user manual oracle banking digital experience personal
TRANSCRIPT

Personal Finance Management User Manual Oracle Banking Digital Experience
Release 21.1.0.0.0
Part No. F40800-01
May 2021

Personal Finance Management User Manual
May 2021
Oracle Financial Services Software Limited
Oracle Park
Off Western Express Highway
Goregaon (East)
Mumbai, Maharashtra 400 063
India
Worldwide Inquiries:
Phone: +91 22 6718 3000
Fax:+91 22 6718 3001
www.oracle.com/financialservices/
Copyright © 2006, 2021, Oracle and/or its affiliates. All rights reserved.
Oracle and Java are registered trademarks of Oracle and/or its affiliates. Other names may be trademarks of their respective owners.
U.S. GOVERNMENT END USERS: Oracle programs, including any operating system, integrated software, any programs installed on the hardware, and/or documentation, delivered to U.S. Government end users are “commercial computer software” pursuant to the applicable Federal Acquisition Regulation and agency-specific supplemental regulations. As such, use, duplication, disclosure, modification, and adaptation of the programs, including any operating system, integrated software, any programs installed on the hardware, and/or documentation, shall be subject to license terms and license restrictions applicable to the programs. No other rights are granted to the U.S. Government.
This software or hardware is developed for general use in a variety of information management applications. It is not developed or intended for use in any inherently dangerous applications, including applications that may create a risk of personal injury. If you use this software or hardware in dangerous applications, then you shall be responsible to take all appropriate failsafe, backup, redundancy, and other measures to ensure its safe use. Oracle Corporation and its affiliates disclaim any liability for any damages caused by use of this software or hardware in dangerous applications.
This software and related documentation are provided under a license agreement containing restrictions on use and disclosure and are protected by intellectual property laws. Except as expressly permitted in your license agreement or allowed by law, you may not use, copy, reproduce, translate, broadcast, modify, license, transmit, distribute, exhibit, perform, publish or display any part, in any form, or by any means. Reverse engineering, disassembly, or decompilation of this software, unless required by law for interoperability, is prohibited.
The information contained herein is subject to change without notice and is not warranted to be error-free. If you find any errors, please report them to us in writing.
This software or hardware and documentation may provide access to or information on content, products and services from third parties. Oracle Corporation and its affiliates are not responsible for and expressly disclaim all warranties of any kind with respect to third-party content, products, and services. Oracle Corporation and its affiliates will not be responsible for any loss, costs, or damages incurred due to your access to or use of third-party content, products, or services.

Table of Contents
1. Preface .............................................................................................................................................. 1–1
1.1 Intended Audience ...................................................................................................................... 1–1
1.2 Documentation Accessibility ....................................................................................................... 1–1
1.3 Access to Oracle Support ........................................................................................................... 1–1
1.4 Structure ..................................................................................................................................... 1–1
1.5 Related Information Sources ...................................................................................................... 1–1
2. Transaction Host Integration Matrix .............................................................................................. 2–1
3. Personal Finance Management ...................................................................................................... 3–1
3.1 Personal Finance Management Overview ................................................................................. 3–2
3.2 Trends .......................................................................................................................................... 3-4
3.3 Goal Calculator – Pre-Login ........................................................................................................ 3-6
4. My Spends ......................................................................................................................................... 4-1
4.1 My Spends – Re-categorize Transaction .................................................................................... 4-4
4.2 My Spends – Split Transaction .................................................................................................... 4-5
4.3 My Spends – Add Category ......................................................................................................... 4-6
4.4 Manage My Categories ............................................................................................................... 4-8
5. Budget ................................................................................................................................................ 5-1
5.1 Set Budget ................................................................................................................................... 5-1
5.2 View and Modify Budget .............................................................................................................. 5-2
5.3 Delete Budget .............................................................................................................................. 5-4
6. Goals ................................................................................................................................................. 6–1
6.1 Create Goal ................................................................................................................................ 6–1
6.2 My Goals ..................................................................................................................................... 6–9

6.3 Goal Details .............................................................................................................................. 6–10
6.4 Goal Calculator ......................................................................................................................... 6–22
6.5 Closed Goals ............................................................................................................................ 6–26

Preface
1–1
1. Preface
1.1 Intended Audience
This document is intended for the following audience:
Customers
Partners
1.2 Documentation Accessibility
For information about Oracle's commitment to accessibility, visit the Oracle Accessibility Program
website at http://www.oracle.com/pls/topic/lookup?ctx=acc&id=docacc.
1.3 Access to Oracle Support
Oracle customers have access to electronic support through My Oracle Support. For information, visit
http://www.oracle.com/pls/topic/lookup?ctx=acc&id=info or visit
http://www.oracle.com/pls/topic/lookup?ctx=acc&id=trs if you are hearing impaired.
1.4 Structure
This manual is organized into the following categories:
Preface gives information on the intended audience. It also describes the overall structure of the User Manual.
Introduction provides brief information on the overall functionality covered in the User Manual.
The subsequent chapters provide information on transactions covered in the User Manual.
Each transaction is explained in the following manner:
Introduction to the transaction
Screenshots of the transaction
The images of screens used in this user manual are for illustrative purpose only, to provide improved understanding of the functionality; actual screens that appear in the application may vary based on selected browser, theme, and mobile devices.
Procedure containing steps to complete the transaction- The mandatory and conditional fields of the transaction are explained in the procedure. If a transaction contains multiple procedures, each procedure is explained. If some functionality is present in many transactions, this functionality is explained separately.
1.5 Related Information Sources
For more information on Oracle Banking Digital Experience Release 21.1.0.0.0, refer to the following documents:
Oracle Banking Digital Experience Licensing Guide
Oracle Banking Digital Experience Installation Manuals

Transaction Host Integration Matrix
2–1
2. Transaction Host Integration Matrix
Legends
NH No Host Interface Required.
Pre integrated Host interface available.
Pre integrated Host interface not available.
Sr No
Transaction / Function Name Oracle FLEXCUBE
Core Banking 11.8.0.0.0
Oracle FLEXCUBE Universal Banking 14.5.0.0.0
Oracle Banking
Payments (OBPM)
14.4.0.0.0
1 Personal Finance Management Overview - My Spends
2 Personal Finance Management Overview - Goals
3 Personal Finance Management Overview - Budget
4 Goal Calculator – Pre-Login
5 My Spends- Spending Analysis
6 Budget- Create Budget/ Manage Budget
7 Create Goals with Payout (Own, Internal)
8 Create Goals with Payout (Domestic, International)
9 Edit Goals with Payout (Own, Internal)
10 Edit Goals with Payout (Domestic, International)
11 Withdraw Goals with Payout (Own, Internal)

Transaction Host Integration Matrix
2–2
12 Withdraw Goals with Payout (Domestic, International)
13 Goal Calculator
14 Closed Goals
Home

Personal Finance Management
3–1
3. Personal Finance Management
Personal finance refers to how the customer manages their money, including their income, expenses and savings. This module enables customers to take control of their money by providing
them with a holistic view of their finances with the bank. With the help of the personal finance management tools, the customer can plan their finances and track their expenditure, set up goals and follow budgets.
This module comprises of multiple tools, such as,
Spend Analysis
This tool provides an insight on the pattern or areas of expenditures. Customers can make smarter financial decisions by tracking their expenses over time
Goals
Enables users to visualize and reach their life goals more easily.
Budgeting
Users can create custom thresholds, and can track their financial goals and relative performances.
Pre-requisites
Transaction access is provided to retail user.
Accounts are maintained in the core banking system under a party ID mapped to the user.
Workflow

Personal Finance Management
3–2
Features Supported In Application
The Personal Finance Management module supports the following features:
Spend
Goals
Goal Calculator
Budget
3.1 Personal Finance Management Overview
The retail dashboard displays an overview of spends of the user. By default it displays user’s spends for last 30 days and the category name with expenditure amount is displayed, where spend has been maximum.

Personal Finance Management
3–3
Dashboard Overview
Trends dashboard shows widgets of PFM namely, My Spends, Budgets and Goals. They give a brief snapshot of the current financial whereabouts of user with the bank.
My Spends
This widget displays the spending analysis of the customer. The spending patterns of the user are in the form of a donut chart. The details displayed in the chart will be based on the category wise expenditure in all savings accounts mapped to the user. The user can also view a period wise and account wise spend analysis.
This displays the total amount expenditure incurred during a period of last 30 days. It also displays the name of the category in which the highest expenditure has been incurred for that period. Click the View Details link to open the My Spends transaction screen. This screen displays the records of all transactions made in the customer’s accounts. The category that each transaction comes under is displayed against the transaction record.

3-4
3.2 Trends
The spending analysis can be viewed by clicking on Trends in the toggle menu. The Trend Dashboard is displayed in the form of widgets, and displays the summary of all the current and savings accounts, term deposit and loan accounts held by the user.
The user can also view all his spends up to last 90 days in the My Spends widget. There is also a widget for Goals which shows the number of active goals with an option to create new goal or manage existing ones. Another widget is placed for showing number of active budget categories with option to create new budget or manage existing ones.
How to reach here:
Toggle menu > Personal Finance Management > Trends
Trends
My Spends
This widget displays the spending analysis of the customer in the form of a pie chart. The customer can customize the way the spending analysis is displayed on the basis of the following filters:
Filter 1: This option enables the user to view the spending analysis based on categories.
Filter 2: Periodic search options available to the user. User can view the spending patterns of the current month, last 30 days, last 60 days or last 90 days.

3-5
The graph displays the percentage wise amount spent in each category in the chart. By default the graph displays the current month and all spend categories where expenses were incurred during that period.
Click a particular category on the graph to view details i.e. sub categories of that category. The amount spent in each category is displayed along with the percentage comprising of that
sub category. Click to refresh the graph.
The total amount of expenditure incurred during the period that is being viewed is displayed along with the two categories in which highest expenditure has been incurred for that period.
The View All Transactions option is provided so that the customer can view the transaction records comprising of the spending analysis. Clicking this option opens the My Spends transaction screen. This screen displays the records of all transactions made in the customer’s accounts. The category that each transaction comes under is displayed against the transaction record.
Budgets
This widget displays the count of all the budgets created by the user. User can view, and
create new budget by clicking icon.
By using the Create Budget option user can create a new budget. Clicking this link takes you to the My Budgets screen.
Goals
This widget displays count of all the active goals that are created by the user.
Clicking on the More Options icon, available on the goal card, opens the Create Goal and Manage Goals screen from which the customer can view, modify, contribute to a goal or even withdraw some amount from a goal.

3-6
3.3 Goal Calculator – Pre-Login
The goal calculator helps evolve a goal for all the customer’s life events and future plans. Goal calculator helps to calculate how much money the user will need to contribute at a regular frequency in order to arrive at a specific savings goal.
The goal calculator option present on the pre-login screen or portal page of the application enables the prospect user and visitors to access the goal calculator.
This option allows the user to identify the amount of savings that has to be done to achieve a certain goal. This feature, hence, enables the user to figure out the feasibility of creating a goal based on the regular contribution amount for a defined period.
The user needs to enter the goal details along with his targeted amount. The outcome will be based on the values entered by user.
How to reach here:
Portal Page > Achieve your Dream with us > Apply Now
Goal Category

3-7
Field Description
Field Name Description
Goal Category Card
Category card allows the user to create a goal from the available list of categories. E.g. Shopping, Education, Vacation etc.
Set Goal Amount
Field Description
Field Name Description
Enter Goal Amount The target amount to be saved for goal.
To create a goal:
1. Click the particular goal category card. The Goal Calculator – Set Goal Amount screen appears. OR Click the Back to Dashboard link to navigate to the Dashboard.
2. In the Enter Goal Amount field, enter the target amount.
3. Click Proceed. The Goal Calculator screen appears. OR Click Cancel to cancel the transaction. OR Click Back to go to the previous screen.

3-8
Goal Calculator
Field Description
Field Name Description
Your Goal Amount The targeted amount of your goal.
Have you already saved something for it?
The amount user has saved already for the goal or willing to add some amount towards achievement to begin with.
The Remaining Amount The amount left after deduction of saved amount.
In how much time do you want to achieve this Goal?
Years, Months
This is the tenure of user’s goal, i.e. when it has to be achieved.
How frequently do you plan to set aside money for this Goal?
The frequency of the regular contributions.
The options are
Quarterly
Monthly
Weekly

3-9
4. In the Have you already saved something for it? field, enter the amount which you have already saved for the goal.
5. From the In how much time do you want to achieve this Goal? lists, select the appropriate years and months, that is, the time frame in which you plan to achieve this goal.
6. In the How frequently do you plan to set aside money for this Goal? field, select the appropriate option. By default, the Monthly option appears selected, displaying the monthly contribution amount, and a bar showing How are we helping you achieve it? This bar displays the amount paid by you, the amount paid by the bank, and the total savings percentage.
7. Click Set your goal now! to create the goal. You are directed to the Login Page of the application. OR Click Cancel to abort the goal creation process. OR Click the Back to Dashboard link to navigate to the Dashboard.
Home

My Spends
4-1
4. My Spends
This tool helps the user by providing an insight on the pattern or areas of expenditures. Customers can make smarter financial decisions by tracking their expenses over time.
Spend analysis graphs and charts provides an insightful view into customer’s spending habits. The spending analysis is displayed in the form of a donut chart on the customer’s dashboard.
The system defines categories and sub categories to which the transactions can be assigned. The categories or sub categories are assigned to the transactions, based on certain rules pre-defined by the system. The users can re-categorize the assignment of transactions to any categories or sub categories of his choice. The user can also split a transaction he has done into two or more sub transactions.
In addition to the existing default categories and sub categories (created by the bank), users can also create his own new categories and subcategories. The categories-sub categories can be created by the user using My Spends screen as well as by clicking the Manage My Categories link.
Pre-requisites:
Transaction access is provided to retail users.
User has an account and have done few transactions.
Basic categories and sub-categories are maintained and necessary rules are defined.
How to reach here:
Dashboard > My Spends widget > View All > My Spends OR Toggle menu > Personal Finance Management > Spend >View Transactions > My Spends

My Spends
4-2
My Spends
Field Description
Field Name Description
Refine Your Results
Category and Sub Category
Customer can filter the spend records based on categories and sub categories. Click a category to see the mapped sub categories. E.g. Vehicle - Car, Bikes
Account No The facility to filter the spend records based on the account from which the transactions were performed.
The account numbers of all current and savings account belonging to the customer are available for selection.
Period The filter criteria to view the spending analysis based on period.
You can view the spending analysis up to last 90 days.
Records
Date The date on which the transaction was performed.

My Spends
4-3
Field Name Description
Category and Sub Category
The category or sub category to which the transaction is assigned.
Transaction The transaction as defined in the system along with the account number of the account from which the transaction was performed.
Amount The transaction amount with currency.
Action Allows the user to re-categorize and split transactions.
To view the spending analysis:
1. Click the Category & Sub Category filter, and select the particular category/ sub category to search the record. OR Click Account filter to search the spend records based on account numbers. OR Click Period filter to search the spend records based on the period. OR
Click to clear the search filters.
2. Click to re-categorize the transaction. In case relevant category/sub category is not available, you can re-categorize by creating new category/sub category. OR
Click to split the transactions. OR Click Manage My Categories to add or edit the categories. OR Click the Back to Dashboard link to navigate to the Dashboard.

My Spends
4-4
4.1 My Spends – Re-categorize Transaction
This option enables the customers to re-categorize the transactions. The user can modify a category/ sub category which is assigned to a transaction. An option is also provided to create new categories and sub categories. Newly added values are saved at customer level. User can also modify the self-created categories.
To re-categorize a transaction:
1. In the My Spends screen, click against the transaction which you want to re-categorize. The Recategorize Transaction screen appears.
Recategorize Transaction
Field Description
Field Name Description
Category The category maintained by the bank and those created by user to which the transaction is assigned.
Sub Category
The sub category maintained by bank and those created by user, to which the transaction is assigned
2. From the Category and Sub Category lists, select the appropriate options.
3. Click Save to re-categorize. OR

My Spends
4-5
Click Cancel to cancel the re-categorization process. OR Click the Want to Add New Category and Sub Category? link if you want to add a new category and sub-category.
4.2 My Spends – Split Transaction
The split transaction feature allows the customer to divide a single transaction into multiple transactions of different categories/sub categories. For example, different items are bought with a single purchase at a departmental store and customer later wishes to split it into different categories / sub-categories, he can do so by using this option.
A transaction can be split into any number of transactions and each division can have their own categories/ sub-categories. The sum of values of all the split categories/ sub-categories transactions should be equal to the main transaction amount. A transaction can be split into categories/sub-categories only once. The split icon is no longer displayed against transactions which have been already split. Once split, the categorization cannot be reversed.
To split a transaction:
1. In the My Spends screen, click , against the transaction which you want to split. The Split Transaction screen appears.
Split Transaction
Field Description

My Spends
4-6
Field Name Description
Category The category to which the transaction is to be assigned.
Sub Category The sub category to which the transaction is to be assigned.
Amount The amount that needs to split.
2. From the Category and Sub Category lists, select the appropriate options.
3. In the Amount field, enter the amount for the split categories/sub categories.
4. Click Save to save the split transaction. OR Click Cancel to cancel the process. OR Click Add to add another category and sub-category for split.
5. The success message of splitting the transaction appears on the My Spends screen. Click the Back to Dashboard link to navigate to the Dashboard. OR Click Manage My Categories to add or edit the categories.
4.3 My Spends – Add Category
Using this option, the user can create new categories and sub categories. Or can just add new a sub-categories under an existing category. Newly created values are specific to the customer.
Further user can re-categorize the transactions using self-created categories/sub categories.
To add a category:
1. In the My Spends screen, click the icon displayed against the transaction. The Recategorize Transaction screen appears.
2. Click the Want to Add New Category and Sub Category? link.
Add Category

My Spends
4-7
Field Description
Field Name Description
Category Name The name of the new category that is to be added.
Sub Category Name The name of the new sub category that is to be created.
3. In the Category Name field, enter the name of the new category.
4. In the Sub Category Name field, enter the name of the new sub category.
5. Click Save to save the newly created category. OR Click Cancel to cancel the process. OR Click the No, I do not want to Add a New Category link, if you do not want to add a new category.
6. The success message of re-categorization of the transaction appears on the screen. Click the Back to Dashboard link to navigate to the Dashboard. OR Click Manage My Categories to add or edit the categories.

My Spends
4-8
4.4 Manage My Categories
All the user defined categories appear in the Manage My Categories screen. This screen enables users to view and manage all the categories and sub categories created by them. The user can also modify the categories and add new categories.
While creating a new category or sub category the system checks that the category being created does not already exist for the user. In case of sub category the system checks that a sub category with the same name does not exist under the same parent category. It is however possible to have duplicate sub categories across different categories for the same user.
How to reach here:
Dashboard > My Spends widget > View All > My Spends > Manage My Categories OR Toggle menu > Personal Finance Management > Spend > Manage Categories > Manage My Categories OR Toggle menu > Personal Finance Management > Spend >View Transactions > My Spends > Manage My Categories
Manage My Categories- View
Field Description
Field Name Description
Category Category name defined by the user for self-created categories.
Sub Category
Sub-category name defined by the user for self-created sub-categories.
Action Allows user to edit a category and sub category details only for the values created by the logged in user.

My Spends
4-9
Manage My Categories- Edit
Field Description
Field Name Description
Category Name The name of the category that is to be edited.
Sub Category Name The name of the sub categories that is to be edited.
To edit a category:
1. In the Manage My Categories screen, click against the record for which you want to edit a category and sub category. The Edit Category screen appears.
2. Edit the required category and sub category. OR
Click to add more sub categories.
3. Click Save to save the changes. OR Click Cancel to cancel the process.
4. The success message of updating a category appears on the screen. Click Add to add more categories. OR Click the Back to Dashboard link to navigate to the Dashboard. OR Click the Back link to go to the previous screen.
Note: You can delete a sub category by clicking .

My Spends
4-10
Manage My Categories- Add
Field Description
Field Name Description
Category Name The name of the category that is to be created.
Sub Category Name The name of the sub category that is to be created.
To add a category:
1. In the Manage My Categories screen, click Add. The Add Category screen appears.
2. In the Category Name field, enter the name of the new category.
3. If you want to add a sub category, click the Add Sub Categories link.
4. In the Sub Category Name field, enter the name of the new sub category.
a. To add another sub category, click .
b. To delete a sub category, click .
5. Click Save to save the newly created category. OR Click Cancel to cancel the process.
6. The success message of adding a category appears on the screen. Click Add to add more categories. OR Click the Back to Dashboard link to navigate to the Dashboard. OR Click the Back link to go to the previous screen.
Home

Budget
5-1
5. Budget
A budget enables the user to set a virtual cap over the expenditure. It is the key, the essential ingredient in taking command over one’s money. Setting a budget, and sticking to it for a long term, can help to cut down a user’s unwanted expenses and thereby enabling him to create wealth.
The Budgeting tool enables a customer to track the progress of budget as well as create, modify or even delete an existing budget. It enables users to set a limit on various spending categories. Over a period of time user can then observe and analyze the status and progress of expenditures against the budgeted value. Users can further set the periodicity of budget, that is, whether they want it for current month, a period of months or on recurring basis, while the frequency is set as monthly. This can be created for new customized user defined categories as well. Once created, users can adjust the budget as per the spending pattern, thus ensuring maximum savings.
Pre-requisites:
Transaction access is provided to retail user.
Accounts are maintained in the core banking system under a party ID mapped to the user.
5.1 Set Budget
This function enables the user to set a budget for a particular period with a monthly frequency. User can create a budget for the set category. The option to continue with the same budget on a rolling basis is also available.
Budget can be set for: This month, Recurring or Specific Duration. User can also view, modify and delete his created budgets. Once the set time is over budget for that duration gets expired, and user can then create another budget in the same category for any duration.
How to reach here:
Toggle menu > Personal Finance Management > Budget > My Budgets > Set your budget > Set Budget OR Toggle menu > Personal Finance Management > Trends > Budgets > More options > Create Budget > My Budgets > Set your budget > Set Budget
Set Budget
Budget
5-2
Field Description
Field Name Description
Choose a Category
Category of the budget that is to be created. This will list down all the categories maintained by the Bank and categories which are self-created by the logged in user.
Set Budget Amount
The amount which user wish to set as his budget.
Periodicity The budget period.
The values are:
This Month
Recurring
Specific Duration
Frequency The frequency of the budget.
To set a budget:
1. In the Set Budget pop-up screen, select the appropriate category, from the Choose a Category list.
2. In the Set Budget Amount field, enter the amount for the budget.
3. From the Periodicity list, select the appropriate budget period.
4. Click Save. The success message of creating the budget appears on the My Budgets screen. OR Click Cancel to cancel the transaction.
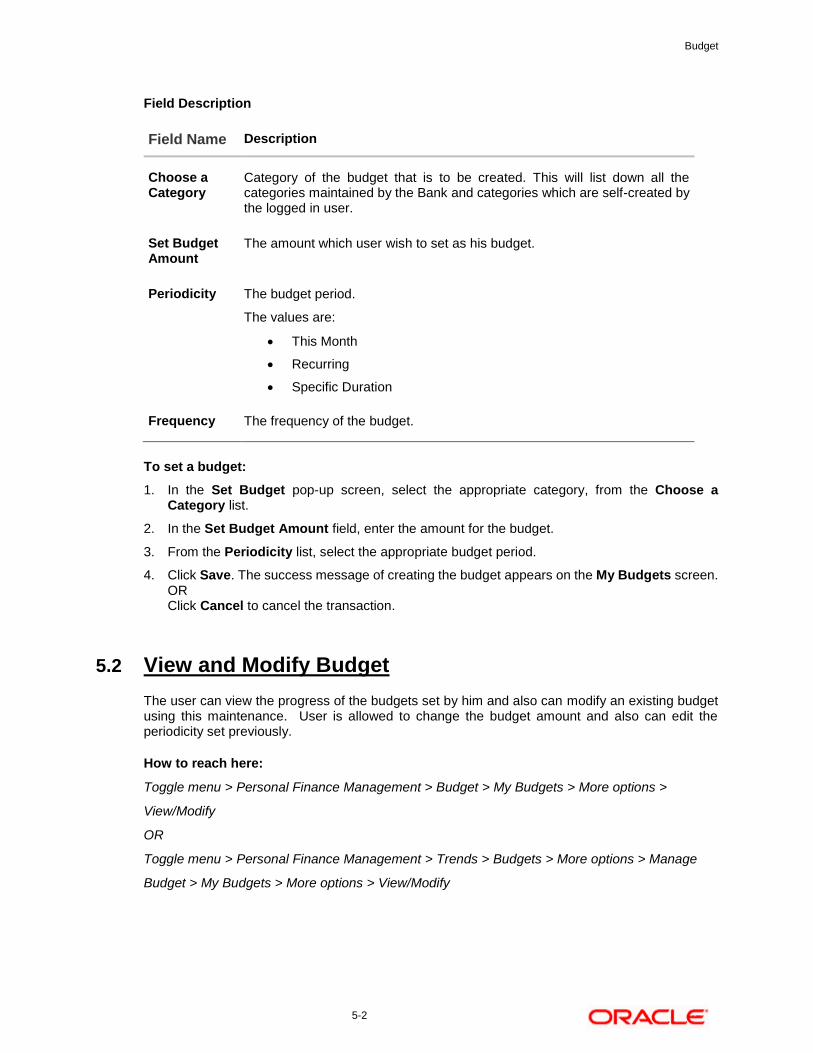
5.2 View and Modify Budget
The user can view the progress of the budgets set by him and also can modify an existing budget using this maintenance. User is allowed to change the budget amount and also can edit the periodicity set previously.
How to reach here:
Toggle menu > Personal Finance Management > Budget > My Budgets > More options >
View/Modify
OR
Toggle menu > Personal Finance Management > Trends > Budgets > More options > Manage
Budget > My Budgets > More options > View/Modify

Budget
5-3
My Budgets- View
Field Description
Field Name Description
Category Category under which the budget is created.
Budgeted Amount
The amount set for the budget.
Progress Bar The graph displaying the current budget as a percentage of what was set initially.
To modify a budget:
1. In the My Budgets screen, select a category for which you want to change budget and click
.
2. Click View/ Modify. The View/ Modify Budget screen appears.
Modify Budget

Budget
5-4
Field Description
Field Name Description
Category Name Name of the category for which a budget is created.
Set Budget Amount The amount, which the user set as budget.
Periodicity The budget period.
The values are:
This Month
Recurring
Specific Duration
Frequency The frequency of the budget. It is currently set as ‘Monthly’.
3. In the Set Budget Amount field, edit the amount for the budget, if required.
4. From the Periodicity list, edit the budget period, if required.
5. Click Save. The success message of updating the budget appears on the My Budgets screen. OR Click Cancel to cancel the transaction.
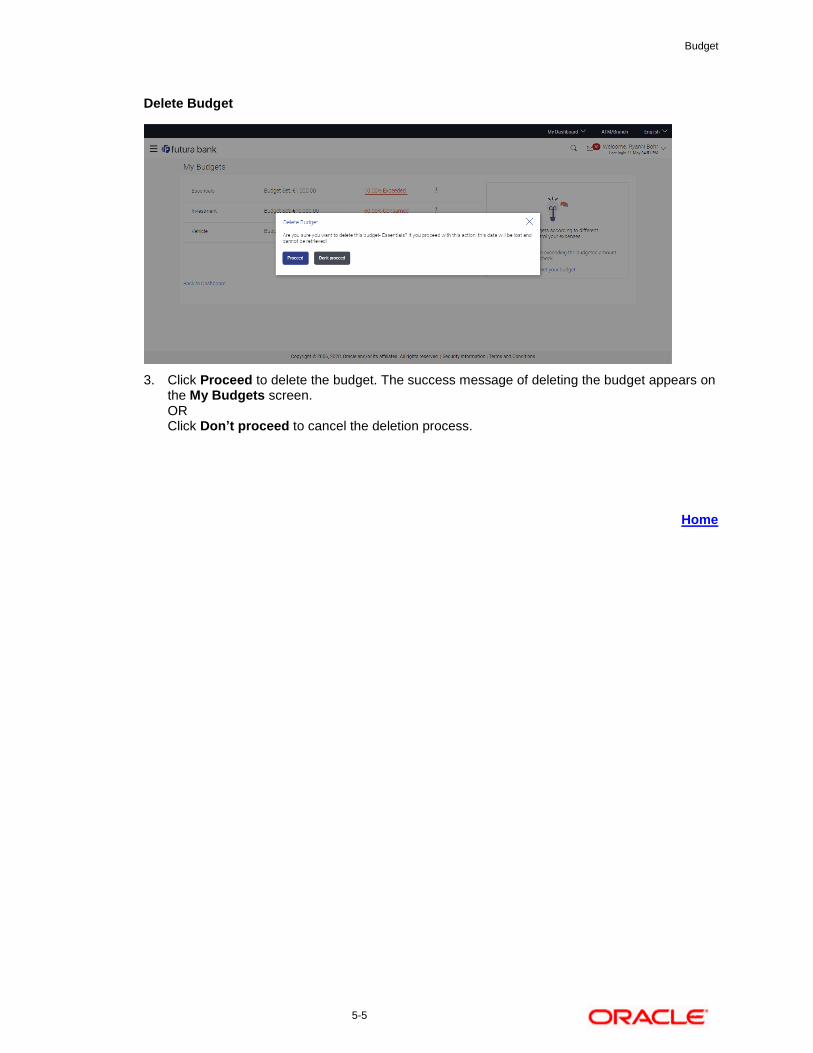
5.3 Delete Budget
User can delete an existing budget using this option.
How to reach here: Toggle menu > Personal Finance Management > Budget > My Budgets > More options > Delete OR Toggle menu > Personal Finance Management > Trends > Budgets > More options > Manage Budget > My Budgets > More options > Delete
To delete a budget:
1. In the My Budgets screen, select a budget which you want to edit and click .
2. Click Delete. A warning screen asking you about deleting the budget appears.
Budget
5-5
Delete Budget
3. Click Proceed to delete the budget. The success message of deleting the budget appears on the My Budgets screen. OR Click Don’t proceed to cancel the deletion process.
Home

Goals
6–1
6. Goals
Setting up a goal is a powerful process for thinking about an ideal future to turn a dream into reality.
An integral part of personal finance management is the process of goal planning and monitoring. Goals setting up process should be easy and should be specific, measurable, achievable, relevant and time-bound. The Goal Setting feature of OBDX enables the customer to do the following:
Calculate goal amounts to view indicative savings
Set goals
Modify goals
View goals and track the progress of each goal
Make ad-hoc and regular contribution to a goal
Redeem the goal partially or fully
View Closed goals
6.1 Create Goal
Using this option the user can create a goal. The create goal screen comprises of the following sections:
Category Selection: In this section the user can select one of the dream goals from the goal categories displayed as creation cards.
Goal Amount: This section enables the user to enter the goal amount.
Goal Details: In this section the user is able to enter details of the goal such as the funding account number, goal tenure, and maturity instructions. The user can also set standing instructions to credit the goal account, in this section.
How to reach here:
Toggle menu > Personal Finance Management > Goal > New Goal > Goals Category > Set Goal Amount > Create Goal OR Toggle menu > Personal Finance Management > Goal > Goal List > My Goals > Create Goal OR Toggle menu > Personal Finance Management > Trends >Goals > More options > Create Goal OR Landing Page > Achieve your dream with us (Apply Now) > Goals Category> Set Goal Amount > Create Goal (Goal Calculator) > Login to continue

Goals
6–2
Goal Category
Field Description
Field Name Description
Goal Category Card
Category card enabling the user to create a goal from the available list. For example, House, Car, Vacation, and so on.

Goals
6–3
To create a goal:
1. Click the particular goal category card. The Set Goal Amount screen appears. OR Click the Back To Dashboard link to navigate to the Dashboard.
Set Goal Amount
Field Description
Field Name Description
Set Goal Amount
Enter Goal Amount The target amount to be saved for goal.
2. In the Enter Goal Amount field, enter the target amount.
3. Click Proceed. The Create Goal screen appears. OR Click Cancel to cancel the transaction. OR Click the Back link to go to the previous screen. OR Click the Back to Dashboard link to navigate to the Dashboard.

Goals
6–4
Create Goal - Goal Details

Goals
6–5
Field Description
Field Name Description
Goal Image The image of the goal.
Click to change the goal image. You can browse and upload an image to be set as the goal image.
Note: The maximum image size that can be uploaded is 1 MB.
Category Name of the selected category gets defaulted.
Name your Goal The name of the goal to be created.
What is your Goal Amount? The target amount of the goal.
Have you already saved something for it?
The initial funding in the goal.
The initial funding amount should be greater than the minimum amount defined for the product.
Account number for initial contribution
The account number from which funds will be debited for initial funding.
Once an account is selected, the balance of that account is displayed below this field.
The remaining amount The amount left to achieve after initial funding.
In how much time do you want to achieve this Goal?
The tenure of the goal.
On goal maturity, you will receive your money in the account selected above.
By default, on maturity, the amount in the goal will be transferred into the source account through internal transfer. The user can, however, choose to have the goal amount credited to a different account when it matures, by defining the requirements in the following section:
No, I would like to plan how I wish to receive my money after the Goal has matured?
The user can select this check box, if he wishes to have the goal amount transferred to a different account than the one defined in the above field as source account.
How would you like the account transfer?
The account transfer option for receiving the goal amount on completion of tenure.
The options suggested are:
To My Mapped Account
Internal Bank Account
Through Domestic Clearing Network

Goals
6–6
Field Name Description
The following field is displayed if you select To My Mapped Account option from the How would you like the account transfer? list.
On maturity, money should be transferred to which account?
The account number to which the amount has to be transferred after completion of goal.
The following fields are displayed if you select Through Domestic Clearing Network option from the How would you like the account transfer? list.
What would be the network type?
The list of applicable domestic clearing network.
Please mention the beneficiary name
The name of the beneficiary to whom funds are to be transferred.
Please tell us the bank code The destination account’s bank code. Customer can also lookup the bank code.
The following field is displayed if you select Internal Bank Account option from the How would you like the account transfer? list.
On maturity, money should be transferred to which account?
The account number to which the amount has to be transferred after completion of goal.
Confirm on Maturity, money should be transferred to which account
The account number to be re-entered to which the amount has to be transferred after the completion of goal.
Serious about achieving this goal? Set standing instructions to increase your chances.
Yes, I would like to set standing instructions
The user can select this check box if he wishes to set standing instructions
At what frequency would you contribute for this Goal?
The frequency of the standing instructions.
The options are
Quarterly
Monthly
Weekly
What will be the Quarterly contribution amount?
The amount to be contributed quarterly towards the goal account.
This field appears if you select Quarterly option from the At what frequency would you contribute for this Goal? list.

Goals
6–7
Field Name Description
What will be the Monthly contribution amount?
The amount to be contributed monthly for goal account.
This field appears if you select Monthly option from the At what frequency would you contribute for this Goal? list.
What will be the Weekly contribution amount?
The amount to be contributed weekly for goal account.
This field appears if you select Weekly option from the At what frequency would you contribute for this Goal? list.
Which will be the contribution Start date?
The start date from which the regular contributions will be executed.
Which will be the contribution End date?
The end date until which the regular contributions will be executed.
Contribution Account Number The account number from which funds will be credited to the goal.
4. In the Name your Goal field, enter the name of your goal.
5. In the What is your Goal Amount? field, enter or modify the target goal amount.
6. In the Have you already saved something for it? field, enter any amount already saved for the goal.
7. From the Account number for initial contribution list, select the appropriate account number.
8. From the In how much time do you want to achieve this Goal? list, select the appropriate years and months. On Goal maturity you will receive the money in the account as selected above.
9. Select No, I like to plan how I wish to receive my money after the Goal has matured?, if you wish to change the existing maturity instructions.
10. From the How would you like the account transfer? list, select the appropriate option:
a. If you select the Through Domestic Clearing Network option:
i. From the What would be the network type? list, select the appropriate network type.
ii. In the On maturity, money should be transferred to which account? field, enter the account number for fund transfer.
iii. In the Please mention the beneficiary name field, enter the name of the beneficiary to which funds are to be transferred.
iv. In the Please tell us the bank code field, enter the bank code or search for it using the Look up Bank Code link. For more information, see the Domestic Clearing Network - Search IFSC Code section below.
b. If you select Internal Bank Account option:

Goals
6–8
i. In the On maturity, money should be transferred to which account? field, enter the account number for fund transfer.
ii. In the Confirm on Maturity, money should be transferred to which account field, enter the account number again to confirm.
c. If you select To My Mapped Accounts option:
i. From the On maturity, money should be transferred to which account? list, select the appropriate account number.
11. Select Yes, I would like to set standing instructions, if you wish to set standing instructions.
a. In the At what frequency would you contribute for this Goal? field, select the appropriate frequency option.
b. In the What will be the Quarterly/ Monthly/ Weekly contribution amount field, enter the appropriate contribution amount.
c. From the Which will be the contribution Start date? and Which will be the contribution End date? fields, select the appropriate dates.
d. From the Contribution Account Number list, select the appropriate account number.
12. Click Create to create the goal. OR Click Cancel to abort the goal creation process. OR Click the Back to Dashboard link to navigate to the Dashboard.
13. The success message of goal creation appears. Click Go to Dashboard to access the dashboard. OR Click the Goals List link to view all your goals.
Domestic Clearing Network - Lookup Bank Code (Search IFSC Code)
Field Description
Field Name Description
IFSC Code IFSC code of the beneficiary bank account.
Bank Name Bank name corresponding to IFSC code.
State State of the beneficiary bank
City City of the beneficiary bank.
1. In the IFSC Code field, enter the IFSC code of the beneficiary bank.
2. In the Bank Name field, enter the beneficiary bank name.
3. In the State / City field, enter the state / city of the beneficiary bank.
4. Click Search. The bank details appear.

Goals
6–9
5. Click the searched IFSC Code link, it gets populated in Please tell us the bank code field.
Note:
1. Goal amount should be within the limits of underlying product
2. On Maturity of Goal, the payout would happen on the network set as per configuration.
6.2 My Goals
The My Goals screen displays all the active goals that are created by the logged in user. Each goal record consists of the goal image, goal name, amount, and progress bar.
Clicking the ‘View details’ available against each record, opens the Goal Details screen from which the customer can view, modify, contribute to a goal or even redeem a goal.
How to reach here:
Toggle menu > Personal Finance Management > Goal > Goal List > My Goals OR Toggle menu > Personal Finance Management > Trends > Goals > More options > Manage Goals > My Goals
My Goals
Field Description
Field Name Description
Goal Image The image set for the goal.
Goal Name The name of the goal.
Goal Amount The targeted amount.

Goals
6–10
Field Name Description
Progress Bar The current achievement in percentage with respect to the goal amount set.
1. Click the View Details link to view the goal details. The Goal Details screen appears. OR Click the Back to Dashboard link to navigate to the Dashboard.
6.3 Goal Details
Retail users can manage goals through this option. The Goal Details screen displays the details such as the current amount in the goal, maturity date of the goal and the progress bar displaying the current achievement in percentage with respect to the goal amount set.
The user can also perform the following tasks from this page:
a. View/ Edit: By default this option is selected on landing the goal details screen. This option allows the user to view and edit the created goal.
b. Contribute: This option enables the user to add funds to a goal. Clicking on this link will open the fund goal screen from which the user can fund his goal.
c. Withdraw: This option enables the user to partially redeem or fully withdraw and close a goal.
d. View Transactions: This option enables the user to view all the goal related transactions.
How to reach here:
Toggle menu > Personal Finance Management > Goal > Goal List > My Goals > View Details > Goal Details OR Toggle menu > Personal Finance Management > Trends > Goals > More options > Manage Goals > My Goals > View Details > Goal Details

Goals
6–11
6.3.1 View / Edit Goals
Using this option, the user can view and modify the goal details at any time during the tenure of the active goal.
Goal Details - View
Field Description
Field Name Description
Goal Name The name of the selected goal is displayed at the top of the screen.
Goal Image The image of the goal.
Current Value The current amount in the goal account.
Maturity Date The date on which the goal will be completed.
Progress Bar The progress bar displaying the percentage of goal achieved.
Name your Goal The name of the goal.
What is your Goal Amount? The target amount of the goal.

Goals
6–12
Field Name Description
Maturity Instructions The maturity instructions as defined at the time of goal created and are displayed in this section.
How would you like the account transfer?
The account transfer option for receiving the goal amount on completion of tenure.
The options are:
To My Mapped Account
Internal Bank Account
Through Domestic Clearing Network
The following field is displayed if the user has selected, To My Mapped Account option from the How would you like the account transfer? list while creating the goal.
On maturity, money should be transferred to which account?
The account number to which the amount is to be transferred after completion of goal.
Below fields are displayed if the user has selected, Through Domestic Clearing Network option from the How would you like the account transfer? list while creating the goal.
What would be the network type? The applicable domestic clearing networks.
Please mention the Beneficiary Name
The name of the beneficiary to whom funds are to be transferred.
Please tell us the Bank Code The destination account’s bank code.
The following fields are displayed if the user has selected, Internal Bank Account option from the How would you like the account transfer? list while creating the goal.
On maturity, money should be transferred to which account?
The account number to which the amount has to be transferred after completion of goal.
At what frequency would you contribute for this Goal?
The frequency of the regular contributions by setting up Standing Instructions.
The options are
Quarterly
Monthly
Weekly
How much would you like to contribute to this Goal?
The amount to be contributed towards the goal.
Which will be the contribution Start date?
The start date from which the regular contributions will be executed.

Goals
6–13
Field Name Description
Which will be the contribution End date?
The end date until which the regular contributions will be executed.
Account Number The account number from which funds will be credited to the goal.
Balance The balance amount in the account from which funds will be credited to the goal.
To edit the goal detail:
1. Click Edit. The Goal Details screen appears in editable mode. OR Click Cancel to cancel the transaction. OR Click the Back to Dashboard link to navigate to the Dashboard.
You can also perform following account related transactions:
To contribute to the goal, click Contribute.
To redeem the goal, click Withdraw.
To view the goal transactions, click Transactions.
Goal Details – Edit

Goals
6–14
Field Description
Field Name Description
Goal Name The name of the selected goal is displayed at the top of the screen.
Goal Image The image of the goal.
Click to change the goal image.
Current Value The current amount in the goal account.
Maturity Date The date on which the goal will be completed.
Achieved The progress bar displaying the percentage of goal achieved.
Edit
Name your goal The name of the goal to be edited.
What is your Goal Amount? The target amount of the goal.
How would you like the account transfer?
The account transfer option for receiving the goal amount on completion of tenure.
The options can be:
To My Mapped Accounts
Internal Bank Account
Through Domestic Clearing Network
The following field is displayed if you select To My Mapped Account option from the How would you like the account transfer? list.
On maturity, money should be transferred to which account?
The account number to which the amount is to be transferred after completion of goal.
Below fields are displayed if you select Through Domestic Clearing Network option from the How would you like the account transfer? list.
What would be the network type? The applicable domestic clearing networks.
Please mention the Beneficiary Name
The name of the beneficiary to whom funds are to be transferred.
Please tell us the Bank Code The destination account’s bank code.

Goals
6–15
Field Name Description
The following fields are displayed if you select Internal Bank Account option from the How would you like the account transfer? list.
On maturity, money should be transferred to which account?
The account number to which the amount has to be transferred after completion of goal.
Confirm on Maturity, money should be transferred to which account
The account number to be re-entered to which the amount has to be transferred after the completion of goal.
At what frequency would you contribute for this Goal?
The frequency of the regular contributions by setting up Standing Instructions.
The options are
Quarterly
Monthly
Weekly
How much would you like to contribute to this Goal?
The amount to be contributed towards the goal.
Which will be the contribution Start date?
The start date from which the regular contributions will be executed.
Which will be the contribution End date?
The end date until which the regular contributions will be executed.
Account Number The account number from which funds will be credited to the goal.
Balance The balance amount in the account from which funds will be credited to the goal.
2. Edit the required goal details.
3. Click near goal image to change it. You can then browse to choose an image of your own and save it.
4. Click Start Transfer to start contributing to your goal. OR Click Save to save the field based changes. OR Click Cancel to cancel the transaction. OR Click the Back To Dashboard link to navigate to the Dashboard.
5. The success message appears on the Goal Details screen. Click the Back To Dashboard link to navigate to the Dashboard.

Goals
6–16
OR Click Goals List to view the list of goals already created.
6.3.2 Goal Details – Contribute
The user can fund a goal using this option. Contribution to the goal can be made by transferring funds from an internal account. The user can contribute to a goal any number of times during the tenure of the goal.
Goal Details - Contribute Goal
Field Description
Field Name Description
You can contribute to your Goal as and when you plan to. This will help you achieve this goal faster.
How much would you like to contribute to this Goal?
The amount to be contributed towards the goal.
Funding Account Number The account number from which funds will be debited for the goal.

Goals
6–17
To fund or contribute to your goal:
1. In the How much would you like to contribute to this Goal? field, enter the amount to be
contributed.
2. From the Funding Account Number list, select the appropriate account number.
3. Click Contribute to fund the goal. OR Click Cancel to cancel the transaction. OR Click the Back to Dashboard link to navigate to the Dashboard.
4. The screen prompting you to confirm the contribution amount appears; click Proceed, to confirm the contribution. OR Click Don’t Proceed, if you do not want to contribute to the goal.
5. The success message appears on the Goal Contribute screen with contribution amount and the current goal value. Click the Back to Dashboard link to navigate to the Dashboard.
Note:
1. User is allowed to make adhoc contributions even if that is more than the Goal Amount.
2. User cannot setup Standing Instruction for amount larger than the set Goal Amount or more than Maximum amount permissible as per product maintenance. However since Standing Instructions gets executed only when the branch run EOD, and even if there has been any adhoc contribution made during the day which makes the total as equal or higher than Goal Amount, the set SI will get executed for the day.

Goals
6–18
6.3.3 Goal Details – Withdraw
Using this option, the user can withdraw from the goal account partially or fully. If the user performs a partial redemption, the goal balance gets reduced to the extent of the amount withdrawn’. On full redemption, the goal account gets closed.
Goal Details – Withdraw Goal
Field Description
Field Name Description
Following message is displayed on this page:
You can withdraw amount from your Goal Account as and when you plan to. Please provide us with the redemption details.
My Current Goal Value The current balance in the goal (including the earned interest).
What would be the nature of your withdrawal?
The type of redemption.
The options are:
Partial
Full
How much would you like to withdraw from the Goal Account?
The amount to be redeemed from the saved value.

Goals
6–19
Field Name Description
How would you like the account transfer?
The account transfer option for withdrawing the goal amount which was chosen while setting up the Goal or edited later. This cannot be modified while redemption.
The options can be:
To My Mapped Accounts
Internal Bank Account
Through Domestic Clearing Network
Additional fields in which the user can specify account details will be displayed in the same manner as that of the Create Goal and Edit Goal screens, once a selection is made.
To redeem/withdraw your goal:
1. In the What would be the nature of your withdrawal? field, select the appropriate option:
a. If you select Partial option, in the How much would you like to withdraw from the Goal Account? field, enter the amount value.
b. Select Full option, if you want to withdraw all the amount and close the goal.
2. Click Withdraw to redeem the goal amount. OR Click Cancel to cancel the transaction. OR Click the Back to Dashboard link to navigate to the Dashboard.
3. The screen prompting you to confirm the amount withdrawal appears; click Proceed to confirm the withdrawal. OR Click Don’t proceed if you do not want to withdraw funds from your goal.
4. The success message of withdrawal amount appears on the Goal Withdraw screen. Click the Back to Dashboard link to navigate to the Dashboard.

Goals
6–20
6.3.4 Goal Details – Transactions
Using this option, the user can view all the transactions that have taken place with regards to a goal. The user shall be able to view the transactions that have been performed on an active or open goal.
The goal transaction page displays the date of transaction, description of transaction, type of transactions (i.e. Debit or Credit), amount and reference number.
Transactions
Field Description
Field Name Description
You can view all the goal related financial transactions here.
Date The date on which the transaction has been done.
Description Details of the transaction such as remarks entered by user.
Example: The account number from which funds have been transferred to credit the goal etc.
Type Type of transaction that is credit or debit.
Amount The amount credited or withdrawn, with currency, into the goal account.
Reference Number
The system generated reference number of each goal transaction will be displayed against each transaction record.

Goals
6–21
1. Click Cancel to go to the My Goals page. OR Click the Back to Dashboard link to navigate to the Dashboard.

Goals
6–22
6.4 Goal Calculator
The goal calculator option enables the user to identify the amount of savings that has to be done to achieve a certain goal. This feature, hence, enables the user to figure out the feasibility of creating a goal.
The user needs to enter the goal details along with his targeted amount. The outcome will be based on values entered by user.
How to reach here:
Toggle menu > Personal Finance Management > Goal > Goal List > My Goals > Goal Calculator
Goal Category

Goals
6–23
Field Description
Field Name Description
Let's begin! Choose your dream Goal
and we will help to achieve it
Goal Category Card
Category card allowing the user to create a goal from the available list. E.g. Shopping, Education, Vacation etc.
To create a goal
1. Click the particular goal category card. The Goal Calculator – Set Goal Amount screen appears. OR Click the Back to Dashboard link to navigate to the Dashboard.
Set Goal Amount
Field Description
Field Name Description
Set Goal Amount
Enter Goal Amount The target amount to be saved for goal.
2. In the Enter Goal Amount field, enter the target amount.

Goals
6–24
3. Click Proceed. The Goal Calculator screen appears. OR Click Cancel to cancel the transaction. OR Click the Back link to go to the previous screen. OR Click the Back to Dashboard link to navigate to the Dashboard.
Goal Calculator
Field Description
Field Name Description
Your Goal Amount The targeted amount of your goal.
Have you already saved something for it?
The amount user has saved already for the goal or willing to add some amount towards achievement to begin with.
The Remaining Amount The amount left after deduction of saved amount.
In how much time do you want to achieve this Goal?
Years, Months
This is the tenure of user’s goal, i.e. when it has to be achieved.

Goals
6–25
Field Name Description
How frequently do you plan to set aside money for this Goal?
The frequency of the regular contributions.
The options are
Quarterly
Monthly
Weekly
4. In the Have you already saved something for it? field; enter the amount which you have already saved for the goal.
5. From the In how much time do you want to achieve this Goal? list, select the appropriate years and months, that is, the time frame in which you plan to achieve the goal.
6. In the How frequently do you plan to set aside money for this Goal? field, select the appropriate option. By default, the Monthly option appears selected, displaying the monthly contribution amount, and a bar showing How are we helping you achieve it? This bar displays the amount paid by you, the amount paid by the bank, and the total savings percentage.
7. Click Set your goal Now!, to create the goal. OR Click Cancel to abort the goal creation process. OR Click the Back to Dashboard link to navigate to the Dashboard.

Goals
6–26
6.5 Closed Goals
Using this option, a retail user can view all his closed goals. The goal gets closed either on maturity or if the user has withdrawn all the balance from the goal account.
How to reach here:
Toggle menu > Personal Finance Management > Goal > Goal List > My Goals > View Closed Goals OR Toggle menu > Personal Finance Management > Trends > Goals > More options > Manage Goals > My Goals > View Closed Goals
Closed Goals
Field Description
Field Name Description
Goal Image The image of the closed goal.
Goal Name The name of the closed goal.
Final Amount The maturity amount of goal.
Closing Date The date on which the goal was closed.

Goals
6–27
To view the closed goal details:
1. Select a goal that you want to view and click View Details. The closed goal details screen appears. OR Click the Back to Dashboard link to navigate to the Dashboard.
Closed Goal Details
Field Description
Field Name Description
Goal Image The image of the closed goal.
Goal Name The name of the closed goal.
Final Amount The maturity amount of your goal.
Closing Date The date on which the goal got closed.
Progress bar The progress bar displaying the percent of goal achieved at the time it got closed.
Name your Goal The name of the closed goal.
What is your Goal Amount?
The target amount of goal which you have set at the time of goal creation.
Maturity Instructions The maturity instructions as defined by the user are displayed in this section.

Goals
6–28
2. Click the Back to Dashboard link to navigate to the Dashboard.
FAQ
1. How do I set a budget for a one-time expense?
You can budget a one-time expense by selecting the option ‘This Month’ from the Periodicity field while creating the budget.
2. How can I identify how much I have spent against a set budget?
The bar graph displays the amount consumed against a budget as a percentage value. The amount spent can also be viewed in terms of actual amount value by hovering over the bar graph.
3. Can I edit my Goal amount?
Yes, you can adjust your goal amount as per your requirements; however the amount should be within the range of the product under which you have created your goal.
4. Can I change the maturity instructions of my goal after it has been created?
Yes, you can change these maturity instructions by selecting the option to edit a goal from the Goal Details page.
5. Can I stop the standing instructions set for a goal?
Yes, you can stop, alter and restart the standing instructions defined on a goal.
6. How much can a user withdraw from a goal account?
The user can withdraw a partial amount or the entire amount of the goal. Please note that if you withdraw the entire amount of the goal, the goal account gets closed. From there on the Goal can be viewed in the closed account section.
7. What happens to the interest accrued in my Goal account if I withdraw some amount?
The interest of the amount withdrawn for that period along with the penalty, if any, will be credited to the Goal account if it is active, in case of full withdrawal, the interest would be credited to the maturity account defined at the time of goal creation.
8. Can a goal be funded from an account of a different currency than that of the goal account?
Yes, however the total value will always be shown as per the base currency of account.
9. Are the interest components added to my Goal account also visible in the Goal Details page?
Goals
6–29
Amount with interest accumulated in the goal account appears on the Goal details page. Separate interest component is not shown.
10. Can I view the transactions performed on my goal that is currently closed?
No, you cannot view the transactions performed on a goal that has been closed.
11. Is there a minimum amount I must contribute initially at the time of goal creation?
Yes, the bank defines a minimum contribution amount for each goal product. At the time of goal creation, you are required to credit the goal account with an amount that is not lower than this minimum amount defined.
12. Are there any validations on the standard instructions to be defined at the time of Goal Creation?
Yes, the validations to be adhered to while defining standing instructions are as follows:
The standing instruction must be set from a savings account you hold with the bank.
The end date of the instruction should not be later than the date on which the goal ends.
13. What do the values in the fields ‘You Pay’ and ‘We Pay’ displayed in the Goal Calculator page signify?
The value displayed in the ‘You Pay’ field is the amount that you contribute towards your goal, while value displayed in the ‘We Pay’ component is interest to be accrued by the bank towards fulfillment of your goal.
14. Can I calculate the time I will require to achieve a Goal if I contribute a certain amount every month?
No, the goal calculator helps you to identify the amount you need to contribute at a defined frequency and time period. The Goal Calculator does not enable calculation of amount of time required to achieve a goal.
Home