user manual - powered portable solar generator · 2019-09-13 · before using or storing, charge...
TRANSCRIPT
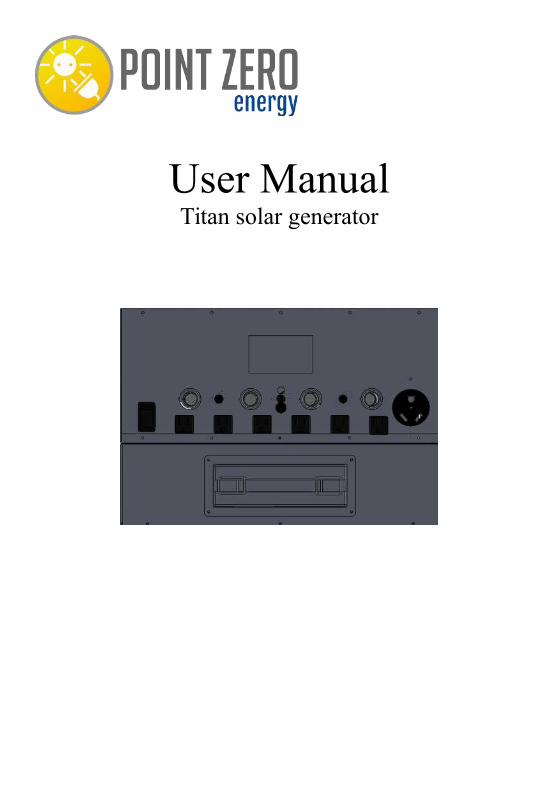
User ManualTitan solar generator

CHARGE BEFORE USING OR STORING
Before using or storing, charge your Titan solar generator until it is fully
charged.
IMPORTANT SAFETY INSTRUCTIONS
To avoid personal injury or damage to the solar generator or any connected
products, carefully read, understand, and comply with all instructions
before use. Keep this manual for future reference.
Observe all Input/Output watt ratings: To avoid fire or electrical shock
hazard, observe all ratings on unit, and products you intend to use; check
manuals for more information.
Use in a well ventilated area: Ensure proper ventilation while in use and
keep away from any combustible materials or gases. Do not stack anything
on top of the unit in storage or in use. Inadequate ventilation and/or
improper storing may cause damage to the unit.
DO NOT operate in wet conditions: In order to avoid short circuits or
electric shock do not allow unit to get wet. Let unit dry completely before
using.
Keep the unit clean and dry: Inspect the unit for dirt, dust, or moisture on
a regular basis.
Shock or Fire Hazard: This Titan solar generator produces the same
potentially lethal AC power as a normal household wall outlet. Please use
caution when operating, just like using a normal AC outlet on the wall.
DO NOT insert foreign objects into outputs or ventilation holes.
DO NOT open the Titan solar generator; there are no user serviceable
parts inside.
Any manipulation to the unit or its components will void all warranties.

TABLE OF CONTENTS
General Information 2
Controls, Indicators, Connections…………………………. 2-3
Technical Specifications…………………………………… 4
Charging Your Titan Solar Generator……………………………… 5
Charging from solar………………………………………... 5
Charing from the wall……………………………………… 6
Charging from a cigarette port……………………………... 6
Operating instructions……………………………………………... 7
General operating and safety instructions…………………. 7
Initial Setup………………………………………………... 7
Adding Multiple Battery Packs……………………………. 8
Calibrating the Battery Meter……………………………… 8
Balancing the Batteries…………………………………….. 8
Using Your Titan Solar Generator…………………………. 9
Battery Meter………………………………………………. 10
Storage …………………………………………………………….. 11
Point Zero Energy Titan Kit Set Up Diagrams…………………….. 12-15
Troubleshooting……………………………………………………. 16-18
FAQ………………………………………………………………... 19-21
Warranty Information……………………………………………… 22
1

GENERAL INFORMATION
Controls, Indicators, Connections
FRONT VIEW
A- Battery displayB- Power switch- down DC only, middle off, up AC and DCC- 12V DC sockets 20Amps max, each socket, or all combined.D- 120V AC sockets 15A per set of 3 (left three combined 15A, and right
3 combined 15A max)E- Reset breaker for left 3 outlets (15A)F- Reset breaker for right 3 outlets (15A)G- Reset breaker for RV outlet (30A)H– 20A fuse for 12V DC socketsI– 30A RV outlet (max 3,000 watts continuously 6,000 watts peak)J- 2,000 watt hour lithium battery pack
2
(Figure 1)

SIDE VIEW
K– External battery portL– 12V Car Charging Port and Battery Reset Port (input voltage 10-20V
DC Max charging 160 watts)M– AC Charging Ports. Max 50A per port @ 29.2VN– Solar input ports. Max charging 1,000 watts per port. Max input amps
30, max VOC (voltage open circuit) 145VO– Battery latch. Make sure the battery is secure with all 4 latches before
use
3
(Figure 2)

Technical Specifications
Weight 35 lbs Power module, 35 lbs battery
Dimensions 18.5x12x12
Generator
Solar Input Voltage volts: up to 145VDC watts: up to 2000 w
Output Voltage 120V AC Pure sine wave
Continuous Power
Output
3,000 watts (recommended 1500 watts with one
battery pack)
Peak Power Output 6,000 watts
Outlets (6) 120V
USB 6 smart USB, 2 USB C (removable sockets)
Battery
Cell type 24V lithium ion
Capacity 2,000 watt-hours per battery pack
Life Up to 10 years or up to 2000 cycles*
Warranty 2 year limited on Titan Power Module
1 year limited on Titan Battery Pack
*Maximum life span of battery based on ideal conditions. Actual life
span will depend on factors such as charge rate, discharge rate, cycle depth of discharge, and usage and storage conditions.
4

CHARGING YOUR TITAN SOLAR GENERATOR
There are three ways to charge your Titan solar generator: From solar,
using an AC charger (wall charger), and from a car cigarette port charger.
The Titan is capable of charging from all three sources at the same time.
*It’s critical to ensure that ALL THREE SOURCES OF CHARGING COMBINED does NOT EXCEED 1000 watts PER BATTERY.
Charging from Solar There are two sets of Anderson plugs designated for solar charging. See
Figure 1 under Controls, Indicators, Connections.
Each set is capable of charging up to 1000 watts. You can connect more
than 1000 watts per set, however, the generator will limit charging to 1000
watts per set. This can be beneficial if your system has one battery and you
want to limit the charge rate and get more power in low sun conditions.
* DO NOT EXCEED 145V of SOLAR INPUT. If you purchase solar panels from Point Zero Energy, follow the diagrams
contained in this user manual. If you purchase solar panels from another
source, make sure it is configured to keep the open circuit voltage under
145V
SEE FIGURES 4-7 for wiring diagrams for Point Zero Energy’s solar kits.
Charing from solar 1. Place your solar panels where they will get as much direct sunlight
as possible.
2. Connect solar panels to the generator using the correct
configuration.
3. Your batteries are fully charged when the battery display monitor
reads 100% (See section BATTERY METER on reading battery
meter). It does not hurt to leave your solar panels connect even
after the batteries are fully charged.
Charging from the wall 1. Ensure the AC battery charger is set to your correct grid voltage.
2. Plug the AC Battery Charger into any wall outlet using the included
power cord.
3. Connect the red Anderson plug end of the AC Battery Charger to
the Titan AC charging port.
4. Turn the AC battery charger switch to ON.
5

Charging from car cigarette port1. Using the included cigarette port adapter, plug the cigarette port
end into the cigarette port of the car.
2. Plug the SAE end of adapter into the 12V charging port on the
Titan solar generator (SEE FIGURE 2)
*CAUTION: THIS WILL DRAIN YOUR CAR BATTERY.THIS METHOD OF CHARGING WILL USE UP TO 18 AMPS FROM YOUR CAR BATTERY. SOME CIGARETTE PORTS MAY NOT HAVE THE CAPACITY TO HANDLE CHARGING. PLEASE ENSURE YOUR VEHICLE HAS THE CAPACITY FOR CHARGING BEFORE YOU USE THIS METHOD.
SAFETY MODEWhen the battery has been depleted below normal operating levels, the
Titan solar generator will go into safety mode. During safety mode, the
Titan will not turn on with the power switch. To take it out of safety mode,
the battery must be charged. To do this, first turn the Titan solar generator
power switch to the OFF position. Next, charge the battery using one of
three sources.
The easiest way is to use the AC charger and completely charge the battery.
Second, is using solar charging. To do this, use ONE SOLAR PANEL
connected to the MC4 to SAE adapter which is then plugged into the 12V
charging port.
(CAUTION: DO NOT USE MORE THAN ONE 12V SOLAR PANEL)
Leave the solar panel plugged in for 5 minutes then turn the Titan power
switch on to DC ONLY MODE. When turned on, if the voltage reads 20
volts or more, you can now remove the solar panel and continue to charge
as normal from solar, connecting to the solar panel charging port.
If it doesn’t turn on or the voltage reads below 20 volts, turn the Titan solar
generator back off, leaving it plugged in for another 5 minutes and check
again.
Repeat this process until the generator reaches above 20 volts.
Third, plug the Titan solar generator to a 12V car port, using the included
Car Charging Port Adapter. Warning: This may take a very long time and completely drain your car battery.
6

OPERATING INSTRUCTIONS
GENERAL OPERATING AND SAFETY INSTRUCTIONS• For optimal performance, use your Titan solar generator in a cool,
dry environment. Although the solar panels need to be kept in
direct sunlight, keeping the generator away from any direct heat
source, including direct sunlight, will keep the generator from over-
heating and shutting off.
• Keep well ventilated, away from any combustible materials or
gases.
• Do not open the Titan solar generator; there are no user serviceable
parts inside.
INITIAL SET-UPBecause of it’s design, there is a specific way to initially setup the Titan
solar generator. PLEASE FOLLOW INSTRUCTIONS CAREFULLY
to keep your Titan functioning properly.
1. Connect the battery pack to the Titan Power Module(FOR SYSTEMS WITH MORE THAN ONE BATTERY PACK, SEE SECTION ‘ADDING MULTIPLE BATTERY PACKS’)
a) First, ensure the power switch on the solar generator is in the OFF
POSITION.
b) Stack the Titan solar generator on top of the battery pack, making
sure the rubber feet of the generator are aligned on top of the circle
indentations of the battery pack.
c) Tighten the four metal latches on the sides of the battery pack. You
may need to press down on the generator to close the latch.
d) The battery is now connected.
2. Fully charge your batteries.*IMPORTANT: Any time you add or replace batteries, you need to fully
charge each battery pack so the system can calibrate correctly to the new
battery configuration.
a) Turn the Titan Power Module on (DC or DC/AC)
b) Fully charge your battery using the provided AC charger.
7

ADDING MULTIPLE BATTERY PACKS*IMPORTANT: When adding multiple battery packs, it’s critical that you follow the instructions listed below so that
1.) The battery meter is calibrated to read the correct state of charge, and
2.) The battery packs are all balanced BEFORE connecting them together
with the solar generator.
*CONNECTING UNBALANCED BATTERIES TOGETHER IN A SYSTEM WILL DAMAGE ONE OR MORE OF THE BATTERIES.
CALIBRATING THE BATTERY METER1. Connect the first battery by stacking the Titan Power Module on top of
the battery pack, making sure the rubber feet of the generator are aligned
on top of the circle indentations of the battery pack.
2. Tighten the four metal latches on the sides of the battery pack. You may
need to press down on the generator to close the latch.
3. The battery is now connected.
4. Turn the generator on (DC or DC/AC).
5. Program the battery meter to the correct amp-hours of all the battery packs combined that will be in use.
Each Point Zero Energy Lithium Ion battery pack is 74 amp-hours.
For example, if you have 3 battery packs, you will need to set the amp-
hours on the meter to 222 amp-hours (3 X 74 amp-hours=222 amp-hours).
SEE SECTION BATTERY METER on programming the battery meter).
6. Fully charge the battery using the provided AC charger.
7. Turn off the Titan solar generator and remove the battery.
8. The Titan solar generator is now calibrated for all battery packs that will
be in use.
BALANCING THE BATTERIES1. Repeat steps 1-8 on CALIBRATING THE BATTERY METER
(excluding step 5) for each remaining battery.
2. Add all batteries to the system.
*This process of ADDING MULTIPLE BATTERY PACKS will need to be followed every time the battery configuration is changed.
8

USING YOUR TITAN SOLAR GENERATORAfter initial setup, your Titan solar generator is ready to use. The Titan
solar generator has two modes of use: DC ONLY and DC/AC.
These two modes can be selected using the power switch.
Middle selection is OFF, down is DC ONLY, and up is DC/AC.
DC Mode: If you only need DC power for charging cellphones, tablets,
lights, etc., you can save power by using the DC ONLY mode. However,
none of the AC outlets will work in this mode.
The DC mode turns on the battery display and the four 12v ports on the
front of the solar generator. You can also optionally use the included USB
adapters in these four 12v ports.
* IMPORTANT: The four 12v ports are capable of up to 20 amps each, however, they are also limited to a combined amperage of 20 amps total. For example, you can use 20 amps in one port, OR 10 amps in two ports, OR 5 amps in all four ports.If you go over 20 amps the fuse will blow and will need to be replaced.
DC/AC Mode: This mode turns on DC power as explained above, as well
as the six 15 amp 120v AC outlets and the 120v RV outlet.
The six 15 amp 120v outlets are separated into two 15 amp breakers. The
left three outlets are on one breaker and the right three outlets are on the
other. This means, the left three outlets are capable of 15 amps per outlet
with a total of 15 amps combined. The right three are also capable of 15
amps per outlet with a total of 15 amps combined.
This means, if you want to run a total of more than 15 amps of AC power,
you will need to plug 15 amps or less into the left side and 15 amps or less
into the right side.
RV Outlet: The 30 amp RV plug can be connected to RV’s or any load
where you need more than 15 amps.
9

BATTERY METERReading the Battery MeterThe battery meter shows an image of a battery. Inside the battery gives a
graphical display as the battery is used, the darker color will gradually
lower until the battery is empty. It also shows the remaining battery
capacity listed in amp-hours as well as a charge-discharge indicator. When
you are draining the battery, these arrows will point down . When you
are charging the battery, the arrows will point up . The background
lighting will also flash on and off while charging.
Also on the battery meter, reads the percent of battery capacity remaining,
as well as the estimated remaining time left of your battery based on your
current load. This is only accurate if you’re using a constant load that is not
fluctuating.
It will also display the battery voltage, current, and power usage in watts.
The battery meter measures all power going into or out of the battery. This
includes the no load power draw, any inefficiencies of the inverter, and all
AC and DC power being used.
10
(Figure 3)

Programming the Battery MeterWhenever your battery configuration is changed (i.e. adding, removing, or
replacing a battery pack), you will need to program the battery meter
accordingly.
1. Press the “OK” key for 3 seconds to enter programming menu.
2. Select “CAP” and click “OK” key to enter the capacity setting.
3. Using the ^ arrow keys, set each digit to appropriate number for your
battery capacity.
4. Once battery capacity is set, press ESC button twice.
*IMPORTANT: DO NOT CHANGE OTHER SETTINGS IN THIS MENU. OTHERWISE, YOUR METER WILL NOT CALIBRATE CORRECTLY.
WHAT CAN I POWER?The Titan solar generator can power various appliances such as
refrigerators, freezers, microwave ovens, and cooking appliances. It's pure
sine wave power output will safely run power tools, electronics, and
medical equipment such as CPAP machines.
When deciding on what to power, you will need to calculate the continuous
and peak loads of each appliance you want to run simultaneously to
determine if the total amount of watts is within the capacity of the
generator. Remember, run times will vary depending on the number of
batteries and solar panels.
When using large amounts of AC power when the battery is low, the
inverter may turn off earlier than normal with useable battery capacity still
remaining. If this happens, turn the Titan solar generator off and back on
again. Try reducing the amount of power being used via AC.
STORING YOUR TITAN SOLAR GENERATORThe Titan solar generator will retain a charge for up to 5 years. However,
for optimal battery life, you should use 10% of the battery once per year.
Make sure each battery pack is charged to at least 50% capacity and the
POWER SWITCH is turned to OFF before storing.
Store your Titan solar generator in cool, dry environments and away from
any combustible materials or gases.
*FAILURE TO STORE AND MAINTAIN YOUR TITAN SOLAR
GENERATOR PROPERLY WILL VOID THE PRODUCT WARRANTY.
11

WARNING:
DIAGRAM IS FOR POINT ZERO ENERGY KITS
A– T
itan
Pow
er M
odule
B– T
itan
2000 w
att
hour
bat
tery
C– A
nder
son t
o M
C4 A
dap
ter
D– 5
0 f
t M
C4 E
xte
nsi
on c
able
(
one
bla
ck a
nd o
ne
red
)
E– 5
100 w
att
flex
ible
sola
r pan
els 500 WATT KIT
12
(Fig
ure
4)

WARNING: DIAGRAM IS FOR POINT
ZERO ENERGY KITS
1000 WATT KITA
– T
itan
Pow
er M
odule
B– T
itan
Bat
tery
pac
k
C– A
nder
son t
o M
C4 A
dap
ter
D– 5
0 f
t M
C4 E
xte
nsi
on c
able
(
one
bla
ck a
nd o
ne
red)
E– 1
0 1
00 w
att
flex
ible
sola
r pan
els
F– 1
5 f
t m
c4 e
xte
nsi
on c
able
(
one
bla
ck a
nd o
ne
red)
G– M
C4 B
ranch
connec
tor
(
one
neg
ativ
e an
d o
ne
posi
tive)
13
(Fig
ure
5)

1500 WATT KIT
WARNING: DIAGRAM IS FOR POINT
ZERO ENERGY KITS
A– T
itan
Pow
er M
odule
B– 2
Tit
an B
atte
ry p
acks
C– 2
Ander
son t
o M
C4 A
dap
ters
D– 5
0 f
t M
C4 E
xte
nsi
on c
able
(
two b
lack
and t
wo r
ed)
E– 1
0 1
00 w
att
flex
ible
sola
r pan
els
F– 1
5 f
t m
c4 e
xte
nsi
on c
able
(
one
bla
ck a
nd o
ne
red
)
G– M
C4 B
ranch
connec
tor
(
one
neg
ativ
e, a
nd o
ne
posi
tive)
14
(Fig
ure
6)

A– T
itan
Pow
er M
odule
B– 2
Tit
an B
atte
ry p
acks
C– 2
Ander
son t
o M
C4 A
dap
ters
D– 5
0 f
t M
C4 E
xte
nsi
on c
able
(
two b
lack
and t
wo r
ed)
E– 2
0 1
00 w
att
flex
ible
sola
r pan
els
F– 1
5 f
t m
c4 e
xte
nsi
on c
able
(
two b
lack
and t
wo r
ed)
G– M
C4 B
ranch
connec
tor
(
two n
egat
ive,
and t
wo p
osi
tive)
WARNING:
DIAGRAM IS FOR POINT ZERO ENERGY KITS
2000 WATT KIT
15
(Fig
ure
7)
4. TROUBLESHOOTING
Problem Possible Cause Solution
The generator is not
turning on
Battery is not installed Follow the instructions in the
user manual on page 7 INITIAL SETUP
Power switch is not turned on
Flip the power switch up for AC/DC power, or down for DC
only.
Battery has overheated If you have been running the
Titan under a heavy load, or you are operating it in a hot
environment, it may have overheated your battery.
Turn off the generator and move it to a cool location and allow to
cool down.
Battery has turned off
due to an over current condition
If you only have one battery and
have been running over 1500 watts, the battery may have
turned off for safety. To reset the battery, turn the generator off
(power switch in the middle position), leave it for a few
seconds, and turn it back on.
Battery may have gone
into safety mode due to being discharged to
low.
This may happen if you have left
your generator on for a long time,or if you are running a DC load
when the battery is already low. If this occurs, you will need to
charge the battery back up. Please see SAFETY MODE on
page 6.
16

Troubleshooting Continued…
Battery will not charge.
When charging it says it is full, and
the voltage is over 29V, but as soon as
the solar or AC charger is removed,
the voltage drops back down
The battery was charged at over 40A,
and for safety reasons the battery has stopped
charging.
Turn the power to the generator off, and disconnect anything
connected to any charging ports (AC charger, car charger, solar,
etc). Wait 5 seconds, and turn it back on.
Generator will turn on, but there is no
ac power.
Power switch is turned to DC only mode
Turn the power switch to the up position (DC and AC mode).
The battery voltage is
too low
To protect the battery, the inverter
will turn off when the battery voltage reaches 20V. If this
happens, you need to charge yourbattery back up before using AC
power.
A breaker has been
tripped
The Titan Generator has
resettable breaker buttons for the AC outlets. If one of these have
tripped, you simple need to press the button back in again. If this
continues to happen, then the load you are running is too high
for the outlet. See section USING YOUR SOLAR
GENERATOR for how much power each outlet can handle.
17

Troubleshooting Continued…
There is no DC power
The power switch is turned off
Turn the power switch down for DC only power, or up for DC and
AC power
DC fuse has blown The maximum DC current to the
DC outlets is 20A. If you go over 20A, the fuse will blow. To
fix this you will need to replace the fuse with a 20A fuse.
The AC charger will not charge.
The fuse in the charger has blown
Replace the fuse in the AC charger.
The battery meter isnot accurate
The amp hours on the meter does not match
your battery size
If you have added more batteries,or removed batteries, you need to
adjust the amp hour setting on thebattery meter Please see page 8
ADDING MULTIPLE BATTERIES
The battery has not been fully charged
since adding a battery or removing a battery
Once any changes have been made to the battery configuration,
and the battery meter has been programed, the battery/batteries
need to be fully charged before the meter is calibrated correctly.
The battery has been cycled many times
without getting fully charged
The battery meter re-calibrates every time it is fully charged. If
you use it for many cycles without every fully charging it,
the meter can slowly get off. To fix this, simply fully charge the
battery.
18

5. FAQ'SHOW MUCH SOLAR CAN I ADD TO THE TITAN?Up to 2000 watts of solar (no more than 145V).
CAN I USE ANY SOLAR PANELS WITH THE TITAN OR DO I HAVE TO PURCHASE PANELS FROM POINT ZERO ENERGY?You can use any solar panels available as long as they have MC4
connectors and when wired together the voltage is between 35V to 145V.
WHAT TYPE OF OUTPUT POWER IS THE TITAN?120 volt 60 HZ, up to 3000 watts (only 1500 watts with one battery).
WHAT TYPE OF BATTERIES COME WITH MY TITAN SOLAR GENERATOR?Lithium NMC batteries
HOW MANY BATTERY PACKS CAN I ADD TO THE TITAN?
Technically speaking, there is no limit to the amount of battery packs you
can add to the Titan. However, to keep charging times within a reasonable
time frame, we recommend not going over 6 battery packs.
CAN I ADD EXTERNAL BATTERIES TO THE SYSTEM?Yes, the Titan is very flexible, and can connect to a 24V external batteries
such as (8S) LiFePo4 and AGM deep cycle batteries. However, for lithium
batteries we suggest you use ones that have a built in battery management
systems (BMS).
CAN I REPLACE THE BATTERIES ?Yes, you can easily add or replace the batteries by adding or replacing
battery packs.
CAN I CHARGE MY TITAN WITH A WALL CHARGER AND SOLAR AT THE SAME TIME?Yes, you can use your wall charger and charge with solar at the same time.
When doing this, make sure you don't charge over 1000 watts combined
per battery.
19

CAN I HAVE MY SOLAR PANELS CONNECTED WHILE USING MY TITAN SOLAR GENERATOR?Yes. In fact we recommend you use your generator in this way so that the
solar panels can be recharging your battery while in use.
HOW OFTEN SHOULD I CHARGE MY TITAN SOLAR GENERATOR?The Titan solar generator will retain a charge for up to 5 years. However,
for optimal battery life, you should use 10% of the battery once per year.
Make sure each battery pack is charged to at least 50% capacity and the
POWER SWITCH is turned to OFF before storing.
CAN I CONNECT MY TITAN TO MY HOME CIRCUIT BREAKERBOX?No, because the Titan is 120v and your home power is 240v, we don't
recommend connecting the Titan to your home circuit.
WHAT SIZE SYSTEM DO I NEED?1- 500 watts of solar, and one battery will be more powerful than any
other portable system like this that is available. It is large enough to run
most home appliances, including a fridge, washing machine, microwave,
cook top stove, fans lights, tv, and other electronics.
2- 1000 watts of solar: With the extra solar, you can run everything the
500 watts of solar can run and more. This means when the sun is out, you
can run most things without even draining your battery, and during cloudy
days it will still produce a lot of power.
3- 1500 watts of solar: Usually with 1500 watts of solar you will also add
a second battery to take advantage of the extra power. This means you can
now run a fridge and a freezer, and much more, including water pumps, a
vacuum, power tools, etc. You could even run a small air conditioner
during the day to keep cool.
4- 2000 watts of solar: Similar to the 1500 watt system, other than it will
recharge even quicker, and provide more power especially during cloudy
days. You can also see our off-grid calculator to show you how much solar
and battery storage you need.
20

CAN THE TITAN RUN 3000 WATTS OR ONLY 1500 WATTS?As with any system, it's only as powerful as it's weakest link. The Titan
Solar Generator was designed from the ground up to be expandable, so
many of the limits of the system will not be reached until other
components are upgraded to match. For example, the MPPT charge
controllers are capable of charging at up to 2000 watts. However, you
would not want to charge at a rate of 2000 watts with just one 2000 wh
battery. The same is true for the inverter. The inverter is capable of up to
3000 watts continuous output. However, one battery will not be able to run
3000 watts for very long, and it is recommended to stay under 1500 watts
when only using one battery. This will ensure a longer life for the battery
and keep the battery from shutting off due to over-temperature or over
current.
So to take advantage of the 3000 watt inverter, and the 2000 watt solar
charging, it's best to have at least 2 batteries connected to the system.
HOW DO I KNOW IF MY APPLIANCE WILL WORK WITH THE TITAN SOLAR GENERATOR?When figuring what appliances can be powered with your Titan solar
generator, you will need to calculate how much the continuous loads are of
each appliance you want to run simultaneously to determine if the total
amount of watts is within the capacity of the generator.
You can find the wattage of the appliance by looking at the manufacturer's
information (this information is usually stamped or printed on most
appliances and equipment) or using a Kill A Watt meter to measure it's
wattage. Add all wattages of appliances to be run to determine if the total
amount of watts is within the maximum continuous and surge watts of the
Titan solar generator.
21

6. WARRANTYLIMITED WARRANTY
Point Zero Energy warrants to the original consumer purchaser this Titan
solar generator to be free from defects in workmanship and material under
normal consumer use during the applicable warranty period identified in
Paragraph 2, subject to the exclusions set forth in Paragraph 4.
This warranty statement sets forth Point Zero Energy’s warranty
obligation. We will not assume, nor authorize any person to assume for us,
any other liability in connection with the sales of our products.
LIMITED WARRANTY PERIODThe warranty period for the Titan power module is two years from original
purchase date.
The warranty period for the Titan solar generator lithium battery packs,
whether purchased as a stand alone product or in a system, is one year
from the original purchase date.
This warranty is NOT transferable and is only valid for the original consumer. The sales receipt from the original consumer purchase, or
other reasonable documentary proof, is required in order to establish the
start date of the warranty period.
With the exception of the 30 Day No-Fault Warranty, the buyer is
responsible for any initial shipping charges required to ship the product for
warranty service. Point Zero Energy will pay the return shipping charges if
the product is repaired or replaced under warranty.
30 DAY NO-FAULT WARRANTYThis 30 Day No-Fault Warranty is supplemental to the Limited Warranties,
and is not a warranty in itself, nor does it waive or modify any exclusions
or limitations in the Limited Warranties.
The 30 Day No-Fault Warranty states that within 30 days of date of
delivery of original purchase, Point Zero Energy guarantees the Titan
power module and/or Titan battery packs to be free of any defects in
workmanship or material. If not, Point Zero Energy will repair or replace
any defective parts with new or reconditioned parts, at Point Zero Energy’s
discretion, without charge to the original purchaser.
22

EXCLUSIONSThe above stated limited warranties DO NOT APPLY to damage from
misuse, alterations, abuse, normal wear and tear, lack of maintenance,
accidents, or repairs made or attempted by anyone other than an authorized
service technician. This warranty does not cover repair if:
• Normal use has exhausted the useful life of the generator and wear
and tear items (including batteries, control panels including digital
displays, outlet plugs, switches, and cords if applicable).
• The customer fails to install, maintain, and operate the product in
accordance with the instructions and recommendations of the
company set forth in the Titan solar generator user manual.
• Damage occurs due to freezing, heat exposure, water exposure,
rust, corrosion, thermal expansion, fire, dropping, misapplication or
any other improper use, storage, and maintanance.
• Any product or part has been modified without the written
permission of Point Zero Energy.
The above limited warranties DO NOT COVER shipping or labor charges
associated with the inspection and testing of generators.
Point Zero Energy is not liable for any loss, cost, expense, inconvenience
or damage that may result from use, misuse, or inability to use this
product. Under no circumstances shall Point Zero Energy be liable for any
loss, cost, expense, inconvenience, or damage exceeding the purchase price
of the product.
The warranty and remedies set forth are exclusive and in lieu of all others,
oral or written, expressed or implied. No reseller, distributor, agent, or
employee is authorized to make any modification, extension, or addition to
this warranty.
HOW TO RECEIVE SERVICETo obtain warranty service, you must contact us at 208-530-2393 or
[email protected] prior to returning any product to receive an
RMA form.
UNAUTHORIZED RETURNS WILL NOT BE ACCEPTED AND WILL BEREFUSED. CUSTOMER IS RESPONSIBLE FOR ALL SHIPPING COSTSON UNAUTHORIZED RETURNS.
23