using demonstrations to stimulate inquiry and students ... · pdf filecomplex concepts on a...
TRANSCRIPT

ISSN
201
3-17
55, S
CQ
-IEC
E
du
caci
ó Q
uím
ica
Edu
Q n
úm
ero
19 (
2014
), p
. 48-
57D
OI:
10.
2436
/20.
2003
.02.
144
htt
p://
scq.
iec.
cat/
scq/
inde
x.ht
ml
48
Using demonstrations to stimulate inquiry and students’ thinkingL’ús de demostracions per estimular la investigació i el pensament dels estudiants
Peter E. Childs / University of Limerick. Department of Chemical and Environmental Sciences. Chemis-try Education Research Group / National Centre for Excellence in Mathematics and Science Teaching and Learning (Limerick, Ireland)
abstract
This article describes how demonstrations can be used to stimulate inquiry and initiate the process of inquiry-based
science education. This means doing demonstrations not just for fun or to illustrate some topic, but to catch stu-
dents’ attention, and engage them in the inquiry process by asking questions and suggesting solutions. Some exam-
ples of such an approach are given using a selection of science demonstrations, used in a lecture in Barcelona in
November 2013. The article focuses on the engagement phase of the 5E enquiry model, which is being development
in the TEMI project, a new FPY IBSE project.
keywordsDemonstrations, questioning, discrepant events, 5E model, IBSE.
resum
Aquest article descriu com es poden utilitzar els experiments demostratius per estimular la investigació i iniciar el
procés d’ensenyament de les ciències basat en la indagació. Això significa fer experiments demostratius no només
per diversió o per il·lustrar algun tema, sinó també per captar l’atenció dels estudiants, així com per involucrar-los
en el procés d’investigació per mitjà de preguntes i el suggeriment de solucions. Alguns exemples d’aquest enfoca-
ment es donen mitjançant una selecció de demostracions científiques que es van presentar en una conferència a
Barcelona el novembre de 2013. L’article se centra en la fase d’implicació del model d’indagació 5E, que és el model
emprat en el projecte TEMI, un nou projecte d’ensenyament de les ciències basat en la indagació (ECBI).
paraules clau Experiments demostratius, formulació de preguntes, controvèrsies científiques, model 5E, ECBI.
IntroductionDemonstrations are widely
used in lectures and in lessons to capture student’s interest or to illustrate something. Katz (2005) is well-known as a science demonstrator and said this about using demonstrations in teaching:
Science demonstrations may be used in magic shows without explanation or in teaching with the explanation and connections to the topic being taught. Often the student is a passive recipient of impressions or ideas, rather than an active participant in such demonstrations. As part of the Tempus SALiS project on «Student Active Learning in Science», we developed a lecture demonstra-tion to show how demonstrations can be used to encourage stu-dents to think and become more actively involved, thus promoting
Magic is science without
explanations. In presenting
demonstrations, either explana-
tions are often omitted or too
much information is given. An
effective demonstration should
promote good observation skills,
stimulate thought, arouse
curiosity, present aspects of
complex concepts on a concrete
level, and, most important, be the
basis for class discussion.
Explanations should contain
enough information to satisfy the
audience’s curiosity as to what
took place and why, and should
serve as a starting point for
further inquiry for those indivi-
duals who need more details.

49
Usi
ng
dem
onst
rati
ons
to s
tim
ula
te i
nq
uir
y an
d s
tud
ents
’ th
inki
ng
scientific inquiry and learning (Childs and Hayes, 2012).
This article describes the approach used in the lecture in Barcelona in November 2013 (fig. 1) as a model for using the various examples in a teaching situation. The format of the lecture was that a demon-stration was introduced and performed and then the audi-ences were asked questions to help them think about what they had seen, to suggest explanations, propose hypotheses to explain what had happened and suggest further experiments to test their ideas.
In a teaching situation, it is envisaged that each example would be developed and would lead to further discussion and experimentation, consolidating the material and developing a deeper understanding of a scientific approach to problems. The initial demonstration would be the first stage, engagement, of the inquiry process as used in the 5E model of inquiry (fig. 2), and is used to kick-start the lesson and to engage students in the learning process (Bybee et al., 2006).
This was not possible in a lecture and this article follows the format of the lecture: first, the demonstration is described, with information on how to do it; sample questions are then given to stimulate students’ thinking about the example, and finally an explanation is given for the teacher. However, it should be stressed that the teacher is not expected to jump straight to giving the answer but should lead the students through the process of questioning, hypothesising and testing ideas, only giving the explanation at the end of the process. The approach taken is very similar to the new EU FP7 project «Teaching Enquiry with
Mysteries Incorporated» (TEMI) (http://teachingmysteries.eu/en).
The purpose of this inquiry-based teaching approach is to:
— Engage the students’ interest and stimulate their curiosity as a prelude to inquiry.
— Stimulate thinking and to get your students involved with their «minds-on».
— Use demonstrations and experiments to encourage thinking, not just to provide answers.
— Not to use demonstrations just as science magic, because we want to end up with answers, not just amazement.
The importance of questioning
I keep six honest serving men
(They taught me all I knew);
Their names are What and Why and
When And How and Where and Who.
ruDyarD KiplinG (1865-1936)
This famous poem by Rudyard Kipling reminds us of how impor- tant questions are in teaching. We want to get our students involved in thinking, discussing, and proposing solutions and questions are the way the teacher can start this process. Westaway (1929, p. 28) emphasised the importance of questions in doing demonstra-tions in school:
But in a school the lecture-room
is a place for teaching, and the
demonstration table is the
teacher’s laboratory bench.
The teacher works experiments,
often because the experiments
are beyond the pupil’s skill; the
lesson consists of questions and
answers all the time —directed
questions, and in case of
emergency leading questions,
and answers which are used
for cross-examination and
further questions.
Figure 1. Peter Childs giving his demonstration lecture in Barcelona.
Figure 2. The 5E model of inquiry
(http://www.bscs.org/bscs-5e-ins
tructional-model).
Inte
rcan
vi /
Tre
bal
l ex
per
imen
tal

50
Edu
caci
ó Q
uím
ica
Edu
Q
n
úm
ero
19
Some points to bear in mind when using demonstrations for inquiry-based learning:
— Make it interactive: the demonstrator should interact with the audience and get them involved.
— Ask questions throughout to raise the level of involvement.
— Get them to make observa-tions as the demonstration proceeds.
— Stimulate thinking by showing unusual things, often known as discrepant events (Liem, 1990; O’Brien, 2010), which can be used to provoke discussion.
— Encourage discussion amongst students, so they argue with each other about what is going on and sharpen their own ideas.
— Ask students to suggest why the demonstration works and what it means.
— Get them to suggest possi-ble reasons to explain the phe-nomena and how they could test them experimentally.
— Ask «what if?» to take the demonstration further by extend-ing it, and if possible do this by proposing hypotheses and testing out their ideas experimentally.
We want to get over the idea that hypotheses are not specula-tions but can be tested by further experiment, and that experimen-tal evidence is used to test them.
Good teaching is more a giving of
right questions than a giving
of right answers.
JoseF albers (1888-1976)
Choosing suitable demonstra-tions or experiments
When deciding what demon-strations to use to engage stu-dents either in a lecture or classroom context, we need to consider a number of factors.
We need to consider:— The background, ability and
level of students.
— The topic being taught.— Identify suitable demon-
strations or experiments that are:a) Safe.b) Low-cost.c) Right level.d) Arouse curiosity.e) Stimulate questions.f) Lead to fruitful inquiry.
There are a wide range of demonstrations and activities in every area of science that could be used. The difference lies in how we present them and use to stimulate inquiry, curiosity and critical thinking. The demonstra-tion is not an end in itself, or the end of the story, but is deliber-ately chosen as the starting point for an adventure in inquiry for your students, which will cause them to engage with the science and develop their understanding through minds-on and hands-on activities. One source of suitable ideas is classed under the heading of discrepant events (Liem, 1990; O’Brien, 2010).
In the following section, some of the demonstrations covered in the lecture, and some additional ones, are described to illustrate the approach used.
Sample demonstrations to initiate inquiry
Colour changesColour changes are one way of
recognising a chemical change, and when the changes are unexpected or are presented in a «magic show» format, they can be used to stimulate thinking. Some examples are given below.
1) Magic writingHow to do it:This is then sprayed with a
colourless solution and a pink message appears. When left for some time, this message disap-pears. It will reappear when sprayed again.
What is happening? Some questions to ask:
Why can a colourless solution produce a pink colour? (The students might recognise the colour of phenolphthalein from titrations and guess that the solution sprayed might be an alkali.)
How might you test the solution that was sprayed? (Litmus or universal indicator would show that the solution was basic. Testing with phenolphtha-lein would produce the same colour as that observed.)
Why does the colour slowly fade? Is this due to light or something in the air? (This is more difficult to explain and there could be several explana-tions. If it was due to light, then we could leave the message in the
A discrepant scientific event is a
surprising occurrence —such as
corn growing faster in the dark
than in the light— that challen-
ges learners’ preconceptions.
Because they at first appear to be
non-academic in nature and
frequently differ from what is
expected, these tidbits can stir
the interest of even the chroni-
cally disinterested student. The
moment a student proclaims:
«No, that just isn’t possible; it
can’t work that way», a window of
opportunity opens for the student
to gain a better understanding of
his or her world (Wright, 2014).
There are a wide range of demonstrations and activities in every area of science that could be used. The difference lies in how we present them and use to stimulate inquiry, curiosity and critical thinking
51
Usi
ng
dem
onst
rati
ons
to s
tim
ula
te i
nq
uir
y an
d s
tud
ents
’ th
inki
ng
dark and see if it still disappeared. However, knowing the colour is due to an acid-base indicator that goes from colourless to pink with base might lead to the suggestion that if it changes back, an acid must be involved to neutralise the base or that the base evaporates reversing the reaction.)
Where could the acid come from? Does it come from the cloth or paper or from the air? (The same thing happens for cloth and paper so it is more likely to be the air.)
Is there anything acidic in the air? What about carbon dioxide? How could you test this hypothesis? (We could put the coloured cloth in air with no carbon dioxide. We could test whether bubbling carbon dioxide through dilute sodium hydroxide plus phenolphthalein, changes the colour from pink to colourless. We could put the paper or cloth in a jar containing carbon dioxide.)
Explanation and set-up:An invisible message is written
using phenolphthalein indicator solution on a sheet of paper or the back of a lab coat. When sprayed with dilute sodium hydroxide (e.g. 0.1M NaOH or another dilute alkali), the acid-base indicator changed from colourless to pink. However, air contains a small amount of carbon dioxide (an acidic gas), which slowly reacts with the alkali, neutralises it, and thus removes the pink colour. This is a slow reaction due to the low concentration of carbon dioxide in air and the fact that it has to diffuse into the paper or cloth and react. The pink colour will reappear if sprayed again with dilute alkali.
2) Water to wine and back againHow to do it:Three glasses or beakers (A, B, C)
are lined up each one-third full
of colourless liquid. When A is poured into the central one B, it turns pink. When C is poured into the central one, the pink colour disappears.
What is happening? Some questions to ask:
What does the colour change from colourless to pink remind you of? (The students will be familiar with acid-base indica-tors, and the only one showing this colour change is phenol-phthalein.) Which beaker must contain the phenolphthalein? (Must be the central one, B.) What must be present in A to cause the pink colour to appear? (An alkali causes phenolphthal-ein to turn pink.) What sort of substance causes the pink colour of phenolphthalein due to an alkali to disappear? (An acid produces the colourless form of phenolphthalein, so C must contain an acid.) If we add an equal volume of C to B as the volume of A (the base), what can we say about the acid? (For the colour to disappear fully, the acid must be more concen-trated than the alkali, so that it neutralises it and produces an acidic solution.)
Explanation and set-up:It is important to have equal
volumes in each glass/beaker to start. When added together, they should not overflow from the middle glass/beaker. The central beaker B contains water with a few drops of phenolphthal-ein and should be colourless to start with. Beaker A contains 0.1M sodium hydroxide solution. When A is poured into B, the pH increases and the phenolphthal-ein indicator changes into its pink form. Beaker C must contain an acid which is more concentrated than the alkali in A, so that it will neutralise it. 0.2M hydro- chloric acid or 0.1M sulfuric acid could be used. Part of the acid will neutralise the alkali
and the excess will convert phenolphthalein to its colour- less form.
How could you turn it pink again? You would need to add more alkali, enough to neutralise the acid.
This simple demonstration could be used to introduce the more complex «Water into wine» series below. It is about acid-base reactions but also introduces the importance of concentrations.
3) Anyone for wine? Water into wine How to do it:A cup of «water» is poured into
a glass and turns pink. Water into wine! This is then poured into a series of glasses and first turns colourless (lemonade); then it fizzes (7-Up lemonade); turns white and cloudy (milk), and finally the milk turns pink (indigestion mixture).
What is happening? Some questions to ask:
How can the various changes be explained? (The demonstra-tion presupposes some knowl-edge of acid-base chemistry and indicators, and tests for common ions. These are often done in introductory chemistry classes, and thus this demonstration is an interesting way to revise this material.)
What could change water into wine and then back again?
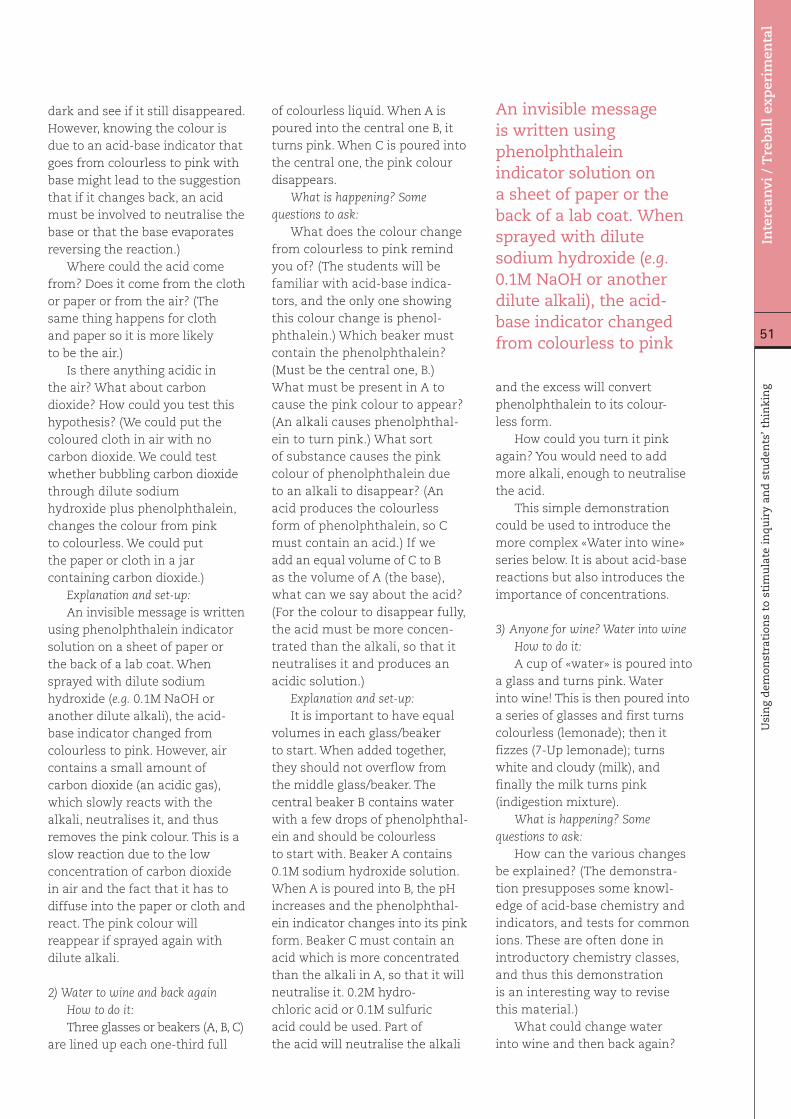
An invisible message is written using phenolphthalein indicator solution on a sheet of paper or the back of a lab coat. When sprayed with dilute sodium hydroxide (e.g. 0.1M NaOH or another dilute alkali), the acid·base indicator changed from colourless to pink
Inte
rcan
vi /
Tre
bal
l ex
per
imen
tal

52
Edu
caci
ó Q
uím
ica
Edu
Q
n
úm
ero
19
(The characteristic colour of phenolphthalein should suggest that the initial «water» is a dilute alkali and the first cup contains phenolphthalein.) To remove the colour we need an acid, so the second glass contains a small amount of a more concentrated acid than the original alkali.
What causes the fizzing to produce «lemonade»? What fizzes with an acid? (It could be a carbonate or hydrogencarbonate, as there is no smell.)
What causes the colour change to «milk» in the next glass? What could the white precipitate be? It must be something that reacts with the chemicals from the previous step. [White precipitates com-monly covered in introductory chemistry classes include barium sulphate (test for sulphate ion) or silver nitrate (test for chloride ion). This would mean that the acid used in step 2 was either sulfuric acid or hydrochloric acid.] How could you check which it was?
In the final step, the white precipitate turns pink. What could cause this? (Since we know we have phenolphthalein present, the final glass must contain an alkali, enough to neutralise any remaining acid, thus restoring the basic colour of phenolphthalein. The white precipitate appears to turn pink.)
The idea is to try to get the students to work out the chemis-try of the demonstration, and
then to try and replicate it themselves to check whether they were correct.
The explanation and set-up:The original glass contains
1-2 cm3 0.1M NaOH(aq) diluted with water and the second class, a few drops of phenolphthalein, which turns pink in the alkali. The third glass contains a few drops of 1M sulfuric acid. This is concentrated enough to neutral-ise the alkali and change the phenolphthalein back to colour-less. The fourth glass contains a small amount of solid sodium hydrogencarbonate or a few drops of sodium hydrogencarbonate concentrated solution. It fizzes as the solution is poured in, as the acid reacts with the hydrogencar-bonate and liberates carbon dioxide. The fifth glass contains a few drops of barium nitrate or barium chloride solution. This forms a white precipitate of barium sulphate from the sul-phate ions in the solution. The sixth glass turns pink, colouring the white precipitate. It contains a few drops of 1M sodium hydrox-ide, which neutralises any remain-ing acid and turns the solution alkaline and the phenolphthalein pink. The glasses appear empty to start with, as small volumes of liquid are used, which are hidden in the bottom of the glass.
There are many variations on this demonstration and it pro-vides a good way to revise acid-base reactions and tests for common ions. You could extend it by asking students to devise their own series of colour changes using the chemistry they have covered in class.
4) Red blood or blue?How to do it:A spray bottle contains a
yellowish solution. When sprayed on to a blank piece of paper, writing in a mixture of red and blue letters appear. Alternatively,
when poured into two «empty» glasses or beakers, one turns blood red and the other, dark blue.
What is happening? Some questions to ask:
How can one solution produce two totally different colours? (There must be something different on the paper or in the glasses to produce two different colours.) What sort of reaction could it be? (They could be acid-base reactions with two different indicators.) The yellow colour of the initial solution is a clue: what could this be due to? What tests could you do on this solution to check its identity? Acid or base? What happens if you add a base? (The intensity of the colours is another clue as they are much more intense than normal indicator colours.)
The explanation and set-up:The yellow solution is an
iron(III) salt, which will be acidic. On adding a base, a yellow/red precipitate of iron(III) hydroxide is formed. Iron is a transition metal and forms strongly col-oured complexes and com-pounds. The first glass contains a small amount of thiocyanate ions (from potassium thiocyanate, KCNS, or ammonium thiocy-anate, NH4CNS), which form an intense blood-red complex with iron(III) ions. The second glass contains a small amount of potassium ferrocyanide (K4[Fe(CN)6]), which forms a dark-blue precipitate (Prussian blue) with iron(III) ions. The invisible writing is made by painting the letters on paper or cloth using thiocyanate ions (red letters) or ferrocyanide (blue letters). This is a very colourful demonstration, which challenges students to think how one solution can produce two differ-ent colours.
Other colour changes are possible using iron(III) ions by
The yellow solution is an iron(III) salt, which will be acidic. On adding a base, a yellow/red precipitate of iron(III) hydroxide is formed. Iron is a transition metal and forms coloured complexes and compounds
53
Usi
ng
dem
onst
rati
ons
to s
tim
ula
te i
nq
uir
y an
d s
tud
ents
’ th
inki
ng
forming different complexes or changing the pH, so that one solution can be changed into several different colours. Get your students to investigate some of the reactions of iron(III) ions, and then set up their own series of colour changes. This can be done in the same way as the «water to wine» demonstration above, using a series of «empty» glasses.
DensityOften density is taught in
a very traditional way that emphasises the content —defini-tion, equation, units, etc.—, and at the end students often do not understand the concept of density (which is a composite quantity of mass and volume). We need to start with concrete experiences and phenomena, which cause students to think and ask questions, and which eventually leads them to the concept of density.
1) Two sorts of soft drinkHow to do it:Set up a large glass or plastic
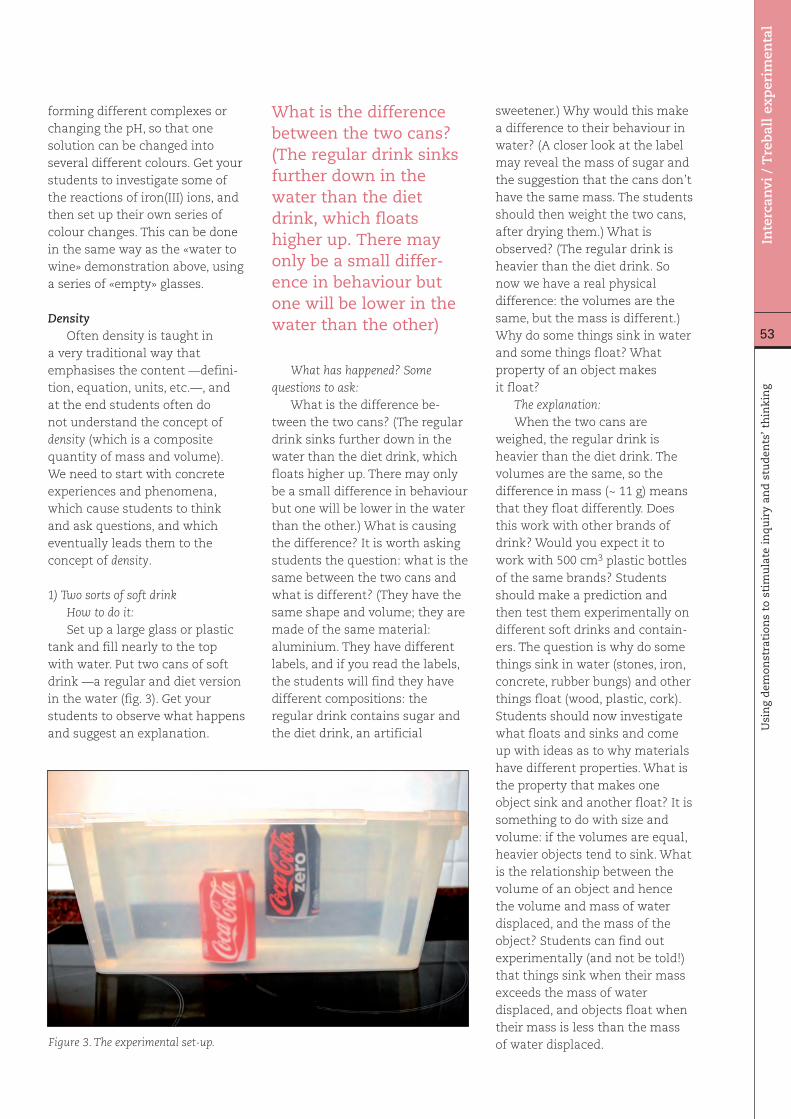
tank and fill nearly to the top with water. Put two cans of soft drink —a regular and diet version in the water (fig. 3). Get your students to observe what happens and suggest an explanation.
What has happened? Some questions to ask:
What is the difference be-tween the two cans? (The regular drink sinks further down in the water than the diet drink, which floats higher up. There may only be a small difference in behaviour but one will be lower in the water than the other.) What is causing the difference? It is worth asking students the question: what is the same between the two cans and what is different? (They have the same shape and volume; they are made of the same material: aluminium. They have different labels, and if you read the labels, the students will find they have different compositions: the regular drink contains sugar and the diet drink, an artificial
sweetener.) Why would this make a difference to their behaviour in water? (A closer look at the label may reveal the mass of sugar and the suggestion that the cans don’t have the same mass. The students should then weight the two cans, after drying them.) What is observed? (The regular drink is heavier than the diet drink. So now we have a real physical difference: the volumes are the same, but the mass is different.) Why do some things sink in water and some things float? What property of an object makes it float?
The explanation:When the two cans are
weighed, the regular drink is heavier than the diet drink. The volumes are the same, so the difference in mass (~ 11 g) means that they float differently. Does this work with other brands of drink? Would you expect it to work with 500 cm3 plastic bottles of the same brands? Students should make a prediction and then test them experimentally on different soft drinks and contain-ers. The question is why do some things sink in water (stones, iron, concrete, rubber bungs) and other things float (wood, plastic, cork). Students should now investigate what floats and sinks and come up with ideas as to why materials have different properties. What is the property that makes one object sink and another float? It is something to do with size and volume: if the volumes are equal, heavier objects tend to sink. What is the relationship between the volume of an object and hence the volume and mass of water displaced, and the mass of the object? Students can find out experimentally (and not be told!) that things sink when their mass exceeds the mass of water displaced, and objects float when their mass is less than the mass of water displaced.
What is the difference between the two cans? (The regular drink sinks further down in the water than the diet drink, which floats higher up. There may only be a small differ·ence in behaviour but one will be lower in the water than the other)
Figure 3. The experimental set-up.
Inte
rcan
vi /
Tre
bal
l ex
per
imen
tal
54
Edu
caci
ó Q
uím
ica
Edu
Q
n
úm
ero
19 Now get them to explain why a piece of iron (or concrete) sinks but a steel (or concrete) boat floats.
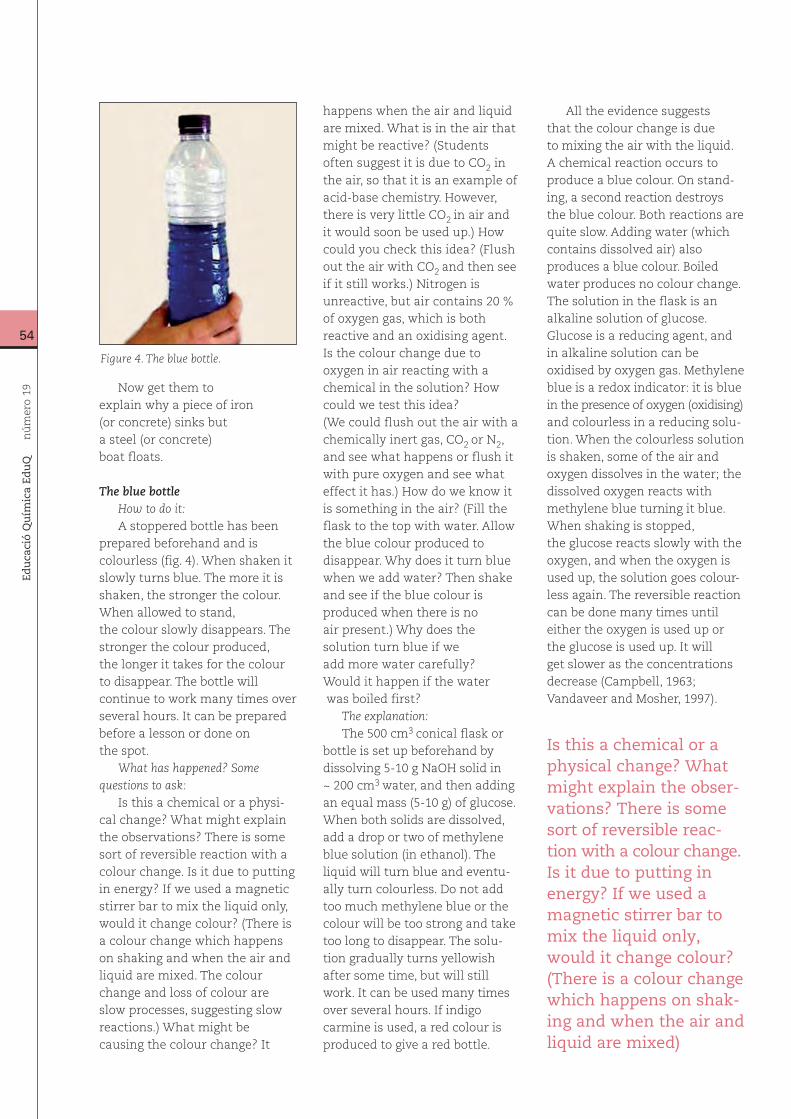
The blue bottleHow to do it:A stoppered bottle has been
prepared beforehand and is colourless (fig. 4). When shaken it slowly turns blue. The more it is shaken, the stronger the colour. When allowed to stand, the colour slowly disappears. The stronger the colour produced, the longer it takes for the colour to disappear. The bottle will continue to work many times over several hours. It can be prepared before a lesson or done on the spot.
What has happened? Some questions to ask:
Is this a chemical or a physi-cal change? What might explain the observations? There is some sort of reversible reaction with a colour change. Is it due to putting in energy? If we used a magnetic stirrer bar to mix the liquid only, would it change colour? (There is a colour change which happens on shaking and when the air and liquid are mixed. The colour change and loss of colour are slow processes, suggesting slow reactions.) What might be causing the colour change? It
happens when the air and liquid are mixed. What is in the air that might be reactive? (Students often suggest it is due to CO2 in the air, so that it is an example of acid-base chemistry. However, there is very little CO2 in air and it would soon be used up.) How could you check this idea? (Flush out the air with CO2 and then see if it still works.) Nitrogen is unreactive, but air contains 20 % of oxygen gas, which is both reactive and an oxidising agent. Is the colour change due to oxygen in air reacting with a chemical in the solution? How could we test this idea? (We could flush out the air with a chemically inert gas, CO2 or N2, and see what happens or flush it with pure oxygen and see what effect it has.) How do we know it is something in the air? (Fill the flask to the top with water. Allow the blue colour produced to disappear. Why does it turn blue when we add water? Then shake and see if the blue colour is produced when there is no air present.) Why does the solution turn blue if we add more water carefully? Would it happen if the water was boiled first?
The explanation:The 500 cm3 conical flask or
bottle is set up beforehand by dissolving 5-10 g NaOH solid in ~ 200 cm3 water, and then adding an equal mass (5-10 g) of glucose. When both solids are dissolved, add a drop or two of methylene blue solution (in ethanol). The liquid will turn blue and eventu-ally turn colourless. Do not add too much methylene blue or the colour will be too strong and take too long to disappear. The solu-tion gradually turns yellowish after some time, but will still work. It can be used many times over several hours. If indigo carmine is used, a red colour is produced to give a red bottle.
All the evidence suggests that the colour change is due to mixing the air with the liquid. A chemical reaction occurs to produce a blue colour. On stand-ing, a second reaction destroys the blue colour. Both reactions are quite slow. Adding water (which contains dissolved air) also produces a blue colour. Boiled water produces no colour change. The solution in the flask is an alkaline solution of glucose. Glucose is a reducing agent, and in alkaline solution can be oxidised by oxygen gas. Methylene blue is a redox indicator: it is blue in the presence of oxygen (oxidising) and colourless in a reducing solu- tion. When the colourless solution is shaken, some of the air and oxygen dissolves in the water; the dissolved oxygen reacts with methylene blue turning it blue. When shaking is stopped, the glucose reacts slowly with the oxygen, and when the oxygen is used up, the solution goes colour-less again. The reversible reaction can be done many times until either the oxygen is used up or the glucose is used up. It will get slower as the concentrations decrease (Campbell, 1963; Vandaveer and Mosher, 1997).
Figure 4. The blue bottle.
Is this a chemical or a physical change? What might explain the obser·vations? There is some sort of reversible reac·tion with a colour change. Is it due to putting in energy? If we used a magnetic stirrer bar to mix the liquid only, would it change colour? (There is a colour change which happens on shak·ing and when the air and liquid are mixed)

55
Usi
ng
dem
onst
rati
ons
to s
tim
ula
te i
nq
uir
y an
d s
tud
ents
’ th
inki
ng
The disappearing waterHow to do it:Add water to a polystyrene
cup and it appears to disappear (fig. 5). When turned upside down, the water does not run out. Where has it gone?
This can also be done as a version of the three card trick: water is poured into one of three identical polystyrene cups; they are then shuffled and the stu-dents asked to say which cup contains the water; they choose the right one, and when it is turned upside down, nothing comes out! They may try again, but still the water has disap-peared.
What has happened? Some questions to ask:
Where has the water gone? What could cause it to «disappear»? Can the water really have vanished? How could you check that the water was still present? (Have a balance available to show that the mass of the cup still includes the water.)
The explanation:When the students can look
inside, they see a whitish solid instead of the water. One of the cups contained a small amount of sodium polyacrylate powder (as used in babies’ disposable nappies/diapers). When the water is added, it is slowly absorbed to form a solid gel. When the cup is turned upside down, the gel traps the water so that it doesn’t flow out. It is important to allow time for the water to be absorbed
and to use the right amounts of solid and water.
The water can’t have disap-peared. If the cup was weighed before and after, it is clear the water is still there. The water must have been turned into a form where it cannot run out or perhaps the cup has a secret bottom? If you do this again with a glass beaker, then the students can see what is happening. When sodium polyacrylate is used in nappies/diapers, the liquid doesn’t disappear: it is trapped in the gel in a solid form.
Polar and non-polar liquidsHow to do it:Set up two burettes, one with
water and one with a colourless non-polar liquid (e.g. hexane).
Charge a plastic pen or comb with static electricity (by rubbing on dry hair or a jumper). Adjust the taps to get a steady stream of liquid running into a beaker (fig. 6). Observe what happens to the two streams of liquid. Do they behave in the same way? In one case, the jet of liquid is deflected: is it repelled or attracted to the comb? In the other case, the stream of liquid is unaffected. If the stu-dents carefully smell the two liquids, one smells organic and the other doesn’t. (It can be revealed that one is water and the other, an alkane or oil.)
What has happened? Some questions to ask:
What effect does it have on the two streams of liquid? Why is
there a difference? (The comb or pen will also pick up small pieces of paper.) What has happened to the pen or comb? (It has picked up a static charge.) Why is one liquid affected and the other not? Why is the water stream deflected but the other stream is not? Is it because water is not an organic substance? (If ethanol or acetone is used in one burette, then there is a similar but smaller deflection to that observed with water.) So it’s not just organic liquids. What’s the difference between water and ethanol, and hexane that would cause the difference in behav-iour? Does the same effect happen if a magnet is used?
The explanation:What is the difference be-
tween these two liquids that explains the behaviour? Is the difference between organic liquids and other liquids? What other organic liquids could be tested? (The students could suggest an alcohol like ethanol or acetone.) Do these behave like water or like the hexane?
This is an example of electro-statics and solvent polarity.
The electrically charged pen or comb attracts the molecules in the polar liquid (water), but not the non-polar liquid (hexane). If
Figure 6. The experimental set-up.
Figure 5. The experimental set-up.
What is the difference between these two liquids that explains the behaviour? Is the difference between organic liquids and other liquids? What other organic liquids could be tested? (The students could suggest an alcohol like ethanol or acetone.) Do these behave like water or like the hexane?
Inte
rcan
vi /
Tre
bal
l ex
per
imen
tal

56
Edu
caci
ó Q
uím
ica
Edu
Q
n
úm
ero
19
ethanol or acetone are tried, the stream of liquid is also deflected (but not as much as water), because these are both polar liquids. The liquids are polar because they contain polar molecules (with positive and negative ends), which are attract-ed to the charge on the comb. A magnet does not cause a deflection, because the liquids are not magnetic.
This is a good way to introduce the topic of polarity in molecules. Why are acetone and ethanol polar but hexane is not?
The burning steel woolHow to do it:First take two lumps of steel
(iron) wool, open one up so it the wires are separated and squash the other piece into a tight ball. Show that if you use a Bunsen flame or a gas lighter, one of them will glow and catch fire and continue burning by itself, and the other will glow but then go out (fig. 7).
What is happening? Can a metal burn like wood? Is this a chemical or physical change? How could you tell?
The same demonstration is done again, but this time the terminals of a 9V battery are touched to the two samples of steel wool: one open and loose and the other tightly packed. The same behaviour is observed. The loosely packed steel wool glows and catches fire and continues to burn; the tightly packed one does not continue to glow after the battery is removed.
What has happened? Some questions to ask:
Why does the iron wire glow and spark in air? (The iron wire glows and sparks as it burns in air and the iron is oxidised with the evolution of heat. It continues to burn when the heat or battery is removed because the heat of reaction is enough to keep it
going.) Is it a chemical or a physical process? (The steel wool changes colour, there is a heat change and the mass increases.) If it is a chemical change, would you expect the mass to increase, decrease or stay the same? (Many students think that if things burn, they lose weight. When a metal oxidise, it combines with oxygen and increases in mass. This should be confirmed experimentally: the same reaction can be done on a top-pan balance using a white tile to protect the balance. As the wire burns, its mass is seen to increase. The students should be asked to explain this.)
Why does the wire change colour in the process? (The steel wire changes colour as it is oxidised and increases in mass as it goes from Fe to Fe2O3. The same reaction happens whether it is initiated with a flame or a battery.) Why does the wire behave differently if it is loosely packed or in a tight ball? How can a battery set iron wire on fire?
The explanation:Why does a battery set the
iron on fire? Iron wire is a good conductor of electricity, and when it shorts the battery terminals, a large current flows, which heats up the wire, and the heat produced is enough to raise the temperature so that the iron starts burning and reacting with the oxygen in the air. The same reaction happens if the wire is
heated in a Bunsen flame. The loose wire continues to burn, unlike the compacted wire, because the surface area is increased and the air can penetrate to keep the reaction going. The heat generated by the reaction is enough to keep the reaction going, but it needs the heat from the flame or from the electrical heating to start the reaction.
ConclusionI hope that this short article
has shown how demonstrations can be used to stimulate ques-tioning and initiate the inquiry process. You can probably think of other ways of using the same demonstrations described here and other questions to be asked. The important idea is for you, the teacher, to get into the habit of asking questions to get your stu- dents thinking. Catching the students’ attention with an unexpected or discrepant event is the first stage of inquiry: engagement. In a classroom or laboratory, the demonstration is not an end in itself but the starting point for inquiry and student involvement. There are many more ideas available in books and on-line for suitable science demonstrations which can be used to stimulate stu-dents’ thinking and inquiry.
Figure 7. The burning steel wool.
Why does the wire change colour in the process? (The steel wire changes colour as it is oxidised and increases in mass as it goes from Fe to Fe2O3. The same reaction hap·pens whether it is initiat· ed with a flame or a battery)
57
Usi
ng
dem
onst
rati
ons
to s
tim
ula
te i
nq
uir
y an
d s
tud
ents
’ th
inki
ng
The approach described here was used in the Tempus SALiS project (Childs and Hayes, 2012; http://www.salislab.org) and is also being used in the new EU TEMI project, and I am one of the University of Limerick’s TEMI project team (Broggy et al., 2014). TEMI is a new FP7 project in IBSE, «Teaching Enquiry with Mysteries Incorporated» (TEMI), which is due to run from 2013 to 2016 (http://cordis.europa.eu/projects/rcn/108650_en.html). The aim of TEMI is to encourage teachers to use inquiry in science teaching by using a scientific mystery or discrepant event to engage students. This is then used to initiate enquiry in the classroom using the 5E model. Several cohorts of teachers in each partner’s country will be trained to use mysteries or discrepant events to initiate inquiry in their own schools. One of the out-comes of the project will be a bank of tested activities for the engagement phase of science inquiry lessons.
I hope that this short article has given you some ideas for introducing demonstrations into your own classroom as a prelude to inquiry. If you can catch your student’s attention and spark their curiosity, then half the battle is won. By asking ques-tions, you can challenge them to observe carefully and think about what they see, and come up with their own explanations and suggestions for further work to test their ideas. The lesson can then proceed to investigate the topic and eventu-ally come up with proper scien-tific explanations, for things that may have seemed at the begin-ning to be just magic. Using demonstrations in the way I suggest above starts by putting the «magic» back into science, so that the students become en-gaged and take on the personal
challenge of explaining the magic in scientific terms.
Many demonstrations are available on-line (e.g. on YouTube), and these can be used instead of live demonstrations to initiate inquiry. The lecture covered more topics and can be seen on-line.
ReferencesbroGGy, J.; ChilDs, P. E.; mCCor-
maCK, O.; mCmanus, B.; o’DWyer, A. (2014). TEMI: Teaching Enquiry with Mysteries Incorporated: An Insight from Ireland. Proceedings, 3rd New Perspectives in Science Educa- tion. Florence, March 2014 [on-line]. Florence: Libreria Universitaria. <http://confer ence.pixel-online.net/NPSE/conferenceproceedings.php> [Accessed: 22 May 2014].
bybee, R.; Taylor, J. A.; GarDner, A.; sCoTTer, P. van; Carlson, J.; WesTbrooK, A.; lanDes, N. (2006). The BSCS 5E Instructional Model: Origins and Effectiveness. Colorado Springs: BSCS.
Campbell, J. A. (1963). «Kinetics: Early and Often». J. Chem. Educ., vol. 40, No. 11, p. 578.
ChilDs, P. E.; hayes, S. (2012). «Using Science Demonstra-
tions to Develop Thinking and Inquiry Skills». Chemistry in Action!, No. 97, p. 28-32.
KaTz, D. (2005). The Art of Effective Demonstrations [on-line]. Tucson: D. Katz ed. <http://www.chymist.com/Effec tive%20demonstrations.pdf> [Accessed: 22 May 2014].
liem, T. L. (1990). Invitations to Science Inquiry. Chino Hills: Science Inquiry Enterprise.
o’brien, T. (2010). Brain-Powered Science: Teaching and Learning with Discrepant Events. Arling ton: NSTA Press.
vanDaveer, W. R.; mosher, M. (1997). «The blue bottle revisited». J. Chem. Educ., vol. 74, No. 4, p. 402.
WesTaWay, F. W. (1929). Science Teaching. London; Glasgow: Blackie & Son Ltd.
WriGhT, E. L. (2014). Motivate the unmotivated with discrepant events [on-line]. <http://go.hrw.com/resources/go_sc/gen/HSTPR060.PDF> [Accessed: 22 May 2014].
Peter E. Childs
Retired in 2009 from lecturing
in chemistry at the University
of Limerick and is Emeritus Senior
Lecturer in the Department of
Chemical and Life Sciences, having
taught at university level since
1970. He currently directs the
Chemistry Education Research
Group and is Associate Director
of the National Centre for Exce-
llence in Mathematics and Science
Teaching and Learning. He has
produced the magazine Chemistry
in Action! for Irish chemistry teachers
since 1980.
E-mail: [email protected].
I hope that this short article has shown how demonstrations can be used to stimulate ques·tioning and initiate the inquiry process. You can probably think of other ways of using the same demonstrations describ·ed here and other ques·tions to be asked. The important idea is for you, the teacher, to get into the habit of asking questions to get your students thinking
Inte
rcan
vi /
Tre
bal
l ex
per
imen
tal