using the digital video recorder (dvr) - rcn...
TRANSCRIPT

Using the Digital Video Recorder (DVR)Passport Echo enables you to digitally record programs and manage a library of previously recorded programs. For example, you can group episodes of the same program into a folder. You can schedule future recordings of programs or entire series. You can also view TV live or time-shift your TV viewing.
Note: In order to access Passport Echo’s DVR menus, you must have a remote control with a DVR LIST button.
Aviso: Para poder accesar los Menús de DVR en Passport Echo, se necesita un control remoto que tenga el botón DVR LIST.
Your set-top box features two tuners as well as DVR capabilities, which enables you to:
• Watch live TV• Watch time-shifted (delayed) TV
You can pause, rewind, or fast forward the video (up to the current point in the program).
• Watch recorded programs• Record one program while watching another live program• Record two programs simultaneously• Record two programs simultaneously--while watching a third program that
had been previously saved to the set-top box’s internal hard disk• Convert any data temporarily recorded in the Live Off Disk (LOD) buffer
to a long-term recordingThis feature enables you to begin a recording well after a program has started and still record the entire program, including the beginning (assuming you were watching the channel since the beginning of the program).
• Swap back and forth between two tunersThis enables you to jump between two channels of live TV, or between a live channel and a time-shifted program or a recording.
• Display information about how much space on your hard disk has been used for recordings and how much is available
• Group recorded programs with identical titles (e.g., episodes of the same series) into folders
Passport Echo Customer Service Guide 237

...........................................................................................................................
......
Understanding Your Digital Video Recorder (DVR)
Your set-top box hardware includes the following components:
• Two TV tuners
• Two video encoder/decoders*
• An internal hard disk drive
*Note: Each tuner is typically associated with one encoder/decoder.
These components enable you to take advantage of a number of special features.
As long as the set-top box is plugged into an AC power outlet, each of the two tuners continuously records a live broadcast from two different channels. As each program is being recorded, the data is held in a temporary disk cache called an LOD buffer. When you turn on the power to the set-top box, a certain amount of programming data (typically one half-hour or one hour, depending on your cable company) is already present in each of the LOD buffers.
These dual tuners and LOD buffers enable you to do several useful things. For example, you can:
• Pause live (and recorded) TV
• Rewind and replay live (and recorded) TV
• Rewind, then fast forward to the current point in a program
• Decide to record a program after it has started, and still record the entire program, including the beginning (assuming one of the tuners was tuned to the channel since the program started)
• Perform standard digital video recorder (DVR) functions, such as fast forwarding live (and recorded) TV
• Play back video from the buffer in slow motion
Passport Echo Customer Service Guide 239

........................................................................................Using the Digital Video Recorder (DVR)
Channel LOD Buffer Cache Size
Each tuner can cache (hold in temporary LOD buffer storage) a certain amount of video, typically 30* minutes.
*Note: This value may be 60 minutes in some locations.
Note: The amount of video that can be cached in each LOD buffer can be configured by Aptiv Digital support. Please contact Aptiv Digital, Inc. for more information.
This means that if you were watching a program since its beginning, you can rewind “back in time” to view an earlier portion of the show. (You can also decide to record the program after it has begun, and if the beginning of the program is present in an LOD buffer, you can record the program in its entirety--even the “free preview” portion of a Pay Per View event.)
240 Passport Echo Customer Service Guide

...........................................................................................................................
......
Swapping Between Foreground and Background Tuners
The tuner you are currently watching is generally referred to as the foreground tuner. The other tuner is called the background tuner.
You can swap between the programs shown on the foreground and background tuners by pressing the SWAP key on the remote control.
Background tuner (not visible)
Foreground tuner (visible)
BEFORE AFTER
SWAPkey
If you press the number keys to tune to the background tuner channel, Passport Echo swaps the tuners (i.e., Passport Echo displays the channel that was on the background tuner and moves the foreground tuner channel to the background) in the same way as if you pressed the SWAP key.
Passport Echo Customer Service Guide 241

........................................................................................Using the Digital Video Recorder (DVR)
Info Banner and Mini Info Banner
Passport Echo briefly displays the Info Banner when you start to record a program or when you press the INFO key.
An LOD buffer progress bar in the lower middle section of the Info Banner provides information on the status of the DVR.
.
Current Program Air Time
Playback HeadTime Increment Tick Marks
Current Show Title
Current Channel Logo Current Channel
Number and Call Letters (above)
LOD BufferStart Time
LOD Buffer Bar
LOD Buffer Timeline
LOD BufferEnd Time
Playback mode
Current Time Rating and Content Advisory
A minimized version of the Info Banner is displayed when you press any of the DVR/VCR control keys (play, pause, rewind, or fast forward). The minimized banner is unobtrusive, yet it provides information about the video.
Time Increment Tick Marks Playback Head LOD Buffer End Time
Playback modeLOD Buffer Timeline LOD Buffer BarLOD Buffer Start Time
242 Passport Echo Customer Service Guide

...........................................................................................................................
......
For information on the DVR section of the Info Banner or the mini Info Banner, see the following table. For more information on other elements of the Info Banner or the mini Info Banner, see "Using the Channel Banner and the Info Banner" on page 22.
Banner Element
Description/Informationfor Live or Delayed Programs
Description/Information for Recorded Programs
LOD Buffer Timeline
Represents the amount of storage for LOD buffer video. The timeline is represented by beginning and end times. These times change as the buffer grows. Initially, the LOD buffer timeline displays the most current 30* minutes of programming. As the buffer grows, the timeline expands to accommodate the LOD buffer bar. The exact amount of buffer growth depends on the head-end configuration.
*Note: This value may be 60 minutes in some
locations.
• For recorded programs greater than 30* minutes in length, the timeline represents the duration of the entire program. (The LOD buffer bar will be the same length for shows that are one hour, two hours, etc.)
• For recorded programs less than or equal to 30* minutes in length, the timeline represents a fixed 30 minute period.
*Note: This value may be 60 minutes in some locations.
LOD Buffer Bar
Displayed in green within the LOD buffer timeline. Represents the amount of the program stored in the LOD buffer on the hard drive. The right edge of the bar shows the live (current) position.
Note: During a Pay Per View program, the LOD Buffer Bar is blue.
Displayed in green within the LOD buffer timeline. Represents the duration of the stored recording on the hard drive. If a program is recorded in its entirety, the green bar will completely fill the LOD buffer timeline. For programs that are partially recorded, the bar represents the recorded portion.
Time Increment Tick Marks
Represent 15-minute intervals on the timeline. Half-hour increments are represented by larger tick marks.
Passport Echo Customer Service Guide 243

........................................................................................Using the Digital Video Recorder (DVR)
As shown in the figure below, Passport Echo displays icons in the Info Banner to represent the current playback state. (Each of these icons is discussed in detail in the table on the following page.)
Icon
Playback Head
Displayed above the timeline. Shows the current position in the video stream. The playback head enables you to pinpoint the displayed portion of the current program. As you watch a program, the playback head moves to the right.
Note: If you are recording a Pay Per View program, you can use the Playback mode keys (such as RWD, FFWD, STOP, etc.) to control program viewing.
LOD Buffer Start Time
Indicates the start time of the first (oldest) data saved to the LOD buffer. If the LOD buffer is full, the LOD buffer start time increments forward as old data is cleared from the LOD buffer.
Displays 0:00
LOD buffer End Time
Represents the latest point in time that may be stored in the LOD buffer.
Displays the duration of the recorded program.
Recording in Progress icon
Indicates that a recording is currently in progress. (Not illustrated on page 242. See “Passport Echo Icons” on page 28 for an illustration of the Recording in Progress icon.)
Rating icon Indicates the Rating of the program. (For more information, see "Locking Ratings" on page 168.)
Content Advisory abbreviation
Content Advisory information is expressed by the following abbreviations: “S” for Sexual situations; “L” for Language; “V” for Violence; and “D” for suggestive Dialog. For example, a Content Advisory summary of (S, L, V) may be displayed. (For more information, see "Hiding Adult Titles" on page 189.)
Banner Element
Description/Informationfor Live or Delayed Programs
Description/Information for Recorded Programs
244 Passport Echo Customer Service Guide

...........................................................................................................................
......
Rewind and Fast Forward Speeds
Passport Echo features three levels of rewind and fast forward. These levels equate approximately to the speeds listed in the table below:
Moderate 8X
Medium 30X
Fast 60X
Icon Meaning
Rewind Fast
Note: When you are in any Rewind mode, pressing the left arrow key will skip back to the previous 15 minute time increment tick mark. (This feature is called “Notch Skip.”)
Rewind Medium
Rewind Moderate
Stop
Pause
Play
Fast Forward Moderate
Fast Forward Medium
Fast Forward Fast
Note: When you are in any Fast Forward mode, pressing the right arrow key will skip forward to the next 15 minute time increment tick mark. (This feature is called “Notch Skip.”)
Slow Motion (to change to slow motion, press the PLAY key twice within one half of a second)
The following table includes explanations of the icons that appear on the Info Banner.
Passport Echo Customer Service Guide 245

........................................................................................Using the Digital Video Recorder (DVR)
Notch Skip Function
Passport Echo includes a Notch Skip feature that enables you to skip forward (or back) to the next (or previous) 15 minute time increment tick mark in a program. This allows you to skip over program content that you do not care to view, or to skip back to view parts of a program again. (Refer to the illustration of the Info Banner on page 244 to see the tick marks.)
When you are in any Fast Forward mode, you can press the right arrow key to skip forward to the next 15 minute time increment tick mark.
When you are in any Rewind mode, you can press the left arrow key to skip back to the previous 15 minute time increment tick mark.
246 Passport Echo Customer Service Guide

...........................................................................................................................
......
Delayed Video (Time-Shifting)
“Time-shifted” or “delayed” video refers to video that has been broadcast and stored in the LOD buffer, or video that has been recorded and is being played back from the hard disk.
The video may be delayed by any amount of time, from one second to 30 minutes (or in some cases, 60 minutes, depending on the size of the configurable buffer).
In delayed video mode, you can use VCR-type commands (pause, fast forward, rewind) to control video playback.
Note: When you change channels, Passport Echo displays the actual broadcast signal. However, the first time you press one of the following keys (PLAY, PAUSE, REW, FFWD, STOP, or Instant Replay) after you change channels, Passport Echo shifts into delayed video mode.
Note: When you use one of these VCR-type commands, the video that you see displayed is actually being read from the hard disk. When you view an analog channel, you might notice a slight degradation of the video quality if the video is read from the hard disk. There should be no such degradation when you use VCR-type commands on digital channels.
Note: If you are watching but not recording a Pay Per View event, Passport Echo will not shift into delayed video mode. All time-shifting keys are disabled. The playback head is dimmed and the LOD Buffer Bar is displayed in blue (see the figure on page 242). If you press the PLAY, PAUSE, REW, FFWD, STOP, or Instant Replay key during a Pay Per View recording, a banner will automatically appear, informing you that you must initiate a recording of the Pay Per View program before you can use those keys.
Passport Echo Customer Service Guide 247

........................................................................................Using the Digital Video Recorder (DVR)
To enter delayed video mode:
Press one of the following keys to switch the viewing mode from live TV to delayed video:
• Rewind
• Pause
• Instant Replay
• Slow Motion
You can rewind up to one half-hour (30 minutes*) in the current broadcast (provided that your current tuner has been on the same channel for at least 30 minutes). In any case, you can rewind only as far as the LOD buffer allows.
*Note: This value may be 60 minutes in some locations.
When you change to a new channel, the LOD buffer is cleared.
To return to live TV mode:
• Press the LIVE key.
Note: After you press the LIVE key, you will still be viewing program data that is being played back from the buffer; however, you will be viewing programming at the very “front” end of the data.)
• Change channels.
248 Passport Echo Customer Service Guide

...........................................................................................................................
......
Recording a Program
You can schedule to record a single program episode or a complete series.
In either case, the program(s) will be recorded to the hard disk, where they will remain available for future viewing.
• You can record two programs at the same time, while watching a saved program from the hard disk.
• You can watch one channel while recording another.
The following sections provide detailed procedures for recording a program.
Note: Banners and dialog boxes that are displayed while you record programs are not saved with the recording.
Passport Echo Customer Service Guide 249

........................................................................................Using the Digital Video Recorder (DVR)
Recording a Program While Watching the Program
To record a program that you are watching:
1 Select a program that you want to record.
(There are numerous ways to do so. For more information, see "Selecting a Channel" on page 17.)
2 Press the REC key.
Passport Echo displays a Recording dialog (at right).
(You can cancel the dialog by pressing the (C) key.)
3 Press the up or down arrow to highlight an option (Record this show, Record entire series, Create a
manual recording) and then press the SELECT key.
• If you selected Record this show, the process is now complete.
• If you selected Create a manual recording, refer to "Manual Recording" on page 257.
• If you selected Record entire series, Passport Echo displays the Series Manager Options dialog. Proceed to the next step.
4 Press the arrow keys to specify your preferences for a series recording in the Series Manager Options dialog. See the list below.
• Episodes to Record: First run only, First run & repeats• Channels: KCET 28 only (example), Any channel• Air Times: All showings, 12 pm only (example)• Save: Until space is needed, Until manually erased• Episodes to Keep: All episodes, Up to 1, Up to 2, ... Up to 5• Start Time: On time, 1 minute early, 2 minutes early, 3, 4, 5, 6,7 8, 9, or 10 minutes early• End Time: On time, 1 minute over, 2 minutes over, 3, 4, 5, 15, or 30 minutes over, 1 hour over, 2 hours
over, 3 hours over
250 Passport Echo Customer Service Guide

...........................................................................................................................
......
Stopping a Program While it is Being Recorded
If you press the STOP key during the recording, a dialog asks whether you want to stop or continue to record the program.
• Press the (A) key to stop the recording.
• Press the (B) key to continue the recording.
• Press the (C) key to continue the recording, but resume playback from the beginning of the program.
Notes:
• Playback control of a program is independent of the recording. This means that you can rewind while the program is recording without interrupting the recording.
• If you are watching but not recording a Pay Per View event, Passport Echo will not shift into delayed video mode. All time-shifting keys are disabled. The Recording Head is dimmed and the LOD Buffer Bar is displayed in blue (see the figure on page 242). If you press the PLAY, PAUSE, REW, FFWD, STOP, or Instant Replay key during a Pay Per View recording, a banner will automatically appear, informing you that you must initiate a recording of the Pay Per View program before you can use those keys.
• The program title will be added to the Saved Shows panel. (Refer to "Using the Saved Shows Panel" on page 273.)
• Recording will automatically stop at the end of the program.
Passport Echo Customer Service Guide 251

........................................................................................Using the Digital Video Recorder (DVR)
Automatically Extending the Recording of a Live Sporting Event
When you attempt to record a live sporting event, Passport Echo offers an option to extend the recording time in case the game goes into overtime or is extended for some reason beyond its scheduled end time
1 Select a live sporting event that you want to record.
.
(There are numerous ways to do so. For more information, see "Selecting a Channel" on page 17.)
2 Press the REC key.
Passport Echo displays a dialog that includes an option to Extend end time.
(Press the left or right arrow to toggle between Extend end time and As scheduled.)
3 Select Extend end time, then press the SELECT key.
Passport Echo displays a dialog that enables you to specify how long you wish to extend the end time.
The End Time option is highlighted.
4 Press the left or right arrow to select the extended end time.
(You can also change the start time by pressing the up arrow to select Start Time, then pressing the left or right arrow to schedule a start time.)
• Start Time: On time, 1 minute early, 2 minutes early, 3, 4, 5, 6,7 8, 9, or 10 minutes early• End Time: On time, 1 minute over, 2 minutes over, 3, 4, 5, 15, or 30 minutes over, 1 hour over, 2 hours
over, 3 hours over
5 Press the (A) key to confirm the setting, or press the (C) key to cancel the start or end time adjustments.
252 Passport Echo Customer Service Guide

...........................................................................................................................
......
Recording a Current or Future Program from the Program Guide
The following procedure explains how to record a program from the Program Guide.
Note: The Series Recording Options dialog is automatically displayed when you create a series recording from the Program Guide or live TV.
1 Press the GUIDE key.
Passport Echo displays the Program Guide.
2 Use the arrows to highlight a current or future program.
3 Press the REC key.
Passport Echo displays a panel similar to the one at right. Depending on the type of program you selected, menu options may include:
• Record this show• Record the entire series• Remind me about this show• View this channel now• List upcoming episodes
Note: The option Remind me about this show is unavailable if the show is currently airing.
4 Press the up or down arrow to highlight one of the following:• Record this show• Record the entire series
Then press the SELECT key.
Note: If you encounter a recording conflict, Passport Echo will display a dialog that will provide information about conflict resolution. For more information, refer to "Resolving Conflicts" on page 268. You must resolve the conflict before proceeding.
Passport Echo Customer Service Guide 253

........................................................................................Using the Digital Video Recorder (DVR)
• If you select Record this show, the procedure is complete.
• If you select Record the entire series, Passport Echo displays the Series Recording dialog. See "Recording a Series" on page 260
• For information about the other options that may appear on this menu, see "Using the Recording Options Dialog" on page 264.
254 Passport Echo Customer Service Guide

...........................................................................................................................
......
Recording a Future Program from QuickInfo
The following procedure explains how to record a future program from QuickInfo.
Note: The Series Recording Options dialog is automatically displayed when you create a series recording from the Program Guide or live TV.
1 Press the INFO key.
Passport Echo displays the Info Banner.
2 Press the INFO key again.
Passport Echo displays QuickInfo.
3 Use the arrow keys to browse program titles and times to locate a future program you wish to record.
4 Press the REC key.
Passport Echo displays the panel similar to the one at right. Depending on the type of program you selected, menu options may include:
• Record this show• Record entire series• Remind me about this show• View this channel now• List upcoming episodes
5 Press the up or down arrow to highlight one of the following:• Record this show• Record entire series
Then press the SELECT key.
Note: If you encounter a recording conflict, Passport Echo will display a dialog that will provide information about conflict resolution. For more information, refer to "Resolving Conflicts" on page 268. You must resolve the conflict before proceeding.
Passport Echo Customer Service Guide 255

........................................................................................Using the Digital Video Recorder (DVR)
• If you select Record this show, the procedure is complete. A record icon will be displayed next to the program title in QuickInfo.
To cancel the recording, press the REC key again to display the future show dialog, highlight the Cancel this recording option, then press the SELECT key.
• If you select Record the entire series, Passport Echo displays the Series Recording dialog. See "Recording a Series" on page 260.
• For information about the other options that may appear on this menu, see "Using the Recording Options Dialog" on page 264.
256 Passport Echo Customer Service Guide

...........................................................................................................................
......
Manual Recording
A manual recording takes place at the time you request. It can occur once or repeatedly. It begins at the time you specify, regardless of the programs that are scheduled to air between the specified start and end times of the manual recording.
To create a manual recording:
1 While any channel is displayed, press the REC key.
2 Press the up or down arrow to highlight the Create a manual recording... option, and then press the SELECT key.
Passport Echo displays the Manual Recording dialog.
3 Select either an individual recording (one time only) or a recurring recording (will record at the same time on the designated days.)
4 Press the right arrow key to access the Channel column. Press the up or down arrow to highlight a channel.
5 Press the right arrow to access the Days column. Press the up or down arrow to highlight a day or days, then press SELECT.
• For individual recordings, the Day(s) column displays the date of the recording.
• For recurring recordings, the Day(s) column displays a day of the week (or a combination of days).
Passport Echo Customer Service Guide 257

........................................................................................Using the Digital Video Recorder (DVR)
6 Press the right arrow to access the Start column, in which you can set the time that the recording should start.
• Press the up or down arrow to select the hour. (You can also use the number keys to enter the number.)
• Press the right arrow to move to the next digit, and repeat the procedure until you have set a Start time.
• Press the right arrow to highlight the ‘a’ or ‘p,’ indicating whether you want the recording to start in the AM or PM.
7 Press the right arrow to move to the End column.
• Press the up or down arrow to select the hour. (You can also use the number keys to enter the number.)
• Press the right arrow to move to the next digit, and repeat the procedure until you have set an End time.
• Press the right arrow to highlight the ‘a’ or ‘p,’ indicating whether you want the recording to end in the AM or PM.
8 Review the information and do one of the following:
• Press the (A) key to accept the entry and schedule the recording.
• If there is an error and you need to change some of the information, you can press the left arrow to return to the column that requires editing. Once the information is correct, press the (A) key to accept.
• Press the (C) key to cancel the process. No recording will be scheduled.
Note: You can use the Scheduled Recordings, Saved Shows, or Series Manager panels to set a manual recording. For additional information on this feature, refer to "Using the Scheduled Recordings Panel" on page 288.
258 Passport Echo Customer Service Guide
...........................................................................................................................
......
Notes on Manual Recordings
• In the Scheduled Recordings panel, the title of a single instance manual recording appears as “Untitled Recording” until recording starts. At that time, the program title will appear. In addition, if the requested recording time precisely matches the start time and end time of a program, the program title will appear.
• In the Saved Shows or Scheduled Recordings panel, the title assigned to a single instance manual recording that spans multiple programs is the title of first complete program in the block. If no program in the block is complete, the assigned title is the title of the program that takes up the greatest amount of space in the recording block.
• In the Series Manager, the title of a recurring manual recording appears as “Untitled Recording” unless the scheduled recording time happens to precisely match a program, in which case the program title will appear.
• In the Program Guide, the first program included in the specifications of a manual recording request appears in red. A recording-in-progress icon is displayed in the program title cell.
• In the event of a conflict, manual recording requests have a higher priority than series recording requests. Manual recording requests have the same priority as single instance recordings and will cause Passport Echo to display a conflict dialog.
Passport Echo Customer Service Guide 259

........................................................................................Using the Digital Video Recorder (DVR)
Recording a Series
Passport Echo allows you to record not just a single episode of a program, but the entire series automatically. You need to set up a series recording only once, and all episodes will automatically be recorded when they are broadcast.
1 Press the GUIDE key.
Passport Echo displays the Program Guide.
2 Use the arrows to select a future program that you want to record as a series.
(You can also use QuickInfo to select a program.)
3 Press the REC key.
Passport Echo displays the dialog at right.
4 Press the up or down arrow to select the Record entire series option, then press the SELECT key.
Passport Echo displays the Series Manager Options dialog.
5 Press the arrow keys to specify your preferences for a series recording in the Series Manager Options dialog. See the list below.
• Episodes to Record: First run only, First run & repeats• Channels: KCET 28 only (example), Any channel• Air Times: All showings, 12 pm only (example)• Save: Until space is needed, Until manually erased• Episodes to Keep: All episodes, Up to 1, Up to 2, ... Up to 5• Start Time: On time, 1 minute early, 2 minutes early, ... 10 minutes early• End Time: On time, 1 minute over, 2 minutes over, 15 minutes over, 30 minutes over, 1 hour over, 2
hours over, 3 hours over
260 Passport Echo Customer Service Guide

...........................................................................................................................
......
6 When you have finished specifying options, press the (A) key.
The series recording (REC) icon will be displayed next to the program listing in the Program Guide.
Passport Echo Customer Service Guide 261

........................................................................................Using the Digital Video Recorder (DVR)
Canceling a Recording from the Program Guide
Note: You can also cancel a recording from the Scheduled Recording display. For additional information, refer to “Using the Scheduled Recordings Panel” on page 288.
1 In the Program Guide, highlight a program that is scheduled to be recorded. (A record icon [either single or recurring] will appear next to the program listing.)
2 Press the REC key.
Passport Echo displays one of the following panels:
• If the recording has started (and it is a single instance recording), Passport Echo displays the panel at right.
Press the up or down arrow to highlight Stop
this recording, then press SELECT.
No more of the show will be recorded. (A partial recording will remain.)
Passport Echo displays the Program Guide. The cell listing for the program is no longer marked for recording.
• If the recording will take place in the future, Passport Echo displays the panel at right.
Press the up or down arrow to highlight either Cancel this recording or Cancel this series, then press SELECT.
262 Passport Echo Customer Service Guide

...........................................................................................................................
......
Passport Echo cancels the scheduled recording.
Passport Echo displays the Program Guide.
The cell listing for the program or series is marked by a cancelled recording icon.
Passport Echo Customer Service Guide 263

........................................................................................Using the Digital Video Recorder (DVR)
Using the Recording Options Dialog
The Recording Options dialog displays options that are context sensitive. Some options may not be available, depending on program status.
All options are listed in the following table. The following illustration is an example of a typical dialog. It does not display all possible recording options.
Option Description
Record this show
This option schedules the program for recording, or starts a recording, if the program is currently being broadcast.
Record this live event
This option is available only when you select a live* sporting event for recording. This option schedules the live sporting event for recording, or starts the recording if the program is currently being broadcast. Use the Extended end time option to record the event in its entirety if, for example, the game goes into overtime. (*Note: For Passport Echo to consider an event “live,” the event must be denoted as a live event by the Guide data information.)
Cancel this recording
This option cancels a scheduled recording. If the program is scheduled as part of a series, only this instance of the recording will be canceled, not the entire series. Use the Cancel this series option to cancel the entire series.
Cancel this series
This option cancels an entire series recording. However, currently recording episodes will not be cancelled. (You can stop current recordings by using the Stop this recording option.)
View this channel now
This option displays the selected channel.
264 Passport Echo Customer Service Guide

...........................................................................................................................
......
To modify the Recording options
1 From either of the following locations, highlight a scheduled recording and press the SELECT key to display the Record Options dialog:
If a recording is in progress, press the REC key.
2 Press the up or down arrow to highlight “Record Options...”, then press SELECT.
3 Press the up or down arrow to highlight an option.
4 Press the SELECT key to accept the highlighted option, or press the (C) key to exit.
:
Stop this recording
This option stops a recording that is in progress.
Remind me about this show
This option creates a Reminder Timer. The Reminder Timer icon is displayed next to the cell listing in the Program Guide and a reminder alert banner will be displayed on your TV one minute before the show starts. For more information, see "Setting a Reminder Timer" on page 122.
Record Options...
This option displays a dialog box with additional recording options, such as start and end time and save options. See the following section, "Additional Recording Options Dialog" on page 266.
Series Recording Options...
This option displays additional options for recording a series. If the program is not a part of a series, this option is grayed out. For more information, see "Recording a Series" on page 260.
List upcoming episodes (or shows)
For the selected program, this option displays a list of all upcoming episodes of a series, or all upcoming showings of a non-serial program (such as a movie). It displays the information in the Program Guide/Search results panel, just as if you had run a Search by Title.
• Program Guide
• Scheduled Recordings panel
Passport Echo displays the Recording Options panel.
(See the table above for a list of options. See the following table for ways in which you can customize your recording request.)
Option Description
Passport Echo Customer Service Guide 265

........................................................................................Using the Digital Video Recorder (DVR)
Additional Recording Options Dialog
The Additional Recording Options dialog offers additional options that let you customize your recording request.
Option Description
Save You can manage how programs are retained or erased by the system using the following options:
Start Time You can select whether to start a recording earlier than the scheduled start time using the following options:
End Time You can select whether to end a recording later than the scheduled end time using the following options:
• Until manually erased: The program will be saved until you manually erase it.
• Until space is needed: The program will automatically be erased when disk space is needed for other recordings.
• On time
• 1-10 minutes early
• On time
• 1-5, 15, 30 minutes over
• 1-3 hours over
266 Passport Echo Customer Service Guide

...........................................................................................................................
......
To display the Recording Options dialog:
The preceding table describes the options available in the Record Options dialog.
1 You can display this dialog in several ways.
2 Press the up or down arrow to select and highlight the desired option.
3 Press the left or right arrow to scroll and highlight the desired sub-options.
4 Press one of the following keys:
• From the Recording dialog, select Record Options...
• From the Schedule Recordings Options dialog. For more information, see “Using the Scheduled Recordings Panel” on page 288.
• While a show is being recorded, press the REC key and then select Record Options...
• From the Saved Shows Options dialog (from the Saved Shows panel for an active recording).
• The (A) key to accept the changes and close the dialog.
• The (C) key to ignore the changes and close the dialog.
Passport Echo Customer Service Guide 267

........................................................................................Using the Digital Video Recorder (DVR)
Resolving Conflicts
Your set-top box may eventually encounter one of three types of conflicts: recording conflicts, tuner conflicts, or space conflicts. These conflicts can occur in several situations:
• If you try to schedule a recording that overlaps two simultaneous active or scheduled recordings
• If you try to schedule a recording that will not fit on the hard disk due to disk space limitations
• If you try to record an all-day program
• If you try to change channels while recording on both tuners
• If you try to extend the start time or end time for a recording in a way that causes the recording to overlap with another recording
When conflicts occur, Passport Echo displays a conflict message. (See the examples below.)
Passport Echo displays the dialog on the left if you have two simultaneous recordings in progress and try to change the channel.
Passport Echo displays the dialog on the right if you have at least two simultaneous recordings scheduled and you attempt to schedule a new recording that conflicts with the previously scheduled recordings.
268 Passport Echo Customer Service Guide

...........................................................................................................................
......
The following table lists conflict messages for recordings and provides information about resolving conflicts.
Message Description
To schedule this recording you must make the following changes:
You tried to schedule a recording that overlaps an existing scheduled recording or you have a program set to start early or end late. Follow the directions in this message and press the appropriate key, or press the (C) key to exit.
Notes:- Series recordings are lower priority than single recordings.
If a conflict arises due to extended start or end times, the Passport Echo resolves the conflict based on the scheduling priorities you established. For more information, see see “Using the Scheduled Recordings Panel” on page 288.
- Changes in the Program Guide may create conflicts with extended start or stop times. These conflicts will be resolved by Passport Echo. Extended end times always take priority over extended start times.
This all-day program is too long to record in its entirety because it exceeds the available hard disk space. You may record parts of it using the Manual Record feature.
You tried to schedule a recording of a program that is too long to be recorded in its entirety due to disk space limitations. You can record parts of the program using the manual recording feature.
Press the (C) key to close the dialog box; the recording will not be scheduled.
There are too many conflicts to schedule this recording. You must cancel other recordings.
You have attempted to schedule a recording that will result in multiple recording conflicts. Press the (C) key to close the dialog box without scheduling this recording. You must cancel previously scheduled recordings that conflict with the program you wish to record. To view a list of schedule conflicts, see the Scheduled Recordings panel. For more information, see “Using the Scheduled Recordings Panel” on page 288.
Passport Echo Customer Service Guide 269

........................................................................................Using the Digital Video Recorder (DVR)
Both tuners are currently recording. To change to channel xx, you must first stop the recording:
You tried to select a channel when both tuners were actively recording. To change a channel, you must stop one of the recordings. The dialog box enables you to stop either recording and change channels, or continue recording without changing channels.
You may change channels after either recording is finished.
The hard disk does not have enough free space to record this program. To make room, you must erase some saved shows.
You tried to start a recording but there is not enough hard disk space currently available. Press the (A) key to acknowledge the message; the recording will not start. You must free up some disk space (i.e., erase one or more saved programs) before starting the program. (Refer to “Erasing a Saved Program” on page 287).
Message Description
270 Passport Echo Customer Service Guide

...........................................................................................................................
......
Playing Back Recorded Programs
Recorded programs are programs that have been saved to the hard disk. They may have been saved using the REC key, or by scheduling them for recording in the Program Guide.
• You can use the VCR-like keys to play, pause, rewind, fast forward and stop the video.
• If a recorded program is subject to Parental Control locking parameters and Parental Control is enabled, you will be asked to disable Parental Control before you can display the video.
To play back a recorded program (a Saved Show):
1 Display the list of previously recorded programs (Saved Shows) by pressing the DVR LIST key on your remote control.
2 Press the up or down arrow to select the program you wish to view.
3 Do one of the following
• Press the SELECT key. Press the up or down arrow to select Play, Play From Beginning, or Resume Playback. (Note: These options are context-sensitive and may not all be displayed.)
• Highlight a recorded program, then press the PLAY key.
Passport Echo Customer Service Guide 271

........................................................................................Using the Digital Video Recorder (DVR)
The program will begin to play.
Notes:• The Saved Shows panel shows you how much of a program was saved. It can play back only the recorded
part. For example, if it lists a program, but only two minutes have been recorded (e.g., 9:58 - 10:00), only two minutes of video will be available for playback.
• In the Saved Shows panel, Start and End times appear in yellow if they differ from the actual start and end times of the broadcast. For example, if the recording started late, the start time appears in yellow, and the end time appears in yellow only if the recording ended early.
• If you press the STOP key, a dialog displays the following options: (A) Stop and erase, (B) Stop and save, and (C) Resume playback.
• When playback of a saved show ends, Passport Echo displays a dialog asking whether you wish to erase the program or play it again from the beginning. At this point, the upper right corner displays live video.
• If communication to the hard drive is lost, Passport will display the dialog at right. You can then choose to display the List menu or reboot the set-top box.
272 Passport Echo Customer Service Guide

...........................................................................................................................
......
Using the Saved Shows Panel
The Saved Shows panel provides access to all programs that have been saved to the hard drive or are currently being recorded. From this display you can also access the (B key) Scheduled Recordings and (C key) Series Manager panels.
In the Saved Shows panel, shows that have been recorded but not yet viewed appear in bold text.
Each entry in the Saved Shows panel contains the following information:
• Program title
• Record date
• Status icons (Recording in Progress, Deletion Status).
A Deletion Status icon appears on the left side of each listing in the Saved Shows panel. In addition, when you highlight a particular show in the list, Passport Echo displays an additional icon and some brief explanatory text on the right side of the display (refer to the figure on page 274). The following table explains the meaning of each Deletion Status icon and the right side text.
Remaining time Left side icon Right side icon Right side text
About 3 days to infinity No icon About <N> days (Usually about 3 to 7 days)
About 1 to 3 days About <N> days (1, 2, or 3 days)
Less than a day Less than a day
Program locked. Program will not be automatically deleted by Passport Echo. (However, you can manually delete it.)
Keep
Passport Echo Customer Service Guide 273

........................................................................................Using the Digital Video Recorder (DVR)
When a program is highlighted, Passport Echo displays additional information:
• Days-until-deletion indicator• Channel call letters and numbers• Recording start/end times• Program description• Parental Control icon• Rating icon• Content Advisory information
If Passport Echo is in Group Titles mode (folders mode), the following information is also displayed when a Group Title is highlighted:
• The number of new recordings of the show that are available for playback (if any)• The date the newest recording of the show was saved (e.g., Newest Show Saved: 6/18)• The number of new recordings of the show that are available for playback, if any (e.g., Unseen
Shows: 4)
To access the Saved Shows panel:
1 Press the DVR LIST key.
Passport Echo displays the Saved Shows panel..
• Press the (B) key to access the Scheduled Recordings panel.
• Press the (C) key to access the Series Manager panel.
• Press the up or down arrow to highlight a specific program, then press the SELECT key. Passport Echo displays the Saved Shows Options dialog box. Refer to "Saved Shows Options Dialog" on page 284.
• Press the REC key to display the Manual Recording dialog box.
274 Passport Echo Customer Service Guide

...........................................................................................................................
......
Sorting and Grouping Titles on the Saved Shows Panel
By default, Passport Echo lists titles of programs on the Saved Shows panel in reverse chronological order by scheduled date of erasure (i.e., the recorded show that is first scheduled for erasure appears at the top of the panel).
However, you can group identical titles into folders, which Passport Echo will then list in alphabetical order. This can be a useful way to sort and display programs on the Saved Shows panel if you record several episodes of the same serial program.
To group titles into folders or display all recordings:
1 Press the DVR LIST key.
Passport Echo displays Saved Shows panel.
2 Press the (A) key.
Passport Echo displays the Saved Shows pop-up menu.
Passport Echo Customer Service Guide 275

........................................................................................Using the Digital Video Recorder (DVR)
3 Press the up or down arrow to highlight the Group Titles menu option, then press SELECT.
Passport Echo groups all recordings with identical titles (e.g., all episodes of a serial program) into folders of the same name.
The show that was highlighted when you selected the Group Titles menu option appears as an expanded folder (i.e., all showings visible; see example at right).
All other sets of shows with identical titles are grouped into collapsed folders.
All folders are listed in alphabetical order.
4 To expand or collapse a folder, press the up or down arrow to highlight the folder, then press the SELECT key.
Note: Alternatively, if an episode in an expanded list is highlighted, you can press the left arrow to collapse the list into a folder. If a folder is highlighted, you can press the right arrow to expand the folder.
Passport Echo expands or collapses the folder.
5 To again list the programs in reverse chronological order based on date of scheduled erasure, press the (A) key.
Passport Echo displays the Saved Shows pop-up menu.
6 Press the up or down arrow to highlight the Show All Listings menu option, then press SELECT.
Passport Echo lists all recorded programs in reverse chronological order based on date of scheduled erasure.
7 To return to full-screen viewing, press the DVR LIST key.
276 Passport Echo Customer Service Guide

...........................................................................................................................
......
Deleting a Folder from the Saved Shows Panel
You can delete folders that contain groups of program episodes (including the content of those folders). This function enables you to delete a relatively large number of recorded programs at once.
To delete a folder of grouped titles and its contents:
1 Press the DVR LIST key.
Passport Echo displays the Saved Shows panel.
Note: If the Saved Shows panel is not already in Grouped Titles mode, press the (A) key, use the up or down arrows to highlight Group Titles, then press SELECT to enter Group Title mode.
2 Press the up or down arrow to highlight the folder you wish to delete, then press the INFO button.
Passport Echo displays the menu at right.
3 Press the down arrow to highlight Erase All (x hrs.).
4 Press the SELECT key.
Passport Echo displays an erasure request confirmation message.
Passport Echo Customer Service Guide 277

........................................................................................Using the Digital Video Recorder (DVR)
(If you do not want to erase the folder and it contents, press the (C) key.)
5 Press the (A) key.
Passport Echo erases the specified folder and its contents.
6 To return to full-screen viewing, press the DVR LIST key.
278 Passport Echo Customer Service Guide

...........................................................................................................................
......
Deleting All Viewed Programs from a Folder on the Saved Shows Panel
You can simultaneously delete all programs that have been viewed from a folder on the Saved Shows panel.
To delete all viewed programs that are contained in a folder:
1 Press the DVR LIST key.
Passport Echo displays the Saved Shows panel.
2 Press the up or down arrow to highlight the folder that contains the viewed programs that you wish to delete, then press the INFO button.
Passport Echo displays the menu at right.
3 Press the down arrow to highlight Erase All Viewed.
4 Press the SELECT key.
Passport Echo displays an erasure request confirmation message.
Passport Echo Customer Service Guide 279

........................................................................................Using the Digital Video Recorder (DVR)
(If you do not want to erase the viewed programs from the folder, press the (C) key.
5 Press the (A) key.
Passport Echo erases all programs in the selected folder that have already been viewed.
6 To return to full-screen viewing, press the DVR LIST key.
280 Passport Echo Customer Service Guide

...........................................................................................................................
......
• Press [
•
• From button
• A foldDisk I
Checking Hard Disk Space Usage
The Saved Shows Information panel features a color-coded bar graph and numerical data for three categories of disk space information.
• Saved until manually erased: This represents the total duration of programs that have been saved to the hard disk that you have requested remain on the hard disk until you manually erase them. In the bar graph, this disk space is color coded red.
• Automatically erased as needed: This represents the total duration of programs that have been saved to the hard disk that you have indicated may be automatically erased by Passport Echo when hard disk space is required to record additional programs. In the bar graph, this disk space is color coded yellow.
• Estimated free space: This represents an estimated amount of hard disk space that is currently available for additional recordings. In the bar graph, this disk space is color coded green. (*Note: On High Definition DVR boxes, this category is labeled as follows: “Estimated free space (fewer hours are available if
recording HDTV shows).”
LIST] to go to the Saved Shows area.
(RT-U50 remotes will need to go to the Quick Menu (GUIDE | DVR Quick Menu | Saved Shows):
the "Saved Shows" area, press the [A] on your remote control.
er will show up over "A". Select "View nfo"
Passport Echo Customer Service Guide 281

........................................................................................Using the Digital Video Recorder (DVR)
To display the Saved Shows Information panel:
1 Press the DVR LIST key.
2 Press the (A) key.
3 Press the up or down arrow to highlight the View Disk Info menu option, then press SELECT.
4 To return to the Saved Shows panel, press the (C) Return key.
5 To return to full-screen viewing, press the DVR LIST key.
Passport Echo displays Saved Shows panel.
Passport Echo displays the Saved Shows pop-up menu.
Passport Echo displays the Saved Shows
Information panel.
282 Passport Echo Customer Service Guide

...........................................................................................................................
......
Clearing Space on the Hard Disk
If your hard disk fills up with locked programming and you try to record another program, Passport Echo will display the following dialog box indicating that you must clear space on the hard disk before you can record additional programs.
• Press C to continue.
The program will be scheduled for recording. However, recording will not start until you have cleared up sufficient space on the hard disk.
You can erase programs from the hard disk by following the steps described in the section “Erasing a Saved Program” on page 287.
Passport Echo Customer Service Guide 283

........................................................................................Using the Digital Video Recorder (DVR)
Saved Shows Options Dialog
The Saved Shows Options dialog provides several options for recorded programs. These options are context-sensitive. Not all options are available at all times.
.
Option Description
Record Options If Passport Echo is currently recording, this option displays the Recording Options dialog.
Play Starts playback from the beginning. If you select Play for an active recording, Passport Echo displays the recording in progress (full display).
Stop Recording Stops the currently selected recording.
Erase Displays the Erase Confirmation dialog if the program is not currently recording. Press the (A) key to confirm that you want to erase the highlighted program. Press the (C) key to exit without making a change. This option is not displayed if the program is currently recording.
Play From Beginning
Starts playback of a recorded program from the beginning of the recording. This option is displayed only if the program has been partially viewed before and is not currently recording.
Resume Playback
Starts playback at the point the program was last stopped. (For example, if you watched 15 minutes of the recording yesterday, playback to will resume at the 15-minute mark.) This option is displayed only if a program has been partially viewed.
284 Passport Echo Customer Service Guide
...........................................................................................................................
......
To access the Saved Shows Options dialog:
1 Press the DVR LIST key.
2 On the Saved Shows panel, highlight a program and then press the SELECT key.
3 Highlight an option and then:
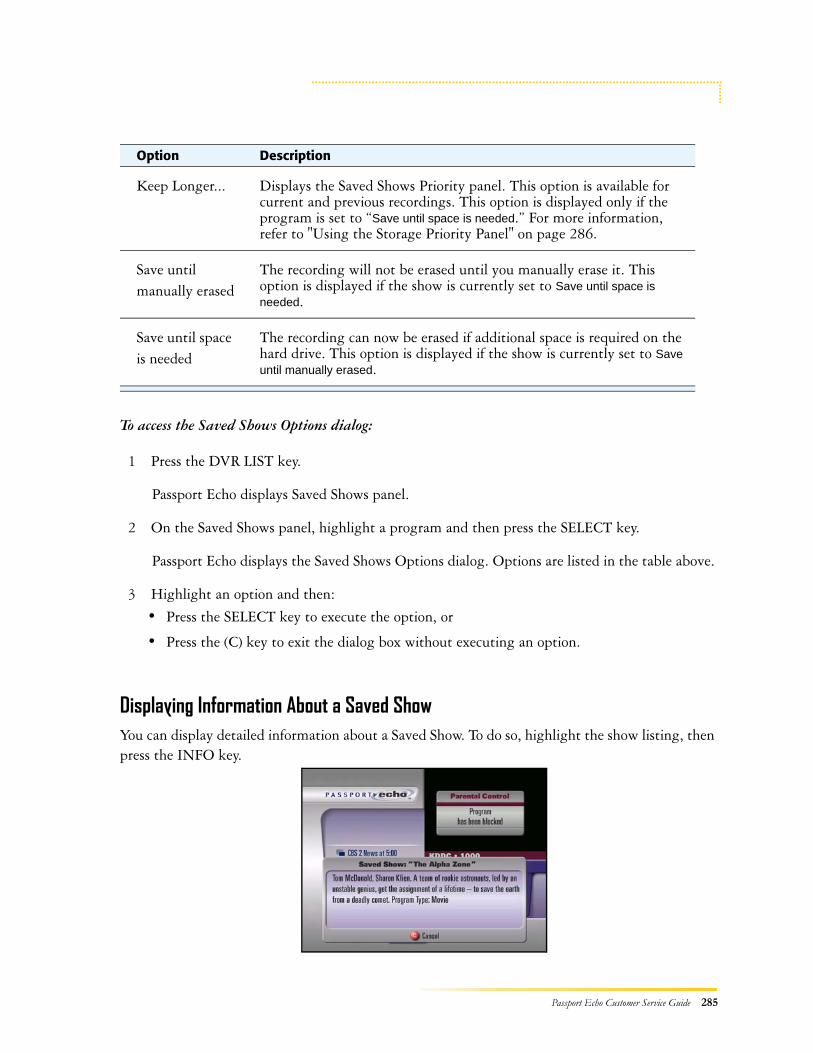
Displaying Information About a Saved ShowYou can display detailed information about a Saved Show. To do so, highlight the show listing, then press the INFO key.
Keep Longer... Displays the Saved Shows Priority panel. This option is available for current and previous recordings. This option is displayed only if the program is set to “Save until space is needed.” For more information, refer to "Using the Storage Priority Panel" on page 286.
Save until manually erased
The recording will not be erased until you manually erase it. This option is displayed if the show is currently set to Save until space is needed.
Save until space is needed
The recording can now be erased if additional space is required on the hard drive. This option is displayed if the show is currently set to Save until manually erased.
Passport Echo displays Saved Shows panel.
Passport Echo displays the Saved Shows Options dialog. Options are listed in the table above.
• Press the SELECT key to execute the option, or
• Press the (C) key to exit the dialog box without executing an option.
Option Description
Passport Echo Customer Service Guide 285

........................................................................................Using the Digital Video Recorder (DVR)
Using the Storage Priority Panel
The Storage Priority panel enables you to set or change the storage priority of your recorded programs. Programs at the top of the list are saved longer; programs at the bottom on the list are erased first.
Note: Passport Echo follows the priority established here when it deletes programs to free disk space.
To access the Storage Priority panel:
1 Press the DVR LIST key.
2 Press the SELECT key.
3 In the Saved Shows Options dialog, select the Keep Longer... option, and then press the SELECT key.
4 Press the up or down arrow to move the highlighted program up or down the list.
5 Press the SELECT key to drop the program into the new location in the list and return to the Saved Shows panel.
The Saved Shows panel is displayed.
Passport Echo displays the Saved Shows Options dialog.
Passport Echo displays the Storage Priority panel.
Note: Programs that are higher on the list are saved longer; items lower on the list will be erased sooner.
286 Passport Echo Customer Service Guide

...........................................................................................................................
......
Erasing a Saved Program
1 Press the DVR LIST key.
Passport Echo displays the Saved Shows panel.
2 Press the up or down arrow to select a recorded program, then press the SELECT key.
3 Press the up or down arrow to highlight Erase, and then press the SELECT key.
A message asks if you are sure you want to permanently erase the recording.
4 To erase the program, press the (A) key.
Passport Echo Customer Service Guide 287

........................................................................................Using the Digital Video Recorder (DVR)
Using the Scheduled Recordings Panel
The Scheduled Recordings panel displays a list of active and upcoming recordings.
When a recording is finished, it is displayed in the Saved Shows panel. It is removed from the Scheduled Recording list.
Note: Recordings in progress are displayed in both the Saved Shows and Scheduled Recordings panels.
From the Scheduled Recordings panel, you can access the (C key) Series Manager panel or return to the (A key) Saved Shows panel.
Each entry in the Scheduled Recordings panel contains the following information:
• Program Title
• Scheduled Record Date:
• No record icon: This icon is displayed if Passport Echo cannot record a program due to a tuner conflict, or if a scheduled recording has been cancelled.
• Recording in Progress icon is displayed if the program is an active recording.
When you highlight a program, Passport Echo provides additional information, including:
• Channel call letters and numbers• Start time and end time of the original showing• Parental control rating• Program description• Content Advisory information• Recording icon (Series Header or Keyword Header icon, manual record icon, or recurrent
manual recording icon)
• Programs scheduled to be recorded on the current day display “Today.”
• Programs scheduled to be recorded over the next six days display a weekday (abbreviated; e.g., SAT, SUN).
• Programs scheduled to be recorded beyond six days away, use the mm/dd format.
288 Passport Echo Customer Service Guide

...........................................................................................................................
......
Accessing the Scheduled Recording Display:
1 On the Saved Shows or Series Manager panels, press the (B) key (Scheduled Recordings).
2 The display shows a list of individual scheduled recordings in reverse chronological order based on date of scheduled recording (the top item will be recorded soonest).
• Press the up or down arrow to scroll and highlight a specific scheduled recording. Press the SELECT key to display the Scheduled Recording options dialog box.
• Press the (A) key to display the Saved Shows panel.
• Press the (C) key to display the Series Manager panel.
• Press the REC key to display the Manual Recording dialog.
• Press the INFO key to display a dialog that contains extended guide information.
Passport Echo Customer Service Guide 289

........................................................................................Using the Digital Video Recorder (DVR)
Scheduled Recording Options Dialog
The Scheduled Recordings Options dialog provides two or three options for recorded programs.
Options Description
Stop Recording This option is displayed only when system is currently recording. Selecting this option stops the recording and closes the dialog box.
Record Options Displays the Recording Options dialog. For additional information on recording options, see “Additional Recording Options Dialog” on page 266.
Cancel Recording This option is displayed only when a future recording is highlighted. Select this option to remove the program from the Scheduled Recordings panel. Passport Echo will display a canceled recording icon next to the listing of the program in the Scheduled Recordings panel (and also in the Program Guide).
Accessing the Scheduled Recording options dialog box
1 Press the DVR LIST key.
Passport Echo displays the Saved Shows panel.
2 Press the (B) key.
Passport Echo displays the Scheduled Recordings panel.
3 Press the up or down arrow to select and highlight a specific scheduled recording, and then press the SELECT key.
Passport Echo displays the Scheduled Recording Options dialog.
290 Passport Echo Customer Service Guide

...........................................................................................................................
......
Using the Series Manager Panel
The Series Manager enables you to modify recording parameters for each of your series recordings. The changes you make to the series recording will affect each episode in the series.
Note: Be careful when you make changes to the Save option in the Series Record options dialog. If you set the Save option to “Until manually erased,” all episodes in the series will be locked.
It is possible that your changes will cause Passport Echo to fill the hard disk drive with programs that must be manually erased, thereby preventing other recordings from taking place.
Note: For information on recording a series, refer to “Recording a Series” on page 260.
When you access the Series Manager panel, you will see a list of the series you have set up for recording.
To access the Series Manager panel:
4 Press the up or down arrow to select and highlight an option, then press the SELECT key.
Refer to the table above for additional information on available options.
1 Press the DVR LIST key.
Passport Echo displays the Saved Shows panel.
Passport Echo Customer Service Guide 291

........................................................................................Using the Digital Video Recorder (DVR)
2 Press the (C) key.
Passport Echo displays the Series Manager.
3 You may select one of the following options:
• Press the up or down arrow to highlight a series, and then press the SELECT key to display the Series Manager Options dialog box. (For additional information, see “Series Manager Options Dialog” on page 293.)
• Press the (A) key to display the Saved Shows panel.
• Press the (B) key to display the Scheduled Recordings panel.
4 To exit the Series Manager panel, press the EXIT or DVR LIST key.
292 Passport Echo Customer Service Guide

...........................................................................................................................
......
Series Manager Options Dialog
The Series Manager Options dialog provides several options for managing series recordings.
Option Description
Series Recording Priority...
Displays the Series Recording Priority panel. For more information, see “Using the Series Recording Priority Panel” on page 294.
Note: This option will be greyed-out if only one series is scheduled.
Series Recording Options...
Displays the Series Recording Options dialog. For more information, see “Series Recording Options Dialog” on page 295.
Series Repeat Options...
Displays the Series Repeat Options dialog. For more information, see “Series Repeat Options Dialog” on page 299.
Cancel Series Recording
Removes the currently-selected series recording from the list. Removes any unrecorded scheduled recordings for the series from the Scheduled Recordings panel. For more information, see “Canceling a Series Recording” on page 300.
To display the Series Manager options dialog:
1 Press the DVR LIST key.
Passport Echo displays the Saved Shows panel.
2 Press the (C) key.
Passport Echo displays the Series Manager.
Passport Echo Customer Service Guide 293

........................................................................................Using the Digital Video Recorder (DVR)
Using the Series Recording Priority Panel
The Series Recording Priority panel enables you to adjust the recording priority of a series.
If there is a conflict between scheduled series recordings, Passport Echo will record the series that is higher in the priority list.
To display the Series Recording Priority panel:
3 Press the up or down arrow to highlight a series, then press the SELECT key.
4 Do one of the following:
• Press the up or down arrow to highlight an option, then press the SELECT key.
• Press the (C) key to cancel any changes and exit the dialog.
5 To exit, press the EXIT key.
1 Press the DVR LIST key.
Passport Echo displays the Saved Shows panel.
2 Press the (C) key.
Passport Echo displays the Series Manager.
3 Press the up or down arrow to highlight a series, and then press the SELECT key.
294 Passport Echo Customer Service Guide

...........................................................................................................................
......
Series Recording Options Dialog
The Series Recording Options dialog provides several options for managing scheduled series. The changes you make here will be reflected on ALL scheduled recordings for a particular series.
4 Press the arrows to highlight Series Recording Priority.
5 Press the SELECT key.
Passport Echo displays the Series Recording Priority panel.
6 Do one of the following:
• Press the up arrow to move the series higher in the list, making it a higher priority for recording in the event of a conflict.
• Press the down arrow to move the series lower in the list, making it a lower priority for recording in the event of a conflict.
• To make no changes, do not move the selected series recording and proceed to step 7.
7 Press the SELECT key to set the new priority position of the selected series.
Passport Echo Customer Service Guide 295

........................................................................................Using the Digital Video Recorder (DVR)
Option Description
Episodes to Record
Press the left or right arrow to select one of the following:
• First run & repeats: Schedules recordings for both new broadcasts and reruns.
• First run only: Schedules recordings for new broadcasts only.
Channels Press the left or right arrow to select one of the following:
• Any channel: Schedules recordings of episodes that air on any channel.
• Call letters/channel number only: Schedules recordings of episodes airing only on the specified channel.
Air Times Press the left or right arrow to select one of the following:
• All showings: Schedules recordings for all episodes airing at any time.
• 00:00xx only: 00:00xx is the air time you selected when initiating the series recording. If you selected a program that airs at 6:00 pm, then the option listed is 6:00 pm, and only the 6:00 pm broadcast of the program is scheduled for recording.
Save Press the left or right arrow to select one of the following:
• Until space is needed: This permits the system to erase a program automatically when space is needed for other recordings.
• Until manually erased: The recordings from this series will not be erased automatically; you must manually erase these programs.
Note: Setting one or more series to the “Until manually erased” option could cause Passport Echo to fill your hard drive with programs that will not be erased automatically. This could prevent Passport Echo from recording other programs. If you choose to save programs until they are manually erased, be certain that hard disk space is available for future recordings.
296 Passport Echo Customer Service Guide

...........................................................................................................................
......
Episodes to Keep
Press the left or right arrow to select the number of episodes you wish to keep in the Saved Shows panel after they are recorded. Options include the following:
• All episodes: Every episode recorded from the series will be saved and displayed in the Saved Shows panel, unless the episode is erased.
• Up to X: This option enables you to specify that you wish to keep up to five episodes. (For example, if the number is set to 2, when the third episode airs, the first episode will be erased.)
Start Time Press the left or right arrow to select a start time for the recordings from the following options.
• On time: All scheduled recordings for the series will start at the time the program is scheduled to air.
• X minutes early: You can choose from 1-10 minutes. This option might help to avoid missing the beginning of a program that airs a little early.
End Time Press the left or right arrow to select an end time for the recordings from the following options:
• On time: All scheduled recordings for the series will end exactly at the time at which the program is scheduled to end.
• X minutes/hours over: You can choose from the following: 1-5 minutes, 15 minutes, 30 minutes, 1 hour, 2 hours, 3 hours. The recording will extend past the normally scheduled time by the amount of time indicated.
Option Description
Passport Echo Customer Service Guide 297

........................................................................................Using the Digital Video Recorder (DVR)
To display the Series Recording Options dialog:
Note: The Series Recording Options dialog is also displayed when you create a series recording from the Program Guide or live TV. The following procedure explains how to display the Series Recording Options dialog from the Series Manager.
1 Press the DVR LIST key.
2 Press the (C) key.
3 Press the up or down arrow to highlight a series, and then press the SELECT key.
4 Press the arrow keys to highlight Series Recording Options, and then press the SELECT key.
5 Press the up or down arrow to highlight an option. Press the right or left arrow to change its status.
6 Do one of the following:
- Press the (A) key to accept the changes and close the dialog box.
- Press the (C) key to ignore the changes and close the dialog box.
Passport Echo displays the Saved Shows panel.
Passport Echo displays the Series Manager.
Passport Echo displays the Series Manager Options dialog.
Passport Echo displays the Series Recording Options dialog.
298 Passport Echo Customer Service Guide
...........................................................................................................................
......
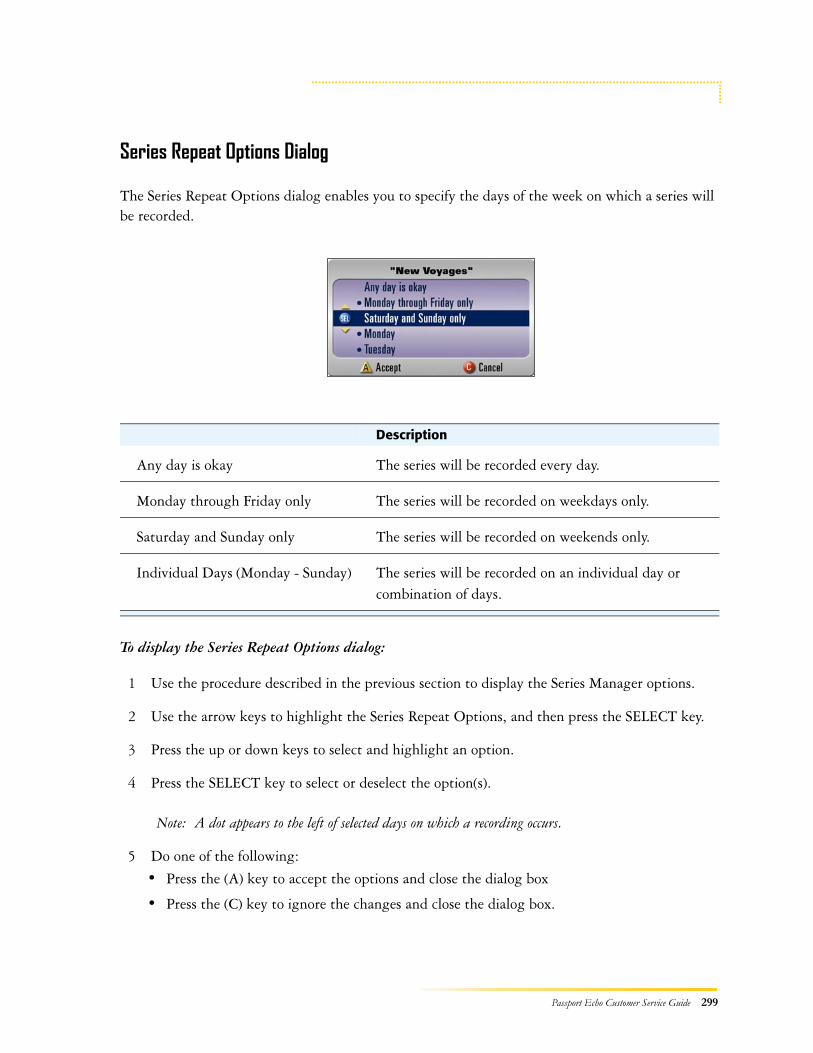
Series Repeat Options Dialog
The Series Repeat Options dialog enables you to specify the days of the week on which a series will be recorded.
Option Description
Any day is okay The series will be recorded every day.
Monday through Friday only The series will be recorded on weekdays only.
Saturday and Sunday only The series will be recorded on weekends only.
Individual Days (Monday - Sunday) The series will be recorded on an individual day or combination of days.
To display the Series Repeat Options dialog:
1 Use the procedure described in the previous section to display the Series Manager options.
2 Use the arrow keys to highlight the Series Repeat Options, and then press the SELECT key.
3 Press the up or down keys to select and highlight an option.
4 Press the SELECT key to select or deselect the option(s).
5 Do one of the following:
Note: A dot appears to the left of selected days on which a recording occurs.
• Press the (A) key to accept the options and close the dialog box
• Press the (C) key to ignore the changes and close the dialog box.
Passport Echo Customer Service Guide 299

........................................................................................Using the Digital Video Recorder (DVR)
Canceling a Series Recording
1 Press the DVR LIST key.
2 Press the (C) key.
3 Press the up or down arrow to highlight a series, and then press the SELECT key.
4 Use the arrows to highlight the Cancel Series
Recording option.
5 Do one of the following:
Passport Echo displays the Saved Shows panel.
Passport Echo displays the Series Manager.
Passport Echo displays the Series Manager Options dialog.
Passport Echo displays a confirmation message.
• To cancel the series, press the (A) key.
• To ignore the message and close the dialog box without canceling the series, press the (C) key.
300 Passport Echo Customer Service Guide