verax snmp simulator - user · pdf fileverax snmp agent simulator enables simulation of...
TRANSCRIPT

Verax SNMP Simulator - User Guide
April 2015
Version 2.2.x

Verax SNMP Simulator - User Guide 2
Copyright © Verax Systems, April 2015 DL704
Contact Information: E-mail: [email protected]
Internet:http://www.veraxsystems.com
Technical support:
E-mail: [email protected]
COPYRIGHT AND DISCLAIMER
Copyright Verax Systems. All rights reserved.
Verax Systems have taken care in the preparation of this publication, but make no expressed or implied warranty of any kind and assume no responsibility for errors or omissions. No liability is assumed for incidental or consequential damages in connection with or arising out of the use of the information or programs contained herein.
All brand names or product names mentioned in this publication are either trademarks or registered trademarks of their respective owners.

Verax SNMP Simulator - User Guide 3
Copyright © Verax Systems, April 2015 DL704
TABLE OF CONTENTS 1 Introduction........................................................................................................................ 7
1.1 System requirements...................................................................................................... 7
2 Installation.......................................................................................................................... 8
2.1 Windows installer ........................................................................................................... 8
2.2 Linux installer ................................................................................................................. 8
2.3 Important file locations.................................................................................................... 9
2.4 Entering a license key .................................................................................................. 10
3 Managing simulator ......................................................................................................... 11
3.1 Starting the simulator service........................................................................................ 11
3.2 Stopping the simulator service ...................................................................................... 11
3.3 Opening the simulator CLI Console .............................................................................. 12
3.4 Opening the simulator Web Console............................................................................. 13
3.5 Working with simulator CLI Console ............................................................................. 14
4 Configuring simulated network ....................................................................................... 20
5 Reloading network configuration .................................................................................... 22
5.1 Managing virtual interfaces ........................................................................................... 23
5.2 Advanced network configuration file.............................................................................. 26
6 SNMP record files ............................................................................................................ 30
6.1 File format .................................................................................................................... 30
6.2 Preparing initial record file ............................................................................................ 33
7 Modifying SNMP agent responses .................................................................................. 34
7.1 Modifier types ............................................................................................................... 34
7.2 Pre-loaded modifier ...................................................................................................... 35
7.2.1 Format ................................................................................................................. 35
7.2.2 Random MAC Address modifier ........................................................................... 35
7.2.3 Random integer modifier ...................................................................................... 36
7.2.4 Unique integer modifier ........................................................................................ 36

Verax SNMP Simulator - User Guide 4
Copyright © Verax Systems, April 2015 DL704
7.2.5 Assigned IP Address & Network Address modifier ................................................ 36
7.3 Post-loaded modifiers ................................................................................................... 38
7.3.1 Counter and Integer modifiers .............................................................................. 39
7.3.2 Integer with arithmetic operator ............................................................................ 42
7.3.3 Hexstring modifier ................................................................................................ 42
7.3.4 IP Address modifier .............................................................................................. 44
7.3.5 MAC Address modifier ......................................................................................... 45
8 APPENDIX ........................................................................................................................ 46
8.1 How to configure Virtual IP Address in Windows XP/2000/ME/2003 .............................. 46
8.2 How to configure Microsoft Loopback Adapter to work with Verax SNMP Agent Simulator in Windows 7 ................................................................................................................................ 47

Verax SNMP Simulator - User Guide 5
Copyright © Verax Systems, April 2015 DL704
How to use this guide?
Purpose and scope This user guide contains description of the installation, configuration and management
procedures for the Verax SNMP Simulator, a tool that can simulate multiple SNMPv1/v2c
agents.
Notation used Source code, commands, user-entered data, on-screen messages and user interface
elements (menus, choice lists, etc.) are shown using the Courier font.
! This notation (Information) is used to indicate important information.
This notation (Warning) is used to flag actions that can lead to data loss, system
malfunction, etc.
This notation (Hint) is used to indicate additional information.
The following logotypes are used to flag information relevant to a particular operating
system:
LINUX Linux WIN
Microsoft Windows

Verax SNMP Simulator - User Guide 6
Copyright © Verax Systems, April 2015 DL704
Intended audience and guide overview This user guide is intended for developers implementing SNMP solutions, QA specialists
involved in testing SNMP tools or other IT personnel involved in maintenance, testing
and demonstrating SNMP tools, such as network management systems.
The guide consists of the following sections:
• Section 1, Introduction contains information on hardware and software
requirements.
• Section 2, Verax SNMP Simulator installation describes the installation
procedure.
• Section 3, Managing simulator describes the processes of starting/ stopping
the simulator service (daemon) and working with the simulator Management
Console.
• Section 4, Configuring simulated network describes how to configure
simulated devices (agents).
• Section 6, SNMP record files describes how to prepare SNMP record files which
define responses for the simulated agents.
• Section 7, Modifying SNMP agent responses describes how to apply
modifiers that will allow for dynamic agent responses (e.g. a varying performance
counter).
• Section 8, APPENDIX describes the procedure of configuring virtual IP
addresses on Microsoft Windows systems.

Verax SNMP Simulator - User Guide 7
Copyright © Verax Systems, April 2015 DL704
1 Introduction Verax SNMP Agent Simulator enables simulation of multiple SNMP v1/v2c agents on a
single host. It allows to save money by rapid building of simulated networks without
purchasing additional hardware. Each agent runs on the standard SNMP 161 port with a
different IP address assigned via multi-netting. Agents' responses can be loaded from
bundled configuration files or collected from real devices using SNMP-walk and can be
modified at runtime by user-defined rules.
System requirements:
• 32 or 64 bit Linux distributions including: SuSE, RedHat Enterprise and Debian
using i386 and x64 architectures.
• 32 or 64 bit Microsoft Windows systems including: XP, Server 2003, Vista, 7, 8
and higher.
• Network connection with a fixed IP address.
RAM, processor, and free disk space requirements depend on a variety of factors
including the number of simulated SNMP agents and tier complexity (number of OIDs,
number of modifiers), number of device types (different SNMP record files) as well as
agents pooling frequency. Hardware recommendation for agents of medium complexity
(with approximately 3K OIDs per each agent) are as follows:
Specification Number of agents Recommendation
Processors or cores
<1K 2 cores
1K-5K 4 cores
5K-10K 6-8 cores
Physical memory (RAM)
<1K 1 GB
1K-5K 6 GB
5K-10K 12 GB
Free disk space 500 MB
Verax SNMP Simulator - User Guide 8
Copyright © Verax Systems, April 2015 DL704
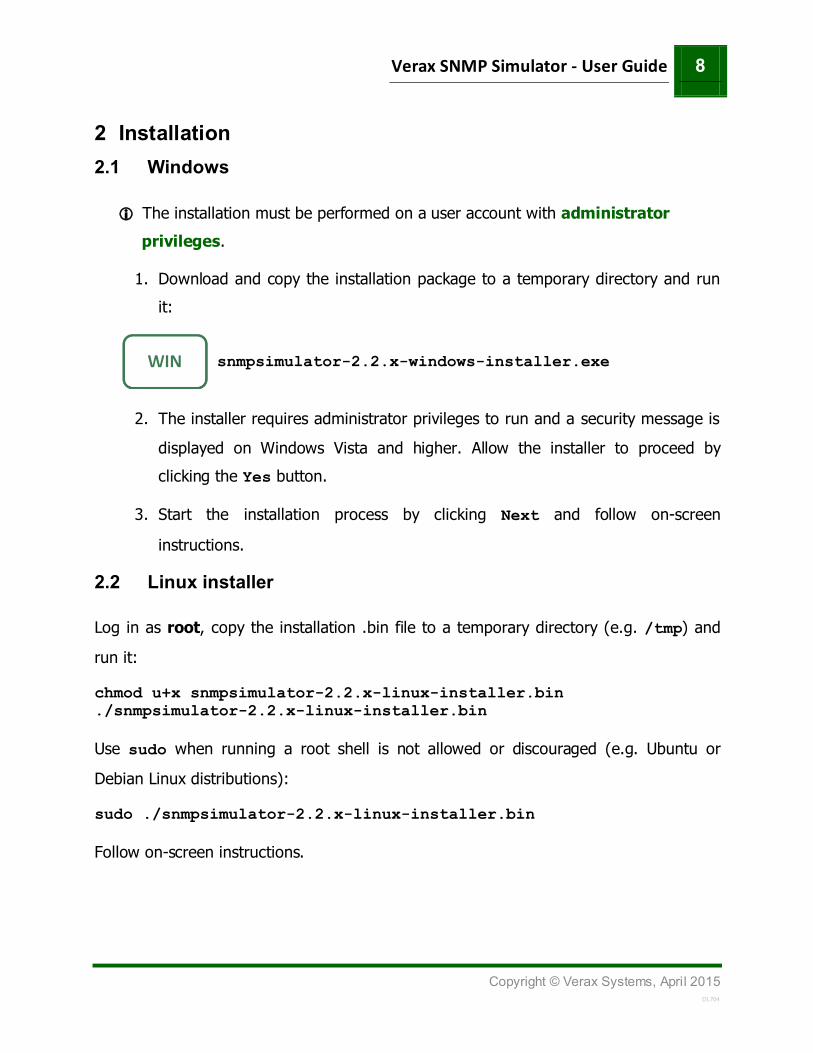
2 Installation 2.1 Windows
The installation must be performed on a user account with administrator
privileges.
1. Download and copy the installation package to a temporary directory and run
it:
snmpsimulator-2.2.x-windows-installer.exe
2. The installer requires administrator privileges to run and a security message is
displayed on Windows Vista and higher. Allow the installer to proceed by
clicking the Yes button.
3. Start the installation process by clicking Next and follow on-screen
instructions.
2.2 Linux installer
Log in as root, copy the installation .bin file to a temporary directory (e.g. /tmp) and
run it:
chmod u+x snmpsimulator-2.2.x-linux-installer.bin ./snmpsimulator-2.2.x-linux-installer.bin Use sudo when running a root shell is not allowed or discouraged (e.g. Ubuntu or
Debian Linux distributions):
sudo ./snmpsimulator-2.2.x-linux-installer.bin Follow on-screen instructions.

Verax SNMP Simulator - User Guide 9
Copyright © Verax Systems, April 2015 DL704
2.3 Important file locations
The installation directory structure is as follows:
Directory name Description
conf Configuration files:
• devices.conf.xml – simulated network configuration file
• console.properties – configuration file for the Web Console
• network.conf.xml – optional configuration file to model device interconnections
Helper files:
• stop, vlan_up, vlan_down – shell scripts for Linux to manage interfaces
device SNMP records library – sample SNMP record files
bin/java Java binaries:
• snmp-simulator-server.jar – simulator server • snmp-simulator-cli-console.jar – CLI console • snmp-simulator-web-console-jetty-
console.war – Web Console bin/windows Scripts and Windows service files
etc/simulator.conf Main configuration file template. The running copy of this file
is located in /etc/verax.d (Linux) or
C:\Windows\etc\verax.d directories (Windows)
jre Bundled Java Runtime Environment files
logs Application log files

Verax SNMP Simulator - User Guide 10
Copyright © Verax Systems, April 2015 DL704
2.4 Entering a license key
If you have a commercial license (allowing to simulate more than 1 device), copy the
simulator-license.lic file to SIMULATOR_HOME/conf and restart the simulator.
Please contact [email protected] to order your license.

Verax SNMP Simulator - User Guide 11
Copyright © Verax Systems, April 2015 DL704
3 Managing simulator 3.1 Starting the simulator service
In order to start the Verax SNMP Simulator service:
WIN
1. Navigate to Windows Start menu 2. Open Verax SNMP Simulator group 3. Click Start Verax SNMP Simulator service
LINUX
Issue the following command in a terminal window (shell):
/etc/int.d verax-snmpsimulator start
Please note that starting the service initiates the process of loading network
configuration and creating virtual interfaces (if configured). This process may take a
while depending on a number of interfaces and overall performance of a machine
running the simulator. The application log file may be examined to trace the process of
creating a simulated network.
Note that all errors and main activities of the simulator service are logged into
application log file. The log file snmp-simulator-agent.log is located in the
logs directory.
3.2 Stopping the simulator service
In order to stop the Verax SNMP Agent Simulator:
WIN
1. Navigate to Windows Start menu 2. Open Verax SNMP Simulator group 3. Click Stop Verax SNMP Simulator service
LINUX
Issue the following command in a terminal window (shell): /etc/int.d/verax-snmpsimulator stop

Verax SNMP Simulator - User Guide 12
Copyright © Verax Systems, April 2015 DL704
3.3 Opening the simulator CLI Console
Verax SNMP Agent Simulator provides a CLI console for managing simulator (possibly
running on another host). In order to open the CLI Console:
WIN
1. Navigate to Windows Start menu 2. Open Verax SNMP Simulator group 3. Click CLI Console
LINUX
Issue the following command in a terminal window (shell): /etc/int.d/verax-snmpsimulator console

Verax SNMP Simulator - User Guide 13
Copyright © Verax Systems, April 2015 DL704
3.4 Opening the simulator Web Console
Verax SNMP Agent Simulator provides a web console for managing simulator through
GUI (possibly running on another host). In order to open the Web Console:
WIN
1. Navigate to Windows Start menu
2. Open Verax SNMP Simulator group
3. Click Web Console. It opens your default web-browser. If you want to open the Web Console on another computer use the following URL http://server-address:8080/ (uses default port, if not changed in the configuration file).
4. Once login screen appears, enter credentials defined in conf/console.properties file (Default login: admin, Password: pass)
LINUX
1. Open the Web Console page in your web-browser at http://server-address:8080/ (uses default port, if not changed in the configuration file).
2. Once login screen appears, enter credentials defined in conf\console.properties file (Default login: admin, Password: pass).
Web console requires Verax SNMP Simulator service up and running.

Verax SNMP Simulator - User Guide 14
Copyright © Verax Systems, April 2015 DL704
3.5 Working with simulator CLI Console
3.5.1 Connecting to the simulator service
1. Once the CLI Console is started, it asks for connection details (it may connect to
multiple simulators). By default, the simulator service process is running on the same
server as the CLI Console – in such a case confirm the default parameters by
pressing y or Enter key at the prompt:
Do you want to connect to default simulator server? [y/n]
The default connection parameters are 127.0.0.1:43500 (localhost as the host name
and 43500 for TCP port).
2. Once connected, use HELP command to see available commands.
3. The most frequently used command is SHOW. This command displays the list of
virtual agents and their statuses.
3.5.2 Checking simulator status
The CLI Console provides a set of commands described in the section 3.5.3. One of the
available commands is SHOW which can be used to check the status of the simulator.
This command shows the list of the virtual agents and their states grouped by type
(determined by SNMP record file). The virtual agent list contains the following
information:
• Dev Id – the unique identifier of the virtual agent (device).
• IP Address – the IP address of the agent assigned as per configuration in
devices.conf.xml file.
• Netmask – length of the netmask associated with the agent.
• Port – port of the agent.
• STATE – State of the agent.

Verax SNMP Simulator - User Guide 15
Copyright © Verax Systems, April 2015 DL704
There are the following states:
State Description
Running Agent is up and running, thus able to respond to SNMP queries.
Stopped
Agent is stopped, not able to respond to SNMP queries.
Agent can be stopped because STOP or STOPALL command was
issued, it has been configured with state="stopped” in the
devices.conf.xml configuration file. Please issue command START or
STARTALL to start the agent.
Cannot bind
Agent cannot start because it cannot bind to the interface. Most likely
the problem is related to another process using the specified port
(e.g. port 161 is using by SNMP service). Please use netstat
command to find the process and kill it. Typically, stopping SNMP
service helps solving this issue.
No interface
Agent cannot start because it cannot assign requested address to the
interface. Most likely the IP address specified for the agent in the
devices.conf.xml configuration file does not exists. Please verify if the
PRIMARY_INTERFACE in the configuration file points to the existing
network adapter which must be enabled, up and running. This
adapter should be configured with static IP address. If it is
configured to obtain IP address from DHCP server, please change the
configuration in order for the Simulator to automatically assign static
IP address. Also please verify if the Verax SNMP Agent Simulator has
sufficient privileges to assign IP address to this adapter (must be
running with root or administrator privileges). Depending on the
CREATE_INTERFACES parameter in the configuration file, Verax
SNMP Simulator is either assigning IP address to the network adapter
or expecting to be assigned manually.

Verax SNMP Simulator - User Guide 16
Copyright © Verax Systems, April 2015 DL704
State Description
Initialized
Agent has been initialized but not yet started. Please wait a while for
the agent to start. If agent cannot start, refer to the application log
files for further details.
Ready Agent has been initialized and is ready to start. Please issue
command START or STARTALL to start the agent.
Unknown Unknown error occurred during an agent initialization. Please refer to
the application log files for further details.
Exemplary output of this command has been show below:
3.5.3 CLI Console commands
The CLI Console provides management of Verax SNMP Simulator service including
browsing and modifying devices in the simulated network. CLI Console provides two
levels of management:
• Level 1 – for management of device types supported by the simulator (add and
remove device type, start and stop devices). Device type is a group of devices using
the same SNMP record file. Once console is opened, this level is available by default.
• Level 2 – for management of devices (agent instances) under current device type
(start, stop, add, remove devices). To go to this level SELECT command must be
issued at level 1.
A different set of commands is available for each level. In order to see all available
commands for the current level, use HELP command.

Verax SNMP Simulator - User Guide 17
Copyright © Verax Systems, April 2015 DL704
The list of available commands for each level is shown below:
Level 1 – type mode
Command Description END Server shutdown (including all device instances).
EXIT Disconnect console from the currently connected server.
SELECT <ID> Select device type identified by <ID> and go to device mode.
SHOW Display the list of all devices (instances) in the simulator.
STARTALL Start simulation for all devices (of all types). Always issue this
command if you see some devices are not responding.
STOPALL Stop simulation for all devices (of all types).
REMOVE <ID> Remove device type identified by <ID>. All devices of this type
will be removed.
ADD[<FILEPATH>]
Add new device type using <FILE> file. To start simulation,
switch to the device mode (using SELECT) and add a device
instance (using ADD).

Verax SNMP Simulator - User Guide 18
Copyright © Verax Systems, April 2015 DL704
Level 2 – device mode
Command Description END Server shutdown (including all device instances).
EXIT Disconnect console from server.
SHOW Display list of devices for the current device type with their details.
BACK Return to type mode.
STARTALL Start simulation of all current device types.
STOPALL Stop simulation of all current device types.
START <ID> Start simulation for a device identified by <ID>.
STOP <ID> Stop simulation for a device identified by <ID>.
REMOVE <ID> Remove a device identified by <ID>.
ADD <IP
RANGE> <NET
MASK> <PORT
RANGE>
<STATE>
Add new device(s) without starting them:
<IP RANGE> – a single IP address or a ‘-‘ delimited range of IP addresses.
<NET MASK> – network mask in IPv4 representation or mask length.
<PORT RANGE> – single port or ‘-‘ delimited port range (port range will be applied for each specified IP address)
<STATE> - optional attribute defining initial device state (valid values are RUN, STOP and DISABLED.
For instance: ADD 192.168.1.100-192.168.1.104 24 135-136
To start simulation of created device(s), issue START <ID> or STARTALL

Verax SNMP Simulator - User Guide 19
Copyright © Verax Systems, April 2015 DL704
3.5.4 Using CLI Console in batch mode
The CLI Console can be also used in the batch (non-interactive) mode. If run in the
batch mode, the console executes a single command, prints results on the standard
output and exits. To run the console in the batch mode, run it with –c argument at the
command line (see section 3.3 for more details). The following arguments are accepted
in the batch mode:
• -c <command> – Mandatory argument defining command to be executed, e.g.
show.
• -t <type> – Optional argument provided if a command is to be executed in a
device mode context. If –t is not specified, batch commands are always executed in
type mode context.
• -a <attributes> – Optional arguments passed the executed command.
• -p <port> – Port number on which the simulator service is listening for console
commands. This argument is optional – the default port value is used if it is not
provided.
• -h <host> – IP address of a host on which the simulator service is running (if not
provided, localhost is assumed).
For example, to run SHOW command in the batch mode on Linux, issue the following
command:
service simulatord console -c show
Please note that on Windows simulator.bat does not support batch mode
invocation (full java command has to be used instead).

Verax SNMP Simulator - User Guide 20
Copyright © Verax Systems, April 2015 DL704
4 Configuring simulated network Configuration of the simulated network is defined in the devices.conf.xml file
located in the conf folder.
The initial version of this file is provided in the installation package.
Please note that an alternative location of devices.conf.xml can be defined
in SIMULATOR_CONFIG_FILE variable in the simulator.conf file. If this
variable is not defined (default setting), the simulator will search for
devices.conf.xml file in the conf folder.
The configuration file is an XML file containing information about simulated devices. The
following fields are defined for each device (identified by the <device> tag):
• ip – IP address for which the simulator will run simulated devices (defined as
ranges or comma separated values), e.g. "127.0.0.1".
• port – port on which the simulator is listening for SNMP requests. Make sure the
port is not occupied by any other service (e.g. port 161 is typically occupied by
SNMP service).
• netmask – network mask (integer representation), e.g. "24".
• filepath – path to SNMP record file (it is recommended to use absolute path).
On Windows, replace all "/" with "\\" in path specifications for a proper operation.
Do not use file and directory names with space (‘ ‘) characters. In essence, the
record files contain SNMP OIDs and response values for the simulated agents.
Please refer to section 6 for details.

Verax SNMP Simulator - User Guide 21
Copyright © Verax Systems, April 2015 DL704
The configuration file is organized by device types which are top elements within the
XML structure. For each device type (<type> tag) one or more device instances
(<device>) can be defined. Exemplary XML structure is shown below:
<?xml version="1.0" encoding="UTF-8"?>
<simulator.veraxsystems.com>
<types>
<type filepath="../device/cisco/cisco4900.txt">
<devices>
<device ip="192.168.112.8" netmask="24"
port="161"></device>
</devices>
</type>
</type>
</types>
</simulator.veraxsystem.com>
Please note that devices.conf.xml file can be changed by the simulator as a
result of modifications performed via console, so we recommend making a copy
of this file before starting the simulator.

Verax SNMP Simulator - User Guide 22
Copyright © Verax Systems, April 2015 DL704
5 Reloading network configuration The simulator is constantly watching for changes in the configuration file
(devices.conf.xml) and reloads configuration automatically on the fly. However,
this automatic reconfiguration will take effect only when a new simulated device has
been added. When a device is removed or modified the simulator must be restarted.
Also please note that once a new device has been added into configuration file, the
simulator is able to create automatically a new, corresponding virtual interface only on
Linux (the interface has to be created manually on Windows).
See section 3 for the detailed information how to stop and start the simulator service.

Verax SNMP Simulator - User Guide 23
Copyright © Verax Systems, April 2015 DL704
5.1 Managing virtual interfaces
The simulator requires virtual interfaces to run simulated devices. Each simulated device
has a separate IP address assigned to a separate virtual interface. Virtual interfaces
must be configured before starting the simulator.
Virtual interfaces can be created and removed automatically by the simulator or can be
managed manually.
In order to configure your virtual interfaces, go to the configuration directory and open
the simulator.conf file
WIN C:\Windows\etc\verax.d\simulator.conf
LINUX /etc/verax.d/simulator.conf
and make changes described below.
5.1.1 Setting primary physical interface
In order to allow the simulator to manage virtual interfaces specify the primary physical
interface the simulator will assign virtual IP addresses to. In order to do that, edit the
simulator.conf file and provide the name of an interface in the following line:
PRIMARY_INTERFACE=dev_name
For example, eth0 is used by default for Linux or “Local Area Connection” for
Windows.
Verax SNMP Simulator - User Guide 24
Copyright © Verax Systems, April 2015 DL704
This interface must exist in your system. You can also use a loopback interface with the
simulator (see section 8.2).
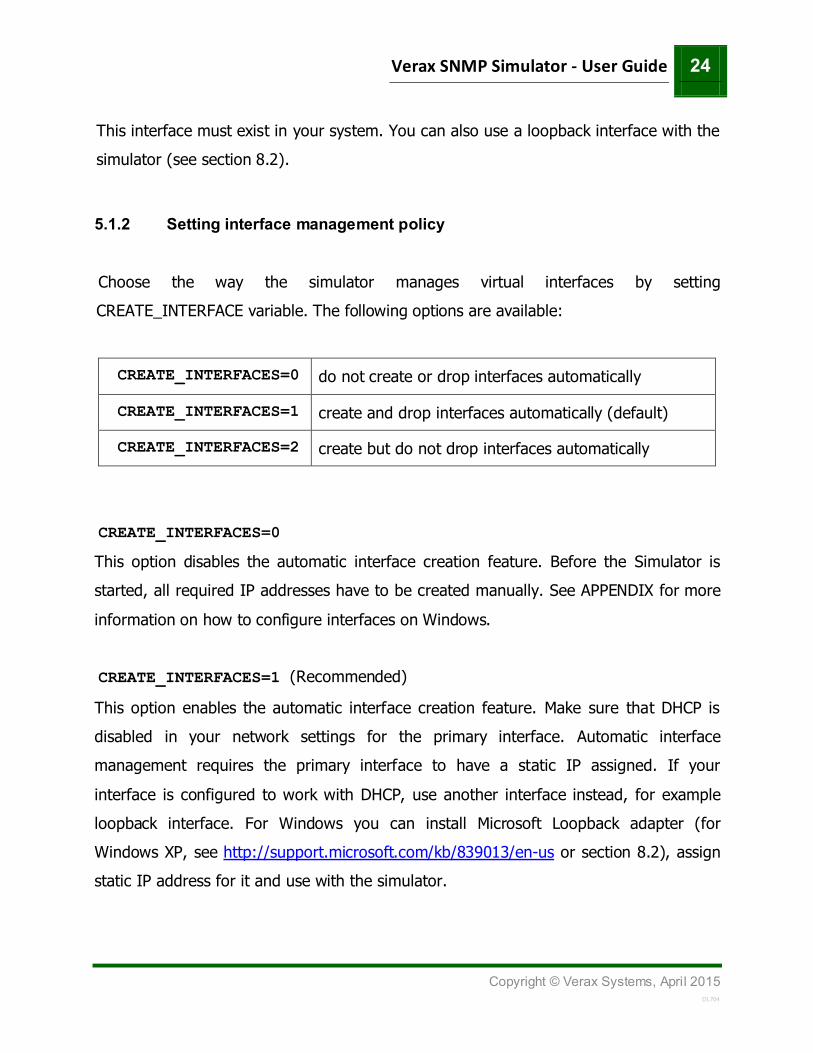
5.1.2 Setting interface management policy
Choose the way the simulator manages virtual interfaces by setting
CREATE_INTERFACE variable. The following options are available:
CREATE_INTERFACES=0 do not create or drop interfaces automatically
CREATE_INTERFACES=1 create and drop interfaces automatically (default)
CREATE_INTERFACES=2 create but do not drop interfaces automatically
CREATE_INTERFACES=0
This option disables the automatic interface creation feature. Before the Simulator is
started, all required IP addresses have to be created manually. See APPENDIX for more
information on how to configure interfaces on Windows.
CREATE_INTERFACES=1 (Recommended)
This option enables the automatic interface creation feature. Make sure that DHCP is
disabled in your network settings for the primary interface. Automatic interface
management requires the primary interface to have a static IP assigned. If your
interface is configured to work with DHCP, use another interface instead, for example
loopback interface. For Windows you can install Microsoft Loopback adapter (for
Windows XP, see http://support.microsoft.com/kb/839013/en-us or section 8.2), assign
static IP address for it and use with the simulator.

Verax SNMP Simulator - User Guide 25
Copyright © Verax Systems, April 2015 DL704
CREATE_INTERFACES=2 (Advanced)
This option allows creating interfaces automatically without interfaces removal. This
feature may be used to make the simulator start (or restart) faster, but all interfaces
that are not used will be still available.

Verax SNMP Simulator - User Guide 26
Copyright © Verax Systems, April 2015 DL704
5.2 Advanced network configuration file
The advanced network configuration file (network.conf.xml) is required if multiple
simulated networks and connections between them need to be created. This file is not
required for simulation of devices without interconnections. The connections are defined
using shared IP addresses available at multiple devices. In order to create shared IP
addresses:
1. Open the network.conf.xml file.
2. Add the <group> item containing <ip> sub-items for each IP address used to
interconnect devices, for example:
<groups>
<group key="192.168.240.5:161">
<ip>192.168.240.33/28</ip>
<ip>192.168.240.101/28</ip>
</group>
</group>
Where:
• <group> - Group of devices or a single device. Devices within a group are
identified by key attribute in the format: ip:port, where ip is the IP of
a primary interface of a device and port is a device listening port. Note
that both ip and port can be substituted with a wildcard * denoting all
IPs or ports (e.g. <group key="*:161"> matches to all devices
listening on port 161).
• <ip> - Shared IP address within a given group. Each IP address may be
referred to in a SNMP record file using ipa.adr modifier.
3. Restart the SNMP Simulator.
Verax SNMP Simulator - User Guide 27
Copyright © Verax Systems, April 2015 DL704
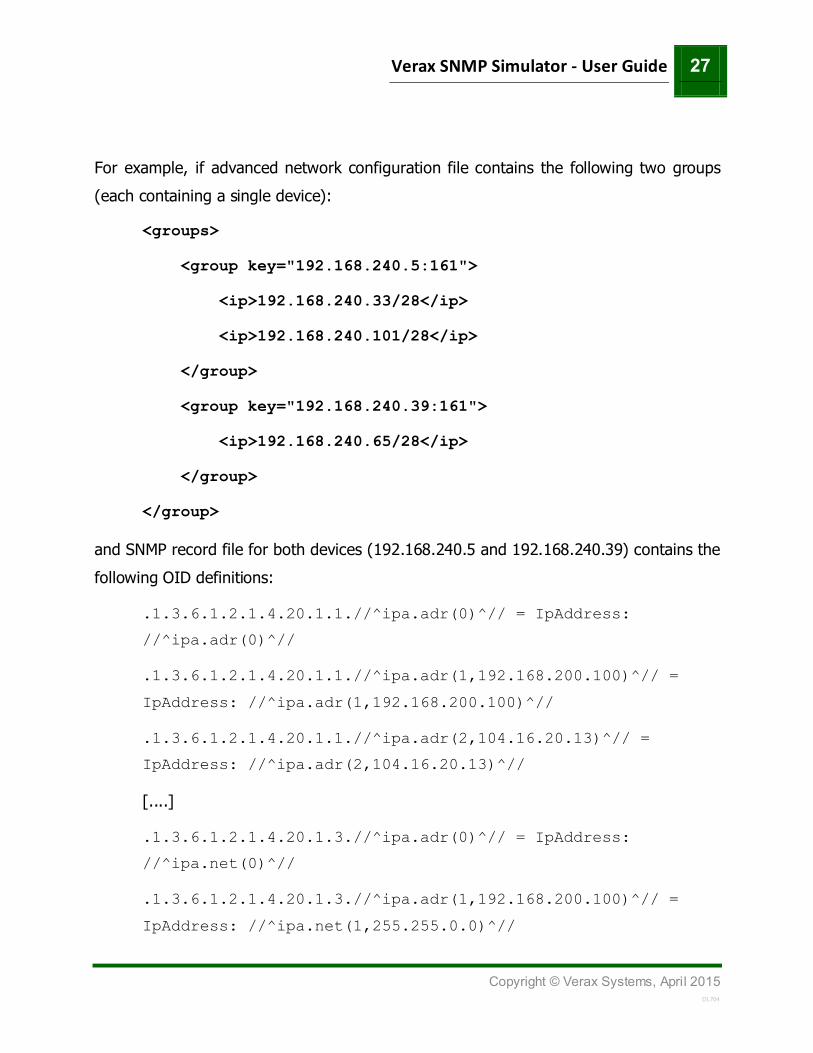
For example, if advanced network configuration file contains the following two groups
(each containing a single device):
<groups>
<group key="192.168.240.5:161">
<ip>192.168.240.33/28</ip>
<ip>192.168.240.101/28</ip>
</group>
<group key="192.168.240.39:161">
<ip>192.168.240.65/28</ip>
</group>
</group>
and SNMP record file for both devices (192.168.240.5 and 192.168.240.39) contains the
following OID definitions:
.1.3.6.1.2.1.4.20.1.1.//^ipa.adr(0)^// = IpAddress:
//^ipa.adr(0)^//
.1.3.6.1.2.1.4.20.1.1.//^ipa.adr(1,192.168.200.100)^// =
IpAddress: //^ipa.adr(1,192.168.200.100)^//
.1.3.6.1.2.1.4.20.1.1.//^ipa.adr(2,104.16.20.13)^// =
IpAddress: //^ipa.adr(2,104.16.20.13)^//
[....]
.1.3.6.1.2.1.4.20.1.3.//^ipa.adr(0)^// = IpAddress:
//^ipa.net(0)^//
.1.3.6.1.2.1.4.20.1.3.//^ipa.adr(1,192.168.200.100)^// =
IpAddress: //^ipa.net(1,255.255.0.0)^//

Verax SNMP Simulator - User Guide 28
Copyright © Verax Systems, April 2015 DL704
.1.3.6.1.2.1.4.20.1.3.//^ipa.adr(2,104.16.20.13)^// =
IpAddress: //^ipa.net(2,255.255.255.0)^//
the SNMP simulator will produce the following SNMP responses:
a) for device with IP 192.168.240.5:
.1.3.6.1.2.1.4.20.1.1.192.168.240.5 = IpAddress:
192.168.240.5
.1.3.6.1.2.1.4.20.1.1.192.168.240.33 = IpAddress:
192.168.240.33
.1.3.6.1.2.1.4.20.1.1.192.168.240.101 = IpAddress:
192.168.240.101
[....]
.1.3.6.1.2.1.4.20.1.3.192.168.240.5 = IpAddress:
255.255.255.0
.1.3.6.1.2.1.4.20.1.3.192.168.240.33 = IpAddress:
255.255.255.240
.1.3.6.1.2.1.4.20.1.3.192.168.240.101 = IpAddress:
255.255.255.240
b) for device with IP 192.168.240.39:
.1.3.6.1.2.1.4.20.1.1.192.168.240.39 = IpAddress:
192.168.240.39
.1.3.6.1.2.1.4.20.1.1.192.168.240.65 = IpAddress:
192.168.240.65
.1.3.6.1.2.1.4.20.1.1.104.16.20.13 = IpAddress: 104.16.20.13
[....]
.1.3.6.1.2.1.4.20.1.3.192.168.240.39 = IpAddress:
255.255.255.0

Verax SNMP Simulator - User Guide 29
Copyright © Verax Systems, April 2015 DL704
.1.3.6.1.2.1.4.20.1.3.192.168.240.65 = IpAddress:
255.255.255.240
.1.3.6.1.2.1.4.20.1.3.104.16.20.13 = IpAddress:
255.255.255.0
While preparing network.conf.xml, network modifiers for network simulation
need to be added to SNMP record files. See section 7 for more details.
Verax SNMP Simulator - User Guide 30
Copyright © Verax Systems, April 2015 DL704
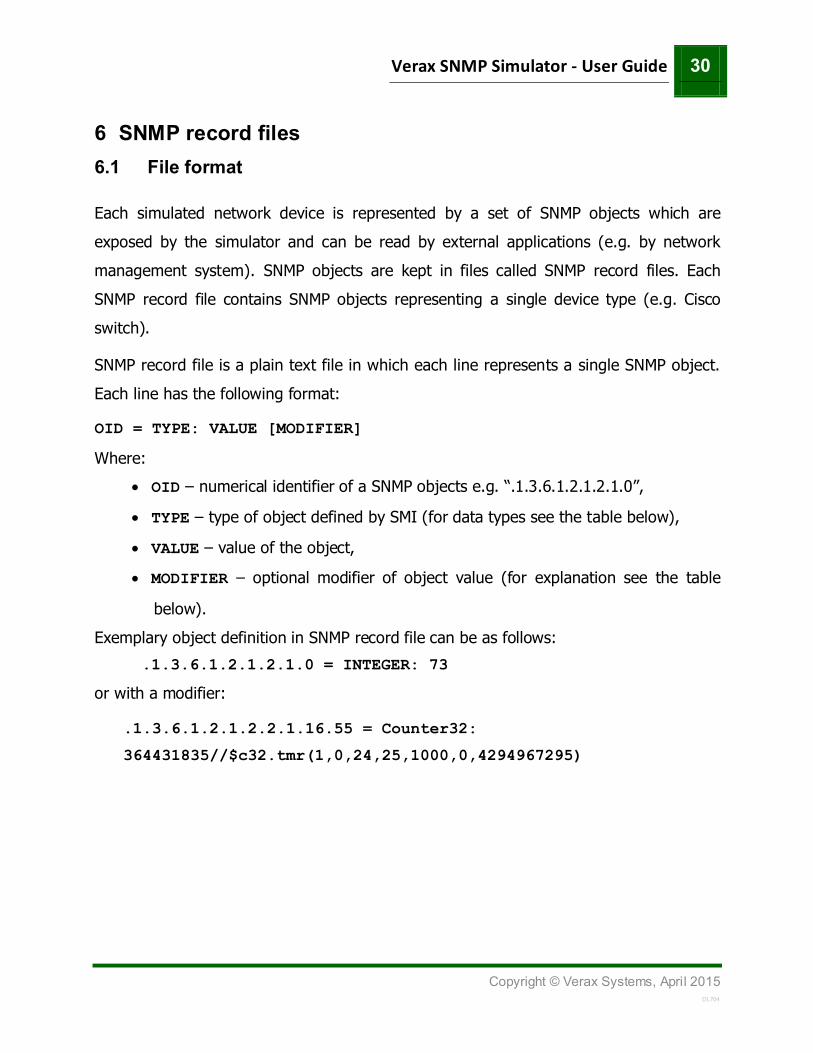
6 SNMP record files 6.1 File format
Each simulated network device is represented by a set of SNMP objects which are
exposed by the simulator and can be read by external applications (e.g. by network
management system). SNMP objects are kept in files called SNMP record files. Each
SNMP record file contains SNMP objects representing a single device type (e.g. Cisco
switch).
SNMP record file is a plain text file in which each line represents a single SNMP object.
Each line has the following format:
OID = TYPE: VALUE [MODIFIER]
Where:
• OID – numerical identifier of a SNMP objects e.g. “.1.3.6.1.2.1.2.1.0”,
• TYPE – type of object defined by SMI (for data types see the table below),
• VALUE – value of the object,
• MODIFIER – optional modifier of object value (for explanation see the table
below).
Exemplary object definition in SNMP record file can be as follows:
.1.3.6.1.2.1.2.1.0 = INTEGER: 73
or with a modifier:
.1.3.6.1.2.1.2.2.1.16.55 = Counter32:
364431835//$c32.tmr(1,0,24,25,1000,0,4294967295)

Verax SNMP Simulator - User Guide 31
Copyright © Verax Systems, April 2015 DL704
SMI defined OID data types
OID data types
Description
Bits Represents an enumeration of named bits, e.g.:
.1.3.6.1.2.1.88.1.4.2.1.3.6.95.115.110.109.112.
100.95.108.105.110.107.85.112 = BITS: 80 0
Counter32 Represents a non-negative integer which monotonically increases until it
reaches a maximum value of 32bits-1 (4294967295 decimal), when it resets
to zero increasing again, e.g.:
.1.3.6.1.2.1.2.2.1.10.10001 = Counter32: 1795836
Counter64 Same as Counter32 but has a maximum value of 64bits-1, e.g.:
.1.3.6.1.2.1.6.17.0 = Counter64: 0
Gauge32 Represents an unsigned integer, which may increase or decrease, but shall
never exceed a maximum value, e.g.:
.1.3.6.1.2.1.2.2.1.5.1 = Gauge32: 10000000
Integer Signed 32bit Integer (values between -2147483648 and 2147483647), e.g.:
.1.3.6.1.2.1.2.1.0 = Integer: 52
Integer32 Same as Integer.
IpAddress An IP address, e.g.:
.1.3.6.1.2.1.14.1.1.0 = IpAddress: 172.16.0.11
Network
Address
Network address, e.g.:
.1.3.6.1.2.1.3.1.1.3.2.1.10.140.252.11 = Network Address:
0A:8C:FC:0B
Null Empty or no value.
Object
Identifier
An OID, e.g.:
.1.3.6.1.2.1.2.2.1.22.587203100 = OID: .0.0

Verax SNMP Simulator - User Guide 32
Copyright © Verax Systems, April 2015 DL704
OID data types
Description
Hex String Hexadecimal string, e.g.:
.1.3.6.1.2.1.3.1.1.2.2.1.10.140.252.1 = Hex-STRING: 00 1F
12 35 EE 40
Opaque Provided for backwards compatibility only and no longer used.
Time Ticks Represents an unsigned integer which represents the time, modulo 232
(4294967296 decimal), in hundredths of a second between two epochs, e.g.:
.1.3.6.1.2.1.1.9.1.4.1 = TimeTicks: (16633)
UInteger32 Unsigned 32bit Integer (values between 0 and 4294967295).
Octet
String
Arbitrary binary or textual data, typically limited to 255 characters in length.
.1.3.6.1.2.1.2.2.1.2.2 = OctetString: IP1
Bit String Represents an enumeration of named bits. This is an unsigned data type,
e.g.:
.1.3.6.1.2.1.4.22.1.2.2.10.140.252.1 = STRING:
0:1f:12:35:ee:40

Verax SNMP Simulator - User Guide 33
Copyright © Verax Systems, April 2015 DL704
6.2 Preparing initial record file
SNMP record file is a plain text file and can be prepared manually in a text editor. It can
also be prepared based on an actual SNMP agent by copying objects exposed by the
agent to the SNMP record file.
In order to prepare SNMP record file reflecting actual SNMP agent available at given IP
address, use Linux SNMP tools and issue the following command:
snmpwalk -On -Oe -OU -v2c -c public address > snmprecordfile.txt
Provide the correct read only community string, IP address and file name. Refer to
snmpwalk manual for the details. Please verify if each line in the resulting file contain a
valid record in the format: OID = TYPE: VALUE. If not, which sometimes happens,
correct it manually.
Resulting SNMP record file can then be copied to SNMP record files subfolder
($SIMULATOR_HOME/devices/). It is now ready to be used.

Verax SNMP Simulator - User Guide 34
Copyright © Verax Systems, April 2015 DL704
7 Modifying SNMP agent responses 7.1 Modifier types
If many devices are simulated based on the same SNMP record file, each device will
expose the same SNMP object values. To differentiate object values, separate SNMP
record files with different values can be created (which often requires a lot of manual
work) or modifiers can be applied.
Modifiers are also useful to define variable SNMP objects (e.g. counters) which return
changing values simulating real-world behavior of a device. Using modifiers requires the
user to familiarize himself with the modifier syntax; however it speeds up the process of
defining simulated devices especially for large networks.
Modifier is an optional element in object definition in SNMP record file that follows the
object value and modifies it.
There are two types of modifiers:
Pre-loaded modifier – object value is modified upon simulator start when SNMP
record files have been loaded. This modifier generates constant value of object which
will be returned unchanged on every object read operation.
Post-loaded modifier – object value is modified on every object read operation. The
value returned will be different each time it was read. This modifier can be used to
simulate performance counters or other objects representing constantly changing
metrics.

Verax SNMP Simulator - User Guide 35
Copyright © Verax Systems, April 2015 DL704
7.2 Pre-loaded modifier
7.2.1 Format
The pre-loaded modifier has the following, general format:
//^type.modifer(args)^//
Where:
• type – type of value returned by modifier (as defined by SMI),
• modifier – type of modifier,
• args – modifier arguments.
For instance:
.1.3.6.1.2.1.1.5.0 = STRING:
"switch//^int.rnd(10,1000)^//.veraxsystems.com_//^int.unq()^//"
.1.3.6.1.2.1.4.20.1.1.//^ipa.adr(0)^// = IpAddress:
//^ipa.adr(0)^//
.1.3.6.1.2.1.4.20.1.3.//^ipa.adr(1,192.168.200.100)^// =
IpAddress: //^ipa.net(1,255.255.0.0)^//
It is possible to use multiple modifiers in a single line. Types of pre-loaded modifiers are
described in the following sections.
7.2.2 Random MAC Address modifier
The random MAC address modifier provides randomly generated MAC address. It has
the following format:
//^mac.rnd(prefix,separator)^//
Where:
prefix – prefix of MAC address (each MAC address will start with this prefix),
separator – separator character between MAC address octets.
For instance:
.1.3.6.1.2.1.2.2.1.6.1 = STRING: "//^mac.rnd(00-11,-)^//"

Verax SNMP Simulator - User Guide 36
Copyright © Verax Systems, April 2015 DL704
7.2.3 Random integer modifier
The random integer modifier inserts a random integer value from the specified range. It
has the following format:
//^int.rnd(min,max)^//
Where:
min – lower bound
max – upper bound
For instance:
//^int.rnd(10,1000)^// - returns number between 10 and 1000, e.g. 763
7.2.4 Unique integer modifier
The unique integer modifier generates the unique integer number. The modifier has the
following format (no parameters are required):
//^int.unq()^//
7.2.5 Assigned IP Address & Network Address modifier
Assigned IP Address & Network Address modifier provides a specific IP address or
network address assigned to the current device.
The modifier has the following format:
• For IP addresses:
//^ipa.adr(idx)^//
//^ipa.adr(idx,default)^//
• For network addresses:
//^ipa.net(idx)^//
//^ipa.net(idx,default)^//

Verax SNMP Simulator - User Guide 37
Copyright © Verax Systems, April 2015 DL704
Where:
• idx – index of address entry (if 0, address is equal to the address of a given
device, if greater than 0, the address is retreived from Advanced network
configuration file).
• default – default value substituted if the address has not been found in
Advanced network configuration file.
If default value is not defined, then the simulator returns the address with index equals
to idx%max_idx, where max_idx is the maximum number of address entries found.
For instance:
.1.3.6.1.2.1.4.20.1.1.//^ipa.adr(1,127.0.0.1)^// = IpAddress: //^
ipa.adr(1,127.0.0.1)^//
.1.3.6.1.2.1.4.20.1.2.//^ipa.adr(1,127.0.0.1)^// = INTEGER: 1
.1.3.6.1.2.1.4.20.1.3.//^ipa.adr(1,127.0.0.1)^// = IpAddress: //^
ipa.net(1,255.255.255.0)^//
.1.3.6.1.2.1.4.20.1.4.//^ipa.adr(1,127.0.0.1)^// = INTEGER: 1
.1.3.6.1.2.1.4.20.1.5.//^ipa.adr(1,127.0.0.1)^// = INTEGER: 4096
Verax SNMP Simulator - User Guide 38
Copyright © Verax Systems, April 2015 DL704
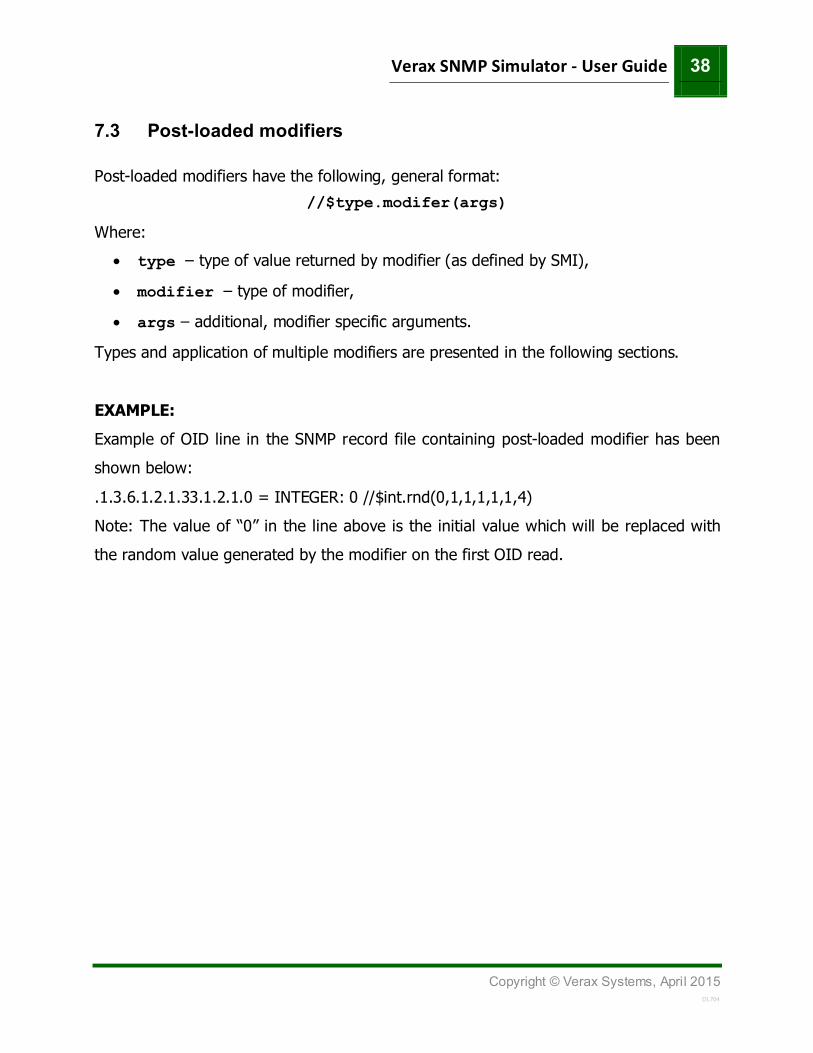
7.3 Post-loaded modifiers
Post-loaded modifiers have the following, general format:
//$type.modifer(args)
Where:
• type – type of value returned by modifier (as defined by SMI),
• modifier – type of modifier,
• args – additional, modifier specific arguments.
Types and application of multiple modifiers are presented in the following sections.
EXAMPLE:
Example of OID line in the SNMP record file containing post-loaded modifier has been
shown below:
.1.3.6.1.2.1.33.1.2.1.0 = INTEGER: 0 //$int.rnd(0,1,1,1,1,1,4)
Note: The value of “0” in the line above is the initial value which will be replaced with
the random value generated by the modifier on the first OID read.

Verax SNMP Simulator - User Guide 39
Copyright © Verax Systems, April 2015 DL704
7.3.1 Counter and Integer modifiers
Counter and integer modifiers use the same parameters and have the following format:
type.modifier(direction, scount_min, scount_max, svalue_min,
svalue_max, value_min, value_max)
where:
• direction – describes the trend how the value should be changed, the following
values are allowed:
o -1 (decrement)
o 0 (random increment or decrement, applicable for integer values only)
o 1 (increment)
• scount_min – minimum number of steps in which the value changes within the
same trend,
• scount_max – maximum number of steps in which the value changes within the
same trend,
• svalue_min – minimum deviation between previous and next value,
• svalue_max – maximum deviation between previous and next value,
• value_min – lower bound of the value (cannot be negative for Gauge and
Counter types),
• value_max – upper bound of the value (cannot be negative for Gauge and
Counter types).
NOTE:
Steps are understood as polls (or reads). Attributes scount_min and scount_max
determine how often the series will change monotonicity.
Verax SNMP Simulator - User Guide 40
Copyright © Verax Systems, April 2015 DL704
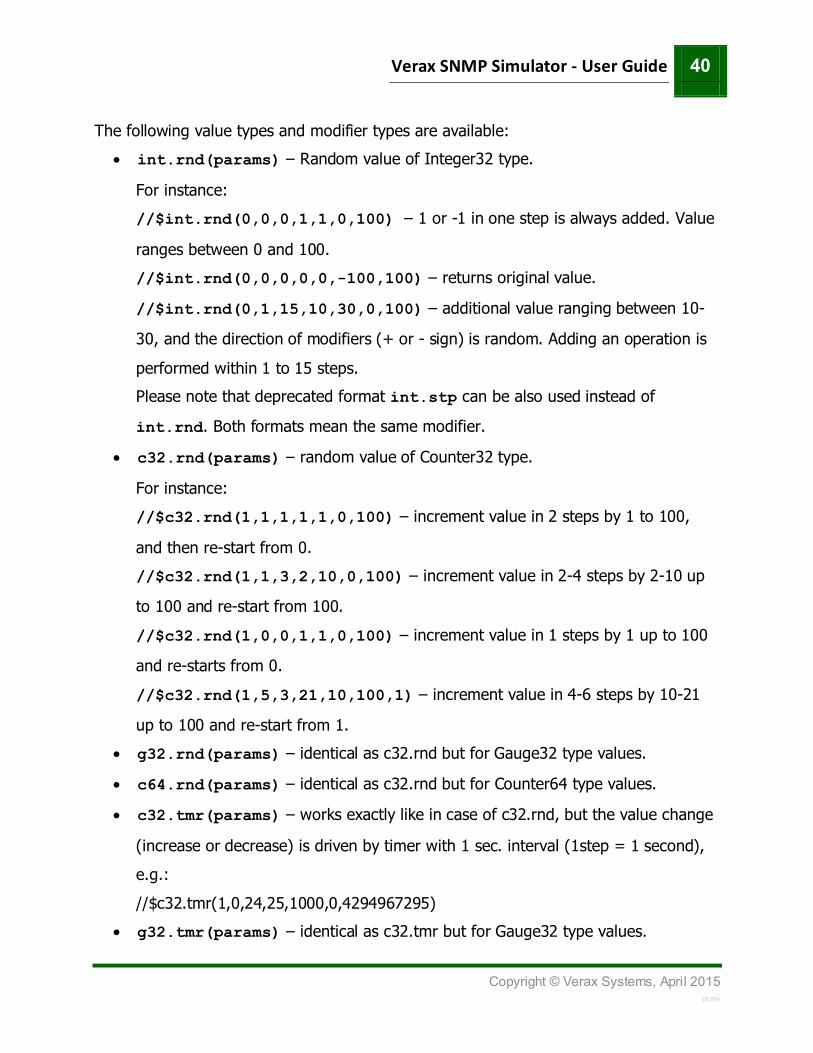
The following value types and modifier types are available:
• int.rnd(params) – Random value of Integer32 type.
For instance:
//$int.rnd(0,0,0,1,1,0,100) – 1 or -1 in one step is always added. Value
ranges between 0 and 100.
//$int.rnd(0,0,0,0,0,-100,100) – returns original value.
//$int.rnd(0,1,15,10,30,0,100) – additional value ranging between 10-
30, and the direction of modifiers (+ or - sign) is random. Adding an operation is
performed within 1 to 15 steps.
Please note that deprecated format int.stp can be also used instead of
int.rnd. Both formats mean the same modifier.
• c32.rnd(params) – random value of Counter32 type.
For instance:
//$c32.rnd(1,1,1,1,1,0,100) – increment value in 2 steps by 1 to 100,
and then re-start from 0.
//$c32.rnd(1,1,3,2,10,0,100) – increment value in 2-4 steps by 2-10 up
to 100 and re-start from 100.
//$c32.rnd(1,0,0,1,1,0,100) – increment value in 1 steps by 1 up to 100
and re-starts from 0.
//$c32.rnd(1,5,3,21,10,100,1) – increment value in 4-6 steps by 10-21
up to 100 and re-start from 1.
• g32.rnd(params) – identical as c32.rnd but for Gauge32 type values.
• c64.rnd(params) – identical as c32.rnd but for Counter64 type values.
• c32.tmr(params) – works exactly like in case of c32.rnd, but the value change
(increase or decrease) is driven by timer with 1 sec. interval (1step = 1 second),
e.g.:
//$c32.tmr(1,0,24,25,1000,0,4294967295)
• g32.tmr(params) – identical as c32.tmr but for Gauge32 type values.

Verax SNMP Simulator - User Guide 41
Copyright © Verax Systems, April 2015 DL704
• c64.tmr(params) – identical as c32.tmr but for Counter64 type values.
• int.tmr(params) – identical as c32.tmr but for Integer type values.
EXAMPLES:
A B C direction = 0 scount_min = 0 scount_max = 0 svalue_min = 0 svalue_max = 0 value_min = -100 value_max = 100
direction = 1 scount_min = 0 scount_max = 0 svalue_min = 0 svalue_max = 10 value_min = 0 value_max = 100
direction = 0 scount_min = 0 scount_max = 0 svalue_min = 0 svalue_max = 100 value_min = 0 value_max = 100
A. If direction is set to 0 that means value may increase or decrease. The value of
each sample is constant because the deviation is set to 0 (svalue_min =
svalue_max = 0). This modifier is not actually randomizing values.
B. If direction is set to 1 that means the value will always increase. The values will
change randomly, ranging from 0 to 100. The deviation between each sample is
ranging from 0 to 10 which limits the speed of value increase (the value can
increase by 10 maximum).
C. If direction is 0 that means the value may increase or decrease. The values will
change randomly, ranging from 0 to 100. The deviation between each sample is
ranging from 0 to 100. As the same range was applied here as for value_min,
value_max, the value can increase or decrease very flexible.

Verax SNMP Simulator - User Guide 42
Copyright © Verax Systems, April 2015 DL704
7.3.2 Integer with arithmetic operator
This modifier performs a specific arithmetic operation. The modifier has the following
format:
//$int.opr(left_side,operation,right_side)
Where:
• left_side – left side of the operation (constant integer or OID)
• operation – sign of the operation (+,-,/,*)
• right_side – right side of the operation (constant integer or OID)
For instance:
(value of .1.2.3.4.5.6..7.8.9.0 = 124; 124; .1.2.3.4.5.6..7.8.10.0 = 248)
//$int.opr(30000,+,oid(.1.2.3.4.5.6.7.8.9.0)) 30124 (30000+124 )
//$int.opr(oid(.1.2.3.4.5.6.7.8.9.0),-,300) -176 (124-300)
//$int.opr(3,*,oid(.1.2.3.4.5.6.7.8.9.0)) 372 (3*124)
//$int.opr(oid(.1.2.3.4.5.6..7.8.9.0),/,oid(.1.2.3.4.5.6.7.8.9.0)
) 2 (248/124)
7.3.3 Hexstring modifier
Hexstring (hexadecimal string) modifier generates a random hexadecimal string, with
prefix and specific number of characters, separated by the defined separator. The
modifier has the following format:
hex.rnd(prefix,separator,count,rnd)
where:
• prefix – prefix to be added before the generated string,
• separator – separator used to separate generated characters (i.e. for a MAC
address, ":" can be used),
• count – number of generated characters (octets),
• rnd – available values: 1 – new value is generated for each character, 0 – the
value is generated only once.

Verax SNMP Simulator - User Guide 43
Copyright © Verax Systems, April 2015 DL704
For instance:
//$hex.rnd(,:,6,0) – a random MAC address is generated, separated with
":" sign, e.g.
On 1-st request: a3:b4:c5:d6:e7:33 || On 2-nd request: a3:b4:c5:d6:e7:33
//$hex.rnd(, ,6,1) – a random 6 bytes hex string is generated, separated
with " " (single space), e.g.
On 1-st request: a3 b4 c5 d6 e7 33 || On 2-nd request: d5 fa f1 32 12 e2
//$hex.rnd(, ,10,0) – at the beginning random 10 bytes hex string is
generated, separated with " " (single space), e.g.
On 1-st request: 1d 13 f5 e4 56 1a a3 c6 f8 ff || On 2-nd request: 1d 13 f5 e4 56 1a a3
c6 f8 ff
//$hex.rnd(11 02 , ,4,1) – random 6 bytes hex string is generated,
always started with "11 02 ", separated with " " (single space), e.g.
On 1-st request: 11 02 a4 e6 55 1f || On 2-nd request: 11 02 a1 12 6f 5a
EXAMPLE:
.1.3.6.1.2.1.25.3.5.1.2.1 = Hex-STRING: //$hex.rnd(,:,8,0) – generates 8 random
hexadecimal octets separated by ":" (colon), e.g. 11 02 a4 e6 b4 c5 d6 55

Verax SNMP Simulator - User Guide 44
Copyright © Verax Systems, April 2015 DL704
7.3.4 IP Address modifier
The modifier generates a random IP address. It has the following format:
ipa.rnd(prefix,separator,count,rnd)
Where:
• prefix – prefix added before generated string,
• separator – string used as a separator (most likely “.”),
• count – number of generated bytes,
• rnd – available values: 1 – new value is generated for each character, 0 – the
value is generated only once.
The parameters are exactly the same with hex string modifier, but in this case bytes are
represented in decimal format.
EXAMPLE:
.1.3.6.1.2.1.4.20.1.1.0.0.0.0 = IpAddress: //$ipa.rnd(,.,4,0) – generates fixed IP
address, not be changed during the simulation,
.1.3.6.1.2.1.4.20.1.1.127.0.0.1 = IpAddress: //$ipa.rnd(,.,4,1) – generates IP address
changing on each read.

Verax SNMP Simulator - User Guide 45
Copyright © Verax Systems, April 2015 DL704
7.3.5 MAC Address modifier
MAC Address modifier generates a random MAC address. The modifier has the following
format:
mac.rnd(prefix,separator,count,rnd)
where:
• prefix – prefix added before generated string,
• separator – character used to separate bytes (i.e. in MAC address is ":"),
• count – number of generated bytes,
• rnd – available values: 1 – new value is generated for each character, 0 – the
value is generated only once.
The parameters for this modifier are exactly the same with hex string modifier, but in
this case MAC is kept in string in alphanumeric format.

Verax SNMP Simulator - User Guide 46
Copyright © Verax Systems, April 2015 DL704
8 APPENDIX
8.1 How to configure Virtual IP Address in Windows
XP/2000/ME/2003
This procedure can be performed only by a user with administrator privilege.
1. Click Start, select Settings and Network Connections.
2. Select Local Area Connection and click Properties.
3. In the Local Area Connection Properties dialog box, click
Internet Protocol (TCP/IP), and then Properties.
4. Click Advanced. The Advanced TCP/IP settings dialog box is displayed showing
all configured IP addresses.
5. Click Add below the IP Addresses section and add a new IP address along
with a corresponding subnet mask (you may add as many addresses as
required).
6. Restart the system for changes to take effect.

Verax SNMP Simulator - User Guide 47
Copyright © Verax Systems, April 2015 DL704
8.2 How to configure Microsoft Loopback Adapter to work with Verax SNMP Agent Simulator in Windows 7
This procedure can be performed only by a user with administrator privilege.
1. Click Start, select Control Panel and View network status and task
to open Network and Sharing Center.
2. Select Change Adapter Settings.
3. Found the adapter of type Microsoft Loopback Adapter. For example, as
depicted on the below picture, Local Area Connection 4 is the name of a
loopback adapter.
4. Click Properties from the pop-up menu for the selected adapter. In the
Properties dialog box, click Internet Protocol Version 4
(TCP/IPv4), and then Properties.
5. The TCP/IP settings dialog box is displayed showing IP address configuration.
Select Use the following IP address: checkbox and enter the IP
address, e.g. 10.0.0.1 and Subnet mask, e.g. 255.255.255.0
6. Click OK to close the dialogs.
7. In the simulator’s configuration file (C:\Windows\etc\verax.d\simulator.conf)
enter the name of Microsoft Loopback Adaper, e.g.:
PRIMARY_INTERFACE=”Local Area Connection 4”
8. Restart the simulator for changes to take effect.