vertical strabismus therapy pearls - ecp builder · vertical strabismus therapy pearls ... dont...
TRANSCRIPT
Vertical Strabismus Treatment Pearls Page 1
Vertical Strabismus Therapy Pearls Colorado COVD Study Group, February 10, 2013
Boulder Valley Vision Therapy Staff:
Jennifer Simonson, OD FCOVD, Amy Zeiger, COVT, Gail Henry, COVT, Kayla Wigle (COVT candidate)
Course Summary:
We will demonstrate vision therapy techniques for treating vertical strabismus. The use of
prisms, appropriate fusional targets, and therapy equipment will be discussed and practiced. We
will discuss how to support and load each activity to build fusion skills.
Course Objectives:
Vision Therapy Technique explanation, demonstration and practice:
1. Eye stretches
2. Red light Red Ring
3. After-image Tracking
4. Head rotations
5. Brock String
6. String and Dowel
7. Vertical Prism bar techniques
8. Bernell-o-scope
9. Vertical Vectograms and Tranaglyphs
10. Prism Rotations
11. Computerized Therapy: VTS, HTS
12. Free-space fusion (ECC, Thumbs, Lines)
13. Voluntary Vergences
General strategies for Vision Therapy techniques:
Patients with vertical deviations often compensate with a head turn or tilt. Be mindful of the
position of their head while doing activities. A head turn or tilt may be used to help them attain
fusion on a difficult task. Try to encourage gradual straightening of the head to primary gaze
(slowly!). Add head movement before increasing the fusional demand.
Always watch for suppression. These adaptations can develop at any age, and are usually
correlated to the length of time the patient has been plagued with binocular vision problems.
When working on binocular activities, start first with VERY STRONG STEREO targets that are
large and have prominent stereopsis cues. Use projected vectograms: polarized targets are
easier than red/green targets. Targets that are smaller and that require only flat fusion (second
degree fusion) will be more difficult.
When horizontal fusion skills are enhanced, the vertical fusion skills will also improve. Don’t
increase the demand too quickly: make sure that images are FUSED WELL.
Work on the edge or border of fusion, don’t just alternate between single and double. Make
your endpoint be where it looks “different” “blurry” or “less comfortable” and then regain solid
fusion. Emphasize small increments (just noticeable differences, JND), SILO perception, and
float on depth perception.
Prescribe prism for fusion. Use the minimal amount for MAXIMUM ability (don’t under-
prescribe), typically this is 90% of the turn. Don’t be too quick to cut the prism (1 pd/month is
goal).
Vertical Strabismus Treatment Pearls Page 2
1. Eye Stretches Purpose: to warm-up eye muscles and increase ocular range of motion. Often, vertical deviations can be
secondary to muscle adhesions (where the muscle or muscle casing is ‘stuck’ to other tissues), and
stretching the eye muscles can break up these adhesions.
Instructions:
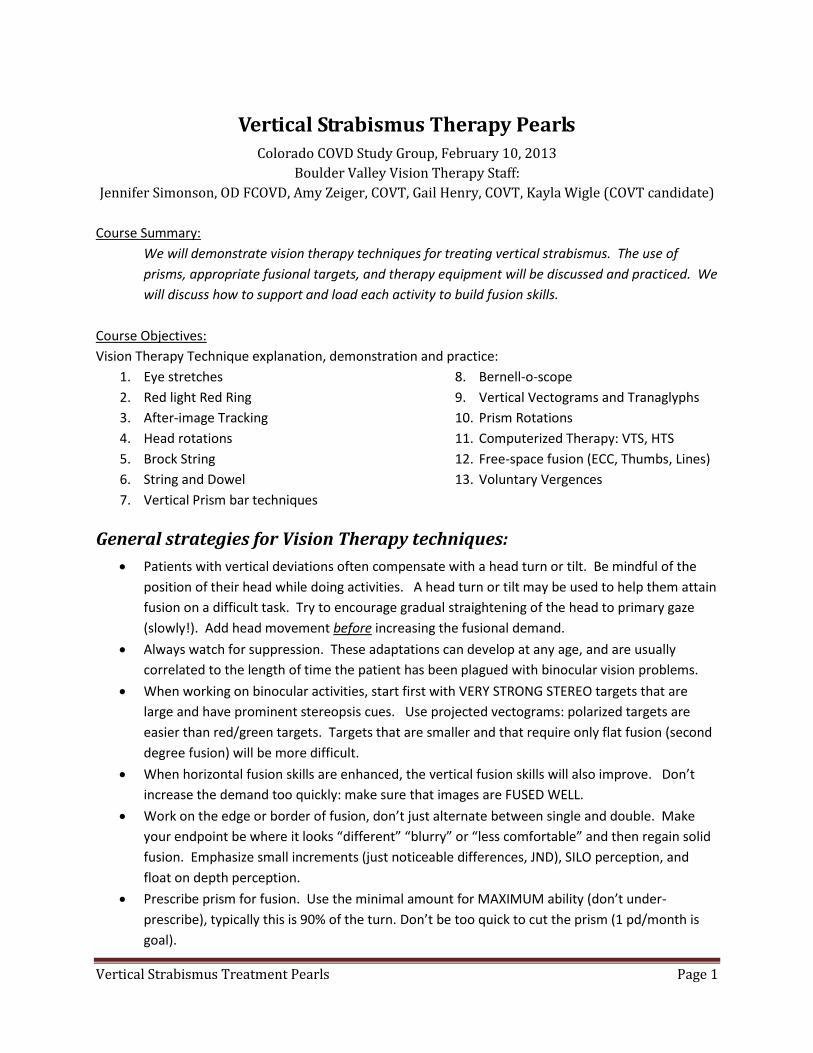
Patient covers one eye with a patch.
Have the patient look at a target such as their thumb or a
pencil. Move the target in each direction of gaze as the
diagram illustrates.
Once you have stretched the muscle in one direction, the
next eye muscle stretch should be in the opposite
direction. For example, look up and then down, to the left
and then the right.
At first try to hold the stretch for 2-3 seconds. Work
towards holding the eye position for longer, up to 30
seconds.
Practice for 2-3 minutes with each eye.
Goal is to stretch 10 times per day.
2. Red Light/Red Ring
Purpose: To break down the brain’s adaptation to the suppression of one eye. This activity causes the
visual field of one eye to encroach upon the other, which gives the patient feedback and awareness of
each field.
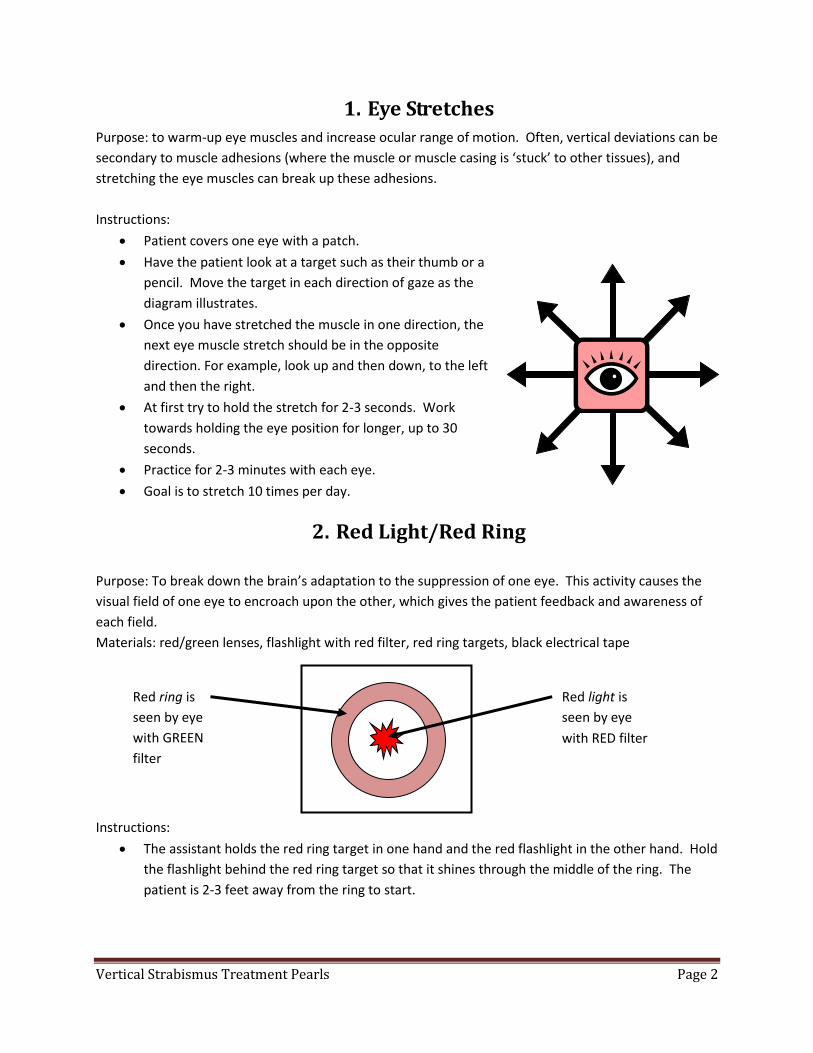
Materials: red/green lenses, flashlight with red filter, red ring targets, black electrical tape
Instructions:
The assistant holds the red ring target in one hand and the red flashlight in the other hand. Hold
the flashlight behind the red ring target so that it shines through the middle of the ring. The
patient is 2-3 feet away from the ring to start.
Red ring is
seen by eye
with GREEN
filter
Red light is
seen by eye
with RED filter
Vertical Strabismus Treatment Pearls Page 3
The patient directs the assistant to move the flashlight until it is perceived to be in the middle of
the ring. The goal is to see both the red ring and red flashlight at all times without either one
disappearing.
Rest for a few seconds and repeat the above. If easy so far, have the patient move further away
from the red target. The goal is to move as far away as possible and still see the red light inside
the red ring.
Continue working with various sizes of ring targets, smaller targets being more difficult than
large ones.
Aspects to Emphasize:
Attempt to sustain the perception of the red light inside the red ring for longer periods of time
with each repetition of the activity.
Encourage the patient to discern when the light appears to be centered closer to the ring,
matching visual and physical space.
3. After-Image Fixations Purpose: To develop accurate fixation, pursuit and saccadic ability with feedback about performance
and accuracy.
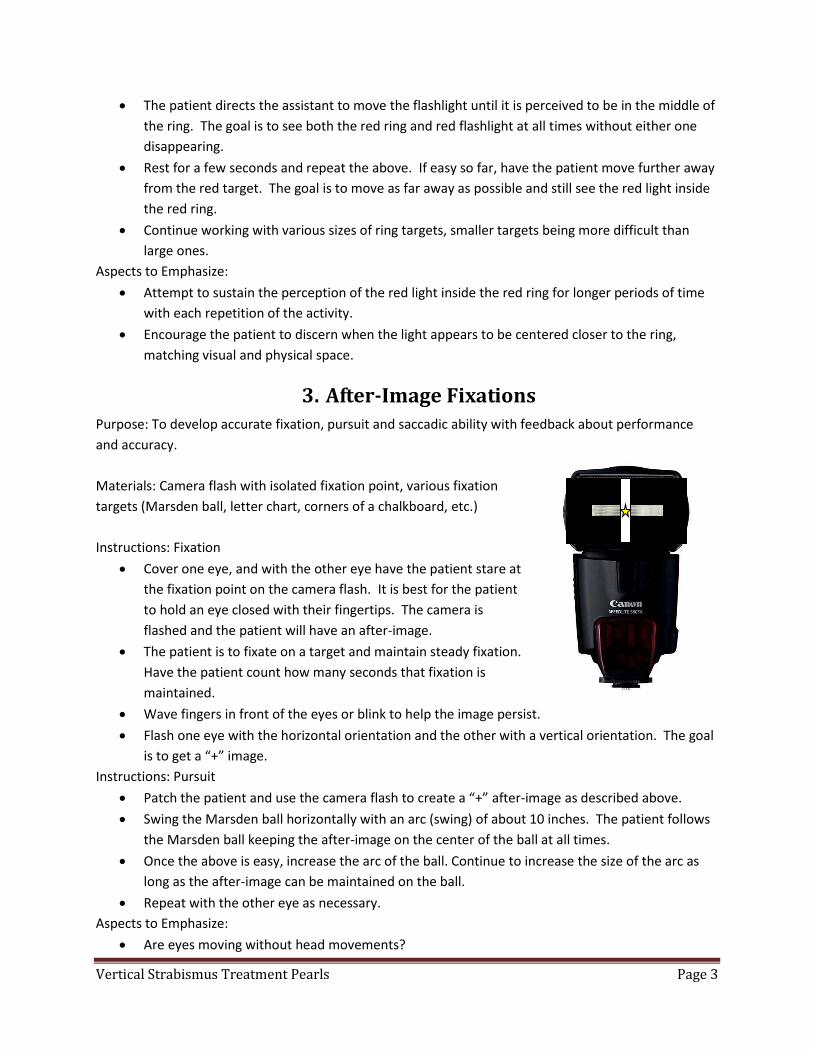
Materials: Camera flash with isolated fixation point, various fixation
targets (Marsden ball, letter chart, corners of a chalkboard, etc.)
Instructions: Fixation
Cover one eye, and with the other eye have the patient stare at
the fixation point on the camera flash. It is best for the patient
to hold an eye closed with their fingertips. The camera is
flashed and the patient will have an after-image.
The patient is to fixate on a target and maintain steady fixation.
Have the patient count how many seconds that fixation is
maintained.
Wave fingers in front of the eyes or blink to help the image persist.
Flash one eye with the horizontal orientation and the other with a vertical orientation. The goal
is to get a “+” image.
Instructions: Pursuit
Patch the patient and use the camera flash to create a “+” after-image as described above.
Swing the Marsden ball horizontally with an arc (swing) of about 10 inches. The patient follows
the Marsden ball keeping the after-image on the center of the ball at all times.
Once the above is easy, increase the arc of the ball. Continue to increase the size of the arc as
long as the after-image can be maintained on the ball.
Repeat with the other eye as necessary.
Aspects to Emphasize:
Are eyes moving without head movements?
Vertical Strabismus Treatment Pearls Page 4
Swing the Marsden ball in random directions for added difficulty.
Load the activity by adding a balance board or balance beam.
4. Head Rotations
Purpose: To develop and improve the visual system’s ability to guide and monitor movement through
space, enhance integration of the visual and vestibular systems, and develop freedom between the
focusing and eye alignment systems.
Materials: Near and far fixation targets
Instructions:
Stand erect, feet shoulder width apart and weight evenly
balanced.
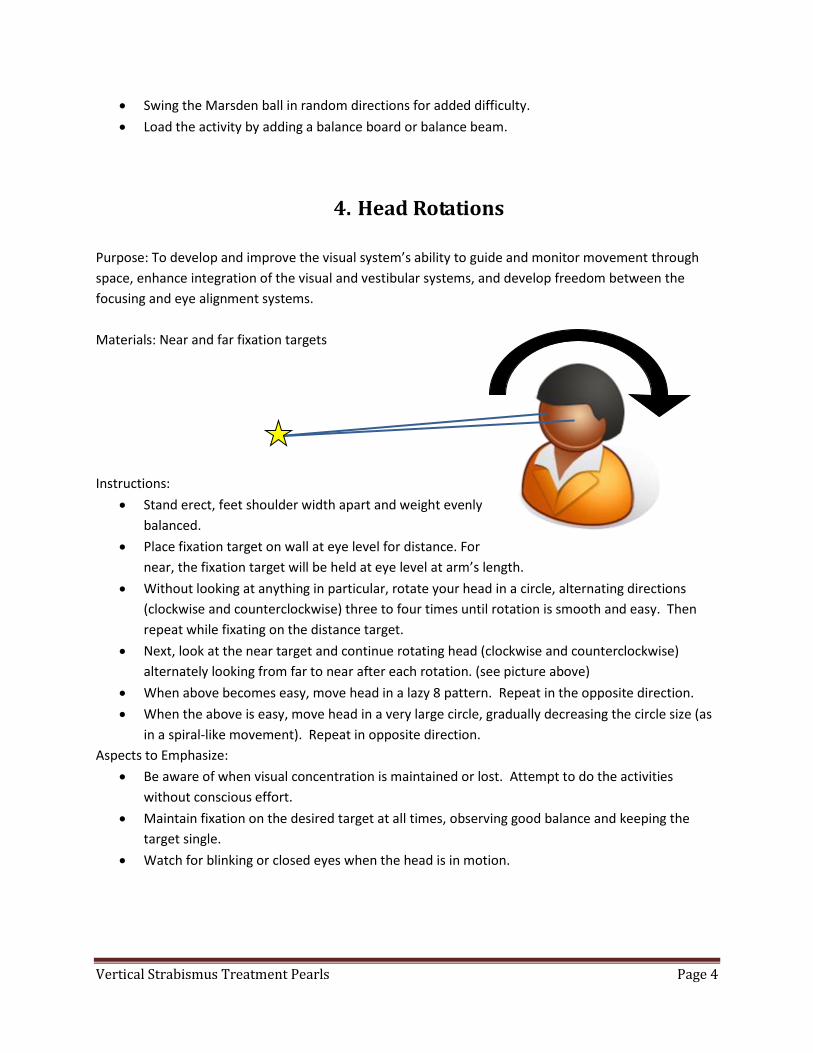
Place fixation target on wall at eye level for distance. For
near, the fixation target will be held at eye level at arm’s length.
Without looking at anything in particular, rotate your head in a circle, alternating directions
(clockwise and counterclockwise) three to four times until rotation is smooth and easy. Then
repeat while fixating on the distance target.
Next, look at the near target and continue rotating head (clockwise and counterclockwise)
alternately looking from far to near after each rotation. (see picture above)
When above becomes easy, move head in a lazy 8 pattern. Repeat in the opposite direction.
When the above is easy, move head in a very large circle, gradually decreasing the circle size (as
in a spiral-like movement). Repeat in opposite direction.
Aspects to Emphasize:
Be aware of when visual concentration is maintained or lost. Attempt to do the activities
without conscious effort.
Maintain fixation on the desired target at all times, observing good balance and keeping the
target single.
Watch for blinking or closed eyes when the head is in motion.
Vertical Strabismus Treatment Pearls Page 5
5. Brock String Purpose: To enhance binocular skills at different distances in space with awareness of both eyes and
control of suppression.
Materials: String with 3-4 colored beads on it, attached at the far end just below the patient’s eye level.
Prisms may also be required for fusion.
Instructions: Single Bead
The patient holds the string just below the nose, exactly at mid-line. The patient may be sitting
or standing and with good posture.
Place a single bead on the string and see if the patient can see an “X” that the strings make
when both eyes are used. Try to keep the bead single while maintaining awareness of the two
strings.
o If the bead is double, try moving it closer or further from the patient.
o If the vertical aspect of the deviation cannot be overcome, use a vertical prism to
compensate for the deviation. Use the smallest amount to achieve fusion.
o If suppression occurs, tap the string to make it vibrate. Also, blinking or tapping the side
of the head near the eye may help. Check posture and peripheral awareness as well.
See how long the “X” can be maintained without suppression and the bead becoming double.
Vary the distance of the bead to the patient to increase difficulty. For example, if the patient can
accomplish this up close, work the bead further away while maintaining the “x”.
Instructions: Multiple Beads
Set up as above, except with 2 or 3 beads on the string spread out at different distances.
The patient shifts focus from one bead to the next while maintaining the “X” at all times.
Vary the position of the beads. Start at distances that the patient can have success, and progress
toward more challenging distances.
If the above is easy, try maintaining fixation on a bead while it is moving, and watch that the “X”
is moving with the bead.
Instructions: Prism Jumps
The patient uses a hand-held prism to increase the difficulty of the activity. The prism can be
base-in (BI) or base-out (BO), put in place and then taken away repeatedly with fusion
maintained each time.
For added difficulty, alternate between BI and BO, or try using base-up (BU) or base-down (BD)
prism in very small amounts to increase the patient’s vertical range.
Instructions: Bug on a String
Place two beads at different distances on the string with no beads in between. It is more
difficult with beads that are further apart; the goal is to have one at near and one at the far end
of the string.
Ask patient to visualize a bug walking slowly from the far bead to the near bead. The perceived
“X” should move slowly up the string towards the nose, until it reaches the near bead.
Vertical Strabismus Treatment Pearls Page 6
Repeat in the opposite direction. If the entire string is being used; the goal is 1 minute in each
direction with smooth, steady eye movements.
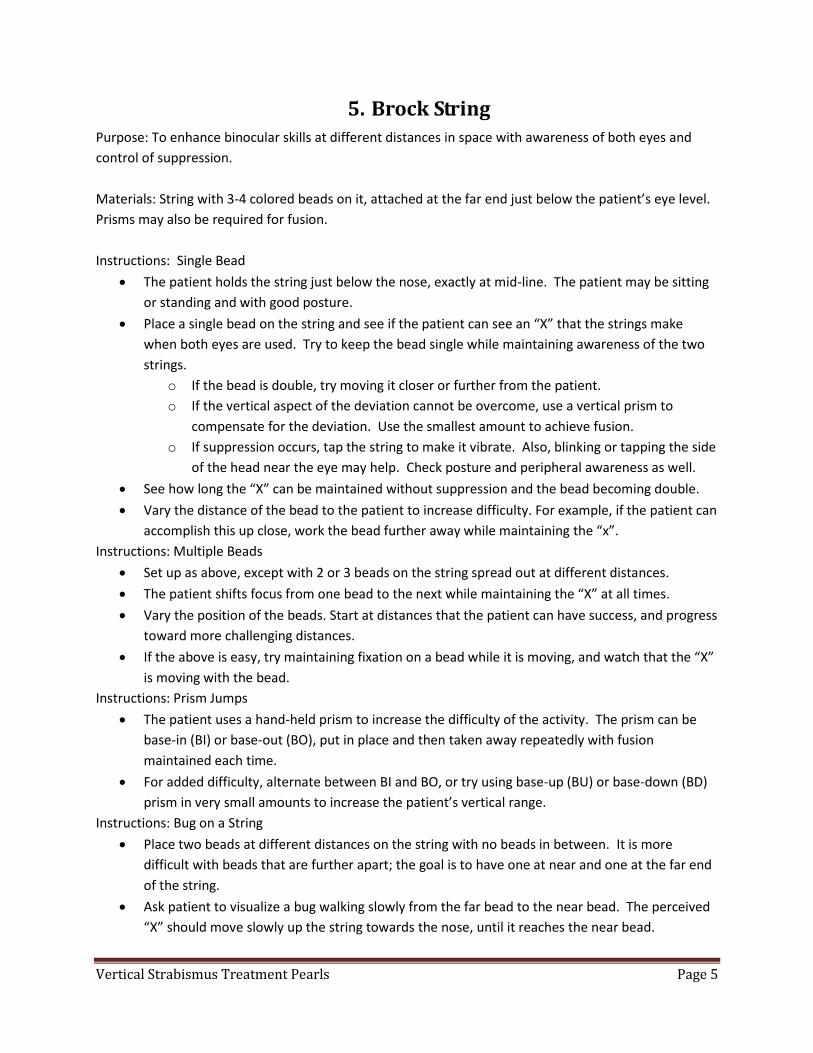
Modifications to increase difficulty:
Turn head in different positions: up, down, right, and left. Change head position slowly for
greater success.
Add balance board or balance beam to activity.
The assistant holds the far end of the string and moves it to different positions.
Making the Brock string FUN:
Each time the patient looks at the bead, have them name something that is that color.
Count 5 letters of the alphabet with each fixation, or count from 5 numbers with each fixation,
see if patient can keep track of where they should be looking and what they should be saying.
For younger children: Move the beads and create a background story. It is attention-grabbing
when the beads are in motion and about to ‘crash’ into each other.
6. String and Dowel Purpose: To enhance binocular skills at different distances and in different positions of gaze with
awareness and control of suppression. To move eyes smoothly and accurately as a team, and to learn
how to shift eyes quickly and precisely from one object to another.
Materials: String 3 feet long with two beads on it, attached to the end of a dowel.
Instructions:
The free end of the string is held just below the nose, similar to the Brock string. One bead
remains at the end of the string while the other bead is placed at a distance 10 inches from the
nose.
The dowel is used to extend the string in front of you, holding it taut.
Vertical Strabismus Treatment Pearls Page 7
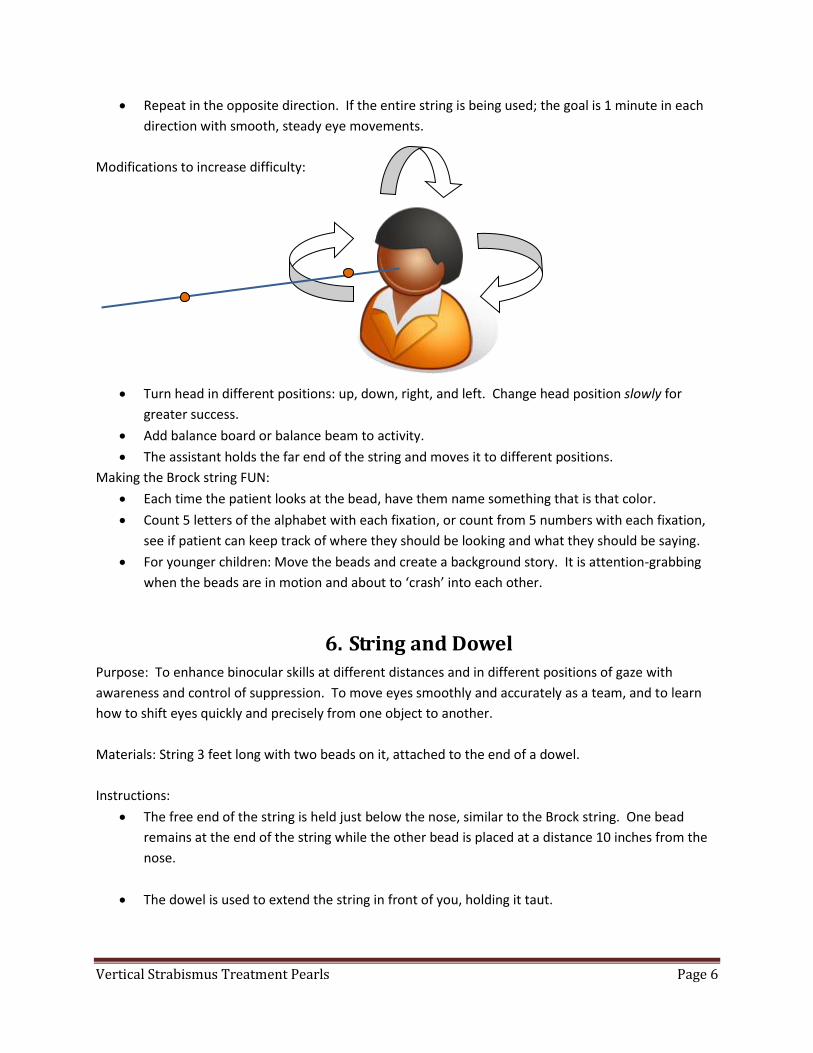
Step 1
Ask patient to look at the far bead and remain aware of two strings that form a “V”, with one
string appearing to come from each eye.
Slowly move the dowel in a circular pattern about 20 to 24 inches in diameter. Maintain fixation
on the bead.
Practice clockwise and counterclockwise rotations. Try to be aware of other objects in the room
while you perform this activity.
When you can follow the bead smoothly at all times, proceed to step 2.
Step 2
Ask the patient to look at near bead and remain aware of two strings that form an “X”, with one
string appearing to come from each eye.
Move the string and dowel as in Step 1, and try to follow the bead smoothly. Make sure the two
strings meet right at the bead to form an “X” at all times.
Step 3
Look at the far bead and proceed as in Step 1, except that after a full rotation, shift the eyes
from the far bead to the near bead and follow the near bead for one rotation.
When shifting from one bead to another, try to make the movements as quick and accurate as
possible.
Shift the eyes to the beat of a metronome to make the activity more challenging.
Aspects to Emphasize
Make sure the patient can see two strings at all times, that meet at the bead he/she is looking
at.
Encourage smooth eye movements while following the bead, and awareness of other objects in
the room.
Shift the eyes quickly from one bead to the next.
7. Vertical Prism Bar Techniques Purpose: To increase the ability of the eyes to compensate for vertical deviations by increasing vertical
vergence ranges.
Materials: Vertical prism bar, fixation target and possibly red/green glasses
Vertical Strabismus Treatment Pearls Page 8
Instructions:
Select a fixation target at near, intermediate or far distance.
Start at the lowest prism value on the prism bar that the patient can fuse. Work in the opposite
direction of the deviation. For example, if the patient has a left hypertropia, you would start
with the prism base down over the left eye (minimum needed for fusion) and try to decrease
the amount of prism.
If the patient can attain fusion without any compensating prism, use prism with the base in the
opposite direction of the deviation.
Slowly progress the prism bar so that the level of prism the patient is required to fuse increases
in difficulty. Allow 5-10 seconds to hold each power to assure stability. The patient is to look at
the fixation target and watch for any signs of doubling.
Continue until the level of prism is reached that is too difficult and the target splits into two,
then reduce the level of prism until fusion is regained.
If the patient has any suppression tendencies, this activity is best performed with red/green
glasses and a target that has suppression controls. Suggestions for targets are:
o Tranaglyphs
o Red/Green letter chart
Repeat at all distances: near, intermediate and far.
Aspects to Emphasize:
Allow time for images to come together when trying to recover fusion.
Watch head position through activity. Head position may help regain fusion, but then attempt
to straighten head to primary position and maintain fusion
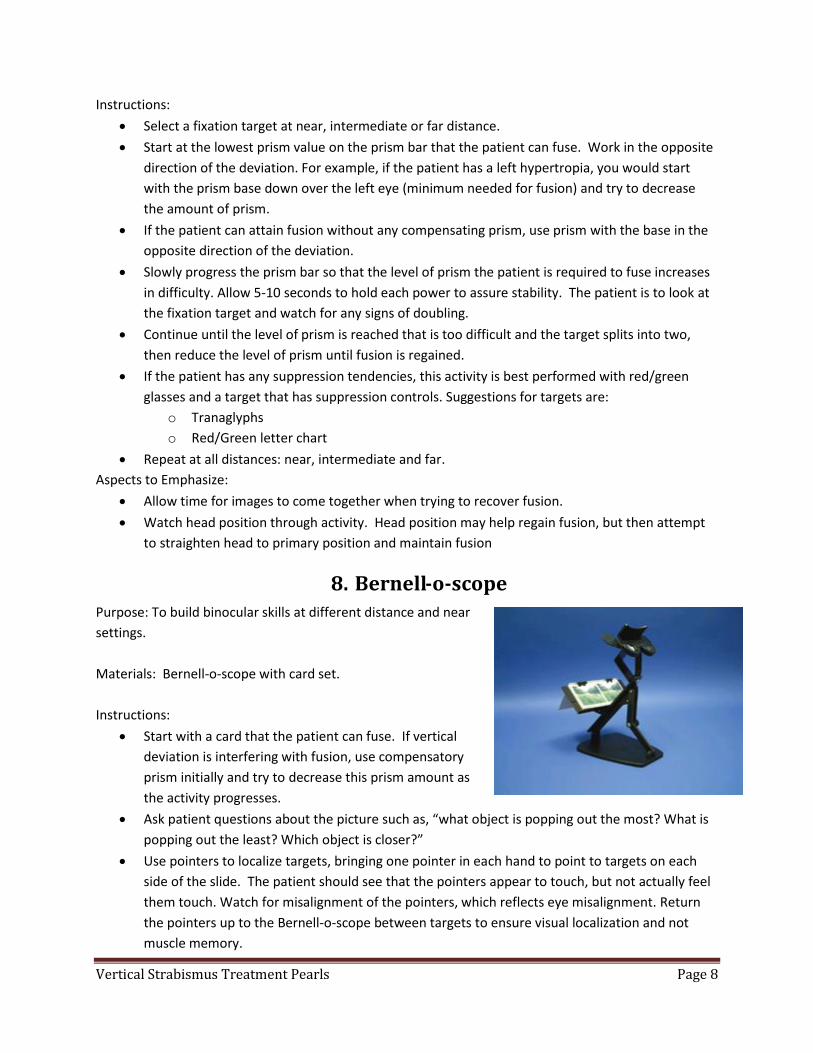
8. Bernell-o-scope Purpose: To build binocular skills at different distance and near
settings.
Materials: Bernell-o-scope with card set.
Instructions:
Start with a card that the patient can fuse. If vertical
deviation is interfering with fusion, use compensatory
prism initially and try to decrease this prism amount as
the activity progresses.
Ask patient questions about the picture such as, “what object is popping out the most? What is
popping out the least? Which object is closer?”
Use pointers to localize targets, bringing one pointer in each hand to point to targets on each
side of the slide. The patient should see that the pointers appear to touch, but not actually feel
them touch. Watch for misalignment of the pointers, which reflects eye misalignment. Return
the pointers up to the Bernell-o-scope between targets to ensure visual localization and not
muscle memory.
Vertical Strabismus Treatment Pearls Page 9
Progressively work base-in and base-out
targets with emphasis on depth of the
targets and accuracy of eye alignment.
You can also copy and cut the targets and
place offset vertically to help with fusion
then work to make both sections level.
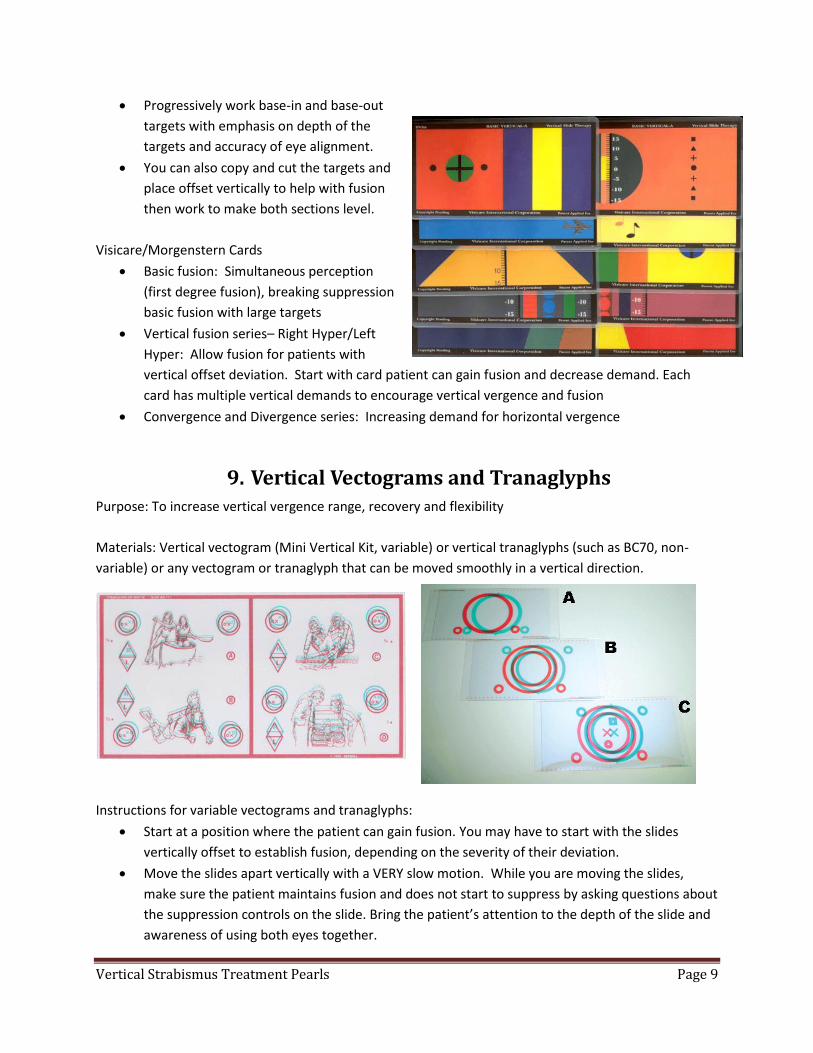
Visicare/Morgenstern Cards
Basic fusion: Simultaneous perception
(first degree fusion), breaking suppression
basic fusion with large targets
Vertical fusion series– Right Hyper/Left
Hyper: Allow fusion for patients with
vertical offset deviation. Start with card patient can gain fusion and decrease demand. Each
card has multiple vertical demands to encourage vertical vergence and fusion
Convergence and Divergence series: Increasing demand for horizontal vergence
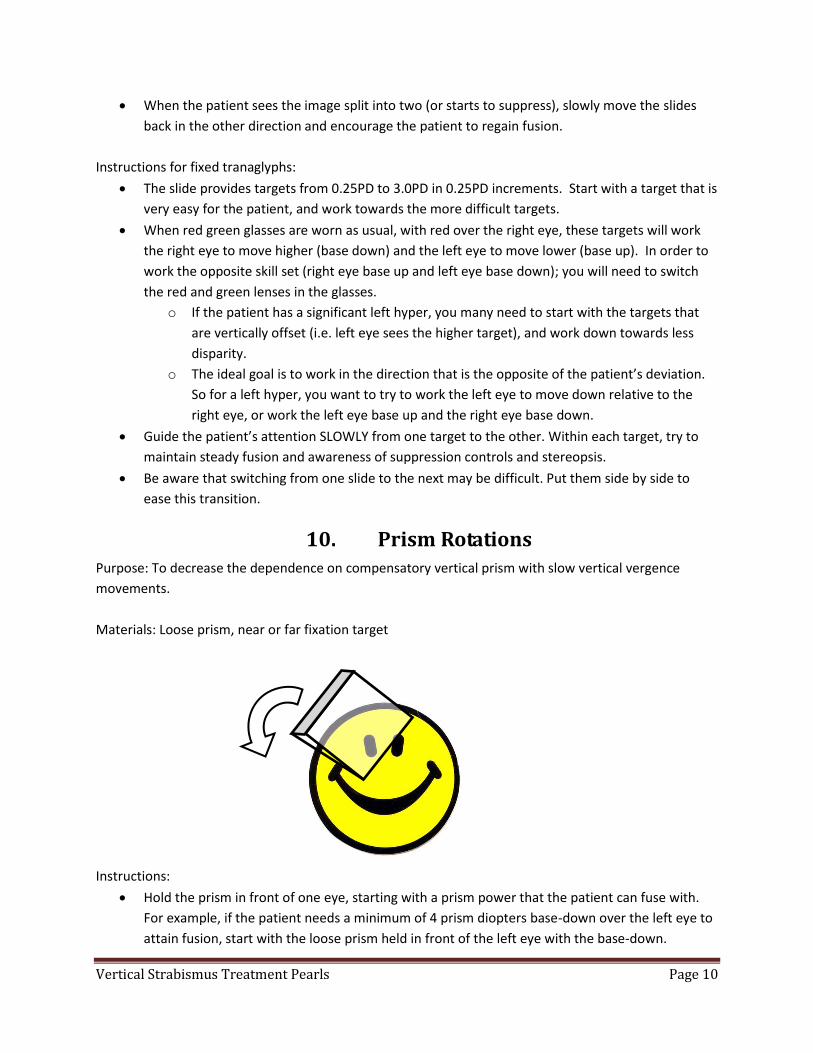
9. Vertical Vectograms and Tranaglyphs Purpose: To increase vertical vergence range, recovery and flexibility
Materials: Vertical vectogram (Mini Vertical Kit, variable) or vertical tranaglyphs (such as BC70, non-
variable) or any vectogram or tranaglyph that can be moved smoothly in a vertical direction.
Instructions for variable vectograms and tranaglyphs:
Start at a position where the patient can gain fusion. You may have to start with the slides
vertically offset to establish fusion, depending on the severity of their deviation.
Move the slides apart vertically with a VERY slow motion. While you are moving the slides,
make sure the patient maintains fusion and does not start to suppress by asking questions about
the suppression controls on the slide. Bring the patient’s attention to the depth of the slide and
awareness of using both eyes together.
Vertical Strabismus Treatment Pearls Page 10
When the patient sees the image split into two (or starts to suppress), slowly move the slides
back in the other direction and encourage the patient to regain fusion.
Instructions for fixed tranaglyphs:
The slide provides targets from 0.25PD to 3.0PD in 0.25PD increments. Start with a target that is
very easy for the patient, and work towards the more difficult targets.
When red green glasses are worn as usual, with red over the right eye, these targets will work
the right eye to move higher (base down) and the left eye to move lower (base up). In order to
work the opposite skill set (right eye base up and left eye base down); you will need to switch
the red and green lenses in the glasses.
o If the patient has a significant left hyper, you many need to start with the targets that
are vertically offset (i.e. left eye sees the higher target), and work down towards less
disparity.
o The ideal goal is to work in the direction that is the opposite of the patient’s deviation.
So for a left hyper, you want to try to work the left eye to move down relative to the
right eye, or work the left eye base up and the right eye base down.
Guide the patient’s attention SLOWLY from one target to the other. Within each target, try to
maintain steady fusion and awareness of suppression controls and stereopsis.
Be aware that switching from one slide to the next may be difficult. Put them side by side to
ease this transition.
10. Prism Rotations Purpose: To decrease the dependence on compensatory vertical prism with slow vertical vergence
movements.
Materials: Loose prism, near or far fixation target
Instructions:
Hold the prism in front of one eye, starting with a prism power that the patient can fuse with.
For example, if the patient needs a minimum of 4 prism diopters base-down over the left eye to
attain fusion, start with the loose prism held in front of the left eye with the base-down.
Vertical Strabismus Treatment Pearls Page 11
The patient fixates on a target and attempts to keep it single. Pick a target that is easy to tell
when it becomes double.
SLOWLY slowly slowly, rotate the prism so the base changes from a vertical orientation to
horizontal. Starting from base-down position, rotate the prism toward either base-in or base-
out.
Continue with SLOW rotation until the patient sees double. Note approximately how much the
prism rotated. 90 degrees, so the base is purely horizontal? 45 degrees, half way between
vertical and horizontal? Past 90 degrees, working in the opposite direction of the patient’s
vertical deviation?
Encourage the regaining of fusion by slowly rotating the prism back toward the initial starting
position. Note the rotation amount when the patient recovers single vision. You can use a trial
frame to get an exact measurement.
Work the prism in this way in front of each eye, switching direction of the prism base when
using the other eye. For example, if the patient is Left Hyperphoric or Hypertropic, start with the
prism base down in front of the left eye and base up in front of the right eye.
If suppression is a problem, use red/green glasses and a red/green target with suppression
controls.
11. Computerized Therapy: VTS, HTS
Purpose: To build vertical and horizontal ranges with the aid of computerized vision therapy programs.
Home Therapy Systems (HTS) – multiple choice Random Dot Stereopsis (RDS) target with red/blue
glasses
Horizontal Vergence – horizontal fusion activity
Vertical Vergence – vertical fusion activity
Autoslide Vergence – slowly and gradually varies demand between convergence and divergence
Jump Ductions – alternates between convergence and divergence
Vision Therapy Systems 3 (VTS3)
Multiple Choice Vergence – can choose vertical offset
Vergence - move targets manually, both horizontal and vertical
Jump Ductions – multiple choice function
Rotations – move targets manually, both horizontal and vertical, while they move clockwise or
counterclockwise on the screen
12. Free-space fusion (Thumbs, Eccentric Circles, Lines) Purpose: To improve horizontal vergence ranges and the ability to coordinate the eyes in free space.
Materials: Your thumbs or a set of eccentric circles (ECC). Clear circles are easier for divergence (base in)
and circles printed on white paper are easier for convergence (base out)

Vertical Strabismus Treatment Pearls Page 12
Offset vertically to aid fusion
Thumb fusion: Base IN
The patient looks in the distance just below their line of sight and holds the thumbs up right
next to each other. Notice how many thumbs are seen. They may see 4 thumbs, which
indicates that they are aware of physiologic diplopia. They may only see 2 thumbs, which means
they are not aware of physiologic diplopia. In this case, try to move the thumbs in such a way to
elicit a double image of each thumb.
The goal is to see three thumbs and to focus in on the middle thumb. So if the patient is set up
as above and sees 4, they are to move their thumbs apart until they see 3, still gazing in the
distance.
SLOWLY transition their gaze from distance to near, keeping the thumbs blurry if necessary.
Once they are looking at the ‘middle’ thumb and can see three, try slowly to clear the image.
o Use plus lenses in front of both eyes to aid in the clearing of the image.
o Put stickers on the thumbs that are exactly the same to aid in fusion.
o Put a dot at the top of one thumbnail and the bottom of the other thumbnail for a
suppression control.
Thumb fusion: Base OUT
Hold the thumbs as described above, but this time the gaze is at a space in between the thumbs
and the eyes. Encourage the patient to look halfway between their thumbs and their nose.
o To aid with convergence, hold a pointer at their thumbs and slowly move it in towards
their nose, encourage the patient to notice when their thumbs change from 2 to 3 or 4
thumbs, the goal being to see 3.
When they can see 3 thumbs, the goal is to get the middle thumb clear and hold fusion for as
long as 30 seconds.
Use minus lenses in front of both eyes to aid in the clearing of the targets while maintaining
fusion.
Vertical Strabismus Treatment Pearls Page 13
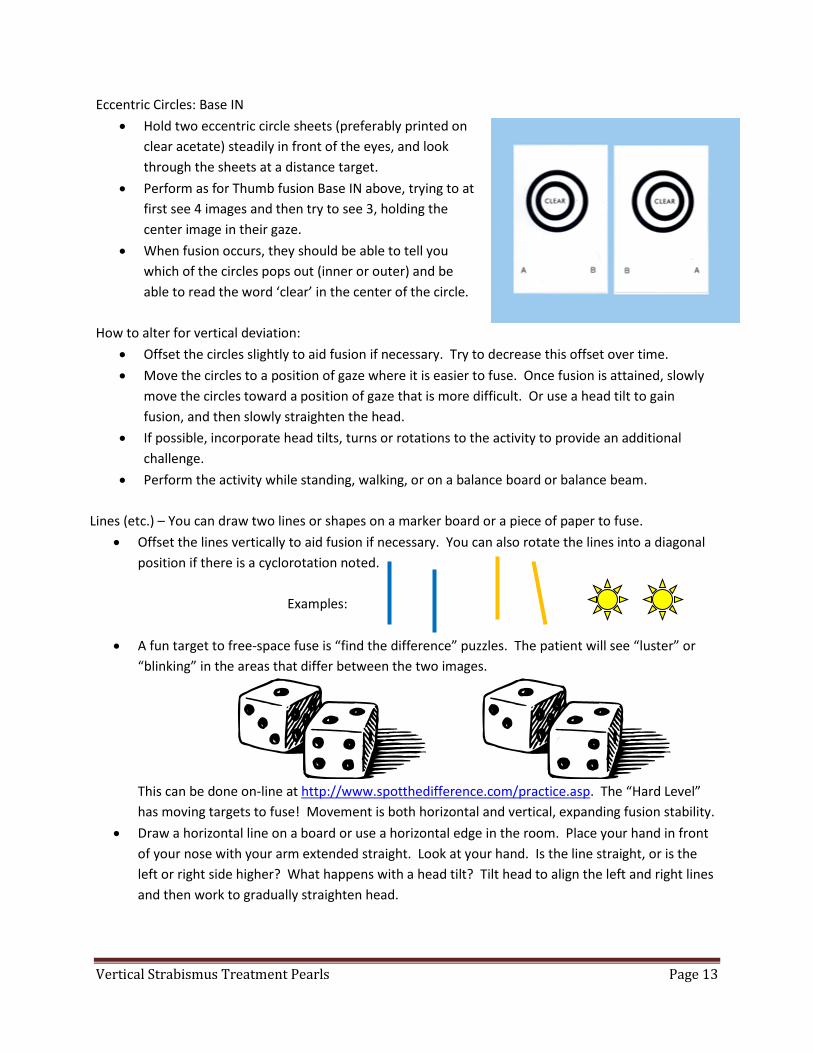
Eccentric Circles: Base IN
Hold two eccentric circle sheets (preferably printed on
clear acetate) steadily in front of the eyes, and look
through the sheets at a distance target.
Perform as for Thumb fusion Base IN above, trying to at
first see 4 images and then try to see 3, holding the
center image in their gaze.
When fusion occurs, they should be able to tell you
which of the circles pops out (inner or outer) and be
able to read the word ‘clear’ in the center of the circle.
How to alter for vertical deviation:
Offset the circles slightly to aid fusion if necessary. Try to decrease this offset over time.
Move the circles to a position of gaze where it is easier to fuse. Once fusion is attained, slowly
move the circles toward a position of gaze that is more difficult. Or use a head tilt to gain
fusion, and then slowly straighten the head.
If possible, incorporate head tilts, turns or rotations to the activity to provide an additional
challenge.
Perform the activity while standing, walking, or on a balance board or balance beam.
Lines (etc.) – You can draw two lines or shapes on a marker board or a piece of paper to fuse.
Offset the lines vertically to aid fusion if necessary. You can also rotate the lines into a diagonal
position if there is a cyclorotation noted.
Examples:
A fun target to free-space fuse is “find the difference” puzzles. The patient will see “luster” or
“blinking” in the areas that differ between the two images.
This can be done on-line at http://www.spotthedifference.com/practice.asp. The “Hard Level”
has moving targets to fuse! Movement is both horizontal and vertical, expanding fusion stability.
Draw a horizontal line on a board or use a horizontal edge in the room. Place your hand in front
of your nose with your arm extended straight. Look at your hand. Is the line straight, or is the
left or right side higher? What happens with a head tilt? Tilt head to align the left and right lines
and then work to gradually straighten head.
Vertical Strabismus Treatment Pearls Page 14
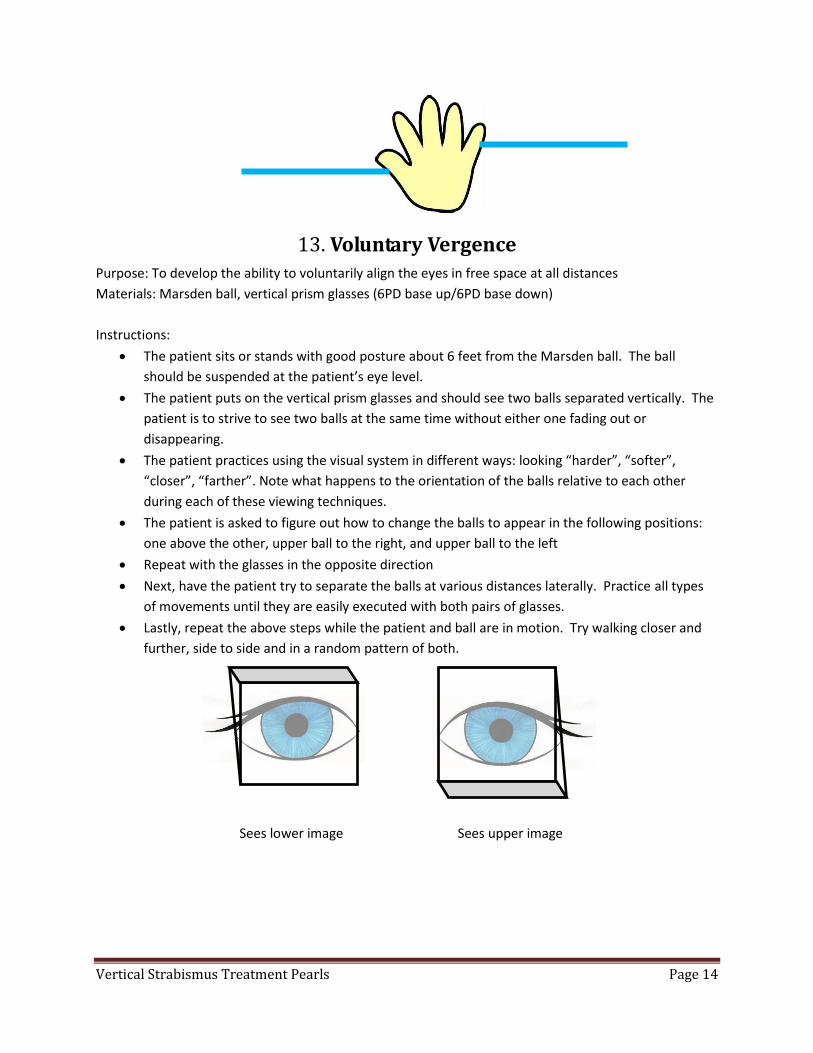
13. Voluntary Vergence Purpose: To develop the ability to voluntarily align the eyes in free space at all distances
Materials: Marsden ball, vertical prism glasses (6PD base up/6PD base down)
Instructions:
The patient sits or stands with good posture about 6 feet from the Marsden ball. The ball
should be suspended at the patient’s eye level.
The patient puts on the vertical prism glasses and should see two balls separated vertically. The
patient is to strive to see two balls at the same time without either one fading out or
disappearing.
The patient practices using the visual system in different ways: looking “harder”, “softer”,
“closer”, “farther”. Note what happens to the orientation of the balls relative to each other
during each of these viewing techniques.
The patient is asked to figure out how to change the balls to appear in the following positions:
one above the other, upper ball to the right, and upper ball to the left
Repeat with the glasses in the opposite direction
Next, have the patient try to separate the balls at various distances laterally. Practice all types
of movements until they are easily executed with both pairs of glasses.
Lastly, repeat the above steps while the patient and ball are in motion. Try walking closer and
further, side to side and in a random pattern of both.
Sees lower image Sees upper image