video capture of your missing loved ones using your...
TRANSCRIPT

Using Video Capture To Enhance The Search For
Missing Your Loved Ones
April 4, 2004Jim Violae-mail: [email protected] Site: http://patriciaviolamissing.homestead.com

2
AgendaAgendaI.I. Video Capture OverviewVideo Capture Overview
II.II. System Requirements System Requirements 1. Hardware1. Hardware2. Software2. Software
III.III. Utilizing Video Capture To Help Us Find Our Missing Utilizing Video Capture To Help Us Find Our Missing Loved OnesLoved Ones
IV.IV. The Video Capture Process The Video Capture Process
V.V. ReferencesReferences
VI.VI. Q & AQ & A

3
I. Video Capture OverviewI. Video Capture Overview
Defined as the cDefined as the conversion of analog onversion of analog video signals, such as video signals, such as those generated by a video camera, into a those generated by a video camera, into a digital format digital format and then and then storstorage of the digital age of the digital videovideo on a on a computer’s mass computer’s mass storage devicestorage device (hard drive). (hard drive).
Video capture from analog devices requires a special video Video capture from analog devices requires a special video capture card or box that converts the analog signals into capture card or box that converts the analog signals into digital form and compresses the digital form and compresses the datadata. .
Utilize your computer to manipulate the captured digital Utilize your computer to manipulate the captured digital video into your own video production.video into your own video production.
(Definition courtesy http://www.webopedia.com)(Definition courtesy http://www.webopedia.com)

4
II. System RequirementsII. System Requirements
1.1. HardwareHardware-- Personal Computer (PC) with minimum requirements:Personal Computer (PC) with minimum requirements:Pentium (or equivalent) PC @ 800 MHz, 256 MB RAM,Pentium (or equivalent) PC @ 800 MHz, 256 MB RAM,40 GB of free hard drive space (7200 RPM drive)40 GB of free hard drive space (7200 RPM drive)Microsoft Windows 98/ME/2000/XPMicrosoft Windows 98/ME/2000/XPFull Duplex Sound card with lineFull Duplex Sound card with line--in, high speed interface (USB in, high speed interface (USB or or FirewireFirewire))CD ROM and (CD or DVD Recordable Drive)CD ROM and (CD or DVD Recordable Drive)Video capture device, Internet AccessVideo capture device, Internet Access
-- Recommended PC Upgrades to above configurationRecommended PC Upgrades to above configurationPentium 4 (or equivalent) @ 2.0 GHz, 512 MB RAM, 250 GB Pentium 4 (or equivalent) @ 2.0 GHz, 512 MB RAM, 250 GB 7200 RPM separate hard drive (an hour of video captured in7200 RPM separate hard drive (an hour of video captured inDVD quality will approach 1.5 GB), High speed USB 2.0 Port,DVD quality will approach 1.5 GB), High speed USB 2.0 Port,Microsoft Windows 2000/XP which support files sizes over 4 GBMicrosoft Windows 2000/XP which support files sizes over 4 GB..

5
II. System Requirements (Cont)II. System Requirements (Cont)1.1. Hardware (Cont)Hardware (Cont)
-- Video Capture Device OptionsVideo Capture Device Options
-- Numerous choices ranging from $50 to $400 as described onNumerous choices ranging from $50 to $400 as described onhttp://www.dvdrhelp.com/capturecardshttp://www.dvdrhelp.com/capturecards depending on your depending on your operating system, PC hardware and application.operating system, PC hardware and application.
-- My choice is an External Capture Device, the My choice is an External Capture Device, the ADS Tech Instant ADS Tech Instant DVD 2.0DVD 2.0, which connects to the computer via the USB 2.0 port., which connects to the computer via the USB 2.0 port.
-- Available for as low as $150Available for as low as $150-- No need to customize computerNo need to customize computer-- Includes Includes Ulead’sUlead’s Video Studio 7 VCD/DVD Capture,Video Studio 7 VCD/DVD Capture,
Edit, Authoring & Burning Software For WinEdit, Authoring & Burning Software For Win98/ME/2000/XP98/ME/2000/XP
-- USB 2.0 & Audio/Video Cables ProvidedUSB 2.0 & Audio/Video Cables Provided-- Small Footprint (7”W x 4.5” deep x 1.5” H)Small Footprint (7”W x 4.5” deep x 1.5” H)

6
II. System Requirements (Cont)II. System Requirements (Cont)
1.1. Hardware (Cont)Hardware (Cont)
ADS Tech Instant DVD 2.0

7
II. System Requirements (Cont)II. System Requirements (Cont)
1.1. Hardware (Cont)Hardware (Cont)
Or VCR Input
Output to computer via USB 2.0
(Not to scale)
ADS Tech Instant DVD 2.0
Simplified Interconnect to the Computer
VCR Input
(not to scale)
Scanner (Optional)
Color Printer
Sony DRX-510UL DVD±RW/R Drive
(Optional)
USB 2.0 or
Firewire
Possible InputsDigital Camcorder Input

8
II. System Requirements (Cont)II. System Requirements (Cont)
2. 2. SoftwareSoftwareEssentialEssential-- Microsoft Windows 2000 or XPMicrosoft Windows 2000 or XP -- PreferredPreferred
-- UleadUlead Video Studio 7 or equivalentVideo Studio 7 or equivalent ( Provided with Capture Device)( Provided with Capture Device)-- Full DVD Authoring SoftwareFull DVD Authoring Software-- Capture Video, Edit Video and Burn Capture Video, Edit Video and Burn VCDsVCDs & DVDs (Burner & DVDs (Burner Req’dReq’d))
Optional But Important Support SoftwareOptional But Important Support Software-- Paint Shop Pro 8.0 or equivalentPaint Shop Pro 8.0 or equivalent –– To Edit Scanned & Digital ImagesTo Edit Scanned & Digital Images
and convert between file types (i.e. .BMP, .TIF or .JPEG)and convert between file types (i.e. .BMP, .TIF or .JPEG)
-- Easy CD Creator 7.0Easy CD Creator 7.0 –– CD/DVD Burning from an image file, ConvertCD/DVD Burning from an image file, ConvertLPs & cassettes to .LPs & cassettes to .WAVandWAVand .MP3 sound files, Play & Edit Sound files,.MP3 sound files, Play & Edit Sound files,Create CD or DVD backups of your data and audio, & create Create CD or DVD backups of your data and audio, & create CD/DVD Labels. CD/DVD Labels.

9
III. Utilizing Video Capture To Help Us III. Utilizing Video Capture To Help Us Find Our Missing Loved OnesFind Our Missing Loved Ones
Why Use Video Capture?Why Use Video Capture?-- Added Dimension of CommunicationAdded Dimension of Communication
-- More Powerful than only Photos on FlyersMore Powerful than only Photos on Flyers-- Introduction Video to Tell Your Story (Tape yourself)Introduction Video to Tell Your Story (Tape yourself)-- Insert Videos of your loved ones to show their mannerismsInsert Videos of your loved ones to show their mannerisms
and hear their voiceand hear their voice-- Insert Photos of your loved onesInsert Photos of your loved ones-- Insert scanned images of maps, jewelry worn, & clothing wornInsert scanned images of maps, jewelry worn, & clothing worn-- Use Overlay to Insert Videos, Titles & Images over Videos forUse Overlay to Insert Videos, Titles & Images over Videos for
EmphasisEmphasis-- Insert Descriptive Titles Insert Descriptive Titles -- Add “Voice Over” to narrate the video or add music if you likAdd “Voice Over” to narrate the video or add music if you likee-- Add a Scene Selection Menu to “Jump” to a Scene & TransitionsAdd a Scene Selection Menu to “Jump” to a Scene & Transitions
Between ScenesBetween Scenes-- Add TV news storiesAdd TV news stories
10
III. Utilizing Video Capture To Help III. Utilizing Video Capture To Help Us Find Our Missing Loved Ones (Cont)Us Find Our Missing Loved Ones (Cont)
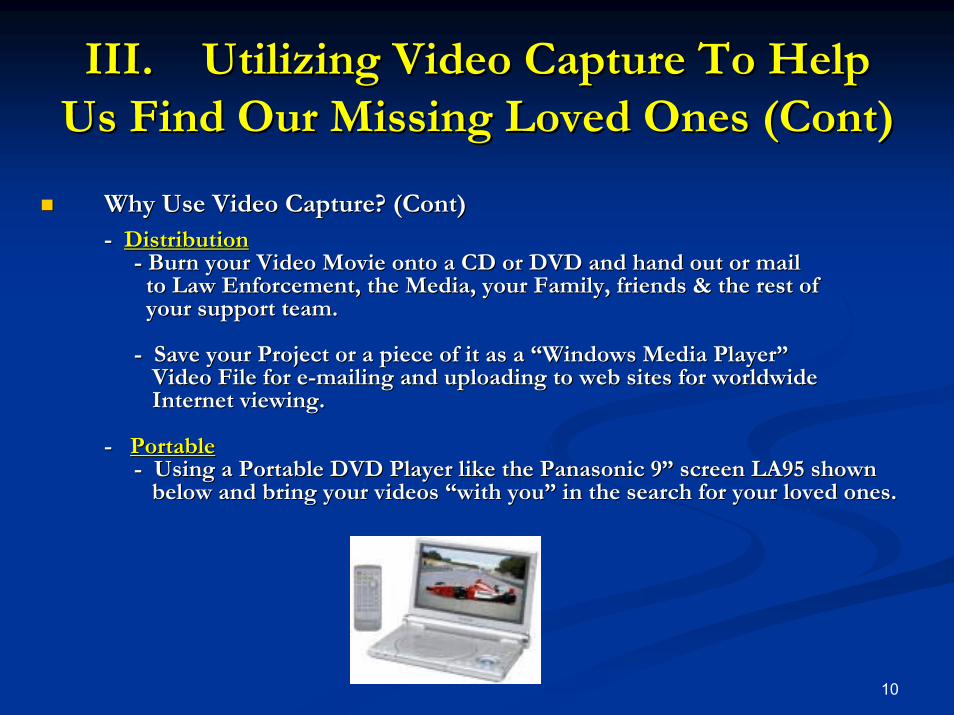
Why Use Video Capture? (Cont)Why Use Video Capture? (Cont)-- DistributionDistribution
-- Burn your Video Movie onto a CD or DVD and hand out or mailBurn your Video Movie onto a CD or DVD and hand out or mailto Law Enforcement, the Media, your Family, friends & theto Law Enforcement, the Media, your Family, friends & the rest of rest of your support team.your support team.
-- Save your Project or a piece of it as a “Windows Media Player”Save your Project or a piece of it as a “Windows Media Player”Video File for eVideo File for e--mailing and uploading to web sites for worldwidemailing and uploading to web sites for worldwideInternet viewing.Internet viewing.
-- PortablePortable-- Using a Portable DVD Player like the Panasonic 9” screen LA95 Using a Portable DVD Player like the Panasonic 9” screen LA95 shownshown
below and bring your videos “with you” in the search forbelow and bring your videos “with you” in the search for your loved ones. your loved ones.

11
IV. The Video Capture ProcessIV. The Video Capture ProcessVideo Capture Setup TipsVideo Capture Setup Tips-- The Video Capture Process is The Video Capture Process is very demandingvery demanding on youron your
computer’s resources.computer’s resources.
-- Before starting the capture process:Before starting the capture process:-- Close all unnecessary applications.Close all unnecessary applications.
-- Shut off all other devices such as USB scanners whichShut off all other devices such as USB scanners whichmay interfere with a USB Capture Device.may interfere with a USB Capture Device.
-- In Control Panel, Sound and Audio Devices, On theIn Control Panel, Sound and Audio Devices, On theAudio tab, Sound Playback Volume, Audio tab, Sound Playback Volume, MuteMute all Masterall MasterVolume mixer settings Volume mixer settings except your “Line In” except your “Line In” to reduceto reduceecho. echo.
-- All subsequent Video Capture screens utilize All subsequent Video Capture screens utilize Ulead’sUlead’sVideo Studio Version 6. Other Software packages will Video Studio Version 6. Other Software packages will be similar.be similar.

12
IV. The Video Capture Process (Cont)IV. The Video Capture Process (Cont)
Video Studio’s Startup screen – Open an existing project or start a new project

13
IV. The Video Capture Process (Cont)IV. The Video Capture Process (Cont)
Setup a New Project for NTSC DVD & Select Working Directory you will use to sore the captured data on your computer’s hard drive.

14
IV. The Video Capture Process (Cont)IV. The Video Capture Process (Cont)
Ready VCR with Tape. Select Capture, Press Play on VCR. Capture starts.

15
IV. The Video Capture Process (Cont)IV. The Video Capture Process (Cont)
Press ESC key to Stop Capture. Clip saved on HD & in the Video Library. Select Storyboard Mode. Select Video Clip on Video Track. Drag handles in
Preview Window to Select Desired Video. Click Save Trimmed Video.

16
IV. The Video Capture Process (Cont)IV. The Video Capture Process (Cont)
Storybook Mode. Clicked Green button on bottom left for storybook mode. Deleted original captured Clip from project on bottom & dragged desired clip plus
two other existing video clips from the library to our project.

17
IV. The Video Capture Process (Cont)IV. The Video Capture Process (Cont)
Effect Mode. Use pull-down on right to select a scene transition. Drag & Drop it between the desired clips.
18
IV. The Video Capture Process (Cont)IV. The Video Capture Process (Cont)
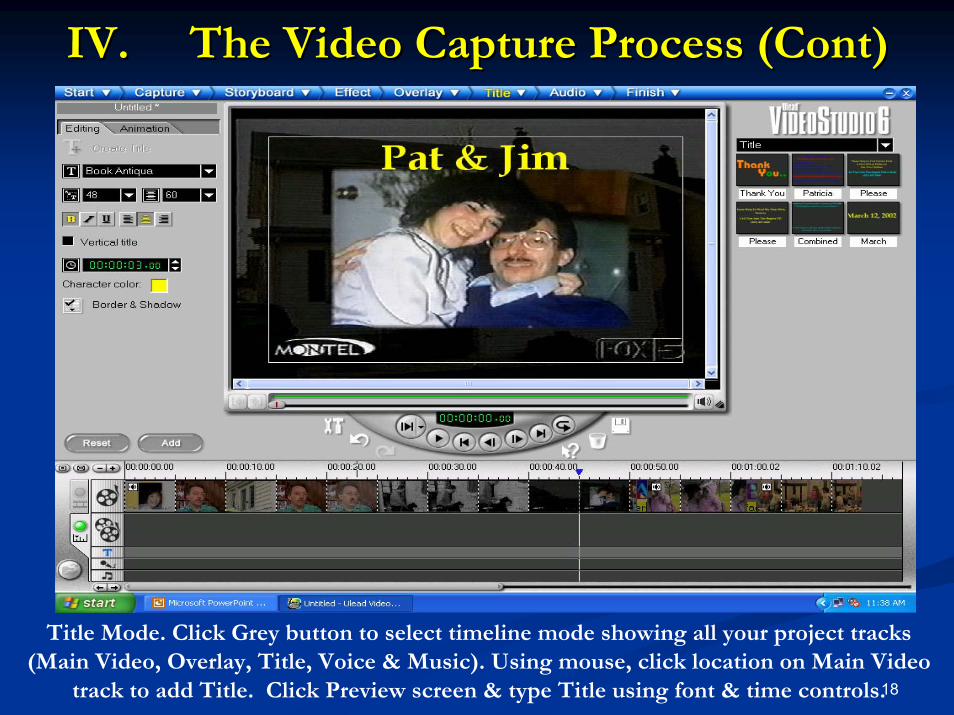
Title Mode. Click Grey button to select timeline mode showing all your project tracks (Main Video, Overlay, Title, Voice & Music). Using mouse, click location on Main Video
track to add Title. Click Preview screen & type Title using font & time controls.

19
IV. The Video Capture Process (Cont)IV. The Video Capture Process (Cont)
Title Mode. Click Add. Note Title added to Title Track, denoted with a “T”. Click the Zoom button to expand the timeline. Drag right side of selected title to increase time.

20
IV. The Video Capture Process (Cont)IV. The Video Capture Process (Cont)
To import an image, go to Storybook. Click on Image on the Library. Click to Folder to select an image from your HD. Click Open to add to the Library. Switch Project to
Storybook mode & drag the new image to the project (Main Video or OverlayTrack) just like a video clip. Click image & set length of time shown.

21
IV. The Video Capture Process (Cont)IV. The Video Capture Process (Cont)
Adding Audio (.MP3 or .WAV) is similar. Select Audio on top and in Library. Import if necessary and drag to the music track. Voice Over recording also performed here and
dragged to Voice track. Volume and time controls available. Click Floppysymbol to save your project. Audio, entire project & each Clip can be previewed.

22
IV. The Video Capture Process (Cont)IV. The Video Capture Process (Cont)
Putting it all together. Click Finish & Select NTSC DVD to create a DVD video file. Type in a title for the video file. For a Windows Media Player File, select Custom, then save as file type, “Windows Media
Video”. The rendering process, piecing together all the clips, results in a .MPG video file created & copied into the Library. Other options are Video CD (VCD) to be burned on a standard CD.

23
IV. The Video Capture Process (Cont)IV. The Video Capture Process (Cont)
While still in Finish Mode, click to select the New Video File created. Click Export & Select the Ulead DVD Wizard to prepare setup the DVD Burning Process. After the Export, the DVD Wizard opens. DVD will be selected & the Creation Scene selection Menu will be selected. Deselect for no
scenes. Click Next to continue.

24
IV. The Video Capture Process (Cont)IV. The Video Capture Process (Cont)
Select Add Introduction Video if you had already created it. Setup the scenes by accepting the pre-selected ones or add your own by selecting the times. The next page allows you to name the scenes and choose your background. You can always go back & update. Click Next to create scene names.
25
IV. The Video Capture Process (Cont)IV. The Video Capture Process (Cont)
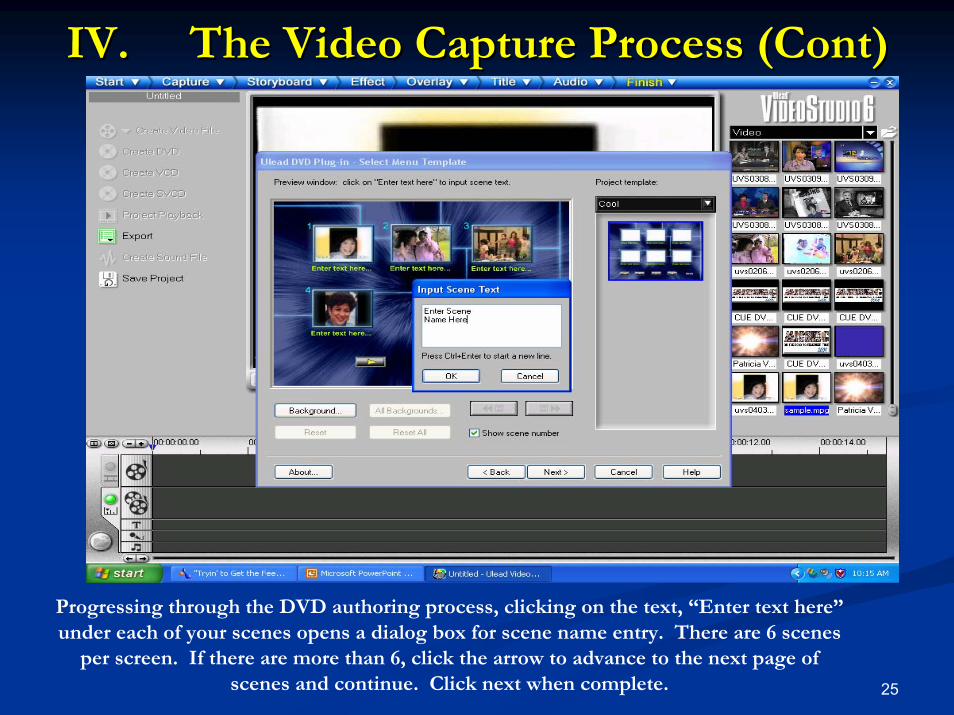
Progressing through the DVD authoring process, clicking on the text, “Enter text here” under each of your scenes opens a dialog box for scene name entry. There are 6 scenes
per screen. If there are more than 6, click the arrow to advance to the next page of scenes and continue. Click next when complete.

26
IV. The Video Capture Process (Cont)IV. The Video Capture Process (Cont)
Select a scene by clicking it with your mouse and use the simulated remote to Playback your scene. Click next when complete.

27
IV. The Video Capture Process (Cont)IV. The Video Capture Process (Cont)
Almost done. Select Output and Working Folder on your hard drive and confirm the CD recorder selected. Click next.
28
IV. The Video Capture Process (Cont)IV. The Video Capture Process (Cont)
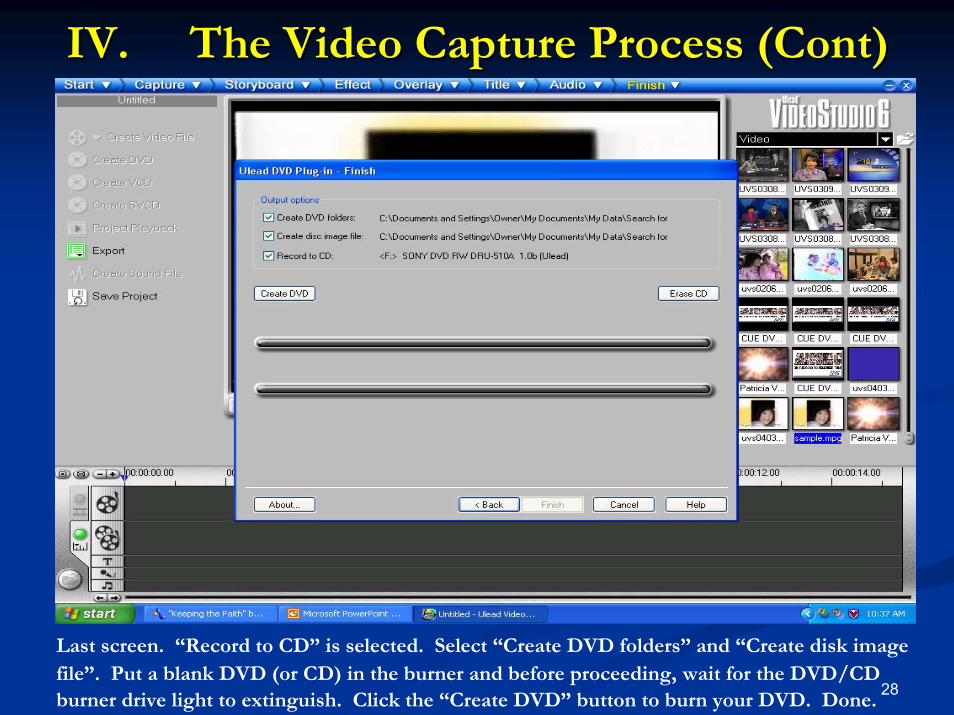
Last screen. “Record to CD” is selected. Select “Create DVD folders” and “Create disk image file”. Put a blank DVD (or CD) in the burner and before proceeding, wait for the DVD/CD burner drive light to extinguish. Click the “Create DVD” button to burn your DVD. Done.
29
IV. The Video Capture Process (Cont)IV. The Video Capture Process (Cont)
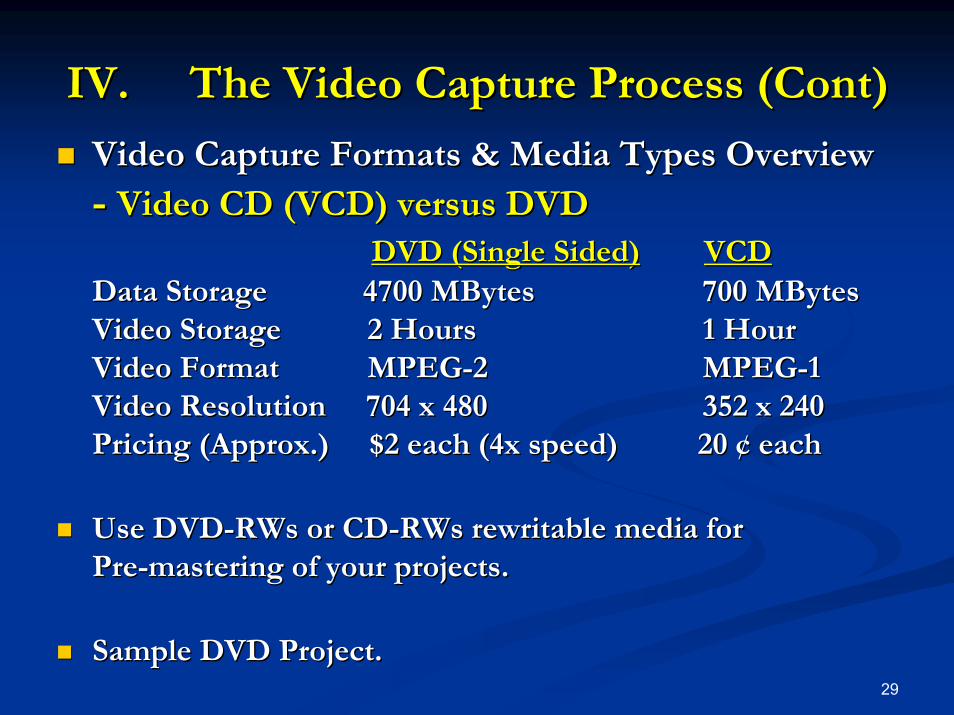
Video Capture Formats & Media Types OverviewVideo Capture Formats & Media Types Overview
-- Video CD (VCD) versus DVDVideo CD (VCD) versus DVDDVDDVD (Single Sided)(Single Sided) VCDVCD
Data Storage 4700 Data Storage 4700 MBytesMBytes 700 700 MBytesMBytesVideo StorageVideo Storage 2 Hours2 Hours 1 Hour1 HourVideo FormatVideo Format MPEGMPEG--2 2 MPEGMPEG--11Video Resolution 704 x 480 Video Resolution 704 x 480 352 x 240 352 x 240 Pricing (Approx.) $2 each (4x speed) 20 ¢ each Pricing (Approx.) $2 each (4x speed) 20 ¢ each
Use DVDUse DVD--RWsRWs or CDor CD--RWsRWs rewritable media for rewritable media for PrePre--mastering of your projects. mastering of your projects.
Sample DVD Project.Sample DVD Project.

30
V. ReferencesV. References
Download this presentation from:Download this presentation from:http://patriciaviolamissing.homestead.com/videocapture.pdfhttp://patriciaviolamissing.homestead.com/videocapture.pdf
The InternetThe Internet-- http://www.dvdrhelp.comhttp://www.dvdrhelp.com-- http://www.webopedia.comhttp://www.webopedia.com-- http://http://www.adstech.comwww.adstech.com-- http://http://www.ulead.comwww.ulead.com
Send me an eSend me an e--mail, mail, [email protected]@att.net

31
VI. Q & AVI. Q & A
Thank You