volume 15: breaching the necromancer’s gate · pineleaf’s pictorial primer to skirmishing...
TRANSCRIPT
Pineleaf’s Pictorial Primer to Skirmishing
Version 1.0 Volume 15: Breaching the Necromancer’s Gate Page | 1
Pineleaf’s Pictorial Primer to Skirmishing
Volume 15: Breaching the Necromancer’s Gate
By Pineleaf Needles for A Casual Stroll to Mordor
http://www.casualstrolltomordor.com
Pineleaf’s Pictorial Primer to Skirmishing
Version 1.0 Volume 15: Breaching the Necromancer’s Gate Page | 2
Contents Pineleaf’s Pictorial Primer to Skirmishing ..................................................................................................... 1
Volume 15: Breaching the Necromancer’s Gate .......................................................................................... 1
Introduction .............................................................................................................................................. 3
Summary ................................................................................................................................................... 5
Skirmish Mark Awards (Level 65/75) .................................................................................................... 5 Layout........................................................................................................................................................ 6
Start of Skirmish .................................................................................................................................... 6 Control Points ........................................................................................................................................... 6
Control Point 1: First Ward (14 SM) ...................................................................................................... 6 Control Point 2: Second Ward (22 SM) ................................................................................................. 7 Control Point 3: Third Ward (22 SM) .................................................................................................... 8 Control Point 4: Fourth Ward (29 SM) .................................................................................................. 8 Control Point 5: Sorcerer’s Ascent (37 SM) .......................................................................................... 9 Control Point 6: The Necromancer’s Gate (44 SM) .............................................................................. 9
Opponents .............................................................................................................................................. 10
Abilities ............................................................................................................................................... 11 Warg Riders ......................................................................................................................................... 11 Orcs ..................................................................................................................................................... 12 Sorcerers ............................................................................................................................................. 13
Lieutenants ............................................................................................................................................. 14
Doraz (The General) ................................................................................................................................ 15
Encounters .............................................................................................................................................. 15
Lavalúg ................................................................................................................................................ 16 Gortag ................................................................................................................................................. 17 Firingúl ................................................................................................................................................ 18 Murúk .................................................................................................................................................. 19 Annoniel .............................................................................................................................................. 20 Thrângund ........................................................................................................................................... 21 Morgúr ................................................................................................................................................ 22 Agardúr ............................................................................................................................................... 23 Grishglok ............................................................................................................................................. 24
Variations ................................................................................................................................................ 25
Level .................................................................................................................................................... 25 Tier ...................................................................................................................................................... 26 Player Group Size ................................................................................................................................ 26
Deeds ...................................................................................................................................................... 27
Quests ..................................................................................................................................................... 27
Pineleaf’s Pictorial Primer to Skirmishing
Version 1.0 Volume 15: Breaching the Necromancer’s Gate Page | 3
Introduction Welcome to Pineleaf’s Pictorial Primer to Skirmishing. In this series, we will look at each of the
skirmishes you can run in The Lord of the Rings Online™. In this 15th volume, we will take a look at the
first of three skirmishes set in Dol Guldur: Breaching the Necromancer’s Gate.
In this series, we will look at each skirmish in turn, including its scenario, layout, mobs, bosses, and
encounters. While I discuss the lieutenants you will be facing, I will leave any detailed descriptions for
them in Appendix A of this Primer.
As of this writing I have only played this skirmish with a lore-master and a warden. My wardens run with
an archer and my lore-master runs with a protector.
Note that values given in this volume are based on a level-75 run. Prior volumes of this primer were
based on a level-65 run, so morale values will be significantly higher than those in earlier volumes.
Acknowledgements: Thanks to The Council of Secret Fire on Landroval and The House of Blackrock on
Windfola for their support in testing these skirmishes in group modes.
Pineleaf Needles
Follow the latest LotRO news at A Casual Stroll to Mordor at http://www.casualstrolltomordor.com
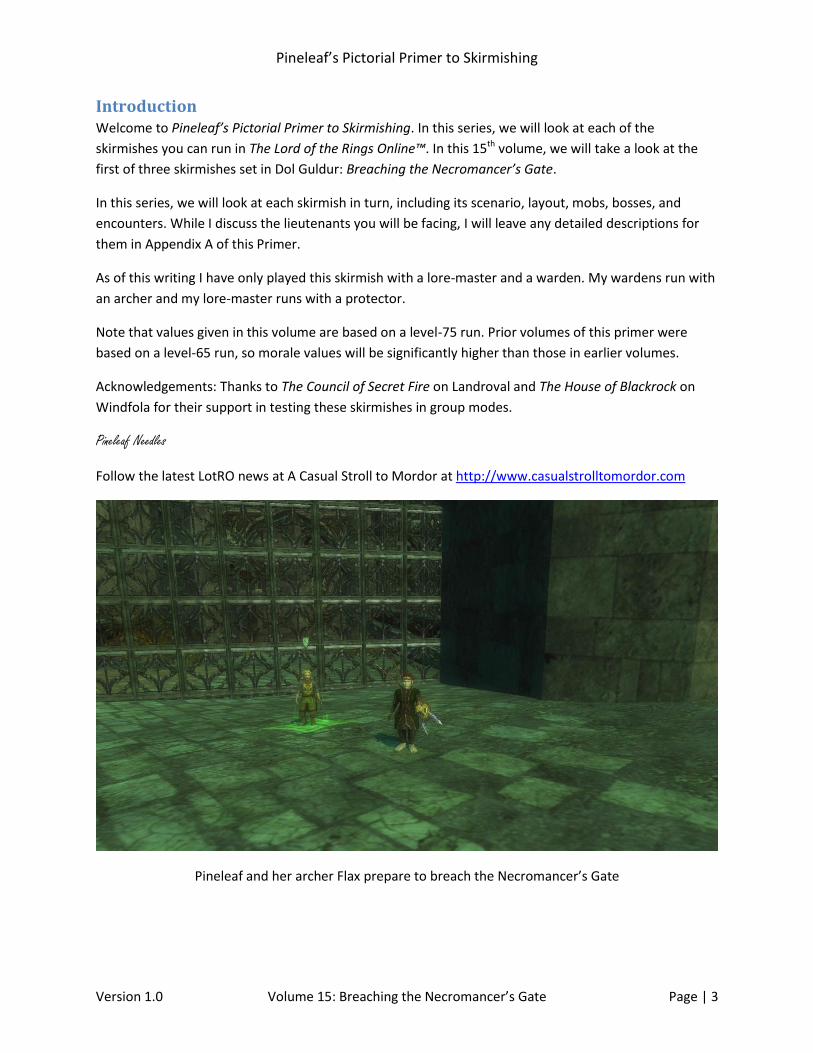
Pineleaf and her archer Flax prepare to breach the Necromancer’s Gate

Pineleaf’s Pictorial Primer to Skirmishing
Version 1.0 Volume 15: Breaching the Necromancer’s Gate Page | 4
Skirmish Specifications Name: Beaching the Necromancer’s Gate
Scenario: Dol Guldur is a labyrinth of tight hallways and open courtyards. The Necromancer's Gate marks the entry into the heart of the fortress....
Type: Offensive
Level Range: 60-75
Availability: Free; Unlocked during Epic 2.9.15
Allowed Group Sizes: Solo, Duo, Small Fellowship, Fellowship, and Raid
Tiers: 1-3
Location: Dol Guldur, Mirkwood
Reputation: Malledhrim
Control Points: 6
Opponents: Orcs, sorcerers, warg riders
Enemy Group Size: Solo 2 Hale
Duo/Small fellowship 1 Strong + 1 Hale
Fellowship 1 Strong + 5 Hale
Raid 1 Staunch + 4 Hardy
Available Lieutenants: 10 solo; 7 duo+; 9 at fellowship+
Lieutenant Count: 12 (15 opportunities with a 80% chance)
Defenders: None
Encounters: 9; Breacher of the Necromancer’s Gate
SM @ Level 75: 196 (168 CP; 0 defenders; 28 encounters)
Experience Rating: 100
Solo Run Time: 25 minutes
Campaign: Cannuilan
Features: Stairs
Consumables: Standard food; Fear food and potions
Damage Types: Light (orcs); Westernesse (sorcerers)

Pineleaf’s Pictorial Primer to Skirmishing
Version 1.0 Volume 15: Breaching the Necromancer’s Gate Page | 5
Summary Breaching the Necromancer’s Gate is the first of three skirmishes set in Dol Guldur. This skirmish is very
similar to Thievery and Mischief: there are multiple groups at several control point and there are no
defenders. They even both have the same number of control points.
As the names implies, Breaching the Necromancer’s Gate involves fighting your way through the
defenses of Dol Guldur in an effort to reach one of its key gates.
The object of this skirmish is to defeat the enemy forces at each control point and then take the control
point. When you capture a control point, you open the way to the next control point. In addition, the
enemy forces will launch one or two counterattacks. Unlike many other skirmishes, there are no
defenders to help you during the counterattacks.
Your opponents will mainly be orcs, sorcerers, and warg riders. In addition, you will face an array of
lieutenants. The encounters are scattered throughout the area and are often summoned by interacting
with objects.
Skirmish Mark Awards (Level 65/75)
L65 Marks L75 Marks
10 14 First Ward
16 22 Second Ward
16 22 Third Ward
21 29 Fourth Ward
26 37 Sorcerer’s Ascent
32 44 Necromancer’s Gate (Boss Fight)
20 28 Two Encounters
141 196 Total

Pineleaf’s Pictorial Primer to Skirmishing
Version 1.0 Volume 15: Breaching the Necromancer’s Gate Page | 6
Layout
Start of Skirmish
When you first enter the skirmish, you are within Dol Guldur facing Goldagnir. He explains your mission.
“It is time to begin the final assault of the fortress. The first step is to capture these outer defences. If you can push forward and claim the Necromancer's Gate, then the heart of Dol Guldur will be opened for our forces. This mission cannot fail. Without the Gate, Dol Guldur stands unassailable. Fight with strength and honour!”
Naturally, he does not join you.
When you consider the scenario, it is quite absurd as a solo skirmish. Why would they send only two
people to assail the gate? I always imagine it to be a stealth mission (get the gates open so that the main
force can pour in). This loses its credibility when you consider the presence of the fell beast.
Control Points Breaching the Necromancer’s Gate is divided into six sections: four wards, the Sorcerer’s Ascent, and the
Necromancer’s Gate itself. Each of these sections includes a single control point.
You will generally face multiple groups of mobs at each control point. These opponents tend to be
scattered about and several have wide patrol areas. The gates to progress to the next section are
opened when you fend off the counterattacks at the first two control points and when you capture the
flag at the remaining control points.
Control Point 1: First Ward (14 SM)
The First Ward is reached by climbing a set of stairs that is to your right at the start of the skirmish. Most of your opponents will be at the top level, though some occasionally patrol down the stairs. You will face two groups of mobs in the First Ward. When you take the control point, a fell beast will fly overhead, followed by a single counterattack.
Pineleaf’s Pictorial Primer to Skirmishing
Version 1.0 Volume 15: Breaching the Necromancer’s Gate Page | 7
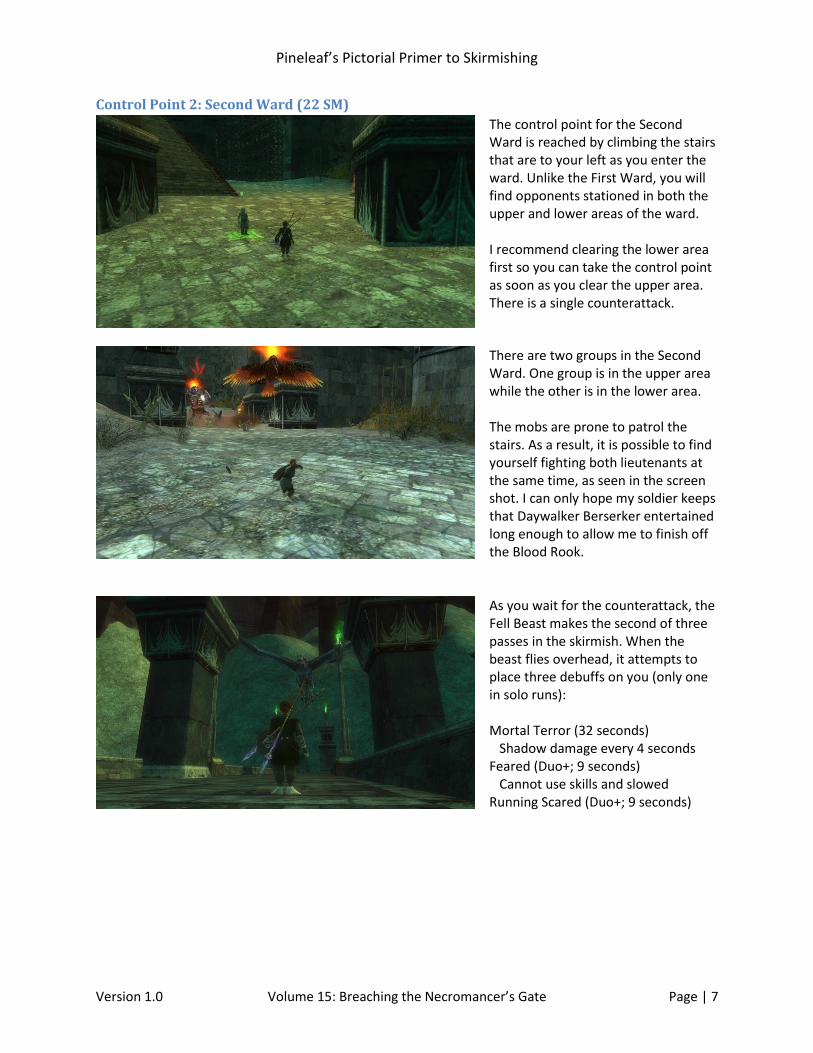
Control Point 2: Second Ward (22 SM)
The control point for the Second Ward is reached by climbing the stairs that are to your left as you enter the ward. Unlike the First Ward, you will find opponents stationed in both the upper and lower areas of the ward. I recommend clearing the lower area first so you can take the control point as soon as you clear the upper area. There is a single counterattack.
There are two groups in the Second Ward. One group is in the upper area while the other is in the lower area. The mobs are prone to patrol the stairs. As a result, it is possible to find yourself fighting both lieutenants at the same time, as seen in the screen shot. I can only hope my soldier keeps that Daywalker Berserker entertained long enough to allow me to finish off the Blood Rook.
As you wait for the counterattack, the Fell Beast makes the second of three passes in the skirmish. When the beast flies overhead, it attempts to place three debuffs on you (only one in solo runs): Mortal Terror (32 seconds) Shadow damage every 4 seconds Feared (Duo+; 9 seconds) Cannot use skills and slowed Running Scared (Duo+; 9 seconds)
Pineleaf’s Pictorial Primer to Skirmishing
Version 1.0 Volume 15: Breaching the Necromancer’s Gate Page | 8
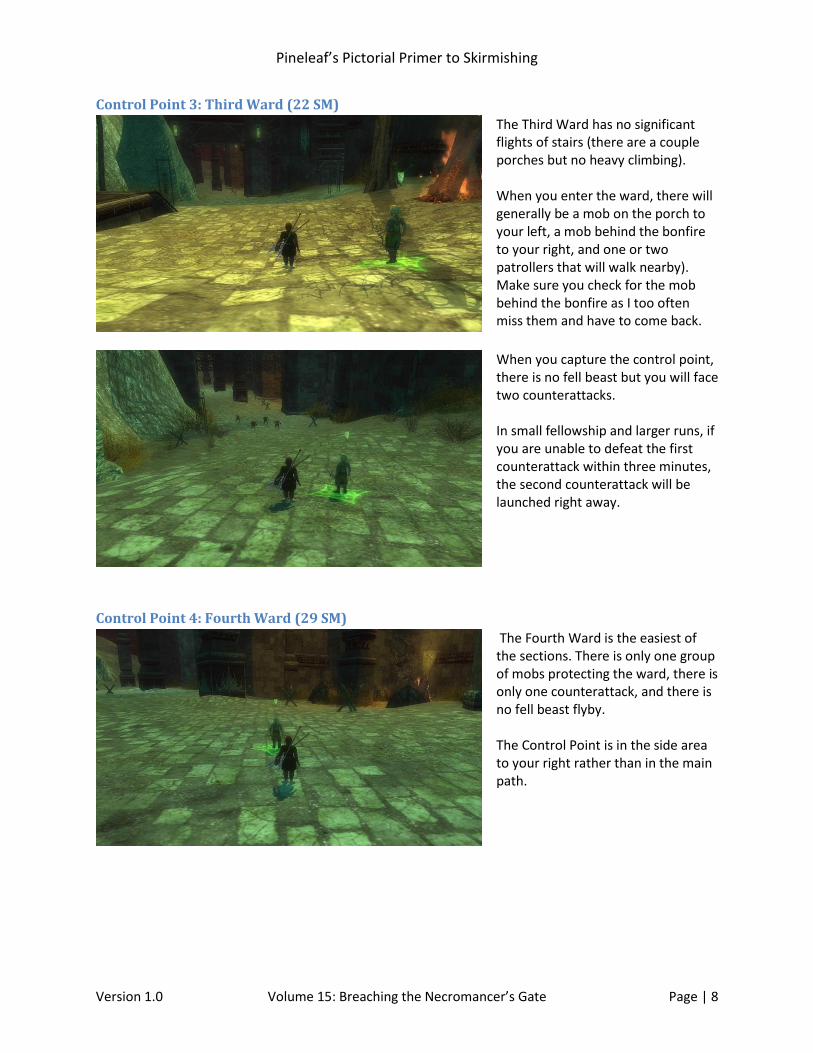
Control Point 3: Third Ward (22 SM)
The Third Ward has no significant flights of stairs (there are a couple porches but no heavy climbing). When you enter the ward, there will generally be a mob on the porch to your left, a mob behind the bonfire to your right, and one or two patrollers that will walk nearby). Make sure you check for the mob behind the bonfire as I too often miss them and have to come back.
When you capture the control point, there is no fell beast but you will face two counterattacks. In small fellowship and larger runs, if you are unable to defeat the first counterattack within three minutes, the second counterattack will be launched right away.
Control Point 4: Fourth Ward (29 SM)
The Fourth Ward is the easiest of the sections. There is only one group of mobs protecting the ward, there is only one counterattack, and there is no fell beast flyby. The Control Point is in the side area to your right rather than in the main path.

Pineleaf’s Pictorial Primer to Skirmishing
Version 1.0 Volume 15: Breaching the Necromancer’s Gate Page | 9
Control Point 5: Sorcerer’s Ascent (37 SM)
The stairs you see in the screen shot lead to two encounters. You will not need to use them to complete the skirmish. The Sorcerer’s Ascent is a hill that leads from the Fourth Ward to the Necromancers’ Gate. It is lightly populated with only a single group guarding it.
While capturing the control point is easy, the counterattack is the toughest in the skirmish. The fell beast flies overhead when you capture the control point, after which you face two counterattacks. In solo runs, I generally stand back away from the gate and start each counterattack at my own pace.
Control Point 6: The Necromancer’s Gate (44 SM)
As you climb the hill to the Necromancer’s Gate, a troll named Doraz arrives to block your way. The fight is straightforward with no adds (at least none in Fellowship and smaller settings). What, you wanted revenge on that fell beast? Don’t worry, you will get your chance in the next skirmish (Assault on the Ringwraiths’ Lair).

Pineleaf’s Pictorial Primer to Skirmishing
Version 1.0 Volume 15: Breaching the Necromancer’s Gate Page | 10
Opponents There are three types of basic opponents that you face while breaching the gate: orcs, sorcerers, and
warg riders.
Each group you face consists of a number of mob points given on the table below. The number of mob
points depends on the fellowship size setting for the skirmish run. Breaching the Necromancer’s Gate
has a high mob density in full fellowship runs but a fairly average density in other group sizes.
Number of Players Mob Points Possible Setup Mob Types
Solo 4 2 Hale; 1 Hale + 2 Weak Weak, Hale
Duo / Small Fellow 10 2 Hardy + 1 Hale Hale, Hardy, Strong
Fellowship 18 1 Strong + 5 Hale Hale, Hardy, Strong
Raid (12) 32 1 Staunch + 4 Hardy Hardy, Strong, Staunch
Just what is a mob point? A mob point is the equivalent of one weak (swarm) opponent. You will not
face 32 swarm enemies in a raid but will instead face a smaller number of tougher opponents. The
number of points for each opponent is given on the table below.
Skirmish designation Quality Mob points
Weak Swarm 1
Hale Normal 2
Hardy Signature 4
Strong Elite 8
Staunch Elite Master 16
Each control point in the skirmish (except the Necromancer’s Gate) is defended by one or more groups.
Each counterattack consists of one group.
Lieutenants are not part of this cost. In this skirmish, each group (whether defending a control point or
part of a counterattack) has a chance of including a single lieutenant.
The morale given for each opponent is for a level 75 hale opponent in a tier 1 solo run.
Pineleaf’s Pictorial Primer to Skirmishing
Version 1.0 Volume 15: Breaching the Necromancer’s Gate Page | 11
Abilities
In this skirmish, you will mainly face fear effects, though you will occasionally face other types as well.
Name Type Time Description
Blood Gift Healing Channel Heals every 3 seconds
Chilled Fear 20 sec Shadow damage every 4 seconds Continual Minor Renewal Buff Aura Heals morale every 4 seconds
Crippled Wound 52 sec -25% run speed
Deep Wound Wound 30 sec Common damage every 2 seconds
Distraught Fear 32 sec Shadow damage every 4 seconds
Fleet of Paw Buff Movement speed increased when high in morale
Fright Fear 3 min Penalty to Will and Fate
Furious Attack Corruption OOC Increased attack speed
Hamstring Wound 10 sec -50% run speed
Healing Healing Instant Restores morale of target
Knocked Down variable Cannot move or act
Major Fright Fright 4 min Penalty to Will and Fright
Minor Crippling Poison Poison 2 min Penalty to Agility
Minor Fright Fear 2 min Penalty to Will and Fate
Minor Poison Poison 12 sec Common damage every 3 seconds
Poison Poison 21 sec Common damage every 3 seconds
Poisoned Lethargy Poison 1m 20s +20% attack duration
Rage Buff 1 min +10% melee damage; +10% incoming melee damage
Renewal Healing 20 sec Restore morale every 4 seconds
Shadow’s Touch Fear 1m 30s -25% shadow mitigation
Shadow Vulnerability Fear 15 sec Penalty to Shadow Mitigation
Suppressed Fear Fear 20 sec Rooted and Silenced for 1 sec on expiration
Weakened Armour Wound 1 min Penalty to armor rating
Abilities in italics can appear on weak and hale trash mobs and are thus available in solo runs.
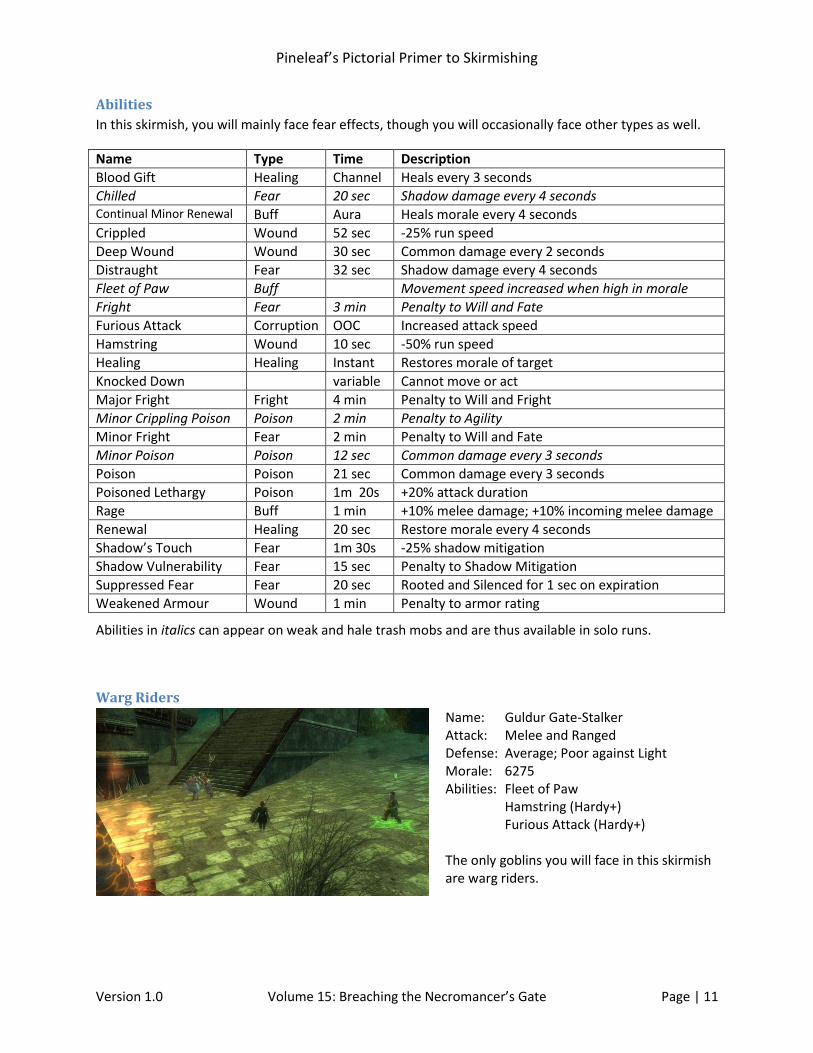
Warg Riders
Name: Guldur Gate-Stalker Attack: Melee and Ranged Defense: Average; Poor against Light Morale: 6275 Abilities: Fleet of Paw Hamstring (Hardy+) Furious Attack (Hardy+) The only goblins you will face in this skirmish are warg riders.

Pineleaf’s Pictorial Primer to Skirmishing
Version 1.0 Volume 15: Breaching the Necromancer’s Gate Page | 12
Orcs
You are in Dol Guldur, one of Sauron’s greatest strongholds. Of course you’ll run into a few orcs.
Name: Guldur Gate-Warden Attack: Melee Defense: Average; Weak vs Fire, Light, and Beleriand Morale: 6212 Abilities: Minor Crippling Poison Minor Poison Rage (Hardy+)
Name: Guldur Gate-Captain Attack: Melee Defense: Average; Weak vs Light Morale: 6432 Abilities: Aura: Combat Tactics (Hardy+) The presence of the aura does not appear to be consistent. It give a bonus to nearby orcs: -50% incoming ranged/tactical damage +50% melee damage
Name: Guldur Blood-Defiler Attack: Tactical Defense: Average; Weak vs Fire, Light, and Beleriand Morale: 6149 Abilities: Minor Poison Poison (Hardy+) Poisoned Lethargy (Hardy+) Renewal
Pineleaf’s Pictorial Primer to Skirmishing
Version 1.0 Volume 15: Breaching the Necromancer’s Gate Page | 13
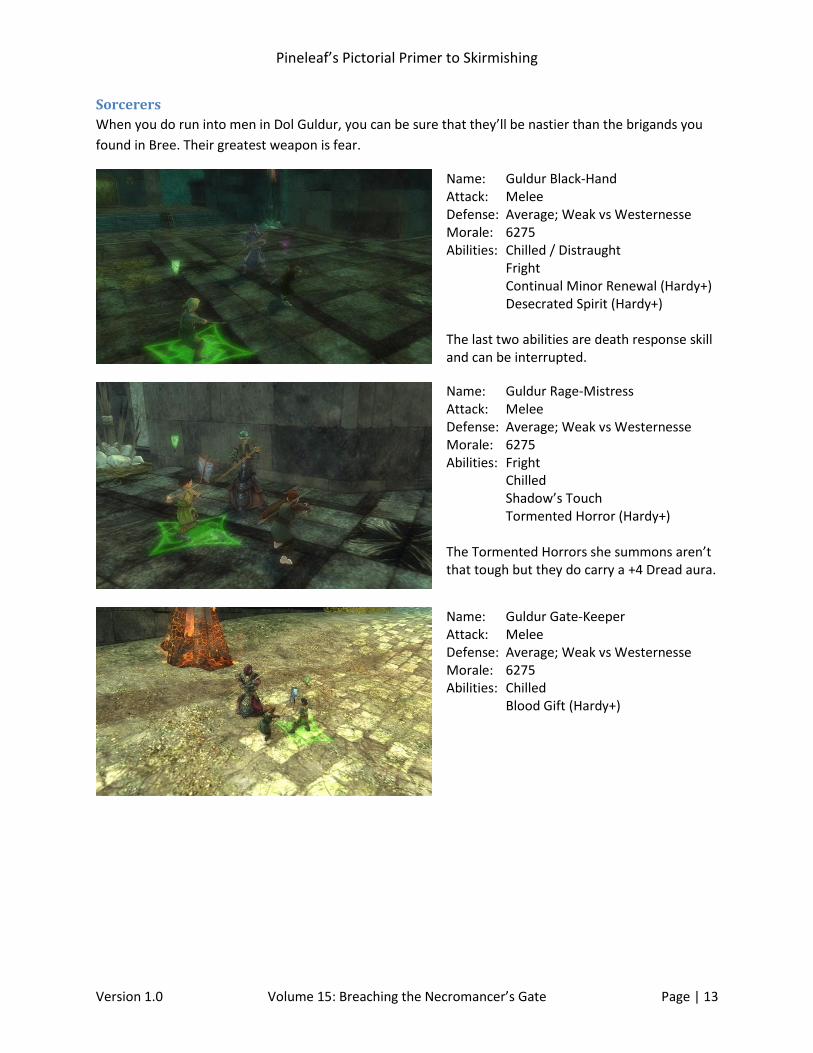
Sorcerers
When you do run into men in Dol Guldur, you can be sure that they’ll be nastier than the brigands you
found in Bree. Their greatest weapon is fear.
Name: Guldur Black-Hand Attack: Melee Defense: Average; Weak vs Westernesse Morale: 6275 Abilities: Chilled / Distraught Fright Continual Minor Renewal (Hardy+) Desecrated Spirit (Hardy+) The last two abilities are death response skill and can be interrupted.
Name: Guldur Rage-Mistress Attack: Melee Defense: Average; Weak vs Westernesse Morale: 6275 Abilities: Fright Chilled Shadow’s Touch Tormented Horror (Hardy+) The Tormented Horrors she summons aren’t that tough but they do carry a +4 Dread aura.
Name: Guldur Gate-Keeper Attack: Melee Defense: Average; Weak vs Westernesse Morale: 6275 Abilities: Chilled Blood Gift (Hardy+)
Pineleaf’s Pictorial Primer to Skirmishing
Version 1.0 Volume 15: Breaching the Necromancer’s Gate Page | 14
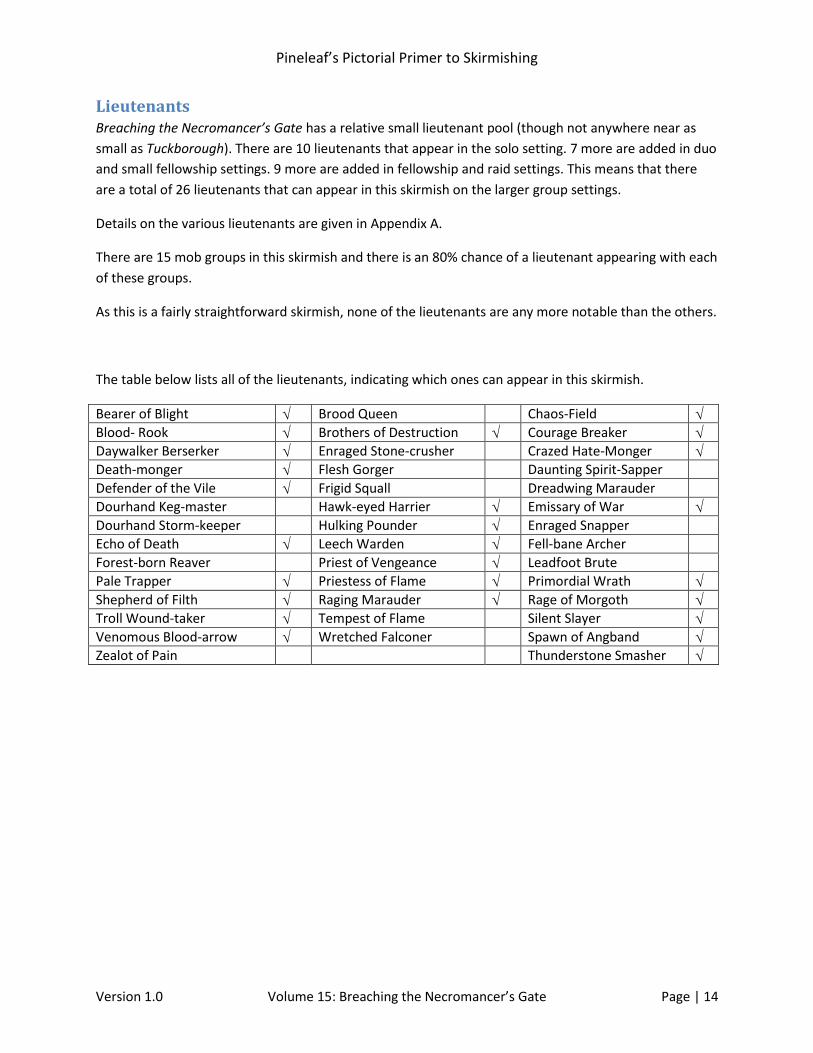
Lieutenants Breaching the Necromancer’s Gate has a relative small lieutenant pool (though not anywhere near as
small as Tuckborough). There are 10 lieutenants that appear in the solo setting. 7 more are added in duo
and small fellowship settings. 9 more are added in fellowship and raid settings. This means that there
are a total of 26 lieutenants that can appear in this skirmish on the larger group settings.
Details on the various lieutenants are given in Appendix A.
There are 15 mob groups in this skirmish and there is an 80% chance of a lieutenant appearing with each
of these groups.
As this is a fairly straightforward skirmish, none of the lieutenants are any more notable than the others.
The table below lists all of the lieutenants, indicating which ones can appear in this skirmish.
Bearer of Blight Brood Queen Chaos-Field Blood- Rook Brothers of Destruction Courage Breaker Daywalker Berserker Enraged Stone-crusher Crazed Hate-Monger Death-monger Flesh Gorger Daunting Spirit-Sapper
Defender of the Vile Frigid Squall Dreadwing Marauder
Dourhand Keg-master Hawk-eyed Harrier Emissary of War Dourhand Storm-keeper Hulking Pounder Enraged Snapper
Echo of Death Leech Warden Fell-bane Archer
Forest-born Reaver Priest of Vengeance Leadfoot Brute
Pale Trapper Priestess of Flame Primordial Wrath Shepherd of Filth Raging Marauder Rage of Morgoth Troll Wound-taker Tempest of Flame Silent Slayer Venomous Blood-arrow Wretched Falconer Spawn of Angband Zealot of Pain Thunderstone Smasher

Pineleaf’s Pictorial Primer to Skirmishing
Version 1.0 Volume 15: Breaching the Necromancer’s Gate Page | 15
Doraz (The General) Morale 15,060 Aura: Weakened Defenses Increases damage taken by 25% Take damage if you leave aura
When you open the combat, Doraz provides the understatement of the Third Age: “You do not belong
here!” He can hit pretty hard, mainly due to the effects of his aura. Despite this, In find him an easier
oppoennt than most of the encounter bosses.
While getting through the skirmsih appears to be a tougher version of Thievery and Mischief, I find the
boss fight to be significantly easier, especially in group runs. Perhaps there’s a nasty surprise waiting for
when you run in a raid but you’ll have an easy fight in lower settings.
Encounters Each time you run a skirmish, the game selects two encounters that are available. The selected
encounters become active when you perform their triggering actions.
There are a total of nine encounters in Breaching the Necromancer’s Gate. As with other offensive
skirmishes, the encounter bosses in this skirmish are all elite in solo runs.
Each encounter is triggered through defeating the final counterattack at a control point. Four of the
bosses are in out-of-the-way locations while the other five are summoned by interacting with objects.
They can all be avoided.
The morale given for each encounter boss is at level 75 in a tier 1 solo setting.

Pineleaf’s Pictorial Primer to Skirmishing
Version 1.0 Volume 15: Breaching the Necromancer’s Gate Page | 16
Lavalúg
When this encounter is active, you will find a slab of aurochs meat next to the fire you see as you enter the Second Ward. Taking this slab generates the following message: “A screech comes from outside the walls. Something wants to be fed.” If you are crazy enough to want to feed this beast, take the slab to the platform near the control point.
When you do this, you get the final message: “A roar echoes through Dol Guldur. Dinner has been served.” Naturally, since you were carrying that steak all over the ward, you will smell just like the drake’s dinner. Have a nice fight. I recommend that you don’t feed the beast until after you fight off the counterattack.
Name: Lavalúg Type: Fire Drake Trigger: Fending off the counterattack in the First Ward. Text: A slab of aurochs-meat is sizzling next to the fire ahead. Location: Near Second Ward control point (13.9S, 43.5W). Morale: 28,519 Abilities: Distraught Major Fright Aura: Blistering Heat Burning Flames
Pineleaf’s Pictorial Primer to Skirmishing
Version 1.0 Volume 15: Breaching the Necromancer’s Gate Page | 17
Gortag
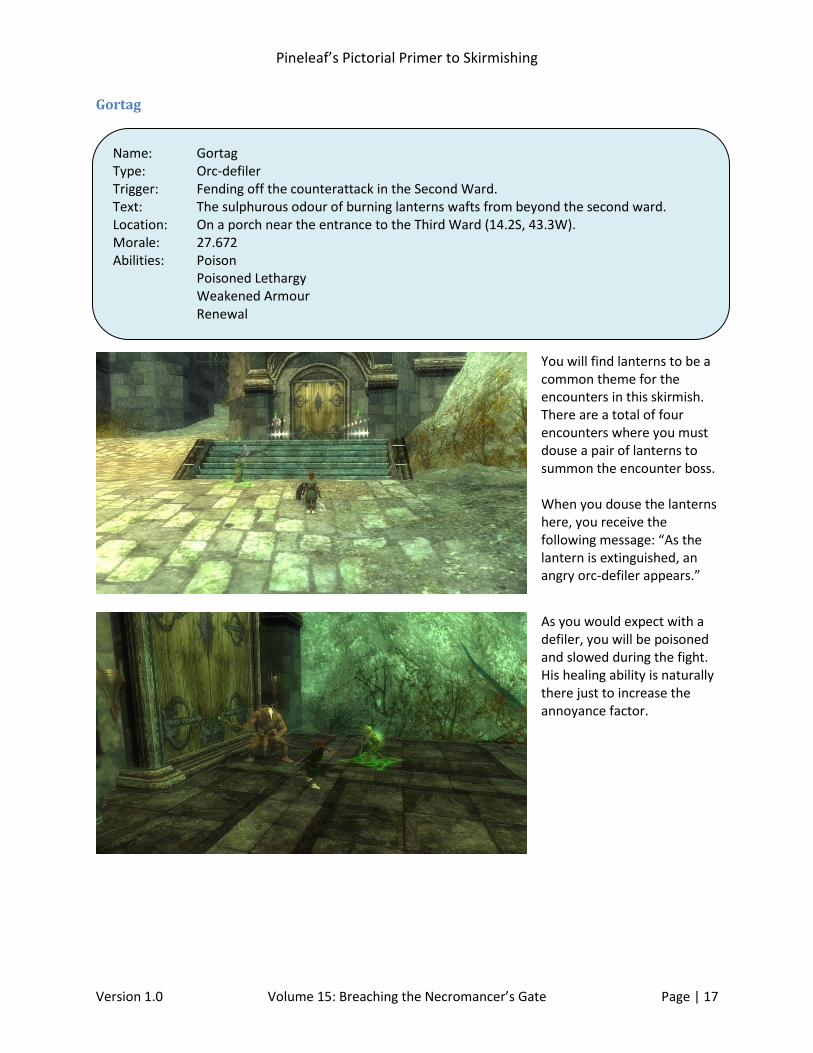
You will find lanterns to be a common theme for the encounters in this skirmish. There are a total of four encounters where you must douse a pair of lanterns to summon the encounter boss. When you douse the lanterns here, you receive the following message: “As the lantern is extinguished, an angry orc-defiler appears.”
As you would expect with a defiler, you will be poisoned and slowed during the fight. His healing ability is naturally there just to increase the annoyance factor.
Name: Gortag Type: Orc-defiler Trigger: Fending off the counterattack in the Second Ward. Text: The sulphurous odour of burning lanterns wafts from beyond the second ward. Location: On a porch near the entrance to the Third Ward (14.2S, 43.3W). Morale: 27.672 Abilities: Poison Poisoned Lethargy Weakened Armour Renewal
Pineleaf’s Pictorial Primer to Skirmishing
Version 1.0 Volume 15: Breaching the Necromancer’s Gate Page | 18
Firingúl
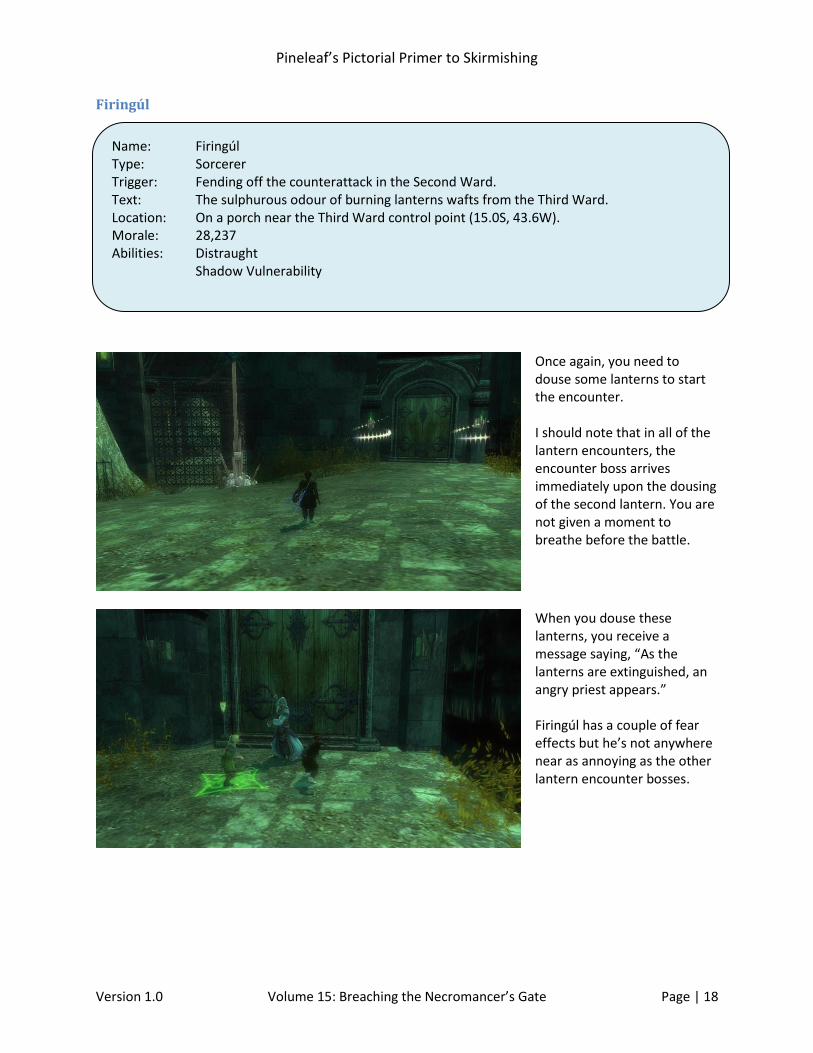
Once again, you need to douse some lanterns to start the encounter. I should note that in all of the lantern encounters, the encounter boss arrives immediately upon the dousing of the second lantern. You are not given a moment to breathe before the battle.
When you douse these lanterns, you receive a message saying, “As the lanterns are extinguished, an angry priest appears.” Firingúl has a couple of fear effects but he’s not anywhere near as annoying as the other lantern encounter bosses.
Name: Firingúl Type: Sorcerer Trigger: Fending off the counterattack in the Second Ward. Text: The sulphurous odour of burning lanterns wafts from the Third Ward. Location: On a porch near the Third Ward control point (15.0S, 43.6W). Morale: 28,237 Abilities: Distraught Shadow Vulnerability
Pineleaf’s Pictorial Primer to Skirmishing
Version 1.0 Volume 15: Breaching the Necromancer’s Gate Page | 19
Murúk
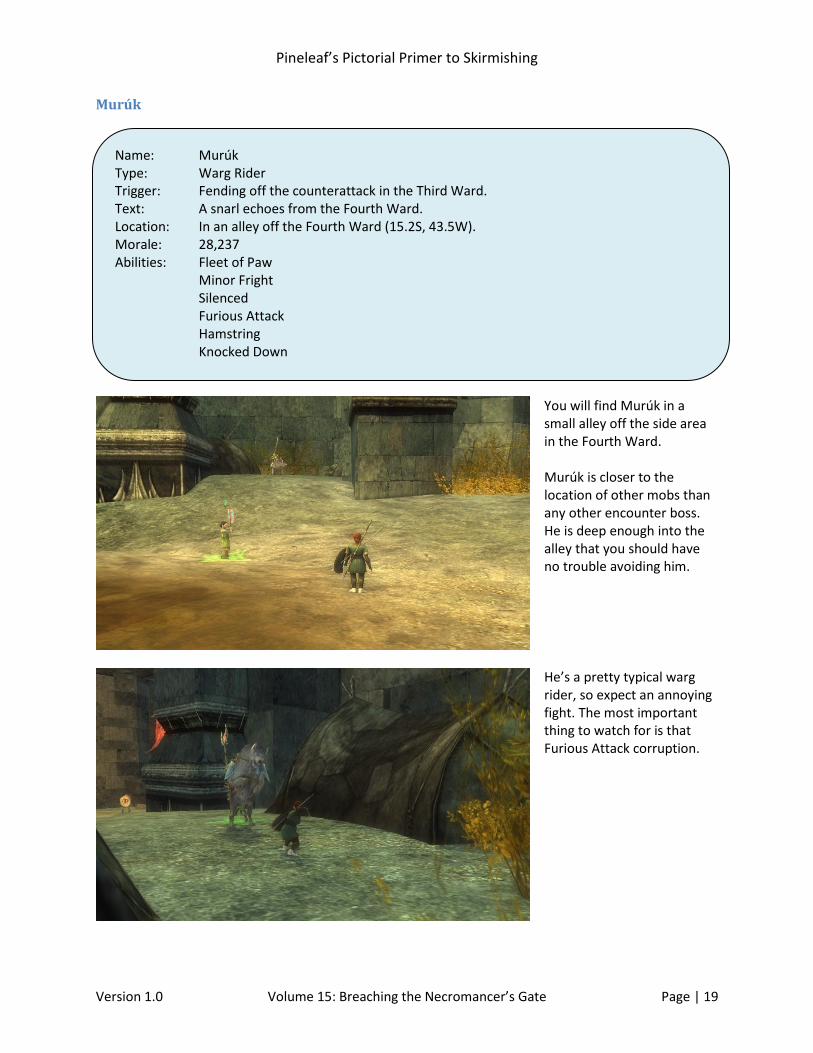
You will find Murúk in a small alley off the side area in the Fourth Ward. Murúk is closer to the location of other mobs than any other encounter boss. He is deep enough into the alley that you should have no trouble avoiding him.
He’s a pretty typical warg rider, so expect an annoying fight. The most important thing to watch for is that Furious Attack corruption.
Name: Murúk Type: Warg Rider Trigger: Fending off the counterattack in the Third Ward. Text: A snarl echoes from the Fourth Ward. Location: In an alley off the Fourth Ward (15.2S, 43.5W). Morale: 28,237 Abilities: Fleet of Paw Minor Fright Silenced Furious Attack Hamstring Knocked Down

Pineleaf’s Pictorial Primer to Skirmishing
Version 1.0 Volume 15: Breaching the Necromancer’s Gate Page | 20
Annoniel
This is one of the more annoying lantern encounters. Annoniel is noted for her wide array of fear effects. When you douse both lanterns, you get the following message: “As the lantern is extinguished, an angry sorceress appears.”
On top of her fear effects, she can summon a shade to her side. The shade naturally has a +1 Dread aura (at least in solo runs – the aura may be worse in larger runs). As with most sorcerers in this skirmish, the best weapon damage type to use is Westernesse.
Name: Annoniel Type: Sorceress Trigger: Fending off the counterattack in the Fourth Ward. Text: The flames of the lanterns ahead should be quenched. Location: On a porch between the Fourth Ward and the Sorcerer’s Ascent (15.5S, 43.0N) Morale: 28,237 Abilities: Major Fright Shadow’s Touch Suppressed Fear
Pineleaf’s Pictorial Primer to Skirmishing
Version 1.0 Volume 15: Breaching the Necromancer’s Gate Page | 21
Thrângund
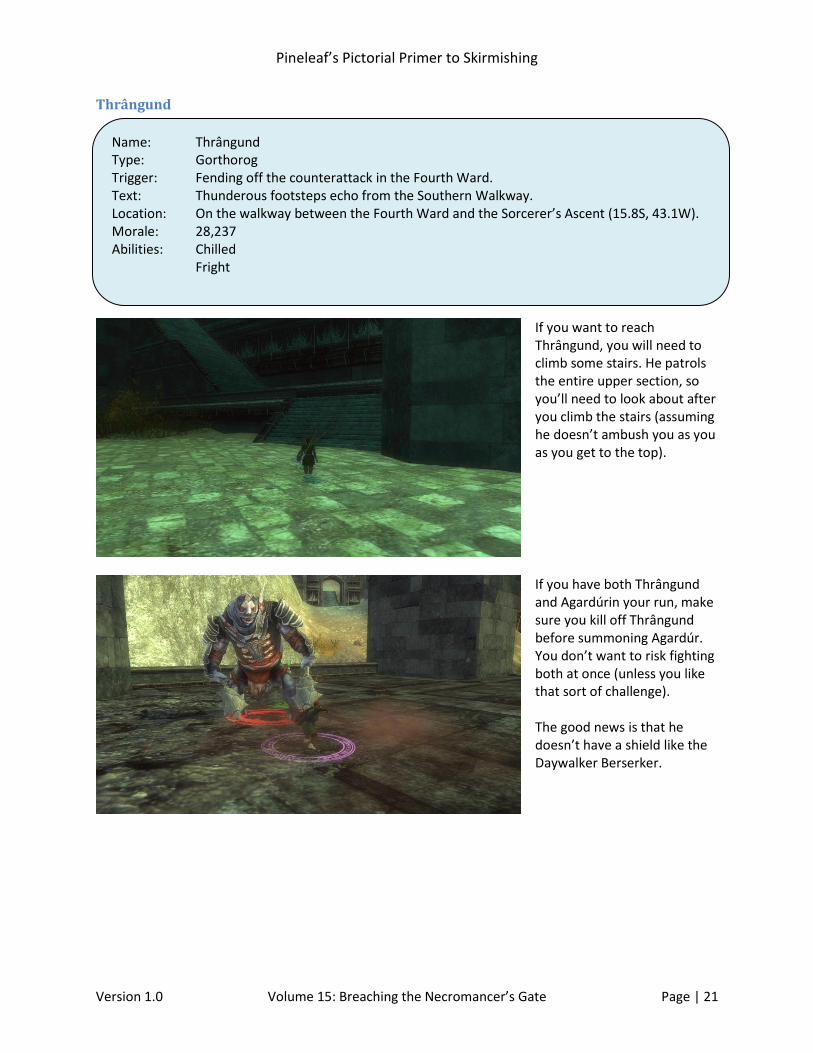
If you want to reach Thrângund, you will need to climb some stairs. He patrols the entire upper section, so you’ll need to look about after you climb the stairs (assuming he doesn’t ambush you as you as you get to the top).
If you have both Thrângund and Agardúrin your run, make sure you kill off Thrângund before summoning Agardúr. You don’t want to risk fighting both at once (unless you like that sort of challenge). The good news is that he doesn’t have a shield like the Daywalker Berserker.
Name: Thrângund Type: Gorthorog Trigger: Fending off the counterattack in the Fourth Ward. Text: Thunderous footsteps echo from the Southern Walkway. Location: On the walkway between the Fourth Ward and the Sorcerer’s Ascent (15.8S, 43.1W). Morale: 28,237 Abilities: Chilled Fright
Pineleaf’s Pictorial Primer to Skirmishing
Version 1.0 Volume 15: Breaching the Necromancer’s Gate Page | 22
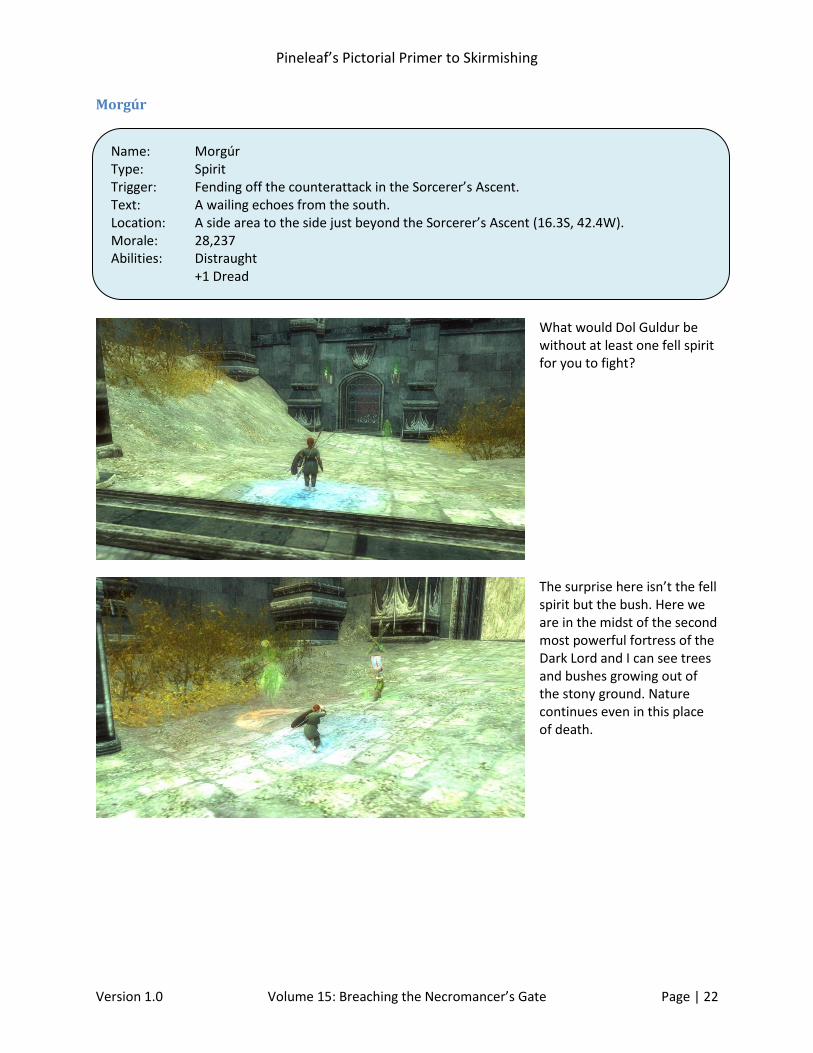
Morgúr
What would Dol Guldur be without at least one fell spirit for you to fight?
The surprise here isn’t the fell spirit but the bush. Here we are in the midst of the second most powerful fortress of the Dark Lord and I can see trees and bushes growing out of the stony ground. Nature continues even in this place of death.
Name: Morgúr Type: Spirit Trigger: Fending off the counterattack in the Sorcerer’s Ascent. Text: A wailing echoes from the south. Location: A side area to the side just beyond the Sorcerer’s Ascent (16.3S, 42.4W). Morale: 28,237 Abilities: Distraught +1 Dread

Pineleaf’s Pictorial Primer to Skirmishing
Version 1.0 Volume 15: Breaching the Necromancer’s Gate Page | 23
Agardúr
You reach Agardúr via the same stairs you reach Thrângund. Once you reach the top of the stairs, head north until you find the door with the glowing lanterns. When you extinguish the lights, you get the following message: “As the lantern is extinguished, an angry caretaker appears.”
Agardúr is your typical annoying healer. He appears to know every healing skill known to the enemy.
Name: Agardúr Type: Sorcerer Trigger: Fending off the counterattack in the Fourth Ward. Text: The sulphurous odour of burning lanterns wafts from the Fourth Ward. Location: On the walkway between the Fourth Ward and the Sorcerer’s Ascent (15.8S, 43.1W). Morale: 28,237 Abilities: Distraught Suppressed Fear Blood Gift

Pineleaf’s Pictorial Primer to Skirmishing
Version 1.0 Volume 15: Breaching the Necromancer’s Gate Page | 24
Grishglok
Grishglok is so nasty that he doesn’t need a goblin on his back. You will find him by looking to your right at the base of the Sorcerer’s Ascent. The stairs you see in the screen shot are a secondary path to Thrângund’s patrol area.
Grishglok has the usual array of wound and fear attacks of a warg as well as a knockdown.
Name: Grishglok Type: Warg Trigger: Fending off the counterattack in the Fourth Ward. Text: A snarl echoes from the south. Location: To the right of the entrance to the Sorcerer’s Ascent (16.1S, 43.0W). Morale: 28,519 Abilities: Knocked Down Crippled Deep Wound Fright Chilled Suppressed Fear

Pineleaf’s Pictorial Primer to Skirmishing
Version 1.0 Volume 15: Breaching the Necromancer’s Gate Page | 25
Variations One of the advantages of skirmishes is their scalability. Skirmishes can be scaled in three ways: level,
player group size, and tier.
Level
All skirmishes have a level range. The range for Breaching the Necromancer’s Gate is 60 to 75. The
default setting for a skirmish run is the level of the character starting the skirmish (in a fellowship that
would be the fellowship leader). You can set the skirmish to any level within the level range if required.
Skirmishes cannot be set to a level higher than the level cap.
Why would you want to change the level for the skirmish? If you are just starting to learn a skirmish, you
may want to set the level lower to allow you to understand how the skirmish works. This isn’t always
possible, though, as you generally first try a skirmish when you reach its minimum level.
Another reason to set the level lower is to compensate for an underpowered soldier. If you start
skirmishing at a high level, your soldier is likely to be under par. Many players in this situation set the
skirmish level one or two levels lower to allow them to complete enough skirmishes to bring their
soldiers to a reasonable level. You should avoid dropping the level too low, though, as you receive a
skirmish mark penalty based on the difference between your level and the skirmish’s level.
You may also want to adjust the level if not all the members of a group are of the same level or if the
group is short of the recommended size.
Finally, you may want to increase the challenge by raising the level by one or two.
This can be especially useful if you are getting near a level where the rewards are
upgraded. There is a reward upgrade at level 66. Therefore, there is some incentive
for a level- 65 character to run a skirmish at level 66 to start gaining those Fourth
Marks needed for equipment barter. Similarly, I would not recommend that a level
66 character reduce the level of a skirmish.
When you adjust the level of the skirmish, you also adjust the skirmish mark rewards
within the skirmish. These adjustments are based on your level when you first enter
the skirmish. The exact adjustment varies based on your level. The table for level 65
is given to the right.
Diff Level 65
-5 60%
-4 75%
-3 85%
-2 90%
-1 94%
Even 100%
+1 104%
+2 107%
+3 110%
+4 114%
+5 119%

Pineleaf’s Pictorial Primer to Skirmishing
Version 1.0 Volume 15: Breaching the Necromancer’s Gate Page | 26
Tier
The tier setting increases the difficulty of the skirmish by increasing the morale, damage, and various
other attributes of the enemy. In some skirmishes, it can also change some of the rules for a skirmish,
though there are apparently no such changes in Breaching the Necromancer’s Gate.
What I find most interesting in the table below are the numbers for Tier 3. Notice how the level 65 Tier 3
morale level is higher than the Level 75 Tier 1 level.
Tier L 65 Hale Sorcerer Morale L 75 Hale Sorcerer Morale Skirmish Mark %
1 4076 6275 100%
2 4982 7669 110%
3 6794 10,458 125%
Player Group Size
The player group size has the greatest change on the play of the skirmish.
Number of Players Mob Points Mark % Lieutenants Boss Encounters
Solo (1) 4 100% Signature Elite Elite
Duo (2) 10 105% Elite Elite Master Elite Master
Small Fellowship (3) 10 120% Elite Elite Master Elite Master
Fellowship (6) 18 150% Elite Master Nemesis Nemesis
Raid (12) 32 190% Nemesis * Arch Nemesis Arch Nemesis
* In addition, some of the control points will include two lieutenants.
The player group setting controls the quality of the lieutenants, the encounter bosses, the boss, as well
as the number of opponents during the final battle.
In addition, the group size controls when the second counterattack comes when there is more than one
at a control point. In solo and duo modes, the second counterattack starts when the first one has been
defeated. In the other settings, if the first counterattack is not defeated within three minutes, the
second counterattack will start right away.
Duo mode is a variation of small fellowship mode, so the number of mobs is the same in these two
settings. In addition to the difference in the counterattack timing given above, opponents under duo
mode receive a 33% penalty to their morale, damage, and other attributes.
Pineleaf’s Pictorial Primer to Skirmishing
Version 1.0 Volume 15: Breaching the Necromancer’s Gate Page | 27
Deeds All skirmishes include a deed to complete all the encounters in the skirmish. This deed awards a title
when all of the encounters have been completed at least once. The title for this skirmish is “Breacher of
the Necromancer’s Gate.” There is no skirmish mark award for completing this deed. You only gain
credit for these deeds if you complete the encounter before killing the skirmish boss and if the
encounter boss is at least green to you (no more than eight levels lower than your level).
Each lieutenant also has an associated slayer deed. There are two tiers for each of these deeds: kill the
lieutenant five times then kill the lieutenant 50 times. There is no title for the deed but you do gain 50
skirmish marks for completing the first tier and 500 skirmish marks for completing the second tier. A
lieutenant only counts for the slayer deed if the level of the lieutenant is at least green.
This skirmish is a good source for Mirkwood slayer deeds. In Breaching the Necromancer’s Gate, you can
complete the deed for killing orcs, goblins, sorcerers, and wargs in Mirkwood. None of the racial slayer
deeds can be readily completed here (yes, you can complete the orc racial deeds here but you’d be
hard-pressed to have any left to complete when you unlock this skirmish).
Quests Each skirmish includes a daily quest that is granted if you have not yet completed that skirmish during
that day. The first time you complete Breaching the Necromancer’s Gate on a day, you receive the
following additional rewards:
Skirmish marks scaled according to the level at which the skirmish is run (149 at level 75)
7058 experience points
4682 item experience points
700 reputation with the Malledhrim
Each skirmish raid run at level 75 also includes a weekly quest that is granted if you have not yet
completed the raid level for that skirmish during that week. Raid quests reset on Thursday morning. The
raid quest awards three Superior Fourth Marks and spawns an additional chest that includes some
useful gear (this is the only means by which skirmishes currently directly award gear).