w head - zsk embroidery · pdf fileoperator’s guide w head for zigzag, cord/tape,...
TRANSCRIPT
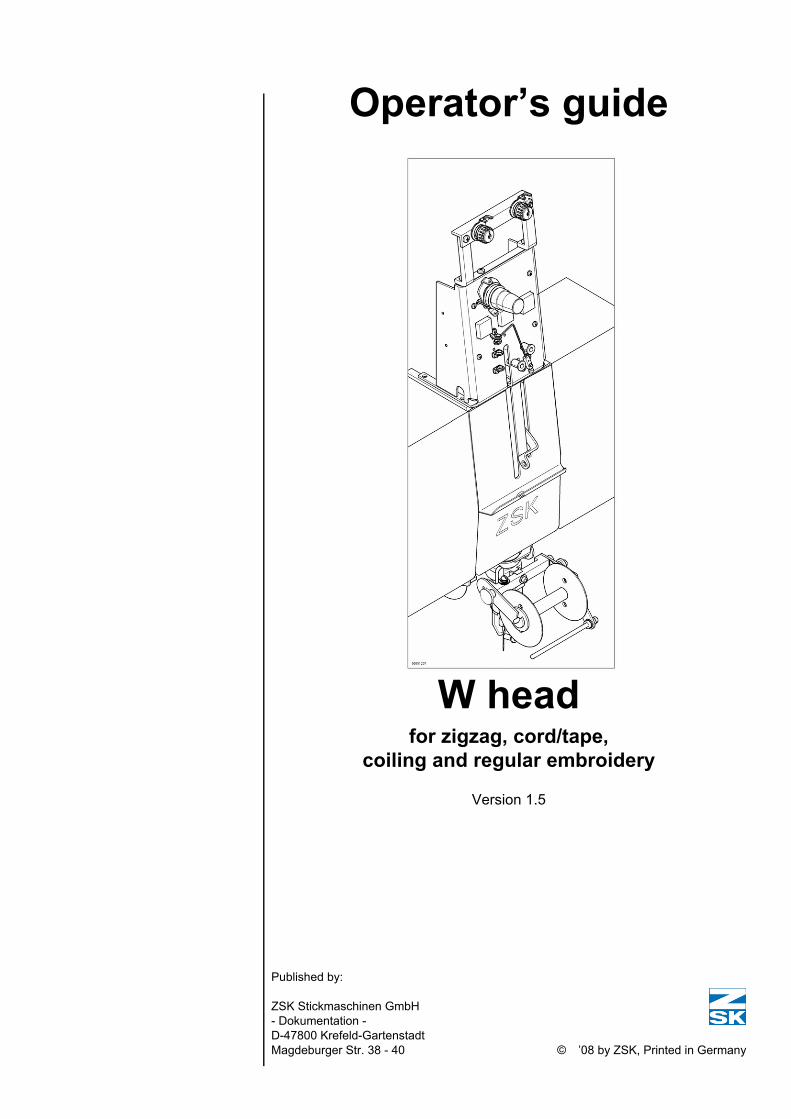
Operator’s guide
W headfor zigzag, cord/tape,
coiling and regular embroidery
Version 1.5
Published by:
ZSK Stickmaschinen GmbH- Dokumentation -D-47800 Krefeld-GartenstadtMagdeburger Str. 38 - 40 © ’08 by ZSK, Printed in Germany

Subject to change © ’08 by ZSK, Printed in Germany
Contents
00552t15IVZ.fm 12.1.09/Kx
Contents
Embroidery head diagram 1 - 1
Operation 2 - 1
Operating elements . . . . . . . . . . . . . . . . . . . . . . . . . . . . . . . . . . . . . 2 - 1
The presser foot key . . . . . . . . . . . . . . . . . . . . . . . . . . . . . . . . . . 2 - 1
Manual operation of presser foot. . . . . . . . . . . . . . . . . . . . . . . 2 - 1
Z axis button. . . . . . . . . . . . . . . . . . . . . . . . . . . . . . . . . . . . . . . . . 2 - 2
Manual rotation of Z axis . . . . . . . . . . . . . . . . . . . . . . . . . . . . . 2 - 2
The embroidery head switch . . . . . . . . . . . . . . . . . . . . . . . . . . . . 2 - 3
Switching embroidery head on and off (W head) . . . . . . . . . . 2 - 3
Head types . . . . . . . . . . . . . . . . . . . . . . . . . . . . . . . . . . . . . . . . . . . . 2 - 4
Multi-needle head . . . . . . . . . . . . . . . . . . . . . . . . . . . . . . . . . . 2 - 4
W head . . . . . . . . . . . . . . . . . . . . . . . . . . . . . . . . . . . . . . . . . . 2 - 4
Preparing for embroidering 3 - 1
General . . . . . . . . . . . . . . . . . . . . . . . . . . . . . . . . . . . . . . . . . . . . . . . 3 - 1
Exchange needle . . . . . . . . . . . . . . . . . . . . . . . . . . . . . . . . . . . . . . . 3 - 2
Removing needle . . . . . . . . . . . . . . . . . . . . . . . . . . . . . . . . . . . . . 3 - 2
Inserting needle . . . . . . . . . . . . . . . . . . . . . . . . . . . . . . . . . . . . . . 3 - 2
Threading (upper thread) . . . . . . . . . . . . . . . . . . . . . . . . . . . . . . . . . 3 - 4
Pretension regulator (holding tension) . . . . . . . . . . . . . . . . . . . . . 3 - 5
Main tension regulator (bobbin tension). . . . . . . . . . . . . . . . . . . . 3 - 5
Threading upper thread . . . . . . . . . . . . . . . . . . . . . . . . . . . . . . . . . . 3 - 6
Threading wire . . . . . . . . . . . . . . . . . . . . . . . . . . . . . . . . . . . . . . . 3 - 6
General threading instructions (effect yarns) . . . . . . . . . . . . . . . . . . 3 - 7
Exchanging effect yarn bobbin. . . . . . . . . . . . . . . . . . . . . . . . . . . 3 - 7
Changing pre-tension of effect yarn bobbin . . . . . . . . . . . . . . . . . 3 - 8
W head – Version 1.5 C - 1

Contents
C - 2
Stitch types 4 - 1
Cord/tape . . . . . . . . . . . . . . . . . . . . . . . . . . . . . . . . . . . . . . . . . . . . . 4 - 1
Typical applications . . . . . . . . . . . . . . . . . . . . . . . . . . . . . . . . . . . 4 - 1
Cord/tape foot . . . . . . . . . . . . . . . . . . . . . . . . . . . . . . . . . . . . . . . 4 - 1
Changing cord/tape foot. . . . . . . . . . . . . . . . . . . . . . . . . . . . . . . . 4 - 2
Adjusting cord/tape foot. . . . . . . . . . . . . . . . . . . . . . . . . . . . . . 4 - 2
Embroidering round materials (cord) . . . . . . . . . . . . . . . . . . . . . . 4 - 3
Threading round material (cord) . . . . . . . . . . . . . . . . . . . . . . . 4 - 4
Embroidering flat material (tape) . . . . . . . . . . . . . . . . . . . . . . . . . 4 - 5
Adjusting spring plate . . . . . . . . . . . . . . . . . . . . . . . . . . . . . . . 4 - 5
Modifying parameters. . . . . . . . . . . . . . . . . . . . . . . . . . . . . . . . . . 4 - 6
Fixing material before embroidering. . . . . . . . . . . . . . . . . . . . . . . 4 - 6
Frilling device . . . . . . . . . . . . . . . . . . . . . . . . . . . . . . . . . . . . . . . . 4 - 7
Typical applications . . . . . . . . . . . . . . . . . . . . . . . . . . . . . . . . . 4 - 7
Preparing the frilling device . . . . . . . . . . . . . . . . . . . . . . . . . . . 4 - 7
Installing frilling device . . . . . . . . . . . . . . . . . . . . . . . . . . . . . . 4 - 9
Adjusting frilling device . . . . . . . . . . . . . . . . . . . . . . . . . . . . . . 4 - 9
Threading frilling device . . . . . . . . . . . . . . . . . . . . . . . . . . . . 4 - 10
Sideways stitch adapter . . . . . . . . . . . . . . . . . . . . . . . . . . . . . . . 4 - 11
Typical applications . . . . . . . . . . . . . . . . . . . . . . . . . . . . . . . . 4 - 11
Installing sideways stitch adapter . . . . . . . . . . . . . . . . . . . . . 4 - 11
Zigzag. . . . . . . . . . . . . . . . . . . . . . . . . . . . . . . . . . . . . . . . . . . . . . . 4 - 14
Typical applications . . . . . . . . . . . . . . . . . . . . . . . . . . . . . . . . . . 4 - 14
Zigzag foot . . . . . . . . . . . . . . . . . . . . . . . . . . . . . . . . . . . . . . . . . 4 - 14
Changing zigzag foot . . . . . . . . . . . . . . . . . . . . . . . . . . . . . . . . . 4 - 15
Adjusting zigzag foot . . . . . . . . . . . . . . . . . . . . . . . . . . . . . . . 4 - 15
Threading. . . . . . . . . . . . . . . . . . . . . . . . . . . . . . . . . . . . . . . . . . 4 - 16
Algorithms (zigzag design) . . . . . . . . . . . . . . . . . . . . . . . . . . 4 - 16
Presser foot . . . . . . . . . . . . . . . . . . . . . . . . . . . . . . . . . . . . . . . . 4 - 17
Changing presser foot . . . . . . . . . . . . . . . . . . . . . . . . . . . . . . 4 - 17
Fixing material before embroidering. . . . . . . . . . . . . . . . . . . . . . 4 - 18
Rolling. . . . . . . . . . . . . . . . . . . . . . . . . . . . . . . . . . . . . . . . . . . . . . . 4 - 19
Typical applications . . . . . . . . . . . . . . . . . . . . . . . . . . . . . . . . . . 4 - 19
W head – Version 1.5 00552t15IVZ.fm 12.1.09/Kx
Contents
00552t15IVZ.fm 12.1.09/Kx
Coiling foot . . . . . . . . . . . . . . . . . . . . . . . . . . . . . . . . . . . . . . . . . 4 - 19
Adjusting coiling foot . . . . . . . . . . . . . . . . . . . . . . . . . . . . . . . 4 - 20
Threading (feed thread) . . . . . . . . . . . . . . . . . . . . . . . . . . . . . . . 4 - 21
Threading feed thread . . . . . . . . . . . . . . . . . . . . . . . . . . . . . . . . 4 - 22
Feed thread . . . . . . . . . . . . . . . . . . . . . . . . . . . . . . . . . . . . . . 4 - 22
Threading wire. . . . . . . . . . . . . . . . . . . . . . . . . . . . . . . . . . . . 4 - 22
Threading coiling thread. . . . . . . . . . . . . . . . . . . . . . . . . . . . . . . 4 - 24
Coiling thread . . . . . . . . . . . . . . . . . . . . . . . . . . . . . . . . . . . . 4 - 24
Fixing material before embroidering. . . . . . . . . . . . . . . . . . . . . . 4 - 25
Embroidery (sewing). . . . . . . . . . . . . . . . . . . . . . . . . . . . . . . . . . . . 4 - 26
Presser foot . . . . . . . . . . . . . . . . . . . . . . . . . . . . . . . . . . . . . . . . 4 - 26
Changing presser foot . . . . . . . . . . . . . . . . . . . . . . . . . . . . . . . . 4 - 26
Threading . . . . . . . . . . . . . . . . . . . . . . . . . . . . . . . . . . . . . . . . . . 4 - 27
Troubleshooting 5 - 1
W head, general . . . . . . . . . . . . . . . . . . . . . . . . . . . . . . . . . . . . . . . . 5 - 1
Zigzag stitch type . . . . . . . . . . . . . . . . . . . . . . . . . . . . . . . . . . . . . . . 5 - 1
Cord/tape stitch type. . . . . . . . . . . . . . . . . . . . . . . . . . . . . . . . . . . . . 5 - 2
Coiling stitch type . . . . . . . . . . . . . . . . . . . . . . . . . . . . . . . . . . . . . . . 5 - 3
Punching advice 6 - 1
General rules . . . . . . . . . . . . . . . . . . . . . . . . . . . . . . . . . . . . . . . . . . 6 - 1
Index I - 1
Appendix B – W head applications App. B - 1
Frilling device . . . . . . . . . . . . . . . . . . . . . . . . . . . . . . . . . . . . . App. B - 1
Setting presser foot height . . . . . . . . . . . . . . . . . . . . . . . . . App. B - 1
Configuring frilling device . . . . . . . . . . . . . . . . . . . . . . . . . . App. B - 1
W head – Version 1.5 C - 3

Contents
C - 4
W head – Version 1.5 00552t15IVZ.fm 12.1.09/Kx
Embroidery head diagram
1. Embroidery head diagram
Figure 1.1: Embroidery head (W head)
00552115.fm 12.1.09/ Ch,Kx W head – Version 1.5 1 - 1

Embroidery head diagram
(1) Pretension regulator (holding tension)(2) Main tension regulator (bobbin tension)(3) Z axis button(4) Embroidery head switch(5) Presser foot key(6) Thread layer(7) Needle bar(8) thread take-up(9) Cover(10) Bobbin holder(11) Fancy yarn bobbin(12) Needle(13 ) Deflector pin
1 - 2 W head – Version 1.5 00552115.fm 12.1.09/ Ch,Kx

Operation
2. Operation
This chapter provides an overview of the embroidery machine’s operating ele-ments.
NOTE The operating elements and procedures described below are also as-sociated with settings that are made via the control unit. More detailedinformation on these settings is contained in the Machine setup andMachine setup for W heads chapters of the operator's guide for thecontrol unit.
2.1 Operating elements
2.1.1 The presser foot key
Manual operation of presser foot
• Press the presser foot button twice.
Once activated, the lamp in the switch flashes. (intermittently)
The presser foot moves to its operating position.
• Press the presser foot button again
Embroidery head switch illuminated
The presser foot moves to its starting position
00551020
00551102
00552215.fm 12.1.09/ Ch,Kx W head – Version 1.5 2 - 1

Operation
2.1.2 Z axis button
This button allows you to rotate the Z axis manually when certain tasks need tobe performed (e.g. changing effect yarn bobbins or a foot).
Manual rotation of Z axis
• Press the Z axis button
The lamp in the embroidery head switch flashes
Manually rotate the Z axis
Figure 2.1: Rotating Z axis
• Press the Z axis button again
Embroidery head switch illuminated
The Z axis rotates back to its starting position
NOTE For safety reasons, the machine cannot be started once the presserfoot or Z axis button has been pressed. To deactivate the relevant but-ton once the necessary adjustments have been made, in order to re-start the machine, press it one more time.
00551021
00551202
2 - 2 W head – Version 1.5 00552215.fm 12.1.09/ Ch,Kx

Operation
2.1.3 The embroidery head switch
Figure 2.2: Embroidery head switch
When the embroidery head switch is pressed and the machine isswitched on, the presser foot, bobbin and zigzag device automaticallyreturn to the default settings for setting up the machine. The associat-ed machine movements pose a danger to your head and hands.
Switching embroidery head on and off (W head)
Each embroidery head has an embroidery head switch (1) with which it isswitched on and off.
• Press the embroidery head switches only when the machine is stationary.
NOTE In case of a thread break, the embroidery head switch of the W head re-sponds in the same way as the switch of a conventional embroideryhead.
When the embroidery head is switched off, the needle remains in the fully raisedposition while embroidering is taking place.
NOTE The machine’s operating elements are illustrated and their locationsshown in the chapter entitled Embroidery head diagram.
The rotary hook and thread trimmer operate even when the embroi-dery head is switched off.
Embroidery head switched on
Embroidery head switch illuminated
Embroidery head switched off
Embroidery head switch not illuminated
00551018
00551019
00552215.fm 12.1.09/ Ch,Kx W head – Version 1.5 2 - 3

Operation
2.2 Head types
Multi-needle head
The multi-needle head is used for conventional embroidery. The zigzag, cord/braid (not to be confused with the optional cord/loop device, which can only beused with multi-needle heads) and coiling stitch types cannot be executed withthe multi-needle head.
W head
The W head is used to execute effect embroidery. The zigzag, cord/braid andcoiling stitch types can only be executed with the W head.
NOTE Z and V-series machines have two different types of embroideryhead which can be selected separately. The different head typescannot be operated together.
Instructions on switching between embroidery heads are contained inthe Changing embroidery heads chapter of the operator's guide forthe control unit.
2 - 4 W head – Version 1.5 00552215.fm 12.1.09/ Ch,Kx

Preparing for embroidering
3. Preparing for embroidering
This chapter describes all the general tasks that are to be performed before em-broidering. These are fundamental operations that have to be performed afterfaults as well (e.g. needle changes and threading the machine). Tasks associatedwith special stitch types are described in the chapter entitled „Stitch types“.
NOTE The operating procedures described below are also associated withsettings that are made via the T8 control unit. More detailed infor-mation on these settings is contained in the Machine setup and Ma-chine setup for W heads chapters of the operator's guide for thecontrol unit.
3.1 General
The bobbin holder and effect yarn bobbins below the embroideryhead are rotating parts. The associated machine movements posea danger to your head and hands.
Be sure to adjust the lowest position of the presser foot accordingto the material being embroidered. If the foot is set too low, it candamage the work. Check the height of the presser foot before em-broidering by performing a test run.
00552315.fm 12.1.09/ Ch,Kx W head – Version 1.5 3 - 1

Preparing for embroidering
3.2 Exchange needle
A needle can be removed from the needle bar only if it is positioned at a suffi-cient height above the needle plate. If the machine is stationary, the needle baris automatically in a suitable position for changing the needle.
3.2.1 Removing needle
If the needle bar does not come to rest in a suitably high position,please notify the ZSK customer service department.
Figure 3.1: Removing needle • Press the Z axis button
Disconnects the Z axis.
• Press the presser foot button.
• Turn the Z axis manually to a po-sition giving access to screw (1).
• Slacken off screw (1) with Allenkey (3).
• Pull out needle (2).
3.2.2 Inserting needle
Figure 3.2: Inserting needle
• Push the new needle (2) into theneedle bar as far as it will go.The long needle slot must notface directly to the front, but alittle to the right, as illustratedalongside.
• Retighten screw (1).
• Press the Z axis button
Activates the Z axis.
• Press the presser foot button un-til the light stops flashing.
3 - 2 W head – Version 1.5 00552315.fm 12.1.09/ Ch,Kx

Preparing for embroidering
Figure 3.3: Inserting needle
NOTE Certain kind of yarns (especially artificial silk) require a stronger turnof the needle to minimize the occurrence of thread breakages. If nec-essary, a favourable position must be found during the embroideryprocess.
00552315.fm 12.1.09/ Ch,Kx W head – Version 1.5 3 - 3

Preparing for embroidering
3.3 Threading (upper thread)
Figure 3.4: W head,Threading (upper thread)
(1) Pretension regulator (holding tension)(2) Main tension regulator (bobbin tension)(3) Thread layer
(4) Needle bar(5) Hole in front of needle bar
3 - 4 W head – Version 1.5 00552315.fm 12.1.09/ Ch,Kx
Preparing for embroidering
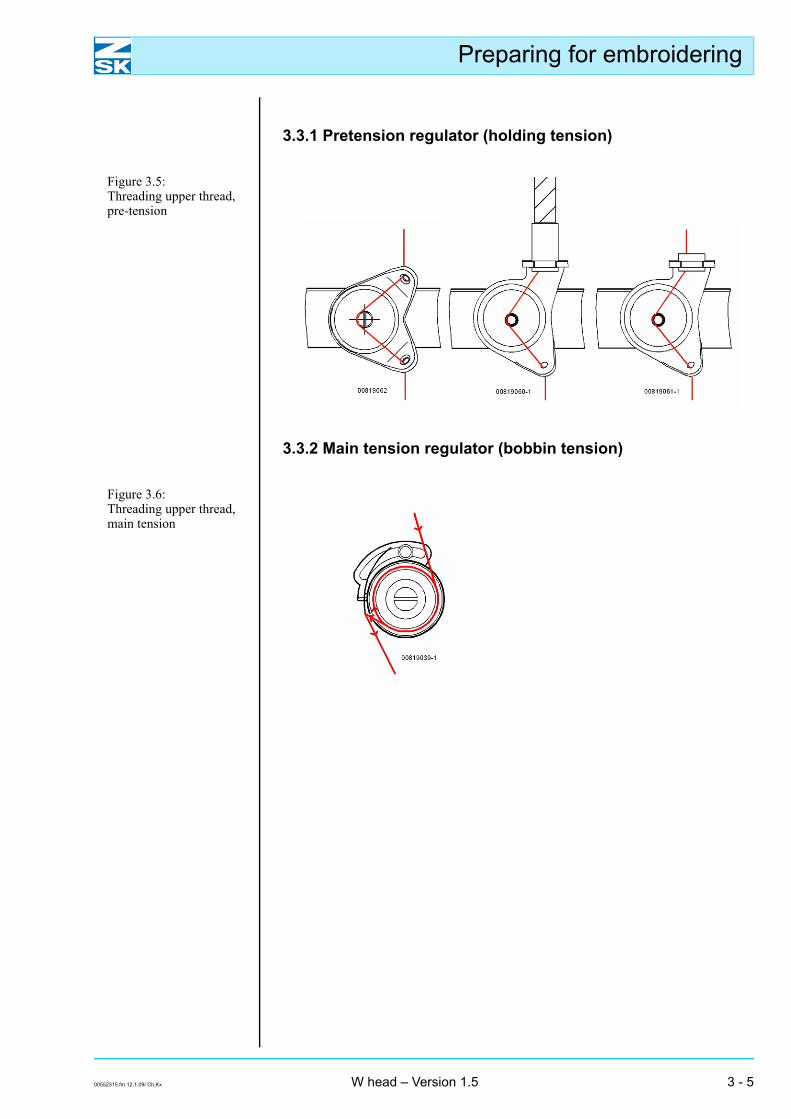
3.3.1 Pretension regulator (holding tension)
Figure 3.5: Threading upper thread, pre-tension
3.3.2 Main tension regulator (bobbin tension)
Figure 3.6: Threading upper thread, main tension
00552315.fm 12.1.09/ Ch,Kx W head – Version 1.5 3 - 5

Preparing for embroidering
3.4 Threading upper thread
3.4.1 Threading wire
In contrast to multi-needle heads, the thread is passed from the inside throughthe needle bar. Threading is facilitated by a threading wire.
Figure 3.7: Threading, upper thread
• Insert the threading wire in hole(1) in the front of the needle bar.
• Feed in the threading wire until itappears at the bottom.
• Pass the thread through the eye atthe top end of the threading wire.
• Hold the end of the thread at thetop of the needle bar while pull-ing more thread off the bobbinwith the threading wire, until thethread emerges from the bottomof the needle bar.
• Pull the threading wire with thethread down and out of the nee-dle bar.
• Pass the thread through the needle.
3 - 6 W head – Version 1.5 00552315.fm 12.1.09/ Ch,Kx

Preparing for embroidering
3.5 General threading instructions (effect yarns)
NOTE Since different yarns are threaded in a variety of ways, specific in-structions are contained in the chapter entitled Stitch types.
Use the threading wire to facilitate the threading of effect yarns.
3.5.1 Exchanging effect yarn bobbin
NOTE Make sure that the effect yarn bobbin for the relevant stitch type isinstalled on the appropriate side (the feed element side).
Figure 3.8: Effect yarn bobbin, exchanging
• Slacken off knurled screw (1).
• Pull down locating arm (2).
• Take out felt (3).
• Remove effect yarn bobbin (4).
• Install the new effect yarn bob-bin.
• Insert felt (3).
• Push up locating arm (2) untilpositioning recess (5) engageswith the pin.
• Retighten knurled screw (1).
00552315.fm 12.1.09/ Ch,Kx W head – Version 1.5 3 - 7

Preparing for embroidering
3.5.2 Changing pre-tension of effect yarn bobbin
The pretension of the effect yarn bobbin is adjusted by means of the bobbinbrake.
NOTE Make sure that the effect yarn bobbin for the relevant stitch type isinstalled on the appropriate side (the feed element side).
Figure 3.9: Bobbin brake, adjusting pre-tension
• Unscrew knurled nut (1).
• Adjust the pre-tension by turn-ing hex screw (2).
• Retighten knurled nut (1).
NOTE Make the knurled nut tight again after adjusting the pretension, oth-erwise the hex nut will not be locked.
3 - 8 W head – Version 1.5 00552315.fm 12.1.09/ Ch,Kx

Stitch types
4. Stitch types
4.1 Cord/tape
NOTE Before using this stitch type, you have to switch to the cord/tapemode. Also see the Changing stitch type chapter in your operator'sguide for the control unit.
The cord/tape stitch type enables you to fix round cord and flat tape.
4.1.1 Typical applications
Figure 4.1: Typical applications.Cord/tapeleft: flat materialright: round material
4.1.2 Cord/tape foot
Figure 4.2: Cord/tape foot
When embroidering with the cord/tape stitch type, the cord/tape footperforms the function of the presserfoot.
The cord/tape feet supplied with themachine are used for embroideringa broad variety of materials. Select the appropriate feet accord-ing to the embroidery material youintend to use and/or by experimen-tation.
Thickness (mm)
0,5 1,0
1,5 2,0
2,5 3,0
3,5 4,0
4,5 5,0
6,0 7,0
8,0 10,0
12,0 14,0
16,0
00552415.fm 12.1.09/ Ch,Kx W head – Version 1.5 4 - 1

Stitch types
Check that the height of foot (2) is suitable for the design/materialbefore you start embroidering by performing a test run. If the foot isset too low, it can damage finished parts of the work.
NOTE Make sure that the effect yarn bobbin for the relevant stitch type isinstalled on the appropriate side (the feed element side).
4.1.3 Changing cord/tape foot
Be sure to use the appropriate size of foot for the material being em-broidered. The material must be flush with the foot without gettingcaught, as this can impair the quality of the work.
Figure 4.3: Cord/tape foot, changing
• Slacken off and remove bolt (1).
• Remove the cord/tape foot.
• Attach new cord/braid foot (2).
• Adjust cord/braid foot to lowestposition.
• Retighten screw (1).
Adjusting cord/tape foot
Check that the height of foot (2) is suitable for the design/materialbefore you start embroidering by performing a test run. If the foot isset too low, it can damage finished parts of the work.
NOTE To adjust the cord/tape foot, certain parameters have to be enteredat the control unit (see operator's guide for the control unit).
4 - 2 W head – Version 1.5 00552415.fm 12.1.09/ Ch,Kx
Stitch types
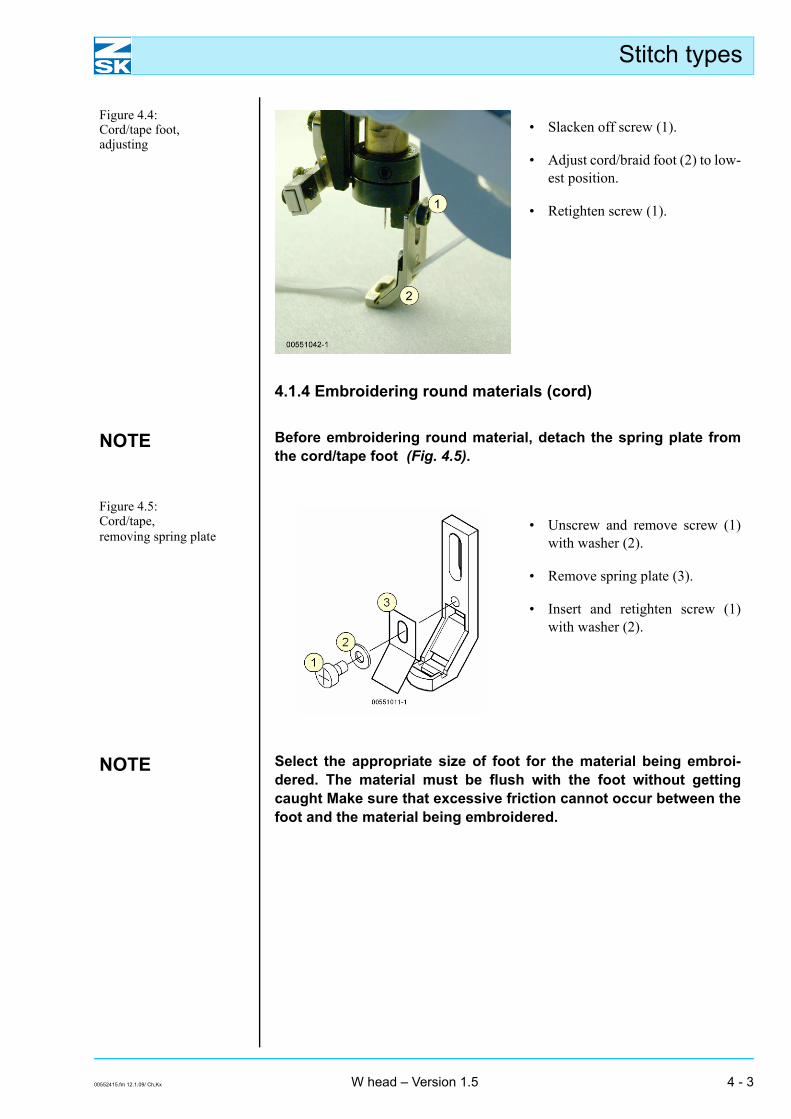
Figure 4.4: Cord/tape foot, adjusting
• Slacken off screw (1).
• Adjust cord/braid foot (2) to low-est position.
• Retighten screw (1).
4.1.4 Embroidering round materials (cord)
NOTE Before embroidering round material, detach the spring plate fromthe cord/tape foot (Fig. 4.5).
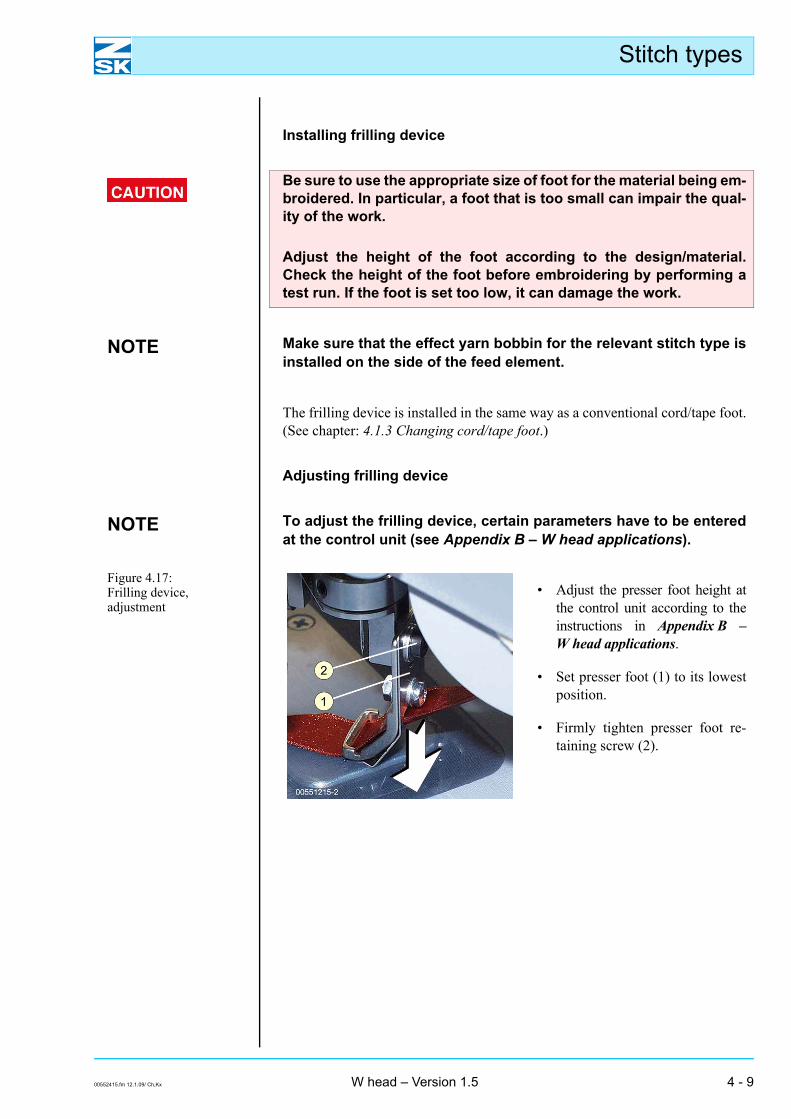
Figure 4.5: Cord/tape, removing spring plate
• Unscrew and remove screw (1)with washer (2).
• Remove spring plate (3).
• Insert and retighten screw (1)with washer (2).
NOTE Select the appropriate size of foot for the material being embroi-dered. The material must be flush with the foot without gettingcaught Make sure that excessive friction cannot occur between thefoot and the material being embroidered.
00552415.fm 12.1.09/ Ch,Kx W head – Version 1.5 4 - 3

Stitch types
Threading round material (cord)
Figure 4.6: Cord/tape, threading round material
Figure 4.7: Embroidering round material
• Insert the material on the effectyarn bobbin from the back intothe bottom aperture (1) in thefoot.
• Pull through the material fromthe front.
• Pass the material through aper-ture (2) and pull it out.
NOTEUse the threading wire to facilitate the threading of effect yarns.
4 - 4 W head – Version 1.5 00552415.fm 12.1.09/ Ch,Kx

Stitch types
4.1.5 Embroidering flat material (tape)
NOTE Select the appropriate size of foot for the type of flat material beingembroidered. The material must be flush with the foot without get-ting caught, as this can impair the quality of the work. Make surethat excessive friction cannot occur between the foot and the mate-rial being embroidered.
Adjusting spring plate
NOTE The slot in the spring plate allows its height to be adjusted (Fig.4.8). The position (height) of the spring plate must be adjusted ac-cording to the material being embroidered, while making sure thatthe material does not get caught. Make sure that excessive frictioncannot occur.
Figure 4.8: Cord/tape, adjusting spring plate for flat material
• Slacken off screw (1) with wash-er (2).
• Adjust spring plate (3) to desiredheight.
• Retighten screw (1) with washer(2).
NOTE Move spring plate before making tight: - for thin material: slide down - for thick material: slide up
Figure 4.9: Cord/tape, threading round material
00552415.fm 12.1.09/ Ch,Kx W head – Version 1.5 4 - 5

Stitch types
Figure 4.10: Embroidering round material
• Insert the material on the effectyarn bobbin from the back intothe middle aperture (1) in thefoot.
• Pass the material behind springplate (2).
• Pull the material forwardthrough bottom aperture (3).
NOTEUse the threading wire to facilitate the threading of effect materials.
4.1.6 Modifying parameters
NOTE To set the cord/tape stitch type, certain parameters have to be en-tered at the control unit (see operator's guide for the control unit -Modifying parameters).
4.1.7 Fixing material before embroidering
NOTE At the start of the design, fix the material being embroidered (1) tothe fabric, typically with adhesive tape (2), as a general rule other-wise it will be impossible to attach by embroidering.
Figure 4.11: Attaching materialexamples: Type of stitch coiling
The bobbin holder and effect yarn bobbins below the embroideryhead are rotating parts. The associated machine movements posea danger to your head and hands.
4 - 6 W head – Version 1.5 00552415.fm 12.1.09/ Ch,Kx

Stitch types
4.1.8 Frilling device
NOTE Before using the frilling device, you have to switch to the zigzagmode. Also see the Changing stitch type chapter in your operator'sguide for the control unit.
The frilling device allows tapes or ribbons 8-16 mm wide to be embroidered in theform of ruffles. It is used together with a conventional tape foot in the width of thetape or ribbon being used (8-16 mm). The frilling device can only be used with theT8 control unit.
Typical applications
Figure 4.12: Typical applications, frilling
Preparing the frilling device
Figure 4.13: Frilling device, preparation
• Choose a tape foot suitable forthe tape or ribbon width (8-16 mm).
• Remove leaf spring (1) from thetape foot.
00552415.fm 12.1.09/ Ch,Kx W head – Version 1.5 4 - 7

Stitch types
Figure 4.14: Frilling device, preparation
• Position large plate (2) of thefrilling device centrally on theback of the tape foot.
Figure 4.15: Frilling device, preparation
• Secure plate (2) with washer (3)and the screw provided (4).
Figure 4.16: Frilling device, preparation
• Replace the conventional leafspring by smaller, tonguelikeleaf spring (5).
• Align the end of leaf spring (5)in a central position.
• Secure the leaf spring withwasher (6) and a nut (7).
4 - 8 W head – Version 1.5 00552415.fm 12.1.09/ Ch,Kx
Stitch types
Installing frilling device
Be sure to use the appropriate size of foot for the material being em-broidered. In particular, a foot that is too small can impair the qual-ity of the work.
Adjust the height of the foot according to the design/material.Check the height of the foot before embroidering by performing atest run. If the foot is set too low, it can damage the work.
NOTE Make sure that the effect yarn bobbin for the relevant stitch type isinstalled on the side of the feed element.
The frilling device is installed in the same way as a conventional cord/tape foot.(See chapter: 4.1.3 Changing cord/tape foot.)
Adjusting frilling device
NOTE To adjust the frilling device, certain parameters have to be enteredat the control unit (see Appendix B – W head applications).
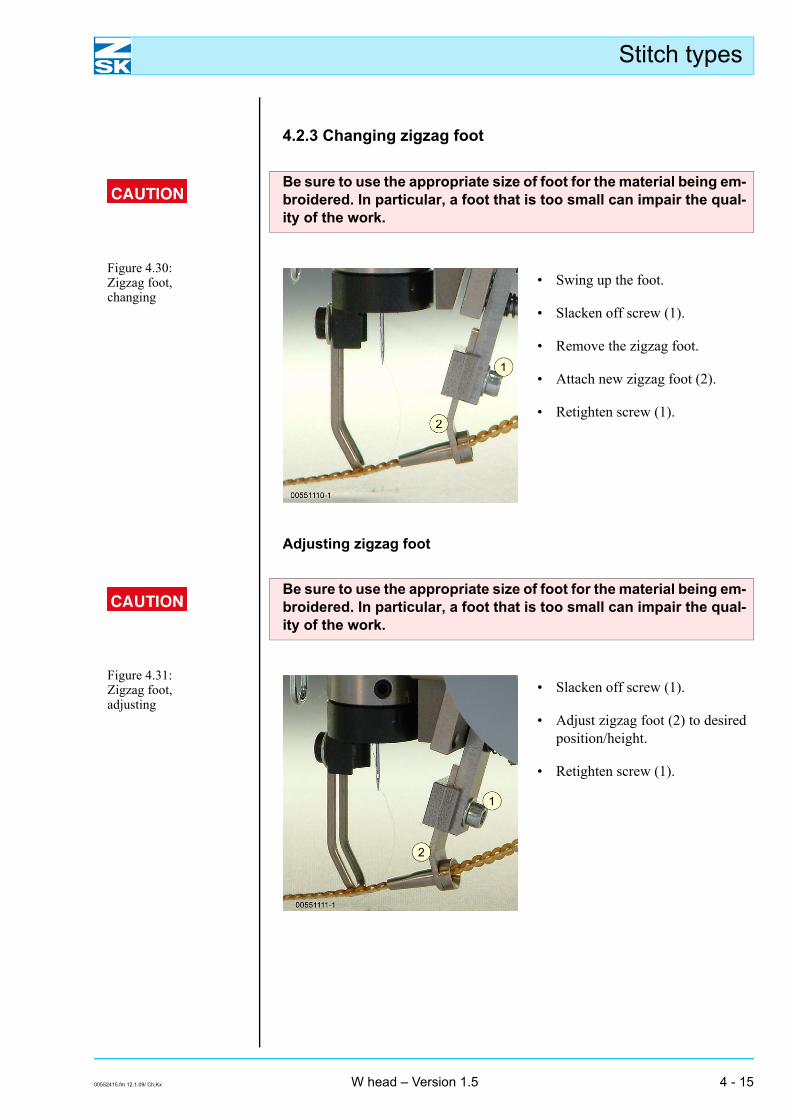
Figure 4.17: Frilling device, adjustment
• Adjust the presser foot height atthe control unit according to theinstructions in Appendix B –W head applications.
• Set presser foot (1) to its lowestposition.
• Firmly tighten presser foot re-taining screw (2).
00552415.fm 12.1.09/ Ch,Kx W head – Version 1.5 4 - 9

Stitch types
Threading frilling device
Figure 4.18: Frilling device, threading
• Insert tape or ribbon from the rearthrough the top aperture in plate(1) and tape foot.
Figure 4.19: Frilling device, threading
• Pull the tape or ribbon throughunderneath tonguelike leafspring (2).
• Pass the tape or ribbon downthrough tape foot front aperture(3) from top to bottom.
4 - 10 W head – Version 1.5 00552415.fm 12.1.09/ Ch,Kx

Stitch types
4.1.9 Sideways stitch adapter
The sideways stitch adapter allows tapes to be stitched off-center in braid em-broidery. The adapter is used together with conventional tape feet (1.5 - 16 mm).
Typical applications
Figure 4.20: Typical applications, sideways stitch adapter
Installing sideways stitch adapter
Figure 4.21: Sideways stitch adapter, installation
• Using the presser foot key on theembroidery head, lower thepresser foot to its bottom posi-tion.
• Slacken off threaded pin (1) inthe adjusting ring.
Figure 4.22: Sideways stitch adapter, installation
• Slacken off threaded pin (2) onthe back of the adjusting ring.
00552415.fm 12.1.09/ Ch,Kx W head – Version 1.5 4 - 11

Stitch types
Figure 4.23: Sideways stitch adapter, installation
• Turn holder (3) 90° counter-clockwise.
Figure 4.24: Sideways stitch adapter, installation
• Retighten threaded pins (2), (1).
Figure 4.25: Sideways stitch adapter, installation
• Tightly secure stitch adapter (4)on repositioned holder (3) withscrew (5).
4 - 12 W head – Version 1.5 00552415.fm 12.1.09/ Ch,Kx

Stitch types
Figure 4.26: Sideways stitch adapter, installation
• Loosely attach selected tape foot(8) with screw (7) and washer (6)to sideways stitch adapter (4).
• Adjust the presser foot height tosuit the tape material (see chap-ter: 4.1.3 Changing cord/tapefoot).
• Tighten screw (7).
Figure 4.27: Sideways stitch adapter, installation
• Slacken off screw (9).
• Position adjusting plate (10) ofthe sideways stitch adapter later-ally according to the desired em-broidery effect and tape width.
• Retighten screw (9).
NOTE Because the position of the adjusting plate affects the embroideryeffect and visual impact of the design, you are recommended tocheck this by doing an embroidery test and making any necessaryimprovements by repositioning the adjusting plate.
00552415.fm 12.1.09/ Ch,Kx W head – Version 1.5 4 - 13

Stitch types
4.2 Zigzag
NOTE Before using this stitch type, you have to switch to the zigzag mode.Also see the Changing stitch type chapter in your operator's guidefor the control unit.
The cord/tape stitch type enables you to fix round cord and flat tape.
4.2.1 Typical applications
Figure 4.28: Typical applicationsZigzagleft: sequinsright: beaded tape
4.2.2 Zigzag foot
Figure 4.29: Zigzag foot
The zigzag feet supplied with the ma-chine are used for embroidering abroad variety of materials. There arethree different variants of the feet:
– Sequin foot for 3.0 mm sequintape
– 2.0 mm and 3.5 mm feet for allembroidery materials (except se-quin tape). Select the appropriate feet ac-cording to the embroidery materi-al you intend to use.
Be sure to use the appropriate size of foot for the material being em-broidered. In particular, a foot that is too small can impair the qual-ity of the work.
4 - 14 W head – Version 1.5 00552415.fm 12.1.09/ Ch,Kx
Stitch types
4.2.3 Changing zigzag foot
Be sure to use the appropriate size of foot for the material being em-broidered. In particular, a foot that is too small can impair the qual-ity of the work.
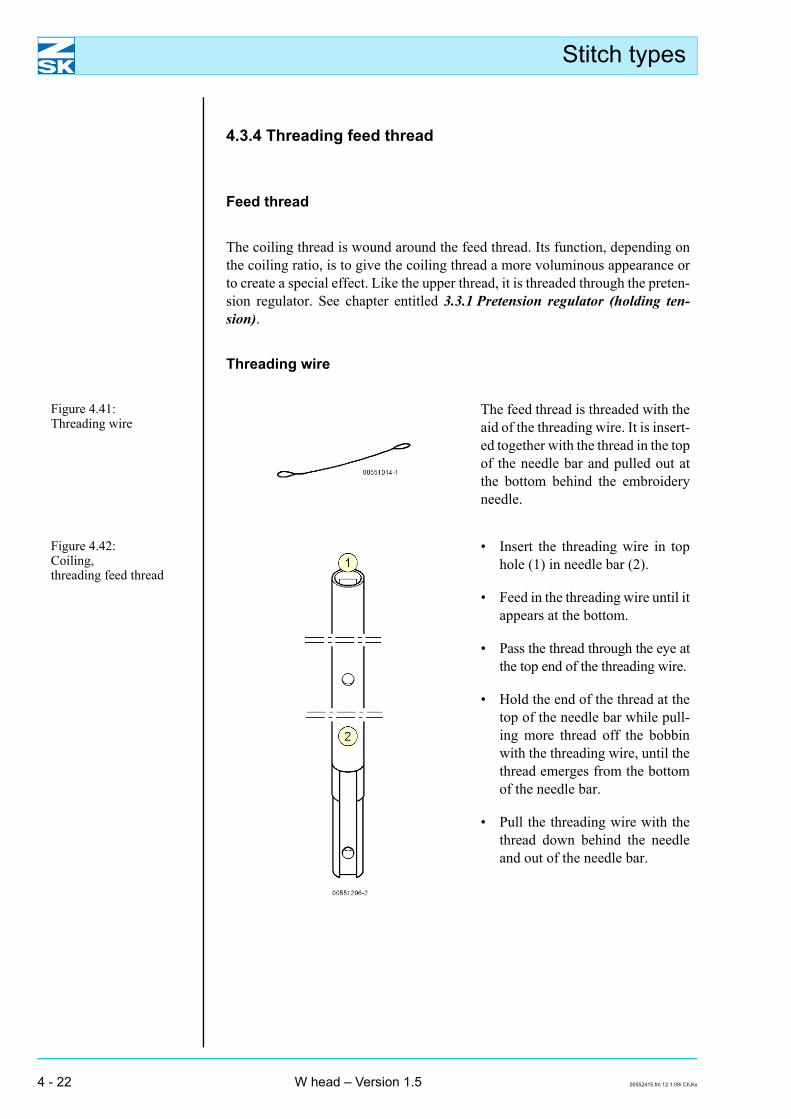
Figure 4.30: Zigzag foot, changing
• Swing up the foot.
• Slacken off screw (1).
• Remove the zigzag foot.
• Attach new zigzag foot (2).
• Retighten screw (1).
Adjusting zigzag foot
Be sure to use the appropriate size of foot for the material being em-broidered. In particular, a foot that is too small can impair the qual-ity of the work.
Figure 4.31: Zigzag foot, adjusting
• Slacken off screw (1).
• Adjust zigzag foot (2) to desiredposition/height.
• Retighten screw (1).
00552415.fm 12.1.09/ Ch,Kx W head – Version 1.5 4 - 15

Stitch types
4.2.4 Threading
Figure 4.32: Effect yarn bobbin, deflector pin
• Run the material off the effectyarn bobbin and over deflectorpin (1).
NOTE In order to obtain the correct effect yarn pretension, it is essentialthat you run the material over the deflector pin Fig. 4.32.
Figure 4.33: Zigzag, threading • Thread the material through hole
(2) in the foot.
Algorithms (zigzag design)
NOTE The zigzag stitch type includes various zigzag designs for attachingthe embroidery material. More detailed information on the designsis contained in the operator's guide for the control unit.
4 - 16 W head – Version 1.5 00552415.fm 12.1.09/ Ch,Kx

Stitch types
4.2.5 Presser foot
Figure 4.34: Presser foot • When employing the zigzag
stitch type, the presser foot mustbe used in addition to the zigzagfoot.
NOTE Never embroider without the presser foot.
Changing presser foot
NOTE Before changing the presser foot, certain parameters have to be en-tered at the control unit (see operator's guide for the control unit).
Figure 4.35: Changing foot • Slacken off screw (1).
• Remove foot (e.g. coiling foot).
• Attach presser foot for zigzagstitch type (2).
• Adjust presser foot (2) to lowestposition.
• Retighten screw (1).
00552415.fm 12.1.09/ Ch,Kx W head – Version 1.5 4 - 17

Stitch types
4.2.6 Fixing material before embroidering
NOTE At the start of the design, fix the material being embroidered (1) tothe fabric, typically with adhesive tape (2), as a general rule other-wise it will be impossible to attach by embroidering.
Figure 4.36: Attaching materialexamples: Coiling stitch type
The bobbin holder and effect yarn bobbins below the embroideryhead are rotating parts. The associated machine movements posea danger to your head and hands.
4 - 18 W head – Version 1.5 00552415.fm 12.1.09/ Ch,Kx

Stitch types
4.3 Rolling
NOTE Before using this stitch type, you have to switch to the coilingmode. Also see the Changing stitch type chapter in your operator'sguide for the control unit.
With the coiling stitch type, the coiling thread is wound around the feed thread.The finished embroidery has the appearance of a twisted cord.
4.3.1 Typical applications
Figure 4.37: Typical applications:Coiling
4.3.2 Coiling foot
Figure 4.38: Coiling foot
When embroidering with the coilingstitch type, the coiling foot performsthe function of the presser foot.
When embroidering with the coiling stitch type, the coiling foot per-forms the function of the presser foot. Adjust the height of the foot(2) according to the design/material. Check the height of the foot be-fore embroidering by performing a test run. If the foot is set too low,it can damage finished parts of the work.
00552415.fm 12.1.09/ Ch,Kx W head – Version 1.5 4 - 19

Stitch types
Adjusting coiling foot
If the foot is set too low, it can damage finished parts of the work.
NOTE Before adjusting the coiling foot, certain parameters have to be en-tered at the control unit (see operator's guide for the control unit).
Figure 4.39: Adjusting coiling foot • Slacken off screw (1).
• Adjust coiling foot (2) to desiredposition/height.
• Retighten screw (1).
Adjust the height of the foot (2) according to the design/material.Check the height of the foot before embroidering by performing atest run. If the foot is set too low, it can damage the work.
4 - 20 W head – Version 1.5 00552415.fm 12.1.09/ Ch,Kx

Stitch types
4.3.3 Threading (feed thread)
Figure 4.40: Coiling, threading feed thread
(1) Pretension regulator (holding tension)(2) Needle bar (top hole)
(3) Needle bar(4) Needle
00552415.fm 12.1.09/ Ch,Kx W head – Version 1.5 4 - 21
Stitch types
4.3.4 Threading feed thread
Feed thread
The coiling thread is wound around the feed thread. Its function, depending onthe coiling ratio, is to give the coiling thread a more voluminous appearance orto create a special effect. Like the upper thread, it is threaded through the preten-sion regulator. See chapter entitled 3.3.1 Pretension regulator (holding ten-sion).
Threading wire
Figure 4.41: Threading wire
The feed thread is threaded with theaid of the threading wire. It is insert-ed together with the thread in the topof the needle bar and pulled out atthe bottom behind the embroideryneedle.
Figure 4.42: Coiling, threading feed thread
• Insert the threading wire in tophole (1) in needle bar (2).
• Feed in the threading wire until itappears at the bottom.
• Pass the thread through the eye atthe top end of the threading wire.
• Hold the end of the thread at thetop of the needle bar while pull-ing more thread off the bobbinwith the threading wire, until thethread emerges from the bottomof the needle bar.
• Pull the threading wire with thethread down behind the needleand out of the needle bar.
4 - 22 W head – Version 1.5 00552415.fm 12.1.09/ Ch,Kx

Stitch types
Figure 4.43: Coiling foot, threading
• Pass the thread through hole (3)in the coiling foot.
00552415.fm 12.1.09/ Ch,Kx W head – Version 1.5 4 - 23

Stitch types
4.3.5 Threading coiling thread
Coiling thread
NOTE The coiling thread is the material that is wound around the feedthread. It is supplied from an effect yarn bobbin and threadedthrough the coiling foot.
Figure 4.44: Coiling thread
(1) Feed thread(2) Coiling thread
Figure 4.45: Coiling foot • Insert the coiling thread on the ef-
fect yarn bobbin from the outsideinto upper hole (3) of the foot.
• Insert the coiling thread fromabove into bottom hole (4) andpull it down and through thehole.
NOTEUse the threading wire to facilitate the threading of effect yarns.
4 - 24 W head – Version 1.5 00552415.fm 12.1.09/ Ch,Kx

Stitch types
4.3.6 Fixing material before embroidering
NOTE At the start of the design, fix the material being embroidered (1) tothe fabric, typically with adhesive tape (2), as a general rule other-wise it will be impossible to attach by embroidering.
Figure 4.46: Attaching material, example:Coiling stitch type
The bobbin holder and effect yarn bobbins below the embroideryhead are rotating parts. The associated machine movements posea danger to your head and hands.
00552415.fm 12.1.09/ Ch,Kx W head – Version 1.5 4 - 25

Stitch types
4.4 Embroidery (sewing)
NOTE Before using this stitch type, you have to switch to the embroiderymode. Also see the Changing stitch type chapter in your operator'sguide for the control unit.
The embroidery stitch type performed with the W head is equivalent to conven-tional embroidery executed in the multi-head mode, but with only one needleand color. For multi-color embroidery or to use different yarns, the yarn must bechanged manually.
4.4.1 Presser foot
NOTE For the embroidery stitch type, use the presser foot for the zigzagstitch type. Remove all other feet you have used previously.
4.4.2 Changing presser foot
Figure 4.47: Changing presser foot • Slacken off screw (1).
• Remove foot (e.g. coiling foot).
• Use presser foot for zigzag stitchtype (2).
• Adjust foot (2) to lowest posi-tion.
• Retighten screw (1).
4 - 26 W head – Version 1.5 00552415.fm 12.1.09/ Ch,Kx

Stitch types
Check the height of the foot before embroidering by performing atest run. If the foot is set too low, it can damage the work.
4.4.3 Threading
NOTE The yarn for the embroidery stitch type is threaded in the same wayas the upper thread. Also see Threading upper thread. The run of thethread is illustrated in the chapter entitled Threading (upper thread).
00552415.fm 12.1.09/ Ch,Kx W head – Version 1.5 4 - 27

Stitch types
4 - 28 W head – Version 1.5 00552415.fm 12.1.09/ Ch,Kx

Troubleshooting
5. Troubleshooting
NOTE In case of frequent malfunctions, note whether the same problemalways occurs at the same embroidery head or same needle. If cus-tomer service is required, this information is important to ensure aquick remedy.
5.1 W head, general
Fault Cause Remedy
Z axis offset Toothed belt too loose • Tighten toothed belt
Movement of rotating parts (in Z axis) impeded by incorrect screws
• Use screws with correct length for bobbin holders
Toothed belt coated with oil • Clean or exchange toothed belt
5.2 Zigzag stitch type
Fault Cause Remedy
Untidy work (zigzag) Irregular sequence of stitches in design • Recalculate stitch length in the edi-tor
Incorrect zigzag foot • Change zigzag foot
Effect yarn poorly wound on bobbin • Wind on effect yarn/tape according to yarn/tape properties
00552515.fm 12.1.09/ Ch,Kx W head – Version 1.5 5 - 1

Troubleshooting
Zigzag not on center of tape
Zigzag foot not engaged • Engage foot
Incorrect or irregular stitch length • Recalculate stitch length in the edi-tor
Unsymmetrical pivoting of zigzag foot • Properly adjust zigzag drive clamp in the head
Stitches missing (zigzag) Presser foot height incorrectly set • Set presser foot height in the parameters dialog
5.3 Cord/tape stitch type
Fault Cause Remedy
Tape is not embroidered Incorrect tape foot • Change tape foot
Incorrect stitch length • Recalculate stitch length in the edi-tor
Tape foot height incorrectly set • Set tape foot height electrically or mechanically
5 - 2 W head – Version 1.5 00552515.fm 12.1.09/ Ch,Kx

Troubleshooting
5.4 Coiling stitch type
Fault Cause Remedy
Irregular coiling Irregular stitch lengths • Recalculate stitch length in the edi-tor
• Modify parameters to suit materials
• Adjust presser foot height / coiling ratio
Coiling too wide Coiling / feed thread too thick • Modify parameters to suit materials
Coiling foot set too low • Adjust presser foot height in param-eters to suit materials
Incorrect stitch length • Recalculate stitch length in the edi-tor
• Modify parameters to suit materials
Incorrect coiling ratio • Modify parameters to suit materials
Incorrect tension of coiling / feed thread • Recalculate stitch length in the edi-tor
• Modify parameters to suit materials
Inconsistent appearance of mirrored design parts
Design is mirrored, but coiling direction is not reversed
• Change coiling direction
Caution: The effect yarn behaves differently according to the coiling direction (yarn twist direction, S or Z-twist)
00552515.fm 12.1.09/ Ch,Kx W head – Version 1.5 5 - 3

Troubleshooting
00552515.fm 12.1.09/ Ch,Kx W head – Version 1.5 5 - 4

Punching advice
6. Punching advice
The following advice does not constitute punching instructions, but merely de-scribes various key points from the perspective of the embroidery machine man-ufacturer. The advice is not to be regarded as exhaustive; complying withgeneral rules does not always give rise to a good punching result. Machine-spe-cific factors often play a crucial role and therefore need to be taken into account.
6.1 General rules
• The ideal stitch length depends on the type of design and the yarn count.
• In contrast to the practice with multi-needle heads, fixing sequences at thedesign start and end are to be avoided.
• Stitches that are shorter than 0.5 mm and blank stitches (no movement inX or Y direction) give rise to thread breaks.
• Corners in the design that are more acute than 90 give rise to untidy work.
There are no special factors to consider with W-head embroidery; punching fol-lows the pattern of a step stitch line. Depending on the yarn material, the punching length is 1.3 mm - 2.0 mm.
NOTE Additional special settings for W-head embroidery form part of themachine setup routine (presser foot height, zigzag designs, coiling ra-tio etc.) and are entered as described under Machine setup forW heads.
00552615.fm 12.1.09/ Ch,Kx W head – Version 1.5 6 - 1
Punching advice
6 - 2 W head – Version 1.5 00552615.fm 12.1.09/ Ch,Kx

Index
Index
AAdjusting foot, cord/tape 4 - 2Adjusting spring plate 4 - 5
BBlank stitches 6 - 1Bobbin holder 1 - 2Bobbin tension 1 - 2
3 - 4Bobbin thread sensing App. B - 1Bobbin, exchanging 3 - 7Button - F8 W/K-heads 4 - 3
4 - 154 - 16
Button, embroidery head 2 - 3Z axis 2 - 2
CChanging foot,
cord/tape 4 - 2zigzag 4 - 15
Coiling foot 4 - 194 - 234 - 24
Coiling foot, adjusting 4 - 20exchanging 4 - 20
Coiling stitch type, troubleshooting 5 - 3Coiling thread 4 - 24Coiling,
coiling thread 4 - 24feed thread 4 - 22fixing material before embroidering 4 - 25threading coiling thread 4 - 24typical applications 4 - 19
Cord/tape 4 - 1Cord/tape foot 4 - 1
4 - 4Cord/tape foot,
adjusting 4 - 2adjusting spring plate 4 - 5changing 4 - 2removing spring plate 4 - 3
Cord/tape stitch type, troubleshooting 5 - 2Cord/tape,
adjusting spring plate for flat material 4 - 5embroidering flat material 4 - 5embroidering round material 4 - 3fixing material before embroidering 4 - 6foot size 4 - 2
4 - 9removing spring plate 4 - 3
threading round material 4 - 4Cover 1 - 2
DDeflector pin 1 - 2
4 - 16
EEffect yarn bobbin,
deflector pin 4 - 16exchanging 3 - 7
Embroidery head 2 - 3Embroidery head (W head) 1 - 1Embroidery head switch 1 - 2
2 - 3Embroidery head switch illuminated 2 - 3Embroidery head switch not illuminated 2 - 3
FFancy yarn bobbin 1 - 2Feed thread 4 - 22Feed thread, threading 4 - 21Fixing material before embroidering 4 - 6
4 - 25Fixing sequence 6 - 1Flat material, embroidering 4 - 5Frilling device 4 - 7
App. B - 1Frilling device,
configuring App. B - 1installing 4 - 9preparation 4 - 7threading 4 - 9
4 - 10typical applications 4 - 7
4 - 11Frilling,
maximum speed App. B - 1selecting pattern App. B - 1
GGeneral 3 - 1General rules, punching 6 - 1
HHead type,
multi-needle head 2 - 4W head 2 - 4
KKey, presser foot 2 - 1
00552t15MIX.fm 12.1.09/Ge,Kx W head – Version 1.5 Index - 1

Index
MMachine not ready 2 - 2Main tension regulator 1 - 2
3 - 4Multi-needle head 2 - 4
NNeedle 1 - 2Needle bar 1 - 2Needle bar, front hole 3 - 4Needle,
exchanging 3 - 2inserting 3 - 2removing 3 - 2
OOperating elements 2 - 1
2 - 3Operation 2 - 1
PPantograph start App. B - 1Position of Z axis button 1 - 2Position,
bobbin holder 1 - 2cover 1 - 2deflector pin 1 - 2effect yarn bobbin 1 - 2embroidery head switch 1 - 2main tension 1 - 2needle 1 - 2needle bar 1 - 2presser foot key 1 - 2pre-tension 1 - 2thread feeder 1 - 2thread layer 1 - 2
Preparing for embroidering 3 - 1Presser foot 4 - 17Presser foot height, setting App. B - 1Presser foot key 1 - 2
2 - 1Presser foot stroke App. B - 1Presser foot,
changing 4 - 17manual operation 2 - 1
Pre-tension 1 - 23 - 4
Punching advice 6 - 1Punching length 6 - 1Punching, general rules 6 - 1
RRemoving spring plate 4 - 3Rolling 4 - 19Rolling, design starting point 4 - 25Round material, embroidering 4 - 3
SSewing 4 - 26Sewing,
changing presser foot 4 - 26presser foot 4 - 26
Sideways stitch adapter 4 - 11Sideways stitch adapter, preparation 4 - 11Start angle App. B - 1Step stitch line 6 - 1Stitch length, ideal 6 - 1Stitch type, embroidering (sewing) 4 - 26Stitch types 4 - 1Switching off, embroidery head 2 - 3Switching on, embroidery head 2 - 3
TTension regulator 1 - 2
3 - 4Thread break 6 - 1Thread layer 1 - 2
3 - 4thread take-up 1 - 2Threading coiling thread 4 - 24Threading effect yarn 3 - 7Threading feed thread 4 - 21
4 - 22Threading round material (cord) 4 - 4Threading wire 3 - 6
4 - 22Threading,
general instructions (effect yarns) 3 - 7stitch type coiling (feed thread) 4 - 22type of stitch, Zigzag, 4 - 16upper thread 3 - 6
Troubleshooting, coiling stitch type 5 - 3coiling, coiling too wide 5 - 3coiling, irregular coiling 5 - 3cord/tape 5 - 2cord/tape stitch type 5 - 2W head general 5 - 1zigzag stitch type 5 - 1zigzag, not on center of tape 5 - 2zigzag, stitches missing 5 - 2zigzag, untidy work 5 - 1
Typ of stitch, Cord/tape 4 - 1Type of stitch,
rolling 4 - 19zigzag 4 - 14
Typical applications, coiling 4 - 19cord/tape 4 - 1zigzag 4 - 14
UUpper thread, threading 3 - 4
Index - 2 W head – Version 1.5 00552t15MIX.fm 12.1.09/Ge,Kx

Index
WW head 2 - 4W-head embroidery 6 - 1
ZZ axis button 1 - 2
2 - 2Z axis offset, troubleshooting 5 - 1Z axis, manual rotation 2 - 2Zigzag 4 - 14Zigzag foot 4 - 14
4 - 15Zigzag foot,
adjusting 4 - 15changing 4 - 15
Zigzag stitch type, troubleshooting 5 - 1Zigzag,
changing presser foot 4 - 17deflector pin 4 - 16design starting point 4 - 6
4 - 18foot size 4 - 14
4 - 15pattern App. B - 1stroke App. B - 1threading 4 - 16
00552t15MIX.fm 12.1.09/Ge,Kx W head – Version 1.5 Index - 3

Index
Index - 4 W head – Version 1.5 00552t15MIX.fm 12.1.09/Ge,Kx
Appendix B – W head applications
Appendix B – W head applications
Frilling device
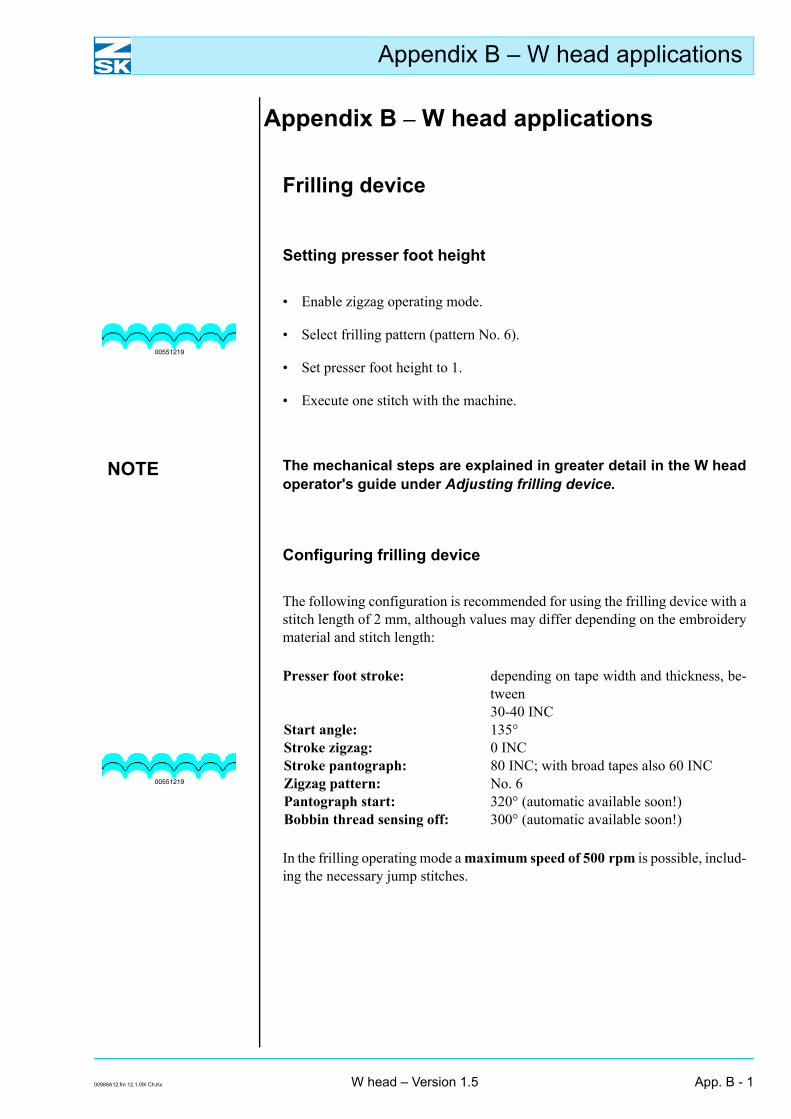
Setting presser foot height
• Enable zigzag operating mode.
• Select frilling pattern (pattern No. 6).
• Set presser foot height to 1.
• Execute one stitch with the machine.
NOTE The mechanical steps are explained in greater detail in the W headoperator's guide under Adjusting frilling device.
Configuring frilling device
The following configuration is recommended for using the frilling device with astitch length of 2 mm, although values may differ depending on the embroiderymaterial and stitch length:
Presser foot stroke: depending on tape width and thickness, be-tween30-40 INC
Start angle: 135°Stroke zigzag: 0 INCStroke pantograph: 80 INC; with broad tapes also 60 INCZigzag pattern: No. 6Pantograph start: 320° (automatic available soon!)Bobbin thread sensing off: 300° (automatic available soon!)
In the frilling operating mode a maximum speed of 500 rpm is possible, includ-ing the necessary jump stitches.
00551219
00551219
00988A12.fm 12.1.09/ Ch,Kx W head – Version 1.5 App. B - 1

Appendix B – W head applications
App. B - 2 W head – Version 1.5 00988A12.fm 12.1.09/ Ch,Kx