wake-up light wecker - info-tcs.netinfo-tcs.net/download/wul10001.pdf · wake-up light wecker...
TRANSCRIPT

WAKE-UP LIGHT WECKERWAKE-UP LIGHT ALARM CLOCK
WUL10001entspanntes Aufwachen durch simu-lierten Sonnenaufgang 25 Minuten vor Weckzeit / USB-Ladeanschluss
a relaxed way to wake up using simu-lated sunrise 25 minutes before the alarm time / USB charging port
Light Radio (Wake-up)_WUL10001_144010902_IM-DE-GB_150603.indb 1 17/06/2015 5:24 PM

Light Radio (Wake-up)_WUL10001_144010902_IM-DE-GB_150603.indb 2 17/06/2015 5:24 PM
Deutsch
1
Inhaltsverzeichnis
1. Übersicht ................................................................................................. 31.1 Technische Daten ..............................................................................................................31.2 Symbole ............................................................................................................................4
2. Wichtige Sicherheitshinweise .................................................................. 42.1 Allgemeine Sicherheitshinweise ....................................................................................42.2 Netzanschluss ..................................................................................................................62.3 Batterien ...........................................................................................................................62.4 Aufstellort ........................................................................................................................72.5 Bestimmungsgemäßer Gebrauch .................................................................................7
3. Bedienelemente ...................................................................................... 83.1 Gerät ..................................................................................................................................83.2 Display ..............................................................................................................................83.3 Bedienfeld ........................................................................................................................9
4. Bedienungsanweisungen ........................................................................104.1 Auspacken und Kontrolle ..............................................................................................104.2 Back-up Funktion ..........................................................................................................104.3 Gerät ein- / ausschalten ............................................................................................... 114.4 Uhrzeit einstellen .......................................................................................................... 114.5 Umstellung Sommer- / Winterzeit (DST-Funktion) ................................................. 114.6 Dimmer Funktion ..........................................................................................................124.7 Lautstärke einstellen .....................................................................................................124.8 Radio Funktion ..............................................................................................................124.9 Naturklang Funktion ....................................................................................................144.10 Alarm Funktion ............................................................................................................144.11 Licht Funktion ...............................................................................................................164.12 Schlaffunktion ..............................................................................................................164.13 USB-Ladefunktion ....................................................................................................... 17
5. Reinigung und Pflege ..............................................................................185.1 Reinigung .........................................................................................................................185.2 Aufbewahrung und Transport ......................................................................................185.3 Fehlerbehebung .............................................................................................................18
6. Entsorgung ............................................................................................ 20
7. Garantie ................................................................................................. 21
Light Radio (Wake-up)_WUL10001_144010902_IM-DE-GB_150603.indb 1 17/06/2015 5:24 PM

Deutsch
2
VIVESS Qualitätsprodukte mit TÜV Rheinland Siegel
Für die Unternehmen der REWE Group sind verlässliche Produktqualität und Sicherheit oberstes Gebot. Darauf können sich REWE Kunden verlassen.
Deshalb lässt die REWE Group VIVESS Produkte durch die unabhängigen Prüfer des TÜV Rheinland auf „Herz und Nieren“ testen.
Um hohe Qualitätsansprüche zu erfüllen, lassen wir zusätzlich zu der strengen REWE-Qualitätsnorm Produkte mit dem Siegel des TÜV Rheinland auszeichnen.
Konkret bedeutet das:
Produkte müssen zusätzliche strenge Einzeltests bestehen, um das Siegel des unabhängigen TÜV Rheinland zu erhalten.
Das TÜV Rheinland Siegel geht weit über die gesetzlich geforderten Prüfungen hinaus.
Wir wollen damit einen neuen Maßstab setzen - zur Sicherheit und zum Vorteil für Sie.
Light Radio (Wake-up)_WUL10001_144010902_IM-DE-GB_150603.indb 2 17/06/2015 5:24 PM

Deutsch
3
1. Übersicht
1.1 Technische DatenGerät
Modell WUL10001Eingang 5 V , 2 A Leistungsaufnahme max. 10 WSchutzklasse III Back-up Batterie 9 V , Typ 6F22/6LR61Ausgangsleistung (Lautsprecher) 1 WRadiofrequenz 87,5 - 108 MHzUSB Ausgang 5 V , max. 1 ALEDs 9 je 3,2 V, 20 mAAußenmaße ca. 120 x 175 x 185 mm (L x B x H)Gewicht ca. 580 gBetriebstemperature 0 °C bis 30 °CHergestellt für REWE-Zentral AG, 50603 Köln
Adapter
Modell AKN2G-0500200VW Eingang 100 – 240 V~, 50/60 Hz, 0,35 A Ausgang 5 V , 2 ASchutzklasse II Betriebstemperature 0 °C bis 30 °CHergestellt für REWE-Zentral AG, 50603 Köln
Light Radio (Wake-up)_WUL10001_144010902_IM-DE-GB_150603.indb 3 17/06/2015 5:24 PM

Deutsch
4
1. Übersicht
1.2 SymboleWichtige Hinweise für Ihre Sicherheit sind besonders gekennzeichnet. Beachten Sie diese Hinweise unbedingt, um Unfälle und Sachschäden zu vermeiden.
WARNUNG - Warnt vor Gefahren für Ihre Gesundheit und zeigt mögliche Verletzungsrisiken auf.
WARNUNG - Stromschlaggefahr!
WARNUNG - Um eine mögliche Schädigung des Hörsinns zu verhindern, vermeiden Sie das Hören bei großem Lautstärkepegel über lange Zeiträume. Extreme Lautstärke führt durch zu hohen Schalldruck zu dauerhaften Hörschäden.
Nur für den Gebrauch in trockenen Innenräumen.
Hinweis: Hebt Tipps und Informationen hervor.
Bedienungsanleitung lesen.
2. Wichtige Sicherheitshinweise
2.1 Allgemeine Sicherheitshinweise1. Lesen Sie diese Bedienungsanleitung vor dem ersten Gebrauch gründlich durch.
Sie enthält wichtige Informationen für Ihre Sicherheit sowie zum Gebrauch und der Pflege des Gerätes. Heben Sie die Anleitung zum späteren Nachschlagen auf und geben Sie sie mit dem Gerät weiter.
2. Beachten Sie alle Warnungen auf dem Gerät und in dieser Bedienungsanleitung.3. Benutzen Sie das Gerät nur für den vorgesehenen Zweck. Unsachgemäßer
Gebrauch führt zu Gefährdungen. Wenn Sie das Gerät nicht bestimmungsgemäß verwenden oder falsch bedienen, wird für daraus resultierende Schäden keine Haftung übernommen.
Light Radio (Wake-up)_WUL10001_144010902_IM-DE-GB_150603.indb 4 17/06/2015 5:24 PM
Deutsch
5
2. Wichtige Sicherheitshinweise4. Die Verwendung von Zubehör und Geräteteilen, die vom Hersteller nicht
ausdrücklich empfohlen werden, können Verletzungen oder Schäden verursachen und führen zum Verlust der Garantie.
5. Dieses Gerät kann von Kindern ab 8 Jahren sowie von Personen mit reduzierten physischen, sensorischen oder mentalen Fähigkeiten oder Mangel an Erfahrung und / oder Wissen benutzt werden, wenn sie beaufsichtigt oder bezüglich des sicheren Gebrauchs des Gerätes unterwiesen wurden und die daraus resultierenden Gefahren verstanden haben.
6. Kinder dürfen nicht mit dem Gerät spielen.7. Kinder jünger als 8 Jahre sind vom Gerät und dem Netzkabel fernzuhalten.8. Reinigung und Benutzer-Wartung dürfen nicht durch Kinder durchgeführt werden,
es sei denn, sie werden beaufsichtigt.
WARNUNG - Um eine mögliche Schädigung des Hörsinns zu verhindern, vermeiden Sie das Hören bei großem Lautstärkepegel über lange Zeiträume. Extreme Lautstärke führt durch zu hohen Schalldruck zu dauerhaften Hörschäden.
WARNUNG - Benutzen Sie dieses Gerät nicht in der Nähe von Wasser, starker Feuchtigkeit oder Spritzwasser, z. B. in einem feuchten Keller, neben einem Schwimmbecken oder der einer Badewanne.
9. Halten Sie das Gerät vor Hitze und Kälte, direkter Sonneneinstrahlung, Staub, Feuchtigkeit (auf keinen Fall in Flüssigkeiten tauchen) und scharfen Kanten fern.
10. Tauchen Sie das Gerät und Adapter mit Netzkabel während des Reinigens oder des Betriebs nie in Wasser oder andere Flüssigkeiten.
WARNUNG - Stromschlaggefahr! Versuchen Sie nie, das Gerät selbst zu reparieren. Lassen Sie das Gerät im Falle von Störungen nur von qualifizierten Fachleuten reparieren.
11. Wenn der Adapter, das Netzkabel oder das Gehäuse des Gerätes beschädigt oder wenn das Gerät heruntergefallen ist, darf das Gerät nicht benutzt werden, bevor es von einem Fachmann überprüft worden ist.
12. Nehmen Sie das Gerät nicht mit feuchten Händen oder auf nassem Untergrund stehend in Betrieb.
13. Öffnen Sie das Gerät nicht. Stecken Sie keine Gegenstände in die Öffnungen. Halten Sie alle Öffnungen frei.
14. Kleben Sie keine Fremdkörper an das Gerät und decken Sie es nicht ab.
Light Radio (Wake-up)_WUL10001_144010902_IM-DE-GB_150603.indb 5 17/06/2015 5:24 PM
Deutsch
6
2. Wichtige Sicherheitshinweise15. Stellen Sie keine Gegenstände auf das Gerät.16. Stellen Sie keine Gegenstände mit offenen Flammen, wie z. B. Kerzen, oder
Gegenstände gefüllt mit Flüssigkeit, wie z. B. Vasen, auf das Gerät.17. Beachten Sie die weiteren Hinweise im Kapitel 5. Reinigung und Pflege.
2.2 Netzanschluss1. Die Netzspannung muss mit den Angaben auf dem Typenschild des Adapters
übereinstimmen.2. Verwenden Sie nur den mitgelieferten Adapter. 3. Der Adapter dient als Trennvorrichtung. Achten Sie darauf, dass der Adapter
immer gut zugänglich und erreichbar ist. Beachten Sie, dass das Gerät unter Strom steht, solange der Adapter mit dem Gerät und einer Steckdose verbunden ist. Nur der Adapter kann das Gerät vollständig vom Stromnetz trennen.
4. Verhindern Sie eine Beschädigung des Adapters und Netzkabels durch Quetschen, Knicken oder Scheuern an scharfen Kanten und halten Sie sie von heißen Oberflächen und offenen Flammen fern.
5. Achten Sie darauf, dass man das Gerät nicht am Kabel herunterziehen kann. Legen Sie das Kabel so, dass man nicht darüber stolpern kann.
6. Ziehen Sie den Adapter bei Nichtgebrauch, bei Gewitter, bei Störungen und vor jeder Reinigung aus der Steckdose.
7. Im Falle einer Fehlfunktion des Gerätes durch eine elektrostatische Entladung oder elektrischer Spitzen, trennen Sie den Adapter vom Stromnetz. Warten Sie kurz und stecken Sie den Adapter wieder in die Steckdose. Schalten Sie das Gerät erneut ein, um in den normalen Betriebszustand zurückzukehren.
8. Ziehen Sie den Adapter nur am Adapter aus der Steckdose nicht am Kabel.9. Ein beschädigtes Netzkabel darf nur vom Hersteller, einer von ihm beauftragten
Werkstatt oder einer ähnlich qualifizierten Person ersetzt werden, um Gefährdungen zu vermeiden.
2.3 BatterienWARNUNG - Explosionsgefahr bei unsachgemäßem Auswechseln der Batterien. Ersatz nur durch denselben oder einen gleichwertigen Batterietyp.
Light Radio (Wake-up)_WUL10001_144010902_IM-DE-GB_150603.indb 6 17/06/2015 5:24 PM

Deutsch
7
2. Wichtige Sicherheitshinweise1. Batterien dürfen nicht übermäßiger Wärme wie Sonnenschein, Feuer oder
ähnlichem ausgesetzt werden. Die Batterien könnten explodieren.2. Stets die richtige Batteriegröße und -typ wählen, die sich für den vorgesehenen
Verwendungszweck am besten eignet. Hinweise für die richtige Batteriewahl, die in der Bedienungsanleitung von Geräten stehen, sollten zum späteren Nachschlagen aufgehoben werden.
3. Alle Batterien eines Satzes gleichzeitig wechseln.4. Batteriekontakte und auch die Kontakte im Gerät vor dem Einlegen der Batterien
reinigen.5. Sicherstellen, dass die Batterien richtig eingelegt werden, d. h. Polarität
(+ / –) beachten.6. Erschöpfte Batterien umgehend entfernen.7. Vor der Entsorgung müssen Batterien zuerst entfernt und separat vom Gerät
entsorgt werden.
2.4 Aufstellort1. Stellen Sie das Gerät auf eine ebene, trockene, saubere, stabile und rutschfeste
Oberfläche.2. Stellen Sie das Gerät nicht auf Kochplatten (Gas-, Elektro-, Kohleherd usw.).3. Beachten Sie den Abschnitt 2.1 Allgemeine Sicherheitshinweise.4. Halten Sie einen Mindestabstand von 10 cm rings um das Gerät ein, um für
genügend Kühlung zu sorgen.5. Stellen Sie das Gerät nicht in die Nähe von Geräten, die starke Magnetfelder
erzeugen (z. B. Motoren, Transformatoren).
2.5 Bestimmungsgemäßer Gebrauch1. Verwenden Sie das Gerät ausschließlich zum Hören von Radiosendern und als
Wecker. 2. Dieses Gerät ist nur für die Nutzung im Haushalt konzipiert. Es ist nicht für
kommerziellen Gebrauch geeignet. 3. Verwenden Sie dieses Gerät nur in gemäßigtem Klima.4. Verwenden Sie dieses Gerät nur wie in der Bedienungsanleitung beschrieben.
Jeglicher andere Gebrauch kann zu Schäden am Gerät oder Verletzungen führen.
Light Radio (Wake-up)_WUL10001_144010902_IM-DE-GB_150603.indb 7 17/06/2015 5:24 PM
Deutsch
8
3. Bedienelemente
3.1 Gerät
1
29
34
USB DC 5V
5
6
789
3.2 Display
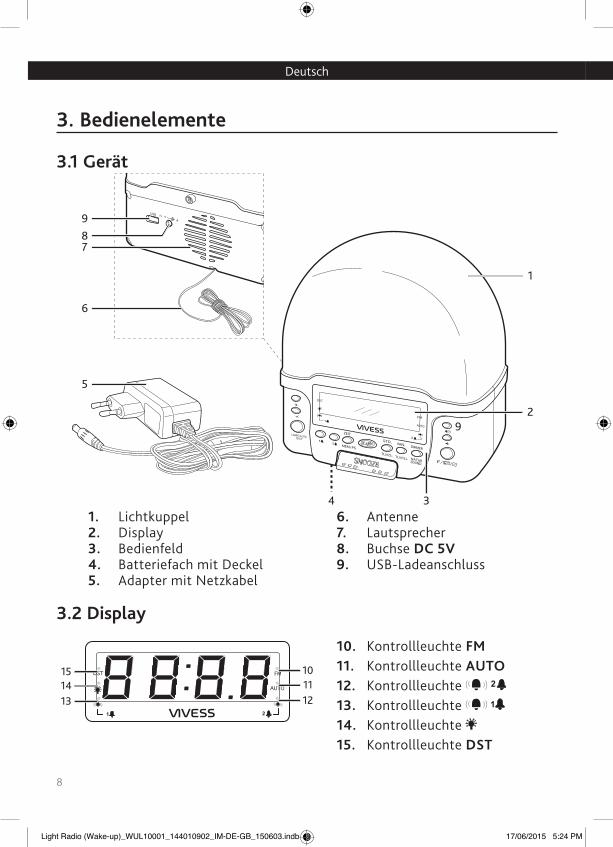
1. Lichtkuppel2. Display3. Bedienfeld4. Batteriefach mit Deckel5. Adapter mit Netzkabel
6. Antenne7. Lautsprecher8. Buchse DC 5V9. USB-Ladeanschluss
10111213
1415
10. Kontrollleuchte FM11. Kontrollleuchte AUTO12. Kontrollleuchte 13. Kontrollleuchte 14. Kontrollleuchte 15. Kontrollleuchte DST
Light Radio (Wake-up)_WUL10001_144010902_IM-DE-GB_150603.indb 8 17/06/2015 5:24 PM

Deutsch
9
3. Bedienelemente
3.3 Bedienfeld
16. Taste 17. Taste 18. Taste 19. Taste DIMMER - NATUR SOUND20. Taste MIN. - TU/PS+21. Taste STD. - TU/PS-22. Taste SLEEP
162928
27
17
18
1920212223242526
23. Taste SNOOZE24. Taste ZEIT - MEM/PS25. Taste (Alarm 2)26. Taste (Alarm 1)27. Taste LAMPE/AUTO/DST28. Taste 29. Taste
Light Radio (Wake-up)_WUL10001_144010902_IM-DE-GB_150603.indb 9 17/06/2015 5:24 PM

Deutsch
10
4. Bedienungsanweisungen
4.1 Auspacken und Kontrolle1. Nehmen Sie das Gerät und Zubehör vorsichtig aus der Verpackung.2. Überprüfen Sie den Verpackungsinhalt auf Vollständigkeit und Beschädigungen.
Sollte der Verpackungsinhalt unvollständig oder Beschädigungen feststellbar sein, nehmen Sie das Gerät nicht in Betrieb. Bringen Sie es umgehend zum Händler zurück.
3. Falls Sie Verpackungsmaterial entsorgen wollen, halten Sie sich an die gesetzlichen Bestimmungen.
4. Bewahren Sie das Verpackungsmaterial auf, wenn Sie das Gerät damit verpacken, verschicken oder anderweitig transportieren wollen. Lagern Sie es so, dass es kein Gefährdungspotenzial darstellt.
WARNUNG - Erstickungsgefahr! Das Verpackungsmaterial ist kein Spielzeug. An Plastiktüten, Folien und Styroporteilchen können Kinder ersticken. Halten Sie daher Verpackungsmaterial immer von Kindern fern.
4.2 Back-up FunktionHinweis: Die Batterie dient nur als Back-up Batterie. Sollte es einen Stromausfall geben, speichert sie die eingestellte Uhrzeit und Weckzeit. Das Gerät kann nicht nur mit der Batterie betrieben werden. Das Gerät kann auch ohne Back-up Batterie verwendet werden.
1. Öffnen Sie das Batteriefach (4), an der Unterseite des Geräts, indem Sie den Batteriefachdeckel (4) entfernen (Abb. 1).
2. Legen Sie eine Batterie des Typs 6F22/6LR61 ein. Beachten Sie die Polarität (+ / –) auf der Batterie und im Batteriefach (4) (Abb. 2).
3. Schließen Sie anschließend das Batteriefach (4), indem Sie den Batteriefachdeckel (4) wieder anbringen (Abb. 3).
Abb. 1 Abb. 2 Abb. 3
Light Radio (Wake-up)_WUL10001_144010902_IM-DE-GB_150603.indb 10 17/06/2015 5:24 PM
Deutsch
11
4. Bedienungsanweisungen
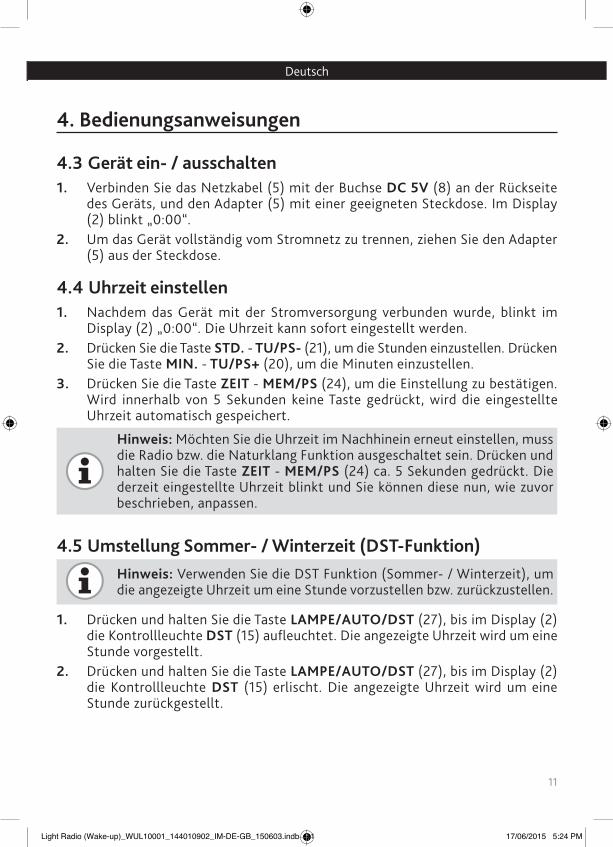
4.3 Gerät ein- / ausschalten1. Verbinden Sie das Netzkabel (5) mit der Buchse DC 5V (8) an der Rückseite
des Geräts, und den Adapter (5) mit einer geeigneten Steckdose. Im Display (2) blinkt „0:00“.
2. Um das Gerät vollständig vom Stromnetz zu trennen, ziehen Sie den Adapter (5) aus der Steckdose.
4.4 Uhrzeit einstellen1. Nachdem das Gerät mit der Stromversorgung verbunden wurde, blinkt im
Display (2) „0:00“. Die Uhrzeit kann sofort eingestellt werden. 2. Drücken Sie die Taste STD. - TU/PS- (21), um die Stunden einzustellen. Drücken
Sie die Taste MIN. - TU/PS+ (20), um die Minuten einzustellen. 3. Drücken Sie die Taste ZEIT - MEM/PS (24), um die Einstellung zu bestätigen.
Wird innerhalb von 5 Sekunden keine Taste gedrückt, wird die eingestellte Uhrzeit automatisch gespeichert.
Hinweis: Möchten Sie die Uhrzeit im Nachhinein erneut einstellen, muss die Radio bzw. die Naturklang Funktion ausgeschaltet sein. Drücken und halten Sie die Taste ZEIT - MEM/PS (24) ca. 5 Sekunden gedrückt. Die derzeit eingestellte Uhrzeit blinkt und Sie können diese nun, wie zuvor beschrieben, anpassen.
4.5 Umstellung Sommer- / Winterzeit (DST-Funktion)Hinweis: Verwenden Sie die DST Funktion (Sommer- / Winterzeit), um die angezeigte Uhrzeit um eine Stunde vorzustellen bzw. zurückzustellen.
1. Drücken und halten Sie die Taste LAMPE/AUTO/DST (27), bis im Display (2) die Kontrollleuchte DST (15) aufleuchtet. Die angezeigte Uhrzeit wird um eine Stunde vorgestellt.
2. Drücken und halten Sie die Taste LAMPE/AUTO/DST (27), bis im Display (2) die Kontrollleuchte DST (15) erlischt. Die angezeigte Uhrzeit wird um eine Stunde zurückgestellt.
Light Radio (Wake-up)_WUL10001_144010902_IM-DE-GB_150603.indb 11 17/06/2015 5:24 PM

Deutsch
12
4. Bedienungsanweisungen
4.6 Dimmer Funktion1. Drücken Sie die Taste DIMMER - NATUR SOUND (19), um die Helligkeit des
Displays (2) zwischen hell, mittel, dunkel und automatisch (AUTO) einzustellen. 2. Wird automatisch eingestellt, leuchtet im Display (2) die Kontrollleuchte AUTO
(11) auf. Die Helligkeit des Displays (2) wird nun automatisch von 23:00 bis 6:59 auf niedrig und von 7:00 bis 22:59 auf hell eingestellt.
Hinweis: Die Dimmer Funktion kann nur eingestellt werden während die Uhrzeit angezeigt wird. Danach wird die eingestellte Helligkeit für alle Anzeigen auf dem Display (2) verwendet.
4.7 Lautstärke einstellenHinweis: Die Lautstärke kann nur eingestellt werden, während die Radio bzw. Naturklang Funktion verwendet wird.
1. Drücken Sie die Taste (16), um die Lautstärke zu erhöhen.2. Drücken Sie die Taste (17), um die Lautstärke zu verringern.
Hinweis: Wird die entsprechende Taste gedrückt gehalten, erhöht bzw. verringert sich die Lautstärke schneller. Die Veränderung der Lautstärke wird im Display (2) angezeigt und ist von „00” bis „15” einstellbar.
4.8 Radio Funktion1. Legen Sie die Antenne (6) komplett aus, um den bestmöglichen Empfang von
Radiosendern zu bekommen.2. Schalten Sie das Gerät wie im Abschnitt 4.3. Gerät ein- / ausschalten beschrieben
ein.
Light Radio (Wake-up)_WUL10001_144010902_IM-DE-GB_150603.indb 12 17/06/2015 5:24 PM
Deutsch
13
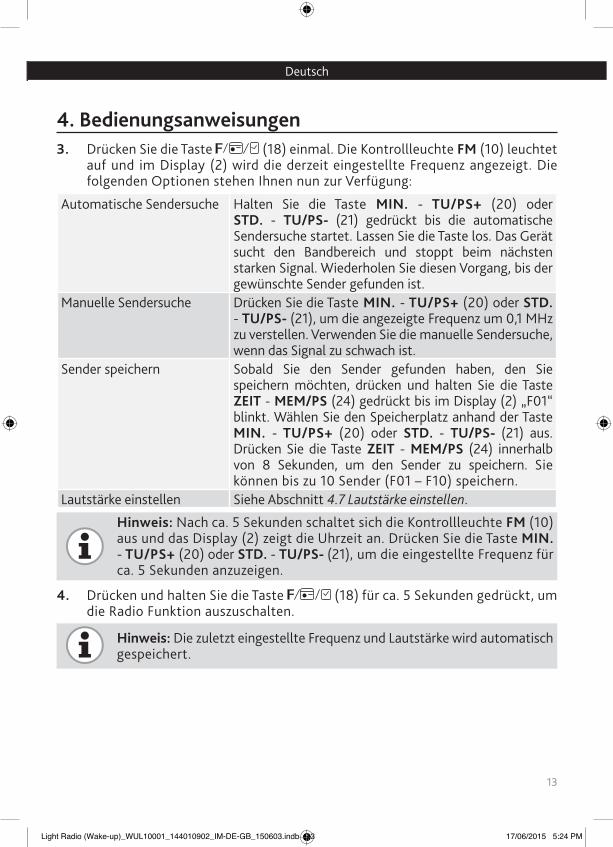
4. Bedienungsanweisungen3. Drücken Sie die Taste (18) einmal. Die Kontrollleuchte FM (10) leuchtet
auf und im Display (2) wird die derzeit eingestellte Frequenz angezeigt. Die folgenden Optionen stehen Ihnen nun zur Verfügung:
Automatische Sendersuche Halten Sie die Taste MIN. - TU/PS+ (20) oder STD. - TU/PS- (21) gedrückt bis die automatische Sendersuche startet. Lassen Sie die Taste los. Das Gerät sucht den Bandbereich und stoppt beim nächsten starken Signal. Wiederholen Sie diesen Vorgang, bis der gewünschte Sender gefunden ist.
Manuelle Sendersuche Drücken Sie die Taste MIN. - TU/PS+ (20) oder STD. - TU/PS- (21), um die angezeigte Frequenz um 0,1 MHz zu verstellen. Verwenden Sie die manuelle Sendersuche, wenn das Signal zu schwach ist.
Sender speichern Sobald Sie den Sender gefunden haben, den Sie speichern möchten, drücken und halten Sie die Taste ZEIT - MEM/PS (24) gedrückt bis im Display (2) „F01“ blinkt. Wählen Sie den Speicherplatz anhand der Taste MIN. - TU/PS+ (20) oder STD. - TU/PS- (21) aus. Drücken Sie die Taste ZEIT - MEM/PS (24) innerhalb von 8 Sekunden, um den Sender zu speichern. Sie können bis zu 10 Sender (F01 – F10) speichern.
Lautstärke einstellen Siehe Abschnitt 4.7 Lautstärke einstellen.
Hinweis: Nach ca. 5 Sekunden schaltet sich die Kontrollleuchte FM (10) aus und das Display (2) zeigt die Uhrzeit an. Drücken Sie die Taste MIN. - TU/PS+ (20) oder STD. - TU/PS- (21), um die eingestellte Frequenz für ca. 5 Sekunden anzuzeigen.
4. Drücken und halten Sie die Taste (18) für ca. 5 Sekunden gedrückt, um die Radio Funktion auszuschalten.
Hinweis: Die zuletzt eingestellte Frequenz und Lautstärke wird automatisch gespeichert.
Light Radio (Wake-up)_WUL10001_144010902_IM-DE-GB_150603.indb 13 17/06/2015 5:24 PM

Deutsch
14
4. Bedienungsanweisungen
4.9 Naturklang FunktionHinweis: Um die Naturklang Funktion zu verwenden, muss die Radio Funktion eingeschaltet sein. Die Lautstärke kann wie zuvor beschrieben eingestellt werden.
1. Drücken Sie die Taste DIMMER - NATUR SOUND (19) einmal. Im Display (2) wird „n51“ angezeigt.
2. Drücken Sie die Taste DIMMER - NATUR SOUND (19) erneut, um zum nächsten Naturton zu wechseln. Die folgenden Naturtöne stehen Ihnen zur Verfügung:
Display Naturtonn51 Vögeln52 Wassern53 Naturn54 Meer
3. Drücken Sie die Taste (18), um zurück zur Radio Funktion zu gelangen oder drücken Sie die Taste (18) für ca. 5 Sekunden, um die Naturklang Funktion auszuschalten.
4.10 Alarm FunktionHinweis: Dieses Gerät verfügt über zwei Alarm Funktionen. Jede Alarm Funktion kann unabhängig eingestellt werden und hat eine Auswahl von Weckmethoden (Radio, Beep-Ton oder Naturtöne). Sie können mit der Licht Funktion kombiniert werden (siehe Abschnitt 4.11 Licht Funktion).
Alarm einstellen
Hinweis: Die Radio- bzw. Naturklang Funktion muss ausgeschaltet sein, bevor der Alarm eingestellt werden kann.
1. Drücken und halten Sie die Taste (26) oder Taste (25) für ca. 4 Sekunden, um entweder den oder einzustellen. Im Display (2) blinkt die Weckzeit und die Kontrollleuchte (13) oder (12).
2. Drücken Sie die Taste STD. - TU/PS- (21), um die Stunden einzustellen. Drücken Sie die Taste MIN. - TU/PS+ (20), um die Minuten einzustellen.
Light Radio (Wake-up)_WUL10001_144010902_IM-DE-GB_150603.indb 14 17/06/2015 5:24 PM

Deutsch
15
4. Bedienungsanweisungen3. Drücken Sie die Taste (26) bzw. Taste (25), um die Weckzeit zu bestätigen
und die Aufweckmethode zu wählen. 4. Drücken Sie die Taste (26) bzw. Taste (25), um zwischen den Weckmethoden
zu wechseln.
Display Weckmethode bu Beep-Ton (ansteigend)Tad Radio Funktionn51 Vögeln52 Wassern53 Naturn54 MeerOFF Alarm aus
5. Wird innerhalb von 5 Sekunden keine Taste gedrückt, werden die Einstellungen automatisch gespeichert. Die Kontrollleuchte (13) bzw. (12) wird im Display (2) angezeigt und die Alarm Funktion ist aktiviert.
Hinweis: Ist die Alarm Funktion deaktiviert, wird die Kontrollleuchte (13) bzw. (12) nicht im Display (2) angezeigt.
Alarm ausschalten
Hinweis: Wurde die Licht Funktion als Teil der Alarm Funktion eingestellt (siehe Abschnitt 4.11 Licht Funktion), so wird diese mit der Alarm Funktion aktiviert bzw. deaktiviert.
1. Wurde der Alarm ausgelöst, erklingt die eingestellte Weckmethode und die Kontrollleuchte des Alarms blinkt im Display (2). Sie haben nun die folgenden Optionen:
a. Drücken Sie die Taste (18), um den Alarm zu deaktivieren. Die Kontrollleuchte des Alarms wird nun permanent angezeigt. Der Alarm wird in 24 Stunden erneut ausgelöst. b. Drücken Sie die Taste SNOOZE (23), um den Alarm für ca. 10 Minuten zu deaktivieren. Nach ca. 10 Minuten wird der Alarm erneut ausgelöst und Ihnen stehen dieselben Optionen zur Verfügung.
Light Radio (Wake-up)_WUL10001_144010902_IM-DE-GB_150603.indb 15 17/06/2015 5:24 PM

Deutsch
16
4. Bedienungsanweisungen c. Wird keine Taste gedrückt, schaltet sich der Alarm nach ca. 60 Minuten automatisch aus. d. Drücken und halten Sie die Taste des ausgelösten Alarms gedrückt, um den Alarm permanent zu deaktivieren. Die Kontrollleuchte des Alarms wird ebenfalls deaktiviert.
4.11 Licht FunktionHinweis: Die Licht Funktion des Gerätes kann als Teil der Alarm Funktion sowie als eigenstehende Funktion verwendet werden. Sie kann in 10 Stufen eingestellt werden.
Hinweis: Für beste Resultate, verwenden Sie die Licht Funktion in dunklen Räumen.
1. Drücken Sie die Taste LAMPE/AUTO/DST (27) einmal, um das Licht einzuschalten.
2. Drücken Sie die Taste (29) bzw. (28), um die Helligkeit zu erhöhen bzw. zu verringern. Im Display (2) wird „06“ bzw. „04“ angezeigt. Die Helligkeit kann von 01 bis 10 eingestellt werden.
3. Drücken Sie die Taste LAMPE/AUTO/DST (27) erneut, um die Licht Funktion als Teil der Alarm Funktion zu verwenden. Die Kontrollleuchte (14) wird im Display (2) angezeigt.
Hinweis: Wird die Licht Funktion als Teil der Alarm Funktion verwendet, schaltet sich das Licht ca. 25 Minuten vor der Weckzeit auf Stufe 5 ein und wird alle 5 Minuten ansteigend heller.
4. Drücken Sie die Taste LAMPE/AUTO/DST (27) ein drittes Mal, um die Licht Funktion auszuschalten. Die Kontrollleuchte (14) erlischt.
4.12 SchlaffunktionDas Gerät hat eine Schlaffunktion, welche das Gerät nach der eingestellten Zeit automatisch ausschaltet.
Hinweis: Die Schlaffunktion kann von 10 bis 90 Minuten, in 10 Minuten Schritten, eingestellt werden.
Light Radio (Wake-up)_WUL10001_144010902_IM-DE-GB_150603.indb 16 17/06/2015 5:24 PM

Deutsch
17
4. BedienungsanweisungenHinweis: Um die Schlaffunktion zu verwenden, muss entweder die Radio- oder Naturklang Funktion aktiviert sein.
1. Drücken Sie die Taste SLEEP (22), um die Schlaffunktion zu aktivieren. Im Display (2) wird „90“ angezeigt. Die Schlaffunktion ist nun aktiviert und schaltet das Gerät automatisch nach 90 Minuten aus.
2. Drücken Sie die Taste SLEEP (22), um die Zeit jedes Mal um 10 Minuten zu verringern (90 -> 80 -> 70 -> 60 -> 50 -> 40 -> 30 -> 20 -> 10 -> OFF).
3. Drücken Sie die Taste SLEEP (22) so oft bis im Display (2) „OFF“ angezeigt wird. Die Schlaffunktion ist deaktiviert.
4.13 USB-LadefunktionDas Gerät hat einen USB-Ladeanschluss (9) an der Rückseite, welcher zum Laden von externen Geräten via USB verwendet werden kann.
Hinweis: Das Gerät muss mit dem Stromnetz verbunden sein, um diese Funktion zu verwenden.
1. Verbinden Sie das benötigte USB Kabel mit dem USB-Ladeanschluss (9) an der Rückseite des Gerätes.
2. Verbinden Sie das andere Ende des USB Kabels mit dem externen Gerät, welches geladen werden soll.
Light Radio (Wake-up)_WUL10001_144010902_IM-DE-GB_150603.indb 17 17/06/2015 5:24 PM

Deutsch
18
5. Reinigung und Pflege
5.1 Reinigung1. Ziehen Sie vor jeder Reinigung den Adapter (5) aus der Steckdose und lassen
Sie das Gerät vollständig abkühlen.
WARNUNG - Stromschlaggefahr! Tauchen Sie das Gerät niemals in Wasser oder andere Flüssigkeiten. Halten Sie das Gerät niemals unter fließendes Wasser.
2. Verwenden Sie zur Reinigung keinesfalls Lösungs- und Scheuermittel, harte Bürsten, metallische oder scharfe Gegenstände. Lösungsmittel sind gesundheitsschädlich und greifen die Plastikteile an, scheuernde Reiniger und Hilfsmittel zerkratzen die Oberfläche.
3. Reinigen Sie das Gerätegehäuse mit einem leicht angefeuchteten Tuch. Trocknen Sie das Gerätegehäuse anschließend ab.
5.2 Aufbewahrung und Transport1. Reinigen Sie das Gerät wie im Abschnitt 5.1 Reinigung beschrieben.
Hinweis: Verstauen Sie das Gerät immer in einem sauberen und trockenen Zustand an einem trockenen, sauberen und für Kinder unzugänglichen Ort, vorzugsweise in seiner Originalverpackung.
2. Stellen Sie sicher, dass das Gerät während des Transports nicht herunterfallen oder umfallen kann.
3. Schützen Sie das Gerät vor Schlägen und Vibrationen, vor allem beim Transport in Fahrzeugen.
5.3 FehlerbehebungDas Gerät funktioniert nicht:1 Ist das Gerät an das Netz angeschlossen?
Verbinden Sie das Gerät mit dem Stromnetz.2 Hat die Sicherung der verwendeten Steckdose ausgelöst?
Überprüfen Sie die Funktion der Steckdose mit einem anderen Gerät.
Light Radio (Wake-up)_WUL10001_144010902_IM-DE-GB_150603.indb 18 17/06/2015 5:24 PM

Deutsch
19
5. Reinigung und PflegeIm Display wird nichts angezeigt, und das Gerät reagiert nicht auf Tastendruck:1 Wurde das Gerät einer elektrostatischen Entladung oder elektrischen Spitzen
ausgesetzt?Trennen Sie das Gerät vom Stromnetz. Warten Sie kurz und stecken Sie den Netzstecker wieder in die Steckdose.
2 Ist das Gerät an das Netz angeschlossen? Verbinden Sie das Gerät mit dem Stromnetz.
Kein Radiosender wird empfangen:1 Ist die Radiofunktion eingestellt?
Schalten Sie das Gerät in die Radiofunktion.2 Ist der Sender richtig eingestellt?
Stellen Sie den Sender neu ein.3 Ist die Lautstärke richtig eingestellt?
Erhöhen Sie die Lautstärke.4 Ist die Antenne vollständig ausgelegt?
Legen Sie Antenne vollständig aus. Richten Sie das Gerät bzw. die Antenne neu aus.
Die Naturklang Funktion funktioniert nicht: 1 Ist die Naturklang Funktion eingestellt?
Schalten Sie das Gerät in die Naturklang Funktion. 2 Ist die Lautstärke richtig eingestellt?
Erhöhen Sie die Lautstärke.
Die USB-Ladefunktion funktioniert nicht: 1 Ist das Gerät an das Netz angeschlossen?
Verbinden Sie das Gerät mit dem Stromnetz.2 Ist das USB Kabel mit dem Gerät verbunden
Verbinden Sie das USB Kabel mit dem Gerät.
Hinweis: Wenden Sie sich an unseren Kundendienst, wenn das Gerät nach dem Überprüfen der obigen Punkte immer noch nicht funktionieren sollte. Versuchen Sie auf keinen Fall selbst, das Gerät zu reparieren.
Light Radio (Wake-up)_WUL10001_144010902_IM-DE-GB_150603.indb 19 17/06/2015 5:24 PM
Deutsch
20
6. EntsorgungKorrekte Entsorgung dieses Gerätes:Diese Kennzeichnung weist darauf hin, dass Elektrogeräte in der EU nicht mit dem normalen Haushaltsmüll entsorgt werden dürfen. Benutzen Sie bitte die Rückgabe- und Sammelsysteme in Ihrer Gemeinde oder wenden Sie sich an den Händler, bei dem das Gerät gekauft wurde.
Bitte entsorgen Sie Batterien auf umweltfreundlicher Weise.Entsorgen Sie Batterien nicht mit dem regulären Hausmüll. Nehmen Sie die Sammelstellen Ihrer Kommune in Anspruch oder sprechen Sie den Fachhändler an, bei dem das Produkt gekauft wurde.
Light Radio (Wake-up)_WUL10001_144010902_IM-DE-GB_150603.indb 20 17/06/2015 5:24 PM


Light Radio (Wake-up)_WUL10001_144010902_IM-DE-GB_150603.indb 23 17/06/2015 5:25 PM
English
24
Table of content
1. Overview ............................................................................................... 261.1 Technical data................................................................................................................. 261.2 Symbols ...........................................................................................................................27
2. Important safety instructions .................................................................272.1 General safety instructions ...........................................................................................272.2 Mains connection ......................................................................................................... 292.3 Batteries ........................................................................................................................ 292.4 Installation location ..................................................................................................... 302.5 Intended use ................................................................................................................. 30
3. Controls ................................................................................................. 313.1 Appliance .........................................................................................................................313.2 Display ............................................................................................................................313.3 Control panel ................................................................................................................ 32
4. Operating instructions .......................................................................... 334.1 Unpacking and inspection ........................................................................................... 334.2 Back-up function .......................................................................................................... 334.3 Switching the appliance on / off ................................................................................ 344.4 Setting the time ........................................................................................................... 344.5 Switching between summer / winter time (DST function) .................................... 344.6 Dimmer function .......................................................................................................... 354.7 Setting the volume ....................................................................................................... 354.8 Radio function .............................................................................................................. 354.9 Nature sound function .................................................................................................374.10 Alarm function .............................................................................................................374.11 Light function............................................................................................................... 394.12 Sleep function ............................................................................................................. 394.13 USB charging function ............................................................................................... 40
5. Cleaning and care .................................................................................. 405.1 Cleaning .......................................................................................................................... 405.2 Storage and transportation ........................................................................................ 405.3 Troubleshooting .............................................................................................................41
6. Disposal ................................................................................................ 42
7. Warranty ............................................................................................... 43
Light Radio (Wake-up)_WUL10001_144010902_IM-DE-GB_150603.indb 24 17/06/2015 5:25 PM

English
25
VIVESS Quality Products with TÜV Rheinland Seal
For companies of the REWE Group, reliable product quality and safety are a top priority. You, as a REWE customer, can rely on this.
That is why REWE Group has VIVESS products thoroughly tested by TÜV Rheinland’s independent engineers.
Our products satisfy not only the strict requirements of REWE quality standards, but were also awarded the TÜV Rheinland’s seal.
More specifically:
Our products have to undergo additional strict individual tests in order to receive the seal of the independent TÜV Rheinland.
The requirements for TÜV Rheinland‘s seal go far beyond any legal test requirements.
We are aiming to set a new benchmark -for your safety and benefit.
Light Radio (Wake-up)_WUL10001_144010902_IM-DE-GB_150603.indb 25 17/06/2015 5:25 PM

English
26
1. Overview
1.1 Technical dataAppliance
Model WUL10001Input 5 V , 2 A Power consumption max. 10 WProtection class III Back-up battery 9 V , Type 6F22/6LR61Output power (speaker) 1 WRadio frequency 87.5 - 108 MHzUSB output 5 V , max. 1 ALEDs 9 each 3.2 V, 20 mADimensions approx. 120 x 175 x 185 mm (L x W x H)Weight approx. 580 gOperating temperature 0 °C to 30 °CProduced for REWE-Zentral AG, 50603 Köln
Adapter
Model AKN2G-0500200VW Input 100 – 240 V~, 50/60 Hz, 0.35 A Output 5 V , 2 AProtection class II Operating temperature 0 °C to 30 °CProduced for REWE-Zentral AG, 50603 Köln
Light Radio (Wake-up)_WUL10001_144010902_IM-DE-GB_150603.indb 26 17/06/2015 5:25 PM

English
27
1. Overview
1.2 SymbolsImportant safety instructions are especially marked. These instructions must always be observed to avoid accidents and property damage.
WARNING - Warns against health risks and points out possible injury risks.
WARNING - Danger of electrocution!
WARNING - To prevent possible damage to the sense of hearing, avoid listening at high volume levels for long periods of time. Extreme volume levels lead to permanent hearing loss due to high sound pressure.
Only for use in dry indoor rooms.
Note: Provides tips and information.
Read instruction manual.
2. Important safety instructions
2.1 General safety instructions1. Read this instruction manual thoroughly before using the appliance for the first
time. It contains important information for your safety and for the use and maintenance of the appliance. Keep the instruction manual in a safe place for future reference and pass it along with the appliance.
2. Pay attention to all warnings on the appliance and this instruction manual.3. Only use the appliance for the intended use. Improper use can cause hazards. If
you do not use the appliance for its intended purpose or improperly, no liability will be accepted for resulting damages.
Light Radio (Wake-up)_WUL10001_144010902_IM-DE-GB_150603.indb 27 17/06/2015 5:25 PM
English
28
2. Important safety instructions4. The use of accessories and appliance parts, which are not recommended by the
supplier, can cause injuries and damages and voids the warranty.5. This appliance can be used by children aged from 8 years and above and persons
with reduced physical, sensory or mental capabilities or lack of experience and / or knowledge if they have been given supervision or instruction concerning use of the appliance in a safe way and understand the hazards involved.
6. Children shall not play with the appliance.7. Keep the appliance and its cord out of reach of children aged less than 8 years.8. Cleaning and user maintenance shall not be made by children without
supervision.
WARNING - To prevent possible damage to the sense of hearing, avoid listening at high volume levels for long periods of time. Extreme volume levels lead to permanent hearing loss due to high sound pressure.
WARNING - Do not use this appliance in proximity to water, high humidity or splashing water, e.g. in a damp cellar, next to a swimming pool or bathtub. Protect the appliance from dripping and splashing water.
9. Keep the appliance away from heat and cold, direct sunlight, dust, moisture (do not immerse in liquids) and sharp corners.
10. During cleaning, do not immerse the appliance or adapter with power cord in water or any other liquids.
WARNING - Danger of electrocution! Do not try to repair the appliance yourself. Please return the appliance to the retailer or a qualified customer service centre for maintenance and repairs.
11. If the adapter, power cord or appliance housing is damaged or if the appliance was dropped do not use the appliance until a professional electrician has checked it.
12. Do not operate the appliance with wet hands or while standing on a wet surface.13. Do not open the appliance. Do not insert objects into the openings of the
appliance. Keep all openings clear.14. Do not stick any foreign objects onto the appliance and do not cover it.15. Do not place any objects on top of the appliance.16. Do not place any objects with open flames, e.g. candles, or objects filled with
liquids, e.g. vase, on top of the appliance.
Light Radio (Wake-up)_WUL10001_144010902_IM-DE-GB_150603.indb 28 17/06/2015 5:25 PM
English
29
2. Important safety instructions17. Please note additional instruction in the chapter 5. Cleaning and care.
2.2 Mains connection1. The voltage indicated on the type plate of the adapter must correspond with
the mains voltage.2. Only use the supplier adapter with this appliance. 3. The adapter is used as a disconnecting device. Ensure that the adapter is always
easily accessible. Please note, the appliance is under current as long as the adapter is connected to the appliance and a mains socket. Only the adapter can disconnect the appliance from the mains completely.
4. Avoid damaging the adapter and power cord by squashing, bending or contact with sharp edges and keep it away from hot surfaces and open flames.
5. Ensure that the appliance cannot be pulled down by its power cord. Place the power cord, so nobody can trip over it.
6. Unplug the adapter from the mains socket, when not in use, during thunderstorms, when there are malfunctions and before every cleaning.
7. In case the appliance malfunctions due to an electrostatic discharge or electrical spikes, disconnect the adapter from the mains. Wait one minute and plug the adapter back into the mains socket. Turn the appliance back on in order to return to normal operation.
8. Only unplug the adapter by pulling the adapter itself, do not pull the power cord.9. In order to avoid hazards, a damaged power cord may only be replaced by the
manufacturer, an appointed workshop or a similarly qualified person.
2.3 BatteriesWARNING - Danger of explosion if battery is incorrectly replaced. Replace only with the same or equivalent type.
1. Batteries shall not be exposed to excessive heat such as sunshine, fire or similar. Batteries could explode.
2. Always select the correct battery size and type most suitable for the intended use. Instructions on proper battery selection, which can be found in the instruction manual of appliances, have to be kept safe for future reference.
3. Change all batteries in a set at the same time.
Light Radio (Wake-up)_WUL10001_144010902_IM-DE-GB_150603.indb 29 17/06/2015 5:25 PM

English
30
2. Important safety instructions4. Clean the battery contacts and the contacts in the appliance before inserting
the batteries. 5. Ensure the batteries are inserted correctly and pay attention to the polarity
(+ / –).6. Remove depleted batteries immediately.7. Before disposing the appliance, remove the batteries and dispose them
separately.
2.4 Installation location1. Place the appliance on a horizontal, dry, clean, sturdy and anti-slip surface.2. Do not place the appliance on top of hobs (gas-, electronic-, coal hobs etc.).3. Please pay attention to the paragraph 2.1 General safety instructions.4. Keep a minimum space of 10 cm around the appliance to ensure sufficient
ventilation.5. Do not place the appliance in close proximity to other appliances, which generate
strong magnetic fields (e.g. engines, transformers).
2.5 Intended use1. This appliance is to be used exclusively listening to radio stations and as an
alarm clock. 2. This appliance is only designed for domestic use. It is not suitable for commercial
use.3. Only use the appliance in moderate climates.4. Only use the appliance as described in this instruction manual. Any other use
can damage the appliance and cause injuries.
Light Radio (Wake-up)_WUL10001_144010902_IM-DE-GB_150603.indb 30 17/06/2015 5:25 PM

English
31
3. Controls
3.1 Appliance
1
29
34
USB DC 5V
5
6
789
3.2 Display
1. Light dome2. Display3. Control panel4. Battery compartment with lid5. Adaptor with power cord
6. Aerial7. Speaker8. Socket DC 5V9. USB charging port
10111213
1415
10. Indicator FM11. Indicator AUTO12. Indicator 13. Indicator 14. Indicator 15. Indicator DST
Light Radio (Wake-up)_WUL10001_144010902_IM-DE-GB_150603.indb 31 17/06/2015 5:25 PM

English
32
3. Controls
3.3 Control panel
16. Button 17. Button 18. Button 19. Button DIMMER - NATUR SOUND20. Button MIN. - TU/PS+21. Button STD. - TU/PS-22. Button SLEEP
162928
27
17
18
1920212223242526
23. Button SNOOZE24. Button ZEIT - MEM/PS25. Button (alarm 2)26. Button (alarm 1)27. Button LAMPE/AUTO/DST28. Button 29. Button
Light Radio (Wake-up)_WUL10001_144010902_IM-DE-GB_150603.indb 32 17/06/2015 5:25 PM
English
33
4. Operating instructions
4.1 Unpacking and inspection1. Carefully remove the appliance and the accessories from the packaging.2. Check package contents for completeness and damage. Do not operate the
appliance if package contents is incomplete or appear damaged. Return it immediately to the retailer.
3. Dispose of packaging material in accordance with legal provisions.4. Store the packaging material if you want to use it to pack, ship or transport
the appliance. Store it in such a way that it cannot cause harm.
WARNING - Risk of suffocation! Packaging materials are not toys. Plastic bags, foils and Styrofoam parts can suffocate children. Always keep all packaging materials away from children.
4.2 Back-up functionNote: The battery is only a back-up battery. In the case of a power cut, it will save the set time and alarm. The appliance cannot be operated using only the battery. The appliance can be used without the back-up battery.
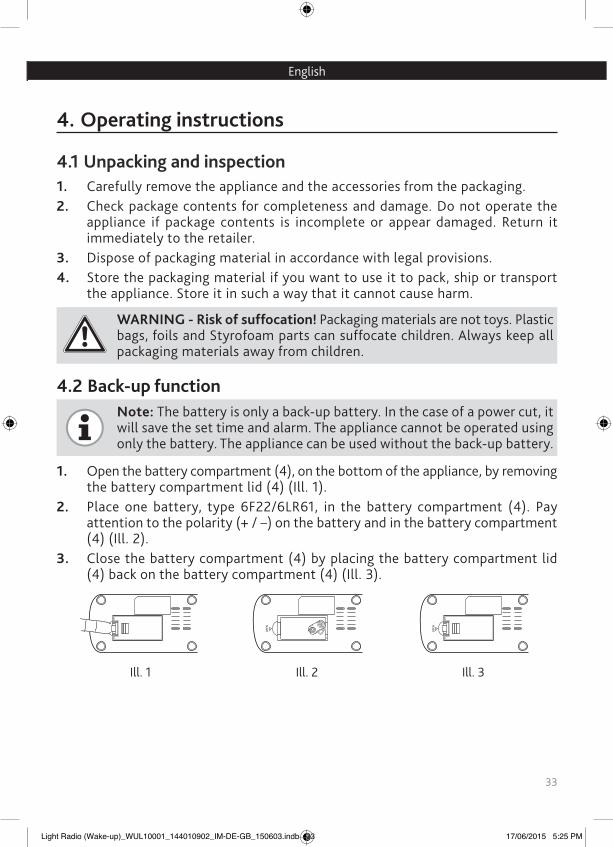
1. Open the battery compartment (4), on the bottom of the appliance, by removing the battery compartment lid (4) (Ill. 1).
2. Place one battery, type 6F22/6LR61, in the battery compartment (4). Pay attention to the polarity (+ / –) on the battery and in the battery compartment (4) (Ill. 2).
3. Close the battery compartment (4) by placing the battery compartment lid (4) back on the battery compartment (4) (Ill. 3).
Ill. 1 Ill. 2 Ill. 3
Light Radio (Wake-up)_WUL10001_144010902_IM-DE-GB_150603.indb 33 17/06/2015 5:25 PM
English
34
4. Operating instructions
4.3 Switching the appliance on / off1. Connect the power cord (5) with the socket DC 5V (8) on the back of the
appliance, and the adapter (5) with a suitable mains socket. “0:00“ flashes on the display (2).
2. To disconnect the appliance from the mains supply, disconnect the adapter (5) from the mains socket.
4.4 Setting the time1. After connecting the appliance to the mains supply, “0:00” flashes on the
display (2). The time can be set straight away. 2. Press the button STD. - TU/PS- (21), to set the hours. Press the button MIN.
- TU/PS+ (20), to set the minutes. 3. Press the button ZEIT - MEM/PS (24), to confirm the set time. The time will
be saved automatically, if no button is pressed within 5 seconds.
Note: To set the time, both the radio and nature sound function have to be switched off. Press and hold the button ZEIT - MEM/PS (24) for approx. 5 seconds. The currently set time flashes and can now be adjusted as previously described.
4.5 Switching between summer / winter time (DST function)Note: Use the DST function (summer / winter time) to adjust the time shown by adding or removing one hour.
1. Press and hold the button LAMPE/AUTO/DST (27) until the indicator DST (15) lights up on the display (2). The set time will be adjusted by adding one hour.
2. Press and hold the button LAMPE/AUTO/DST (27) until the indicator DST (15) is no longer shown on the display (2). The time shown will be set back by one hour.
Light Radio (Wake-up)_WUL10001_144010902_IM-DE-GB_150603.indb 34 17/06/2015 5:25 PM

English
35
4. Operating instructions
4.6 Dimmer function1. Press the button DIMMER - NATUR SOUND (19), to adjust the brightness of
the display (2) between high, medium, low and automatic (AUTO).2. If automatic is set, the indicator AUTO (11) lights up on the display (2). The
brightness of the display (2) will now be automatically set to low between 23:00 and 6:59, and set to high between 7:00 and 22:59.
Note: The dimmer function can only be set while the time is shown on the display (2). After setting, the set brightness will be used for all displayed information.
4.7 Setting the volumeNote: The volume can only be set while using the radio or nature sound function.
1. Press the button (16), to increase the volume. 2. Press the button (17), to reduce the volume.
Note: If the corresponding button is being pressed and held, the volume is being increased or reduced faster. The adjustment in volume is being shown on the display (2) and is adjustable from “00” to “15”.
4.8 Radio function1. Extend the aerial (6) completely, for the best possible reception of radio stations.2. Switch the appliance on, as described in paragraph 4.3 Switching the appliance
on / off.
Light Radio (Wake-up)_WUL10001_144010902_IM-DE-GB_150603.indb 35 17/06/2015 5:25 PM

English
36
4. Operating instructions3. Press the button (18) once. The indicator FM (10) lights up and the
currently set frequency are shown on the display (2). The following options are now available:
Automatic station search Press and hold the button MIN. - TU/PS+ (20) or STD. - TU/PS- (21) until the automatic station search starts. Release the button. The appliance searches the frequency range and stops at the next strong signal. Repeat this process until the desired station is found.
Manuel station search Press the button MIN. - TU/PS+ (20) or STD. - TU/PS- (21), to adjust the displayed frequency by 0.1 MHz. Use the manual station search, if the signal is too weak.
Save station Once the desired station you want to save is found, press and hold the button ZEIT - MEM/PS (24) until “F01” flashes on the display (2). Select the memory slot using the button MIN. - TU/PS+ (20) or STD. - TU/PS- (21). Press the button ZEIT - MEM/PS (24) within 8 seconds, to save the station. You can save up to 10 stations (F01 – F10).
Adjust volume Refer to paragraph 4.7 Setting the volume.
Note: After approx. 5 seconds, the indicator FM (10) switches off and the display (2) shows the time. Press the button MIN. - TU/PS+ (20) or STD. - TU/PS- (21), to display the set frequency for approx. 5 seconds.
4. Press and hold the button (18) for approx. 5 seconds, to switch off the radio function.
Note: The last used frequency and volume will be saved automatically.
Light Radio (Wake-up)_WUL10001_144010902_IM-DE-GB_150603.indb 36 17/06/2015 5:25 PM
English
37
4. Operating instructions
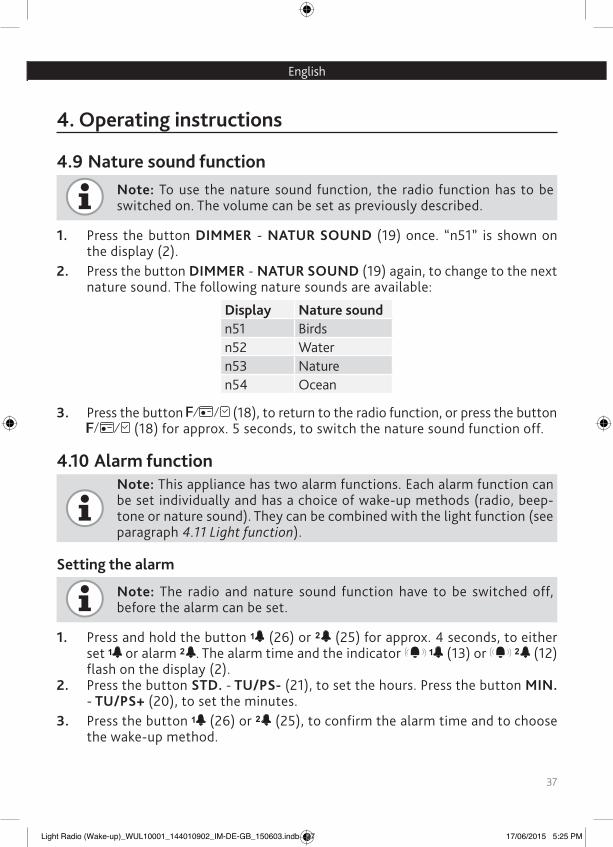
4.9 Nature sound functionNote: To use the nature sound function, the radio function has to be switched on. The volume can be set as previously described.
1. Press the button DIMMER - NATUR SOUND (19) once. “n51” is shown on the display (2).
2. Press the button DIMMER - NATUR SOUND (19) again, to change to the next nature sound. The following nature sounds are available:
Display Nature soundn51 Birdsn52 Watern53 Naturen54 Ocean
3. Press the button (18), to return to the radio function, or press the button (18) for approx. 5 seconds, to switch the nature sound function off.
4.10 Alarm functionNote: This appliance has two alarm functions. Each alarm function can be set individually and has a choice of wake-up methods (radio, beep-tone or nature sound). They can be combined with the light function (see paragraph 4.11 Light function).
Setting the alarm
Note: The radio and nature sound function have to be switched off, before the alarm can be set.
1. Press and hold the button (26) or (25) for approx. 4 seconds, to either set or alarm . The alarm time and the indicator (13) or (12) flash on the display (2).
2. Press the button STD. - TU/PS- (21), to set the hours. Press the button MIN. - TU/PS+ (20), to set the minutes.
3. Press the button (26) or (25), to confirm the alarm time and to choose the wake-up method.
Light Radio (Wake-up)_WUL10001_144010902_IM-DE-GB_150603.indb 37 17/06/2015 5:25 PM
English
38
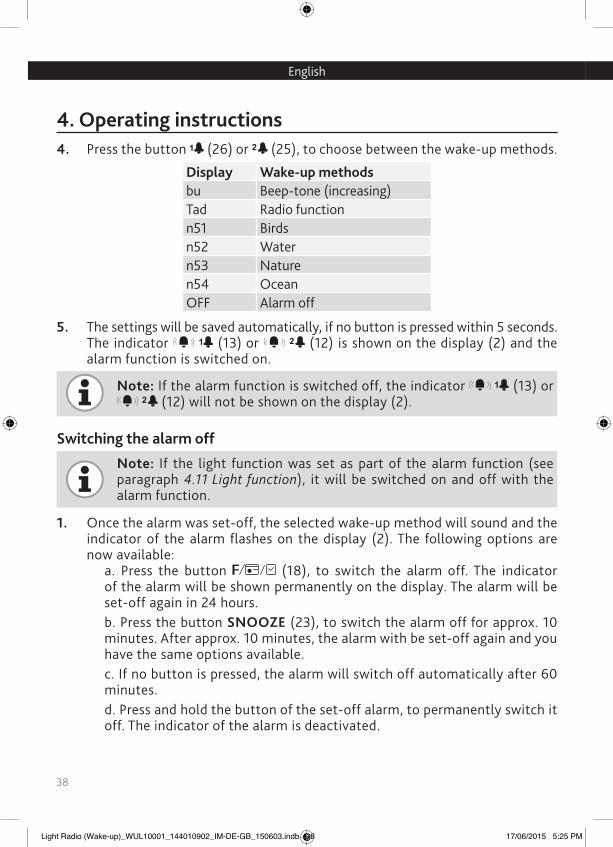
4. Operating instructions4. Press the button (26) or (25), to choose between the wake-up methods.
Display Wake-up methods bu Beep-tone (increasing)Tad Radio functionn51 Birdsn52 Watern53 Naturen54 OceanOFF Alarm off
5. The settings will be saved automatically, if no button is pressed within 5 seconds. The indicator (13) or (12) is shown on the display (2) and the alarm function is switched on.
Note: If the alarm function is switched off, the indicator (13) or (12) will not be shown on the display (2).
Switching the alarm off
Note: If the light function was set as part of the alarm function (see paragraph 4.11 Light function), it will be switched on and off with the alarm function.
1. Once the alarm was set-off, the selected wake-up method will sound and the indicator of the alarm flashes on the display (2). The following options are now available:
a. Press the button (18), to switch the alarm off. The indicator of the alarm will be shown permanently on the display. The alarm will be set-off again in 24 hours. b. Press the button SNOOZE (23), to switch the alarm off for approx. 10 minutes. After approx. 10 minutes, the alarm with be set-off again and you have the same options available. c. If no button is pressed, the alarm will switch off automatically after 60 minutes. d. Press and hold the button of the set-off alarm, to permanently switch it off. The indicator of the alarm is deactivated.
Light Radio (Wake-up)_WUL10001_144010902_IM-DE-GB_150603.indb 38 17/06/2015 5:25 PM

English
39
4. Operating instructions
4.11 Light functionNote: The light function of the appliance can be used as part of the alarm function or individually. The brightness can be adjusted in 10 levels.
Note: For best results, use the light function in dark rooms.
1. Press the button LAMPE/AUTO/DST (27) once, to switch the light on. 2. Press the button (29) or (28), to increase or decrease the brightness. The
display (2) shows either “06” or “04”. The brightness can be set from 01 to 10. 3. Press the button LAMPE/AUTO/DST (27) again, to use the light function as
part of the alarm function. The indicator (14) is shown on the display (2).
Note: If the light function is used as part of the alarm function, the light will switch on approx. 25 minutes before the alarm time on level 5 and gradually increase in brightness every 5 minutes.
4. Press the button LAMPE/AUTO/DST (27) a third time, to switch the light function off. The indicator (14) is deactivated.
4.12 Sleep functionThe appliance has a sleep function, which switches the appliance off automatically after the set time.
Note: The sleep function can be set from 10 to 90 minutes and adjusted in 10 minute intervals.
Note: To use the sleep function, either the radio or nature sound function has to be in use.
1. Press the button SLEEP (22), to switch the sleep function on. “90“ is shown on the display (2). The sleep function is now switched on and the appliance will switch off automatically after 90 minutes.
2. Press the button SLEEP (22), to reduce the time by 10 minutes each time (90 -> 80 -> 70 -> 60 -> 50 -> 40 -> 30 -> 20 -> 10 -> OFF).
3. Press the button SLEEP (22) until “OFF” is shown on the display (2). The sleep function is switched off.
Light Radio (Wake-up)_WUL10001_144010902_IM-DE-GB_150603.indb 39 17/06/2015 5:25 PM

English
40
4. Operating instructions
4.13 USB charging functionThe appliance has a USB charging port (9) on the back, which can be used to charge external appliance via USB.
Note: The appliance has to be connected to the mains for this function to work.
1. Connect the required USB cable to the USB charging port (9) on the back of the appliance.
2. Connect the other end of the USB to the external appliance for charging.
5. Cleaning and care
5.1 Cleaning1. Prior to every cleaning, remove the adapter (5) from the mains socket and
allow the appliance to cool down completely.
WARNING - Danger of electrocution! Do not immerse the appliance in water or other liquids. Do not hold the appliance under running water.
2. Never use solvents or abrasive cleaners, hard brushes, metallic or sharp objects when cleaning. Solvents are harmful and can damage plastics, abrasive cleaners and aids can scratch surfaces.
3. Clean the appliance housing using a slightly damp cloth. Afterwards dry the appliance housing.
5.2 Storage and transportation1. Clean the appliance as described in paragraph 5.1 Cleaning.
Note: Always store the appliance in clean and dry conditions. Store the appliance in a dry, clean place, inaccessible to children, preferably in its original packaging.
2. Ensure that the appliance cannot fall down or tumble during transport.3. Protect the appliance from impact and vibrations, especially when transporting
it in vehicles.
Light Radio (Wake-up)_WUL10001_144010902_IM-DE-GB_150603.indb 40 17/06/2015 5:25 PM
English
41
5. Cleaning and care
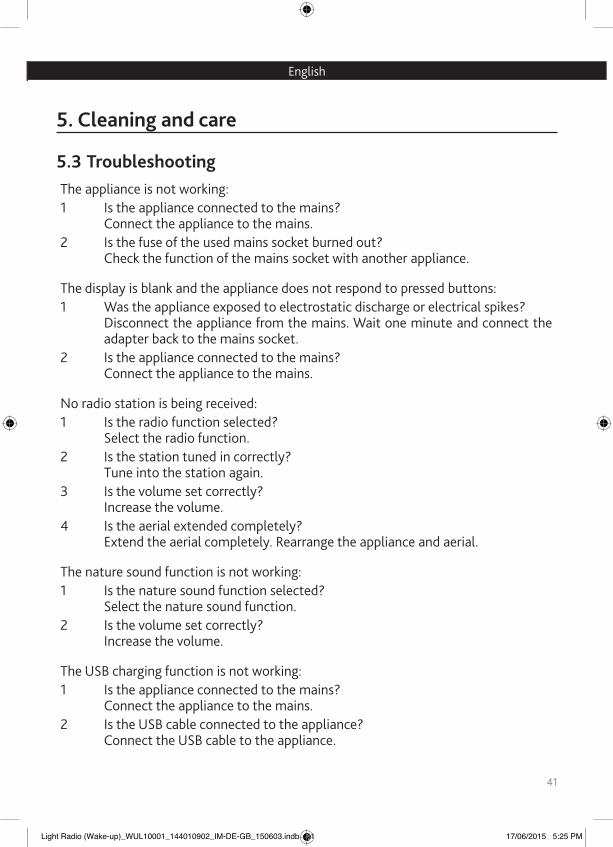
5.3 TroubleshootingThe appliance is not working: 1 Is the appliance connected to the mains?
Connect the appliance to the mains. 2 Is the fuse of the used mains socket burned out?
Check the function of the mains socket with another appliance.
The display is blank and the appliance does not respond to pressed buttons: 1 Was the appliance exposed to electrostatic discharge or electrical spikes?
Disconnect the appliance from the mains. Wait one minute and connect the adapter back to the mains socket.
2 Is the appliance connected to the mains?Connect the appliance to the mains.
No radio station is being received:1 Is the radio function selected?
Select the radio function. 2 Is the station tuned in correctly?
Tune into the station again.3 Is the volume set correctly?
Increase the volume.4 Is the aerial extended completely?
Extend the aerial completely. Rearrange the appliance and aerial.
The nature sound function is not working:1 Is the nature sound function selected?
Select the nature sound function. 2 Is the volume set correctly?
Increase the volume.
The USB charging function is not working: 1 Is the appliance connected to the mains?
Connect the appliance to the mains.2 Is the USB cable connected to the appliance?
Connect the USB cable to the appliance.
Light Radio (Wake-up)_WUL10001_144010902_IM-DE-GB_150603.indb 41 17/06/2015 5:25 PM

English
42
5. Cleaning and care
Note: Contact our customer service, if the appliance remains non-functional after checking the above points. Do not try under any circumstances to repair the appliance yourself.
6. DisposalCorrect disposal of this appliance:This mark indicates that no electrical devices in the EU must be disposed of along with normal household waste.Please use the return and collection systems in your community or contact the retailer where the appliance was purchased.
Please dispose of the batteries in an environmentally friendly manner. Do not throw batteries into the household rubbish. Please use the return and collection systems in your community or consult the retailer, from whom the product was purchased.
Light Radio (Wake-up)_WUL10001_144010902_IM-DE-GB_150603.indb 42 17/06/2015 5:25 PM


Light Radio (Wake-up)_WUL10001_144010902_IM-DE-GB_150603.indb 45 17/06/2015 5:25 PM

REWE-Zentral AG, 50603 Köln
WAKE-UP LIGHT WECKER WUL10001 1952793015
Light Radio (Wake-up)_WUL10001_144010902_IM-DE-GB_150603.indb 46 17/06/2015 5:25 PM