walmart backdrop building kit in ho scale · assembly instructions for walmart backdrop building...
TRANSCRIPT
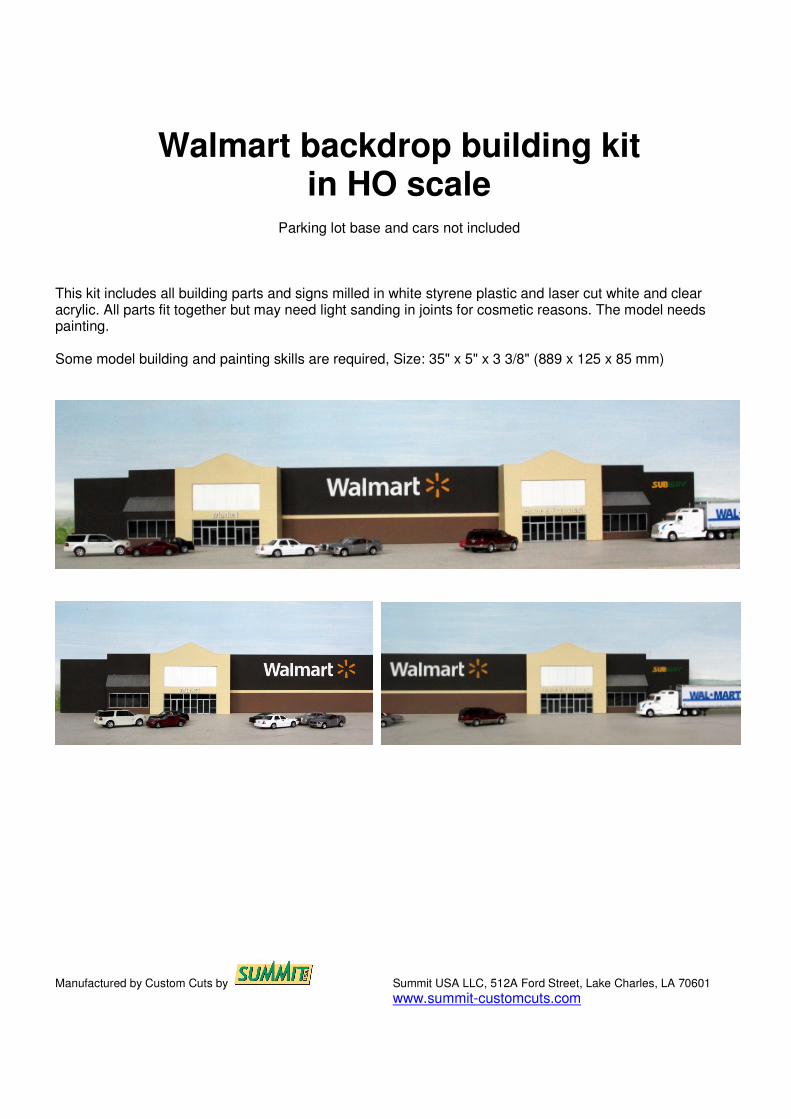
Walmart backdrop building kit in HO scale
Parking lot base and cars not included
This kit includes all building parts and signs milled in white styrene plastic and laser cut white and clear acrylic. All parts fit together but may need light sanding in joints for cosmetic reasons. The model needs painting. Some model building and painting skills are required, Size: 35" x 5" x 3 3/8" (889 x 125 x 85 mm)
Manufactured by Custom Cuts by Summit USA LLC, 512A Ford Street, Lake Charles, LA 70601
www.summit-customcuts.com
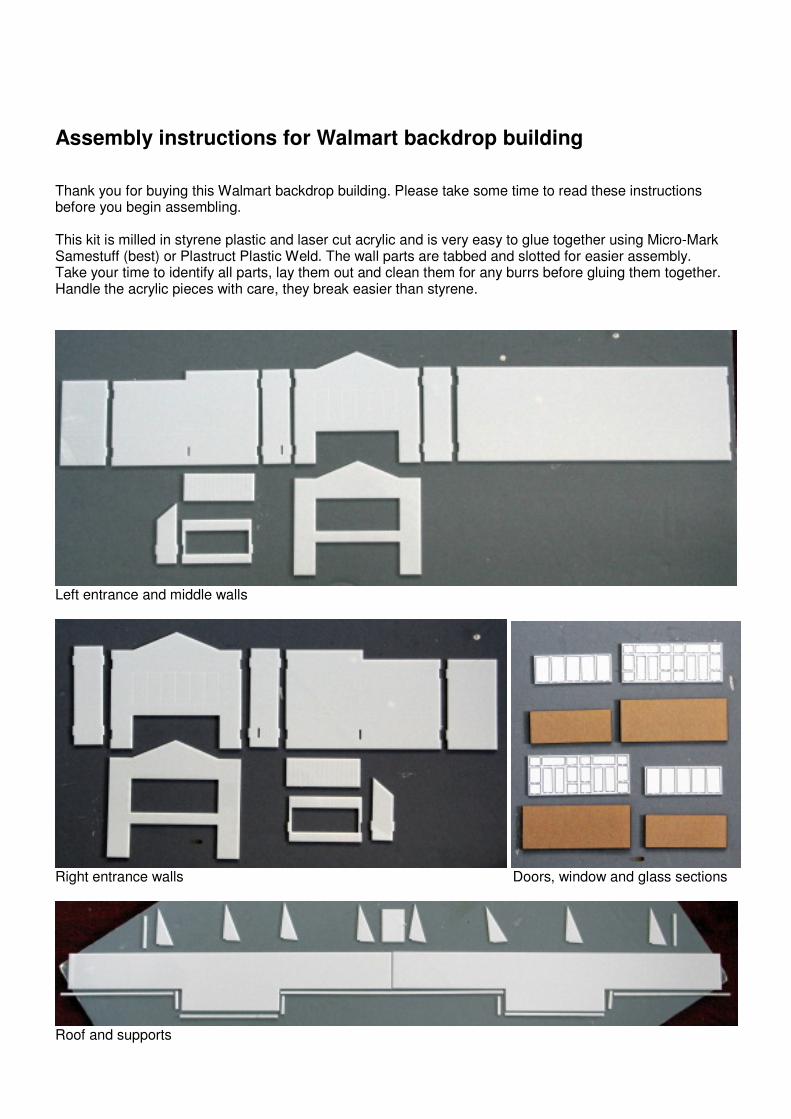
Assembly instructions for Walmart backdrop building Thank you for buying this Walmart backdrop building. Please take some time to read these instructions before you begin assembling. This kit is milled in styrene plastic and laser cut acrylic and is very easy to glue together using Micro-Mark Samestuff (best) or Plastruct Plastic Weld. The wall parts are tabbed and slotted for easier assembly. Take your time to identify all parts, lay them out and clean them for any burrs before gluing them together. Handle the acrylic pieces with care, they break easier than styrene.
Left entrance and middle walls
Right entrance walls Doors, window and glass sections
Roof and supports
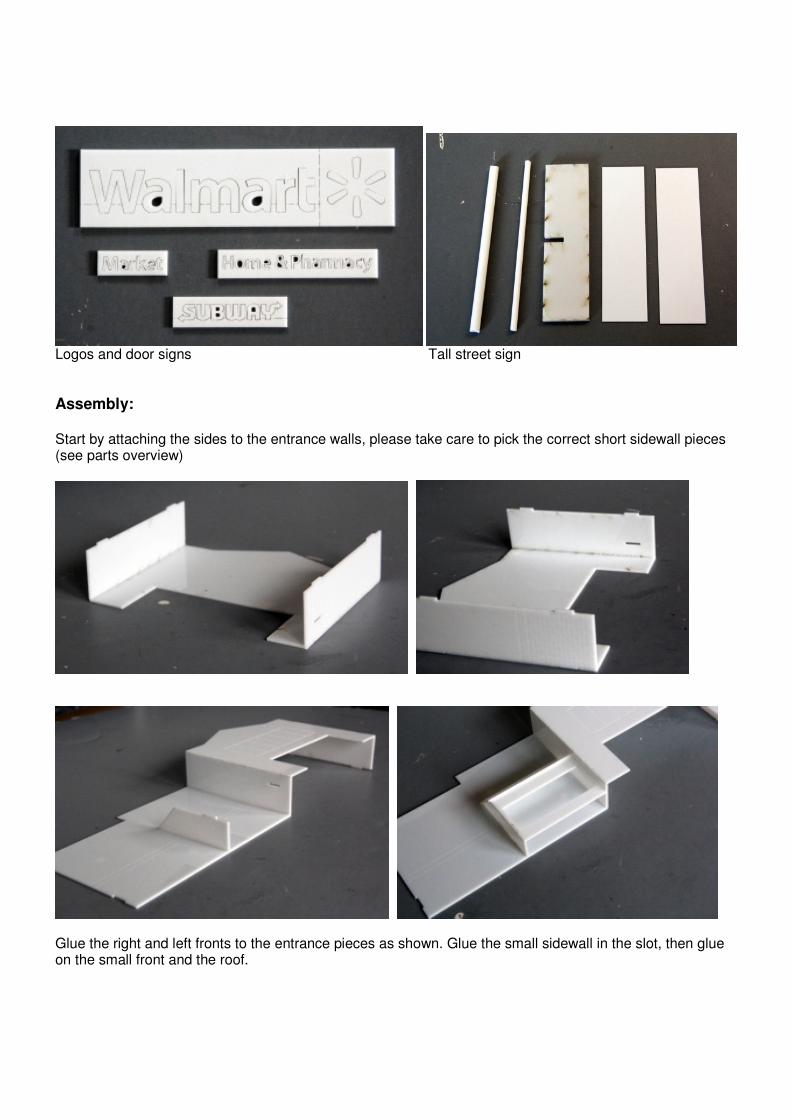
Logos and door signs Tall street sign
Assembly: Start by attaching the sides to the entrance walls, please take care to pick the correct short sidewall pieces (see parts overview)
Glue the right and left fronts to the entrance pieces as shown. Glue the small sidewall in the slot, then glue on the small front and the roof.

Glue the entrance pieces to the centerpiece.
Glue on the roof support strips to the front wall, about ¼” below the top. Glue the short strips to the short side walls.
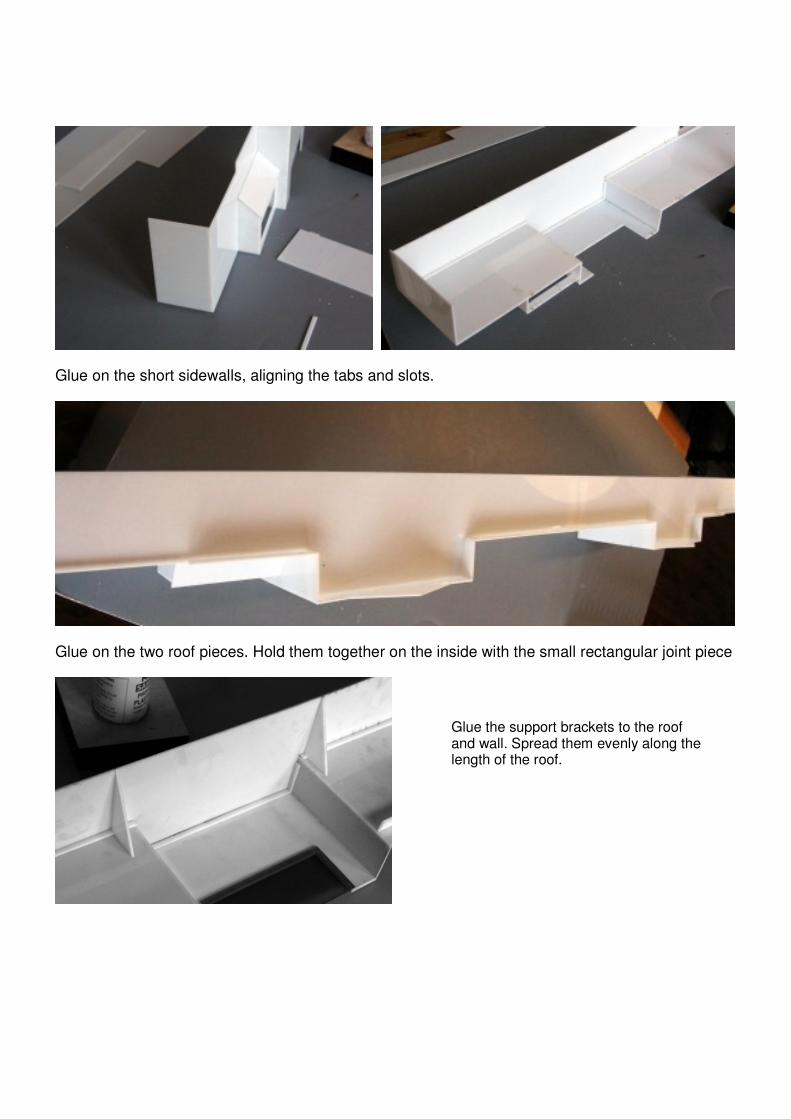
Glue on the short sidewalls, aligning the tabs and slots.
Glue on the two roof pieces. Hold them together on the inside with the small rectangular joint piece
Glue the support brackets to the roof and wall. Spread them evenly along the length of the roof.
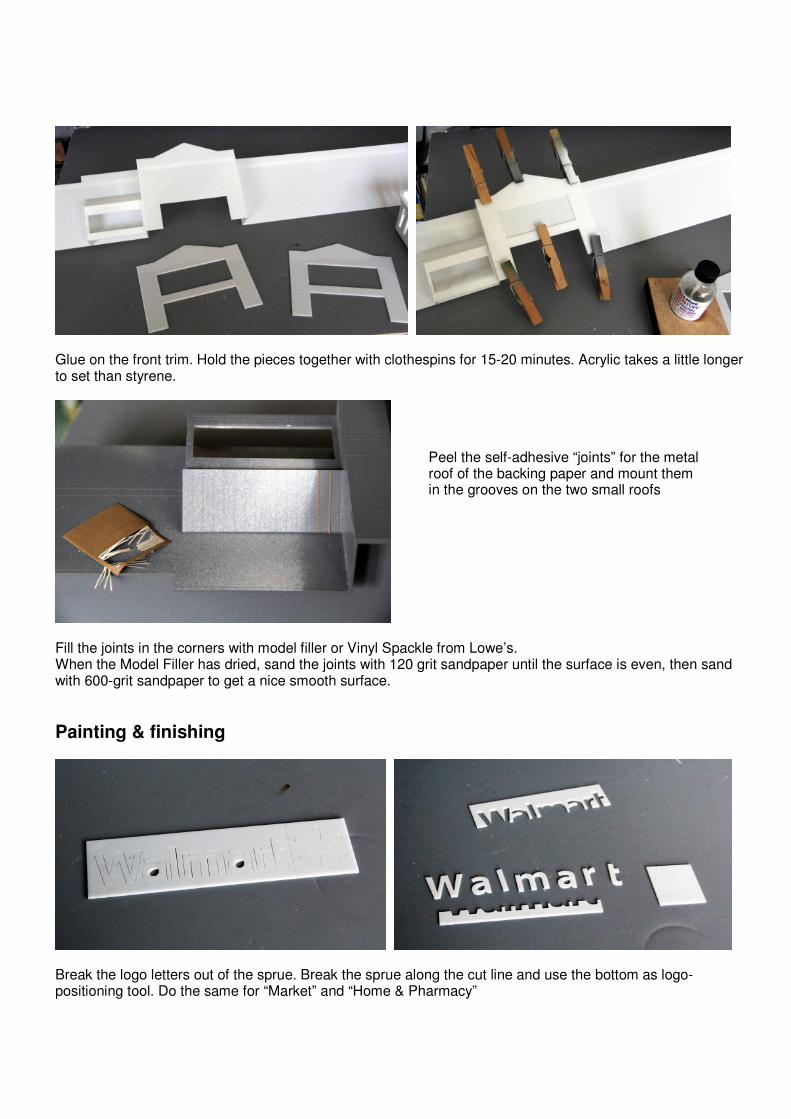
Glue on the front trim. Hold the pieces together with clothespins for 15-20 minutes. Acrylic takes a little longer to set than styrene.
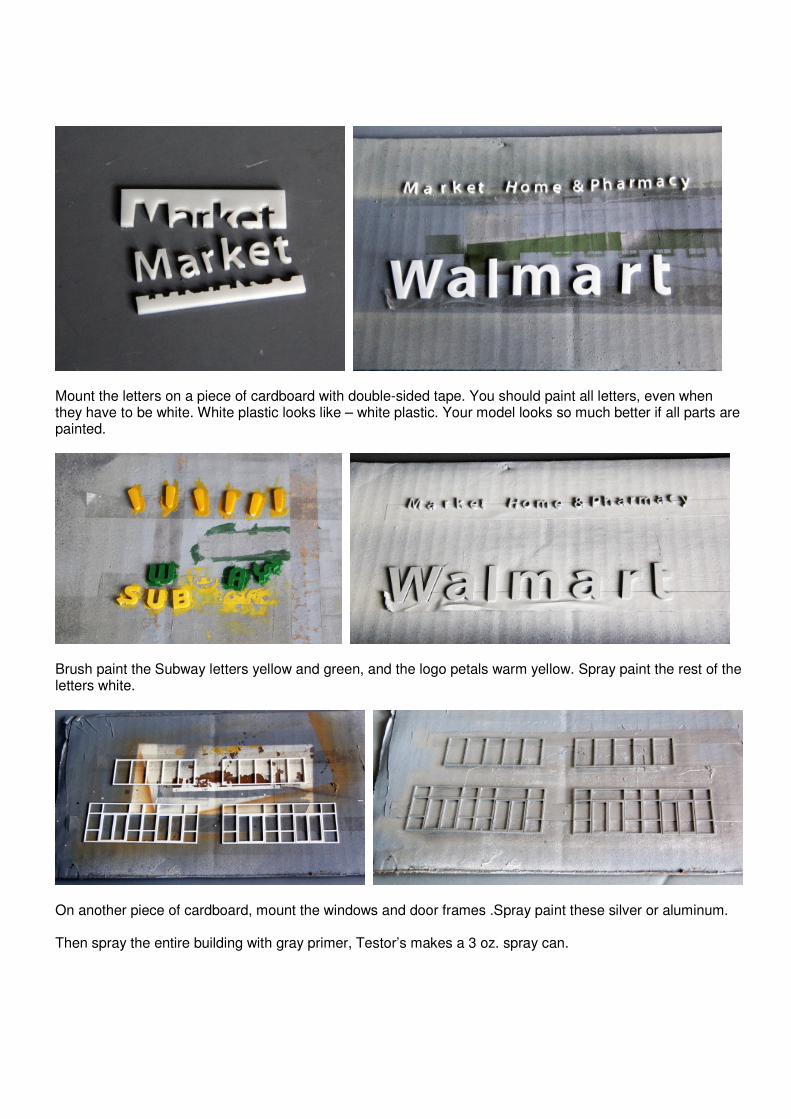
Fill the joints in the corners with model filler or Vinyl Spackle from Lowe’s. When the Model Filler has dried, sand the joints with 120 grit sandpaper until the surface is even, then sand with 600-grit sandpaper to get a nice smooth surface.
Painting & finishing
Break the logo letters out of the sprue. Break the sprue along the cut line and use the bottom as logo-positioning tool. Do the same for “Market” and “Home & Pharmacy”
Peel the self-adhesive “joints” for the metal roof of the backing paper and mount them in the grooves on the two small roofs
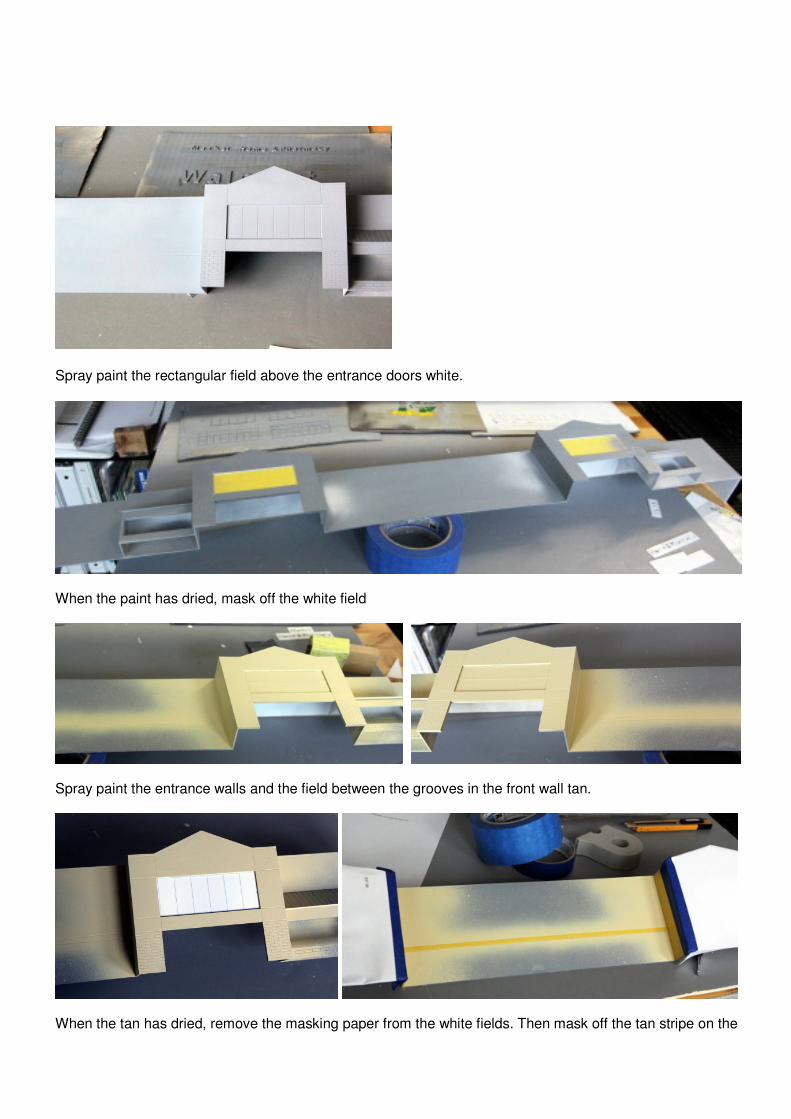
Mount the letters on a piece of cardboard with double-sided tape. You should paint all letters, even when they have to be white. White plastic looks like – white plastic. Your model looks so much better if all parts are painted.
Brush paint the Subway letters yellow and green, and the logo petals warm yellow. Spray paint the rest of the letters white.
On another piece of cardboard, mount the windows and door frames .Spray paint these silver or aluminum. Then spray the entire building with gray primer, Testor’s makes a 3 oz. spray can.
Spray paint the rectangular field above the entrance doors white.
When the paint has dried, mask off the white field
Spray paint the entrance walls and the field between the grooves in the front wall tan.
When the tan has dried, remove the masking paper from the white fields. Then mask off the tan stripe on the
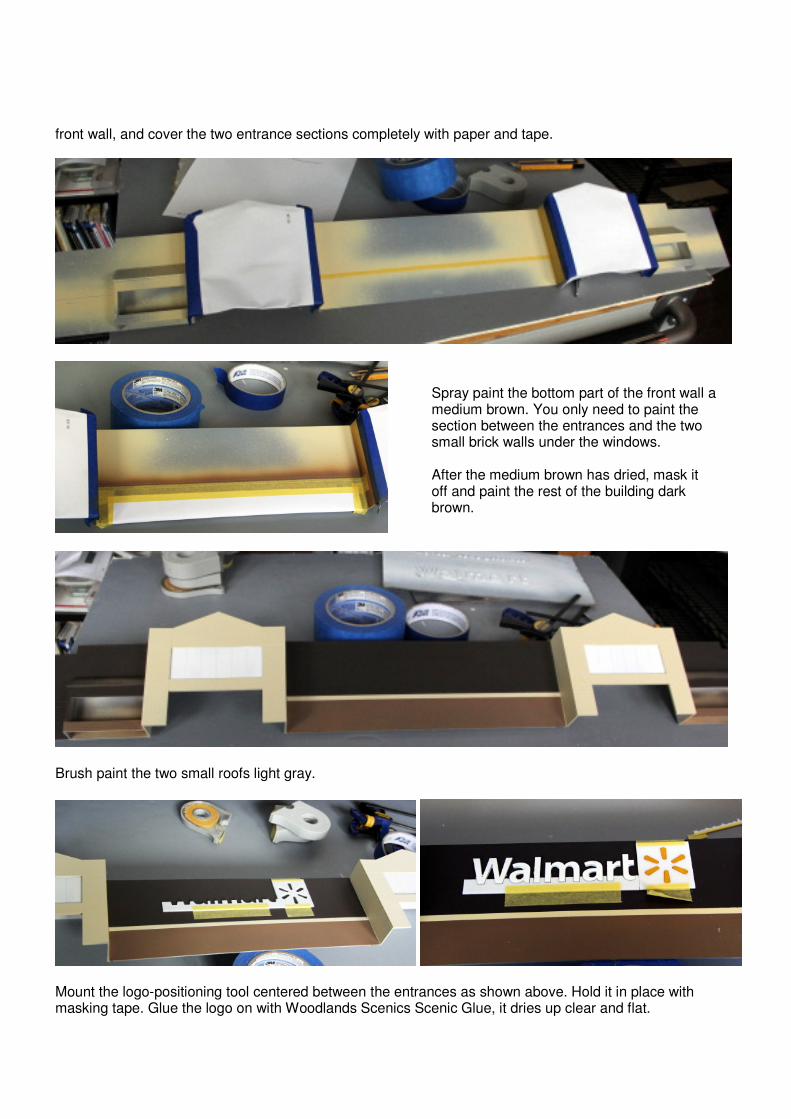
front wall, and cover the two entrance sections completely with paper and tape.
Brush paint the two small roofs light gray.
Mount the logo-positioning tool centered between the entrances as shown above. Hold it in place with masking tape. Glue the logo on with Woodlands Scenics Scenic Glue, it dries up clear and flat.
Spray paint the bottom part of the front wall a medium brown. You only need to paint the section between the entrances and the two small brick walls under the windows. After the medium brown has dried, mask it off and paint the rest of the building dark brown.
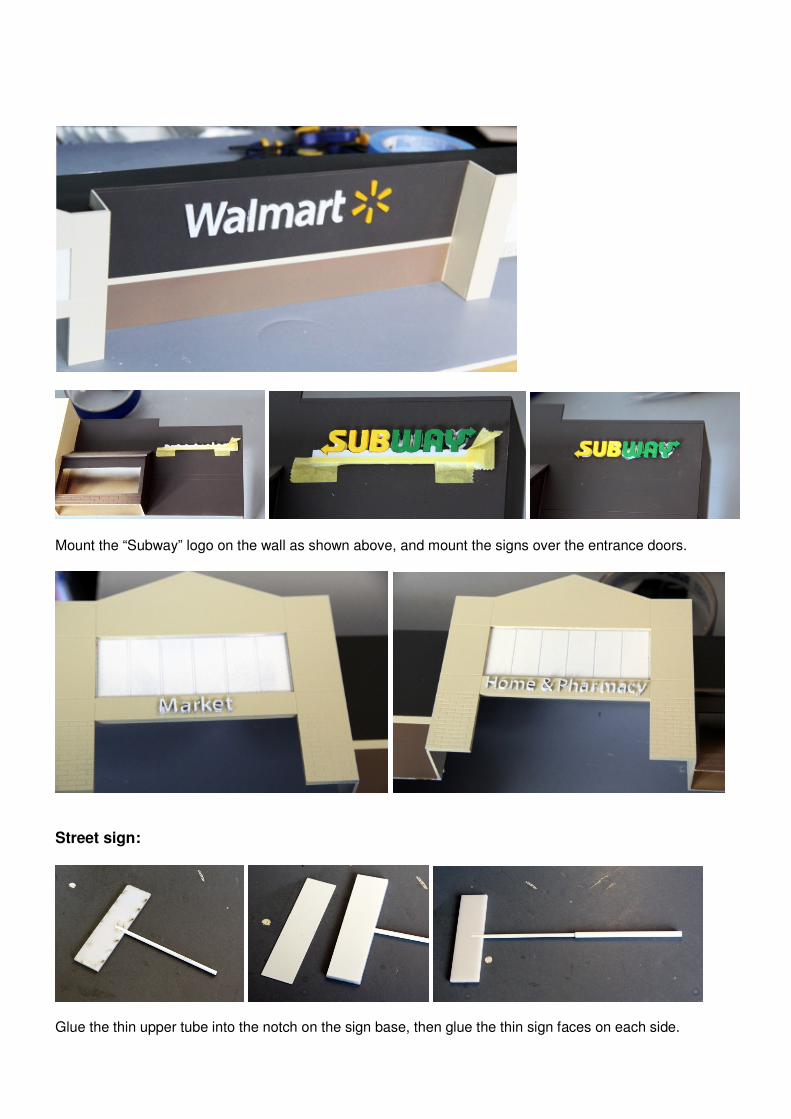
Mount the “Subway” logo on the wall as shown above, and mount the signs over the entrance doors.
Street sign:
Glue the thin upper tube into the notch on the sign base, then glue the thin sign faces on each side.

Sand the ends of the lower tube straight. Insert the upper tube ¼” into the lower tube and glue. Take care that the pole is straight. Paint the sign white, silver or black. Do not paint the sign faces black, it will shine through the label over time.
Final assembly Mount the window glazing from behind. The window glazing is clear. If you want it tinted as on this demonstration model, you can apply some car window film. This you can buy in any auto parts store. Cut out the dark gray cardboard decals and place them behind the glass with a piece of tape.
Mount the window frames and doors on the glazing. It should be a tight fit, but if you want to glue it in place, you should use “Formula 500 Canopy Glue” (see picture below), smear a small amount on the windows and doors and put them in place. The glue dries up totally clear and invisible.
Spray the self-adhesive paper label with Krylon clear acrylic spray or Testor’s Dullcote to protect the print. Cut out the logo signs, using a steel ruler and a sharp hobby knife. Mount the labels on the sign.

The Testor’s colors used on this model are: Model Master #1963 Modern Desert Sand (3 oz. spray can) Model master # 1745 Insignia White Model Master # 2005 Burnt Umber Model master Raw Sienna Enjoy your Walmart on your layout. Here are some other products you may enjoy in a future project:
#SMFS Summit Motel, full version #DP-001 Domino's Pizza take-out #DP-003 Domino’s latest design
#CS-001 Dave's Coffee Shop #TB-001 Taco Bell Restaurant #TB-003 New Taco Bell Restaurant
#KFC-001 KFC Restaurant #SW-001 Subway Restaurant #WH-001 Waffle House Restaurant
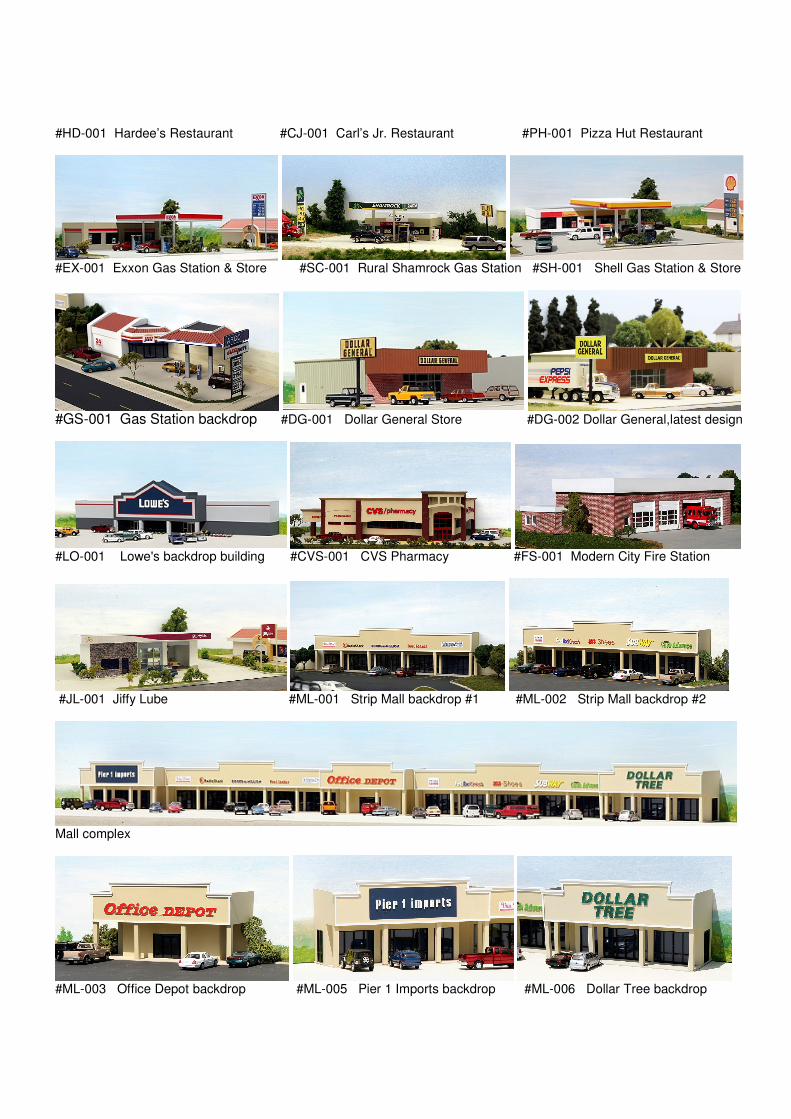
#HD-001 Hardee’s Restaurant #CJ-001 Carl’s Jr. Restaurant #PH-001 Pizza Hut Restaurant
#EX-001 Exxon Gas Station & Store #SC-001 Rural Shamrock Gas Station #SH-001 Shell Gas Station & Store
#GS-001 Gas Station backdrop #DG-001 Dollar General Store #DG-002 Dollar General,latest design
#LO-001 Lowe's backdrop building #CVS-001 CVS Pharmacy #FS-001 Modern City Fire Station
#JL-001 Jiffy Lube #ML-001 Strip Mall backdrop #1 #ML-002 Strip Mall backdrop #2
Mall complex
#ML-003 Office Depot backdrop #ML-005 Pier 1 Imports backdrop #ML-006 Dollar Tree backdrop
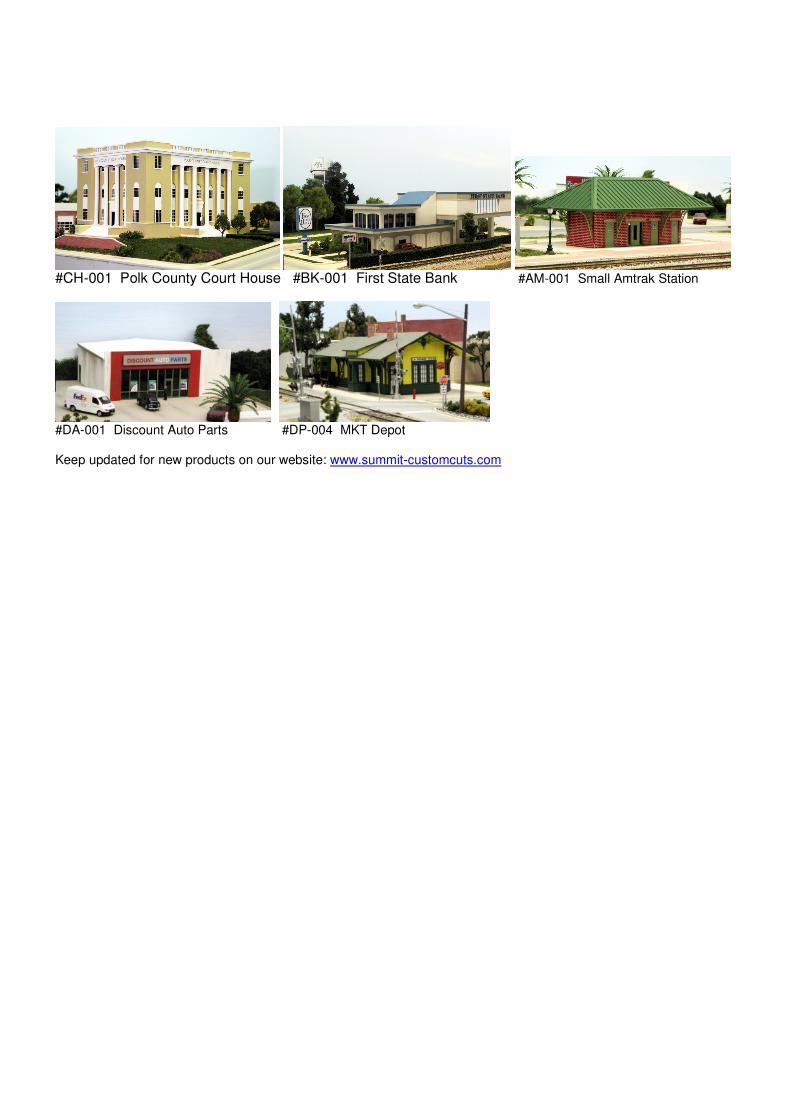
#CH-001 Polk County Court House #BK-001 First State Bank #AM-001 Small Amtrak Station
#DA-001 Discount Auto Parts #DP-004 MKT Depot Keep updated for new products on our website: www.summit-customcuts.com