water educators guide development process healthy habits
TRANSCRIPT
Healthy WaterHealthy HabitsHealthy People
Healthy Water, Healthy Habits, Healthy People Student Activity Booklet – Companion to the Educators Guide of the same title
Water is Life Student Activity Booklet – Basic water principles specific to Africa
The Water Cycle Poster – An interactive poster illustrating the water cycle
Companion Publications
For other publications, go to www.projectwet.org.
Educators Guide on Water, Health, Sanitation and Disease Prevention
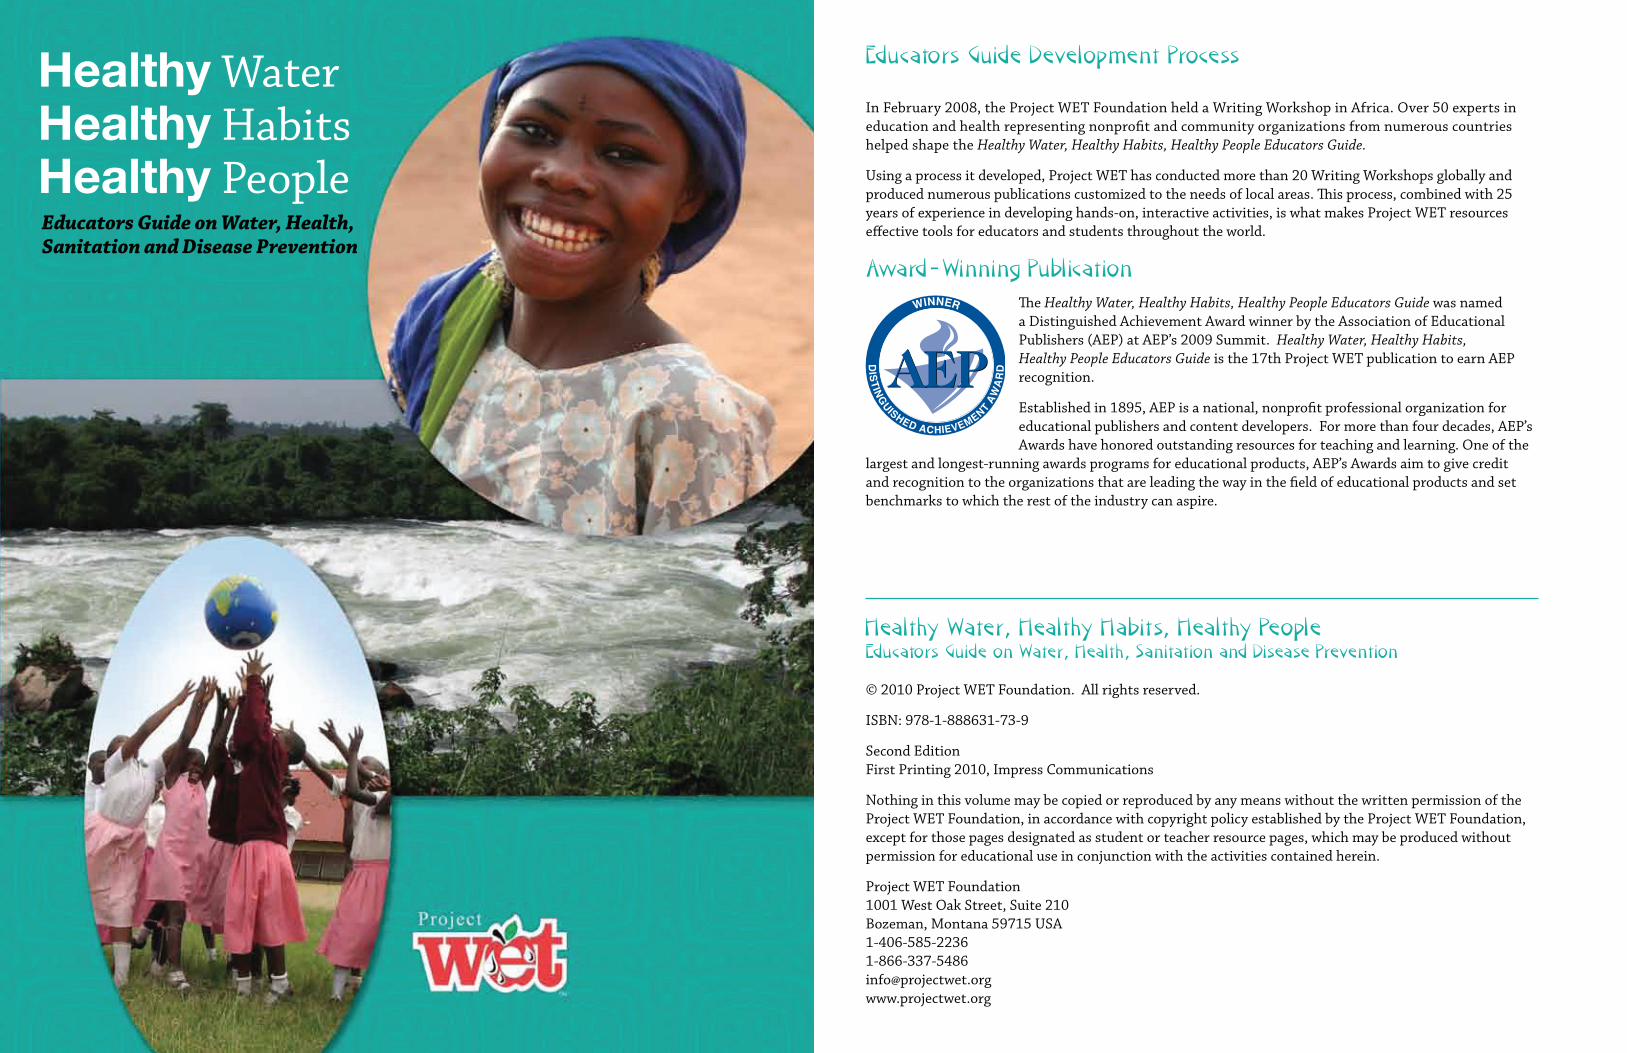
Healthy Water, Healthy Habits, Healthy People Educators Guide on Water, Health, Sanitation and Disease Prevention
© 2010 Project WET Foundation. All rights reserved.
ISBN: 978-1-888631-73-9
Second Edition First Printing 2010, Impress Communications
Nothing in this volume may be copied or reproduced by any means without the written permission of the Project WET Foundation, in accordance with copyright policy established by the Project WET Foundation, except for those pages designated as student or teacher resource pages, which may be produced without permission for educational use in conjunction with the activities contained herein.
Project WET Foundation1001 West Oak Street, Suite 210Bozeman, Montana 59715 USA1-406-585-22361-866-337-5486info@projectwet.orgwww.projectwet.org
Educators Guide Development Process
In February 2008, the Project WET Foundation held a Writing Workshop in Africa. Over 50 experts in education and health representing nonprofit and community organizations from numerous countries helped shape the Healthy Water, Healthy Habits, Healthy People Educators Guide.
Using a process it developed, Project WET has conducted more than 20 Writing Workshops globally and produced numerous publications customized to the needs of local areas. This process, combined with 25 years of experience in developing hands-on, interactive activities, is what makes Project WET resources effective tools for educators and students throughout the world.
Award-Winning Publ icationThe Healthy Water, Healthy Habits, Healthy People Educators Guide was named a Distinguished Achievement Award winner by the Association of Educational Publishers (AEP) at AEP’s 2009 Summit. Healthy Water, Healthy Habits, Healthy People Educators Guide is the 17th Project WET publication to earn AEP recognition.
Established in 1895, AEP is a national, nonprofit professional organization for educational publishers and content developers. For more than four decades, AEP’s Awards have honored outstanding resources for teaching and learning. One of the
largest and longest-running awards programs for educational products, AEP’s Awards aim to give credit and recognition to the organizations that are leading the way in the field of educational products and set benchmarks to which the rest of the industry can aspire.
WINNER

Healthy Water, Healthy Habits, Healthy People Educators Guide
1
Healthy Water, Healthy Habits, Healthy People Educators Guide - © 2010 Project WET Foundation. All rights reserved.
Healthy Water, Healthy Habits, Healthy PeopleAn Educators Guide on Water, Health, Sanitation and Disease Prevention
Table of Contents
Why Project WET? Learning to Succeed in the 21st Century . . . . . . . . . . . . . . . . . . . . . . . . . . . . i
How to Use This Activity Guide . . . . . . . . . . . . . . . . . . . . . . . . . . . . . . . . . . . . . . . . . . . . . 2
ActivitiesHealthy Habits . . . . . . . . . . . . . . . . . . . . . . . . . . . . . . . . . . . . . . . . . . . . . . . . . . . . . . . . . . . . 3Students learn to identify and prevent common water- and hygiene-related diseases by acting out symptoms, methods of spreading disease, and healthy habits.Disease Cards – Resource Page . . . . . . . . . . . . . . . . . . . . . . . . . . . . . . . . . . . . . . . . . . . . . . . . . . . . . . . . . . . . . . . . . . 7
Don’t Pass It Along . . . . . . . . . . . . . . . . . . . . . . . . . . . . . . . . . . . . . . . . . . . . . . . . . . . . . . . . 8Students learn how illness-causing germs can spread through contact and how healthy habits can stop them.
Hand Washing for Health . . . . . . . . . . . . . . . . . . . . . . . . . . . . . . . . . . . . . . . . . . . . . . . . . 11Students learn a song to correctly practice the healthy habit of hand washing.Soap Story Cards – Resource Page . . . . . . . . . . . . . . . . . . . . . . . . . . . . . . . . . . . . . . . . . . . . . . . . . . . . . . . . . . . . . . 15Hand Washing for Health – Resource Page . . . . . . . . . . . . . . . . . . . . . . . . . . . . . . . . . . . . . . . . . . . . . . . . . . . . . . . 16How to Construct a Tippy Tap – Resource Page . . . . . . . . . . . . . . . . . . . . . . . . . . . . . . . . . . . . . . . . . . . . . . . . . . . 17
Break the Chains . . . . . . . . . . . . . . . . . . . . . . . . . . . . . . . . . . . . . . . . . . . . . . . . . . . . . . . . . 18Students use problem solving skills to discover how to break the chains of disease transmission.Disease Transmission Chain Cards – Resource Page . . . . . . . . . . . . . . . . . . . . . . . . . . . . . . . . . . . . . . . . . . . . . . . 21
The Path to Healthy Drinking Water . . . . . . . . . . . . . . . . . . . . . . . . . . . . . . . . . . . . . . . . 22By understanding how to treat water in their own homes, students contribute to their health, as well as that of their families and communities.Steps Along the Path to Healthy Drinking Water – Resource Pages . . . . . . . . . . . . . . . . . . . . . . . . . . . . . . . . 26 - 27Finding Healthy Water Sources . . . . . . . . . . . . . . . . . . . . . . . . . . . . . . . . . . . . . . . . . . . . 28Students map drinking water sources in their community, identify signs of healthy water sources and learn how to protect them.Signs of a Healthy Water Source – Resource Page . . . . . . . . . . . . . . . . . . . . . . . . . . . . . . . . . . . . . . . . . . . . . . . . . . 32
Water Wisdom . . . . . . . . . . . . . . . . . . . . . . . . . . . . . . . . . . . . . . . . . . . . . . . . . . . . . . . . . . . . 33Generations hand down wisdom through stories and proverbs. Students use them as a guide to create their own wise sayings about water.Proverbs – Resource Page . . . . . . . . . . . . . . . . . . . . . . . . . . . . . . . . . . . . . . . . . . . . . . . . . . . . . . . . . . . . . . . . . . . . . . 37
Why Project WET?Learning to Succeed in the 21st Century
Global water problems continue to escalate and affect the quality of life for billions of people. The struggle to acquire and maintain clean water sup-plies saps the energy of communities; children, too ill to attend school because of the effects of waterborne diseases, lose too many precious childhood days. Empowering students through an understanding of the relationship between their health and water resources, teachers can be catalysts in their communities. Project WET materials and training workshops help educa-tors, students and their families understand sustainable water resources management.
Project WET is currently active in over 50 coun-tries on five continents. Its materials have been translated into several languages including Japanese, Hungarian, Spanish, French, Arabic and Kiswahili. Students, teachers and commu-nity members of diverse cultures, often with different learning styles, use Project WET. From photographs taken around the world, children and adults participating in Project WET activi-ties and events all have one thing in common—a smile.
So, we have to ask ourselves, why does it work? Project WET materials motivate children and adults to learn. Educational theorists maintain that for people to learn, they must find pleasure and joy in learning. What are the qualities of Project WET materials that appeal to children’s natural curiosity and support lifelong learning?
• Interactive: Learners participating in Project WET activities are not passive observers. Engaging students through questioning and other inquiry-based strategies, educators become facilitators involving students in hands-on lessons and encouraging them to take responsibility for their own learning. For example, students design investigations to seek answers to real-world problems; play games to explore scientific concepts; reflect; debate; and share learnings by creating songs, stories and dramas.
• Multi-sensory: Activities engage as many of the learner’s senses as possible. Research has shown that stimulation of multiple senses enhances learning.
• Adaptable: While adaptable for any environment, many Project WET activities are ideal for outdoor settings and encourage children to be physically active.
• Contemporary(21stCenturySkills): Project WET activities help students develop skills necessary for success in the 21st century. In most activities students work in small, collaborative groups; many activities engage students in higher level thinking skills requiring them to analyze, interpret, apply learned information (including problem-solving, decision-making and planning), evaluate and present. Project WET is aggressively incorporating technology education into its activities and offering cross-cultural materials to prepare learners for participation in a global economy, in which an understanding of water resources will be critical.
• Relevant: Information is not delivered in isolation; educators are encouraged to localize activities to give them relevance.
• Solution-oriented(ActionEducation):Project WET believes in linking awareness and education to action and solutions. In this context, Project WET and local education and water partners seek to incorporate educational materials and training with on the ground action and solutions.
• Measurable: Project WET activities provide simple assessment tools to measure student learning.
And what do learners participating in Project WET activities say? Pausing to catch their breath in a game of tag that demonstrates the relationship between healthy habits and healthy drinking water, students will tell you they like Project WET activities simply because they’re fun!
i

2
Healthy Water, Healthy Habits, Healthy People Educators Guide - © 2010 Project WET Foundation. All rights reserved.
Healthy Water, Healthy Habits, Healthy People Educators Guide
3
Healthy Water, Healthy Habits, Healthy People Educators Guide - © 2010 Project WET Foundation. All rights reserved.
How to Use This Guide
All activities are self-contained. Although the activities in this Guide represent a unit, it is not necessary to teach them in order. Each lesson in the Educators Guide corresponds to a two-page activity in the student booklet of the same title.
Objectives: The qualities or skills students should possess after partici-pating in the activity.
Materials: Supplies needed to conduct the activity.
Making Connections: Describes the relevance of the activity to students.
Background: Information needed to under-stand activity concepts.
ProcedureWarm UpPrepares everyone for the activity and gives the educator an idea of students’ current knowledge about the topic.
The ActivityProvides step-by-step direc-tions for conducting the activity. Some activities are organized into “parts.” All, or some, of the parts may be used, depending upon instruc-tional objectives.
Wrap UpBrings closure to the lesson and includes questions and
activities to assess student learning.
AssessmentPresents diverse assessment strategies that relate to the objectives of the activity, noting the part of the activity during which each assessment occurs.
ExtensionsProvides additional activities for continued investigation into concepts addressed in the activity. Extensions can be used for further assessment.
ResourcesReferences from the internet that enhance the ‘Background’ section.
* A note about age and skill level for this Guide: The activi-ties in this Guide will benefit learners of all ages and skill levels.
Subject Areas: Project WET activities are designed to satisfy the goals of your educational program by complementing existing curricula. This section suggests subject areas in which you could teach this activity.
Duration: The approximate time needed to complete each part of the activity.
Setting: Suggested sites.
Skills: There are eight skill levels in ascending order: gathering, organizing, analyzing and interpreting information; applying, evaluating and presenting learned information. Listed skills are applied in the activity.
Vocabulary: Words defined in the activity that you may need to highlight for students.
Summary A brief description of the activity concepts and students skills.
ObjectivesStudents will: • link water- and hygiene-
related diseases to their causes and symptoms.
• describe how some common water- and hygiene-related diseases are spread.
• identify ways to reduce the chances of becoming infected with a disease.
Materials • Chalkboard• Area for ‘Healthy Habits’
tag game• Disease Cards – Resource
Page
Making Connections Understanding diseases, their causes, transmission and symptoms empowers students to develop healthy habits to help prevent disease.
Background Germs are disease-causing agents that can make you sick. You can find them any-where in the world. Types
of disease-causing agents include: bacteria (tiny single-celled organisms), fungi, viruses, and parasites (pro-tozoa and worms). Some of these can be harmful to humans while others are beneficial. For example, some bacteria help our body’s immune system fight disease-causing agents. When disease-causing germs invade your body and your immune system can’t fight them, they multiply and gain strength. Germs take nutrients and energy from your body and can produce toxins (chemicals that damage cells). Your body reacts to the toxins, creating symptoms (evidence or signs of illness).
Different diseases cause dif-ferent symptoms. However, different diseases can share the same symptoms. The best way to diagnose and treat any illness is to consult a doctor or nurse. Doctors and nurses diagnose diseases through a process of elimination. When you are sick, they may ask you about your habits and the symptoms you are experienc-ing. In addition, they may conduct laboratory tests to diagnose the illness.
One way you can learn to avoid getting a disease is to understand how it is spread. Common ways diseases are
Healthy HabitsHow does what you do on the outside (wash hands, cover a cough, boil water) keep you healthy on the inside?
Subject Areas:Science, Drama
Duration:Warm Up: 15 minutes Activity: Part I: 45 minutes Part II: 45 minutes Wrap Up: 30 minutes
Setting: Classroom, theater facility, large common room or outdoor area
Skills:Gathering (observing, listening); Interpreting (relating, summarizing); Applying (planning, designing); Presenting (acting)
Vocabulary:bilharzia, cholera, dysentery, epidemic, germ, hepatitis, malaria, microorganism, parasite, polio, symptom, toxins, transmission, typhoid fever
Summary Students learn to identify and prevent common water- and hygiene-related diseases by acting out symptoms, methods of spreading disease and healthy habits.

4
Healthy Water, Healthy Habits, Healthy People Educators Guide - © 2010 Project WET Foundation. All rights reserved.
Healthy Water, Healthy Habits, Healthy People Educators Guide
5
Healthy Water, Healthy Habits, Healthy People Educators Guide - © 2010 Project WET Foundation. All rights reserved.
spread include:• droplet contact – (inhaling
or other contact with droplets coughed or sneezed by an infected person).
• direct physical contact – (touching an infected person or infected bodily fluids).
• indirect contact – (touching a contaminated surface).
• airborne transmission – (breathing in contaminated dust particles or airborne germs that can remain alive in air for long periods).
• fecal-oral transmission – (consuming contaminated food or water, and indirect contact that spreads germs from feces).
• vector transmission – (contact with insects or other animals that transmit disease).
Practicing the following healthy habits helps to pre-vent the spread of diseases: • Washing your hands
frequently with soap and clean water, especially before or after certain activities (e.g., before preparing food and after going to the latrine)
• Covering your mouth when you cough or sneeze
• Protecting yourself from insects and animals that may carry disease (e.g., to prevent malaria, sleep under a mosquito net)
• Boiling all your household drinking water
• Avoiding sharing clothing and bedding
Procedure Warm UpAsk students to name diseases they are familiar with, and list them on the board.
Ask students what causes dis-eases (germs). Emphasize that there are both harmful and beneficial germs. Discuss the fact that one disease-causing germ will probably not make you ill, but once these germs multiply in your body, you can experience symptoms of the disease.
The ActivityPart I
1. Establish a defined area where your students can play a game of tag.
2. Have students participate in a game of “Healthy Habits” tag to simulate how diseases are spread through a community.
3. Ask for one volunteer to be “it.” Explain that this student will be a disease ready to infect other people.
4. Ask for five more volunteers. Gather all volunteers, including the student who has been identified as “it.”
5. Explain to this group that they will be sharing
a secret. Each of the five students will be given a different role. Each role represents a healthy habit supporting the body’s immune system. Therefore, each of these students must be tagged three times before becoming “ill.”
6. Assign roles to the volunteers and answer any questions from the students. Use the healthy habits below or create your own for this activity.
• Role1: You washed your hands with soap and water after using the latrine.
• Role2:You slept under a mosquito net and avoided mosquito bites.
• Role3:Your family boiled all the water they use in the house.
• Role4: You drained stagnant water from around your house.
• Role5: You received the correct vaccinations.
7. Explain to the group that if you are tagged by the student who is “it,” (the disease), you must leave the playing area and sit on the sidelines. As an alternative to having tagged students sit on the sidelines you may want to rope off a portion of the playing area and designate it as the “Hospital”.
8. Time the game so that it lasts three to five minutes.
9. After time expires, gather the group.
10. Ask students to raise their hands if they did not become sick the first time they were tagged. (These students should be the ones who received the healthy habits roles at the start of the game.)
Ask them to reveal the secret to their health (that is, the healthy habit that protected them from being tagged by the disease).
11. Ask students to identify other healthy habits that help support the body’s immune system.
12. Repeat the game, this time asking for five new volunteers to come up with their own healthy habits.
Part II1. Divide the class into
groups of four to eight students. Hand one

6
Healthy Water, Healthy Habits, Healthy People Educators Guide - © 2010 Project WET Foundation. All rights reserved.
Healthy Water, Healthy Habits, Healthy People Educators Guide
7
Healthy Water, Healthy Habits, Healthy People Educators Guide - © 2010 Project WET Foundation. All rights reserved.
Typhoid FeverCause: The bacteria Salmonella typhiHowdoyougetit?• Fecal-oral transmission paths• Direct or indirect contact transmission paths• Germs from infected feces and urine come in contact with food or
drinking water, which are then consumed
Symptomsmayinclude:• Persistent, high fever• Heavy sweating• Mild to severe diarrheaHowdoyouavoidit? • Wash hands with soap and water after using the latrine and before
preparing food• Be sure your drinking water is safe to drink, especially after flooding
when sewage and latrine overflow can mix with water• Get a typhoid vaccination to boost your immune system’s ability to
identify and kill the bacteria that causes typhoid fever
BilharziaCause: The parasitic worms Shistosoma mansoni and Shistosoma haematobium Howdoyougetit? • Vector transmission paths• When skin comes in contact with freshwater containing snails carrying
the Shistosome worms—wading, swimming, bathing or washingSymptomsmayinclude:• Rash and/or itchy skin• Fever• Chills• Cough• Muscle aches• Malnutrition
• Learning difficulties• Abdominal pain• Diarrhea• Blood in stools and/or urineHowdoyouavoidit?• Avoid wading and swimming in freshwater (swimming in the ocean
or treated pools is generally okay)• Be sure drinking water is safe to drink—bring to a boil for at least
three minutes• Heat bath water to 66 degrees Celsius for five minutes or hold in
storage tank for at least 48 hours before using for bathing• Visit a health care provider for preventative treatments• If symptoms occur, visit health care provider immediately for
treatment
Disease Cards—Resource Page
DysenteryCause: The bacteria Salmonella entericaHowdoyougetit?• Fecal-oral transmission paths• Direct and indirect contact transmission paths• Germs from infected feces come in contact with food or drinking water,
which are then consumed
Symptomsmayinclude:• Vomiting.• Passing mucus in stools• Difficulty eating dairy productsHowdoyouavoidit?• Wash hands with soap and water after using the latrine and before
preparing food• Be sure your drinking water is safe to drink• Before eating uncooked fruits and vegetables, wash them thoroughly
with safe water
Hepatitis ACause: The Hepatitis virusHowdoyougetit?• Fecal-oral transmission paths• Direct and indirect contact transmission paths• Germs from infected feces come in contact with food or drinking water,
which are then consumed
Symptomsmayinclude:• Flu-like symptoms (fever, body aches, etc.)• Appetite loss• Nausea• Abdominal painHowdoyouavoidit?• Wash hands with soap and water after using the latrine and before
preparing food• Be sure your drinking water is safe to drink• Before eating uncooked fruits and vegetables, wash them thoroughly
with safe water
Polio Cause: The human Polio virusHowdoyougetit?• Fecal-oral transmission paths• Direct and indirect contact transmission paths• Virus particles are excreted in feces for several weeks following initial
infection• Polio is a highly contagious disease (individuals are most infectious 10
days before and after symptoms appear)• Polio is spread by personal contact and when infected human feces
come in contact with food or drinking water, which is then consumed
• Mainly affects young children
Symptomsmayinclude:• Symptoms may or may not be present• Flu-like symptoms (fever, body aches, etc.)• Neck and limb pain and stiffness• Vomiting• In a small percentage of cases, Polio can cause paralysis (usually of the legs)Howdoyouavoidit?• Get a series of vaccinations. The vaccine boosts the immune system’s ability to fight the virus that causes Polio• Wash hands with soap and water after using the latrine and before preparing food
CholeraCause: The bacteria Vibrio choleraeHowdoyougetit?• Fecal-oral transmission paths• Direct and indirect contact transmission paths• Cholera is spread where infected human feces comes in contact with
food or drinking water, which are then consumed• Also spread through personal contact
Symptomsmayinclude:• Symptoms may or may not be present• Severe watery diarrhea followed by severe dehydration• Vomiting• Leg crampsHowdoyouavoidit?• Wash hands with soap and water after using the latrine and before preparing food• Be sure your drinking water is safe, especially after flooding when sewage and latrine overflow can mix with water• Pay attention to cholera warnings and make sure to boil water from areas where cholera contamination is known or suspected
MalariaCause:Theparasite Plasmodium Howdoyougetit?• Vector transmission paths• Parasites enter the human body through mosquito bites by infected
female Anopheles mosquito, which mainly feed between evening and morning
Symptomsmayinclude:• Respiratory distress• Shivering, feeling cold, chills• Fever
• Headache• Nausea and vomiting• Seizures• Sweating• Tiredness• Body achesHowdoyouavoidit?• Protection against mosquito bites—sleeping under a mosquito net,
spraying of insecticides indoors• Remove stagnant standing water• Wear long sleeves and pants or skirts, especially in the evening.• Use insect repellent
Disease Card to each group. More than one group can have the same Disease Card.
2. Instruct the class that each group will prepare a short role play (possibly including a song or a poem) to teach classmates about the illness described on the card. Encourage groups to be creative and accurately share as much of the information on the cards as possible. Each role play should be no more than three minutes. Circulate among the groups to check progress, note missing elements, and offer ideas. Encourage students to make their role play fun, for example:
• Make the disease-causing germ on your card into a character. Give it a personality, and have it interact with the people in the role play.
• Exaggerate the symptoms.• Be dramatic about how
the disease is spread and how people can avoid the disease.
3. Have groups present their role plays.
4. After each role play is completed, have a brief discussion about the disease that was presented. Ask students to recall the most important details of each
presentation, such as the name of the disease, its symptoms, transmission and prevention methods.
Wrap UpAs a class, discuss similarities and differences in how dis-eases are spread and how they can be avoided. • Can students identify
relationships between disease transmission and prevention?
• List as many healthy habits as the students can offer and discuss why the habits are beneficial.
AssessmentHave students:• identify five healthy habits
to prevent disease (Part I, step 6 and 12).
• identify the symptoms of diseases (Part II, step 4).
• identify transmission paths of diseases (Part II, step 4).
ExtensionsAsk a doctor, nurse, health educator or health volunteer from a nearby clinic to speak to students about prevent-ing, diagnosing and treating common diseases.
Research and create role plays about other common diseases. Make up songs with actions to demonstrate the best disease-prevention methods.
Resources“Infectious diseases: How they spread, how to stop them.” Mayo Clinic. http://
www.mayoclinic.com/health/infectious-disease/ID00004 (accessed May 12, 2008).
“Cholera, Poliomyelitis, Shigella Dysenteriae, Typhoid Fever, Viral Hepatitis A.” Centers for Disease Control and Prevention. http://www.cdc.gov (accessed May 12, 2008).
“Health Topics.” World Health Organization. http://www.who.int/topics/en/ (accessed April 2, 2008).
“Germs: Understand and pro-tect against bacteria, viruses and infection.” Mayo Clinic. http://www.mayoclinic.com/health/germs/ID00002 (accessed May 12, 2008).

8
Healthy Water, Healthy Habits, Healthy People Educators Guide - © 2010 Project WET Foundation. All rights reserved.
Healthy Water, Healthy Habits, Healthy People Educators Guide
9
Healthy Water, Healthy Habits, Healthy People Educators Guide - © 2010 Project WET Foundation. All rights reserved.
Subject Areas:Science
Duration: Warm Up: 15 minutes Activity: 45 minutes Wrap Up: 15 minutes
Setting: Classroom
Skills: Gathering (observing, calculating)
Vocabulary: indirect contact transmission, exposure, germs
ObjectivesStudents will:• develop awareness about
the frequency with which they come in contact with people and objects.
• describe how germs may be spread through touch.
• demonstrate how, through both indirect and direct contact, one person can expose many to germs.
• identify ways to avoid spreading germs.
Materials• A small amount of water• Glitter, dirt or sand
(optional)
Making ConnectionsEach person touches many things and people throughout a day. Each time we do, whatever is on our hands may be left on these things or people. We may not be able to see what we leave behind – or what we pick up from the surfaces we touch. Understanding that germs may be spread through simple contact with other people and objects can encourage healthy
habits, such as frequent hand washing.
BackgroundGerms, and associated dis-eases, can be spread by indirect contact. Indirect contact transmission refers to situations where a person is infected from contact with a contaminated surface. Some germs, including many that cause sanitation- and hygiene-related diseases, can survive on everyday objects for a long time.
Frequently touched surfaces are among the most likely places for spreading germs through indirect contact. These include:• handles of doors and
handrails.• surfaces on any form of
public transportation. (bicycles, motorcycles, buses, etc.).
• furniture, including chairs, tables and beds.
• kitchen items such as dishes, cups, forks, spoons, knives or trays.
• public telephones.• mobile telephones and
other electronics with buttons.
• computer equipment.• shared school supplies.• shared clothing and/or
bedding.Some diseases that can spread through indirect contact also can be transmitted by direct
Don’t Pass It AlongHow can healthy habits make for a healthy handshake?
Summary Students learn how illness-causing germs can spread through contact and how healthy habits can stop them.
contact, that is touching an infected person or infected bodily fluids.
Students should not be afraid to touch what others have touched, nor come in contact with other people. Emphasize that there are simple ways to stay healthy and avoid spread-ing illness from germs. These include:• frequently washing hands
with soap and water.• covering the mouth
with an arm instead of a hand when sneezing or coughing.
• cleaning surfaces that people frequently contact.
• not sharing eating utensils, food or drinks.
• keeping hands away from the mouth, nose and eyes.
• avoiding close contact with sick people.
ProcedureWarm UpOpen the discussion by asking students to estimate how many objects and people they touch in a day.
On the blackboard, list school objects students have touched that day. Read each item and ask students to raise their hands if they have touched it.
The list will contain dupli-cate items, such as benches, books, papers and pencils. Ask students if it is possible that some of them touched the same benches, books, papers and pencils. How many people do they think have touched
common items, such as the latrine door?
The Activity1. Demonstrate how germs
can be passed along through touch by asking one student to cover his or her mouth with a hand and fake a sneeze, or do this yourself. Wet the student’s hand (or yours) thoroughly with water. (For visual impact, glitter, or a small amount of dirt or sand can also be used on the wet hand.) Ask the student to shake hands with another student. (If there are many students in the class, you may have more than one student start shaking hands with a wet hand, perhaps one for each row or two of benches.)
2. Without drying hands between shakes, have the second student shake hands with a third student, the third with a fourth, and so on.
3. Allow the hand shaking to continue as long as students are shaking a damp hand. Ask students to inform you when the handshakes are dry, and stop the activity. How many students shook a wet or damp hand? If you have split up the class into rows, ask students to report in separate rows.
Sneezing is the body’s way of relieving an irritation or
tickle in the nose. A sneeze is not necessarily a sign of illness, but when a person has a cold or respiratory infection, the effects (swollen and irritated tissues) that the germs create can be the source of irritation that causes you to sneeze.
In this activity, if the sneeze were real and carried germs, those with damp hands would be exposed to the sneezer’s illness. Being exposed to germs does not necessarily mean a person will become ill. A person’s immune system can keep the body healthy by preventing many types of illness-causing germs from invading and multiplying in the body.
4. Have all students who shook a damp hand stand on one side of the room and all others on the opposite side. Ask students how many faked a sneeze (had their hands sprayed initially)? What if illness-causing germs were in the sneezed fluids? How many students now have been exposed to potential illness (how many had damp hands in the activity)?
5. Discuss how the number of people exposed in a community can be large, even if the number of those ill and spreading
10
Healthy Water, Healthy Habits, Healthy People Educators Guide - © 2010 Project WET Foundation. All rights reserved.
Healthy Water, Healthy Habits, Healthy People Educators Guide
11
Healthy Water, Healthy Habits, Healthy People Educators Guide - © 2010 Project WET Foundation. All rights reserved.
germs is small.
6. Ask students how germs on the hand get to the mouth? Discuss the difference between direct contact (e.g., shaking hands with the sneezer) and indirect contact (e.g., handling a pencil the sneezer touched after sneezing).
Wrap Up Return to the list of surfaces and objects the class created in the Warm Up. Do students think these are likely locations for spreading germs through indirect contact? Why or why not?
Ask students to suggest ways to prevent spreading germs.
AssessmentHave students:• describe how germs
can be spread through physical contact (steps 1 through 3).
• differentiate between direct and indirect contact (step 6).
• identify five locations or objects where germs are likely to be found (Wrap Up).
• identify ways to prevent spreading germs through contact (Wrap Up).
ExtensionsTeach this activity to other students or members in your community and educate them about healthy habits.
Resources“Methods of Disease Transmission,” Mount Sinai Hospital Department of Microbiology. http://micro-biology.mtsinai.on.ca/faq/transmission.shtml (accessed April 2, 2008).
“Infectious diseases: How they spread, how to stop them, Germs: Understand and pro-tect against bacteria, viruses and infection and Hand wash-ing: an easy way to prevent infection.” Mayo Clinic. http://www.mayoclinic.com (accessed May 12, 2008).
Ask students to suggest ways to prevent spreading germs.
community and educate them about healthy habits.
ObjectivesStudents will:• identify the benefits
of using soap for hand washing.
• learn a song that can serve as a timer for healthy hand washing.
• recognize and perform proper hand washing techniques.
• identify when it is important to wash hands.
• develop and reinforce the healthy habit of frequent hand washing.
• build a simple hand washing station that can be used at school or at home.
Materials• Small amount of dirt• Two clear containers• Soap• Rinse water container• Soap Story Cards –
Resource Page• Hand Washing for Health
– Resource Page• Lyrics of the Hand Washing
Song written on board• Clean water• One large water container
with a handle and a cap (one
to four liters)• Three pieces of cord, the
length of an adult’s arm• A bar of soap• Small plastic water bottle
(one-half to one liter)• Knife• Hammer• Nail
Making ConnectionsMany students recognize that washing their hands is impor-tant. However, some may not know when, how or why to do it. Hands-on practice and a song can help students further develop the healthy habit of frequent hand washing.
BackgroundHand washing is the simplest, most effective way of prevent-ing germs from spreading. Proper hand washing helps remove germs that cause dis-ease, stopping many diseases from spreading through indi-rect and direct contact.
Washing hands with soap and water for at least 15 sec-onds removes many germs. Washing with only water pro-vides little benefit.
Soap consists of long mol-ecules that help to remove oil, dirt and germs. One end of the molecule is attracted to water. The other is repelled by water molecules, but attracted to grease and dirt. Soap removes grease and soil
Hand Washing For HealthWhat is the simplest way to help stop the spread of disease?
Subject Areas: Science, Health
Duration: Warm Up: 30 minutes Activity: Part I: 45 minutes Part II: 45 minutes Part III: 60 minutes Wrap up: 15 minutes
Setting: Classroom or outdoor area
Skills: Gathering (reading, listening, observing); Analyzing (comparing, discussing); Interpreting (defining problems); Applying (acting); Evaluating (assessing); Presenting (demonstrating, performing)
Vocabulary: germs, molecule, tippy tap
Summary Students learn a song to correctly practice the healthy habit of hand washing.

12
Healthy Water, Healthy Habits, Healthy People Educators Guide - © 2010 Project WET Foundation. All rights reserved.
Healthy Water, Healthy Habits, Healthy People Educators Guide
13
Healthy Water, Healthy Habits, Healthy People Educators Guide - © 2010 Project WET Foundation. All rights reserved.
be important to have a hand washing station. Ask them why they chose these locations.
3. Use the How to Construct a Tippy Tap resource page to build a simple hand washing station with the class. You may also construct one ahead of time and use it for demonstration. Using the student’s suggestions choose a proper location to hang your Tippy Tap.
4. After the hand washing station is complete have the students line up and practice proper hand washing. Encourage the class to sing The Hand Washing Song or count 15 seconds while each student washes their hands.
5. Have the students come up with suggestions on how they could improve the design of the Tippy
from the hands. Friction from the motion of rubbing hands together pulls more dirt and grease free from the skin. Rinsing washes away the sus-pended dirt and grease, along with the germs.
If soap is not available, using a different rubbing agent, such as ash, and rinsing thoroughly may clean as well as soap. Ash works well because it is sterile and coarse; vigorous rubbing creates friction which helps scrub germs away.
Wash and rinse hands with clean water. If running water is not available, a barrel with a tap that can be turned on and off, a pitcher and basin, or a Tippy Tap (part III) are alter-natives that can provide the water flow to rinse thoroughly.
Drying hands on dirty towels, clothing, or other objects can quickly re-contaminate. Shaking hands dry is a better way to avoid picking up new germs.
ProcedureWarm UpAsk students why hand
washing is important. What items do they need for healthy hand washing? Tell students they are going to participate in an investigation. You will wash your hands using three different methods, and they will decide which method is the most effective.• Method1: Rub some
dirt on your hands. Hold them over a basin, and ask a student to pour water over them. Ask students to inspect your hands. Are they clean? (Dirt should still appear on your hands.)
• Method2: Rub more dirt on your hands. Apply soap, but do not rub your hands together. Hold your hands over a basin, and ask a student to pour water over them. Ask students to inspect your hands again. Are they clean? (Some dirt will still cling to them.)
• Method3: Rub dirt on your hands a third time. Use soap and water according to the Hand Washing Diagram and scrub
vigorously while students count to 15. Hold your hands over a basin, and ask a student to pour water over them. Ask students to inspect your hands. Are they clean?
Ask students to identify which hand washing method was the most effective. Why? (The most effective hand washing involves soap, clean water and vigorous rubbing that pro-duces friction dislodging dirt and grease from your hands.) Be sure to emphasize that Method 3 is the best method for proper hand washing.
The ActivityPart I
1. Ask students when they think it is important to make sure their hands are clean. Remind them that disease can be transmitted in many ways. Ask them to suggest different ways hands could transmit diseases. These may include direct contact with people, dirty surfaces, (such as toilets), feces and animals. Sneezing or coughing into a hand and putting dirty hands in your mouth when eating or preparing food are other ways hands can spread disease. List student ideas on the board and reinforce that hand washing with soap and clean water is one of the most effective ways to
prevent spreading disease.
2. Have the class perform a demonstration using the Soap Story Cards. Divide the class into four groups and assign roles:
• Group 1: Dirt• Group 2: Water• Group 3: Soap• Group 4: Rinse water
3. Hand each group a Soap Story Card and allow group members to review it. Designate one student from each group to read the group’s “role” to the class.
4. Ask each group to come to the front of the room in the following order: dirt, water, soap, rinse water. For example, the dirt group gets in “position,” the “role” is read, and the group performs the “action.” Then ask the water group to come to the front and perform their “action” by interacting with the dirt group. Next the soap group will come to the front and perform their “action” by interacting with the dirt and water groups. Finally the rinse water group will come to the front and perform their “action” by interacting with the dirt, water, and soap groups.
5. After all groups have performed their actions, ask students to review why washing with soap and water is effective.
Part II1. Tell students that in
addition to washing with soap and water, the length of time spent hand washing is critical.
2. Teach students The Hand Washing Song, sung to the tune of Frere Jacques. This simple song lasts about 15 seconds, so it can be sung during hand washing to remind students to wash each part of their hands and make sure they wash long enough.
3. Have each student look at the Hand Washing Diagram, and practice proper hand washing techniques, pretending to use soap and water.
4. As they practice the techniques on the diagram, ask the class to sing the Hand Washing Song again or count 15 seconds. This is the amount of time they should spend washing their hands, excluding time for preparing, rinsing, or drying.
Part III1. Ask students to talk
about whether there are any hand washing stations at school or in their communities.
2. Have the students come up with ideas about where they think it would
Hand washing is one of the most effective ways of preventing germs from spreading.
The Hand Washing SongSing this to the tune of Frere Jacques. This song lasts about 15 seconds.
Lather with soap
Rub your palms together
Now the backs
Of your hands
Interlace your fingers
Cleaning in between them
Now the thumbs
Clean your nails

14
Healthy Water, Healthy Habits, Healthy People Educators Guide - © 2010 Project WET Foundation. All rights reserved.
Healthy Water, Healthy Habits, Healthy People Educators Guide
15
Healthy Water, Healthy Habits, Healthy People Educators Guide - © 2010 Project WET Foundation. All rights reserved.
Soap Story Cards – Resource Page
WALL
We are dirt and germs, clinging to your hands. We like it here!
Line up along the wall at the front of the classroom.
Position
Action
Pretend you’re clinging to the wall.
(As the other groups move in, go wherever one of their members moves you.)
Make a line in front of the students in the Dirt Group. Stand parallel to their line, about a meter away.
Position
Action
Two water group students each select one of the students from the Dirt Group to join the water group.
(As the other groups move in, listen to them and act out what their part of the story tells you to do.)
Line up in front of the students in the Water Group. Stand parallel to their line, about a meter away.
Position
Action
Wiggle between the students in the water group. Take one of the water group members by the hand. �en use your
other hand to take one of the Dirt Group members by the hand. Pull the Dirt Group members away from the wall.
(When the Rinse Water Group moves in, allow yourself to be carried along with them.)
Grouped together at one side of the classroom.
Position
Action
In a group, hurry across the front of the classroom from one side to the other, taking all the other
groups with you.
We are the water you used to wet your hands. We remove some of the dirt and germs clinging to your hands.
We are soap. Each of us is a long molecule. One end is attracted to the water. �e other is attracted to dirt and
germs. We pull the dirt and germs from your hands.
We are the rinse water. We rush over your hands, washing away dirty water, soap, dirt, and germs in a big flood!
Role
Role
Role
Role
Tap. They can also suggest other materials that could be used if they do not have access to the materials listed on the resource page.
6. Encourage students to ask an adult to help them build a hand washing station at home or in their community.
Wrap UpDiscuss hand washing with the class. What are some obstacles we may have to overcome to wash our hands often? How do we eliminate these obstacles? What are the benefits of hand washing with soap and clean water? How can we teach others in our community about these benefits?
AssessmentHave students:• identify important times
for hand washing (Part I, step 1).
• explain why using soap is important (Warm Up, Part I, step 4).
• practice proper hand washing techniques (Part II, steps 3 and 4, Part III, step 4).
• Identify important locations for hand washing stations (Part III, step 2).
ExtensionsHave students create a hand washing educational campaign for the school or community.
Use strategies like songs, post-ers and poems to teach others about proper hand washing. Older students also can teach younger students the hand-washing song.
Make additional Tippy Taps to provide hand washing stations for your school or students’ homes. Refer to the How to Construct a Tippy Tap – Resource Page for instructions on how to build a Tippy Tap.
Resources“Hand washing Facilities in Schools, Tool Kit on Hygiene, Sanitation & Water in Schools.” World Bank. http://www.schoolsanita-tion.org/BasicPrinciples/HandwashingFacilities.html (accessed April 2, 2008).
“News and educational mate-rials on hand hygiene from the Soap and Detergent Association.” The Soap and Detergent Association. http://
www.cleaning101.com/hand-hygiene/ (accessed April 2, 2008).
“The Hand Washing Handbook.” The Global Public Private Partnership for Handwashing. http://www.eddcontrol.org/files/Handwashing_Handbook_WB.pdf (accessed April 2, 2008).
Children with clean hands
Gro
up 1
Dir
tG
roup
2W
ater
Gro
up 3
So
apG
roup
4Ri
nse
Wat
er

16
Healthy Water, Healthy Habits, Healthy People Educators Guide - © 2010 Project WET Foundation. All rights reserved.
Healthy Water, Healthy Habits, Healthy People Educators Guide
17
Healthy Water, Healthy Habits, Healthy People Educators Guide - © 2010 Project WET Foundation. All rights reserved.
Materials• One large water container with a handle and a
cap (one to four liters)• Three pieces of cord, the length of an adult’s
arm• A bar of soap• Small plastic water bottle (one-half to one liter)• Knife• Hammer• Nail
LocationChoose a location that is convenient for use, such as near the latrine at your school or home or near where you prepare food. You will need to either construct something from which to hang your Tippy Tap or utilize a tree branch. Choose a location that is prominent so that the Tippy Tap is used frequently. Remember to keep soap replenished and available to those who use the Tippy Tap.
InstructionsAsk an adult to help you .
Large Water Container1. Using boiled water, clean the inside of one
large water container. Fill the container half full with clean water.
2. Use a hammer and nail to put 8-12 holes in the cap of the large water container. Place the cap back on the container.
Soap Cover and Soap Hanger3. Bore a hole through the middle of the soap
using a nail or knife. The hole should be large enough to thread a piece of cord.
4. Make a hole in the bottom of the small (one half to one liter) plastic bottle. Using the knife cut off the bottom of the small bottle.
5. Tie a knot at the end of one piece of cord. Thread the bar of soap onto the cord. Tie a second knot above the bar of soap. Thread the soap cover (from the small plastic bottle that was cut in half in step #4) onto
How to Construct a Tippy Tap—Resource Page
the cord. This provides a cover for the soap. Set aside.
Securing Your Tippy Tap6. Use one piece of cord for hanging the
container. Tie one end of the cord around the handle and tie the other end securely to a branch or log.
7. Use a second piece of cord as a pull cord to tip the Tippy Tap. Tie one end of the cord around the nozzle. Tie a loop large enough to be a handle in the other end. You may also tie this end around a log to use as a foot pedal for tipping the Tippy Tap.
8. Tie the cord with the soap and soap cover to either the handle of the water container or from the branch or log where the Tippy Tap is hanging.
9. You are now ready to wash your hands with soap and water using the Tippy Tap!
Tree branch
Cord for hanging
Handle
Nozzle
Large water container (one to four liters)
Cap with holes
Soap cord
Soap cover
Soap
Pull cord
When should we wash our hands?
Before• Preparing food• Eating• Taking medication or
giving it to someone • Taking care of a wound• Going to bed
After• Using the toilet or latrine• Taking care of animals• Wiping your nose• Helping a child on the
toilet, or changing a baby• Caring for someone ill• Handling raw meat
How to wash your hands1. Get ready
Have soap and clean water ready. Store soap where it can drain, so it does not sit in a pool of water,
which can waste soap and encourage germ growth.
Remove jewelry and roll up sleeves to the elbow.
Wet hands and wrists. Keep your hands lower than your elbows as you wash, so water flows to your fingertips rather than up your arms.
2. Wash!
Apply soap to your hands and lather thoroughly.
Use firm, circular motions to wash hands and arms up to the wrists, covering all areas, including palms, back of the hands, fingers, between and sides of fingers, knuckles, and wrists.
Wash hands for at least 15 seconds.
Repeat the process if your hands are very soiled.
Clean under your fingernails.
3. Rinse
Rinse your hands using running water, if possible. If not available, use a bucket with a tap that can be turned on and off, a pitcher and basin or bucket, or a Tippy Tap.
Do not dip your hands into a basin of water to rinse them. The water will quickly contain dirt and germs that could re-contaminate hands.
4. Dry
Shake your hands dry to avoid picking up new germs from your clothing or towels.
Hand Washing For Health—Resource Page
Apply soap to wet hands and wrists. Vigorously scrub the backs of both hands. Vigorously rub hands together, palms facing and fingers interlaced.
Interlock fingers and scrub the backs of fingers on both hands.
Hand Washing Diagram
Vigorously scrub each thumb with oppo-site hand.
Rub the tips of thumb and fingers against the palm of opposite hand and vice versa.
Repeat all steps in the process until hands are clean and for a minimum of 15 seconds. Rinse hands with clean water and shake hands until dry.

18
Healthy Water, Healthy Habits, Healthy People Educators Guide - © 2010 Project WET Foundation. All rights reserved.
Healthy Water, Healthy Habits, Healthy People Educators Guide
19
Healthy Water, Healthy Habits, Healthy People Educators Guide - © 2010 Project WET Foundation. All rights reserved.
Subject Areas: Science, Health
Duration: Warm up: 45 minutes Activity: 45 minutes Wrap up: 20 minutes
Setting: Classroom
Skills: Gathering (reading, listening); Analyzing (identifying components and relationships among components); Interpreting (relating, making models, identifying cause and effect); Presenting (demonstrating)
Vocabulary: Bilharzia, cholera, dysentery, feces, fecal-oral transmission, hepatitis A, malaria, parasite, polio, typhoid, vector transmission
ObjectivesStudents will: • describe transmission
pathways of common water- and sanitation- related illnesses.
• identify personal and community actions that can prevent or contribute to spreading disease.
Materials• Disease Transmission
Chain Cards – Resource Page for each of seven groups
• Chalkboard
Making ConnectionsUnderstanding the different transmission paths helps stu-dents learn how healthy habits can decrease the possibility of spreading disease.
BackgroundDiarrheal diseases are among the most dangerous in Africa. Although these diseases use many paths to spread, many can be controlled by using healthy habits. Simple individ-ual actions like washing hands properly, water treatment and basic sanitation can make entire communities healthier.
A primary cause of most diar-rheal diseases is fecal-oral transmission. Germs enter the body when human or animal feces contaminate food or water. These germs or micro-organisms multiply in the digestive system and are shed from the body in human and animal feces.
Proper sanitation, and hygiene along with healthy habits, can keep both animal and human feces out of water supplies. Many steps can be taken to keep diseases from spreading through fecal-oral transmis-sion. For example:• Frequently wash your
hands with soap and clean water. (This is one of the most effective ways to stop spreading disease).
• Tether animals away from water sources so their waste does not contaminate the water.
• Construct your latrine away from water sources to avoid contamination by human waste.
• Maintain the latrine properly; if one is unavailable, dig a hole and cover your waste with dirt.
• Boil drinking water. (This can kill many germs from fecal and other types of contamination.)
• Get vaccinated. This can boost natural immune defenses against many
Break the ChainsWhat healthy habits can break the chain of infection?
SummaryStudents use problem- solving skills to discover how to break the chains of disease transmission.
diseases, including some fecal-oral diseases, such as polio.
Vector disease transmission is another way in which disease is spread. Vector transmission involves contact with insects or other animals that transmit disease. Malaria and Bilharzia are examples of diseases that are spread through vector transmission. There are many steps that can be taken to keep diseases from spreading through vector transmission. For example: • Sleep under a mosquito
net at night. The Anopheles mosquito feeds at night and can spread the malaria parasite from person to person.
• Remove stagnant water from around your home. This will help keep the Anopheles mosquito from laying her eggs near your home.
• Avoid swimming and wading in freshwater. The Bilharzia parasite is found in contaminated freshwater.
• Heat bath water to 66 degrees Celsius for at least 5 minutes before bathing. This can kill parasites that are passed through vector transmission to your skin.
ProcedureWarm UpTo explain how germs and dis-ease can spread, copy the two disease webs onto the board and explain to students the pathways diseases can travel.
The following three examples illustrate the fecal-oral route of transmission:• A person who uses the
latrine, but does not wash her hands afterward, goes to the kitchen to prepare food. This allows germs on her hands from the latrine to contaminate the food. When this food is consumed, so are the germs.
• Flies are attracted to feces. The fly may have carried germs from the feces in the latrine onto your food. When you consume your food, you can also consume germs from the latrine.
• Your goats defecate in the spring that provides your drinking water. This introduces germs into your water supply. When
you collect water from this contaminated source and do not boil it before drinking, you can consume the germs from the goats’ feces.
The following two examples illustrate the vector route of disease transmission.• A person collects
bath water from a contaminated fresh water source. They do not heat their bath water before using it allowing parasites from the water to transmit disease through contact with their skin.
• At night, an Anopheles mosquito bites and infects you with the malaria parasite. You become infected and begin to show symtoms of the disease. If an Anopheles mosquito
Feces
Flies
Food
Mouth
Hands Water
Disease Web Diagram
This diagram illustrates possible scenarios for fecal-oral disease transmission.
Parasite
Skin
Water(Bilharzia) (Malaria)
Mosquito
This diagram illustrates possible scenarios for vector disease transmission.

20
Healthy Water, Healthy Habits, Healthy People Educators Guide - © 2010 Project WET Foundation. All rights reserved.
Healthy Water, Healthy Habits, Healthy People Educators Guide
21
Healthy Water, Healthy Habits, Healthy People Educators Guide - © 2010 Project WET Foundation. All rights reserved.
TyphoidFever – A bacterial disease that multiplies in your blood-stream and spreads through feces.
Feces Water Mouth
1st Link 2nd Link
BestMethodsofPrevention:TyphoidFeverBoiling drinking water and proper hand washing with soap and water.
Bilharzia – A disease caused by parasitic worms that is spread when skin comes in contact with contaminated freshwater. Eggs of the para-site can be introduced to freshwater through the urine and feces of infected people.
Parasite Water Skin
1st Link 2nd Link
BestMethodsofPrevention:BilharziaAvoiding wading and swimming in freshwater, properly heating or storing bath water and boiling drinking water.
Dysentery– A symptom of a disease that causes the body to elimi-nate feces. Bacterial and viral germs can spread through the feces.
Feces Water Mouth
1st Link 2nd Link
BestMethodsofPrevention:DysenteryBoiling drinking water and proper hand washing with soap and water.
bites you again she can carry the malaria parasites from you and pass them on to other people she bites.
Healthy habits can break the transmission chains and stop spreading of germs and disease. Boiling water before drinking, frequent hand washing with soap and sleep-ing under a mosquito net are some of the most effective ways to break the transmis-sion chains.
The Activity1. Explain the diagram
describing a disease’s transmission path to your students.
2. Ask seven students to volunteer as team leaders. Give each team leader one of the seven Disease Transmission Chain Cards. You may want to remove the Best Methods of Prevention section of the cards before handing out to students.
3. Allow each student group 10 minutes to think of actions that could break the transmission chain for each disease. Have them consider healthy habits that they are familiar with as options.
4. Ask a volunteer from each group to show the class the group’s results. If there are prevention methods the groups did not
consider, ask the other students to contribute ideas. Reference the Best Methods of Prevention for each disease in the Disease Transmission Chain Cards – Resource Page for more information.
Wrap UpDiscuss habits that can help the class stay healthy. Can they think of healthy habits besides those in the activity? Emphasize that students can do a lot to stay healthy, and help their school-mates, fami-lies and communities break disease transmission chains.
AssessmentHave students: • diagram how disease-
causing germs can spread from feces to people (Warm Up).
• diagram how disease can be spread through insects or animals to people (Warm Up).
• identify actions that spread germs and disease and how they relate to a specific part of the disease transmission paths (step 3).
• identify healthy habits that can stop the spread of germs and disease (Steps 3 and 4, Wrap Up).
ExtensionsCreate a “Break the Chain” campaign to promote sani-tation and hygiene. Have students make posters and display them around their school and community.
Have students dramatize the activity and perform it for others, emphasizing healthy habits.
Have students adapt the activ-ity to other diseases with different transmission routes, such as HIV/AIDS. For each disease, ask students to iden-tify the transmission chain and healthy habits that break it.
Resources“Health Impacts of Improved Sanitation.” WELL Fact Sheet. http://www.lboro.ac.uk/well/resources/fact-sheets/fact-sheets-htm/Household%20Sanitation.htm (accessed April 2, 2008).
“Hepatitis A.” Virginia Department of Health. http://www.vdh.virginia.gov/epidemiology/factsheets/Hepatitis_A.htm (accessed April 15, 2008).
“Cholera.” Department of Health and Human Services Centers for Disease Control and Prevention (CDC). Division of Foodborne, Bacterial and Mycotic Diseases (DFBMD). http://www.cdc.gov/nczved/dfbmd/dis-ease_listing/cholera_gi.html (accessed April 15, 2008).
“Hygiene Education.” WaterAid America. http://www.wateraid.org/uk/what_we_do/how_we_work/sustainable_technologies/technology_notes/238.asp (accessed May 14, 2008).
Disease Transmission Chain Cards—Resource Page
Cholera– A bacterial disease that causes massive, highly liquid diarrhea, which has very high concentrations of the cholera bacteria.
Feces Water Mouth
1st Link 2nd Link
BestMethodsofPrevention:CholeraProper hand washing with soap and water, boiling drinking water and isolation of cholera-infected water, clothing and bedding.
Polio – A viral infection spread through infected feces or mouth-to-mouth contact.
Feces Water Mouth
1st Link 2nd Link
BestMethodsofPrevention:PolioVaccination, proper hand washing with soap and water, boiling drinking water, and avoiding kissing or sharing drinking or eating utensils with an infected person.
HepatitisA – A viral disease that infects the human liver and spreads through fecal-oral transmission or sexual contact.
Feces Water Mouth
1st Link 2nd Link
BestMethodsofPrevention:HepatitisABoiling drinking water and proper hand washing with soap and water.
Malaria – A disease caused by a parasite that is transmitted to humans through Anopholes mosquitoes. Mosquitoes breed in standing water.
BestMethodsofPrevention:MalariaSleeping under a mosquito net, wearing protective clothing at night and removing stagnant water from around your house.
Parasite Mosquito Skin
1st Link 2nd Link

22
Healthy Water, Healthy Habits, Healthy People Educators Guide - © 2010 Project WET Foundation. All rights reserved.
Healthy Water, Healthy Habits, Healthy People Educators Guide
23
Healthy Water, Healthy Habits, Healthy People Educators Guide - © 2010 Project WET Foundation. All rights reserved.
Subject Areas: Science, Health, Mathematics
Duration: Warm Up: 45 minutes Activity: Part I: 30 minutes Part II: 30 minutes Part III: 45 minutes Wrap Up: 30 minutes
Setting: Classroom, outdoor area near school water source
Skills: Gathering (observing, listening, measuring, recording, calculating); Organizing (estimating, drawing, manipulating materials); Analyzing (discussing); Applying (planning, constructing); Evaluating (assessing), Presenting (demonstrating, reporting)
Vocabulary: microorganism, sediment, filtration
ObjectivesStudents will:• recognize that certain
personal and household activities require clean water.
• explain why their senses are not sufficient to test whether water is safe to drink.
• explain the best way to purify drinking water.
• analyze home water systems and identify potential improvements.
Materials• Four clear plastic bottles
with holes in the lids• Clean drinking water• A pen to label bottles• Small amount of salt• Small amount of white
vinegar or clear soda• Small amount of dirt • Copies of Steps Along the
Path to Healthy Drinking Water – Resource Page, or one large version to post for the class
• Large sheets of paper
• Colored pencils or other writing implements
Making Connections Most students know the source of their household water. While some activities, such as drinking, food preparation and hand washing, require clean water, others do not. Learning the steps toward providing healthy drinking water can help students, their house-holds, and communities avoid spreading disease.
BackgroundMany households and com-munities lack healthy drinking water. People use contami-nated drinking water for many reasons, including: • limited/no access to water. • inability to pay for water
fees or tariffs. • lack of information to
determine their water supply’s safety.
• lack of knowledge of water treatment and storage methods.
Contaminated water and food causes significant health prob-lems across Africa, and around the world.
According to the World Health Organization: “Worldwide, contaminated water helps make more than three billion people sick and contributes to five million deaths annually.
The Path to Healthy Drinking WaterIf you doubt your water is clean – boil it!
Summary By understanding how to treat water in their own homes, students contribute to their health, as well as that of their families and communities.
The estimated death rate for children from these diseases is one every eight seconds.”
Having a water source or supply near home does not guarantee it’s safe to drink. Clean water sources may become contaminated periodi-cally by natural events, such as flooding or drought. Water treatment may be unavail-able or poorly managed. Even water from a well can be con-taminated, depending on the quality of ground water.
Even when the water source is clean, water can become contaminated during collec-tion, transportation, storage or use.
Many methods of water puri-fication exist and all have advantages and disadvantages including cost, availability, effectiveness, etc. Vigourously boiling your drinking water for at least three minutes kills bacteria, parasites and viruses and is the most effective way to make drinking water safe. This process can significantly reduce diarrheal and water-borne diseases and improves family and community health.
ProcedureWarm UpIn advance of the Warm Up, pour equal amounts of clean water into four clear bottles. Number each bottle. This activity works best if holes are made in the bottle lids to allow students to use their sense of smell (holes can be
made prior to the activity using a hammer and nail).
To bottle number one add a small amount of salt and shake to dissolve (be sure to cover the holes in the lid when shaking). To bottle number two add a small amount of white vinegar or clear soda (enough so that you can smell the vinegar or soda). To bottle number three add a small handful of dirt. Do not add anything to the water in bottle number four. Line the bottles up on a table at the front of the room.
To begin the Warm Up, ask students how they can tell if our drinking water is healthy. Without using water testing equipment, what do we have available to us to determine if drinking water is clean. List student answers on the board.
Ask students to identify their five senses (sight, smell, taste, touch and hearing). Can they use any of their senses to help them decide if water is healthy to drink? Donottasteorhavestudentstasteanywaterinthisinvestigation.
Tell them we are going to con-duct tests to see if our senses are adequate water testing tools.
Show the class the four bottles of water. Ask the students if, through observation, they know this water is healthy to drink? Explain to the stu-dents that only one of the four
bottles contains clean drink-ing water. Ask them to use their senses (except for taste) to try to determine which bottle contains clean drinking water. Provide slips of paper and pens or pencils and ask the students to write down the number of the bottle that they think is clean water and their name. Students can fold their slip of paper and make a pile of guesses. After everyone has had a chance to guess, determine how many students guessed correctly and read their names aloud.
Explain to students that just because water appears clear and clean does not mean that it is healthy to drink. For example, you cannot see the salt in the water of bottle #1. Why? (Salt dissolves in water.) Ask students if it is possible there are other things in the water they cannot see. (Germs and microorganisms can be present in water but only seen with a microscope.)
Ask students if observing (without special tools) is suf-ficient to determine if water is healthy to drink.
What can students do to ensure their drinking water is healthy?
Remind students the most effective way to ensure water is healthy to drink is to purify it. Boiling is the simplest method of purification for making water healthy to drink.

24
Healthy Water, Healthy Habits, Healthy People Educators Guide - © 2010 Project WET Foundation. All rights reserved.
Healthy Water, Healthy Habits, Healthy People Educators Guide
25
Healthy Water, Healthy Habits, Healthy People Educators Guide - © 2010 Project WET Foundation. All rights reserved.
The ActivityPart I
1. Divide the class into groups of six students. Ask each group to form three pairs of two. Instruct the groups to have each pair focus on a different one of the three purificaiton methods from the Steps Along the Path to Healthy Drinking Water resource page.
2. Have each pair present the purification method they studied to their group through a demonstration, explaining how and why the methods work. Each group should discuss and debate the advantages and disadvantages of each method.
3. Have each group of six students decide which method of purification they would prefer to use in their homes to ensure their drinking water is healthy.
Part II1. Draw a long line (30m
or so) in the dirt in the school yard. You could also do this activity in a classroom with an imaginary line, or a line made from desks, pencils, etc. This line will represent the path to healthy drinking water.
2. Make a sign (or write in the dirt) at one end of
the line “Step 1: Water Source”, or, if there is a water source in the school yard (like a pump), start the line there.
3. Explain to the students that they are about to follow the path to healthy drinking water. Gather the students at the start of the line. Explain that this point represents the place where they collect water—their water source. Ask them to think about whether or not the water collected here is clean. Ask them to reflect on the Warm Up—is it possible to tell if the water is clean by observing it?
4. Move the group along the line. Explain that this movement represents transporting the water home.
5. Stop somewhere along the center of the line. This point represents the part of the path to healthy drinking water where the water is purified and should be labeled “Step 2: Water Purification”. There are many options for purifying water. This activity focuses on three common and relatively inexpensive options—boiling, chemical treatment and solar water disinfection. Have students recall their discussions about
different methods of water purifications from part one and discuss which method they would choose to use in their own homes.
6. Now move the group along the line again—purifying their water has moved them further down the path toward healthy drinking water. About three-quarters of the way to the end of the line, stop the group. This point should be labeled “Step 3: Safe Storage of Clean Water”. At this point, use the information on the “Safe Storage of Clean Water” card to lead a discussion with the students about the importance and methods for clean water storage.
7. Move the class to the end of the line. At this point the water is clean, healthy and ready to drink. However, if the water is now poured into a dirty glass, all the work they have just done to keep their water clean is wasted. The end of the line should be labeled “Step 4: Handling of Clean Drinking Water”. At this point, use the information on the “Safe Handling of Clean Water” card to lead a discussion with the students about the importance and methods of clean water handling.
Part III1. Using the ideas addressed
in Part II of this activity, students should create a “Path to Healthy Drinking Water” poster illustrating their own personal path to healthy drinking water. They should be sure to include the source where their water comes from, how they choose to purify their water, how they safely store their water, and how they safely serve the clean water. Have students take this poster home to share with their families to encourage following the path to healthy drinking water in their home.
Wrap UpDiscuss whether students’ families use purified water at
To ensure water is safe to drink, it must be drawn, transported, treated, stored and retrieved with care.
home. If so, which methods do they use? If not, do they think some of the methods demon-strated would work at home? Why or why not? How would they put these methods into practice?
AssessmentHave students:• explain why observation
may not be sufficient to judge the safety of drinking water (Warm Up).
• explain different methods of water purification (Part I, steps 2-3, Part II, step 5, Part III)
• identify the steps along the path to healthy drinking water ((Part II, step 1-7, Part III).
• identify how water is purified and stored at home and suggest ways to
improve these methods (Wrap Up).
ExtensionsResearch other filtration methods (e.g., slow sand fil-ters and silver impregnated filters). Explain how and why they work. If possible, con-struct a model.
Resources“Household Water Treatment, Storage and Handling.” WELL Fact Sheet. http://www.lboro.ac.uk/well/resources/fact-sheets/fact-sheets-htm/Household%20WT.htm (accessed April 2, 2008).
“Household Water Treatment.” WELL Technical Brief. http://www.lboro.ac.uk/well/resources/technical-briefs/58-household-water-treatment-1.pdf (accessed April 2, 2008).
“Water Treatment Methods.” Centers for Disease Control and Prevention. http://wwwn.cdc.gov/travel/contentWater-Treatment.aspx (accessed May 15, 2008).

26
Healthy Water, Healthy Habits, Healthy People Educators Guide - © 2010 Project WET Foundation. All rights reserved.
Healthy Water, Healthy Habits, Healthy People Educators Guide
27
Healthy Water, Healthy Habits, Healthy People Educators Guide - © 2010 Project WET Foundation. All rights reserved.
Steps Along the Path to Healthy Drinking Water
ChemicalTreatmentHow it worksA small amount of chemical (sodium hypochlorite or calcium hypochlorinate in a pre-packaged solution) is added to drinking water in a container about 30 minutes prior to consuming. Consumers can purchase a small bottle of the product from shops or pharmacies and then add the appropriate amount for the volume of water, stir and let stand for the amount of time indicated on the packaging of the product. Various brands of chemical treatments are available (e.g. PUR™ and WaterGuard™).
What it does The chemical kills many of the bacteria and parasites which can cause diarrhea.
Advantages• Relatively inexpensive• Relatively easy to use
Limitations• Taste of water• Ineffective against some parasites
SafeStorageofCleanWaterClean water must be stored safely to prevent recontamination. To safely store water in an open storage pot:• Cover the storage pot when you are not drawing water• Use a clean lid and put a rock on top if the lid falls off easily• Clean the storage pot well using clean water (boiling water is best) before refilling it with clean water. Allow time for it to dry completely
A closed storage system is safer. It allows you to pour out water or use a tap at the bottom. The storage vessels can be anything from a narrow-necked jar to a jerry can or a pot with a small tap at the bottom.
• Clean the storage vessel well using clean water (boiling water is best) before refilling• If you cannot scrub the inside of the vessel easily (as with a jerry can), clean the vessel by shaking pebbles inside with a solution of soap and clean water or disinfectant and water
SafeHandlingofCleanWaterWater that has been purified and stored safely can be recontaminated at the point of use.
Do not dip a communal drinking cup into the water because fingers touching the cup or the water can introduce germs. Draw water from the storage pot only with a long-handled ladle and pour the water into your drinking cup. Touch only the handle of the ladle, and keep your fingers and the ladle handle out of the water.
A closed storage system is safer. It allows you to pour out water or use a tap at the bottom. The storage vessels can be anything from a narrow-necked jar to a jerry can or a pot with a small tap at the bottom.
Step 1: Water Source Step 2: Water Purification
BoilingHow it worksThe Centers for Disease Control and Prevention state, “Boiling water is the best method for making water safe to drink. Boiling water as recommended will kill bacterial, parasitic, and viral causes ofdiarrhea.” Heat water in a pot until it boils vigorously and keeps boiling for at least three minutes. Water is boiling fully when it is moving in fast, rolling waves of bubbles, and the pot is releasing steam. (Above 1,600 meters, increase boiling time to five minutes, adding one minute for each additional 300 meters.) Cover the pot and cool the water in a safe place before pouring it into covered containers for storage. Clean the storage containers and their lids with boiling water to kill any germs. Store boiled water separately from un-boiled water.If you don’t like the taste of boiled water, add a pinch of salt.
Why it worksThe high temperature of boiling water kills bacteria, parasites and viruses.
Advantages• Kills harmful bacteria and other disease- causing germs• Simple• Easy to use a fire for boiling water after preparing meals
Limitations• Requires fuel, such as firewood, charcoal, a solar cooker, or gas stove, making it too expensive for some households• Takes time to gather fuel, boil water, and cool for storage• Boiling affects water’s taste
SolarWaterDisinfectionHow it worksSmall quantities of untreated water are placed in clean, clear, non-scratched PET or glass bottles closed with lids and set in direct sunlight for at least six hours. Bottles used for solar water disinfection must be clear (not brown or green), PET plastic (not PVC plastic) or glass and hold less than three liters of water. Bottles must be placed horizontally (on their sides) in the sun.
What it does UV-A rays from the sun kill bacteria and parasites in the water making it safer for consumption.
Advantages• Relatively affordable • Materials available• Relatively easy
Limitations• Not as effective when sun is obscured by clouds (if half of sky or more is covered by clouds, bottle must be left in the sun for 48 hours consecutively)• Not as effective with turbid water
Step 3: Safe Storage of Clean Water Step 4: Safe Handling of Clean Water

28
Healthy Water, Healthy Habits, Healthy People Educators Guide - © 2010 Project WET Foundation. All rights reserved.
Healthy Water, Healthy Habits, Healthy People Educators Guide
29
Healthy Water, Healthy Habits, Healthy People Educators Guide - © 2010 Project WET Foundation. All rights reserved.
Subject Areas: Science, Health
Duration: Warm Up: 20 minutesActivity: Part I: 45 minutes Part II: 60 minutesWrap Up: 30 minutes
Setting: Classroom, school yard/school drinking water source
Skills: Gathering (observing, recording); Organizing (mapping); Analyzing (identifying components and relationships, identifying patterns, comparing); Interpreting (drawing conclusions); Applying (developing and implementing action plans)
Vocabulary: water source, ground water, surface water, borehole, well, spring, rain water catchment
ObjectivesStudents will:• locate community
drinking water sources.• recognize healthy water
sources.• identify ways to protect
community water sources.• connect their water
source with their personal drinking water.
Materials• Large sheets of paper• Colored pencils or other
writing implements• One copy of Signs of a
Healthy Water Source – Resource Page (or write this information on the board for students to reference)
• Ball
Making ConnectionsCollecting water for drinking and household activities is part of many students’ daily lives. This activity helps students to understand the source of their school, household and com-munity drinking water, how to protect these sources and why.
BackgroundWater used in homes origi-nally comes from one of three sources. These are:• surface water (lakes,
rivers, streams, reservoirs)
• ground water (boreholes, wells, springs)
• water-catchment or rain-water harvesting systems (roof-top collection systems)
Whether water is collected by hand or piped into a home from a municipal supply, these sources can provide safe drinking water if they are properly developed, main-tained, used and protected. Surface water is most easily contaminated. Ground water usually is much cleaner, but can be contaminated by people or natural causes. Ground water can be tapped by a borehole or well, or it may flow naturally to the surface as a spring. Rain water captured from metal or tile roofs is rela-tively pure, especially if water from the first rain is used to flush the system before filling storage tanks.
The table, Signs of a Healthy Water Source, describes threats to each water source and explains some of the signs that the source is healthy.
Finding Healthy Water SourcesThe quality of your water starts with the cleanliness of the source!
Summary Students map drinking water sources in their community, identify signs of healthy water sources and learn how to protect them.
healthy to drink. Why or why not?
3. Ask how they would evaluate if the water is clean and safe?
4. Record student ideas. They may respond: • the area around the
source is clean.• the water looks clear
and has no odor. • no one is washing
their clothes or vehicle in the source, and no cattle or goats are grazing nearby.
• there has been no pattern of illness
among students who drink the water.
5. Divide students into small groups.
6. Provide each group with the appropriate checklist from the Signs of a Healthy Water Source Resource Page.
7. Add additional signs of a healthy source from the list the students made.
8. Ask each group to observe the water source and complete the checklist.
Procedure Warm UpAsk students to make a circle. Tell them you are going to toss a ball and, as each student catches it, he or she names one feature of surface water. Ask one stu-dent to record responses on the board. Students should answer: lake, river, pond, reservoir, stream, puddle, ocean. Be sure to distinguish between fresh water sources for drinking water and salt water, which requires special treatment before drinking it.
Remind them water is also found under the ground and is called ground water. Toss the ball again and ask how ground water can be tapped. They may answer “well” or “borehole.” Remind them that “springs” are places where ground water flows naturally to the surface of the earth.
Continue to toss the ball and ask if they can think of any other water sources. Tell them that rain can be harvested through water catchments.
The Activity Part I
1. Take the class to the school’s drinking water source (the location where students and teachers collect water for use at the school) and ask them to identify it: is it a well, borehole or stream?
2. Ask students if they think the water is
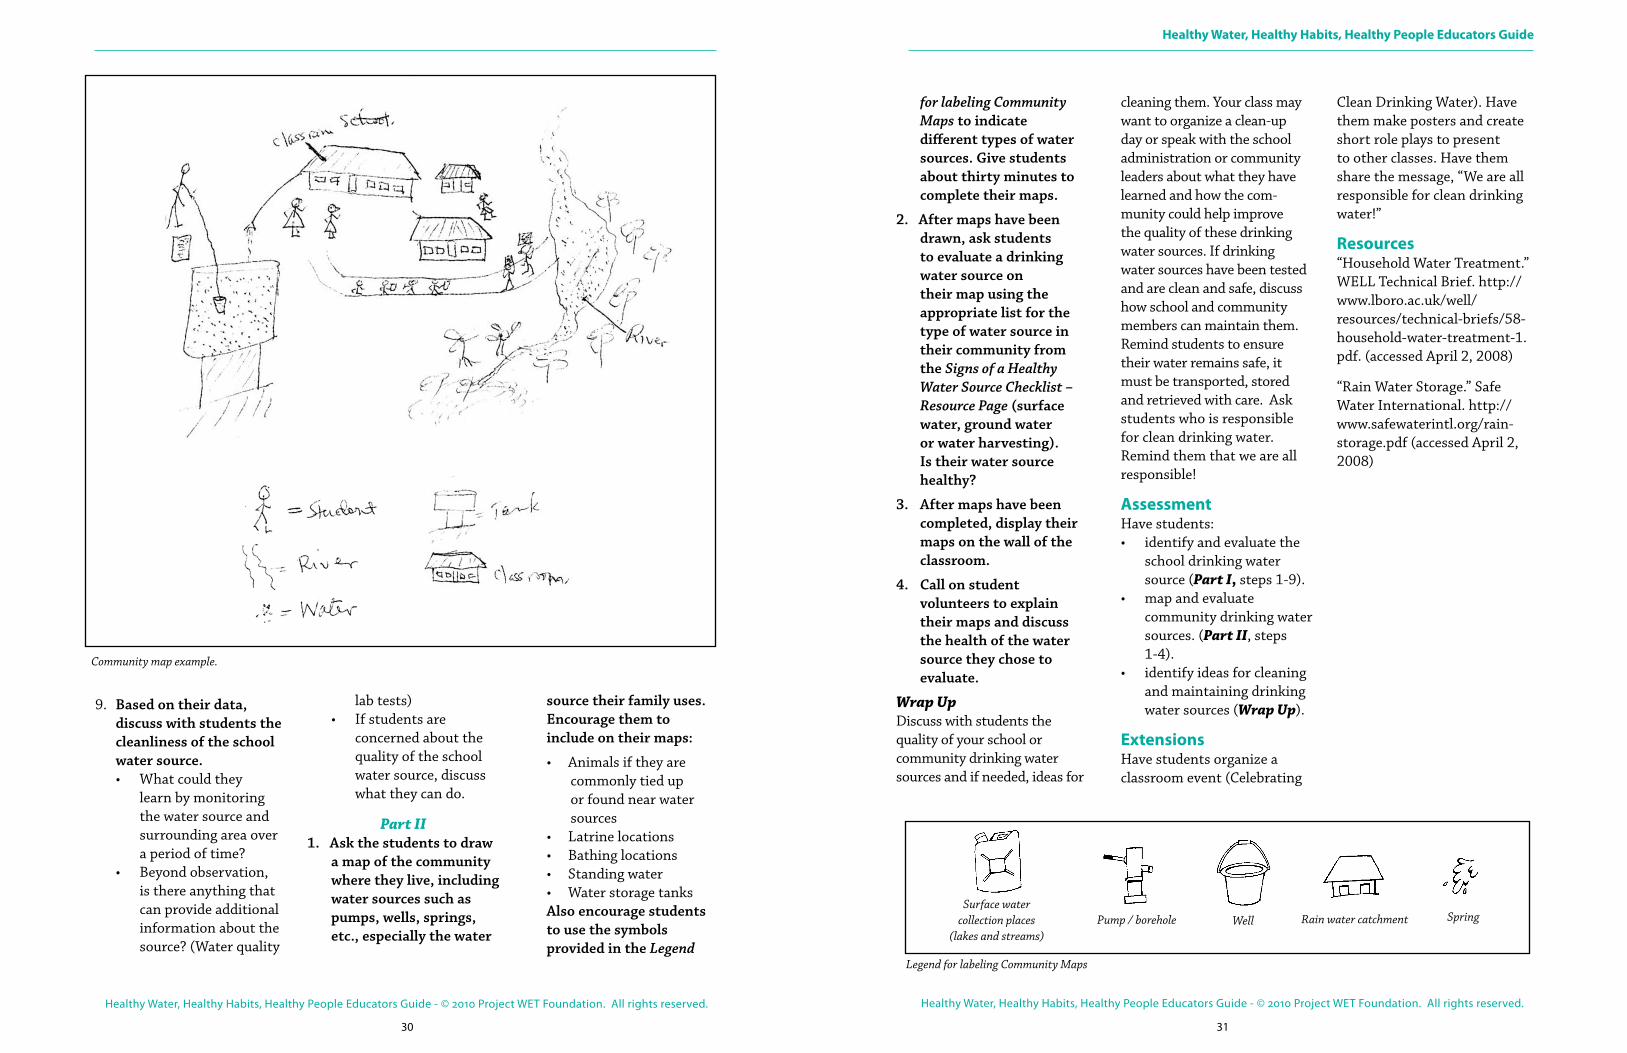
30
Healthy Water, Healthy Habits, Healthy People Educators Guide - © 2010 Project WET Foundation. All rights reserved.
Healthy Water, Healthy Habits, Healthy People Educators Guide
31
Healthy Water, Healthy Habits, Healthy People Educators Guide - © 2010 Project WET Foundation. All rights reserved.
9. Based on their data, discuss with students the cleanliness of the school water source.• What could they
learn by monitoring the water source and surrounding area over a period of time?
• Beyond observation, is there anything that can provide additional information about the source? (Water quality
lab tests)• If students are
concerned about the quality of the school water source, discuss what they can do.
Part II1. Ask the students to draw
a map of the community where they live, including water sources such as pumps, wells, springs, etc., especially the water
source their family uses. Encourage them to include on their maps:
• Animals if they are commonly tied up or found near water sources
• Latrine locations• Bathing locations• Standing water• Water storage tanks
Also encourage students to use the symbols provided in the Legend
Surface water collection places
(lakes and streams)Pump / borehole Well
Legend for labeling Community Maps
Rain water catchment Spring
for labeling Community Maps to indicate different types of water sources. Give students about thirty minutes to complete their maps.
2. After maps have been drawn, ask students to evaluate a drinking water source on their map using the appropriate list for the type of water source in their community from the Signs of a Healthy Water Source Checklist – Resource Page (surface water, ground water or water harvesting). Is their water source healthy?
3. After maps have been completed, display their maps on the wall of the classroom.
4. Call on student volunteers to explain their maps and discuss the health of the water source they chose to evaluate.
Wrap UpDiscuss with students the quality of your school or community drinking water sources and if needed, ideas for
cleaning them. Your class may want to organize a clean-up day or speak with the school administration or community leaders about what they have learned and how the com-munity could help improve the quality of these drinking water sources. If drinking water sources have been tested and are clean and safe, discuss how school and community members can maintain them. Remind students to ensure their water remains safe, it must be transported, stored and retrieved with care. Ask students who is responsible for clean drinking water. Remind them that we are all responsible!
AssessmentHave students:• identify and evaluate the
school drinking water source (Part I, steps 1-9).
• map and evaluate community drinking water sources. (Part II, steps 1-4).
• identify ideas for cleaning and maintaining drinking water sources (Wrap Up).
ExtensionsHave students organize a classroom event (Celebrating
Clean Drinking Water). Have them make posters and create short role plays to present to other classes. Have them share the message, “We are all responsible for clean drinking water!”
Resources“Household Water Treatment.” WELL Technical Brief. http://www.lboro.ac.uk/well/resources/technical-briefs/58-household-water-treatment-1.pdf. (accessed April 2, 2008)
“Rain Water Storage.” Safe Water International. http://www.safewaterintl.org/rain-storage.pdf (accessed April 2, 2008)
Community map example.
32
Healthy Water, Healthy Habits, Healthy People Educators Guide - © 2010 Project WET Foundation. All rights reserved.
Healthy Water, Healthy Habits, Healthy People Educators Guide
33
Healthy Water, Healthy Habits, Healthy People Educators Guide - © 2010 Project WET Foundation. All rights reserved.
Signs of a Healthy Water Source—Resource Page
Surface water (lakes, streams, reservoirs, ponds, rivers)
Signs of a healthy water sourcce Yes No Explanation
Animals are kept away from the water.
People do not defecate or urinate in or near the water.
Latrines are clean and well maintained so they do not overflow.
People do not bathe, wash cars, or do other clean-up in the water.
Detergents, grease and litter are challenging to clean from a surface-water source, and are more difficult to clean from drinking water than germs, which can be killed by boiling or other methods.
There is no litter floating in the water.
Ground water (boreholes, wells, springs)
Signs of a healthy water source Yes No Explanation
Latrines are located below the source, at least 30 meters away.
Germs from human waste can contaminate ground water if there is not enough soil to filter these contaminants between the latrine or septic tank and the water source. Overflowing latrines can release large amounts of waste and germs that are carried overland and can seep into ground water.
Latrines are clean and well maintained.
Pipes or plumbing are clean and in good condition.
To ensure clean water coming from the ground is not contaminated.
The ground slopes away from the source so water does not collect around the source resulting in contaminated water running down into the borehole or spring.
Contaminants from surface water can enter ground water through a well head if surface water collects around the source.
Water-harvesting or catchment systems
Signs of a healthy water source Yes No Explanation
Roofs and gutters are clear of debris. Debris and dirt from the roof and gutters can contaminate a clean storage tank.The first water to run off during a
rain is used to flush the system before connecting the system to the storage tank.
Pipes are well maintained. Maintenance and frequent monitoring of a plumbed system reduce the possibility of outside contaminants.
Storage tanks are airtight. Airtight lids on water storage tanks keep animals, insects and dirt from contaminating the water.
Your Drinking Water Source
Subject Areas:English (Language Arts), Science
Duration: Warm up: 45 minutes Activity: 60 minutes Wrap up: 30 minutes
Setting: Classroom or home
Skills: Gathering (reading, listening, interviewing); Organizing (matching, arranging); Analyzing (identifying patterns, comparing, discussing); Interpreting (translating, relating); Presenting (writing, speaking)
Vocabulary: comparison, literal, interpretation, proverb
ObjectivesStudents will: • examine and interpret the
meaning of traditional proverbs.
• describe two ways proverbs communicate meaning.
• create new proverbs to teach others about water and health.
Materials• One card from the
Proverbs – Resource Page for each group of three students
Making ConnectionsStudents can often connect with elders who use proverbs to educate family and com-munity members. In this activity, students examine the educational value of prov-erbs, and create their own to teach others about water and health.
BackgroundPassed from generation to generation, proverbs are short
sayings that reflect the values and beliefs of a culture. Across Africa, as in many other places around the world, proverbs are used to teach a lesson or a moral, warn against foolish acts, guide conduct, help solve problems and bring special meaning to situations.
Proverbs are used not only to instruct, but also to debate, tell stories and spice up daily conversation.
Proverbs have at least two and sometimes more mean-ings. One is the literal meaning. The other is a figurative interpretation, in which the real teaching or truth is contained. Consider the following Southern African proverb: “Not every-one who chased the zebra caught it, but he who caught it, chased it.” Literally inter-preted, this is a statement about hunting. Figuratively and more broadly, it can mean that one must try to succeed, although trying is not a guarantee of success.
Formulating proverbs is an art form. In this activity, stu-dents are challenged to create their own. To get your stu-dents started, discuss stylistic devices or use the following sample proverbs.
Water Wisdom“If a child washes his hands, he could eat with kings.” Our ancestors speak to us through their proverbs and stories.
Summary Generations hand down wisdom through stories and proverbs. Students use them as a guide to create their own wise sayings about water.
Your Drinking Water Source
Your Drinking Water Source
Germs from human and animal waste easily contaminate surface water.

34
Healthy Water, Healthy Habits, Healthy People Educators Guide - © 2010 Project WET Foundation. All rights reserved.
Healthy Water, Healthy Habits, Healthy People Educators Guide
35
Healthy Water, Healthy Habits, Healthy People Educators Guide - © 2010 Project WET Foundation. All rights reserved.
• Alliteration – the repetition of a consonant sound in a phrase.
Many men, many minds• Parallelism – balance
among clauses, phrases, or words.
Youths talk first then listen, elders listen first then talk.
He who laughs last, laughs best.
• Rhyme – repetition of identical or similar sounds.
A friend in need is a friend indeed.
Advice when most needed is least heeded.
• Ellipsis – the omission of words.
A hedge between keeps friendship green.
Better late than never.• Hyperbole – exaggeration. Do not use a hatchet
to remove a fly from a friend’s forehead.
All is fair in love and war.
• Paradox – contradiction. Darkness reigns at the
foot of the lighthouse. The longest way around is
the shortest way home.• Personification – giving
an object or idea human qualities.
A lie travels around the world while truth is putting her boots on.
A new broom sweeps clean, but the old brush knows all the corners.
Proverb Wisdom from Around the World
Proverb One Interpretation
A village without elders is like a well without water.
A well without water is incomplete, as is a village without elders.
Until lions have their own historians, tales of the hunt will always glorify the hunter.
The story (or history) depends on the perspective of the person telling it.
Between true friends, even water drunk together is sweet enough.
Friendship makes everything seem brighter.
You think of water when the well is empty. You don’t appreciate what you have until it is gone.
The youth walk faster than the elderly, but the elderly know the road.
Elders move more deliberately because their experience gives them better understanding than the young person has.
Health is the body of prosperity. If you don’t have your health, you don’t have anything.
Where you will sit when you are old shows where you stood in youth.
You set the course for your life when you are young.
If a child washes his hands, he could eat with kings.
A young person who develops discipline and manners may participate with elders.
Not everyone who chased the zebra caught it, but he who caught it, chased it.
Trying does not guarantee success, but you cannot be successful unless you try.
A hippopotamus can be made invisible in dark water.
Ignorance can hide even a big truth.
We are who we are today because of those who came before us.
Our history and ancestors are important in shaping our identities.
Who digs the well should not be refused water. Those who work should share in the benefits.
ProcedureWarm UpDivide the class into groups of three students. Give each group one card from the Proverbs – Resource Page.
Each card contains three proverbs and one interpreta-tion of each proverb. Have groups match each proverb with its correct meaning by drawing a line between each matched pair.
Assign each group one proverb from its card and have them read the inter-pretation to the class. Ask students to provide both the literal and figurative mean-ings. If the class is small or you have more time, you may have each student come up with their own interpre-tation for each proverb.
Ask students to describe the character and function of proverbs. Who uses proverbs? Why? Write their ideas on the board, and encourage dis-cussion about the following characteristics:
Proverbs express basic truths or teachings.
Many proverbs advise against foolish behavior, or serve as a guide to acceptable behavior.
The real meaning of many proverbs is different from their literal interpretation.
Some proverbs are direct statements that can be inter-preted literally, though often
expressed in poetic language.
Proverbs are short and, there-fore, easy to remember.
Proverbs are passed down from generation to generation.
Some proverbs are cultur-ally specific, while others can be broadly applied across cultures.
The Activity1. Tell students they will
be creating their own proverbs about water, cleanliness, good sanitation practices and health. Step one is to decide what they want their proverbs to teach.
2. Ask the class to develop a list of ideas or teachings about clean water, links between clean water and health, guidance about sanitation, instructions for personal hygiene and other ideas related to water, cleanliness and health. List them on the board.
3. Divide students again into groups. Have each group write at least one proverb about water, cleanliness, or health. Groups may use ideas from the board, or develop their own ideas for a proverb.
If students need help getting started use the following suggestions and examples:
• Using an existing proverb as a model can be a good way to start. For example, students can change the proverb, “He who forgives ends the argument,” to say, “She who drinks clean water lives a long and healthy life.”
• Rhyming can make proverbs memorable. “Where flies’ legs land, germs are close at hand” is a proverb using rhyme.
• Students might know other proverbs that express relevant ideas and can be models for new proverbs. For example, a proverb from the United States is: “An ounce of prevention is worth a pound of cure.” Students can modify that to say, “Drinking a cup of boiled water now is better than taking a pound of medicine later.”
4. When groups have completed their work, bring the class back together.
5. Have groups present their proverbs to the class. After each proverb is stated, ask the class to interpret it.
6. After hearing ideas from the class, have the presenter explain the group’s intended meaning.

36
Healthy Water, Healthy Habits, Healthy People Educators Guide - © 2010 Project WET Foundation. All rights reserved.
Healthy Water, Healthy Habits, Healthy People Educators Guide
37
Healthy Water, Healthy Habits, Healthy People Educators Guide - © 2010 Project WET Foundation. All rights reserved.
Wrap UpWrite the following Yoruba (Nigeria) proverb on the board: “A proverb is the horse that can carry one swiftly to the discovery of ideas.”
Discuss which of the new water proverbs best carry them “swiftly to the discovery of ideas.”
AssessmentHave students:• identify how proverbs
communicate meaning (Warm Up).
• list five characteristics of
Proverbs—Resource Page
Card #1
Card #2
Card #3
Card #4
1 A village without elders is like a well without water.
A Friendship makes everything seem brighter.
2 Until lions have their own historians, tales of the hunt will always glorify the hunter.
B A well without water is incomplete, as is a village without elders.
3 Between true friends, even water drunk together is sweet enough.
C The story (or history) depends on the perspective of the person telling it.
1 You think of water when the well is empty. A Elders move more deliberately because their experience gives them better understanding than the young person has.
2 The youth walk faster than the elderly, but the elderly know the road.
B If you don’t have your health, you don’t have anything.
3 Health is the body of prosperity. C You don’t appreciate what you have until it is gone.
1 Where you will sit when you are old shows where you stood in youth.
A You set the course for your life when you are young.
2 If a child washes his hands, he could eat with kings.
B Trying does not guarantee success, but you cannot be successful unless you try.
3 Not everyone who chased the zebra caught it, but he who caught it, chased it.
C A young person who develops discipline and manners may participate with elders.
1 A hippopotamus can be made invisible in dark water.
A Those who work should share in the benefits.
2 We are who we are today because of those who came before us.
B Our history and ancestors are important in shaping our identities.
3 Who digs the well should not be refused water. C Ignorance can hide even a big truth.
Answers: Card #1 – 1B, 2C, 3A; Card #2 – 1C, 2A, 3B; Card #3 – 1A, 2C, 3B; Card #4 – 1C, 2B, 3A
proverbs (Warm Up).• create, present, and
explain an original proverb about water or health (steps 3 through 6).
ExtensionsMake educational posters using illustrations and tradi-tional or new proverbs about water, cleanliness and health. Or create educational songs using student proverbs as lyrics. Use these tools to teach youngsters, other classes, or community members.
Play Proverb Charades. Have a student or group use role play to act out a proverb, and the rest of the class guess the proverb. Actors may choose to portray either the literal or figurative meaning.
ResourcesAfrican Proverbs, Sayings, and Stories. http://www.afriprov.org/ (accessed April 2, 2008).
“Famous Proverbs and Adages.” Brain Candy. http://www.corsinet.com/brain-candy/proverb.html (accessed April 2, 2008).

Thank you to the participants of the Writing Workshop whose ideas became these activities, the wonderful people of Africa and all who contributed to the evolution and development of this Educators Guide.
Project Management Team:
John Etgen, Project DirectorMolly Ward, Project ManagerMorgan Perlson, Project AssistantSandra DeYonge, Vice President of
PublicationsKristen Read, Project Manager Publications ManagerMeg Long, Chief Financial Officer
Thanks to the Project WET Foundation staff for all your support and for making this publication possible:Dennis L. Nelson, President and CEOJohn Etgen, Senior Vice PresidentSandra DeYonge, Vice President of PublicationsMeg Long, Chief Financial OfficerLinda Hveem, Executive Assistant to the President and CEOLindsay Lemon, Bookkeeper
Laurina Lyle, Executive Director and National Network Coordinator, Project WET USAJulia Nelson, Project ManagerHeath Noel, IT CoordinatorMorgan Perlson, International Projects AssistantKristen Read, Project Manager & Publications ManagerNicole Rosenleaf Ritter, Communications SpecialistVerna Schaff, AccountantTheresa Schrum, Project WET USA Assistant
Erin Vait, Sales ManagerAbby Ward, Project AssistantMolly Ward, Project Manager
Thank you to USAID and SAIC.
Illustrations by Peter GrosshauserOriginal Design by Geoff Wyatt, Wyatt
DesignReprint Design by Abby McMillen, Folk
Dog ArtProduction coordination by Koehler + Co.
A Cal l to ActionThe need for water resources education training and materials in Africa is great. To help expand Project WET’s work and the impact of water education in Africa, sponsors (NGOs, agencies, corporations, individuals) can:
• Support a wider distribution of Healthy Water, Healthy Habits, Healthy People and help make this publication available to more people.
• Sponsor a Project WET workshop for schools, communities or countries.
• Donate Project WET materials to a class-room, school or community.
• Sponsor school and community events to educate participants about water using Project WET.
• Provide grants for community improve-ment projects linked to Project WET education materials.
• Fund the development of Project WET activities and materials on new, relevant topics.
• Sponsor a teacher in an African school providing her access to additional Project WET resources.
Healthy WaterHealthy HabitsHealthy People
Healthy Water, Healthy Habits, Healthy People Student Activity Booklet – Companion to the Educators Guide of the same title
Water is Life Student Activity Booklet – Basic water principles specific to Africa
The Water Cycle Poster – An interactive poster illustrating the water cycle
Companion Publications
For other publications, go to www.projectwet.org.
Educators Guide on Water, Health, Sanitation and Disease Prevention