web programming by najeeb ullahazad(1)
TRANSCRIPT

Web Programming MCS First term Notes
1
Najeeb ullah Azad
MCS First term
Roll No:43
Mob No: 0332-5669693

Web Programming MCS First term Notes
2
Internet
The Internet is a global network connecting millions of computers. More than 190 countries are linked into exchanges of data, news and opinions. According to Internet Live Stats, as of December 30, 2014 there was an estimated 3,037,608,300 Internet users worldwide. The number of Internet users represents nearly 40 percent of the world's population. The largest number of Internet users by country is China, followed by the United States and India.
Intranet
An intranet is a network based on TCP/IP protocols belonging to an organization, accessible only by the organization's members or those with authorization.
Protocol
Protocol is an agreed-upon format for transmitting data between two devices. It determines type of error checking and data compression used.
WWW
The World Wide Web (abbreviated as WWW or W3,[2] commonly known as the Web), is a system of interlinked hypertext documents accessed via the Internet. With a web browser, one can view web pages that may contain text, images,
videos, and other multimedia, and navigate between them via hyperlinks.
Web page
A web page or webpage is a document or information resource that is suitable for the World Wide Web and can be accessed through a web browser and displayed on a monitor or mobile device. This information is usually in HTML or XHTML format, and may provide navigation to other web pages via hypertext links. .

Web Programming MCS First term Notes
3
Web browser
A browser is a software application for retrieving, presenting and traversing information resources on the World Wide Web. An information resource is identified by a Uniform Resource Identifier (URI) and may be a web page, image, video or other piece of content.[1] Hyperlinks present in resources enable users easily to navigate their browsers to related resources. A web browser can also be defined as an application software or program designed to enable users to access, retrieve and view documents and other resources on the Internet
Website
A website, also written as Web site, web site, or simply site is a set of related web pages containing content such as text, images, video, audio, etc. A website is hosted on at least one web server, accessible via a network such as the Internet or a private local area network through an Internet address known as a Uniform Resource Locator. All publicly accessible websites collectively constitute the World Wide Web.
How Do Web Browsers Work?
The World Wide Web is a system of Internet servers that support specially formatted documents. Web browsers are used to make it easy to access the World Wide Web. Browsers are able to display Web pages largely in part to an underlying Web protocol called HyperText Transfer Protocol (HTTP). HTTP defines how messages are formatted and transmitted, and what actions Web servers and browsers should take in response to various commands. It is what allows Web clients and Web servers to communicate with each other. When you enter a Web address (URL) in your browser, this actually sends an HTTP command to the Web server directing it to fetch and transmit the requested Web page and display the information in your browser. All Web servers serving Web sites and pages support the HTTP protocol.

Web Programming MCS First term Notes
4
URL (Uniform Resource Locator)
Abbreviation of Uniform Resource Locator (URL) it is the global address of documents and other resources on the World Wide Web.
The first part of the URL is called a protocol identifier and it indicates what protocol to use, and the second part is called a resource name and it specifies the IP address or the domain name where the resource is located. The protocol identifier and the resource name are separated by a colon and two forward slashes.
For example, the two URLs below point to two different files at the domain pcwebopedia.com. The first specifies an executable file that should be fetched using the FTP protocol; the second specifies a Web page that should be fetched using the HTTP protocol:
ftp://www.pcwebopedia.com/stuff.exe http://www.pcwebopedia.com/index.html
A URL is one type of Uniform Resource Identifier (URI); the generic term for all types of names and addresses that refer to objects on the World Wide Web.
The term "Web address" is a synonym for a URL that uses the HTTP / HTTPS protocol.
The Uniform Resource Locator (URL) was developed by Tim Berners-Lee in 1994 and the Internet Engineering Task Force (IETF) URI working group.
Domain name
Domain names are used to identify one or more IP addresses. For example, the domain name microsoft.com represents about a dozen IP addresses. Domain names are used in URLs to identify particular Web pages. For example, in the URL http://www.pcwebopedia.com/index.html, the domain name is pcwebopedia.com. Every domain name has a suffix that indicates which top level domain (TLD) it belongs to. There are only a limited number of such domains. For example:

Web Programming MCS First term Notes
5
gov - Government agencies edu - Educational institutions
org - Organizations (nonprofit) mil - Military com - commercial business net - Network organization ca - Canada th - Thailand
Differentiate between the following terminologies?
Web and Internet
• Internet : a physical network connecting millions of computers using the same protocols for sharing/transmitting information (TCP/IP)
in reality, the Internet is a network of smaller networks
• World Wide Web: a collection of interlinked multimedia documents that are stored on the Internet and accessed using a common protocol (HTTP)
Static vs. Dynamic pages
• most Web pages are static contents (text/links/images) are the same each time it is accessed
e.g., online documents, most homepages
HyperText Markup Language (HTML) is used to specify text/image format
• as the Web continues to move towards more and more online services and e-commerce continues to grow, Web pages must also provide dynamic content
pages can be fluid, changeable (e.g., rotating banners) must be able to react to the user's actions, request and process info,
tailor services e.g., amazon.com
• this course is about applying your programming skills to the development of dynamic Web pages and applications

Web Programming MCS First term Notes
6
Two HTTP Request Methods: GET and POST
Two commonly used methods for a request-response between a client and server are: GET and
POST.
GET - Requests data from a specified resource
POST - Submits data to be processed to a specified resource
The GET Method
Note that query strings (name/value pairs) is sent in the URL of a GET request:
/test/demo_form.asp?name1=value1&name2=value2
Some other notes on GET requests:
GET requests can be cached
GET requests remain in the browser history
GET requests can be bookmarked
GET requests should never be used when dealing with sensitive data
GET requests have length restrictions
GET requests should be used only to retrieve data
The POST Method
Note that query strings (name/value pairs) is sent in the HTTP message body of a POST
request:
POST /test/demo_form.asp HTTP/1.1
Host: w3schools.com
name1=value1&name2=value2
Some other notes on POST requests:
POST requests are never cached
POST requests do not remain in the browser history
POST requests cannot be bookmarked
POST requests have no restrictions on data length

Web Programming MCS First term Notes
7
Differences between HTML and DHTML:
HTML is a mark-up language, while DHTML is a collection of technology.
DHTML creates dynamic web pages, whereas HTML creates static web pages.
DHTML allows including small animations and dynamic menus in Web pages.
DHML used events, methods, properties to insulate dynamism in HTML Pages.
DHML is basically using JavaScript and style sheets in an HTML page.
HTML sites will be slow upon client-side technologies, while DHTML sites will be fast
enough upon client-side technologies.
HTML creates a plain page without any styles and Scripts called as HTML. Whereas,
DHTML creates a page with HTML, CSS, DOM and Scripts called as DHTML.
HTML cannot have any server side code but DHTML may contain server side code.
In HTML, there is no need for database connectivity, but DHTML may require
connecting to a database as it interacts with user.
HTML files are stored with .htm or .html extension, while DHTML files are stored with
.dhtm extension.
HTML does not require any processing from browser, while DHTML requires processing
from browser which changes its look and feel
Differences between ASP and PHP ASP is defined as Active Server Pages. ASP runs inside Internet Information Services (IIS). This
IIS is a component of Windows. ASP allows us to edit, change or add any content of a web page.
It responds to user queries or data given from HTML forms. Any data or databases are accessed
easily and the results are returned to the browser. It is helpful in customizing a web page; this
feature makes the page more useful for individual users.
PHP is defined as Pre Hypertext Processor. PHP is a server-side, cross platform, HTML scripting
language. The syntax of PHP is almost similar to C and Java. The goal of PHP is to allow web
developers to write dynamically generated pages quickly.
The difference between PHP and ASP is that ASP is a Microsoft product based on visual basic syntax whereas PHP has C and Java based syntax. ASP works better on Microsoft servers.

Web Programming MCS First term Notes
8
HTML Introduction
What is HTML?
HTML is a markup language for describing web documents (web pages).
HTML stands for Hyper Text Markup Language
A markup language is a set of markup tags
HTML documents are described by HTML tags
Each HTML tag describes different document content
HTML Example
A small HTML document:
<!DOCTYPE html>
<html>
<head>
<title>Page Title</title>
</head>
<body>
<h1>My First Heading</h1>
<p>My first paragraph.</p>
</body>
</html>

Web Programming MCS First term Notes
9
Example Explained
The DOCTYPE declaration defines the document type to be HTML
The text between <html> and </html> describes an HTML document
The text between <head> and </head> provides information about the
document
The text between <title> and </title> provides a title for the document
The text between <body> and </body> describes the visible page content
The text between <h1> and </h1> describes a heading
The text between <p> and </p> describes a paragraph
Using this description, a web browser can display a document with a heading and a
paragraph.
HTML Tags
HTML tags are keywords (tag names) surrounded by angle brackets:
<tagname>content</tagname>
HTML tags normally come in pairs like <p> and </p>
The first tag in a pair is the start tag, the second tag is the end tag
The end tag is written like the start tag, but with a slash before the tag name
The start tag is often called the opening tag. The end tag is often called
the closing tag.
Web Browsers
The purpose of a web browser (Chrome, IE, Firefox, Safari) is to read HTML
documents and display them.
The browser does not display the HTML tags, but uses them to determine how to
display the document:
Note

Web Programming MCS First term Notes
10
HTML Page Structure
Below is a visualization of an HTML page structure:
<html>
<head>
<title>Page title</title>
</head>
<body>
<h1>This is a heading</h1>
<p>This is a paragraph.</p>
<p>This is another paragraph.</p>
</body> </html>
Only the <body> area (the white area) is displayed by the browser.
Note

Web Programming MCS First term Notes
11
The <!DOCTYPE> Declaration
The <!DOCTYPE> declaration helps the browser to display a web page correctly.
There are different document types on the web.
To display a document correctly, the browser must know both type and version.
The doctype declaration is not case sensitive. All cases are acceptable:
<!DOCTYPE html>
<!DOCTYPE HTML>
<!doctype html>
<!Doctype Html>
HTML Editors
Write HTML Using Notepad or TextEdit
HTML can be edited by using a professional HTML editor like:
Adobe Dreamweaver
Microsoft Expression Web
CoffeeCup HTML Editor
However, for learning HTML we recommend a text editor like Notepad (PC) or
TextEdit (Mac).
We believe using a simple text editor is a good way to learn HTML.

Web Programming MCS First term Notes
12
Follow the 4 steps below to create your first web page with Notepad.
Step 1: Open Notepad
To open Notepad in Windows 7 or earlier:
Click Start (bottom left on your screen). Click All Programs. Click Accessories.
Click Notepad.
To open Notepad in Windows 8 or later:
Open the Start Screen (the window symbol at the bottom left on your screen).
Type Notepad.
Step 2: Write Some HTML
Write or copy some HTML into Notepad.
<!DOCTYPE html>
<html>
<body>
<h1>My First Heading</h1>
<p>My first paragraph.</p>
</body>
</html>
Web Programming MCS First term Notes
13
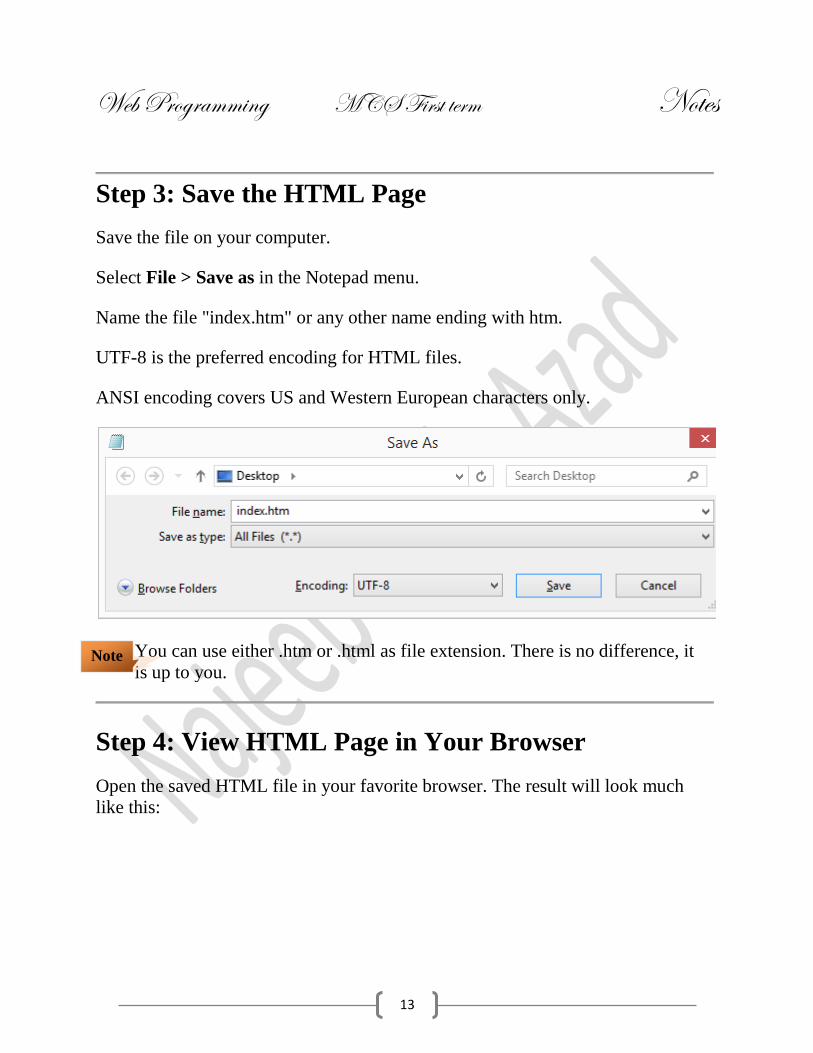
Step 3: Save the HTML Page
Save the file on your computer.
Select File > Save as in the Notepad menu.
Name the file "index.htm" or any other name ending with htm.
UTF-8 is the preferred encoding for HTML files.
ANSI encoding covers US and Western European characters only.
You can use either .htm or .html as file extension. There is no difference, it
is up to you.
Step 4: View HTML Page in Your Browser
Open the saved HTML file in your favorite browser. The result will look much
like this:
Note

Web Programming MCS First term Notes
14
To open a file in a browser, double click on the file, or right-click, and
choose open with.
HTML Headings
Headings are defined with the <h1> to <h6> tags.
<h1> defines the most important heading. <h6> defines the least important
heading.
Example
<h1>This is a heading</h1> <h2>This is a heading</h2> <h3>This is a heading</h3>
Note: Browsers automatically add some empty space (a margin) before and after
each heading.
Note

Web Programming MCS First term Notes
15
Headings Are Important
Use HTML headings for headings only. Don't use headings to make text BIG or
bold.
Search engines use your headings to index the structure and content of your web
pages.
Users skim your pages by its headings. It is important to use headings to show the
document structure.
h1 headings should be main headings, followed by h2 headings, then the less
important h3, and so on.
HTML Horizontal Rules
The <hr> tag creates a horizontal line in an HTML page.
Example
<p>This is a paragraph.</p> <hr> <p>This is a paragraph.</p> <hr> <p>This is a paragraph.</p>
The HTML <head> Element
The HTML <head> element has nothing to do with HTML headings.
The HTML <head> element contains meta data. Meta data are not displayed.
The HTML <head> element is placed between the <html> tag and the <body> tag:

Web Programming MCS First term Notes
16
Example
<!DOCTYPE html> <html> <head> <title>My First HTML</title> <meta charset="UTF-8"> </head> <body> . . .
</body></html>
Meta data means data about data. HTML meta data is data about the HTML document.
The HTML <title> Element
The HTML <title> element is meta data. It defines the HTML document's title.
The title will not be displayed in the document, but might be displayed in the
browser tab.
The HTML <meta> Element
The HTML <meta> element is also meta data.
It can be used to define the character set, and other information about the HTML
document.

Web Programming MCS First term Notes
17
More Meta Elements
In the chapter about HTML styles you discover more meta elements:
The HTML <style> element is used to define internal CSS style sheets.
The HTML <link> element is used to define external CSS style sheets.
HTML Tip - How to View HTML Source
Have you ever seen a Web page and wondered "Hey! How did they do that?"
To find out, right-click in the page and select "View Page Source" (in Chrome) or
"View Source" (in IE), or similar in another browser. This will open a window
containing the HTML code of the page.
HTML Tag Reference
Tag Description
<h1> to <h6>
Defines HTML headings
<hr>
Defines a horizontal line
HTML Paragraphs
The HTML <p> element defines a paragraph.
Example
<p>This is a paragraph</p> <p>This is another paragraph</p>

Web Programming MCS First term Notes
18
HTML Display
You cannot be sure how HTML will be displayed.
Large or small screens, and resized windows will create different
results. With
Any number of spaces, and any number of new lines, count as only
one space.
Example
<p> This paragraph contains a lot of lines in the source code, but the browser ignores it. </p> <p> This paragraph contains a lot of spaces in the source code, but the browser ignores it. </p>
HTML Line Breaks
The HTML <br> element defines a line break.
Use <br> if you want a line break (a new line) without starting a new
paragraph:

Web Programming MCS First term Notes
19
Example
<p>This is<br>a para<br>graph with line breaks</p>
The <br> element is an empty HTML element. It has no end tag.
The HTML <pre> Element
The HTML <pre> element defines preformatted text.The text inside
a <pre> element is displayed in a fixed-width font (usually Courier),
and it preserves both spaces and line breaks:
Example
<pre> My Bonnie lies over the ocean. My Bonnie lies over the sea. Oh, bring back my Bonnie to me. </pre>
HTML Tag Reference
Tag Description
<p> Defines a paragraph
<br> Inserts a single line break
<pre> Defines pre-formatted text

Web Programming MCS First term Notes
20
HTML Text Formatting Elements
Text Formatting
This text is bold
This text is italic
This is superscript
HTML Formatting Elements
In the previous chapter, you learned about HTML styling, using the HTML style
attribute.
HTML also defines special elements, for defining text with a special meaning.
HTML uses elements like <b> and <i> for formatting output, like bold or italic
text.
Formatting elements were designed to display special types of text:
Bold text
Important text
Italic text
Emphasized text
Marked text
Small text
Deleted text
Inserted text
Subscripts
Superscripts

Web Programming MCS First term Notes
21
HTML Bold and Strong Formatting
The HTML <b> element defines bold text, without any extra importance.
Example
<p>This text is normal.</p>
<p><b>This text is bold</b>.</p>
The HTML <strong> element defines strong text, with added semantic "strong"
importance.
Example
<p>This text is normal.</p>
<p><strong>This text is strong</strong>.</p>
HTML Italic and Emphasized Formatting
The HTML <i> element defines italic text, without any extra importance.
Example
<p>This text is normal.</p>
<p><i>This text is italic</i>.</p>
The HTML <em> element defines emphasized text, with added semantic
importance.

Web Programming MCS First term Notes
22
Example
<p>This text is normal.</p>
<p><em>This text is emphasized</em>.</p>
HTML Small Formatting
The HTML <small> element defines small text:
Example
<h2>HTML <small>Small</small> Formatting</h2>
HTML Marked Formatting
The HTML <mark> element defines marked or highlighted text:
Example
<h2>HTML <mark>Marked</mark> Formatting</h2>
HTML Formatting
The HTML <del> element defines deleted (removed) of text.
Example
<p>My favorite color is <del>blue</del> red.</p>
HTML Inserted Formatting
The HTML <ins> element defines inserted (added) text.

Web Programming MCS First term Notes
23
Example
<p>My favorite <ins>color</ins> is red.</p>
HTML Subscript Formatting
The HTML <sub> element defines subscripted text.
Example
<p>This is <sub>subscripted</sub> text.</p>
HTML Superscript Formatting
The HTML <sup> element defines superscripted text.
Example
<p>This is <sup>superscripted</sup> text.</p>
HTML Text Formatting Elements
Tag Description
<b> Defines bold text
<em> Defines emphasized text
<i> Defines italic text
<small> Defines smaller text
<strong> Defines important text
<sub> Defines subscripted text
<sup> Defines superscripted text
Tag Discription
<ins> Defines inserted text
<del> Defines deleted text
<mark>
Defines marked/highlighted
text

Web Programming MCS First term Notes
24
HTML <font> Tag.
Definition and Usage
The <font> tag is not supported in HTML5. Use CSS instead.
The <font> tag specifies the font face, font size, and color of text.
Optional Attributes
Attribute Value Description
color
rgb(x,x,x) #xxxxxx colorname
Not supported in HTML5. Specifies the color of text
face font_family Not supported in HTML5. Specifies the font of text
size number Not supported in HTML5. Specifies the size of text

Web Programming MCS First term Notes
25
Example
<!DOCTYPE html>
<html>
<body>
<p><font size="3" color="red">This is some text!</font></p>
<p><font size="2" color="blue">This is some text!</font></p>
<p><font face="verdana" color="green">This is some text!</font></p>
<p><strong>Note:</strong> The font element is not supported in HTML. Use CSS instead.</p>
</body>
</html>
HTML <div> Tag.
Definition and Usage
The <div> tag defines a division or a section in an HTML document.
The <div> tag is used to group block-elements to format them with CSS
Tips and Notes
Tip: The <div> element is very often used together with CSS, to layout a web page.
Note: By default, browsers always place a line break before and after the <div> element.
However, this can be changed with CSS.

Web Programming MCS First term Notes
26
Attributes
Attribute Value Description
align
left right center justify
Not supported in HTML5. Specifies the alignment of the content inside a <div> element
Example
<div style="center">
<h3>This is a heading</h3>
<p>This is a paragraph.</p>
</div>
HTML <marquee>Tag.
An HTML marquee is a scrolling piece of text displayed either horizontally across or vertically down your webpage depending on the settings. This is created by using HTML<marquees> tag.
Example with importants attributes.
<html><body> <marquee bgcolor="peru" behavior="altrenate" direction="left" width="750" height="75"
loop="6" scrollamount="2" scrolldelay="40" title=silly tags aren't for Netscape anymore."
width="90%">
<font face="georgia" color="blue" size="+10">Azad wazir </font>
</body>
</html>
Web Programming MCS First term Notes
27
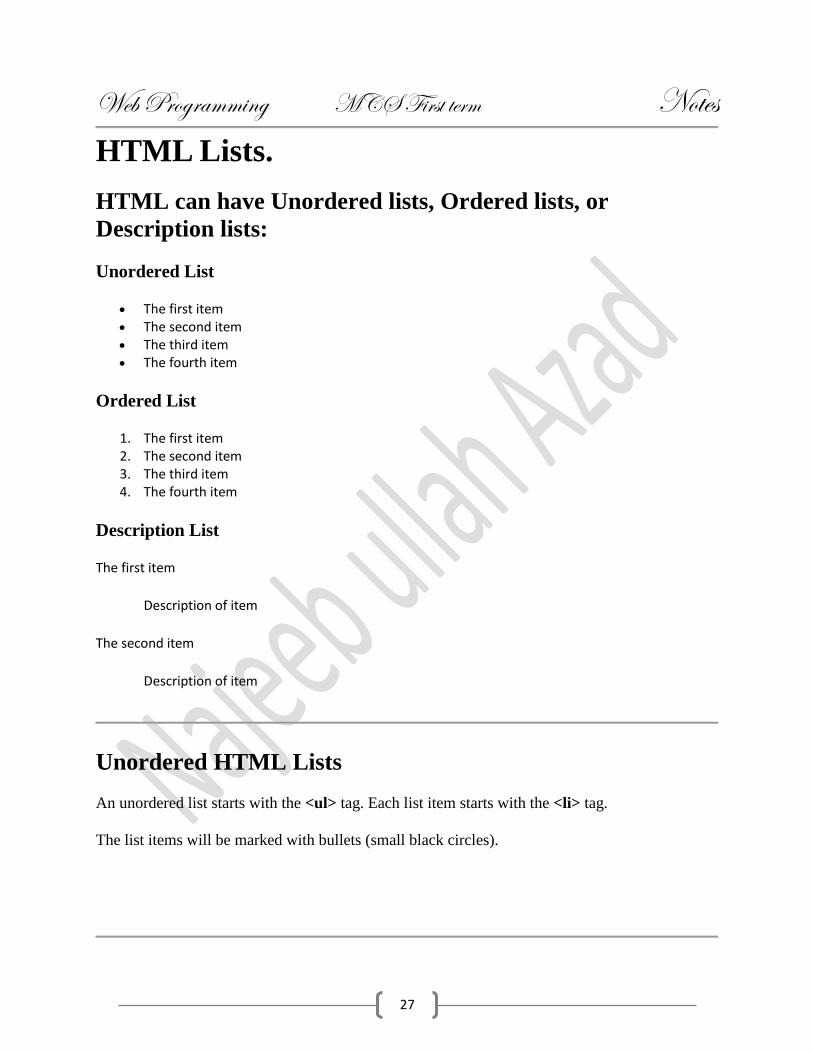
HTML Lists.
HTML can have Unordered lists, Ordered lists, or
Description lists:
Unordered List
The first item The second item The third item The fourth item
Ordered List
1. The first item 2. The second item 3. The third item 4. The fourth item
Description List
The first item
Description of item
The second item
Description of item
Unordered HTML Lists
An unordered list starts with the <ul> tag. Each list item starts with the <li> tag.
The list items will be marked with bullets (small black circles).

Web Programming MCS First term Notes
28
Unordered List: out put
<ul> <li>Coffee</li> <li>Tea</li> <li>Milk</li> </ul>
Unordered HTML Lists - The Style Attribute
A style attribute can be added to an unordered list, to define the style of the marker:
Style Description
list-style-type:disc The list items will be marked with bullets (default)
list-style-type:circle The list items will be marked with circles
list-style-type:square The list items will be marked with squares
list-style-type:none The list items will not be marked
Disc:
<ul style="list-style-type:disc">
<li>Coffee</li>
<li>Tea</li>
<li>Milk</li>
</ul>
Circle:
<ul style="list-style-type:circle"> <li>Coffee</li> <li>Tea</li> <li>Milk</li> </ul>
Square:
<ul style="list-style-type:square"> <li>Coffee</li> <li>Tea</li> <li>Milk</li> </ul>
Coffee
Tea
Milk
Web Programming MCS First term Notes
29
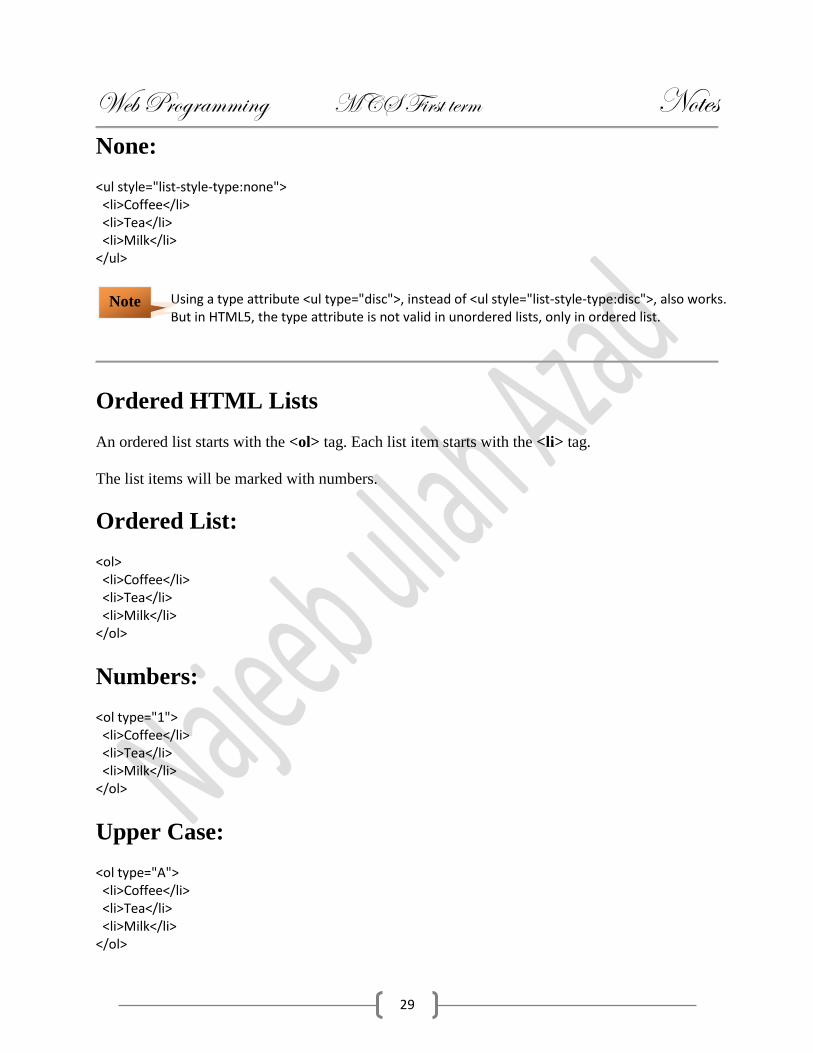
None:
<ul style="list-style-type:none"> <li>Coffee</li> <li>Tea</li> <li>Milk</li> </ul>
Using a type attribute <ul type="disc">, instead of <ul style="list-style-type:disc">, also works. But in HTML5, the type attribute is not valid in unordered lists, only in ordered list.
Ordered HTML Lists
An ordered list starts with the <ol> tag. Each list item starts with the <li> tag.
The list items will be marked with numbers.
Ordered List:
<ol> <li>Coffee</li> <li>Tea</li> <li>Milk</li> </ol>
Numbers:
<ol type="1"> <li>Coffee</li> <li>Tea</li> <li>Milk</li> </ol>
Upper Case:
<ol type="A"> <li>Coffee</li> <li>Tea</li> <li>Milk</li> </ol>
Note
Web Programming MCS First term Notes
30
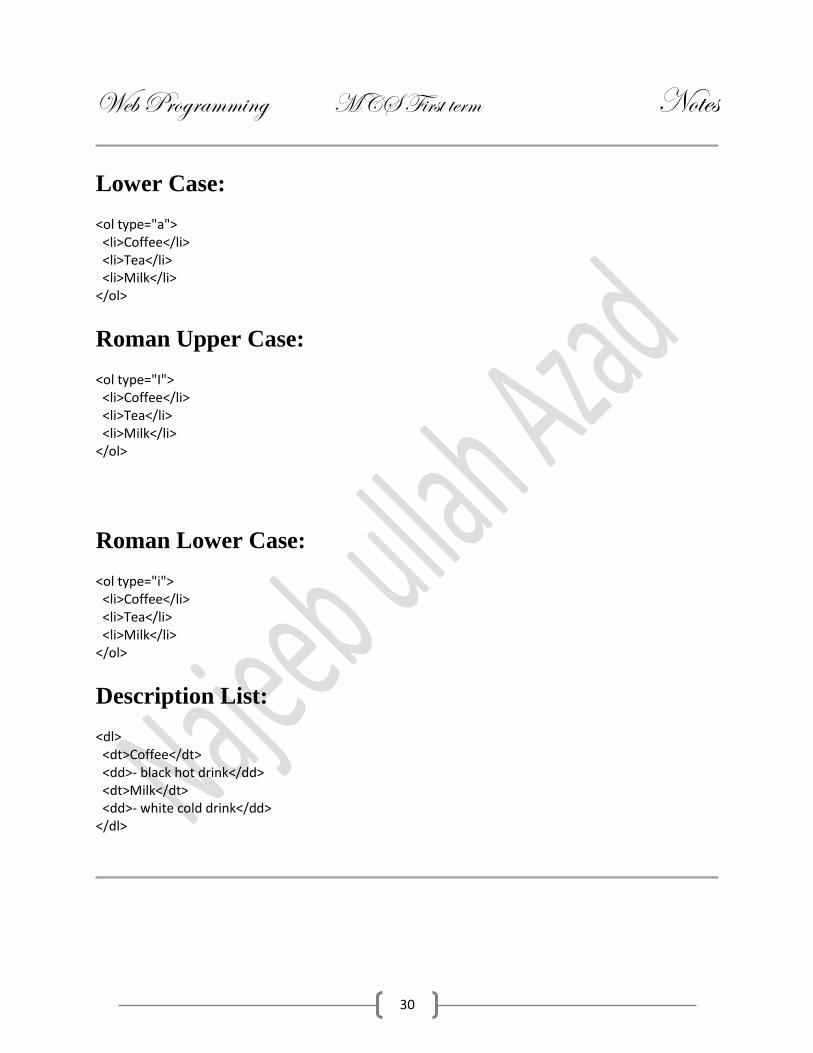
Lower Case:
<ol type="a"> <li>Coffee</li> <li>Tea</li> <li>Milk</li> </ol>
Roman Upper Case:
<ol type="I"> <li>Coffee</li> <li>Tea</li> <li>Milk</li> </ol>
Roman Lower Case:
<ol type="i"> <li>Coffee</li> <li>Tea</li> <li>Milk</li> </ol>
Description List:
<dl> <dt>Coffee</dt> <dd>- black hot drink</dd> <dt>Milk</dt> <dd>- white cold drink</dd> </dl>

Web Programming MCS First term Notes
31
Nested Lists:
<ul> <li>Coffee</li> <li>Tea <ul> <li>Black tea</li> <li>Green tea</li> </ul> </li> <li>Milk</li> </ul>
Horizontal Lists
HTML lists can be styled in many different ways with CSS.
One popular way, is to style a list to display horizontally:
Horizontal List:
<!DOCTYPE html> <html> <head> <style> ul#menu li { display:inline; } </style> </head><body><h2>Horizontal List</h2> <ul id="menu"> <li>HTML</li> <li>CSS</li> <li>JavaScript</li> <li>PHP</li> </ul> </body></html>

Web Programming MCS First term Notes
32
With a little extra style, you can make it look like a menu:
New Style:
ul#menu { padding: 0; } ul#menu li { display: inline; } ul#menu li a { background-color: black; color: white; padding: 10px 20px; text-decoration: none; border-radius: 4px 4px 0 0; } ul#menu li a:hover { background-color: orange; }
Chapter Summary
Use the HTML <ul> element to define an unordered list Use the HTML style attribute to define the bullet style Use the HTML <ol> element to define an ordered list Use the HTML type attribute to define the numbering type Use the HTML <li> element to define a list item Use the HTML <dl> element to define a description list Use the HTML <dt> element to define the description term Use the HTML <dd> element to define the description data Lists can be nested inside lists List items can contain other HTML elements Use the CSS property display:inline to display a list horizontally

Web Programming MCS First term Notes
33
HTML Images
HTML Images Syntax
In HTML, images are defined with the <img> tag.
The <img> tag is empty, it contains attributes only, and does not have a closing tag.
The src attribute defines the url (web address) of the image:
<img src="url" alt="some_text">
Example
<!DOCTYPE html> <html> <body> <h2>Azad wazir</h2> <img src="azad.jpg" style="width:150px;height:125px"> </body> </html>
Always specify the width and height of an image. If width and height are not specified, the page will flicker while the image loads.
The alt Attribute
The alt attribute specifies an alternate text for the image, if it cannot be displayed.
The value of the alt attribute should describe the image in words:
Note

Web Programming MCS First term Notes
34
Example
<img src="html5.gif" alt="The official HTML5 Icon">
The alt attribute is required. A web page will not validate correctly without it.
HTML Screen Readers
Screen readers are software programs that can read what is displayed on a screen.
Used on the web, screen readers can "reproduce" HTML as text-to-speech, sound icons, or
braille output.
Screen readers are used by people who are blind, visually impaired, or learning disabled.
Screen readers can read the alt attribute.
Image Size - Width and Height
You can use the style attribute to specify the width and height of an image.
The values are specified in pixels (use px after the value):
Example
<img src="html5.gif" alt="HTML5 Icon" style="width:128px;height:128px">
Alternatively, you can use width and height attributes.
The values are specified in pixels (without px after the value):
Note

Web Programming MCS First term Notes
35
Width and Height or Style?
Both the width, the height, and the style attributes, are valid in the latest HTML5 standard.
We suggest you use the style attribute. It prevents styles sheets from changing the default size of
images:
Example
<!DOCTYPE html> <html> <head> <style> img { width:100%; } </style> </head> <body> <img src="html5.gif" alt="HTML5 Icon" style="width:128px;height:128px"> <img src="html5.gif" alt="HTML5 Icon" width="128" height="128"> </body></html>
Images in Another Folder
If not specified, the browser expects to find the image in the same folder as the web page.
However, it is common on the web, to store images in a sub-folder, and refer to the folder in the
image name:
Example
<img src="/images/html5.gif" alt="HTML5 Icon" style="width:128px;height:128px">
If a browser cannot find an image, it will display a broken link icon:
Example
<img src="wrongname.gif" alt="HTML5 Icon" style="width:128px;height:128px">
Web Programming MCS First term Notes
36
Images on Another Server
Some web sites store their images on image servers.
Actually, you can access images from any web address in the world:
Example
<img src="http://www.w3schools.com/images/w3schools_green.jpg">
Animated Images
The GIF standard allows animated images:
Example
<img src="programming.gif" alt="Computer Man" style="width:48px;height:48px">
Note that the syntax of inserting animated images is no different from non-animated images.
Using an Image as a Link
It is common to use images as links:
Example
<a href="default.asp"> <img src="smiley.gif" alt="HTML tutorial" style="width:42px;height:42px;border:0"> </a>
We have added border:0 to prevent IE9 (and earlier) from displaying a border around the image.
Note

Web Programming MCS First term Notes
37
Image Maps
For an image, you can create an image map, with clickable areas:
Example
<img src="planets.gif" alt="Planets" usemap="#planetmap" style="width:145px;height:126px"> <map name="planetmap"> <area shape="rect" coords="0,0,82,126" alt="Sun" href="sun.htm"> <area shape="circle" coords="90,58,3" alt="Mercury" href="mercur.htm"> <area shape="circle" coords="124,58,8" alt="Venus" href="venus.htm"> </map>
Image Floating
You can let an image float to the left or right of a paragraph:
Example
<p> <img src="smiley.gif" alt="Smiley face" style="float:left;width:42px;height:42px"> A paragraph with an image. The image floats to the left of the text. </p>
Chapter Summary
Use the HTML <img> element to define images Use the HTML src attribute to define the image file name Use the HTML alt attribute to define an alternative text Use the HTML width and height attributes to define the image size Use the CSS width and height properties to define the image size (alternatively) Use the CSS float property to let the image float Use the HTML usemap attribute to point to an image map Use the HTML <map> element to define an image map Use the HTML <area> element to define image map areas
Loading images takes time. Large images can slow down your page. Use images carefully. Note

Web Programming MCS First term Notes
38
What Is a URL?
Definition: URL is an acronym that stands for Uniform Resource Locator and is a reference (an address) to a resource on the Internet. Example: http is the protocol identifier and //java.sun.com/ is the resource name.
HTML Links - Hyperlinks
HTML links are hyperlinks.
A hyperlink is a text or an image you can click on, and jump to another document.
HTML Links - Syntax
In HTML, links are defined with the <a> tag:
<a href="url">link text</a>
Example:
<a href="http://www.azad.com/html/">Visit our HTML tutorial</a>
The href attribute specifies the destination address (http://www.azad.com/html/)
The link text is the visible part (Visit our HTML tutorial).
Clicking on the link text, will send you to the specified address.
The link text does not have to be text. It can be an HTML image or any other HTML element.
Local Links
The example above used an absolute URL (A full web address).
A local link (link to the same web site) is specified with a relative URL (without http://www....).
Means address of the page
Note

Web Programming MCS First term Notes
39
Example:
<a href="html_images.asp">HTML Images</a>
HTML Links - Colors and Icons
When you move the mouse cursor over a link, two things will normally happen:
The mouse arrow will turn into a little hand The color of the link element will change
By default, links will appear as this in all browsers:
An unvisited link is underlined and blue A visited link is underlined and purple An active link is underlined and red
You can change the defaults, using styles:
Example
<!DOCTYPE html>
<html><head><style>
a:link {
color:#000000;
background-color:transparent;
text-decoration:none;
}
a:visited {
color:#000000;
background-color:transparent;

Web Programming MCS First term Notes
40
text-decoration:none;
}
a:hover {
color:#ff0000;
background-color:transparent;
text-decoration:underline;
}
a:active {
color:#ff0000;
background-color:transparent;
text-decoration:underline;
}
</style></head>
<body>
<p>You can change the default colors of links</p>
<a href="html_images.asp" target="_blank">HTML Images</a>
</body></html>
HTML Links - The target Attribute
The target attribute specifies where to open the linked document.
This example will open the linked document in a new browser window or in a new tab:
Example
<a href="http://www.ustb.com/" target="_blank">Visit ustb</a>

Web Programming MCS First term Notes
41
HTML Link- Tag Refrence
Target Value Description
_blank Opens the linked document in a new window or tab
_self Opens the linked document in the same frame as it was clicked (this is default)
_parent Opens the linked document in the parent frame
_top Opens the linked document in the full body of the window
framename Opens the linked document in a named frame
If your webpage is locked in a frame, you can use target="_top" to break out of the frame:
Example
<a href="http://www.azad.com/html/" target="_top">Azad Project</a>
HTML Links - Image as Link
It is common to use images as links:
Example
<a href="default.asp"> <img src="smiley.gif" alt="HTML tutorial" style="width:42px;height:42px;border:0"> </a>
border:0 is added to prevent IE9 (and earlier) from displaying a border around the image.
Note

Web Programming MCS First term Notes
42
HTML Links - The id Attribute
The id attribute can be used to create bookmarks inside HTML documents.
Bookmarks are not displayed in any special way. They are invisible to the reader.
Example
Add an id attribute to any <a> element:
<a id="tips">Useful Tips Section</a>
Then create a link to the <a> element (Useful Tips Section):
<a href="#tips">Visit the Useful Tips Section</a>
Or, create a link to the <a> element (Useful Tips Section) from another page:
<a href="http://www.w3schools.com/html_links.htm#tips">Visit the Useful Tips Section</a>
Without a trailing slash on subfolder addresses, you might generate two requests to the server. Many servers will automatically add a slash to the address, and then create a new request.
Chapter Summary
Use the HTML <a> element to define a link Use the HTML href attribute to define the link address Use the HTML target attribute to define where to open the linked document Use the HTML <img> element (inside <a>) to use an image as a link Use the HTML id attribute (id="value") to define bookmarks in a page Use the HTML href attribute (href="#value") to address the bookmark
Note

Web Programming MCS First term Notes
43
HTML Tabl
Defining HTML Tables
Combination of row and column is called table
Example
<table style="width:100%"> <tr> <td>Jill</td> <td>Smith</td> <td>50</td> </tr> <tr> <td>Eve</td> <td>Jackson</td> <td>94</td> </tr> </table>
Example explained:
Tables are defined with the <table> tag.
Tables are divided into table rows with the <tr> tag.
Table rows are divided into table data with the <td> tag.
A table row can also be divided into table headings with the <th> tag.
Table data <td> are the data containers of the table. They can contain all sorts of HTML elements like text, images, lists, other tables, etc.
Note
Web Programming MCS First term Notes
44
An HTML Table with a Border Attribute
If you do not specify a border for the table, it will be displayed without borders.
A border can be added using the border attribute:
Example
<table border="1" style="width:100%"> <tr> <td>Jill</td> <td>Smith</td> <td>50</td> </tr> <tr> <td>Eve</td> <td>Jackson</td> <td>94</td> </tr> </table>
The border attribute is on its way out of the HTML standard! It is better to use CSS.
To add borders, use the CSS border property:
Example
table, th, td { border: 1px solid black; }
Remember to define borders for both the table and the table cells.
An HTML Table with Collapsed Borders
If you want the borders to collapse into one border, add CSS border-collapse:
Note

Web Programming MCS First term Notes
45
Example
table, th, td { border: 1px solid black; border-collapse: collapse; }
An HTML Table with Cell Padding
Cell padding specifies the space between the cell content and its borders.
If you do not specify a padding, the table cells will be displayed without padding.
To set the padding, use the CSS padding property:
Example
table, th, td { border: 1px solid black; border-collapse: collapse; } th,td { padding: 15px; }
HTML Table Headings
Table headings are defined with the <th> tag.
By default, all major browsers display table headings as bold and centered:
Example
<table style="width:100%"> <tr<th>Firstname</th><th>Lastname</th> <th>Points</th></tr> <tr> <td>Eve</td><td>Jackson</td> <td>94</td></tr> </table>
Web Programming MCS First term Notes
46
To left-align the table headings, use the CSS text-align property:
Example
th { text-align: left; }
An HTML Table with Border Spacing
Border spacing specifies the space between the cells.
To set the border spacing for a table, use the CSS border-spacing property:
Example
table { border-spacing: 5px; }
If the table has collapsed borders, border-spacing has no effect.
Table Cells that Span Many Columns
To make a cell span more than one column, use the colspan attribute:
Example
<table style="width:100%"> <tr><th>Name</th> <th colspan="2">Telephone</th></tr> <tr> <td>Bill Gates</td><td>555 77 854</td><td>555 77 855</td> </tr> </table>
Note

Web Programming MCS First term Notes
47
Table Cells that Span Many Rows
To make a cell span more than one row, use the rowspan attribute:
Example
<table style="width:100%"> <tr> <th>Name:</th> <td>Bill Gates</td> </tr> <tr> <th rowspan="2">Telephone:</th> <td>555 77 854</td> </tr> <tr> <td>555 77 855</td> </tr> </table>
An HTML Table With a Caption
To add a caption to a table, use the <caption> tag:
Example
<table style="width:100%"> <caption>Monthly savings</caption> <tr> <th>Month</th> <th>Savings</th> </tr> <tr> <td>January</td> <td>$100</td> </tr> <tr> <td>February</td><td>$50</td></tr></table>

Web Programming MCS First term Notes
48
The <caption> tag must be inserted immediately after the <table> tag.
Different Styles for Different Tables
Most of the examples above use a style attribute (width="100%") to define the width of each
table.
This makes it easy to define different widths for different tables.
The styles in the <head> section, however, define a style for all tables in a page.
To define a special style for a special table, add an id attribute to the table:
Example
<table id="t01"> <tr> <th>Firstname</th> <th>Lastname</th> <th>Points</th> </tr> <tr> <td>Eve</td> <td>Jackson</td> <td>94</td> </tr> </table>
Now you can define a different style for this table:
table#t01 { width: 100%; background-color: #f1f1c1; }
Note

Web Programming MCS First term Notes
49
And add more styles:
table#t01 tr:nth-child(even) { background-color: #eee; } table#t01 tr:nth-child(odd) { background-color: #fff; } table#t01 th { color: white; background-color: black; }
Chapter Summary
Use the HTML <table> element to define a table Use the HTML <tr> element to define a table row Use the HTML <td> element to define a table data Use the HTML <th> element to define a table heading Use the HTML <caption> element to define a table caption Use the CSS border property to define a border Use the CSS border-collapse property to collapse cell borders Use the CSS padding property to add padding to cells Use the CSS text-align property to align cell text Use the CSS border-spacing property to set the spacing between cells Use the colspan attribute to make a cell span many columns Use the rowspan attribute to make a cell span many rows Use the id attribute to uniquely define one table

Web Programming MCS First term Notes
50
HTML Table Tags
Tag Description
<table> Defines a table
<th> Defines a header cell in a table
<tr> Defines a row in a table
<td> Defines a cell in a table
<caption> Defines a table caption
<colgroup> Specifies a group of one or more columns in a table for formatting
<col> Specifies column properties for each column within a <colgroup> element
<thead> Groups the header content in a table
<tbody> Groups the body content in a table
<tfoot> Groups the footer content in a table

Web Programming MCS First term Notes
51
Write HTML code to create the following Table.
<!Doctype html>
<html>
<body>
<table border="2">
<tr>
<td rowspan="2">A</td>
<td>B</td>
<td>C</td>
<td rowspan="2">D</td></tr>
<tr>
<td>G</td>
<td rowspan="3">j</td></tr>
<tr>
<td>E</td><td>H</td><td>L</td></tr>
<tr>
<td>F</td><td>I</td><td>M</td></tr>
</table>
</body>
</html>
Table

Web Programming MCS First term Notes
52
Write HTML code to create the following Table.
<!Doctype html>
<html>
<body>
<table border="3" cellspacing="2" cellpadding="2" bgcolor="red">
<caption>Student</caption>
<tr>
<td colspan="4" align="center">Student information</td></tr>
<tr><td >Name</td><td>Student #</td><td>Student age</td><td>Address</td></tr>
<tr><td rowspan="2">
<a href="https://www.google.com.pk/">www.Google.com</a></td>
<td rowspan="2">passport No</td><td colspan="2">
<img src="4.jpg" style="width:150px;height:125px"></td></tr>
<tr><td>1</td><td>2</td></tr>
</table>
</body>
</html>
Border=3, cellspacing=2, cellpadding=2, bgcolor=red.?

Web Programming MCS First term Notes
53
HTML Frame.
HTML frames allow authors to present documents in multiple views, which may be independent windows or sub windows. Multiple views offer designers a way to keep certain information visible, while other views are scrolled or replaced. For example, within the same window, one frame might display a static banner, a second a navigation menu, and a third the main document that can be scrolled through or replaced by navigating in the second frame.
HTML <frameset> Tag. Not Supported in HTML5.
Example
A simple three-framed page:
<frameset cols="25%,*,25%"> <frame src="frame_a.htm"> <frame src="frame_b.htm"> <frame src="frame_c.htm"> </frameset>
Definition and Usage
The <frameset> tag is not supported in HTML5.
The <frameset> tag defines a frameset.
The <frameset> element holds one or more <frame> elements. Each <frame> element can hold a
separate document.
The <frameset> element specifies HOW MANY columns or rows there will be in the frameset,
and HOW MUCH percentage/pixels of space will occupy each of them.
Note: If you want to validate a page containing frames, be sure the <!DOCTYPE> is set to either
"HTML Frameset DTD" or "XHTML Frameset DTD".

Web Programming MCS First term Notes
54
Differences Between HTML 4.01 and HTML5
The <frameset> tag is not supported in HTML5.
Optional Attributes
Attribute Value Description
cols
pixels % *
Not supported in HTML5. Specifies the number and size of columns in a frameset
rows
pixels % *
Not supported in HTML5. Specifies the number and size of rows in a frameset
Horizontal frameset How to make a horizontal frameset with three different documents.
Mixed frameset
How to make a frameset with three documents, and how to mix them in rows and columns.
Frameset with noresize="noresize"
How to use the "noresize" attribute. The frames are not resizable. Move the mouse over the
borders between the frames and notice that you can not move the borders.
Ouput in the above example.

Web Programming MCS First term Notes
55
Forms are often used to collect personal data when registering for
a service on a website, and usually these forms contain many
input fields. However, forms can be very short too; for example,
the form on most search engines' home pages, which have a
keywords input field and a submit button only.
The <form> Element
HTML forms are used to collect user input.
The <form> element defines an HTML form:
Example
<form> . form elements . </form>
HTML forms contain form elements.
Form elements are different types of input elements, checkboxes, radio buttons, submit buttons,
and more.
The <input> Element
The <input> element is the most important form element.
The <input> element has many variations, depending on the type attribute.
Here are the types used in this chapter:

Web Programming MCS First term Notes
56
Type Description
text Defines normal text input
radio Defines radio button input (for selecting one of many choices)
submit Defines a submit button (for submitting the form)
You will learn a lot more about input types later in this tutorial.
Text Input
<input type="text"> defines a one-line input field for text input:
Example
<form> First name:<br> <input type="text" name="firstname"> <br> Last name:<br> <input type="text" name="lastname"> </form>
This is how it will look like in a browser:
First name:
Last name:
Note: The form itself is not visible. Also note that the default width of a text field is 20
characters.
Note

Web Programming MCS First term Notes
57
Radio Button Input
<input type="radio"> defines a radio button.
Radio buttons let a user select ONE of a limited number of choices:
Example
<form> <input type="radio" name="sex" value="male" checked>Male <br> <input type="radio" name="sex" value="female">Female </form>
This is how the HTML code above will be displayed in a browser:
Male
Female
The Submit Button
<input type="submit"> defines a button for submitting a form to a form-handler.
The form-handler is typically a server page with a script for processing input data.
The form-handler is specified in the form's action attribute:
Example
<form action="action_page.php"> First name:<br> <input type="text" name="firstname" value="Mickey"> <br> Last name:<br> <input type="text" name="lastname" value="Mouse"> <br><br> <input type="submit" value="Submit"> </form>

Web Programming MCS First term Notes
58
This is how the HTML code above will be displayed in a browser:
The Action Attribute
The action attribute defines the action to be performed when the form is submitted.
The common way to submit a form to a server, is by using a submit button.
Normally, the form is submitted to a web page on a web server.
In the example above, a server-side script is specified to handle the submitted form:
<form action="action_page.php">
If the action attribute is omitted, the action is set to the current page.
The Method Attribute
The method attribute specifies the HTTP method (GET or POST) to be used when submitting
the forms:
<form action="action_page.php" method="GET">
or:
<form action="action_page.php" method="POST">

Web Programming MCS First term Notes
59
When to Use GET?
You can use GET (the default method):
If the form submission is passive (like a search engine query), and without sensitive information.
When you use GET, the form data will be visible in the page address:
action_page.php?firstname=Mickey&lastname=Mouse
GET is best suited to short amounts of data. Size limitations are set in your browser.
When to Use POST?
You should use POST:
If the form is updating data, or includes sensitive information (password).
POST offers better security because the submitted data is not visible in the page address
The Name Attribute
To be submitted correctly, each input field must have a name attribute.
This example will only submit the "Last name" input field:
Example
<form action="action_page.php"> First name:<br> <input type="text" value="Mickey"> <br> Last name:<br> <input type="text" name="lastname" value="Mouse"> <br><br> <input type="submit" value="Submit"> </form>
Note

Web Programming MCS First term Notes
60
Grouping Form Data with <fieldset>
The <fieldset> element groups related data in a form.
The <legend> element defines a caption for the <fieldset> element.
Example
<form action="action_page.php"> <fieldset> <legend>Personal information:</legend> First name:<br> <input type="text" name="firstname" value="Mickey"> <br> Last name:<br> <input type="text" name="lastname" value="Mouse"> <br><br> <input type="submit" value="Submit"></fieldset> </form>
This is how the HTML code above will be displayed in a browser:

Web Programming MCS First term Notes
61
HTML Form Attributes
An HTML <form> element, with all possible attributes set, will look like this:
Example
<form action="action_page.php" method="GET" target="_blank" accept-charset="UTF-8" enctype="application/x-www-form-urlencoded" autocomplete="off" novalidate> . form elements . </form>
Here is the list of <form> attributes:
Attribute Description
accept-charset Specifies the charset used in the submitted form (default: the page charset).
action Specifies an address (url) where to submit the form (default: the submitting page).
autocomplete Specifies if the browser should autocomplete the form (default: on).
enctype Specifies the encoding of the submitted data (default: is url-encoded).
method Specifies the HTTP method used when submitting the form (default: GET).
name Specifies a name used to identify the form (for DOM usage: document.forms.name).
novalidate Specifies that the browser should not validate the form.
target Specifies the target of the address in the action attribute (default: _self).
You will learn more about attributes in the next chapters.
Note
Web Programming MCS First term Notes
62
Form example with all attributes .
<HTML>
<body bgcolor="pink"><br>
<table><tr><td>
<h2 style="color:blue;align:center">Addmission Form</h2>
<form>
<fieldset><legend style="color:blue">Personal Information</legend>
<h3>Name<input type="text" name="iname" value="First Name">
<br><h4>F.Name<input type="text" name="iname1" value="Father First Name">
<br><h4>Address<input type="text" name="iname2" value="City or Country Name"></fieldset>
<fieldset><legend style="color:blue">Sex</legend>
<h4>Male <input type="radio" name="sex" value="Male" checked>
<h5>Female<input type="radio" name="sex" value="Female"></fieldset>
<fieldset><legend style="color:blue">Qualification</legend>
<input type="checkbox" name="Qualification">SSC<br>
<input type="checkbox" name="Qualification">FSC<br>
<input type="checkbox" name="Qualification">BSC<br>
<input type="checkbox" name="Qualification">MCS</fieldset>
<fieldset><input type="button" name="Send" value="Send">
<input type="button" name="Send" value="cancel"></fieldset></td></forme>
Web Programming MCS First term Notes
63
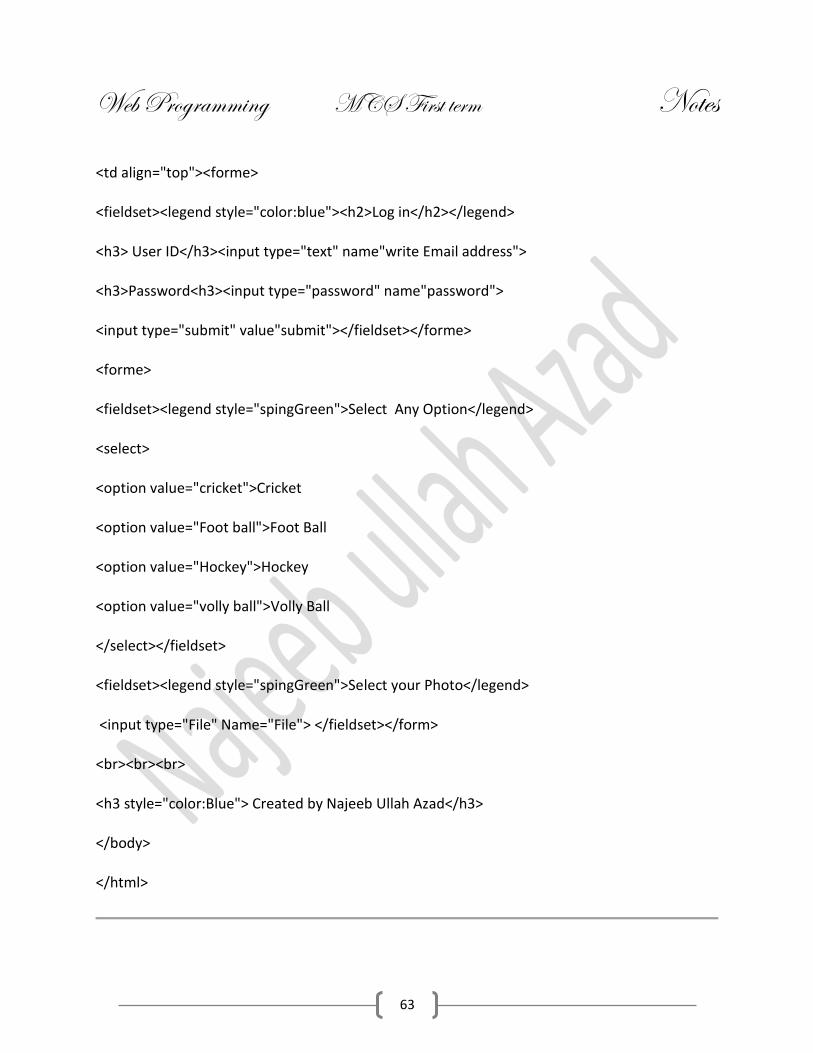
<td align="top"><forme>
<fieldset><legend style="color:blue"><h2>Log in</h2></legend>
<h3> User ID</h3><input type="text" name"write Email address">
<h3>Password<h3><input type="password" name"password">
<input type="submit" value"submit"></fieldset></forme>
<forme>
<fieldset><legend style="spingGreen">Select Any Option</legend>
<select>
<option value="cricket">Cricket
<option value="Foot ball">Foot Ball
<option value="Hockey">Hockey
<option value="volly ball">Volly Ball
</select></fieldset>
<fieldset><legend style="spingGreen">Select your Photo</legend>
<input type="File" Name="File"> </fieldset></form>
<br><br><br>
<h3 style="color:Blue"> Created by Najeeb Ullah Azad</h3>
</body>
</html>

Web Programming MCS First term Notes
64
Result

Web Programming MCS First term Notes
65
What is Multimedia?
Multimedia comes in many different formats. It can be almost anything you can hear or see.
Examples: Pictures, music, sound, videos, records, films, animations, and more.
Web pages often contains multimedia elements of different types and formats.
In this chapter you will learn about the different multimedia formats.
Multimedia Formats
Multimedia elements (like sounds or videos) are stored in media files.
The most common way to discover the type of a file, is to look at the file extension. When a
browser sees the file extension .htm or .html, it will treat the file as an HTML file. The .xml
extension indicates an XML file, and the .css extension indicates a style sheet file. Pictures are
recognized by extensions like .gif, .png and .jpg.
Multimedia files also have their own formats and different extensions like: .swf, .wav, .mp3,
.mp4, .mpg, .wmv, and .avi.
The HTML <video> Element
To show a video in HTML, use the <video> element:
Example
<video width="320" height="240" controls> <source src="movie.mp4" type="video/mp4"> <source src="movie.ogg" type="video/ogg"> Your browser does not support the video tag. </video>

Web Programming MCS First term Notes
66
HTML <video> Autoplay
To start a video automatically use the autoplay attribute:
Example
<video width="320" height="240" autoplay> <source src="movie.mp4" type="video/mp4"> <source src="movie.ogg" type="video/ogg"> Your browser does not support the video tag. </video>
Another Tag of Video
<a href="1.mp4"> play video</a>
The HTML <audio> Element
To play an audio file in HTML, use the <audio> element:
Example
<audio controls> <source src="horse.ogg" type="audio/ogg"> <source src="horse.mp3" type="audio/mpeg"> Your browser does not support the audio element. </audio>
HTML Audio - How It Works
The controls attribute adds audio controls, like play, pause, and volume.
Text between the <audio> and </audio> tags will display in browsers that do not support the
<audio> element.
Multiple <source> elements can link to different audio files. The browser will use the first
recognized format.
Another Tag of Audio
<a href="1.mp3/wave"> play Audio</a>
Name of Element Farmate of Audio

Web Programming MCS First term Notes
67
Three Ways to Insert CSS
There are three ways of inserting a style sheet:
External style sheet Internal style sheet Inline style
External Style Sheet
With an external style sheet, you can change the look of an entire website by changing just one
file!
Each page must include a reference to the external style sheet file inside the <link> element. The
<link> element goes inside the head section:
<head> <link rel="stylesheet" type="text/css" href="mystyle.css"> </head>
An external style sheet can be written in any text editor. The file should not contain any html
tags. The style sheet file must be saved with a .css extension. An example of a style sheet file
called "myStyle.css", is shown below:
body { background-color: lightblue; } h1 { color: navy; margin-left: 20px; }
Do not add a space between the property value and the unit (such as margin-left: 20 px;). The correct way is: margin-left: 20px;
Note

Web Programming MCS First term Notes
68
Internal Style Sheet
An internal style sheet may be used if one single page has a unique style.
Internal styles are defined within the <style> element, inside the head section of an HTML page:
Example
<head> <style> body { background-color: linen; } h1 { color: maroon; margin-left: 40px; } </style> </head>
Inline Styles
An inline style may be used to apply a unique style for a single element.
An inline style loses many of the advantages of a style sheet (by mixing content with
presentation). Use this method sparingly!
To use inline styles, add the style attribute to the relevant tag. The style attribute can contain any
CSS property. The example shows how to change the color and the left margin of a <h1>
element:
Example
<h1 style="color:blue;margin-left:30px;">This is a heading.</h1>

Web Programming MCS First term Notes
69
Java Script
JavaScript is the most popular programming language in the world .JavaScript and Java are
completely different languages, both in concept and design.
JavaScript was invented by Brendan Eich in 1995, and became an ECMA standard in 1997.
ECMA-262 is the official name. ECMAScript 5 (JavaScript 1.8.5 - July 2010) is the current
standard.
JavaScript Syntax
JavaScript syntax is the set of rules, how JavaScript programs are constructed.
JavaScript Programs
A computer program is a list of "instructions" to be "executed" by the computer.
In a programming language, these program instructions are called statements.
JavaScript is a programming language.
JavaScript statements are separated by semicolon.
Example
var x = 5; var y = 6; var z = x + y;
JavaScript Variables
In a programming language, variables are used to store data values.
JavaScript uses the var keyword to define variables.An equal sign is used to assign values to
variables.In this example, x is defined as a variable. Then, x is assigned (given) the value 6:
var x;
x = 6;

Web Programming MCS First term Notes
70
JavaScript Data Types
String, Number, Boolean, Array, Object.
JavaScript Strings
A string (or a text string) is a series of characters like "John Doe".
Strings are written with quotes. You can use single or double quotes:
Example
var carName = "Volvo XC60"; // Using double quotes var carName = 'Volvo XC60'; // Using single quotes
You can use quotes inside a string, as long as they don't match the quotes surrounding the string:
Example
var answer = "It's alright"; // Single quote inside double quotes var answer = "He is called 'Johnny'"; // Single quotes inside double quotes var answer = 'He is called "Johnny"'; // Double quotes inside single quotes
JavaScript Numbers
JavaScript has only one type of numbers.
Numbers can be written with, or without decimals:
Example
var x1 = 34.00; // Written with decimals var x2 = 34; // Written without decimals
Extra large or extra small numbers can be written with scientific (exponential) notation:

Web Programming MCS First term Notes
71
Example
var y = 123e5; // 12300000 var z = 123e-5; // 0.00123
JavaScript Booleans
Booleans can only have two values: true or false.
Example
var x = true; var y = false;
Booleans are often used in conditional testing.
You will learn more about conditional testing later in this tutorial.
JavaScript Arrays
JavaScript arrays are written with square brackets.
Array items are separated by commas.
The following code declares (creates) an array called cars, containing three items (car names):
Example
var cars = ["Saab", "Volvo", "BMW"];
Array indexes are zero-based, which means the first item is [0], second is [1], and so on.
You will learn more about arrays later in this tutorial

Web Programming MCS First term Notes
72
JavaScript Objects
JavaScript objects are written with curly braces.
Object properties are written as name:value pairs, separated by commas.
Example
var person = {firstName:"John", lastName:"Doe", age:50, eyeColor:"blue"};
The object (person) in the example above has 4 properties: firstName, lastName, age, and
eyeColor.
You will learn more about objects later in this tutorial.
Conditional Statements
Very often when you write code, you want to perform different actions for different decisions.
You can use conditional statements in your code to do this.
In JavaScript we have the following conditional statements:
Use if to specify a block of code to be executed, if a specified condition is true Use else to specify a block of code to be executed, if the same condition is false Use else if to specify a new condition to test, if the first condition is false Use switch to specify many alternative blocks of code to be executed
The if Statement
Use the if statement to specify a block of JavaScript code to be executed if a condition is true.
Syntax
if (condition) { block of code to be executed if the condition is true }

Web Programming MCS First term Notes
73
Note that if is in lowercase letters. Uppercase letters (If or IF) will generate a JavaScript error.
Example
<!DOCTYPE html>
<html>
<body>
<p>Display "Good day!" if the hour is less than 18:00:</p>
<p id="demo">Good Evening!</p>
<script>
if (new Date().getHours() < 18) {
document.getElementById("demo").innerHTML = "Good day!";
}
</script>
</body></html>
The else Statement
Use the else statement to specify a block of code to be executed if the condition is false.
if (condition) { block of code to be executed if the condition is true } else { block of code to be executed if the condition is false }
Result
Display "Good day!" if the
hour is less than 18:00:
Good day!

Web Programming MCS First term Notes
74
Example
If the hour is less than 18, create a "Good day" greeting, otherwise "Good evening":
<!DOCTYPE html>
<html><body>
<p>Click the button to display a time-based greeting:</p>
<button onclick="myFunction()">Try it</button>
<p id="demo"></p>
<script>
function myFunction() {
var hour = new Date().getHours();
var greeting;
if (hour < 18) {
greeting = "Good day";
} else {
greeting = "Good evening";
}
document.getElementById("demo").innerHTML = greeting;
}
</script>
</body>
</html>
Web Programming MCS First term Notes
75
The else if Statement
Use the else if statement to specify a new condition if the first condition is false.
Syntax
if (condition1) { block of code to be executed if condition1 is true } else if (condition2) { block of code to be executed if the condition1 is false and condition2 is true } else { block of code to be executed if the condition1 is false and condition2 is false }
Example
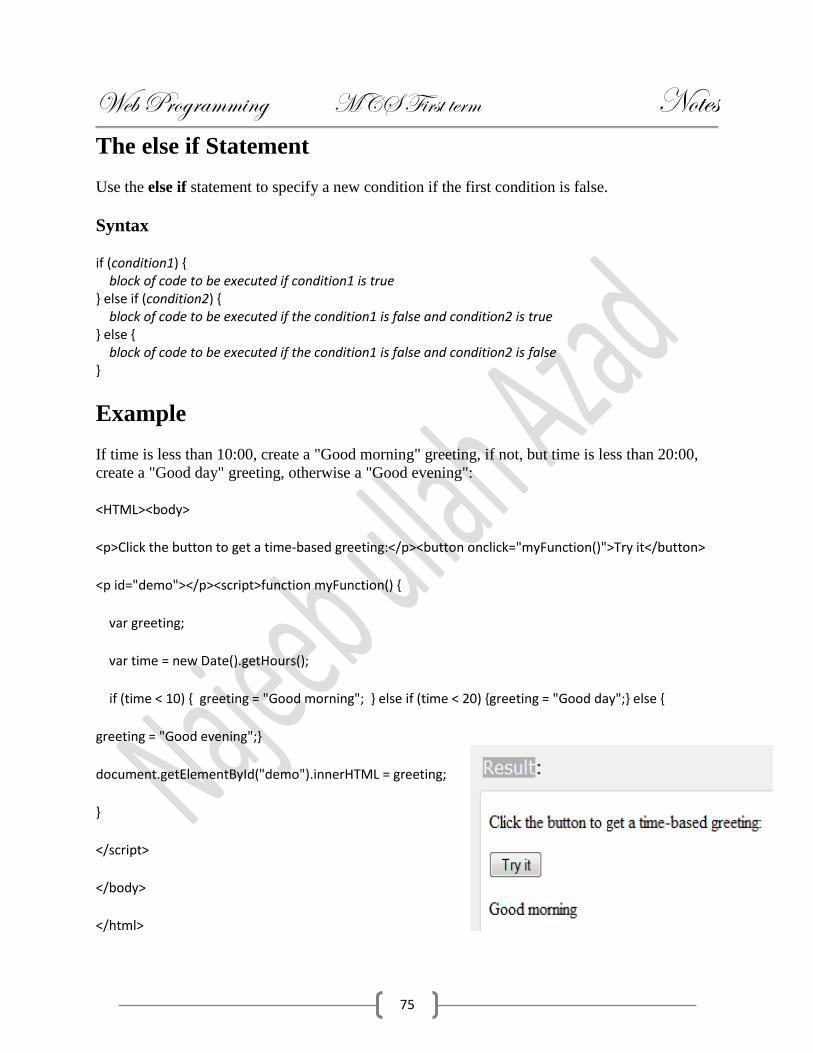
If time is less than 10:00, create a "Good morning" greeting, if not, but time is less than 20:00,
create a "Good day" greeting, otherwise a "Good evening":
<HTML><body>
<p>Click the button to get a time-based greeting:</p><button onclick="myFunction()">Try it</button>
<p id="demo"></p><script>function myFunction() {
var greeting;
var time = new Date().getHours();
if (time < 10) { greeting = "Good morning"; } else if (time < 20) {greeting = "Good day";} else {
greeting = "Good evening";}
document.getElementById("demo").innerHTML = greeting;
}
</script>
</body>
</html>

Web Programming MCS First term Notes
76
JavaScript Loops
Loops are handy, if you want to run the same code over and over again, each time with a
different value.
Often this is the case when working with arrays:
Instead of writing:
text += cars[0] + "<br>"; text += cars[1] + "<br>"; text += cars[2] + "<br>"; text += cars[3] + "<br>"; text += cars[4] + "<br>"; text += cars[5] + "<br>";
You can write:
<!DOCTYPE html>
<html><body><p id="demo"></p>
<script>
var cars = ["Najeeb ullah Azad", "Student of MCS 1st", "Mobile#", "03325669693"];
var text = "";
var i;
for (i = 0; i < cars.length; i++) {
text += cars[i] + "<br>";}
document.getElementById("demo").innerHTML = text;
</script></body>
</html>

Web Programming MCS First term Notes
77
Different Kinds of Loops
JavaScript supports different kinds of loops:
for - loops through a block of code a number of times for/in - loops through the properties of an object while - loops through a block of code while a specified condition is true do/while - also loops through a block of code while a specified condition is true
The For Loop
The for loop is often the tool you will use when you want to create a loop.
The for loop has the following syntax:
for (statement 1; statement 2; statement 3) { code block to be executed }
Statement 1 is executed before the loop (the code block) starts.
Statement 2 defines the condition for running the loop (the code block).
Statement 3 is executed each time after the loop (the code block) has been executed.
Example
<HTML><body><p>Click the button to loop through a block of code five times.</p>
<button onclick="myFunction()">
Try it</button><p id="demo"></p><script>function myFunction() { var text = ""; var i;
for (i = 0; i < 5; i++) {text += "The number is " + i + "<br>"; }
document.getElementById("demo").innerHTML = text;}
</script></body>
</html>

Web Programming MCS First term Notes
78
From the example above, you can read:
Statement 1 sets a variable before the loop starts (var i = 0).
Statement 2 defines the condition for the loop to run (i must be less than 5).
Statement 3 increases a value (i++) each time the code block in the loop has been executed.
Statement 1
Normally you will use statement 1 to initiate the variable used in the loop (var i = 0).
This is not always the case, JavaScript doesn't care. Statement 1 is optional.
You can initiate many values in statement 1 (separated by comma):
Example:
for (i = 0, len = cars.length, text = ""; i < len; i++) { text += cars[i] + "<br>"; }
And you can omit statement 1 (like when your values are set before the loop starts):
Example:
var i = 2; var len = cars.length; var text = ""; for (; i < len; i++) { text += cars[i] + "<br>";}
Statement 2
Often statement 2 is used to evaluate the condition of the initial variable.
This is not always the case, JavaScript doesn't care. Statement 2 is also optional.
If statement 2 returns true, the loop will start over again, if it returns false, the loop will end.

Web Programming MCS First term Notes
79
If you omit statement 2, you must provide a break inside the loop. Otherwise the loop will never end. This will crash your browser. Read about breaks in a later chapter of this tutorial.
Statement 3
Often statement 3 increases the initial variable.
This is not always the case, JavaScript doesn't care, and statement 3 is optional.
Statement 3 can do anything like negative increment (i--), positive increment (i = i + 15), or
anything else.
Statement 3 can also be omitted (like when you increment your values inside the loop):
Example:
var i = 0; var len = cars.length; for (; i < len; ) { text += cars[i] + "<br>"; i++; }
The For/In Loop
The JavaScript for/in statement loops through the properties of an object:
Example
var person = {fname:"John", lname:"Doe", age:25}; var text = ""; var x; for (x in person) { text += person[x]; }

Web Programming MCS First term Notes
80
The While Loop
The while loop loops through a block of code as long as a specified condition is true.
Syntax
while (condition) { code block to be executed }
Example
In the following example, the code in the loop will run, over and over again, as long as a variable
(i) is less than 10:
Example
<HTML><body>
<p>Click the button to loop through a block of code as long as i is less than 10.</p>
<button onclick="myFunction()">Try it</button><p id="demo"></p>
<script>
function myFunction() {
var text = "";
var i = 0;
while (i < 10) {
text += "<br>The number is " + i;
i++;} document.getElementById("demo").innerHTML = text;}</script>
</body></html>
If you forget to increase the variable used in the condition, the loop will never end. This will crash your browser.
Note

Web Programming MCS First term Notes
81
The Do/While Loop
The do/while loop is a variant of the while loop. This loop will execute the code block once,
before checking if the condition is true, then it will repeat the loop as long as the condition is
true.
Syntax
do { code block to be executed } while (condition);
Example
The example below uses a do/while loop. The loop will always be executed at least once, even if
the condition is false, because the code block is executed before the condition is tested:
Example
do { text += "The number is " + i; i++; } while (i < 10);
Do not forget to increase the variable used in the condition, otherwise the loop will never end!

Web Programming MCS First term Notes
82
JavaScript Arrays
What is an Array?
An array is a special variable, which can hold more than one value at a time.
If you have a list of items (a list of car names, for example), storing the cars in single variables
could look like this:
var car1 = "Saab"; var car2 = "Volvo"; var car3 = "BMW";
However, what if you want to loop through the cars and find a specific one? And what if you had
not 3 cars, but 300?
The solution is an array!
An array can hold many values under a single name, and you can access the values by referring
to an index number.
Displaying Arrays
In this tutorial we will use a script to display arrays inside a <p> element with id="demo":
Example
<p id="demo"></p> <script> var cars = ["Saab", "Volvo", "BMW"]; document.getElementById("demo").innerHTML = cars; </script>
The first line (in the script) creates an array named cars.
The second line "finds" the element with id="demo", and "displays" the array in the
"innerHTML" of it.

Web Programming MCS First term Notes
83
Create an array, and assign values to it:
Example
var cars = ["Saab", "Volvo", "BMW"];
Spaces and line breaks are not important. A declaration can span multiple lines:
Example
var cars = [ "Saab", "Volvo", "BMW" ];
Creating an Array
Using an array literal is the easiest way to create a JavaScript Array.
Syntax:
var array-name = [item1, item2, ...];
Example:
var cars = ["Saab", "Volvo", "BMW"];
Using the JavaScript Keyword new
The following example also creates an Array, and assigns values to it:
Example
var cars = new Array("Saab", "Volvo", "BMW");
Web Programming MCS First term Notes
84
Access the Elements of an Array
You refer to an array element by referring to the index number.
This statement accesses the value of the first element in cars:
var name = cars[0];
This statement modifies the first element in cars:
cars[0] = "Opel";
[0] is the first element in an array. [1] is the second. Array indexes start with 0.
You Can Have Different Objects in One Array
JavaScript variables can be objects. Arrays are special kinds of objects.
Because of this, you can have variables of different types in the same Array.
You can have objects in an Array. You can have functions in an Array. You can have arrays in
an Array:
myArray[0] = Date.now; myArray[1] = myFunction; myArray[2] = myCars;
Arrays are Objects
Arrays are a special type of objects. The typeof operator in JavaScript returns "object" for arrays.
But, JavaScript arrays are best described as arrays.
Arrays use numbers to access its "elements". In this example, person[0] returns John:
Array:
var person = ["John", "Doe", 46];
Note
Web Programming MCS First term Notes
85
Objects use names to access its "members". In this example, person.firstName returns John:
Object:
var person = {firstName:"John", lastName:"Doe", age:46};
Array Properties and Methods
The real strength of JavaScript arrays are the built-in array properties and methods:
Examples
var x = cars.length; // The length property returns the number of elements in cars var y = cars.sort(); // The sort() method sort cars in alphabetical order
Array methods are covered in the next chapter.
The length Property
The length property of an array returns the length of an array (the number of array elements).
Example
var fruits = ["Banana", "Orange", "Apple", "Mango"]; fruits.length; // the length of fruits is 4
Adding Array Elements
The easiest way to add a new element to an array is to use the length property:
Example
var fruits = ["Banana", "Orange", "Apple", "Mango"]; fruits[fruits.length] = "Lemon"; // adds a new element (Lemon) to fruits
Adding elements with high indexes can create undefined "holes" in an array:
Web Programming MCS First term Notes
86
Example
var fruits = ["Banana", "Orange", "Apple", "Mango"]; fruits[10] = "Lemon"; // adds a new element (Lemon) to fruits
Dialog Box
JavaScript supports three important types of dialog boxes. These dialog boxes can be used to
raise and alert, or to get confirmation on any input or to have a kind of input from the users.
Here we will see each dialog box one by one:
Alert Dialog Box:
An alert dialog box is mostly used to give a warning message to the users. Like if one input field
requires to enter some text but user does not enter that field then as a part of validation you can
use alert box to give warning message as follows:
<head>
<script type="text/javascript">
<!--
alert("Warning Message");
//-->
</script>
</head>
Nonetheless, an alert box can still be used for friendlier messages. Alert box gives only one
button "OK" to select and proceed.
Confirmation Dialog Box:
A confirmation dialog box is mostly used to take user's consent on any option. It displays a
dialog box with two buttons: OK and Cancel.
If the user clicks on OK button the window method confirm() will return true. If the user clicks
on the Cancel button confirm() returns false. You can use confirmation dialog box as follows:

Web Programming MCS First term Notes
87
Example
<head>
<script type="text/javascript">
<!--
var retVal = confirm("Do you want to continue ?");
if( retVal == true ){
alert("User wants to continue!");
return true;
}else{
alert("User does not want to continue!");
return false;
}
//-->
</script>
</head>
Prompt Dialog Box:
The prompt dialog box is very useful when you want to pop-up a text box to get user input. Thus
it enable you to interact with the user. The user needs to fill in the field and then click OK.
This dialog box is displayed using a method called prompt() which takes two parameters (i) A
label which you want to display in the text box (ii) A default string to display in the text box.
This dialog box with two buttons: OK and Cancel. If the user clicks on OK button the window
method prompt() will return entered value from the text box. If the user clicks on the Cancel
button the window method prompt() returns null.
You can use prompt dialog box as follows:
Example
<head>
<script type="text/javascript">
<!--
var retVal = prompt("Enter your name : ", "your name here");
alert("You have entered : " + retVal );
//-->
</script>
</head>

Web Programming MCS First term Notes
88
My Project:
ALL Examples Available

Web Programming MCS First term Notes
89
University of science and Technology Bannu