wedding photography - lessons learned - roman zolintips.romanzolin.com/articles/pdf/wedding...
TRANSCRIPT
Wedding Photography - Lessons Learned August 2006
www.ArtificialRainbow.com Copyright 2005, Roman Zolin Page 1 of 13
Wedding Photography - Lessons Learned After successfully finishing several wedding photography assignments I learned a few valuable things, which I am going to share in this article. Here you will find out what the guiding list of shots to consider while doing wedding photography and how to be better prepared to the wedding day. In addition to that I want to share some ways that helped me to produce better photographs and finally made my clients happy. This article though is more about photography techniques, not the business ones. And I should add that the article mostly regards to the photojournalistic style of the wedding photography, when the photographer is transparent and unobtrusive.
By the way as my life goes and I find out some things, I will try to find time and add here a few lines about new ways to shoot weddings. This is the "Second Edition" of this article, which before was called "My Wedding Photography Experience".
• In the Bag of Wedding Photographer • The Shooting Script • Preparation to the Wedding • Using Flash • Lens Choice • Focusing, Metering & Composition • Getting Closer and the Attitude • My Mistakes
In the Bag of Wedding Photographer THE EQUIPMENT NECESSARY TO DO THE JOB
When I was asked to shoot my first wedding I had only a few things in the bag and that definitely was not enough. I more or less knew what "the basic package" should be and thus I had to buy some additional equipment. The first thing was the flash. The photographer must not be too dependent on the ambient light, especially in dark places like tents and reception halls. So the flash is the must in your bag. In addition to flash you may consider a flash bracket. What's wrong with the flash attached to the camera, you may ask. The answer - look at the light it produces, the face looks flat and boring (see Using Flash later in the article). Though I found even better way to modify the flash light - bounce from the ceiling (or walls). I use LightSphere (more about it later in the article). And the third necessary item in your bag should be plenty of film rolls or room in the flash card. The reason is that you will take a lot of shots, sometimes wedding photographers estimate number of shots by using the formula: 75 frames per hour.
Note: The number 75 frames per hour was used for photographers that were using film. I learned that in the digital era this number could be easily doubled (even up to 200 shots per hour). You will think less about the card space than about the shots you may miss.
All these three things I listed here are the must along with the standard "camera package", like the body, lens and batteries.
So my list initially was:
• Canon EOS 10D body with standard battery • Lens 28-105 f3.5-4.5 USM • Lens 50 f1.4 USM • 512Mb CF Card • Monopod and tripod (very useful with slow lens) • Notebook • Card reader
Wedding Photography - Lessons Learned August 2006
www.ArtificialRainbow.com Copyright 2005, Roman Zolin Page 2 of 13
To shoot my first wedding I added:
• Lens 16-35 f2.8L USM • 1Gb CF Card • Flash 550EX • Flash bracket • Flash cord (hot shoe) • Omni Bounce diffuser (just in case) • Spare battery for 10D • Plenty AA batteries for the flash
Finally at this "more matured" moment I have:
• Canon EOS 1D Mark II body with a spare battery • Lens 16-35 f2.8L USM • Lens 24-70 f2.8L USM • Lens 70-200 f2.8 IS USM • Two flashes 550EX • LightSphere diffuser/bouncer • Digital battery pack for the flash • Two 4Gb CF Cards • Monopod and tripod (very useful with slow lens) • Notebook • Card reader
Most professional photographers will add that all your equipment has to have a backup, at the very minimum you have to have two bodies with different lens on it (as many photojournalists have). All this precaution is to make sure that if something goes wrong with your camera or lens you can shoot without screwing the wedding up and making your client's happiest day into a nightmare. For the first wedding and with some caution you will go fine with just one set of the equipment, but if your budget allows or you can rent or borrow another set of familiar equipment than do it. Don't put all the eggs into one basket. I have to emphasize that you should be very familiar with all the equipment in your bag, but more about it in "Preparation for the wedding" section of this article.
There is one more thing about the lenses, which you are going to use. Many venues don't have sufficient lighting to get a perfect exposure (churches especially), so you have to get fast lenses - lenses with the widest aperture you can get (f2.8 usually is the goal, wider and you may have problems with too narrow depth of field, smaller and shutter speed is too long, so camera shake is visible). If possible try to get the lens with stabilizing features, such as Image Stabilizer (IS) in Canon lens or Vibration Reduction (VR) for Nikon lens, it will give you more room to play with the exposure (i.e. lower shutter speed, smaller aperture and sharper focus)
The Shooting Script WHAT SHOTS CLIENTS MAY REQUIRE OR EXPECT FROM THE PHOTOGRAPHER
I am not saying that the shots listed below has to be taken always, but it's what usually the bride and the groom would expect for their wedding album or on CD/DVD. The list is too long, and it's hard to remember all the details, so try to get the general idea of it, and may be write down some important (as you think) shots. And I don't know much about Jewish weddings, so the script for shooting their weddings could be different. The shooting script is

Wedding Photography - Lessons Learned August 2006
www.ArtificialRainbow.com Copyright 2005, Roman Zolin Page 3 of 13
divided into two major sections: Candids and Formals. As Photojournalistic (PJ) approach is about taking candids (and as my experience) the following is about candids:
Scene One At the bride's home, preparing for the wedding
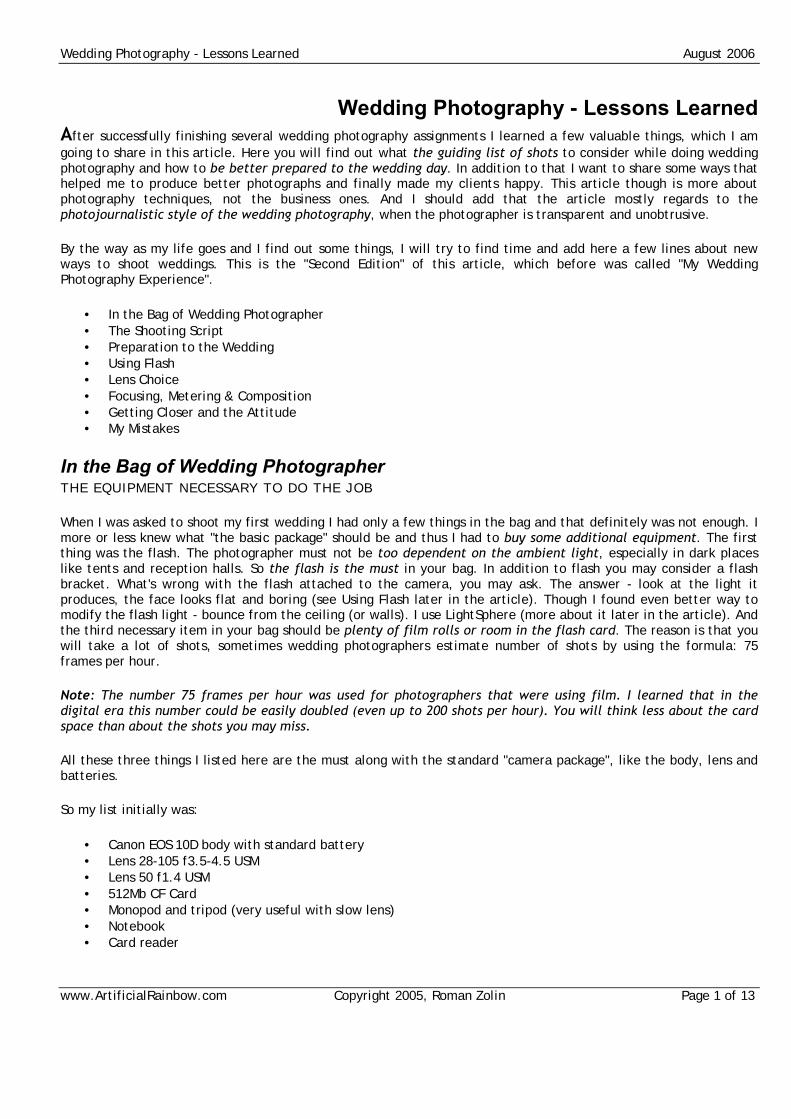
• Mirror reflection of bride alone, • Mirror reflection of bride with maid of honor, • Adjusting bridal garter (optional), • Bride on stairs (if any), • Full length portraits of bride, • Three-quarter length portrait of bride, • Bride surrounded with flowers, • Bride surrounded with gifts, • Bride pinning flowers on mother, • Bride pinning flowers on father, • Mother with bride, • Father with bride, • Sisters and brothers with bride (individually and together), • Father and mother with bride, • Bride with maid of honor, • Bride with attendants.
Tips: Use different types of objects to frame the image, flights of stairs as the frame and the bride within is a good example. Find some time to take pictures of small innocent objects alone, such like a shoe, a lipstick or a reflection of bride's face in a small mirror. Be creative and express your emotions in pictures of those small objects.
Scene Two Leaving Home & Arriving at the Church
• Mother, father and bride leaving the house • Groom opening/holding the limo's door • Bride getting into the limousine • Bride in the limousine • Groom is holding hand of bride while she is getting out
the limo (if possible) • Bridal party on the church steps • Groom awaiting for bride (watching his watch)
Tips: It's very hard to be there when the bride is leaving and arriving, because you will need to pack your equipment and drive as crazy to be before the bridal party at the church. But there is a solution. Talk to the limo driver and tell him to wait while you've taken the shots of bride getting into the limo and even more, while you pack and leaving to the church. Tell him as well to drive slower than speed limit, so you will get to the church about 10-15 minutes before and be able to set your equipment and take a few shots of the groom.
Scene Three Processional
• Bride and Father walking down the isle • Guests walking down the isle • Flower girls and ring bearers boys
Wedding Photography - Lessons Learned August 2006
www.ArtificialRainbow.com Copyright 2005, Roman Zolin Page 4 of 13
Tips: It's easier if you set up your equipment at the end of the central isle and signal the party to proceed, so you are ready and won't miss the shots. As well it may be feasible to prefocus at certain point and take the shots of people passing this point.
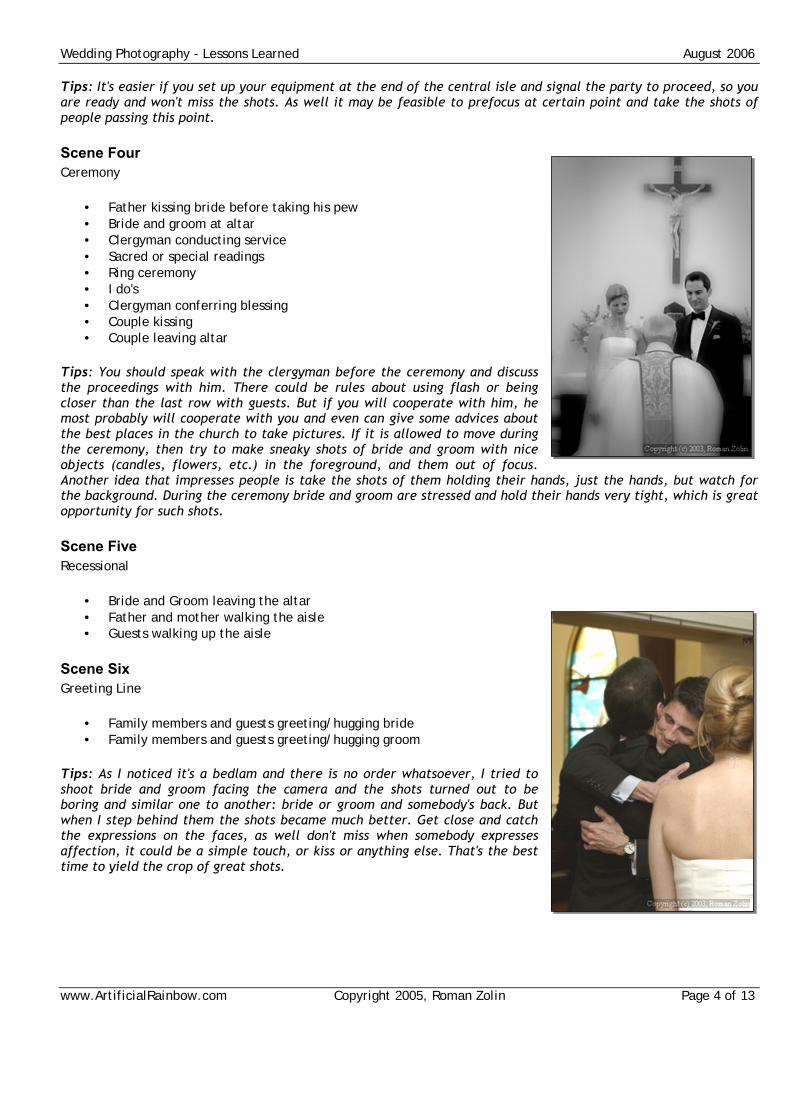
Scene Four Ceremony
• Father kissing bride before taking his pew • Bride and groom at altar • Clergyman conducting service • Sacred or special readings • Ring ceremony • I do's • Clergyman conferring blessing • Couple kissing • Couple leaving altar
Tips: You should speak with the clergyman before the ceremony and discuss the proceedings with him. There could be rules about using flash or being closer than the last row with guests. But if you will cooperate with him, he most probably will cooperate with you and even can give some advices about the best places in the church to take pictures. If it is allowed to move during the ceremony, then try to make sneaky shots of bride and groom with nice objects (candles, flowers, etc.) in the foreground, and them out of focus. Another idea that impresses people is take the shots of them holding their hands, just the hands, but watch for the background. During the ceremony bride and groom are stressed and hold their hands very tight, which is great opportunity for such shots.
Scene Five Recessional
• Bride and Groom leaving the altar • Father and mother walking the aisle • Guests walking up the aisle
Scene Six Greeting Line
• Family members and guests greeting/hugging bride • Family members and guests greeting/hugging groom
Tips: As I noticed it's a bedlam and there is no order whatsoever, I tried to shoot bride and groom facing the camera and the shots turned out to be boring and similar one to another: bride or groom and somebody's back. But when I step behind them the shots became much better. Get close and catch the expressions on the faces, as well don't miss when somebody expresses affection, it could be a simple touch, or kiss or anything else. That's the best time to yield the crop of great shots.
Wedding Photography - Lessons Learned August 2006
www.ArtificialRainbow.com Copyright 2005, Roman Zolin Page 5 of 13
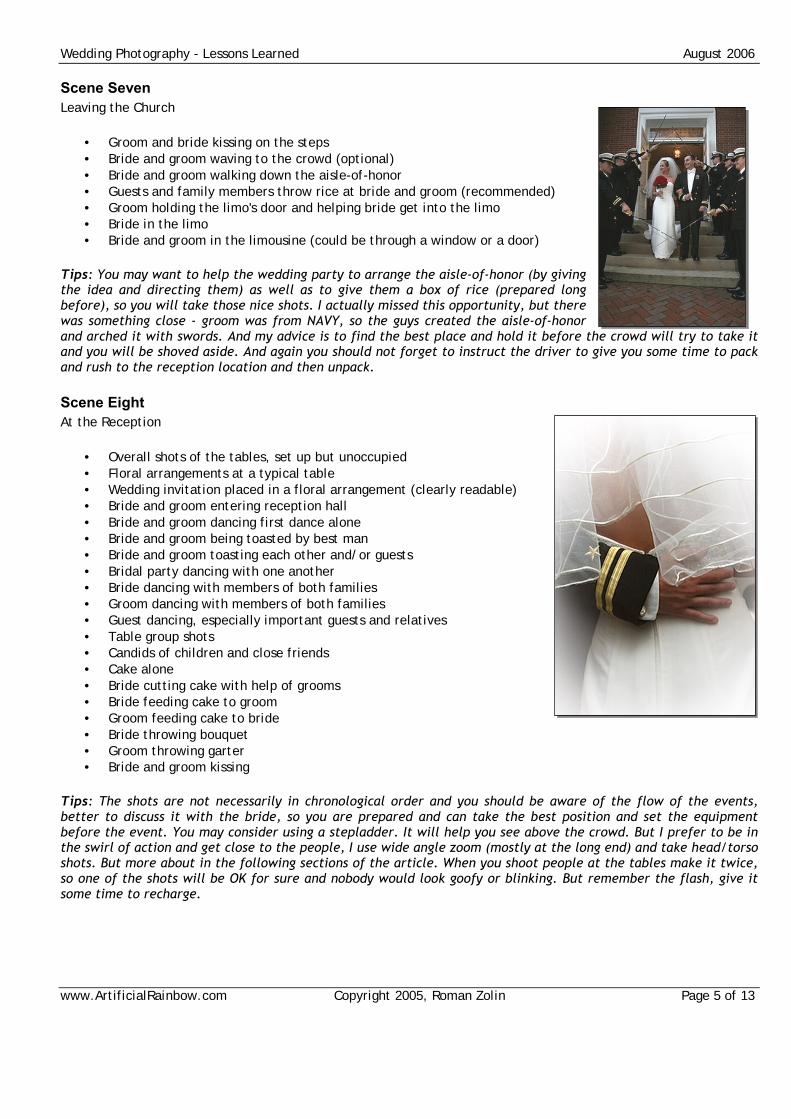
Scene Seven Leaving the Church
• Groom and bride kissing on the steps • Bride and groom waving to the crowd (optional) • Bride and groom walking down the aisle-of-honor • Guests and family members throw rice at bride and groom (recommended) • Groom holding the limo's door and helping bride get into the limo • Bride in the limo • Bride and groom in the limousine (could be through a window or a door)
Tips: You may want to help the wedding party to arrange the aisle-of-honor (by giving the idea and directing them) as well as to give them a box of rice (prepared long before), so you will take those nice shots. I actually missed this opportunity, but there was something close - groom was from NAVY, so the guys created the aisle-of-honor and arched it with swords. And my advice is to find the best place and hold it before the crowd will try to take it and you will be shoved aside. And again you should not forget to instruct the driver to give you some time to pack and rush to the reception location and then unpack.
Scene Eight At the Reception
• Overall shots of the tables, set up but unoccupied • Floral arrangements at a typical table • Wedding invitation placed in a floral arrangement (clearly readable) • Bride and groom entering reception hall • Bride and groom dancing first dance alone • Bride and groom being toasted by best man • Bride and groom toasting each other and/or guests • Bridal party dancing with one another • Bride dancing with members of both families • Groom dancing with members of both families • Guest dancing, especially important guests and relatives • Table group shots • Candids of children and close friends • Cake alone • Bride cutting cake with help of grooms • Bride feeding cake to groom • Groom feeding cake to bride • Bride throwing bouquet • Groom throwing garter • Bride and groom kissing
Tips: The shots are not necessarily in chronological order and you should be aware of the flow of the events, better to discuss it with the bride, so you are prepared and can take the best position and set the equipment before the event. You may consider using a stepladder. It will help you see above the crowd. But I prefer to be in the swirl of action and get close to the people, I use wide angle zoom (mostly at the long end) and take head/torso shots. But more about in the following sections of the article. When you shoot people at the tables make it twice, so one of the shots will be OK for sure and nobody would look goofy or blinking. But remember the flash, give it some time to recharge.
Wedding Photography - Lessons Learned August 2006
www.ArtificialRainbow.com Copyright 2005, Roman Zolin Page 6 of 13
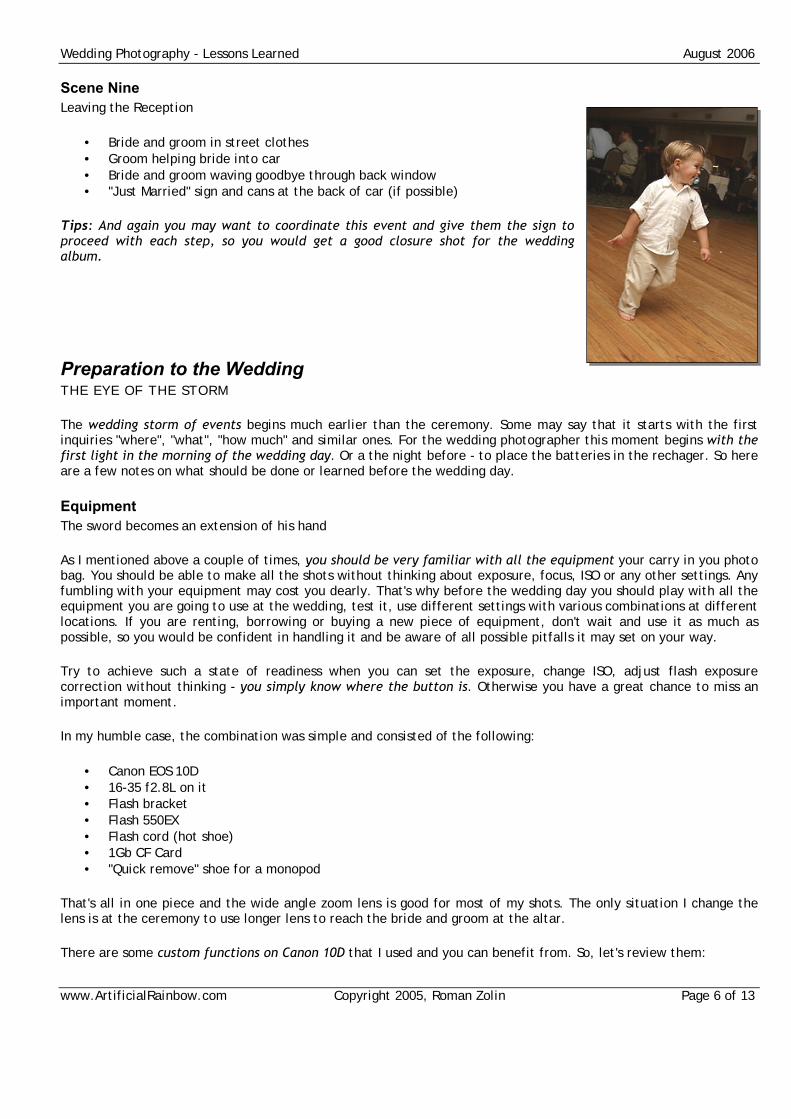
Scene Nine Leaving the Reception
• Bride and groom in street clothes • Groom helping bride into car • Bride and groom waving goodbye through back window • "Just Married" sign and cans at the back of car (if possible)
Tips: And again you may want to coordinate this event and give them the sign to proceed with each step, so you would get a good closure shot for the wedding album.
Preparation to the Wedding THE EYE OF THE STORM
The wedding storm of events begins much earlier than the ceremony. Some may say that it starts with the first inquiries "where", "what", "how much" and similar ones. For the wedding photographer this moment begins with the first light in the morning of the wedding day. Or a the night before - to place the batteries in the rechager. So here are a few notes on what should be done or learned before the wedding day.
Equipment The sword becomes an extension of his hand
As I mentioned above a couple of times, you should be very familiar with all the equipment your carry in you photo bag. You should be able to make all the shots without thinking about exposure, focus, ISO or any other settings. Any fumbling with your equipment may cost you dearly. That's why before the wedding day you should play with all the equipment you are going to use at the wedding, test it, use different settings with various combinations at different locations. If you are renting, borrowing or buying a new piece of equipment, don't wait and use it as much as possible, so you would be confident in handling it and be aware of all possible pitfalls it may set on your way.
Try to achieve such a state of readiness when you can set the exposure, change ISO, adjust flash exposure correction without thinking - you simply know where the button is. Otherwise you have a great chance to miss an important moment.
In my humble case, the combination was simple and consisted of the following:
• Canon EOS 10D • 16-35 f2.8L on it • Flash bracket • Flash 550EX • Flash cord (hot shoe) • 1Gb CF Card • "Quick remove" shoe for a monopod
That's all in one piece and the wide angle zoom lens is good for most of my shots. The only situation I change the lens is at the ceremony to use longer lens to reach the bride and groom at the altar.
There are some custom functions on Canon 10D that I used and you can benefit from. So, let's review them:
Wedding Photography - Lessons Learned August 2006
www.ArtificialRainbow.com Copyright 2005, Roman Zolin Page 7 of 13
• CF 3: Set to 1. This functions set the flash synchronization speed to a fixed value - 1/200 instead of Auto. The function is optional.
• CF 4: Set to 1. Setting this function will allow you to separate focus locking and exposure metering/shutter.
I like this feature a lot. When the function is set to 1, the focus is locked by the button, which is right under your thumb. By pressing the button once the focus is obtained (based on currently selected focus point) and locked. By holding the button the camera will try to hold the focus on the object and in case it moves the focus will change as well. The holding capability will be available only when the focus is AI Focus mode. The metering still is triggered by the half pressing the shutter, and pressing it fully you releasing the shutter. But you should be very comfortable with such a new approach of focusing and metering, it takes time to get used and do it subconsciously. Otherwise the fumbling is guaranteed to you.
• CF 6: Set to 1. This setting controls the exposure level increments. And I set them in 1/3 instead of 1/2. So I usually set my exposure compensation into -2/3 (for P mode).
Since I moved to 1D Mark II the setting has not changed much, I just ensured that the approach stays the same. Actually there is a short blog post on the settings specifically for a wedding photographer (but for Canon 1 D bodies), where you can read more about preferences and settings.
When I was shooting with Canon 10D I set the quality of the shots to RAW, it will add some extra time to your workflow to convert the images into JPEGs and will require a lot of space on the flash cards. (Read more about RAW vs JPEG) But it will definitely save some of your under/overexposed shots that bound to happen especially when you just starting. I saved some shots that were underexposed by 2 stops, and it didn't affected the noise in shadows. Canon 10D had some strange behavior sometime and it was hard to get the right exposure all the time, as well the dynamic range was not that great (5-6 stops) and shooting JPEGs was a risk.
Now I am shooting with Canon 1D Mark II, which has a much better hold on exposure and the dynamic range is great (9 stops). Such latitude lifts the fear about exposure from my shoulders, that's why I switch to JPEGs. The quality of the images is sufficient to make large prints. I've done some of 40x60 size, which looked great.
When you shoot in RAW, it's usually easy to correct the balance during conversion of the RAW images, and with 550EX flash the balance 99% is very good. Though in JPEG file that's not that hard to correct white balance, so I leave auto all the time. By the way, Canon has done a great job on keeping the right colors in auto mode.
With Canon 10D my focusing mode was set to AI Focus, which allowed me to keep the focus on moving objects and
people. Kids are especially hard to catch in focus. And it was easy to press the assistance button and be able to keep the focus when they move. Since then I learned a possible issue with such settings. When you skip the half-press touch (like in a sequence of shots) at the first frame the camera will fire without achieving the focus. So, it's very easy to get out-of-focus images. Which is not acceptable in wedding photography. This issue caused me to switch back to regular focus mode.
My flash has its own settings and tricks, which will be described in the next section "Flash experience".
Locations The scouts should be sent in all directions
It's very good to know about the locations where the wedding will take place. First of all it will be much easier for you to find them at the wedding day. But the main reason is that you can evaluate the lighting conditions and choose the best exposure settings. Another point is that you may research the locations for good places to take shots or pose people for formals. I used such a visit to the locations to research and make some photographs of the locations at the inn to pose bride and groom for formals and later show them the pictures for consideration.
Wedding Photography - Lessons Learned August 2006
www.ArtificialRainbow.com Copyright 2005, Roman Zolin Page 8 of 13
It's very important to meet the clergyman before the wedding and discuss the rules and restrictions of the church. Doing it at the wedding day will just add more chaos and can cause you some missed shots. So the best approach is to do it at the day when you do your research of the locations. But be aware that you might be at the church during the day and only in the morning you can reach the minister or the clergyman.
While at the location where the event will take place, it could be feasible to talk with people who will take part in the wedding events and the preparations, they may advise you about where exactly the guests will be and what usually other photographers consider or do at this location.
Flow of Events Everybody knows his role to the letter
It is essentially important to know the flow of the events. For instance when I was shooting my first wedding, I had no idea what the flow of the ceremony is and I missed some good shots, because I couldn't anticipate the next action and choose the best place to take the shot. Only my quick reaction to changing situation saved me. So, if you foresee some unexpected or unknown to you events consult with the bride and be ready to it.
The Day Before Ensure that the troops are ready
So, you are familiar with all your equipment, the locations are researched, you know what settings work best for every part and situation, the events of the wedding are stored in your memory in chronological order. So what's left? The main thing not to leave anything behind and make sure that you are 100% ready. To make it happen I created a check list what should be taken to the wedding. Except the list of equipment there are the following things you will or may need:
• Flash batteries, take at least one full set of batteries for each hour of the wedding (when you are going to use flash),
• Charged batteries for the camera. I had one spare battery and the charger, which I could use in the car, • As many CF cards as you can find, borrow or buy. • A belt bag, to carry batteries, CF cards and other small things you may need, such as a list of events and
their steps, contact information of bride and groom, addresses and directions to church and reception hall • Lens hood (it can be handy when the sun start shining into the lens) • A lens cleaning kit • A knife • Set of screwdrivers • Pliers (as I used it to unscrew the "quick release" shoe from the bracket) • A large umbrella if there is a possibility of rain
Note: Don't forget to have contact information of the bridal party and parents of the bride and the groom. There was a situation, when we have to look for the groom (he wasn't there where we expected him to be). And we couldn't reach him, because of that we had to call all relatives and friends.
Using Flash BRING YOUR OWN LIGHT
I put the story about the flash in a separate section because the story is long and requires special attention. The main point here is that the flash mostly is your primary light source and as I know Photography is all about the Light.
Why to Use Flash How do you shoot in dark?
Wedding Photography - Lessons Learned August 2006
www.ArtificialRainbow.com Copyright 2005, Roman Zolin Page 9 of 13
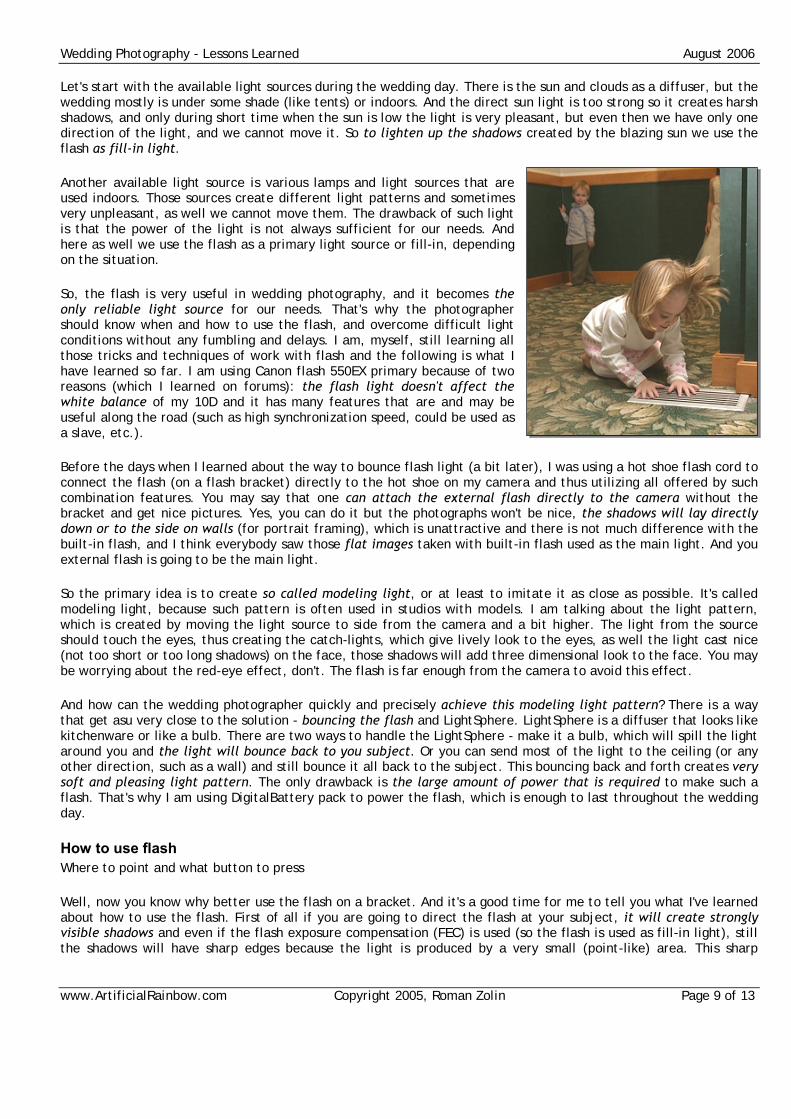
Let's start with the available light sources during the wedding day. There is the sun and clouds as a diffuser, but the wedding mostly is under some shade (like tents) or indoors. And the direct sun light is too strong so it creates harsh shadows, and only during short time when the sun is low the light is very pleasant, but even then we have only one direction of the light, and we cannot move it. So to lighten up the shadows created by the blazing sun we use the flash as fill-in light.
Another available light source is various lamps and light sources that are used indoors. Those sources create different light patterns and sometimes very unpleasant, as well we cannot move them. The drawback of such light is that the power of the light is not always sufficient for our needs. And here as well we use the flash as a primary light source or fill-in, depending on the situation.
So, the flash is very useful in wedding photography, and it becomes the only reliable light source for our needs. That's why the photographer should know when and how to use the flash, and overcome difficult light conditions without any fumbling and delays. I am, myself, still learning all those tricks and techniques of work with flash and the following is what I have learned so far. I am using Canon flash 550EX primary because of two reasons (which I learned on forums): the flash light doesn't affect the white balance of my 10D and it has many features that are and may be useful along the road (such as high synchronization speed, could be used as a slave, etc.).
Before the days when I learned about the way to bounce flash light (a bit later), I was using a hot shoe flash cord to connect the flash (on a flash bracket) directly to the hot shoe on my camera and thus utilizing all offered by such combination features. You may say that one can attach the external flash directly to the camera without the bracket and get nice pictures. Yes, you can do it but the photographs won't be nice, the shadows will lay directly down or to the side on walls (for portrait framing), which is unattractive and there is not much difference with the built-in flash, and I think everybody saw those flat images taken with built-in flash used as the main light. And you external flash is going to be the main light.
So the primary idea is to create so called modeling light, or at least to imitate it as close as possible. It's called modeling light, because such pattern is often used in studios with models. I am talking about the light pattern, which is created by moving the light source to side from the camera and a bit higher. The light from the source should touch the eyes, thus creating the catch-lights, which give lively look to the eyes, as well the light cast nice (not too short or too long shadows) on the face, those shadows will add three dimensional look to the face. You may be worrying about the red-eye effect, don't. The flash is far enough from the camera to avoid this effect.
And how can the wedding photographer quickly and precisely achieve this modeling light pattern? There is a way that get asu very close to the solution - bouncing the flash and LightSphere. LightSphere is a diffuser that looks like kitchenware or like a bulb. There are two ways to handle the LightSphere - make it a bulb, which will spill the light around you and the light will bounce back to you subject. Or you can send most of the light to the ceiling (or any other direction, such as a wall) and still bounce it all back to the subject. This bouncing back and forth creates very soft and pleasing light pattern. The only drawback is the large amount of power that is required to make such a flash. That's why I am using DigitalBattery pack to power the flash, which is enough to last throughout the wedding day.
How to use flash Where to point and what button to press
Well, now you know why better use the flash on a bracket. And it's a good time for me to tell you what I've learned about how to use the flash. First of all if you are going to direct the flash at your subject, it will create strongly visible shadows and even if the flash exposure compensation (FEC) is used (so the flash is used as fill-in light), still the shadows will have sharp edges because the light is produced by a very small (point-like) area. This sharp
Wedding Photography - Lessons Learned August 2006
www.ArtificialRainbow.com Copyright 2005, Roman Zolin Page 10 of 13
shadows could be avoided if you bounce and shake the light. What do I mean by that? The flash light has one remarkable feature - it's very reflective, it will reflect almost from any surface and lose much less power than any other kind of light (or almost any other). And when you direct the flash to a ceiling or a white wall, the light will bounce from more wider area and will envelope the subject, thus reducing or even eliminating those sharp shadows. I am very fond of such technique and use whenever I can. But this coin has it's flip side - it requires a lot more power from your batteries and the batteries die within an hour of constant work. As well they become very hot. I have to add that this technique work poorly or even fails in churches and halls with high ceilings.
To solve the problem of sharp shadows where the bouncing flash doesn't work, photographers use various attachments to the flash to soften the light. One of them is in my back - it's Omni Bounce. The device (if I may call it that) is very simple, it's a white cap of semi-transparent white plastic that tightly sits on the flash head. The effect is not as good as from with bouncing from the ceiling, but better than nothing. So, I switched to another solution, discussed ahead.
The next step in diffusing the flash light is LightSphere. It's a translucent extension to your flash. There are two parts, a tube and a dome. The tube primary directs the light (to a ceiling, for example) and the dome works like a lid, which turns the LightSphere in a full diffuser. The tube lets some light through, which adds that so needed catchlights into the eyes of your subject. And most of the time I use the tube only. As I mentioned above, such bouncing technique requires a lot of power from your batteries, that's why I bought a 40W battery pack from Digital Camera Battery. This is the lowest capacity they offer, but it is sufficient to power my battery for a 10-12 hour wedding (considering that you are not using it at all times).
Note: This battery pack could be used to power your camera or even laptop. There are two sockets for two cables, i.e. one for the camera and one for the flash. As well, they offer different cables for Canon 550EX flash - standard and pro. Pro version allows the flash recharge much quicker and get about 1-2 shots per second (depending on the required power).
Directing the bare flash on the subject produces good catch-lights in the eyes of the subject. And the same could be achieved with bouncing the light from the ceiling/wall. The 550EX flash has a built-in diffuser (a simple translucent plate) that could be pulled out, so it would cover the flash. But there is intermediate position of the diffuser, when it stands on its end and reflect a small portion of the light into the face of the subject. As you can guess it doesn't affect the light pattern, but creates those catch-lights. Unfortunately there is a catch, it could be used only when you shoot horizontal shots. In that case directed upwards flash has its flat area to the subject and the diffuser reflects it to the same direction. But when I shoot verticals (portraits) you have to swivel the flash and the flat surface of the flash is directed to the side. The LightSphere is round and it doesn't matter whether you shoot portraits or landscapes, and when the flash is fired the tube spreads some light around you (not only into the main direction), which creates those nice catch-lights.
Flash and Settings Adjust the flash to get the best results
When you are shooting with flash, there are several settings that you need to adjust. Based on this settings you will get the correct exposure, good light pattern on your subject face and will not drain your batteries in the first hour. So here is the list:
• Mode: Manual - don't worry, the flash will calculate the power of the light and produce it as much as needed
• Aperture: 4.5-5.6 (could be up to 7-8) - to give the picture enough depth of field and have all the subjects in focus (the wider DOF the more power your flash will suck from the batteries)
• Shutter speed: 1/40-1/100 - the slower shutter speed the more light from background will get to the camera and lighter it will be (more visible people and objects will be)
• ISO: 100-400 - it primary depends on the height of the ceiling, the higher ceiling, the less light will bounce back and the higher ISO should be (the higher ISO the less power it will require from the flash batteries and the faster it will recharge). With the latest advances in sensitivity of DSLR cameras (regarding the low noise) I sometimes use ISO 800 to extend the life of the battery pack.
Wedding Photography - Lessons Learned August 2006
www.ArtificialRainbow.com Copyright 2005, Roman Zolin Page 11 of 13
• HighSync mode (on flash) - when I shoot outside, so I can use shutter speed up to 1/4000. Isn't it cool? • ETTL mode (on flash) - to use in-camera metering. The camera will tell the flash when there is enough light
to get the correct exposure. • +2/3 to 1 FEC (on camera) - when the ceiling is high, you have to boost your beam of light to let get back to
your from the ceiling. • -2/3 FEC (on camera) - to use as fill-in flash (with a diffuser or outside mostly) - don't forget to check the
setting when use as primary light source.
Lens choice TO SEE CLEARLY AND FAR
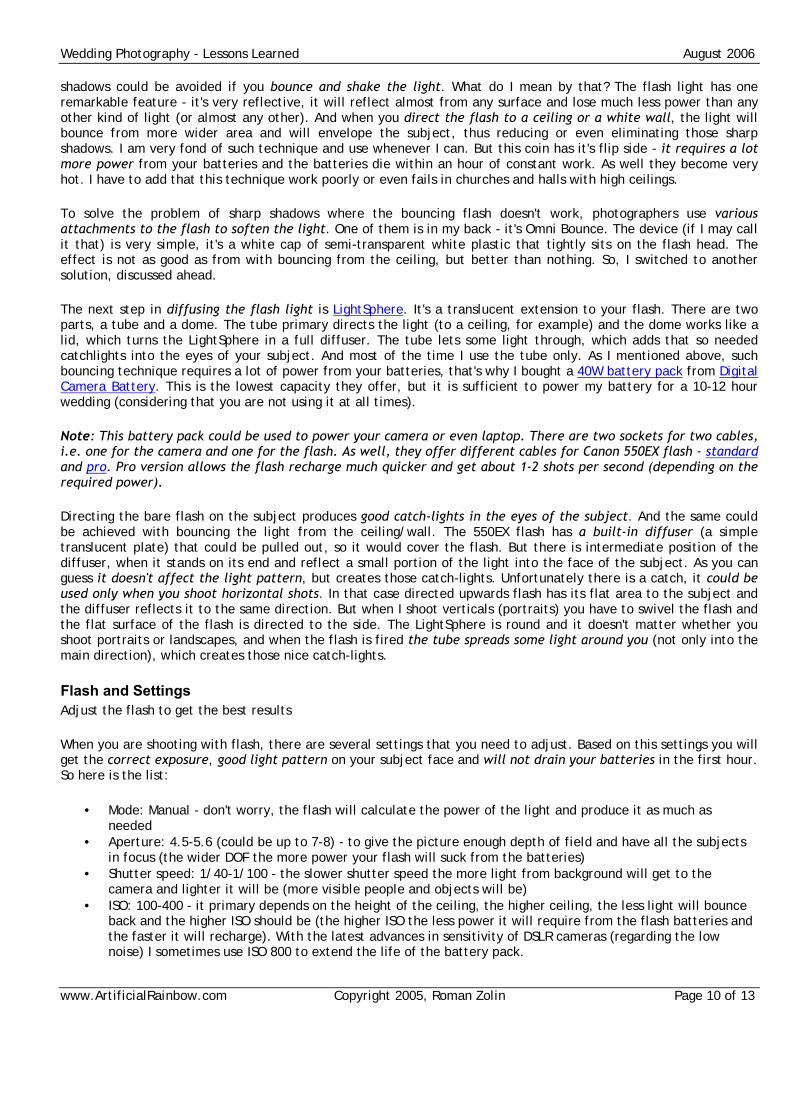
Here, as in most of all other areas of photography, the lens is chosen as it requires or based on the preferences of the photographer, I would say his/her style. Let's take for example the style when photographer is trying to be invisible and least obstructive. It means that the photographers stays far away from the action and uses long lens. What implications it brings? The flash mostly should be directed on the subject (to be able to reach the subject at all), not to the ceiling as I like, and there are sharp shadows. The photographs are real candids, because people do not notice the photographer most of the time and behave freely. Long lens are the necessity when you are restricted by rules of the church and cannot get closer to the altar than the last row of guests. But even in such situations you may want to switch for a shot to wide-angle lens, and take some creative shots, as the shot with the hat. I know, it's not the best shot of the wedding, but it's unusual, and people like unusual, and several shots won't ruin your wedding photostory (only enhance it).
OK, I love the wide-angle lens, and you may hear more tendencies to that lens from me. And you know what, some professional photographers as Ed Shapiro, which I respect very much, prefer the wide-angle lens as well, because of the dynamics it gives to the shots. I agree, it adds some tension and dynamics as well lets you to blend into the action. But my advice is to try all the possibilities and choose what best suites you.
The only thing about the lens, which may be required is their maximum aperture. Your lens should allow you get the most of the available light (flash or ambient). And it means that the aperture should be close as much as possible to 2.8 (or wider - 1.2). Then it will shorten the shutter speed and thus reduce the camera shake. Another advantage - it will allow your camera to focus faster and in conditions with poor light. Unfortunately, there is a catch - the wider the aperture, the less focusing mistakes you can make, the DOF will be so shallow, that any misalignment of the focus plane will result in out-of-focus picture. It's a tight balance between the light and focus.
You may want to read more on lens choice in one of my articles. In that article you will find out how lens choice affects the photograph you produce.
Wedding Photography - Lessons Learned August 2006
www.ArtificialRainbow.com Copyright 2005, Roman Zolin Page 12 of 13
Focusing, Metering & Composition JUGGLING THE BALLS IN THE AIR
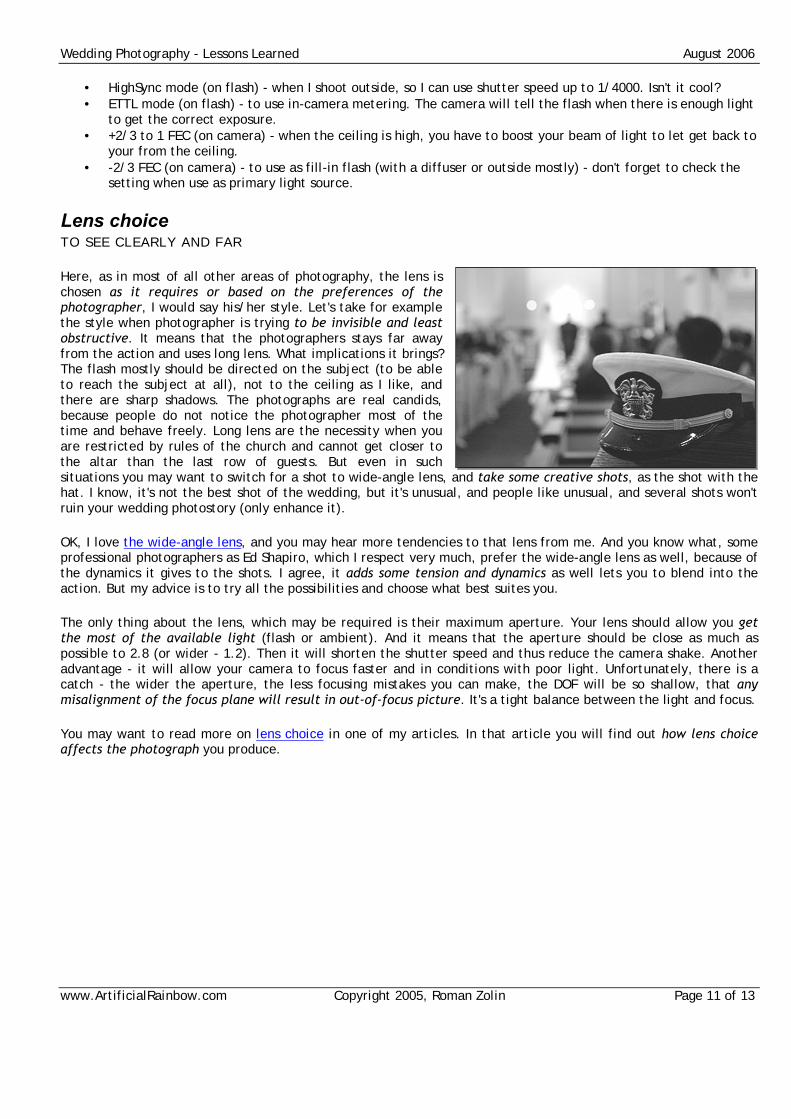
Focusing could be one of the challenges you experience during the wedding day. In dim or low light it may even become a problem. My previous camera Sony DSC F707 was too slow focusing, and after reading articles and reviews of equipment, I decided to stick to USM lens. USM stands for Ultra-Sonic Motor, as I remember, which significantly improve speed of focusing. As well if the lens has wide apperture (1-2.8), it gives a bit better focusing in dim light. Such combination of Canon 10D and the wide-angle zoom lens as 16-36 f2.8L almost completely solves the issue with focusing. But still you may need sometimes to wait a second or less to let the camera focus. The 550EX flash produces a beam of red light (assist light) to help with focusing.
My first wedding I used to focus with the center point, but constantly failed to move the camera to recompose the image properly. So at the second wedding I used the one, which is off to the long side, but not the farthest from the center. I switch the point from one side off the center to another, but rarely. Most of the time it is the focusing point that will be above the center I am taking vertical shots, so the point is very close or right at the person's eye or face. When I am shooting horizontal shots, the point is getting of the center, mostly to the left side, and if I am making a photograph of group of people at a table, I just move slightly the camera to the right, so the focusing point is pointing on one of the people and take the shot.
Note: For Canon cameras & lenses there is a tricky point - the center focus point usually has two way focus/contrast detection, the other focus points have one way detection. This increases the quality and speed of the focus when you use the center point.
Such a choice of focusing point intervenes with the metering of the exposure, which is tied to the center point (not all cameras do it - check specifications for yours). I use the center-weighted mode of metering, which balances a bit between the center point and its closest distance. But still it's off the subject's face and often is metering the dress, which could be a disaster, because most people wear black jackets, white shirts and of course the bride wears the white gown. There is a combination of two ways to solve or at least dramatically reduce the impact of this issue. First and primary is after focusing (I use the assist button as you remember) move the camera before the shot in such way that the center point is on the subject's face or mid-tone surface and then half-press the shutter to lock the metering. Better to point on light toned objects, so the camera will not blow out the highlights, which cannot be restored. Unfortunately, in the rush of the wedding and taking the shots, I sometimes forget or discard this technique. But shooting in RAW mode helps to correct the exposure without degrading the image, sometimes up to 2 stops, which is a huge correction and most of the time is everything or even more than you need.
Using the focusing point off the center somehow enforces your composition technique and makes the images nicer. I will not go in details about composition, because it was covered in my other articles. But I have to tell you about the position of the camera during the shots. It's known that for "usual" photographs the best position of the camera is at the eye level of the subject, so you have to duck and crouch if necessary to get the camera at that level. Such position of the camera gives the subject more importance in the photographs, which brings more attention to it and thus improves the overall quality. I am using wide-angle lens, so I have to worry about possible distortion. And to avoid it I duck even deeper, so the head and lowest visible part of the body are on the same distance from the center. Lowering the camera more than the eye level gives you another advantage. People usually don't look at anything higher than the eyes, because they watch where they step. So their heads are tilted a bit forward, and by lowering the camera below the eye level allows you to get the full view of their eyes and it doesn't bring tension into their position. But I have to say, it will definitely bring some tension into your legs. All it is good, but you have to beware of the flash spilling the light onto your subject heads - just turn the flash head a bit backward to avoid it.

Wedding Photography - Lessons Learned August 2006
www.ArtificialRainbow.com Copyright 2005, Roman Zolin Page 13 of 13
Getting closer and Attitude INCLUDING YOUR EMOTIONS INTO THE PHOTOGRAPHS
Do you know what was the most valuable advice I found about wedding photography? You'll never guess. It's to ENJOY the wedding. And I cannot stress it more to emphasize the value of the advice. You should have fun at the wedding and enjoy taking part in it. Because your mood at the wedding and attitude towards the people and especially the bride and groom is what you will get in your pictures. All the other stuff is not as important as the attitude you come with to the wedding. But to enjoy the wedding you have to be relaxed, which is hard even for some people who is doing wedding photography for many months and even years. Fortunately, I haven't been stressed or tensed at the weddings I did and honestly enjoyed being with people and making them smile with my silly moves and words. Even when my flash didn't work (not recharged yet) I smiled and made a goofy face, so the people were still smiling when I was completely ready to take the shot.
Another important part as I think, is to get closer to people. My wide-angle lens somehow enforce it, so I have to step closer to fill the frame with their happy faces or bodies. Such short distance make people to notice me and their smile into the camera and recognize me as a person, so their attitude as well is showing in the picture. And what is interesting, after a short while they get used to my presence and stop noticing my pesky camera, so I can get closer and get candids at the same time. It's amazing how long I can be "invisible" standing or crouching by the person and pointing my camera right into his/her face. What else is good in it is that they ASK me to take a picture of them or their family, which later will bring additional money to the pocket.
I have to say that shooting with digital camera has additional benefits that nobody noticed before. When I took a nice shot and review it on my LCD display, sometimes I show it to the person I took picture of, and he/she recognizes my good work and makes him/her a bit happier and more friendly toward me. Which in its turn brings more attention to me (and references) and more requests for photographs. Isn't it great?
My mistakes THINGS THAT COULD (AND USUALLY DO) GO WRONG
And finally in this long article I am going to list several mistakes, which I made during the weddings, so you may learn and avoid them:
• I didn't know the flow of the ceremony, and couldn't anticipate the next event and prepare to the shot by taking the best position,
• I forgot to set ISO back to 200 when switched to using flash in the church (it was set to ISO 800), and blew out some shots,
• I was rushing and sometimes pressed the shutter without letting the flash to charge, thus getting black frames,
• I didn't turned the flash head (while bouncing) a bit backward when lowered my camera and the flash light spilled on subjects' heads,
• I forgot to give out my business cards, • Once while waiting for the bride to arrive, I missed her and the ceremony started without me knowing
(ouch!)
Well, there are not too many mistakes as you see, but sometimes it's more than enough to miss or fail an important shot.
Good luck.