week 1: dress to flatter your shape - style makeover hq 1: dress to flatter your shape ......
TRANSCRIPT

Week 1: Dress to Flatter your Shape
OVERVIEW For most of us developing and creating our own unique, flattering and pleasing style is not
an innate skill. However, as with any skill, it is something that can be learned.
What’s needed to help you on your style journey is to:
Learn more about you: your proportions, your colouring, your personality, and
Learn more about clothes: where to find them, what’s contemporary, how to style
clothes into outfits. It’s also good to get into the habit of editing your wardrobe
regularly to keep your style in great shape.
To make this an easier process I’ve identified what I call the six steps to savvy style. These
are:
1. Understanding your shape and how to dress to flatter your shape (Weeks 1 & 2)
2. Expressing your personality and personal values in what you wear (we won’t
explicitly be looking at personality in this program, although I ask you to notice and
note when your personal preferences come to your attention)
3. Understanding and wearing your best colours (although you won’t be learning your
specific colouring in this program, you will be learning about aspects of colouring
from a shape perspective that will help you wear colour better)
4. Assessing your grooming (Week 3)
5. Editing and planning your wardrobe (Weeks 3 & 4)
6. Strategic shopping (Week 4)
Grooming is a fundamental and ongoing aspect of style and the easiest to fix.
Understanding your style criteria (1. shape, 2. colours, and 4. personality) are essential to
consistently creating great style. Your style criteria can change over time, but will usually
remain constant (when you’ve worked it out) for years at a time, at least until a significant
change occurs.
(Changes that might trigger a re-assessment of a style criteria could include:
a major lifestyle change which may mean you want to change how you reflect your
personality eg moving from a city to the country, changing jobs, retiring from paid work
a change in your hair colour;
a change in your shape such as after child birth, with significant weight changes, or after
illness)
Style steps 5 and 6 are where you apply your style criteria and create the inspirational
wardrobe that takes you everywhere you need and want to go! Depending on your lifestyle,
you should aim to work on these steps at least twice every year (ie at the major change of
fashion seasons, when temperatures are about to change from cool to warm and vice
Week 1: Dress to Flatter Your Shape
© Style Makeover HQ Pilot Online Style Makeover Program 2
versa). If you are retired and have a minimalist approach to your wardrobe you may only
need to do this twice every two years.
It may be helpful for you to see an example of a mix-and-match wardrobe,
also called a capsule wardrobe, at this stage. Take a look at this article on
my website where I share my summer travel wardrobe from a trip in 2015.
So, let’s get started! This week you’ll start to learn about one of the three main style criteria,
that is dressing to flatter your shape. Firstly, we’re going to make sure you have an objective
view of your shape.
Part 1: Assess Your Body Shape Why is understanding your body shape so important to creating personal style?
It’s all about creating flattering silhouettes and proportions in your outfits. So it’s a great
place to start!
We’re super-critical of our own bodies, so it can be challenging to assess our shape
objectively. And sometimes you may feel you fit into more than one category on a particular
dimension. However, I would like you to try to assess yourself. Then send your assessment
to me to validate (this part is optional, but highly recommended).
Instructions Follow the steps below to assess your proportions…
Wear good-fitting underwear and close fitting clothing, such as leggings and a slim fitting
tee-shirt that allows you to see your silhouette. Do make sure that your underwear and
clothing aren’t creating any additional lumps and bumps, especially at your waist!
If you’d like a printed form to record your assessment DOWNLOAD & PRINT: Your body
assessment worksheet (otherwise just enter it into the online form provided in the
homework below)
Step 1: Assess your horizontal shape
This is the body proportion that you’ll be most familiar with. The ‘ideal’ horizontal shape is
the hourglass figure. Horizontal shape is important for understanding your best clothing
silhouettes and placement of garment design lines.
Week 1: Dress to Flatter Your Shape
© Style Makeover HQ Pilot Online Style Makeover Program 3
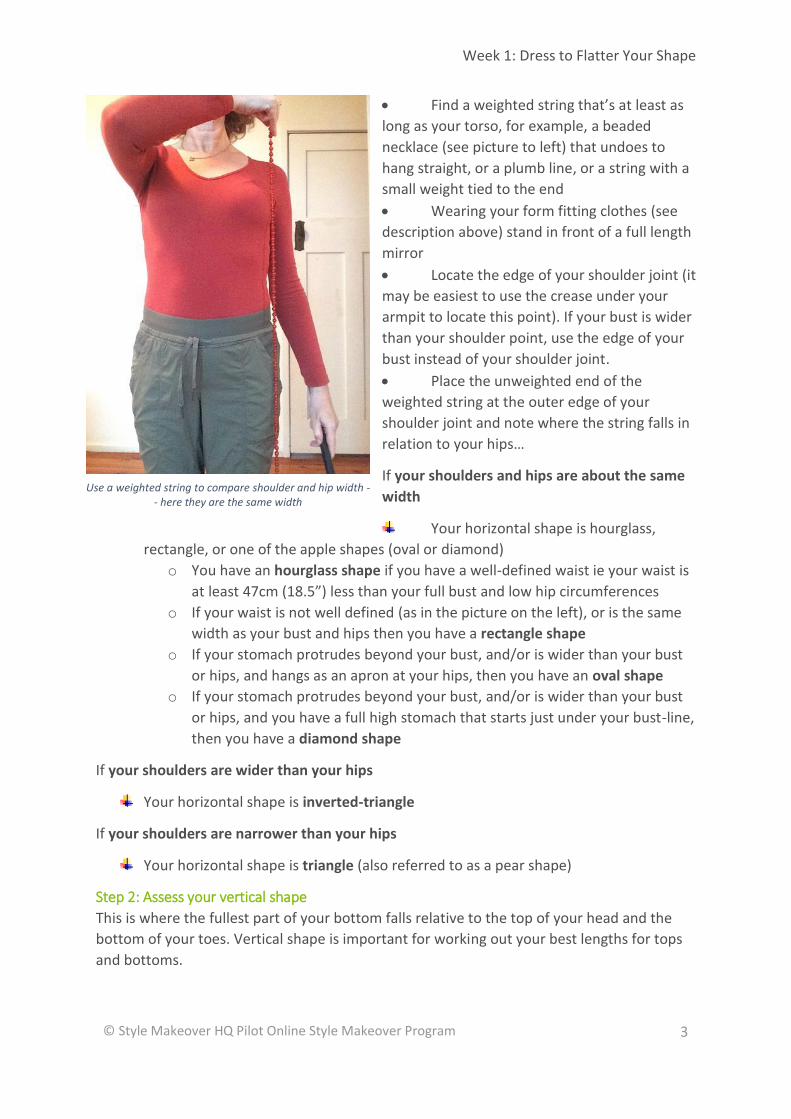
Find a weighted string that’s at least as
long as your torso, for example, a beaded
necklace (see picture to left) that undoes to
hang straight, or a plumb line, or a string with a
small weight tied to the end
Wearing your form fitting clothes (see
description above) stand in front of a full length
mirror
Locate the edge of your shoulder joint (it
may be easiest to use the crease under your
armpit to locate this point). If your bust is wider
than your shoulder point, use the edge of your
bust instead of your shoulder joint.
Place the unweighted end of the
weighted string at the outer edge of your
shoulder joint and note where the string falls in
relation to your hips…
If your shoulders and hips are about the same
width
Your horizontal shape is hourglass,
rectangle, or one of the apple shapes (oval or diamond)
o You have an hourglass shape if you have a well-defined waist ie your waist is
at least 47cm (18.5”) less than your full bust and low hip circumferences
o If your waist is not well defined (as in the picture on the left), or is the same
width as your bust and hips then you have a rectangle shape
o If your stomach protrudes beyond your bust, and/or is wider than your bust
or hips, and hangs as an apron at your hips, then you have an oval shape
o If your stomach protrudes beyond your bust, and/or is wider than your bust
or hips, and you have a full high stomach that starts just under your bust-line,
then you have a diamond shape
If your shoulders are wider than your hips
Your horizontal shape is inverted-triangle
If your shoulders are narrower than your hips
Your horizontal shape is triangle (also referred to as a pear shape)
Step 2: Assess your vertical shape
This is where the fullest part of your bottom falls relative to the top of your head and the
bottom of your toes. Vertical shape is important for working out your best lengths for tops
and bottoms.
Use a weighted string to compare shoulder and hip width -- here they are the same width

Week 1: Dress to Flatter Your Shape
© Style Makeover HQ Pilot Online Style Makeover Program 4
The easiest way to assess this is by bending your arm at the elbow, and seeing where your
elbow is relative to your waist. Your waist is often higher than you’d think! Your waist is at
the bottom of your ribcage – bend to the side and see where you bend to locate it. (See
pictures below.)
Use waist position to identify your vertical shape
Step 3: Assess your face shape
Your face shape is important for identifying your best shapes for hairstyles, glasses, hats,
earrings and (to a lesser extent) makeup.
Use this article on my website to try and identify your face shape. However, don’t spend too
long on this. The main things to identify are how long your face is relative to its width,
where its widest, and whether your jawline is more rounded or more square.
Halle Berry's face shape is oval; my face is oblong; Kirsten Dunst has a round face shape
The shapes are:

Week 1: Dress to Flatter Your Shape
© Style Makeover HQ Pilot Online Style Makeover Program 5
Oblong (the most common face shape) – obviously longer than wide + rounded
jawline
Rectangle – obviously longer than wide + square jawline
Oval (the ‘ideal’ face shape – the shape to balance to) – a little longer than wide,
inverted egg-shape
Triangle – a little longer than wide, wider at jawline
Pear (a rounder version of Triangle)
Inverted Triangle – a little longer than wide, wider at forehead
Heart (Inverted Triangle with a widow’s peak)
Diamond – a little longer than wide, narrow forehead, wide cheekbones, narrow
pointed chin
Round – almost as long as wide, with full cheeks
Square – almost as long as wide, with a square jawline
Step 4: Assess your other proportions
Height Short Medium Short Medium Medium Tall Tall
162.4cm and under 162.5cm to 167cm 167.1cm to 174.5cm 174.6cm to 179.95cm 180cm and taller
5’3¾” and under 5’4”to 5’5¾” 5’5” to 5’8¾” 5’8” to 5’10¾” 5’11” and taller
Weight Moderately Underweight Slightly Underweight Normal Slightly Overweight Moderately Overweight Substantially Overweight
This is not based on the BMI. It’s a subjective measure of how you look
Bra Cup Size A, B, C, D, E+, DD
Neck Length Short Medium Short Medium Medium Long Long
Select what you think and I’ll verify.
Neck Thickness
Very Thin Average Thick or Double Chin
If your neck is much narrower than your head If in doubt select ‘average’ Neck width similar to width of head or you have a double chin, or no defined chin
Bone Structure
Small Medium Large
Gently wrap your thumb and middle finger around the wrist of the hand you write with: Your thumb and middle finger easily pass each other Your thumb and middle finger just touch There is a gap between your thumb and middle finger

Week 1: Dress to Flatter Your Shape
© Style Makeover HQ Pilot Online Style Makeover Program 6
Shoulders Sloped Tapered Square
Very sloped from base of neck to edge of shoulder Slightly sloped from base of neck to edge of shoulder Square with little or no slope (swimmers shoulders)
Step 5: Identify any figure challenges
Only select the prominent features that truly apply to you. For every feature you select you
will lose clothing options.
Very Thin Arms Usually associated with very thin body (prefer to keep covered)
Heavy Arms Full fleshy upper arms (usually prefer to keep covered)
Aged Arms Your upper arms have lost their tone and are ‘crepey’ (usually prefer to keep covered)
Sway Back A definite curve in the lower spine causing straight skirts to have a roll of excess fabric below the waistband in the back.
Large Bottom A bottom that is out of proportion to the rest of your body. Straight skirts can be difficult to fit. Your hemlines often rise up at the back. Tops get caught up on your bottom
Flat Bottom You have the appearance of being almost bottomless. Your pants and skirts are often baggy in the back around your bottom and down the back of the leg. The Hem of your skirts and dresses may hang lower in the back.
Bowed Legs Your legs bow outwards anywhere from ankles to thighs and there’s a rounded gap between your legs where they bow.
Thin Legs Legs that are very thin, especially at the ankles
Heavy Lower Legs Legs that are very heavy or thick in the region of the calves and/or ankles. Also select this if your legs are severely marked eg varicose veins, and you prefer to keep them covered.
Saddle Bags Thighs that are very full and wide, dimpled at the top and have the appearance of jodhpurs.
Thick Outer Thighs Thighs that are very full and at the outside edges are substantially wider than the widest part of your hip line.
Thick Inner Thighs Your thighs rub together when you walk.
Large Midriff A large roll at the midriff that makes tucked-in tops and fitted tight garments unflattering.
Large Stomach A full stomach that protrudes in front and causes the hemline of dresses and shirts to rise up in the front.
Dowager’s Hump Select this if you have a head-forward position, with a very rounded shoulder line.

Week 1: Dress to Flatter Your Shape
© Style Makeover HQ Pilot Online Style Makeover Program 7
Part 1 Homework: 1. If you haven’t already done so, join our private Facebook group.
2. Enter your self assessment in this form
3. (Optional, but recommended) Send photos to me so I can review your assessment.
DOWNLOAD instructions for taking body shape photos. Either:
a. Post your photos on our Facebook group, or
b. Email your photos and measurements to me at [email protected]
(please note I can only accept emails that are less than about 2M, so if the
photos are large send them in separate emails. If I don’t respond to you
within 1 day it’s most likely because your email was too large so I didn’t
receive it).
Week 1: Dress to Flatter Your Shape
© Style Makeover HQ Pilot Online Style Makeover Program 8
PART 2: Assess your clothes & accessories Having completed Part 1 you have now objectively identified your body proportions and
(ideally) had them confirmed by me (please do wait for my confirmation, if you requested
it).
Now you’re going to discover the style elements that work for all of your body proportions
(your style ‘rules’), by creating your own personalized online style portfolio (using the My
Private Stylist program).
In this lesson you’ll explore your style recommendations (in your MPS program), learn how
to use them, and start using them to assess clothes and accessories in your wardrobe.
We’re not talking about complete outfits just yet, but rather individual
clothing items and accessories.
Part 2a: Get familiar with your style ‘rules’
Step 1: Create your MPS profile
When you’ve received your license key (I’ll email it to you when you when I’ve confirmed
your assessment, or when you’ve told me you’ve completed your assessment) you can get
started with this module.
Use the login details in the email I send you to create your MPS account. Remember
to enter your license key number. The cost of this program is included in this style
makeover program DO NOT PAY FOR IT AGAIN!

Week 1: Dress to Flatter Your Shape
© Style Makeover HQ Pilot Online Style Makeover Program 9
You can change your contact details and password whenever you need to
Enter your body proportions (identified in Part 1) to complete your MPS profile
The MPS program will now contain style element guidelines that take account of all
your body proportions.
Over time if you need to change your profile eg if your weight changes, or
you move from one age bracket to another, you can update your profile
twice for no extra charge. After that there is a small charge to make
changes.
Week 1: Dress to Flatter Your Shape
© Style Makeover HQ Pilot Online Style Makeover Program 10
Step 2: Explore your MPS
Spend 15 minutes or so familiarising yourself with your MPS program:
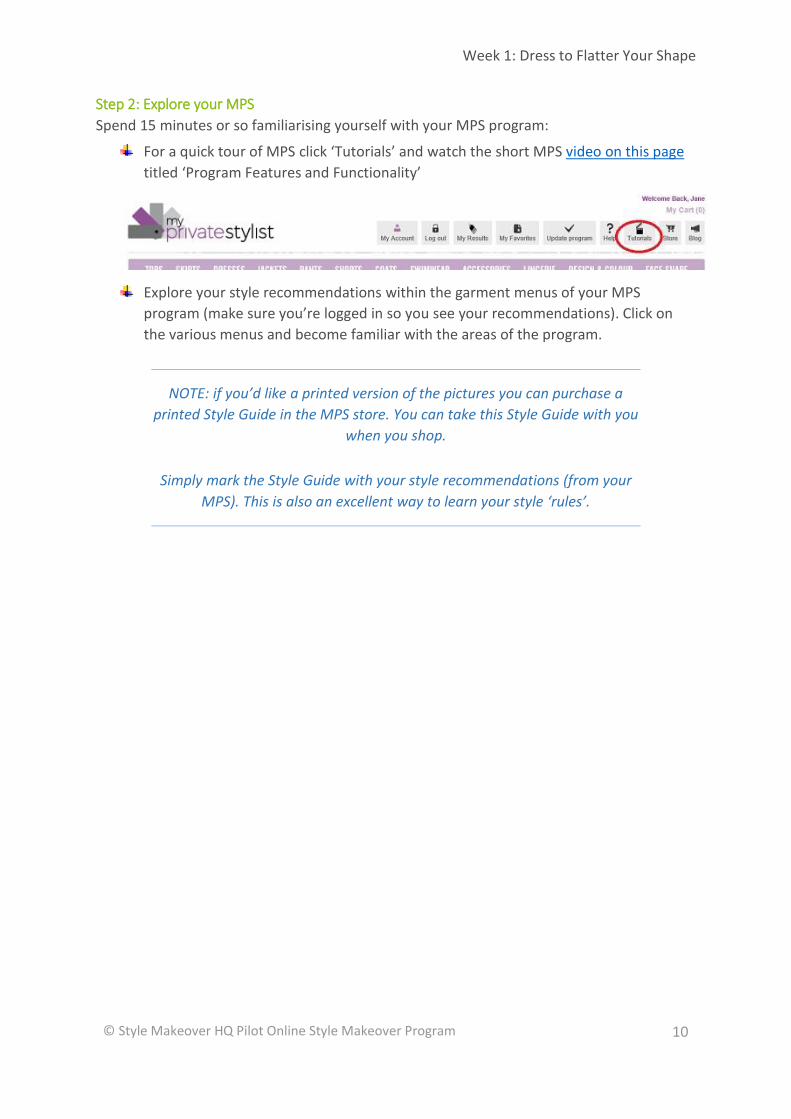
For a quick tour of MPS click ‘Tutorials’ and watch the short MPS video on this page
titled ‘Program Features and Functionality’
Explore your style recommendations within the garment menus of your MPS
program (make sure you’re logged in so you see your recommendations). Click on
the various menus and become familiar with the areas of the program.
NOTE: if you’d like a printed version of the pictures you can purchase a
printed Style Guide in the MPS store. You can take this Style Guide with you
when you shop.
Simply mark the Style Guide with your style recommendations (from your
MPS). This is also an excellent way to learn your style ‘rules’.

Week 1: Dress to Flatter Your Shape
© Style Makeover HQ Pilot Online Style Makeover Program 11
Part 2b: Start assessing items in your wardrobe
Step 1: Select garment
Select a clothing item from your wardrobe, for example, something you love and
wear all the time
Step 2: Assess garment
Start at the top of the garment and work down using your MPS to check:
External design lines
The silhouette DESIGN & COLOUR > Garment Silhouette For SKIRTS and DRESSES > Basic Shapes For PANTS > Pant Width For all other items look at each of the outer style elements in the drop down menu for the item
The length [Garment Type] eg Tops > Length
Internal design lines
Patterns: scale, type, placement
DESIGN & COLOUR > Pattern Scale, Pattern Type, Pattern Placement Also check where the pattern falls on your body. Is it drawing attention to an area you don’t want to draw attention to? Is there a light colour in the pattern over an area you don’t want to draw attention to, or to appear larger? It’s surprising how many women forget to check this detail!
Pocket placement [Garment Type] > Pockets
Borders and other embellishments
Do they form a horizontal line across your widest point? Do they form a horizontal line across your narrowest point? What do embellishments draw attention to? Make sure borders and embellishments are flattering and balancing, rather than emphasising an area you don’t want to emphasise!
Colour changes Where ever there is a change of colour within a garment or an outfit it draws attention, so make sure it falls in over an area you want to draw attention to.
Seams Seams within the silhouette of a garment can also form distracting or enhancing design lines. Seams where the thread is in a contrasting colour to the garment are particularly obvious. So check the orientation and placement of seams and where they fall on your body.
Week 1: Dress to Flatter Your Shape
© Style Makeover HQ Pilot Online Style Makeover Program 12
Initially this step may seem like a lot of work. However, eventually (as you
understand what to look for) it will become second nature.
We’ll go over an example in the Week 1 Video.
EXAMPLE OF A STYLE MISTAKE:
You may notice that you’ve fallen into the habit of buying one or two types of designs that
aren’t the most flattering on your shape.
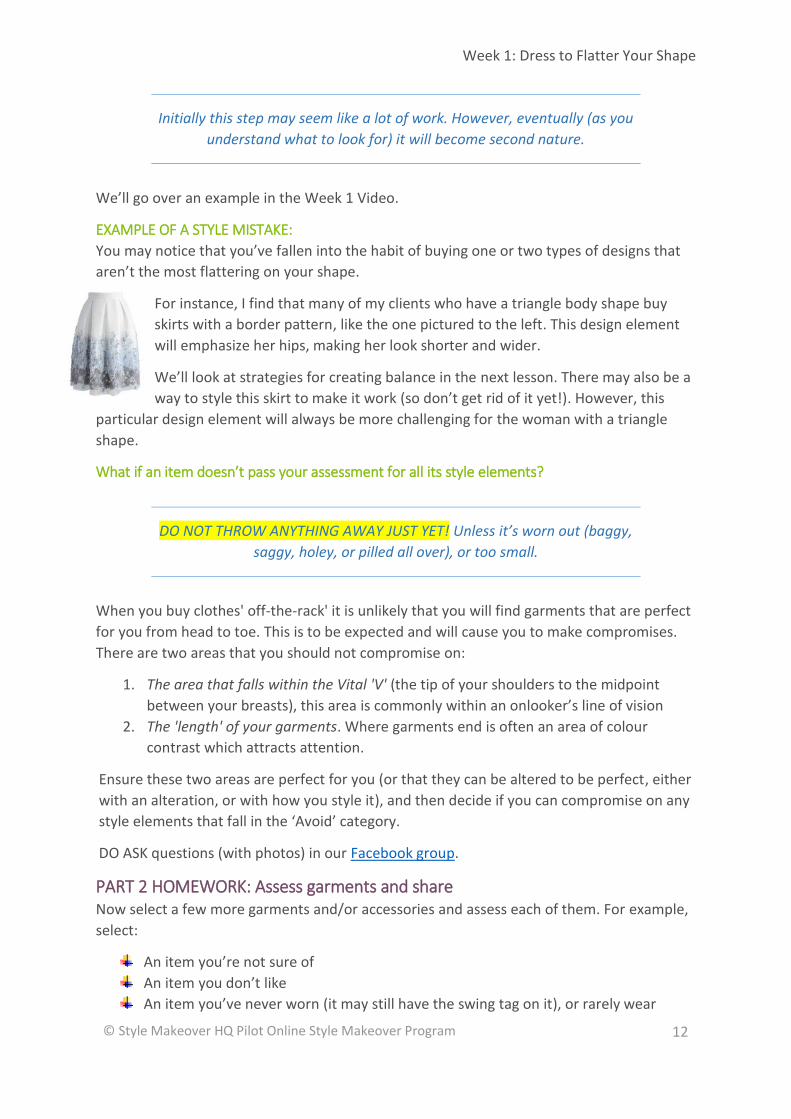
For instance, I find that many of my clients who have a triangle body shape buy
skirts with a border pattern, like the one pictured to the left. This design element
will emphasize her hips, making her look shorter and wider.
We’ll look at strategies for creating balance in the next lesson. There may also be a
way to style this skirt to make it work (so don’t get rid of it yet!). However, this
particular design element will always be more challenging for the woman with a triangle
shape.
What if an item doesn’t pass your assessment for all its style elements?
DO NOT THROW ANYTHING AWAY JUST YET! Unless it’s worn out (baggy,
saggy, holey, or pilled all over), or too small.
When you buy clothes' off-the-rack' it is unlikely that you will find garments that are perfect
for you from head to toe. This is to be expected and will cause you to make compromises.
There are two areas that you should not compromise on:
1. The area that falls within the Vital 'V' (the tip of your shoulders to the midpoint
between your breasts), this area is commonly within an onlooker’s line of vision
2. The 'length' of your garments. Where garments end is often an area of colour
contrast which attracts attention.
Ensure these two areas are perfect for you (or that they can be altered to be perfect, either
with an alteration, or with how you style it), and then decide if you can compromise on any
style elements that fall in the ‘Avoid’ category.
DO ASK questions (with photos) in our Facebook group.
PART 2 HOMEWORK: Assess garments and share Now select a few more garments and/or accessories and assess each of them. For example,
select:
An item you’re not sure of
An item you don’t like
An item you’ve never worn (it may still have the swing tag on it), or rarely wear
Week 1: Dress to Flatter Your Shape
© Style Makeover HQ Pilot Online Style Makeover Program 13
Go to our private Facebook group and share photos (preferably of you wearing each item, a
selfie of you in your full length mirror is fine) along with your assessments and whether or
not you like the item (regardless of whether the style suits you). Include the item you love
and wear all the time.
NOTE: Just because something suits your shape it doesn’t mean the
colouring is good for you, or that you actually like the item. However, at
the moment we’re just assessing whether items flatter your shape. We’ll
look at other factors later in this program.
NEXT WEEK… Next week we’ll continue dressing to flatter your shape:
You’ll learn some simple tricks of illusion borrowed, from art, to help you create
flattering proportions within your outfits.
I’ll introduce you to some simple outfit strategies that make use of colour to
create flattering shapes.
You’ll start creating flattering outfits using clothes and accessories already in
your wardrobe