welcome to the qbcc roadshow · 2018-11-13 · standard of painting •painting is defective if it...
TRANSCRIPT

Welcome to the QBCC Roadshow
October 2018

Chris Munday CEO / President Master Painters Association Queensland
President Master Painters Australia

Painting Defect
What is a painting defect?

STANDARD OF PAINTING
• Painting is defective if it does not comply with the manufacturer’s installation instructions or AS/NZS 2311 – Guide to the painting of buildings.
• Coatings used are to be suitable for the relevant conditions and relevant wear and tear.
What is a Painting
Defect?

INSPECTING THE PAINTWORK
• Variations in the surface colour, texture and finish of walls, ceilings, floors and roofs, are to be viewed where possible from a normal viewing position.
• A normal viewing position is looking from a distance of 1.5 m or greater (600 mm for appliances and fixtures), with the surface or material being illuminated by ‘non-critical light’.
Painting Defects

INSPECTING THE PAINTWORK
AS/NZS -2311 (C4 Final Inspections)
Illumination by “NON CRITICAL LIGHT” means the light that strikes the surface is diffused and is not glancing, or parallel to that surface.
Painting Defects

Glancing Light
Acute or critical angle of lighting shows up small undulations
and imperfections by:
• Poor design permitting strong external natural light
sources to fall on a wall and ceiling surfaces at acute
angles
• Poor internal lighting design detailing strong unshaded
surface mounted lights or feature lighting that strikes the
wall or ceiling surface at acute angles
• Poorly aligned substrate framing
• Excessive patching of plasterboard
• Poorly set joints
• Inadequate paint coverage
• Inadequate back rolling of paint

INSPECTING THE PAINTWORK
Paintwork is defective if the application results in
Paint Runs, Sagging and Curtaining:
Runs, sags and curtains are the downwards movement of
paint that can appear shortly after application and before
the setting of the paint.
What causes paint runs, sags and curtains?
• Paint was applied in excess of the dry film specified.
• Excessive or improper thinner / reducer has been
added to the paint
• The object being painted was too cold
Painting Defect

INSPECTING THE PAINTWORK
Paintwork is defective if the application results in
Wrinkling:
Wrinkles occur when uncured paint forms a "skin,"
leaving the surface rough and crinkled
What causes paint wrinkling?
• Not allowing undercoats to dry properly
• Applying paint on to a hot surface
• The paint layer is too heavy
• Exposing uncured paint to water or high humidity
Painting Defect
INSPECTING THE PAINTWORK
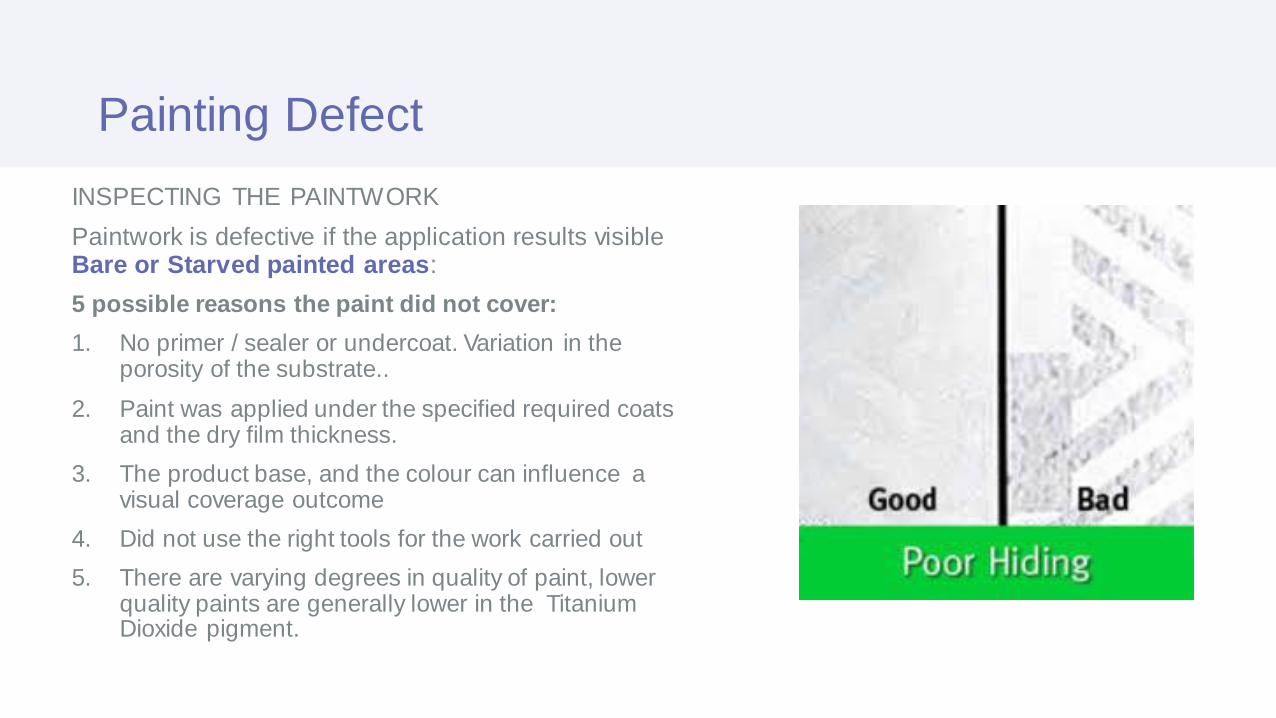
Paintwork is defective if the application results visible Bare or Starved painted areas:
5 possible reasons the paint did not cover:
1. No primer / sealer or undercoat. Variation in the porosity of the substrate..
2. Paint was applied under the specified required coats and the dry film thickness.
3. The product base, and the colour can influence a visual coverage outcome
4. Did not use the right tools for the work carried out
5. There are varying degrees in quality of paint, lower quality paints are generally lower in the Titanium Dioxide pigment.
Painting Defect

INSPECTING THE PAINTWORK
Paintwork is defective if the application results in Dirt or any other foreign bodies are in the coating:
Foreign bodies such as deposits of dried paint and dust is the most common.
5 Possible reasons for this to occur:
1. Poor preparation
2. Lack of sanding prior to final coats
3. Insufficient cleaning
4. Contaminated paint product
5. Contaminated tools and equipment
.
Painting Defect

INSPECTING THE PAINTWORK
Paintwork is defective if the application results in Irregular and coarse brush and roller marks:
Roller marks or stipple is the unintentional textured
pattern left in the paint by the roller.
What causes brush and roller marks to occur?
• Use of incorrect roller cover
• Use of lower quality brush
• Use of lower grades of paint
• Use of low quality roller
• Poor application technique
Painting Defect
INSPECTING THE PAINTWORK
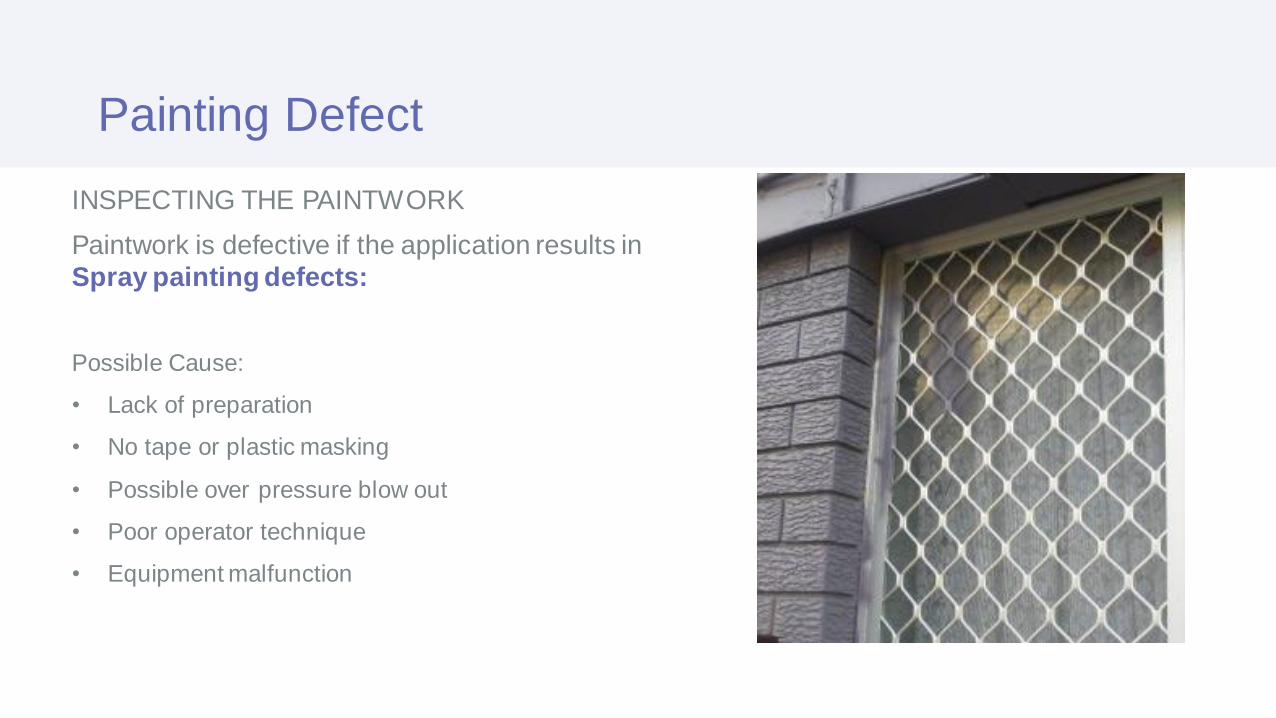
Paintwork is defective if the application results in
Spray painting defects:
Possible Cause:
• Lack of preparation
• No tape or plastic masking
• Possible over pressure blow out
• Poor operator technique
• Equipment malfunction
Painting Defect

INSPECTING THE PAINTWORK
Paintwork is defective if the application results in
Blistering:
Paint blisters or bubbles occur when the paint film lifts from the underlying surface. The loss of adhesion between the paint film and surface is usually caused by heat, moisture or a combination of both..
• Painting a warm surface in direct sunlight
• Application of paint over a damp or wet surface
• Moisture escaping through the exterior walls (less likely with latex paint than with oil-based or alkyd paint)
• Exposure of latex paint film to dew, high humidity or rain shortly after paint has dried, especially if there was inadequate surface preparation
Painting Defect

INSPECTING THE PAINTWORK
Paintwork is defective if the application results in
Uniformity of gloss level, which is inconsistent with
good trade practices:
Poor sheen uniformity is generally a result of inconsistent gloss
levels and will appear as shiny spots or dull spots on a painted
surface (it is also known as 'flashing’).
Possible causes:
• Uneven spread rate
• Failure to properly prime a porous surface, or surface with varying degrees of porosity
• Poor application resulting in lapping
Painting Defect

INSPECTING THE PAINTWORK
Paintwork is defective if the application results in
Other irregularities in the surface that are visible
from a normal viewing point position.
A Range of Visible Issues?
• Poor Preparation
• Starved of Paint
• No Gapping
• Lumps and Bumps
• Silicone Paint Cissing
• Lumps and Bumps in the surface
Painting Defect

INSPECTING THE PAINTWORK
Paintwork is defective if the application results in
Excessive over-painting of fittings, trims, skirting,
architraves, glazing and other finished edges
Possible solutions
• Removal of door furniture
• Mask or tape the fitting
• Applicator Skill / Technique
Painting Defect

INSPECTING THE PAINTWORK
NAIL & SCREW FIXING
Mechanical fixings or unfilled depressions are defects that can be seen from a normal viewing position
Possible Cause:
• Under Filling
• Wrong fillers used
• Filler shrinkage
• Poor preparation
Painting Defect

INSPECTING THE PAINTWORK
MECHANICAL DAMAGE & NATURAL DEFECTS
IN SURFACES.
Holes, mechanical damage, depressions in painted
or stained timber, gum pockets or surface splits are defects if they can be seen from a normal viewing
position
Painting Defects

COATING MIN DURABILITY
EXTERIOR ACRYLIC 36 MONTHS
EXTERIOR ENAMEL 24 MONTHS
EXTERIOR SEMI TRANSPARENT STAINS 12 MONTHS
EXTERIOR CLEAR FINISHES NOT RECOMMENDED
INTERIOR – ALL FINISHES 36 MONTHS
INSPECTING THE PAINTWORK
PAINT DURABILITY
Coatings are defective if they fail by lifting,
blistering, flaking or fading within the minimum time period, unless otherwise documented
Possible causes:
• Use of lower quality paints that have inadequate adhesion and flexibility
• Over thinning or overspreading the paint
• Inadequate surface preparation, e.g. Not applying a sealer or primer on porous surfaces prior to top coating
• Poor adhesion of the underlying coats
• Excessive hardening and embrittlement of alkyd paint as the paint job ages
Painting Defect

Accepting SubstratesWho is responsible?

Premature paint failure usually occurs if the surfaces are not adequately prepared before painting
Surface assessment and preparation are particularly important, as the painter may be held liable for any future failing
AS/NZS 2311 – Guide to the painting of buildings states;
THE VERY ACT OF PAINTING A SURFACE MAY BE INTERPRETED AS
ACCEPTING THE SURFACE AS BEING SUITABLE FOR PAINTING.
Accepting Substrates

When painting surfaces in good condition, cleaning will still be required to remove surface contaminants
When painting surfaces in poor condition, any blistering, flaking or cracking should be completely removed
Similarly, loosely bound paint systems such as kalsomine, lime wash and other may also need to be removed
These may be indications of a wider adhesion problem and adhesion checks of the entire paint film should be undertaken
Accepting Substrates

PAINTING NEW SURFACES
Unacceptable surface imperfections may be undetectable until one or more coats of paint have been applied
Food for thought? Pre Paint on New Construction
THE VERY ACT OF PAINTING A SURFACE MAY BE INTERPRETED AS ACCEPTING THE SURFACE AS BEING SUITABLE FOR PAINTING
Accepting Substrates

Accepting SubstratesAdhesion testing - when to adopt testing?

When maintenance painting is undertaken,
it is seldom necessary to strip off old paint
before repainting
The criteria for removal of an existing
coating is largely dictated by the soundness
of the existing coating
There are a number of methods for testing
paint adhesion under AS/ANZ-2311
Assessment of Surface Soundness

Methods for testing paint adhesion under AS/ANZ-
2311.
ADHESION CROSSCUT-SEMI QUANTITATIVE TEST
• This involves a series of parallel cuts through the
coating and a further similar series of cuts at right
angles to form a grid pattern
• On applying, then removing, pressure sensitive
adhesive tape, the extent of detachment of the coating is measured
Assessment of Surface Soundness

TWO SIMPLIFIED VERSIONS OF THE
CROSSCUT TEST
• Method A - a pass/fail test with just two parallel
cuts
• Method B – usually suitable for conventional
decorative finishes on interior broad wall areas, is
the application of an agreed quality pressure
sensitive adhesive tape – this should be applied
to the wall for 30 seconds and quickly pulled off at a right angle to the surface
Assessment of Surface Soundness

Lead Based PaintHow to identify, how to test and what to do about it?

AS/NZS 4361.2:2017
Australian/New Zealand Standard™
Guide to hazardous paint management
Part 2: Lead paint in residential, public and commercial buildings
Lead Based Paint

White lead (lead carbonate) was once the
principal white pigment in paints for houses
and public buildings
Paint with lead pigment was manufactured up
until the late 1960’s, although in diminishing
quantities from 1950 onwards
Lead Paint

Many older homes and buildings still contain lead paint,
even though it may be concealed with layers of more
recent paint
25% of all Australian homes still contain some form of
lead paint
Paint containing 20% of lead was commonly used in
undercoats and primers for exterior surfaces, interior doors and architraves
Lead Paint

Lead in any form is toxic to humans when
ingested and inhaled. Repeated inhalation
or ingestion of lead paint particles may
produce the cumulative effects of lead
poisoning
Women of child-bearing age, pregnant
women and children should be excluded from lead paint removal
areas, as lead can have detrimental
effects on a child’s intellectual
development and may cause other health
problems
Lead Paint

There is minimal risk where lead paint is in a
sound condition
If lead paint is subject to abrasion, chalking or
flaking, this presents a health risk
In most instances, workers involved in lead paint
management may be simply and easily
protected by employment of protective
equipment
The public may be protected by preventing
access to the work site
Lead Paint

Deposition of lead paint waste, may be much
more complex and difficult to manage, depending
on the size, shape and location of the building
Deposition of lead paint particles on nearby
footpaths, streets or soil may be resuspended and
tracked into houses or buildings where it can be
inhaled or ingested
Lead Paint

GENERAL
If the presence of lead in paint is known or suspected, testing should be carried out using the following methods:
• Portable x-ray fluorescence (XRF) field tests
• Laboratory analysis
• Lead identification test stick
Lead Paint Methods of Detection

Portable X-ray fluorescence (XRF) field tests
• This method uses a portable instrument in the field to
provide a numerical value for the amount of lead present in
paint on a surface
• It provides an instantaneous result and is non-destructive
Lead Paint Methods of Detection

Laboratory analysis
• This method provides both confirmation of the presence of lead and its concentration in an existing paint film
• The laboratory result is a combined value for all layers of paint and its accuracy is dependent to some extent on the sampling technique
Lead Paint Methods of Detection

If a house or building contains lead paint, the paint needs
to be managed to prevent it becoming a health hazard
Depending on the particular circumstances, the options for
management of lead paint usually include:
1. Doing nothing;
2. Stabilising the paint;
3. Carrying out abatement; or
4. A combination of these options
Lead Paint

DOING NOTHING
• Doing nothing is an option when the lead paint is in sound condition and does not need to
be disturbed
• Generally, the ‘do nothing’ option is only applicable where lead paint is not directly accessible, or where the hazard lies in the underlying layers of paint that have been
overpainted with lead-free paint
Lead Paint

LEAD PAINT STABILISATION
General
• The easiest, and usually cheapest way to manage lead paint, is to over-paint using
lead-free paint, or by covering it with an encapsulant
• This can provide an interim or long-term solution to a lead paint hazard, allowing more
permanent treatment to be deferred
• Materials used to stabilise existing paint surfaces need to be durable and non-toxic.
The integrity of the existing painted surface will determine the effectiveness of
stabilisation
• Thorough surface preparation will be needed to address issues such as chalking, poor
adhesion, cracking, flaking, peeling or blistering
Lead Paint

LEAD PAINT STABILISATION
Replacement of painted items
• The least hazardous way of dealing with lead paint is by replacement of the painted article,
where appropriate. In this process, components with lead paint are removed in large pieces
and replaced with new
• Enclosure has a low potential for hazardous dust generation, thus minimizing the risk of
exposure to the renovator and the occupants. With enclosure, the lead paint remains in
position. Since a future renovator may have less chance of discovering it before starting
renovations, conspicuous signs warning of the presence of lead paint should be placed on
the surfaces before installing the enclosure
Lead Paint

LEAD ABATEMENT - Removal or disturbance of lead paint
• The removal or disturbance of lead paint has the greatest potential to generate dust and waste and will therefore need;
• Appropriate containment and ventilation control measures; and
• Safe work practices
Lead Paint

LEAD ABATEMENT - Removal and
disturbance of lead paint
Practices recommended for the removal
of lead paint include:
• Wet scraping and wet sanding
• On-site chemical stripping
• Off-site chemical stripping
• Removal by heat gun and scraper
• Removal by mechanical sanding
• HEPA filter vacuum
Lead Paint

LEAD ABATEMENT - Removal and
disturbance of lead paint
On-site chemical stripping
• Chemical paint strippers will soften
and swell the paint, allowing it to be
easily removed with a scraper
• The residue is usually a gel-like
paste that is easily contained and
handled
• Chemical stripping is suitable for
most surfaces such as timber,
render or steel
Lead Paint

LEAD ABATEMENT - Removal and
disturbance of lead paint
Off-site chemical stripping
• This involves removing components and
shipping them to a paint stripping
establishment where they are immersed in
baths of chemicals
• This is limited to removable components
such as windows, doors and trim
Lead Paint

LEAD ABATEMENT - Removal and
disturbance of lead paint
Paint removal sanding tools:
• These must be fitted with vacuum
attachments and HEPA filters to control
dust generation
• High Efficiency Particulate Air
• These may be suitable for residential,
public and commercial applications
Lead Paint

LEAD ABATEMENT - Removal and disturbance of lead paint
CONTAINMENT
• An essential part of hazardous paint management is the containment of the work
• Containment includes all procedures and systems that prevent dust and waste from spreading
beyond the immediate work area
Lead Paint

Roof RestorationPainting of concrete tile and iron roofs
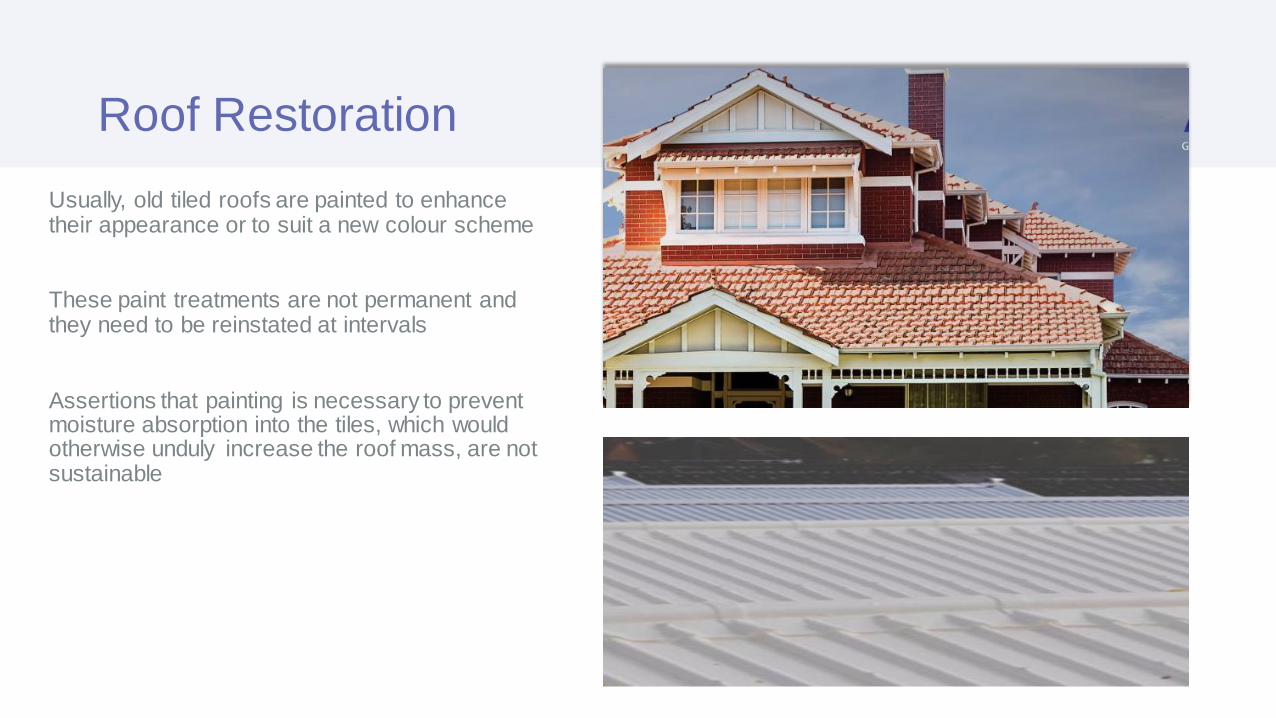
Usually, old tiled roofs are painted to enhance their appearance or to suit a new colour scheme
These paint treatments are not permanent and they need to be reinstated at intervals
Assertions that painting is necessary to prevent moisture absorption into the tiles, which would otherwise unduly increase the roof mass, are not sustainable
Roof Restoration
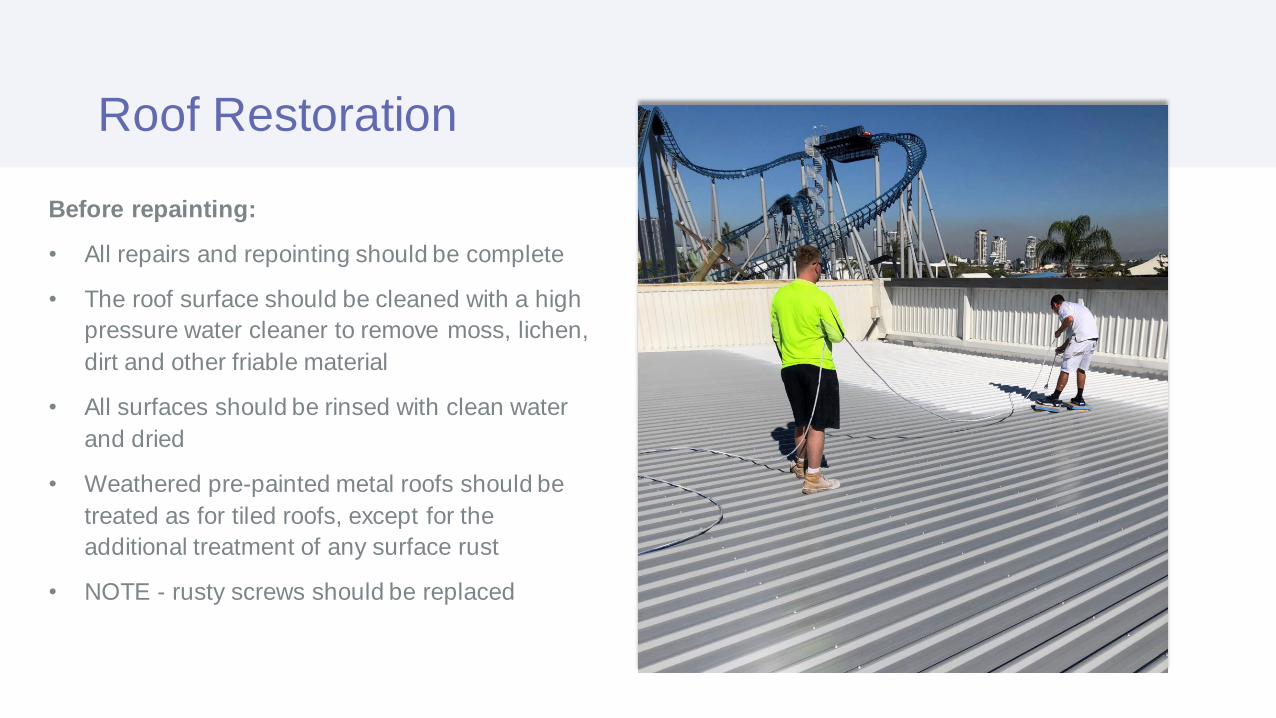
Before repainting:
• All repairs and repointing should be complete
• The roof surface should be cleaned with a high
pressure water cleaner to remove moss, lichen,
dirt and other friable material
• All surfaces should be rinsed with clean water
and dried
• Weathered pre-painted metal roofs should be
treated as for tiled roofs, except for the
additional treatment of any surface rust
• NOTE - rusty screws should be replaced
Roof Restoration

Painting:
• Where the surface has become dull, chalky, porous, or otherwise weathered, one coat of a penetrating primer should be applied
• For less weathered surfaces and pre-painted metal roofs, the primer may be omitted
• Two top coats of required colour and gloss level should be applied by brush, roller, or spray
• Higher build acrylic coatings, combined with conventional acrylic latex top coats, can also be satisfactory
• As always, ensure each coat is applied to the manufacturer’s specifications
Roof Restoration

Types of PaintPerformance expectations of different types of paint - what is the appropriate type of product for internal and external applications?

The choice of paint and appropriate painting
system that meet the requirement of the job
depend on a number of factors, including the
following:
• Type and complexity of the surface to be
painted
• Area of use (interior or exterior)
• Cost consideration
• Required durability and protection of asset
• Decorative effect required
• Any special requirement (resistance to salt
spray, industrial pollutants, low odour, high
abrasion resistance or similar)
Gloss Level Range as per AS/NZS 1580.602.2
Gloss Units
Flat / (Matt) Up to 5 Gloss Units
Low Gloss ( Low Sheen) Over 5 up to 20 Gloss Units
Semi Gloss (Satin) Over 20 up to 50 Gloss Units
Gloss Over 50 up to 85 Gloss Units
High Gloss Over 85 Gloss Units
Range of Paint Quality
Premium Quality (Interior and Exterior)
Trade Quality (Interior and Exterior)
Budget Quality (interior)
Paint Products

GENERAL DESCRIPTION OF PAINTS AND THEIR TYPICAL AREAS OF USE
Flat or low-gloss finishes tend to mask imperfections, such as joints or patching. Semi-gloss, gloss and full-gloss finishes highlight such defects, with the higher the gloss level, the higher degree of highlighting
Flat and low-gloss finishes diffuse light and minimise the glare, which may occur when higher gloss finishes are used
Relative to flat finishes, low-gloss, semi-gloss, gloss, and full-gloss finishes of the same generic type, have an increasingly higher resistance to abrasion, staining and moisture
Flat finishes are usually more difficult to clean than gloss and more likely to be affected by mould growth, because of their rough surface texture. Some flat finishes are more prone to gloss increase when cleaned
Full-gloss and gloss finishes tend to be more durable than lower gloss finishes in exterior applications
Some solvent-borne products have greater tolerance to surface contamination
Types of Paint

Dulux Wash & Wear 101 Barrier Technology creates a hard
wearing acrylic finish that allows you to wipe away most
common marks, scuffs and stains with a wet cloth. With
Wash and Wear, your walls will look freshly painted for years
Features:
• Withstands wear and tear
• Low odour and low VOC
Benefits:
• Wipe away most common marks, scuffs and stains
with a wet cloth
• Looks freshly painted for years
• Exceptional wash ability
• Hard wearing finish that lasts
Typical Premium Interior Product Key Features &
Benefits (Serviceability)

Features and benefits
• UV block out - blocks out harmful UV rays, preventing them
from penetrating the surface
• Flexible - resists cracking & peeling for long-term weather
protection
• Stay Clean - UV cross link. Toughens the surface to stay cleaner
for longer
• Breathable - resists blistering by allowing water vapour to pass
through
• Self Priming - no primer required on most exterior surfaces for
faster painting
• 100% acrylic - resists chalking and fading in the extremes of sun
and weather
• Inhibits growth of mould & mildew - protects the surface
• Made and developed in Australia for lasting protection in all
Australian conditions
Typical Exterior Premium Product - Key Features &
Benefits(Durability)


Application of PaintWhere can you source application systems, instructions and MSDS’s?
How do I achieve adequate coverage and what testing is readily available?

• AS/NZS 2311 Table 5.1 has a range of system recommendations for various interior substrates and conditions
• Gypsum plasterboard – use a three coat quality painting system - one coat of latex sealer followed by 2 coats of latex paint - flat, low-gloss, semi-gloss, or gloss
• When the paint application is by airless spray, the first sealer coat should be back rolled
• It is recommended the final coat also be back rolled, as this process will assist to conceal glancing light issues and accommodate paint touch-ups
Painting - Good Practice Recommendations

• AS/NZS 2311 Table 5.2 has a range of recommendations for various exterior
substrates and conditions
• Weatherboards, Exterior Grade Hardboard Cladding:
• System 1. One coat of wood primer, latex or solvent borne followed by two coats of latex paint - low-gloss, semi-gloss or gloss
• System 2. One coat of wood primer, latex or solvent-borne followed by two coats of
solvent-borne paint - full-gloss
Painting - Good Practice Recommendations

A Material Safety Data Sheet (MSDS), is a
document prepared by the manufacturer that
details information with respect to the physical
and chemical properties of the product
It can be sourced:
• On the manufacturer’s website
• At a paint retail or trade outlet
MSDS.

Contains detailed information such as:
• Description
• Features and benefits
• Uses
• Precautions and limitations
• Performance guide
• Typical properties
• Application guide
• Health and safety information
• Transport and storage instructions
Data Sheet

• The back of the paint can provides basic information regarding application
• The manufacturer’s product data sheet contains detailed information regarding
application
• Meeting the manufacturer’s product application conditions generally provides for a two-
coat finishing system, however:
• Depending upon the substrate colour, texture, porosity and hiding power of the finishing
coats, additional preparatory or finishing coats, or both, may be required
• The selection of the right tools, combined with the appropriate skills, can also affect the
final outcome
Application Instructions

• Airless and conventional spray
• Rollers sleeves of different types, such
as wool, synthetic, mohair, foam, or
blends - most are available with
different naps and quality
• A wide selection of brushes, such as
pure bristle or synthetic, wall brush,
long handle, sash cutter, oval cutter
and bevelled cutters, across a range of
size and quality
Adequate Coverage (Typical Tools)

Meeting the manufacturer’s product application
conditions:
• Visual inspection
• Dry film testing – specialist equipment
• Wet film testing is simple, low cost and efficient with a WET FILM GAUGE
• The product on the data sheet shown gave
a wet film thickness of 65 microns
• A roof membrane could for example show a
wet film thickness of 175 microns
Testing for Coverage and Performance

Sealers, Primers and UndercoatsLimitations, design and what product to use?

Sealers are generally applied to ensure that the chosen
finishing coats are not affected by factors associated with
the substrate material or previous coatings. Typically,
these are used to:
• Seal absorbent surfaces
• Create a barrier that reduces migration of one or more
chemicals from the substrate material, which could
interfere with the performance of the finishing coat
• Prevent substances which may be included in the
substrate material, or previous coating, from bleeding into finishing coats
• NOTE - no single sealer will necessarily perform all
functions
Sealers

A general rule is:
• SOLVENT BASED SEALERS PREVENT
BLEEDING OF WATER – SOLUABLE STAINS
• WATER BASED SEALERS PREVENT BLEEDING
OF SOLVENT - SOLUABLE STAINS
Where doubt exists as to the appropriateness of the
sealer?
• Obscure areas can be painted out using different
sealers (i.e. water-based, spirit-based or oil-based)
to gauge their effectiveness
Sealers

• Primers are applied to obtain good adhesion
of a paint system to a substrate
• They may be formulated for use on a specific
substrate such as metal or galvanised iron
etc.
• They may also be formulated for anti-
corrosion, or tannin stain resistant
Primers

Undercoats are usually an intermediate
coat, designed for filling, sanding, stain
blocking or increasing opacity
Undercoats

• Combined sealer undercoats are generally
latex-based and formulated to give combined
attributes of both a sealer and an undercoat
through the application of one, rather than two
separate coats
• They are a compromise of two specialty products do not normally provide stain or
chemical sealing properties
Sealers / Undercoats

Membrane & Texture CoatingsProducts and preparation

High build membrane, smooth and textured coatings, are
applied to provide decorative effect and mask surface
irregularities in the substrate
Typical applications to rigid substrates are:
• Concrete, masonry and fibre cement sheeting
• They may also inhibit the ingress of moisture and
carbonation of concrete surfaces
• A variety of finishes may be achieved, including
textured and stippled coatings
• The final appearance is, in part, related to the application technique
Products

• Colour variation of membrane and textured coatings can
vary significantly from batch to batch
• The coating should be overcoated with a colour finishing
coat
• Latex extensible coatings are generally referred to as a
membrane. They are non aggregate, flexible, watertight
finishes, which are applied to prevent the ingress of
moisture and retain flexibility
• High-build, low profile latex coatings, are water-based
coatings, designed to be used over textured coatings to
elevate the exposure performance of the paint system.
These coatings are designed to provide a non aggregate
water resistant finish, producing an even film coverage
over an irregular surface profile
Products

• Non-aggregate, textured latex coatings - low to medium
profile textured coatings selected for aesthetic purposes
to provide decorative profiles. Typically, these are applied
with textured rollers or hopper spray
• Aggregate-filled, textured latex coating - medium to high
profile textured coatings, selected for aesthetic purposes, to provide maximum relief from underlying surface
irregularities. The aggregate may consist of sand, marble
or other mineral constituent. These products can be
applied by texture roller, hopper spray or trowel
• Both of these coatings are generally specified in a
system, including a top coat, where maximum resistance
to moisture ingress and dirt pick up is required
Products

OversprayAirless at its worst -consequential damages on surrounding areas

Tips for painters faced with motor vehicle overspray claims:
• Stay calm - get information about spray dates, types and
colour of paint, number of vehicles, weather conditions, and
other painting contractors in the area
• Accept responsibility and stabilise the claim
• Choose a competent detailer, have the vehicles pre-
inspected and make sure the detailer's products and
equipment are up-to-date
• Create a positive atmosphere and close the claim. Expect to
pay $175-$225 per vehicle for a local detailer and $250-
$300 for a national detailer
• Be sure that your insurance company has you covered
Airless Spray

Industry ExpertHow do I source help when required?

• The manufacturer
• Technical department
• Field representative
• Retail and trade distributor
• Internet Google search
• Peer groups
• Internet Facebook groups
• MSDS and technical data sheets
Expert Help When I need it?

Master Painters Association of Queensland (MPA)
is the peak representative body for the State’s
painting & decorating industry
MPA represent the interests of all individuals and
companies operating within the industry and
encourage high standards of craftsmanship and business practices
Besides offering general advice from within our own industry experienced trainers, we also offer:
• Independent inspection; and
• Mediation service
Expert Help When I Need It?

Thank You.
Questions?