well-balanced advanced exercise booklet - · pdf filewell-balanced advanced exercise booklet....
TRANSCRIPT
Well-Balanced Advanced Exercise Booklet
Well-Balanced Advanced Booklet | 1
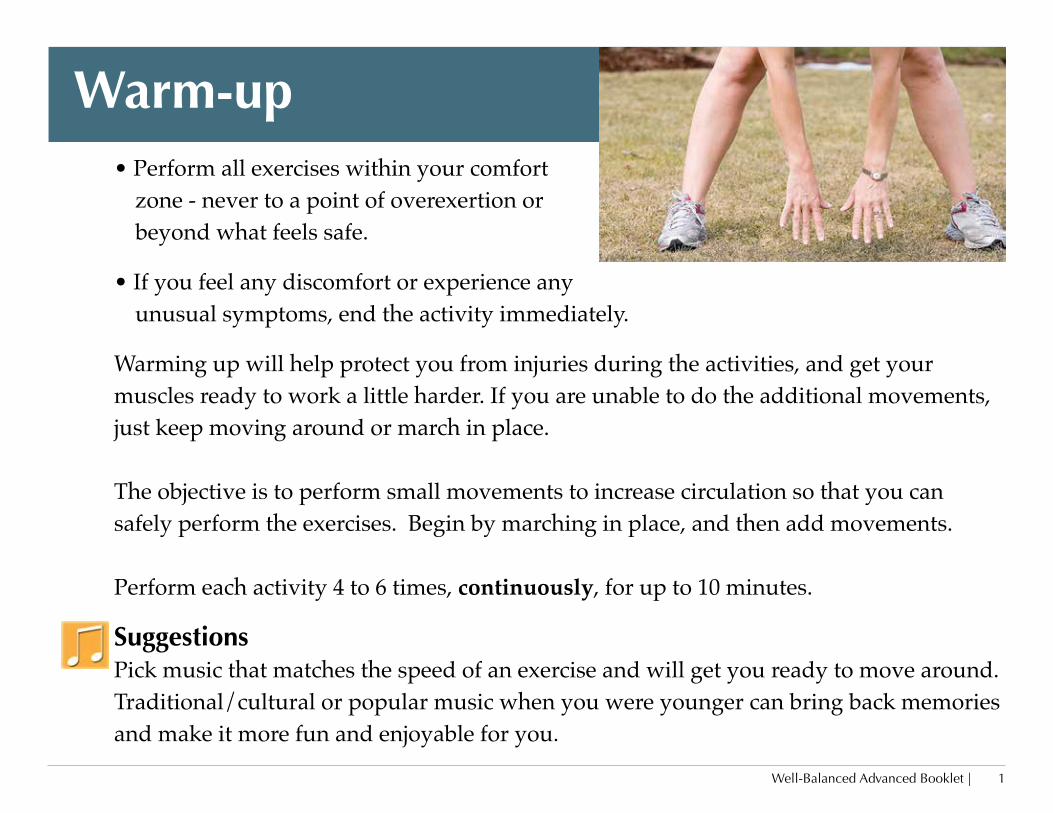
Warm-up• Perform all exercises within your comfort
zone - never to a point of overexertion or beyond what feels safe.
• If you feel any discomfort or experience any unusual symptoms, end the activity immediately.
Warming up will help protect you from injuries during the activities, and get your muscles ready to work a little harder. If you are unable to do the additional movements, just keep moving around or march in place.
The objective is to perform small movements to increase circulation so that you can safely perform the exercises. Begin by marching in place, and then add movements.
Perform each activity 4 to 6 times, continuously, for up to 10 minutes.
SuggestionsPick music that matches the speed of an exercise and will get you ready to move around. Traditional/cultural or popular music when you were younger can bring back memories and make it more fun and enjoyable for you.
| Well-Balanced Advanced Booklet 2
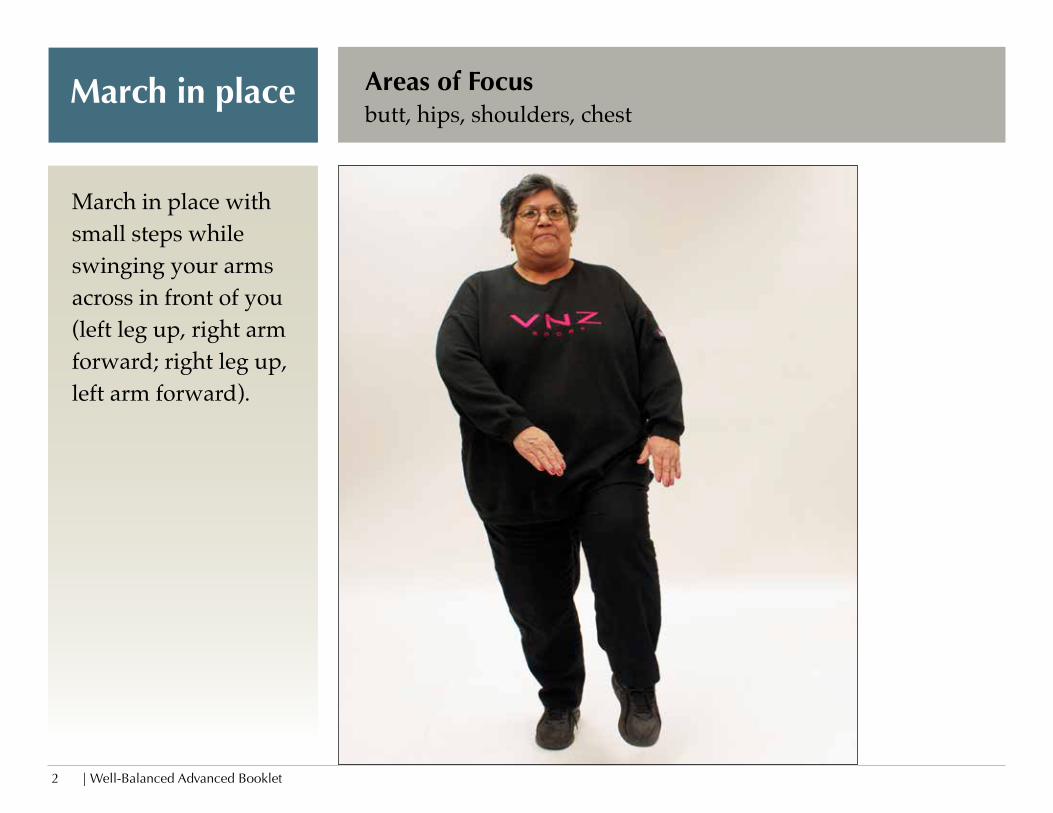
March in place Areas of Focusbutt, hips, shoulders, chest
March in place with small steps while swinging your arms across in front of you (left leg up, right arm forward; right leg up, left arm forward).
Well-Balanced Advanced Booklet | 3
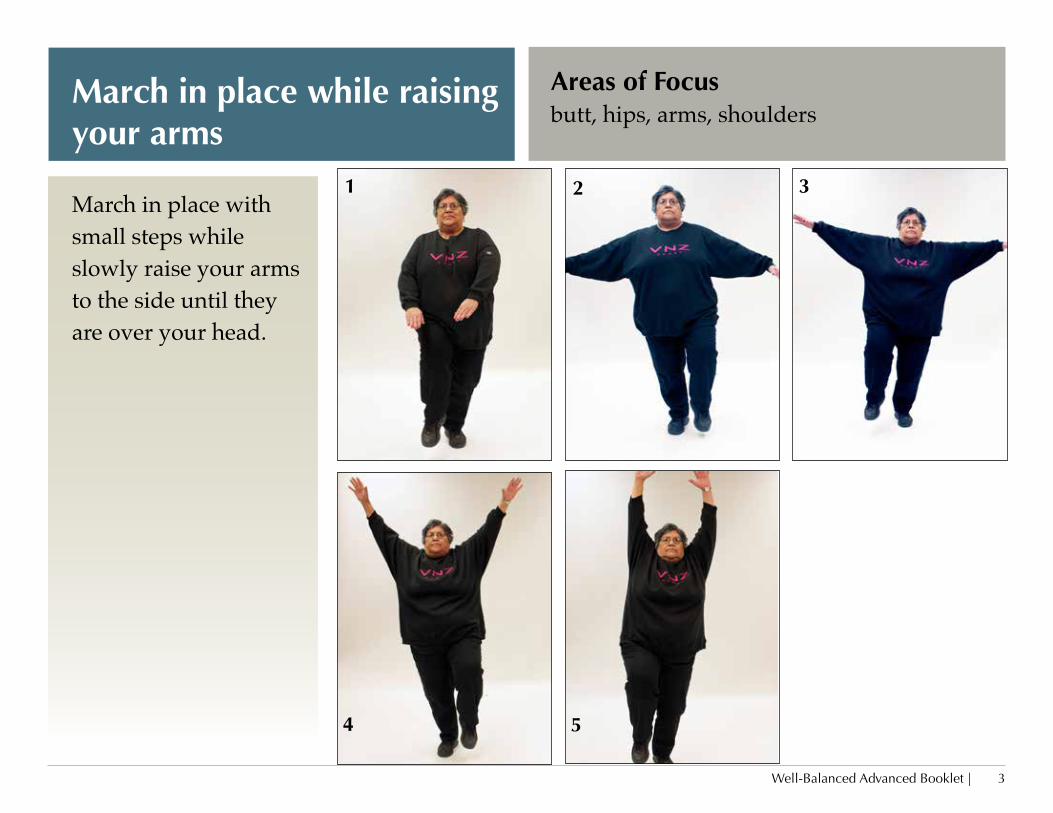
March in place while raising your arms
Areas of Focusbutt, hips, arms, shoulders
March in place with small steps while slowly raise your arms to the side until they are over your head.
1 2 3
4 5
| Well-Balanced Advanced Booklet 4
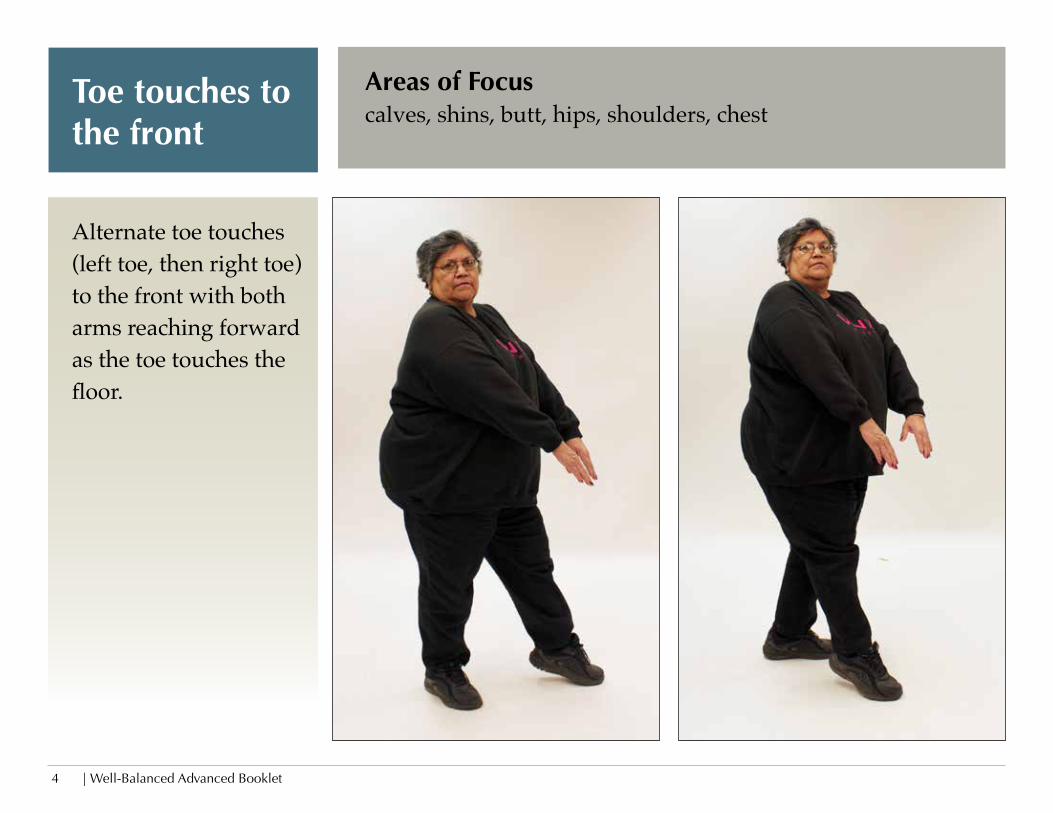
Toe touches to the front
Areas of Focuscalves, shins, butt, hips, shoulders, chest
Alternate toe touches (left toe, then right toe) to the front with both arms reaching forward as the toe touches the floor.
Well-Balanced Advanced Booklet | 5
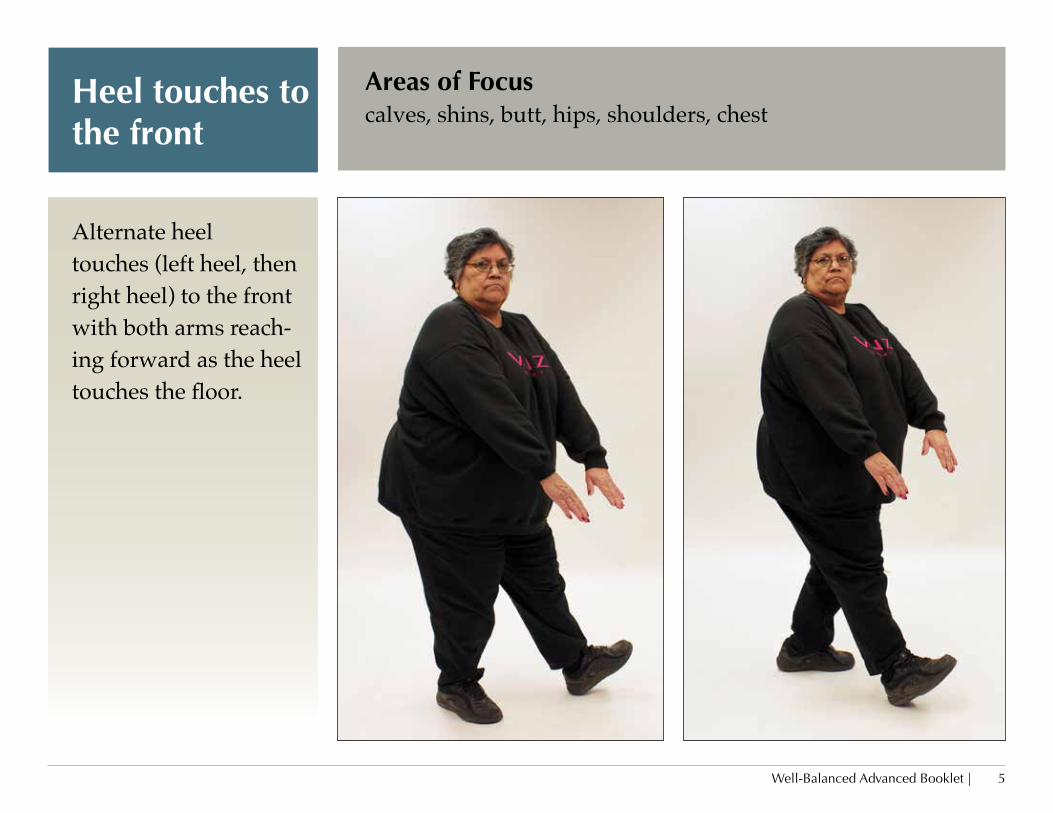
Heel touches to the front
Areas of Focuscalves, shins, butt, hips, shoulders, chest
Alternate heel touches (left heel, then right heel) to the front with both arms reach-ing forward as the heel touches the floor.
| Well-Balanced Advanced Booklet 6
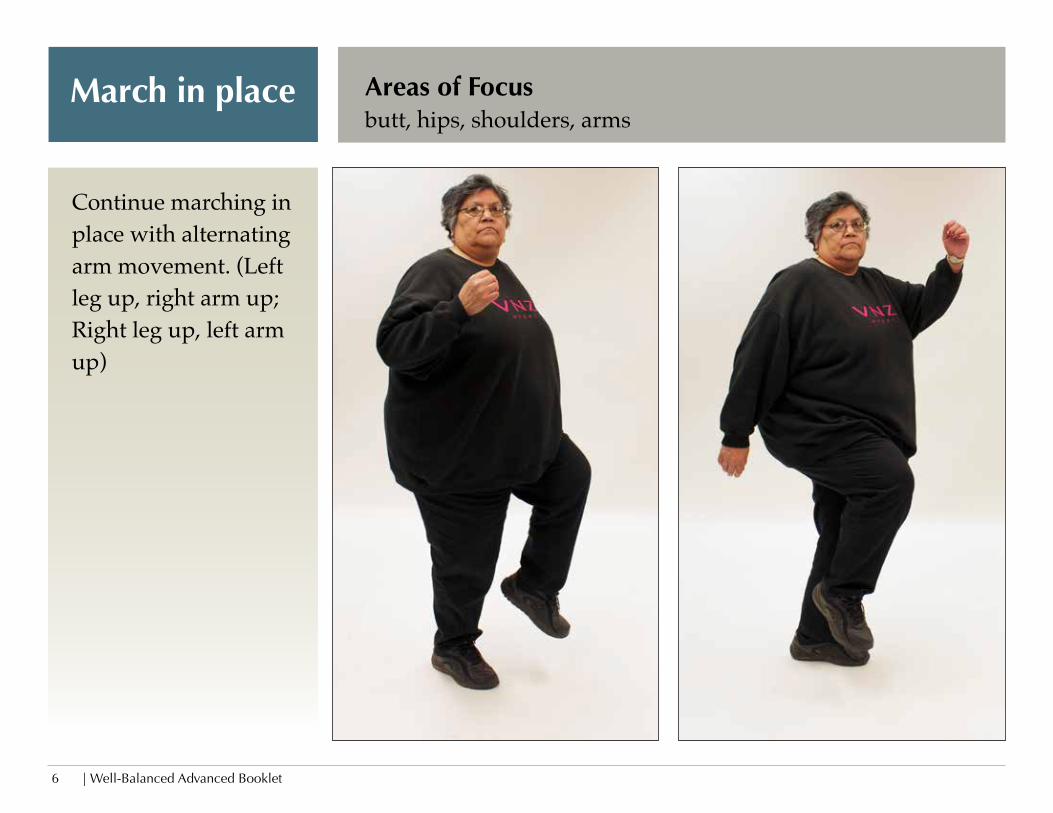
Areas of Focusbutt, hips, shoulders, arms
Continue marching in place with alternating arm movement. (Left leg up, right arm up; Right leg up, left arm up)
March in place
Well-Balanced Advanced Booklet | 7
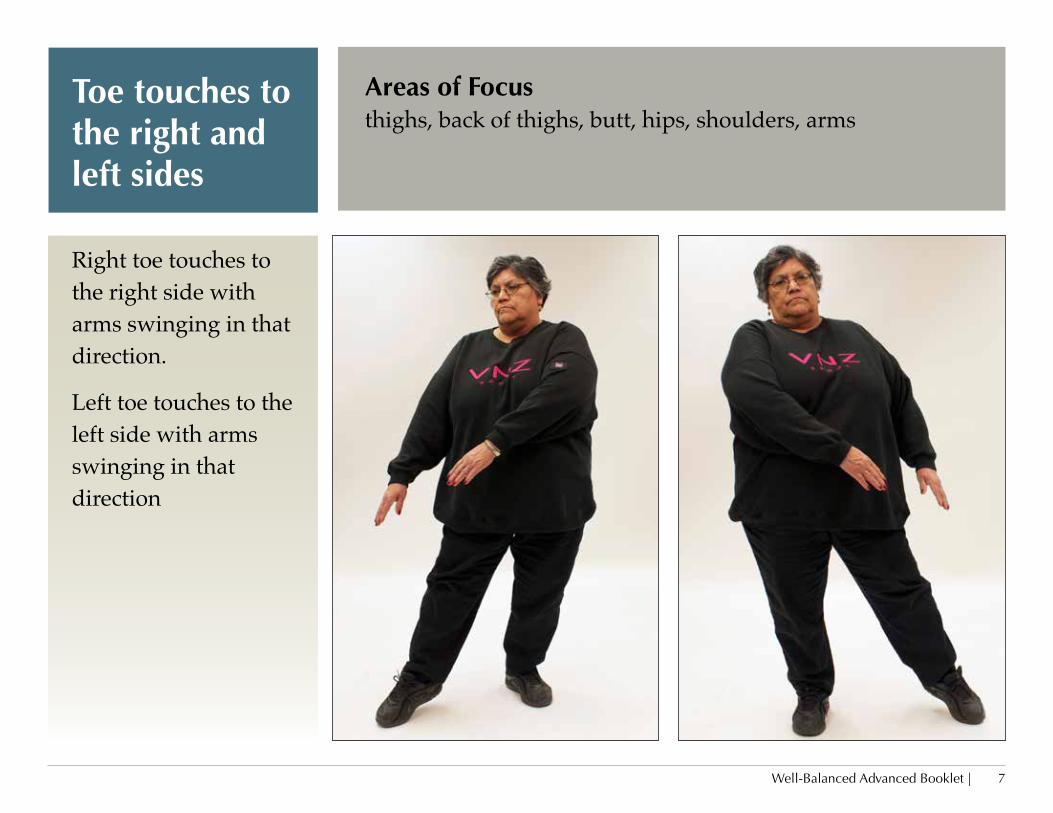
Toe touches to the right and left sides
Areas of Focusthighs, back of thighs, butt, hips, shoulders, arms
Right toe touches to the right side with arms swinging in that direction.
Left toe touches to the left side with arms swinging in that direction
| Well-Balanced Advanced Booklet 8
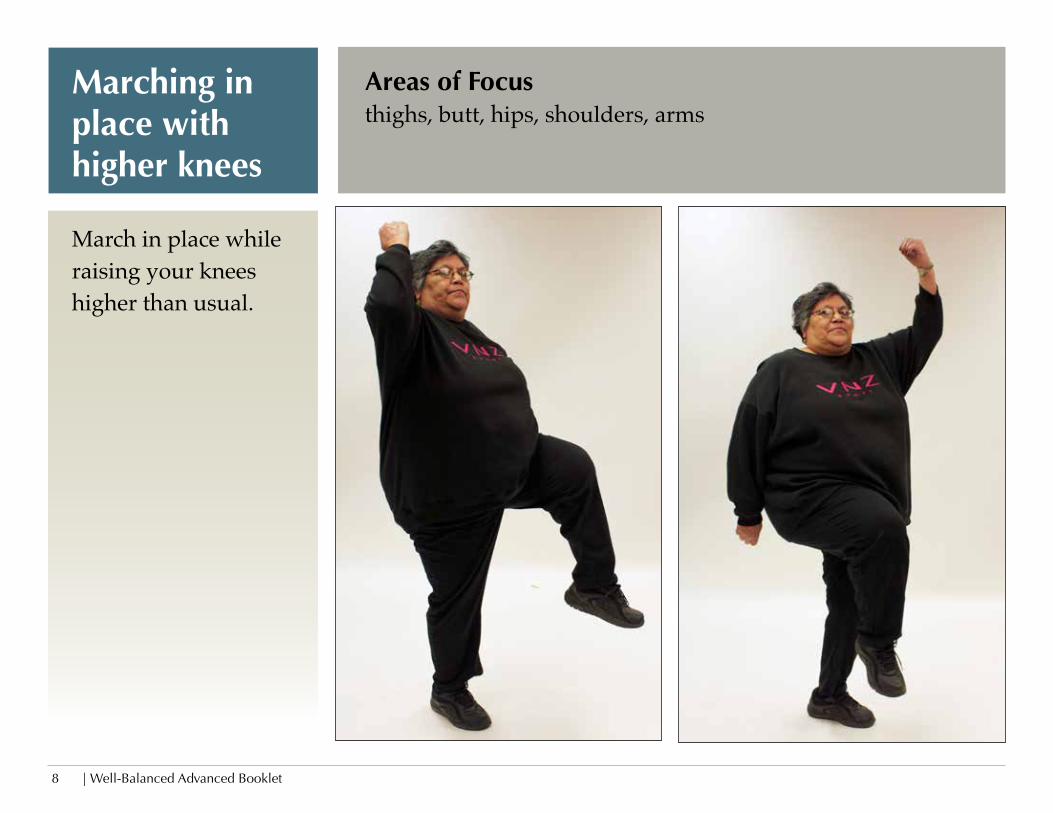
Marching in place with higher knees
Areas of Focusthighs, butt, hips, shoulders, arms
March in place while raising your knees higher than usual.
Well-Balanced Advanced Booklet | 9
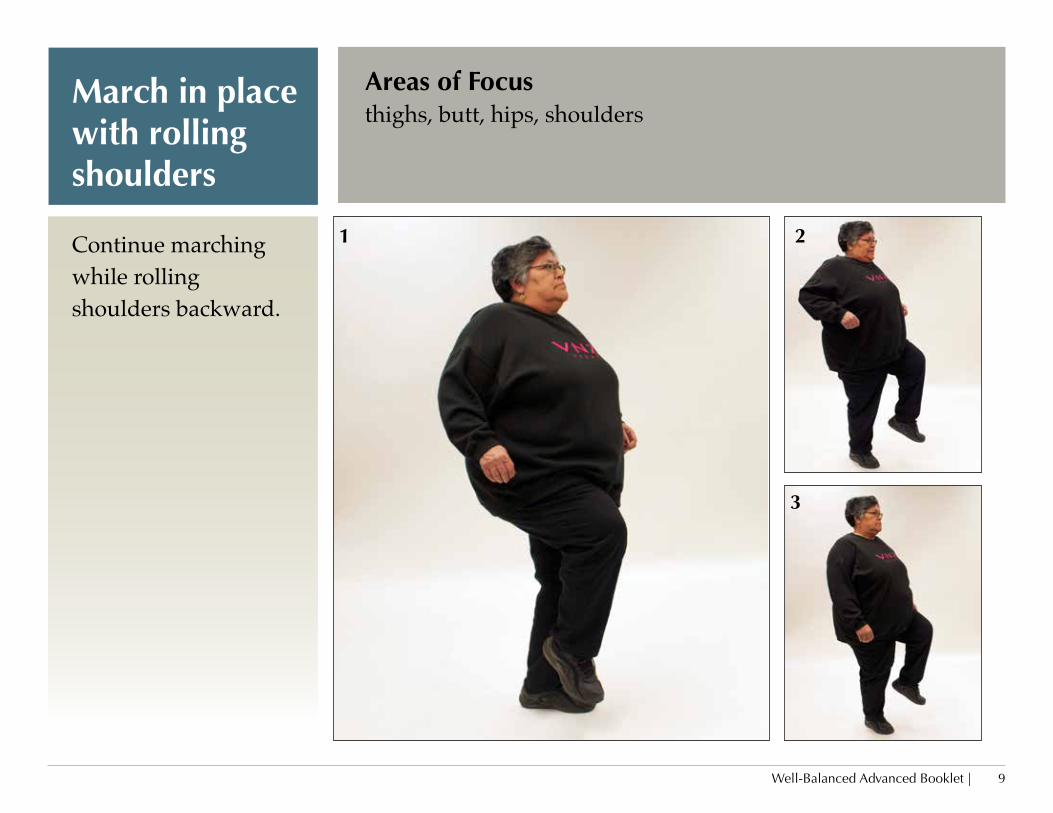
March in place with rolling shoulders
Areas of Focusthighs, butt, hips, shoulders
Continue marching while rolling shoulders backward.
1 2
3
| Well-Balanced Advanced Booklet 10
Seated Balance Activities Purpose• To improve your balance while performing functional
activities.Materials• Chairs without arm rests
• Stability balls and ball holders (optional)

Well-Balanced Advanced Booklet | 11
Safety when using the Stability Ball
• When using a stability ball, select a size that allows you to sit in the middle of the ball and still have your feet flat on the floor. The knees should be flexed at a 90 degree angle to the floor. Unless otherwise instructed, the feet should be hip-width apart.
• Do not perform the next level of a task until you can safely perform the previous exercise.
• Do not perform an exercise with your eyes closed, if you feel that you are unable to perform the task safely with your eyes open. Open your eyes immediately if you feel like you are about to your balance.
• Always check that the ball is fully inflated to the specified dimensions (check with measuring tape after inflation, or use a ball-measuring device).
• Check for any scratches or deep cuts on the stability ball that might render it unsafe. (Deflate damaged balls and discard them.)
• If you’ve had a total hip replacement you should use a stability ball that is one size larger than recommended for your height, so your hips are higher than their knees. This will increase your level of comfort during certain activities.
• Everyone should begin sitting on a chair without arms.
• First practice seated in a chair.
• If you want to try the stability ball in a ball holder should, practice with the ball before trying to do any exercises.
• DO NOT use the stability ball without the holder.
| Well-Balanced Advanced Booklet 12
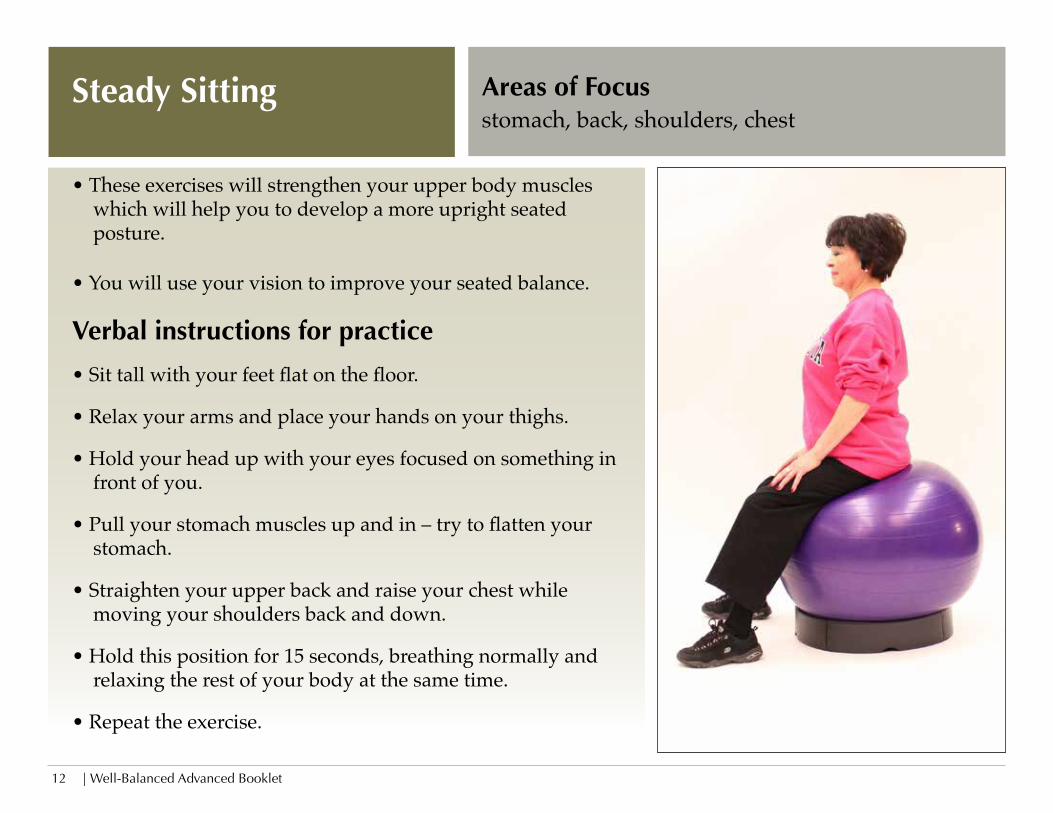
Areas of Focusstomach, back, shoulders, chest
• These exercises will strengthen your upper body muscles which will help you to develop a more upright seated posture.
• You will use your vision to improve your seated balance.
Verbal instructions for practice
• Sit tall with your feet flat on the floor.
• Relax your arms and place your hands on your thighs.
• Hold your head up with your eyes focused on something in front of you.
• Pull your stomach muscles up and in – try to flatten your stomach.
• Straighten your upper back and raise your chest while moving your shoulders back and down.
• Hold this position for 15 seconds, breathing normally and relaxing the rest of your body at the same time.
• Repeat the exercise.
Steady Sitting
Well-Balanced Advanced Booklet | 13
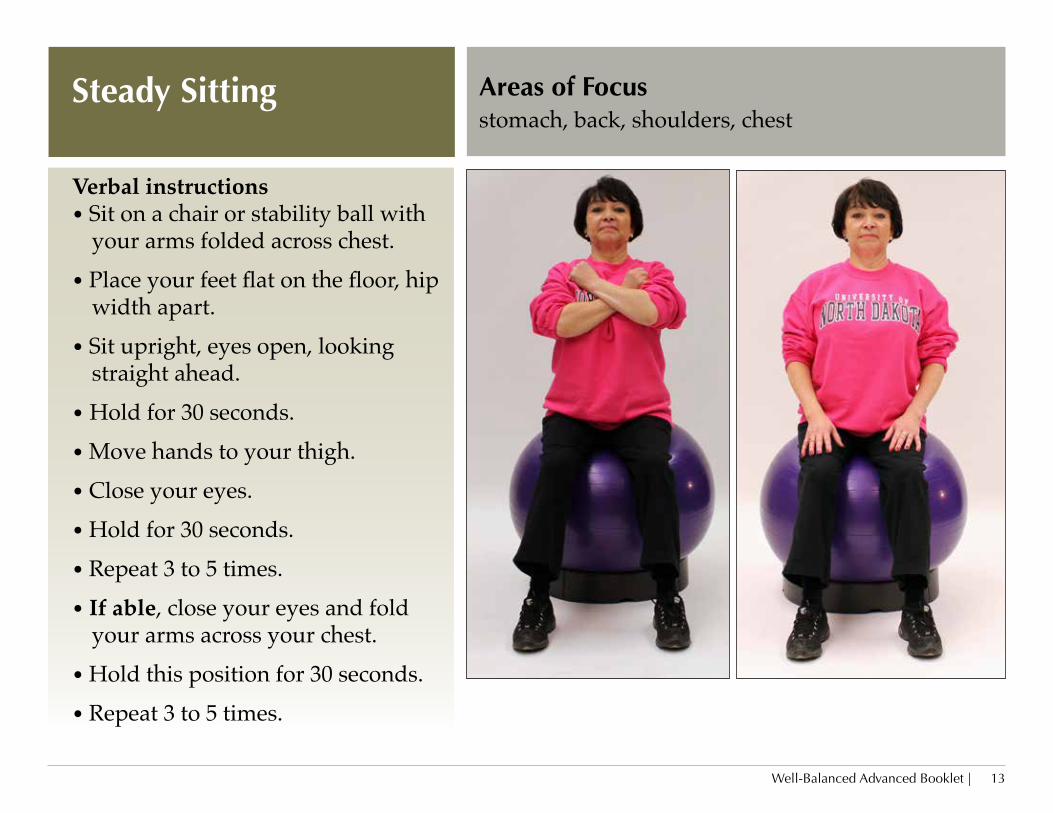
Areas of Focusstomach, back, shoulders, chest
Verbal instructions• Sit on a chair or stability ball with
your arms folded across chest.• Place your feet flat on the floor, hip
width apart. • Sit upright, eyes open, looking
straight ahead.• Hold for 30 seconds.• Move hands to your thigh.• Close your eyes.• Hold for 30 seconds. • Repeat 3 to 5 times.• If able, close your eyes and fold
your arms across your chest.• Hold this position for 30 seconds. • Repeat 3 to 5 times.
Steady Sitting
| Well-Balanced Advanced Booklet 14
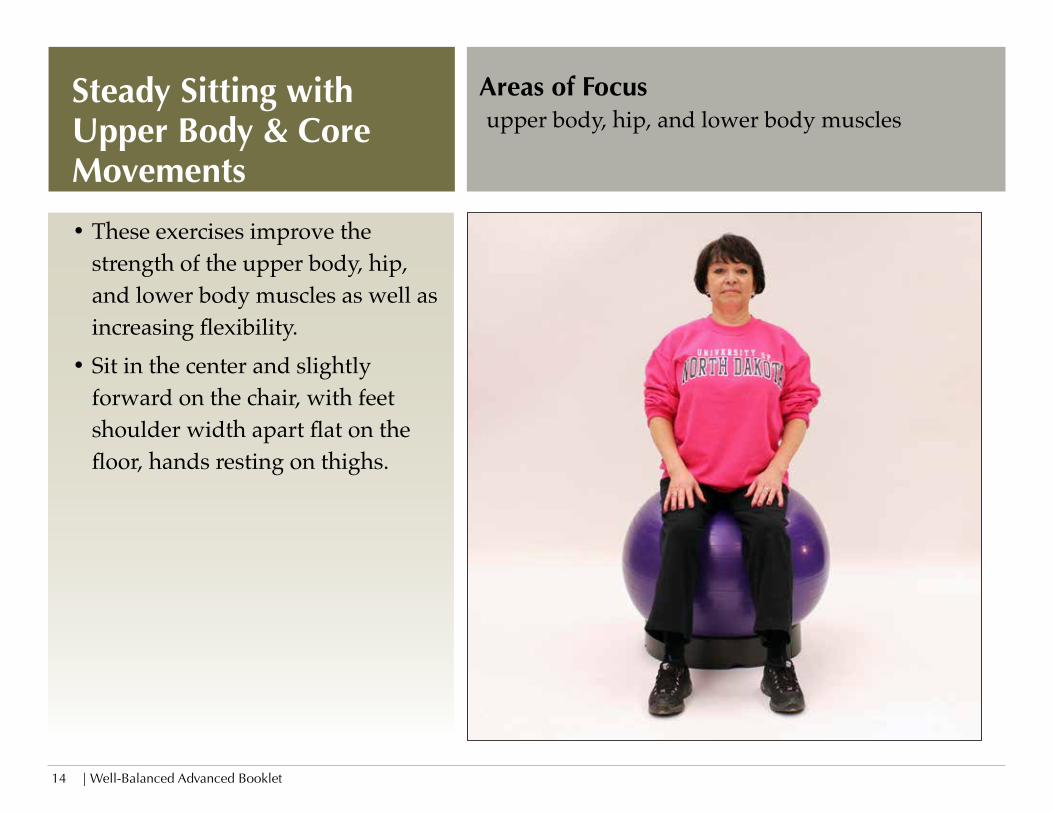
Areas of Focus upper body, hip, and lower body muscles
• These exercises improve the strength of the upper body, hip, and lower body muscles as well as increasing flexibility.
• Sit in the center and slightly forward on the chair, with feet shoulder width apart flat on the floor, hands resting on thighs.
Steady Sitting with Upper Body & Core Movements
Well-Balanced Advanced Booklet | 15
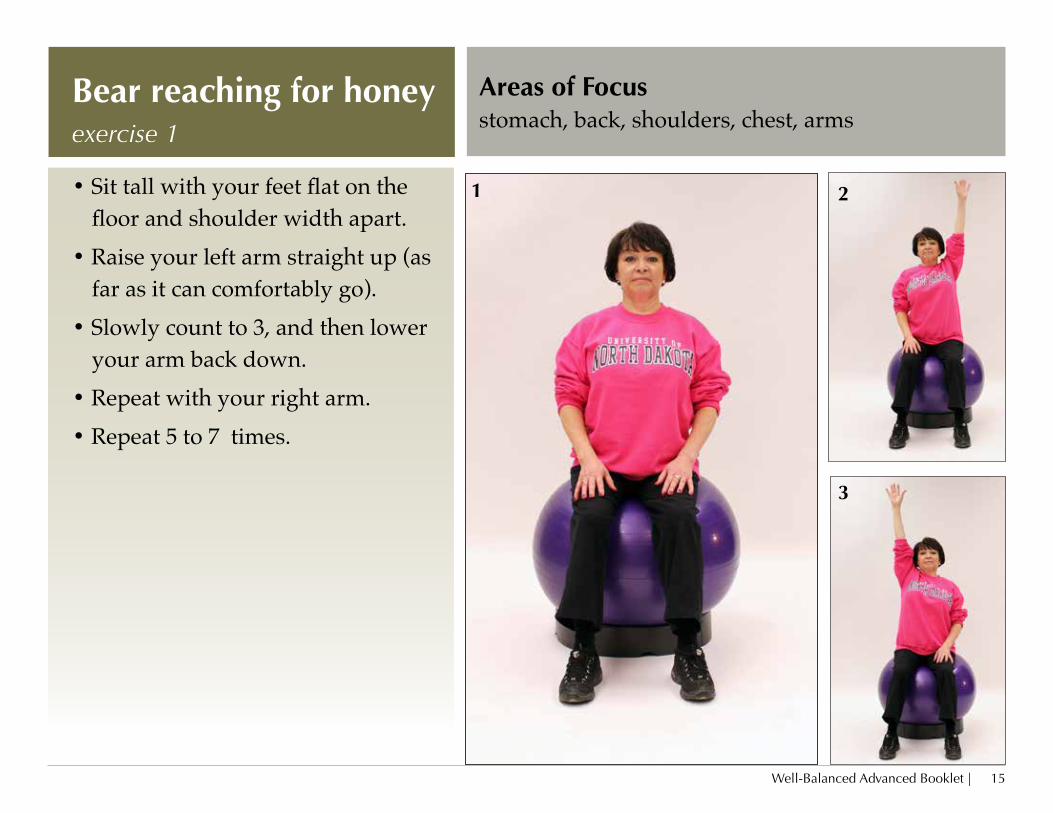
Areas of Focusstomach, back, shoulders, chest, arms
• Sit tall with your feet flat on the floor and shoulder width apart.
• Raise your left arm straight up (as far as it can comfortably go).
• Slowly count to 3, and then lower your arm back down.
• Repeat with your right arm.• Repeat 5 to 7 times.
Bear reaching for honeyexercise 1
1 2
3
| Well-Balanced Advanced Booklet 16
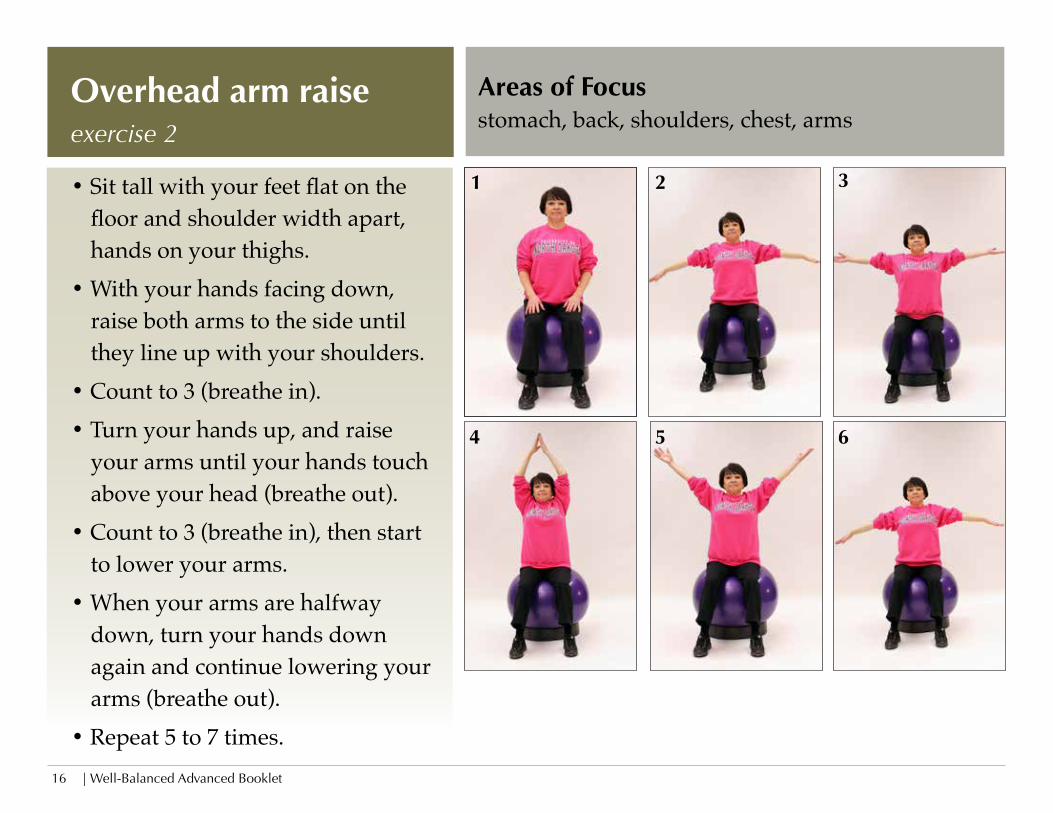
Areas of Focusstomach, back, shoulders, chest, arms
• Sit tall with your feet flat on the floor and shoulder width apart, hands on your thighs.
• With your hands facing down, raise both arms to the side until they line up with your shoulders.
• Count to 3 (breathe in).• Turn your hands up, and raise
your arms until your hands touch above your head (breathe out).
• Count to 3 (breathe in), then start to lower your arms.
• When your arms are halfway down, turn your hands down again and continue lowering your arms (breathe out).
• Repeat 5 to 7 times.
Overhead arm raise exercise 2
1 2 3
4 5 6
Well-Balanced Advanced Booklet | 17
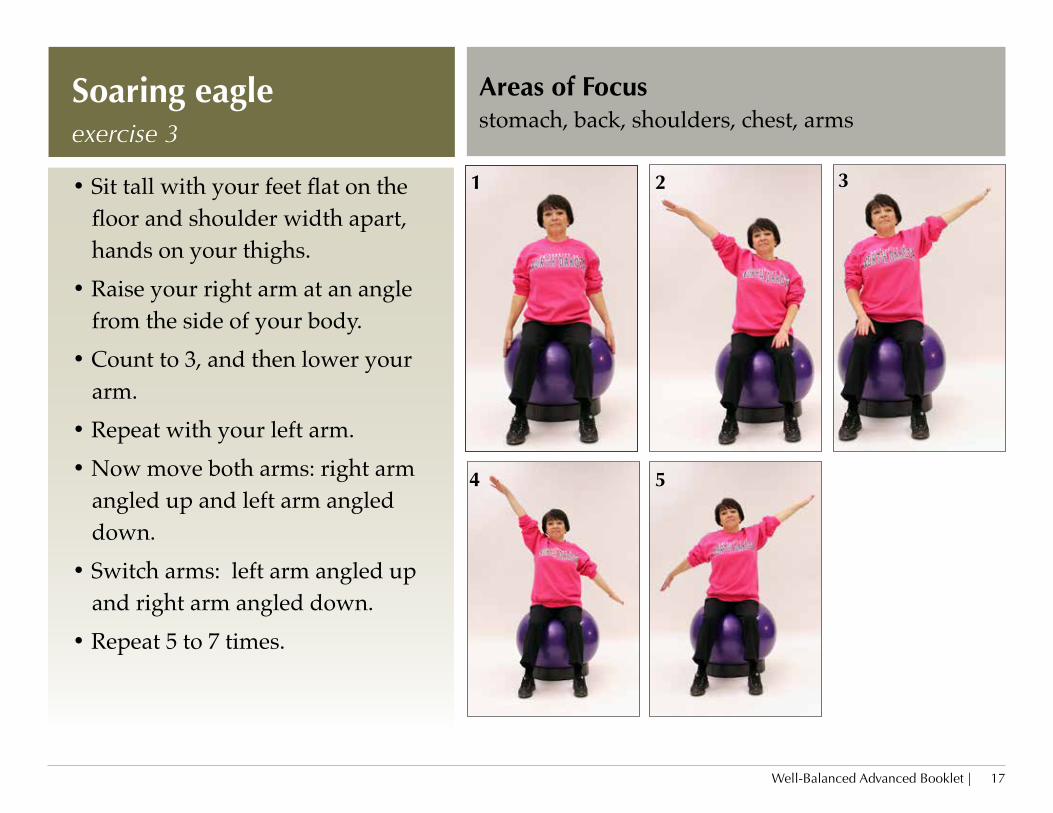
Areas of Focusstomach, back, shoulders, chest, arms
• Sit tall with your feet flat on the floor and shoulder width apart, hands on your thighs.
• Raise your right arm at an angle from the side of your body.
• Count to 3, and then lower your arm.
• Repeat with your left arm.• Now move both arms: right arm
angled up and left arm angled down.
• Switch arms: left arm angled up and right arm angled down.
• Repeat 5 to 7 times.
Soaring eagle exercise 3
1 2 3
4 5
| Well-Balanced Advanced Booklet 18
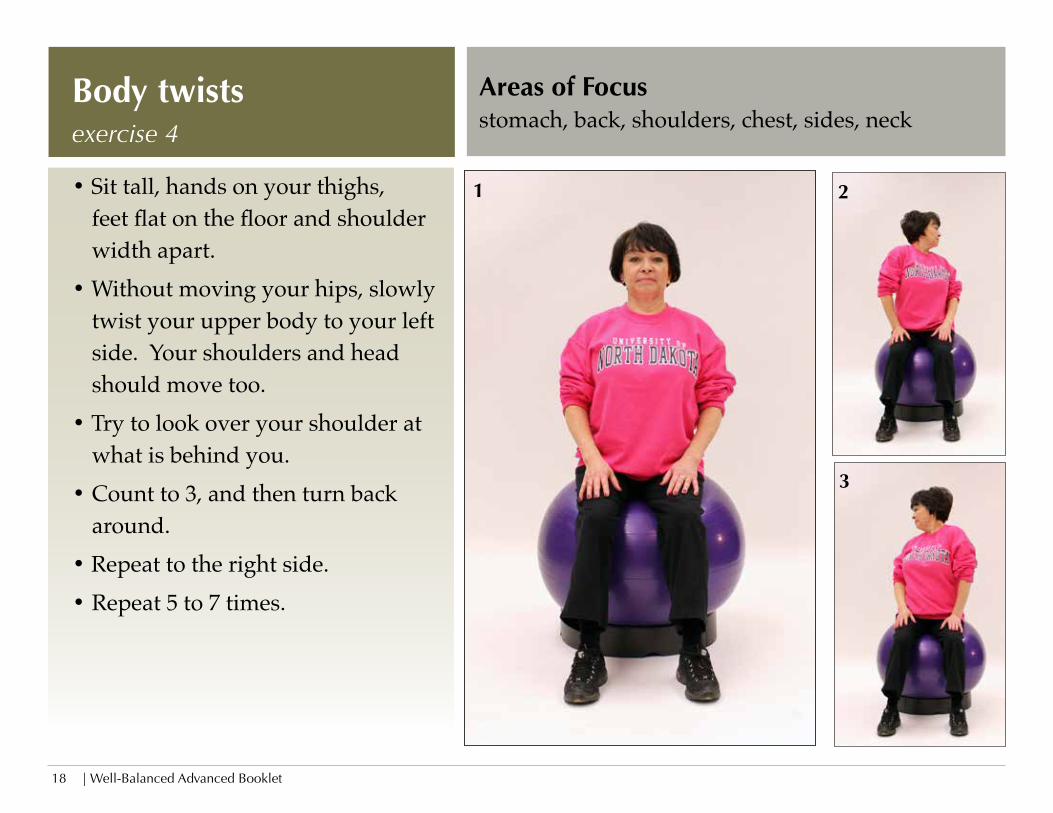
Areas of Focusstomach, back, shoulders, chest, sides, neck
• Sit tall, hands on your thighs, feet flat on the floor and shoulder width apart.
• Without moving your hips, slowly twist your upper body to your left side. Your shoulders and head should move too.
• Try to look over your shoulder at what is behind you.
• Count to 3, and then turn back around.
• Repeat to the right side.• Repeat 5 to 7 times.
Body twists exercise 4
1 2
3
Well-Balanced Advanced Booklet | 19
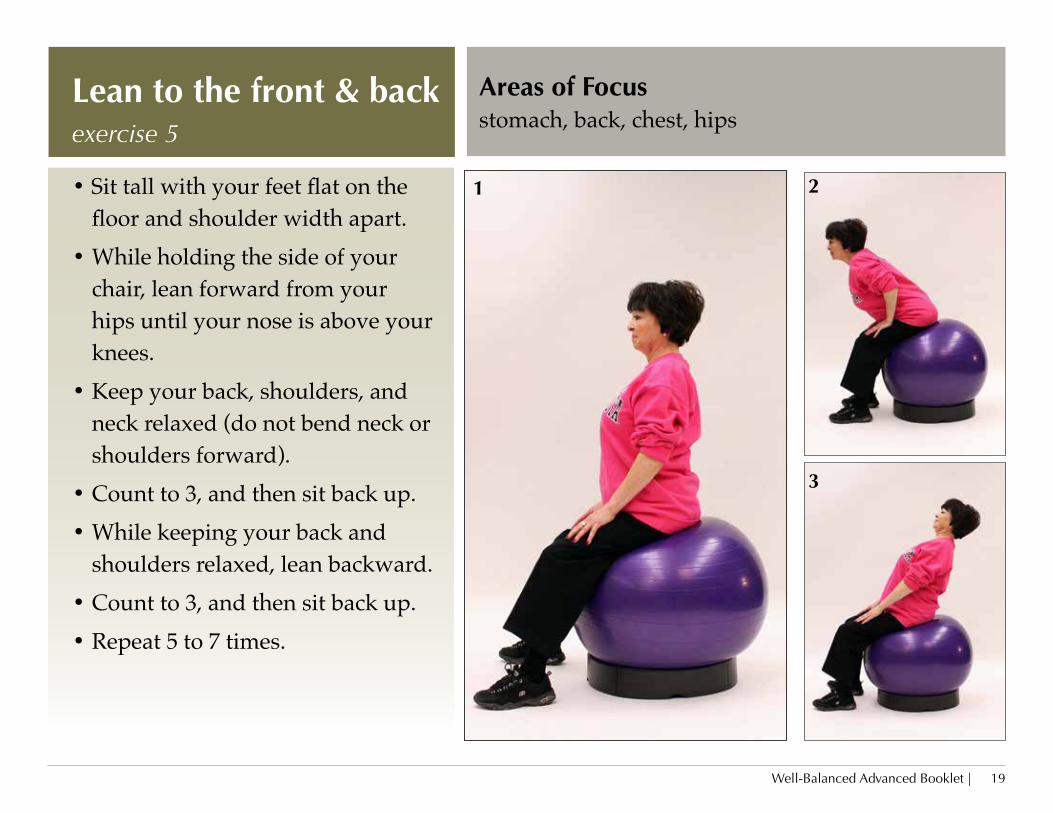
Areas of Focusstomach, back, chest, hips
• Sit tall with your feet flat on the floor and shoulder width apart.
• While holding the side of your chair, lean forward from your hips until your nose is above your knees.
• Keep your back, shoulders, and neck relaxed (do not bend neck or shoulders forward).
• Count to 3, and then sit back up.• While keeping your back and
shoulders relaxed, lean backward.• Count to 3, and then sit back up.• Repeat 5 to 7 times.
Lean to the front & back exercise 5
1 2
3
| Well-Balanced Advanced Booklet 20
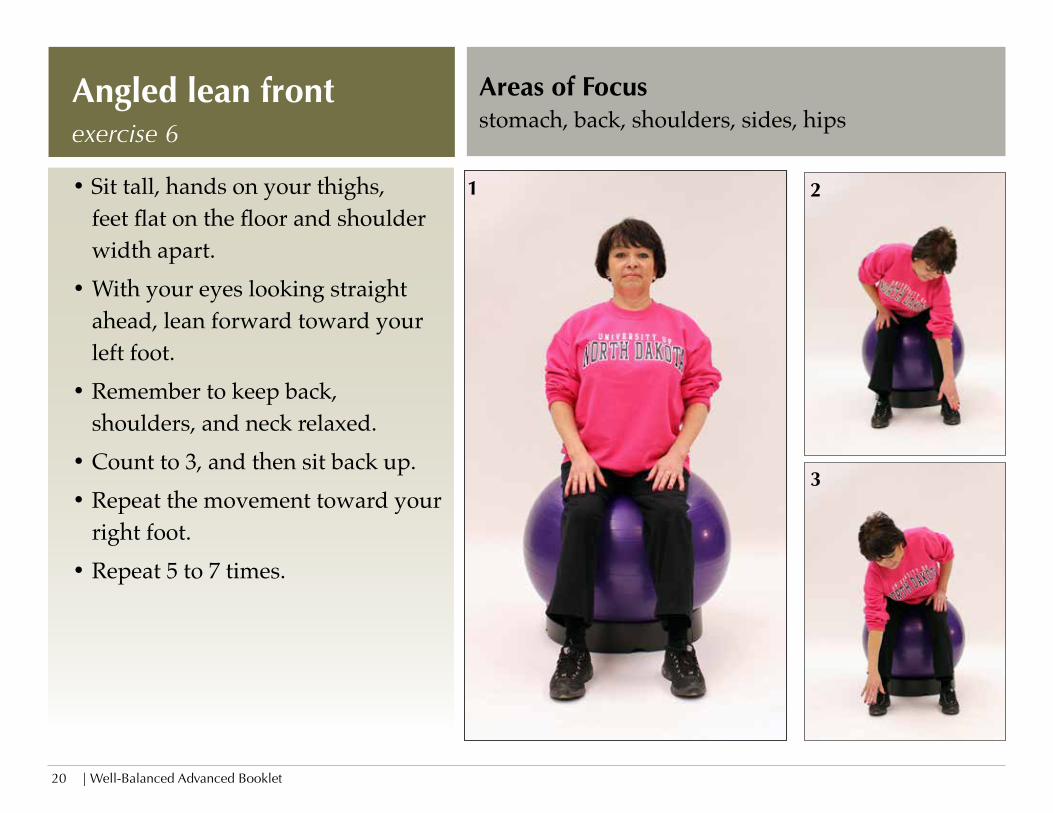
Areas of Focusstomach, back, shoulders, sides, hips
• Sit tall, hands on your thighs, feet flat on the floor and shoulder width apart.
• With your eyes looking straight ahead, lean forward toward your left foot.
• Remember to keep back, shoulders, and neck relaxed.
• Count to 3, and then sit back up.• Repeat the movement toward your
right foot.• Repeat 5 to 7 times.
Angled lean front exercise 6
1 2
3
Well-Balanced Advanced Booklet | 21
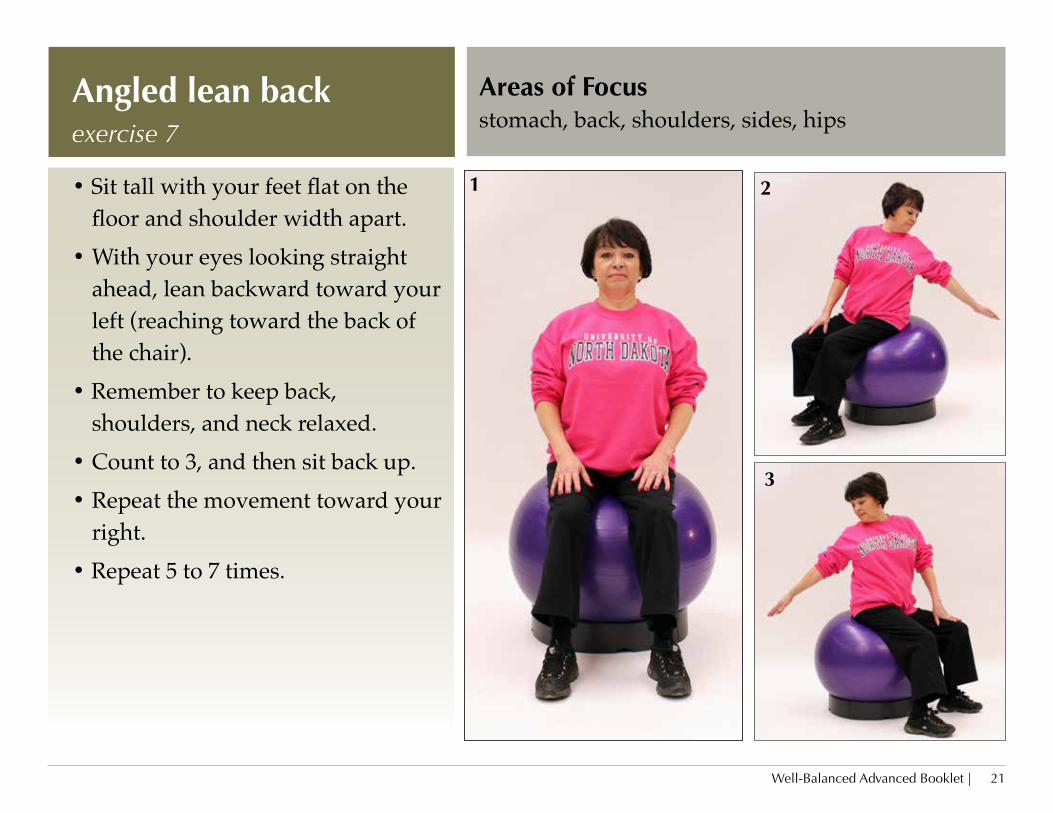
Areas of Focusstomach, back, shoulders, sides, hips
• Sit tall with your feet flat on the floor and shoulder width apart.
• With your eyes looking straight ahead, lean backward toward your left (reaching toward the back of the chair).
• Remember to keep back, shoulders, and neck relaxed.
• Count to 3, and then sit back up.• Repeat the movement toward your
right.• Repeat 5 to 7 times.
Angled lean backexercise 7
1 2
3
| Well-Balanced Advanced Booklet 22
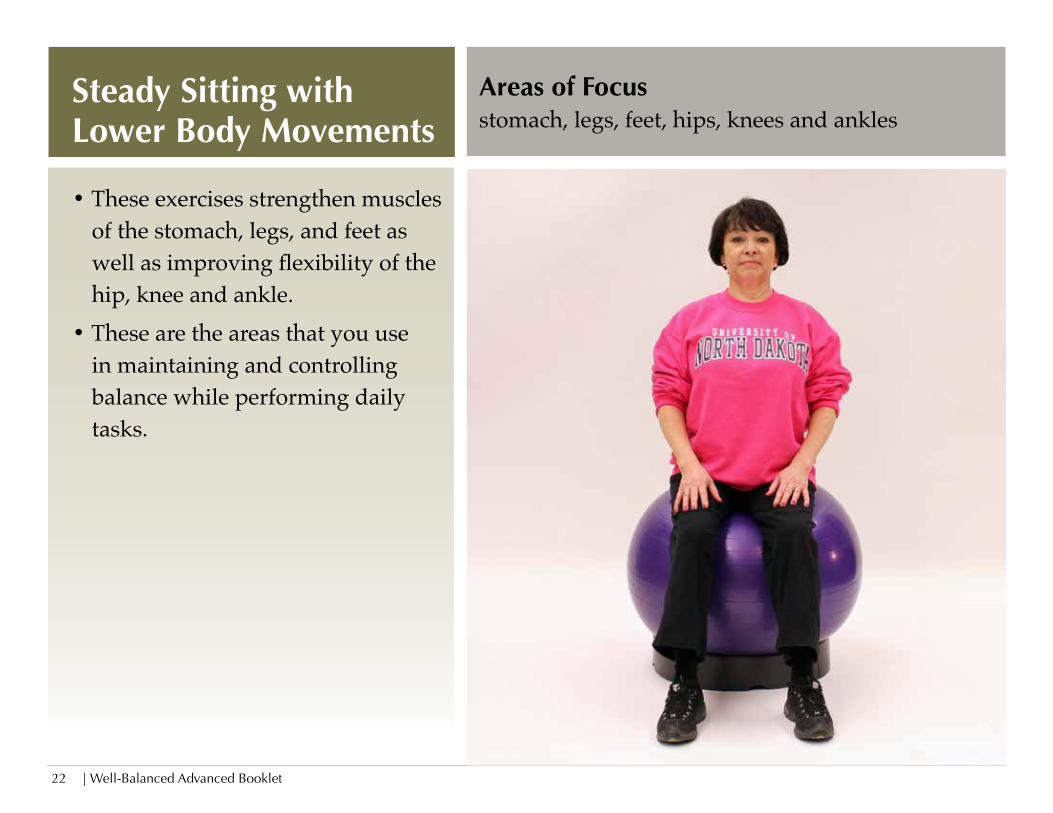
Areas of Focusstomach, legs, feet, hips, knees and ankles
• These exercises strengthen muscles of the stomach, legs, and feet as well as improving flexibility of the hip, knee and ankle.
• These are the areas that you use in maintaining and controlling balance while performing daily tasks.
Steady Sitting with Lower Body Movements
Well-Balanced Advanced Booklet | 23
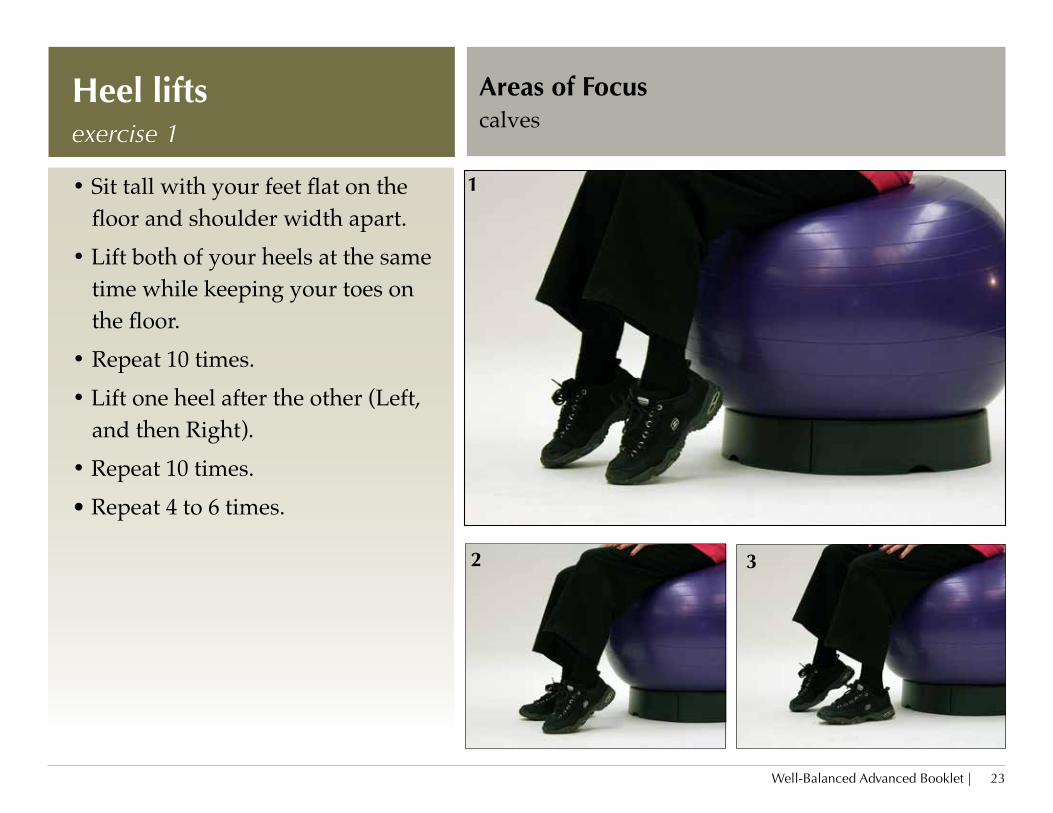
Areas of Focuscalves
• Sit tall with your feet flat on the floor and shoulder width apart.
• Lift both of your heels at the same time while keeping your toes on the floor.
• Repeat 10 times.• Lift one heel after the other (Left,
and then Right). • Repeat 10 times.• Repeat 4 to 6 times.
Heel lifts exercise 1
1
2 3
| Well-Balanced Advanced Booklet 24
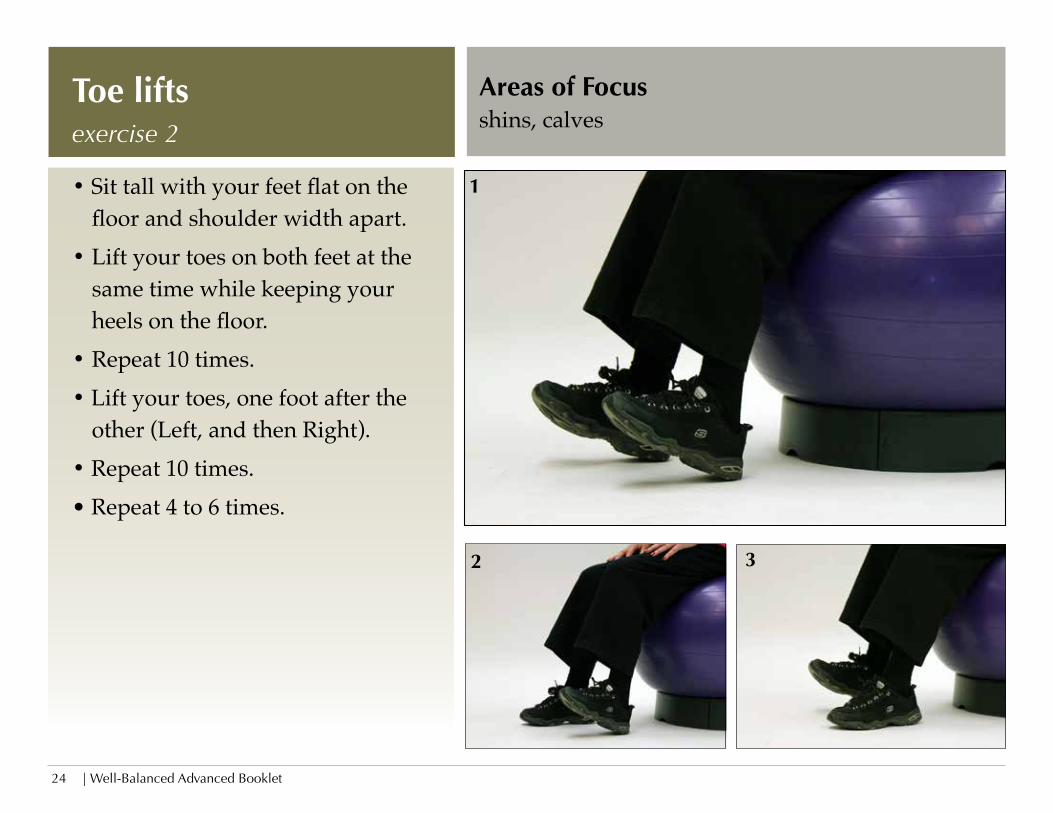
Areas of Focusshins, calves
• Sit tall with your feet flat on the floor and shoulder width apart.
• Lift your toes on both feet at the same time while keeping your heels on the floor.
• Repeat 10 times.• Lift your toes, one foot after the
other (Left, and then Right).• Repeat 10 times.• Repeat 4 to 6 times.
Toe lifts exercise 2
1
2 3
Well-Balanced Advanced Booklet | 25
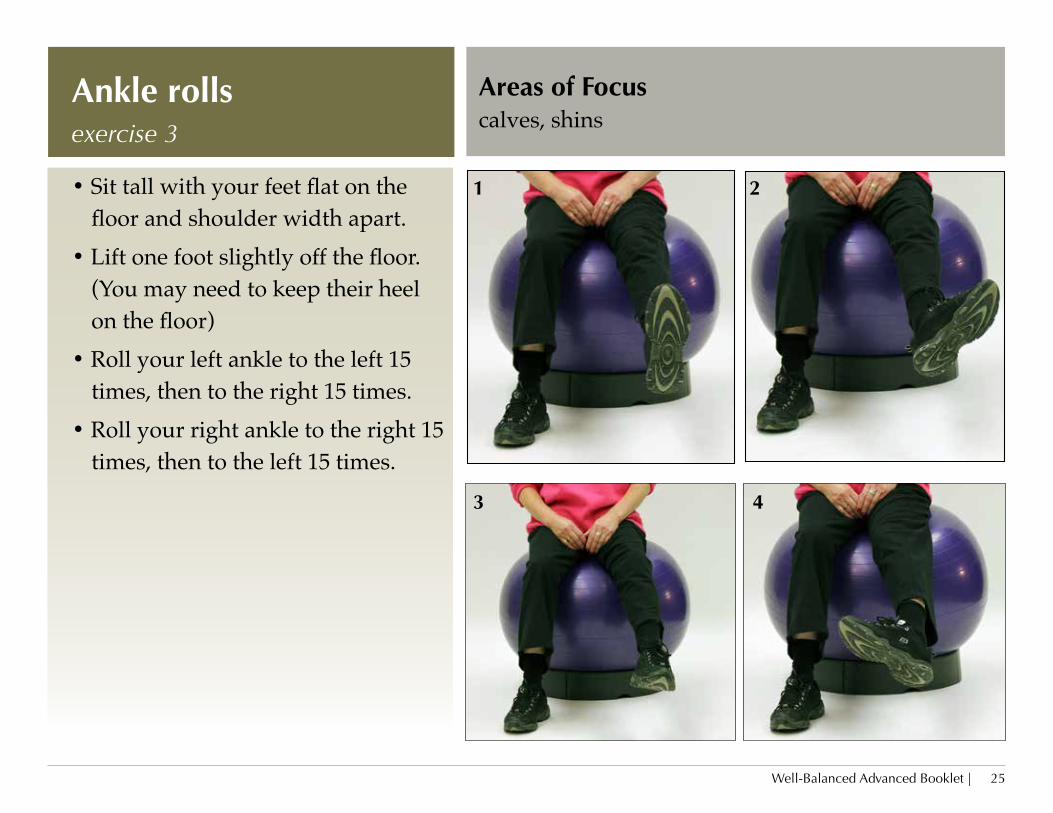
Areas of Focuscalves, shins
• Sit tall with your feet flat on the floor and shoulder width apart.
• Lift one foot slightly off the floor. (You may need to keep their heel on the floor)
• Roll your left ankle to the left 15 times, then to the right 15 times.
• Roll your right ankle to the right 15 times, then to the left 15 times.
Ankle rolls exercise 3
1 2
3 4
| Well-Balanced Advanced Booklet 26
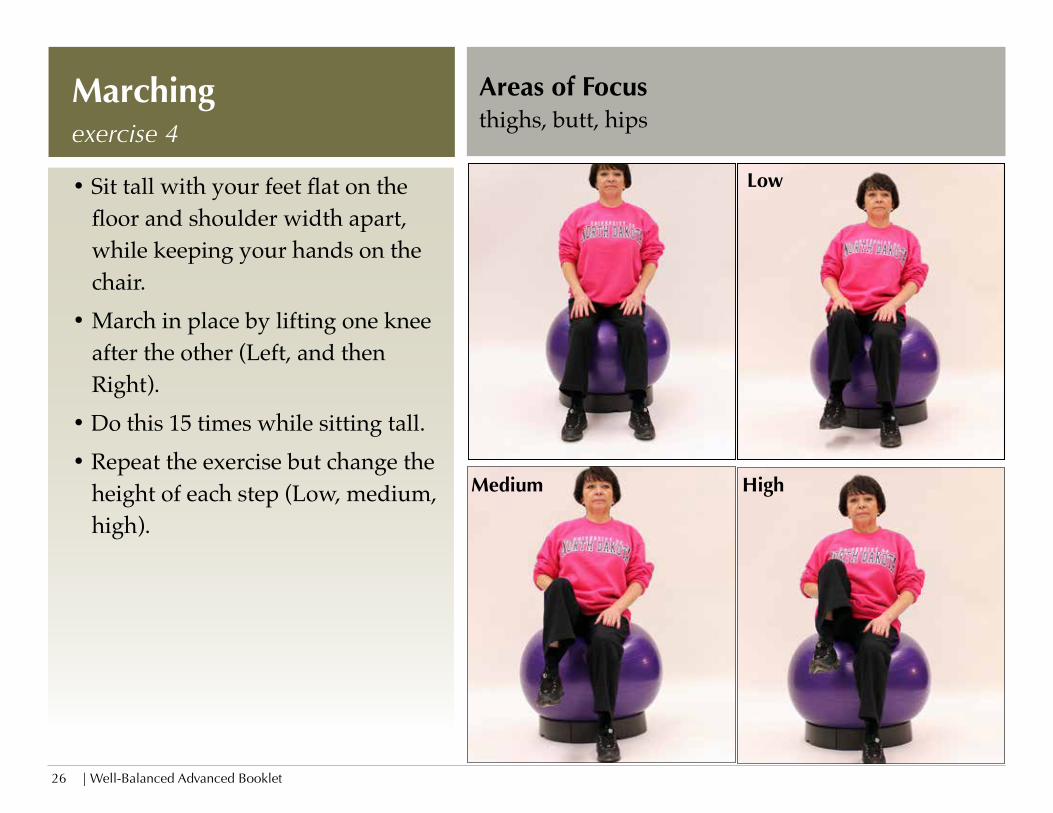
Areas of Focusthighs, butt, hips
• Sit tall with your feet flat on the floor and shoulder width apart, while keeping your hands on the chair.
• March in place by lifting one knee after the other (Left, and then Right).
• Do this 15 times while sitting tall.• Repeat the exercise but change the
height of each step (Low, medium, high).
Marching exercise 4
Low
Medium High
Well-Balanced Advanced Booklet | 27
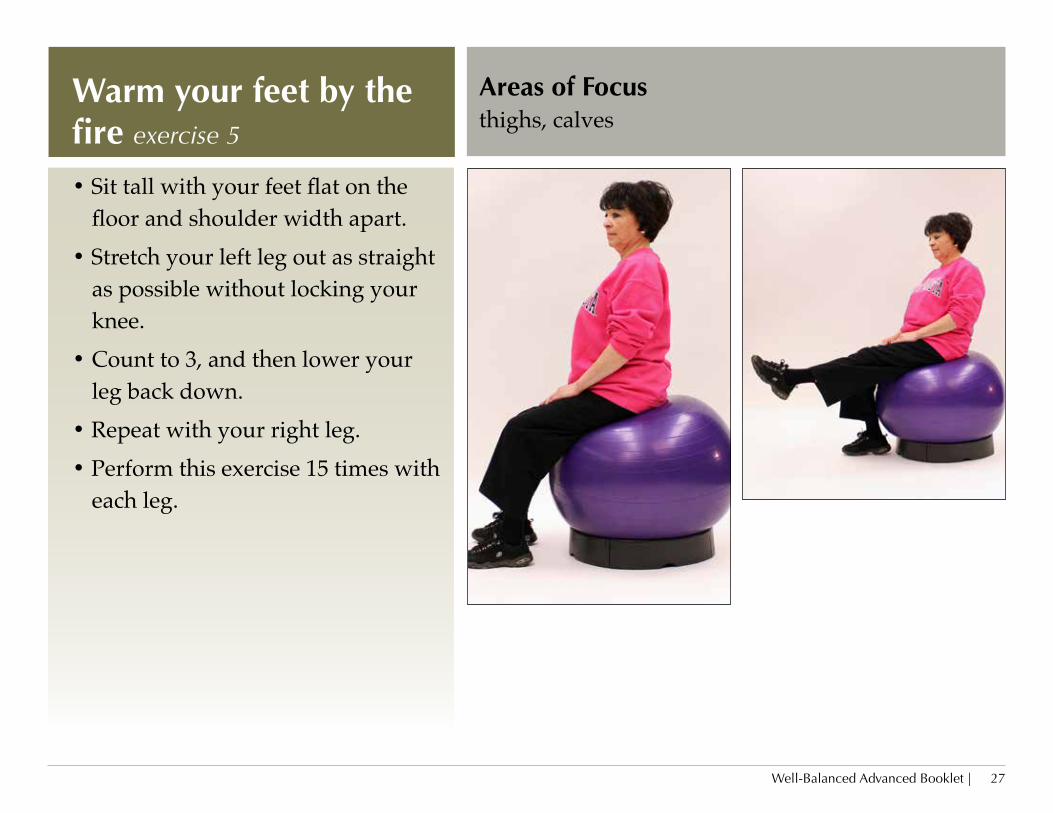
Areas of Focusthighs, calves
• Sit tall with your feet flat on the floor and shoulder width apart.
• Stretch your left leg out as straight as possible without locking your knee.
• Count to 3, and then lower your leg back down.
• Repeat with your right leg. • Perform this exercise 15 times with
each leg.
Warm your feet by the fire exercise 5
| Well-Balanced Advanced Booklet 28
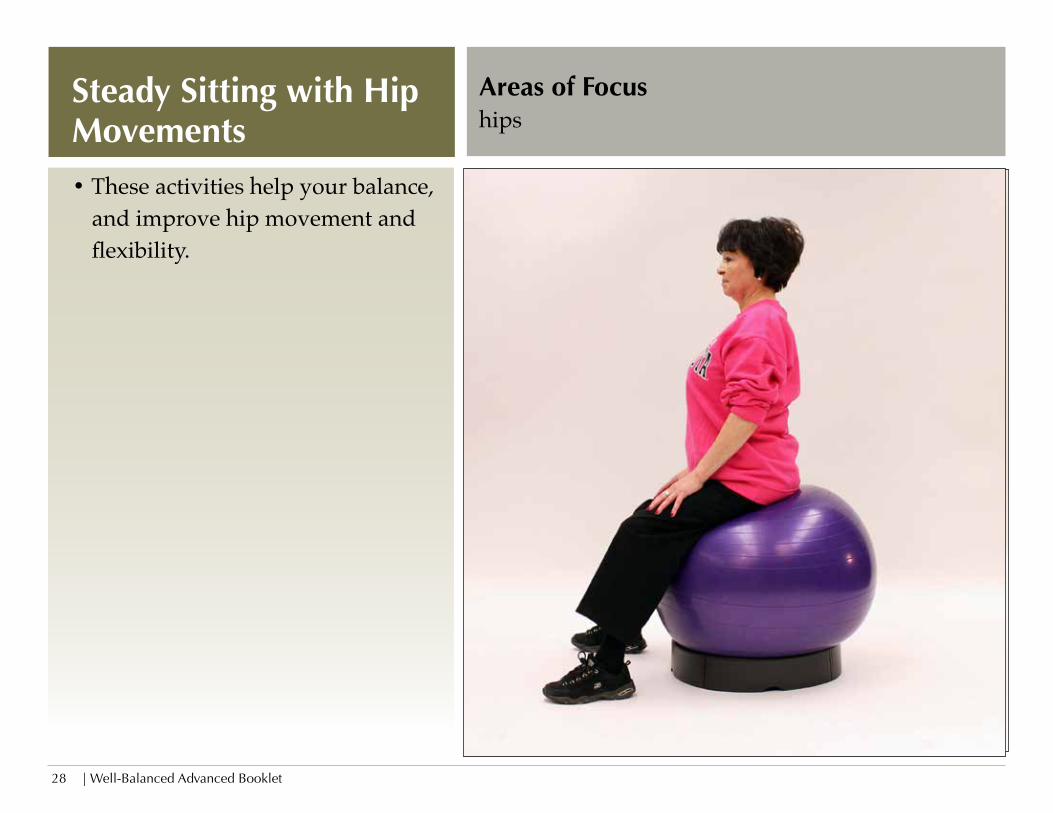
Areas of Focuships
• These activities help your balance, and improve hip movement and flexibility.
Steady Sitting with Hip Movements
Well-Balanced Advanced Booklet | 29
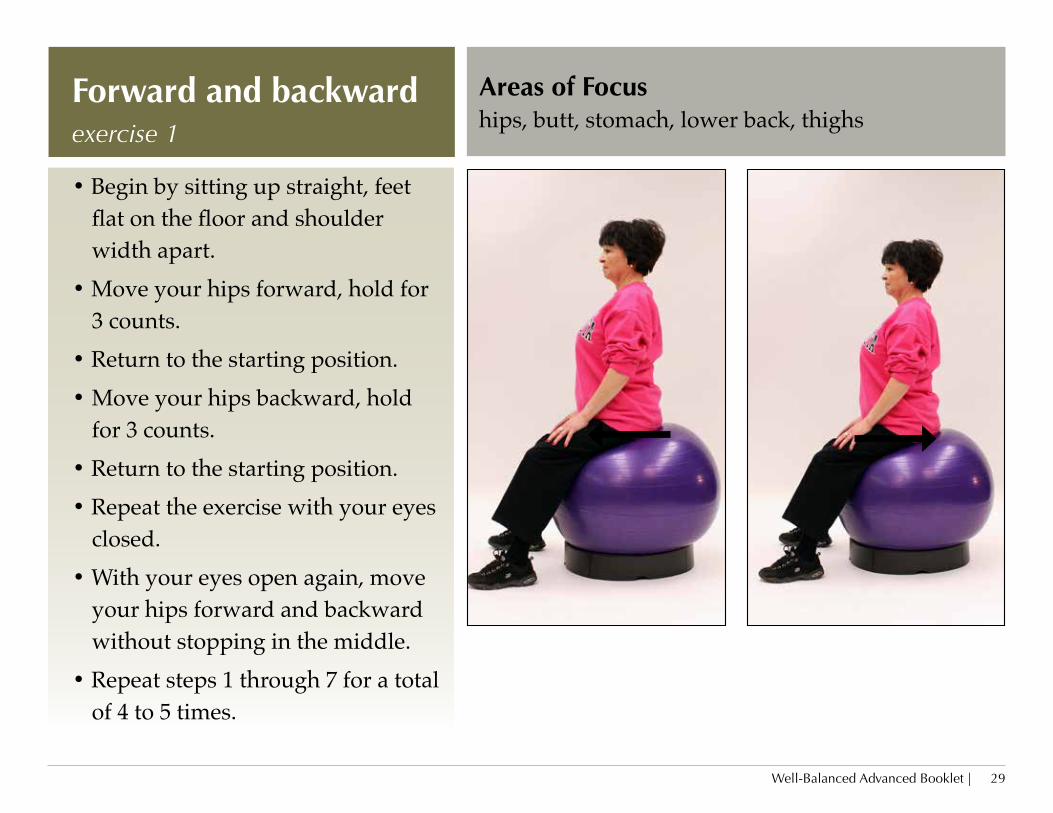
Areas of Focuships, butt, stomach, lower back, thighs
• Begin by sitting up straight, feet flat on the floor and shoulder width apart.
• Move your hips forward, hold for 3 counts.
• Return to the starting position.• Move your hips backward, hold
for 3 counts.• Return to the starting position.• Repeat the exercise with your eyes
closed.• With your eyes open again, move
your hips forward and backward without stopping in the middle.
• Repeat steps 1 through 7 for a total of 4 to 5 times.
Forward and backward exercise 1
| Well-Balanced Advanced Booklet 30
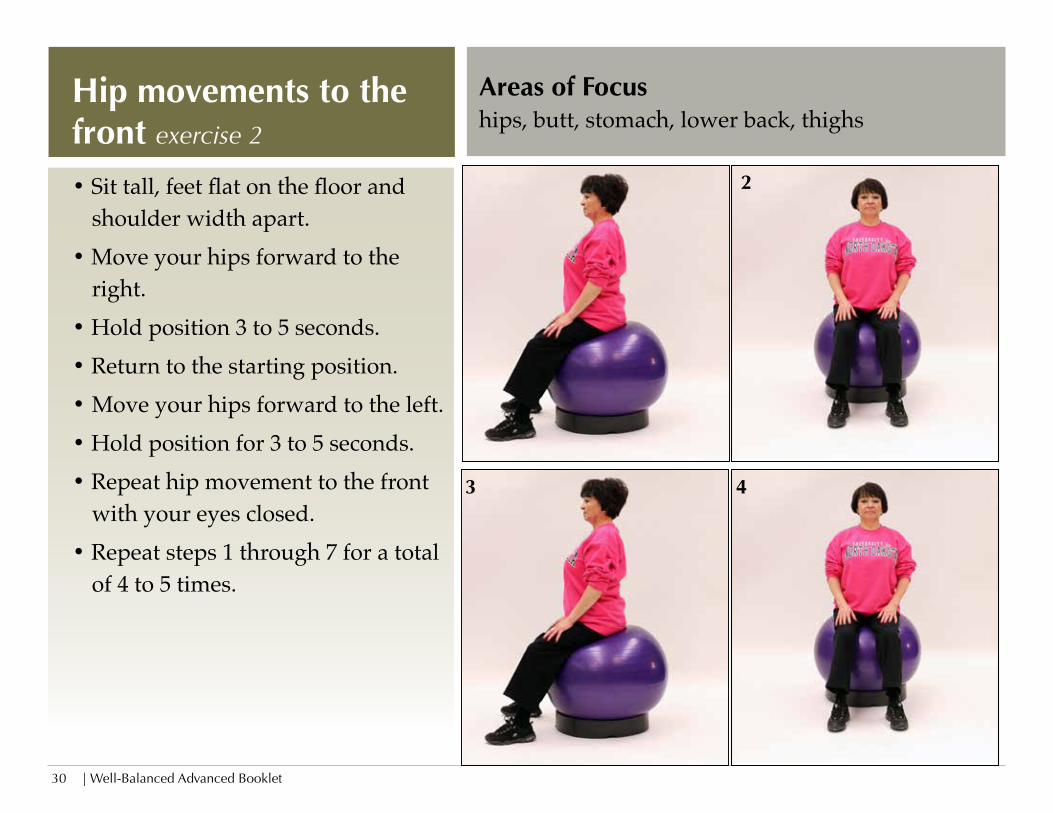
Areas of Focuships, butt, stomach, lower back, thighs
• Sit tall, feet flat on the floor and shoulder width apart.
• Move your hips forward to the right.
• Hold position 3 to 5 seconds.• Return to the starting position.• Move your hips forward to the left.• Hold position for 3 to 5 seconds.• Repeat hip movement to the front
with your eyes closed.• Repeat steps 1 through 7 for a total
of 4 to 5 times.
Hip movements to the front exercise 2
2
3 4
Well-Balanced Advanced Booklet | 31
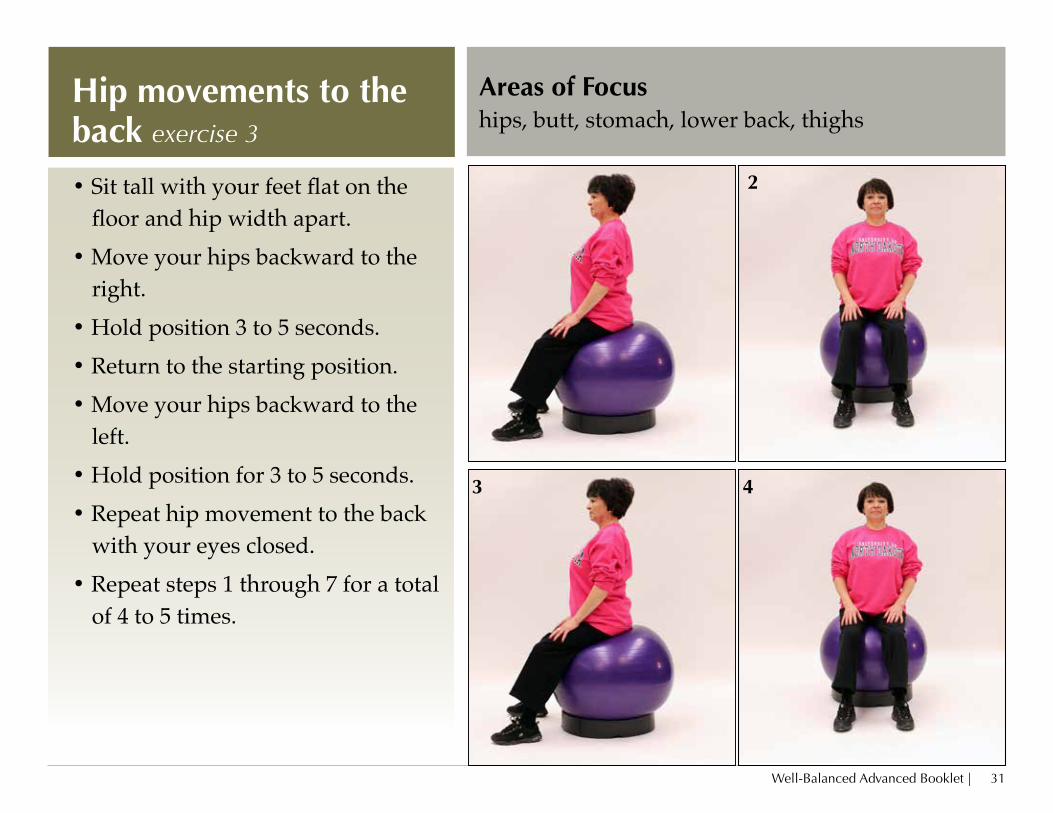
Areas of Focuships, butt, stomach, lower back, thighs
• Sit tall with your feet flat on the floor and hip width apart.
• Move your hips backward to the right.
• Hold position 3 to 5 seconds.• Return to the starting position.• Move your hips backward to the
left.• Hold position for 3 to 5 seconds.• Repeat hip movement to the back
with your eyes closed.• Repeat steps 1 through 7 for a total
of 4 to 5 times.
Hip movements to the back exercise 3
2
3 4
| Well-Balanced Advanced Booklet 32
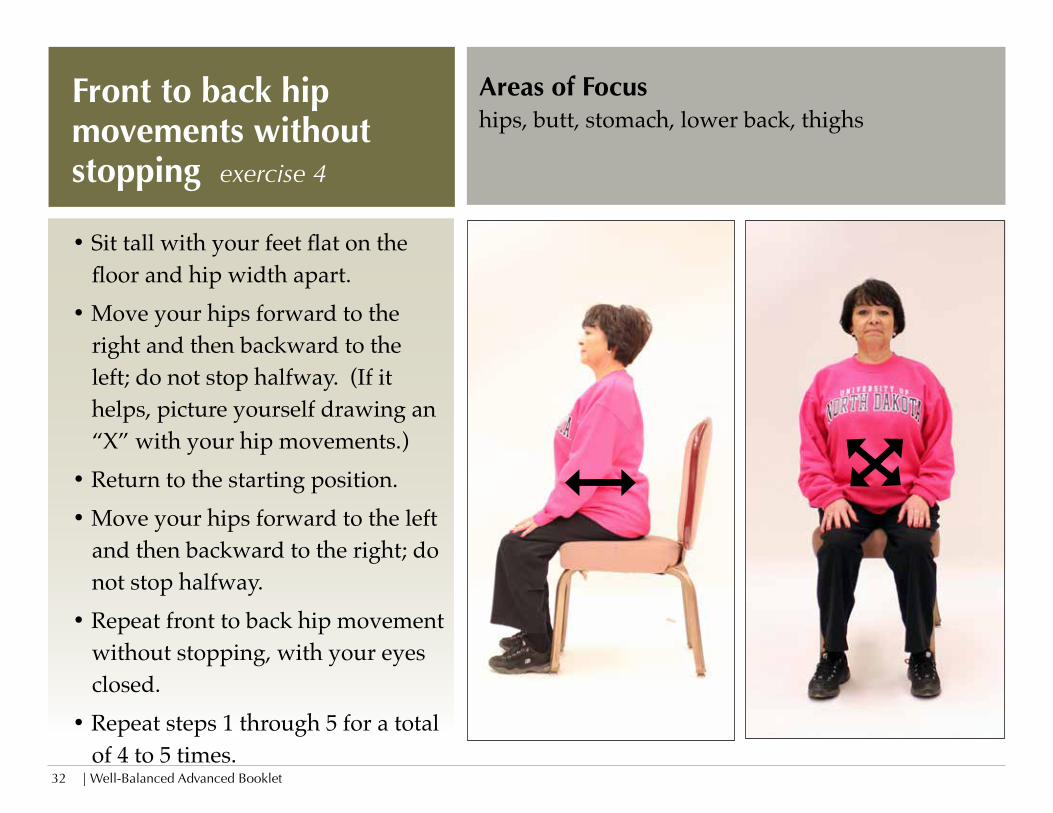
Areas of Focuships, butt, stomach, lower back, thighs
• Sit tall with your feet flat on the floor and hip width apart.
• Move your hips forward to the right and then backward to the left; do not stop halfway. (If it helps, picture yourself drawing an “X” with your hip movements.)
• Return to the starting position.• Move your hips forward to the left
and then backward to the right; do not stop halfway.
• Repeat front to back hip movement without stopping, with your eyes closed.
• Repeat steps 1 through 5 for a total of 4 to 5 times.
Front to back hip movements without stopping exercise 4
Well-Balanced Advanced Booklet | 33
Standing Balance Activities Purpose• To improve your balance while performing daily activities.
• These exercises are designed to challenge your standing balance and, with practice, to improve it.
Materials• Step (platform)
• Chairs for balance if you wish to use them (if you use a walker, you can use that for balance)
Safety• You may need to perform these exercises with your back about 2 feet from a wall, with
a chair in front of you.
• Do not perform the next exercise until you can safely perform the task at hand. For example, do not perform an exercise with your eyes closed if you are not able to do it safely with your eyes open.
• Open your eyes immediately if you feel that you are about to lose your balance.
| Well-Balanced Advanced Booklet 34
To make sure you are standing correctly, follow these steps:• Stand with your back against the wall with a chair (or walker) in front of you, feet flat on
the floor with your heels about 6 inches from the wall.• Relax your arms and let them hang by your sides.• Hold your head up, look straight ahead, and focus on an object in front of you.• Gently move your head straight back until your ears are above your shoulders.
Imagine that the top of your head is being pulled toward the ceiling by a string (imagine you are a puppet on a string).
• Stand tall. (Make sure your upper back is straight and your chest is slightly lifted)
• Pull your stomach muscles in and up so that your stomach flattens. (Your lower back should have a slight curve to the front, your hips should be level, your kneecaps
should be facing forward, and your ankles and feet should be straight)
• Your body weight should be equal on each foot.• Looking straight ahead with your eyes focused on an object ahead of you, breath
normally, and hold this standing position for 15 seconds.• Now, still breathing normally, close your eyes, hold this standing position, and try to focus
on the feeling of standing correctly.
Checking Your Standing Position
Well-Balanced Advanced Booklet | 35
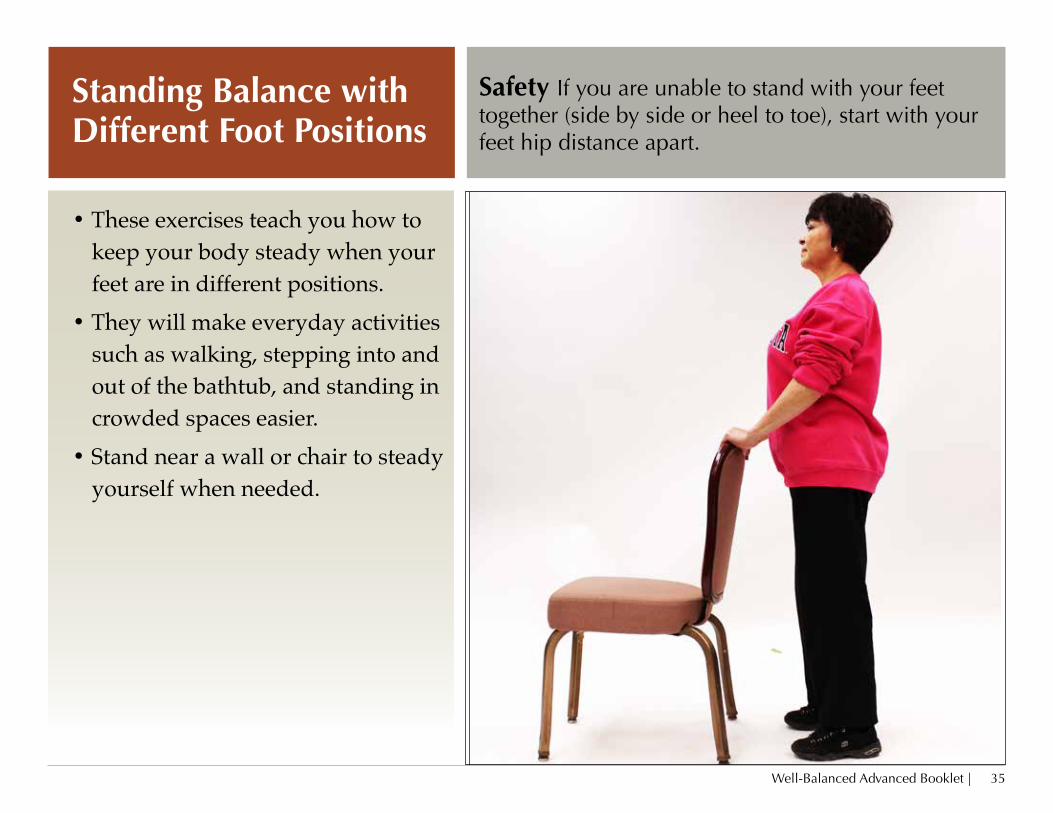
Safety If you are unable to stand with your feet together (side by side or heel to toe), start with your feet hip distance apart.
• These exercises teach you how to keep your body steady when your feet are in different positions.
• They will make everyday activities such as walking, stepping into and out of the bathtub, and standing in crowded spaces easier.
• Stand near a wall or chair to steady yourself when needed.
Standing Balance with Different Foot Positions
| Well-Balanced Advanced Booklet 36
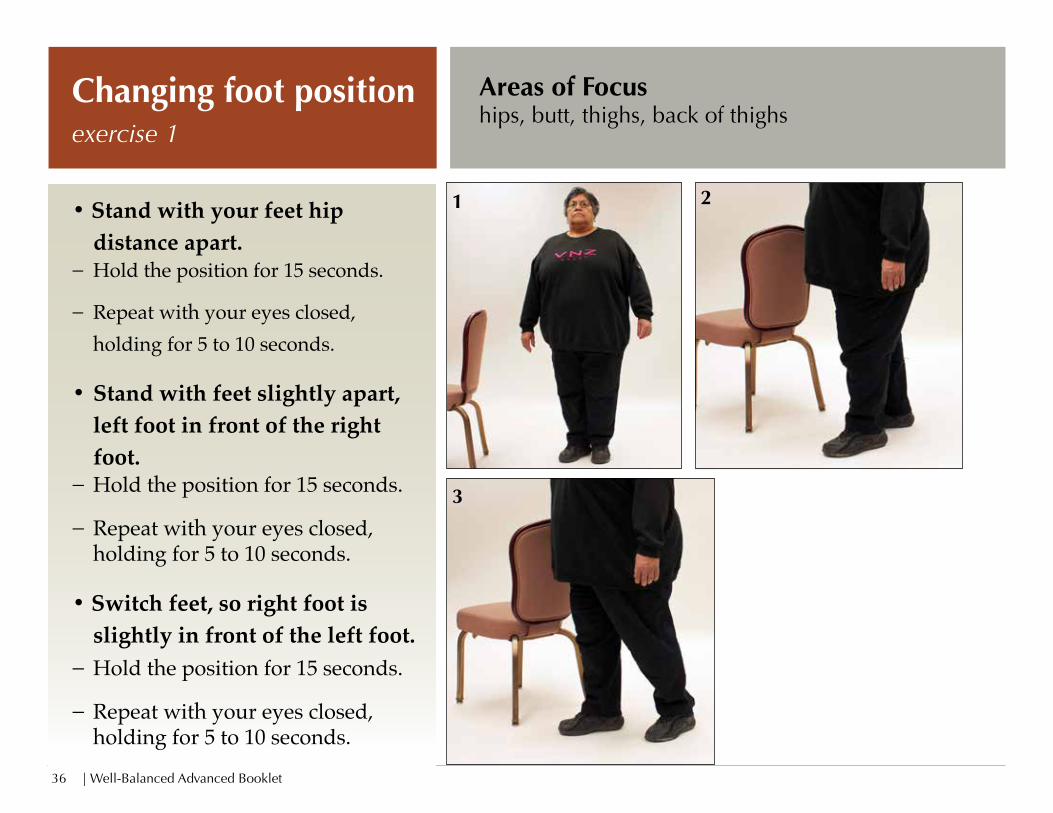
Areas of Focuships, butt, thighs, back of thighs
• Stand with your feet hip distance apart.
− Hold the position for 15 seconds.
− Repeat with your eyes closed, holding for 5 to 10 seconds.
• Stand with feet slightly apart, left foot in front of the right foot.
− Hold the position for 15 seconds.
− Repeat with your eyes closed, holding for 5 to 10 seconds.
• Switch feet, so right foot is slightly in front of the left foot.
− Hold the position for 15 seconds.
− Repeat with your eyes closed, holding for 5 to 10 seconds.
Changing foot positionexercise 1
1 2
3
Well-Balanced Advanced Booklet | 37
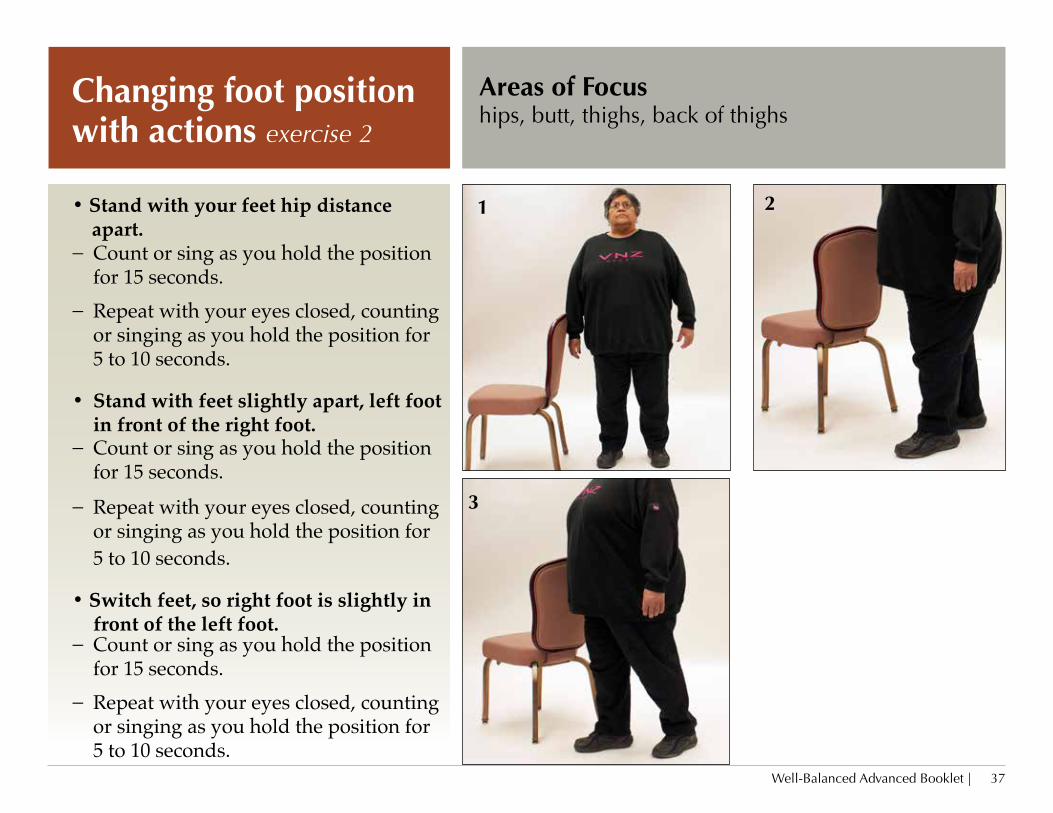
Areas of Focuships, butt, thighs, back of thighs
• Stand with your feet hip distance apart.
− Count or sing as you hold the position for 15 seconds.
− Repeat with your eyes closed, counting or singing as you hold the position for 5 to 10 seconds.
• Stand with feet slightly apart, left foot in front of the right foot.
− Count or sing as you hold the position for 15 seconds.
− Repeat with your eyes closed, counting or singing as you hold the position for 5 to 10 seconds.
• Switch feet, so right foot is slightly in front of the left foot.
− Count or sing as you hold the position for 15 seconds.
− Repeat with your eyes closed, counting or singing as you hold the position for 5 to 10 seconds.
Changing foot position with actions exercise 2
1 2
3
| Well-Balanced Advanced Booklet 38
Areas of Focuships, butt, thighs, back of thighs, shoulders, arms
• Stand with your feet together.
− Reach upward like you are trying to grab an object, alternating arms (left, and then right).
− Continue reaching, changing the height of the object you are grabbing for (3 or 4 times each arm).
• Stand with left foot in front of the right foot, heel to toe.
− Reach upward like you are trying to grab an object, alternating arms (left, and then right).
− Continue reaching, changing the height of the object you are grabbing for (3 or 4 times each arm).
• Switch feet, so right foot is in front of the left foot.
− Reach upward like you are trying to grab an object, alternating arms (right, and then left).
− Continue reaching, changing the height of the object you are grabbing for (3 or 4 times each arm).
Changing foot position while reachingexercise 3
Well-Balanced Advanced Booklet | 39
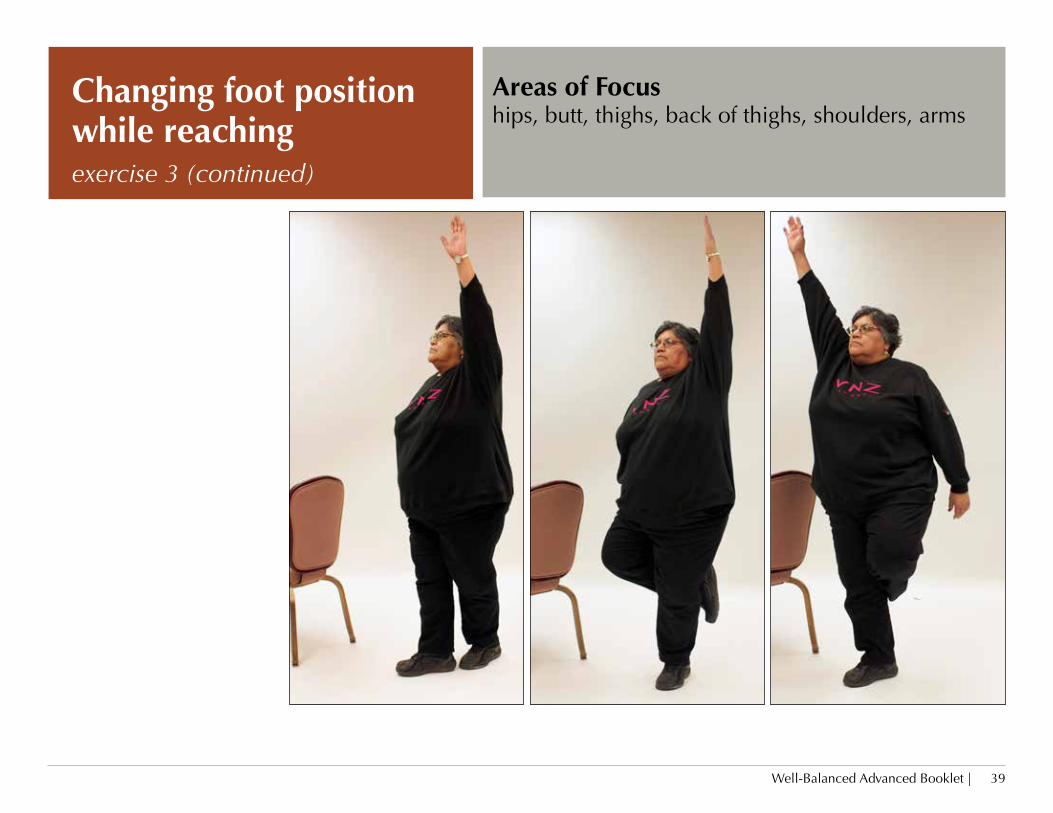
Areas of Focuships, butt, thighs, back of thighs, shoulders, arms
Changing foot position while reachingexercise 3 (continued)
| Well-Balanced Advanced Booklet 40
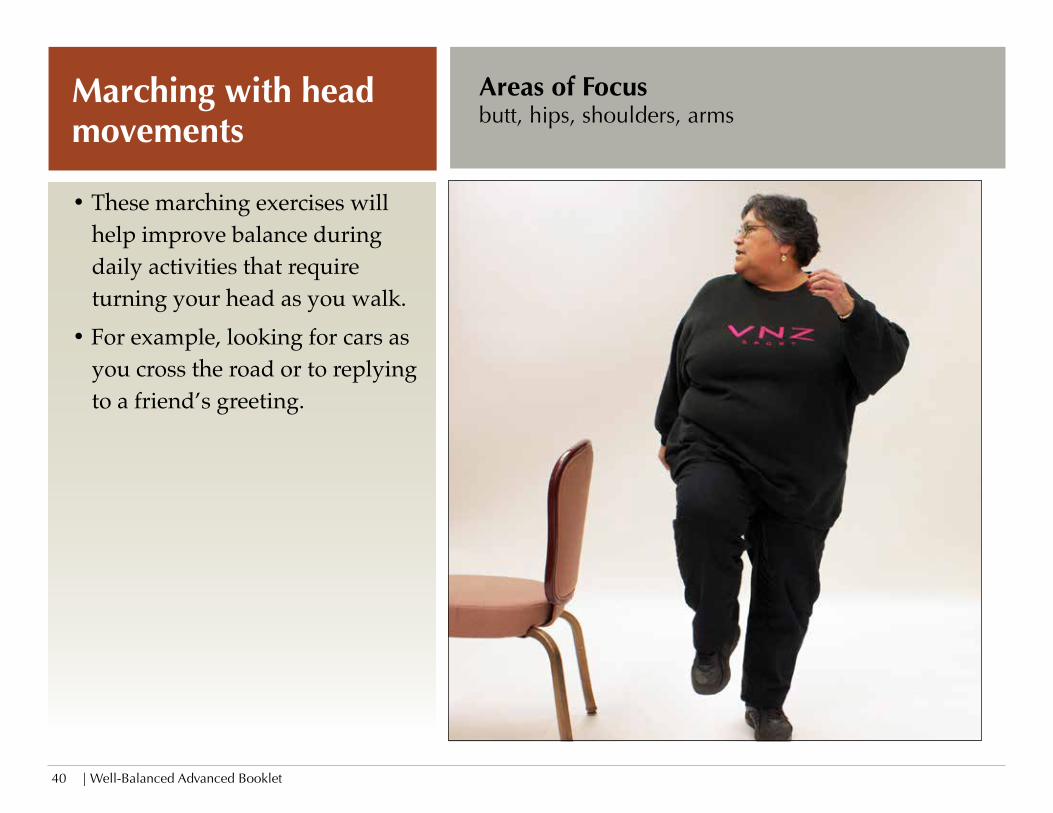
Areas of Focusbutt, hips, shoulders, arms
• These marching exercises will help improve balance during daily activities that require turning your head as you walk.
• For example, looking for cars as you cross the road or to replying to a friend’s greeting.
Marching with head movements
Well-Balanced Advanced Booklet | 41
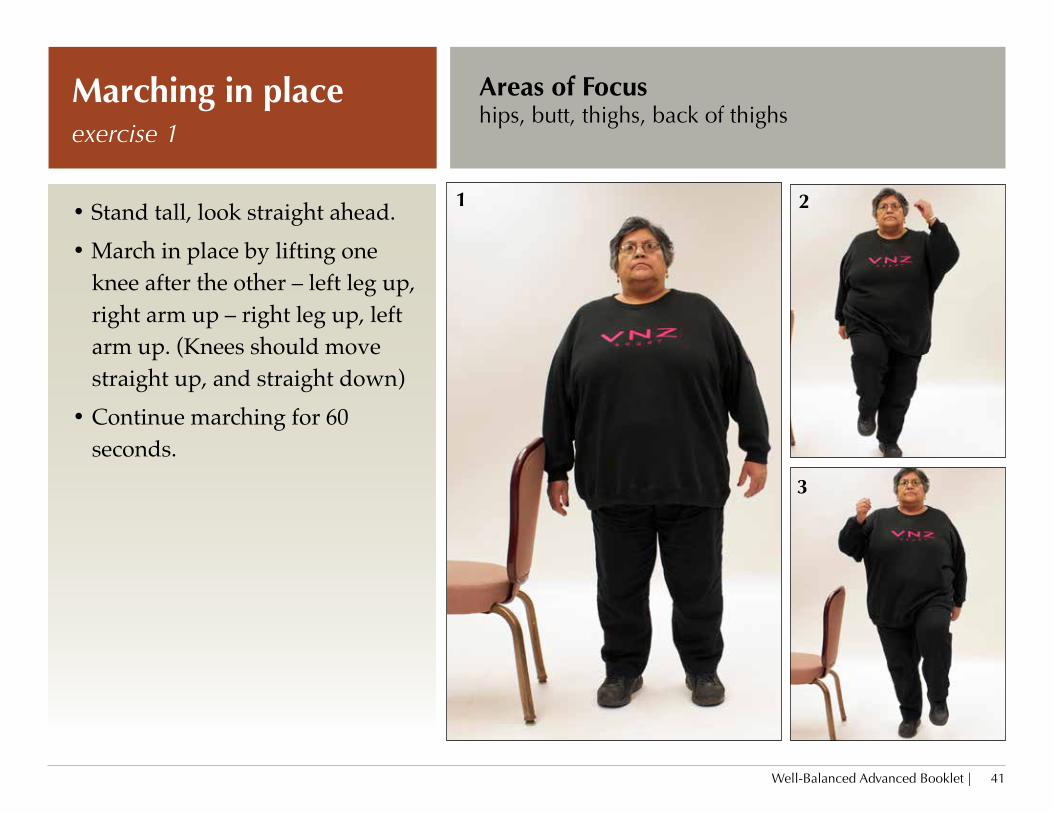
Areas of Focuships, butt, thighs, back of thighs
• Stand tall, look straight ahead.• March in place by lifting one
knee after the other – left leg up, right arm up – right leg up, left arm up. (Knees should move straight up, and straight down)
• Continue marching for 60 seconds.
Marching in place exercise 1
1 2
3
| Well-Balanced Advanced Booklet 42
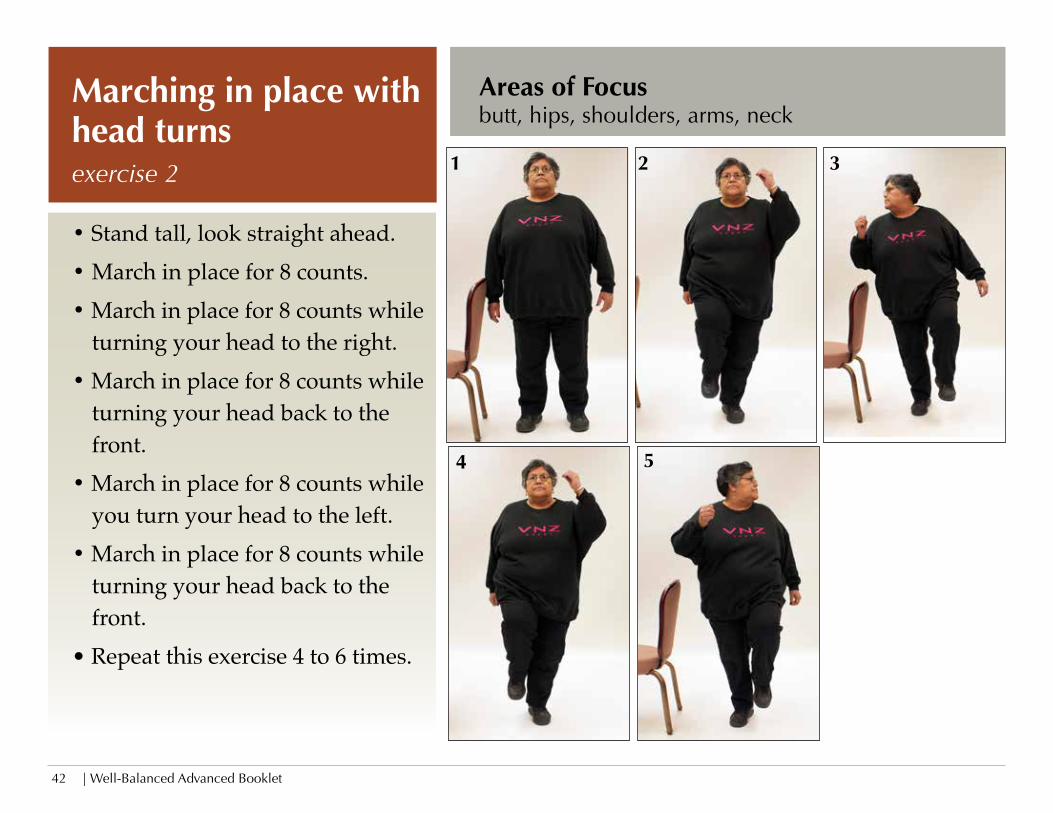
Areas of Focusbutt, hips, shoulders, arms, neck
• Stand tall, look straight ahead.• March in place for 8 counts.• March in place for 8 counts while
turning your head to the right.• March in place for 8 counts while
turning your head back to the front.
• March in place for 8 counts while you turn your head to the left.
• March in place for 8 counts while turning your head back to the front.
• Repeat this exercise 4 to 6 times.
Marching in place with head turns exercise 2 1 2 3
4 5
Well-Balanced Advanced Booklet | 43
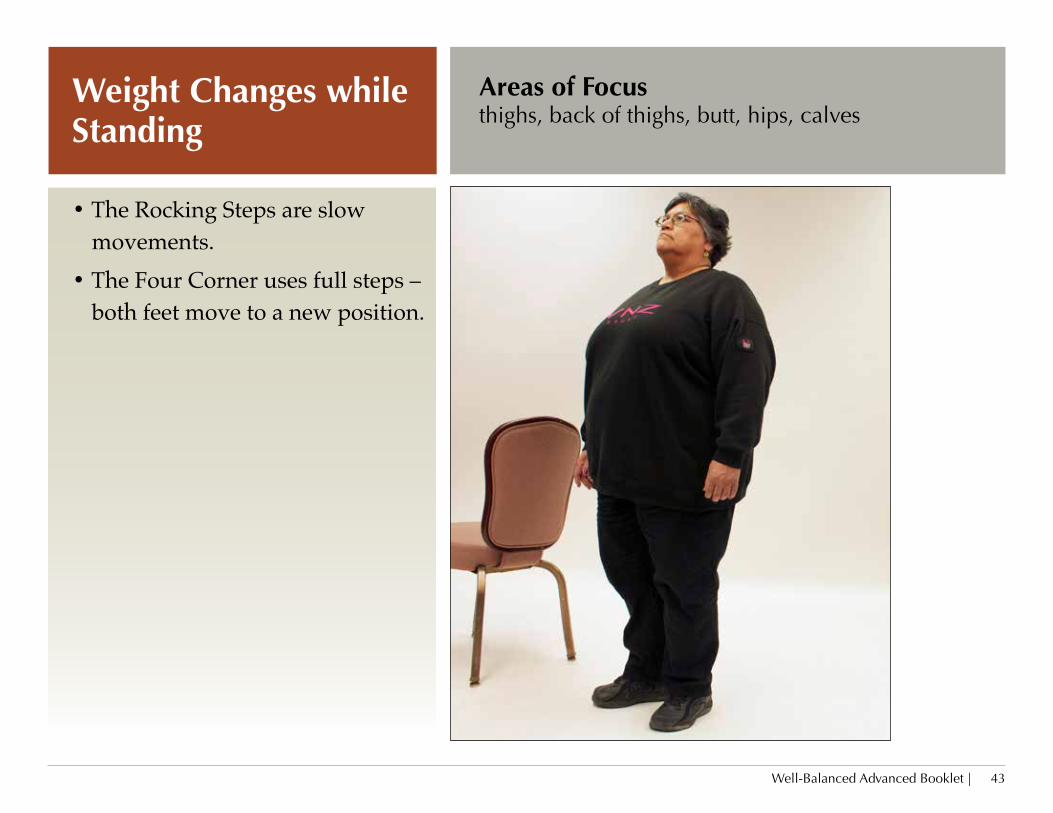
Areas of Focusthighs, back of thighs, butt, hips, calves
• The Rocking Steps are slow movements.
• The Four Corner uses full steps – both feet move to a new position.
Weight Changes while Standing
| Well-Balanced Advanced Booklet 44
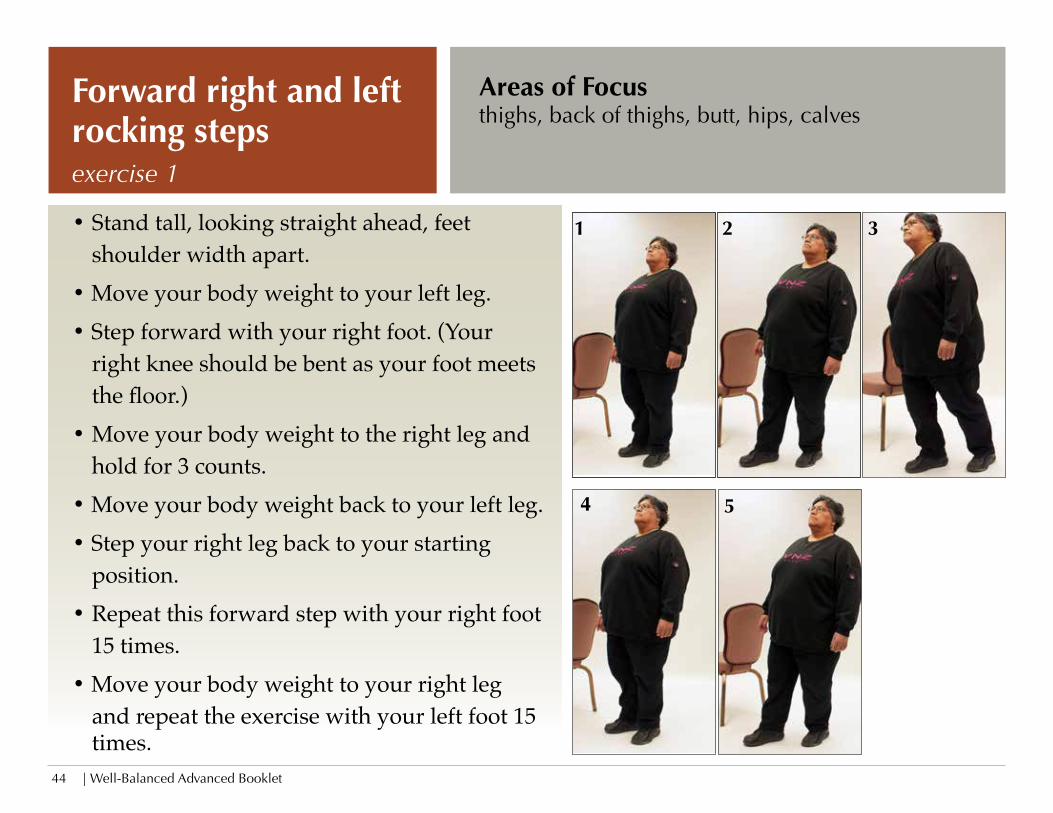
Areas of Focusthighs, back of thighs, butt, hips, calves
• Stand tall, looking straight ahead, feet shoulder width apart.
• Move your body weight to your left leg.• Step forward with your right foot. (Your
right knee should be bent as your foot meets the floor.)
• Move your body weight to the right leg and hold for 3 counts.
• Move your body weight back to your left leg.• Step your right leg back to your starting
position.• Repeat this forward step with your right foot
15 times.• Move your body weight to your right leg
and repeat the exercise with your left foot 15 times.
Forward right and left rocking steps exercise 1
1 2 3
4 5
Well-Balanced Advanced Booklet | 45
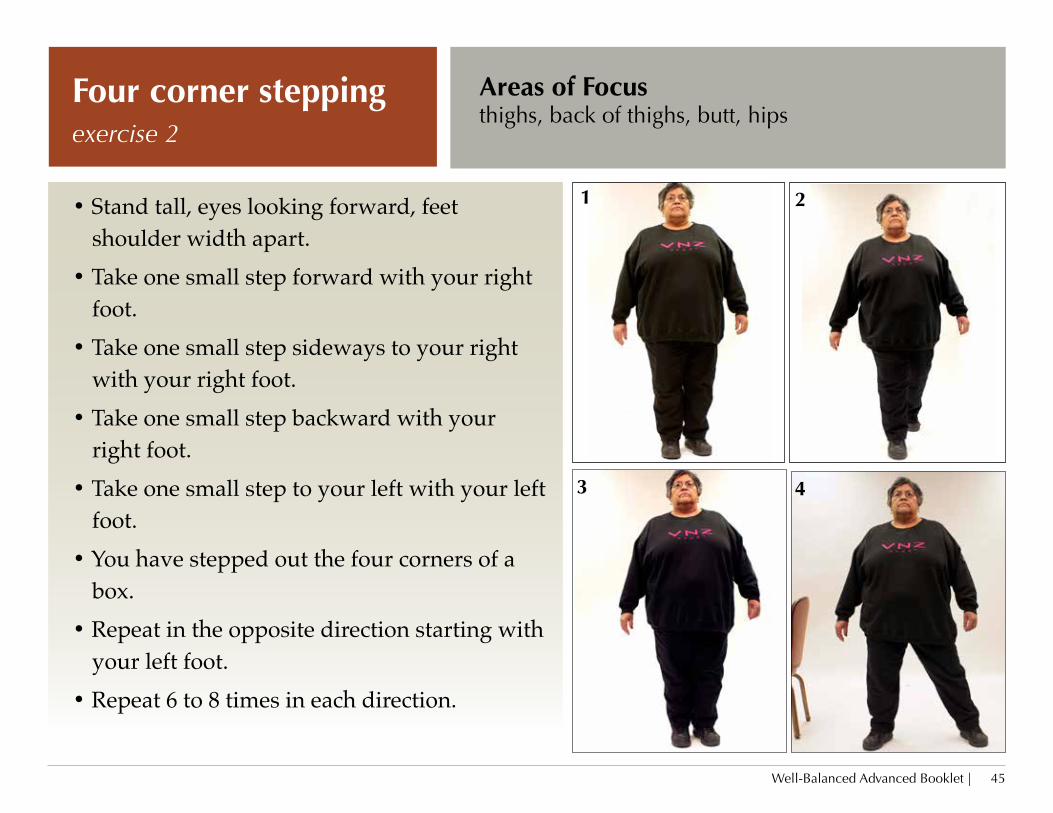
Areas of Focusthighs, back of thighs, butt, hips
• Stand tall, eyes looking forward, feet shoulder width apart.
• Take one small step forward with your right foot.
• Take one small step sideways to your right with your right foot.
• Take one small step backward with your right foot.
• Take one small step to your left with your left foot.
• You have stepped out the four corners of a box.
• Repeat in the opposite direction starting with your left foot.
• Repeat 6 to 8 times in each direction.
Four corner stepping exercise 2
1 2
3 4
| Well-Balanced Advanced Booklet 46
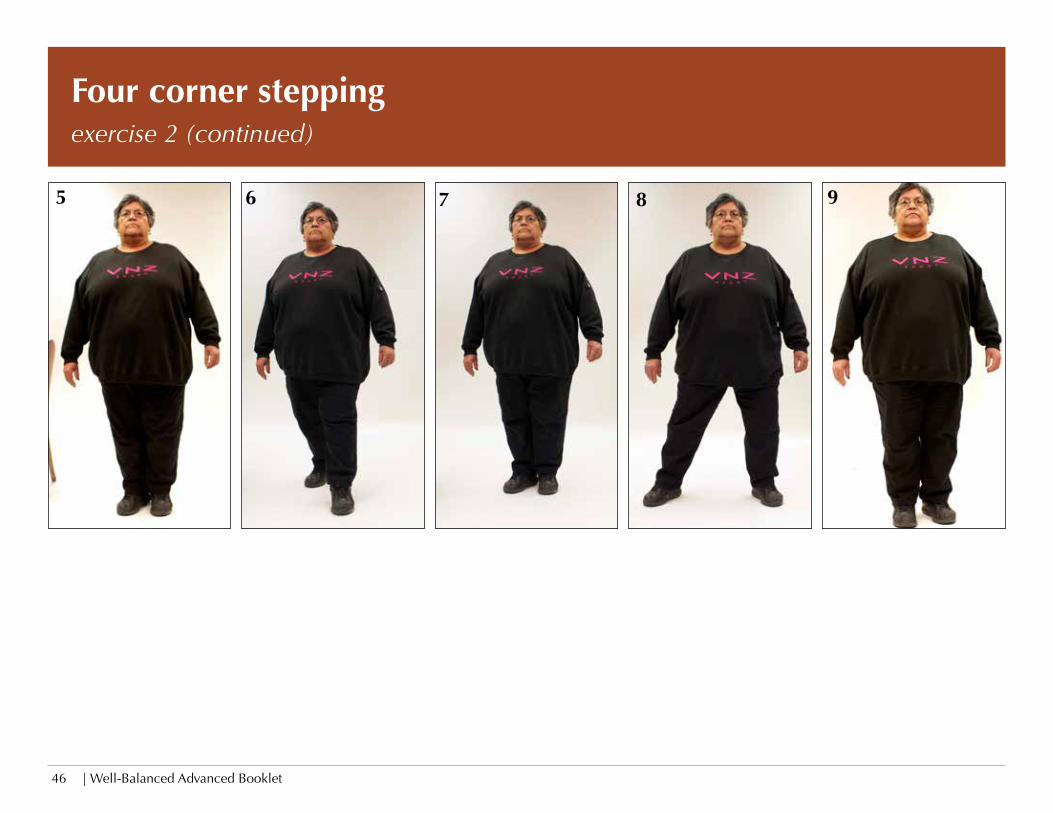
Four corner stepping exercise 2 (continued)
5 6 7 8 9
Well-Balanced Advanced Booklet | 47
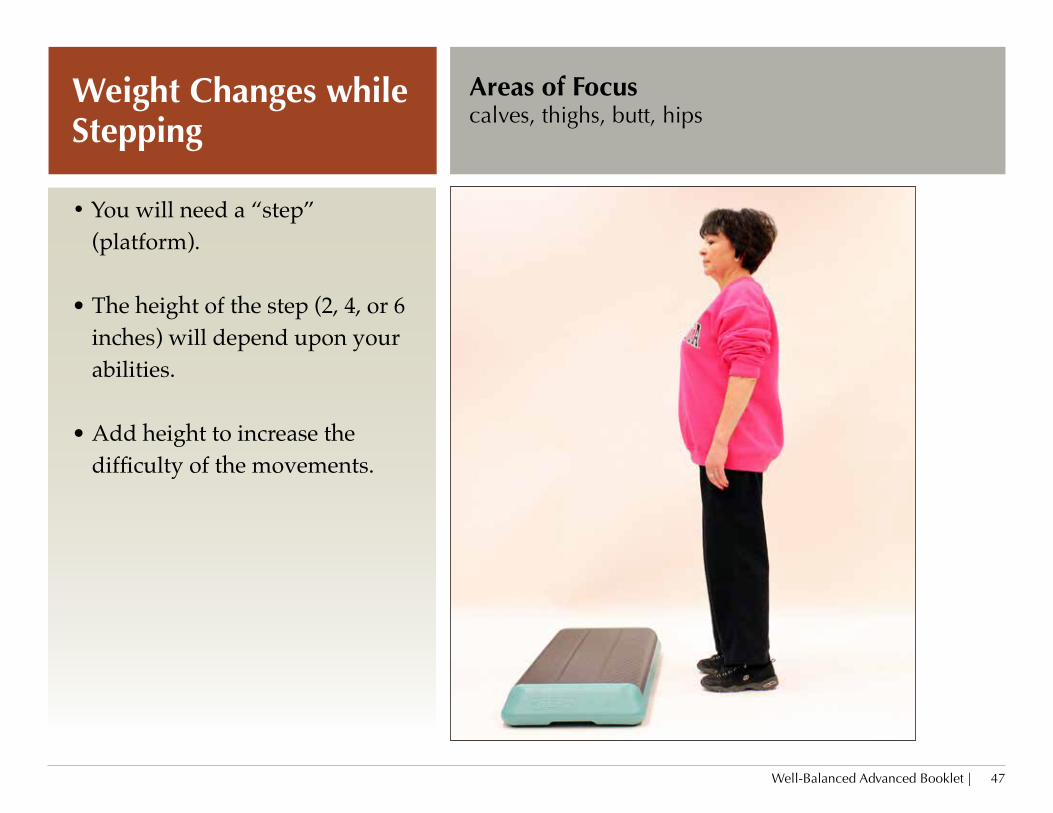
Areas of Focuscalves, thighs, butt, hips
• You will need a “step” (platform).
• The height of the step (2, 4, or 6 inches) will depend upon your abilities.
• Add height to increase the difficulty of the movements.
Weight Changes while Stepping
| Well-Balanced Advanced Booklet 48
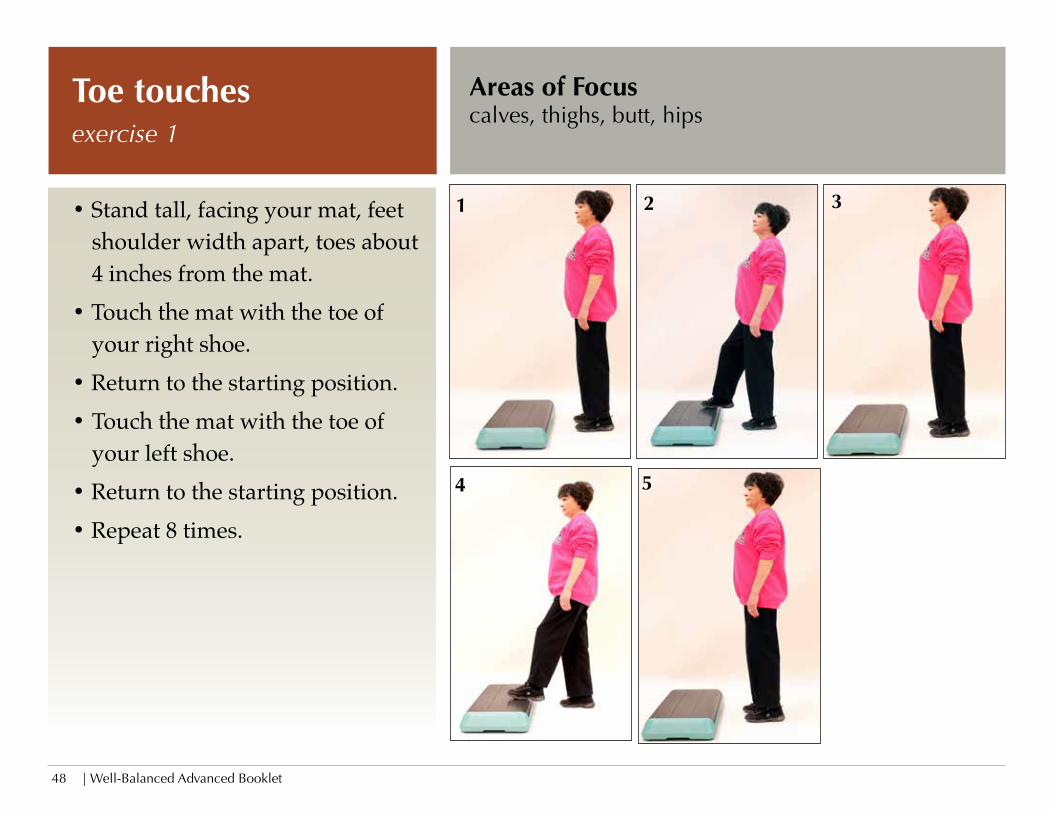
Areas of Focuscalves, thighs, butt, hips
• Stand tall, facing your mat, feet shoulder width apart, toes about 4 inches from the mat.
• Touch the mat with the toe of your right shoe.
• Return to the starting position.• Touch the mat with the toe of
your left shoe.• Return to the starting position.• Repeat 8 times.
Toe touchesexercise 1
1 2 3
4 5
Well-Balanced Advanced Booklet | 49
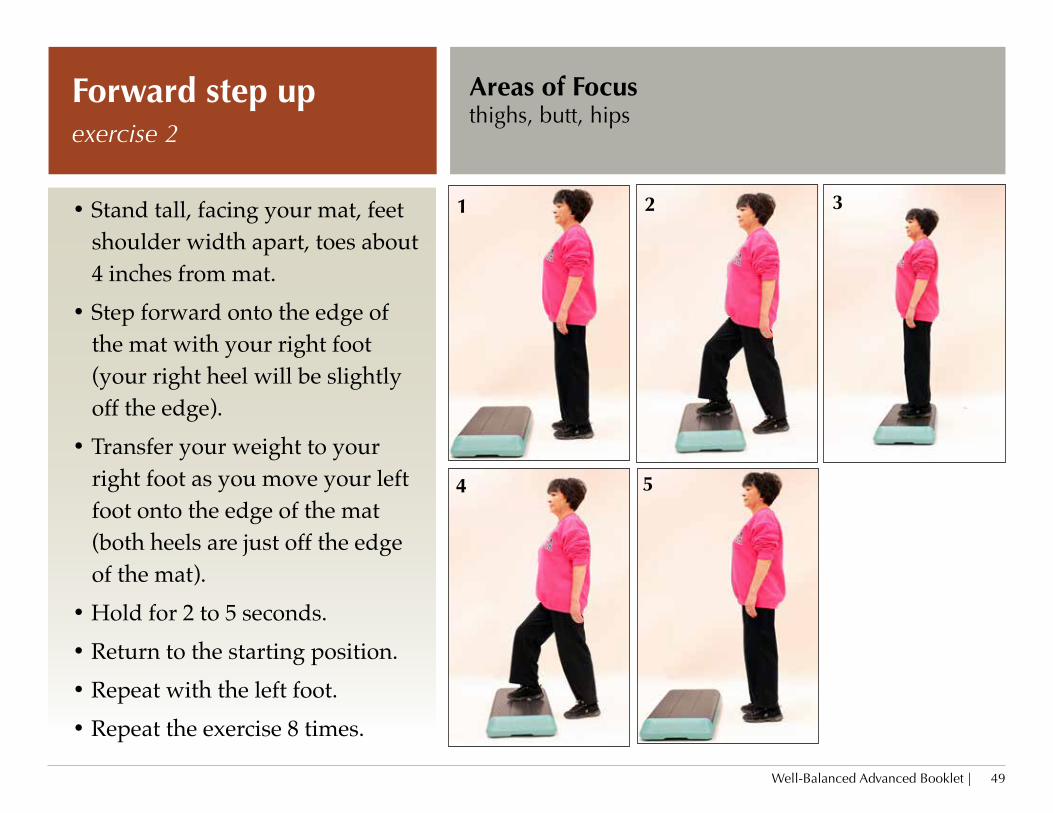
• Stand tall, facing your mat, feet shoulder width apart, toes about 4 inches from mat.
• Step forward onto the edge of the mat with your right foot
(your right heel will be slightly off the edge).
• Transfer your weight to your right foot as you move your left foot onto the edge of the mat (both heels are just off the edge of the mat).
• Hold for 2 to 5 seconds.• Return to the starting position.• Repeat with the left foot.• Repeat the exercise 8 times.
Forward step up exercise 2
Areas of Focusthighs, butt, hips
1 2 3
4 5
| Well-Balanced Advanced Booklet 50
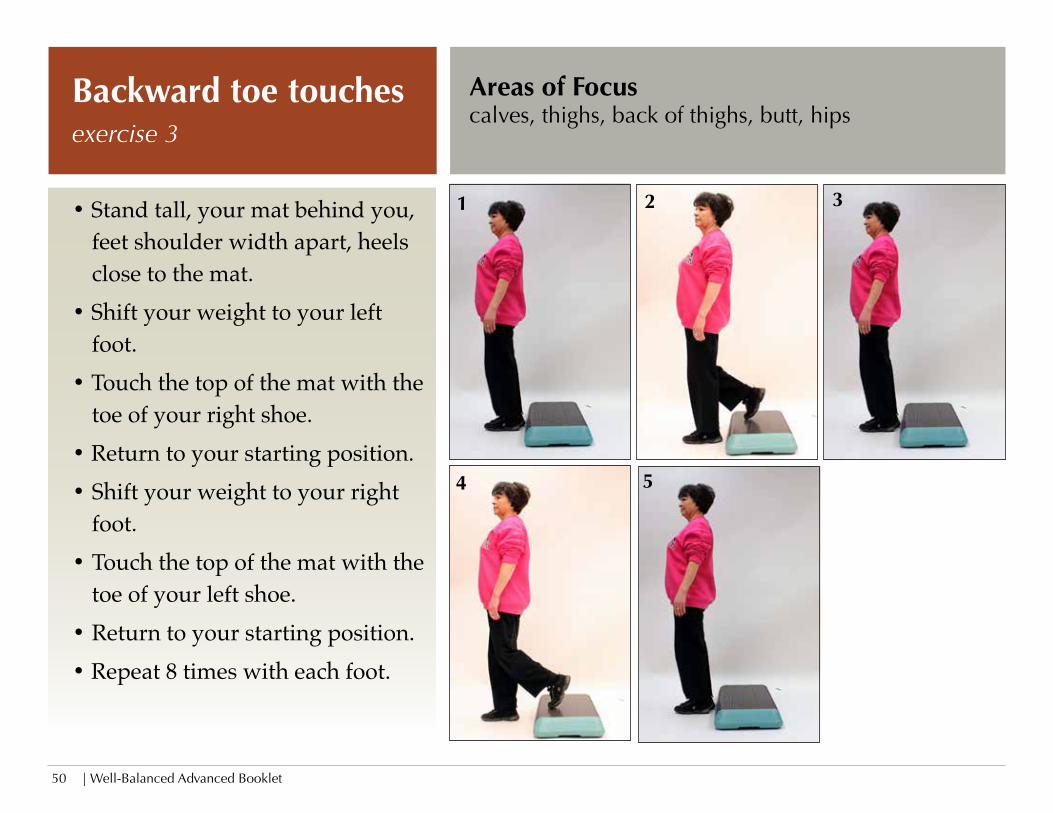
• Stand tall, your mat behind you, feet shoulder width apart, heels close to the mat.
• Shift your weight to your left foot.
• Touch the top of the mat with the toe of your right shoe.
• Return to your starting position.• Shift your weight to your right
foot.• Touch the top of the mat with the
toe of your left shoe.• Return to your starting position.• Repeat 8 times with each foot.
Backward toe touches exercise 3
Areas of Focuscalves, thighs, back of thighs, butt, hips
1 2 3
4 5
Well-Balanced Advanced Booklet | 51
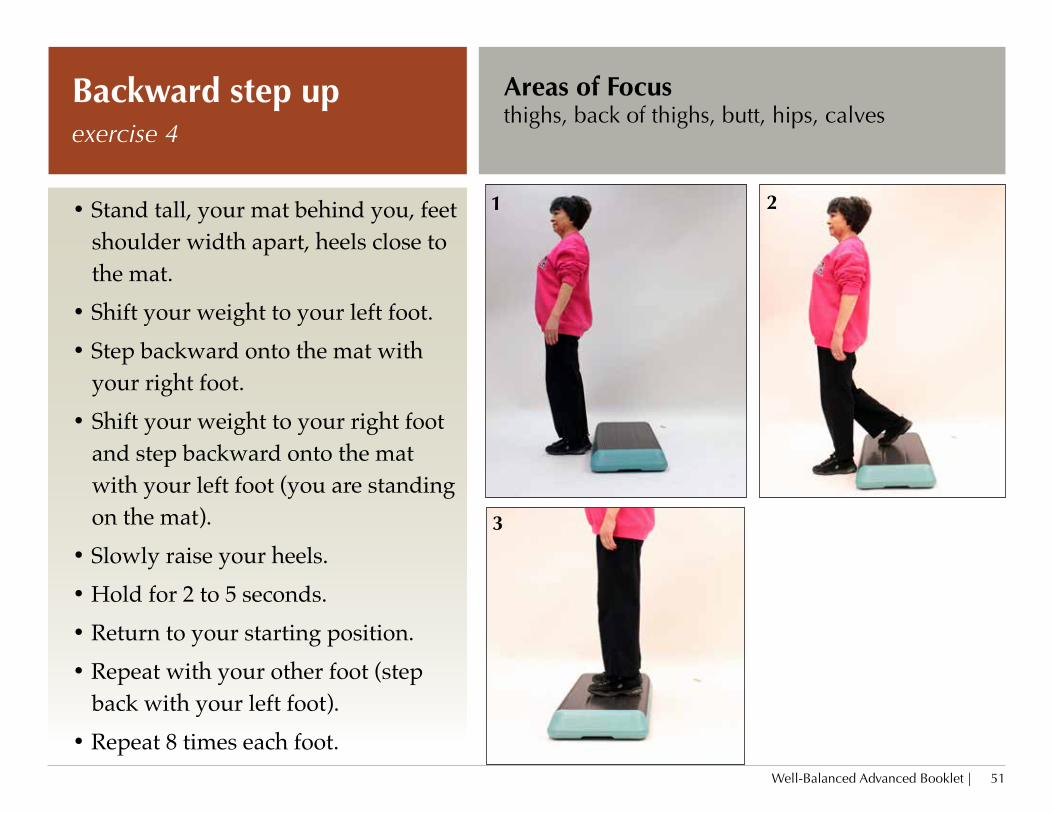
• Stand tall, your mat behind you, feet shoulder width apart, heels close to the mat.
• Shift your weight to your left foot.• Step backward onto the mat with
your right foot.• Shift your weight to your right foot
and step backward onto the mat with your left foot (you are standing on the mat).
• Slowly raise your heels.• Hold for 2 to 5 seconds.• Return to your starting position.• Repeat with your other foot (step
back with your left foot).• Repeat 8 times each foot.
Backward step up exercise 4
Areas of Focusthighs, back of thighs, butt, hips, calves
1 2
3
| Well-Balanced Advanced Booklet 52
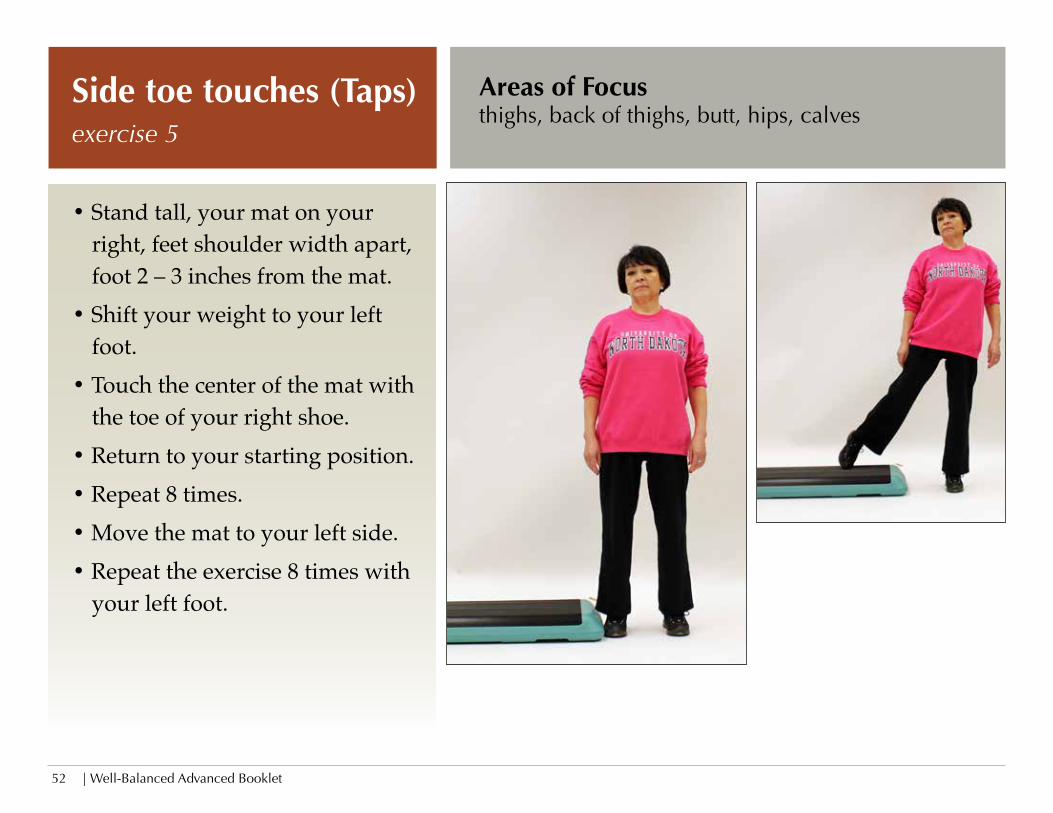
Areas of Focusthighs, back of thighs, butt, hips, calves
• Stand tall, your mat on your right, feet shoulder width apart, foot 2 – 3 inches from the mat.
• Shift your weight to your left foot.
• Touch the center of the mat with the toe of your right shoe.
• Return to your starting position.• Repeat 8 times.• Move the mat to your left side.• Repeat the exercise 8 times with
your left foot.
Side toe touches (Taps) exercise 5

Well-Balanced Advanced Booklet | 53
Areas of Focusthighs, back of thighs, butt, hips
• Stand tall, your mat on your right, feet shoulder width apart, foot 2 to 3 inches from mat.
• Shift your weight to your left foot.
• Step up onto your mat with your right foot.
• Shift your weight to your right foot.
• Lift your left foot off the floor.• Hold for 3 seconds.• Set your left foot on the floor.• Step back down to your
beginning position.• Repeat 8 times on each side.
Side step raises exercise 6
1 2 3
4 5
| Well-Balanced Advanced Booklet 54
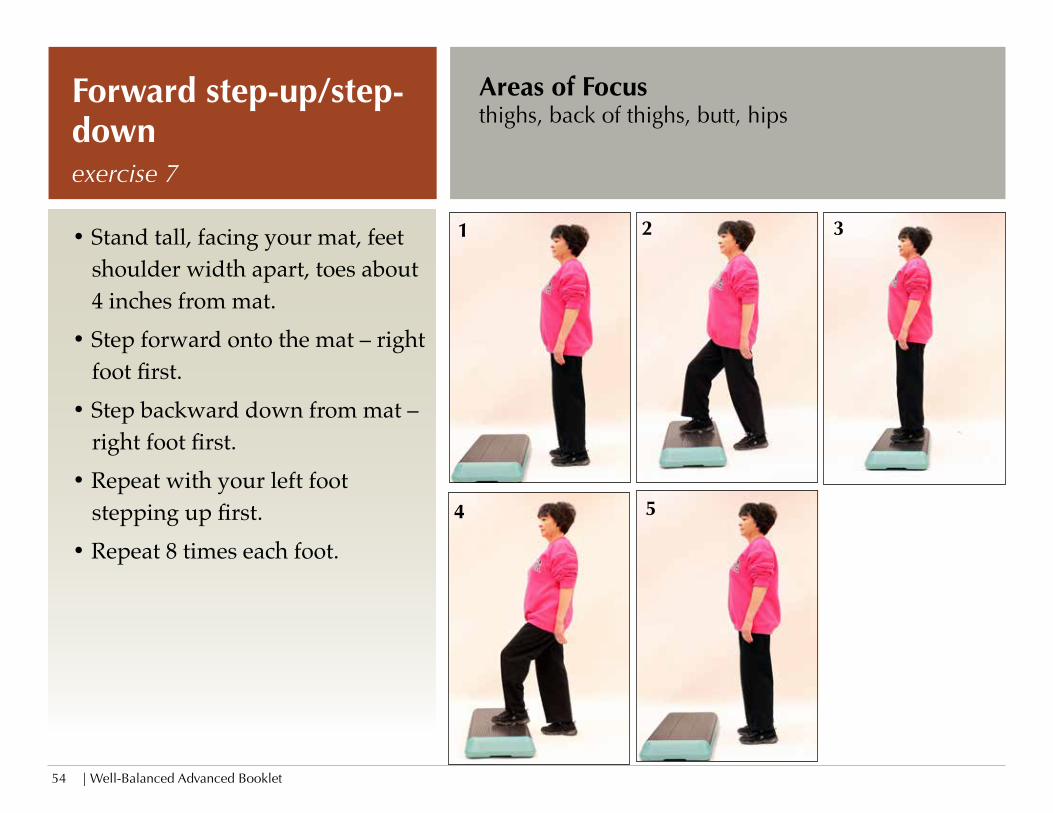
Areas of Focusthighs, back of thighs, butt, hips
• Stand tall, facing your mat, feet shoulder width apart, toes about 4 inches from mat.
• Step forward onto the mat – right foot first.
• Step backward down from mat – right foot first.
• Repeat with your left foot stepping up first.
• Repeat 8 times each foot.
Forward step-up/step-down exercise 7
1 2 3
4 5
Well-Balanced Advanced Booklet | 55
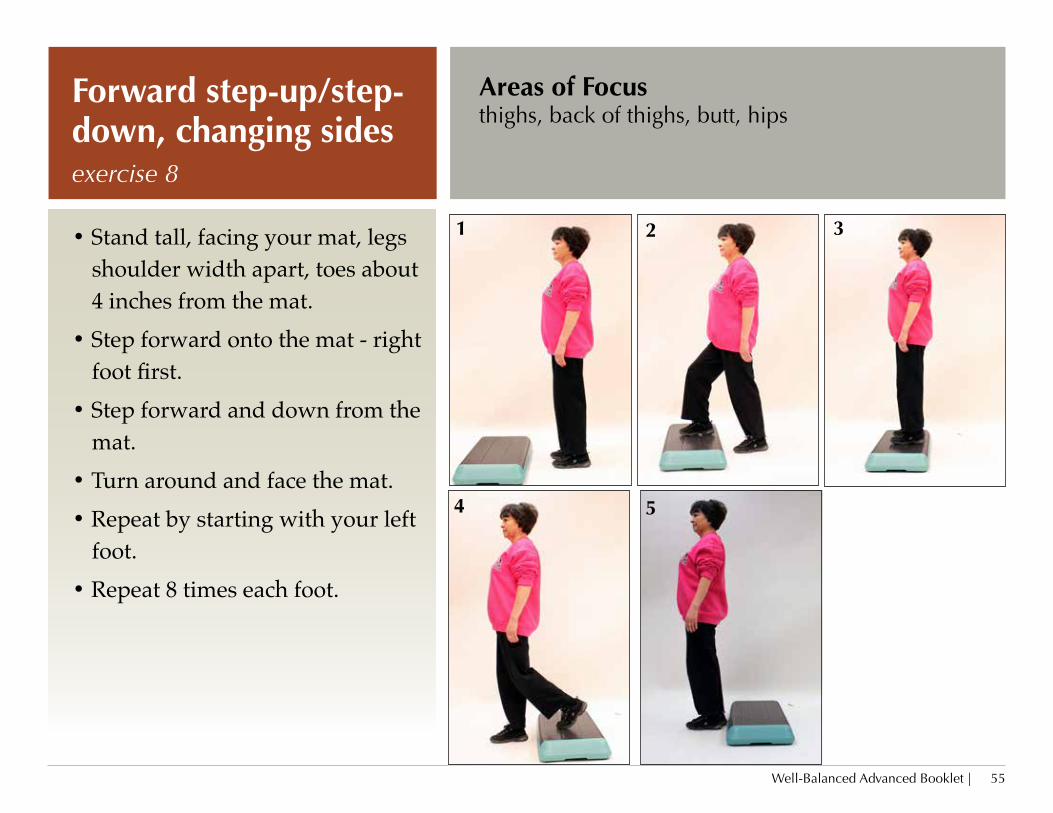
Areas of Focusthighs, back of thighs, butt, hips
• Stand tall, facing your mat, legs shoulder width apart, toes about 4 inches from the mat.
• Step forward onto the mat - right foot first.
• Step forward and down from the mat.
• Turn around and face the mat.• Repeat by starting with your left
foot.• Repeat 8 times each foot.
Forward step-up/step-down, changing sides exercise 8
1 2 3
4 5
| Well-Balanced Advanced Booklet 56
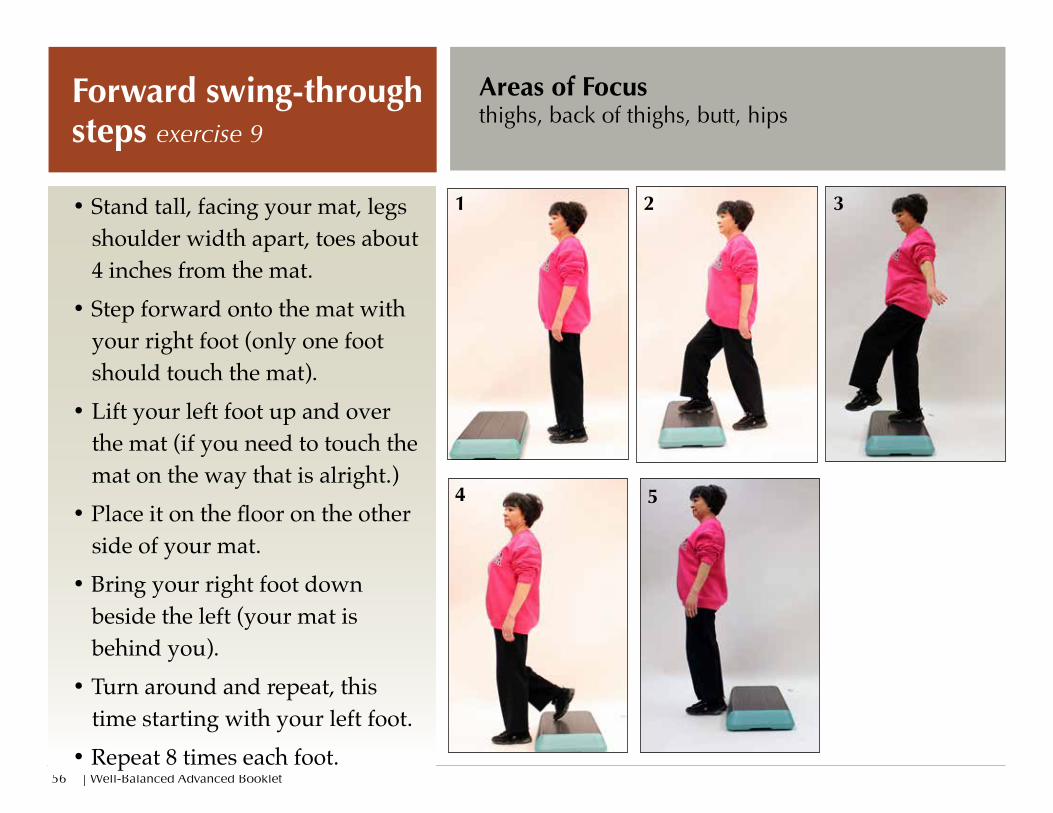
Areas of Focusthighs, back of thighs, butt, hips
• Stand tall, facing your mat, legs shoulder width apart, toes about 4 inches from the mat.
• Step forward onto the mat with your right foot (only one foot should touch the mat).
• Lift your left foot up and over the mat (if you need to touch the mat on the way that is alright.)
• Place it on the floor on the other side of your mat.
• Bring your right foot down beside the left (your mat is behind you).
• Turn around and repeat, this time starting with your left foot.
• Repeat 8 times each foot.
Forward swing-through steps exercise 9
1 2 3
4 5
Well-Balanced Advanced Booklet | 57
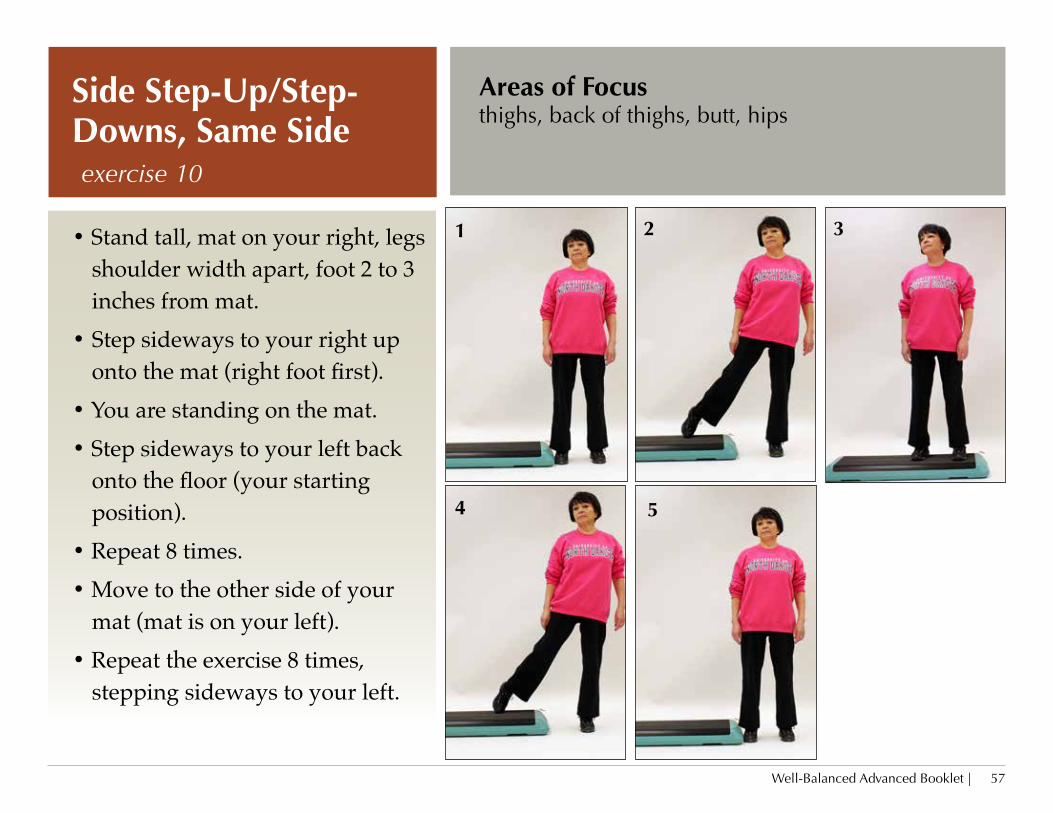
Areas of Focusthighs, back of thighs, butt, hips
• Stand tall, mat on your right, legs shoulder width apart, foot 2 to 3 inches from mat.
• Step sideways to your right up onto the mat (right foot first).
• You are standing on the mat.• Step sideways to your left back
onto the floor (your starting position).
• Repeat 8 times.• Move to the other side of your
mat (mat is on your left).• Repeat the exercise 8 times,
stepping sideways to your left.
Side Step-Up/Step-Downs, Same Side exercise 10
1 2 3
4 5
| Well-Balanced Advanced Booklet 58
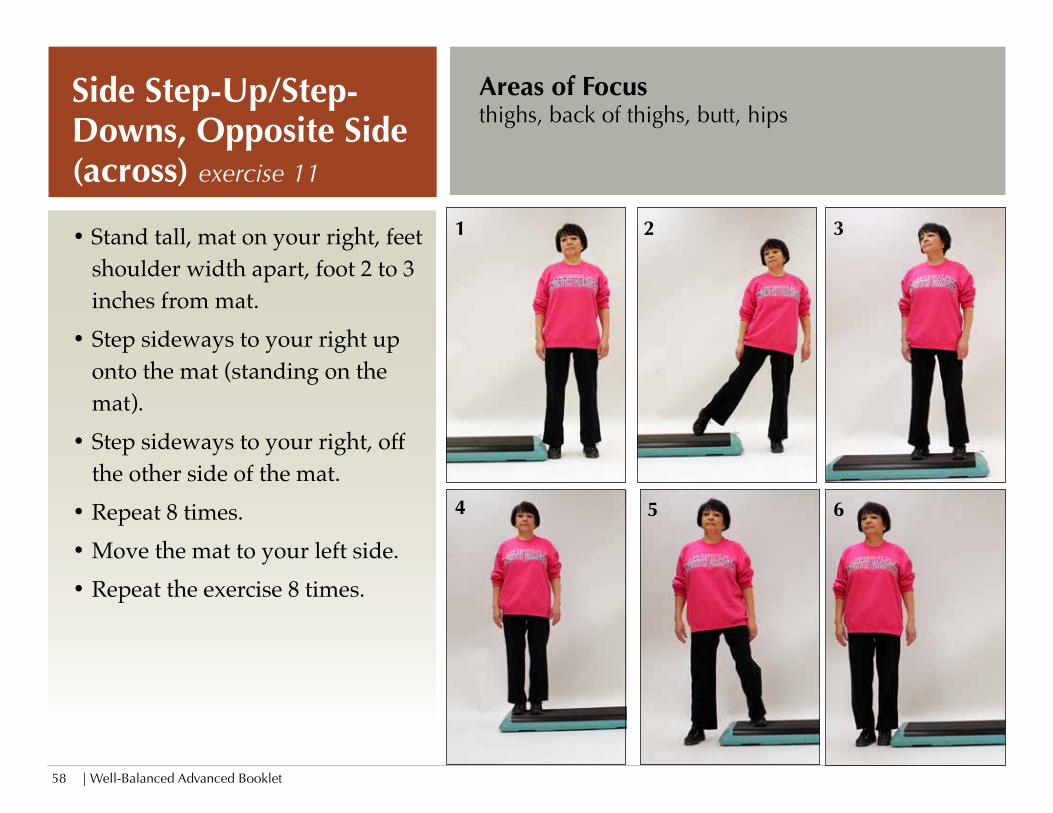
Areas of Focusthighs, back of thighs, butt, hips
• Stand tall, mat on your right, feet shoulder width apart, foot 2 to 3 inches from mat.
• Step sideways to your right up onto the mat (standing on the mat).
• Step sideways to your right, off the other side of the mat.
• Repeat 8 times.• Move the mat to your left side.• Repeat the exercise 8 times.
Side Step-Up/Step-Downs, Opposite Side (across) exercise 11
1 2 3
4 5 6
Well-Balanced Advanced Booklet | 59
Walking Balance Activities Purpose• To improve your balance while performing daily activities.
Materials• Masking tape• Music and player (optional)
| Well-Balanced Advanced Booklet 60
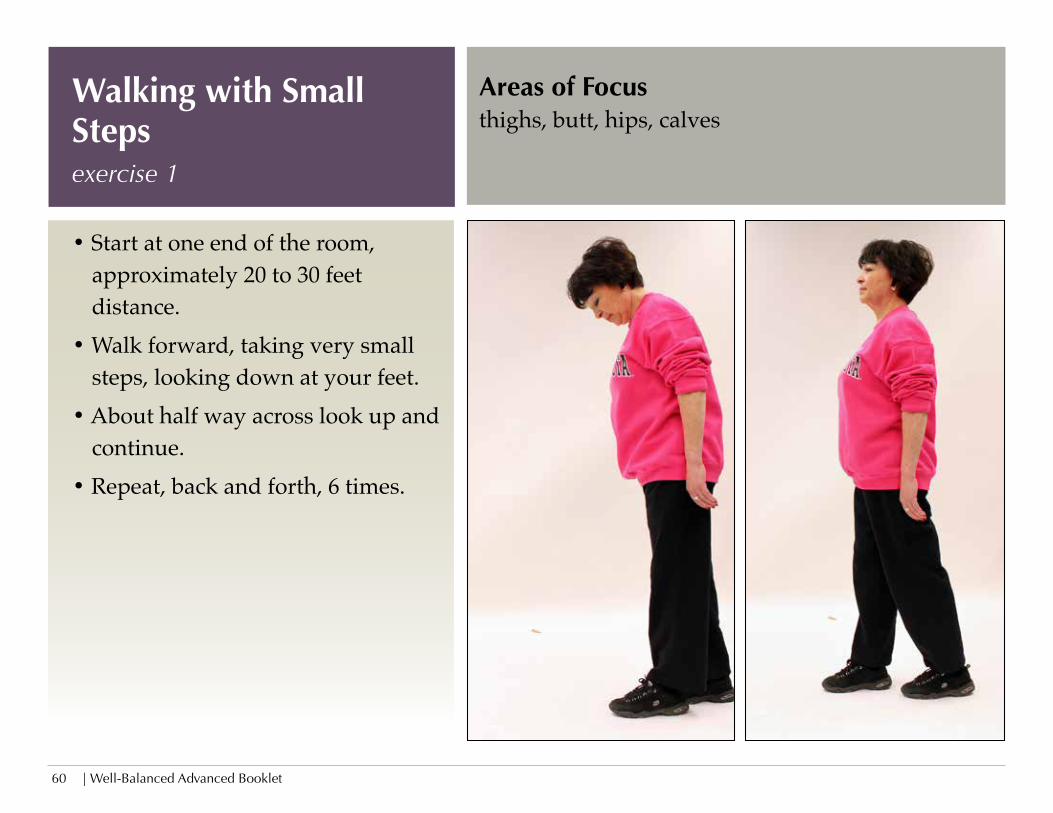
Areas of Focusthighs, butt, hips, calves
• Start at one end of the room, approximately 20 to 30 feet distance.
• Walk forward, taking very small steps, looking down at your feet.
• About half way across look up and continue.
• Repeat, back and forth, 6 times.
Walking with Small Steps exercise 1
Well-Balanced Advanced Booklet | 61
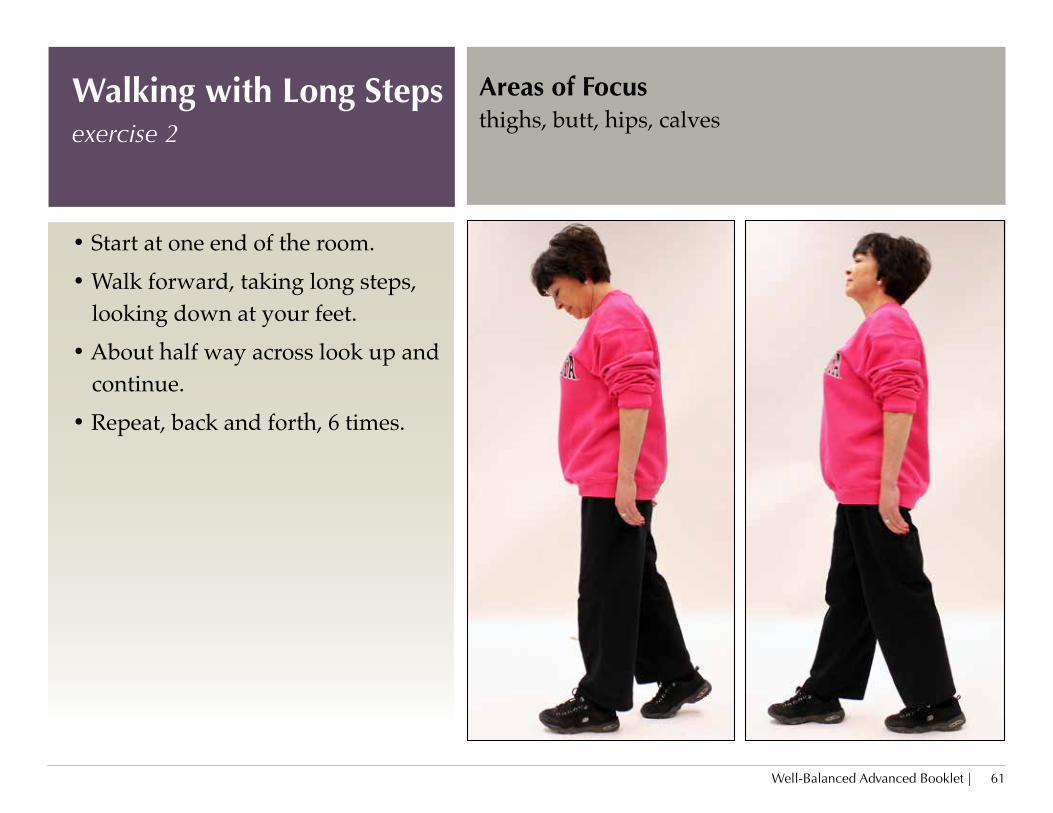
Areas of Focusthighs, butt, hips, calves
• Start at one end of the room.• Walk forward, taking long steps,
looking down at your feet.• About half way across look up and
continue.• Repeat, back and forth, 6 times.
Walking with Long Steps exercise 2

| Well-Balanced Advanced Booklet 62
Areas of Focusthighs, butt, hips, calves
• Start at one end of the room.• Looking down at your feet, take a
long step forward, and then stop with feet together.
• About half way across – look up and continue.
• Repeat, back and forth, 6 times.
Walking with Long Steps & Stopping with Feet Together exercise 3
1 2
3
Well-Balanced Advanced Booklet | 63
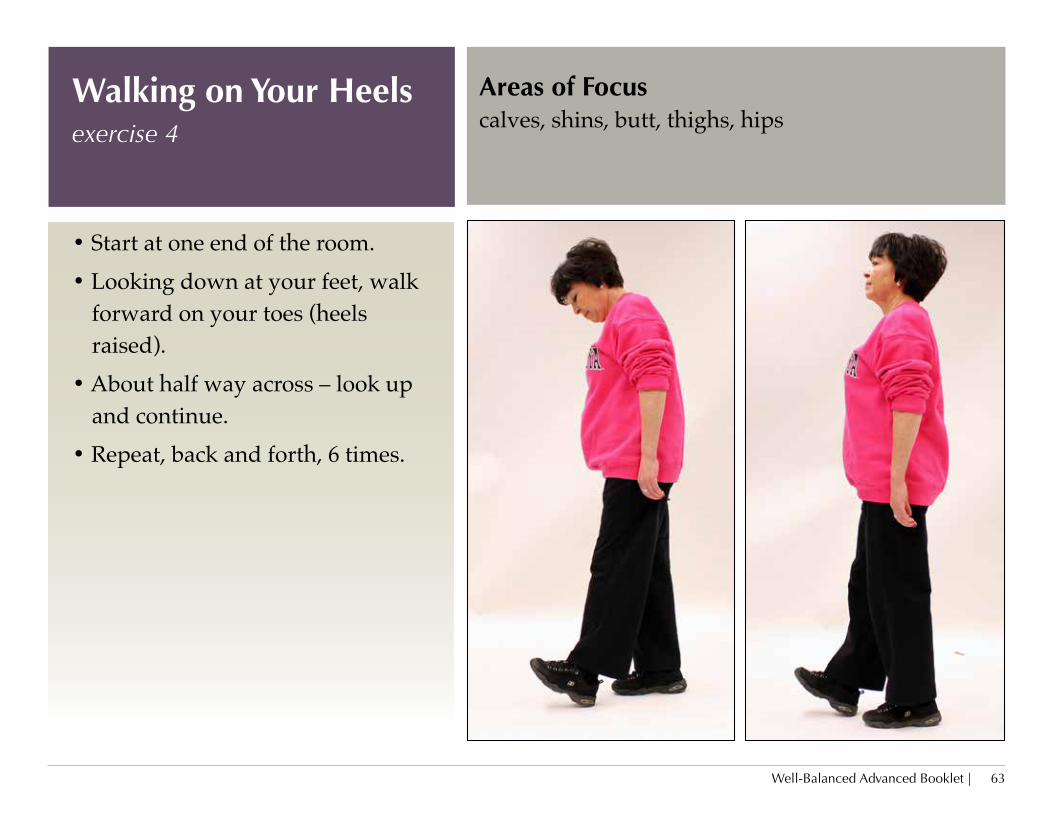
• Start at one end of the room.• Looking down at your feet, walk
forward on your toes (heels raised).
• About half way across – look up and continue.
• Repeat, back and forth, 6 times.
Walking on Your Heels exercise 4
Areas of Focuscalves, shins, butt, thighs, hips

| Well-Balanced Advanced Booklet 64
• Start at one end of the room.• Looking down at your feet, walk
forward on your heels (toes raised).
• About half way across – look up and continue.
• Repeat, back and forth, 6 times.
Walking on Your Toes exercise 5
Areas of Focuscalves, shins, butt, thighs, hips
Well-Balanced Advanced Booklet | 65
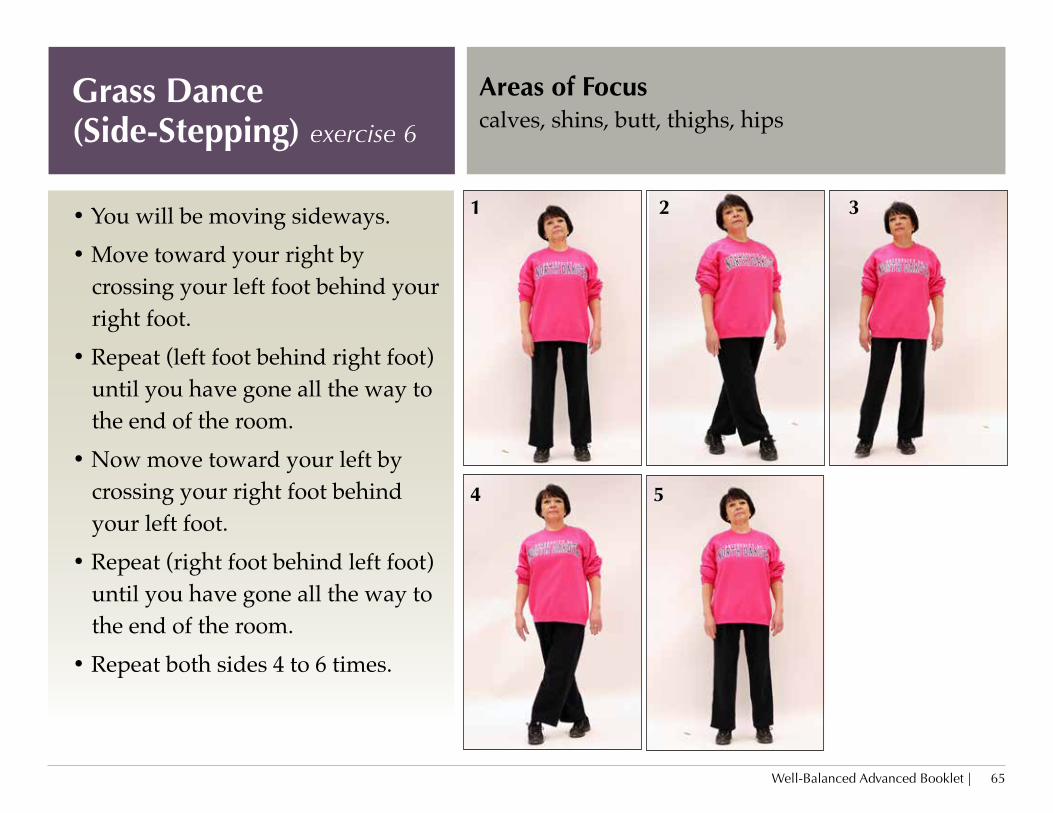
• You will be moving sideways. • Move toward your right by
crossing your left foot behind your right foot.
• Repeat (left foot behind right foot) until you have gone all the way to the end of the room.
• Now move toward your left by crossing your right foot behind your left foot.
• Repeat (right foot behind left foot) until you have gone all the way to the end of the room.
• Repeat both sides 4 to 6 times.
Grass Dance (Side-Stepping) exercise 6
Areas of Focuscalves, shins, butt, thighs, hips
1 2 3
4 5
| Well-Balanced Advanced Booklet 66
Set-upWith masking tape create several “creeks” on the floor. For each creek:
• Lay a piece of masking tape on the floor (about 5 to 6 feet in length).• Lay another piece of tape the same length, next to the first piece, with a space
between that gradually gets wider (starting about 6 inches apart and ending about 18 inches apart).
• Repeat till you have a “creek” for every 2 or 3 elders.
The area between the two lines is the “creek” and the areas outside the two lines are the “creek banks.”
• If you have problems completing any of these exercises – don’t move on to the next. • Do not go past your comfort level!
Creek Crossing Goal Try to cross the “creek,” as many times as possible without getting your feet wet (feet touch-ing the floor in the space between the two lines).
Well-Balanced Advanced Booklet | 67
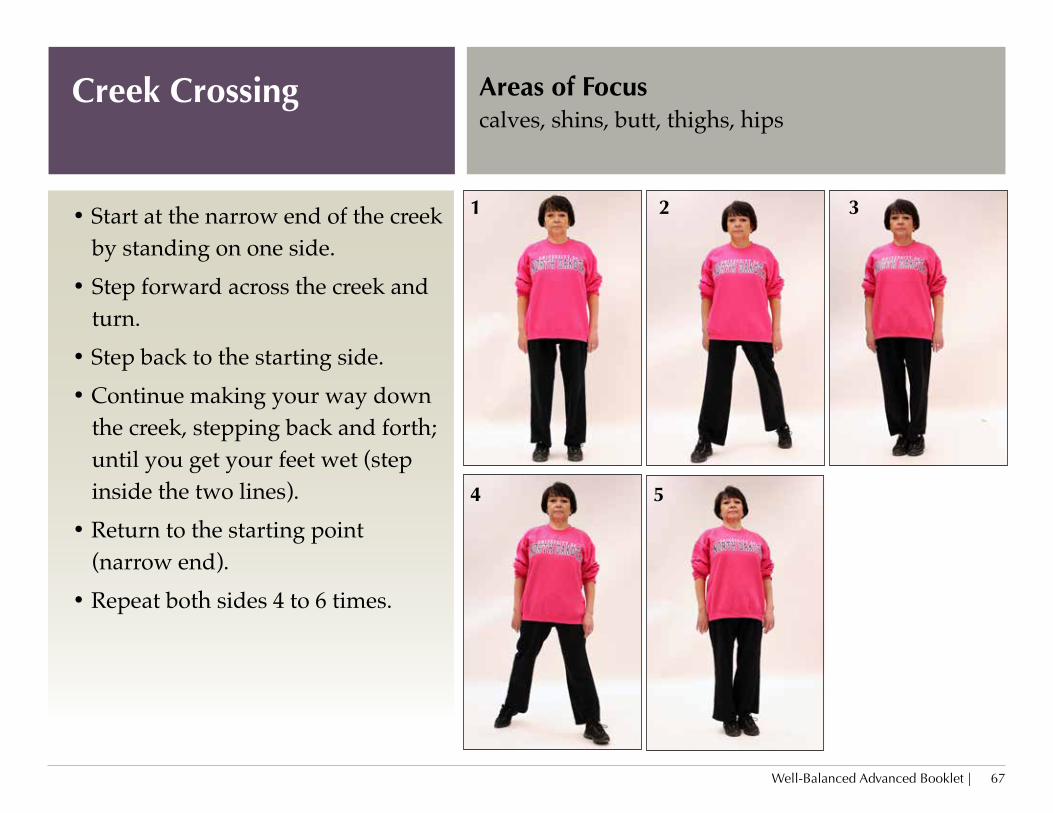
• Start at the narrow end of the creek by standing on one side.
• Step forward across the creek and turn.
• Step back to the starting side.• Continue making your way down
the creek, stepping back and forth; until you get your feet wet (step inside the two lines).
• Return to the starting point (narrow end).
• Repeat both sides 4 to 6 times.
Creek Crossing Areas of Focuscalves, shins, butt, thighs, hips
1 2 3
4 5
| Well-Balanced Advanced Booklet 68
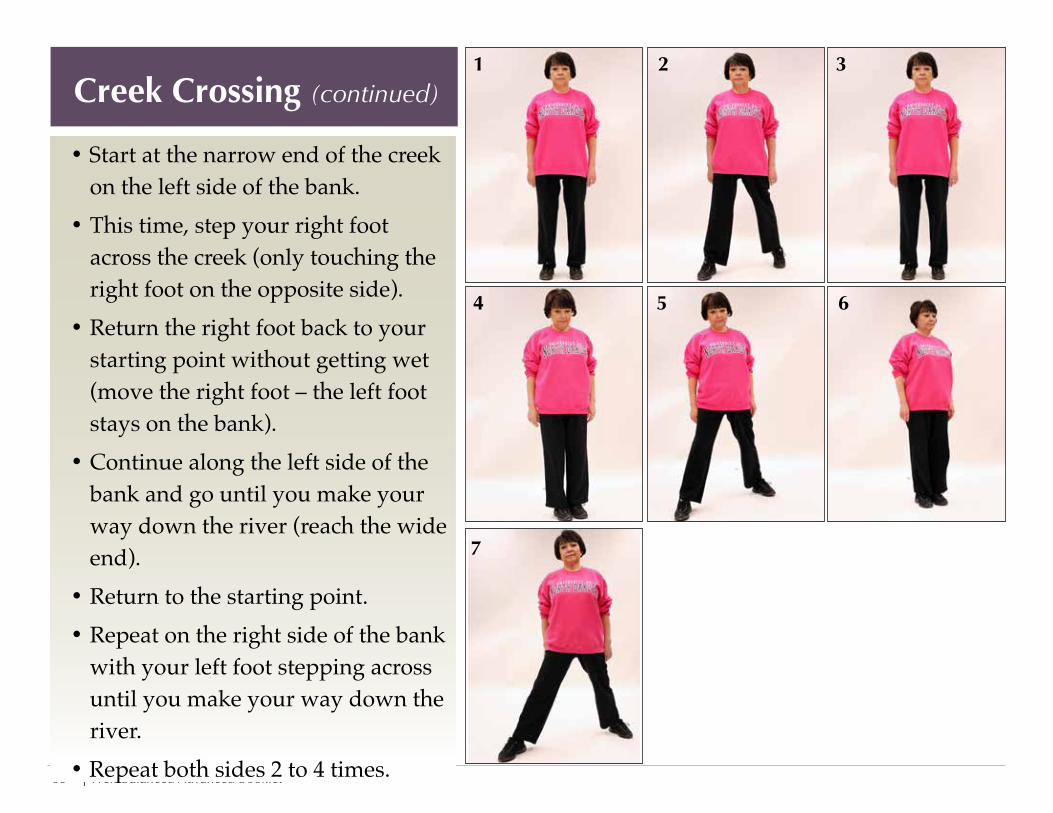
• Start at the narrow end of the creek on the left side of the bank.
• This time, step your right foot across the creek (only touching the right foot on the opposite side).
• Return the right foot back to your starting point without getting wet (move the right foot – the left foot stays on the bank).
• Continue along the left side of the bank and go until you make your way down the river (reach the wide end).
• Return to the starting point.• Repeat on the right side of the bank
with your left foot stepping across until you make your way down the river.
• Repeat both sides 2 to 4 times.
Creek Crossing (continued)1 2 3
4 6
7
5
Well-Balanced Advanced Booklet | 69
Strengthening Activities Materials• Resistance band: two 3 foot long strips of each color
(yellow, red or green). (One strip should have a loop tied at the end. Make the loop big enough to place your foot through it.)
• Chair
How Much and How Often
• Do strength exercises at least twice a week.
• Resistance Bands: Yellow is extra light, red is light and green is medium. You may want to use yellow or red bands for arm exercises and red or green for leg exercises.
• Use lowest resistance the first week (yellow or red bands), then gradually add resistance (move to red or green bands). (Starting out with too much resistance can cause injuries, but you need to challenge your muscles in order to benefit from strength exercises.)
• Repeat each exercise 8 to 12 times (repetitions). As you become stronger, you will be able to do two sets of each exercise (do 1 set of 8 to 12 repetitions, wait a short time, then do another set of 8 to 12 repetitions). You may want to choose a more resistant band when it becomes easy to perform 2 sets of repetitions.
| Well-Balanced Advanced Booklet 70
Strengthening Activities Safety
• Don’t hold your breath during strength exercises. Breathe normally. (Holding your breath while exercising can cause changes in blood pressure.)
• Use smooth, steady movements.
• Avoid “locking” the joints in your arms and legs.
• Breathe out as you lift or push, and breathe in as you relax.
• None of the exercises should cause pain.
- You may be a little sore for a few days. You may feel slightly more tired than normal. This is natural.
- But exhaustion, sore joints, and muscle pain are not normal. These symptoms mean you are overdoing it.
Well-Balanced Advanced Booklet | 71
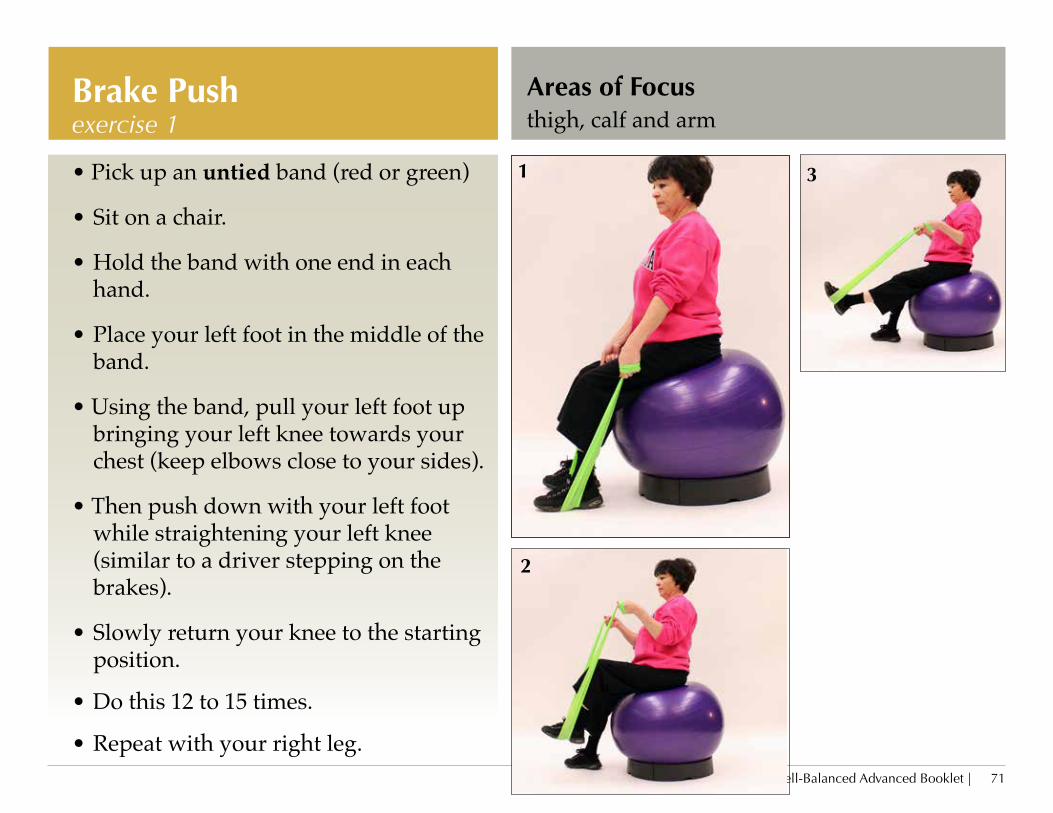
Areas of Focusthigh, calf and arm
• Pick up an untied band (red or green)
• Sit on a chair.
• Hold the band with one end in each hand.
• Place your left foot in the middle of the band.
• Using the band, pull your left foot up bringing your left knee towards your chest (keep elbows close to your sides).
• Then push down with your left foot while straightening your left knee (similar to a driver stepping on the brakes).
• Slowly return your knee to the starting position.
• Do this 12 to 15 times.
• Repeat with your right leg.
Brake Push exercise 1
1
2
3
| Well-Balanced Advanced Booklet 72
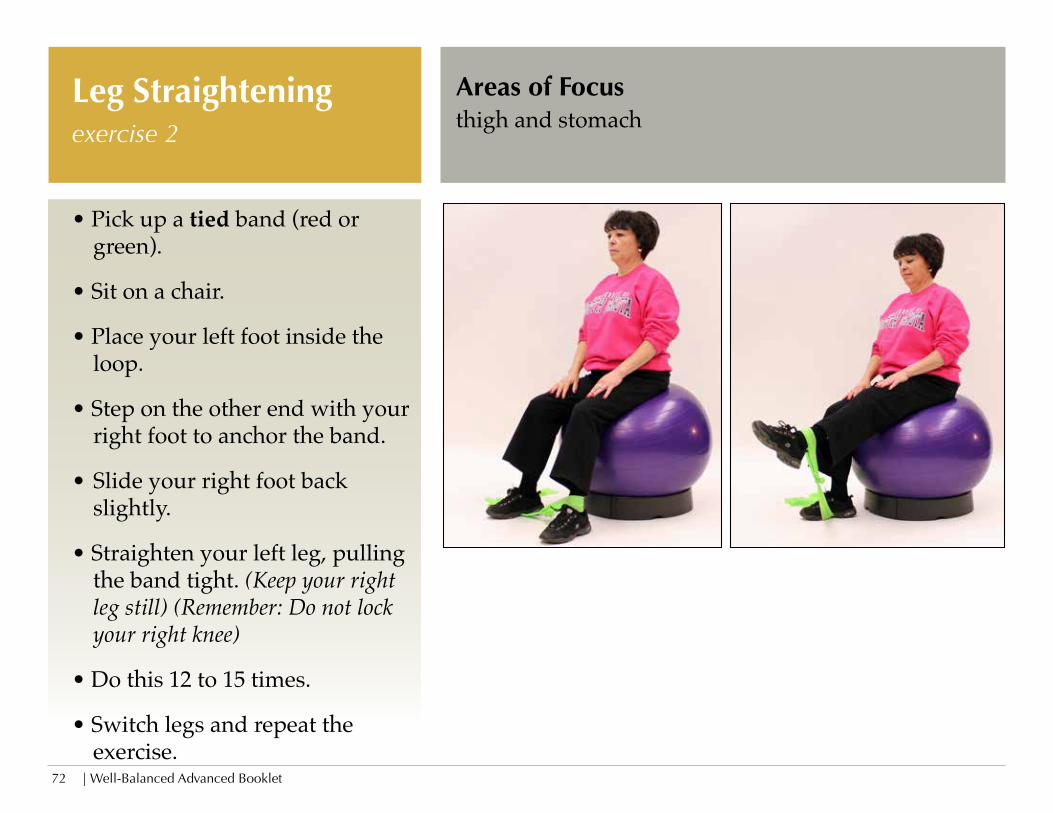
• Pick up a tied band (red or green).
• Sit on a chair.
• Place your left foot inside the loop.
• Step on the other end with your right foot to anchor the band.
• Slide your right foot back slightly.
• Straighten your left leg, pulling the band tight. (Keep your right leg still) (Remember: Do not lock your right knee)
• Do this 12 to 15 times.
• Switch legs and repeat the exercise.
Leg Straightening exercise 2
Areas of Focusthigh and stomach
Well-Balanced Advanced Booklet | 73
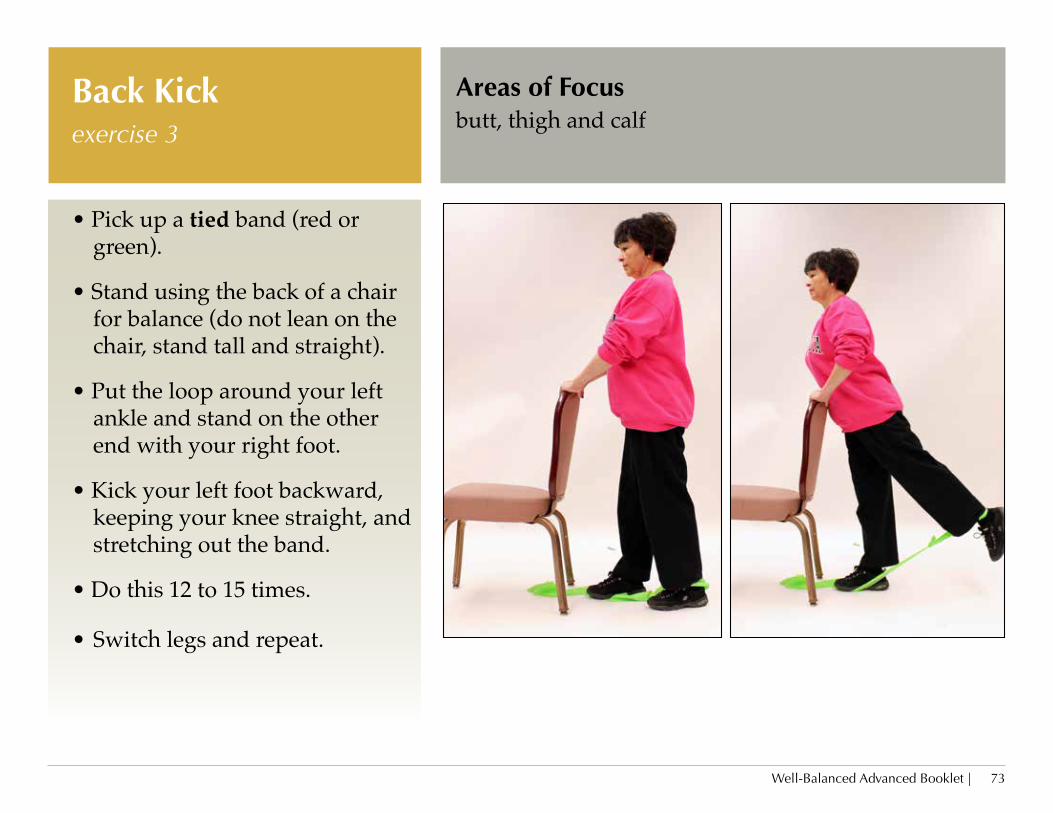
• Pick up a tied band (red or green).
• Stand using the back of a chair for balance (do not lean on the chair, stand tall and straight).
• Put the loop around your left ankle and stand on the other end with your right foot.
• Kick your left foot backward, keeping your knee straight, and stretching out the band.
• Do this 12 to 15 times.
• Switch legs and repeat.
Back Kickexercise 3
Areas of Focusbutt, thigh and calf

| Well-Balanced Advanced Booklet 74
• Pick up a tied band (red or green).
• Stand while using the back of a chair for balance.
• Put the loop around your left ankle and stand on the other end with your right foot.
• Lift your left leg out to the side, keeping your knee and back straight. (Tighten your stomach muscles and remember to breathe)
• Repeat 12 to 15 times.
• Switch legs and repeat.
Side Kickexercise 4
Areas of Focuship and stomach
Well-Balanced Advanced Booklet | 75
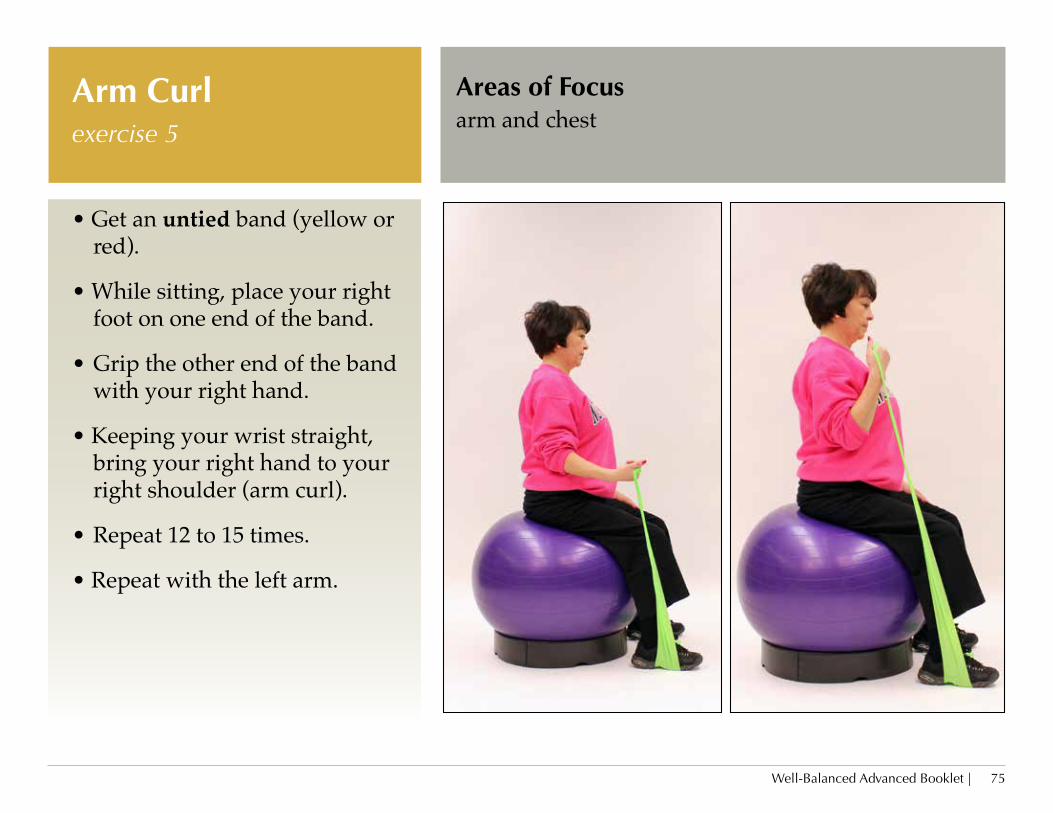
• Get an untied band (yellow or red).
• While sitting, place your right foot on one end of the band.
• Grip the other end of the band with your right hand.
• Keeping your wrist straight, bring your right hand to your right shoulder (arm curl).
• Repeat 12 to 15 times.
• Repeat with the left arm.
Arm Curlexercise 5
Areas of Focusarm and chest
| Well-Balanced Advanced Booklet 76
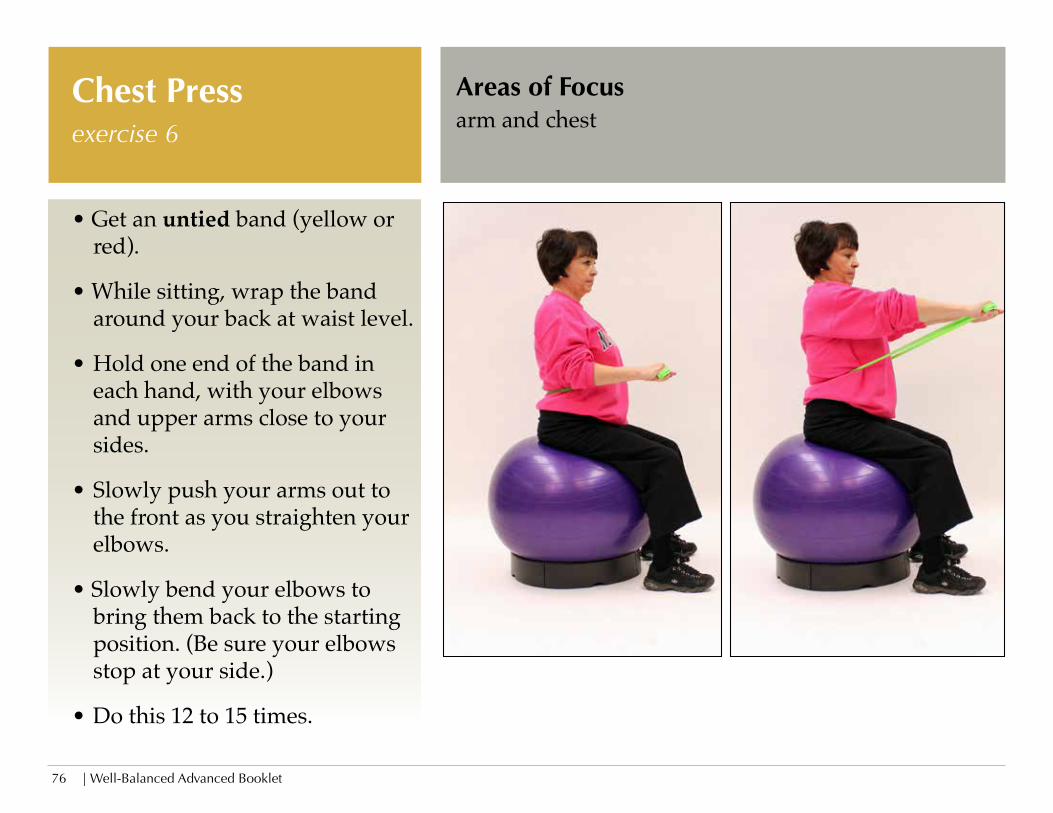
• Get an untied band (yellow or red).
• While sitting, wrap the band around your back at waist level.
• Hold one end of the band in each hand, with your elbows and upper arms close to your sides.
• Slowly push your arms out to the front as you straighten your elbows.
• Slowly bend your elbows to bring them back to the starting position. (Be sure your elbows stop at your side.)
• Do this 12 to 15 times.
Chest Pressexercise 6
Areas of Focusarm and chest
Well-Balanced Advanced Booklet | 77
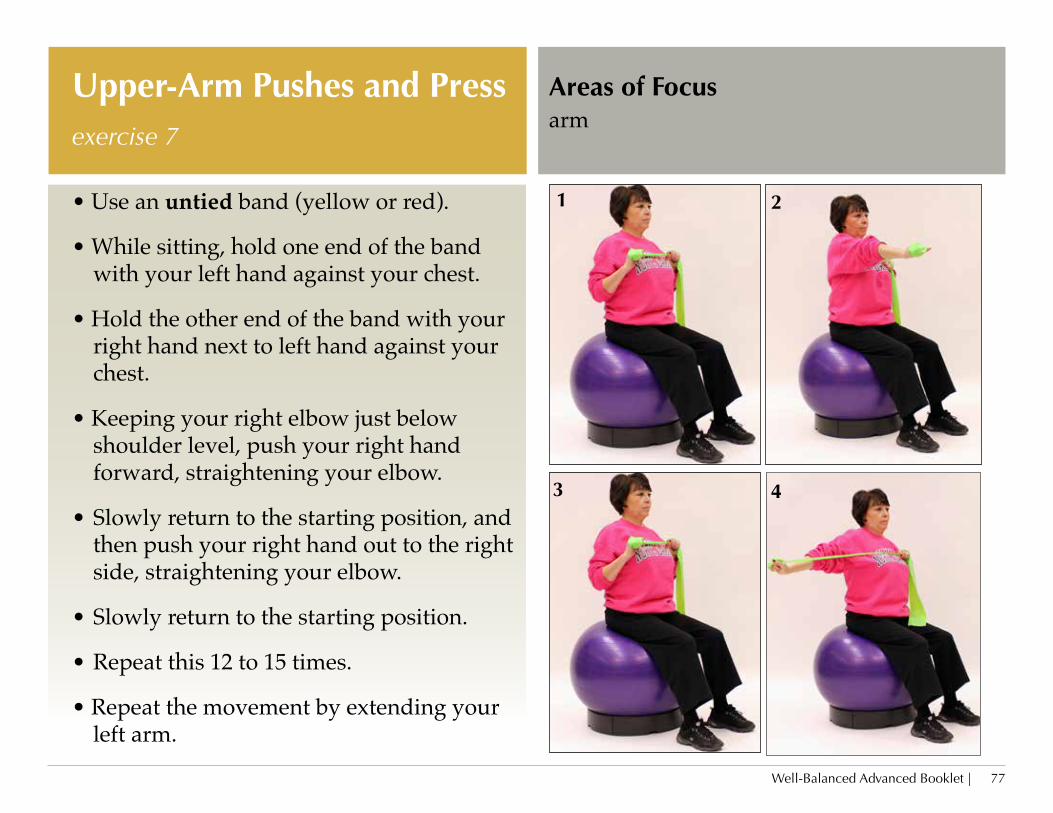
• Use an untied band (yellow or red).
• While sitting, hold one end of the band with your left hand against your chest.
• Hold the other end of the band with your right hand next to left hand against your chest.
• Keeping your right elbow just below shoulder level, push your right hand forward, straightening your elbow.
• Slowly return to the starting position, and then push your right hand out to the right side, straightening your elbow.
• Slowly return to the starting position.
• Repeat this 12 to 15 times.
• Repeat the movement by extending your left arm.
Upper-Arm Pushes and Pressexercise 7
Areas of Focusarm
1 2
3 4
| Well-Balanced Advanced Booklet 78
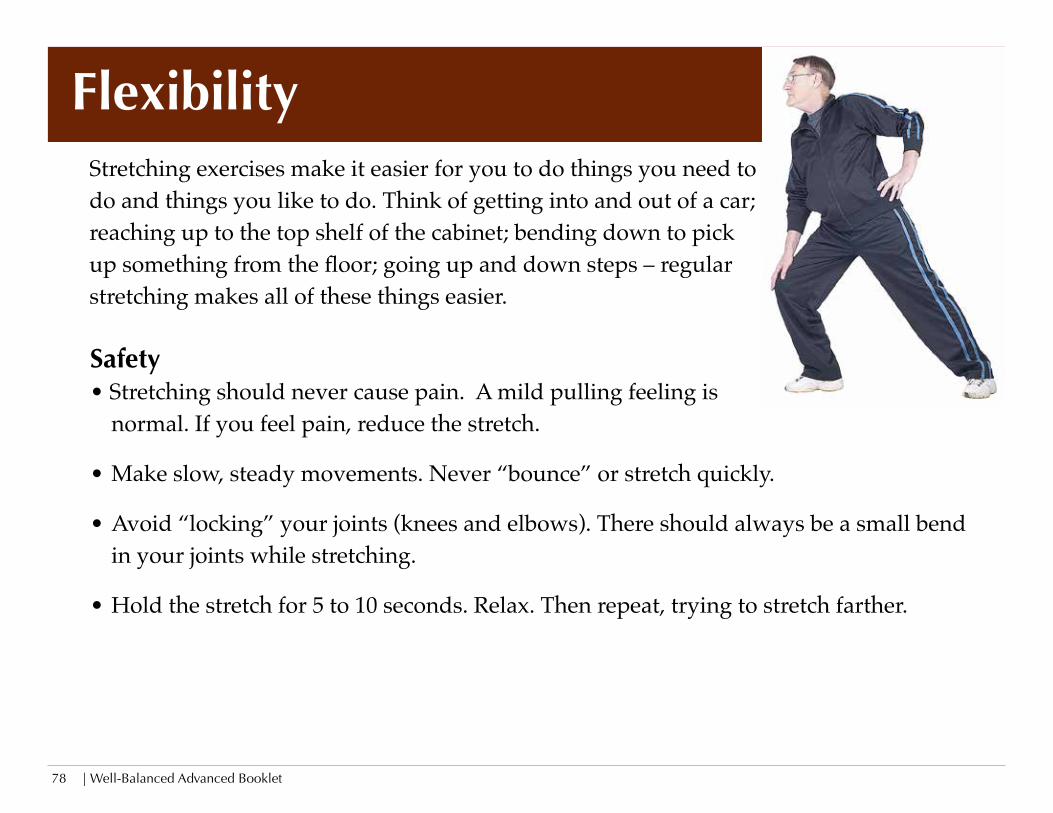
Flexibility Stretching exercises make it easier for you to do things you need to do and things you like to do. Think of getting into and out of a car; reaching up to the top shelf of the cabinet; bending down to pick up something from the floor; going up and down steps – regular stretching makes all of these things easier.
Safety • Stretching should never cause pain. A mild pulling feeling is
normal. If you feel pain, reduce the stretch.
• Make slow, steady movements. Never “bounce” or stretch quickly.
• Avoid “locking” your joints (knees and elbows). There should always be a small bend in your joints while stretching.
• Hold the stretch for 5 to 10 seconds. Relax. Then repeat, trying to stretch farther.
Well-Balanced Advanced Booklet | 79
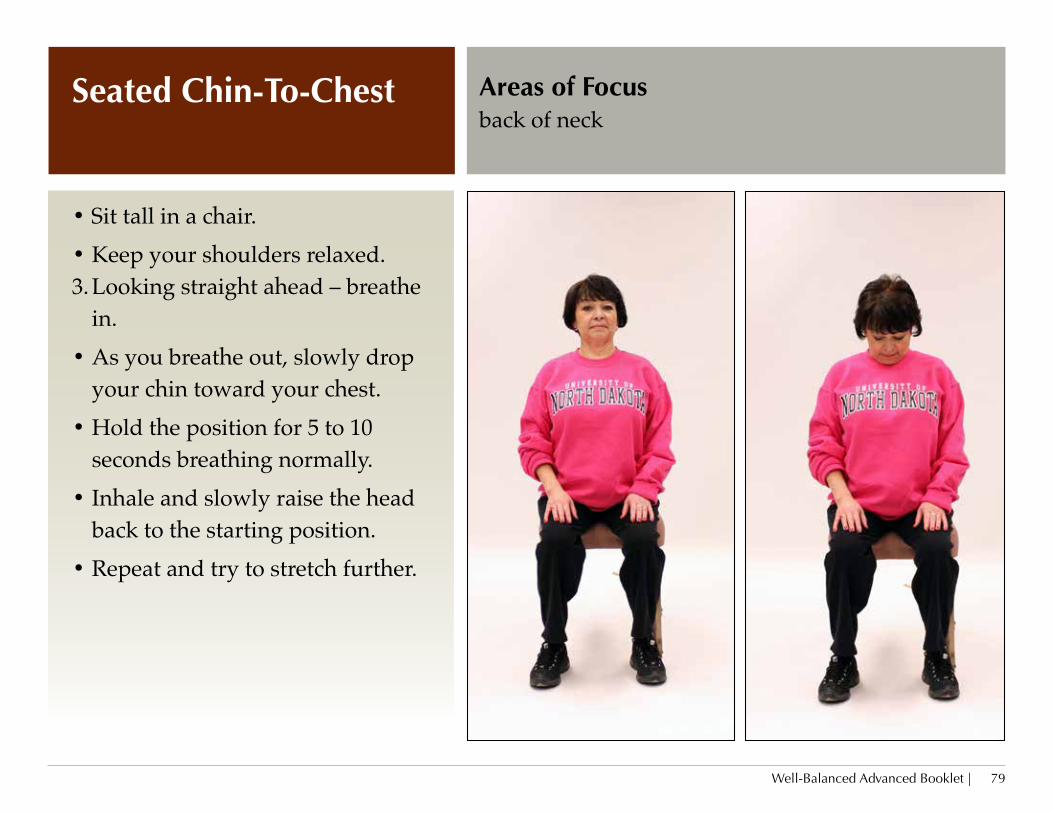
• Sit tall in a chair.• Keep your shoulders relaxed.3. Looking straight ahead – breathe
in.• As you breathe out, slowly drop
your chin toward your chest.• Hold the position for 5 to 10
seconds breathing normally.• Inhale and slowly raise the head
back to the starting position.• Repeat and try to stretch further.
Seated Chin-To-Chest Areas of Focusback of neck
| Well-Balanced Advanced Booklet 80
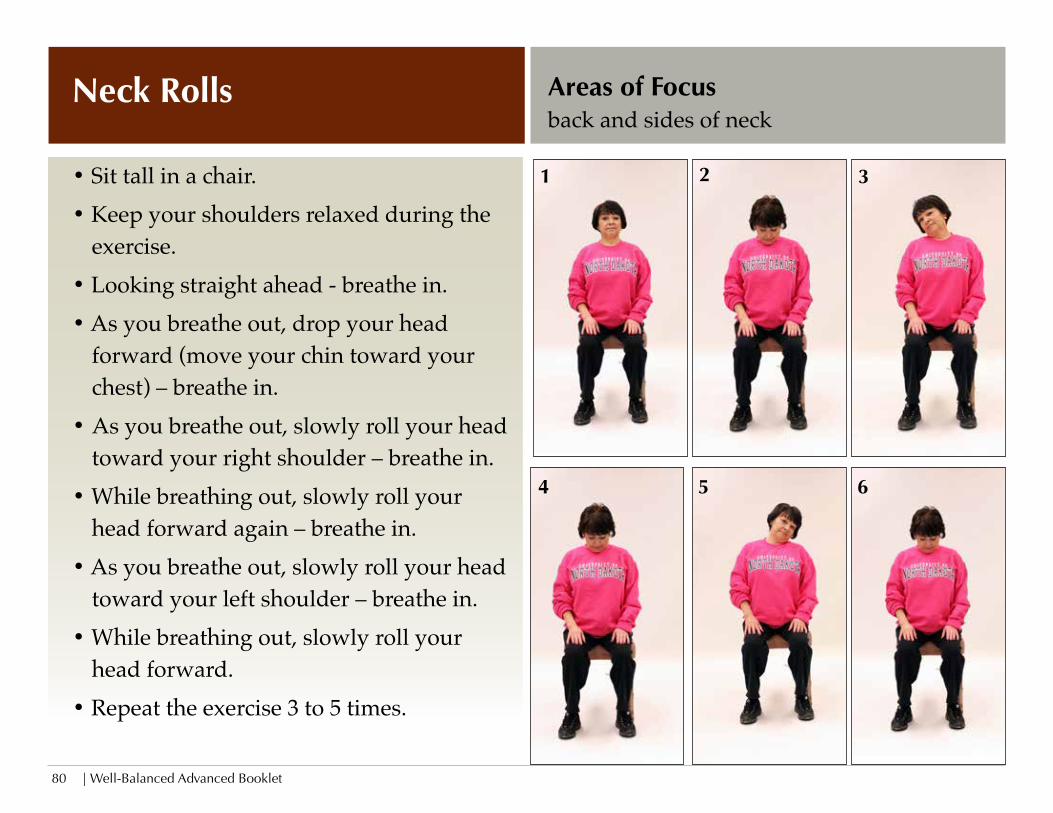
• Sit tall in a chair.• Keep your shoulders relaxed during the
exercise.• Looking straight ahead - breathe in.• As you breathe out, drop your head
forward (move your chin toward your chest) – breathe in.
• As you breathe out, slowly roll your head toward your right shoulder – breathe in.
• While breathing out, slowly roll your head forward again – breathe in.
• As you breathe out, slowly roll your head toward your left shoulder – breathe in.
• While breathing out, slowly roll your head forward.
• Repeat the exercise 3 to 5 times.
Neck Rolls Areas of Focusback and sides of neck
1 2 3
4 5 6
Well-Balanced Advanced Booklet | 81
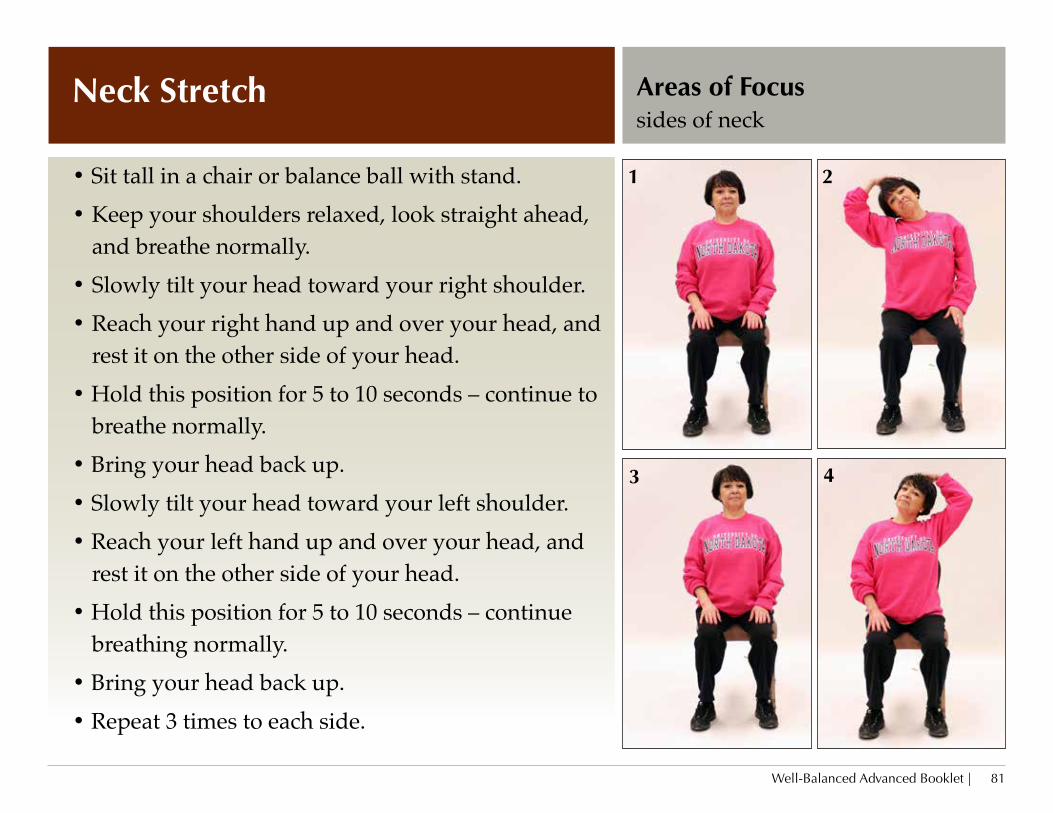
• Sit tall in a chair or balance ball with stand.• Keep your shoulders relaxed, look straight ahead,
and breathe normally. • Slowly tilt your head toward your right shoulder.• Reach your right hand up and over your head, and
rest it on the other side of your head.• Hold this position for 5 to 10 seconds – continue to
breathe normally. • Bring your head back up. • Slowly tilt your head toward your left shoulder.• Reach your left hand up and over your head, and
rest it on the other side of your head. • Hold this position for 5 to 10 seconds – continue
breathing normally.• Bring your head back up. • Repeat 3 times to each side.
Neck Stretch Areas of Focussides of neck
1 2
43
| Well-Balanced Advanced Booklet 82
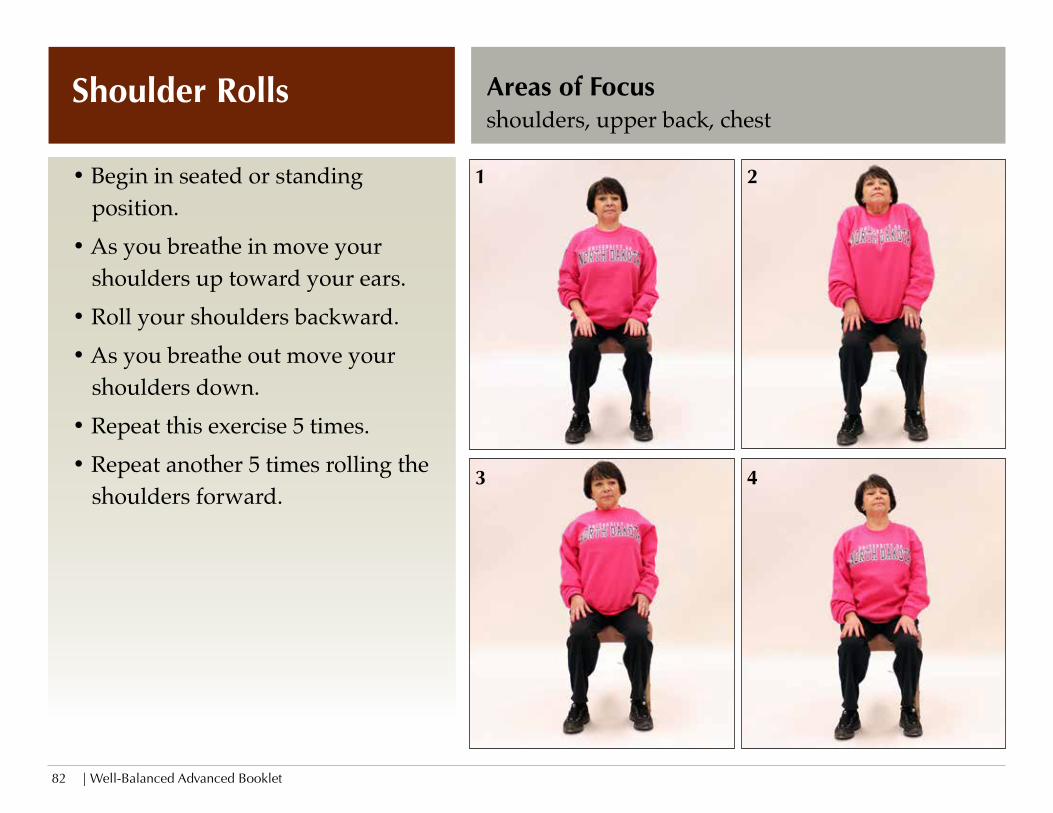
• Begin in seated or standing position.
• As you breathe in move your shoulders up toward your ears.
• Roll your shoulders backward.• As you breathe out move your
shoulders down.• Repeat this exercise 5 times.• Repeat another 5 times rolling the
shoulders forward.
Shoulder Rolls Areas of Focusshoulders, upper back, chest
1 2
43
Well-Balanced Advanced Booklet | 83
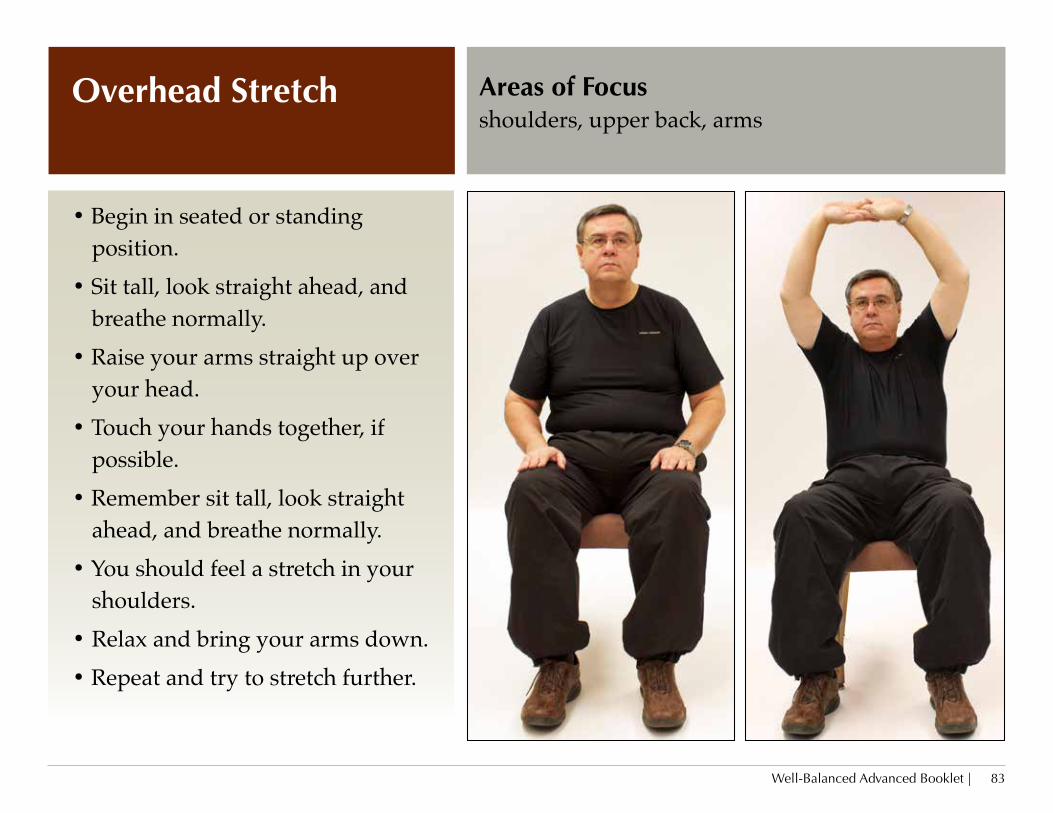
• Begin in seated or standing position.
• Sit tall, look straight ahead, and breathe normally.
• Raise your arms straight up over your head.
• Touch your hands together, if possible.
• Remember sit tall, look straight ahead, and breathe normally.
• You should feel a stretch in your shoulders.
• Relax and bring your arms down.• Repeat and try to stretch further.
Overhead Stretch Areas of Focusshoulders, upper back, arms
| Well-Balanced Advanced Booklet 84
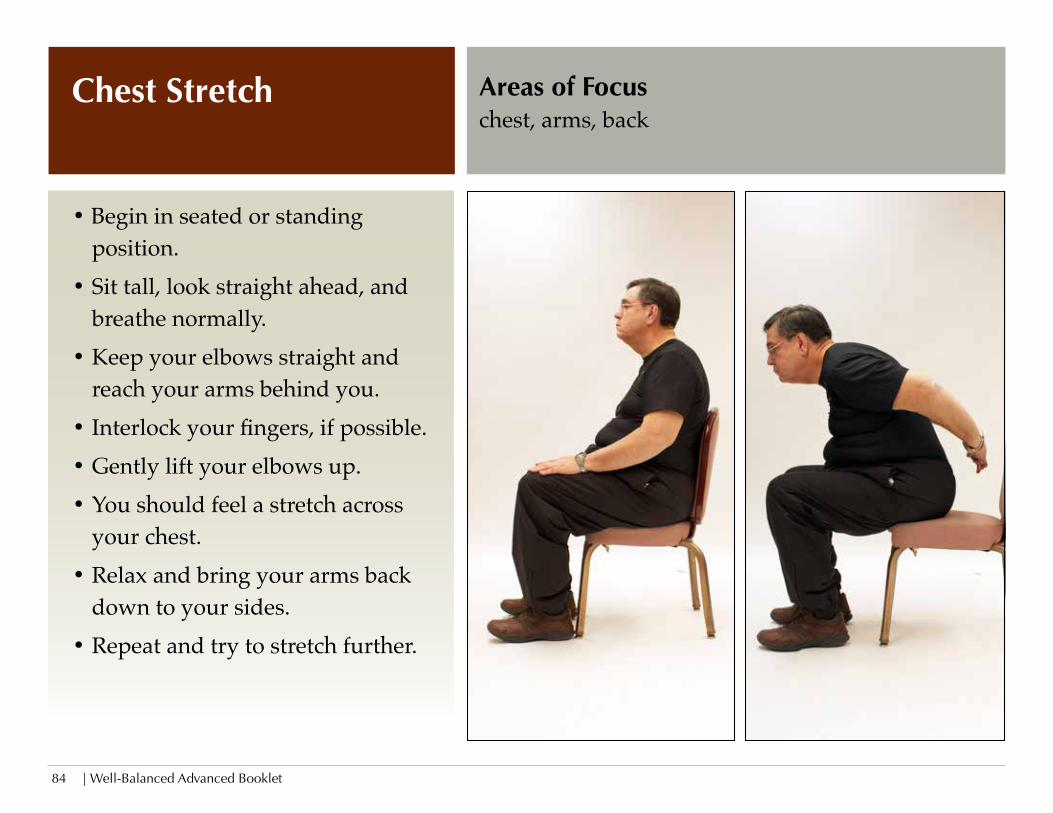
• Begin in seated or standing position.
• Sit tall, look straight ahead, and breathe normally.
• Keep your elbows straight and reach your arms behind you.
• Interlock your fingers, if possible. • Gently lift your elbows up. • You should feel a stretch across
your chest.• Relax and bring your arms back
down to your sides.• Repeat and try to stretch further.
Chest Stretch Areas of Focuschest, arms, back
Well-Balanced Advanced Booklet | 85
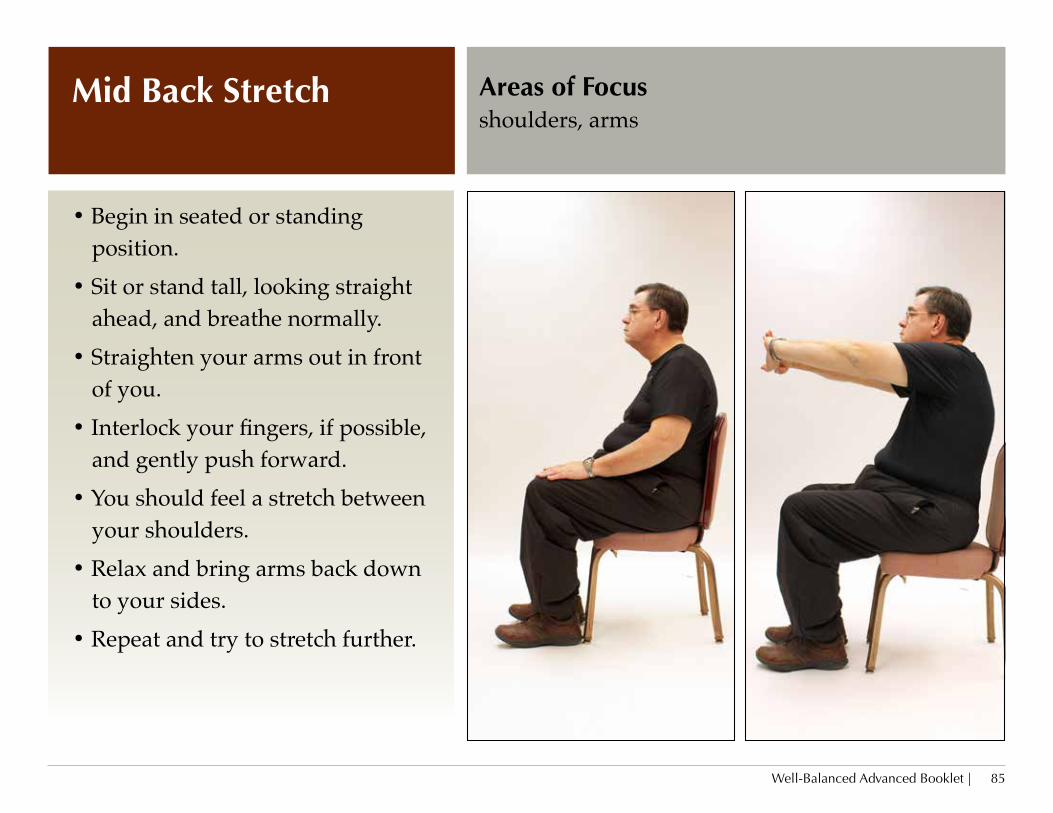
• Begin in seated or standing position.
• Sit or stand tall, looking straight ahead, and breathe normally.
• Straighten your arms out in front of you.
• Interlock your fingers, if possible, and gently push forward.
• You should feel a stretch between your shoulders.
• Relax and bring arms back down to your sides.
• Repeat and try to stretch further.
Mid Back Stretch Areas of Focusshoulders, arms
| Well-Balanced Advanced Booklet 86
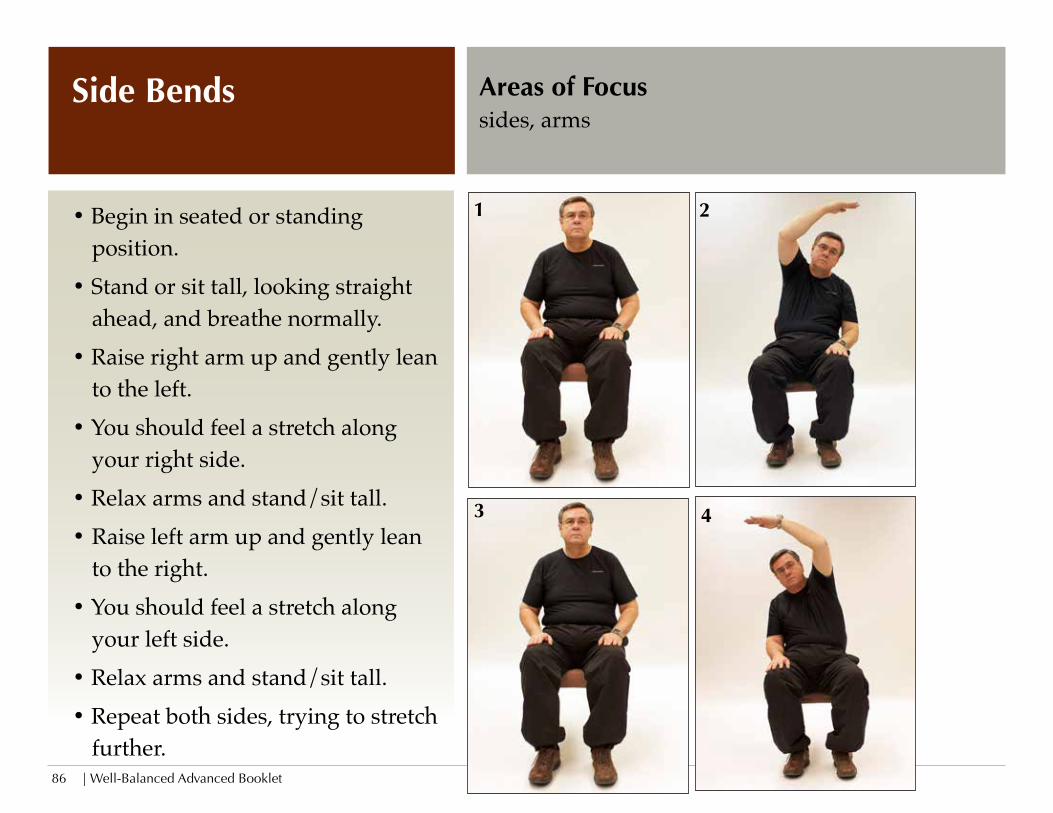
• Begin in seated or standing position.
• Stand or sit tall, looking straight ahead, and breathe normally.
• Raise right arm up and gently lean to the left.
• You should feel a stretch along your right side.
• Relax arms and stand/sit tall.• Raise left arm up and gently lean
to the right.• You should feel a stretch along
your left side.• Relax arms and stand/sit tall.• Repeat both sides, trying to stretch
further.
Side Bends Areas of Focussides, arms
1 2
43
Well-Balanced Advanced Booklet | 87
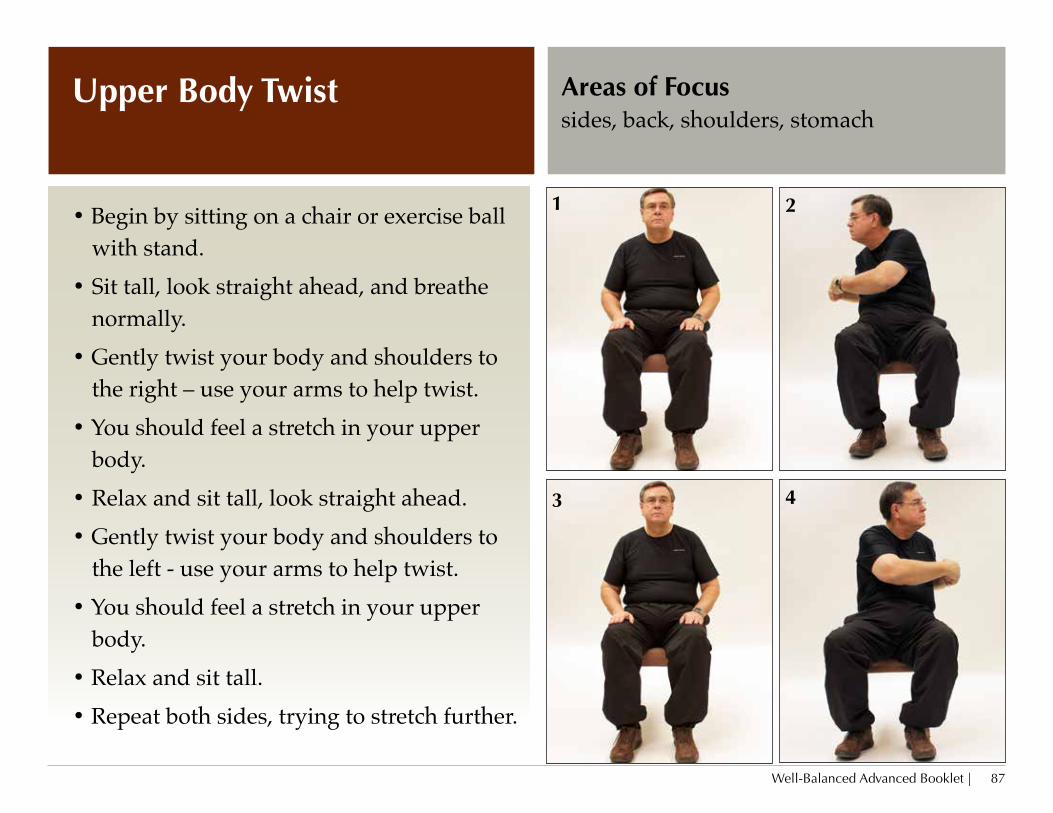
• Begin by sitting on a chair or exercise ball with stand.
• Sit tall, look straight ahead, and breathe normally.
• Gently twist your body and shoulders to the right – use your arms to help twist.
• You should feel a stretch in your upper body.
• Relax and sit tall, look straight ahead.• Gently twist your body and shoulders to
the left - use your arms to help twist.• You should feel a stretch in your upper
body.• Relax and sit tall.• Repeat both sides, trying to stretch further.
Upper Body Twist Areas of Focussides, back, shoulders, stomach
1 2
43
| Well-Balanced Advanced Booklet 88
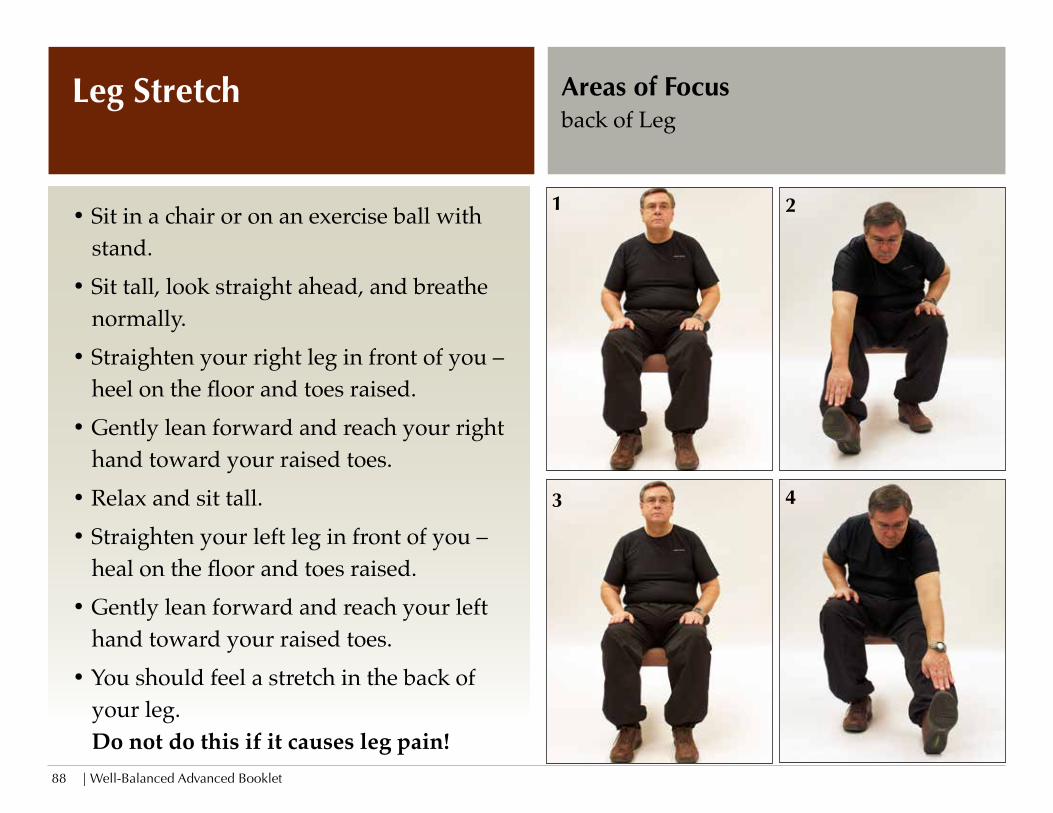
• Sit in a chair or on an exercise ball with stand.
• Sit tall, look straight ahead, and breathe normally.
• Straighten your right leg in front of you – heel on the floor and toes raised.
• Gently lean forward and reach your right hand toward your raised toes.
• Relax and sit tall.• Straighten your left leg in front of you –
heal on the floor and toes raised.• Gently lean forward and reach your left
hand toward your raised toes.• You should feel a stretch in the back of
your leg. Do not do this if it causes leg pain!
Leg Stretch Areas of Focusback of Leg
1 2
43
Well-Balanced Advanced Booklet | 89
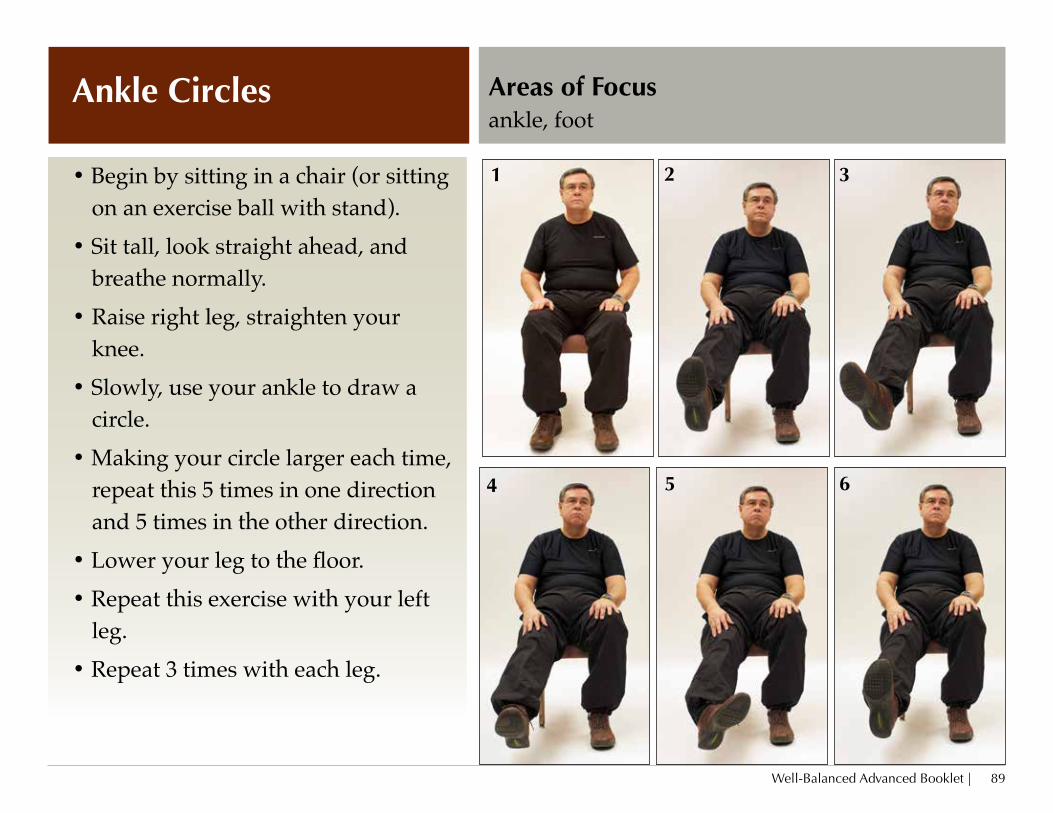
• Begin by sitting in a chair (or sitting on an exercise ball with stand).
• Sit tall, look straight ahead, and breathe normally.
• Raise right leg, straighten your knee.
• Slowly, use your ankle to draw a circle.
• Making your circle larger each time, repeat this 5 times in one direction and 5 times in the other direction.
• Lower your leg to the floor. • Repeat this exercise with your left
leg.• Repeat 3 times with each leg.
Ankle Circles Areas of Focusankle, foot
1 2 3
4 5 6
| Well-Balanced Advanced Booklet 90
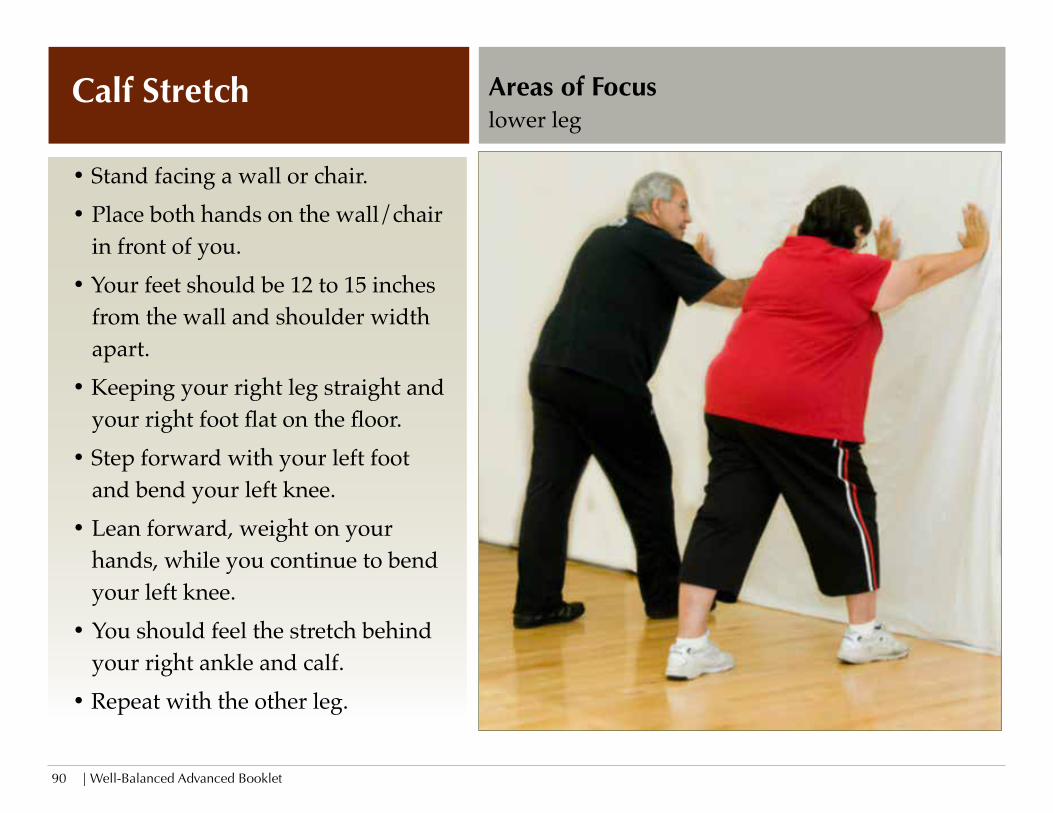
• Stand facing a wall or chair. • Place both hands on the wall/chair
in front of you.• Your feet should be 12 to 15 inches
from the wall and shoulder width apart.
• Keeping your right leg straight and your right foot flat on the floor.
• Step forward with your left foot and bend your left knee.
• Lean forward, weight on your hands, while you continue to bend your left knee.
• You should feel the stretch behind your right ankle and calf.
• Repeat with the other leg.
Calf Stretch Areas of Focuslower leg
The original photo. ?? this is all it says, not sure what photo that is??
Well-Balanced Advanced Booklet | 91
Endurance
Safety • These activities should not cause dizziness or chest pain. You should be breathing hard,
but still able to talk comfortably.
• You should have a water bottle with you. Take a drink before you begin activities and stop for another drink as you exercise. By the time you notice you are thirsty, you may already be low on fluid.
• If your doctor has asked you to limit your fluids, be sure to check with him or her before increasing the amount of fluid you drink while exercising (Congestive heart failure and kidney disease are chronic diseases that often require fluid limits).
• If you haven’t been active for a long time, start out slowly and work your way up to a higher level. (Walk slowly for 1 or 2 minutes to begin.)
• Walk for 20 to 30 minutes (indoors, outdoors, around the classroom, gym, etc.)
• Over time, your goal is to reach a point where you can increase your heart rate. (4-7 safe green zone on RPE chart.)
• Once you reach your goal, you can split your exercise into sessions of no less than 10 minutes at a time, which will total 30 minutes or more throughout the day.
• You will receive the greatest benefit from doing at least 30 minutes of endurance exercise on most or all days of the week. More often is better, and every day is best.
| Well-Balanced Advanced Booklet 92
Transition to the DayRelaxation Exercise • Begin by sitting on a chair with your back resting against the back of the chair.• Sit tall, both feet on the floor, and breathe normally.• Place your hands on your stomach.• As you breathe in and out feel how your stomach moves in and out.• Take a breath, letting your stomach get bigger while you breathe in.• Let your stomach relax as you breathe out.• Continue to breathe normally with your hands on your stomach for 1 or 2 minutes.• Then, take some very slow, deep breaths: Count as you breathe in: – 1 – 2 – 3 Count as you breathe out: – 1 – 2 – 3• Repeat.• Slowly raise your arms above your head as you breathe in through your nose ( – 1 – 2 – 3)
and lower your arms while breathing out through your mouth ( – 1 – 2 – 3)• Repeat.• Sit comfortably and continue to breathe slowly and deeply.• Think about something you enjoy as you continue breathing for 2 or 3 minutes.