what is openjump
TRANSCRIPT
http://tsusiatsoftware.net/jts/javadoc/index.html
What is OpenJUMP
Download OpenJUMP facts sheet
"JUMP is a computer program that uses a unified mapping platform as a visualisation
framework..." (changed ESRI keynote on What is GIS? by M. Bobzien)
But to be a bit more serious - OpenJUMP is an open source GIS software written in Java and it is based
on JUMP GIS by Vivid Solutions. Furthermore...
It is a Vector GIS that can read rasters as well
OpenJUMP is known to work on Windows, Linux and Mac platforms, but should work on any
operating system that runs Java 1.5 or later.
It is not just another free demo viewer, but you can edit, save, analyze etc. with JUMP / OpenJUMP
It works, even with medium size datasets, and with professional touch
It provides a GIS API with a flexible plugin structure, so that new features are relatively easy to
develope around the sound mapping platform.
It utilizes OGC standards like SFS, GML, WMS and WFS
It is already translated in English, Finnish, French, German, Italian, Portugese and Spanish. The
translation in other languages is in progress.
..and it is free (under the GPL license).
OpenJUMP finally adds some key enhancements to the original JUMP software, including:
I18N (internationalization),
more drawing and geometry editing tools,
advanced attribute query,
enhanced set of selection tools,
image export in Scalable Vector Graphics (SVG) format,
function to copy objects including attributes,
it can show layers dependent on the current map scale,
more classification methods for thematic coloring
...

OpenJUMP is the result of a larger umbrella project called the JUMP Pilot Project (JPP). The OpenJUMP
network consists of english speaking Jump-Pilot Project, the french Projet SIGLE, the german University
of Osnabrück project Pirol, the companies Lat/Lon GmbH (producers of the deegree web map server)
and Integrated Systems Analysts, Inc. ; and a number of others, such as freelancers, people from
municipalities, reserach institutes and universities (University of Zurich, EPFL, Ostrava University, Hafen-
City University Hamburg,... ). A list of contributors can be found here
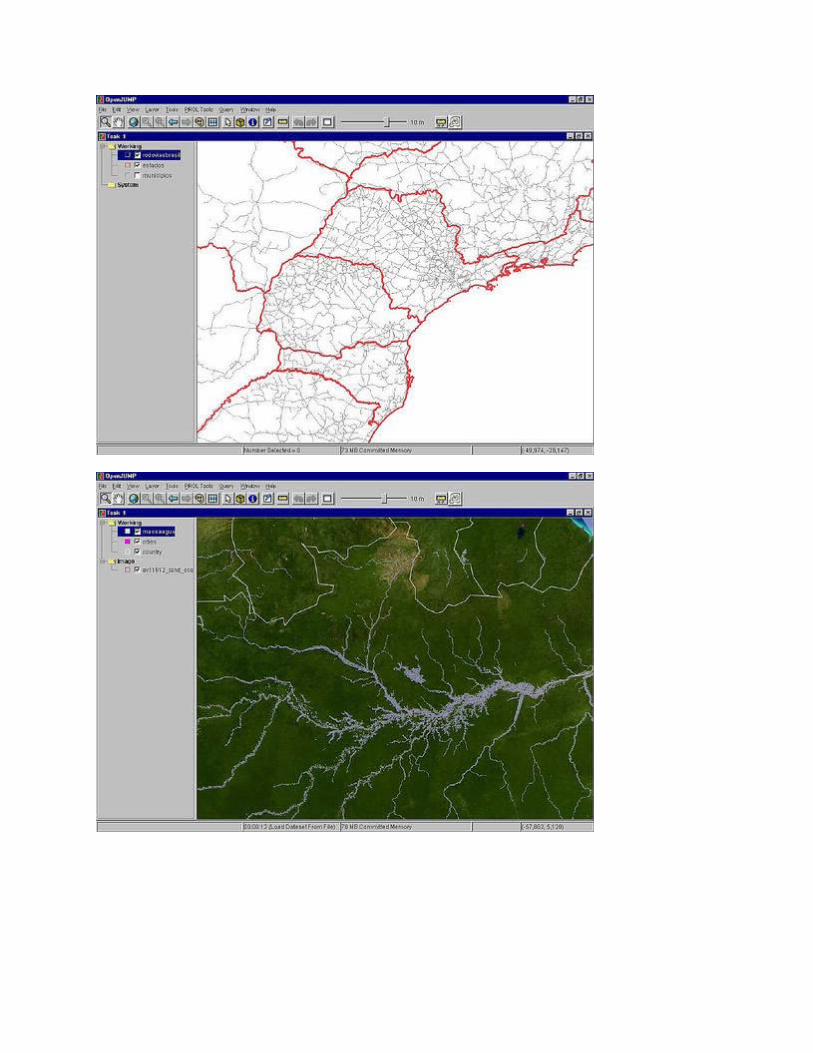
Screen shots


OpenJUMP Licensing
OpenJUMP (OJ) and the used software components distributed are licensed as follows. For more recent
informations about licensing read the readme.txt file of the OJ distribution you are using.
OpenJUMP Core & Plugins/Extensions
OpenJUMP is distributed under the GPL2 license. A description of this license can be found in the
"gpl2_license.txt" file in the "licenses" folder or on http://www.gnu.org/licenses/gpl-2.0.html .
Used libraries
Regarding the multitude of libraries that are included in the OpenJUMP distributions (currently CORE and
PLUS) please refer to the chapter LICENSING in
http://jump-pilot.sourceforge.net/svn/core/trunk/etc/readme.txt
as the most current source for information on this topic.
ErMapper ECW/JP2 SDK libraries
Proprietary ECW libraries (as distributed in the PLUS edition) are a quite confusing issue and
therefore deserve a special mention here.
Until version 3.3 the ErMapper SDK used to have a triple licensing policy described here.

Later versions restricted the license so much that a use and distribution in open source software is
either not possible or bound to very strict conditions. Erdas website now invite SDK user to acquire a
license through the following form.
OpenJUMP uses libraries based on the version 3.3 of the ErMapper ECW JPEG 2000 SDK. The
binaries and sources were actually taken form the gvSIG project. As GPL2'd software it uses these
under the "ECW JPEG 2000 SDK PUBLIC USE LICENSE AGREEMENT"
Use of the ECW JPEG 2000 SDK with Unlimited Decompressing and Unlimited
Compression for applications licensed under a GNU General Public style
license ("GPL") is governed by the "ECW JPEG 2000 SDK PUBLIC USE LICENSE
AGREEMENT"
Be aware: It contains noteworthy restrictions. You are not allowed to sell or lend the drivers
or an OJ distribution if it contains these libraries. You can of course always strip the release
from these library files (check readme.txt) to gain the full freedom of free software again.
Free of charge
This license applies to any use of the Software Product solely intended
to develop or be distributed with products that are licensed under a
license similar to a General Public License ("GPL") and at no charge to
the public. This license covers modification and distribution of the
Software, use of third-party application programs based on the Software,
and development of free software that uses the Software.
and
1.d.ii) You must explicitly license all recipients of your items to use
and re-distribute original and modified versions of the items in both
machine-executable and source code forms. The recipients must be able to
do so without any charges whatsoever, and they must be able to re-
distribute to anyone they choose.
No renting
4.a) Rental. You may not rent, lease or lend the SOFTWARE PRODUCT.
Find the full license text here.
The OJ developers had some extensive discussions about the ECW licensing which
can be read here :
http://www.mail-archive.com/[email protected]/msg09231.html
and
http://www.mail-archive.com/[email protected]/msg09358.html
and
http://www.mail-archive.com/[email protected]/msg09543.html
Other resources about ecw licensing issue are :
ecw+sdk+licensing issue
Use of Erdas product in server side applications
QGis user ECW license on OsGeo list - 2007
Downloading OpenJUMPContents
[hide]
1 Releases
o 1.1 Latest
o 1.2 Archived
o 1.3 Plugins
2 Source Code
o 2.1 Latest release
o 2.2 Current development (trunk)
3 Install Instructions
4 Plugins for OpenJUMP
5 Development Snapshots
Releases
Latest
⇒ OpenJUMP 1.5.2 download area (read explanatory text on the bottom when in doubt which file
to choose)
Archived
⇒ past OpenJUMP releases
Plugins
⇒ Plugins for OpenJUMP
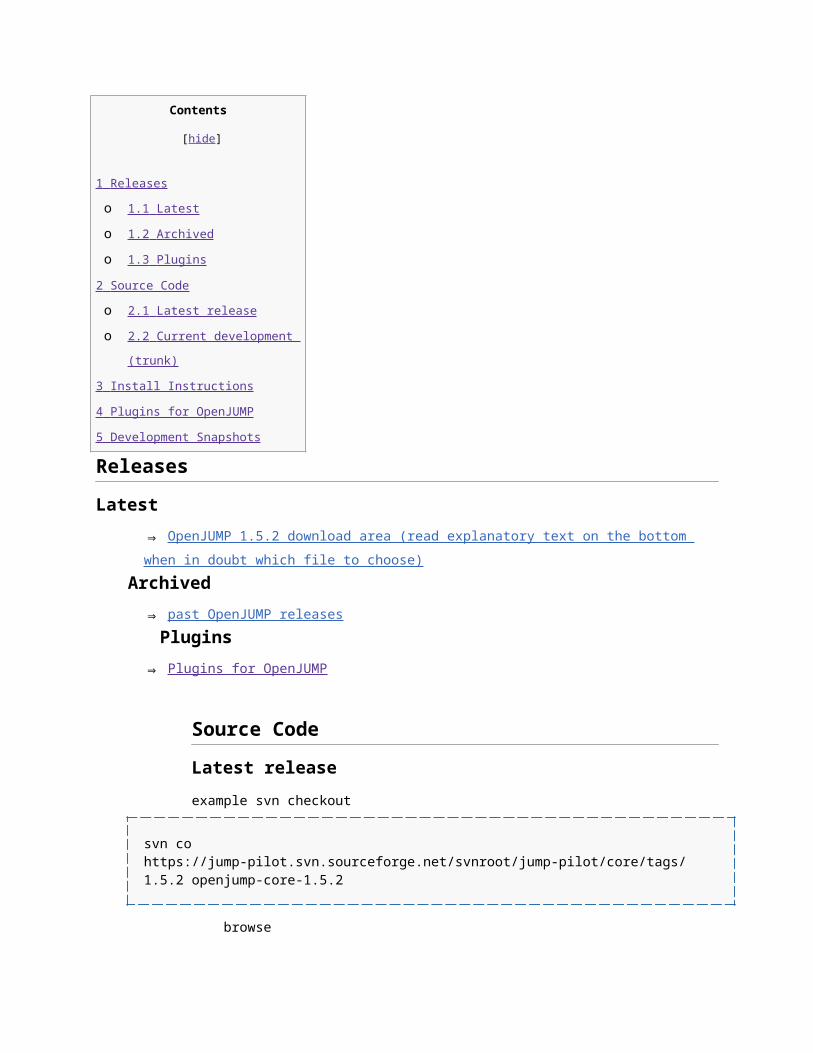
Source Code
Latest release
example svn checkout
svn co https://jump-pilot.svn.sourceforge.net/svnroot/jump-pilot/core/tags/1.5.2 openjump-core-1.5.2
browse
⇒ http://jump-pilot.svn.sourceforge.net/viewvc/jump-pilot/core/tags/1.5.2/
download
⇒ http://sourceforge.net/projects/jump-pilot/files/OpenJUMP/1.5.2/OpenJUMP-1.5.2-r2930-
src.zip
Current development (trunk)
example svn checkout
svn co https://jump-pilot.svn.sourceforge.net/svnroot/jump-pilot/core/trunk openjump-core
browse
⇒ http://jump-pilot.svn.sourceforge.net/viewvc/jump-pilot/core/trunk
Install Instructions
⇒ Installation Page
Plugins for OpenJUMP
⇒ Plugins_for_OpenJUMP
Development Snapshots
ChangeLog
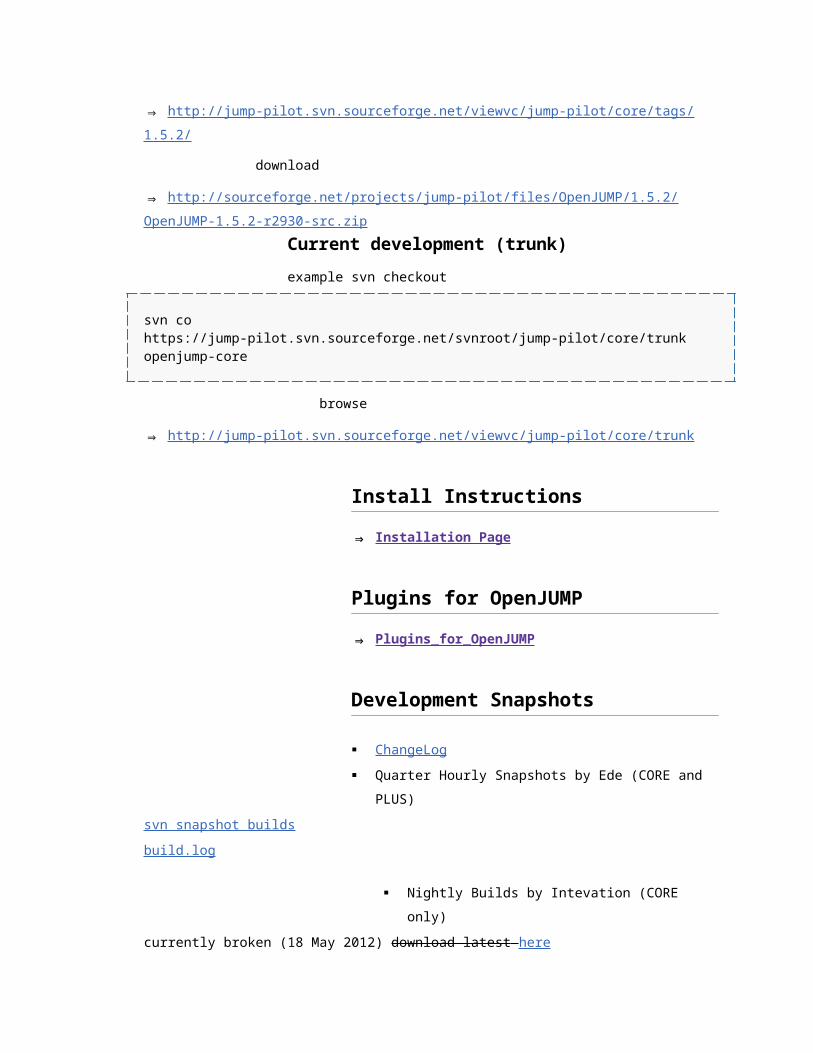
Quarter Hourly Snapshots by Ede (CORE and PLUS)
svn snapshot builds
build.log
Nightly Builds by Intevation (CORE only)
currently broken (18 May 2012) download latest here
build ErrorLog
Plugins for OpenJUMP
Below you will find a non-complete listing of available plugins for OpenJUMP. To add a plugin to
OpenJUMP, simply put the extensions file(s) into the OpenJUMP lib/ext directory. Probably they come in
an archive you will have to unzip. See also the Installing Plugins page.

Contents
[hide]
1 Installing Plugins
2 Popular Plugins
3 Websites with several plugins
4 Plugins for OpenJUMP
o 4.1 Editing Plugins
o 4.2 Raster Image Plugins
o 4.3 Print Plugins
o 4.4 Database Plugins
o 4.5 Other Dataformats
o 4.6 Internet Datasources and Web-Processing
o 4.7 Spatial Analysis and Editing PlugIns
o 4.8 Coordinate Reference Systems / Coordinate Transformation
o 4.9 Security for Geodata
o 4.10 Programming and Scripting Support
o 4.11 GPS Plugins
o 4.12 Styling
o 4.13 Charts / Plots
5 Plugins for JUMP
6 Plugins for Kosmo
Installing Plugins
⇒ Installing Plugins
Popular Plugins
⇒ Popular Plugins
Websites with several plugins
OpenJUMP Plugin repository: http://sourceforge.net/projects/jump-pilot/files/OpenJUMP_plugins/
Project PIROL plugins: http://www.al.fh-osnabrueck.de/jump-download.html
project SIGLE: http://sourceforge.net/projects/sigle/ (last update in 2006)
Michael Michaud (in french): http://michael.michaud.free.fr/index_jump.html and http://
geo.michaelm.free.fr

Edgar Soldin : latest versions of CTS and GPS extension are on jump-pilot@sourceforge, see below
GISAK.VSB: http://gis.vsb.cz/ruzicka/Projekty/jump/index.php
CADPLAN Plugins: http://www.cadplan.com.au/jump.html
GEOSTAF: http://digilander.libero.it/valruggero/download.html
OpenJUMP.de: Archikart Communication plugin
Plugins for OpenJUMP
Editing Plugins
New ISA 2.5 tools for OpenJUMP deriving from SkyJUMP. Download "isa-
2.5.jar":http://www.ashsiii.com/downloads/openjump/isa-2.5.jar and place it in your \OpenJUMP
/lib/ext folder. Download also a modified workbench-properties.xml and place it in your OpenJUMP
/bin folder to enables the individual tools on OJ menus.
KML datasource
Text Block Annotation and Interactive Buffer, on Editing toolbox (1)
Clip To Fence (1) , Orthogonalize and Auto Assign Attribute (1) on Tools menu.
(1) Added to \OpenJUMP nightly snapshot
CAD Extension for OpenJUMP: http://sourceforge.net/projects/opensit/files/Openjump/PlugIn/
CADExtension/.
A large set of tools for drawing, modifying features and to calculate lenghts, areas and angles. It is
designed to work with DXF PlugIn on inport/export CAD files
Raster Image Plugins
OpenJUMP provides a basic raster support to display TIFF, JPG and PNG. ECW & JPEG2000 support is
also provided if ECW drivers are correctly installed (see Working with Raster page). There are other
raster plugins. Some of them require Java Advanced Imaging (JAI) libray. JAI for different platforms can
be found here
an improved version is the image plugin from Project PIROL: download here - which in the new
version also supports GeoTIFF files To work with the pirol plugin you need to install JAI and
additionally to download the BaseClasses package.
another fine image plugin is the TANATO plugin from SIGLE: download here - which support apart
from several image formats (ECW, TIF, JPG as Raster Catalog Data) the generation of TIN and TIN-
Flow calculations (note: the page is in french!)

To display ESRI ASCII raster the raster plugin from SIGLE team may help you download here
Print Plugins
Basic Print PlugIn supporting also multiple sheets by Geoff (http://www.cadplan.com.au/). It should
work also with JUMP - It requires iText library to work.
Print Layout Plugin by Intevation
Database Plugins
DB Query allows OpenJUMP users to give arbitrary database queries to retrieve and display
geographic feature sets (see documentation) from PostGIS, MySQL, SpatialLite and Oracle
databases. See also the tutorial "OpenJUMP with SpatialLite".
PostGIS database connector (download) : see also Installing Plugins
PostGIS plugin (download) by Erwan Brocher. See also Erwan's wiki page for the description
iSQLViewer: SQL front end by Erwan Brocher(download).
ArcSDE database reader (as separate download but also contained in ISA 2.0 tools package - see
below)
Oracle database reader (download)
SpatiaLite database reader (download)
pgRouting network analysis with pgRouting and PostgreSQL(download)
Note, an introduction on how to use OpenJUMP with PostGIS can be found in OpenJUMP 1.3 tutorial
presented at OGRS 2009 (see the Downloadable Tutorials and Guides section of the wiki or our
download area on SourceForge). Also the book "PostGIS in Action" contains a chapter on that.
Other Dataformats
DXF Driver Loads/write dxf files into/from OpenJUMP.
1. from Michael Michaud': download
2. Another dxf plugin from Dante and Rammi:
download JUMP plugin (jar): http://jump-pilot.sourceforge.net/download/driver-dxf.jar by
Dante Fuster, Peru, contact: dante.fuster[=at=]gmail.com (note: download also the CAFF
program below and place the file dxfviewer-swing-pro.jar as well in OpenJUMPs /lib/ext
directory like driver-dxf.jar

download CAFF dxf viewer: http://jump-pilot.sourceforge.net/download/dxfviewer-swing-
pro.jar by Rammi, contact: rammi[=at=]caff.de, note: just click on the jar file to start the
application
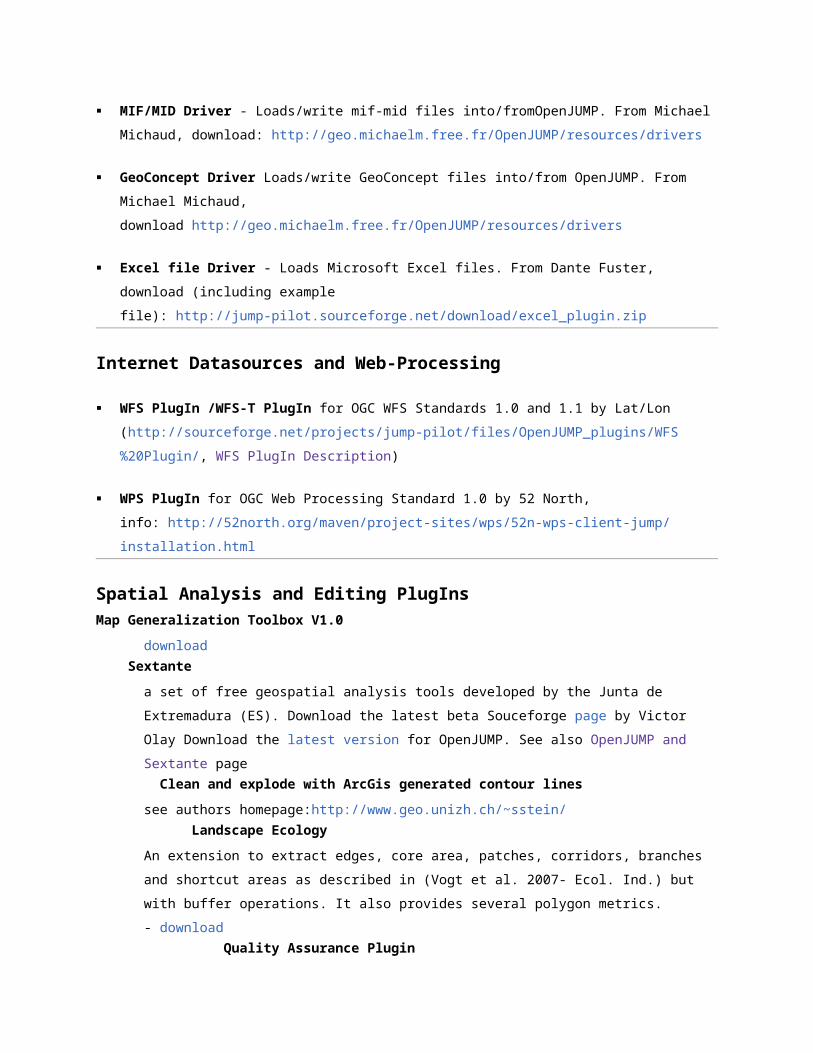
MIF/MID Driver - Loads/write mif-mid files into/fromOpenJUMP. From Michael Michaud,
download: http://geo.michaelm.free.fr/OpenJUMP/resources/drivers
GeoConcept Driver Loads/write GeoConcept files into/from OpenJUMP. From Michael Michaud,
download http://geo.michaelm.free.fr/OpenJUMP/resources/drivers
Excel file Driver - Loads Microsoft Excel files. From Dante Fuster, download (including example
file): http://jump-pilot.sourceforge.net/download/excel_plugin.zip
Internet Datasources and Web-Processing
WFS PlugIn /WFS-T PlugIn for OGC WFS Standards 1.0 and 1.1 by Lat/Lon
(http://sourceforge.net/projects/jump-pilot/files/OpenJUMP_plugins/WFS%20Plugin/, WFS PlugIn
Description)
WPS PlugIn for OGC Web Processing Standard 1.0 by 52 North,
info: http://52north.org/maven/project-sites/wps/52n-wps-client-jump/installation.html
Spatial Analysis and Editing PlugIns
Map Generalization Toolbox V1.0
download
Sextante
a set of free geospatial analysis tools developed by the Junta de Extremadura (ES). Download
the latest beta Souceforge page by Victor Olay Download the latest version for OpenJUMP. See
also OpenJUMP and Sextante page
Clean and explode with ArcGis generated contour lines
see authors homepage:http://www.geo.unizh.ch/~sstein/
Landscape Ecology
An extension to extract edges, core area, patches, corridors, branches and shortcut areas as
described in (Vogt et al. 2007- Ecol. Ind.) but with buffer operations. It also provides several
polygon metrics. - download
Quality Assurance Plugin
from the original JUMP project to work with OpenJUMP: download
Road Matcher Plugin
from the original JUMP project to work with OpenJUMP - Plugins/ download Access to the source
code: here - and on our project SVN. We thank Steve Singer for making the necessary adoptions
- this way Road Matcher could be used in an OpenStreetMap Conflation project
Graph Toolbox Plugin
from Michaël Michaud - jar file and packaged source code are available at download, and a short
documentation (available in english and in french) can be downloaded: engl. doc, general
Skeletonizer Plugin
from the original JUMP project - creates skeletons of polygon objects. Download it from here
GeOxygene Plugin
for the GeOygene analysis & computation platform. Download from here
Home Range Analysis Toolbox (HoRAE)
for animal movement analysis based on GPS collar data. Download from here
MorphAL
morphological analysis of vector data. Download from [1]
Multi Depot Vehicle Routing (portuguese only)
[2]
Matching PlugIn
from Michaël Michaud - jar file and packaged source code are available at download, and a
documentation can be downloaded from the same repository (in english or in french).
Coordinate Reference Systems / Coordinate Transformation
CTS extension
allows the user to assign a coordinate reference system (CRS) to vector layers and reproject.
Please look at CTS Extension - Working with Projections for installation and instructions.
Security for Geodata
Watermarking Plugin for Jump and Openjump by Julien Lafaye - please visit his webpage to download
the WaterGoatOpenJumpPlugin. It is distributed under the LGPL license.
Programming and Scripting Support
Beanshell Editor is a text editor using a very old version of jEdit for syntax color. You can use it to write,
launch, and save your own beanshell scripts. You can download it here

Groovy: we also have people that started to develop with Groovy and OpenJUMP. For more info check
this page OpenJUMP and Groovy
GPS Plugins
GPS extension
new version available at The Jump Pilot Project download page
Coordinate transformation extension is needed also if OpenJUMP task is using some other
projection than the GPS output.
Instructions for using GPS extension available at GPS Plugin page
GPX import plugin
http://sourceforge.net/projects/surveyos/files/SurveyOS%20OpenJUMP%20Plug-Ins/GPX/
nmeaRaw.jar Plugin
for Openjump that reads GPS logs (GGA and RMC) : see download page of the PIROL
Project http://www.al.fh-osnabrueck.de/jump-download.html
NMEA converter script
script to convert the NMEA data into a Jump compatible GML file available by Joe Desbonet : see
emails on Jump-User mail list from 21.01.2006 with subject: GPS
Styling
VertexSymbols Plugin adds vector or raster symbols to vertex. Download page from
Cadplan http://www.cadplan.com.au/jump.html
Jump Fill Pattern Plugin allows user to add their own fill patterns to an Openjump project from
Cadpan http://www.cadplan.com.au/jump.html
Charts / Plots
Create pie, column or stacked column charts for presenting your numeric attribute data of an Openjump
layer: http://services.giub.uni-bonn.de/downloads/openjump/
Based on the first one, Geoff created a newer Version which returns the charts as permanent
layer: http://www.cadplan.com.au/jump.html
A plugin that provides attribute classification tools and charts (scatter plot, bar
plot,histogram): http://www.geo.uzh.ch/~sstein/

Plugins for JUMP
These plugiare already (partly) integrated in OpenJUMP.
Selection Tools Package: see authors homepage: http://www.geo.unizh.ch/~sstein/
SVG image export PlugIn (exports max. 100 features per layer): see authors
homepage: http://www.geo.unizh.ch/~sstein/ISA Tools Package: contains several useful tools especially
for geometry editing. The plugin contains also the possibility to display \MrSid Raster Images
andconnectto\ArcSDE (download:http://sourceforge.net/projects/jump-pilot/files/OpenJUMP_plugins/ISA
%20Plugins/). It may work only with OpenJUMP 1.0
The Looks Extension: http://jonathanaquino.com/looks_extension/looks-extension-1.0.zip applies the
aesthetically pleasing JGoodies Looks look-and-feel to Openjump. Author: Jonathan Aquino
Proportional symbols plugin for Openjump. It's accessible by the "Analyse" menu, and tested against
Openjump 0.1 french vesion. http://www.geotests.net/jump/symboles.jar Hope his helps. Author:
Laurent http://www.univ-tlse2fr/geoprdc http://www.geotests.net/blog
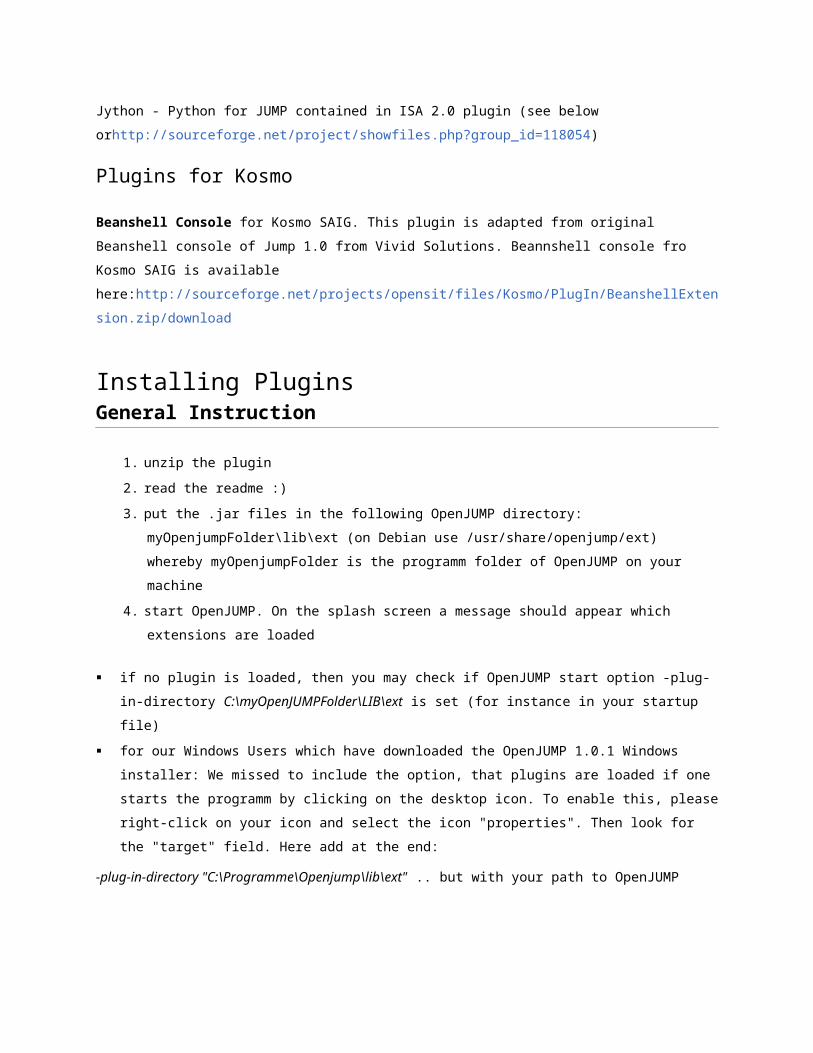
Jython - Python for JUMP contained in ISA 2.0 plugin (see below
orhttp://sourceforge.net/project/showfiles.php?group_id=118054)
Plugins for Kosmo
Beanshell Console for Kosmo SAIG. This plugin is adapted from original Beanshell console of Jump 1.0
from Vivid Solutions. Beannshell console fro Kosmo SAIG is available
here:http://sourceforge.net/projects/opensit/files/Kosmo/PlugIn/BeanshellExtension.zip/download
Installing PluginsGeneral Instruction
1. unzip the plugin
2. read the readme :)
3. put the .jar files in the following OpenJUMP directory: myOpenjumpFolder\lib\ext (on Debian
use /usr/share/openjump/ext) whereby myOpenjumpFolder is the programm folder of OpenJUMP
on your machine
4. start OpenJUMP. On the splash screen a message should appear which extensions are loaded

if no plugin is loaded, then you may check if OpenJUMP start option -plug-in-directory C:\
myOpenJUMPFolder\LIB\ext is set (for instance in your startup file)
for our Windows Users which have downloaded the OpenJUMP 1.0.1 Windows installer: We missed
to include the option, that plugins are loaded if one starts the programm by clicking on the desktop
icon. To enable this, please right-click on your icon and select the icon "properties". Then look for the
"target" field. Here add at the end:
-plug-in-directory "C:\Programme\Openjump\lib\ext" .. but with your path to OpenJUMP
2) Installing the PostGIS PlugIn
NOTE: the JDBC plugin must be installed in the jvm extensions directory, not the OpenJUMP directory to
work properly. To do that:
Download the JDCB Driver from here
Move the postgresql-8.3-currentversion.jar file to your jvm ext directory. On Ubuntu 7.10, that's:
/usr/lib/jvm/java-6-sun-1.6.currentversion/jre/lib/ext/
Restart OpenJUMP
3) Installing the Coordinate Transformation PlugIn by Edgar Soldin
Edgar wrote: first of all ... the transformation path must be possible (else an exception is thrown)
1. put 'cs.conf' from 'lib/ext' in a folder which is in the classpath, or add 'lib/ext' to the classpath (to
circumvent the NullPointerException in WKTSLoader)
2. add the WKT-Strings describing _both_ of your coordinate systems/projections (cs/proj) to
'cs.conf'
3. start jump and assign the cs/proj to the layer (rightside tick is off) .. hint: read mini manual in
'readme.txt' of extensions zip archive
4. activate the tick and choose the cs/proj to project to .. voila all geometries of the layer get
transformed
good luck .. ede
Ravi wrote:
1. I have followed as per instructions, to add *.jar files for projection. gt2jump.cts-0.1a But this
resulted in an error (see box below) after I right clicked on the layer
2. Edgars Solution:
please add the folder containing cs.conf to thge classpath .. e.g. 'lib/ext'
------------ Error reportjava.lang.NullPointerExceptionat de.soldin.gt2jump.cts.WKTCSLoader.<init>(WKTCSLoader.java:51)at de.soldin.gt2jump.cts.CSComboBox.<init>(CSComboBox.java:48)at sun.reflect.NativeConstructorAccessorImpl.newInstance0(Native Method)at sun.reflect.NativeConstructorAccessorImpl.newInstance(Unknown Source)at sun.reflect.DelegatingConstructorAccessorImpl.newInstance(Unknown Source)at java.lang.reflect.Constructor.newInstance(Unknown Source)at java.lang.Class.newInstance0(Unknown Source)at java.lang.Class.newInstance(Unknown Source)at org.swixml.DefaultFactory.newInstance(Unknown Source)at org.swixml.Parser.getSwing(Unknown Source)at org.swixml.Parser.getSwing(Unknown Source)at org.swixml.Parser.parse(Unknown Source)at org.swixml.SwingEngine.render(Unknown Source)at org.swixml.SwingEngine.render(Unknown Source)at org.swixml.SwingEngine.render(Unknown Source)at de.soldin.gt2jump.cts.CSLayerSetExtension.execute(CSLayerSetExtension.java:218)
useful plugins for data editing in public administration
eg. city planning and mapping departments:
DXF-Plugin by Dante Fuster
from Cadplan
Print-Plugin
VERTEX-Plugin
CHART-Plugin
Plugin for GeoTIFF images (source? from Pirol)
The difference of PlugIn and Extension and Registry Here are some explanations from Martin Davis, designer of JUMP workbench about PlugIn,
Extension and Registry, three important OpenJUMP workbench concepts for every people who
want to contribute :
"Originally JUMP just had the concept of plugins, but this quickly turned out to be limiting. Many
JUMP add-ons (to use a neutral term) comprise a whole collection of inter-operating plugins.
They may also contain other things, such as objects or classes which need to be added to the
Registry (more on this later). Also, while plugins can self-install, sometimes it's more convenient

to have another piece of code manage their installation (note: just like as the JUMPConfiguration
class!)
A JUMP Extension was intended to be a way of managing a whole collection of plugins and
associate objects. It provides a single place where the developer can do all the various house-
keeping tasks needed to install & configure a large add-on. The extension class "gets control"
during the load, and gets full access to the JUMP core.
An extension also provides a way of managing a set of plugins which are related. The extension
has a version number and a name. If JUMP allowed you to unload things, it would be extensions
which were unloaded.
Hopefully that clears things up, and convinces people that Extensions really are a necessary and
fundamental JUMP concept.
As for the Registry, I'm not sure if people really grok what this is for. There are more and more
things in JUMP which aren't plugins, but which need to be installed, managed, discovered and
used by plugins which actually do work. These are things like I/O drivers, Datastore drivers,
Decorators, Geometry Functions, etc etc. The Registry was developed as a central place where
these things could be managed. The Registry formalizes and provides a standard pattern for
doing this. It of course can have new Categories of objects added to it (by an Extension,
naturally)."
Martin Davis
Question: It seems to me the purpose of the Extension Class is to provide a container that allows
for the easy installation and configuration of a set of plug-ins and cursor tools. Is this correct?
Answer: Yes, installing GUI components is the primary use for extensions ... but this is not there
sole purpose.
Extensions are intended as a method of automatically injecting an initialization routine into Jump.
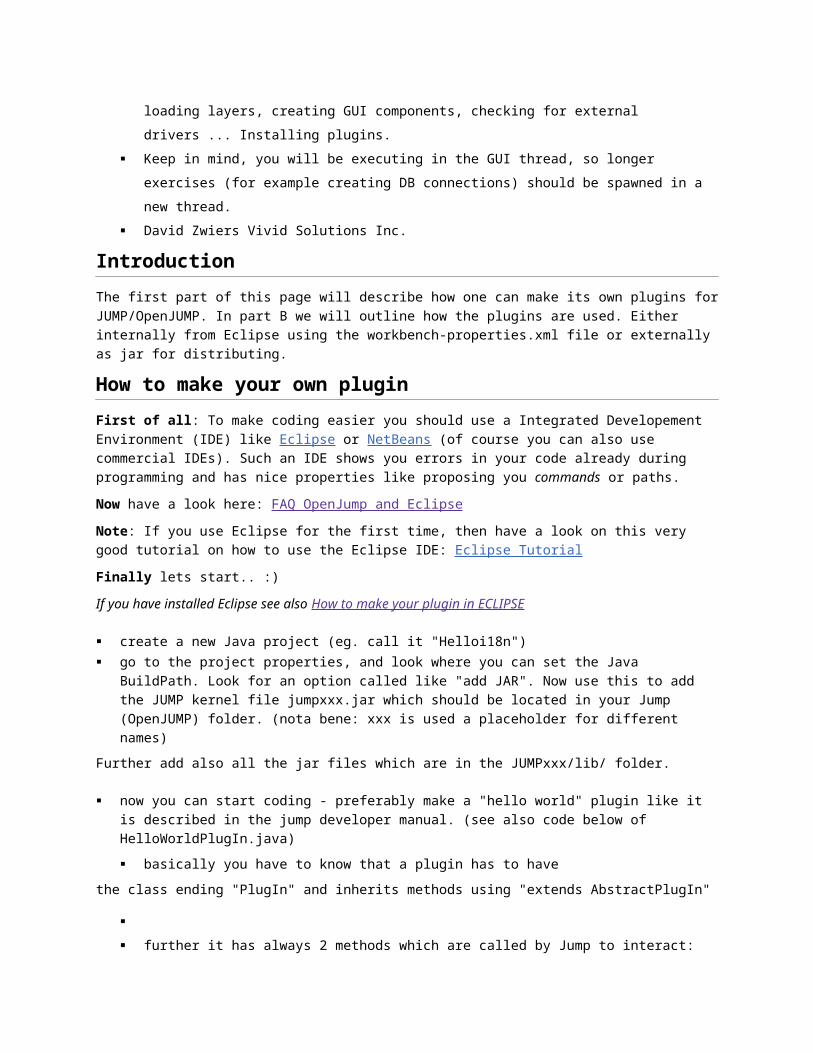
For example: reading properties, loading layers, creating GUI components, checking for external
drivers ... Installing plugins.
Keep in mind, you will be executing in the GUI thread, so longer exercises (for example creating
DB connections) should be spawned in a new thread.
David Zwiers Vivid Solutions Inc.
Introduction
The first part of this page will describe how one can make its own plugins for JUMP/OpenJUMP. In part B
we will outline how the plugins are used. Either internally from Eclipse using the workbench-
properties.xml file or externally as jar for distributing.

How to make your own plugin
First of all: To make coding easier you should use a Integrated Developement Environment (IDE)
like Eclipse or NetBeans (of course you can also use commercial IDEs). Such an IDE shows you errors in
your code already during programming and has nice properties like proposing you commands or paths.
Now have a look here: FAQ OpenJump and Eclipse
Note: If you use Eclipse for the first time, then have a look on this very good tutorial on how to use the
Eclipse IDE: Eclipse Tutorial
Finally lets start.. :)
If you have installed Eclipse see also How to make your plugin in ECLIPSE
create a new Java project (eg. call it "Helloi18n")
go to the project properties, and look where you can set the Java BuildPath. Look for an option called
like "add JAR". Now use this to add the JUMP kernel file jumpxxx.jar which should be located in your
Jump (OpenJUMP) folder. (nota bene: xxx is used a placeholder for different names)
Further add also all the jar files which are in the JUMPxxx/lib/ folder.
now you can start coding - preferably make a "hello world" plugin like it is described in the jump
developer manual. (see also code below of HelloWorldPlugIn.java)
basically you have to know that a plugin has to have
the class ending "PlugIn" and inherits methods using "extends AbstractPlugIn"
further it has always 2 methods which are called by Jump to interact:
1. the method initialize() is necessary to register and to create a menu item (for the
example it is done in the View menu)
2. the method execute() contains the code which should be evaluated if the menu
entry/button is activated. (see below)
/* * created on 04.10.2005 * last modified: 05.10.2005 comments added * * author: sstein * **/
package ch.unizh.geo.degen;
import com.vividsolutions.jump.workbench.WorkbenchContext;import com.vividsolutions.jump.workbench.plugin.AbstractPlugIn;

import com.vividsolutions.jump.workbench.plugin.EnableCheckFactory;import com.vividsolutions.jump.workbench.plugin.MultiEnableCheck;import com.vividsolutions.jump.workbench.plugin.PlugInContext;import com.vividsolutions.jump.workbench.ui.plugin.FeatureInstaller;
/** * @description: * testplugin for jump<p> * shows hello world - window in Jump * * @author sstein * */public class HelloWorldPlugIn extends AbstractPlugIn{
public HelloWorldPlugIn() {// empty constructor
}
public void initialize(PlugInContext context) throws Exception {FeatureInstaller featureInstaller = new
FeatureInstaller(context.getWorkbenchContext());featureInstaller.addMainMenuItem(
this, //exenew String[] {"View"}, //menu paththis.getName(), //name methode .getName
recieved by AbstractPlugIn false, //checkboxnull, //icon
createEnableCheck(context.getWorkbenchContext())); //enable check }
public static MultiEnableCheck createEnableCheck(WorkbenchContext workbenchContext) {
EnableCheckFactory checkFactory = new EnableCheckFactory(workbenchContext);
return new MultiEnableCheck()
.add(checkFactory.createWindowWithLayerNamePanelMustBeActiveCheck());}
/** * Action on menu item selection: * creates doc to show */public boolean execute(PlugInContext context) throws Exception{
context.getWorkbenchFrame().getOutputFrame().createNewDocument();context.getWorkbenchFrame().getOutputFrame().addText("Hello,
World!");context.getWorkbenchFrame().getOutputFrame().surface();
return true;}
}
Example For Eclipse i have done an example Project, which needs OpenJump (donwload here). To use
that in Eclipse:
download it and unpack. Put it into your Eclipse workspace folder
use the following menu entry to load "\File\Import\". Select "Existing Project into Workspace"
After importing don't forget to set the java build path entries in the project properties.
Another example, that shows how to create buffers from features in a layer has been posted
here: Example Plugin For Buffering Features in a Layer
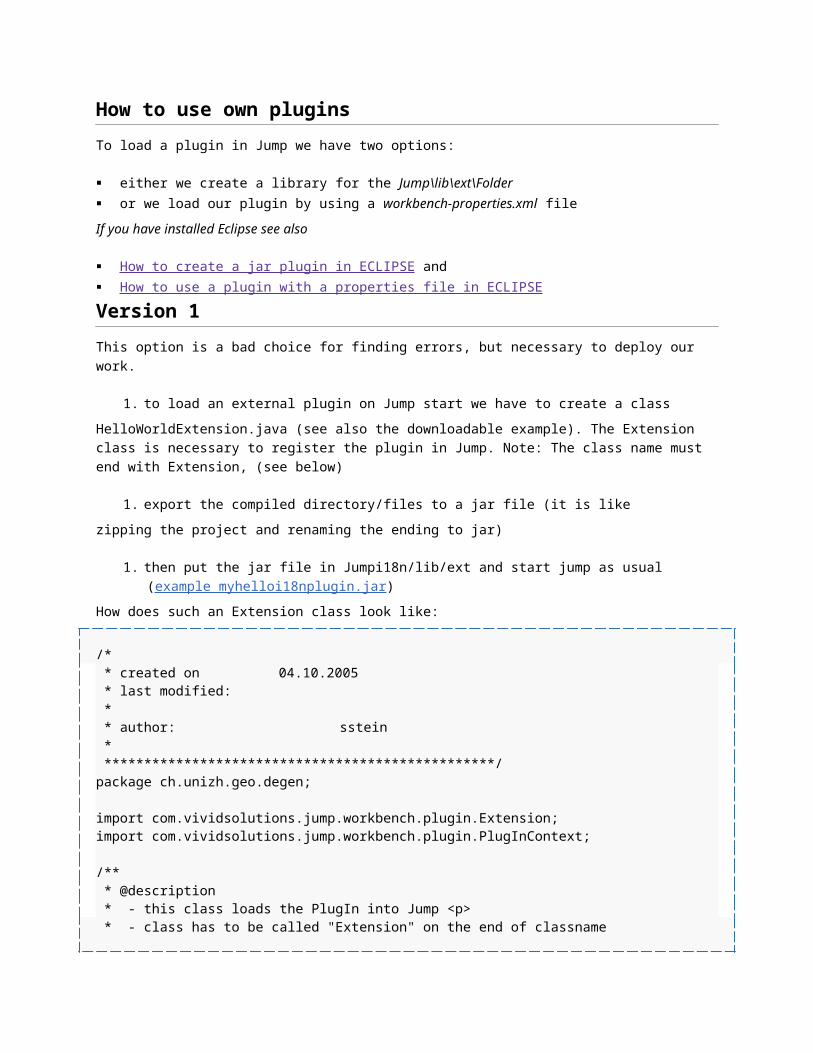
How to use own plugins
To load a plugin in Jump we have two options:
either we create a library for the Jump\lib\ext\Folder
or we load our plugin by using a workbench-properties.xml file
If you have installed Eclipse see also
How to create a jar plugin in ECLIPSE and
How to use a plugin with a properties file in ECLIPSE
Version 1
This option is a bad choice for finding errors, but necessary to deploy our work.
1. to load an external plugin on Jump start we have to create a class
HelloWorldExtension.java (see also the downloadable example). The Extension class is necessary to
register the plugin in Jump. Note: The class name must end with Extension, (see below)
1. export the compiled directory/files to a jar file (it is like
zipping the project and renaming the ending to jar)
1. then put the jar file in Jumpi18n/lib/ext and start jump as usual (example myhelloi18nplugin.jar)

How does such an Extension class look like:
/* * created on 04.10.2005 * last modified: * * author: sstein * *************************************************/package ch.unizh.geo.degen;
import com.vividsolutions.jump.workbench.plugin.Extension;import com.vividsolutions.jump.workbench.plugin.PlugInContext;
/** * @description * - this class loads the PlugIn into Jump <p> * - class has to be called "Extension" on the end of classname * to use the PlugIn in Jump * * @author sstein */public class HelloWorldExtension extends Extension{
/** * calls PlugIn using class method xplugin.initialize() */public void configure(PlugInContext context) throws Exception{
new HelloWorldPlugIn().initialize(context);}
}
Version 2
This option is a good choice for debugging errors but not for deployment.
note: for this version is might be good to have the original openjump sources in a project (since one can
better trace errors and has good examples on programming). The Jump sources can be obtained from
the Jump or OpenJUMP SVN or as zip files. If you create your own Openjump project, don't forget to
include the libraries into your project (using the "Buildpath" properties). Further you have to create a
dependency of the Helloi18 project on the new Jump (OpenJump) project, which can be also done in the
project properties of Helloi18
1 - create in your project a new file and call it workbench-properties.xml (example workbench file)
2 - write the package path to your plugin inside the file (see file)
3 - create a new run entry: the class which is the entry point for OpenJUMP

is com.vividsolutions.jump.workbench.JUMPWorkbench
4 - add to the "Arguments" of the run entry:
-properties C:\myRealProjectPath\workbench-properties.xml-plug-in-directory C:\Programme\Jumpi18n\lib\ext
5 - add to your "run entry" the "classpaths" for the jar files in
jump/lib/ (as Bootstrap Entries) and the project you just created (as User Entries)
6 - start the run entry
Notes
the examples above use the parent class AbstractPlugIn which has disadvatanges for long computations.
For such a case use "implements ThreadedPlugIn". Here also a _monitor_ can be used to send
messages to the user. Apart from that a second method run() has to be implemented which contains the
now the time consuming code while execute() should contain dialogs for initial interatcion. (I will make this
clearer in future - hopefully)
Please don't forget to document your plugin. I've done a template that can be downloaded: here
have fun, Stefan (sstein)
How to use a plugin with a properties file in ECLIPSE
If you have created your HelloWorldPlugIn like in the section How to make your plugin in ECLIPSE then
you can test (debug) it by loading it via use of a property file. This method is not a good way if you want to
deploy your plugin. For this case see this section: How to create a jar plugin in ECLIPSE. There exists
also a third case for including your plugins into Jump by modifying theJumpWorkbenchProperties.java file.
But this way is not recommendable.
But lets start on "how to include your plugin code" into Jump:
1 - For this method it is necessary to create a project containing the original Jump/OpenJUMP code.
You can get the sources from the downlowad pages or the C-V-S repositories. After you have create
the Jump/OpenJUMP project your project view should look like in the following picture. The project
should not contain build errors - which may be caused by not included jar libraries (here use
the project properties and the java build path option) or wrong java-path structures (wrong folder
structure).
2 - The next step is to create a run entry for the Jump project. Therefore do right-mouse-click on the
Jump / OpenJUMP folder and choose Run and select in the submenu the option Run... and a new
dialog will pop up. Note: For debugging/testing use instead of Run the similar menu otpion
called Debug (one below Run). Entries created with Debug can be used also by the Run option and
vice versa.
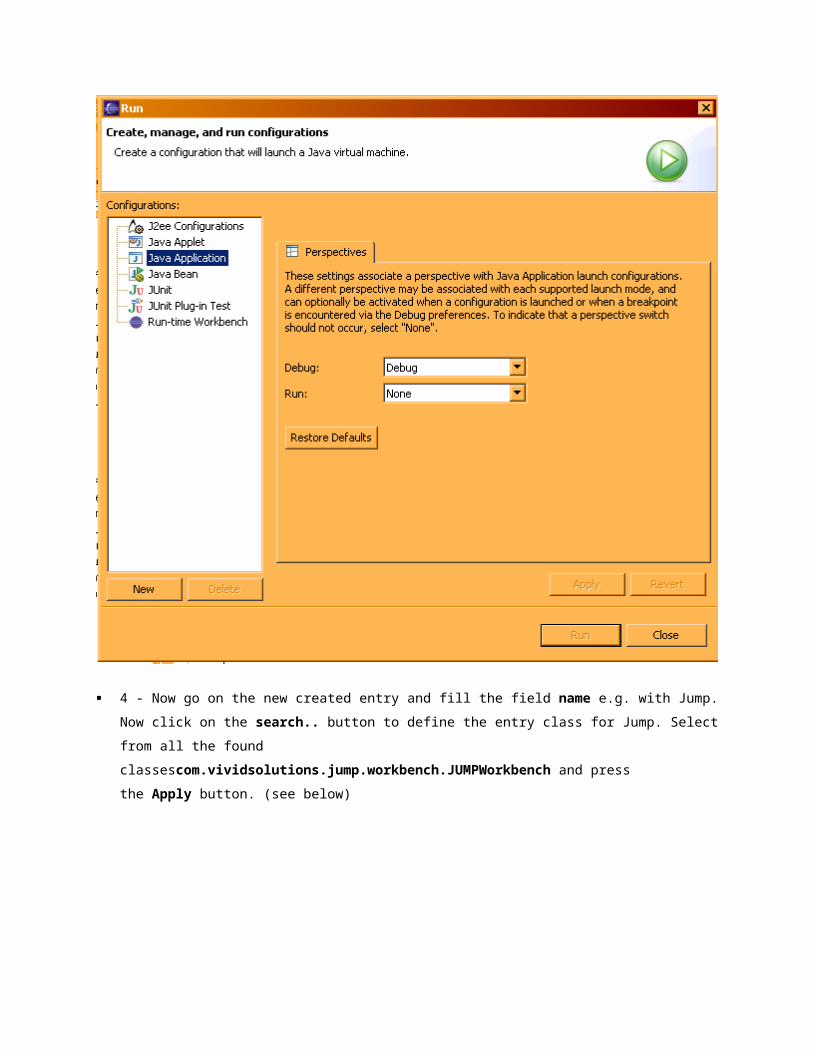
3 - Select here "Java Application" and press the "New" button.

4 - Now go on the new created entry and fill the field name e.g. with Jump. Now click on
the search.. button to define the entry class for Jump. Select from all the found
classescom.vividsolutions.jump.workbench.JUMPWorkbench and press the Apply button. (see
below)

5 - Select the Classpath tab and add the libraries of the Openjump\lib\ folder of your normal installed
OpenJUMP. Use therefore the option Add External JARs.. or Add JARs. (Have a look on the
picture below)
6 - Further add also the Helloi18 project to the class path by using Add Projects.. button.

7 - Now press the Run button and OpenJUMP should start without any problems. If problems exists
have a look on the messages which appear in the console window.
8 - If Jump starts without problems you should made some additional setting. Open therefore again
the Run or Debug menu an select the appropriate entry (e.g. OpenJUMP) of the option Java
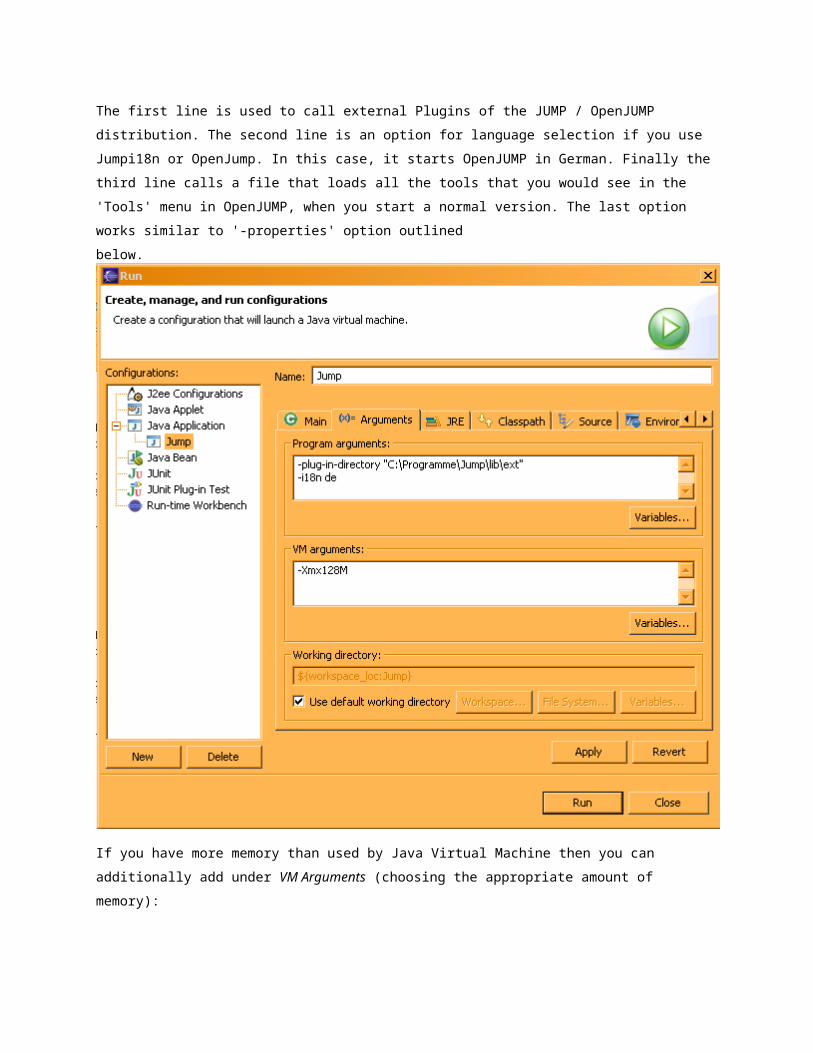
Application. Select the tab Arguments and add under Programm Arguments the following lines:
-plug-in-directory "C:\Programme\Openjump\lib\ext"-i18n de-default-plugins c:\dev\eclwork\openjump_svn\scripts\default-plugins.xml
The first line is used to call external Plugins of the JUMP / OpenJUMP distribution. The second line is an
option for language selection if you use Jumpi18n or OpenJump. In this case, it starts OpenJUMP in
German. Finally the third line calls a file that loads all the tools that you would see in the 'Tools' menu in
OpenJUMP, when you start a normal version. The last option works similar to '-properties' option outlined
below.
If you have more memory than used by Java Virtual Machine then you can additionally add under VM
Arguments (choosing the appropriate amount of memory):
-Xmx128M

9 - Now we will include our plugin code by using a properties file. Therefore we go to
our Helloi18 project and have to create a new file called workbench-properties.xml. If Your eclipse
does not give you the possibility to create a xml file you can either download one here or you create a
new textfile with same name and rename the ending to xml. Note: the file should be put in the "top"
path of your folder like you see below. If you have created the file not inside Jump (because you used
the downloaded file), then you have to use the "Refresh" option of the project menu (or
pressing F5 key)

10 - The workbench-properties.xml file should contain the following line.
<workbench><plug-in>ch.unizh.geo.degen.HelloWorldPlugIn</plug-in> </workbench>
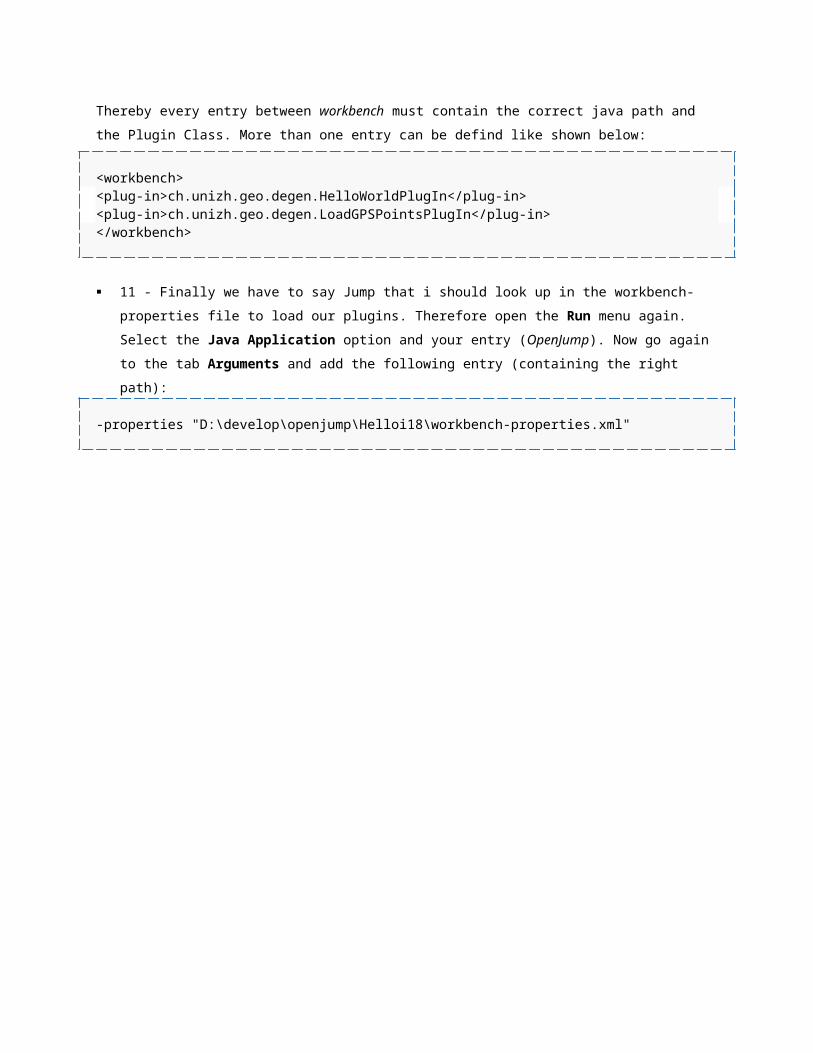
Thereby every entry between workbench must contain the correct java path and the Plugin Class. More
than one entry can be defind like shown below:
<workbench><plug-in>ch.unizh.geo.degen.HelloWorldPlugIn</plug-in><plug-in>ch.unizh.geo.degen.LoadGPSPointsPlugIn</plug-in> </workbench>
11 - Finally we have to say Jump that i should look up in the workbench-properties file to load our
plugins. Therefore open the Run menu again. Select the Java Application option and your entry
(OpenJump). Now go again to the tab Arguments and add the following entry (containing the right
path):
-properties "D:\develop\openjump\Helloi18\workbench-properties.xml"
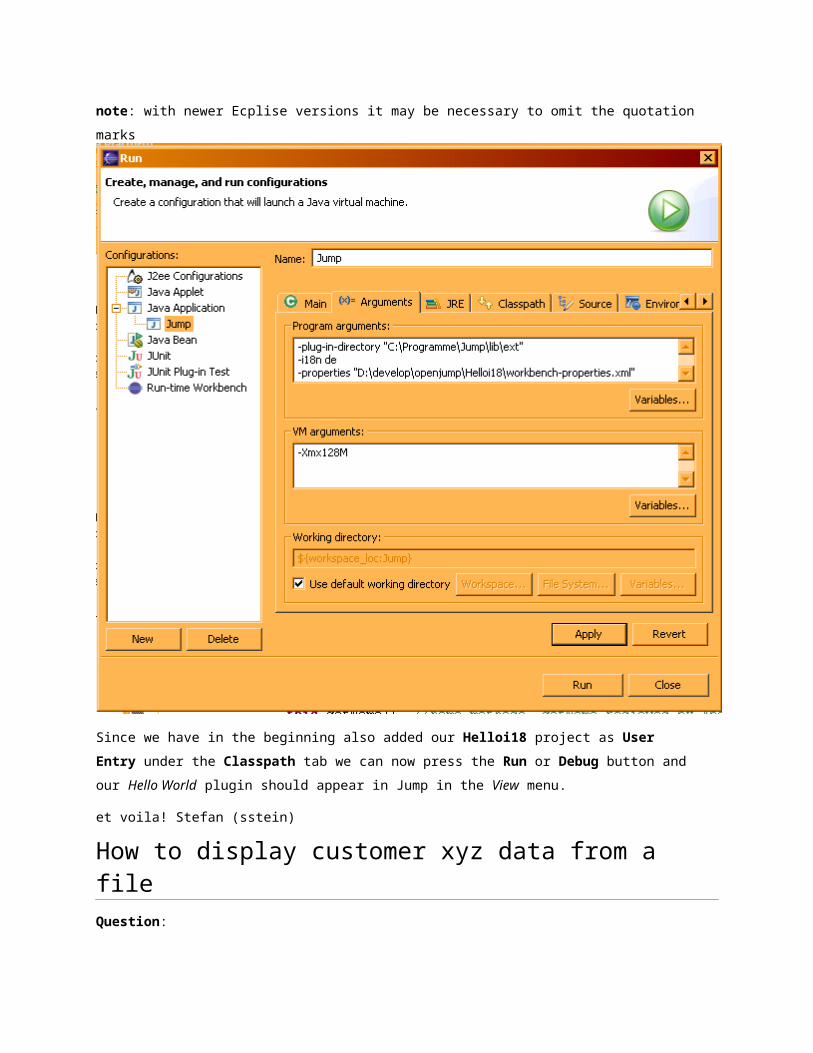
note: with newer Ecplise versions it may be necessary to omit the quotation
marks
Since we have in the beginning also added our Helloi18 project as User Entry under the Classpath tab
we can now press the Run or Debug button and our Hello World plugin should appear in Jump in
the View menu.
et voila! Stefan (sstein)
How to display customer xyz data from a file
Question:
Hello,

I'm a new openjump user, and i'm now trying to make a GIS viewer tool. Some layers have been read
from typical shp GIS files and is shown good. How can i draw my own data item on the map according to
the coordinate that I already constructed from the shp file? (the data is not from GIS files)
thanks for your help!
Stefan's answer:
1. first you need to know the geometry type (Point,Line,Polygon), that you want to create.
2. Then you transform your data to Point/Line/Polygon from the JTS Geometry Library. JTS has
therefore a GeometryFactory which provides several methods to build geometries. (note: making
Polygons needs to create LinearRing before that)
3. After you need to create a Feature from the Geometry. If you dont't need attributes it is very
simply using FeatureDatasetFactory. If you like to have Features with attributes you must first a)
create the FeatureSchema, b) then create a BasicFeature using that schema, c) then set the
geometry for that BasicFeature, d) then set the attributes, e) create a FeatureDataset a subclass
of FeatureCollection (see next step) and add every BasicFeature to that collection
4. if you have the features, then create a feature collection from it
(all features in a collection need to have the same attributes = FeatureSchema)
1. display the FeatureCollection
i attach some code which reads, x y z coordinates from a file (note the file reader is in an external class:
jmath - part of openjump) and creates a point layer without additional attributes.
Note: the code below uses an additional library called JMathTools. This library has been
refactored/renamed in 2007 to JMathIO and unfortunately the MatlabSyntax class does not exist
anymore.
package ch.unizh.geo.degen.christian;
import java.awt.Component;import java.util.ArrayList;import java.util.Iterator;
import javax.swing.JComboBox;import javax.swing.JFileChooser;
import org.jmat.MatlabSyntax;import org.jmat.data.Matrix;
import com.vividsolutions.jts.geom.Coordinate;import com.vividsolutions.jts.geom.Geometry;import com.vividsolutions.jts.geom.GeometryFactory;import com.vividsolutions.jts.geom.Point;import com.vividsolutions.jump.feature.AttributeType;import com.vividsolutions.jump.feature.Feature;import com.vividsolutions.jump.feature.FeatureCollection;import com.vividsolutions.jump.feature.FeatureDataset;import com.vividsolutions.jump.feature.FeatureDatasetFactory;import com.vividsolutions.jump.feature.FeatureSchema;import com.vividsolutions.jump.feature.FeatureUtil;import com.vividsolutions.jump.task.TaskMonitor;import com.vividsolutions.jump.workbench.WorkbenchContext;import com.vividsolutions.jump.workbench.model.StandardCategoryNames;import com.vividsolutions.jump.workbench.plugin.EnableCheckFactory;import com.vividsolutions.jump.workbench.plugin.MultiEnableCheck;import com.vividsolutions.jump.workbench.plugin.PlugInContext;import com.vividsolutions.jump.workbench.plugin.ThreadedBasePlugIn;import com.vividsolutions.jump.workbench.ui.GUIUtil;import com.vividsolutions.jump.workbench.ui.MultiInputDialog;import com.vividsolutions.jump.workbench.ui.plugin.FeatureInstaller;
/** * @author sstein * * */public class LoadxyzDataPlugIn extends ThreadedBasePlugIn{ // is faster if it is not threaded .. but // looks better since a dialog is shown and no graphic errors appear private static String LAST_FORMAT_KEY = LoadxyzDataPlugIn.class.getName() + " - LAST FORMAT"; private Matrix pointMat = null; private MultiInputDialog dialog; public void initialize(PlugInContext context) throws Exception { FeatureInstaller featureInstaller = new FeatureInstaller(context.getWorkbenchContext()); featureInstaller.addMainMenuItem( this,
//exe new String[] {"Generalisation", "loadxyz"}, //menu path this.getName(), //name methode .getName recieved by AbstractPlugIn
false, //checkbox null, //icon createEnableCheck(context.getWorkbenchContext())); //enable check } public boolean execute(PlugInContext context) throws Exception{
this.pointMat= this.loadAsciiDataMatrix(context); return true; }
/** * this function is called after execute * Action on menu item selection: */ public void run(TaskMonitor monitor, PlugInContext myContext) throws Exception{
System.gc(); FeatureCollection fc = this.makeNewDataset(this.pointMat,
monitor); this.showDataset(myContext,fc);}
private Matrix loadAsciiDataMatrix(PlugInContext myContext) throws Exception{ String filename = this.getFilename(myContext); Matrix inMat = MatlabSyntax.load(filename); return inMat;
}
private FeatureCollection makeNewDataset(Matrix inMat, TaskMonitor monitor){
ArrayList geoms = new ArrayList(); int nopoints = inMat.getRowDimension(); //nopoints = 1000; for (int i = 0; i < nopoints; i++) { double x = inMat.get(i,0); double y = inMat.get(i,1); double z = inMat.get(i,2);
Coordinate p = new Coordinate(x,y,z); Point pt = new GeometryFactory().createPoint(p); geoms.add(pt); }
FeatureCollection points = FeatureDatasetFactory.createFromGeometry(geoms);
return points;
}
private void showDataset(PlugInContext myContext, FeatureCollection myFC){ myContext.addLayer(StandardCategoryNames.WORKING, "pointsxy", myFC);
}
public String getFilename(PlugInContext context) throws Exception { String fname = ""; JFileChooser chooser = new JFileChooser(); chooser.setDialogTitle("load point ascii matrix "); Component parent = context.getWorkbenchFrame(); int returnVal = chooser.showOpenDialog(parent); if(returnVal == JFileChooser.APPROVE_OPTION) { fname = chooser.getSelectedFile().getAbsolutePath(); } return fname; }
public static MultiEnableCheck createEnableCheck(WorkbenchContext workbenchContext) { EnableCheckFactory checkFactory = new EnableCheckFactory(workbenchContext);
return new MultiEnableCheck() .add(checkFactory.createWindowWithLayerNamePanelMustBeActiveCheck()) .add(checkFactory.createAtLeastNLayersMustBeSelectedCheck(0)); } }//end class
New Build/Release Procedure
The new build and release procedure uses maven.
Maven profiles
Command line to build and package OpenJUMP with maven is
mvn package -P <profile>,<profile>,...
where profile is at least one of the following:
The available maven profiles are
core

a snapshot of the basic edition
example result:
target/OpenJUMP-20120423-r2834-CORE.zip
plus
a snapshot of the extended edition (core plus extensions from lib/plus)
example result:
target/OpenJUMP-20120423-r2834-PLUS.zip
release
stable builds of core and plus which can be named via e.g.
-D version.number=X.X.X -D version.release=stable
example result:
target/OpenJUMP-1.5.1-r2721-CORE.zip
target/OpenJUMP-1.5.1-r2721-PLUS.zip
the following profiles can be added to build additional files
installer
builds multi platform executable izpack installers (*.jar,*.exe) for either core and plus or release
example result:
target/izpack/Install_OpenJUMP-20120423-r2834-CORE.jar
target/izpack/Install_OpenJUMP-20120423-r2834-CORE.exe
target/izpack/Install_OpenJUMP-20120423-r2834-PLUS.jar
target/izpack/Install_OpenJUMP-20120423-r2834-PLUS.exe
srczip
a zip file containing the source files of the build
example result:
target/OpenJUMP-20120425-r2834-src.zip
javadoc
build java doc html files for the current source
example result:
target/apidocs/

Release
The command line to release a new version of OpenJUMP is
mvn package -P release[,installer][,srczip][,javadoc] -D version.number=X.X.X -D version.release=stable
you can select either core and plus (both are the snapshots) or release (builds
releases for CORE and PLUS)
for releases you might want to give a version.number (default=unknown) and a
version.release (default=stable)
example
mvn package -P release -D version.number=1.5.1
Old Release Process
update the readme.txt
summarize the changes to the previous version, based on the change log file
(copy/sorting out)
compile everything with the Ant script (check the java version to compile against)
add the license, openjump.exe, and readme files (if not already included)
so the platform independent zip & source release may be ready after copying the lic
files into the zip (but best is to compare the zip content of an older release with the
just created version)
create a win-installer using Nullsoft NSIS (maybe with a pointer to download java 1.6)
and include before-hand the ecw and mrsid libs into this edition (see also the notes
on the svn for the past releases: e.g. for OJ 1.3.1)
create another zip/release version that includes the sextante tools, postgis and print-
plugin; based on the platform independent zip
write the release notes
upload the files to sourceforge
make an announcement on slashgeo & our wiki & our sourceforge new section &
change our webpage/links
finally, updating of the documentation on the wiki on the new functions
Example Plugin For Buffering Features in a Layer
this example plugin shows:
how to retrieve data from a layer

how to provide input paramter for a spatial analysis
how to create a new layer that contains your results
package ch.unizh.geo.degen.jumpplugins;
import java.util.Collection;import java.util.Iterator;
import javax.swing.JComboBox;
import com.vividsolutions.jts.geom.Geometry;import com.vividsolutions.jump.feature.Feature;import com.vividsolutions.jump.feature.FeatureCollection;import com.vividsolutions.jump.feature.FeatureDataset;import com.vividsolutions.jump.feature.FeatureSchema;import com.vividsolutions.jump.task.TaskMonitor;import com.vividsolutions.jump.workbench.WorkbenchContext;import com.vividsolutions.jump.workbench.model.Layer;import com.vividsolutions.jump.workbench.model.StandardCategoryNames;import com.vividsolutions.jump.workbench.plugin.AbstractPlugIn;import com.vividsolutions.jump.workbench.plugin.EnableCheckFactory;import com.vividsolutions.jump.workbench.plugin.MultiEnableCheck;import com.vividsolutions.jump.workbench.plugin.PlugInContext;import com.vividsolutions.jump.workbench.plugin.ThreadedPlugIn;import com.vividsolutions.jump.workbench.ui.GUIUtil;import com.vividsolutions.jump.workbench.ui.MultiInputDialog;import com.vividsolutions.jump.workbench.ui.plugin.FeatureInstaller;
/** * @description: * Example plugin which creates buffers from the input * features. The Plugin ask for the layer with the features * and the radius for the buffer. The output will be * the buffered features containing the attributes from the * source features. * * @author sstein * **/public class BufferFeaturesFromLayerPlugIn extends AbstractPlugIn implements ThreadedPlugIn{
private String T1 ="buffers all features in a layer"; private String T2 ="buffer radius"; private String CLAYER = "select layer"; private Layer itemlayer = null;

private double radius = 0;
/** * this method is called on the startup by JUMP/OpenJUMP. * We set here the menu entry for calling the function. */ public void initialize(PlugInContext context) throws Exception {
FeatureInstaller featureInstaller = new FeatureInstaller(context.getWorkbenchContext());
featureInstaller.addMainMenuItem( this, //exe new String[] {"SSTools"}, //menu path this.getName(), //name methode .getName recieved by
AbstractPlugIn false, //checkbox null, //icon createEnableCheck(context.getWorkbenchContext()));
//enable check } /** * This method is used to define when the menu entry is activated or * disabled. In this example we allow the menu entry to be usable only * if one layer exists. * @param workbenchContext * @return */ public static MultiEnableCheck createEnableCheck(WorkbenchContext workbenchContext) { EnableCheckFactory checkFactory = new EnableCheckFactory(workbenchContext);
return new MultiEnableCheck() .add(checkFactory.createAtLeastNLayersMustExistCheck(1)) .add(checkFactory.createTaskWindowMustBeActiveCheck()); } /** * this function is called by JUMP/OpenJUMP if one clicks on the menu entry. * It is called before the "run" method and useful to do all the GUI /user-input things * In this example we call two additional methods {@link #setDialogValues(MultiInputDialog, PlugInContext)}

* and {@link #getDialogValues(MultiInputDialog)} to obtain the Layer and the buffer radius by the user. */
public boolean execute(PlugInContext context) throws Exception{ this.reportNothingToUndoYet(context); MultiInputDialog dialog = new MultiInputDialog( context.getWorkbenchFrame(), getName(), true); this.setDialogValues(dialog, context); GUIUtil.centreOnWindow(dialog); dialog.setVisible(true); if (! dialog.wasOKPressed()) { return false; } this.getDialogValues(dialog); return true;}
private void setDialogValues(MultiInputDialog dialog, PlugInContext context){
dialog.setSideBarDescription(T1); JComboBox addLayerComboBoxBuild = dialog.addLayerComboBox(this.CLAYER, context.getCandidateLayer(0), null, context.getLayerManager()); dialog.addDoubleField(T2, this.radius, 6);
}
private void getDialogValues(MultiInputDialog dialog){ this.itemlayer = dialog.getLayer(this.CLAYER); this.radius = dialog.getDouble(T2);
}
/** * This method is called by JUMP/OpenJUMP after {@link #execute(PlugInContext)}, * It is usefull to do some longterm calculations. */ public void run(TaskMonitor monitor, PlugInContext context) throws Exception{ //-- allow cancel monitor.allowCancellationRequests(); this.bufferItems(context, monitor, this.radius); System.gc(); }
/** * This is a method which calculates buffers from the items in a layer. * @param context * @param monitor * @param radius used for the buffer * @return

* @throws Exception */ private boolean bufferItems(PlugInContext context, TaskMonitor monitor, double radius) throws Exception{
System.gc(); //flush garbage collector// -------------------------- //-- get items
final Collection features = this.itemlayer.getFeatureCollectionWrapper().getFeatures(); //-- create the FeatureCollection which will contain the buffers
FeatureCollection myCollA = null; // get the first feature to determine the FeatureSchema of the collection Feature firstF = (Feature)features.iterator().next(); // get FeatureSchema FeatureSchema fs = firstF.getSchema(); // create the new FeatureCollection (containing the output of the buffer operation) myCollA = new FeatureDataset(fs); // get every feature(clone it!) - get the geometry - calculate the buffer // and set as new Geometry the buffer geometry // so the buffers have the same attributes as the original features int numFeatures = features.size(); int count=0;
for (Iterator iter = features.iterator(); iter.hasNext();) { Feature f = (Feature) iter.next(); //-- clone the feature - so we can add it to a new FC Feature newF = f.clone(false); Geometry geom = f.getGeometry(); //-- calculate the buffer Geometry buffer = geom.buffer(radius); //-- set as new geometry the buffer geometry newF.setGeometry(buffer); //-- add the new (cloned) feature to the collection myCollA.add(newF); count++; //-- give the user some info : how far the calculation is monitor.report("processed: "+count+" of " + numFeatures + " items"); //-- stop here if the user whishes // we will not display the buffers calculated so far if (monitor.isCancelRequested()){ return false; } } //-- display the resulting buffer features

context.addLayer(StandardCategoryNames.WORKING, "buffers", myCollA);
return true; }
}
How to Access and Display Attributes of Selected Features
//Prepare Output Framecontext.getWorkbenchFrame().getOutputFrame().createNewDocument();context.getWorkbenchFrame().getOutputFrame().addText("Hello, World!");context.getWorkbenchFrame().getOutputFrame().surface(); //Select desired Layer::In this case the iththis.itemlayer=context.getCandidateLayer(i); //Get respective LayerViewPanelLayerViewPanel LVP=context.getLayerViewPanel();//Get SelectionManager for the LayerSelectionManager SM=LVP.getSelectionManager();//Get FeaturesCollection data=SM.getFeaturesWithSelectedItems();
//Iterate features to access desired AttributesFeature firstF;Object firstO;for (Iterator iter = data.iterator(); iter.hasNext();){ firstF = (Feature)iter.next(); //Get required Attributes:: '0' represents the column index in my case it was 'length' firstO = firstF.getAttribute(0); //Finally display :) context.getWorkbenchFrame().getOutputFrame().addText("\n"+LayerName+"\n"+"\n"+firstO.toString()+"\n"); }
Example Plugin For Accessing Sextante Algorithms
The following plugin code enables to derive convex hull for a point layer whereby the convexh hull
algorithm (minimum enclosing polygon) utilized is taken from the Sextante processing libraries. (Note,
Sextante actually uses the JTS algorithm, which is also used in our standard implementation)
package org.openjump.core.ui.plugin.tools;
import java.io.IOException;
import javax.swing.JComboBox;
import com.vividsolutions.jts.geom.GeometryFactory;import com.vividsolutions.jump.feature.FeatureCollection;import com.vividsolutions.jump.task.TaskMonitor;import com.vividsolutions.jump.workbench.WorkbenchContext;import com.vividsolutions.jump.workbench.model.Layer;import com.vividsolutions.jump.workbench.model.StandardCategoryNames;import com.vividsolutions.jump.workbench.plugin.AbstractPlugIn;import com.vividsolutions.jump.workbench.plugin.EnableCheckFactory;import com.vividsolutions.jump.workbench.plugin.MultiEnableCheck;import com.vividsolutions.jump.workbench.plugin.PlugInContext;import com.vividsolutions.jump.workbench.plugin.ThreadedPlugIn;import com.vividsolutions.jump.workbench.ui.GUIUtil;import com.vividsolutions.jump.workbench.ui.MultiInputDialog;import com.vividsolutions.jump.workbench.ui.plugin.FeatureInstaller;
import es.unex.sextante.core.OutputFactory;import es.unex.sextante.core.OutputObjectsSet;import es.unex.sextante.core.ParametersSet;import es.unex.sextante.core.Sextante;import es.unex.sextante.dataObjects.IVectorLayer;import es.unex.sextante.exceptions.GeoAlgorithmExecutionException;import es.unex.sextante.openjump.core.OpenJUMPOutputFactory;import es.unex.sextante.openjump.core.OpenJUMPVectorLayer;import es.unex.sextante.outputs.Output;import es.unex.sextante.parameters.Parameter;import es.unex.sextante.vectorTools.minimumEnclosingPolygon.MinimumEnclosingPolygonAlgorithm;
/** * @description: OpenJUMP plugin to demonstrate the utilization and access to Sextante algorithms * * @author sstein * **/public class SextanteTestPlugIn extends AbstractPlugIn implements ThreadedPlugIn{
private String sSidebar ="Testplugin that uses an algorithm that generates a convex hull (i.e. minimum enclosing polygon) from Sextante";

private final String sLAYERPTS = "Layer with Point Geometries"; private Layer input = null; private MultiInputDialog dialog; private PlugInContext context = null; GeometryFactory gfactory = new GeometryFactory(); public void initialize(PlugInContext context) throws Exception {
FeatureInstaller featureInstaller = new FeatureInstaller(context.getWorkbenchContext());
featureInstaller.addMainMenuItem( this,//exe new String[] {"OJ-Sextante"}, //menu path "Sextante Test Plugin",
//AbstractPlugIn.createName(CalculateMinimumConvexPolygonPlugIn.class), false, //checkbox null, //icon createEnableCheck(context.getWorkbenchContext()));
//enable check }
public static MultiEnableCheck createEnableCheck(WorkbenchContext workbenchContext) { EnableCheckFactory checkFactory = new EnableCheckFactory(workbenchContext);
return new MultiEnableCheck() .add(checkFactory.createAtLeastNLayersMustExistCheck(1)); }
public boolean execute(PlugInContext context) throws Exception{ //Unlike ValidatePlugIn, here we always call #initDialog because we want //to update the layer comboboxes. initDialog(context); dialog.setVisible(true); if (!dialog.wasOKPressed()) { return false; } else{ this.getDialogValues(dialog); } return true;

} public void run(TaskMonitor monitor, PlugInContext context) throws Exception{
System.gc(); //flush garbage collector this.context = context; monitor.allowCancellationRequests(); FeatureCollection resultC = this.calculateHull(this.input,
context, monitor); if(resultC != null){ context.addLayer(StandardCategoryNames.RESULT,
this.input.getName() + "-hull", resultC); }
System.gc(); }
private void initDialog(PlugInContext context) { dialog = new MultiInputDialog(context.getWorkbenchFrame(), "Generate Hull", true); dialog.setSideBarDescription(sSidebar); try { JComboBox addLayerComboBoxRegions = dialog.addLayerComboBox(this.sLAYERPTS, context.getCandidateLayer(0), null, context.getLayerManager()); } catch (IndexOutOfBoundsException e) {} GUIUtil.centreOnWindow(dialog); } private void getDialogValues(MultiInputDialog dialog) { this.input = dialog.getLayer(this.sLAYERPTS); }
private FeatureCollection calculateHull(Layer stefanspoints,PlugInContext context, TaskMonitor monitor) throws GeoAlgorithmExecutionException, IOException {
OutputFactory outputFactory = new OpenJUMPOutputFactory(context.getWorkbenchContext());
monitor.report("initialize sextante");Sextante.initialize();
monitor.report("prepare computation");OpenJUMPVectorLayer layer = new OpenJUMPVectorLayer();layer.create(stefanspoints);

MinimumEnclosingPolygonAlgorithm alg = new MinimumEnclosingPolygonAlgorithm();
ParametersSet params = alg.getParameters();Parameter layerParam =
(Parameter)params.getParameter(MinimumEnclosingPolygonAlgorithm.POINTS);boolean worked = layerParam.setParameterValue(layer);if(worked){
//method values: 0 - for convex hull, 1 - for circle, 2 - envelope
params.getParameter(MinimumEnclosingPolygonAlgorithm.METHOD).setParameterValue(new Integer(2));
params.getParameter(MinimumEnclosingPolygonAlgorithm.USECLASSES).setParameterValue(false);
//-- not sure why the following param needs to be set, if I set false before
params.getParameter(MinimumEnclosingPolygonAlgorithm.FIELD).setParameterValue(new Integer(0));
OutputObjectsSet outputs = alg.getOutputObjects();Output polygon =
outputs.getOutput(MinimumEnclosingPolygonAlgorithm.RESULT);monitor.report("computation");alg.execute(null, outputFactory);
monitor.report("retrieving results");IVectorLayer result =
(IVectorLayer)polygon.getOutputObject();Layer resultOJLayer =
(Layer)result.getBaseDataObject();return
resultOJLayer.getFeatureCollectionWrapper().getWrappee();}else{
context.getWorkbenchFrame().warnUser("layer not a point layer; has ShapeType: " + layer.getShapeType());
return null;}
} }

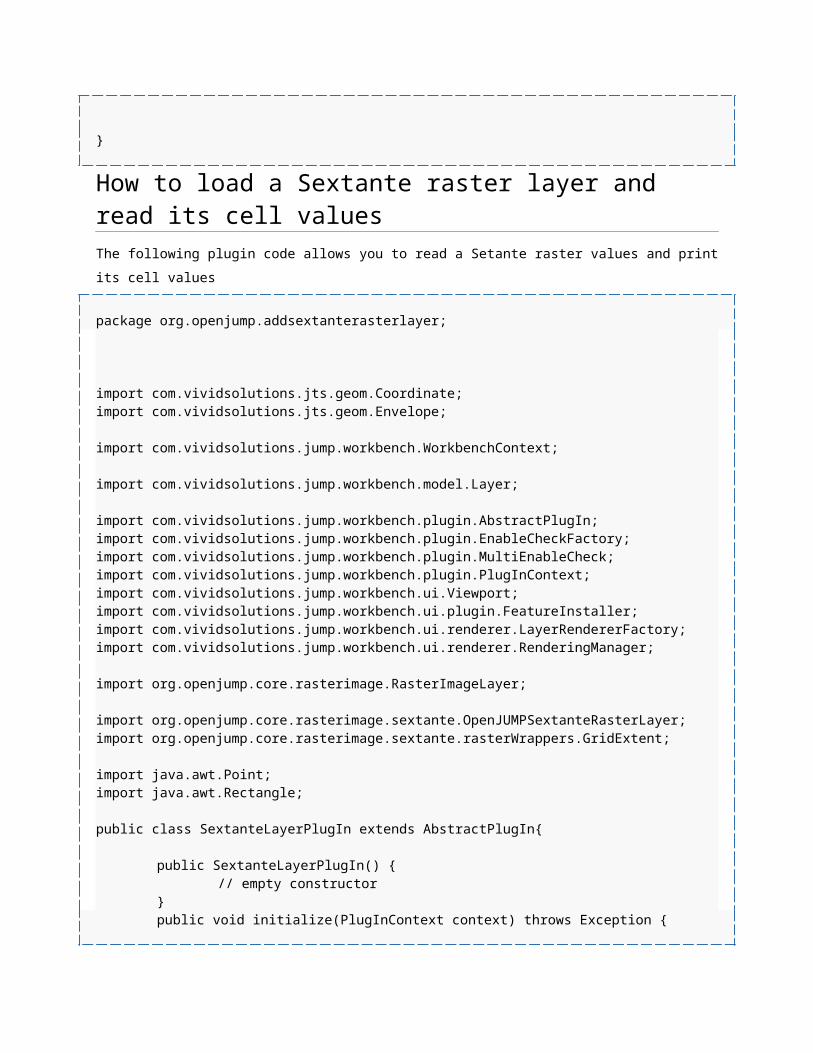
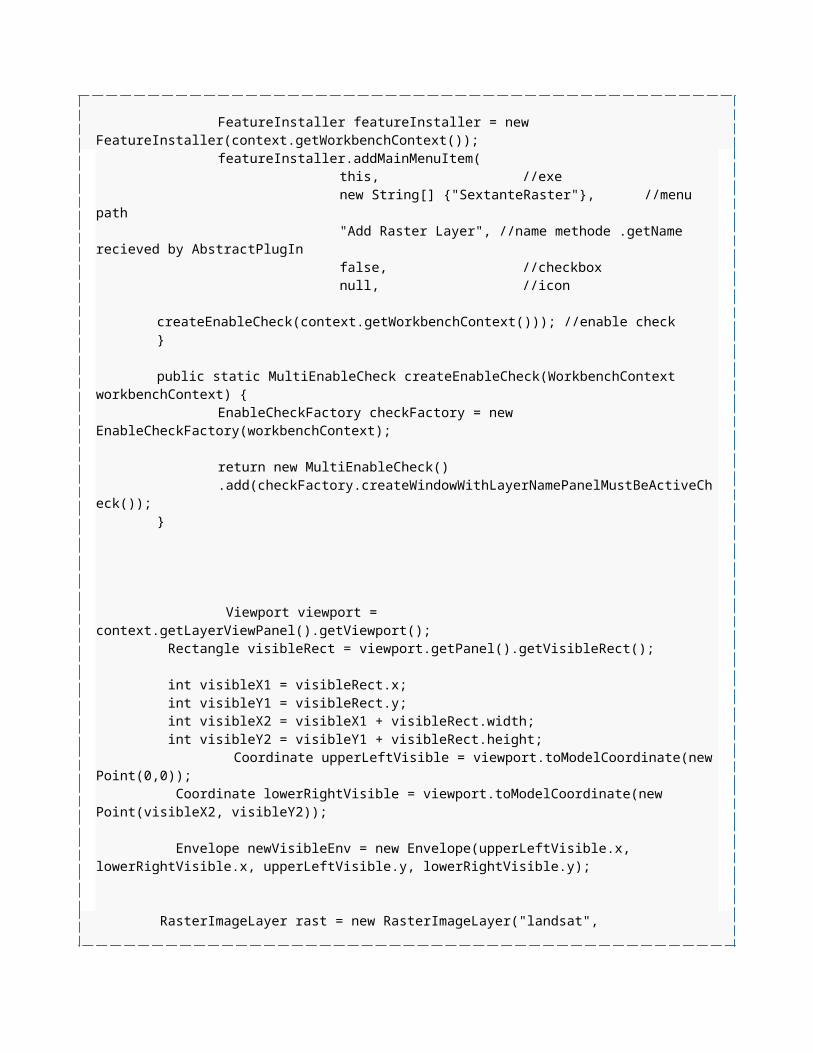
How to load a Sextante raster layer and read its cell values
The following plugin code allows you to read a Setante raster values and print its cell values
package org.openjump.addsextanterasterlayer;
import com.vividsolutions.jts.geom.Coordinate;import com.vividsolutions.jts.geom.Envelope;
import com.vividsolutions.jump.workbench.WorkbenchContext;
import com.vividsolutions.jump.workbench.model.Layer;
import com.vividsolutions.jump.workbench.plugin.AbstractPlugIn;import com.vividsolutions.jump.workbench.plugin.EnableCheckFactory;import com.vividsolutions.jump.workbench.plugin.MultiEnableCheck;import com.vividsolutions.jump.workbench.plugin.PlugInContext;import com.vividsolutions.jump.workbench.ui.Viewport;import com.vividsolutions.jump.workbench.ui.plugin.FeatureInstaller;import com.vividsolutions.jump.workbench.ui.renderer.LayerRendererFactory;import com.vividsolutions.jump.workbench.ui.renderer.RenderingManager;
import org.openjump.core.rasterimage.RasterImageLayer;
import org.openjump.core.rasterimage.sextante.OpenJUMPSextanteRasterLayer;import org.openjump.core.rasterimage.sextante.rasterWrappers.GridExtent;
import java.awt.Point;import java.awt.Rectangle;
public class SextanteLayerPlugIn extends AbstractPlugIn{
public SextanteLayerPlugIn() {// empty constructor
}public void initialize(PlugInContext context) throws Exception {
FeatureInstaller featureInstaller = new FeatureInstaller(context.getWorkbenchContext());
featureInstaller.addMainMenuItem(this, //exenew String[] {"SextanteRaster"}, //menu
path

"Add Raster Layer", //name methode .getName recieved by AbstractPlugIn
false, //checkboxnull, //icon
createEnableCheck(context.getWorkbenchContext())); //enable check }
public static MultiEnableCheck createEnableCheck(WorkbenchContext workbenchContext) {
EnableCheckFactory checkFactory = new EnableCheckFactory(workbenchContext);
return new MultiEnableCheck()
.add(checkFactory.createWindowWithLayerNamePanelMustBeActiveCheck());}
Viewport viewport = context.getLayerViewPanel().getViewport(); Rectangle visibleRect = viewport.getPanel().getVisibleRect(); int visibleX1 = visibleRect.x; int visibleY1 = visibleRect.y; int visibleX2 = visibleX1 + visibleRect.width; int visibleY2 = visibleY1 + visibleRect.height;
Coordinate upperLeftVisible = viewport.toModelCoordinate(new Point(0,0)); Coordinate lowerRightVisible = viewport.toModelCoordinate(new Point(visibleX2, visibleY2)); Envelope newVisibleEnv = new Envelope(upperLeftVisible.x, lowerRightVisible.x, upperLeftVisible.y, lowerRightVisible.y);
RasterImageLayer rast = new RasterImageLayer("landsat", context.getLayerManager(), "/home/rashadkm/lsat.png", null, null, newVisibleEnv); OpenJUMPSextanteRasterLayer rasterlayer = new OpenJUMPSextanteRasterLayer(); rasterlayer.create(rast,true);

context.addLayerSextanteRaster("Raster Layer", rast); GridExtent gridExtent = new GridExtent(rasterlayer); rasterlayer.setWindowExtent(gridExtent); int iNX = gridExtent.getNX(); int iNY = gridExtent.getNY(); for(int y = 0; y < iNY; y++){ for(int x = 0; x < iNX; x++){
System.out.println(rasterlayer.getCellValueAsDouble(x, y)); } } return true; }
}
How to use i18n InternationalizationContents
[hide]
1 Introduction
2 Internationalization with i18n
3 Since OpenJUMP nightly built Nov. 2007
4 Using Resource Bundle Class
Introduction
There exists 2 ways for internationalizing the user interface.
a) using the i18n classes

b) using the resource bundle classes
both are described below
Internationalization with i18n
For internationalization an additional class I18NPlug.java is needed.
Further the name and the path of a language properties file, containing the translation, has to be
defined.
To allow international plugins to work also with JUMP (not only OpenJump) a case selection should
be made in the #initialize() method. Therefore use the expression:
if(I18NPlug.jumpi18n == true){ //do something}else{ //do something else}
For more details see Example plugin for internationalization
Since OpenJUMP nightly built Nov. 2007
The updates done in November 2007 for the I18N class supports different resource files for plug-ins.
To use it in your plug-ins you will need to do the following, assuming your plug-in is in the package
com.foo.jump.bar
1 - Create a language package in the resource directory of you source for your resource bundles.
Using MAVEN the directory would be src/main/resources/com/foo/jump/bar/language
2 - Add the jump.properties file (and other language files) into the directory created in 1
3 - Use the method I18N.getText("com.foo.jump.bar","com.foo.jump.bar.MyPlugin.some-text-key") in
your plugin to get the I18Nized text
4 - Make sure when you build your jar file the whole directory tree under src/main/resources is copied
to the jar file. With MAVEN this is done for you.
The new code uses the plug-in classloader so it should be able to find the resource bundle as long as you
don't use your own classloader.
Using Resource Bundle Class
Holger suggests to use the ResourceBundle- Class (Java Standard). This works with all versions of
JUMP. Here the is the Hello World Example:
package example;
import com.vividsolutions.jump.workbench.plugin.*;import java.util.*;
public class MyInternational extends AbstractPlugIn{ // this is the path to the propertie- files // myinternational.properties = language not suported // myinternational_de.properties = german // myinternational_en.properties = english // etc. String basename = "example.resources.myinternational"; ResourceBundle res;
public MyInternational() { }
public void initialize(PlugInContext context) throws Exception { res = ResourceBundle.getBundle(basename); // example System.out.println(getString("Text1"));
context.getFeatureInstaller().addMainMenuItem(this, new String[] {getString("Tools"), getString("MyPlugins")}, getName(), false, null, null); }
public boolean execute(PlugInContext context) throws Exception { context.getWorkbenchFrame().getOutputFrame().createNewDocument(); context.getWorkbenchFrame().getOutputFrame().addText(getString("Hallo"));
context.getWorkbenchFrame().getOutputFrame().surface(); return true; }
public String getName() { return getString("Name"); }
private String getString(String s) { try { return res.getString(s); } catch (MissingResourceException ex) { // no entry ex.printStackTrace(); return ""; } catch (Exception ex) { // no resource file ex.printStackTrace(); return ""; }
}}
How to load data from a Shape File directly
An example that allows to load data stored in a Shapefile directly, without any GUI interactions:
String filename= "data/tigerline/2009_us_state/tl_2009_us_state.shp";ShapefileReader reader = new ShapefileReader();FeatureCollection fc = reader.read(new DriverProperties(filename));List<Feature> features = fc.getFeatures();
The list of features can then be parsed and modified. You can also add the FeatureCollection as layer in
OpenJUMP using:
context.addLayer(StandardCategoryNames.RESULT, "myLayerName" , fc );
Note, the context is a PlugInContext available in a PlugIn class.

For other examples, and also on how to load image files by code check out this email thread:
http://www.mail-archive.com/[email protected]/msg07498.html
Implementing Undo
2005-08-11 21:10:20 Jonatan: you remember the undo Tools ?
2005-08-11 21:10:26 Jon: ah yes
2005-08-11 21:10:48 Jonatan: you have me notices about this ?
2005-08-11 21:11:57 Jon: There are two ways to do Undo: the hard way and the easy way
2005-08-11 21:12:18 Jonatan: mm
2005-08-11 21:12:43 Jon: If you are lucky, you can use the easy way; otherwise you must use the
hard way
2005-08-11 21:13:49 Jonatan: what you recomend me ?
2005-08-11 21:15:32 Jon: it depends...
2005-08-11 21:16:02 Jon: The easy way uses EditTransaction. The hard way uses
UndoableCommand. I will give you an example of each...
2005-08-11 21:16:20 Jonatan: mmm
2005-08-11 21:21:56 Jon: Example of UndoableCommand: AddNewCategoryPlugIn
2005-08-11 21:22:06 Jon: Example of EditTransaction: DeleteAllFeaturesPlugIn
Displaying Debug Messages
There are several ways to display debug, progress or even warning messages.
The common way is to write to the console, which only works if debugging is performed in a
development environment or so. Simply use:
System.out.println("debugmessagehere")
If you only want to display a progress report (e.g. counting the number of items processed) you may
use a ThreadedPlugIn (interface, or ThreadedBasePlugIn) and the TaskMonitor of the run method,
e.g.
monitor.report("prepare computation");
if you want to sent the user a warning message (or other message) you may use either

context.getWorkbenchFrame().warnUser("blabla");
or
context.getWorkbenchFrame().setTimeMEssage("blabla");
a not so direct method, but useful for sending long reports at the end of the processing is to generate
a new html output window as shown in the "Hello World" example of the Developer's Guide.
context.getWorkbenchFrame().getOutputFrame().createNewDocument();context.getWorkbenchFrame().getOutputFrame().addText(getString("Hallo"));context.getWorkbenchFrame().getOutputFrame().surface();
Adding A Toolbar Button
Here's an example of adding a plugin to the toolbar as a button:
workbenchFrame.getToolBar().addPlugIn(outputWindowPlugIn.getIcon(), outputWindowPlugIn, new MultiEnableCheck(), workbenchContext)
Another way to do it is to use
WorkbenchToolBar#add(AbstractButton button, String tooltip, Icon icon, ActionListener actionListener, EnableCheck enableCheck)
Still another way is to use WorkbenchToolBar#add(Component)
[31. Aug 2006]
Hei,
to add a button you need:
to specify an icon for you plugin => xxxPlugIn.getIcon();
to add it to the toolbar. For Jump own plugins this is done
in JumpConfiguration.configureToolBar(final WorkbenchContext workbenchContext,
EnableCheckFactory checkFactory)
e.g.

WorkbenchFrame frame = workbenchContext.getWorkbench().getFrame(); frame.getToolBar().addPlugIn(zoomToSelectedItemsPlugIn.getIcon(), zoomToSelectedItemsPlugIn, ZoomToSelectedItemsPlugIn.createEnableCheck(workbenchContext), workbenchContext);
If you have access to the OpenJUMP SVN repository you can see an example in the NewTaskPlugIn.java
in package com.vividsolutions.jump.workbench.ui.plugin; another example .. if you use original JUMP ..
may be look on ZoomToSelectedItemsPlugIn.java in package workbench.ui.zoom
stefan
Implementing cursortools
To implement a new cursortool, the best way is to study and subclass existant cursortools with a similar
behaviour:
for example cursortool #DragTool if your tool needs a mouse drag;
or cursortool#NClickTool if your tool uses several clicks
(see Jump Developer's Guide chapter 6. for more informations on cursortool classes)
Let's create a simple cursortool that displays cursor coordinates in a java console, each time we click
once in the layerViewPanel (not a very useful tool...):
public class CoordinateCursorTool extends AbstractCursorTool{ private Coordinate actualCoord = new Coordinate(); public RasterQueryCursorTool() //constructor does nothing special here
public Icon getIcon() { return IconLoader.icon("My_toolbar_Icon.gif"); //specify here the toolbar icon file (button image) to use% }
public Cursor getCursor() { return createCursor(IconLoader.icon("My_Cursor.gif") .getImage()); //specify here the cursor image file to use }
public void deactivate() {

}
public boolean isRightMouseButtonUsed() { return false; }
public void mouseClicked(MouseEvent e) { try {//add here the code to execute when the mouse is clicked% actualCoord = getPanel().getViewport().toModelCoordinate( e.getPoint());
system.out.println(actualCoord); //Display coordinates as a string } catch (NoninvertibleTransformException e1) { e1.printStackTrace(); }
fireGestureFinished(); //Notify that mouse gesture is finished }
public boolean isGestureInProgress() { return false; }
public void cancelGesture() { }
public String getName() { return "CoordinateTool"; }
protected Shape getShape() throws Exception { return null; //because nothing should be drawn here }
protected void gestureFinished() throws Exception { reportNothingToUndoYet();
}}
Then we add our cursortool to the workbench toolbar. This can be done in the initialize() method of a new
plugin:
public void initialize(PlugInContext context){ WorkbenchFrame frame = context.getWorkbenchContext() .getWorkbench().getFrame();

frame.getToolBar().addCursorTool(new CoordinateCursorTool());
//etc...
In the workbench, you have now a new button. Press it and the CoordinateCursortool becomes active
(the #activate method is called). Have fun!
Thanks to Paul Plouy for writing up the tutorial above. Note that there are some subclasses of
AbstractCursorTool that you can subclass to get additional power for free; for example: MultiClickTool,
SpecifyFeaturesTool, etc. For examples of their use, see the classes in
com.vividsolutions.jump.workbench.ui.cursortool [Jon Aquino 2005-09-22]
There are several good examples of CursorTools in the OpenJUMP source code. Check out the
cursortools folder. [Jon Aquino 2005-11-04]
Converting a CursorTool to a PlugIn
This is a useful class. It wraps a CursorTool with a PlugIn interface. For example, you can use it to
convert the InfoTool into a PlugIn which you can then add to the right-click menu on the map.
package com.vividsolutions.jcs.jump;
import java.awt.Point;import java.awt.event.MouseEvent;
import com.vividsolutions.jts.util.Assert;import com.vividsolutions.jump.workbench.plugin.PlugInContext;import com.vividsolutions.jump.workbench.plugin.AbstractPlugIn;import com.vividsolutions.jump.workbench.ui.LayerViewPanel;import com.vividsolutions.jump.workbench.ui.cursortool.CursorTool;
public class FUTURE_CursorToolToPlugInAdapter extends AbstractPlugIn { private CursorTool tool;
public FUTURE_CursorToolToPlugInAdapter(CursorTool tool) { this.tool = tool; } public boolean execute(PlugInContext context) throws Exception { Assert.isTrue(context.getLayerViewPanel() != null);
Assert.isTrue(p(context) != null); tool.activate(context.getLayerViewPanel()); try { doClick(tool, p(context).x, p(context).y, context.getLayerViewPanel()); } finally { tool.deactivate(); } return true; } public static void doClick(CursorTool tool, int x, int y, LayerViewPanel panel) { tool.mousePressed(createEvent(x, y, panel)); tool.mouseReleased(createEvent(x, y, panel)); tool.mouseClicked(createEvent(x, y, panel)); }
public String getName() { return tool.getName(); }
private static MouseEvent createEvent(int x, int y, LayerViewPanel panel) { return new MouseEvent(panel, 0, 0, MouseEvent.BUTTON1_MASK, x, y, 1, false, MouseEvent.BUTTON1); }
private Point p(PlugInContext context) { return context.getLayerViewPanel().getLastClickedPoint(); }}
Extending a FeatureCollection by Adding new AttributesThe Problem
I imported a shapefile and put its contents in a jump FeatureCollection. With these Features I’m doing
some calculations and now I want to add the result as a new attribute to the features, so I can export it as
a new shapefile.
So basically I want to add a new field to attribute table and fill it with values.
But I just can’t figure it out! I played with with the addAttribute Method of the FeatureSchema, but that
didn’t really work.
The Solution
you need to do the following:
create a new FeatureSchema based on the old one
create a new FeatureDataset with that FeatureSchema
copy every feature from old to new FeatureSchema (use the function
FeatureCollectionTools.copyFeatureAndSetFeatureSchema for this)
add the features to the new FeatureSchema
display
a code example can be found below
Another option, with respect to updating, may be to look on how the "View / Edit Schema"-Function from
the mouse menu works (class: com.vividsolutions.jump.workbench.ui.plugin.ViewSchemaPlugIn)
Example
the input is pFeatures
I assume that this code is in the "run" or "execute" method of a plugin.
FeatureSchema fsNew=(FeatureSchema)pFeatures.getFeatureSchema().clone();fsNew.addAttribute("huhuattribut",AttributeType.STRING);resultFC = new FeatureDataset(fsNew);//-- set the attribute for every feature in the collectionfor (Iterator iterator = pFeatures.iterator(); iterator.hasNext();) { Feature ftemp = (Feature) iterator.next(); //-- copies the original feature to the new feature schema Feature fcore = FeatureCollectionTools.copyFeatureAndSetFeatureSchema(ftemp, fsNew); //-- in case the geometry changed: fcore.setGeometry(core); //-- set the new attribute fcore.setAttribute("huhuattribut", "helloworld"); resultFC.add(fcore);}//-- displaycontext.addLayer(StandardCategoryNames.RESULT, "newLayer", resultFC);
Drawing an on-screen ornament
This code shows you how to draw something that appears on-screen in a fixed location on the screen. In
this example, I have made a line that stays on-screen, from (75, 25) to (100, 100), even if you zoom or
pan around. This is the technique you would use, for example, to draw a North arrow.

package com.example;
import java.awt.BasicStroke;import java.awt.Color;import java.awt.Graphics2D;
import com.vividsolutions.jump.workbench.ui.LayerViewPanel;import com.vividsolutions.jump.workbench.ui.renderer.SimpleRenderer;
public class AzimuthRenderer extends SimpleRenderer { public final static String CONTENT_ID = "AZIMUTH"; public AzimuthRenderer(LayerViewPanel panel) { super(CONTENT_ID, panel); } protected void paint(Graphics2D g) throws Exception { g.setColor(Color.red); g.setStroke(new BasicStroke(4)); g.drawLine(75, 25, 100, 100); }}
package com.example;
import com.vividsolutions.jump.workbench.ui.TaskFrame;import com.vividsolutions.jump.workbench.ui.plugin.InstallRendererPlugIn;import com.vividsolutions.jump.workbench.ui.renderer.Renderer;/** * Ensures that all TaskFrames get a scale bar. */public class InstallAzimuthPlugIn extends InstallRendererPlugIn { public InstallAzimuthPlugIn() { super(AzimuthRenderer.CONTENT_ID, true); } protected Renderer.Factory createFactory(final TaskFrame frame) { return new Renderer.Factory() { public Renderer create() { return new AzimuthRenderer(frame.getLayerViewPanel()); } }; }}package com.example;
import com.vividsolutions.jump.workbench.plugin.Extension;

import com.vividsolutions.jump.workbench.plugin.PlugInContext;
public class AzimuthExtension extends Extension { public void configure(PlugInContext context) throws Exception { new InstallAzimuthPlugIn().initialize(context); }}
OpenJUMP with Wallpaper
that code adds a wallpaper to workbench's jdesktoppane.
File:Oj wallpaper.jpg
1. First add the image to com.vividsolutions.jump.workbench.ui.images, where is the IconLoader.
you can download one from here
2. Then modified the Configuration in OpenJUMP the
class org.openjump.OpenJumpConfigurationin JUMP com.vividsolutions.jump.workbench.JUMP
Configuration
adding the follow code
first add the next method.
private static void loadBackground(WorkbenchContext workbenchContext){
/*setting the border with a image*/ workbenchContext.getWorkbench().getFrame() .getDesktopPane().setBorder(new Border() { public void paintBorder(Component c, Graphics g, int x, int y, int width, int height) {
//the name of the image is walljump.png in this case g.drawImage(IconLoader.icon("walljump.png").getImage(), 0, 0, null); }
public Insets getBorderInsets(Component c) { return new Insets(0,0,0,0); }
public boolean isBorderOpaque() { return true; } }
);
/*setting background white*/ workbenchContext.getWorkbench().getFrame()
.getDesktopPane().setBackground(Color.WHITE); }
and now call the method loadBackground from OpenJumpConfiguration.java in (JUMP add the line in the
method setup)
public static void loadOpenJumpPlugIns(final WorkbenchContext workbenchContext) throws Exception {
.....
loadBackground(workbenchContext);
}
.. so that's all..
Notes on Speed Improvements on Rendering
note: for further info see the emails with subject _OJ extreme slowness_ on Jump User List around 28/29
November 2006 A big thanx to Larry and Bob for investing the time! sstein
Larry Becker wrote* (30 Nov. 2006):
OK, let's see if we can't put this issue to rest. The RenderingManager has a 1 second repaint timer that
allows the GUI to appear responsive by updating the screen every second during long operations like
dataset loading. The code is:
<code>
private Timer repaintTimer = new Timer(1000, new ActionListener() { public void actionPerformed(ActionEvent e) { for (Iterator i = contentIDToRendererMap.values().iterator(); i .hasNext();) { Renderer renderer = (Renderer) i.next(); if (renderer.isRendering()) {

repaintPanel(); return; } }
repaintTimer.stop(); repaintPanel(); } });</code>
Notice the final repaintPanel() invocation. This is what is triggering the second paint that Fco is seeing. I
have commented out the final repaintPanel() and observed no ill effects on correct rendering, however it
had no positive effects on render times either. I recommend leaving it as is for belt-AND-suspenders
paranoia.
Robert and I have done fairly extensive analysis of JUMP's rendering pipeline and have not found
anything that can be significantly improved. We have done experiments with blocking vs. non-blocking
renderers and found no improvement. Robert tried rendering more features in each synchronized draw
invocation (as Jon's comment recommended) and found no improvement in speed. I want to emphasize
that all of these mods have decreased the responsiveness of the GUI without noticeably increasing
drawing speed.
In conclusion, the results of our benchmarks, analysis, and experiments show that JUMP's rendering is
one of the best compromises of quality, responsiveness, and speed that I have ever seen in an
application.
One final word: late tests of JUMP 1.2 of redraw of the 48MB burlulc.shp file (New Jersey) dataset have
deteriorated to 20 seconds from 11 in the previous version. I an unaware of any reason for this slowdown,
except for perhaps the addition of the new Imaging layer type since OpenJUMP and SkyJUMP have
implemented most of the JUMP 1.2 improvements except Imaging and do not experience any slowdown.
regards, Larry Becker ISA
Notes on the Display of AttributeTables
I wanted to jot down some notes on the code involved in displaying the attributes for features in a layer.

ViewAttributesPlugIn
Here is a basic run down of the series of method calls when the user calls up the attribute table for a
layer:
ViewAttributesPlugIn defines the public static innner class ViewAttributesFrame. A new instance of
this class is created when the execute method of the ViewAttributesPlugIn is called.
The constructor of the ViewAttributesFrame class creates a new OneLayerAttributeTab. The
constructor of an AttributeTab class creates a new AttributePanel class.
Main Components of a ViewAttributesFrame
A OneLayerAttributeTab in a ViewAttributesFrame A AttributeTablePanel in a OneLayerAttributeTab
The AttributePanel class defines a layerAdded method that calls the addTablePanel method that is
also defined in the AttributePanel class.
The addTablePanel method creates a new AttributeTablePanel using the provided LayerTableModel.
The AttributeTablePanel contains an inner class named MyTable that extends JTable.
FeatureInfoPlugIn
Common Components
The AttributeTablePanel class looks like it could be a package itself. It contains three (3) inner classes
and one inner interface. These include:
MyTable
FeatureEditor
GeometryCellRenderer
SelectionModelRenderer

The AttributeTablePanel class is definitely one of the most complex I've seen in OpenJUMP.
The LayerTableModel class extends the ColumnTableModel class. ColumnTableModel implements the
Swing TableModel interface. A LayerTableModel is passed to the AttributeTable so the attribute values of
Feature objects in a layer can be displayed.
otes on TaskFrames
I'm creating this wiki page as a place holder for some notes on TaskFrame objects. A TaskFrame is a
JInternalFrame that is used to display the LayerNamePanel and LayerViewPanel to the user within the
WorkbenchFrame.
For the time being this page just has some notes on the methods used to add and close TaskFrames. I
hope to add more material as I become more familiar with the TaskFrame class and how it interacts with
the rest of the OpenJUMP Core.
The Sunburned Surveyor
Contents
[hide]
1 WorkbenchFrame.closeTaskFrame
2 WorkbenchFrame.addInternalFrame
3 Workbench.addTaskFrame(Task argTask)
4 Workbench.addTaskFrame(TaskFrame argFrame)
5 Workbench.setClosingBehavior(LayerManagerProxy argProxy)
6 Proposed Changes For Customizable TaskFrames
WorkbenchFrame.closeTaskFrame
Private method warns the user if there are layers with the task that have unmodified features. It also asks
the user if they want to close other JInternalFrames that are open in the Workbench AND associated with
the TaskFrame that is being closed. Calls the confirmClose methods defined in the WorkbenchFrame
class. I think this method is currently the place where the closing of a task frame begins. (This is probably
the method that is called when the user clicks on the close button of a TaskFrame. Should it be called by
the TaskFrame class by triggering a callto the InternalFrameAdapter class associated with each
TaskFrame?)

WorkbenchFrame.addInternalFrame
public method that allows a JInternalFrame to be added to the WorkbenchFrame. If the JInternalFrame
being added is a LayerManagerProxy, as a TaskFrame is, then the WorkbenchFrame.setClosingBehavior
method is called.
Workbench.addTaskFrame(Task argTask)
Uses a TaskFrameFactory to create a TaskFrame if a TaskFrameFactory exists. If a TaskFrameFactory
does not exist, one of the TaskFrame constructors is called directly. The
WorkBenchFrame.addTaskFrame(TaskFrame argTaskFrame) method is called.
Workbench.addTaskFrame(TaskFrame argFrame)
Calls the add internalFrame method.
Workbench.setClosingBehavior(LayerManagerProxy argProxy)
Adds an InternalFrameCloseHandler to the TaskFrame being added to the WorkbenchFrame. This is an
internal class. The internal class is an InternalFrameAdapter that simply calls the
InternalFrameCloseHandler.close method. The InternalFrameCloseHandler class whose clsoe method is
called by the InternalFrameAdapter is whatever InternalFrameCloseHandler is set with the
workbenchFrame.setInternalFrameCloseHandler method.
Proposed Changes For Customizable TaskFrames
(this is probably realized in BizzJUMP)
When questioning the purpose of the TaskFrame.setTask method I disovered that Paul Austin had
enabled a system to allow for customized extensions of the TaskFrame class. Paul did this in an effort to
test the InfoNode docking framework in OpenJUMP.
I am proposing some changes to the system that Paul implemented. It will eliminate the use of the
setTask method, which I think could produce some bugs, and will allow TaskFrame extensions to be
added via a plug-in.
Here is how it would work.
The Workbench.addTask method will be modified to accept a String identifying the TaskFrame type in
addition to the Task beind displayed in the TaskFrame.
The Workbench.addTask method will create a TaskFrameFactory (a new class that extends
org.openjump.swing.ComponentFactory) and will use it to create the type of TaskFrame identified by the

String argument passed to the addTask method. It obtains the new TaskFrame by using the
TaskFrameFactory.createComponent method.
The TaskFrameFactory method obtains a list of TaskFrame extensions from the Registry. It then loads
the appropriate class based on the String argument passed to the addTask method and creates and
instance from it. This is returned and added to the WorkbenchFrame.
A programmer can add support for a custom task by creating a plug-in that adds the TaskFrame
extension class name to the Registry during initialization. This will make it available to the
TaskFrameFactory.
All custom TaskFrame's will need to extend the TaskFrame class and implement the constructor that
accepts a Task and a WorkbenchContext as its only arguments.
I am close to having this system implemented, and I will begin testing it soon.
How to run OpenJUMP in EclipseTo run OpenJUMP in Eclipse
have first a look here: FAQ OpenJump and Eclipse
Click Run > Run...
Press the New button
Set it up as follows:

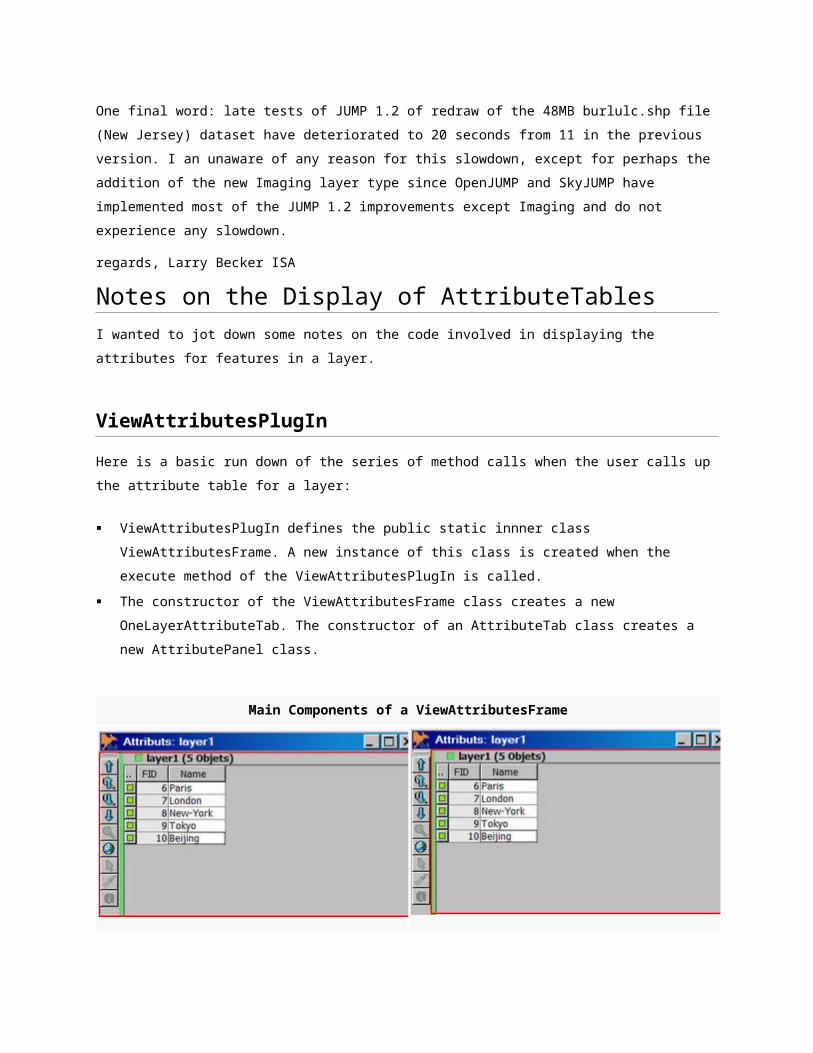
Press the Run button
How to include all the functions from the tools menu
Go to the Program Arguments box and add the following line, but use your path to the default-plugins.xml
file
-default-plugins "C:\dev\eclwork\sv_openjump_trunk\scripts\default-plugins.xml"
How to include existing external Jump plugins
In Eclipse you can use JUMP plugins by

first placing the plugin in a directory of your choice
e.g. for windows you could put the plugin in C:\myjump\coolplugins\
add to the startup line the plugin-directory option, like it is done in the batch or sh file:
go in Eclipse to your "Run.." entry - choose the "arguments" tab and write in the first field:
-plug-in-directory C:\myjump\coolplugins\
Video Tutorial - http://www.youtube.com/watch?v=cDAs04QEuzU
for more information on startup options in Eclipse see:
How to use a plugin with a properties file in ECLIPSE
How to make your own OpenJUMP built
This is a quick an dirty note on what's necessary to make your own built of OpenJUMP.
What you need to built OpenJUMP:
the ANT builder: http://ant.apache.org/
either a download of the nightly built src-package from www.openjump.org or a checkout of the
sources from our SVN
A installation of a JAVA SDK.
If you have done the downloads and and installed ANT (it should be contained already in Eclipse), then
you have to create an arbitrary folder. In Eclipse this might be done by creating a "simple" project. This
folder must contains the following subfolders:
\build => here the class files from the ant built will be stored (note: you may create the folder by
yourself if not contained in the download)
\dist => after building you will find here you distribution files (note: you may create the folder by
yourself if not contained in the download)
\docs => is currently empty but will later contain some pdf files (note: you may create the folder by
yourself if not contained in the download)
\etc => this must contains several files including the built.xml file for ANT (take the folder from the
download)
\lib => contains all the necessary libraries (including 2 subfolders: \Batik and \ext) (take the folder
from the download, the BATIK folder may not be there in newer versions)
\scripts => should contain the openJUMP start-up scripts for different OS (take the folder from the
download)
\src => includes the Jump\OpenJUMP source files needed to built OpenJUMP. It should contain at
least 4 subfolders:
\src\com
\src\org
\src\de
\src\language,
whereby the latter contains the language files to start-up OpenJUMP in different languages. (take the
folders from the download)
If you have now all these folders in one, then go to the \etc\ folder and look for the file built.xml. Start this
file with ANT. In Eclipse it might work to simply click on built.xml file and then choose from the mouse-
menu the option to "run" with ANT.
note A: OpenJUMP can be built with Java 1.5 and higher
note B: look here if ANT built errors in Eclipse appear
I think that's it???
stefan
page
discussion
view source
historyopenjump
OJ Wiki Main Page
About OJ
License
Download
Plugins & Extensions
Website

documentation
Overview
Installation
Starting OpenJUMP
Usage
Online User Manual
Developmentget involved / support
Mailing Lists
Bug/Feature Tracker
Forum
Professional Supportsearch
toolbox
What links here
Related changes
TS Topology Suite version 1.12All Classes
Packages com.vividsolutions.jts com.vividsolutions.jts.algorithm com.vividsolutions.jts.algorithm.distance com.vividsolutions.jts.algorithm.locate com.vividsolutions.jts.algorithm.match com.vividsolutions.jts.awt com.vividsolutions.jts.densify com.vividsolutions.jts.geom com.vividsolutions.jts.geom.impl com.vividsolutions.jts.geom.prep com.vividsolutions.jts.geom.util com.vividsolutions.jts.geomgraph com.vividsolutions.jts.geomgraph.index com.vividsolutions.jts.index com.vividsolutions.jts.index.bintree com.vividsolutions.jts.index.chain com.vividsolutions.jts.index.intervalrtree com.vividsolutions.jts.index.kdtree
Go Search
com.vividsolutions.jts.index.quadtree com.vividsolutions.jts.index.strtree com.vividsolutions.jts.index.sweepline com.vividsolutions.jts.io com.vividsolutions.jts.io.gml2 com.vividsolutions.jts.linearref com.vividsolutions.jts.math com.vividsolutions.jts.noding com.vividsolutions.jts.noding.snapround com.vividsolutions.jts.operation com.vividsolutions.jts.operation.buffer com.vividsolutions.jts.operation.buffer.validate com.vividsolutions.jts.operation.distance com.vividsolutions.jts.operation.linemerge com.vividsolutions.jts.operation.overlay com.vividsolutions.jts.operation.overlay.snap com.vividsolutions.jts.operation.overlay.validate com.vividsolutions.jts.operation.polygonize com.vividsolutions.jts.operation.predicate com.vividsolutions.jts.operation.relate com.vividsolutions.jts.operation.union com.vividsolutions.jts.operation.valid com.vividsolutions.jts.planargraph com.vividsolutions.jts.planargraph.algorithm com.vividsolutions.jts.precision com.vividsolutions.jts.shape com.vividsolutions.jts.shape.fractal com.vividsolutions.jts.shape.random com.vividsolutions.jts.simplify com.vividsolutions.jts.triangulate com.vividsolutions.jts.triangulate.quadedge com.vividsolutions.jts.util All Classes AbstractNode AbstractSTRtree AbstractSTRtree.IntersectsOp AffineTransformation AffineTransformationBuilder AffineTransformationFactory Angle AreaSimilarityMeasure ArrayListVisitor

Assert AssertionFailedException BasicSegmentString Bintree Boundable BoundaryNodeRule BoundaryNodeRule.EndPointBoundaryNodeRule BoundaryNodeRule.Mod2BoundaryNodeRule BoundaryNodeRule.MonoValentEndPointBoundaryNodeRule BoundaryNodeRule.MultiValentEndPointBoundaryNodeRule BoundaryOp BufferBuilder BufferCurveMaximumDistanceFinder BufferCurveMaximumDistanceFinder.MaxMidpointDistanceFilter BufferCurveMaximumDistanceFinder.MaxPointDistanceFilter BufferDistanceValidator BufferInputLineSimplifier BufferOp BufferParameters BufferResultValidator BufferSubgraph ByteArrayInStream ByteOrderDataInStream ByteOrderValues CascadedPolygonUnion CentralEndpointIntersector CentroidArea CentroidLine CentroidPoint CGAlgorithms CollectionUtil CollectionUtil.Function CommonBits CommonBitsOp CommonBitsRemover ComponentCoordinateExtracter ConformingDelaunayTriangulationBuilder ConformingDelaunayTriangulator ConnectedElementLocationFilter ConnectedElementPointFilter ConnectedInteriorTester ConnectedSubgraphFinder ConsistentAreaTester ConsistentPolygonRingChecker ConstraintEnforcementException ConstraintSplitPointFinder ConstraintVertex ConstraintVertexFactory ConvexHull Coordinate Coordinate.DimensionalComparator CoordinateArrayFilter CoordinateArrays

CoordinateArrays.BidirectionalComparator CoordinateArrays.ForwardComparator CoordinateArraySequence CoordinateArraySequenceFactory CoordinateCountFilter CoordinateFilter CoordinateList CoordinatePrecisionReducerFilter CoordinateSequence CoordinateSequenceComparator CoordinateSequenceFactory CoordinateSequenceFilter CoordinateSequences DD Debug DefaultCoordinateSequenceFactory DelaunayTriangulationBuilder Densifier Depth Dimension DirectedEdge DirectedEdge DirectedEdgeStar DirectedEdgeStar DiscreteHausdorffDistance DiscreteHausdorffDistance.MaxDensifiedByFractionDistanceFilter DiscreteHausdorffDistance.MaxPointDistanceFilter DistanceOp DistanceToPoint DistanceToPointFinder DoubleBits DouglasPeuckerSimplifier Edge Edge EdgeConnectedTriangleTraversal EdgeEnd EdgeEndBuilder EdgeEndBundle EdgeEndBundleStar EdgeEndStar EdgeIntersection EdgeIntersectionList EdgeList EdgeNodingValidator EdgeRing EdgeSetIntersector EdgeSetNoder EdgeString EnhancedPrecisionOp Envelope FacetSequence FacetSequenceTreeBuilder FastNodingValidator

FastSegmentSetIntersectionFinder FontGlyphReader FuzzyPointLocator GeometricShapeBuilder GeometricShapeFactory Geometry GeometryCollection GeometryCollectionIterator GeometryCollectionMapper GeometryCollectionMapper.MapOp GeometryCollectionShape GeometryCombiner GeometryComponentFilter GeometryEditor GeometryEditor.CoordinateOperation GeometryEditor.GeometryEditorOperation GeometryEditor.NoOpGeometryOperation GeometryExtracter GeometryFactory GeometryFilter GeometryGraph GeometryGraphOperation GeometryItemDistance GeometryLocation GeometryMapper GeometryMapper.MapOp GeometryNoder GeometryPrecisionReducer GeometrySnapper GeometryStrategies GeometryTransformer GMLConstants GMLHandler GMLReader GMLWriter GraphComponent GraphComponent HausdorffSimilarityMeasure HCoordinate HotPixel IdentityPointTransformation IncrementalDelaunayTriangulator IndexedFacetDistance IndexedNestedRingTester IndexedPointInAreaLocator InputStreamInStream InStream InteriorIntersectionFinder InteriorPointArea InteriorPointLine InteriorPointPoint IntersectionAdder IntersectionFinderAdder

IntersectionMatrix Interval Interval IntervalRTreeBranchNode IntervalRTreeLeafNode IntervalRTreeNode IntervalRTreeNode.NodeComparator IntervalSize IsSimpleOp IsValidOp ItemBoundable ItemDistance ItemVisitor IteratedNoder JTSVersion KdNode KdTree Key Key KochSnowflakeBuilder Label LastFoundQuadEdgeLocator LengthIndexedLine LengthLocationMap Lineal LinearComponentExtracter LinearGeometryBuilder LinearIterator LinearLocation LinearRing LineBuilder LineIntersector LineMergeDirectedEdge LineMergeEdge LineMergeGraph LineMerger LineSegment LineSequencer LineString LineStringExtracter LineStringSnapper LocateFailureException Location LocationIndexedLine MathUtil Matrix MaximalEdgeRing MCIndexNoder MCIndexPointSnapper MCIndexSegmentSetMutualIntersector MCIndexSnapRounder MCPointInRing Memory

MidpointSplitPointFinder MinimalEdgeRing MinimumBoundingCircle MinimumClearance MinimumDiameter MonotoneChain MonotoneChain MonotoneChainBuilder MonotoneChainEdge MonotoneChainIndexer MonotoneChainOverlapAction MonotoneChainSelectAction MultiLineString MultiPoint MultiPolygon NodableSegmentString Node Node Node Node NodeBase NodeBase NodedSegmentString NodeFactory NodeMap NodeMap Noder NodingValidator NonEncroachingSplitPointFinder NoninvertibleTransformationException NonRobustCGAlgorithms NonRobustLineIntersector NotRepresentableException ObjectCounter OctagonalEnvelope Octant OffsetCurveBuilder OffsetCurveSetBuilder OffsetPointGenerator OrientedCoordinateArray OutputStreamOutStream OutStream OverlayNodeFactory OverlayOp OverlayResultValidator PackedCoordinateSequence PackedCoordinateSequence.Double PackedCoordinateSequence.Float PackedCoordinateSequenceFactory ParseException PlanarGraph PlanarGraph Point

PointBuilder PointExtracter PointGeometryUnion PointInRing PointLocator PointOnGeometryLocator PointPairDistance PointPairDistance PointShapeFactory PointShapeFactory.BasePointShapeFactory PointShapeFactory.Circle PointShapeFactory.Cross PointShapeFactory.Point PointShapeFactory.Square PointShapeFactory.Star PointShapeFactory.Triangle PointShapeFactory.X PointTransformation Polygon Polygonal PolygonBuilder PolygonExtracter Polygonizer PolygonShape Position PrecisionModel PrecisionModel.Type PrecisionReducerCoordinateOperation PreparedGeometry PreparedGeometryFactory PreparedLineString PreparedPoint PreparedPolygon PriorityQueue Puntal QuadEdge QuadEdgeLocator QuadEdgeSubdivision QuadEdgeTriangle QuadEdgeUtil Quadrant Quadtree QuadtreeNestedRingTester RandomPointsBuilder RandomPointsInGridBuilder RayCrossingCounter RectangleContains RectangleIntersects RelateComputer RelateNode RelateNodeFactory RelateNodeGraph RelateOp

RepeatedPointTester RightmostEdgeFinder RobustCGAlgorithms RobustDeterminant RobustLineIntersector Root Root ScaledNoder Segment SegmentIntersectionDetector SegmentIntersectionTester SegmentIntersector SegmentIntersector SegmentNode SegmentNodeList SegmentPointComparator SegmentSetMutualIntersector SegmentString SegmentStringDissolver SegmentStringDissolver.SegmentStringMerger SegmentStringUtil ShapeCollectionPathIterator ShapeReader ShapeWriter ShortCircuitedGeometryVisitor SierpinskiCarpetBuilder SimilarityMeasure SimilarityMeasureCombiner SimpleEdgeSetIntersector SimpleGeometryPrecisionReducer SimpleMCSweepLineIntersector SimpleMinimumClearance SimpleNestedRingTester SimpleNoder SimplePointInAreaLocator SimplePointInRing SimpleSegmentSetMutualIntersector SimpleSnapRounder SimpleSweepLineIntersector SineStarFactory SinglePassNoder SIRtree SnapIfNeededOverlayOp SnapOverlayOp SortedPackedIntervalRTree SpatialIndex SplitSegment Stopwatch STRtree Subgraph SubgraphDepthLocater SweepLineEvent SweepLineEvent
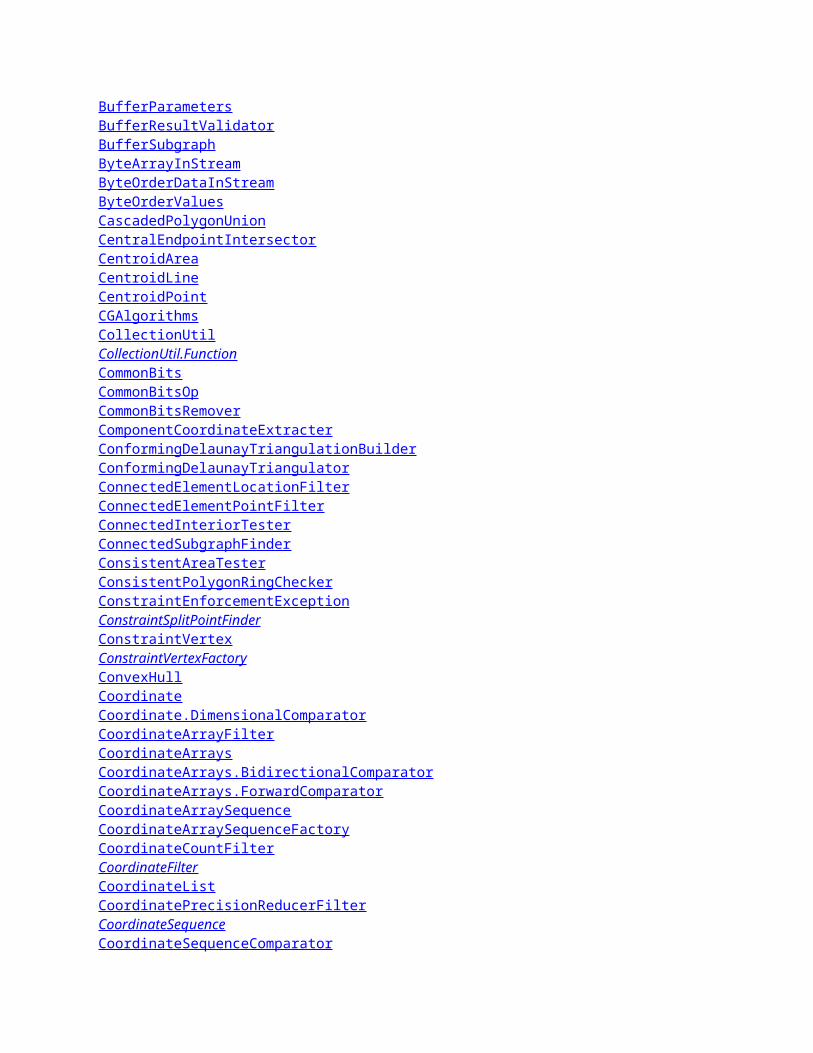
SweepLineIndex SweepLineInterval SweeplineNestedRingTester SweepLineOverlapAction SweepLineSegment TopologyException TopologyLocation TopologyPreservingSimplifier TopologyValidationError TraversalVisitor Triangle TrianglePredicate TriangleVisitor UnaryUnionOp UnionInteracting UniqueCoordinateArrayFilter Vector2D Vertex VertexTaggedGeometryDataMapper VoronoiDiagramBuilder WKBConstants WKBReader WKBWriter WKTFileReader WKTReader WKTWriter
Packagescom.vividsolutions.jts
com.vividsolutions.jts.algorithm
Contains classes and interfaces implementing fundamental computational geometry algorithms.
com.vividsolutions.jts.algorithm.distanceClasses to compute distance metrics between geonetries.
com.vividsolutions.jts.algorithm.locateClasses to determine the topological location of points in geometries.
com.vividsolutions.jts.algorithm.matchClasses to compute matching metrics between geometries.
com.vividsolutions.jts.awtClasses to perform conversions from Java2D shape objects.
com.vividsolutions.jts.densifyClasses to perform densification on geometries.
com.vividsolutions.jts.geomContains the Geometry interface hierarchy and supporting classes.
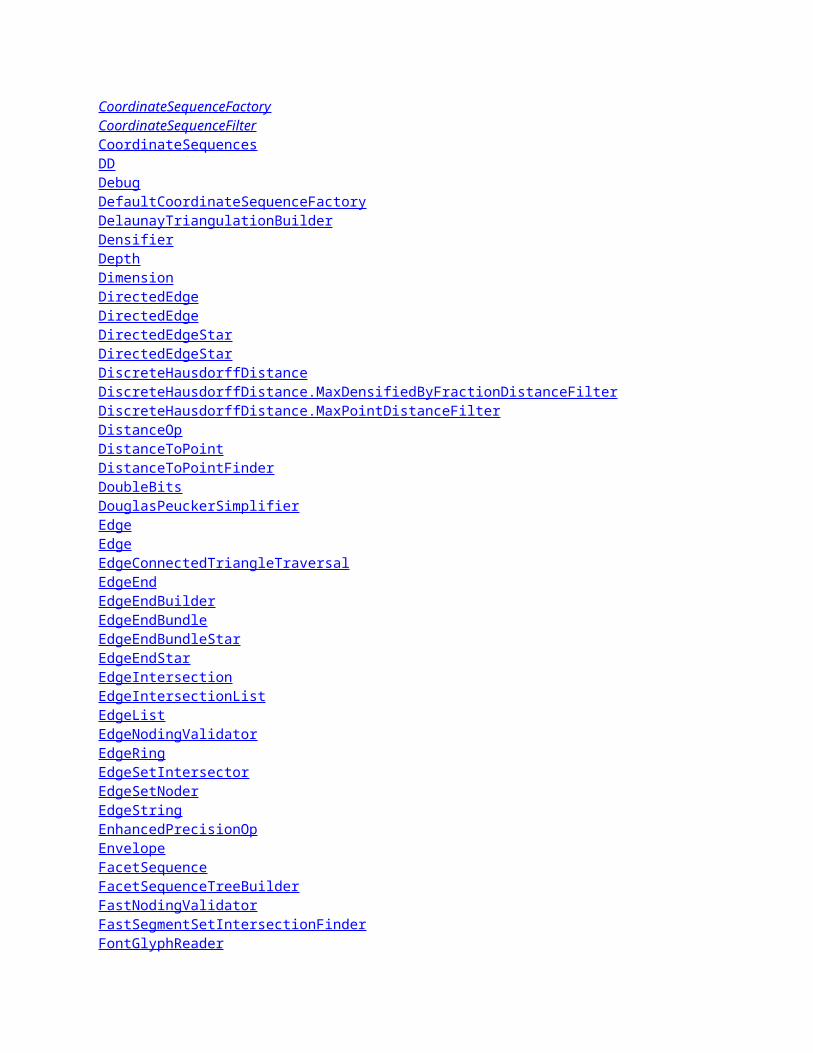
com.vividsolutions.jts.geom.implImplementations of interfaces for geometric structures.
com.vividsolutions.jts.geom.prepClasses to perform optimized geometric operations on suitably prepared geometries.
com.vividsolutions.jts.geom.utilProvides classes that parse and modify Geometry objects.
com.vividsolutions.jts.geomgraphContains classes that implement topology graphs.
com.vividsolutions.jts.geomgraph.indexContains classes that implement indexes for performing noding on geometry graph edges.
com.vividsolutions.jts.indexProvides classes for various kinds of spatial indexes.
com.vividsolutions.jts.index.bintreeContains classes that implement a Binary Interval Tree index
com.vividsolutions.jts.index.chainContains classes that implement Monotone Chains
com.vividsolutions.jts.index.intervalrtreeContains classes to implement an R-tree index for one-dimensional intervals.
com.vividsolutions.jts.index.kdtreeContains classes which implement a k-D tree index over 2-D point data.
com.vividsolutions.jts.index.quadtreeContains classes that implement a Quadtree spatial index
com.vividsolutions.jts.index.strtreeContains 2-D and 1-D versions of the Sort-Tile-Recursive (STR) tree, a query-only R-tree.
com.vividsolutions.jts.index.sweepline
Contains classes which implement a sweepline algorithm for scanning geometric data structures.
com.vividsolutions.jts.ioContains the interfaces for converting JTS objects to and from other formats.
com.vividsolutions.jts.io.gml2Classes to read and write the GML2 geometry format.

com.vividsolutions.jts.linearrefContains classes and interfaces implementing linear referencing on linear geometries
com.vividsolutions.jts.math
com.vividsolutions.jts.nodingClasses to compute nodings for arrangements of line segments and line segment sequences.
com.vividsolutions.jts.noding.snaproundContains classes to implement the Snap Rounding algorithm for noding linestrings.
com.vividsolutions.jts.operationProvides classes for implementing operations on geometries
com.vividsolutions.jts.operation.bufferProvides classes for computing buffers of geometries
com.vividsolutions.jts.operation.buffer.validateClasses to perform validation of the results of buffer operations.
com.vividsolutions.jts.operation.distanceProvides classes for computing the distance between geometries
com.vividsolutions.jts.operation.linemerge Classes to perform line merging.
com.vividsolutions.jts.operation.overlayContains classes that perform a topological overlay to compute boolean spatial functions.
com.vividsolutions.jts.operation.overlay.snapClasses to perform snapping on geometries to prepare them for overlay operations.
com.vividsolutions.jts.operation.overlay.validateClasses to validate the results of overlay operations.
com.vividsolutions.jts.operation.polygonizeAn API for polygonizing sets of lines.
com.vividsolutions.jts.operation.predicate
Classes which implement topological predicates optimized for particular kinds of geometries.
com.vividsolutions.jts.operation.relateContains classes to implement the computation of the spatial relationships of Geometrys.
com.vividsolutions.jts.operation.union Classes to perform efficent
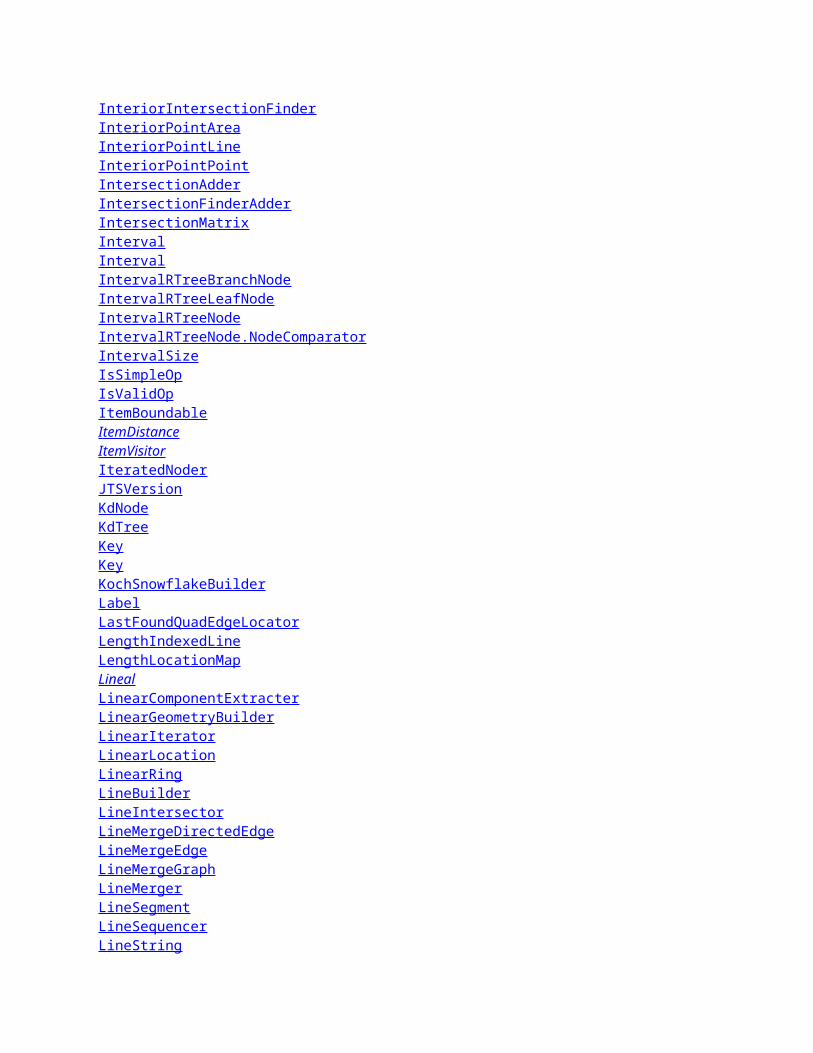
unioning of collections of geometries.
com.vividsolutions.jts.operation.validProvides classes for testing the validity of geometries.
com.vividsolutions.jts.planargraphContains classes to implement a planar graph data structure.
com.vividsolutions.jts.planargraph.algorithmClasses which implement graph algorithms on planar graphs.
com.vividsolutions.jts.precisionProvides classes for analyzing and manipulating the precision of Geometries.
com.vividsolutions.jts.shape com.vividsolutions.jts.shape.fractal com.vividsolutions.jts.shape.random
com.vividsolutions.jts.simplifyClasses which implement algorithms for simplifying or generalizing geometries.
com.vividsolutions.jts.triangulateClasses to compute Delaunay triangulations.
com.vividsolutions.jts.triangulate.quadedge
Classes to implement a topological subdivision of quadeges, to support creating triangulations and Voronoi diagrams.
com.vividsolutions.jts.utilContains support classes for the Java Topology Suite.
OpenJUMP programming Guideline
This section is written to help OpenJUMP programmers
to follow general java programming conventions
to use OpenJUMP as a library in a consistent way
to share good habits and to avoid bad habits
Note: These are guidelines for the practical use to make it other programmers easiere - an not strikt rules.
I.e. we just want to share and to improve OpenJUMP code readability.

Contents
[hide]
1 Follow general (Java) rules
2 OpenJUMP Packages
3 PlugIns and Extensions
4 PlugIn names and initialization
Follow general (Java) rules
First of all, there is a complete Java Programming Guideline here
Here are my preferences about the position of curly braces and on indentation
Most code in OpenJUMP follow this convention which is also the one I prefer
for (int i = 0 ; i < max ; i++) { // your code here}
The following convention should be avoided
for (int i = 0 ; i < max ; i++){ // your code here}
About indentation, my preferred way is to use whitespaces and not tabs. This way, you have more
chance to keep the original presentation through all the sources with any IDE and with any parameter for
your tabulation width (in any case, using tabs to add whitespaces here and there is a bad idea).
OpenJUMP Packages
There are two main packages in the OpenJUMP source code.
com.vividsolutions.jump contains the original sources. Classes from this package can be fixed or
improved, but functional improvements and new capabilities should be added to org.openjump
package
org.openjump.core contains all new contributions, i.e. the improvements added after the inital JUMP
developement stopped and since OpenJUMP was created
Most of the new plugins should be placed in one of the org.openjump.core.ui.plugin.xxx packages

PlugIns and Extensions
A PlugIn is basically a class that adds a new function to OpenJUMP by use of an "execute" method. A
plugin also contains a "initialize" method to allow installation of the feature in the OpenJUMP user
interface (GUI). Plugins can be also threaded plugins to avoid that long tasks stop interaction with the
user interface. Here the ThreadedBasePlugin is used.
An extension is a class able to initialize one or several plugins. This class is automatically recognised
when it is contained in a jar-file which is placed in the /ext/ directory.
You have a good explanation of the plugin architecture in the original JUMP Developer Guide
See also our Developer Documentation and HowTo and the page How to use and make own Plugins
PlugIn names and initialization
The PlugIn name is set in the getName() method of the PlugIn interface. If not overloaded, AbstractPlugin
returns a default name, based on the class name. You must overload it to get an internationalized name,
e.g.:
public String getName() {return I18N.get("org.core.ui.plugin.MyPlugIn");}
If the plugin is called from the menu, you generally want to place it in an appropiate sub-menu and call it
by its name. You define where the plugin is installed in the user interface (e.g. as main menu item, or
context menu item or mouse menu item) in plugin's initialize method. E.g. the code below initializes the
plugin as main menu item.
context.getFeatureInstaller().addMainMenuItem { this, new String[] { MenuNames.TOOLS, MenuNames.STATISTICS}, this.getName(), false, null, null);
If the plugin opens a new dialog box, you should add "..." to the name, e.g.
context.getFeatureInstaller().addMainMenuItem { this, new String[] { MenuNames.TOOLS, MenuNames.STATISTICS}, this.getName() + "...", false,

null, null);
Check the MenuNames class to explore available menus and submenus
If you want to activate/deactivate the plugin based on certain conditions, you must use an EnableCheck
created with the EnableCheckFactory class, by using MultiEnableCheck, or by directly implementing
EnableCheck. EnableCheckFactory can be obtain from the PlugInContext, e.g.:
context.getFeatureInstaller().addMainMenuItem { this, new String[] { MenuNames.TOOLS, MenuNames.STATISTICS}, this.getName() + "...", false, null, context.getCheckFactory().createAtLeastNLayersMustExistCheck(2));
PS: This page was written by M. Michaud - improved by S. Steiniger
Class Rootjava.lang.Object
com.vividsolutions.jts.index.quadtree.NodeBase com.vividsolutions.jts.index.quadtree.Root
public class Rootextends NodeBase
QuadRoot is the root of a single Quadtree. It is centred at the origin, and does not have a defined extent.
Version:
1.7
Field Summary
Fields inherited from class com.vividsolutions.jts.index.quadtree.NodeBase

items, subnode
Constructor Summary
Root()
Method Summary
void insert(Envelope itemEnv, java.lang.Object item) Insert an item into the quadtree this is the root of.
protected boolean
isSearchMatch(Envelope searchEnv)
Methods inherited from class com.vividsolutions.jts.index.quadtree.NodeBase
add, addAllItems, addAllItemsFromOverlapping, getItems, getSubnodeIndex, hasChildren, hasItems, isEmpty, isPrunable, remove, visit
Methods inherited from class java.lang.Object
clone, equals, finalize, getClass, hashCode, notify, notifyAll, toString, wait, wait, wait
Constructor Detail
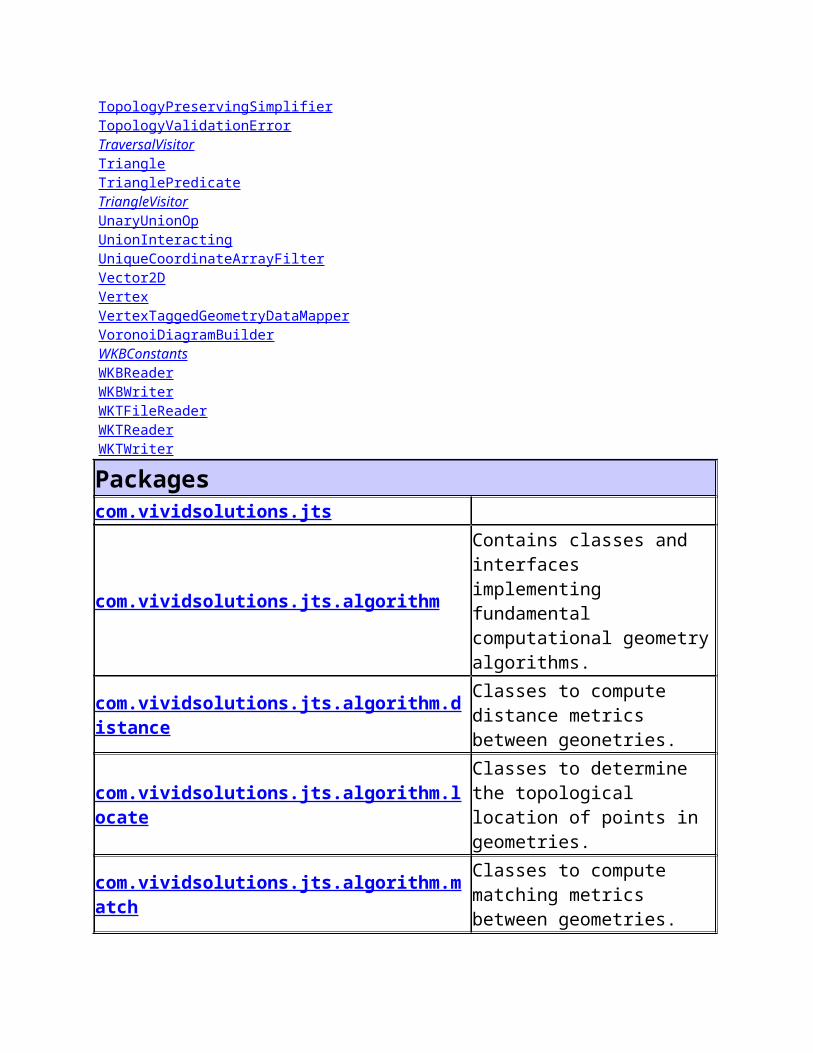
Rootpublic Root()
Method Detail
insertpublic void insert(Envelope itemEnv, java.lang.Object item)
Insert an item into the quadtree this is the root of.
isSearchMatchprotected boolean isSearchMatch(Envelope searchEnv)
Specified by:
isSearchMatch in class NodeBase