white mage - wordpress.com · white mage a 12-quest epic by mike macdee recommended for experienced...
TRANSCRIPT
Legacy of the
White Mage
A 12-Quest Epic by Mike MacDee
Recommended for experienced heroes.
Requires 2 stairway tiles, Men-At-Arms, Giant Stone Boulder, extra undead.
HOUSE RULES TO AID PLAYERS
These are optional rules I sometimes use when
running a game. These rules are not required to play
Legacy of the White Mage, but they can be helpful.
Giving Items
A hero may freely pass any of his items to another
hero on his turn, if that hero is in line of sight. Items
can only pass from the active hero to an inactive one,
not vice-versa.
Unarmed Combat
Adopted from the Shipwrecked! Quest Book. Unarmed
heroes roll 1 combat die when attacking and consult
the following chart:
Barbarian = Hits with a skull
Dwarf / Elf = Hits with a white shield
Wizard = Hits with a black shield
Useful Genie
In addition to opening doors, the Genie spell can also
activate switches and puzzle objects.
The "One Equip" Limit
During a Quest heroes are allowed to equip a weapon
or piece of armor once per turn, and only on their
turn. They should keep track of what items are
equipped for Zargon's benefit.
Example: On Barbarian's turn, Barbarian switches
from his broadsword to his battle axe in order to
attack a stronger foe. This automatically unequips his
shield and leaves him at a defense disadvantage on
Zargon's turn -- he cannot re-equip his shield until
next turn.
Returning Patrols
If a hero takes an unproductive turn -- a productive
turn would be revealing a new area, performing an
action, using an item, or moving tactically -- he rolls
1 combat die. If he rolls a black shield, Zargon places
a wandering monster at the dungeon entrance.
Climbing Into Pits
Instead of jumping a pit, a hero may attempt to
deliberately climb into a pit. He must declare that he
is doing so while next to a pit, then he rolls 1 combat
die: if he rolls anything but a skull, he safely reaches
the bottom; otherwise he slips and falls in, taking 1
body point of damage. In either case, his turn ends.
Fallen Heroes (a)
When a hero loses all his body or mind points he falls
unconscious: his piece is replaced with a custom
"fallen hero" marker that does not block movement or

line of sight for other pieces, and also holds all of the
unconscious hero's possessions. Any hero may pick
up and carry (or drop) a fallen hero once per turn as a
free action, as long as he is adjacent to or standing on
the fallen hero and only carries one fallen hero at a
time. While carrying his comrade, the hero cannot
attack or defend.
If the fallen hero is carried through the exit, that hero
survives the dungeon. Otherwise he is left for dead,
and all his un-looted possessions are lost forever.
Fallen Heroes (b): Looting
A less savory hero may find it easier to loot his fallen
companion and flee for his own life. The first hero
who searches the fallen hero's room/corridor for
treasure claims all of that hero's possessions. If there
are multiple fallen heroes, the looter must choose
which victim to loot first.
Fallen Heroes (c): Stabilizing
A surviving hero can use a healing item or spell to
revive a fallen comrade. If he has neither at his
disposal, he may attempt to stabilize and revive a
fallen hero at the cost of his action. The hero
attempting to do this stands adjacent to the fallen
hero and rolls red dice equal to half of the fallen
hero's maximum body points (or mind points,
depending which stat was reduced to 0): if at least
one 6 is rolled, the hero revives with half his body
and mind points, rounded down. Each hero may only
be stabilized once per Quest: after that he remains
unconscious.

NOTE: This Questbook requires Mercenary or Men-At-
Arms figures, or suitable equivalent.
SCOUT
MOVE 9 :: ATTK 2 :: DEF 3 :: BODY 2 :: MIND 2
HALBERDIER
MOVE 6 :: ATTK 3 :: DEF 3 :: BODY 2 :: MIND 2
Can attack diagonally.
CROSSBOWMAN
MOVE 6 :: ATTK 3 :: DEF 3 :: BODY 2 :: MIND 2
Wields a crossbow.
SWORDSMAN
MOVE 5 :: ATTK 4 :: DEF 5 :: BODY 2 :: MIND 2
SKAVEN TERRITORY
If Zargon has the Skaven figure set, he is encouraged to
use them in place of goblins, orcs, and fimir.
GIANT RAT
MOVE 10 :: ATTK 1 :: DEF 2 :: BODY 1 :: MIND 1
SKAVEN WARRIOR
MOVE 12 :: ATTK 2 :: DEF 2 :: BODY 1 :: MIND 2
Can make ranged attacks with a sling for 1 attack die.
RAT OGRE
MOVE 8 :: ATTK 4 :: DEF 3 :: BODY 2 :: MIND 1
WHITE SEER
MOVE 6 :: ATTK 3 :: DEF 3 :: BODY 1 :: MIND 3
May steal 1 random spell card from any magic user in
sight, to use immediately or later.
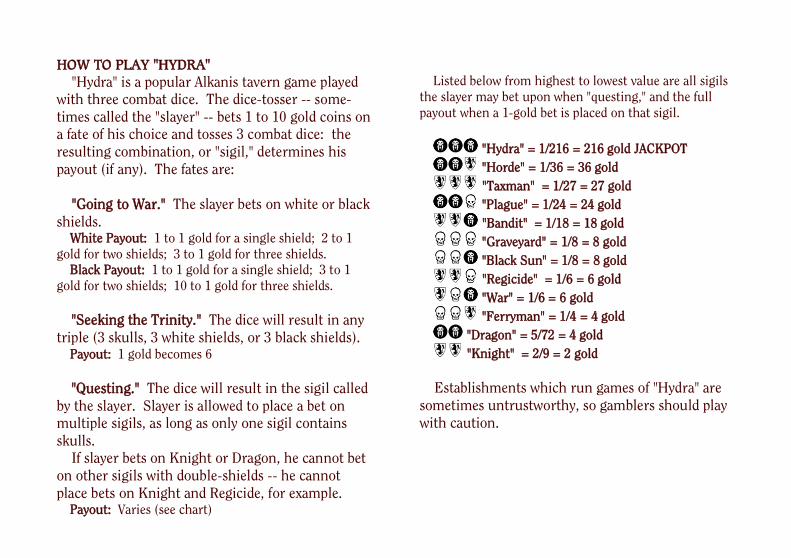
HOW TO PLAY "HYDRA"
"Hydra" is a popular Alkanis tavern game played
with three combat dice. The dice-tosser -- some-
times called the "slayer" -- bets 1 to 10 gold coins on
a fate of his choice and tosses 3 combat dice: the
resulting combination, or "sigil," determines his
payout (if any). The fates are:
"Going to War." The slayer bets on white or black
shields.
White Payout: 1 to 1 gold for a single shield; 2 to 1
gold for two shields; 3 to 1 gold for three shields.
Black Payout: 1 to 1 gold for a single shield; 3 to 1
gold for two shields; 10 to 1 gold for three shields.
"Seeking the Trinity." The dice will result in any
triple (3 skulls, 3 white shields, or 3 black shields).
Payout: 1 gold becomes 6
"Questing." The dice will result in the sigil called
by the slayer. Slayer is allowed to place a bet on
multiple sigils, as long as only one sigil contains
skulls.
If slayer bets on Knight or Dragon, he cannot bet
on other sigils with double-shields -- he cannot
place bets on Knight and Regicide, for example.
Payout: Varies (see chart)
Listed below from highest to lowest value are all sigils
the slayer may bet upon when "questing," and the full
payout when a 1-gold bet is placed on that sigil.
"Hydra" = 1/216 = 216 gold JACKPOT
"Horde" = 1/36 = 36 gold
"Taxman" = 1/27 = 27 gold
"Plague" = 1/24 = 24 gold
"Bandit" = 1/18 = 18 gold
"Graveyard" = 1/8 = 8 gold
"Black Sun" = 1/8 = 8 gold
"Regicide" = 1/6 = 6 gold
"War" = 1/6 = 6 gold
"Ferryman" = 1/4 = 4 gold
"Dragon" = 5/72 = 4 gold
"Knight" = 2/9 = 2 gold
Establishments which run games of "Hydra" are
sometimes untrustworthy, so gamblers should play
with caution.
INTRODUCTION
The Alkanis Blight
The war left the landscape barren and lifeless:
over the next two generations, crops and
livestock withered, and the few remaining
resources were rationed sparingly. A plague
spread glacier-like and swallowed all cities in its
wake, named the Crawling Death for its hideous
power to raise the dead and rot the living,
twisting both into feral ghouls that flay and
devour whatever they see.
In the wake of this calamity Alkanis began to
crumble, its once mighty empire degenerating
into squabbling city-states ruled by whomever
controlled the ration stocks. Clergymen mounted
"forage missions" -- expeditions into the
wilderness to find food and water. Sometimes
rival expeditions met and fought to the death
over as little as a watering hole or a bag of stale
bread.
Cirius -- the capital of Alkanis, and your
current residence -- suffers the most. The task of
keeping the ration stocks had been assigned to
Sheriff Gallos and the constabulary, and with the
Emperor's health failing, complete control of the
capital fell into the Sheriff's hands. He sends
battalions into neighboring cities every year to
collect their resources as a "protection tax," and
outright raids them if they refuse to pay. He
holds seasonal gladiatory games that award food
to the survivors. His solution to population
control and political dissent is mass starvation
of entire city blocks. Any forage mission lacking
the constabulary's approval is punishable by
banishment to the city sewers, where no living
thing can survive more than an hour.
The White Mage
It was the Empress's lamentations about the
reclusive White Mage that led to the expedition,
and your current predicament. The White Mage
was a priest who had dabbled in arcane powers,
hoping to find a way to augment the rituals of
his god, which included healing spells and
harvest rituals. Shunned by his fellow priests
and hated by the city mages, he took his
experiments to Warlock Cove, where a monestary
-- abandoned for centuries -- had been carved
into the cliff face. Here he continued his work in
solitude, protected only by his own arcane
devices. If anyone can purify the land and
remove the ration-holders' stranglehold on the
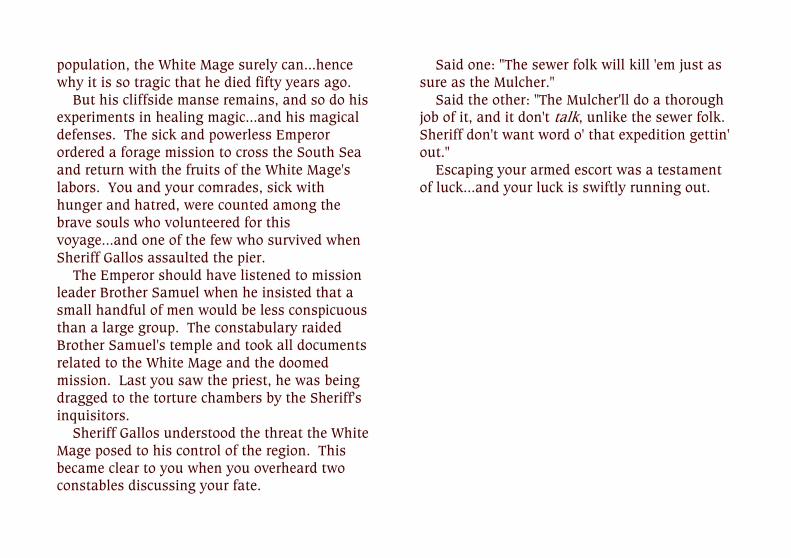
population, the White Mage surely can...hence
why it is so tragic that he died fifty years ago.
But his cliffside manse remains, and so do his
experiments in healing magic...and his magical
defenses. The sick and powerless Emperor
ordered a forage mission to cross the South Sea
and return with the fruits of the White Mage's
labors. You and your comrades, sick with
hunger and hatred, were counted among the
brave souls who volunteered for this
voyage...and one of the few who survived when
Sheriff Gallos assaulted the pier.
The Emperor should have listened to mission
leader Brother Samuel when he insisted that a
small handful of men would be less conspicuous
than a large group. The constabulary raided
Brother Samuel's temple and took all documents
related to the White Mage and the doomed
mission. Last you saw the priest, he was being
dragged to the torture chambers by the Sheriff's
inquisitors.
Sheriff Gallos understood the threat the White
Mage posed to his control of the region. This
became clear to you when you overheard two
constables discussing your fate.
Said one: "The sewer folk will kill 'em just as
sure as the Mulcher."
Said the other: "The Mulcher'll do a thorough
job of it, and it don't talk, unlike the sewer folk.
Sheriff don't want word o' that expedition gettin'
out."
Escaping your armed escort was a testament
of luck...and your luck is swiftly running out.

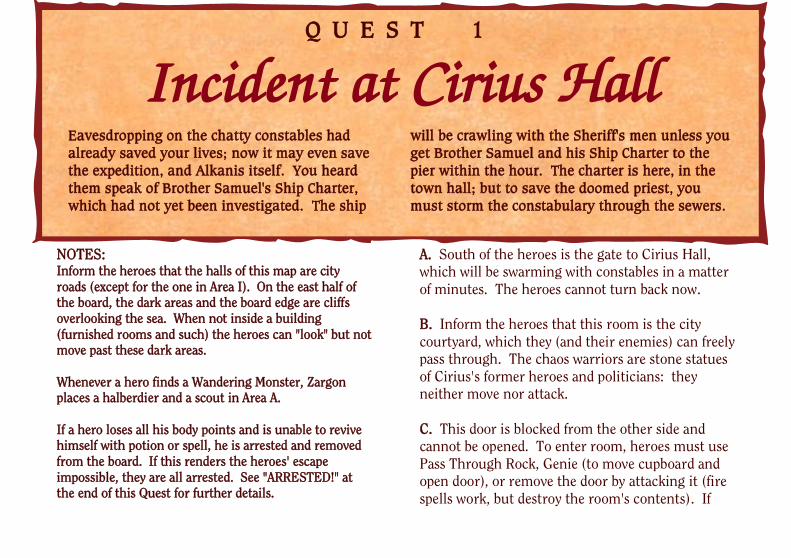
NOTES:
Inform the heroes that the halls of this map are city
roads (except for the one in Area I). On the east half of
the board, the dark areas and the board edge are cliffs
overlooking the sea. When not inside a building
(furnished rooms and such) the heroes can "look" but not
move past these dark areas.
Whenever a hero finds a Wandering Monster, Zargon
places a halberdier and a scout in Area A.
If a hero loses all his body points and is unable to revive
himself with potion or spell, he is arrested and removed
from the board. If this renders the heroes' escape
impossible, they are all arrested. See "ARRESTED!" at
the end of this Quest for further details.
A. South of the heroes is the gate to Cirius Hall,
which will be swarming with constables in a matter
of minutes. The heroes cannot turn back now.
B. Inform the heroes that this room is the city
courtyard, which they (and their enemies) can freely
pass through. The chaos warriors are stone statues
of Cirius's former heroes and politicians: they
neither move nor attack.
C. This door is blocked from the other side and
cannot be opened. To enter room, heroes must use
Pass Through Rock, Genie (to move cupboard and
open door), or remove the door by attacking it (fire
spells work, but destroy the room's contents). If
Q U E S T 1
Incident at Cirius Hall
Eavesdropping on the chatty constables had
already saved your lives; now it may even save
the expedition, and Alkanis itself. You heard
them speak of Brother Samuel's Ship Charter,
which had not yet been investigated. The ship
will be crawling with the Sheriff's men unless you
get Brother Samuel and his Ship Charter to the
pier within the hour. The charter is here, in the
town hall; but to save the doomed priest, you
must storm the constabulary through the sewers.
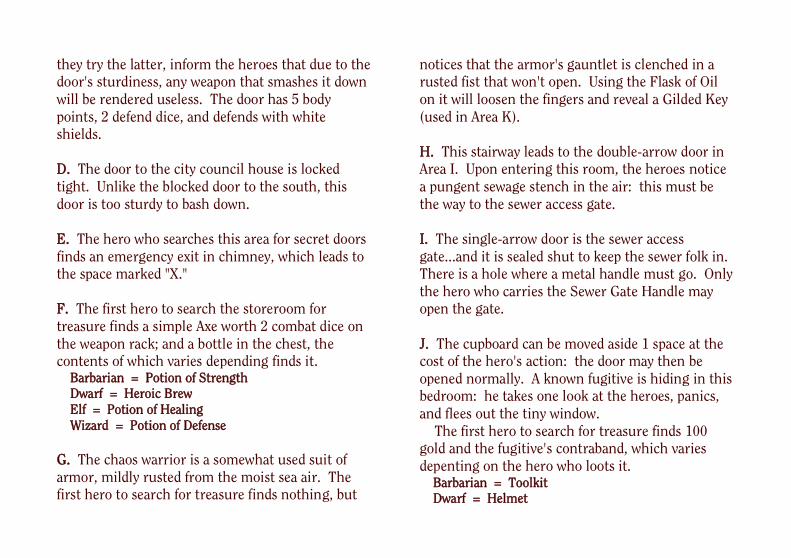
they try the latter, inform the heroes that due to the
door's sturdiness, any weapon that smashes it down
will be rendered useless. The door has 5 body
points, 2 defend dice, and defends with white
shields.
D. The door to the city council house is locked
tight. Unlike the blocked door to the south, this
door is too sturdy to bash down.
E. The hero who searches this area for secret doors
finds an emergency exit in chimney, which leads to
the space marked "X."
F. The first hero to search the storeroom for
treasure finds a simple Axe worth 2 combat dice on
the weapon rack; and a bottle in the chest, the
contents of which varies depending finds it.
Barbarian = Potion of Strength
Dwarf = Heroic Brew
Elf = Potion of Healing
Wizard = Potion of Defense
G. The chaos warrior is a somewhat used suit of
armor, mildly rusted from the moist sea air. The
first hero to search for treasure finds nothing, but
notices that the armor's gauntlet is clenched in a
rusted fist that won't open. Using the Flask of Oil
on it will loosen the fingers and reveal a Gilded Key
(used in Area K).
H. This stairway leads to the double-arrow door in
Area I. Upon entering this room, the heroes notice
a pungent sewage stench in the air: this must be
the way to the sewer access gate.
I. The single-arrow door is the sewer access
gate...and it is sealed shut to keep the sewer folk in.
There is a hole where a metal handle must go. Only
the hero who carries the Sewer Gate Handle may
open the gate.
J. The cupboard can be moved aside 1 space at the
cost of the hero's action: the door may then be
opened normally. A known fugitive is hiding in this
bedroom: he takes one look at the heroes, panics,
and flees out the tiny window.
The first hero to search for treasure finds 100
gold and the fugitive's contraband, which varies
depenting on the hero who loots it.
Barbarian = Toolkit
Dwarf = Helmet
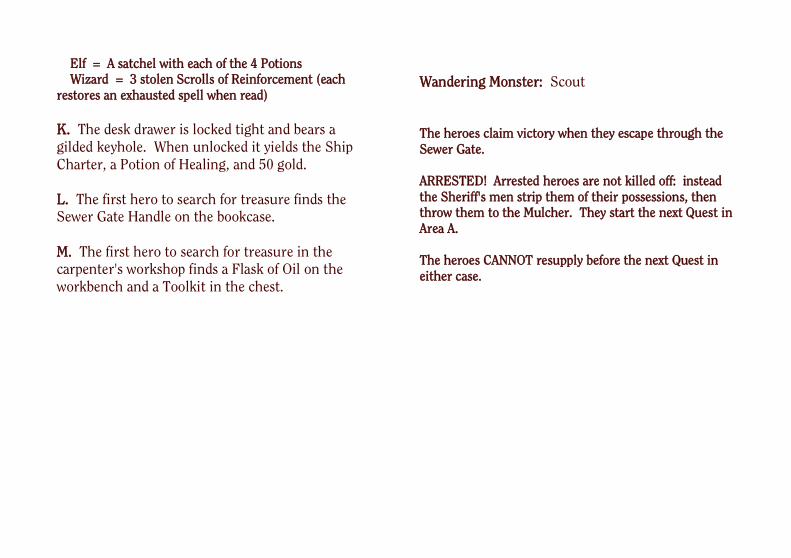
Elf = A satchel with each of the 4 Potions
Wizard = 3 stolen Scrolls of Reinforcement (each
restores an exhausted spell when read)
K. The desk drawer is locked tight and bears a
gilded keyhole. When unlocked it yields the Ship
Charter, a Potion of Healing, and 50 gold.
L. The first hero to search for treasure finds the
Sewer Gate Handle on the bookcase.
M. The first hero to search for treasure in the
carpenter's workshop finds a Flask of Oil on the
workbench and a Toolkit in the chest.
Wandering Monster: Scout
The heroes claim victory when they escape through the
Sewer Gate.
ARRESTED! Arrested heroes are not killed off: instead
the Sheriff's men strip them of their possessions, then
throw them to the Mulcher. They start the next Quest in
Area A.
The heroes CANNOT resupply before the next Quest in
either case.


NOTES:
Heroes who escaped the previous Quest through the
sewer access gate begin this Quest in Area D; otherwise
they begin in Area A with no possessions. Spellcasters
may still wield their spells, unless their class requires a
spellcasting item.
Goblins and orcs wield Shortswords and Broadswords
respectively, which the heroes may loot from any enemy
they kill. These weapons are of terrible quality, however,
and break when their attack scores 2 or more hits in a
single attack.
The monsters on this map will attack heroes and Men-At-
Arms -- whichever is closer.
A. On Zargon's turn, the Mulcher (the double-block
marked with white arrows) attempts to move 1
space south. If a hero stands in its way, he rolls a
combat die and stops it from moving if he rolls a
white shield. If two heroes are in the way, they both
roll. If the heroes fail to stop it from moving, they
each take 1 body point of damage; then they move 1
space south, and the Mulcher does the same.
If a hero blocking the Mulcher has nowhere to
move, he is crushed and removed from the board.
B. This tunnel gate is sealed when the Mulcher is
active, and can be opened one of two ways: either by
opening it like a door from the west side, or by
Q U E S T 2
The Mulcher
You stand knee-deep in rancid water and sludge.
Somewhere within the rank blackness of the
tunnels, the Mulcher grinds to life, ready to
seamlessly add its prey to the shreds of trash and
filth trickling past your knees. To die here in the
city's underbelly is a fate too gruesome to fathom,
so you shake it from your thoughts and focus on
the task at hand: finding the constabulary's
sewer access gate. Still...you wonder if you would
have been better off storming the gates.

bashing it down. The gate rolls 2 dice in defense,
defends with white shields, and has 2 body points.
C. The secret door in the Mulcher area is a small,
cramped grate only the Dwarf can fit through. The
room beyond cannot be "looked" into: it is only
revealed when entered by a hero. Once the Mulcher
passes the grate, it is sealed off.
D. This room is mostly stocked with dirty tools, but
the first hero to search for treasure finds loot
among them. If the searcher started in Area A, the
treasure consists of a Staff, a Helmet, and two small
Potions of Healing worth 2 body points apiece;
otherwise all he finds is a Potion of Defense.
E. When revealed, this massive piece of debris
moves with a single red die on Zargon's turn, slowly
making its way to the upper-left corner of the map.
Any victim it bowls into must roll 4 combat dice and
lose 1 body point for every skull.
F. Sewer-dwelling monsters are looting these
rooms. The first hero to search for treasure finds 45
gold, a Shortsword, and a Shield on a dead
constable lying against the cupboard.
G. The stairway leads back into the constabulary.
Heroes leave the dungeon by moving onto the
stairway.
Wandering Monster: Goblin
The heroes claim victory when they escape the sewers via
the stairway.
The heroes CANNOT resupply before the next Quest.

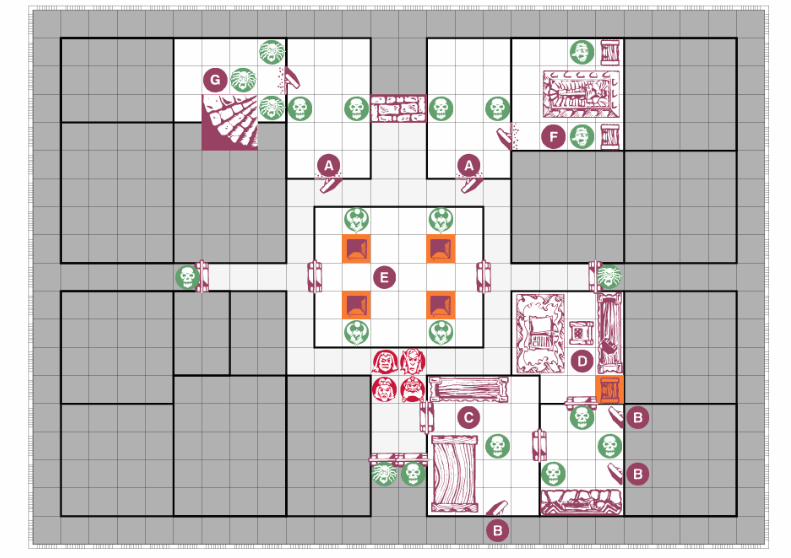
NOTES:
The stairways allow travel between the first and second
floor: anyone who uses one stairway appears next to the
other stairway, on either space marked "X".
The numbered doors bear signs on the outside, which the
heroes may read if the door is in their line of sight:
1: "Registration"
2: "Armory"
3: "Courtroom"
4: "Evidence"
5: "Training Room"
6: "Interrogation"
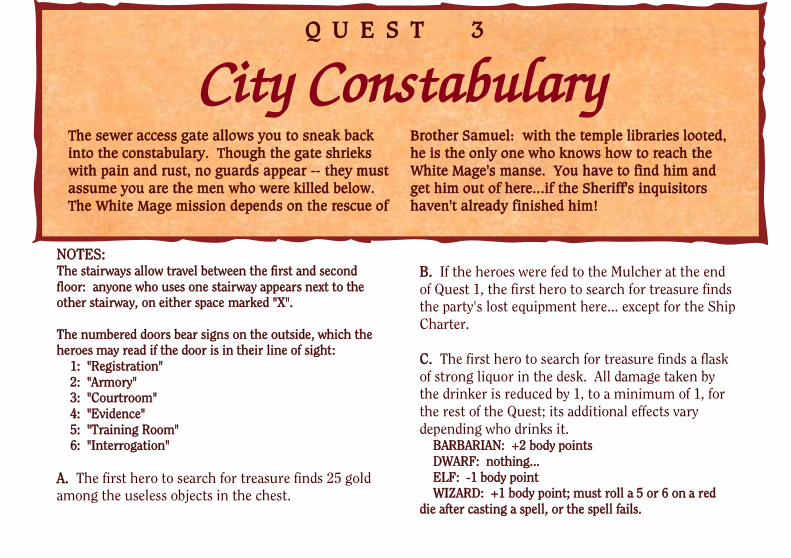
A. The first hero to search for treasure finds 25 gold
among the useless objects in the chest.
B. If the heroes were fed to the Mulcher at the end
of Quest 1, the first hero to search for treasure finds
the party's lost equipment here... except for the Ship
Charter.
C. The first hero to search for treasure finds a flask
of strong liquor in the desk. All damage taken by
the drinker is reduced by 1, to a minimum of 1, for
the rest of the Quest; its additional effects vary
depending who drinks it.
BARBARIAN: +2 body points
DWARF: nothing...
ELF: -1 body point
WIZARD: +1 body point; must roll a 5 or 6 on a red
die after casting a spell, or the spell fails.
Q U E S T 3
City Constabulary
The sewer access gate allows you to sneak back
into the constabulary. Though the gate shrieks
with pain and rust, no guards appear -- they must
assume you are the men who were killed below.
The White Mage mission depends on the rescue of
Brother Samuel: with the temple libraries looted,
he is the only one who knows how to reach the
White Mage's manse. You have to find him and
get him out of here...if the Sheriff's inquisitors
haven't already finished him!

D. The crossbowman has a Heroic Brew and 40
gold in his satchel, looted by the hero who slays
him.
E. Brother Samuel is in this room, and in the
process of agonizing torture. The swordsman holds
a Keyring, claimed by the hero who slays him.
Brother Samuel is near death and can barely
speak. He manages to strain out the words,
"Evidence...Map..." before succumbing to his
injuries.
F. The hero who searches for traps notices that the
cell door has a keyhole, and is also trapped: if it is
not opened with the Keyring -- or opened before the
trap is disarmed -- the opener is hit with the Fear
chaos spell, and an alarm resounds throughout the
city! All non-trapped doors are immediately opened,
and Zargon places a halberdier and a crossbowman
at each door marked with an "I."
Brother Samuel's holy symbol lies abandoned in
the cell. The hero who searches for treasure claims
it, and discovers it ironically contains healing
potion worth 3 body points!
G. The evidence room door and the evidence chest
beyond both have the same alarm trap and keyhole
as the Area F cell door: when disarmed or opened
with the Keyring, the alarm does not activate.
The first hero to search for treasure finds 65 gold,
a Potion of Strength, and a South Sea Map inside
the evidence chest.
H. The first hero to search for treasure finds only
documents and ledgers in the office. If he searches
for secret doors, however, he discovers a hidden
alcove behind the bookcase: inside is a pouch
containing a Heroic Brew and 50 gold.
I. These doors lead to the city streets. The heroes
escape the building by moving through either.
Wandering Monster: Halberdier
The heroes claim victory when they escape the dungeon
with the South Sea Map. If they have the Ship Charter
from Quest 1, skip to Quest 5.
The heroes may resupply before the next Quest.


NOTES:
If Zargon has no hostile minions on the board, he rolls 2
red dice: for each 5 rolled, he places a scout adjacent to
either space marked "X," and for each 6 he places a
halberdier and a scout. Inform the heroes that these
spaces extend further into the city, and the Sheriff's men
can be seen searching for them door to door, closing in
on the port.
The numbered doors bear signs on the outside, which the
heroes may read if the door is in their line of sight:
1: "Tyr's Armory and Other Goods"
2: "Harbormaster"
3: "The Cloak & Dagger"
4: "Rare Books"
5: "Storehouse"
6: "Hellga's Kitchen"
A. If there are no enemies in sight, any hero in this
room may use his action to shop for equipment just
like he does between Quests, and may also sell any
piece of equipment he has for half its market value.
The shopkeeper refuses to buy any weapons used by
the sewer folk, however.
B. This hall represents the pier: the dark regions of
the top half of the board represent open ocean, not
solid wall.
The stairway leads to the heroes' chartered ship.
Because they have yet to charter the ship, the
stairway is not placed on the board. When the
Q U E S T 4
Cast Off
Brother Samuel's ship sits in Cirius Port, its decks
torn inside-out by the contables infesting it. You
will need to charter another vessel for your week-
long voyage to Warlock Cove...and that costs more
gold than you make in a month. You have only
minutes to scrounge up the funds before Sheriff
Gallos's thugs reinforce the pier: now only the
sea can save you from the hangman's noose.

stairway is finally placed, the heroes may leave the
map by moving onto it.
C. The Harbormaster (crossbowman) will give the
heroes a Ship Charter when paid 250 gold: the
stairway is then placed on the board.
The guards in this room do not attack the heroes
unless provoked, either by the heroes attacking
them or opening the door to the south. Each hero
who provokes the Harbormaster is "blacklisted" and
will be attacked on sight: he refuses to charter a
ship to blacklisted heroes, so when all heroes are
blacklisted, the Quest ends in failure.
The only way the heroes can explore the back
rooms of the Harbormaster's house (Areas D and E)
is by casting Pass Through Rock, or casting Veil of
Mist before moving through the door.
D. The first hero to search for treasure finds 35
gold and a Jug of Ale on the desk. Drinking the Ale
has the combined effects of a Potion of Healing and
a Heroic Brew, but the drinker's defend dice are
reduced by half the next time he defends.
The hero who searches for secret doors discovers
that the desk is a giant lever! When the desk is
pulled 1 space north, the secret door is revealed and
opened. The secret door can be found with a search,
but cannot be opened manually.
E. The first hero to search for treasure in the
Harbormaster's quarters finds a small wooden box
under the bed. Inside is 100 gold coins and a Cloak
& Dagger Sigil.
F. The soldiers in this area are hired thugs who do
not attack the heroes unless provoked, in which
case the alarm goes off. When the alarm is
triggered, all doors in the Cloak & Dagger
automatically open and all enemies within attack
the heroes like normal.
When revealed, the halberdier guarding the
entrance gives the heroes a stony look and says,
"Members only." He will allow any hero holding a
Cloak & Dagger Sigil to pass through the door;
anyone without a Sigil who steps through the door
triggers the alarm.
The men at the table are playing the dice game
"Hydra": any hero with a Sigil may spend his action
to bet on the dice. The house has 150 gold for use
in the game: if the heroes reduce this to 50 or less,
the thugs refuse to pay out and the alarm sounds.
Each of the Cloak & Dagger inhabitants carries 35
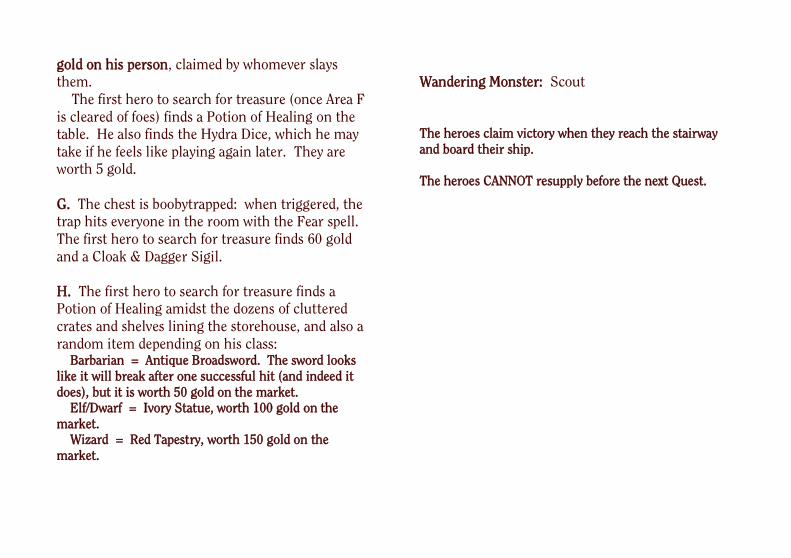
gold on his person, claimed by whomever slays
them.
The first hero to search for treasure (once Area F
is cleared of foes) finds a Potion of Healing on the
table. He also finds the Hydra Dice, which he may
take if he feels like playing again later. They are
worth 5 gold.
G. The chest is boobytrapped: when triggered, the
trap hits everyone in the room with the Fear spell.
The first hero to search for treasure finds 60 gold
and a Cloak & Dagger Sigil.
H. The first hero to search for treasure finds a
Potion of Healing amidst the dozens of cluttered
crates and shelves lining the storehouse, and also a
random item depending on his class:
Barbarian = Antique Broadsword. The sword looks
like it will break after one successful hit (and indeed it
does), but it is worth 50 gold on the market.
Elf/Dwarf = Ivory Statue, worth 100 gold on the
market.
Wizard = Red Tapestry, worth 150 gold on the
market.
Wandering Monster: Scout
The heroes claim victory when they reach the stairway
and board their ship.
The heroes CANNOT resupply before the next Quest.

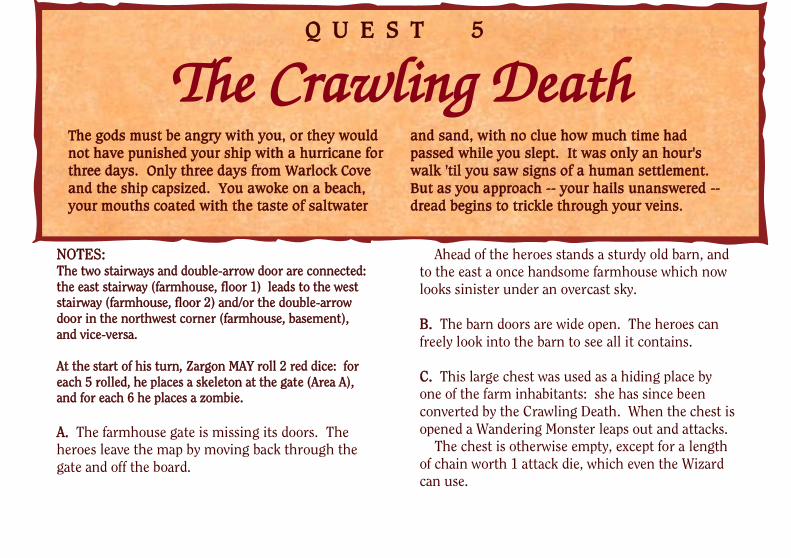
NOTES:
The two stairways and double-arrow door are connected:
the east stairway (farmhouse, floor 1) leads to the west
stairway (farmhouse, floor 2) and/or the double-arrow
door in the northwest corner (farmhouse, basement),
and vice-versa.
At the start of his turn, Zargon MAY roll 2 red dice: for
each 5 rolled, he places a skeleton at the gate (Area A),
and for each 6 he places a zombie.
A. The farmhouse gate is missing its doors. The
heroes leave the map by moving back through the
gate and off the board.
Ahead of the heroes stands a sturdy old barn, and
to the east a once handsome farmhouse which now
looks sinister under an overcast sky.
B. The barn doors are wide open. The heroes can
freely look into the barn to see all it contains.
C. This large chest was used as a hiding place by
one of the farm inhabitants: she has since been
converted by the Crawling Death. When the chest is
opened a Wandering Monster leaps out and attacks.
The chest is otherwise empty, except for a length
of chain worth 1 attack die, which even the Wizard
can use.
Q U E S T 5
The Crawling Death
The gods must be angry with you, or they would
not have punished your ship with a hurricane for
three days. Only three days from Warlock Cove
and the ship capsized. You awoke on a beach,
your mouths coated with the taste of saltwater
and sand, with no clue how much time had
passed while you slept. It was only an hour's
walk 'til you saw signs of a human settlement.
But as you approach -- your hails unanswered --
dread begins to trickle through your veins.

D. The first hero to search for treasure finds a Flask
on the hearth, containing an unknown elixir of
indeterminate age. The hero who drinks it rolls 1
red die and loses that many body points: if he
survives, his defend dice are increased by 2 for the
duration of the Quest.
E. The first hero to search for treasure finds the
Cemetery Key and the Undertaker's Journal. The
hero who wants to read the journal rolls 1 red die
and must spend that many actions to skim its entire
contents.
The journal explains in graphic detail how the
undertaker watched the plague-ridden dead rise
from their graves en masse, and how the city fell to
the Crawling Death in a matter of days. One
passage mentions a hidden path leading from the
cemetery to Warlock Cove, used by smugglers a
century before. When last he left the cemetery, he
had securely locked the gate, but to no avail as the
undead horde simply crawled over the fence.
F. The first hero to search for treasure finds two
items on the table: another mysterious Flask
(identical to the one in Area D) and a pouch
containing 30 gold.
G. The first hero to search the closet for treasure
finds something in the pocket of a hanging
overcoat: an old locket worth 75 gold.
H. In the cold, cluttered basement the devoured
remains of a dead man lay against the east door,
blocking it shut. It costs an action for any hero to
move the body out of the way.
I. The chest is filled with undead rats: if opened
without a disarm, the treasure-hungry victim is
swarmed by them. He rolls 4 combat dice and loses
1 body point for each skull; then he loses 1 mind
point regardless of damage.
The heroes can pour either of the mystery Flasks
into the cracks of the chest to automatically disarm
it. The chest contains an old but useable helmet!
Wandering Monster: Zombie
The heroes claim victory when they leave the map with
the Cemetery Key.
The heroes CANNOT buy equipment before next Quest.
NOTES:
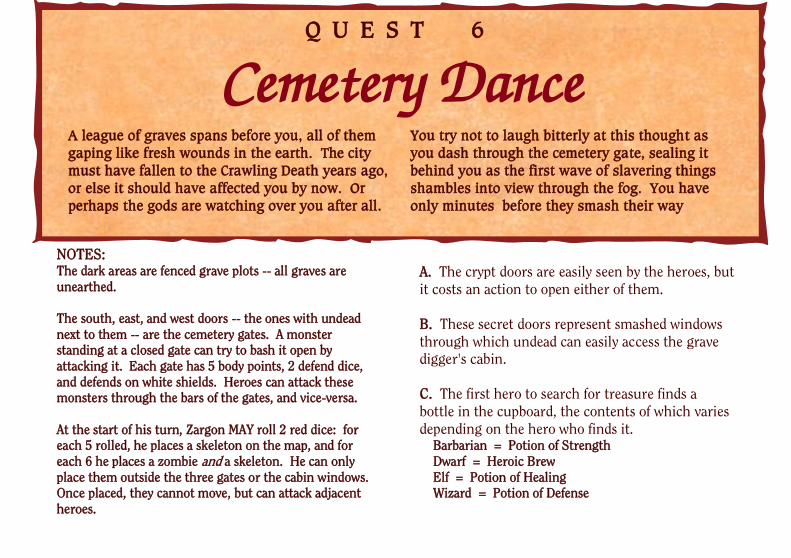
The dark areas are fenced grave plots -- all graves are
unearthed.
The south, east, and west doors -- the ones with undead
next to them -- are the cemetery gates. A monster
standing at a closed gate can try to bash it open by
attacking it. Each gate has 5 body points, 2 defend dice,
and defends on white shields. Heroes can attack these
monsters through the bars of the gates, and vice-versa.
At the start of his turn, Zargon MAY roll 2 red dice: for
each 5 rolled, he places a skeleton on the map, and for
each 6 he places a zombie and a skeleton. He can only
place them outside the three gates or the cabin windows.
Once placed, they cannot move, but can attack adjacent
heroes.
A. The crypt doors are easily seen by the heroes, but
it costs an action to open either of them.
B. These secret doors represent smashed windows
through which undead can easily access the grave
digger's cabin.
C. The first hero to search for treasure finds a
bottle in the cupboard, the contents of which varies
depending on the hero who finds it.
Barbarian = Potion of Strength
Dwarf = Heroic Brew
Elf = Potion of Healing
Wizard = Potion of Defense
Q U E S T 6
Cemetery Dance
A league of graves spans before you, all of them
gaping like fresh wounds in the earth. The city
must have fallen to the Crawling Death years ago,
or else it should have affected you by now. Or
perhaps the gods are watching over you after all.
You try not to laugh bitterly at this thought as
you dash through the cemetery gate, sealing it
behind you as the first wave of slavering things
shambles into view through the fog. You have
only minutes before they smash their way
through...
D. There is an undead rat lurking inside the chest,
which bites any careless hero who searches for
treasure without disarming traps first. The victim
is reduced to 1 body point before dispatching the
foul creature with his fist.
The first hero to search for treasure finds a small
Potion of Healing worth 2 body points in the chest,
and a stack of 15 gold coins on the desk.
E. The gates to this grave plot are open when the
heroes arrive, the graves exhumed.
F. The first hero to search for treasure finds a
cleric's Mace worth 2 attack dice, and a Holy
Pendant. When the pendant is worn as armor,
undead monsters receive 1 less combat die in
defense against the wearer. When the wearer loses a
body point to an enemy attack, the pendant is lost.
G. This stairway descends into the crypt; the heroes
escape the monster-infested city by moving onto it.
Wandering Monster: Zombie
The heroes claim victory when they reach the stairway.
The heroes CANNOT buy equipment before next Quest.


NOTES:
The stairway leads back to the surface, where endless
monsters await. The heroes cannot turn back.
The number of heroes at the start of this Quest
determines which of the four eastern crypts contains a
chest (refer to the numbers). The other three are empty.
1: The chest contains the Effigy item, and a strong
Potion of Healing worth 4 body points and a large gem
worth 35 gold.
2: The chest contains the Effigy item, and an old
Helmet.
3: The chest contains the Effigy item, and a Scroll of
Reinforcement which restores 1 exhausted spell.
4: The chest contains the Effigy item, and two well-
preserved Jars of Honey, each worth 1 body point.
The Effigy is a child-sized figure made of straw and
shamped like a mummy. It holds a carpenter's hammer
in its "hand" and wears a laurel wreath on its "head."
A. The first hero to search for anything sees that
this small coffin lays open and empty, a crest
engraved on the lid -- the crest portrays a
carpenter's hammer and a laurel.
When the Effigy is laid in the coffin, the heroes
hear stones grinding in the walls, and the stone
blocks marked "B" both activate.
B. When activated, these blocks move two spaces
north and stop on the spaces marked "X."
Q U E S T 7
Halls of the Dead
The halls of the dead greet you with the echoing
moans of the Crawling Death's adopted children.
It is difficult to believe the plague's tentacles
could slither so deeply into the earth. Surely the
White Mage wasn't so mad that he would pervert
this crypt into another of his magical defenses,
just to protect his manse from landside intrusion.
But if he did, then his secrets must be powerful
indeed to warrant such drastic safety measures...

C. These chaos warriors are vigilant statues...at
first.
D. Here sits the sarcophagus of whatever important
figure was laid to rest here. When the heroes enter
this room, they are filled with a sense of dread, as if
they'd just intruded upon someone's privacy.
E. The dead man's trove of valuable personal effects
are stored here. The first hero to search for treasure
finds all of the other "crypt chest" items listed above
(except the Effigy).
The moment any hero sets foot inside this room,
the "statues" in Area C creak. On Zargon's turn they
spring to life and attack.
F. These secret doors open simultaneously,
allowing passage into this hidden corridor. The
door at the end leads to the beach of Warlock Cove.
Wandering Monster: Zombie
The heroes claim victory when they escape via the hidden
tunnel in Area F.
The heroes CANNOT buy equipment before next Quest.


NOTES:
The outer edges of this map are the treacherous rocky
shoreline of Warlock Cove, with the cold, unforgiving
waters crashing only a few feet below. Heroes who move
along the edge of the board can safely move one space at
a time. To move more than that on his turn, the hero
rolls a combat die along with his movement dice, and
may take his full movement if he rolls a skull; otherwise
he moves one space, then slips and falls, ending his turn.
If he rolls a black shield, he additionally loses 1 body
point from injuring himself on the rocks.
The monsters on this map will attack heroes and Men-At-
Arms -- whichever is closer. Men-At-Arms can also
trigger the boulder traps.
The Teleport Trap in Area G is one-way only: stepping
on Teleport "A" takes the hero or monster to Teleport
"B," then his turn ends.
A. The doorway is carved out of the cliff and leads
back to the beach.
B. These are false doors.
C. When a hero enters its line of sight, the giant
boulder trap activates: it moves with 1 red die on
Zargon's turn, following the white arrows. Any
victim it bowls into must roll 4 combat dice and
lose 1 body point for every skull. When the boulder
reaches the edge of the map, it crashes into the
ocean and is removed from the board. One turn
Q U E S T 8
Warlock Cove
A strange sort of luck seems to have befallen you.
You were just wondering where to find another
ship for the return trip to Cirius. No sooner had
you finally stepped onto the rocky shore of
Warlock Cove, you spotted a freighter anchored
within swimming distance, with one or two of
Sheriff Gallos's men patrolling the deck. They
arrived before you, so with a bit more luck they
might've triggered some of the White Mage's
forgotten defenses for you...

later, the boulder reappears at its starting space
(unless a hero is standing there) and can be
activated again.
D. The stairway is the exit: it leads to the Manse of
the White Mage.
E. Sheriff Gallos's men are here, attempting to
open the rusty old chest. They recognize the heroes
and attack! If the crossbowman is reduced to 1 body
point, but isn't killed before Zargon's next turn, he
surrenders his Crossbow and flees from the heroes.
The first hero to search for treasure finds a
Potion of Healing and 25 gold in the chest. He also
finds...a dragon-shaped Doorknob.
F. The chest is rigged to destroy its contents when
opened incorrectly. If the trap isn't triggered, the
first hero to search for treasure finds a well-
preserved Jar of Honey, which restores 2 body
points when eaten; and a Scroll of Reinforcement
which restores 1 exhausted spell when used.
G. This door has no knob, and thus cannot be
opened unless a hero replaces its Doorknob (found
in Area E).
Wandering Monster: Skeleton
The heroes claim victory when they reach the stairway.
The heroes CANNOT resupply before the next Quest.


NOTES:
The door at the entrance is a portcullis, which only opens
when either of its levers (the spaces marked "X") are
pulled. Once pulled, Zargon rolls 1 red die to determine
how many rounds the portcullis will stay open. The
levers cannot be pulled again until the portcullis closes.
The chaos warriors are actually Spectral Stalkers,
shadowy fiends that flicker before the heroes' eyes like
swamp mist.
SPECTRAL STALKER
MOVE 7 :: ATTK 4 :: DEF 3 :: BODY 2 :: MIND 3
Can cast Pass Through Rock on itself once per turn.
Defends with white shields.
The Teleport Traps are one-way only: any hero or
monster who steps on Teleport "A" moves to Teleport "B,"
then his turn ends.
A. The first hero to search for treasure finds a Jug
of Ale on the table. Drinking it has the combined
effects of a Potion of Healing and a Heroic Brew, but
the drinker's defend dice are reduced by half the
next time he defends.
B. The weapons on the rack are rusted and useless.
C. The first hero to search for treasure finds that
the bookcases have nothing but useless, crumbling
books adorning their shelves.
Q U E S T 9
Manse of the White Mage
Beyond the portcullis, the halls echo with the
ghostly howl of the wind and the distant crashing
of the sea...and now and then, a few ghastly
noises you can't quite place. Somewhere within
those halls are the arcane secrets that will restore
life to Alkanis and save its people from the likes
of Sheriff Gallos once and for all. The White
Mage was a mad genius, however, and would
surely have saved his most diabolical defenses for
the very last...

The objects behind the north bookcase are only
revealed when the north bookcase is moved via the
switch in Area F, or when a hero uses Pass Through
Rock to move behind the bookcase.
D. The first hero to search for treasure finds the
White Mage Journal, explaining all of his
experiments and formulas! It also mentions further
documents and equipment stored in the three
chests. All three chests are locked and cannot be
opened without several hours of diligent work: the
heroes must carry the chests back to the entrance
using the rules for carrying fallen heroes (see
"House Rules to Aid Players -- Fallen Heroes").
The moment the Journal is taken, both secret
doors marked "E" spring open, unleashing hordes of
undead creatures upon the unsuspecting heroes.
The portcullis, if open, immediately slams shut.
E. These secret doors can be found with a search
for traps OR secret doors, but only open when the
journal is taken from Area D. The heroes can seal
the doors with a successful trap disarm, but they
must roll 2 dice without any failures.
F. The door is trapped: it vanishes after the first
hero steps through it. This trap can only be
detected and disarmed by magic users.
The first hero to search for treasure finds two tiny
drams of healing potion, each worth 2 body points;
and a Sapphire Wand worth 150 gold on the market.
The wand can only be used by the Wizard, and
allows him to zap monsters in line of sight for 1
attack die.
The first hero to search for secret doors finds a
book-shaped switch on the south side of the
cupboard, which moves the north bookcase (Area C)
two spaces in the white arrow's direction. This
gives the heroes access to the door...and the spectral
stalkers access to the heroes!
Wandering Monster: Zombie
The heroes claim victory when they return to the
stairway with the three chests and the Journal. These
four items are now bundled together into the "White
Mage Parcel," carried by a single hero.
The heroes may resupply before the next Quest.


NOTES:
There are three chests aboard the derelict. At the start of
the Quest, Zargon chooses which of those chests holds
the Sextant: a search for treasure will yield the Sextant
to the heroes. If he forgets to choose, it is Chest C by
default.
Skeletons are not placed on the board initially: they are
revealed to the heroes as the skeletal remains of
devoured crewmen. On Zargon's turn, any dead
crewman may rise as a skeleton and attack the heroes.
A. The first hero to search for treasure finds a Jug
of Ale in the cupboard. Drinking it has the
combined effects of a Potion of Healing and a Heroic
Brew, but the drinker's defend dice are reduced by
half the next time he defends.
B. The first hero to search for treasure finds the
Map spread out on the captain's table.
C. The chest is trapped with a spring-loaded metal
cable, which whips across the victim's hands. The
victim loses 1 body point and rolls 2 red dice: he is
unable to attack, cast spells, or disarm traps for that
many turns.
The first hero to search for treasure finds 3
Harpoons on the weapon rack, worth 2 attack dice
when thrown.
Q U E S T 1 0
Derelict
Only yesterday you were trading equipment and
tales of adventure with the crew members of the
constabulary's ship, a freighter chartered by the
Sheriff: now you and your comrades are among
the very few who survived when the ship was
seized by the Crawling Death. Stranded in the
middle of the South Sea on a monster-infested
derelict, your only options are to find the Map and
Sextant and sail this ship yourselves, or join its
hideous undead crew forever...

D. The first hero to search the captain's quarters
for secret doors finds a hidden compartment in the
desk, which contains 50 gold and another Jug of Ale
like the one found in Area A.
Wandering Monster: Zombie
The heroes claim victory when they return to either
stairway with the Map, Sextant, and White Mage Parcel.
The heroes may resupply before the next Quest.


NOTES:
The tunnels are flooded with putrid water and vermin.
When any hero ends his turn in a corridor, he rolls a red
die for each of his remaining body points: if he fails to
roll any 6's, he loses 1 body point.
The white arrows indicate a strong current. The current
ends at the pit trap on the west end of the map, which is
already open when revealed.
Trapped doors close and seal behind the first hero who
steps through, forcing the other heroes to take a different
path. If the trap is disarmed, the door is forever locked in
its current state (open or closed).
A. The first hero to search for treasure finds 4
potions of healing in the cupboard, minus one for
each healing item the party already has (spells do
not count).
B. Once revealed, this giant floating piece of debris
moves with 1 red die at the start of Zargon's turn,
following the strong current. Any victim it bowls
into must roll 4 combat dice and lose 1 body point
for every skull. When it reaches the end of the
current, it crashes into the pit trap: both it and the
pit trap are removed from the board.
After the debris moves, any hero or monster
standing in the current moves the same number of
spaces, unless he was hit by the debris.
Q U E S T 1 1
The Kingdom of Rats
You left the blighted ship burning in full view of
Cirius Port and rowed to a neighboring city,
knowing full well that returning to Cirius -- by
ship or road -- means returning forever to Sheriff
Gallos's dungeons. Now you stand a mile outside
of Cirius, facing the open drain tunnel of the city
sump, the legacy of the White Mage held firmly in
your hands. It must be delivered to the Emperor,
and the only way past the Sheriff's men is
through the sump...and the Kingdom of Rats...

C. The chest does not open, and the weapons are
rusted and useless. However, the first hero to
search for secret doors discovers that an old spiked
club on the rack is actually a lever: when pulled,
the chest pops open, revealing 60 gold and a Scroll
of Swift Wind, which casts the Swift Wind spell
when read.
D. The first hero to search for treasure finds a
Potion of Defense and another Scroll of Swift Wind.
E. The double-arrow door is the sewer entrance to
the Cirius Meadhall, where the Emperor awaits.
Wandering Monster: Goblin
The heroes claim victory when they escape the sump
through the double-arrow door with the White Mage
Parcel.
The heroes CANNOT buy equipment before next Quest.


NOTES:
The west-most and south-most doors (marked with white
"in" arrows) are the two entrances to the meadhall. The
heroes escape the meadhall through either of these
doors.
All chaos warriors on this Quest are stone statues.
A. This door leads back to the sump.
B. This door connects to the stairway. Fresh air at
long last!
C. The first hero to search for treasure finds a Jug
of Ale in the cupboard. Drinking it has the
combined effects of a Potion of Healing and a Heroic
Brew, but the drinker's defend dice are reduced by
half the next time he defends.
D. The central corridors and room are a single open
space which the heroes (and their enemies) can
freely move through. When the heroes reveal this
area, read the following aloud:
Sheriff Gallos and his lieutenants are turning the mead
hall upside down in their search for the sick Emperor.
The Sheriff locks eyes with you across the room and
smirks in recognition. "By the gods!" he says. "So they
survived the Crawling Death and the terror of the fabled
White Mage! I don't know whether to have you hanged
or promote you to my new captains." Pointing his
longsword at the Parcel in your hands he adds, "And it
appears you've brought me the spoils, to boot. That
Q U E S T 1 2
House Arrest
Right away the racket upstairs tells you some-
thing is amiss: scores of armored bodies
marching about, furniture smashing, and
arrogant voices shouting orders. The Sheriff is
here, searching for the Emperor and his lady.
They are hiding somewhere in the meadhall, but
they'll be found sooner or later, and more
constables are surely on the way. The expedition
will have been for naught if its patron and
architect dies.
settles it, then: I'll have that parcel, then I'll have you all
ground to giblets and fed to the peasants!"
SHERIFF GALLOS
MOVE 6 :: ATTK 4 :: DEF 5 :: BODY 3 :: MIND 4
Keeps a retractable dagger up his sleeve: if a hero's
attack is blocked, the Sheriff counter-attacks with 1
attack die, and the hero cannot defend.
E. The first hero to search for secret doors
discovers that the throne sits on a cleverly hidden
rail: when pushed back 1 space, it reveals and opens
the secret door to the north (Area F).
F. The Emperor and Empress are both here. Read
the following to the heroes:
The Empress stands wearing her elegant breastplate,
sword ready to pounce. At the last instant she recognizes
you and sighs with relief.
"His Excellency is getting worse," she says. "I trust
that parcel is the White Mage's legacy? Then we haven't
a moment to waste. Take us to the clergy, quickly!"
The Emperor is too weak to stand on his own,
and is regarded as a fallen hero who cannot be
revived (see "House Rules to Aid Players"). The
Empress, by contrast, is in perfect health, and a
renowned swordsman: she is controlled like
another hero once she is revealed.
EMPRESS
MOVE 5 :: ATTK 3 :: DEF 2 :: BODY 3 :: MIND 3
G. The first hero to search for treasure finds 50
gold in a lockbox on the desk.
H. Someone left a Battle Axe on the weapons rack!
The first hero to search for treasure takes it.
Wandering Monster: Halberdier
The heroes claim victory when they escape the mead hall
with the White Mage Parcel, and the Emperor and
Empress. The Emperor must survive the Quest to
achieve victory.
The campaign is won! Read the conclusion to the
heroes.

Conclusion
The effects of Sheriff Gallos's defeat were immediate: his lieutenants, less organized and
intelligent than their late master, bickered constantly for control of the city and its people. New
sheriffs came and went, each one's grip of the city weaker and clumsier than the last. It only took
two years for total reform to eradicate the last traces of corruption in the constabulary, and by then
the Emperor's health had fully returned...and the Cirius landscape had shown the first shades of
green in years.
The effects of the White Mage's legacy are not as swift, but they show great promise in the hands
of the Cirius priests and spellcasters. Total restoration is a mere dream yet: perhaps in another ten
years the fields of Alkanis will return to their former glory. For now, you and your comrades -- the
elite constables of Cirius -- are content to finally fill your bellies and leave the adventuring to some
other poor, unfortunate fool.
That is, until the boredom of peace starts getting to you.
The heroes may permanently increase a stat of their choice by 1.


A Questbook for Heroquest
by
Mike MacDee made 2013 with Questbook.doc by Dr. Benedikt Rothöhler a.k.a.. Big Bene
Heroquest is copyright of Milton Bradly Company
all rights reserved
a devision of Hasbro, inc.
developed with Games Workshop.
Heroquest font and parts of map symbols are made by Flavio Chierichetti.
Special thanks to Karthesios for the "Hydra" math help.