wi-fi training - hands on - emcu
TRANSCRIPT

Wi-Fi Training - Hands On
SPG Application
FW 35
Hands On Training content
bull This presentation provides a modular training on the
SPWF01 Wi-Fi module
bull The presentation answers frequently asked questions about the module
bull The AT command set is used to illustrate practical use cases called labs
bull The labs familiarize the reader with the key
features of the SPWF01 module bull Common hardware (eg PC amp cellphone) and software (eg terminal
emulator amp browser) are needed to perform the labs
bull ST offers two different platforms for evaluating the
Wi-Fi module bull The ST-EVAL board ie STEVAL-IDW001V1 + STEVAL-PCC018V1
bull The Nucleo X-Pansion board ie X-NUCLEO-IDW01M1
bull Both evaluation boards are based on the same SPWF01 Wi-Fi module
2
Lab Prerequisites
STEVAL-IDW001V1 + STEVAL-PCC018V1
bull Hardware
bull STEVAL-IDW001V1 + STEVAL-PCC018V1 evaluation board for
SPWF01SA11 (used in the following LABs)
bull Utility software
bull CP210x USB to UART Bridge VCP Drivers (available from
httpwwwsilabscomproductsmcuPagesUSBtoUARTBridgeVCPDriversaspx)
bull Tera Term terminal emulator (available from
httpensourceforgejpprojectsttssh2releases)
bull Text Editor
bull Web browser
3
Lab Prerequisites
X-NUCLEO-IDW01M1
bull Hardware
bull X-NUCLEO-IDW01M1 Wi-Fi expansion board based on SWPF01SA
module for STM32 Nucleo
bull NUCLEO-F401RE NUCLEO-F103RB NUCLEO-L053R8 or NUCLEO-
L476RG
bull Utility software
bull X-CUBE-WIFI1 SW package httpwww2stcomcontentst_comenproductsembedded-softwaremcus-
embedded-softwarestm32-embedded-softwarestm32cube-expansion-softwarex-
cube-wifi1html)
bull Tera Term terminal emulator (available from
httpensourceforgejpprojectsttssh2releases)
bull Text Editor
bull Web browser
4
Hands on chapters 5
bull Lab 1 HW and SW setup
bull Lab 2 Set the SPWF variables
bull Lab 2a FOTA update
bull Lab 3 Access point connection (WPA or WEP)
bull Lab 4 Web client mode
bull Lab 5 Web server mode ndash files in RAM
bull Lab 6 Web server mode ndash files in FLASH
bull Lab 7 Socket interface
bull Lab 8 MiniAP mode for the first set
bull Lab 9 Socket interface in MiniAP mode
bull Lab 10 Web server in MiniAP mode
bull Lab 11 Remote control of GPIO interfaces
bull Lab 12 Input demo
bull Lab 13 Socket Server
bull Lab 14 Low Power Modes
bull Lab 15 HW switch from STA to MiniAP
bull Lab 16 IBSS mode
Lab 1 HW and SW setup
bull Objective
bull Hardware set-up
bull Software set-up
bull Prerequisites
bull Work alone
6
Lab 1 EVAL of the SPWF01Sxy1 module
STEVAL-IDW001V1 + STEVAL-PCC018V1 7
bull PlugampPlay Solution
bull AT command set
bull Power Supplied via the USB interface
bull UARTUSB bridge from Silicon Lab requires to
install the correspondent driver on your PC
bull SMD antenna and reset button on-board
HyperTerminal or similar
AT CommandsEvents
SPWF01SA11
VCOM
8
Lab 1 STEVAL-IDW001V1
STEVAL-IDW001V1 evaluation board of the WiFi module SPWF01SA11
8
9
Lab 1 STEVAL-PCC018V1
STEVAL-PCC018V1 USB to UART board
9
Lab 1 Hardware setup
STEVAL-IDW001V1 + STEVAL-PCC018V1
bull Insert the jumpers in the USB to
UART board as in the figure
bull Connect the Evaluation board to
the PC
bull Use the Device manager to find
the assigned COM port
10
Module automatically performs a reset Module automatically performs a scan for
available networks (if wifi_mode variable is ne 0) Module automatically enters in command mode STEVAL-PCC018V1 Yellow power LED will light up STEVAL-IDW001V1 Yellow power LED will light
up orange wifi link up LED will light up
Lab 1 Configuring the UART STEVAL-IDW001V1 + STEVAL-PCC018V1
bull Open Tera Term
bull Run Tera Term (open Tera term folder
and then run ttermproexe)
bull Open the assigned COM port
bull Tera Term Setup rarr Serial port
bull Baud rate 115200
bull Data 8 bit
bull Parity none
bull Stop 1 bit
bull Flow control none
bull Set CR in the Terminal setup
(default config)
bull Tera Term Setup rarr Terminal rarr
Transmit CR
11
Tip the modulersquos localecho is disabled by default The local echo option can be enabled on Tera Term in order to display the AT command entered
Lab 1 Configuring the UART STEVAL-IDW001V1 + STEVAL-PCC018V1
bull Open Tera Term
bull Command Mode
bull Type AT followed by a carriage return
(CR)
12
OK
All
Tera Term output
Lab 1 EVAL of the SPWF01Sxy1 module
X-NUCLEO-IDW01M1 amp X-CUBE-WIFI1 13
bull X-NUCLEO-IDW01M1
bull X-NUCLEO-IDW01M1 is a Wi-Fi evaluation board based on SPWF01SA module
bull X-CUBE-WIFI1
bull X-CUBE-WIFI1 is an expansion software package for STM32Cube
bull httpwww2stcomcontentst_comenproductsembedded-softwaremcus-embedded-softwarestm32-embedded-softwarestm32cube-expansion-softwarex-cube-wifi1html
Lab 1 Set Vcom binary in Nucleo X-NUCLEO-IDW01M1 amp X-CUBE-WIFI1
1 Flash VCOM binary into Nucleo drive
binaries
IDErsquos project
drag and drop
Projectbin
on Nucleo drive
14
NUCLEO-F401RE
F103RB
L053R8
L476RG
Lab 1 Configuring the UART X-NUCLEO-IDW01M1 amp X-CUBE-WIFI1
Setup TeraTerm window in order to send AT command to Wi-Fi module
2
Open Hyper terminal or TeraTerm Select correct COM port
Terminal setup Serial port setup
15
Lab 1 Configuring the UART X-NUCLEO-IDW01M1 amp X-CUBE-WIFI1
bull Open Tera Term
bull Command Mode
bull Type AT followed by a carriage return
(CR)
16
OK
All
Tera Term output
You are ready to use your Wi-Fi
EVAL board
Lab 2 Set the SPWF variables
bull Objective bull Run a command
bull Get the default configuration dump
bull Set host name
bull Set static IP parameters
bull Reset the module
bull Prerequisites bull Work alone
18
Lab 2 Run a command
Run a command - Syntax
- ATampx ltCRgt
- AT+S[Command] ltCRgt
Response - Syntax
xxxxxxxx
19
- OK
- Command output followed by OK
- ERROR Command not found
- ERROR Unrecognized key
AT Command Prefix
Not case sensitive
Lab 2 Set the SPWF variables
bull Get the default configuration dump
bull Type ATampV
bull Get a variable value
bull Type AT+SGCFG=console1_speed
Config dump frame
20
Variable
Name
Variable
Value
How to change the variable value
1 AT+SSCFG=[var name]xxxx
2 ATampW
Lab 2 Set the SPWF variables
bull Get the default configuration dump
bull Set host name
bull Type AT+SSCFG=ip_hostnamexxxxxxxx
21
Up to 31 characters (case sensitive) ldquospacebarrdquo is allowed
OK
All
Tera Term output
Lab 2 Set the SPWF variables
bull Get the default configuration dump
bull Set host name
bull Set IP address IP default gateway IP DNS and IP netmask (for
static usage)
bull Type AT+SSCFG=ip_ipaddr19216801xx
bull Type AT+SSCFG=ip_gw19216801
bull Type AT+SSCFG=ip_dns19216801
bull Type AT+SSCFG=ip_netmask2552552550
22
OK
All
Tera Term output
Tera Term output
Lab 2 Set the SPWF variables
bull Get the default configuration dump
bull Set host name
bull Set IP address IP default gateway IP
DNS and IP netmask (DHCP off)
bull Save settings on the flash memory
(mandatory after a variable change)
bull Type ATampW
bull Reset the module
bull Type AT+CFUN=1
23
+WIND21WiFi Scanning +WIND35WiFi Scan Complete (0x0)
All
Lab 2 Set the SPWF variables
bull Get the default configuration dump
bull Set host name
bull Set IP address IP default gateway IP
DNS and IP netmask (DHCP off)
bull Save settings on the flash memory
(mandatory after a variable change)
and reset the module
bull Check the new configuration dump
bull Type ATampV
24
Proceed to the next LAB
Lab 2a FOTA update
bull Objective
bull Upgrade the FW using the OTA file
bull Prerequisites
bull OTA file (provided in the SPWF01S FW
package)
bull External web server (ie Apache web
server running on PC)
26
Lab 2a FOTA update 27
The SPWF01Sx11 module (with external flash on board) allows
performing a Firmware Over-the-air update via a single HTTP GET
The SPWF01S will validate the firmware image it downloads load it
into a staging area then prompt the user to issue a reset command in
order to complete the update
Lab 2a FOTA update
The Apache Web Server will be used in this LAB
(Apache Web Server is available at this link
httparchiveapacheorgdisthttpdbinarieswin32httpd-2225-win32-x86-openssl-098ymsi)
Note please check that the local firewall is disabled or properly set It can
block the connection from module to Apache
bull Copy the OTA file (ie SPWF01S-xxxxxx-yyyyyyy-
RELEASE-mainota) in the Apache 22 htdocs folder
28
Lab 2a FOTA update
The FWUPDATE command allows to perform a Firmware Over-the-
air update via a single HTTP GET
bull Sintax
bull AT+SFWUPDATE=lthostnamegtltpathgtltportgt
bull Configuration parameters
bull lthostnamegt Target host DNS resolvable name or IP address
bull ltpathampqueryoptsgt Document path and optional query arguments
bull ltportgt Target host port
29
Lab 2a FOTA update
bull The module and the Apache Web server must be connected to the same network
bull In Tera Term type AT+SFWUPDATE=[Apache IP address][ota_fileota]
ie type AT+SFWUPDATE=192168xyyySPWF01S-150410-c2e37a3-RELEASE-
mainota
bull Reset the module to apply the new FW
bull Type AT+CFUN=1
bull Restore factory default settings (mandatory)
bull Type ATampF
30
Staging FW update for SPWF01SX11 version 1203-120918_01 FW length 276824 0x00002800 (offset 0x00000000 block len 4096) Write len 4096 -gt 0x0 Write len 4096 -gt 0x1000 (note - deleted extra output for clarity) Write len 4096 -gt 0x42000 Write len 2476 -gt 0x43000 (final) Wrote 276904 bytes Complete Update will be applied on next reboot (at+cfun=1)
All Tera Term output
Proceed to the next LAB
Lab 3 Access point connection
bull Objective
bull Scan for available networks
bull Join a network
bull Check the statusstatistics variables
bull Prerequisites
bull USB dongle and computer are set
up as described in Lab 2
bull Work alone
32
Lab 3 Scan for available networks
The SCAN command performs an immediate scan for available
networks Infrastructure (AP) and IBSS (Ad-Hoc) networks are both
reported Network type Channel BSSID SSID Signal strength (RSSI)
and 80211 capabilities are all reported
bull Type AT+SSCAN
bull Scan syntax AT+SSCAN [=lta|pgt[ltr|s|mgt[ltfnamegt]]] -- Perform a [activepassive]
network scan [filter offfilter on SSIDfilter on MAC] [print to file])
33
FOUND BSS 14D64D243600 CHAN 01 RSSI -28 SSID ENG-WPA CAPS 0431 WPA WPA2 FOUND BSS 00180A31EA78 CHAN 11 RSSI -82 SSID ZyckoItalyWireless CAPS 0531 WPA WPA2 FOUND BSS 06180A31E7E2 CHAN 11 RSSI -85 SSID ZyckoItalyGuest CAPS 0531 WPA WPA2 OK
All
Network type
Network MAC
Network
channel Network
RSSI
Network
SSID Network
capabilities
Tera Term output
Tera Term output
Lab 3 Joining a network (WPA Key)
In order to be connected to an available Wifi network the AP parameters setting is needed
bull Set the SSID
bull Type AT+SSSIDTXT=ENG-WPA
bull Set the password
bull Type AT+SSCFG=wifi_wpa_psk_texthelloworld
bull Set the network privacy mode (0=none 1=WEP 2=WPA-Personal (TKIPAES) or WPA2-Personal (TKIPAES))
bull Type AT+SSCFG=wifi_priv_mode2
bull NB wifi_auth_type must be set to 0 AT+SSCFG=wifi_auth_type0
bull Set the network mode (1 = STA 2 = IBSS 3 = MiniAP)
bull Type AT+SSCFG=wifi_mode1
34
OK
All
Lab 3 Joining a network (WPA Key)
bull Save the settings on the flash memory and reset the module
bull Type ATampW
bull Type AT+CFUN=1
35
+WIND0Console active +WIND46WPA Crunching PSK +WIND32WiFi Hardware Started +WIND21WiFi Scanning +WIND35WiFi Scan Complete (0x0) +WIND19WiFi Join 14D64D243600 +WIND25WiFi Association with ENG-WPA successful +WIND51WPA Handshake Complete +WIND24WiFi Up 19216801xx
All
ENG-WPA AP
Tera Term output
Lab 3 Joining a network (WPA Key)
bull Check the statusstatistics variables
bull Type AT+SSTS
bull Send a ping to the gateway (ip_gw)
bull Type AT+SPING=19216801
36
ENG-WPA AP
Tera Term output
OK
All
Lab 3 Joining a network (WEP Key)
Configure the module using the WEP key (4 possible combinations
available)
Sample table
37
AP configuration AT command to be used
Security Mode WEP
WEP Key Length 64 bit
(10 hex digits)
Authentication Open
Wep Key 1 1234567890
ie
at+sssidtxt=ENG-WEP
AT+SSCFG=wifi_wep_keys[0]1234567890
AT+SSCFG=wifi_wep_key_lens05
AT+SSCFG=wifi_auth_type0
AT+SSCFG=wifi_priv_mode1
AT+SSCFG=wifi_mode1
atampw
at+cfun=1
Security Mode WEP
WEP Key Length 64 bit
(10 hex digits)
Authentication Shared
Key
Wep Key 1 1234567890
ie
at+sssidtxt=ENG-WEP
AT+SSCFG=wifi_wep_keys[0]1234567890
AT+SSCFG=wifi_wep_key_lens05
AT+SSCFG=wifi_auth_type1
AT+SSCFG=wifi_priv_mode1
AT+SSCFG=wifi_mode1
atampw
at+cfun=1
AP configuration AT command to be used
Security Mode WEP
WEP Key Length
128 bit (26 hex digits)
Authentication Open
Wep Key 1
123456789012345678
90123456
ie
at+sssidtxt=ENG-WEP
AT+SSCFG=wifi_wep_keys[0]12345678
901234567890123456
AT+SSCFG=wifi_wep_key_lens0D
AT+SSCFG=wifi_auth_type0
AT+SSCFG=wifi_priv_mode1
AT+SSCFG=wifi_mode1
atampw
at+cfun=1
Security Mode WEP
WEP Key Length
128 bit (26 hex digits)
Authentication
Shared Key
Wep Key 1
123456789012345678
90123456
ie
at+sssidtxt=ENG-WEP
AT+SSCFG=wifi_wep_keys[0]12345678
901234567890123456
AT+SSCFG=wifi_wep_key_lens0D
AT+SSCFG=wifi_auth_type1
AT+SSCFG=wifi_priv_mode1
AT+SSCFG=wifi_mode1
atampw
at+cfun=1
Lab 3 Joining a network (WEP Key)
Notes
bull ldquowifi_wep_key_lensrdquo variable values 05 and 0D
bull Itrsquos possible to enter any text string into a WEP key box in the AP in which case it will be converted into a hexadecimal key using the ASCII values of the characters A maximum of 5 text characters can be entered for 64 bit keys and a maximum of 13 characters for 128 bit keys
In this case it needs to manually convert your ASCII password to HEX and complete the wifi_wep_keys[0] variable with the HEX value bull ie AP WEP key test1 ASCII to HEX 7465737431 So the AT command is AT+SSCFG=wifi_wep_keys[0]7465737431
bull Some APs allow user to insert a passphrase and then the AP automatically generates the hex keys In this scenario user have not to perform the ASCII to HEX conversion because the AP already gives it the hex value
38
Proceed to the next LAB
Lab 4 Web client mode
bull Objective
bull HTTP GET
bull HTTP POST
bull PUSH DATA ON SERIAL PORT
bull Prerequisites
bull USB dongle and computer are set up
as described in Lab 2
bull Work in couple
40
Lab 4 HTTP GET
The HTTP GET feature performs a single HTTP request to the specified
host and path The server response is printed on the UART enabled
bull Sintax
bull AT+SHTTPGET=lthostnamegtltpathgt[ltportgt]
bull Configuration parameters
bull lthostnamegt target host DNS resolvable name or IP address
bull ltpathgt document path
bull ltportgt target port
41
Lab 4 HTTP GET
bull Device A performs an HTTP GET to the Device B
bull Device A
AT+SHTTPGET=ltDevice B IP addrgtindexhtml
Type AT+SHTTPGET=19216801xxindexhtml
42
GET indexhtml HTTP10 User-Agent SPWF01S helliphelliphellip lth1gtST SPWF01Sx11 WiFi Modulelth1gt ltpgt Welcome to the ST SPWF01Sx11 WiFi Module ltpgt ltpgt This page was delivered from the SPWF01Sx11 internal HTTP server hellip lta href=statusshtmlgtSPWF01Sx11 Status Pageltagt ltpgt ltbodygt lthtmlgt OK
Device A
A B
Tera Term output
Lab 4 HTTP POST
The HTTP POST performs a post of the given path to the specified host The module can be only used as an HTTP POST client
bull Sintax
bull AT+SHTTPPOST =lthostnamegtltpathampqueryoptsgtltformcontentgt[ltportgt]
bull Configuration parameters
bull lthostnamegt target host DNS resolvable name or IP address
bull ltpathampqueryoptsgt document path
bull ltformcontentgt form to be submitted
bull ltportgt target port
43
Lab 4 HTTP POST
bull The SPWF01S performs an HTTP POST to an HTTP Post Test Server
bull Type
at+shttppost=posttestservercompostphpname=demoampemail=mymailampsubjec
t=subjampbody=message
bull The HTTP Post Test Server replies as
displayed in the Tera Term output if the HTTP
POST successfully
44
HTTP11 200 OK Date Fri 10 Jan 2014 132414 GMT Server Apache Access-Control-Allow-Origin Vary Accept-Encoding Content-Length 139 Connection close Content-Type texthtml Successfully dumped 4 post variables View it at httpwwwposttestservercomdata2014011005241443192628 Post body was 0 chars long OK
Device A
A B
Tera Term output
HTTP POST
SERVER
Lab 4 HTTPREQ bull The SPWF01S can perform a custom HTTP request to a specified
target Refer to the User Manual for more details
bull Type
AT+SHTTPREQ=wwwgooglecom8089
After ltCRgt the module accepts data We will try to open an non-existent web page
GET downloadTagphp HTTP10ltCRgtltLFgt
User-Agent SPWF01SltCRgtltLFgt
Host iwm-testltCRgtltLFgt
Connection closeltCRgtltLFgtltCRgtltLFgt
45
HTTP10 404 Not FoundltCRgtltLFgt Date Sun 31 Jan 2016 142704 GMTltCRgtltLFgt Content-Type texthtmlltCRgtltLFgt Server HTTP server (unknown)ltCRgtltLFgt Content-Length 49ltCRgtltLFgt X-XSS-Protection 1 mode=blockltCRgtltLFgt X-Frame-Options SAMEORIGINltCRgtltLFgt ltCRgtltLFgt lthtmlgtltbodygtlth1gt404 Not Foundlth1gtltbodygtlthtmlgtltLFgtltCRgt ltLFgt ltSUBgtltSUBgtltSUBgtltCRgtltLFgt ltCRgtltLFgt OKltCRgtltLFgt
All
A B
Tera Term output
[AT+SHTTPREQ =lthostnamegt[port]ltlengthgtltCRgtltdatagt]
Lab 4 Push data on serial port
A built-in html page ldquooutput_demohtmlrdquo allows to remotely push
characters on the serial port from a remote browser
46
output_demohtml
Modulersquos IP addressoutput_demohtml
Lab 4 Push data on serial port
bull Find your IP address
bull Type AT+SSTS
bull Associate your computer with the AP
bull Open your web browser
bull In the address bar type
ltmodulersquos IP
Addressgtoutput_demohtml
bull Type
19216801xxoutput_demohtml
47
Lab 4 Push data on serial port
bull Enter the text
bull In order to manage non-ASCII chars the ip_use_decoder variable must be modified (refer to the User Manual for more details)
bull Submit
bull The text will be sent to the serial port of the module
48
Proceed to the next LAB
Lab 5 Web Server use mode
bull Objective
bull List existing files
bull Print a file
bull Create a file
bull Append to an existing file
bull Delete an existing file
bull Prerequisites
bull USB dongle and computer are
set up as described in Lab 2
bull Work alone
50
Lab 5 Web server 51
The Web Server feature allows to create print and delete ASCII files in
the RAM memory of the module
Lab 5 List existing files
The FSL command lists type sizes and name of all the existing files
bull Type AT+SFSL
52
I 461 input_demoshtml I 180 messageshtml I 384 output_demohtml I 614 indexhtml I 157 peersshtml I 193 configshtml I 174 statusshtml I 212 404html I 2022 firstsethtml I 2898 remotehtml OK
All
Files stored in the STM32
FLASH memory
Tera Term output
Lab 5 Print a file
The FSP command prints the content
of an existing file
bull Type AT+SFSP=indexhtml
53
lthtmlgt ltheadgtlttitlegtST SPWF01Slttitlegtltheadgt ltbody bgcolor=white text=blackgt lth1gtST SPWF01S Intelligent WiFi Modulelth1gt ltpgtWelcome to the ST SPWF01S intelligent Wi-Fi moduleltpgt ltpgtThis page was delivered from the SPWF01S internal HTTP serverltpgt ltpgt lta href=configshtmlgtSPWF01S Configuration Settings Pageltagt ltpgt ltpgt lta href=statusshtmlgtSPWF01S Status Pageltagt ltpgt ltpgt lta href=peersshtmlgtSPWF01S Peers Pageltagt ltpgt ltpgtMore information about the SPWF01S and other ST products can be found at STs website lta href=httpwwwSTcomgthttpwwwSTcomltagtltpgt ltbodygt lthtmlgt OK
All Tera Term output
Tip How to use the offset and length parameters AT+SFSP=indexhtml[offset][length] ie Type AT+SFSP=indexhtml520 Length parameter is mandatory if is used the offset
Lab 5 Create a file
The FSC command allows to create a file inside the SPWF for
delivery by the SPWF HTTP server
bull Sintax
bull AT+SFSC =ltfnamegtltmax_lengt[lthttp_headergt]
bull Configuration parameters
bull lt filename gt filename to create
bull lt max_len gt amount of space to allocate for file max = 4096 bytes
bull lthttp_headergt 0=HTML header automatically added 1=HTML header not
added (as by default)
Type AT+SFSC=wifidemohtml1965
54
OK
All
Tera Term output
Lab 5 Configuring the UART
bull Set CR+LF in the Terminal setup
(to properly paste text in the
terminal)
bull Tera Term Setup rarr Terminal rarr
Transmit CR+LF
55
Tip The local echo option must be disabled on Tera Term
Added in FW 35 using the AT+SFSR command user can rename dynamic files stored in the RAM memory Refer to the User Manual for more details
Lab 5 Append to an existing file
The FSA command allows to append blocks of data to an existing file
This command accepts data after the ltcrgt at the end of the command
line
bull Sintax
bull AT+SFSA=ltfilenamegtltdatalengt
bull Configuration parameters
bull lt filename gt filename pre-created
bull lt datalen gt number of characters to append to the file
Type AT+SFSA=wifidemohtml1965
56
Now SPWF accepts data
Tips
Lab 5 Append to an existing file
bull Open wifidemotxt in the following
directory Hands_on
folderHTML_demo_page
bull Check you have set up CR+LF in the
Terminal setup (for more
information refer to the slide 48)
bull Copy the file content into Tera term
(paste with ALT+V or mouse right
button)
57
OK
All
Tera Term output
Lab 5 Append to an existing file
bull Open wifidemohtml
bull Open your Web browser (suggested Google
Chrome for HTML5 test)
bull In address bar type ltSPWF IP addrgtwifidemohtml
Type 19216801xxwifidemohtml
58
Lab 5 Configuring the UART
bull Re-set CR in the Terminal setup
as by default
bull Tera Term Setup rarr Terminal rarr
Transmit CR
59
Tip The local echo option can be re-enabled on Tera Term
Lab 5 List existing files
Lets list the files
bull Type AT+SFSL
60
D 1965 wifidemohtml I 461 input_demoshtml I 180 messageshtml I 384 output_demohtml I 614 indexhtml I 157 peersshtml I 193 configshtml I 174 statusshtml I 212 404html I 2022 firstsethtml I 2898 remotehtml OK
All
File stored in the RAM memory
Tera Term output
Lab 5 Delete an existing file
The FSD command allows to delete an existing file by name Static
files may not be deleted
bull Sintax
bull AT+SFSD=ltfilenamegt
Type AT+SFSD=wifidemohtml
61
OK
All
Tera Term output
Lab 5 Delete an existing file
bull Re-open wifidemohtml
bull Open your Web browser
bull In address bar ltSPWF IP addrgtwifidemohtml
Type 19216801xxwifidemohtml
62
Proceed to the next LAB
Lab 6 Web Server use mode
bull Objective
bull Create an image file
bull Filesystem update over-the-air
bull Filesystem update over UART
bull Prerequisites
bull Work alone
64
Lab 6 Web server 65
The Web Server feature also allows to upload generic files (PDF
HTML DOC JPEG and so on) in the EXTERNAL FLASH memory of
the module It needs to follow the below steps
- create an image file (IMG) using the tool provided in the Hands-on package
(the IMG contains the files to upload)
- Put the image in a generic and accessible Web Server (Apache Web server
will be used in the Hands-on as example)
- Using the proper AT command the IMG will be retrieved over-the-air and the
static files will be created in the external flash memory
Lab 6 Create an image file
bull Open the following folder and
extract all the files
hands_on_wififilesystem_update
bull Put your own files to upload in the
pages folder (max 512 Kbytes)
bull Run genbat
bull Open the pages folder and copy
outfileimg in your external Web
Server (Apache)
66
3
1
2
Lab 6 Create an image file
The Apache Web Server will be used in this tutorial
(Apache Web Server is available at this link
httparchiveapacheorgdisthttpdbinarieswin32httpd-2225-win32-x86-openssl-098ymsi)
Note please check that the local firewall is disabled or properly set It can
block the connection from module to Apache
bull Copy outfileimg in the Apache 22
htdocs folder (this is the default
root server directory)
67
4
Lab 6 Filesystem update
The HTTPDFSUPDATE command allows to create static files inside
the SPWF for delivery by the SPWF HTTP server
bull Sintax
bull AT+SHTTPDFSUPDATE=lthostnamegtltpathgt[port]
bull Configuration parameters
bull lthostnamegt external web server DNS resolvable name or IP address
bull ltpathgt document path
bull ltportgt target host port
68
Lab 6 Filesystem update
bull In Tera Term type
AT+SHTTPDFSUPDATE=192168x10xoutfileimg
bull Reset the module
bull Type AT+CFUN=1
69
Image length 357957 (offset 0x00080000 block len 4096) Write len 4096 -gt 0x80000 Write len 4096 -gt 0x81000 Write len 4096 -gt 0x82000 helliphelliphelliphellip helliphelliphelliphelliphelliphellip helliphelliphelliphelliphellip Write len 4096 -gt 0xD6000 Write len 1612 -gt 0xD7000 (final) Wrote 357964 bytes Complete Please reboot (at+cfun=1) OK
All
Tera Term output
The file system will be permanently deleted The new IMG will overwrite the existent files in the file system
Warning
Lab 6 Filesystem update
Lets list the files
bull Type AT+SFSL
70
E 2615 st766gif E 112374 modulepng E 2430 index1html E 419 indexhtml E 239887 MKTWiFipdf I 461 input_demoshtml I 180 messageshtml I 384 output_demohtml I 614 indexhtml I 157 peersshtml I 193 configshtml I 174 statusshtml I 212 404html I 2022 firstsethtml I 2898 remotehtml OK
All
Files stored in
the EXT FLASH memory
Tera Term output
Lab 6 Filesystem update
bull Open index1html page
bull Open your web browser
bull In the address bar ltSPWF IP addrgtindex1html
Type 192168x1xxindex1html
71
Lab 6 Filesystem erase
Erase the external httpd filesystem
bull Type AT+S HTTPDFSERASE
The files stored in the EXT FLASH memory will be erased
Lets list the files
bull Type AT+SFSL
72
I 461 input_demoshtml I 180 messageshtml I 384 output_demohtml I 614 indexhtml I 157 peersshtml I 193 configshtml I 174 statusshtml I 212 404html I 2022 firstsethtml I 2898 remotehtml OK
All
Tera Term output
Lab 6 Filesystem update
The HTTPDFSWRITE command allows to create static files inside
the SPWF via the UART interface The HW flow control MUST be
enabled in order to use the command
bull Sintax
bull AT+SHTTPDFSWRITE =ltdatalengtltCRgtltdatagt
bull Configuration parameters
bull ltdatalengt Amount of bytes to be sent
73
Lab 6 Filesystem update
bull Type AT+S HTTPDFSWRITE=357957
bull In Tera Term File ndash Send File
bull Reset the module
bull Type AT+CFUN=1
74
Image length 357957 (offset 0x00080000 block len 4096) Write len 4096 -gt 0x80000 Write len 4096 -gt 0x81000 Write len 4096 -gt 0x82000 helliphelliphelliphellip helliphelliphelliphelliphelliphellip helliphelliphelliphelliphellip Write len 4096 -gt 0xD6000 Write len 1612 -gt 0xD7000 (final) Wrote 357964 bytes Complete Please reboot (at+cfun=1) OK
All
Tera Term output
The file system will be permanently deleted The new IMG will overwrite the existent files in the file system
Warning
Proceed to the next LAB
Lab 7 Socket interface
bull Objective
bull Open TCPUDP connection
bull Write data to socket
bull Read data from socket
bull Close socket
bull Prerequisites
bull Work alone
76
TCPUDP socket
Socket
Client
Socket
Server
Lab 7 TCPUDPUART socket interface 77
The Socket interface allows communication via TCP UDP and UART
The SPWF is both a client and a server socket In this LAB will be
detailed the socket client feature
Ho
st
En
d P
rod
uct
Open TCPUDP connection
Write data to socket
Read data from socket
Close socket
Lab 7 Open TCPUDP connection
The SOCKON command allows to open a TCPUDP connection
to a specified host (up to 8 socket connections at same time)
bull Sintax
bull AT+SSOCKON=lthostnamegtltportgtltprotocolgtind
bull Configuration parameters
bull lthostnamegt target host DNS resolvable name or IP address
bull ltportgt TCPUDP socket port
bull ltprotocolgt t for TCP socket u for UDP socket
bull ind indicate when data has arrived (optional) Up to 4 (x730 bytes)
consecutive ldquoPending datardquo message (without any AT+SSOCKR) are
guaranteed It is suggested to empty the buffer using the AT+SSOCKR
command and to avoid exceeding 4 indications
78
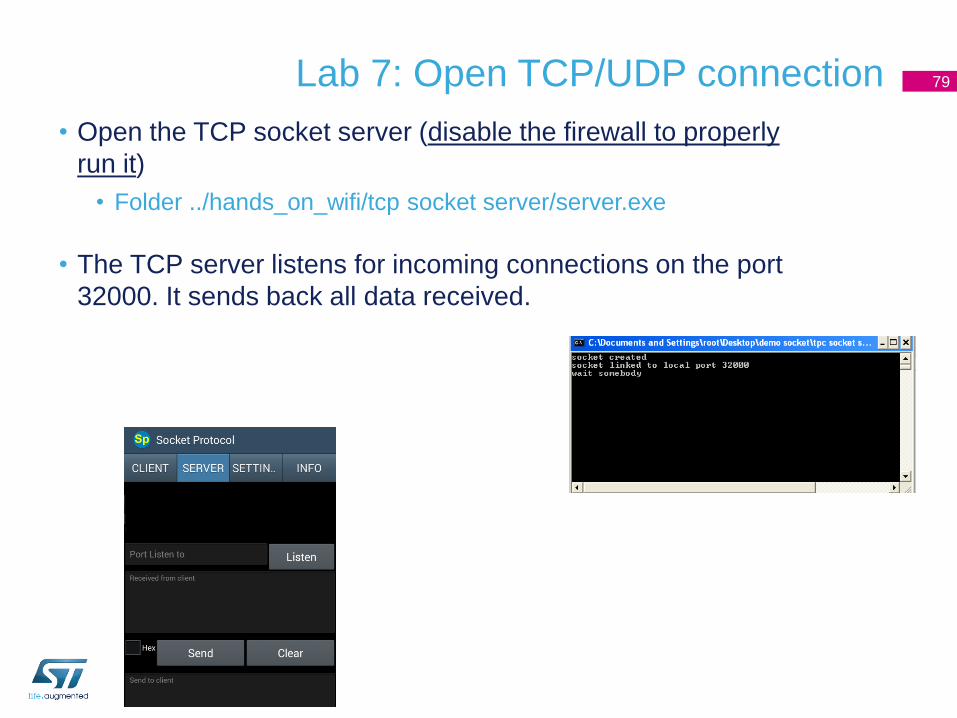
Lab 7 Open TCPUDP connection
bull Open the TCP socket server (disable the firewall to properly
run it)
bull Folder hands_on_wifitcp socket serverserverexe
bull The TCP server listens for incoming connections on the port
32000 It sends back all data received
79
Optional - Lab 7 Open TCPUDP connection
bull Using an Android platform the socket server can be opened
using a specific APP (Socket Protocol available on Play Store)
bull The TCP socket server can be configured to listen for
incoming connections on the port 32000
bull Type 32000 on laquoPort Listen toraquo box
bull Click on Listen
80
Lab 7 Open TCPUDP connection
bull Type AT+SSOCKON=192168010x32000tind
bull The client and the server use the socket identifier (ID)
displayed
81
ID 00 OK
All
Tera Term output
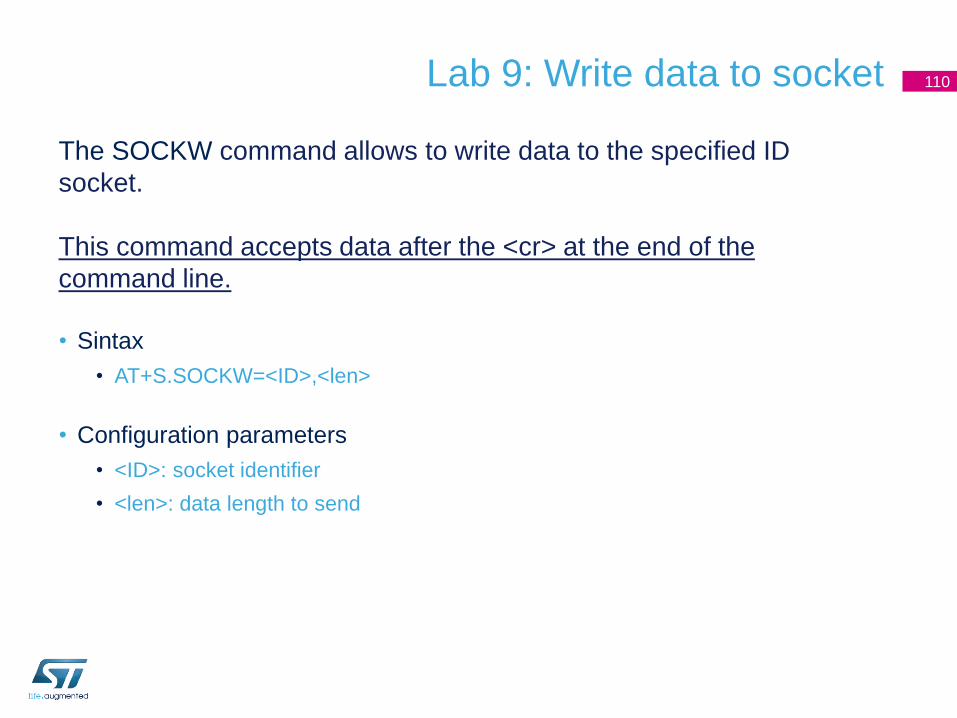
Lab 7 Write data to socket
The SOCKW command allows to write data to the specified ID
socket
This command accepts data after the ltcrgt at the end of the
command line
bull Sintax
bull AT+SSOCKW=ltIDgtltlengt
bull Configuration parameters
bull ltIDgt socket identifier
bull ltlengt data length to send
82
Lab 7 Write data to socket
bull Write data
bull Type AT+SSOCKW=0013
bull Type hello worldltCRgt
bull SPWF shows that there are ltpending datagt and their amount
83
+WIND55Pending Data013
All
Tera Term output
ID
Pending
bytes
Note the module is waiting 13 bytes to be written to the socket As soon as 13 bytes (or characters) are sent from the terminal the module is going to write them to the socket and will be ready to receive new commands
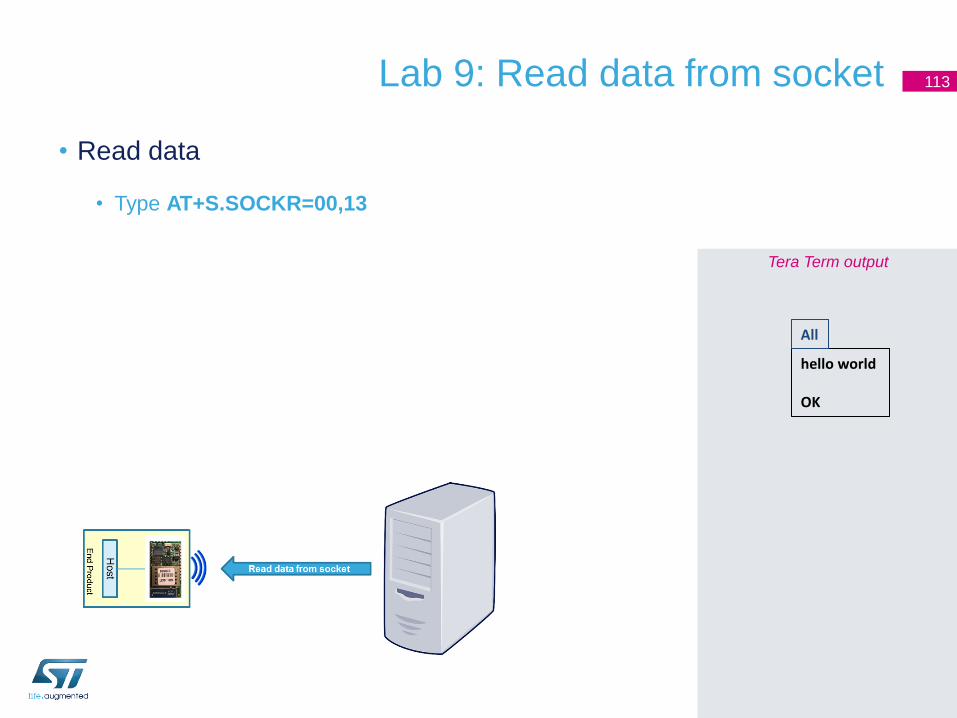
Lab 7 Read data from socket
The SOCKR command allows to read data from socket
bull Sintax
bull AT+SSOCKR=ltIDgtltlengt
bull Configuration parameters
bull ltIDgt socket identifier
bull ltlengt data length to read
84
Lab 7 Read data from socket
bull Read data
bull Type AT+SSOCKR=0013
85
hello world OK
All
Tera Term output
Lab 7 Close socket
The SOCKC command allows to close socket
bull Sintax
bull AT+SSOCKC=ltIDgt
bull Configuration parameters
bull ltIDgt socket identifier
86
Tera Term output
Lab 7 Close socket
bull Close socket
bull Type AT+SSOCKC=00
87
OK
All
Proceed to the next LAB
Lab 8 MiniAP mode for the first set
bull Objective
bull Create a direct connection between
the module and an end device
bull First set of the module in order to
enable the connection between the
module and a generic AP
bull Prerequisites
bull Work alone
89
Tera Term output
Lab 8 Configuring the module in MiniAP mode
The Mini AP mode is available starting from the following FW release
SPWF01S-131115-de4568d-RELEASE
In order to set the module in Mini AP mode the following parameters
are needed
bull Set the SSID
bull Type AT+SSSIDTXT=SPWF_AP
bull Set the network privacy mode (0=OPEN or 1=WEP are supported)
bull Type AT+SSCFG=wifi_priv_mode0
bull Set the network mode (1 = STA 2 = IBSS 3 = MiniAP)
bull Type AT+SSCFG=wifi_mode3
90
OK
All
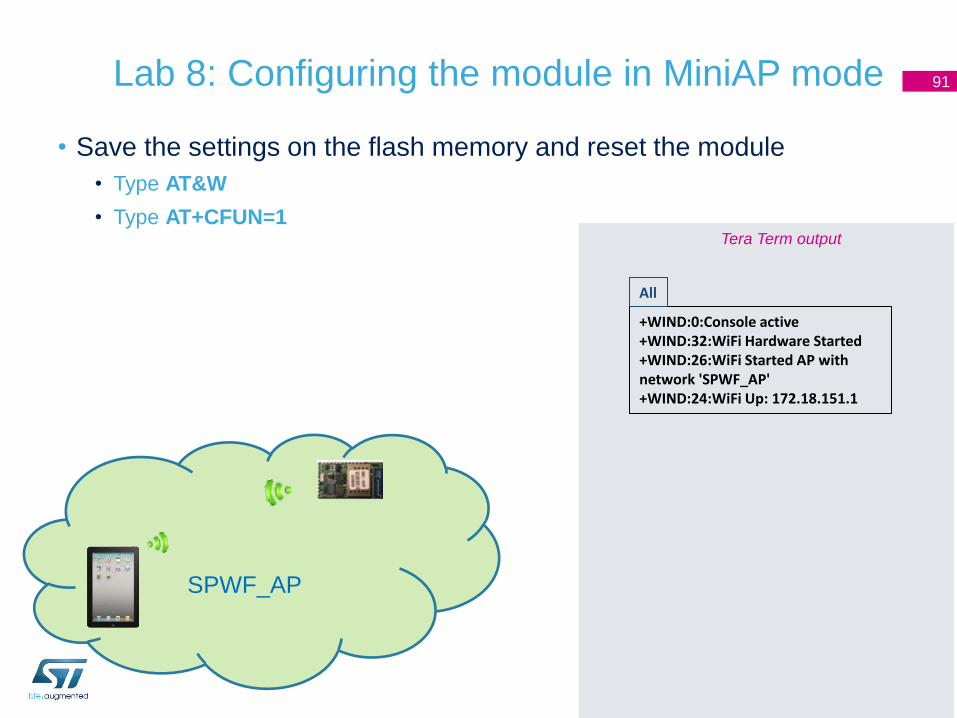
Lab 8 Configuring the module in MiniAP mode
bull Save the settings on the flash memory and reset the module
bull Type ATampW
bull Type AT+CFUN=1
91
+WIND0Console active +WIND32WiFi Hardware Started +WIND26WiFi Started AP with network SPWF_AP +WIND24WiFi Up 172181511
All
Tera Term output
SPWF_AP
Lab 8 Configuring the module in MiniAP mode (WEP Key)
Configure the module using the WEP key (2 possible combinations
available)
Sample table
92
AP configuration AT command to be used
Security Mode WEP
WEP Key Length 64 bit
(10 hex digits)
Authentication Open
Wep Key 1 1234567890
ie
at+sssidtxt=SPWF_AP
AT+SSCFG=wifi_wep_keys[0]1234567890
AT+SSCFG=wifi_wep_key_lens05
AT+SSCFG=wifi_auth_type0
AT+SSCFG=wifi_priv_mode1
AT+SSCFG=wifi_mode3
atampw
at+cfun=1
AP configuration AT command to be used
Security Mode WEP
WEP Key Length
128 bit (26 hex digits)
Authentication Open
Wep Key 1
123456789012345678
90123456
ie
at+sssidtxt=SPWF_AP
AT+SSCFG=wifi_wep_keys[0]12345678
901234567890123456
AT+SSCFG=wifi_wep_key_lens0D
AT+SSCFG=wifi_auth_type0
AT+SSCFG=wifi_priv_mode1
AT+SSCFG=wifi_mode3
atampw
at+cfun=1
Lab 8 Configuring the module in MiniAP mode (WEP Key)
Notes
bull ldquowifi_wep_key_lensrdquo variable values 05 and 0D
bull Itrsquos possible to enter any text string as WEP key It have to be converted into a
hexadecimal key using the ASCII values of the characters A maximum of 5 text
characters can be entered for 64 bit keys and a maximum of 13 characters for 128
bit keys
In this case it needs to manually convert your ASCII password to
HEX and complete the wifi_wep_keys[0] variable with the HEX
value
bull ie WEP key test1
ASCII to HEX 7465737431
So the AT command is AT+SSCFG=wifi_wep_keys[0]7465737431
93
Lab 8 Customizing the MiniAP address (optional)
Starting from FW 33 the module allows user to customize the IP address of the MiniAP
bull Set the SSID
bull Type AT+SSSIDTXT=SPWF_AP
bull Set the network privacy mode (0=OPEN or 1=WEP are supported)
bull Type AT+SSCFG=wifi_priv_mode0
bull Set the network mode (1 = STA 2 = IBSS 3 = MiniAP)
bull Type AT+SSCFG=wifi_mode3
bull Set the use_dhcp mode (0 = DHCP server off 1 = DHCP server on 2 = DHCP server on and customizable)
bull Type AT+SSCFG=ip_use_dhcp2
bull Set the MiniAP address
bull Type AT+SSCFG=ip_ipaddr19216801
bull Save the settings on the flash memory and reset the module
bull Type ATampW
bull Type AT+CFUN=1
94
Tera Term output
+WIND0Console active +WIND32WiFi Hardware Started +WIND26WiFi Started AP with network SPWF_AP +WIND24WiFi Up 19216801
All
Tip the MiniAP will assign sequential addresses to the client ie 1deg client 19216802 2deg client 19216803
Lab 8 Mini AP mode
bull Associate your end device to the
SPWF_AP network
bull Find the SPWF_AP network and connect
the end device to the module
95
SPWF_AP +WIND2890187C960D0B Associated +WIND29DHCP reply for 17218151290187C960D0B to 172181512 +WIND29DHCP reply for 17218151290187C960D0B to 172181512
All
Tera Term output
Lab 8 Mini AP mode
bull Open your web browser
bull In the address bar type captiveportalnet
96
SPWF_AP
Tip The Mini AP domain can be set using the variable ip_apdomainname The default value is ldquocaptiveportalnetrdquo
The Mini AP default homepage can be set using the variable ip_apredirect The default value is ldquofirstsethtmlrdquo
Tip If the AP domain name is not quickly opened itrsquos suggested to turn off an eventual proxy server (check the connection settings or browser preferences)
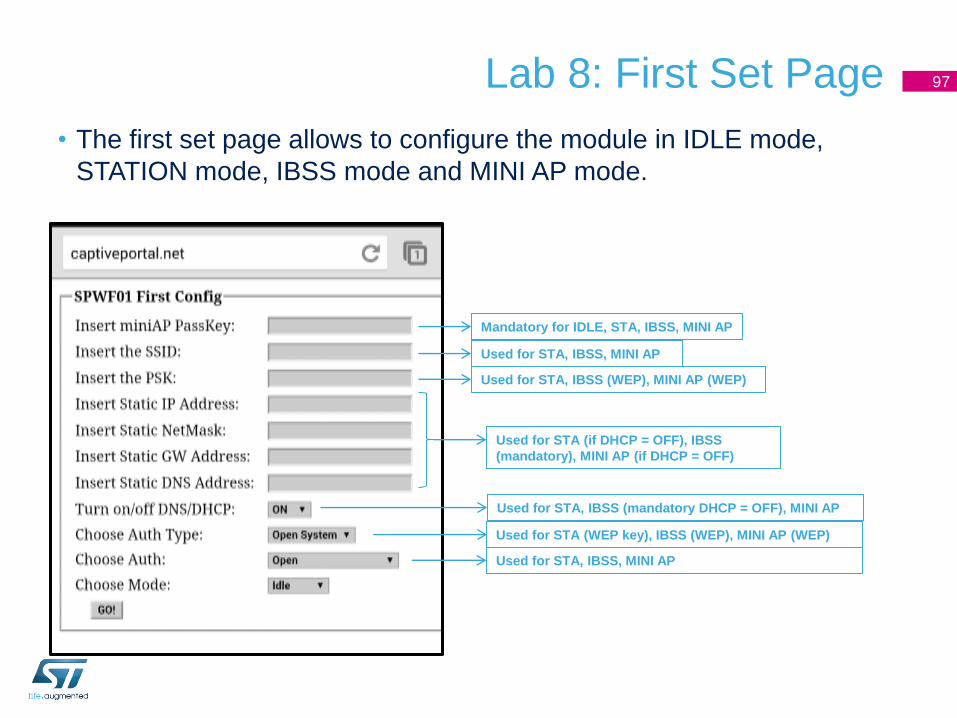
Lab 8 First Set Page
bull The first set page allows to configure the module in IDLE mode
STATION mode IBSS mode and MINI AP mode
97
Used for STA IBSS MINI AP
Mandatory for IDLE STA IBSS MINI AP
Used for STA IBSS (WEP) MINI AP (WEP)
Used for STA (if DHCP = OFF) IBSS
(mandatory) MINI AP (if DHCP = OFF)
Used for STA IBSS (mandatory DHCP = OFF) MINI AP
Used for STA (WEP key) IBSS (WEP) MINI AP (WEP)
Used for STA IBSS MINI AP
Lab 8 Mini AP mode
bull Set all the parameters required in order to enable the connection
between the module and a generic AP
ie AP configured in WPAWPA2 mode
bull MiniAP PassKey anonymous (by default)
bull SSID of the access point
bull Password of the access point
bull Authentication type of the access point
bull Use mode of the module
98
Tip The Mini AP PassKey can be set using the variable ldquouser_descrdquo The default value is ldquoanonymousrdquo
Note In order to manage non-ASCII chars the ip_use_decoder variable must be modified according as below at+sscfg=ip_use_decoder0 no decoding [default] at+sscfg=ip_use_decoder1 RAW decoding (the USER and PSK fields must be completed in HEX) at+sscfg=ip_use_decoder2 UTF-8 decoding at+sscfg=ip_use_decoder6 HTML entities decoding
Lab 8 Mini AP mode
bull Click on GO button and then send the
parameters confirming with OK
99
SPWF_AP
AP
SSID ciscosb2
Lab 8 Mini AP mode
bull The module will receive the parameters and will automatically
connect to the access point required
100
+WIND57Received SSID is ciscosb2 +WIND57Received PWD is +WIND57Received Auth mode is 2 +WIND57Received Mode is 1 +WIND2RESET +WIND1Poweron (--SPWF01S) +WIND13ST IWM Copyright (c) 2012-2013 STmicroelectronics +WIND3Watchdog Running +WIND0Console active +WIND46WPA Crunching PSK +WIND32WiFi Hardware Started +WIND21WiFi Scanning +WIND35WiFi Scan Complete (0x0) +WIND19WiFi Join 02621F518F0B +WIND25WiFi Association with ciscosb2 successful +WIND51WPA Handshake Complete +WIND24WiFi Up 1921681106
All
Tera Term output
ciscosb2
AP
Lab 8 Mini AP mode ndash RAW decoding example
101
Note In order to manage non-ASCII chars the ip_use_decoder variable must be modified according as below at+sscfg=ip_use_decoder0 no decoding [default] at+sscfg=ip_use_decoder1 RAW decoding (the USER and PSK fields must be completed in HEX) at+sscfg=ip_use_decoder2 UTF-8 decoding at+sscfg=ip_use_decoder6 HTML entities decoding
7177657261736466
AP SSIS
AP PSK
Proceed to the next LAB
Lab 9 Socket interface - MiniAP mode
bull Objective
bull Create a direct connection between
the module and an end device
bull Socket interface used in MiniAP
mode
bull Prerequisites
bull Work alone
103
Tera Term output
Lab 9 Configuring the module in MiniAP mode
The Mini AP mode (available starting from the SPWF01S-131115-de4568d-RELEASE) also allows to use the socket interface The procedure is the same as in Lab 7
In order to set the module in Mini AP mode the following parameters are needed
bull Set the SSID
bull Type AT+SSSIDTXT=SPWF_AP
bull Set the network privacy mode
bull Type AT+SSCFG=wifi_priv_mode0
bull Set the network mode (1 = STA 2 = IBSS 3 = MiniAP)
bull Type AT+SSCFG=wifi_mode3
104
OK
All
Lab 9 Configuring the module in MiniAP mode
bull Save the settings on the flash memory and reset the module
bull Type ATampW
bull Type AT+CFUN=1
105
+WIND0Console active +WIND32WiFi Hardware Started +WIND26WiFi Started AP with network SPWF_AP +WIND24WiFi Up 172181511
All
Tera Term output
SPWF_AP
Lab 9 Mini AP mode
bull Connect your PC to the SPWF_AP
network
bull Find the SPWF_AP network and connect
the end device to the module
106
SPWF_AP +WIND2890187C960D0B Associated +WIND29DHCP reply for 17218151290187C960D0B to 172181512 +WIND29DHCP reply for 17218151290187C960D0B to 172181512
All
Tera Term output
Lab 9 Open TCPUDP connection
As described in the Lab 7 the SOCKON command allows to
open a TCPUDP connection to a specified host
bull Sintax
bull AT+SSOCKON=lthostnamegtltportgtltprotocolgtind
bull Configuration parameters
bull lthostnamegt target host DNS resolvable name or IP address
bull ltportgt TCPUDP socket port
bull ltprotocolgt t for TCP socket u for UDP socket
bull ind indicate when data has arrived (optional) Up to 4 consecutive ldquoPending
datardquo message (without any AT+SSOCKR) are guaranteed It is
suggested to empty the buffer using the AT+SSOCKR command and
to avoid exceeding 4 indications
107
Lab 9 Open TCP connection
bull Open the TCP socket server (disable the firewall to properly
run it)
bull Folder hands_on_wifitcp socket serverserverexe
bull The TCP server listens for incoming connections on the port
32000 It sends back all data received
108
Lab 9 Open TCP connection
bull Type AT+SSOCKON=17218151232000tind
bull The client and the server use the socket identifier (ID)
displayed
109
ID 00 OK
All
Tera Term output
Lab 9 Write data to socket
The SOCKW command allows to write data to the specified ID
socket
This command accepts data after the ltcrgt at the end of the
command line
bull Sintax
bull AT+SSOCKW=ltIDgtltlengt
bull Configuration parameters
bull ltIDgt socket identifier
bull ltlengt data length to send
110
Lab 9 Write data to socket
bull Write data
bull Type AT+SSOCKW=0013
bull Type hello worldltCRgt
bull SPWF shows that there are ltpending datagt and their amount
111
+WIND55Pending Data013
All
Tera Term output
ID
Pending
bytes
Note the module is waiting 13 bytes to be written to the socket As soon as 13 bytes (or characters) are sent from the terminal the module is going to write them to the socket and will be ready to receive new commands
Lab 9 Read data from socket
The SOCKR command allows to read data from socket
bull Sintax
bull AT+SSOCKR=ltIDgtltlengt
bull Configuration parameters
bull ltIDgt socket identifier
bull ltlengt data length to read
112
Lab 9 Read data from socket
bull Read data
bull Type AT+SSOCKR=0013
113
hello world OK
All
Tera Term output
Lab 9 Close socket
The SOCKC command allows to close socket
bull Sintax
bull AT+SSOCKC=ltIDgt
bull Configuration parameters
bull ltIDgt socket identifier
114
Tera Term output
Lab 9 Close socket
bull Close socket
bull Type AT+SSOCKC=00
115
OK
All
Proceed to the next LAB
Lab 10 Web server - MiniAP mode
bull Objective
bull Create a direct connection between
the module and an end device
bull Web server used in MiniAP mode
bull Prerequisites
bull Work alone
117
Tera Term output
Lab 10 Configuring the module in MiniAP mode
The Mini AP mode (available starting from the SPWF01S-131115-de4568d-RELEASE) also allows to use the module file system (both RAM and IntExt FLASH)
In order to set the module in Mini AP mode the following parameters are needed
bull Set the SSID
bull Type AT+SSSIDTXT=SPWF_AP
bull Set the network privacy mode
bull Type AT+SSCFG=wifi_priv_mode0
bull Set the network mode (1 = STA 2 = IBSS 3 = MiniAP)
bull Type AT+SSCFG=wifi_mode3
118
OK
All
Lab 10 Configuring the module in MiniAP mode
bull Save the settings on the flash memory and reset the module
bull Type ATampW
bull Type AT+CFUN=1
119
+WIND0Console active +WIND32WiFi Hardware Started +WIND26WiFi Started AP with network SPWF_AP +WIND24WiFi Up 172181511
All
Tera Term output
SPWF_AP
Lab 10 Mini AP mode
bull Connect your PC to the SPWF_AP
network
bull Find the SPWF_AP network and connect
the end device to the module
120
SPWF_AP +WIND2890187C960D0B Associated +WIND29DHCP reply for 17218151290187C960D0B to 172181512 +WIND29DHCP reply for 17218151290187C960D0B to 172181512
All
Tera Term output
Lab 10 Access to Web server - Mini AP mode
bull Open your web browser
bull In the address bar type
captiveportalnetindexhtml
bull The SPWF01S homepage will be
displayed
121
SPWF_AP Tip The Mini AP domain can be set using the variable ip_apdomainname The default value is ldquocaptiveportalnetrdquo
Lab 10 Access to Web server - Mini AP mode
bull Open the SPWF01S Device Status
bull click on the highlighted link
bull The SPWF01S Device Status will be
displayed
122
SPWF_AP Tip The Mini AP domain can be set using the variable ip_apdomainname The default value is ldquocaptiveportalnetrdquo
The Mini AP default homepage can be set using the variable ip_apredirect The default value is ldquofirstsethtmlrdquo
Proceed to the next LAB
Lab 11 Remotely control - GPIOs
bull Objective
bull write remotely a GPIO
bull configure remotely a GPIO
bull read remotely a GPIO
bull Prerequisites
bull module connected to the AP or
module configured in MiniAP mode
124
Lab 11 Remotely control - GPIO
This feature allows to remotely write configure and read a GPIO
The module should be connected to the AP (as shown in Lab 3) or
should be configured in Mini AP mode (as shown in Lab 8)
The external client have to open the remotehtml page stored in the
module
125
ENG-WPA AP
SPWF_AP
miniAP
Tera Term output
Lab 11 Joining a network
In order to be connected to an available Wifi network the AP parameters setting is needed
bull Set the SSID
bull Type AT+SSSIDTXT=ENG-WPA
bull Set the password
bull Type AT+SSCFG=wifi_wpa_psk_texthelloworld
bull Set the network privacy mode (0=none 1=WEP 2=WPA-Personal (TKIPAES) or WPA2-Personal (TKIPAES))
bull Type AT+SSCFG=wifi_priv_mode2
bull NB wifi_auth_type must be set to 0 AT+SSCFG=wifi_auth_type0
bull Set the network mode (1 = STA 2 = IBSS 3 = MiniAP)
bull Type AT+SSCFG=wifi_mode1
126
OK
All
Lab 11 Joining a network
bull Save the settings on the flash memory and reset the module
bull Type ATampW
bull Type AT+CFUN=1
127
+WIND0Console active +WIND46WPA Crunching PSK +WIND32WiFi Hardware Started +WIND21WiFi Scanning +WIND35WiFi Scan Complete (0x0) +WIND19WiFi Join 14D64D243600 +WIND25WiFi Association with ENG-WPA successful +WIND51WPA Handshake Complete +WIND24WiFi Up 19216801xx
All
ENG-WPA AP
Tera Term output
Lab 11 Remotely control in MiniAP mode - GPIO
bull Open your web browser
bull In the address bar type
192168x1xxremotehtml
128
ENG-WPA
AP
Lab 11 Remotely control in MiniAP mode - GPIO
bull Try to write the GPIO14 connected to the LED3 (check if the
LED3 is mounted on your EVAL BOARD otherwise can be used
the GPIO13)
bull Click on the laquoGOraquo button
and LED3 will switch on
129
ENG-WPA
AP
Proceed to the next LAB
Lab 12 Input demo
bull Objective
bull Send a message from the server (wifi
module) to an external client connected
to the same network
bull Prerequisites
bull module connected to the AP or module
configured in MiniAP mode
131
Lab 12 Input demo
The module provides some DEMOs to show the interaction between
the module and an external client connected to the same network
The module should be connected to the AP (as shown in Lab 3) or
should be configured in Mini AP mode (as shown in Lab 8)
In order to run this demo the client have to open the
input_demoshtml page stored in the module
132
ENG-WPA AP
SPWF_AP
miniAP
Tera Term output
Lab 12 Joining a network
In order to be connected to an available Wifi network the AP parameters setting is needed
bull Set the SSID
bull Type AT+SSSIDTXT=ENG-WPA
bull Set the password
bull Type AT+SSCFG=wifi_wpa_psk_texthelloworld
bull Set the network privacy mode (0=none 1=WEP 2=WPA-Personal (TKIPAES) or WPA2-Personal (TKIPAES))
bull Type AT+SSCFG=wifi_priv_mode2
bull NB wifi_auth_type must be set to 0 AT+SSCFG=wifi_auth_type0
bull Set the network mode (1 = STA 2 = IBSS 3 = MiniAP)
bull Type AT+SSCFG=wifi_mode1
133
OK
All
Lab 12 Joining a network
bull Save the settings on the flash memory and reset the module
bull Type ATampW
bull Type AT+CFUN=1
134
+WIND0Console active +WIND46WPA Crunching PSK +WIND32WiFi Hardware Started +WIND21WiFi Scanning +WIND35WiFi Scan Complete (0x0) +WIND19WiFi Join 14D64D243600 +WIND25WiFi Association with ENG-WPA successful +WIND51WPA Handshake Complete +WIND24WiFi Up 19216801xx
All
ENG-WPA AP
Tera Term output
Lab 12 Input demo
bull Open your web browser
bull In the address bar type
192168x1xxinput_demoshtml
bull Insert the message to the client
ie type laquotestraquo (suggested ndash copy
the string and paste it in the
terminal) and then send a carriage
return
135
VERY IMPORTANT
Both client and server are pending (2 sec) after the page
request If no message is sent from the module a timeout
mechanism will be triggered
The server shows the ldquo+WIND56 messagerdquo and it will
wait for a string to be inserted and terminated by [Cr] ldquo+WIND56Insert message to clientdrdquo d is the Nth input SSI into html page (please refer to CGIampSSI Application Notes for details)
Lab 12 Input demo
bull The module receives the HTML
page containing the string inserted
server-side
bull Below this string there are two
buttons to try again the demo or to
return to the homepage
136
Proceed to the next LAB
Lab 13 Socket Server functionality
bull Objective
bull Configure a Server Listening Port
bull Open a TCP connection from a
socket client to the module
bull Data modeCommand Mode usage
bull Prerequisites
bull module connected to the AP or
module configured in MiniAP mode
bull PC to be used as socket client
138
TCP socket
Socket
Server
Socket
Client
Lab 13 Socket Server
This feature allows to enable the socket server mode The module
can be able to listen for an incoming connection on the specified port
The module should be connected to the AP (as shown in Lab 3) or
should be configured in Mini AP mode (as shown in Lab 8)
Please refer to ldquoSocket Server Application Notesrdquo for more details
139
ENG-WPA AP
SPWF_AP
miniAP
Tera Term output
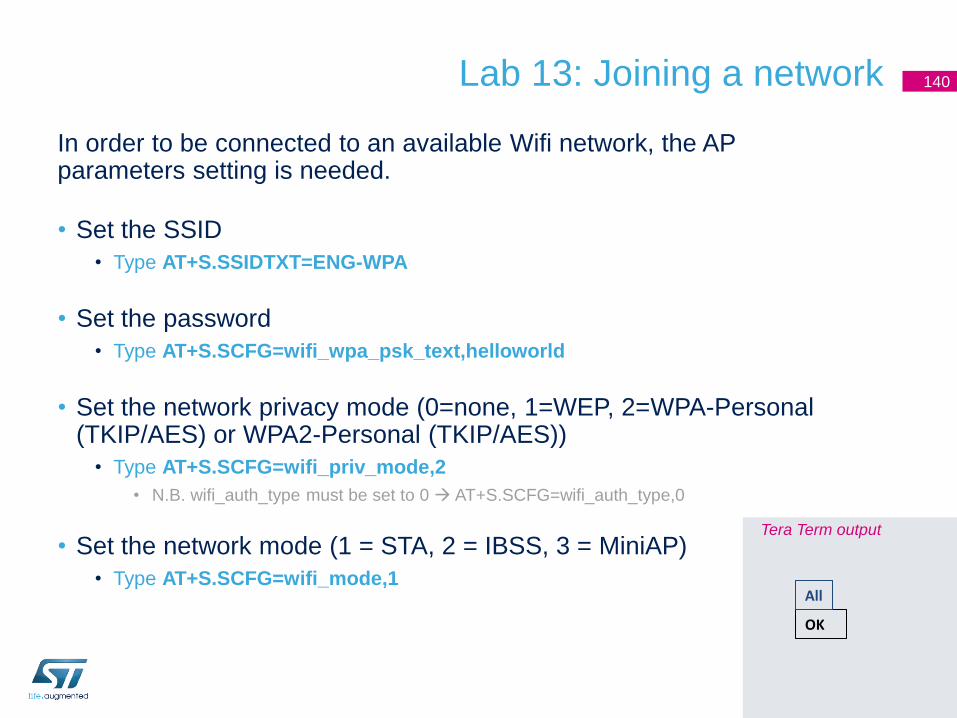
Lab 13 Joining a network
In order to be connected to an available Wifi network the AP parameters setting is needed
bull Set the SSID
bull Type AT+SSSIDTXT=ENG-WPA
bull Set the password
bull Type AT+SSCFG=wifi_wpa_psk_texthelloworld
bull Set the network privacy mode (0=none 1=WEP 2=WPA-Personal (TKIPAES) or WPA2-Personal (TKIPAES))
bull Type AT+SSCFG=wifi_priv_mode2
bull NB wifi_auth_type must be set to 0 AT+SSCFG=wifi_auth_type0
bull Set the network mode (1 = STA 2 = IBSS 3 = MiniAP)
bull Type AT+SSCFG=wifi_mode1
140
OK
All
Lab 13 Joining a network
bull Save the settings on the flash memory and reset the module
bull Type ATampW
bull Type AT+CFUN=1
141
+WIND0Console active +WIND46WPA Crunching PSK +WIND32WiFi Hardware Started +WIND21WiFi Scanning +WIND35WiFi Scan Complete (0x0) +WIND19WiFi Join 14D64D243600 +WIND25WiFi Association with ENG-WPA successful +WIND51WPA Handshake Complete +WIND24WiFi Up 19216801xx
All
ENG-WPA AP
Tera Term output
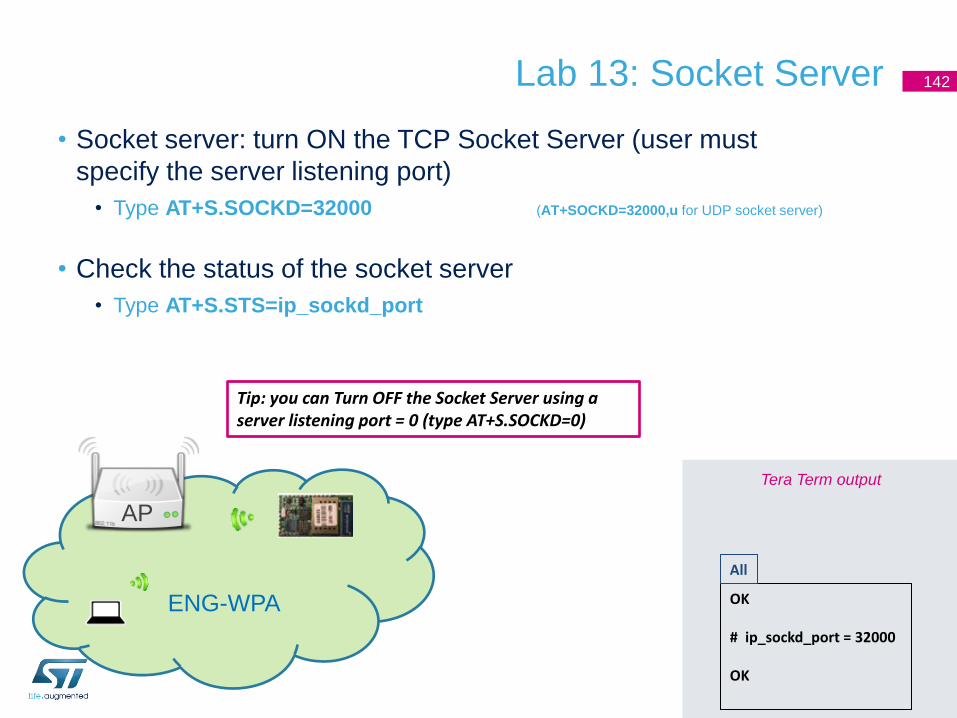
Lab 13 Socket Server
bull Socket server turn ON the TCP Socket Server (user must
specify the server listening port)
bull Type AT+SSOCKD=32000 (AT+SOCKD=32000u for UDP socket server)
bull Check the status of the socket server
bull Type AT+SSTS=ip_sockd_port
142
ENG-WPA
AP
Tera Term output
OK ip_sockd_port = 32000 OK
All
Tip you can Turn OFF the Socket Server using a server listening port = 0 (type AT+SSOCKD=0)
Lab 13 Socket Server
bull Socket client can be used a simple socket client in order to test the communication
(SocketTest ndash available on httpsourceforgenetprojectssockettest)
143
ENG-WPA
AP
Lab 13 Socket Server
bull Socket client
bull Insert the modulersquos IP Address and the port
bull Click on Connect button
144
Tera Term output
+WIND61Incoming Socket Client1921681102 +WIND60Now in Data Mode
All
Lab 13 Socket Server
bull The module (socket server) enters in data mode and a bidirectional channel is
created to allow exchanging data with the socket client
bull Try to send and receive data from the module
145
Tera Term output
test_1
All
Lab 13 Socket Server ndash escape sequence
bull From Data Mode to Command Mode
bull Configuration variable used escape_seq (default is ldquoat+srdquo case sensitive
suggested to be sent by the local host in a single complete packet with no CR or
LF in the sequence)
bull Type at+s
bull Now itrsquos possible to send AT commands while the socket connection
is still active
146
Tera Term output
+WIND59Back to Command Mode
All
Tip During the Command Mode you cannot send data to client but can receive data from it Every data chunk generates an URC (+WIND64Sockd Pending Data) with limit to 4 (x730 bytes) This is the max number of pending messages From the 5th chunk on messages are lost
Lab 13 Socket Server ndash return to data mode
bull From Command Mode to Data Mode
bull While in Command Mode
bull Type AT+S (this is an AT command AT+S must be followed by ltCRgt)
bull The module returns in data mode
147
ENG-WPA
AP
Tera Term output
+WIND60Now in Data Mode
All
Lab 13 Socket Server ndash turn off
bull Turn OFF the Socket Server
bull Type at+s (to enter in command mode)
bull Type AT+SSOCKD=0
148
ENG-WPA
AP
Tera Term output
OK +WIND62Socket Client Gone1921681102
All
Proceed to the next LAB
Lab 14 Low power modes
bull Objective
bull Practice with Radio Power Save
bull Sleep Mode
bull Standby Mode
bull Prerequisites
bull module connected to the AP
150
Lab 14 Low power modes
This feature allows to enable the low power states
The module supports the ldquoRadio Power Saverdquo mode the ldquoSleeprdquo
mode and the ldquoStandbyrdquo mode
The module should be connected to the AP (as shown in Lab 3) in
order to use the ldquoRadio Power Saverdquo mode
Please refer to ldquoSPWF01S Power Management Application Notesrdquo for
more details
151
ENG-WPA AP
Low Power
Tera Term output
Lab 14 Joining a network
In order to be connected to an available Wifi network the AP parameters setting is needed
bull Set the SSID
bull Type AT+SSSIDTXT=ENG-WPA
bull Set the password
bull Type AT+SSCFG=wifi_wpa_psk_texthelloworld
bull Set the network privacy mode (0=none 1=WEP 2=WPA-Personal (TKIPAES) or WPA2-Personal (TKIPAES))
bull Type AT+SSCFG=wifi_priv_mode2
bull NB wifi_auth_type must be set to 0 AT+SSCFG=wifi_auth_type0
bull Set the network mode (1 = STA 2 = IBSS 3 = MiniAP)
bull Type AT+SSCFG=wifi_mode1
152
OK
All
Lab 14 Joining a network
bull Save the settings on the flash memory and reset the module
bull Type ATampW
bull Type AT+CFUN=1
153
+WIND0Console active +WIND46WPA Crunching PSK +WIND32WiFi Hardware Started +WIND21WiFi Scanning +WIND35WiFi Scan Complete (0x0) +WIND19WiFi Join 14D64D243600 +WIND25WiFi Association with ENG-WPA successful +WIND51WPA Handshake Complete +WIND24WiFi Up 19216801xx
All
Tera Term output
ENG-WPA AP
Low Power
Lab 14 Low power modes ndash Power Save 154
Module
Power State STM32 WLAN
Standby Standby Standby
Sleep Stop PS
Power Save Run PS or Fast-PS
Active Rx Run Rx Idle Rx Active
Active Tx Run Tx Active
Lab 14 Low power modes ndash Power Save
bull By default the module starts in ACTIVE mode
bull Enable the Power Save Mode
bull Type at+sscfg=wifi_powersave1 (ldquowifi_powersave2rdquo enables the Fast-PS mode)
bull Enable the doze operational mode
bull Type at+sscfg=wifi_operational_mode11 (ldquowifi_operational_mode12rdquo enables the quiescent mode)
bull Choose the wake up mode
1 Wake up every n beacon (specified in the wifi_beacon_wakeup variable)
bull Type at+sscfg=wifi_listen_interval0
bull Type at+sscfg=wifi_beacon_wakeup1
OR
2 Wake up every n beacon adaptively (specified in the wifi_beacon_wakeup variable)
bull Type at+sscfg=wifi_listen_interval1
bull Type at+sscfg=wifi_beacon_wakeup1
155
Tip The Wifi Power Save (wifi_powersave1) can also be quickly enabled using the command AT+CFUN=2
Lab 14 Low power modes ndash Power Save
bull Save the settings on the flash memory and reset the module
bull Type ATampW
bull Type AT+CFUN=1
bull The WIND66 message related to Low Power Mode will be
displayed
156
+WIND1Poweron (--SPWF01S) +WIND13ST SPWF01S IWM Copyright (c) 2012-2014 STMicroelectronics Inc All rights Reserved +WIND3Watchdog Running +WIND0Console active +WIND32WiFi Hardware Started +WIND21WiFi Scanning +WIND35WiFi Scan Complete (0x0) +WIND19WiFi Join 02621F518F0B +WIND25WiFi Association with IoT successful +WIND51WPA Handshake Complete +WIND24WiFi Up 1921681104 +WIND66Low Power mode1
All
Tera Term output
ENG-WPA AP
Low Power
Lab 14 Low power modes ndash Sleep Mode 157
Module
Power State STM32 WLAN
Standby Standby Standby
Sleep Stop PS or Fast-PS
Power Save Run PS or Fast-PS
Active Rx Run Rx Idle Rx Active
Active Tx Run Tx Active
Lab 14 Low power modes ndash Sleep Mode
bull In the Sleep Mode the core STM32 is stopped
bull Enable the Sleep Mode
bull Type at+sscfg=sleep_enabled1
bull Enable the Power Save Mode
bull Type at+sscfg=wifi_powersave1 (ldquowifi_powersave2rdquo enables the Fast-PS mode)
bull Enable the doze operational mode
bull Type at+sscfg=wifi_operational_mode11 (ldquowifi_operational_mode12rdquo enables the quiescent mode)
bull Choose the wake up mode
1 Wake up every n beacon (specified in the wifi_beacon_wakeup variable)
bull Type at+sscfg=wifi_listen_interval0
bull Type at+sscfg=wifi_beacon_wakeup1
OR
2 Wake up every n beacon adaptively (specified in the wifi_beacon_wakeup variable)
bull Type at+sscfg=wifi_listen_interval1
bull Type at+sscfg=wifi_beacon_wakeup1
158
Tip The Wifi Sleep Mode (and wifi_powersave1) can also be quickly enabled using the command AT+CFUN=3
Lab 14 Low power modes ndash Sleep Mode
bull Save the settings on the flash memory and reset the module
bull Type ATampW
bull Type AT+CFUN=1
bull The WIND69 message related to Sleep Mode will be displayed
159
+WIND1Poweron (--SPWF01S) +WIND13ST SPWF01S IWM Copyright (c) 2012-2014 STMicroelectronics Inc All rights Reserved +WIND3Watchdog Running +WIND0Console active +WIND32WiFi Hardware Started +WIND21WiFi Scanning +WIND35WiFi Scan Complete (0x0) +WIND19WiFi Join 02621F518F0B +WIND25WiFi Association with IoT successful +WIND51WPA Handshake Complete +WIND24WiFi Up 1921681104 +WIND66Low Power mode1 +WIND69Going into DeepSleep
All
Tera Term output
ENG-WPA AP
Low Power
Lab 14 Low power modes ndash Sleep Mode
bull Wake STM32 up using the GPIO6
bull Put the GPIO6 to 25V (jumper on JP2 as in
the picture)
bull The WIND messages will be displayed
160
+WIND70Resuming from DeepSleep +WIND53Wakeup (GPIO6 High)
All
Tera Term output
Lab 14 Low power modes ndash Sleep Mode
bull Put STM32 in sleep mode using the
GPIO6
bull Go back the GPIO6 floating (remove jumper
- as default)
bull The WIND69 message will be
displayed
161
+WIND69Going into DeepSleep
All
Tera Term output
Lab 14 Low power modes ndash Sleep Mode
bull Wake STM32 up using the remote
page
bull Connect a device to the same modulersquos
network
bull Open the following link
http[module_IP_address]remotehtml
bull Select ldquoWakerdquo and click on ldquoGordquo button
to wake up the module
bull The WIND message will be displayed
162
+WIND70Resuming from DeepSleep
All
Tera Term output
Lab 14 Low power modes ndash Sleep Mode
bull Put STM32 in sleep mode using the
remote page
bull Connect a device to the same modulersquos
network
bull Open the following link
http[module_IP_address]remotehtml
bull Select ldquoSleeprdquo and click on ldquoGordquo button
to put the module in sleep mode
bull The WIND message will be displayed
163
+WIND69Going into DeepSleep
All
Tera Term output
Lab 14 Low power modes ndash Standby Mode 164
Module
Power State STM32 WLAN
Standby Standby Standby
Sleep Stop PS or Fast-PS
Power Save Run PS or Fast-PS
Active Rx Run Rx Idle Rx Active
Active Tx Run Tx Active
Lab 14 Low power modes ndash Standby Mode
bull During the Standby Mode both the STM32 and the Radio will be
put in standby mode The standby mode allows to achieve the
lowest power consumption
bull Enable the Standby Mode
bull Type at+sscfg=sleep_enabled0 (Sleep mode must be disabled)
bull Type at+sscfg=standby_enabled1
bull Please be sure that GPIO6 isnrsquot forced high
bull Set the standby time to wake up via RTC alarm
bull Type at+sscfg=standby_time15
165
Tip The Wifi Standby Mode can also be quickly enabled using the command AT+CFUN=4
Lab 14 Low power modes ndash Standby Mode
bull Save the settings on the flash
memory and reset the module
bull Type ATampW
bull Type AT+CFUN=1
bull After 15 seconds the module will be
rebooted and will return in the
ACTIVE state
166
+WIND0Console active +WIND32WiFi Hardware Started +WIND38WiFi Powered Down +WIND67Going into Standby15 +WIND68Resuming from Standby +WIND1Poweron (--SPWF01S) +WIND13ST SPWF01S IWM Copyright (c) 2012-2014 STMicroelectronics Inc All rights Reserved +WIND3Watchdog Running +WIND0Console active +WIND32WiFi Hardware Started +WIND21WiFi Scanning +WIND35WiFi Scan Complete (0x0) +WIND19WiFi Join02621F518F0B +WIND25WiFi Association with IoT successful +WIND51WPA Handshake Complete +WIND24WiFi Up1921681113
All
Tera Term output
Lab 14 Low power modes ndash Standby Mode
bull Wake up the module using the GPIO6
bull Enable the Standby Mode
bull Type at+sscfg=sleep_enabled0 (make sure that
Sleep mode is disabled)
bull Type at+sscfg=standby_enabled1
bull Type ATampW
bull Type AT+CFUN=1
bull Put the GPIO6 to 25V to wake up the module
bull The WIND message will be displayed and
the module will return in ACTIVE state
167
+WIND68Resuming from Standby +WIND1Poweron (--SPWF01S) helliphelliphellip
All
Tera Term output
Proceed to the next LAB
Lab 15 STAMINI AP switcher
bull Objective
bull HW ldquoSTA to MiniAPrdquo switcher
bull Prerequisites
bull Work alone
169
Lab 15 STAMINI AP switcher
This feature allows to force the module in Mini AP mode starting from
a preexistent state
ldquoRecovery Moderdquo this functionality could be useful to lead the module
in a known state and to reconfigure it (ie using the firstset page)
The GPIO7 will be used to drive this feature
170
Lab 15 STAMINI AP switcher
bull Press and hold the SW2 button on the
EVAL and then perform a reset (HW reset
via SW1 button or SW reset via AT
command)
bull Release the SW2 button
bull The MiniAP mode will be started and the
module is discoverable with the following
SSID
bull iwm-XX-YY-ZZ where XX-YY-ZZ are the last
six digits of modulersquos MAC ADDRESS
171
+WIND2Reset +WIND1Poweron (--SPWF01S) +WIND13ST SPWF01S IWM Copyright (c) 2012-2014 STMicroelectronics Inc All rights Reserved +WIND39HW in miniAP mode (GPIO7 Low) +WIND0Console active +WIND3Watchdog Running +WIND32WiFi Hardware Started +WIND26WiFi Started AP +WIND24WiFi Up172312551
All
Tera Term output
Tip To exit from ldquominiAP mode via GPIO7rdquo perform a modulersquos reset
Proceed to the next LAB
Lab 16 IBSS connection
bull Objective
bull Create an IBSS network
bull Prerequisites
bull Work alone
173
Lab 16 Create an IBSS network
In an IBSS network the SSID is chosen by the client device that
starts the network
Module settings to create an IBSS network
bull Set the IBSS SSID
bull Type AT+SSSIDTXT=ADHOC
bull Set the network privacy mode (0=OPEN or 1=WEP are supported)
bull Type AT+SSCFG=wifi_priv_mode0
bull Set the network mode (2 = IBSS)
bull Type AT+SSCFG=wifi_mode2
174
OK
All
Tera Term output
Lab 16 Create an IBSS network
bull Set IP address IP default gateway IP DNS and IP netmask
bull Type AT+SSCFG=ip_ipaddr192168y1xx
bull Type AT+SSCFG=ip_gw192168y1
bull Type AT+SSCFG=ip_dns192168y1
bull Type AT+SSCFG=ip_netmask2552552550
bull Turn off the DHCP
bull Type AT+SSCFG=ip_use_dhcp0
175
OK
All
Tera Term output
Lab 16 Create an IBSS network
bull Save the settings on the flash memory and reset the module
bull Type ATampW
bull Type AT+CFUN=1
176
+WIND0Console active +WIND32WiFi Hardware Started +WIND21WiFi Scanning +WIND35WiFi Scan Complete (0x0) +WIND19WiFi Join EE33CE002418 +WIND25WiFi Association with ADHOC successful +WIND51WiFi Handshake Complete +WIND24WiFi Up 19216813
All
AD-HOC
Tera Term output
Lab 16 Create an IBSS network
bull Associate the iOS device with the
ADHOC network (iOS gt 8 could not
support the IBSS mode)
177
AD-HOC
Tip manual configuration of static TCPIPv4 parameters is suggested using a PC Ie PC TCPIPv4 properties
Lab 16 Create an IBSS network
bull Find your IP address
bull Type AT+SSTS
bull Open Safari web browser
bull In the address bar type
ltSPWF IP addressgtindexhtml
bull Type 192168y1xxindexhtml
178
AD-HOC
THANK YOU

Hands On Training content
bull This presentation provides a modular training on the
SPWF01 Wi-Fi module
bull The presentation answers frequently asked questions about the module
bull The AT command set is used to illustrate practical use cases called labs
bull The labs familiarize the reader with the key
features of the SPWF01 module bull Common hardware (eg PC amp cellphone) and software (eg terminal
emulator amp browser) are needed to perform the labs
bull ST offers two different platforms for evaluating the
Wi-Fi module bull The ST-EVAL board ie STEVAL-IDW001V1 + STEVAL-PCC018V1
bull The Nucleo X-Pansion board ie X-NUCLEO-IDW01M1
bull Both evaluation boards are based on the same SPWF01 Wi-Fi module
2
Lab Prerequisites
STEVAL-IDW001V1 + STEVAL-PCC018V1
bull Hardware
bull STEVAL-IDW001V1 + STEVAL-PCC018V1 evaluation board for
SPWF01SA11 (used in the following LABs)
bull Utility software
bull CP210x USB to UART Bridge VCP Drivers (available from
httpwwwsilabscomproductsmcuPagesUSBtoUARTBridgeVCPDriversaspx)
bull Tera Term terminal emulator (available from
httpensourceforgejpprojectsttssh2releases)
bull Text Editor
bull Web browser
3
Lab Prerequisites
X-NUCLEO-IDW01M1
bull Hardware
bull X-NUCLEO-IDW01M1 Wi-Fi expansion board based on SWPF01SA
module for STM32 Nucleo
bull NUCLEO-F401RE NUCLEO-F103RB NUCLEO-L053R8 or NUCLEO-
L476RG
bull Utility software
bull X-CUBE-WIFI1 SW package httpwww2stcomcontentst_comenproductsembedded-softwaremcus-
embedded-softwarestm32-embedded-softwarestm32cube-expansion-softwarex-
cube-wifi1html)
bull Tera Term terminal emulator (available from
httpensourceforgejpprojectsttssh2releases)
bull Text Editor
bull Web browser
4
Hands on chapters 5
bull Lab 1 HW and SW setup
bull Lab 2 Set the SPWF variables
bull Lab 2a FOTA update
bull Lab 3 Access point connection (WPA or WEP)
bull Lab 4 Web client mode
bull Lab 5 Web server mode ndash files in RAM
bull Lab 6 Web server mode ndash files in FLASH
bull Lab 7 Socket interface
bull Lab 8 MiniAP mode for the first set
bull Lab 9 Socket interface in MiniAP mode
bull Lab 10 Web server in MiniAP mode
bull Lab 11 Remote control of GPIO interfaces
bull Lab 12 Input demo
bull Lab 13 Socket Server
bull Lab 14 Low Power Modes
bull Lab 15 HW switch from STA to MiniAP
bull Lab 16 IBSS mode
Lab 1 HW and SW setup
bull Objective
bull Hardware set-up
bull Software set-up
bull Prerequisites
bull Work alone
6
Lab 1 EVAL of the SPWF01Sxy1 module
STEVAL-IDW001V1 + STEVAL-PCC018V1 7
bull PlugampPlay Solution
bull AT command set
bull Power Supplied via the USB interface
bull UARTUSB bridge from Silicon Lab requires to
install the correspondent driver on your PC
bull SMD antenna and reset button on-board
HyperTerminal or similar
AT CommandsEvents
SPWF01SA11
VCOM
8
Lab 1 STEVAL-IDW001V1
STEVAL-IDW001V1 evaluation board of the WiFi module SPWF01SA11
8
9
Lab 1 STEVAL-PCC018V1
STEVAL-PCC018V1 USB to UART board
9
Lab 1 Hardware setup
STEVAL-IDW001V1 + STEVAL-PCC018V1
bull Insert the jumpers in the USB to
UART board as in the figure
bull Connect the Evaluation board to
the PC
bull Use the Device manager to find
the assigned COM port
10
Module automatically performs a reset Module automatically performs a scan for
available networks (if wifi_mode variable is ne 0) Module automatically enters in command mode STEVAL-PCC018V1 Yellow power LED will light up STEVAL-IDW001V1 Yellow power LED will light
up orange wifi link up LED will light up
Lab 1 Configuring the UART STEVAL-IDW001V1 + STEVAL-PCC018V1
bull Open Tera Term
bull Run Tera Term (open Tera term folder
and then run ttermproexe)
bull Open the assigned COM port
bull Tera Term Setup rarr Serial port
bull Baud rate 115200
bull Data 8 bit
bull Parity none
bull Stop 1 bit
bull Flow control none
bull Set CR in the Terminal setup
(default config)
bull Tera Term Setup rarr Terminal rarr
Transmit CR
11
Tip the modulersquos localecho is disabled by default The local echo option can be enabled on Tera Term in order to display the AT command entered
Lab 1 Configuring the UART STEVAL-IDW001V1 + STEVAL-PCC018V1
bull Open Tera Term
bull Command Mode
bull Type AT followed by a carriage return
(CR)
12
OK
All
Tera Term output
Lab 1 EVAL of the SPWF01Sxy1 module
X-NUCLEO-IDW01M1 amp X-CUBE-WIFI1 13
bull X-NUCLEO-IDW01M1
bull X-NUCLEO-IDW01M1 is a Wi-Fi evaluation board based on SPWF01SA module
bull X-CUBE-WIFI1
bull X-CUBE-WIFI1 is an expansion software package for STM32Cube
bull httpwww2stcomcontentst_comenproductsembedded-softwaremcus-embedded-softwarestm32-embedded-softwarestm32cube-expansion-softwarex-cube-wifi1html
Lab 1 Set Vcom binary in Nucleo X-NUCLEO-IDW01M1 amp X-CUBE-WIFI1
1 Flash VCOM binary into Nucleo drive
binaries
IDErsquos project
drag and drop
Projectbin
on Nucleo drive
14
NUCLEO-F401RE
F103RB
L053R8
L476RG
Lab 1 Configuring the UART X-NUCLEO-IDW01M1 amp X-CUBE-WIFI1
Setup TeraTerm window in order to send AT command to Wi-Fi module
2
Open Hyper terminal or TeraTerm Select correct COM port
Terminal setup Serial port setup
15
Lab 1 Configuring the UART X-NUCLEO-IDW01M1 amp X-CUBE-WIFI1
bull Open Tera Term
bull Command Mode
bull Type AT followed by a carriage return
(CR)
16
OK
All
Tera Term output
You are ready to use your Wi-Fi
EVAL board
Lab 2 Set the SPWF variables
bull Objective bull Run a command
bull Get the default configuration dump
bull Set host name
bull Set static IP parameters
bull Reset the module
bull Prerequisites bull Work alone
18
Lab 2 Run a command
Run a command - Syntax
- ATampx ltCRgt
- AT+S[Command] ltCRgt
Response - Syntax
xxxxxxxx
19
- OK
- Command output followed by OK
- ERROR Command not found
- ERROR Unrecognized key
AT Command Prefix
Not case sensitive
Lab 2 Set the SPWF variables
bull Get the default configuration dump
bull Type ATampV
bull Get a variable value
bull Type AT+SGCFG=console1_speed
Config dump frame
20
Variable
Name
Variable
Value
How to change the variable value
1 AT+SSCFG=[var name]xxxx
2 ATampW
Lab 2 Set the SPWF variables
bull Get the default configuration dump
bull Set host name
bull Type AT+SSCFG=ip_hostnamexxxxxxxx
21
Up to 31 characters (case sensitive) ldquospacebarrdquo is allowed
OK
All
Tera Term output
Lab 2 Set the SPWF variables
bull Get the default configuration dump
bull Set host name
bull Set IP address IP default gateway IP DNS and IP netmask (for
static usage)
bull Type AT+SSCFG=ip_ipaddr19216801xx
bull Type AT+SSCFG=ip_gw19216801
bull Type AT+SSCFG=ip_dns19216801
bull Type AT+SSCFG=ip_netmask2552552550
22
OK
All
Tera Term output
Tera Term output
Lab 2 Set the SPWF variables
bull Get the default configuration dump
bull Set host name
bull Set IP address IP default gateway IP
DNS and IP netmask (DHCP off)
bull Save settings on the flash memory
(mandatory after a variable change)
bull Type ATampW
bull Reset the module
bull Type AT+CFUN=1
23
+WIND21WiFi Scanning +WIND35WiFi Scan Complete (0x0)
All
Lab 2 Set the SPWF variables
bull Get the default configuration dump
bull Set host name
bull Set IP address IP default gateway IP
DNS and IP netmask (DHCP off)
bull Save settings on the flash memory
(mandatory after a variable change)
and reset the module
bull Check the new configuration dump
bull Type ATampV
24
Proceed to the next LAB
Lab 2a FOTA update
bull Objective
bull Upgrade the FW using the OTA file
bull Prerequisites
bull OTA file (provided in the SPWF01S FW
package)
bull External web server (ie Apache web
server running on PC)
26
Lab 2a FOTA update 27
The SPWF01Sx11 module (with external flash on board) allows
performing a Firmware Over-the-air update via a single HTTP GET
The SPWF01S will validate the firmware image it downloads load it
into a staging area then prompt the user to issue a reset command in
order to complete the update
Lab 2a FOTA update
The Apache Web Server will be used in this LAB
(Apache Web Server is available at this link
httparchiveapacheorgdisthttpdbinarieswin32httpd-2225-win32-x86-openssl-098ymsi)
Note please check that the local firewall is disabled or properly set It can
block the connection from module to Apache
bull Copy the OTA file (ie SPWF01S-xxxxxx-yyyyyyy-
RELEASE-mainota) in the Apache 22 htdocs folder
28
Lab 2a FOTA update
The FWUPDATE command allows to perform a Firmware Over-the-
air update via a single HTTP GET
bull Sintax
bull AT+SFWUPDATE=lthostnamegtltpathgtltportgt
bull Configuration parameters
bull lthostnamegt Target host DNS resolvable name or IP address
bull ltpathampqueryoptsgt Document path and optional query arguments
bull ltportgt Target host port
29
Lab 2a FOTA update
bull The module and the Apache Web server must be connected to the same network
bull In Tera Term type AT+SFWUPDATE=[Apache IP address][ota_fileota]
ie type AT+SFWUPDATE=192168xyyySPWF01S-150410-c2e37a3-RELEASE-
mainota
bull Reset the module to apply the new FW
bull Type AT+CFUN=1
bull Restore factory default settings (mandatory)
bull Type ATampF
30
Staging FW update for SPWF01SX11 version 1203-120918_01 FW length 276824 0x00002800 (offset 0x00000000 block len 4096) Write len 4096 -gt 0x0 Write len 4096 -gt 0x1000 (note - deleted extra output for clarity) Write len 4096 -gt 0x42000 Write len 2476 -gt 0x43000 (final) Wrote 276904 bytes Complete Update will be applied on next reboot (at+cfun=1)
All Tera Term output
Proceed to the next LAB
Lab 3 Access point connection
bull Objective
bull Scan for available networks
bull Join a network
bull Check the statusstatistics variables
bull Prerequisites
bull USB dongle and computer are set
up as described in Lab 2
bull Work alone
32
Lab 3 Scan for available networks
The SCAN command performs an immediate scan for available
networks Infrastructure (AP) and IBSS (Ad-Hoc) networks are both
reported Network type Channel BSSID SSID Signal strength (RSSI)
and 80211 capabilities are all reported
bull Type AT+SSCAN
bull Scan syntax AT+SSCAN [=lta|pgt[ltr|s|mgt[ltfnamegt]]] -- Perform a [activepassive]
network scan [filter offfilter on SSIDfilter on MAC] [print to file])
33
FOUND BSS 14D64D243600 CHAN 01 RSSI -28 SSID ENG-WPA CAPS 0431 WPA WPA2 FOUND BSS 00180A31EA78 CHAN 11 RSSI -82 SSID ZyckoItalyWireless CAPS 0531 WPA WPA2 FOUND BSS 06180A31E7E2 CHAN 11 RSSI -85 SSID ZyckoItalyGuest CAPS 0531 WPA WPA2 OK
All
Network type
Network MAC
Network
channel Network
RSSI
Network
SSID Network
capabilities
Tera Term output
Tera Term output
Lab 3 Joining a network (WPA Key)
In order to be connected to an available Wifi network the AP parameters setting is needed
bull Set the SSID
bull Type AT+SSSIDTXT=ENG-WPA
bull Set the password
bull Type AT+SSCFG=wifi_wpa_psk_texthelloworld
bull Set the network privacy mode (0=none 1=WEP 2=WPA-Personal (TKIPAES) or WPA2-Personal (TKIPAES))
bull Type AT+SSCFG=wifi_priv_mode2
bull NB wifi_auth_type must be set to 0 AT+SSCFG=wifi_auth_type0
bull Set the network mode (1 = STA 2 = IBSS 3 = MiniAP)
bull Type AT+SSCFG=wifi_mode1
34
OK
All
Lab 3 Joining a network (WPA Key)
bull Save the settings on the flash memory and reset the module
bull Type ATampW
bull Type AT+CFUN=1
35
+WIND0Console active +WIND46WPA Crunching PSK +WIND32WiFi Hardware Started +WIND21WiFi Scanning +WIND35WiFi Scan Complete (0x0) +WIND19WiFi Join 14D64D243600 +WIND25WiFi Association with ENG-WPA successful +WIND51WPA Handshake Complete +WIND24WiFi Up 19216801xx
All
ENG-WPA AP
Tera Term output
Lab 3 Joining a network (WPA Key)
bull Check the statusstatistics variables
bull Type AT+SSTS
bull Send a ping to the gateway (ip_gw)
bull Type AT+SPING=19216801
36
ENG-WPA AP
Tera Term output
OK
All
Lab 3 Joining a network (WEP Key)
Configure the module using the WEP key (4 possible combinations
available)
Sample table
37
AP configuration AT command to be used
Security Mode WEP
WEP Key Length 64 bit
(10 hex digits)
Authentication Open
Wep Key 1 1234567890
ie
at+sssidtxt=ENG-WEP
AT+SSCFG=wifi_wep_keys[0]1234567890
AT+SSCFG=wifi_wep_key_lens05
AT+SSCFG=wifi_auth_type0
AT+SSCFG=wifi_priv_mode1
AT+SSCFG=wifi_mode1
atampw
at+cfun=1
Security Mode WEP
WEP Key Length 64 bit
(10 hex digits)
Authentication Shared
Key
Wep Key 1 1234567890
ie
at+sssidtxt=ENG-WEP
AT+SSCFG=wifi_wep_keys[0]1234567890
AT+SSCFG=wifi_wep_key_lens05
AT+SSCFG=wifi_auth_type1
AT+SSCFG=wifi_priv_mode1
AT+SSCFG=wifi_mode1
atampw
at+cfun=1
AP configuration AT command to be used
Security Mode WEP
WEP Key Length
128 bit (26 hex digits)
Authentication Open
Wep Key 1
123456789012345678
90123456
ie
at+sssidtxt=ENG-WEP
AT+SSCFG=wifi_wep_keys[0]12345678
901234567890123456
AT+SSCFG=wifi_wep_key_lens0D
AT+SSCFG=wifi_auth_type0
AT+SSCFG=wifi_priv_mode1
AT+SSCFG=wifi_mode1
atampw
at+cfun=1
Security Mode WEP
WEP Key Length
128 bit (26 hex digits)
Authentication
Shared Key
Wep Key 1
123456789012345678
90123456
ie
at+sssidtxt=ENG-WEP
AT+SSCFG=wifi_wep_keys[0]12345678
901234567890123456
AT+SSCFG=wifi_wep_key_lens0D
AT+SSCFG=wifi_auth_type1
AT+SSCFG=wifi_priv_mode1
AT+SSCFG=wifi_mode1
atampw
at+cfun=1
Lab 3 Joining a network (WEP Key)
Notes
bull ldquowifi_wep_key_lensrdquo variable values 05 and 0D
bull Itrsquos possible to enter any text string into a WEP key box in the AP in which case it will be converted into a hexadecimal key using the ASCII values of the characters A maximum of 5 text characters can be entered for 64 bit keys and a maximum of 13 characters for 128 bit keys
In this case it needs to manually convert your ASCII password to HEX and complete the wifi_wep_keys[0] variable with the HEX value bull ie AP WEP key test1 ASCII to HEX 7465737431 So the AT command is AT+SSCFG=wifi_wep_keys[0]7465737431
bull Some APs allow user to insert a passphrase and then the AP automatically generates the hex keys In this scenario user have not to perform the ASCII to HEX conversion because the AP already gives it the hex value
38
Proceed to the next LAB
Lab 4 Web client mode
bull Objective
bull HTTP GET
bull HTTP POST
bull PUSH DATA ON SERIAL PORT
bull Prerequisites
bull USB dongle and computer are set up
as described in Lab 2
bull Work in couple
40
Lab 4 HTTP GET
The HTTP GET feature performs a single HTTP request to the specified
host and path The server response is printed on the UART enabled
bull Sintax
bull AT+SHTTPGET=lthostnamegtltpathgt[ltportgt]
bull Configuration parameters
bull lthostnamegt target host DNS resolvable name or IP address
bull ltpathgt document path
bull ltportgt target port
41
Lab 4 HTTP GET
bull Device A performs an HTTP GET to the Device B
bull Device A
AT+SHTTPGET=ltDevice B IP addrgtindexhtml
Type AT+SHTTPGET=19216801xxindexhtml
42
GET indexhtml HTTP10 User-Agent SPWF01S helliphelliphellip lth1gtST SPWF01Sx11 WiFi Modulelth1gt ltpgt Welcome to the ST SPWF01Sx11 WiFi Module ltpgt ltpgt This page was delivered from the SPWF01Sx11 internal HTTP server hellip lta href=statusshtmlgtSPWF01Sx11 Status Pageltagt ltpgt ltbodygt lthtmlgt OK
Device A
A B
Tera Term output
Lab 4 HTTP POST
The HTTP POST performs a post of the given path to the specified host The module can be only used as an HTTP POST client
bull Sintax
bull AT+SHTTPPOST =lthostnamegtltpathampqueryoptsgtltformcontentgt[ltportgt]
bull Configuration parameters
bull lthostnamegt target host DNS resolvable name or IP address
bull ltpathampqueryoptsgt document path
bull ltformcontentgt form to be submitted
bull ltportgt target port
43
Lab 4 HTTP POST
bull The SPWF01S performs an HTTP POST to an HTTP Post Test Server
bull Type
at+shttppost=posttestservercompostphpname=demoampemail=mymailampsubjec
t=subjampbody=message
bull The HTTP Post Test Server replies as
displayed in the Tera Term output if the HTTP
POST successfully
44
HTTP11 200 OK Date Fri 10 Jan 2014 132414 GMT Server Apache Access-Control-Allow-Origin Vary Accept-Encoding Content-Length 139 Connection close Content-Type texthtml Successfully dumped 4 post variables View it at httpwwwposttestservercomdata2014011005241443192628 Post body was 0 chars long OK
Device A
A B
Tera Term output
HTTP POST
SERVER
Lab 4 HTTPREQ bull The SPWF01S can perform a custom HTTP request to a specified
target Refer to the User Manual for more details
bull Type
AT+SHTTPREQ=wwwgooglecom8089
After ltCRgt the module accepts data We will try to open an non-existent web page
GET downloadTagphp HTTP10ltCRgtltLFgt
User-Agent SPWF01SltCRgtltLFgt
Host iwm-testltCRgtltLFgt
Connection closeltCRgtltLFgtltCRgtltLFgt
45
HTTP10 404 Not FoundltCRgtltLFgt Date Sun 31 Jan 2016 142704 GMTltCRgtltLFgt Content-Type texthtmlltCRgtltLFgt Server HTTP server (unknown)ltCRgtltLFgt Content-Length 49ltCRgtltLFgt X-XSS-Protection 1 mode=blockltCRgtltLFgt X-Frame-Options SAMEORIGINltCRgtltLFgt ltCRgtltLFgt lthtmlgtltbodygtlth1gt404 Not Foundlth1gtltbodygtlthtmlgtltLFgtltCRgt ltLFgt ltSUBgtltSUBgtltSUBgtltCRgtltLFgt ltCRgtltLFgt OKltCRgtltLFgt
All
A B
Tera Term output
[AT+SHTTPREQ =lthostnamegt[port]ltlengthgtltCRgtltdatagt]
Lab 4 Push data on serial port
A built-in html page ldquooutput_demohtmlrdquo allows to remotely push
characters on the serial port from a remote browser
46
output_demohtml
Modulersquos IP addressoutput_demohtml
Lab 4 Push data on serial port
bull Find your IP address
bull Type AT+SSTS
bull Associate your computer with the AP
bull Open your web browser
bull In the address bar type
ltmodulersquos IP
Addressgtoutput_demohtml
bull Type
19216801xxoutput_demohtml
47
Lab 4 Push data on serial port
bull Enter the text
bull In order to manage non-ASCII chars the ip_use_decoder variable must be modified (refer to the User Manual for more details)
bull Submit
bull The text will be sent to the serial port of the module
48
Proceed to the next LAB
Lab 5 Web Server use mode
bull Objective
bull List existing files
bull Print a file
bull Create a file
bull Append to an existing file
bull Delete an existing file
bull Prerequisites
bull USB dongle and computer are
set up as described in Lab 2
bull Work alone
50
Lab 5 Web server 51
The Web Server feature allows to create print and delete ASCII files in
the RAM memory of the module
Lab 5 List existing files
The FSL command lists type sizes and name of all the existing files
bull Type AT+SFSL
52
I 461 input_demoshtml I 180 messageshtml I 384 output_demohtml I 614 indexhtml I 157 peersshtml I 193 configshtml I 174 statusshtml I 212 404html I 2022 firstsethtml I 2898 remotehtml OK
All
Files stored in the STM32
FLASH memory
Tera Term output
Lab 5 Print a file
The FSP command prints the content
of an existing file
bull Type AT+SFSP=indexhtml
53
lthtmlgt ltheadgtlttitlegtST SPWF01Slttitlegtltheadgt ltbody bgcolor=white text=blackgt lth1gtST SPWF01S Intelligent WiFi Modulelth1gt ltpgtWelcome to the ST SPWF01S intelligent Wi-Fi moduleltpgt ltpgtThis page was delivered from the SPWF01S internal HTTP serverltpgt ltpgt lta href=configshtmlgtSPWF01S Configuration Settings Pageltagt ltpgt ltpgt lta href=statusshtmlgtSPWF01S Status Pageltagt ltpgt ltpgt lta href=peersshtmlgtSPWF01S Peers Pageltagt ltpgt ltpgtMore information about the SPWF01S and other ST products can be found at STs website lta href=httpwwwSTcomgthttpwwwSTcomltagtltpgt ltbodygt lthtmlgt OK
All Tera Term output
Tip How to use the offset and length parameters AT+SFSP=indexhtml[offset][length] ie Type AT+SFSP=indexhtml520 Length parameter is mandatory if is used the offset
Lab 5 Create a file
The FSC command allows to create a file inside the SPWF for
delivery by the SPWF HTTP server
bull Sintax
bull AT+SFSC =ltfnamegtltmax_lengt[lthttp_headergt]
bull Configuration parameters
bull lt filename gt filename to create
bull lt max_len gt amount of space to allocate for file max = 4096 bytes
bull lthttp_headergt 0=HTML header automatically added 1=HTML header not
added (as by default)
Type AT+SFSC=wifidemohtml1965
54
OK
All
Tera Term output
Lab 5 Configuring the UART
bull Set CR+LF in the Terminal setup
(to properly paste text in the
terminal)
bull Tera Term Setup rarr Terminal rarr
Transmit CR+LF
55
Tip The local echo option must be disabled on Tera Term
Added in FW 35 using the AT+SFSR command user can rename dynamic files stored in the RAM memory Refer to the User Manual for more details
Lab 5 Append to an existing file
The FSA command allows to append blocks of data to an existing file
This command accepts data after the ltcrgt at the end of the command
line
bull Sintax
bull AT+SFSA=ltfilenamegtltdatalengt
bull Configuration parameters
bull lt filename gt filename pre-created
bull lt datalen gt number of characters to append to the file
Type AT+SFSA=wifidemohtml1965
56
Now SPWF accepts data
Tips
Lab 5 Append to an existing file
bull Open wifidemotxt in the following
directory Hands_on
folderHTML_demo_page
bull Check you have set up CR+LF in the
Terminal setup (for more
information refer to the slide 48)
bull Copy the file content into Tera term
(paste with ALT+V or mouse right
button)
57
OK
All
Tera Term output
Lab 5 Append to an existing file
bull Open wifidemohtml
bull Open your Web browser (suggested Google
Chrome for HTML5 test)
bull In address bar type ltSPWF IP addrgtwifidemohtml
Type 19216801xxwifidemohtml
58
Lab 5 Configuring the UART
bull Re-set CR in the Terminal setup
as by default
bull Tera Term Setup rarr Terminal rarr
Transmit CR
59
Tip The local echo option can be re-enabled on Tera Term
Lab 5 List existing files
Lets list the files
bull Type AT+SFSL
60
D 1965 wifidemohtml I 461 input_demoshtml I 180 messageshtml I 384 output_demohtml I 614 indexhtml I 157 peersshtml I 193 configshtml I 174 statusshtml I 212 404html I 2022 firstsethtml I 2898 remotehtml OK
All
File stored in the RAM memory
Tera Term output
Lab 5 Delete an existing file
The FSD command allows to delete an existing file by name Static
files may not be deleted
bull Sintax
bull AT+SFSD=ltfilenamegt
Type AT+SFSD=wifidemohtml
61
OK
All
Tera Term output
Lab 5 Delete an existing file
bull Re-open wifidemohtml
bull Open your Web browser
bull In address bar ltSPWF IP addrgtwifidemohtml
Type 19216801xxwifidemohtml
62
Proceed to the next LAB
Lab 6 Web Server use mode
bull Objective
bull Create an image file
bull Filesystem update over-the-air
bull Filesystem update over UART
bull Prerequisites
bull Work alone
64
Lab 6 Web server 65
The Web Server feature also allows to upload generic files (PDF
HTML DOC JPEG and so on) in the EXTERNAL FLASH memory of
the module It needs to follow the below steps
- create an image file (IMG) using the tool provided in the Hands-on package
(the IMG contains the files to upload)
- Put the image in a generic and accessible Web Server (Apache Web server
will be used in the Hands-on as example)
- Using the proper AT command the IMG will be retrieved over-the-air and the
static files will be created in the external flash memory
Lab 6 Create an image file
bull Open the following folder and
extract all the files
hands_on_wififilesystem_update
bull Put your own files to upload in the
pages folder (max 512 Kbytes)
bull Run genbat
bull Open the pages folder and copy
outfileimg in your external Web
Server (Apache)
66
3
1
2
Lab 6 Create an image file
The Apache Web Server will be used in this tutorial
(Apache Web Server is available at this link
httparchiveapacheorgdisthttpdbinarieswin32httpd-2225-win32-x86-openssl-098ymsi)
Note please check that the local firewall is disabled or properly set It can
block the connection from module to Apache
bull Copy outfileimg in the Apache 22
htdocs folder (this is the default
root server directory)
67
4
Lab 6 Filesystem update
The HTTPDFSUPDATE command allows to create static files inside
the SPWF for delivery by the SPWF HTTP server
bull Sintax
bull AT+SHTTPDFSUPDATE=lthostnamegtltpathgt[port]
bull Configuration parameters
bull lthostnamegt external web server DNS resolvable name or IP address
bull ltpathgt document path
bull ltportgt target host port
68
Lab 6 Filesystem update
bull In Tera Term type
AT+SHTTPDFSUPDATE=192168x10xoutfileimg
bull Reset the module
bull Type AT+CFUN=1
69
Image length 357957 (offset 0x00080000 block len 4096) Write len 4096 -gt 0x80000 Write len 4096 -gt 0x81000 Write len 4096 -gt 0x82000 helliphelliphelliphellip helliphelliphelliphelliphelliphellip helliphelliphelliphelliphellip Write len 4096 -gt 0xD6000 Write len 1612 -gt 0xD7000 (final) Wrote 357964 bytes Complete Please reboot (at+cfun=1) OK
All
Tera Term output
The file system will be permanently deleted The new IMG will overwrite the existent files in the file system
Warning
Lab 6 Filesystem update
Lets list the files
bull Type AT+SFSL
70
E 2615 st766gif E 112374 modulepng E 2430 index1html E 419 indexhtml E 239887 MKTWiFipdf I 461 input_demoshtml I 180 messageshtml I 384 output_demohtml I 614 indexhtml I 157 peersshtml I 193 configshtml I 174 statusshtml I 212 404html I 2022 firstsethtml I 2898 remotehtml OK
All
Files stored in
the EXT FLASH memory
Tera Term output
Lab 6 Filesystem update
bull Open index1html page
bull Open your web browser
bull In the address bar ltSPWF IP addrgtindex1html
Type 192168x1xxindex1html
71
Lab 6 Filesystem erase
Erase the external httpd filesystem
bull Type AT+S HTTPDFSERASE
The files stored in the EXT FLASH memory will be erased
Lets list the files
bull Type AT+SFSL
72
I 461 input_demoshtml I 180 messageshtml I 384 output_demohtml I 614 indexhtml I 157 peersshtml I 193 configshtml I 174 statusshtml I 212 404html I 2022 firstsethtml I 2898 remotehtml OK
All
Tera Term output
Lab 6 Filesystem update
The HTTPDFSWRITE command allows to create static files inside
the SPWF via the UART interface The HW flow control MUST be
enabled in order to use the command
bull Sintax
bull AT+SHTTPDFSWRITE =ltdatalengtltCRgtltdatagt
bull Configuration parameters
bull ltdatalengt Amount of bytes to be sent
73
Lab 6 Filesystem update
bull Type AT+S HTTPDFSWRITE=357957
bull In Tera Term File ndash Send File
bull Reset the module
bull Type AT+CFUN=1
74
Image length 357957 (offset 0x00080000 block len 4096) Write len 4096 -gt 0x80000 Write len 4096 -gt 0x81000 Write len 4096 -gt 0x82000 helliphelliphelliphellip helliphelliphelliphelliphelliphellip helliphelliphelliphelliphellip Write len 4096 -gt 0xD6000 Write len 1612 -gt 0xD7000 (final) Wrote 357964 bytes Complete Please reboot (at+cfun=1) OK
All
Tera Term output
The file system will be permanently deleted The new IMG will overwrite the existent files in the file system
Warning
Proceed to the next LAB
Lab 7 Socket interface
bull Objective
bull Open TCPUDP connection
bull Write data to socket
bull Read data from socket
bull Close socket
bull Prerequisites
bull Work alone
76
TCPUDP socket
Socket
Client
Socket
Server
Lab 7 TCPUDPUART socket interface 77
The Socket interface allows communication via TCP UDP and UART
The SPWF is both a client and a server socket In this LAB will be
detailed the socket client feature
Ho
st
En
d P
rod
uct
Open TCPUDP connection
Write data to socket
Read data from socket
Close socket
Lab 7 Open TCPUDP connection
The SOCKON command allows to open a TCPUDP connection
to a specified host (up to 8 socket connections at same time)
bull Sintax
bull AT+SSOCKON=lthostnamegtltportgtltprotocolgtind
bull Configuration parameters
bull lthostnamegt target host DNS resolvable name or IP address
bull ltportgt TCPUDP socket port
bull ltprotocolgt t for TCP socket u for UDP socket
bull ind indicate when data has arrived (optional) Up to 4 (x730 bytes)
consecutive ldquoPending datardquo message (without any AT+SSOCKR) are
guaranteed It is suggested to empty the buffer using the AT+SSOCKR
command and to avoid exceeding 4 indications
78
Lab 7 Open TCPUDP connection
bull Open the TCP socket server (disable the firewall to properly
run it)
bull Folder hands_on_wifitcp socket serverserverexe
bull The TCP server listens for incoming connections on the port
32000 It sends back all data received
79
Optional - Lab 7 Open TCPUDP connection
bull Using an Android platform the socket server can be opened
using a specific APP (Socket Protocol available on Play Store)
bull The TCP socket server can be configured to listen for
incoming connections on the port 32000
bull Type 32000 on laquoPort Listen toraquo box
bull Click on Listen
80
Lab 7 Open TCPUDP connection
bull Type AT+SSOCKON=192168010x32000tind
bull The client and the server use the socket identifier (ID)
displayed
81
ID 00 OK
All
Tera Term output
Lab 7 Write data to socket
The SOCKW command allows to write data to the specified ID
socket
This command accepts data after the ltcrgt at the end of the
command line
bull Sintax
bull AT+SSOCKW=ltIDgtltlengt
bull Configuration parameters
bull ltIDgt socket identifier
bull ltlengt data length to send
82
Lab 7 Write data to socket
bull Write data
bull Type AT+SSOCKW=0013
bull Type hello worldltCRgt
bull SPWF shows that there are ltpending datagt and their amount
83
+WIND55Pending Data013
All
Tera Term output
ID
Pending
bytes
Note the module is waiting 13 bytes to be written to the socket As soon as 13 bytes (or characters) are sent from the terminal the module is going to write them to the socket and will be ready to receive new commands
Lab 7 Read data from socket
The SOCKR command allows to read data from socket
bull Sintax
bull AT+SSOCKR=ltIDgtltlengt
bull Configuration parameters
bull ltIDgt socket identifier
bull ltlengt data length to read
84
Lab 7 Read data from socket
bull Read data
bull Type AT+SSOCKR=0013
85
hello world OK
All
Tera Term output
Lab 7 Close socket
The SOCKC command allows to close socket
bull Sintax
bull AT+SSOCKC=ltIDgt
bull Configuration parameters
bull ltIDgt socket identifier
86
Tera Term output
Lab 7 Close socket
bull Close socket
bull Type AT+SSOCKC=00
87
OK
All
Proceed to the next LAB
Lab 8 MiniAP mode for the first set
bull Objective
bull Create a direct connection between
the module and an end device
bull First set of the module in order to
enable the connection between the
module and a generic AP
bull Prerequisites
bull Work alone
89
Tera Term output
Lab 8 Configuring the module in MiniAP mode
The Mini AP mode is available starting from the following FW release
SPWF01S-131115-de4568d-RELEASE
In order to set the module in Mini AP mode the following parameters
are needed
bull Set the SSID
bull Type AT+SSSIDTXT=SPWF_AP
bull Set the network privacy mode (0=OPEN or 1=WEP are supported)
bull Type AT+SSCFG=wifi_priv_mode0
bull Set the network mode (1 = STA 2 = IBSS 3 = MiniAP)
bull Type AT+SSCFG=wifi_mode3
90
OK
All
Lab 8 Configuring the module in MiniAP mode
bull Save the settings on the flash memory and reset the module
bull Type ATampW
bull Type AT+CFUN=1
91
+WIND0Console active +WIND32WiFi Hardware Started +WIND26WiFi Started AP with network SPWF_AP +WIND24WiFi Up 172181511
All
Tera Term output
SPWF_AP
Lab 8 Configuring the module in MiniAP mode (WEP Key)
Configure the module using the WEP key (2 possible combinations
available)
Sample table
92
AP configuration AT command to be used
Security Mode WEP
WEP Key Length 64 bit
(10 hex digits)
Authentication Open
Wep Key 1 1234567890
ie
at+sssidtxt=SPWF_AP
AT+SSCFG=wifi_wep_keys[0]1234567890
AT+SSCFG=wifi_wep_key_lens05
AT+SSCFG=wifi_auth_type0
AT+SSCFG=wifi_priv_mode1
AT+SSCFG=wifi_mode3
atampw
at+cfun=1
AP configuration AT command to be used
Security Mode WEP
WEP Key Length
128 bit (26 hex digits)
Authentication Open
Wep Key 1
123456789012345678
90123456
ie
at+sssidtxt=SPWF_AP
AT+SSCFG=wifi_wep_keys[0]12345678
901234567890123456
AT+SSCFG=wifi_wep_key_lens0D
AT+SSCFG=wifi_auth_type0
AT+SSCFG=wifi_priv_mode1
AT+SSCFG=wifi_mode3
atampw
at+cfun=1
Lab 8 Configuring the module in MiniAP mode (WEP Key)
Notes
bull ldquowifi_wep_key_lensrdquo variable values 05 and 0D
bull Itrsquos possible to enter any text string as WEP key It have to be converted into a
hexadecimal key using the ASCII values of the characters A maximum of 5 text
characters can be entered for 64 bit keys and a maximum of 13 characters for 128
bit keys
In this case it needs to manually convert your ASCII password to
HEX and complete the wifi_wep_keys[0] variable with the HEX
value
bull ie WEP key test1
ASCII to HEX 7465737431
So the AT command is AT+SSCFG=wifi_wep_keys[0]7465737431
93
Lab 8 Customizing the MiniAP address (optional)
Starting from FW 33 the module allows user to customize the IP address of the MiniAP
bull Set the SSID
bull Type AT+SSSIDTXT=SPWF_AP
bull Set the network privacy mode (0=OPEN or 1=WEP are supported)
bull Type AT+SSCFG=wifi_priv_mode0
bull Set the network mode (1 = STA 2 = IBSS 3 = MiniAP)
bull Type AT+SSCFG=wifi_mode3
bull Set the use_dhcp mode (0 = DHCP server off 1 = DHCP server on 2 = DHCP server on and customizable)
bull Type AT+SSCFG=ip_use_dhcp2
bull Set the MiniAP address
bull Type AT+SSCFG=ip_ipaddr19216801
bull Save the settings on the flash memory and reset the module
bull Type ATampW
bull Type AT+CFUN=1
94
Tera Term output
+WIND0Console active +WIND32WiFi Hardware Started +WIND26WiFi Started AP with network SPWF_AP +WIND24WiFi Up 19216801
All
Tip the MiniAP will assign sequential addresses to the client ie 1deg client 19216802 2deg client 19216803
Lab 8 Mini AP mode
bull Associate your end device to the
SPWF_AP network
bull Find the SPWF_AP network and connect
the end device to the module
95
SPWF_AP +WIND2890187C960D0B Associated +WIND29DHCP reply for 17218151290187C960D0B to 172181512 +WIND29DHCP reply for 17218151290187C960D0B to 172181512
All
Tera Term output
Lab 8 Mini AP mode
bull Open your web browser
bull In the address bar type captiveportalnet
96
SPWF_AP
Tip The Mini AP domain can be set using the variable ip_apdomainname The default value is ldquocaptiveportalnetrdquo
The Mini AP default homepage can be set using the variable ip_apredirect The default value is ldquofirstsethtmlrdquo
Tip If the AP domain name is not quickly opened itrsquos suggested to turn off an eventual proxy server (check the connection settings or browser preferences)
Lab 8 First Set Page
bull The first set page allows to configure the module in IDLE mode
STATION mode IBSS mode and MINI AP mode
97
Used for STA IBSS MINI AP
Mandatory for IDLE STA IBSS MINI AP
Used for STA IBSS (WEP) MINI AP (WEP)
Used for STA (if DHCP = OFF) IBSS
(mandatory) MINI AP (if DHCP = OFF)
Used for STA IBSS (mandatory DHCP = OFF) MINI AP
Used for STA (WEP key) IBSS (WEP) MINI AP (WEP)
Used for STA IBSS MINI AP
Lab 8 Mini AP mode
bull Set all the parameters required in order to enable the connection
between the module and a generic AP
ie AP configured in WPAWPA2 mode
bull MiniAP PassKey anonymous (by default)
bull SSID of the access point
bull Password of the access point
bull Authentication type of the access point
bull Use mode of the module
98
Tip The Mini AP PassKey can be set using the variable ldquouser_descrdquo The default value is ldquoanonymousrdquo
Note In order to manage non-ASCII chars the ip_use_decoder variable must be modified according as below at+sscfg=ip_use_decoder0 no decoding [default] at+sscfg=ip_use_decoder1 RAW decoding (the USER and PSK fields must be completed in HEX) at+sscfg=ip_use_decoder2 UTF-8 decoding at+sscfg=ip_use_decoder6 HTML entities decoding
Lab 8 Mini AP mode
bull Click on GO button and then send the
parameters confirming with OK
99
SPWF_AP
AP
SSID ciscosb2
Lab 8 Mini AP mode
bull The module will receive the parameters and will automatically
connect to the access point required
100
+WIND57Received SSID is ciscosb2 +WIND57Received PWD is +WIND57Received Auth mode is 2 +WIND57Received Mode is 1 +WIND2RESET +WIND1Poweron (--SPWF01S) +WIND13ST IWM Copyright (c) 2012-2013 STmicroelectronics +WIND3Watchdog Running +WIND0Console active +WIND46WPA Crunching PSK +WIND32WiFi Hardware Started +WIND21WiFi Scanning +WIND35WiFi Scan Complete (0x0) +WIND19WiFi Join 02621F518F0B +WIND25WiFi Association with ciscosb2 successful +WIND51WPA Handshake Complete +WIND24WiFi Up 1921681106
All
Tera Term output
ciscosb2
AP
Lab 8 Mini AP mode ndash RAW decoding example
101
Note In order to manage non-ASCII chars the ip_use_decoder variable must be modified according as below at+sscfg=ip_use_decoder0 no decoding [default] at+sscfg=ip_use_decoder1 RAW decoding (the USER and PSK fields must be completed in HEX) at+sscfg=ip_use_decoder2 UTF-8 decoding at+sscfg=ip_use_decoder6 HTML entities decoding
7177657261736466
AP SSIS
AP PSK
Proceed to the next LAB
Lab 9 Socket interface - MiniAP mode
bull Objective
bull Create a direct connection between
the module and an end device
bull Socket interface used in MiniAP
mode
bull Prerequisites
bull Work alone
103
Tera Term output
Lab 9 Configuring the module in MiniAP mode
The Mini AP mode (available starting from the SPWF01S-131115-de4568d-RELEASE) also allows to use the socket interface The procedure is the same as in Lab 7
In order to set the module in Mini AP mode the following parameters are needed
bull Set the SSID
bull Type AT+SSSIDTXT=SPWF_AP
bull Set the network privacy mode
bull Type AT+SSCFG=wifi_priv_mode0
bull Set the network mode (1 = STA 2 = IBSS 3 = MiniAP)
bull Type AT+SSCFG=wifi_mode3
104
OK
All
Lab 9 Configuring the module in MiniAP mode
bull Save the settings on the flash memory and reset the module
bull Type ATampW
bull Type AT+CFUN=1
105
+WIND0Console active +WIND32WiFi Hardware Started +WIND26WiFi Started AP with network SPWF_AP +WIND24WiFi Up 172181511
All
Tera Term output
SPWF_AP
Lab 9 Mini AP mode
bull Connect your PC to the SPWF_AP
network
bull Find the SPWF_AP network and connect
the end device to the module
106
SPWF_AP +WIND2890187C960D0B Associated +WIND29DHCP reply for 17218151290187C960D0B to 172181512 +WIND29DHCP reply for 17218151290187C960D0B to 172181512
All
Tera Term output
Lab 9 Open TCPUDP connection
As described in the Lab 7 the SOCKON command allows to
open a TCPUDP connection to a specified host
bull Sintax
bull AT+SSOCKON=lthostnamegtltportgtltprotocolgtind
bull Configuration parameters
bull lthostnamegt target host DNS resolvable name or IP address
bull ltportgt TCPUDP socket port
bull ltprotocolgt t for TCP socket u for UDP socket
bull ind indicate when data has arrived (optional) Up to 4 consecutive ldquoPending
datardquo message (without any AT+SSOCKR) are guaranteed It is
suggested to empty the buffer using the AT+SSOCKR command and
to avoid exceeding 4 indications
107
Lab 9 Open TCP connection
bull Open the TCP socket server (disable the firewall to properly
run it)
bull Folder hands_on_wifitcp socket serverserverexe
bull The TCP server listens for incoming connections on the port
32000 It sends back all data received
108
Lab 9 Open TCP connection
bull Type AT+SSOCKON=17218151232000tind
bull The client and the server use the socket identifier (ID)
displayed
109
ID 00 OK
All
Tera Term output
Lab 9 Write data to socket
The SOCKW command allows to write data to the specified ID
socket
This command accepts data after the ltcrgt at the end of the
command line
bull Sintax
bull AT+SSOCKW=ltIDgtltlengt
bull Configuration parameters
bull ltIDgt socket identifier
bull ltlengt data length to send
110
Lab 9 Write data to socket
bull Write data
bull Type AT+SSOCKW=0013
bull Type hello worldltCRgt
bull SPWF shows that there are ltpending datagt and their amount
111
+WIND55Pending Data013
All
Tera Term output
ID
Pending
bytes
Note the module is waiting 13 bytes to be written to the socket As soon as 13 bytes (or characters) are sent from the terminal the module is going to write them to the socket and will be ready to receive new commands
Lab 9 Read data from socket
The SOCKR command allows to read data from socket
bull Sintax
bull AT+SSOCKR=ltIDgtltlengt
bull Configuration parameters
bull ltIDgt socket identifier
bull ltlengt data length to read
112
Lab 9 Read data from socket
bull Read data
bull Type AT+SSOCKR=0013
113
hello world OK
All
Tera Term output
Lab 9 Close socket
The SOCKC command allows to close socket
bull Sintax
bull AT+SSOCKC=ltIDgt
bull Configuration parameters
bull ltIDgt socket identifier
114
Tera Term output
Lab 9 Close socket
bull Close socket
bull Type AT+SSOCKC=00
115
OK
All
Proceed to the next LAB
Lab 10 Web server - MiniAP mode
bull Objective
bull Create a direct connection between
the module and an end device
bull Web server used in MiniAP mode
bull Prerequisites
bull Work alone
117
Tera Term output
Lab 10 Configuring the module in MiniAP mode
The Mini AP mode (available starting from the SPWF01S-131115-de4568d-RELEASE) also allows to use the module file system (both RAM and IntExt FLASH)
In order to set the module in Mini AP mode the following parameters are needed
bull Set the SSID
bull Type AT+SSSIDTXT=SPWF_AP
bull Set the network privacy mode
bull Type AT+SSCFG=wifi_priv_mode0
bull Set the network mode (1 = STA 2 = IBSS 3 = MiniAP)
bull Type AT+SSCFG=wifi_mode3
118
OK
All
Lab 10 Configuring the module in MiniAP mode
bull Save the settings on the flash memory and reset the module
bull Type ATampW
bull Type AT+CFUN=1
119
+WIND0Console active +WIND32WiFi Hardware Started +WIND26WiFi Started AP with network SPWF_AP +WIND24WiFi Up 172181511
All
Tera Term output
SPWF_AP
Lab 10 Mini AP mode
bull Connect your PC to the SPWF_AP
network
bull Find the SPWF_AP network and connect
the end device to the module
120
SPWF_AP +WIND2890187C960D0B Associated +WIND29DHCP reply for 17218151290187C960D0B to 172181512 +WIND29DHCP reply for 17218151290187C960D0B to 172181512
All
Tera Term output
Lab 10 Access to Web server - Mini AP mode
bull Open your web browser
bull In the address bar type
captiveportalnetindexhtml
bull The SPWF01S homepage will be
displayed
121
SPWF_AP Tip The Mini AP domain can be set using the variable ip_apdomainname The default value is ldquocaptiveportalnetrdquo
Lab 10 Access to Web server - Mini AP mode
bull Open the SPWF01S Device Status
bull click on the highlighted link
bull The SPWF01S Device Status will be
displayed
122
SPWF_AP Tip The Mini AP domain can be set using the variable ip_apdomainname The default value is ldquocaptiveportalnetrdquo
The Mini AP default homepage can be set using the variable ip_apredirect The default value is ldquofirstsethtmlrdquo
Proceed to the next LAB
Lab 11 Remotely control - GPIOs
bull Objective
bull write remotely a GPIO
bull configure remotely a GPIO
bull read remotely a GPIO
bull Prerequisites
bull module connected to the AP or
module configured in MiniAP mode
124
Lab 11 Remotely control - GPIO
This feature allows to remotely write configure and read a GPIO
The module should be connected to the AP (as shown in Lab 3) or
should be configured in Mini AP mode (as shown in Lab 8)
The external client have to open the remotehtml page stored in the
module
125
ENG-WPA AP
SPWF_AP
miniAP
Tera Term output
Lab 11 Joining a network
In order to be connected to an available Wifi network the AP parameters setting is needed
bull Set the SSID
bull Type AT+SSSIDTXT=ENG-WPA
bull Set the password
bull Type AT+SSCFG=wifi_wpa_psk_texthelloworld
bull Set the network privacy mode (0=none 1=WEP 2=WPA-Personal (TKIPAES) or WPA2-Personal (TKIPAES))
bull Type AT+SSCFG=wifi_priv_mode2
bull NB wifi_auth_type must be set to 0 AT+SSCFG=wifi_auth_type0
bull Set the network mode (1 = STA 2 = IBSS 3 = MiniAP)
bull Type AT+SSCFG=wifi_mode1
126
OK
All
Lab 11 Joining a network
bull Save the settings on the flash memory and reset the module
bull Type ATampW
bull Type AT+CFUN=1
127
+WIND0Console active +WIND46WPA Crunching PSK +WIND32WiFi Hardware Started +WIND21WiFi Scanning +WIND35WiFi Scan Complete (0x0) +WIND19WiFi Join 14D64D243600 +WIND25WiFi Association with ENG-WPA successful +WIND51WPA Handshake Complete +WIND24WiFi Up 19216801xx
All
ENG-WPA AP
Tera Term output
Lab 11 Remotely control in MiniAP mode - GPIO
bull Open your web browser
bull In the address bar type
192168x1xxremotehtml
128
ENG-WPA
AP
Lab 11 Remotely control in MiniAP mode - GPIO
bull Try to write the GPIO14 connected to the LED3 (check if the
LED3 is mounted on your EVAL BOARD otherwise can be used
the GPIO13)
bull Click on the laquoGOraquo button
and LED3 will switch on
129
ENG-WPA
AP
Proceed to the next LAB
Lab 12 Input demo
bull Objective
bull Send a message from the server (wifi
module) to an external client connected
to the same network
bull Prerequisites
bull module connected to the AP or module
configured in MiniAP mode
131
Lab 12 Input demo
The module provides some DEMOs to show the interaction between
the module and an external client connected to the same network
The module should be connected to the AP (as shown in Lab 3) or
should be configured in Mini AP mode (as shown in Lab 8)
In order to run this demo the client have to open the
input_demoshtml page stored in the module
132
ENG-WPA AP
SPWF_AP
miniAP
Tera Term output
Lab 12 Joining a network
In order to be connected to an available Wifi network the AP parameters setting is needed
bull Set the SSID
bull Type AT+SSSIDTXT=ENG-WPA
bull Set the password
bull Type AT+SSCFG=wifi_wpa_psk_texthelloworld
bull Set the network privacy mode (0=none 1=WEP 2=WPA-Personal (TKIPAES) or WPA2-Personal (TKIPAES))
bull Type AT+SSCFG=wifi_priv_mode2
bull NB wifi_auth_type must be set to 0 AT+SSCFG=wifi_auth_type0
bull Set the network mode (1 = STA 2 = IBSS 3 = MiniAP)
bull Type AT+SSCFG=wifi_mode1
133
OK
All
Lab 12 Joining a network
bull Save the settings on the flash memory and reset the module
bull Type ATampW
bull Type AT+CFUN=1
134
+WIND0Console active +WIND46WPA Crunching PSK +WIND32WiFi Hardware Started +WIND21WiFi Scanning +WIND35WiFi Scan Complete (0x0) +WIND19WiFi Join 14D64D243600 +WIND25WiFi Association with ENG-WPA successful +WIND51WPA Handshake Complete +WIND24WiFi Up 19216801xx
All
ENG-WPA AP
Tera Term output
Lab 12 Input demo
bull Open your web browser
bull In the address bar type
192168x1xxinput_demoshtml
bull Insert the message to the client
ie type laquotestraquo (suggested ndash copy
the string and paste it in the
terminal) and then send a carriage
return
135
VERY IMPORTANT
Both client and server are pending (2 sec) after the page
request If no message is sent from the module a timeout
mechanism will be triggered
The server shows the ldquo+WIND56 messagerdquo and it will
wait for a string to be inserted and terminated by [Cr] ldquo+WIND56Insert message to clientdrdquo d is the Nth input SSI into html page (please refer to CGIampSSI Application Notes for details)
Lab 12 Input demo
bull The module receives the HTML
page containing the string inserted
server-side
bull Below this string there are two
buttons to try again the demo or to
return to the homepage
136
Proceed to the next LAB
Lab 13 Socket Server functionality
bull Objective
bull Configure a Server Listening Port
bull Open a TCP connection from a
socket client to the module
bull Data modeCommand Mode usage
bull Prerequisites
bull module connected to the AP or
module configured in MiniAP mode
bull PC to be used as socket client
138
TCP socket
Socket
Server
Socket
Client
Lab 13 Socket Server
This feature allows to enable the socket server mode The module
can be able to listen for an incoming connection on the specified port
The module should be connected to the AP (as shown in Lab 3) or
should be configured in Mini AP mode (as shown in Lab 8)
Please refer to ldquoSocket Server Application Notesrdquo for more details
139
ENG-WPA AP
SPWF_AP
miniAP
Tera Term output
Lab 13 Joining a network
In order to be connected to an available Wifi network the AP parameters setting is needed
bull Set the SSID
bull Type AT+SSSIDTXT=ENG-WPA
bull Set the password
bull Type AT+SSCFG=wifi_wpa_psk_texthelloworld
bull Set the network privacy mode (0=none 1=WEP 2=WPA-Personal (TKIPAES) or WPA2-Personal (TKIPAES))
bull Type AT+SSCFG=wifi_priv_mode2
bull NB wifi_auth_type must be set to 0 AT+SSCFG=wifi_auth_type0
bull Set the network mode (1 = STA 2 = IBSS 3 = MiniAP)
bull Type AT+SSCFG=wifi_mode1
140
OK
All
Lab 13 Joining a network
bull Save the settings on the flash memory and reset the module
bull Type ATampW
bull Type AT+CFUN=1
141
+WIND0Console active +WIND46WPA Crunching PSK +WIND32WiFi Hardware Started +WIND21WiFi Scanning +WIND35WiFi Scan Complete (0x0) +WIND19WiFi Join 14D64D243600 +WIND25WiFi Association with ENG-WPA successful +WIND51WPA Handshake Complete +WIND24WiFi Up 19216801xx
All
ENG-WPA AP
Tera Term output
Lab 13 Socket Server
bull Socket server turn ON the TCP Socket Server (user must
specify the server listening port)
bull Type AT+SSOCKD=32000 (AT+SOCKD=32000u for UDP socket server)
bull Check the status of the socket server
bull Type AT+SSTS=ip_sockd_port
142
ENG-WPA
AP
Tera Term output
OK ip_sockd_port = 32000 OK
All
Tip you can Turn OFF the Socket Server using a server listening port = 0 (type AT+SSOCKD=0)
Lab 13 Socket Server
bull Socket client can be used a simple socket client in order to test the communication
(SocketTest ndash available on httpsourceforgenetprojectssockettest)
143
ENG-WPA
AP
Lab 13 Socket Server
bull Socket client
bull Insert the modulersquos IP Address and the port
bull Click on Connect button
144
Tera Term output
+WIND61Incoming Socket Client1921681102 +WIND60Now in Data Mode
All
Lab 13 Socket Server
bull The module (socket server) enters in data mode and a bidirectional channel is
created to allow exchanging data with the socket client
bull Try to send and receive data from the module
145
Tera Term output
test_1
All
Lab 13 Socket Server ndash escape sequence
bull From Data Mode to Command Mode
bull Configuration variable used escape_seq (default is ldquoat+srdquo case sensitive
suggested to be sent by the local host in a single complete packet with no CR or
LF in the sequence)
bull Type at+s
bull Now itrsquos possible to send AT commands while the socket connection
is still active
146
Tera Term output
+WIND59Back to Command Mode
All
Tip During the Command Mode you cannot send data to client but can receive data from it Every data chunk generates an URC (+WIND64Sockd Pending Data) with limit to 4 (x730 bytes) This is the max number of pending messages From the 5th chunk on messages are lost
Lab 13 Socket Server ndash return to data mode
bull From Command Mode to Data Mode
bull While in Command Mode
bull Type AT+S (this is an AT command AT+S must be followed by ltCRgt)
bull The module returns in data mode
147
ENG-WPA
AP
Tera Term output
+WIND60Now in Data Mode
All
Lab 13 Socket Server ndash turn off
bull Turn OFF the Socket Server
bull Type at+s (to enter in command mode)
bull Type AT+SSOCKD=0
148
ENG-WPA
AP
Tera Term output
OK +WIND62Socket Client Gone1921681102
All
Proceed to the next LAB
Lab 14 Low power modes
bull Objective
bull Practice with Radio Power Save
bull Sleep Mode
bull Standby Mode
bull Prerequisites
bull module connected to the AP
150
Lab 14 Low power modes
This feature allows to enable the low power states
The module supports the ldquoRadio Power Saverdquo mode the ldquoSleeprdquo
mode and the ldquoStandbyrdquo mode
The module should be connected to the AP (as shown in Lab 3) in
order to use the ldquoRadio Power Saverdquo mode
Please refer to ldquoSPWF01S Power Management Application Notesrdquo for
more details
151
ENG-WPA AP
Low Power
Tera Term output
Lab 14 Joining a network
In order to be connected to an available Wifi network the AP parameters setting is needed
bull Set the SSID
bull Type AT+SSSIDTXT=ENG-WPA
bull Set the password
bull Type AT+SSCFG=wifi_wpa_psk_texthelloworld
bull Set the network privacy mode (0=none 1=WEP 2=WPA-Personal (TKIPAES) or WPA2-Personal (TKIPAES))
bull Type AT+SSCFG=wifi_priv_mode2
bull NB wifi_auth_type must be set to 0 AT+SSCFG=wifi_auth_type0
bull Set the network mode (1 = STA 2 = IBSS 3 = MiniAP)
bull Type AT+SSCFG=wifi_mode1
152
OK
All
Lab 14 Joining a network
bull Save the settings on the flash memory and reset the module
bull Type ATampW
bull Type AT+CFUN=1
153
+WIND0Console active +WIND46WPA Crunching PSK +WIND32WiFi Hardware Started +WIND21WiFi Scanning +WIND35WiFi Scan Complete (0x0) +WIND19WiFi Join 14D64D243600 +WIND25WiFi Association with ENG-WPA successful +WIND51WPA Handshake Complete +WIND24WiFi Up 19216801xx
All
Tera Term output
ENG-WPA AP
Low Power
Lab 14 Low power modes ndash Power Save 154
Module
Power State STM32 WLAN
Standby Standby Standby
Sleep Stop PS
Power Save Run PS or Fast-PS
Active Rx Run Rx Idle Rx Active
Active Tx Run Tx Active
Lab 14 Low power modes ndash Power Save
bull By default the module starts in ACTIVE mode
bull Enable the Power Save Mode
bull Type at+sscfg=wifi_powersave1 (ldquowifi_powersave2rdquo enables the Fast-PS mode)
bull Enable the doze operational mode
bull Type at+sscfg=wifi_operational_mode11 (ldquowifi_operational_mode12rdquo enables the quiescent mode)
bull Choose the wake up mode
1 Wake up every n beacon (specified in the wifi_beacon_wakeup variable)
bull Type at+sscfg=wifi_listen_interval0
bull Type at+sscfg=wifi_beacon_wakeup1
OR
2 Wake up every n beacon adaptively (specified in the wifi_beacon_wakeup variable)
bull Type at+sscfg=wifi_listen_interval1
bull Type at+sscfg=wifi_beacon_wakeup1
155
Tip The Wifi Power Save (wifi_powersave1) can also be quickly enabled using the command AT+CFUN=2
Lab 14 Low power modes ndash Power Save
bull Save the settings on the flash memory and reset the module
bull Type ATampW
bull Type AT+CFUN=1
bull The WIND66 message related to Low Power Mode will be
displayed
156
+WIND1Poweron (--SPWF01S) +WIND13ST SPWF01S IWM Copyright (c) 2012-2014 STMicroelectronics Inc All rights Reserved +WIND3Watchdog Running +WIND0Console active +WIND32WiFi Hardware Started +WIND21WiFi Scanning +WIND35WiFi Scan Complete (0x0) +WIND19WiFi Join 02621F518F0B +WIND25WiFi Association with IoT successful +WIND51WPA Handshake Complete +WIND24WiFi Up 1921681104 +WIND66Low Power mode1
All
Tera Term output
ENG-WPA AP
Low Power
Lab 14 Low power modes ndash Sleep Mode 157
Module
Power State STM32 WLAN
Standby Standby Standby
Sleep Stop PS or Fast-PS
Power Save Run PS or Fast-PS
Active Rx Run Rx Idle Rx Active
Active Tx Run Tx Active
Lab 14 Low power modes ndash Sleep Mode
bull In the Sleep Mode the core STM32 is stopped
bull Enable the Sleep Mode
bull Type at+sscfg=sleep_enabled1
bull Enable the Power Save Mode
bull Type at+sscfg=wifi_powersave1 (ldquowifi_powersave2rdquo enables the Fast-PS mode)
bull Enable the doze operational mode
bull Type at+sscfg=wifi_operational_mode11 (ldquowifi_operational_mode12rdquo enables the quiescent mode)
bull Choose the wake up mode
1 Wake up every n beacon (specified in the wifi_beacon_wakeup variable)
bull Type at+sscfg=wifi_listen_interval0
bull Type at+sscfg=wifi_beacon_wakeup1
OR
2 Wake up every n beacon adaptively (specified in the wifi_beacon_wakeup variable)
bull Type at+sscfg=wifi_listen_interval1
bull Type at+sscfg=wifi_beacon_wakeup1
158
Tip The Wifi Sleep Mode (and wifi_powersave1) can also be quickly enabled using the command AT+CFUN=3
Lab 14 Low power modes ndash Sleep Mode
bull Save the settings on the flash memory and reset the module
bull Type ATampW
bull Type AT+CFUN=1
bull The WIND69 message related to Sleep Mode will be displayed
159
+WIND1Poweron (--SPWF01S) +WIND13ST SPWF01S IWM Copyright (c) 2012-2014 STMicroelectronics Inc All rights Reserved +WIND3Watchdog Running +WIND0Console active +WIND32WiFi Hardware Started +WIND21WiFi Scanning +WIND35WiFi Scan Complete (0x0) +WIND19WiFi Join 02621F518F0B +WIND25WiFi Association with IoT successful +WIND51WPA Handshake Complete +WIND24WiFi Up 1921681104 +WIND66Low Power mode1 +WIND69Going into DeepSleep
All
Tera Term output
ENG-WPA AP
Low Power
Lab 14 Low power modes ndash Sleep Mode
bull Wake STM32 up using the GPIO6
bull Put the GPIO6 to 25V (jumper on JP2 as in
the picture)
bull The WIND messages will be displayed
160
+WIND70Resuming from DeepSleep +WIND53Wakeup (GPIO6 High)
All
Tera Term output
Lab 14 Low power modes ndash Sleep Mode
bull Put STM32 in sleep mode using the
GPIO6
bull Go back the GPIO6 floating (remove jumper
- as default)
bull The WIND69 message will be
displayed
161
+WIND69Going into DeepSleep
All
Tera Term output
Lab 14 Low power modes ndash Sleep Mode
bull Wake STM32 up using the remote
page
bull Connect a device to the same modulersquos
network
bull Open the following link
http[module_IP_address]remotehtml
bull Select ldquoWakerdquo and click on ldquoGordquo button
to wake up the module
bull The WIND message will be displayed
162
+WIND70Resuming from DeepSleep
All
Tera Term output
Lab 14 Low power modes ndash Sleep Mode
bull Put STM32 in sleep mode using the
remote page
bull Connect a device to the same modulersquos
network
bull Open the following link
http[module_IP_address]remotehtml
bull Select ldquoSleeprdquo and click on ldquoGordquo button
to put the module in sleep mode
bull The WIND message will be displayed
163
+WIND69Going into DeepSleep
All
Tera Term output
Lab 14 Low power modes ndash Standby Mode 164
Module
Power State STM32 WLAN
Standby Standby Standby
Sleep Stop PS or Fast-PS
Power Save Run PS or Fast-PS
Active Rx Run Rx Idle Rx Active
Active Tx Run Tx Active
Lab 14 Low power modes ndash Standby Mode
bull During the Standby Mode both the STM32 and the Radio will be
put in standby mode The standby mode allows to achieve the
lowest power consumption
bull Enable the Standby Mode
bull Type at+sscfg=sleep_enabled0 (Sleep mode must be disabled)
bull Type at+sscfg=standby_enabled1
bull Please be sure that GPIO6 isnrsquot forced high
bull Set the standby time to wake up via RTC alarm
bull Type at+sscfg=standby_time15
165
Tip The Wifi Standby Mode can also be quickly enabled using the command AT+CFUN=4
Lab 14 Low power modes ndash Standby Mode
bull Save the settings on the flash
memory and reset the module
bull Type ATampW
bull Type AT+CFUN=1
bull After 15 seconds the module will be
rebooted and will return in the
ACTIVE state
166
+WIND0Console active +WIND32WiFi Hardware Started +WIND38WiFi Powered Down +WIND67Going into Standby15 +WIND68Resuming from Standby +WIND1Poweron (--SPWF01S) +WIND13ST SPWF01S IWM Copyright (c) 2012-2014 STMicroelectronics Inc All rights Reserved +WIND3Watchdog Running +WIND0Console active +WIND32WiFi Hardware Started +WIND21WiFi Scanning +WIND35WiFi Scan Complete (0x0) +WIND19WiFi Join02621F518F0B +WIND25WiFi Association with IoT successful +WIND51WPA Handshake Complete +WIND24WiFi Up1921681113
All
Tera Term output
Lab 14 Low power modes ndash Standby Mode
bull Wake up the module using the GPIO6
bull Enable the Standby Mode
bull Type at+sscfg=sleep_enabled0 (make sure that
Sleep mode is disabled)
bull Type at+sscfg=standby_enabled1
bull Type ATampW
bull Type AT+CFUN=1
bull Put the GPIO6 to 25V to wake up the module
bull The WIND message will be displayed and
the module will return in ACTIVE state
167
+WIND68Resuming from Standby +WIND1Poweron (--SPWF01S) helliphelliphellip
All
Tera Term output
Proceed to the next LAB
Lab 15 STAMINI AP switcher
bull Objective
bull HW ldquoSTA to MiniAPrdquo switcher
bull Prerequisites
bull Work alone
169
Lab 15 STAMINI AP switcher
This feature allows to force the module in Mini AP mode starting from
a preexistent state
ldquoRecovery Moderdquo this functionality could be useful to lead the module
in a known state and to reconfigure it (ie using the firstset page)
The GPIO7 will be used to drive this feature
170
Lab 15 STAMINI AP switcher
bull Press and hold the SW2 button on the
EVAL and then perform a reset (HW reset
via SW1 button or SW reset via AT
command)
bull Release the SW2 button
bull The MiniAP mode will be started and the
module is discoverable with the following
SSID
bull iwm-XX-YY-ZZ where XX-YY-ZZ are the last
six digits of modulersquos MAC ADDRESS
171
+WIND2Reset +WIND1Poweron (--SPWF01S) +WIND13ST SPWF01S IWM Copyright (c) 2012-2014 STMicroelectronics Inc All rights Reserved +WIND39HW in miniAP mode (GPIO7 Low) +WIND0Console active +WIND3Watchdog Running +WIND32WiFi Hardware Started +WIND26WiFi Started AP +WIND24WiFi Up172312551
All
Tera Term output
Tip To exit from ldquominiAP mode via GPIO7rdquo perform a modulersquos reset
Proceed to the next LAB
Lab 16 IBSS connection
bull Objective
bull Create an IBSS network
bull Prerequisites
bull Work alone
173
Lab 16 Create an IBSS network
In an IBSS network the SSID is chosen by the client device that
starts the network
Module settings to create an IBSS network
bull Set the IBSS SSID
bull Type AT+SSSIDTXT=ADHOC
bull Set the network privacy mode (0=OPEN or 1=WEP are supported)
bull Type AT+SSCFG=wifi_priv_mode0
bull Set the network mode (2 = IBSS)
bull Type AT+SSCFG=wifi_mode2
174
OK
All
Tera Term output
Lab 16 Create an IBSS network
bull Set IP address IP default gateway IP DNS and IP netmask
bull Type AT+SSCFG=ip_ipaddr192168y1xx
bull Type AT+SSCFG=ip_gw192168y1
bull Type AT+SSCFG=ip_dns192168y1
bull Type AT+SSCFG=ip_netmask2552552550
bull Turn off the DHCP
bull Type AT+SSCFG=ip_use_dhcp0
175
OK
All
Tera Term output
Lab 16 Create an IBSS network
bull Save the settings on the flash memory and reset the module
bull Type ATampW
bull Type AT+CFUN=1
176
+WIND0Console active +WIND32WiFi Hardware Started +WIND21WiFi Scanning +WIND35WiFi Scan Complete (0x0) +WIND19WiFi Join EE33CE002418 +WIND25WiFi Association with ADHOC successful +WIND51WiFi Handshake Complete +WIND24WiFi Up 19216813
All
AD-HOC
Tera Term output
Lab 16 Create an IBSS network
bull Associate the iOS device with the
ADHOC network (iOS gt 8 could not
support the IBSS mode)
177
AD-HOC
Tip manual configuration of static TCPIPv4 parameters is suggested using a PC Ie PC TCPIPv4 properties
Lab 16 Create an IBSS network
bull Find your IP address
bull Type AT+SSTS
bull Open Safari web browser
bull In the address bar type
ltSPWF IP addressgtindexhtml
bull Type 192168y1xxindexhtml
178
AD-HOC
THANK YOU

Lab Prerequisites
STEVAL-IDW001V1 + STEVAL-PCC018V1
bull Hardware
bull STEVAL-IDW001V1 + STEVAL-PCC018V1 evaluation board for
SPWF01SA11 (used in the following LABs)
bull Utility software
bull CP210x USB to UART Bridge VCP Drivers (available from
httpwwwsilabscomproductsmcuPagesUSBtoUARTBridgeVCPDriversaspx)
bull Tera Term terminal emulator (available from
httpensourceforgejpprojectsttssh2releases)
bull Text Editor
bull Web browser
3
Lab Prerequisites
X-NUCLEO-IDW01M1
bull Hardware
bull X-NUCLEO-IDW01M1 Wi-Fi expansion board based on SWPF01SA
module for STM32 Nucleo
bull NUCLEO-F401RE NUCLEO-F103RB NUCLEO-L053R8 or NUCLEO-
L476RG
bull Utility software
bull X-CUBE-WIFI1 SW package httpwww2stcomcontentst_comenproductsembedded-softwaremcus-
embedded-softwarestm32-embedded-softwarestm32cube-expansion-softwarex-
cube-wifi1html)
bull Tera Term terminal emulator (available from
httpensourceforgejpprojectsttssh2releases)
bull Text Editor
bull Web browser
4
Hands on chapters 5
bull Lab 1 HW and SW setup
bull Lab 2 Set the SPWF variables
bull Lab 2a FOTA update
bull Lab 3 Access point connection (WPA or WEP)
bull Lab 4 Web client mode
bull Lab 5 Web server mode ndash files in RAM
bull Lab 6 Web server mode ndash files in FLASH
bull Lab 7 Socket interface
bull Lab 8 MiniAP mode for the first set
bull Lab 9 Socket interface in MiniAP mode
bull Lab 10 Web server in MiniAP mode
bull Lab 11 Remote control of GPIO interfaces
bull Lab 12 Input demo
bull Lab 13 Socket Server
bull Lab 14 Low Power Modes
bull Lab 15 HW switch from STA to MiniAP
bull Lab 16 IBSS mode
Lab 1 HW and SW setup
bull Objective
bull Hardware set-up
bull Software set-up
bull Prerequisites
bull Work alone
6
Lab 1 EVAL of the SPWF01Sxy1 module
STEVAL-IDW001V1 + STEVAL-PCC018V1 7
bull PlugampPlay Solution
bull AT command set
bull Power Supplied via the USB interface
bull UARTUSB bridge from Silicon Lab requires to
install the correspondent driver on your PC
bull SMD antenna and reset button on-board
HyperTerminal or similar
AT CommandsEvents
SPWF01SA11
VCOM
8
Lab 1 STEVAL-IDW001V1
STEVAL-IDW001V1 evaluation board of the WiFi module SPWF01SA11
8
9
Lab 1 STEVAL-PCC018V1
STEVAL-PCC018V1 USB to UART board
9
Lab 1 Hardware setup
STEVAL-IDW001V1 + STEVAL-PCC018V1
bull Insert the jumpers in the USB to
UART board as in the figure
bull Connect the Evaluation board to
the PC
bull Use the Device manager to find
the assigned COM port
10
Module automatically performs a reset Module automatically performs a scan for
available networks (if wifi_mode variable is ne 0) Module automatically enters in command mode STEVAL-PCC018V1 Yellow power LED will light up STEVAL-IDW001V1 Yellow power LED will light
up orange wifi link up LED will light up
Lab 1 Configuring the UART STEVAL-IDW001V1 + STEVAL-PCC018V1
bull Open Tera Term
bull Run Tera Term (open Tera term folder
and then run ttermproexe)
bull Open the assigned COM port
bull Tera Term Setup rarr Serial port
bull Baud rate 115200
bull Data 8 bit
bull Parity none
bull Stop 1 bit
bull Flow control none
bull Set CR in the Terminal setup
(default config)
bull Tera Term Setup rarr Terminal rarr
Transmit CR
11
Tip the modulersquos localecho is disabled by default The local echo option can be enabled on Tera Term in order to display the AT command entered
Lab 1 Configuring the UART STEVAL-IDW001V1 + STEVAL-PCC018V1
bull Open Tera Term
bull Command Mode
bull Type AT followed by a carriage return
(CR)
12
OK
All
Tera Term output
Lab 1 EVAL of the SPWF01Sxy1 module
X-NUCLEO-IDW01M1 amp X-CUBE-WIFI1 13
bull X-NUCLEO-IDW01M1
bull X-NUCLEO-IDW01M1 is a Wi-Fi evaluation board based on SPWF01SA module
bull X-CUBE-WIFI1
bull X-CUBE-WIFI1 is an expansion software package for STM32Cube
bull httpwww2stcomcontentst_comenproductsembedded-softwaremcus-embedded-softwarestm32-embedded-softwarestm32cube-expansion-softwarex-cube-wifi1html
Lab 1 Set Vcom binary in Nucleo X-NUCLEO-IDW01M1 amp X-CUBE-WIFI1
1 Flash VCOM binary into Nucleo drive
binaries
IDErsquos project
drag and drop
Projectbin
on Nucleo drive
14
NUCLEO-F401RE
F103RB
L053R8
L476RG
Lab 1 Configuring the UART X-NUCLEO-IDW01M1 amp X-CUBE-WIFI1
Setup TeraTerm window in order to send AT command to Wi-Fi module
2
Open Hyper terminal or TeraTerm Select correct COM port
Terminal setup Serial port setup
15
Lab 1 Configuring the UART X-NUCLEO-IDW01M1 amp X-CUBE-WIFI1
bull Open Tera Term
bull Command Mode
bull Type AT followed by a carriage return
(CR)
16
OK
All
Tera Term output
You are ready to use your Wi-Fi
EVAL board
Lab 2 Set the SPWF variables
bull Objective bull Run a command
bull Get the default configuration dump
bull Set host name
bull Set static IP parameters
bull Reset the module
bull Prerequisites bull Work alone
18
Lab 2 Run a command
Run a command - Syntax
- ATampx ltCRgt
- AT+S[Command] ltCRgt
Response - Syntax
xxxxxxxx
19
- OK
- Command output followed by OK
- ERROR Command not found
- ERROR Unrecognized key
AT Command Prefix
Not case sensitive
Lab 2 Set the SPWF variables
bull Get the default configuration dump
bull Type ATampV
bull Get a variable value
bull Type AT+SGCFG=console1_speed
Config dump frame
20
Variable
Name
Variable
Value
How to change the variable value
1 AT+SSCFG=[var name]xxxx
2 ATampW
Lab 2 Set the SPWF variables
bull Get the default configuration dump
bull Set host name
bull Type AT+SSCFG=ip_hostnamexxxxxxxx
21
Up to 31 characters (case sensitive) ldquospacebarrdquo is allowed
OK
All
Tera Term output
Lab 2 Set the SPWF variables
bull Get the default configuration dump
bull Set host name
bull Set IP address IP default gateway IP DNS and IP netmask (for
static usage)
bull Type AT+SSCFG=ip_ipaddr19216801xx
bull Type AT+SSCFG=ip_gw19216801
bull Type AT+SSCFG=ip_dns19216801
bull Type AT+SSCFG=ip_netmask2552552550
22
OK
All
Tera Term output
Tera Term output
Lab 2 Set the SPWF variables
bull Get the default configuration dump
bull Set host name
bull Set IP address IP default gateway IP
DNS and IP netmask (DHCP off)
bull Save settings on the flash memory
(mandatory after a variable change)
bull Type ATampW
bull Reset the module
bull Type AT+CFUN=1
23
+WIND21WiFi Scanning +WIND35WiFi Scan Complete (0x0)
All
Lab 2 Set the SPWF variables
bull Get the default configuration dump
bull Set host name
bull Set IP address IP default gateway IP
DNS and IP netmask (DHCP off)
bull Save settings on the flash memory
(mandatory after a variable change)
and reset the module
bull Check the new configuration dump
bull Type ATampV
24
Proceed to the next LAB
Lab 2a FOTA update
bull Objective
bull Upgrade the FW using the OTA file
bull Prerequisites
bull OTA file (provided in the SPWF01S FW
package)
bull External web server (ie Apache web
server running on PC)
26
Lab 2a FOTA update 27
The SPWF01Sx11 module (with external flash on board) allows
performing a Firmware Over-the-air update via a single HTTP GET
The SPWF01S will validate the firmware image it downloads load it
into a staging area then prompt the user to issue a reset command in
order to complete the update
Lab 2a FOTA update
The Apache Web Server will be used in this LAB
(Apache Web Server is available at this link
httparchiveapacheorgdisthttpdbinarieswin32httpd-2225-win32-x86-openssl-098ymsi)
Note please check that the local firewall is disabled or properly set It can
block the connection from module to Apache
bull Copy the OTA file (ie SPWF01S-xxxxxx-yyyyyyy-
RELEASE-mainota) in the Apache 22 htdocs folder
28
Lab 2a FOTA update
The FWUPDATE command allows to perform a Firmware Over-the-
air update via a single HTTP GET
bull Sintax
bull AT+SFWUPDATE=lthostnamegtltpathgtltportgt
bull Configuration parameters
bull lthostnamegt Target host DNS resolvable name or IP address
bull ltpathampqueryoptsgt Document path and optional query arguments
bull ltportgt Target host port
29
Lab 2a FOTA update
bull The module and the Apache Web server must be connected to the same network
bull In Tera Term type AT+SFWUPDATE=[Apache IP address][ota_fileota]
ie type AT+SFWUPDATE=192168xyyySPWF01S-150410-c2e37a3-RELEASE-
mainota
bull Reset the module to apply the new FW
bull Type AT+CFUN=1
bull Restore factory default settings (mandatory)
bull Type ATampF
30
Staging FW update for SPWF01SX11 version 1203-120918_01 FW length 276824 0x00002800 (offset 0x00000000 block len 4096) Write len 4096 -gt 0x0 Write len 4096 -gt 0x1000 (note - deleted extra output for clarity) Write len 4096 -gt 0x42000 Write len 2476 -gt 0x43000 (final) Wrote 276904 bytes Complete Update will be applied on next reboot (at+cfun=1)
All Tera Term output
Proceed to the next LAB
Lab 3 Access point connection
bull Objective
bull Scan for available networks
bull Join a network
bull Check the statusstatistics variables
bull Prerequisites
bull USB dongle and computer are set
up as described in Lab 2
bull Work alone
32
Lab 3 Scan for available networks
The SCAN command performs an immediate scan for available
networks Infrastructure (AP) and IBSS (Ad-Hoc) networks are both
reported Network type Channel BSSID SSID Signal strength (RSSI)
and 80211 capabilities are all reported
bull Type AT+SSCAN
bull Scan syntax AT+SSCAN [=lta|pgt[ltr|s|mgt[ltfnamegt]]] -- Perform a [activepassive]
network scan [filter offfilter on SSIDfilter on MAC] [print to file])
33
FOUND BSS 14D64D243600 CHAN 01 RSSI -28 SSID ENG-WPA CAPS 0431 WPA WPA2 FOUND BSS 00180A31EA78 CHAN 11 RSSI -82 SSID ZyckoItalyWireless CAPS 0531 WPA WPA2 FOUND BSS 06180A31E7E2 CHAN 11 RSSI -85 SSID ZyckoItalyGuest CAPS 0531 WPA WPA2 OK
All
Network type
Network MAC
Network
channel Network
RSSI
Network
SSID Network
capabilities
Tera Term output
Tera Term output
Lab 3 Joining a network (WPA Key)
In order to be connected to an available Wifi network the AP parameters setting is needed
bull Set the SSID
bull Type AT+SSSIDTXT=ENG-WPA
bull Set the password
bull Type AT+SSCFG=wifi_wpa_psk_texthelloworld
bull Set the network privacy mode (0=none 1=WEP 2=WPA-Personal (TKIPAES) or WPA2-Personal (TKIPAES))
bull Type AT+SSCFG=wifi_priv_mode2
bull NB wifi_auth_type must be set to 0 AT+SSCFG=wifi_auth_type0
bull Set the network mode (1 = STA 2 = IBSS 3 = MiniAP)
bull Type AT+SSCFG=wifi_mode1
34
OK
All
Lab 3 Joining a network (WPA Key)
bull Save the settings on the flash memory and reset the module
bull Type ATampW
bull Type AT+CFUN=1
35
+WIND0Console active +WIND46WPA Crunching PSK +WIND32WiFi Hardware Started +WIND21WiFi Scanning +WIND35WiFi Scan Complete (0x0) +WIND19WiFi Join 14D64D243600 +WIND25WiFi Association with ENG-WPA successful +WIND51WPA Handshake Complete +WIND24WiFi Up 19216801xx
All
ENG-WPA AP
Tera Term output
Lab 3 Joining a network (WPA Key)
bull Check the statusstatistics variables
bull Type AT+SSTS
bull Send a ping to the gateway (ip_gw)
bull Type AT+SPING=19216801
36
ENG-WPA AP
Tera Term output
OK
All
Lab 3 Joining a network (WEP Key)
Configure the module using the WEP key (4 possible combinations
available)
Sample table
37
AP configuration AT command to be used
Security Mode WEP
WEP Key Length 64 bit
(10 hex digits)
Authentication Open
Wep Key 1 1234567890
ie
at+sssidtxt=ENG-WEP
AT+SSCFG=wifi_wep_keys[0]1234567890
AT+SSCFG=wifi_wep_key_lens05
AT+SSCFG=wifi_auth_type0
AT+SSCFG=wifi_priv_mode1
AT+SSCFG=wifi_mode1
atampw
at+cfun=1
Security Mode WEP
WEP Key Length 64 bit
(10 hex digits)
Authentication Shared
Key
Wep Key 1 1234567890
ie
at+sssidtxt=ENG-WEP
AT+SSCFG=wifi_wep_keys[0]1234567890
AT+SSCFG=wifi_wep_key_lens05
AT+SSCFG=wifi_auth_type1
AT+SSCFG=wifi_priv_mode1
AT+SSCFG=wifi_mode1
atampw
at+cfun=1
AP configuration AT command to be used
Security Mode WEP
WEP Key Length
128 bit (26 hex digits)
Authentication Open
Wep Key 1
123456789012345678
90123456
ie
at+sssidtxt=ENG-WEP
AT+SSCFG=wifi_wep_keys[0]12345678
901234567890123456
AT+SSCFG=wifi_wep_key_lens0D
AT+SSCFG=wifi_auth_type0
AT+SSCFG=wifi_priv_mode1
AT+SSCFG=wifi_mode1
atampw
at+cfun=1
Security Mode WEP
WEP Key Length
128 bit (26 hex digits)
Authentication
Shared Key
Wep Key 1
123456789012345678
90123456
ie
at+sssidtxt=ENG-WEP
AT+SSCFG=wifi_wep_keys[0]12345678
901234567890123456
AT+SSCFG=wifi_wep_key_lens0D
AT+SSCFG=wifi_auth_type1
AT+SSCFG=wifi_priv_mode1
AT+SSCFG=wifi_mode1
atampw
at+cfun=1
Lab 3 Joining a network (WEP Key)
Notes
bull ldquowifi_wep_key_lensrdquo variable values 05 and 0D
bull Itrsquos possible to enter any text string into a WEP key box in the AP in which case it will be converted into a hexadecimal key using the ASCII values of the characters A maximum of 5 text characters can be entered for 64 bit keys and a maximum of 13 characters for 128 bit keys
In this case it needs to manually convert your ASCII password to HEX and complete the wifi_wep_keys[0] variable with the HEX value bull ie AP WEP key test1 ASCII to HEX 7465737431 So the AT command is AT+SSCFG=wifi_wep_keys[0]7465737431
bull Some APs allow user to insert a passphrase and then the AP automatically generates the hex keys In this scenario user have not to perform the ASCII to HEX conversion because the AP already gives it the hex value
38
Proceed to the next LAB
Lab 4 Web client mode
bull Objective
bull HTTP GET
bull HTTP POST
bull PUSH DATA ON SERIAL PORT
bull Prerequisites
bull USB dongle and computer are set up
as described in Lab 2
bull Work in couple
40
Lab 4 HTTP GET
The HTTP GET feature performs a single HTTP request to the specified
host and path The server response is printed on the UART enabled
bull Sintax
bull AT+SHTTPGET=lthostnamegtltpathgt[ltportgt]
bull Configuration parameters
bull lthostnamegt target host DNS resolvable name or IP address
bull ltpathgt document path
bull ltportgt target port
41
Lab 4 HTTP GET
bull Device A performs an HTTP GET to the Device B
bull Device A
AT+SHTTPGET=ltDevice B IP addrgtindexhtml
Type AT+SHTTPGET=19216801xxindexhtml
42
GET indexhtml HTTP10 User-Agent SPWF01S helliphelliphellip lth1gtST SPWF01Sx11 WiFi Modulelth1gt ltpgt Welcome to the ST SPWF01Sx11 WiFi Module ltpgt ltpgt This page was delivered from the SPWF01Sx11 internal HTTP server hellip lta href=statusshtmlgtSPWF01Sx11 Status Pageltagt ltpgt ltbodygt lthtmlgt OK
Device A
A B
Tera Term output
Lab 4 HTTP POST
The HTTP POST performs a post of the given path to the specified host The module can be only used as an HTTP POST client
bull Sintax
bull AT+SHTTPPOST =lthostnamegtltpathampqueryoptsgtltformcontentgt[ltportgt]
bull Configuration parameters
bull lthostnamegt target host DNS resolvable name or IP address
bull ltpathampqueryoptsgt document path
bull ltformcontentgt form to be submitted
bull ltportgt target port
43
Lab 4 HTTP POST
bull The SPWF01S performs an HTTP POST to an HTTP Post Test Server
bull Type
at+shttppost=posttestservercompostphpname=demoampemail=mymailampsubjec
t=subjampbody=message
bull The HTTP Post Test Server replies as
displayed in the Tera Term output if the HTTP
POST successfully
44
HTTP11 200 OK Date Fri 10 Jan 2014 132414 GMT Server Apache Access-Control-Allow-Origin Vary Accept-Encoding Content-Length 139 Connection close Content-Type texthtml Successfully dumped 4 post variables View it at httpwwwposttestservercomdata2014011005241443192628 Post body was 0 chars long OK
Device A
A B
Tera Term output
HTTP POST
SERVER
Lab 4 HTTPREQ bull The SPWF01S can perform a custom HTTP request to a specified
target Refer to the User Manual for more details
bull Type
AT+SHTTPREQ=wwwgooglecom8089
After ltCRgt the module accepts data We will try to open an non-existent web page
GET downloadTagphp HTTP10ltCRgtltLFgt
User-Agent SPWF01SltCRgtltLFgt
Host iwm-testltCRgtltLFgt
Connection closeltCRgtltLFgtltCRgtltLFgt
45
HTTP10 404 Not FoundltCRgtltLFgt Date Sun 31 Jan 2016 142704 GMTltCRgtltLFgt Content-Type texthtmlltCRgtltLFgt Server HTTP server (unknown)ltCRgtltLFgt Content-Length 49ltCRgtltLFgt X-XSS-Protection 1 mode=blockltCRgtltLFgt X-Frame-Options SAMEORIGINltCRgtltLFgt ltCRgtltLFgt lthtmlgtltbodygtlth1gt404 Not Foundlth1gtltbodygtlthtmlgtltLFgtltCRgt ltLFgt ltSUBgtltSUBgtltSUBgtltCRgtltLFgt ltCRgtltLFgt OKltCRgtltLFgt
All
A B
Tera Term output
[AT+SHTTPREQ =lthostnamegt[port]ltlengthgtltCRgtltdatagt]
Lab 4 Push data on serial port
A built-in html page ldquooutput_demohtmlrdquo allows to remotely push
characters on the serial port from a remote browser
46
output_demohtml
Modulersquos IP addressoutput_demohtml
Lab 4 Push data on serial port
bull Find your IP address
bull Type AT+SSTS
bull Associate your computer with the AP
bull Open your web browser
bull In the address bar type
ltmodulersquos IP
Addressgtoutput_demohtml
bull Type
19216801xxoutput_demohtml
47
Lab 4 Push data on serial port
bull Enter the text
bull In order to manage non-ASCII chars the ip_use_decoder variable must be modified (refer to the User Manual for more details)
bull Submit
bull The text will be sent to the serial port of the module
48
Proceed to the next LAB
Lab 5 Web Server use mode
bull Objective
bull List existing files
bull Print a file
bull Create a file
bull Append to an existing file
bull Delete an existing file
bull Prerequisites
bull USB dongle and computer are
set up as described in Lab 2
bull Work alone
50
Lab 5 Web server 51
The Web Server feature allows to create print and delete ASCII files in
the RAM memory of the module
Lab 5 List existing files
The FSL command lists type sizes and name of all the existing files
bull Type AT+SFSL
52
I 461 input_demoshtml I 180 messageshtml I 384 output_demohtml I 614 indexhtml I 157 peersshtml I 193 configshtml I 174 statusshtml I 212 404html I 2022 firstsethtml I 2898 remotehtml OK
All
Files stored in the STM32
FLASH memory
Tera Term output
Lab 5 Print a file
The FSP command prints the content
of an existing file
bull Type AT+SFSP=indexhtml
53
lthtmlgt ltheadgtlttitlegtST SPWF01Slttitlegtltheadgt ltbody bgcolor=white text=blackgt lth1gtST SPWF01S Intelligent WiFi Modulelth1gt ltpgtWelcome to the ST SPWF01S intelligent Wi-Fi moduleltpgt ltpgtThis page was delivered from the SPWF01S internal HTTP serverltpgt ltpgt lta href=configshtmlgtSPWF01S Configuration Settings Pageltagt ltpgt ltpgt lta href=statusshtmlgtSPWF01S Status Pageltagt ltpgt ltpgt lta href=peersshtmlgtSPWF01S Peers Pageltagt ltpgt ltpgtMore information about the SPWF01S and other ST products can be found at STs website lta href=httpwwwSTcomgthttpwwwSTcomltagtltpgt ltbodygt lthtmlgt OK
All Tera Term output
Tip How to use the offset and length parameters AT+SFSP=indexhtml[offset][length] ie Type AT+SFSP=indexhtml520 Length parameter is mandatory if is used the offset
Lab 5 Create a file
The FSC command allows to create a file inside the SPWF for
delivery by the SPWF HTTP server
bull Sintax
bull AT+SFSC =ltfnamegtltmax_lengt[lthttp_headergt]
bull Configuration parameters
bull lt filename gt filename to create
bull lt max_len gt amount of space to allocate for file max = 4096 bytes
bull lthttp_headergt 0=HTML header automatically added 1=HTML header not
added (as by default)
Type AT+SFSC=wifidemohtml1965
54
OK
All
Tera Term output
Lab 5 Configuring the UART
bull Set CR+LF in the Terminal setup
(to properly paste text in the
terminal)
bull Tera Term Setup rarr Terminal rarr
Transmit CR+LF
55
Tip The local echo option must be disabled on Tera Term
Added in FW 35 using the AT+SFSR command user can rename dynamic files stored in the RAM memory Refer to the User Manual for more details
Lab 5 Append to an existing file
The FSA command allows to append blocks of data to an existing file
This command accepts data after the ltcrgt at the end of the command
line
bull Sintax
bull AT+SFSA=ltfilenamegtltdatalengt
bull Configuration parameters
bull lt filename gt filename pre-created
bull lt datalen gt number of characters to append to the file
Type AT+SFSA=wifidemohtml1965
56
Now SPWF accepts data
Tips
Lab 5 Append to an existing file
bull Open wifidemotxt in the following
directory Hands_on
folderHTML_demo_page
bull Check you have set up CR+LF in the
Terminal setup (for more
information refer to the slide 48)
bull Copy the file content into Tera term
(paste with ALT+V or mouse right
button)
57
OK
All
Tera Term output
Lab 5 Append to an existing file
bull Open wifidemohtml
bull Open your Web browser (suggested Google
Chrome for HTML5 test)
bull In address bar type ltSPWF IP addrgtwifidemohtml
Type 19216801xxwifidemohtml
58
Lab 5 Configuring the UART
bull Re-set CR in the Terminal setup
as by default
bull Tera Term Setup rarr Terminal rarr
Transmit CR
59
Tip The local echo option can be re-enabled on Tera Term
Lab 5 List existing files
Lets list the files
bull Type AT+SFSL
60
D 1965 wifidemohtml I 461 input_demoshtml I 180 messageshtml I 384 output_demohtml I 614 indexhtml I 157 peersshtml I 193 configshtml I 174 statusshtml I 212 404html I 2022 firstsethtml I 2898 remotehtml OK
All
File stored in the RAM memory
Tera Term output
Lab 5 Delete an existing file
The FSD command allows to delete an existing file by name Static
files may not be deleted
bull Sintax
bull AT+SFSD=ltfilenamegt
Type AT+SFSD=wifidemohtml
61
OK
All
Tera Term output
Lab 5 Delete an existing file
bull Re-open wifidemohtml
bull Open your Web browser
bull In address bar ltSPWF IP addrgtwifidemohtml
Type 19216801xxwifidemohtml
62
Proceed to the next LAB
Lab 6 Web Server use mode
bull Objective
bull Create an image file
bull Filesystem update over-the-air
bull Filesystem update over UART
bull Prerequisites
bull Work alone
64
Lab 6 Web server 65
The Web Server feature also allows to upload generic files (PDF
HTML DOC JPEG and so on) in the EXTERNAL FLASH memory of
the module It needs to follow the below steps
- create an image file (IMG) using the tool provided in the Hands-on package
(the IMG contains the files to upload)
- Put the image in a generic and accessible Web Server (Apache Web server
will be used in the Hands-on as example)
- Using the proper AT command the IMG will be retrieved over-the-air and the
static files will be created in the external flash memory
Lab 6 Create an image file
bull Open the following folder and
extract all the files
hands_on_wififilesystem_update
bull Put your own files to upload in the
pages folder (max 512 Kbytes)
bull Run genbat
bull Open the pages folder and copy
outfileimg in your external Web
Server (Apache)
66
3
1
2
Lab 6 Create an image file
The Apache Web Server will be used in this tutorial
(Apache Web Server is available at this link
httparchiveapacheorgdisthttpdbinarieswin32httpd-2225-win32-x86-openssl-098ymsi)
Note please check that the local firewall is disabled or properly set It can
block the connection from module to Apache
bull Copy outfileimg in the Apache 22
htdocs folder (this is the default
root server directory)
67
4
Lab 6 Filesystem update
The HTTPDFSUPDATE command allows to create static files inside
the SPWF for delivery by the SPWF HTTP server
bull Sintax
bull AT+SHTTPDFSUPDATE=lthostnamegtltpathgt[port]
bull Configuration parameters
bull lthostnamegt external web server DNS resolvable name or IP address
bull ltpathgt document path
bull ltportgt target host port
68
Lab 6 Filesystem update
bull In Tera Term type
AT+SHTTPDFSUPDATE=192168x10xoutfileimg
bull Reset the module
bull Type AT+CFUN=1
69
Image length 357957 (offset 0x00080000 block len 4096) Write len 4096 -gt 0x80000 Write len 4096 -gt 0x81000 Write len 4096 -gt 0x82000 helliphelliphelliphellip helliphelliphelliphelliphelliphellip helliphelliphelliphelliphellip Write len 4096 -gt 0xD6000 Write len 1612 -gt 0xD7000 (final) Wrote 357964 bytes Complete Please reboot (at+cfun=1) OK
All
Tera Term output
The file system will be permanently deleted The new IMG will overwrite the existent files in the file system
Warning
Lab 6 Filesystem update
Lets list the files
bull Type AT+SFSL
70
E 2615 st766gif E 112374 modulepng E 2430 index1html E 419 indexhtml E 239887 MKTWiFipdf I 461 input_demoshtml I 180 messageshtml I 384 output_demohtml I 614 indexhtml I 157 peersshtml I 193 configshtml I 174 statusshtml I 212 404html I 2022 firstsethtml I 2898 remotehtml OK
All
Files stored in
the EXT FLASH memory
Tera Term output
Lab 6 Filesystem update
bull Open index1html page
bull Open your web browser
bull In the address bar ltSPWF IP addrgtindex1html
Type 192168x1xxindex1html
71
Lab 6 Filesystem erase
Erase the external httpd filesystem
bull Type AT+S HTTPDFSERASE
The files stored in the EXT FLASH memory will be erased
Lets list the files
bull Type AT+SFSL
72
I 461 input_demoshtml I 180 messageshtml I 384 output_demohtml I 614 indexhtml I 157 peersshtml I 193 configshtml I 174 statusshtml I 212 404html I 2022 firstsethtml I 2898 remotehtml OK
All
Tera Term output
Lab 6 Filesystem update
The HTTPDFSWRITE command allows to create static files inside
the SPWF via the UART interface The HW flow control MUST be
enabled in order to use the command
bull Sintax
bull AT+SHTTPDFSWRITE =ltdatalengtltCRgtltdatagt
bull Configuration parameters
bull ltdatalengt Amount of bytes to be sent
73
Lab 6 Filesystem update
bull Type AT+S HTTPDFSWRITE=357957
bull In Tera Term File ndash Send File
bull Reset the module
bull Type AT+CFUN=1
74
Image length 357957 (offset 0x00080000 block len 4096) Write len 4096 -gt 0x80000 Write len 4096 -gt 0x81000 Write len 4096 -gt 0x82000 helliphelliphelliphellip helliphelliphelliphelliphelliphellip helliphelliphelliphelliphellip Write len 4096 -gt 0xD6000 Write len 1612 -gt 0xD7000 (final) Wrote 357964 bytes Complete Please reboot (at+cfun=1) OK
All
Tera Term output
The file system will be permanently deleted The new IMG will overwrite the existent files in the file system
Warning
Proceed to the next LAB
Lab 7 Socket interface
bull Objective
bull Open TCPUDP connection
bull Write data to socket
bull Read data from socket
bull Close socket
bull Prerequisites
bull Work alone
76
TCPUDP socket
Socket
Client
Socket
Server
Lab 7 TCPUDPUART socket interface 77
The Socket interface allows communication via TCP UDP and UART
The SPWF is both a client and a server socket In this LAB will be
detailed the socket client feature
Ho
st
En
d P
rod
uct
Open TCPUDP connection
Write data to socket
Read data from socket
Close socket
Lab 7 Open TCPUDP connection
The SOCKON command allows to open a TCPUDP connection
to a specified host (up to 8 socket connections at same time)
bull Sintax
bull AT+SSOCKON=lthostnamegtltportgtltprotocolgtind
bull Configuration parameters
bull lthostnamegt target host DNS resolvable name or IP address
bull ltportgt TCPUDP socket port
bull ltprotocolgt t for TCP socket u for UDP socket
bull ind indicate when data has arrived (optional) Up to 4 (x730 bytes)
consecutive ldquoPending datardquo message (without any AT+SSOCKR) are
guaranteed It is suggested to empty the buffer using the AT+SSOCKR
command and to avoid exceeding 4 indications
78
Lab 7 Open TCPUDP connection
bull Open the TCP socket server (disable the firewall to properly
run it)
bull Folder hands_on_wifitcp socket serverserverexe
bull The TCP server listens for incoming connections on the port
32000 It sends back all data received
79
Optional - Lab 7 Open TCPUDP connection
bull Using an Android platform the socket server can be opened
using a specific APP (Socket Protocol available on Play Store)
bull The TCP socket server can be configured to listen for
incoming connections on the port 32000
bull Type 32000 on laquoPort Listen toraquo box
bull Click on Listen
80
Lab 7 Open TCPUDP connection
bull Type AT+SSOCKON=192168010x32000tind
bull The client and the server use the socket identifier (ID)
displayed
81
ID 00 OK
All
Tera Term output
Lab 7 Write data to socket
The SOCKW command allows to write data to the specified ID
socket
This command accepts data after the ltcrgt at the end of the
command line
bull Sintax
bull AT+SSOCKW=ltIDgtltlengt
bull Configuration parameters
bull ltIDgt socket identifier
bull ltlengt data length to send
82
Lab 7 Write data to socket
bull Write data
bull Type AT+SSOCKW=0013
bull Type hello worldltCRgt
bull SPWF shows that there are ltpending datagt and their amount
83
+WIND55Pending Data013
All
Tera Term output
ID
Pending
bytes
Note the module is waiting 13 bytes to be written to the socket As soon as 13 bytes (or characters) are sent from the terminal the module is going to write them to the socket and will be ready to receive new commands
Lab 7 Read data from socket
The SOCKR command allows to read data from socket
bull Sintax
bull AT+SSOCKR=ltIDgtltlengt
bull Configuration parameters
bull ltIDgt socket identifier
bull ltlengt data length to read
84
Lab 7 Read data from socket
bull Read data
bull Type AT+SSOCKR=0013
85
hello world OK
All
Tera Term output
Lab 7 Close socket
The SOCKC command allows to close socket
bull Sintax
bull AT+SSOCKC=ltIDgt
bull Configuration parameters
bull ltIDgt socket identifier
86
Tera Term output
Lab 7 Close socket
bull Close socket
bull Type AT+SSOCKC=00
87
OK
All
Proceed to the next LAB
Lab 8 MiniAP mode for the first set
bull Objective
bull Create a direct connection between
the module and an end device
bull First set of the module in order to
enable the connection between the
module and a generic AP
bull Prerequisites
bull Work alone
89
Tera Term output
Lab 8 Configuring the module in MiniAP mode
The Mini AP mode is available starting from the following FW release
SPWF01S-131115-de4568d-RELEASE
In order to set the module in Mini AP mode the following parameters
are needed
bull Set the SSID
bull Type AT+SSSIDTXT=SPWF_AP
bull Set the network privacy mode (0=OPEN or 1=WEP are supported)
bull Type AT+SSCFG=wifi_priv_mode0
bull Set the network mode (1 = STA 2 = IBSS 3 = MiniAP)
bull Type AT+SSCFG=wifi_mode3
90
OK
All
Lab 8 Configuring the module in MiniAP mode
bull Save the settings on the flash memory and reset the module
bull Type ATampW
bull Type AT+CFUN=1
91
+WIND0Console active +WIND32WiFi Hardware Started +WIND26WiFi Started AP with network SPWF_AP +WIND24WiFi Up 172181511
All
Tera Term output
SPWF_AP
Lab 8 Configuring the module in MiniAP mode (WEP Key)
Configure the module using the WEP key (2 possible combinations
available)
Sample table
92
AP configuration AT command to be used
Security Mode WEP
WEP Key Length 64 bit
(10 hex digits)
Authentication Open
Wep Key 1 1234567890
ie
at+sssidtxt=SPWF_AP
AT+SSCFG=wifi_wep_keys[0]1234567890
AT+SSCFG=wifi_wep_key_lens05
AT+SSCFG=wifi_auth_type0
AT+SSCFG=wifi_priv_mode1
AT+SSCFG=wifi_mode3
atampw
at+cfun=1
AP configuration AT command to be used
Security Mode WEP
WEP Key Length
128 bit (26 hex digits)
Authentication Open
Wep Key 1
123456789012345678
90123456
ie
at+sssidtxt=SPWF_AP
AT+SSCFG=wifi_wep_keys[0]12345678
901234567890123456
AT+SSCFG=wifi_wep_key_lens0D
AT+SSCFG=wifi_auth_type0
AT+SSCFG=wifi_priv_mode1
AT+SSCFG=wifi_mode3
atampw
at+cfun=1
Lab 8 Configuring the module in MiniAP mode (WEP Key)
Notes
bull ldquowifi_wep_key_lensrdquo variable values 05 and 0D
bull Itrsquos possible to enter any text string as WEP key It have to be converted into a
hexadecimal key using the ASCII values of the characters A maximum of 5 text
characters can be entered for 64 bit keys and a maximum of 13 characters for 128
bit keys
In this case it needs to manually convert your ASCII password to
HEX and complete the wifi_wep_keys[0] variable with the HEX
value
bull ie WEP key test1
ASCII to HEX 7465737431
So the AT command is AT+SSCFG=wifi_wep_keys[0]7465737431
93
Lab 8 Customizing the MiniAP address (optional)
Starting from FW 33 the module allows user to customize the IP address of the MiniAP
bull Set the SSID
bull Type AT+SSSIDTXT=SPWF_AP
bull Set the network privacy mode (0=OPEN or 1=WEP are supported)
bull Type AT+SSCFG=wifi_priv_mode0
bull Set the network mode (1 = STA 2 = IBSS 3 = MiniAP)
bull Type AT+SSCFG=wifi_mode3
bull Set the use_dhcp mode (0 = DHCP server off 1 = DHCP server on 2 = DHCP server on and customizable)
bull Type AT+SSCFG=ip_use_dhcp2
bull Set the MiniAP address
bull Type AT+SSCFG=ip_ipaddr19216801
bull Save the settings on the flash memory and reset the module
bull Type ATampW
bull Type AT+CFUN=1
94
Tera Term output
+WIND0Console active +WIND32WiFi Hardware Started +WIND26WiFi Started AP with network SPWF_AP +WIND24WiFi Up 19216801
All
Tip the MiniAP will assign sequential addresses to the client ie 1deg client 19216802 2deg client 19216803
Lab 8 Mini AP mode
bull Associate your end device to the
SPWF_AP network
bull Find the SPWF_AP network and connect
the end device to the module
95
SPWF_AP +WIND2890187C960D0B Associated +WIND29DHCP reply for 17218151290187C960D0B to 172181512 +WIND29DHCP reply for 17218151290187C960D0B to 172181512
All
Tera Term output
Lab 8 Mini AP mode
bull Open your web browser
bull In the address bar type captiveportalnet
96
SPWF_AP
Tip The Mini AP domain can be set using the variable ip_apdomainname The default value is ldquocaptiveportalnetrdquo
The Mini AP default homepage can be set using the variable ip_apredirect The default value is ldquofirstsethtmlrdquo
Tip If the AP domain name is not quickly opened itrsquos suggested to turn off an eventual proxy server (check the connection settings or browser preferences)
Lab 8 First Set Page
bull The first set page allows to configure the module in IDLE mode
STATION mode IBSS mode and MINI AP mode
97
Used for STA IBSS MINI AP
Mandatory for IDLE STA IBSS MINI AP
Used for STA IBSS (WEP) MINI AP (WEP)
Used for STA (if DHCP = OFF) IBSS
(mandatory) MINI AP (if DHCP = OFF)
Used for STA IBSS (mandatory DHCP = OFF) MINI AP
Used for STA (WEP key) IBSS (WEP) MINI AP (WEP)
Used for STA IBSS MINI AP
Lab 8 Mini AP mode
bull Set all the parameters required in order to enable the connection
between the module and a generic AP
ie AP configured in WPAWPA2 mode
bull MiniAP PassKey anonymous (by default)
bull SSID of the access point
bull Password of the access point
bull Authentication type of the access point
bull Use mode of the module
98
Tip The Mini AP PassKey can be set using the variable ldquouser_descrdquo The default value is ldquoanonymousrdquo
Note In order to manage non-ASCII chars the ip_use_decoder variable must be modified according as below at+sscfg=ip_use_decoder0 no decoding [default] at+sscfg=ip_use_decoder1 RAW decoding (the USER and PSK fields must be completed in HEX) at+sscfg=ip_use_decoder2 UTF-8 decoding at+sscfg=ip_use_decoder6 HTML entities decoding
Lab 8 Mini AP mode
bull Click on GO button and then send the
parameters confirming with OK
99
SPWF_AP
AP
SSID ciscosb2
Lab 8 Mini AP mode
bull The module will receive the parameters and will automatically
connect to the access point required
100
+WIND57Received SSID is ciscosb2 +WIND57Received PWD is +WIND57Received Auth mode is 2 +WIND57Received Mode is 1 +WIND2RESET +WIND1Poweron (--SPWF01S) +WIND13ST IWM Copyright (c) 2012-2013 STmicroelectronics +WIND3Watchdog Running +WIND0Console active +WIND46WPA Crunching PSK +WIND32WiFi Hardware Started +WIND21WiFi Scanning +WIND35WiFi Scan Complete (0x0) +WIND19WiFi Join 02621F518F0B +WIND25WiFi Association with ciscosb2 successful +WIND51WPA Handshake Complete +WIND24WiFi Up 1921681106
All
Tera Term output
ciscosb2
AP
Lab 8 Mini AP mode ndash RAW decoding example
101
Note In order to manage non-ASCII chars the ip_use_decoder variable must be modified according as below at+sscfg=ip_use_decoder0 no decoding [default] at+sscfg=ip_use_decoder1 RAW decoding (the USER and PSK fields must be completed in HEX) at+sscfg=ip_use_decoder2 UTF-8 decoding at+sscfg=ip_use_decoder6 HTML entities decoding
7177657261736466
AP SSIS
AP PSK
Proceed to the next LAB
Lab 9 Socket interface - MiniAP mode
bull Objective
bull Create a direct connection between
the module and an end device
bull Socket interface used in MiniAP
mode
bull Prerequisites
bull Work alone
103
Tera Term output
Lab 9 Configuring the module in MiniAP mode
The Mini AP mode (available starting from the SPWF01S-131115-de4568d-RELEASE) also allows to use the socket interface The procedure is the same as in Lab 7
In order to set the module in Mini AP mode the following parameters are needed
bull Set the SSID
bull Type AT+SSSIDTXT=SPWF_AP
bull Set the network privacy mode
bull Type AT+SSCFG=wifi_priv_mode0
bull Set the network mode (1 = STA 2 = IBSS 3 = MiniAP)
bull Type AT+SSCFG=wifi_mode3
104
OK
All
Lab 9 Configuring the module in MiniAP mode
bull Save the settings on the flash memory and reset the module
bull Type ATampW
bull Type AT+CFUN=1
105
+WIND0Console active +WIND32WiFi Hardware Started +WIND26WiFi Started AP with network SPWF_AP +WIND24WiFi Up 172181511
All
Tera Term output
SPWF_AP
Lab 9 Mini AP mode
bull Connect your PC to the SPWF_AP
network
bull Find the SPWF_AP network and connect
the end device to the module
106
SPWF_AP +WIND2890187C960D0B Associated +WIND29DHCP reply for 17218151290187C960D0B to 172181512 +WIND29DHCP reply for 17218151290187C960D0B to 172181512
All
Tera Term output
Lab 9 Open TCPUDP connection
As described in the Lab 7 the SOCKON command allows to
open a TCPUDP connection to a specified host
bull Sintax
bull AT+SSOCKON=lthostnamegtltportgtltprotocolgtind
bull Configuration parameters
bull lthostnamegt target host DNS resolvable name or IP address
bull ltportgt TCPUDP socket port
bull ltprotocolgt t for TCP socket u for UDP socket
bull ind indicate when data has arrived (optional) Up to 4 consecutive ldquoPending
datardquo message (without any AT+SSOCKR) are guaranteed It is
suggested to empty the buffer using the AT+SSOCKR command and
to avoid exceeding 4 indications
107
Lab 9 Open TCP connection
bull Open the TCP socket server (disable the firewall to properly
run it)
bull Folder hands_on_wifitcp socket serverserverexe
bull The TCP server listens for incoming connections on the port
32000 It sends back all data received
108
Lab 9 Open TCP connection
bull Type AT+SSOCKON=17218151232000tind
bull The client and the server use the socket identifier (ID)
displayed
109
ID 00 OK
All
Tera Term output
Lab 9 Write data to socket
The SOCKW command allows to write data to the specified ID
socket
This command accepts data after the ltcrgt at the end of the
command line
bull Sintax
bull AT+SSOCKW=ltIDgtltlengt
bull Configuration parameters
bull ltIDgt socket identifier
bull ltlengt data length to send
110
Lab 9 Write data to socket
bull Write data
bull Type AT+SSOCKW=0013
bull Type hello worldltCRgt
bull SPWF shows that there are ltpending datagt and their amount
111
+WIND55Pending Data013
All
Tera Term output
ID
Pending
bytes
Note the module is waiting 13 bytes to be written to the socket As soon as 13 bytes (or characters) are sent from the terminal the module is going to write them to the socket and will be ready to receive new commands
Lab 9 Read data from socket
The SOCKR command allows to read data from socket
bull Sintax
bull AT+SSOCKR=ltIDgtltlengt
bull Configuration parameters
bull ltIDgt socket identifier
bull ltlengt data length to read
112
Lab 9 Read data from socket
bull Read data
bull Type AT+SSOCKR=0013
113
hello world OK
All
Tera Term output
Lab 9 Close socket
The SOCKC command allows to close socket
bull Sintax
bull AT+SSOCKC=ltIDgt
bull Configuration parameters
bull ltIDgt socket identifier
114
Tera Term output
Lab 9 Close socket
bull Close socket
bull Type AT+SSOCKC=00
115
OK
All
Proceed to the next LAB
Lab 10 Web server - MiniAP mode
bull Objective
bull Create a direct connection between
the module and an end device
bull Web server used in MiniAP mode
bull Prerequisites
bull Work alone
117
Tera Term output
Lab 10 Configuring the module in MiniAP mode
The Mini AP mode (available starting from the SPWF01S-131115-de4568d-RELEASE) also allows to use the module file system (both RAM and IntExt FLASH)
In order to set the module in Mini AP mode the following parameters are needed
bull Set the SSID
bull Type AT+SSSIDTXT=SPWF_AP
bull Set the network privacy mode
bull Type AT+SSCFG=wifi_priv_mode0
bull Set the network mode (1 = STA 2 = IBSS 3 = MiniAP)
bull Type AT+SSCFG=wifi_mode3
118
OK
All
Lab 10 Configuring the module in MiniAP mode
bull Save the settings on the flash memory and reset the module
bull Type ATampW
bull Type AT+CFUN=1
119
+WIND0Console active +WIND32WiFi Hardware Started +WIND26WiFi Started AP with network SPWF_AP +WIND24WiFi Up 172181511
All
Tera Term output
SPWF_AP
Lab 10 Mini AP mode
bull Connect your PC to the SPWF_AP
network
bull Find the SPWF_AP network and connect
the end device to the module
120
SPWF_AP +WIND2890187C960D0B Associated +WIND29DHCP reply for 17218151290187C960D0B to 172181512 +WIND29DHCP reply for 17218151290187C960D0B to 172181512
All
Tera Term output
Lab 10 Access to Web server - Mini AP mode
bull Open your web browser
bull In the address bar type
captiveportalnetindexhtml
bull The SPWF01S homepage will be
displayed
121
SPWF_AP Tip The Mini AP domain can be set using the variable ip_apdomainname The default value is ldquocaptiveportalnetrdquo
Lab 10 Access to Web server - Mini AP mode
bull Open the SPWF01S Device Status
bull click on the highlighted link
bull The SPWF01S Device Status will be
displayed
122
SPWF_AP Tip The Mini AP domain can be set using the variable ip_apdomainname The default value is ldquocaptiveportalnetrdquo
The Mini AP default homepage can be set using the variable ip_apredirect The default value is ldquofirstsethtmlrdquo
Proceed to the next LAB
Lab 11 Remotely control - GPIOs
bull Objective
bull write remotely a GPIO
bull configure remotely a GPIO
bull read remotely a GPIO
bull Prerequisites
bull module connected to the AP or
module configured in MiniAP mode
124
Lab 11 Remotely control - GPIO
This feature allows to remotely write configure and read a GPIO
The module should be connected to the AP (as shown in Lab 3) or
should be configured in Mini AP mode (as shown in Lab 8)
The external client have to open the remotehtml page stored in the
module
125
ENG-WPA AP
SPWF_AP
miniAP
Tera Term output
Lab 11 Joining a network
In order to be connected to an available Wifi network the AP parameters setting is needed
bull Set the SSID
bull Type AT+SSSIDTXT=ENG-WPA
bull Set the password
bull Type AT+SSCFG=wifi_wpa_psk_texthelloworld
bull Set the network privacy mode (0=none 1=WEP 2=WPA-Personal (TKIPAES) or WPA2-Personal (TKIPAES))
bull Type AT+SSCFG=wifi_priv_mode2
bull NB wifi_auth_type must be set to 0 AT+SSCFG=wifi_auth_type0
bull Set the network mode (1 = STA 2 = IBSS 3 = MiniAP)
bull Type AT+SSCFG=wifi_mode1
126
OK
All
Lab 11 Joining a network
bull Save the settings on the flash memory and reset the module
bull Type ATampW
bull Type AT+CFUN=1
127
+WIND0Console active +WIND46WPA Crunching PSK +WIND32WiFi Hardware Started +WIND21WiFi Scanning +WIND35WiFi Scan Complete (0x0) +WIND19WiFi Join 14D64D243600 +WIND25WiFi Association with ENG-WPA successful +WIND51WPA Handshake Complete +WIND24WiFi Up 19216801xx
All
ENG-WPA AP
Tera Term output
Lab 11 Remotely control in MiniAP mode - GPIO
bull Open your web browser
bull In the address bar type
192168x1xxremotehtml
128
ENG-WPA
AP
Lab 11 Remotely control in MiniAP mode - GPIO
bull Try to write the GPIO14 connected to the LED3 (check if the
LED3 is mounted on your EVAL BOARD otherwise can be used
the GPIO13)
bull Click on the laquoGOraquo button
and LED3 will switch on
129
ENG-WPA
AP
Proceed to the next LAB
Lab 12 Input demo
bull Objective
bull Send a message from the server (wifi
module) to an external client connected
to the same network
bull Prerequisites
bull module connected to the AP or module
configured in MiniAP mode
131
Lab 12 Input demo
The module provides some DEMOs to show the interaction between
the module and an external client connected to the same network
The module should be connected to the AP (as shown in Lab 3) or
should be configured in Mini AP mode (as shown in Lab 8)
In order to run this demo the client have to open the
input_demoshtml page stored in the module
132
ENG-WPA AP
SPWF_AP
miniAP
Tera Term output
Lab 12 Joining a network
In order to be connected to an available Wifi network the AP parameters setting is needed
bull Set the SSID
bull Type AT+SSSIDTXT=ENG-WPA
bull Set the password
bull Type AT+SSCFG=wifi_wpa_psk_texthelloworld
bull Set the network privacy mode (0=none 1=WEP 2=WPA-Personal (TKIPAES) or WPA2-Personal (TKIPAES))
bull Type AT+SSCFG=wifi_priv_mode2
bull NB wifi_auth_type must be set to 0 AT+SSCFG=wifi_auth_type0
bull Set the network mode (1 = STA 2 = IBSS 3 = MiniAP)
bull Type AT+SSCFG=wifi_mode1
133
OK
All
Lab 12 Joining a network
bull Save the settings on the flash memory and reset the module
bull Type ATampW
bull Type AT+CFUN=1
134
+WIND0Console active +WIND46WPA Crunching PSK +WIND32WiFi Hardware Started +WIND21WiFi Scanning +WIND35WiFi Scan Complete (0x0) +WIND19WiFi Join 14D64D243600 +WIND25WiFi Association with ENG-WPA successful +WIND51WPA Handshake Complete +WIND24WiFi Up 19216801xx
All
ENG-WPA AP
Tera Term output
Lab 12 Input demo
bull Open your web browser
bull In the address bar type
192168x1xxinput_demoshtml
bull Insert the message to the client
ie type laquotestraquo (suggested ndash copy
the string and paste it in the
terminal) and then send a carriage
return
135
VERY IMPORTANT
Both client and server are pending (2 sec) after the page
request If no message is sent from the module a timeout
mechanism will be triggered
The server shows the ldquo+WIND56 messagerdquo and it will
wait for a string to be inserted and terminated by [Cr] ldquo+WIND56Insert message to clientdrdquo d is the Nth input SSI into html page (please refer to CGIampSSI Application Notes for details)
Lab 12 Input demo
bull The module receives the HTML
page containing the string inserted
server-side
bull Below this string there are two
buttons to try again the demo or to
return to the homepage
136
Proceed to the next LAB
Lab 13 Socket Server functionality
bull Objective
bull Configure a Server Listening Port
bull Open a TCP connection from a
socket client to the module
bull Data modeCommand Mode usage
bull Prerequisites
bull module connected to the AP or
module configured in MiniAP mode
bull PC to be used as socket client
138
TCP socket
Socket
Server
Socket
Client
Lab 13 Socket Server
This feature allows to enable the socket server mode The module
can be able to listen for an incoming connection on the specified port
The module should be connected to the AP (as shown in Lab 3) or
should be configured in Mini AP mode (as shown in Lab 8)
Please refer to ldquoSocket Server Application Notesrdquo for more details
139
ENG-WPA AP
SPWF_AP
miniAP
Tera Term output
Lab 13 Joining a network
In order to be connected to an available Wifi network the AP parameters setting is needed
bull Set the SSID
bull Type AT+SSSIDTXT=ENG-WPA
bull Set the password
bull Type AT+SSCFG=wifi_wpa_psk_texthelloworld
bull Set the network privacy mode (0=none 1=WEP 2=WPA-Personal (TKIPAES) or WPA2-Personal (TKIPAES))
bull Type AT+SSCFG=wifi_priv_mode2
bull NB wifi_auth_type must be set to 0 AT+SSCFG=wifi_auth_type0
bull Set the network mode (1 = STA 2 = IBSS 3 = MiniAP)
bull Type AT+SSCFG=wifi_mode1
140
OK
All
Lab 13 Joining a network
bull Save the settings on the flash memory and reset the module
bull Type ATampW
bull Type AT+CFUN=1
141
+WIND0Console active +WIND46WPA Crunching PSK +WIND32WiFi Hardware Started +WIND21WiFi Scanning +WIND35WiFi Scan Complete (0x0) +WIND19WiFi Join 14D64D243600 +WIND25WiFi Association with ENG-WPA successful +WIND51WPA Handshake Complete +WIND24WiFi Up 19216801xx
All
ENG-WPA AP
Tera Term output
Lab 13 Socket Server
bull Socket server turn ON the TCP Socket Server (user must
specify the server listening port)
bull Type AT+SSOCKD=32000 (AT+SOCKD=32000u for UDP socket server)
bull Check the status of the socket server
bull Type AT+SSTS=ip_sockd_port
142
ENG-WPA
AP
Tera Term output
OK ip_sockd_port = 32000 OK
All
Tip you can Turn OFF the Socket Server using a server listening port = 0 (type AT+SSOCKD=0)
Lab 13 Socket Server
bull Socket client can be used a simple socket client in order to test the communication
(SocketTest ndash available on httpsourceforgenetprojectssockettest)
143
ENG-WPA
AP
Lab 13 Socket Server
bull Socket client
bull Insert the modulersquos IP Address and the port
bull Click on Connect button
144
Tera Term output
+WIND61Incoming Socket Client1921681102 +WIND60Now in Data Mode
All
Lab 13 Socket Server
bull The module (socket server) enters in data mode and a bidirectional channel is
created to allow exchanging data with the socket client
bull Try to send and receive data from the module
145
Tera Term output
test_1
All
Lab 13 Socket Server ndash escape sequence
bull From Data Mode to Command Mode
bull Configuration variable used escape_seq (default is ldquoat+srdquo case sensitive
suggested to be sent by the local host in a single complete packet with no CR or
LF in the sequence)
bull Type at+s
bull Now itrsquos possible to send AT commands while the socket connection
is still active
146
Tera Term output
+WIND59Back to Command Mode
All
Tip During the Command Mode you cannot send data to client but can receive data from it Every data chunk generates an URC (+WIND64Sockd Pending Data) with limit to 4 (x730 bytes) This is the max number of pending messages From the 5th chunk on messages are lost
Lab 13 Socket Server ndash return to data mode
bull From Command Mode to Data Mode
bull While in Command Mode
bull Type AT+S (this is an AT command AT+S must be followed by ltCRgt)
bull The module returns in data mode
147
ENG-WPA
AP
Tera Term output
+WIND60Now in Data Mode
All
Lab 13 Socket Server ndash turn off
bull Turn OFF the Socket Server
bull Type at+s (to enter in command mode)
bull Type AT+SSOCKD=0
148
ENG-WPA
AP
Tera Term output
OK +WIND62Socket Client Gone1921681102
All
Proceed to the next LAB
Lab 14 Low power modes
bull Objective
bull Practice with Radio Power Save
bull Sleep Mode
bull Standby Mode
bull Prerequisites
bull module connected to the AP
150
Lab 14 Low power modes
This feature allows to enable the low power states
The module supports the ldquoRadio Power Saverdquo mode the ldquoSleeprdquo
mode and the ldquoStandbyrdquo mode
The module should be connected to the AP (as shown in Lab 3) in
order to use the ldquoRadio Power Saverdquo mode
Please refer to ldquoSPWF01S Power Management Application Notesrdquo for
more details
151
ENG-WPA AP
Low Power
Tera Term output
Lab 14 Joining a network
In order to be connected to an available Wifi network the AP parameters setting is needed
bull Set the SSID
bull Type AT+SSSIDTXT=ENG-WPA
bull Set the password
bull Type AT+SSCFG=wifi_wpa_psk_texthelloworld
bull Set the network privacy mode (0=none 1=WEP 2=WPA-Personal (TKIPAES) or WPA2-Personal (TKIPAES))
bull Type AT+SSCFG=wifi_priv_mode2
bull NB wifi_auth_type must be set to 0 AT+SSCFG=wifi_auth_type0
bull Set the network mode (1 = STA 2 = IBSS 3 = MiniAP)
bull Type AT+SSCFG=wifi_mode1
152
OK
All
Lab 14 Joining a network
bull Save the settings on the flash memory and reset the module
bull Type ATampW
bull Type AT+CFUN=1
153
+WIND0Console active +WIND46WPA Crunching PSK +WIND32WiFi Hardware Started +WIND21WiFi Scanning +WIND35WiFi Scan Complete (0x0) +WIND19WiFi Join 14D64D243600 +WIND25WiFi Association with ENG-WPA successful +WIND51WPA Handshake Complete +WIND24WiFi Up 19216801xx
All
Tera Term output
ENG-WPA AP
Low Power
Lab 14 Low power modes ndash Power Save 154
Module
Power State STM32 WLAN
Standby Standby Standby
Sleep Stop PS
Power Save Run PS or Fast-PS
Active Rx Run Rx Idle Rx Active
Active Tx Run Tx Active
Lab 14 Low power modes ndash Power Save
bull By default the module starts in ACTIVE mode
bull Enable the Power Save Mode
bull Type at+sscfg=wifi_powersave1 (ldquowifi_powersave2rdquo enables the Fast-PS mode)
bull Enable the doze operational mode
bull Type at+sscfg=wifi_operational_mode11 (ldquowifi_operational_mode12rdquo enables the quiescent mode)
bull Choose the wake up mode
1 Wake up every n beacon (specified in the wifi_beacon_wakeup variable)
bull Type at+sscfg=wifi_listen_interval0
bull Type at+sscfg=wifi_beacon_wakeup1
OR
2 Wake up every n beacon adaptively (specified in the wifi_beacon_wakeup variable)
bull Type at+sscfg=wifi_listen_interval1
bull Type at+sscfg=wifi_beacon_wakeup1
155
Tip The Wifi Power Save (wifi_powersave1) can also be quickly enabled using the command AT+CFUN=2
Lab 14 Low power modes ndash Power Save
bull Save the settings on the flash memory and reset the module
bull Type ATampW
bull Type AT+CFUN=1
bull The WIND66 message related to Low Power Mode will be
displayed
156
+WIND1Poweron (--SPWF01S) +WIND13ST SPWF01S IWM Copyright (c) 2012-2014 STMicroelectronics Inc All rights Reserved +WIND3Watchdog Running +WIND0Console active +WIND32WiFi Hardware Started +WIND21WiFi Scanning +WIND35WiFi Scan Complete (0x0) +WIND19WiFi Join 02621F518F0B +WIND25WiFi Association with IoT successful +WIND51WPA Handshake Complete +WIND24WiFi Up 1921681104 +WIND66Low Power mode1
All
Tera Term output
ENG-WPA AP
Low Power
Lab 14 Low power modes ndash Sleep Mode 157
Module
Power State STM32 WLAN
Standby Standby Standby
Sleep Stop PS or Fast-PS
Power Save Run PS or Fast-PS
Active Rx Run Rx Idle Rx Active
Active Tx Run Tx Active
Lab 14 Low power modes ndash Sleep Mode
bull In the Sleep Mode the core STM32 is stopped
bull Enable the Sleep Mode
bull Type at+sscfg=sleep_enabled1
bull Enable the Power Save Mode
bull Type at+sscfg=wifi_powersave1 (ldquowifi_powersave2rdquo enables the Fast-PS mode)
bull Enable the doze operational mode
bull Type at+sscfg=wifi_operational_mode11 (ldquowifi_operational_mode12rdquo enables the quiescent mode)
bull Choose the wake up mode
1 Wake up every n beacon (specified in the wifi_beacon_wakeup variable)
bull Type at+sscfg=wifi_listen_interval0
bull Type at+sscfg=wifi_beacon_wakeup1
OR
2 Wake up every n beacon adaptively (specified in the wifi_beacon_wakeup variable)
bull Type at+sscfg=wifi_listen_interval1
bull Type at+sscfg=wifi_beacon_wakeup1
158
Tip The Wifi Sleep Mode (and wifi_powersave1) can also be quickly enabled using the command AT+CFUN=3
Lab 14 Low power modes ndash Sleep Mode
bull Save the settings on the flash memory and reset the module
bull Type ATampW
bull Type AT+CFUN=1
bull The WIND69 message related to Sleep Mode will be displayed
159
+WIND1Poweron (--SPWF01S) +WIND13ST SPWF01S IWM Copyright (c) 2012-2014 STMicroelectronics Inc All rights Reserved +WIND3Watchdog Running +WIND0Console active +WIND32WiFi Hardware Started +WIND21WiFi Scanning +WIND35WiFi Scan Complete (0x0) +WIND19WiFi Join 02621F518F0B +WIND25WiFi Association with IoT successful +WIND51WPA Handshake Complete +WIND24WiFi Up 1921681104 +WIND66Low Power mode1 +WIND69Going into DeepSleep
All
Tera Term output
ENG-WPA AP
Low Power
Lab 14 Low power modes ndash Sleep Mode
bull Wake STM32 up using the GPIO6
bull Put the GPIO6 to 25V (jumper on JP2 as in
the picture)
bull The WIND messages will be displayed
160
+WIND70Resuming from DeepSleep +WIND53Wakeup (GPIO6 High)
All
Tera Term output
Lab 14 Low power modes ndash Sleep Mode
bull Put STM32 in sleep mode using the
GPIO6
bull Go back the GPIO6 floating (remove jumper
- as default)
bull The WIND69 message will be
displayed
161
+WIND69Going into DeepSleep
All
Tera Term output
Lab 14 Low power modes ndash Sleep Mode
bull Wake STM32 up using the remote
page
bull Connect a device to the same modulersquos
network
bull Open the following link
http[module_IP_address]remotehtml
bull Select ldquoWakerdquo and click on ldquoGordquo button
to wake up the module
bull The WIND message will be displayed
162
+WIND70Resuming from DeepSleep
All
Tera Term output
Lab 14 Low power modes ndash Sleep Mode
bull Put STM32 in sleep mode using the
remote page
bull Connect a device to the same modulersquos
network
bull Open the following link
http[module_IP_address]remotehtml
bull Select ldquoSleeprdquo and click on ldquoGordquo button
to put the module in sleep mode
bull The WIND message will be displayed
163
+WIND69Going into DeepSleep
All
Tera Term output
Lab 14 Low power modes ndash Standby Mode 164
Module
Power State STM32 WLAN
Standby Standby Standby
Sleep Stop PS or Fast-PS
Power Save Run PS or Fast-PS
Active Rx Run Rx Idle Rx Active
Active Tx Run Tx Active
Lab 14 Low power modes ndash Standby Mode
bull During the Standby Mode both the STM32 and the Radio will be
put in standby mode The standby mode allows to achieve the
lowest power consumption
bull Enable the Standby Mode
bull Type at+sscfg=sleep_enabled0 (Sleep mode must be disabled)
bull Type at+sscfg=standby_enabled1
bull Please be sure that GPIO6 isnrsquot forced high
bull Set the standby time to wake up via RTC alarm
bull Type at+sscfg=standby_time15
165
Tip The Wifi Standby Mode can also be quickly enabled using the command AT+CFUN=4
Lab 14 Low power modes ndash Standby Mode
bull Save the settings on the flash
memory and reset the module
bull Type ATampW
bull Type AT+CFUN=1
bull After 15 seconds the module will be
rebooted and will return in the
ACTIVE state
166
+WIND0Console active +WIND32WiFi Hardware Started +WIND38WiFi Powered Down +WIND67Going into Standby15 +WIND68Resuming from Standby +WIND1Poweron (--SPWF01S) +WIND13ST SPWF01S IWM Copyright (c) 2012-2014 STMicroelectronics Inc All rights Reserved +WIND3Watchdog Running +WIND0Console active +WIND32WiFi Hardware Started +WIND21WiFi Scanning +WIND35WiFi Scan Complete (0x0) +WIND19WiFi Join02621F518F0B +WIND25WiFi Association with IoT successful +WIND51WPA Handshake Complete +WIND24WiFi Up1921681113
All
Tera Term output
Lab 14 Low power modes ndash Standby Mode
bull Wake up the module using the GPIO6
bull Enable the Standby Mode
bull Type at+sscfg=sleep_enabled0 (make sure that
Sleep mode is disabled)
bull Type at+sscfg=standby_enabled1
bull Type ATampW
bull Type AT+CFUN=1
bull Put the GPIO6 to 25V to wake up the module
bull The WIND message will be displayed and
the module will return in ACTIVE state
167
+WIND68Resuming from Standby +WIND1Poweron (--SPWF01S) helliphelliphellip
All
Tera Term output
Proceed to the next LAB
Lab 15 STAMINI AP switcher
bull Objective
bull HW ldquoSTA to MiniAPrdquo switcher
bull Prerequisites
bull Work alone
169
Lab 15 STAMINI AP switcher
This feature allows to force the module in Mini AP mode starting from
a preexistent state
ldquoRecovery Moderdquo this functionality could be useful to lead the module
in a known state and to reconfigure it (ie using the firstset page)
The GPIO7 will be used to drive this feature
170
Lab 15 STAMINI AP switcher
bull Press and hold the SW2 button on the
EVAL and then perform a reset (HW reset
via SW1 button or SW reset via AT
command)
bull Release the SW2 button
bull The MiniAP mode will be started and the
module is discoverable with the following
SSID
bull iwm-XX-YY-ZZ where XX-YY-ZZ are the last
six digits of modulersquos MAC ADDRESS
171
+WIND2Reset +WIND1Poweron (--SPWF01S) +WIND13ST SPWF01S IWM Copyright (c) 2012-2014 STMicroelectronics Inc All rights Reserved +WIND39HW in miniAP mode (GPIO7 Low) +WIND0Console active +WIND3Watchdog Running +WIND32WiFi Hardware Started +WIND26WiFi Started AP +WIND24WiFi Up172312551
All
Tera Term output
Tip To exit from ldquominiAP mode via GPIO7rdquo perform a modulersquos reset
Proceed to the next LAB
Lab 16 IBSS connection
bull Objective
bull Create an IBSS network
bull Prerequisites
bull Work alone
173
Lab 16 Create an IBSS network
In an IBSS network the SSID is chosen by the client device that
starts the network
Module settings to create an IBSS network
bull Set the IBSS SSID
bull Type AT+SSSIDTXT=ADHOC
bull Set the network privacy mode (0=OPEN or 1=WEP are supported)
bull Type AT+SSCFG=wifi_priv_mode0
bull Set the network mode (2 = IBSS)
bull Type AT+SSCFG=wifi_mode2
174
OK
All
Tera Term output
Lab 16 Create an IBSS network
bull Set IP address IP default gateway IP DNS and IP netmask
bull Type AT+SSCFG=ip_ipaddr192168y1xx
bull Type AT+SSCFG=ip_gw192168y1
bull Type AT+SSCFG=ip_dns192168y1
bull Type AT+SSCFG=ip_netmask2552552550
bull Turn off the DHCP
bull Type AT+SSCFG=ip_use_dhcp0
175
OK
All
Tera Term output
Lab 16 Create an IBSS network
bull Save the settings on the flash memory and reset the module
bull Type ATampW
bull Type AT+CFUN=1
176
+WIND0Console active +WIND32WiFi Hardware Started +WIND21WiFi Scanning +WIND35WiFi Scan Complete (0x0) +WIND19WiFi Join EE33CE002418 +WIND25WiFi Association with ADHOC successful +WIND51WiFi Handshake Complete +WIND24WiFi Up 19216813
All
AD-HOC
Tera Term output
Lab 16 Create an IBSS network
bull Associate the iOS device with the
ADHOC network (iOS gt 8 could not
support the IBSS mode)
177
AD-HOC
Tip manual configuration of static TCPIPv4 parameters is suggested using a PC Ie PC TCPIPv4 properties
Lab 16 Create an IBSS network
bull Find your IP address
bull Type AT+SSTS
bull Open Safari web browser
bull In the address bar type
ltSPWF IP addressgtindexhtml
bull Type 192168y1xxindexhtml
178
AD-HOC
THANK YOU

Lab Prerequisites
X-NUCLEO-IDW01M1
bull Hardware
bull X-NUCLEO-IDW01M1 Wi-Fi expansion board based on SWPF01SA
module for STM32 Nucleo
bull NUCLEO-F401RE NUCLEO-F103RB NUCLEO-L053R8 or NUCLEO-
L476RG
bull Utility software
bull X-CUBE-WIFI1 SW package httpwww2stcomcontentst_comenproductsembedded-softwaremcus-
embedded-softwarestm32-embedded-softwarestm32cube-expansion-softwarex-
cube-wifi1html)
bull Tera Term terminal emulator (available from
httpensourceforgejpprojectsttssh2releases)
bull Text Editor
bull Web browser
4
Hands on chapters 5
bull Lab 1 HW and SW setup
bull Lab 2 Set the SPWF variables
bull Lab 2a FOTA update
bull Lab 3 Access point connection (WPA or WEP)
bull Lab 4 Web client mode
bull Lab 5 Web server mode ndash files in RAM
bull Lab 6 Web server mode ndash files in FLASH
bull Lab 7 Socket interface
bull Lab 8 MiniAP mode for the first set
bull Lab 9 Socket interface in MiniAP mode
bull Lab 10 Web server in MiniAP mode
bull Lab 11 Remote control of GPIO interfaces
bull Lab 12 Input demo
bull Lab 13 Socket Server
bull Lab 14 Low Power Modes
bull Lab 15 HW switch from STA to MiniAP
bull Lab 16 IBSS mode
Lab 1 HW and SW setup
bull Objective
bull Hardware set-up
bull Software set-up
bull Prerequisites
bull Work alone
6
Lab 1 EVAL of the SPWF01Sxy1 module
STEVAL-IDW001V1 + STEVAL-PCC018V1 7
bull PlugampPlay Solution
bull AT command set
bull Power Supplied via the USB interface
bull UARTUSB bridge from Silicon Lab requires to
install the correspondent driver on your PC
bull SMD antenna and reset button on-board
HyperTerminal or similar
AT CommandsEvents
SPWF01SA11
VCOM
8
Lab 1 STEVAL-IDW001V1
STEVAL-IDW001V1 evaluation board of the WiFi module SPWF01SA11
8
9
Lab 1 STEVAL-PCC018V1
STEVAL-PCC018V1 USB to UART board
9
Lab 1 Hardware setup
STEVAL-IDW001V1 + STEVAL-PCC018V1
bull Insert the jumpers in the USB to
UART board as in the figure
bull Connect the Evaluation board to
the PC
bull Use the Device manager to find
the assigned COM port
10
Module automatically performs a reset Module automatically performs a scan for
available networks (if wifi_mode variable is ne 0) Module automatically enters in command mode STEVAL-PCC018V1 Yellow power LED will light up STEVAL-IDW001V1 Yellow power LED will light
up orange wifi link up LED will light up
Lab 1 Configuring the UART STEVAL-IDW001V1 + STEVAL-PCC018V1
bull Open Tera Term
bull Run Tera Term (open Tera term folder
and then run ttermproexe)
bull Open the assigned COM port
bull Tera Term Setup rarr Serial port
bull Baud rate 115200
bull Data 8 bit
bull Parity none
bull Stop 1 bit
bull Flow control none
bull Set CR in the Terminal setup
(default config)
bull Tera Term Setup rarr Terminal rarr
Transmit CR
11
Tip the modulersquos localecho is disabled by default The local echo option can be enabled on Tera Term in order to display the AT command entered
Lab 1 Configuring the UART STEVAL-IDW001V1 + STEVAL-PCC018V1
bull Open Tera Term
bull Command Mode
bull Type AT followed by a carriage return
(CR)
12
OK
All
Tera Term output
Lab 1 EVAL of the SPWF01Sxy1 module
X-NUCLEO-IDW01M1 amp X-CUBE-WIFI1 13
bull X-NUCLEO-IDW01M1
bull X-NUCLEO-IDW01M1 is a Wi-Fi evaluation board based on SPWF01SA module
bull X-CUBE-WIFI1
bull X-CUBE-WIFI1 is an expansion software package for STM32Cube
bull httpwww2stcomcontentst_comenproductsembedded-softwaremcus-embedded-softwarestm32-embedded-softwarestm32cube-expansion-softwarex-cube-wifi1html
Lab 1 Set Vcom binary in Nucleo X-NUCLEO-IDW01M1 amp X-CUBE-WIFI1
1 Flash VCOM binary into Nucleo drive
binaries
IDErsquos project
drag and drop
Projectbin
on Nucleo drive
14
NUCLEO-F401RE
F103RB
L053R8
L476RG
Lab 1 Configuring the UART X-NUCLEO-IDW01M1 amp X-CUBE-WIFI1
Setup TeraTerm window in order to send AT command to Wi-Fi module
2
Open Hyper terminal or TeraTerm Select correct COM port
Terminal setup Serial port setup
15
Lab 1 Configuring the UART X-NUCLEO-IDW01M1 amp X-CUBE-WIFI1
bull Open Tera Term
bull Command Mode
bull Type AT followed by a carriage return
(CR)
16
OK
All
Tera Term output
You are ready to use your Wi-Fi
EVAL board
Lab 2 Set the SPWF variables
bull Objective bull Run a command
bull Get the default configuration dump
bull Set host name
bull Set static IP parameters
bull Reset the module
bull Prerequisites bull Work alone
18
Lab 2 Run a command
Run a command - Syntax
- ATampx ltCRgt
- AT+S[Command] ltCRgt
Response - Syntax
xxxxxxxx
19
- OK
- Command output followed by OK
- ERROR Command not found
- ERROR Unrecognized key
AT Command Prefix
Not case sensitive
Lab 2 Set the SPWF variables
bull Get the default configuration dump
bull Type ATampV
bull Get a variable value
bull Type AT+SGCFG=console1_speed
Config dump frame
20
Variable
Name
Variable
Value
How to change the variable value
1 AT+SSCFG=[var name]xxxx
2 ATampW
Lab 2 Set the SPWF variables
bull Get the default configuration dump
bull Set host name
bull Type AT+SSCFG=ip_hostnamexxxxxxxx
21
Up to 31 characters (case sensitive) ldquospacebarrdquo is allowed
OK
All
Tera Term output
Lab 2 Set the SPWF variables
bull Get the default configuration dump
bull Set host name
bull Set IP address IP default gateway IP DNS and IP netmask (for
static usage)
bull Type AT+SSCFG=ip_ipaddr19216801xx
bull Type AT+SSCFG=ip_gw19216801
bull Type AT+SSCFG=ip_dns19216801
bull Type AT+SSCFG=ip_netmask2552552550
22
OK
All
Tera Term output
Tera Term output
Lab 2 Set the SPWF variables
bull Get the default configuration dump
bull Set host name
bull Set IP address IP default gateway IP
DNS and IP netmask (DHCP off)
bull Save settings on the flash memory
(mandatory after a variable change)
bull Type ATampW
bull Reset the module
bull Type AT+CFUN=1
23
+WIND21WiFi Scanning +WIND35WiFi Scan Complete (0x0)
All
Lab 2 Set the SPWF variables
bull Get the default configuration dump
bull Set host name
bull Set IP address IP default gateway IP
DNS and IP netmask (DHCP off)
bull Save settings on the flash memory
(mandatory after a variable change)
and reset the module
bull Check the new configuration dump
bull Type ATampV
24
Proceed to the next LAB
Lab 2a FOTA update
bull Objective
bull Upgrade the FW using the OTA file
bull Prerequisites
bull OTA file (provided in the SPWF01S FW
package)
bull External web server (ie Apache web
server running on PC)
26
Lab 2a FOTA update 27
The SPWF01Sx11 module (with external flash on board) allows
performing a Firmware Over-the-air update via a single HTTP GET
The SPWF01S will validate the firmware image it downloads load it
into a staging area then prompt the user to issue a reset command in
order to complete the update
Lab 2a FOTA update
The Apache Web Server will be used in this LAB
(Apache Web Server is available at this link
httparchiveapacheorgdisthttpdbinarieswin32httpd-2225-win32-x86-openssl-098ymsi)
Note please check that the local firewall is disabled or properly set It can
block the connection from module to Apache
bull Copy the OTA file (ie SPWF01S-xxxxxx-yyyyyyy-
RELEASE-mainota) in the Apache 22 htdocs folder
28
Lab 2a FOTA update
The FWUPDATE command allows to perform a Firmware Over-the-
air update via a single HTTP GET
bull Sintax
bull AT+SFWUPDATE=lthostnamegtltpathgtltportgt
bull Configuration parameters
bull lthostnamegt Target host DNS resolvable name or IP address
bull ltpathampqueryoptsgt Document path and optional query arguments
bull ltportgt Target host port
29
Lab 2a FOTA update
bull The module and the Apache Web server must be connected to the same network
bull In Tera Term type AT+SFWUPDATE=[Apache IP address][ota_fileota]
ie type AT+SFWUPDATE=192168xyyySPWF01S-150410-c2e37a3-RELEASE-
mainota
bull Reset the module to apply the new FW
bull Type AT+CFUN=1
bull Restore factory default settings (mandatory)
bull Type ATampF
30
Staging FW update for SPWF01SX11 version 1203-120918_01 FW length 276824 0x00002800 (offset 0x00000000 block len 4096) Write len 4096 -gt 0x0 Write len 4096 -gt 0x1000 (note - deleted extra output for clarity) Write len 4096 -gt 0x42000 Write len 2476 -gt 0x43000 (final) Wrote 276904 bytes Complete Update will be applied on next reboot (at+cfun=1)
All Tera Term output
Proceed to the next LAB
Lab 3 Access point connection
bull Objective
bull Scan for available networks
bull Join a network
bull Check the statusstatistics variables
bull Prerequisites
bull USB dongle and computer are set
up as described in Lab 2
bull Work alone
32
Lab 3 Scan for available networks
The SCAN command performs an immediate scan for available
networks Infrastructure (AP) and IBSS (Ad-Hoc) networks are both
reported Network type Channel BSSID SSID Signal strength (RSSI)
and 80211 capabilities are all reported
bull Type AT+SSCAN
bull Scan syntax AT+SSCAN [=lta|pgt[ltr|s|mgt[ltfnamegt]]] -- Perform a [activepassive]
network scan [filter offfilter on SSIDfilter on MAC] [print to file])
33
FOUND BSS 14D64D243600 CHAN 01 RSSI -28 SSID ENG-WPA CAPS 0431 WPA WPA2 FOUND BSS 00180A31EA78 CHAN 11 RSSI -82 SSID ZyckoItalyWireless CAPS 0531 WPA WPA2 FOUND BSS 06180A31E7E2 CHAN 11 RSSI -85 SSID ZyckoItalyGuest CAPS 0531 WPA WPA2 OK
All
Network type
Network MAC
Network
channel Network
RSSI
Network
SSID Network
capabilities
Tera Term output
Tera Term output
Lab 3 Joining a network (WPA Key)
In order to be connected to an available Wifi network the AP parameters setting is needed
bull Set the SSID
bull Type AT+SSSIDTXT=ENG-WPA
bull Set the password
bull Type AT+SSCFG=wifi_wpa_psk_texthelloworld
bull Set the network privacy mode (0=none 1=WEP 2=WPA-Personal (TKIPAES) or WPA2-Personal (TKIPAES))
bull Type AT+SSCFG=wifi_priv_mode2
bull NB wifi_auth_type must be set to 0 AT+SSCFG=wifi_auth_type0
bull Set the network mode (1 = STA 2 = IBSS 3 = MiniAP)
bull Type AT+SSCFG=wifi_mode1
34
OK
All
Lab 3 Joining a network (WPA Key)
bull Save the settings on the flash memory and reset the module
bull Type ATampW
bull Type AT+CFUN=1
35
+WIND0Console active +WIND46WPA Crunching PSK +WIND32WiFi Hardware Started +WIND21WiFi Scanning +WIND35WiFi Scan Complete (0x0) +WIND19WiFi Join 14D64D243600 +WIND25WiFi Association with ENG-WPA successful +WIND51WPA Handshake Complete +WIND24WiFi Up 19216801xx
All
ENG-WPA AP
Tera Term output
Lab 3 Joining a network (WPA Key)
bull Check the statusstatistics variables
bull Type AT+SSTS
bull Send a ping to the gateway (ip_gw)
bull Type AT+SPING=19216801
36
ENG-WPA AP
Tera Term output
OK
All
Lab 3 Joining a network (WEP Key)
Configure the module using the WEP key (4 possible combinations
available)
Sample table
37
AP configuration AT command to be used
Security Mode WEP
WEP Key Length 64 bit
(10 hex digits)
Authentication Open
Wep Key 1 1234567890
ie
at+sssidtxt=ENG-WEP
AT+SSCFG=wifi_wep_keys[0]1234567890
AT+SSCFG=wifi_wep_key_lens05
AT+SSCFG=wifi_auth_type0
AT+SSCFG=wifi_priv_mode1
AT+SSCFG=wifi_mode1
atampw
at+cfun=1
Security Mode WEP
WEP Key Length 64 bit
(10 hex digits)
Authentication Shared
Key
Wep Key 1 1234567890
ie
at+sssidtxt=ENG-WEP
AT+SSCFG=wifi_wep_keys[0]1234567890
AT+SSCFG=wifi_wep_key_lens05
AT+SSCFG=wifi_auth_type1
AT+SSCFG=wifi_priv_mode1
AT+SSCFG=wifi_mode1
atampw
at+cfun=1
AP configuration AT command to be used
Security Mode WEP
WEP Key Length
128 bit (26 hex digits)
Authentication Open
Wep Key 1
123456789012345678
90123456
ie
at+sssidtxt=ENG-WEP
AT+SSCFG=wifi_wep_keys[0]12345678
901234567890123456
AT+SSCFG=wifi_wep_key_lens0D
AT+SSCFG=wifi_auth_type0
AT+SSCFG=wifi_priv_mode1
AT+SSCFG=wifi_mode1
atampw
at+cfun=1
Security Mode WEP
WEP Key Length
128 bit (26 hex digits)
Authentication
Shared Key
Wep Key 1
123456789012345678
90123456
ie
at+sssidtxt=ENG-WEP
AT+SSCFG=wifi_wep_keys[0]12345678
901234567890123456
AT+SSCFG=wifi_wep_key_lens0D
AT+SSCFG=wifi_auth_type1
AT+SSCFG=wifi_priv_mode1
AT+SSCFG=wifi_mode1
atampw
at+cfun=1
Lab 3 Joining a network (WEP Key)
Notes
bull ldquowifi_wep_key_lensrdquo variable values 05 and 0D
bull Itrsquos possible to enter any text string into a WEP key box in the AP in which case it will be converted into a hexadecimal key using the ASCII values of the characters A maximum of 5 text characters can be entered for 64 bit keys and a maximum of 13 characters for 128 bit keys
In this case it needs to manually convert your ASCII password to HEX and complete the wifi_wep_keys[0] variable with the HEX value bull ie AP WEP key test1 ASCII to HEX 7465737431 So the AT command is AT+SSCFG=wifi_wep_keys[0]7465737431
bull Some APs allow user to insert a passphrase and then the AP automatically generates the hex keys In this scenario user have not to perform the ASCII to HEX conversion because the AP already gives it the hex value
38
Proceed to the next LAB
Lab 4 Web client mode
bull Objective
bull HTTP GET
bull HTTP POST
bull PUSH DATA ON SERIAL PORT
bull Prerequisites
bull USB dongle and computer are set up
as described in Lab 2
bull Work in couple
40
Lab 4 HTTP GET
The HTTP GET feature performs a single HTTP request to the specified
host and path The server response is printed on the UART enabled
bull Sintax
bull AT+SHTTPGET=lthostnamegtltpathgt[ltportgt]
bull Configuration parameters
bull lthostnamegt target host DNS resolvable name or IP address
bull ltpathgt document path
bull ltportgt target port
41
Lab 4 HTTP GET
bull Device A performs an HTTP GET to the Device B
bull Device A
AT+SHTTPGET=ltDevice B IP addrgtindexhtml
Type AT+SHTTPGET=19216801xxindexhtml
42
GET indexhtml HTTP10 User-Agent SPWF01S helliphelliphellip lth1gtST SPWF01Sx11 WiFi Modulelth1gt ltpgt Welcome to the ST SPWF01Sx11 WiFi Module ltpgt ltpgt This page was delivered from the SPWF01Sx11 internal HTTP server hellip lta href=statusshtmlgtSPWF01Sx11 Status Pageltagt ltpgt ltbodygt lthtmlgt OK
Device A
A B
Tera Term output
Lab 4 HTTP POST
The HTTP POST performs a post of the given path to the specified host The module can be only used as an HTTP POST client
bull Sintax
bull AT+SHTTPPOST =lthostnamegtltpathampqueryoptsgtltformcontentgt[ltportgt]
bull Configuration parameters
bull lthostnamegt target host DNS resolvable name or IP address
bull ltpathampqueryoptsgt document path
bull ltformcontentgt form to be submitted
bull ltportgt target port
43
Lab 4 HTTP POST
bull The SPWF01S performs an HTTP POST to an HTTP Post Test Server
bull Type
at+shttppost=posttestservercompostphpname=demoampemail=mymailampsubjec
t=subjampbody=message
bull The HTTP Post Test Server replies as
displayed in the Tera Term output if the HTTP
POST successfully
44
HTTP11 200 OK Date Fri 10 Jan 2014 132414 GMT Server Apache Access-Control-Allow-Origin Vary Accept-Encoding Content-Length 139 Connection close Content-Type texthtml Successfully dumped 4 post variables View it at httpwwwposttestservercomdata2014011005241443192628 Post body was 0 chars long OK
Device A
A B
Tera Term output
HTTP POST
SERVER
Lab 4 HTTPREQ bull The SPWF01S can perform a custom HTTP request to a specified
target Refer to the User Manual for more details
bull Type
AT+SHTTPREQ=wwwgooglecom8089
After ltCRgt the module accepts data We will try to open an non-existent web page
GET downloadTagphp HTTP10ltCRgtltLFgt
User-Agent SPWF01SltCRgtltLFgt
Host iwm-testltCRgtltLFgt
Connection closeltCRgtltLFgtltCRgtltLFgt
45
HTTP10 404 Not FoundltCRgtltLFgt Date Sun 31 Jan 2016 142704 GMTltCRgtltLFgt Content-Type texthtmlltCRgtltLFgt Server HTTP server (unknown)ltCRgtltLFgt Content-Length 49ltCRgtltLFgt X-XSS-Protection 1 mode=blockltCRgtltLFgt X-Frame-Options SAMEORIGINltCRgtltLFgt ltCRgtltLFgt lthtmlgtltbodygtlth1gt404 Not Foundlth1gtltbodygtlthtmlgtltLFgtltCRgt ltLFgt ltSUBgtltSUBgtltSUBgtltCRgtltLFgt ltCRgtltLFgt OKltCRgtltLFgt
All
A B
Tera Term output
[AT+SHTTPREQ =lthostnamegt[port]ltlengthgtltCRgtltdatagt]
Lab 4 Push data on serial port
A built-in html page ldquooutput_demohtmlrdquo allows to remotely push
characters on the serial port from a remote browser
46
output_demohtml
Modulersquos IP addressoutput_demohtml
Lab 4 Push data on serial port
bull Find your IP address
bull Type AT+SSTS
bull Associate your computer with the AP
bull Open your web browser
bull In the address bar type
ltmodulersquos IP
Addressgtoutput_demohtml
bull Type
19216801xxoutput_demohtml
47
Lab 4 Push data on serial port
bull Enter the text
bull In order to manage non-ASCII chars the ip_use_decoder variable must be modified (refer to the User Manual for more details)
bull Submit
bull The text will be sent to the serial port of the module
48
Proceed to the next LAB
Lab 5 Web Server use mode
bull Objective
bull List existing files
bull Print a file
bull Create a file
bull Append to an existing file
bull Delete an existing file
bull Prerequisites
bull USB dongle and computer are
set up as described in Lab 2
bull Work alone
50
Lab 5 Web server 51
The Web Server feature allows to create print and delete ASCII files in
the RAM memory of the module
Lab 5 List existing files
The FSL command lists type sizes and name of all the existing files
bull Type AT+SFSL
52
I 461 input_demoshtml I 180 messageshtml I 384 output_demohtml I 614 indexhtml I 157 peersshtml I 193 configshtml I 174 statusshtml I 212 404html I 2022 firstsethtml I 2898 remotehtml OK
All
Files stored in the STM32
FLASH memory
Tera Term output
Lab 5 Print a file
The FSP command prints the content
of an existing file
bull Type AT+SFSP=indexhtml
53
lthtmlgt ltheadgtlttitlegtST SPWF01Slttitlegtltheadgt ltbody bgcolor=white text=blackgt lth1gtST SPWF01S Intelligent WiFi Modulelth1gt ltpgtWelcome to the ST SPWF01S intelligent Wi-Fi moduleltpgt ltpgtThis page was delivered from the SPWF01S internal HTTP serverltpgt ltpgt lta href=configshtmlgtSPWF01S Configuration Settings Pageltagt ltpgt ltpgt lta href=statusshtmlgtSPWF01S Status Pageltagt ltpgt ltpgt lta href=peersshtmlgtSPWF01S Peers Pageltagt ltpgt ltpgtMore information about the SPWF01S and other ST products can be found at STs website lta href=httpwwwSTcomgthttpwwwSTcomltagtltpgt ltbodygt lthtmlgt OK
All Tera Term output
Tip How to use the offset and length parameters AT+SFSP=indexhtml[offset][length] ie Type AT+SFSP=indexhtml520 Length parameter is mandatory if is used the offset
Lab 5 Create a file
The FSC command allows to create a file inside the SPWF for
delivery by the SPWF HTTP server
bull Sintax
bull AT+SFSC =ltfnamegtltmax_lengt[lthttp_headergt]
bull Configuration parameters
bull lt filename gt filename to create
bull lt max_len gt amount of space to allocate for file max = 4096 bytes
bull lthttp_headergt 0=HTML header automatically added 1=HTML header not
added (as by default)
Type AT+SFSC=wifidemohtml1965
54
OK
All
Tera Term output
Lab 5 Configuring the UART
bull Set CR+LF in the Terminal setup
(to properly paste text in the
terminal)
bull Tera Term Setup rarr Terminal rarr
Transmit CR+LF
55
Tip The local echo option must be disabled on Tera Term
Added in FW 35 using the AT+SFSR command user can rename dynamic files stored in the RAM memory Refer to the User Manual for more details
Lab 5 Append to an existing file
The FSA command allows to append blocks of data to an existing file
This command accepts data after the ltcrgt at the end of the command
line
bull Sintax
bull AT+SFSA=ltfilenamegtltdatalengt
bull Configuration parameters
bull lt filename gt filename pre-created
bull lt datalen gt number of characters to append to the file
Type AT+SFSA=wifidemohtml1965
56
Now SPWF accepts data
Tips
Lab 5 Append to an existing file
bull Open wifidemotxt in the following
directory Hands_on
folderHTML_demo_page
bull Check you have set up CR+LF in the
Terminal setup (for more
information refer to the slide 48)
bull Copy the file content into Tera term
(paste with ALT+V or mouse right
button)
57
OK
All
Tera Term output
Lab 5 Append to an existing file
bull Open wifidemohtml
bull Open your Web browser (suggested Google
Chrome for HTML5 test)
bull In address bar type ltSPWF IP addrgtwifidemohtml
Type 19216801xxwifidemohtml
58
Lab 5 Configuring the UART
bull Re-set CR in the Terminal setup
as by default
bull Tera Term Setup rarr Terminal rarr
Transmit CR
59
Tip The local echo option can be re-enabled on Tera Term
Lab 5 List existing files
Lets list the files
bull Type AT+SFSL
60
D 1965 wifidemohtml I 461 input_demoshtml I 180 messageshtml I 384 output_demohtml I 614 indexhtml I 157 peersshtml I 193 configshtml I 174 statusshtml I 212 404html I 2022 firstsethtml I 2898 remotehtml OK
All
File stored in the RAM memory
Tera Term output
Lab 5 Delete an existing file
The FSD command allows to delete an existing file by name Static
files may not be deleted
bull Sintax
bull AT+SFSD=ltfilenamegt
Type AT+SFSD=wifidemohtml
61
OK
All
Tera Term output
Lab 5 Delete an existing file
bull Re-open wifidemohtml
bull Open your Web browser
bull In address bar ltSPWF IP addrgtwifidemohtml
Type 19216801xxwifidemohtml
62
Proceed to the next LAB
Lab 6 Web Server use mode
bull Objective
bull Create an image file
bull Filesystem update over-the-air
bull Filesystem update over UART
bull Prerequisites
bull Work alone
64
Lab 6 Web server 65
The Web Server feature also allows to upload generic files (PDF
HTML DOC JPEG and so on) in the EXTERNAL FLASH memory of
the module It needs to follow the below steps
- create an image file (IMG) using the tool provided in the Hands-on package
(the IMG contains the files to upload)
- Put the image in a generic and accessible Web Server (Apache Web server
will be used in the Hands-on as example)
- Using the proper AT command the IMG will be retrieved over-the-air and the
static files will be created in the external flash memory
Lab 6 Create an image file
bull Open the following folder and
extract all the files
hands_on_wififilesystem_update
bull Put your own files to upload in the
pages folder (max 512 Kbytes)
bull Run genbat
bull Open the pages folder and copy
outfileimg in your external Web
Server (Apache)
66
3
1
2
Lab 6 Create an image file
The Apache Web Server will be used in this tutorial
(Apache Web Server is available at this link
httparchiveapacheorgdisthttpdbinarieswin32httpd-2225-win32-x86-openssl-098ymsi)
Note please check that the local firewall is disabled or properly set It can
block the connection from module to Apache
bull Copy outfileimg in the Apache 22
htdocs folder (this is the default
root server directory)
67
4
Lab 6 Filesystem update
The HTTPDFSUPDATE command allows to create static files inside
the SPWF for delivery by the SPWF HTTP server
bull Sintax
bull AT+SHTTPDFSUPDATE=lthostnamegtltpathgt[port]
bull Configuration parameters
bull lthostnamegt external web server DNS resolvable name or IP address
bull ltpathgt document path
bull ltportgt target host port
68
Lab 6 Filesystem update
bull In Tera Term type
AT+SHTTPDFSUPDATE=192168x10xoutfileimg
bull Reset the module
bull Type AT+CFUN=1
69
Image length 357957 (offset 0x00080000 block len 4096) Write len 4096 -gt 0x80000 Write len 4096 -gt 0x81000 Write len 4096 -gt 0x82000 helliphelliphelliphellip helliphelliphelliphelliphelliphellip helliphelliphelliphelliphellip Write len 4096 -gt 0xD6000 Write len 1612 -gt 0xD7000 (final) Wrote 357964 bytes Complete Please reboot (at+cfun=1) OK
All
Tera Term output
The file system will be permanently deleted The new IMG will overwrite the existent files in the file system
Warning
Lab 6 Filesystem update
Lets list the files
bull Type AT+SFSL
70
E 2615 st766gif E 112374 modulepng E 2430 index1html E 419 indexhtml E 239887 MKTWiFipdf I 461 input_demoshtml I 180 messageshtml I 384 output_demohtml I 614 indexhtml I 157 peersshtml I 193 configshtml I 174 statusshtml I 212 404html I 2022 firstsethtml I 2898 remotehtml OK
All
Files stored in
the EXT FLASH memory
Tera Term output
Lab 6 Filesystem update
bull Open index1html page
bull Open your web browser
bull In the address bar ltSPWF IP addrgtindex1html
Type 192168x1xxindex1html
71
Lab 6 Filesystem erase
Erase the external httpd filesystem
bull Type AT+S HTTPDFSERASE
The files stored in the EXT FLASH memory will be erased
Lets list the files
bull Type AT+SFSL
72
I 461 input_demoshtml I 180 messageshtml I 384 output_demohtml I 614 indexhtml I 157 peersshtml I 193 configshtml I 174 statusshtml I 212 404html I 2022 firstsethtml I 2898 remotehtml OK
All
Tera Term output
Lab 6 Filesystem update
The HTTPDFSWRITE command allows to create static files inside
the SPWF via the UART interface The HW flow control MUST be
enabled in order to use the command
bull Sintax
bull AT+SHTTPDFSWRITE =ltdatalengtltCRgtltdatagt
bull Configuration parameters
bull ltdatalengt Amount of bytes to be sent
73
Lab 6 Filesystem update
bull Type AT+S HTTPDFSWRITE=357957
bull In Tera Term File ndash Send File
bull Reset the module
bull Type AT+CFUN=1
74
Image length 357957 (offset 0x00080000 block len 4096) Write len 4096 -gt 0x80000 Write len 4096 -gt 0x81000 Write len 4096 -gt 0x82000 helliphelliphelliphellip helliphelliphelliphelliphelliphellip helliphelliphelliphelliphellip Write len 4096 -gt 0xD6000 Write len 1612 -gt 0xD7000 (final) Wrote 357964 bytes Complete Please reboot (at+cfun=1) OK
All
Tera Term output
The file system will be permanently deleted The new IMG will overwrite the existent files in the file system
Warning
Proceed to the next LAB
Lab 7 Socket interface
bull Objective
bull Open TCPUDP connection
bull Write data to socket
bull Read data from socket
bull Close socket
bull Prerequisites
bull Work alone
76
TCPUDP socket
Socket
Client
Socket
Server
Lab 7 TCPUDPUART socket interface 77
The Socket interface allows communication via TCP UDP and UART
The SPWF is both a client and a server socket In this LAB will be
detailed the socket client feature
Ho
st
En
d P
rod
uct
Open TCPUDP connection
Write data to socket
Read data from socket
Close socket
Lab 7 Open TCPUDP connection
The SOCKON command allows to open a TCPUDP connection
to a specified host (up to 8 socket connections at same time)
bull Sintax
bull AT+SSOCKON=lthostnamegtltportgtltprotocolgtind
bull Configuration parameters
bull lthostnamegt target host DNS resolvable name or IP address
bull ltportgt TCPUDP socket port
bull ltprotocolgt t for TCP socket u for UDP socket
bull ind indicate when data has arrived (optional) Up to 4 (x730 bytes)
consecutive ldquoPending datardquo message (without any AT+SSOCKR) are
guaranteed It is suggested to empty the buffer using the AT+SSOCKR
command and to avoid exceeding 4 indications
78
Lab 7 Open TCPUDP connection
bull Open the TCP socket server (disable the firewall to properly
run it)
bull Folder hands_on_wifitcp socket serverserverexe
bull The TCP server listens for incoming connections on the port
32000 It sends back all data received
79
Optional - Lab 7 Open TCPUDP connection
bull Using an Android platform the socket server can be opened
using a specific APP (Socket Protocol available on Play Store)
bull The TCP socket server can be configured to listen for
incoming connections on the port 32000
bull Type 32000 on laquoPort Listen toraquo box
bull Click on Listen
80
Lab 7 Open TCPUDP connection
bull Type AT+SSOCKON=192168010x32000tind
bull The client and the server use the socket identifier (ID)
displayed
81
ID 00 OK
All
Tera Term output
Lab 7 Write data to socket
The SOCKW command allows to write data to the specified ID
socket
This command accepts data after the ltcrgt at the end of the
command line
bull Sintax
bull AT+SSOCKW=ltIDgtltlengt
bull Configuration parameters
bull ltIDgt socket identifier
bull ltlengt data length to send
82
Lab 7 Write data to socket
bull Write data
bull Type AT+SSOCKW=0013
bull Type hello worldltCRgt
bull SPWF shows that there are ltpending datagt and their amount
83
+WIND55Pending Data013
All
Tera Term output
ID
Pending
bytes
Note the module is waiting 13 bytes to be written to the socket As soon as 13 bytes (or characters) are sent from the terminal the module is going to write them to the socket and will be ready to receive new commands
Lab 7 Read data from socket
The SOCKR command allows to read data from socket
bull Sintax
bull AT+SSOCKR=ltIDgtltlengt
bull Configuration parameters
bull ltIDgt socket identifier
bull ltlengt data length to read
84
Lab 7 Read data from socket
bull Read data
bull Type AT+SSOCKR=0013
85
hello world OK
All
Tera Term output
Lab 7 Close socket
The SOCKC command allows to close socket
bull Sintax
bull AT+SSOCKC=ltIDgt
bull Configuration parameters
bull ltIDgt socket identifier
86
Tera Term output
Lab 7 Close socket
bull Close socket
bull Type AT+SSOCKC=00
87
OK
All
Proceed to the next LAB
Lab 8 MiniAP mode for the first set
bull Objective
bull Create a direct connection between
the module and an end device
bull First set of the module in order to
enable the connection between the
module and a generic AP
bull Prerequisites
bull Work alone
89
Tera Term output
Lab 8 Configuring the module in MiniAP mode
The Mini AP mode is available starting from the following FW release
SPWF01S-131115-de4568d-RELEASE
In order to set the module in Mini AP mode the following parameters
are needed
bull Set the SSID
bull Type AT+SSSIDTXT=SPWF_AP
bull Set the network privacy mode (0=OPEN or 1=WEP are supported)
bull Type AT+SSCFG=wifi_priv_mode0
bull Set the network mode (1 = STA 2 = IBSS 3 = MiniAP)
bull Type AT+SSCFG=wifi_mode3
90
OK
All
Lab 8 Configuring the module in MiniAP mode
bull Save the settings on the flash memory and reset the module
bull Type ATampW
bull Type AT+CFUN=1
91
+WIND0Console active +WIND32WiFi Hardware Started +WIND26WiFi Started AP with network SPWF_AP +WIND24WiFi Up 172181511
All
Tera Term output
SPWF_AP
Lab 8 Configuring the module in MiniAP mode (WEP Key)
Configure the module using the WEP key (2 possible combinations
available)
Sample table
92
AP configuration AT command to be used
Security Mode WEP
WEP Key Length 64 bit
(10 hex digits)
Authentication Open
Wep Key 1 1234567890
ie
at+sssidtxt=SPWF_AP
AT+SSCFG=wifi_wep_keys[0]1234567890
AT+SSCFG=wifi_wep_key_lens05
AT+SSCFG=wifi_auth_type0
AT+SSCFG=wifi_priv_mode1
AT+SSCFG=wifi_mode3
atampw
at+cfun=1
AP configuration AT command to be used
Security Mode WEP
WEP Key Length
128 bit (26 hex digits)
Authentication Open
Wep Key 1
123456789012345678
90123456
ie
at+sssidtxt=SPWF_AP
AT+SSCFG=wifi_wep_keys[0]12345678
901234567890123456
AT+SSCFG=wifi_wep_key_lens0D
AT+SSCFG=wifi_auth_type0
AT+SSCFG=wifi_priv_mode1
AT+SSCFG=wifi_mode3
atampw
at+cfun=1
Lab 8 Configuring the module in MiniAP mode (WEP Key)
Notes
bull ldquowifi_wep_key_lensrdquo variable values 05 and 0D
bull Itrsquos possible to enter any text string as WEP key It have to be converted into a
hexadecimal key using the ASCII values of the characters A maximum of 5 text
characters can be entered for 64 bit keys and a maximum of 13 characters for 128
bit keys
In this case it needs to manually convert your ASCII password to
HEX and complete the wifi_wep_keys[0] variable with the HEX
value
bull ie WEP key test1
ASCII to HEX 7465737431
So the AT command is AT+SSCFG=wifi_wep_keys[0]7465737431
93
Lab 8 Customizing the MiniAP address (optional)
Starting from FW 33 the module allows user to customize the IP address of the MiniAP
bull Set the SSID
bull Type AT+SSSIDTXT=SPWF_AP
bull Set the network privacy mode (0=OPEN or 1=WEP are supported)
bull Type AT+SSCFG=wifi_priv_mode0
bull Set the network mode (1 = STA 2 = IBSS 3 = MiniAP)
bull Type AT+SSCFG=wifi_mode3
bull Set the use_dhcp mode (0 = DHCP server off 1 = DHCP server on 2 = DHCP server on and customizable)
bull Type AT+SSCFG=ip_use_dhcp2
bull Set the MiniAP address
bull Type AT+SSCFG=ip_ipaddr19216801
bull Save the settings on the flash memory and reset the module
bull Type ATampW
bull Type AT+CFUN=1
94
Tera Term output
+WIND0Console active +WIND32WiFi Hardware Started +WIND26WiFi Started AP with network SPWF_AP +WIND24WiFi Up 19216801
All
Tip the MiniAP will assign sequential addresses to the client ie 1deg client 19216802 2deg client 19216803
Lab 8 Mini AP mode
bull Associate your end device to the
SPWF_AP network
bull Find the SPWF_AP network and connect
the end device to the module
95
SPWF_AP +WIND2890187C960D0B Associated +WIND29DHCP reply for 17218151290187C960D0B to 172181512 +WIND29DHCP reply for 17218151290187C960D0B to 172181512
All
Tera Term output
Lab 8 Mini AP mode
bull Open your web browser
bull In the address bar type captiveportalnet
96
SPWF_AP
Tip The Mini AP domain can be set using the variable ip_apdomainname The default value is ldquocaptiveportalnetrdquo
The Mini AP default homepage can be set using the variable ip_apredirect The default value is ldquofirstsethtmlrdquo
Tip If the AP domain name is not quickly opened itrsquos suggested to turn off an eventual proxy server (check the connection settings or browser preferences)
Lab 8 First Set Page
bull The first set page allows to configure the module in IDLE mode
STATION mode IBSS mode and MINI AP mode
97
Used for STA IBSS MINI AP
Mandatory for IDLE STA IBSS MINI AP
Used for STA IBSS (WEP) MINI AP (WEP)
Used for STA (if DHCP = OFF) IBSS
(mandatory) MINI AP (if DHCP = OFF)
Used for STA IBSS (mandatory DHCP = OFF) MINI AP
Used for STA (WEP key) IBSS (WEP) MINI AP (WEP)
Used for STA IBSS MINI AP
Lab 8 Mini AP mode
bull Set all the parameters required in order to enable the connection
between the module and a generic AP
ie AP configured in WPAWPA2 mode
bull MiniAP PassKey anonymous (by default)
bull SSID of the access point
bull Password of the access point
bull Authentication type of the access point
bull Use mode of the module
98
Tip The Mini AP PassKey can be set using the variable ldquouser_descrdquo The default value is ldquoanonymousrdquo
Note In order to manage non-ASCII chars the ip_use_decoder variable must be modified according as below at+sscfg=ip_use_decoder0 no decoding [default] at+sscfg=ip_use_decoder1 RAW decoding (the USER and PSK fields must be completed in HEX) at+sscfg=ip_use_decoder2 UTF-8 decoding at+sscfg=ip_use_decoder6 HTML entities decoding
Lab 8 Mini AP mode
bull Click on GO button and then send the
parameters confirming with OK
99
SPWF_AP
AP
SSID ciscosb2
Lab 8 Mini AP mode
bull The module will receive the parameters and will automatically
connect to the access point required
100
+WIND57Received SSID is ciscosb2 +WIND57Received PWD is +WIND57Received Auth mode is 2 +WIND57Received Mode is 1 +WIND2RESET +WIND1Poweron (--SPWF01S) +WIND13ST IWM Copyright (c) 2012-2013 STmicroelectronics +WIND3Watchdog Running +WIND0Console active +WIND46WPA Crunching PSK +WIND32WiFi Hardware Started +WIND21WiFi Scanning +WIND35WiFi Scan Complete (0x0) +WIND19WiFi Join 02621F518F0B +WIND25WiFi Association with ciscosb2 successful +WIND51WPA Handshake Complete +WIND24WiFi Up 1921681106
All
Tera Term output
ciscosb2
AP
Lab 8 Mini AP mode ndash RAW decoding example
101
Note In order to manage non-ASCII chars the ip_use_decoder variable must be modified according as below at+sscfg=ip_use_decoder0 no decoding [default] at+sscfg=ip_use_decoder1 RAW decoding (the USER and PSK fields must be completed in HEX) at+sscfg=ip_use_decoder2 UTF-8 decoding at+sscfg=ip_use_decoder6 HTML entities decoding
7177657261736466
AP SSIS
AP PSK
Proceed to the next LAB
Lab 9 Socket interface - MiniAP mode
bull Objective
bull Create a direct connection between
the module and an end device
bull Socket interface used in MiniAP
mode
bull Prerequisites
bull Work alone
103
Tera Term output
Lab 9 Configuring the module in MiniAP mode
The Mini AP mode (available starting from the SPWF01S-131115-de4568d-RELEASE) also allows to use the socket interface The procedure is the same as in Lab 7
In order to set the module in Mini AP mode the following parameters are needed
bull Set the SSID
bull Type AT+SSSIDTXT=SPWF_AP
bull Set the network privacy mode
bull Type AT+SSCFG=wifi_priv_mode0
bull Set the network mode (1 = STA 2 = IBSS 3 = MiniAP)
bull Type AT+SSCFG=wifi_mode3
104
OK
All
Lab 9 Configuring the module in MiniAP mode
bull Save the settings on the flash memory and reset the module
bull Type ATampW
bull Type AT+CFUN=1
105
+WIND0Console active +WIND32WiFi Hardware Started +WIND26WiFi Started AP with network SPWF_AP +WIND24WiFi Up 172181511
All
Tera Term output
SPWF_AP
Lab 9 Mini AP mode
bull Connect your PC to the SPWF_AP
network
bull Find the SPWF_AP network and connect
the end device to the module
106
SPWF_AP +WIND2890187C960D0B Associated +WIND29DHCP reply for 17218151290187C960D0B to 172181512 +WIND29DHCP reply for 17218151290187C960D0B to 172181512
All
Tera Term output
Lab 9 Open TCPUDP connection
As described in the Lab 7 the SOCKON command allows to
open a TCPUDP connection to a specified host
bull Sintax
bull AT+SSOCKON=lthostnamegtltportgtltprotocolgtind
bull Configuration parameters
bull lthostnamegt target host DNS resolvable name or IP address
bull ltportgt TCPUDP socket port
bull ltprotocolgt t for TCP socket u for UDP socket
bull ind indicate when data has arrived (optional) Up to 4 consecutive ldquoPending
datardquo message (without any AT+SSOCKR) are guaranteed It is
suggested to empty the buffer using the AT+SSOCKR command and
to avoid exceeding 4 indications
107
Lab 9 Open TCP connection
bull Open the TCP socket server (disable the firewall to properly
run it)
bull Folder hands_on_wifitcp socket serverserverexe
bull The TCP server listens for incoming connections on the port
32000 It sends back all data received
108
Lab 9 Open TCP connection
bull Type AT+SSOCKON=17218151232000tind
bull The client and the server use the socket identifier (ID)
displayed
109
ID 00 OK
All
Tera Term output
Lab 9 Write data to socket
The SOCKW command allows to write data to the specified ID
socket
This command accepts data after the ltcrgt at the end of the
command line
bull Sintax
bull AT+SSOCKW=ltIDgtltlengt
bull Configuration parameters
bull ltIDgt socket identifier
bull ltlengt data length to send
110
Lab 9 Write data to socket
bull Write data
bull Type AT+SSOCKW=0013
bull Type hello worldltCRgt
bull SPWF shows that there are ltpending datagt and their amount
111
+WIND55Pending Data013
All
Tera Term output
ID
Pending
bytes
Note the module is waiting 13 bytes to be written to the socket As soon as 13 bytes (or characters) are sent from the terminal the module is going to write them to the socket and will be ready to receive new commands
Lab 9 Read data from socket
The SOCKR command allows to read data from socket
bull Sintax
bull AT+SSOCKR=ltIDgtltlengt
bull Configuration parameters
bull ltIDgt socket identifier
bull ltlengt data length to read
112
Lab 9 Read data from socket
bull Read data
bull Type AT+SSOCKR=0013
113
hello world OK
All
Tera Term output
Lab 9 Close socket
The SOCKC command allows to close socket
bull Sintax
bull AT+SSOCKC=ltIDgt
bull Configuration parameters
bull ltIDgt socket identifier
114
Tera Term output
Lab 9 Close socket
bull Close socket
bull Type AT+SSOCKC=00
115
OK
All
Proceed to the next LAB
Lab 10 Web server - MiniAP mode
bull Objective
bull Create a direct connection between
the module and an end device
bull Web server used in MiniAP mode
bull Prerequisites
bull Work alone
117
Tera Term output
Lab 10 Configuring the module in MiniAP mode
The Mini AP mode (available starting from the SPWF01S-131115-de4568d-RELEASE) also allows to use the module file system (both RAM and IntExt FLASH)
In order to set the module in Mini AP mode the following parameters are needed
bull Set the SSID
bull Type AT+SSSIDTXT=SPWF_AP
bull Set the network privacy mode
bull Type AT+SSCFG=wifi_priv_mode0
bull Set the network mode (1 = STA 2 = IBSS 3 = MiniAP)
bull Type AT+SSCFG=wifi_mode3
118
OK
All
Lab 10 Configuring the module in MiniAP mode
bull Save the settings on the flash memory and reset the module
bull Type ATampW
bull Type AT+CFUN=1
119
+WIND0Console active +WIND32WiFi Hardware Started +WIND26WiFi Started AP with network SPWF_AP +WIND24WiFi Up 172181511
All
Tera Term output
SPWF_AP
Lab 10 Mini AP mode
bull Connect your PC to the SPWF_AP
network
bull Find the SPWF_AP network and connect
the end device to the module
120
SPWF_AP +WIND2890187C960D0B Associated +WIND29DHCP reply for 17218151290187C960D0B to 172181512 +WIND29DHCP reply for 17218151290187C960D0B to 172181512
All
Tera Term output
Lab 10 Access to Web server - Mini AP mode
bull Open your web browser
bull In the address bar type
captiveportalnetindexhtml
bull The SPWF01S homepage will be
displayed
121
SPWF_AP Tip The Mini AP domain can be set using the variable ip_apdomainname The default value is ldquocaptiveportalnetrdquo
Lab 10 Access to Web server - Mini AP mode
bull Open the SPWF01S Device Status
bull click on the highlighted link
bull The SPWF01S Device Status will be
displayed
122
SPWF_AP Tip The Mini AP domain can be set using the variable ip_apdomainname The default value is ldquocaptiveportalnetrdquo
The Mini AP default homepage can be set using the variable ip_apredirect The default value is ldquofirstsethtmlrdquo
Proceed to the next LAB
Lab 11 Remotely control - GPIOs
bull Objective
bull write remotely a GPIO
bull configure remotely a GPIO
bull read remotely a GPIO
bull Prerequisites
bull module connected to the AP or
module configured in MiniAP mode
124
Lab 11 Remotely control - GPIO
This feature allows to remotely write configure and read a GPIO
The module should be connected to the AP (as shown in Lab 3) or
should be configured in Mini AP mode (as shown in Lab 8)
The external client have to open the remotehtml page stored in the
module
125
ENG-WPA AP
SPWF_AP
miniAP
Tera Term output
Lab 11 Joining a network
In order to be connected to an available Wifi network the AP parameters setting is needed
bull Set the SSID
bull Type AT+SSSIDTXT=ENG-WPA
bull Set the password
bull Type AT+SSCFG=wifi_wpa_psk_texthelloworld
bull Set the network privacy mode (0=none 1=WEP 2=WPA-Personal (TKIPAES) or WPA2-Personal (TKIPAES))
bull Type AT+SSCFG=wifi_priv_mode2
bull NB wifi_auth_type must be set to 0 AT+SSCFG=wifi_auth_type0
bull Set the network mode (1 = STA 2 = IBSS 3 = MiniAP)
bull Type AT+SSCFG=wifi_mode1
126
OK
All
Lab 11 Joining a network
bull Save the settings on the flash memory and reset the module
bull Type ATampW
bull Type AT+CFUN=1
127
+WIND0Console active +WIND46WPA Crunching PSK +WIND32WiFi Hardware Started +WIND21WiFi Scanning +WIND35WiFi Scan Complete (0x0) +WIND19WiFi Join 14D64D243600 +WIND25WiFi Association with ENG-WPA successful +WIND51WPA Handshake Complete +WIND24WiFi Up 19216801xx
All
ENG-WPA AP
Tera Term output
Lab 11 Remotely control in MiniAP mode - GPIO
bull Open your web browser
bull In the address bar type
192168x1xxremotehtml
128
ENG-WPA
AP
Lab 11 Remotely control in MiniAP mode - GPIO
bull Try to write the GPIO14 connected to the LED3 (check if the
LED3 is mounted on your EVAL BOARD otherwise can be used
the GPIO13)
bull Click on the laquoGOraquo button
and LED3 will switch on
129
ENG-WPA
AP
Proceed to the next LAB
Lab 12 Input demo
bull Objective
bull Send a message from the server (wifi
module) to an external client connected
to the same network
bull Prerequisites
bull module connected to the AP or module
configured in MiniAP mode
131
Lab 12 Input demo
The module provides some DEMOs to show the interaction between
the module and an external client connected to the same network
The module should be connected to the AP (as shown in Lab 3) or
should be configured in Mini AP mode (as shown in Lab 8)
In order to run this demo the client have to open the
input_demoshtml page stored in the module
132
ENG-WPA AP
SPWF_AP
miniAP
Tera Term output
Lab 12 Joining a network
In order to be connected to an available Wifi network the AP parameters setting is needed
bull Set the SSID
bull Type AT+SSSIDTXT=ENG-WPA
bull Set the password
bull Type AT+SSCFG=wifi_wpa_psk_texthelloworld
bull Set the network privacy mode (0=none 1=WEP 2=WPA-Personal (TKIPAES) or WPA2-Personal (TKIPAES))
bull Type AT+SSCFG=wifi_priv_mode2
bull NB wifi_auth_type must be set to 0 AT+SSCFG=wifi_auth_type0
bull Set the network mode (1 = STA 2 = IBSS 3 = MiniAP)
bull Type AT+SSCFG=wifi_mode1
133
OK
All
Lab 12 Joining a network
bull Save the settings on the flash memory and reset the module
bull Type ATampW
bull Type AT+CFUN=1
134
+WIND0Console active +WIND46WPA Crunching PSK +WIND32WiFi Hardware Started +WIND21WiFi Scanning +WIND35WiFi Scan Complete (0x0) +WIND19WiFi Join 14D64D243600 +WIND25WiFi Association with ENG-WPA successful +WIND51WPA Handshake Complete +WIND24WiFi Up 19216801xx
All
ENG-WPA AP
Tera Term output
Lab 12 Input demo
bull Open your web browser
bull In the address bar type
192168x1xxinput_demoshtml
bull Insert the message to the client
ie type laquotestraquo (suggested ndash copy
the string and paste it in the
terminal) and then send a carriage
return
135
VERY IMPORTANT
Both client and server are pending (2 sec) after the page
request If no message is sent from the module a timeout
mechanism will be triggered
The server shows the ldquo+WIND56 messagerdquo and it will
wait for a string to be inserted and terminated by [Cr] ldquo+WIND56Insert message to clientdrdquo d is the Nth input SSI into html page (please refer to CGIampSSI Application Notes for details)
Lab 12 Input demo
bull The module receives the HTML
page containing the string inserted
server-side
bull Below this string there are two
buttons to try again the demo or to
return to the homepage
136
Proceed to the next LAB
Lab 13 Socket Server functionality
bull Objective
bull Configure a Server Listening Port
bull Open a TCP connection from a
socket client to the module
bull Data modeCommand Mode usage
bull Prerequisites
bull module connected to the AP or
module configured in MiniAP mode
bull PC to be used as socket client
138
TCP socket
Socket
Server
Socket
Client
Lab 13 Socket Server
This feature allows to enable the socket server mode The module
can be able to listen for an incoming connection on the specified port
The module should be connected to the AP (as shown in Lab 3) or
should be configured in Mini AP mode (as shown in Lab 8)
Please refer to ldquoSocket Server Application Notesrdquo for more details
139
ENG-WPA AP
SPWF_AP
miniAP
Tera Term output
Lab 13 Joining a network
In order to be connected to an available Wifi network the AP parameters setting is needed
bull Set the SSID
bull Type AT+SSSIDTXT=ENG-WPA
bull Set the password
bull Type AT+SSCFG=wifi_wpa_psk_texthelloworld
bull Set the network privacy mode (0=none 1=WEP 2=WPA-Personal (TKIPAES) or WPA2-Personal (TKIPAES))
bull Type AT+SSCFG=wifi_priv_mode2
bull NB wifi_auth_type must be set to 0 AT+SSCFG=wifi_auth_type0
bull Set the network mode (1 = STA 2 = IBSS 3 = MiniAP)
bull Type AT+SSCFG=wifi_mode1
140
OK
All
Lab 13 Joining a network
bull Save the settings on the flash memory and reset the module
bull Type ATampW
bull Type AT+CFUN=1
141
+WIND0Console active +WIND46WPA Crunching PSK +WIND32WiFi Hardware Started +WIND21WiFi Scanning +WIND35WiFi Scan Complete (0x0) +WIND19WiFi Join 14D64D243600 +WIND25WiFi Association with ENG-WPA successful +WIND51WPA Handshake Complete +WIND24WiFi Up 19216801xx
All
ENG-WPA AP
Tera Term output
Lab 13 Socket Server
bull Socket server turn ON the TCP Socket Server (user must
specify the server listening port)
bull Type AT+SSOCKD=32000 (AT+SOCKD=32000u for UDP socket server)
bull Check the status of the socket server
bull Type AT+SSTS=ip_sockd_port
142
ENG-WPA
AP
Tera Term output
OK ip_sockd_port = 32000 OK
All
Tip you can Turn OFF the Socket Server using a server listening port = 0 (type AT+SSOCKD=0)
Lab 13 Socket Server
bull Socket client can be used a simple socket client in order to test the communication
(SocketTest ndash available on httpsourceforgenetprojectssockettest)
143
ENG-WPA
AP
Lab 13 Socket Server
bull Socket client
bull Insert the modulersquos IP Address and the port
bull Click on Connect button
144
Tera Term output
+WIND61Incoming Socket Client1921681102 +WIND60Now in Data Mode
All
Lab 13 Socket Server
bull The module (socket server) enters in data mode and a bidirectional channel is
created to allow exchanging data with the socket client
bull Try to send and receive data from the module
145
Tera Term output
test_1
All
Lab 13 Socket Server ndash escape sequence
bull From Data Mode to Command Mode
bull Configuration variable used escape_seq (default is ldquoat+srdquo case sensitive
suggested to be sent by the local host in a single complete packet with no CR or
LF in the sequence)
bull Type at+s
bull Now itrsquos possible to send AT commands while the socket connection
is still active
146
Tera Term output
+WIND59Back to Command Mode
All
Tip During the Command Mode you cannot send data to client but can receive data from it Every data chunk generates an URC (+WIND64Sockd Pending Data) with limit to 4 (x730 bytes) This is the max number of pending messages From the 5th chunk on messages are lost
Lab 13 Socket Server ndash return to data mode
bull From Command Mode to Data Mode
bull While in Command Mode
bull Type AT+S (this is an AT command AT+S must be followed by ltCRgt)
bull The module returns in data mode
147
ENG-WPA
AP
Tera Term output
+WIND60Now in Data Mode
All
Lab 13 Socket Server ndash turn off
bull Turn OFF the Socket Server
bull Type at+s (to enter in command mode)
bull Type AT+SSOCKD=0
148
ENG-WPA
AP
Tera Term output
OK +WIND62Socket Client Gone1921681102
All
Proceed to the next LAB
Lab 14 Low power modes
bull Objective
bull Practice with Radio Power Save
bull Sleep Mode
bull Standby Mode
bull Prerequisites
bull module connected to the AP
150
Lab 14 Low power modes
This feature allows to enable the low power states
The module supports the ldquoRadio Power Saverdquo mode the ldquoSleeprdquo
mode and the ldquoStandbyrdquo mode
The module should be connected to the AP (as shown in Lab 3) in
order to use the ldquoRadio Power Saverdquo mode
Please refer to ldquoSPWF01S Power Management Application Notesrdquo for
more details
151
ENG-WPA AP
Low Power
Tera Term output
Lab 14 Joining a network
In order to be connected to an available Wifi network the AP parameters setting is needed
bull Set the SSID
bull Type AT+SSSIDTXT=ENG-WPA
bull Set the password
bull Type AT+SSCFG=wifi_wpa_psk_texthelloworld
bull Set the network privacy mode (0=none 1=WEP 2=WPA-Personal (TKIPAES) or WPA2-Personal (TKIPAES))
bull Type AT+SSCFG=wifi_priv_mode2
bull NB wifi_auth_type must be set to 0 AT+SSCFG=wifi_auth_type0
bull Set the network mode (1 = STA 2 = IBSS 3 = MiniAP)
bull Type AT+SSCFG=wifi_mode1
152
OK
All
Lab 14 Joining a network
bull Save the settings on the flash memory and reset the module
bull Type ATampW
bull Type AT+CFUN=1
153
+WIND0Console active +WIND46WPA Crunching PSK +WIND32WiFi Hardware Started +WIND21WiFi Scanning +WIND35WiFi Scan Complete (0x0) +WIND19WiFi Join 14D64D243600 +WIND25WiFi Association with ENG-WPA successful +WIND51WPA Handshake Complete +WIND24WiFi Up 19216801xx
All
Tera Term output
ENG-WPA AP
Low Power
Lab 14 Low power modes ndash Power Save 154
Module
Power State STM32 WLAN
Standby Standby Standby
Sleep Stop PS
Power Save Run PS or Fast-PS
Active Rx Run Rx Idle Rx Active
Active Tx Run Tx Active
Lab 14 Low power modes ndash Power Save
bull By default the module starts in ACTIVE mode
bull Enable the Power Save Mode
bull Type at+sscfg=wifi_powersave1 (ldquowifi_powersave2rdquo enables the Fast-PS mode)
bull Enable the doze operational mode
bull Type at+sscfg=wifi_operational_mode11 (ldquowifi_operational_mode12rdquo enables the quiescent mode)
bull Choose the wake up mode
1 Wake up every n beacon (specified in the wifi_beacon_wakeup variable)
bull Type at+sscfg=wifi_listen_interval0
bull Type at+sscfg=wifi_beacon_wakeup1
OR
2 Wake up every n beacon adaptively (specified in the wifi_beacon_wakeup variable)
bull Type at+sscfg=wifi_listen_interval1
bull Type at+sscfg=wifi_beacon_wakeup1
155
Tip The Wifi Power Save (wifi_powersave1) can also be quickly enabled using the command AT+CFUN=2
Lab 14 Low power modes ndash Power Save
bull Save the settings on the flash memory and reset the module
bull Type ATampW
bull Type AT+CFUN=1
bull The WIND66 message related to Low Power Mode will be
displayed
156
+WIND1Poweron (--SPWF01S) +WIND13ST SPWF01S IWM Copyright (c) 2012-2014 STMicroelectronics Inc All rights Reserved +WIND3Watchdog Running +WIND0Console active +WIND32WiFi Hardware Started +WIND21WiFi Scanning +WIND35WiFi Scan Complete (0x0) +WIND19WiFi Join 02621F518F0B +WIND25WiFi Association with IoT successful +WIND51WPA Handshake Complete +WIND24WiFi Up 1921681104 +WIND66Low Power mode1
All
Tera Term output
ENG-WPA AP
Low Power
Lab 14 Low power modes ndash Sleep Mode 157
Module
Power State STM32 WLAN
Standby Standby Standby
Sleep Stop PS or Fast-PS
Power Save Run PS or Fast-PS
Active Rx Run Rx Idle Rx Active
Active Tx Run Tx Active
Lab 14 Low power modes ndash Sleep Mode
bull In the Sleep Mode the core STM32 is stopped
bull Enable the Sleep Mode
bull Type at+sscfg=sleep_enabled1
bull Enable the Power Save Mode
bull Type at+sscfg=wifi_powersave1 (ldquowifi_powersave2rdquo enables the Fast-PS mode)
bull Enable the doze operational mode
bull Type at+sscfg=wifi_operational_mode11 (ldquowifi_operational_mode12rdquo enables the quiescent mode)
bull Choose the wake up mode
1 Wake up every n beacon (specified in the wifi_beacon_wakeup variable)
bull Type at+sscfg=wifi_listen_interval0
bull Type at+sscfg=wifi_beacon_wakeup1
OR
2 Wake up every n beacon adaptively (specified in the wifi_beacon_wakeup variable)
bull Type at+sscfg=wifi_listen_interval1
bull Type at+sscfg=wifi_beacon_wakeup1
158
Tip The Wifi Sleep Mode (and wifi_powersave1) can also be quickly enabled using the command AT+CFUN=3
Lab 14 Low power modes ndash Sleep Mode
bull Save the settings on the flash memory and reset the module
bull Type ATampW
bull Type AT+CFUN=1
bull The WIND69 message related to Sleep Mode will be displayed
159
+WIND1Poweron (--SPWF01S) +WIND13ST SPWF01S IWM Copyright (c) 2012-2014 STMicroelectronics Inc All rights Reserved +WIND3Watchdog Running +WIND0Console active +WIND32WiFi Hardware Started +WIND21WiFi Scanning +WIND35WiFi Scan Complete (0x0) +WIND19WiFi Join 02621F518F0B +WIND25WiFi Association with IoT successful +WIND51WPA Handshake Complete +WIND24WiFi Up 1921681104 +WIND66Low Power mode1 +WIND69Going into DeepSleep
All
Tera Term output
ENG-WPA AP
Low Power
Lab 14 Low power modes ndash Sleep Mode
bull Wake STM32 up using the GPIO6
bull Put the GPIO6 to 25V (jumper on JP2 as in
the picture)
bull The WIND messages will be displayed
160
+WIND70Resuming from DeepSleep +WIND53Wakeup (GPIO6 High)
All
Tera Term output
Lab 14 Low power modes ndash Sleep Mode
bull Put STM32 in sleep mode using the
GPIO6
bull Go back the GPIO6 floating (remove jumper
- as default)
bull The WIND69 message will be
displayed
161
+WIND69Going into DeepSleep
All
Tera Term output
Lab 14 Low power modes ndash Sleep Mode
bull Wake STM32 up using the remote
page
bull Connect a device to the same modulersquos
network
bull Open the following link
http[module_IP_address]remotehtml
bull Select ldquoWakerdquo and click on ldquoGordquo button
to wake up the module
bull The WIND message will be displayed
162
+WIND70Resuming from DeepSleep
All
Tera Term output
Lab 14 Low power modes ndash Sleep Mode
bull Put STM32 in sleep mode using the
remote page
bull Connect a device to the same modulersquos
network
bull Open the following link
http[module_IP_address]remotehtml
bull Select ldquoSleeprdquo and click on ldquoGordquo button
to put the module in sleep mode
bull The WIND message will be displayed
163
+WIND69Going into DeepSleep
All
Tera Term output
Lab 14 Low power modes ndash Standby Mode 164
Module
Power State STM32 WLAN
Standby Standby Standby
Sleep Stop PS or Fast-PS
Power Save Run PS or Fast-PS
Active Rx Run Rx Idle Rx Active
Active Tx Run Tx Active
Lab 14 Low power modes ndash Standby Mode
bull During the Standby Mode both the STM32 and the Radio will be
put in standby mode The standby mode allows to achieve the
lowest power consumption
bull Enable the Standby Mode
bull Type at+sscfg=sleep_enabled0 (Sleep mode must be disabled)
bull Type at+sscfg=standby_enabled1
bull Please be sure that GPIO6 isnrsquot forced high
bull Set the standby time to wake up via RTC alarm
bull Type at+sscfg=standby_time15
165
Tip The Wifi Standby Mode can also be quickly enabled using the command AT+CFUN=4
Lab 14 Low power modes ndash Standby Mode
bull Save the settings on the flash
memory and reset the module
bull Type ATampW
bull Type AT+CFUN=1
bull After 15 seconds the module will be
rebooted and will return in the
ACTIVE state
166
+WIND0Console active +WIND32WiFi Hardware Started +WIND38WiFi Powered Down +WIND67Going into Standby15 +WIND68Resuming from Standby +WIND1Poweron (--SPWF01S) +WIND13ST SPWF01S IWM Copyright (c) 2012-2014 STMicroelectronics Inc All rights Reserved +WIND3Watchdog Running +WIND0Console active +WIND32WiFi Hardware Started +WIND21WiFi Scanning +WIND35WiFi Scan Complete (0x0) +WIND19WiFi Join02621F518F0B +WIND25WiFi Association with IoT successful +WIND51WPA Handshake Complete +WIND24WiFi Up1921681113
All
Tera Term output
Lab 14 Low power modes ndash Standby Mode
bull Wake up the module using the GPIO6
bull Enable the Standby Mode
bull Type at+sscfg=sleep_enabled0 (make sure that
Sleep mode is disabled)
bull Type at+sscfg=standby_enabled1
bull Type ATampW
bull Type AT+CFUN=1
bull Put the GPIO6 to 25V to wake up the module
bull The WIND message will be displayed and
the module will return in ACTIVE state
167
+WIND68Resuming from Standby +WIND1Poweron (--SPWF01S) helliphelliphellip
All
Tera Term output
Proceed to the next LAB
Lab 15 STAMINI AP switcher
bull Objective
bull HW ldquoSTA to MiniAPrdquo switcher
bull Prerequisites
bull Work alone
169
Lab 15 STAMINI AP switcher
This feature allows to force the module in Mini AP mode starting from
a preexistent state
ldquoRecovery Moderdquo this functionality could be useful to lead the module
in a known state and to reconfigure it (ie using the firstset page)
The GPIO7 will be used to drive this feature
170
Lab 15 STAMINI AP switcher
bull Press and hold the SW2 button on the
EVAL and then perform a reset (HW reset
via SW1 button or SW reset via AT
command)
bull Release the SW2 button
bull The MiniAP mode will be started and the
module is discoverable with the following
SSID
bull iwm-XX-YY-ZZ where XX-YY-ZZ are the last
six digits of modulersquos MAC ADDRESS
171
+WIND2Reset +WIND1Poweron (--SPWF01S) +WIND13ST SPWF01S IWM Copyright (c) 2012-2014 STMicroelectronics Inc All rights Reserved +WIND39HW in miniAP mode (GPIO7 Low) +WIND0Console active +WIND3Watchdog Running +WIND32WiFi Hardware Started +WIND26WiFi Started AP +WIND24WiFi Up172312551
All
Tera Term output
Tip To exit from ldquominiAP mode via GPIO7rdquo perform a modulersquos reset
Proceed to the next LAB
Lab 16 IBSS connection
bull Objective
bull Create an IBSS network
bull Prerequisites
bull Work alone
173
Lab 16 Create an IBSS network
In an IBSS network the SSID is chosen by the client device that
starts the network
Module settings to create an IBSS network
bull Set the IBSS SSID
bull Type AT+SSSIDTXT=ADHOC
bull Set the network privacy mode (0=OPEN or 1=WEP are supported)
bull Type AT+SSCFG=wifi_priv_mode0
bull Set the network mode (2 = IBSS)
bull Type AT+SSCFG=wifi_mode2
174
OK
All
Tera Term output
Lab 16 Create an IBSS network
bull Set IP address IP default gateway IP DNS and IP netmask
bull Type AT+SSCFG=ip_ipaddr192168y1xx
bull Type AT+SSCFG=ip_gw192168y1
bull Type AT+SSCFG=ip_dns192168y1
bull Type AT+SSCFG=ip_netmask2552552550
bull Turn off the DHCP
bull Type AT+SSCFG=ip_use_dhcp0
175
OK
All
Tera Term output
Lab 16 Create an IBSS network
bull Save the settings on the flash memory and reset the module
bull Type ATampW
bull Type AT+CFUN=1
176
+WIND0Console active +WIND32WiFi Hardware Started +WIND21WiFi Scanning +WIND35WiFi Scan Complete (0x0) +WIND19WiFi Join EE33CE002418 +WIND25WiFi Association with ADHOC successful +WIND51WiFi Handshake Complete +WIND24WiFi Up 19216813
All
AD-HOC
Tera Term output
Lab 16 Create an IBSS network
bull Associate the iOS device with the
ADHOC network (iOS gt 8 could not
support the IBSS mode)
177
AD-HOC
Tip manual configuration of static TCPIPv4 parameters is suggested using a PC Ie PC TCPIPv4 properties
Lab 16 Create an IBSS network
bull Find your IP address
bull Type AT+SSTS
bull Open Safari web browser
bull In the address bar type
ltSPWF IP addressgtindexhtml
bull Type 192168y1xxindexhtml
178
AD-HOC
THANK YOU

Lab 1 EVAL of the SPWF01Sxy1 module
STEVAL-IDW001V1 + STEVAL-PCC018V1 7
bull PlugampPlay Solution
bull AT command set
bull Power Supplied via the USB interface
bull UARTUSB bridge from Silicon Lab requires to
install the correspondent driver on your PC
bull SMD antenna and reset button on-board
HyperTerminal or similar
AT CommandsEvents
SPWF01SA11
VCOM
8
Lab 1 STEVAL-IDW001V1
STEVAL-IDW001V1 evaluation board of the WiFi module SPWF01SA11
8
9
Lab 1 STEVAL-PCC018V1
STEVAL-PCC018V1 USB to UART board
9
Lab 1 Hardware setup
STEVAL-IDW001V1 + STEVAL-PCC018V1
bull Insert the jumpers in the USB to
UART board as in the figure
bull Connect the Evaluation board to
the PC
bull Use the Device manager to find
the assigned COM port
10
Module automatically performs a reset Module automatically performs a scan for
available networks (if wifi_mode variable is ne 0) Module automatically enters in command mode STEVAL-PCC018V1 Yellow power LED will light up STEVAL-IDW001V1 Yellow power LED will light
up orange wifi link up LED will light up
Lab 1 Configuring the UART STEVAL-IDW001V1 + STEVAL-PCC018V1
bull Open Tera Term
bull Run Tera Term (open Tera term folder
and then run ttermproexe)
bull Open the assigned COM port
bull Tera Term Setup rarr Serial port
bull Baud rate 115200
bull Data 8 bit
bull Parity none
bull Stop 1 bit
bull Flow control none
bull Set CR in the Terminal setup
(default config)
bull Tera Term Setup rarr Terminal rarr
Transmit CR
11
Tip the modulersquos localecho is disabled by default The local echo option can be enabled on Tera Term in order to display the AT command entered
Lab 1 Configuring the UART STEVAL-IDW001V1 + STEVAL-PCC018V1
bull Open Tera Term
bull Command Mode
bull Type AT followed by a carriage return
(CR)
12
OK
All
Tera Term output
Lab 1 EVAL of the SPWF01Sxy1 module
X-NUCLEO-IDW01M1 amp X-CUBE-WIFI1 13
bull X-NUCLEO-IDW01M1
bull X-NUCLEO-IDW01M1 is a Wi-Fi evaluation board based on SPWF01SA module
bull X-CUBE-WIFI1
bull X-CUBE-WIFI1 is an expansion software package for STM32Cube
bull httpwww2stcomcontentst_comenproductsembedded-softwaremcus-embedded-softwarestm32-embedded-softwarestm32cube-expansion-softwarex-cube-wifi1html
Lab 1 Set Vcom binary in Nucleo X-NUCLEO-IDW01M1 amp X-CUBE-WIFI1
1 Flash VCOM binary into Nucleo drive
binaries
IDErsquos project
drag and drop
Projectbin
on Nucleo drive
14
NUCLEO-F401RE
F103RB
L053R8
L476RG
Lab 1 Configuring the UART X-NUCLEO-IDW01M1 amp X-CUBE-WIFI1
Setup TeraTerm window in order to send AT command to Wi-Fi module
2
Open Hyper terminal or TeraTerm Select correct COM port
Terminal setup Serial port setup
15
Lab 1 Configuring the UART X-NUCLEO-IDW01M1 amp X-CUBE-WIFI1
bull Open Tera Term
bull Command Mode
bull Type AT followed by a carriage return
(CR)
16
OK
All
Tera Term output
You are ready to use your Wi-Fi
EVAL board
Lab 2 Set the SPWF variables
bull Objective bull Run a command
bull Get the default configuration dump
bull Set host name
bull Set static IP parameters
bull Reset the module
bull Prerequisites bull Work alone
18
Lab 2 Run a command
Run a command - Syntax
- ATampx ltCRgt
- AT+S[Command] ltCRgt
Response - Syntax
xxxxxxxx
19
- OK
- Command output followed by OK
- ERROR Command not found
- ERROR Unrecognized key
AT Command Prefix
Not case sensitive
Lab 2 Set the SPWF variables
bull Get the default configuration dump
bull Type ATampV
bull Get a variable value
bull Type AT+SGCFG=console1_speed
Config dump frame
20
Variable
Name
Variable
Value
How to change the variable value
1 AT+SSCFG=[var name]xxxx
2 ATampW
Lab 2 Set the SPWF variables
bull Get the default configuration dump
bull Set host name
bull Type AT+SSCFG=ip_hostnamexxxxxxxx
21
Up to 31 characters (case sensitive) ldquospacebarrdquo is allowed
OK
All
Tera Term output
Lab 2 Set the SPWF variables
bull Get the default configuration dump
bull Set host name
bull Set IP address IP default gateway IP DNS and IP netmask (for
static usage)
bull Type AT+SSCFG=ip_ipaddr19216801xx
bull Type AT+SSCFG=ip_gw19216801
bull Type AT+SSCFG=ip_dns19216801
bull Type AT+SSCFG=ip_netmask2552552550
22
OK
All
Tera Term output
Tera Term output
Lab 2 Set the SPWF variables
bull Get the default configuration dump
bull Set host name
bull Set IP address IP default gateway IP
DNS and IP netmask (DHCP off)
bull Save settings on the flash memory
(mandatory after a variable change)
bull Type ATampW
bull Reset the module
bull Type AT+CFUN=1
23
+WIND21WiFi Scanning +WIND35WiFi Scan Complete (0x0)
All
Lab 2 Set the SPWF variables
bull Get the default configuration dump
bull Set host name
bull Set IP address IP default gateway IP
DNS and IP netmask (DHCP off)
bull Save settings on the flash memory
(mandatory after a variable change)
and reset the module
bull Check the new configuration dump
bull Type ATampV
24
Proceed to the next LAB
Lab 2a FOTA update
bull Objective
bull Upgrade the FW using the OTA file
bull Prerequisites
bull OTA file (provided in the SPWF01S FW
package)
bull External web server (ie Apache web
server running on PC)
26
Lab 2a FOTA update 27
The SPWF01Sx11 module (with external flash on board) allows
performing a Firmware Over-the-air update via a single HTTP GET
The SPWF01S will validate the firmware image it downloads load it
into a staging area then prompt the user to issue a reset command in
order to complete the update
Lab 2a FOTA update
The Apache Web Server will be used in this LAB
(Apache Web Server is available at this link
httparchiveapacheorgdisthttpdbinarieswin32httpd-2225-win32-x86-openssl-098ymsi)
Note please check that the local firewall is disabled or properly set It can
block the connection from module to Apache
bull Copy the OTA file (ie SPWF01S-xxxxxx-yyyyyyy-
RELEASE-mainota) in the Apache 22 htdocs folder
28
Lab 2a FOTA update
The FWUPDATE command allows to perform a Firmware Over-the-
air update via a single HTTP GET
bull Sintax
bull AT+SFWUPDATE=lthostnamegtltpathgtltportgt
bull Configuration parameters
bull lthostnamegt Target host DNS resolvable name or IP address
bull ltpathampqueryoptsgt Document path and optional query arguments
bull ltportgt Target host port
29
Lab 2a FOTA update
bull The module and the Apache Web server must be connected to the same network
bull In Tera Term type AT+SFWUPDATE=[Apache IP address][ota_fileota]
ie type AT+SFWUPDATE=192168xyyySPWF01S-150410-c2e37a3-RELEASE-
mainota
bull Reset the module to apply the new FW
bull Type AT+CFUN=1
bull Restore factory default settings (mandatory)
bull Type ATampF
30
Staging FW update for SPWF01SX11 version 1203-120918_01 FW length 276824 0x00002800 (offset 0x00000000 block len 4096) Write len 4096 -gt 0x0 Write len 4096 -gt 0x1000 (note - deleted extra output for clarity) Write len 4096 -gt 0x42000 Write len 2476 -gt 0x43000 (final) Wrote 276904 bytes Complete Update will be applied on next reboot (at+cfun=1)
All Tera Term output
Proceed to the next LAB
Lab 3 Access point connection
bull Objective
bull Scan for available networks
bull Join a network
bull Check the statusstatistics variables
bull Prerequisites
bull USB dongle and computer are set
up as described in Lab 2
bull Work alone
32
Lab 3 Scan for available networks
The SCAN command performs an immediate scan for available
networks Infrastructure (AP) and IBSS (Ad-Hoc) networks are both
reported Network type Channel BSSID SSID Signal strength (RSSI)
and 80211 capabilities are all reported
bull Type AT+SSCAN
bull Scan syntax AT+SSCAN [=lta|pgt[ltr|s|mgt[ltfnamegt]]] -- Perform a [activepassive]
network scan [filter offfilter on SSIDfilter on MAC] [print to file])
33
FOUND BSS 14D64D243600 CHAN 01 RSSI -28 SSID ENG-WPA CAPS 0431 WPA WPA2 FOUND BSS 00180A31EA78 CHAN 11 RSSI -82 SSID ZyckoItalyWireless CAPS 0531 WPA WPA2 FOUND BSS 06180A31E7E2 CHAN 11 RSSI -85 SSID ZyckoItalyGuest CAPS 0531 WPA WPA2 OK
All
Network type
Network MAC
Network
channel Network
RSSI
Network
SSID Network
capabilities
Tera Term output
Tera Term output
Lab 3 Joining a network (WPA Key)
In order to be connected to an available Wifi network the AP parameters setting is needed
bull Set the SSID
bull Type AT+SSSIDTXT=ENG-WPA
bull Set the password
bull Type AT+SSCFG=wifi_wpa_psk_texthelloworld
bull Set the network privacy mode (0=none 1=WEP 2=WPA-Personal (TKIPAES) or WPA2-Personal (TKIPAES))
bull Type AT+SSCFG=wifi_priv_mode2
bull NB wifi_auth_type must be set to 0 AT+SSCFG=wifi_auth_type0
bull Set the network mode (1 = STA 2 = IBSS 3 = MiniAP)
bull Type AT+SSCFG=wifi_mode1
34
OK
All
Lab 3 Joining a network (WPA Key)
bull Save the settings on the flash memory and reset the module
bull Type ATampW
bull Type AT+CFUN=1
35
+WIND0Console active +WIND46WPA Crunching PSK +WIND32WiFi Hardware Started +WIND21WiFi Scanning +WIND35WiFi Scan Complete (0x0) +WIND19WiFi Join 14D64D243600 +WIND25WiFi Association with ENG-WPA successful +WIND51WPA Handshake Complete +WIND24WiFi Up 19216801xx
All
ENG-WPA AP
Tera Term output
Lab 3 Joining a network (WPA Key)
bull Check the statusstatistics variables
bull Type AT+SSTS
bull Send a ping to the gateway (ip_gw)
bull Type AT+SPING=19216801
36
ENG-WPA AP
Tera Term output
OK
All
Lab 3 Joining a network (WEP Key)
Configure the module using the WEP key (4 possible combinations
available)
Sample table
37
AP configuration AT command to be used
Security Mode WEP
WEP Key Length 64 bit
(10 hex digits)
Authentication Open
Wep Key 1 1234567890
ie
at+sssidtxt=ENG-WEP
AT+SSCFG=wifi_wep_keys[0]1234567890
AT+SSCFG=wifi_wep_key_lens05
AT+SSCFG=wifi_auth_type0
AT+SSCFG=wifi_priv_mode1
AT+SSCFG=wifi_mode1
atampw
at+cfun=1
Security Mode WEP
WEP Key Length 64 bit
(10 hex digits)
Authentication Shared
Key
Wep Key 1 1234567890
ie
at+sssidtxt=ENG-WEP
AT+SSCFG=wifi_wep_keys[0]1234567890
AT+SSCFG=wifi_wep_key_lens05
AT+SSCFG=wifi_auth_type1
AT+SSCFG=wifi_priv_mode1
AT+SSCFG=wifi_mode1
atampw
at+cfun=1
AP configuration AT command to be used
Security Mode WEP
WEP Key Length
128 bit (26 hex digits)
Authentication Open
Wep Key 1
123456789012345678
90123456
ie
at+sssidtxt=ENG-WEP
AT+SSCFG=wifi_wep_keys[0]12345678
901234567890123456
AT+SSCFG=wifi_wep_key_lens0D
AT+SSCFG=wifi_auth_type0
AT+SSCFG=wifi_priv_mode1
AT+SSCFG=wifi_mode1
atampw
at+cfun=1
Security Mode WEP
WEP Key Length
128 bit (26 hex digits)
Authentication
Shared Key
Wep Key 1
123456789012345678
90123456
ie
at+sssidtxt=ENG-WEP
AT+SSCFG=wifi_wep_keys[0]12345678
901234567890123456
AT+SSCFG=wifi_wep_key_lens0D
AT+SSCFG=wifi_auth_type1
AT+SSCFG=wifi_priv_mode1
AT+SSCFG=wifi_mode1
atampw
at+cfun=1
Lab 3 Joining a network (WEP Key)
Notes
bull ldquowifi_wep_key_lensrdquo variable values 05 and 0D
bull Itrsquos possible to enter any text string into a WEP key box in the AP in which case it will be converted into a hexadecimal key using the ASCII values of the characters A maximum of 5 text characters can be entered for 64 bit keys and a maximum of 13 characters for 128 bit keys
In this case it needs to manually convert your ASCII password to HEX and complete the wifi_wep_keys[0] variable with the HEX value bull ie AP WEP key test1 ASCII to HEX 7465737431 So the AT command is AT+SSCFG=wifi_wep_keys[0]7465737431
bull Some APs allow user to insert a passphrase and then the AP automatically generates the hex keys In this scenario user have not to perform the ASCII to HEX conversion because the AP already gives it the hex value
38
Proceed to the next LAB
Lab 4 Web client mode
bull Objective
bull HTTP GET
bull HTTP POST
bull PUSH DATA ON SERIAL PORT
bull Prerequisites
bull USB dongle and computer are set up
as described in Lab 2
bull Work in couple
40
Lab 4 HTTP GET
The HTTP GET feature performs a single HTTP request to the specified
host and path The server response is printed on the UART enabled
bull Sintax
bull AT+SHTTPGET=lthostnamegtltpathgt[ltportgt]
bull Configuration parameters
bull lthostnamegt target host DNS resolvable name or IP address
bull ltpathgt document path
bull ltportgt target port
41
Lab 4 HTTP GET
bull Device A performs an HTTP GET to the Device B
bull Device A
AT+SHTTPGET=ltDevice B IP addrgtindexhtml
Type AT+SHTTPGET=19216801xxindexhtml
42
GET indexhtml HTTP10 User-Agent SPWF01S helliphelliphellip lth1gtST SPWF01Sx11 WiFi Modulelth1gt ltpgt Welcome to the ST SPWF01Sx11 WiFi Module ltpgt ltpgt This page was delivered from the SPWF01Sx11 internal HTTP server hellip lta href=statusshtmlgtSPWF01Sx11 Status Pageltagt ltpgt ltbodygt lthtmlgt OK
Device A
A B
Tera Term output
Lab 4 HTTP POST
The HTTP POST performs a post of the given path to the specified host The module can be only used as an HTTP POST client
bull Sintax
bull AT+SHTTPPOST =lthostnamegtltpathampqueryoptsgtltformcontentgt[ltportgt]
bull Configuration parameters
bull lthostnamegt target host DNS resolvable name or IP address
bull ltpathampqueryoptsgt document path
bull ltformcontentgt form to be submitted
bull ltportgt target port
43
Lab 4 HTTP POST
bull The SPWF01S performs an HTTP POST to an HTTP Post Test Server
bull Type
at+shttppost=posttestservercompostphpname=demoampemail=mymailampsubjec
t=subjampbody=message
bull The HTTP Post Test Server replies as
displayed in the Tera Term output if the HTTP
POST successfully
44
HTTP11 200 OK Date Fri 10 Jan 2014 132414 GMT Server Apache Access-Control-Allow-Origin Vary Accept-Encoding Content-Length 139 Connection close Content-Type texthtml Successfully dumped 4 post variables View it at httpwwwposttestservercomdata2014011005241443192628 Post body was 0 chars long OK
Device A
A B
Tera Term output
HTTP POST
SERVER
Lab 4 HTTPREQ bull The SPWF01S can perform a custom HTTP request to a specified
target Refer to the User Manual for more details
bull Type
AT+SHTTPREQ=wwwgooglecom8089
After ltCRgt the module accepts data We will try to open an non-existent web page
GET downloadTagphp HTTP10ltCRgtltLFgt
User-Agent SPWF01SltCRgtltLFgt
Host iwm-testltCRgtltLFgt
Connection closeltCRgtltLFgtltCRgtltLFgt
45
HTTP10 404 Not FoundltCRgtltLFgt Date Sun 31 Jan 2016 142704 GMTltCRgtltLFgt Content-Type texthtmlltCRgtltLFgt Server HTTP server (unknown)ltCRgtltLFgt Content-Length 49ltCRgtltLFgt X-XSS-Protection 1 mode=blockltCRgtltLFgt X-Frame-Options SAMEORIGINltCRgtltLFgt ltCRgtltLFgt lthtmlgtltbodygtlth1gt404 Not Foundlth1gtltbodygtlthtmlgtltLFgtltCRgt ltLFgt ltSUBgtltSUBgtltSUBgtltCRgtltLFgt ltCRgtltLFgt OKltCRgtltLFgt
All
A B
Tera Term output
[AT+SHTTPREQ =lthostnamegt[port]ltlengthgtltCRgtltdatagt]
Lab 4 Push data on serial port
A built-in html page ldquooutput_demohtmlrdquo allows to remotely push
characters on the serial port from a remote browser
46
output_demohtml
Modulersquos IP addressoutput_demohtml
Lab 4 Push data on serial port
bull Find your IP address
bull Type AT+SSTS
bull Associate your computer with the AP
bull Open your web browser
bull In the address bar type
ltmodulersquos IP
Addressgtoutput_demohtml
bull Type
19216801xxoutput_demohtml
47
Lab 4 Push data on serial port
bull Enter the text
bull In order to manage non-ASCII chars the ip_use_decoder variable must be modified (refer to the User Manual for more details)
bull Submit
bull The text will be sent to the serial port of the module
48
Proceed to the next LAB
Lab 5 Web Server use mode
bull Objective
bull List existing files
bull Print a file
bull Create a file
bull Append to an existing file
bull Delete an existing file
bull Prerequisites
bull USB dongle and computer are
set up as described in Lab 2
bull Work alone
50
Lab 5 Web server 51
The Web Server feature allows to create print and delete ASCII files in
the RAM memory of the module
Lab 5 List existing files
The FSL command lists type sizes and name of all the existing files
bull Type AT+SFSL
52
I 461 input_demoshtml I 180 messageshtml I 384 output_demohtml I 614 indexhtml I 157 peersshtml I 193 configshtml I 174 statusshtml I 212 404html I 2022 firstsethtml I 2898 remotehtml OK
All
Files stored in the STM32
FLASH memory
Tera Term output
Lab 5 Print a file
The FSP command prints the content
of an existing file
bull Type AT+SFSP=indexhtml
53
lthtmlgt ltheadgtlttitlegtST SPWF01Slttitlegtltheadgt ltbody bgcolor=white text=blackgt lth1gtST SPWF01S Intelligent WiFi Modulelth1gt ltpgtWelcome to the ST SPWF01S intelligent Wi-Fi moduleltpgt ltpgtThis page was delivered from the SPWF01S internal HTTP serverltpgt ltpgt lta href=configshtmlgtSPWF01S Configuration Settings Pageltagt ltpgt ltpgt lta href=statusshtmlgtSPWF01S Status Pageltagt ltpgt ltpgt lta href=peersshtmlgtSPWF01S Peers Pageltagt ltpgt ltpgtMore information about the SPWF01S and other ST products can be found at STs website lta href=httpwwwSTcomgthttpwwwSTcomltagtltpgt ltbodygt lthtmlgt OK
All Tera Term output
Tip How to use the offset and length parameters AT+SFSP=indexhtml[offset][length] ie Type AT+SFSP=indexhtml520 Length parameter is mandatory if is used the offset
Lab 5 Create a file
The FSC command allows to create a file inside the SPWF for
delivery by the SPWF HTTP server
bull Sintax
bull AT+SFSC =ltfnamegtltmax_lengt[lthttp_headergt]
bull Configuration parameters
bull lt filename gt filename to create
bull lt max_len gt amount of space to allocate for file max = 4096 bytes
bull lthttp_headergt 0=HTML header automatically added 1=HTML header not
added (as by default)
Type AT+SFSC=wifidemohtml1965
54
OK
All
Tera Term output
Lab 5 Configuring the UART
bull Set CR+LF in the Terminal setup
(to properly paste text in the
terminal)
bull Tera Term Setup rarr Terminal rarr
Transmit CR+LF
55
Tip The local echo option must be disabled on Tera Term
Added in FW 35 using the AT+SFSR command user can rename dynamic files stored in the RAM memory Refer to the User Manual for more details
Lab 5 Append to an existing file
The FSA command allows to append blocks of data to an existing file
This command accepts data after the ltcrgt at the end of the command
line
bull Sintax
bull AT+SFSA=ltfilenamegtltdatalengt
bull Configuration parameters
bull lt filename gt filename pre-created
bull lt datalen gt number of characters to append to the file
Type AT+SFSA=wifidemohtml1965
56
Now SPWF accepts data
Tips
Lab 5 Append to an existing file
bull Open wifidemotxt in the following
directory Hands_on
folderHTML_demo_page
bull Check you have set up CR+LF in the
Terminal setup (for more
information refer to the slide 48)
bull Copy the file content into Tera term
(paste with ALT+V or mouse right
button)
57
OK
All
Tera Term output
Lab 5 Append to an existing file
bull Open wifidemohtml
bull Open your Web browser (suggested Google
Chrome for HTML5 test)
bull In address bar type ltSPWF IP addrgtwifidemohtml
Type 19216801xxwifidemohtml
58
Lab 5 Configuring the UART
bull Re-set CR in the Terminal setup
as by default
bull Tera Term Setup rarr Terminal rarr
Transmit CR
59
Tip The local echo option can be re-enabled on Tera Term
Lab 5 List existing files
Lets list the files
bull Type AT+SFSL
60
D 1965 wifidemohtml I 461 input_demoshtml I 180 messageshtml I 384 output_demohtml I 614 indexhtml I 157 peersshtml I 193 configshtml I 174 statusshtml I 212 404html I 2022 firstsethtml I 2898 remotehtml OK
All
File stored in the RAM memory
Tera Term output
Lab 5 Delete an existing file
The FSD command allows to delete an existing file by name Static
files may not be deleted
bull Sintax
bull AT+SFSD=ltfilenamegt
Type AT+SFSD=wifidemohtml
61
OK
All
Tera Term output
Lab 5 Delete an existing file
bull Re-open wifidemohtml
bull Open your Web browser
bull In address bar ltSPWF IP addrgtwifidemohtml
Type 19216801xxwifidemohtml
62
Proceed to the next LAB
Lab 6 Web Server use mode
bull Objective
bull Create an image file
bull Filesystem update over-the-air
bull Filesystem update over UART
bull Prerequisites
bull Work alone
64
Lab 6 Web server 65
The Web Server feature also allows to upload generic files (PDF
HTML DOC JPEG and so on) in the EXTERNAL FLASH memory of
the module It needs to follow the below steps
- create an image file (IMG) using the tool provided in the Hands-on package
(the IMG contains the files to upload)
- Put the image in a generic and accessible Web Server (Apache Web server
will be used in the Hands-on as example)
- Using the proper AT command the IMG will be retrieved over-the-air and the
static files will be created in the external flash memory
Lab 6 Create an image file
bull Open the following folder and
extract all the files
hands_on_wififilesystem_update
bull Put your own files to upload in the
pages folder (max 512 Kbytes)
bull Run genbat
bull Open the pages folder and copy
outfileimg in your external Web
Server (Apache)
66
3
1
2
Lab 6 Create an image file
The Apache Web Server will be used in this tutorial
(Apache Web Server is available at this link
httparchiveapacheorgdisthttpdbinarieswin32httpd-2225-win32-x86-openssl-098ymsi)
Note please check that the local firewall is disabled or properly set It can
block the connection from module to Apache
bull Copy outfileimg in the Apache 22
htdocs folder (this is the default
root server directory)
67
4
Lab 6 Filesystem update
The HTTPDFSUPDATE command allows to create static files inside
the SPWF for delivery by the SPWF HTTP server
bull Sintax
bull AT+SHTTPDFSUPDATE=lthostnamegtltpathgt[port]
bull Configuration parameters
bull lthostnamegt external web server DNS resolvable name or IP address
bull ltpathgt document path
bull ltportgt target host port
68
Lab 6 Filesystem update
bull In Tera Term type
AT+SHTTPDFSUPDATE=192168x10xoutfileimg
bull Reset the module
bull Type AT+CFUN=1
69
Image length 357957 (offset 0x00080000 block len 4096) Write len 4096 -gt 0x80000 Write len 4096 -gt 0x81000 Write len 4096 -gt 0x82000 helliphelliphelliphellip helliphelliphelliphelliphelliphellip helliphelliphelliphelliphellip Write len 4096 -gt 0xD6000 Write len 1612 -gt 0xD7000 (final) Wrote 357964 bytes Complete Please reboot (at+cfun=1) OK
All
Tera Term output
The file system will be permanently deleted The new IMG will overwrite the existent files in the file system
Warning
Lab 6 Filesystem update
Lets list the files
bull Type AT+SFSL
70
E 2615 st766gif E 112374 modulepng E 2430 index1html E 419 indexhtml E 239887 MKTWiFipdf I 461 input_demoshtml I 180 messageshtml I 384 output_demohtml I 614 indexhtml I 157 peersshtml I 193 configshtml I 174 statusshtml I 212 404html I 2022 firstsethtml I 2898 remotehtml OK
All
Files stored in
the EXT FLASH memory
Tera Term output
Lab 6 Filesystem update
bull Open index1html page
bull Open your web browser
bull In the address bar ltSPWF IP addrgtindex1html
Type 192168x1xxindex1html
71
Lab 6 Filesystem erase
Erase the external httpd filesystem
bull Type AT+S HTTPDFSERASE
The files stored in the EXT FLASH memory will be erased
Lets list the files
bull Type AT+SFSL
72
I 461 input_demoshtml I 180 messageshtml I 384 output_demohtml I 614 indexhtml I 157 peersshtml I 193 configshtml I 174 statusshtml I 212 404html I 2022 firstsethtml I 2898 remotehtml OK
All
Tera Term output
Lab 6 Filesystem update
The HTTPDFSWRITE command allows to create static files inside
the SPWF via the UART interface The HW flow control MUST be
enabled in order to use the command
bull Sintax
bull AT+SHTTPDFSWRITE =ltdatalengtltCRgtltdatagt
bull Configuration parameters
bull ltdatalengt Amount of bytes to be sent
73
Lab 6 Filesystem update
bull Type AT+S HTTPDFSWRITE=357957
bull In Tera Term File ndash Send File
bull Reset the module
bull Type AT+CFUN=1
74
Image length 357957 (offset 0x00080000 block len 4096) Write len 4096 -gt 0x80000 Write len 4096 -gt 0x81000 Write len 4096 -gt 0x82000 helliphelliphelliphellip helliphelliphelliphelliphelliphellip helliphelliphelliphelliphellip Write len 4096 -gt 0xD6000 Write len 1612 -gt 0xD7000 (final) Wrote 357964 bytes Complete Please reboot (at+cfun=1) OK
All
Tera Term output
The file system will be permanently deleted The new IMG will overwrite the existent files in the file system
Warning
Proceed to the next LAB
Lab 7 Socket interface
bull Objective
bull Open TCPUDP connection
bull Write data to socket
bull Read data from socket
bull Close socket
bull Prerequisites
bull Work alone
76
TCPUDP socket
Socket
Client
Socket
Server
Lab 7 TCPUDPUART socket interface 77
The Socket interface allows communication via TCP UDP and UART
The SPWF is both a client and a server socket In this LAB will be
detailed the socket client feature
Ho
st
En
d P
rod
uct
Open TCPUDP connection
Write data to socket
Read data from socket
Close socket
Lab 7 Open TCPUDP connection
The SOCKON command allows to open a TCPUDP connection
to a specified host (up to 8 socket connections at same time)
bull Sintax
bull AT+SSOCKON=lthostnamegtltportgtltprotocolgtind
bull Configuration parameters
bull lthostnamegt target host DNS resolvable name or IP address
bull ltportgt TCPUDP socket port
bull ltprotocolgt t for TCP socket u for UDP socket
bull ind indicate when data has arrived (optional) Up to 4 (x730 bytes)
consecutive ldquoPending datardquo message (without any AT+SSOCKR) are
guaranteed It is suggested to empty the buffer using the AT+SSOCKR
command and to avoid exceeding 4 indications
78
Lab 7 Open TCPUDP connection
bull Open the TCP socket server (disable the firewall to properly
run it)
bull Folder hands_on_wifitcp socket serverserverexe
bull The TCP server listens for incoming connections on the port
32000 It sends back all data received
79
Optional - Lab 7 Open TCPUDP connection
bull Using an Android platform the socket server can be opened
using a specific APP (Socket Protocol available on Play Store)
bull The TCP socket server can be configured to listen for
incoming connections on the port 32000
bull Type 32000 on laquoPort Listen toraquo box
bull Click on Listen
80
Lab 7 Open TCPUDP connection
bull Type AT+SSOCKON=192168010x32000tind
bull The client and the server use the socket identifier (ID)
displayed
81
ID 00 OK
All
Tera Term output
Lab 7 Write data to socket
The SOCKW command allows to write data to the specified ID
socket
This command accepts data after the ltcrgt at the end of the
command line
bull Sintax
bull AT+SSOCKW=ltIDgtltlengt
bull Configuration parameters
bull ltIDgt socket identifier
bull ltlengt data length to send
82
Lab 7 Write data to socket
bull Write data
bull Type AT+SSOCKW=0013
bull Type hello worldltCRgt
bull SPWF shows that there are ltpending datagt and their amount
83
+WIND55Pending Data013
All
Tera Term output
ID
Pending
bytes
Note the module is waiting 13 bytes to be written to the socket As soon as 13 bytes (or characters) are sent from the terminal the module is going to write them to the socket and will be ready to receive new commands
Lab 7 Read data from socket
The SOCKR command allows to read data from socket
bull Sintax
bull AT+SSOCKR=ltIDgtltlengt
bull Configuration parameters
bull ltIDgt socket identifier
bull ltlengt data length to read
84
Lab 7 Read data from socket
bull Read data
bull Type AT+SSOCKR=0013
85
hello world OK
All
Tera Term output
Lab 7 Close socket
The SOCKC command allows to close socket
bull Sintax
bull AT+SSOCKC=ltIDgt
bull Configuration parameters
bull ltIDgt socket identifier
86
Tera Term output
Lab 7 Close socket
bull Close socket
bull Type AT+SSOCKC=00
87
OK
All
Proceed to the next LAB
Lab 8 MiniAP mode for the first set
bull Objective
bull Create a direct connection between
the module and an end device
bull First set of the module in order to
enable the connection between the
module and a generic AP
bull Prerequisites
bull Work alone
89
Tera Term output
Lab 8 Configuring the module in MiniAP mode
The Mini AP mode is available starting from the following FW release
SPWF01S-131115-de4568d-RELEASE
In order to set the module in Mini AP mode the following parameters
are needed
bull Set the SSID
bull Type AT+SSSIDTXT=SPWF_AP
bull Set the network privacy mode (0=OPEN or 1=WEP are supported)
bull Type AT+SSCFG=wifi_priv_mode0
bull Set the network mode (1 = STA 2 = IBSS 3 = MiniAP)
bull Type AT+SSCFG=wifi_mode3
90
OK
All
Lab 8 Configuring the module in MiniAP mode
bull Save the settings on the flash memory and reset the module
bull Type ATampW
bull Type AT+CFUN=1
91
+WIND0Console active +WIND32WiFi Hardware Started +WIND26WiFi Started AP with network SPWF_AP +WIND24WiFi Up 172181511
All
Tera Term output
SPWF_AP
Lab 8 Configuring the module in MiniAP mode (WEP Key)
Configure the module using the WEP key (2 possible combinations
available)
Sample table
92
AP configuration AT command to be used
Security Mode WEP
WEP Key Length 64 bit
(10 hex digits)
Authentication Open
Wep Key 1 1234567890
ie
at+sssidtxt=SPWF_AP
AT+SSCFG=wifi_wep_keys[0]1234567890
AT+SSCFG=wifi_wep_key_lens05
AT+SSCFG=wifi_auth_type0
AT+SSCFG=wifi_priv_mode1
AT+SSCFG=wifi_mode3
atampw
at+cfun=1
AP configuration AT command to be used
Security Mode WEP
WEP Key Length
128 bit (26 hex digits)
Authentication Open
Wep Key 1
123456789012345678
90123456
ie
at+sssidtxt=SPWF_AP
AT+SSCFG=wifi_wep_keys[0]12345678
901234567890123456
AT+SSCFG=wifi_wep_key_lens0D
AT+SSCFG=wifi_auth_type0
AT+SSCFG=wifi_priv_mode1
AT+SSCFG=wifi_mode3
atampw
at+cfun=1
Lab 8 Configuring the module in MiniAP mode (WEP Key)
Notes
bull ldquowifi_wep_key_lensrdquo variable values 05 and 0D
bull Itrsquos possible to enter any text string as WEP key It have to be converted into a
hexadecimal key using the ASCII values of the characters A maximum of 5 text
characters can be entered for 64 bit keys and a maximum of 13 characters for 128
bit keys
In this case it needs to manually convert your ASCII password to
HEX and complete the wifi_wep_keys[0] variable with the HEX
value
bull ie WEP key test1
ASCII to HEX 7465737431
So the AT command is AT+SSCFG=wifi_wep_keys[0]7465737431
93
Lab 8 Customizing the MiniAP address (optional)
Starting from FW 33 the module allows user to customize the IP address of the MiniAP
bull Set the SSID
bull Type AT+SSSIDTXT=SPWF_AP
bull Set the network privacy mode (0=OPEN or 1=WEP are supported)
bull Type AT+SSCFG=wifi_priv_mode0
bull Set the network mode (1 = STA 2 = IBSS 3 = MiniAP)
bull Type AT+SSCFG=wifi_mode3
bull Set the use_dhcp mode (0 = DHCP server off 1 = DHCP server on 2 = DHCP server on and customizable)
bull Type AT+SSCFG=ip_use_dhcp2
bull Set the MiniAP address
bull Type AT+SSCFG=ip_ipaddr19216801
bull Save the settings on the flash memory and reset the module
bull Type ATampW
bull Type AT+CFUN=1
94
Tera Term output
+WIND0Console active +WIND32WiFi Hardware Started +WIND26WiFi Started AP with network SPWF_AP +WIND24WiFi Up 19216801
All
Tip the MiniAP will assign sequential addresses to the client ie 1deg client 19216802 2deg client 19216803
Lab 8 Mini AP mode
bull Associate your end device to the
SPWF_AP network
bull Find the SPWF_AP network and connect
the end device to the module
95
SPWF_AP +WIND2890187C960D0B Associated +WIND29DHCP reply for 17218151290187C960D0B to 172181512 +WIND29DHCP reply for 17218151290187C960D0B to 172181512
All
Tera Term output
Lab 8 Mini AP mode
bull Open your web browser
bull In the address bar type captiveportalnet
96
SPWF_AP
Tip The Mini AP domain can be set using the variable ip_apdomainname The default value is ldquocaptiveportalnetrdquo
The Mini AP default homepage can be set using the variable ip_apredirect The default value is ldquofirstsethtmlrdquo
Tip If the AP domain name is not quickly opened itrsquos suggested to turn off an eventual proxy server (check the connection settings or browser preferences)
Lab 8 First Set Page
bull The first set page allows to configure the module in IDLE mode
STATION mode IBSS mode and MINI AP mode
97
Used for STA IBSS MINI AP
Mandatory for IDLE STA IBSS MINI AP
Used for STA IBSS (WEP) MINI AP (WEP)
Used for STA (if DHCP = OFF) IBSS
(mandatory) MINI AP (if DHCP = OFF)
Used for STA IBSS (mandatory DHCP = OFF) MINI AP
Used for STA (WEP key) IBSS (WEP) MINI AP (WEP)
Used for STA IBSS MINI AP
Lab 8 Mini AP mode
bull Set all the parameters required in order to enable the connection
between the module and a generic AP
ie AP configured in WPAWPA2 mode
bull MiniAP PassKey anonymous (by default)
bull SSID of the access point
bull Password of the access point
bull Authentication type of the access point
bull Use mode of the module
98
Tip The Mini AP PassKey can be set using the variable ldquouser_descrdquo The default value is ldquoanonymousrdquo
Note In order to manage non-ASCII chars the ip_use_decoder variable must be modified according as below at+sscfg=ip_use_decoder0 no decoding [default] at+sscfg=ip_use_decoder1 RAW decoding (the USER and PSK fields must be completed in HEX) at+sscfg=ip_use_decoder2 UTF-8 decoding at+sscfg=ip_use_decoder6 HTML entities decoding
Lab 8 Mini AP mode
bull Click on GO button and then send the
parameters confirming with OK
99
SPWF_AP
AP
SSID ciscosb2
Lab 8 Mini AP mode
bull The module will receive the parameters and will automatically
connect to the access point required
100
+WIND57Received SSID is ciscosb2 +WIND57Received PWD is +WIND57Received Auth mode is 2 +WIND57Received Mode is 1 +WIND2RESET +WIND1Poweron (--SPWF01S) +WIND13ST IWM Copyright (c) 2012-2013 STmicroelectronics +WIND3Watchdog Running +WIND0Console active +WIND46WPA Crunching PSK +WIND32WiFi Hardware Started +WIND21WiFi Scanning +WIND35WiFi Scan Complete (0x0) +WIND19WiFi Join 02621F518F0B +WIND25WiFi Association with ciscosb2 successful +WIND51WPA Handshake Complete +WIND24WiFi Up 1921681106
All
Tera Term output
ciscosb2
AP
Lab 8 Mini AP mode ndash RAW decoding example
101
Note In order to manage non-ASCII chars the ip_use_decoder variable must be modified according as below at+sscfg=ip_use_decoder0 no decoding [default] at+sscfg=ip_use_decoder1 RAW decoding (the USER and PSK fields must be completed in HEX) at+sscfg=ip_use_decoder2 UTF-8 decoding at+sscfg=ip_use_decoder6 HTML entities decoding
7177657261736466
AP SSIS
AP PSK
Proceed to the next LAB
Lab 9 Socket interface - MiniAP mode
bull Objective
bull Create a direct connection between
the module and an end device
bull Socket interface used in MiniAP
mode
bull Prerequisites
bull Work alone
103
Tera Term output
Lab 9 Configuring the module in MiniAP mode
The Mini AP mode (available starting from the SPWF01S-131115-de4568d-RELEASE) also allows to use the socket interface The procedure is the same as in Lab 7
In order to set the module in Mini AP mode the following parameters are needed
bull Set the SSID
bull Type AT+SSSIDTXT=SPWF_AP
bull Set the network privacy mode
bull Type AT+SSCFG=wifi_priv_mode0
bull Set the network mode (1 = STA 2 = IBSS 3 = MiniAP)
bull Type AT+SSCFG=wifi_mode3
104
OK
All
Lab 9 Configuring the module in MiniAP mode
bull Save the settings on the flash memory and reset the module
bull Type ATampW
bull Type AT+CFUN=1
105
+WIND0Console active +WIND32WiFi Hardware Started +WIND26WiFi Started AP with network SPWF_AP +WIND24WiFi Up 172181511
All
Tera Term output
SPWF_AP
Lab 9 Mini AP mode
bull Connect your PC to the SPWF_AP
network
bull Find the SPWF_AP network and connect
the end device to the module
106
SPWF_AP +WIND2890187C960D0B Associated +WIND29DHCP reply for 17218151290187C960D0B to 172181512 +WIND29DHCP reply for 17218151290187C960D0B to 172181512
All
Tera Term output
Lab 9 Open TCPUDP connection
As described in the Lab 7 the SOCKON command allows to
open a TCPUDP connection to a specified host
bull Sintax
bull AT+SSOCKON=lthostnamegtltportgtltprotocolgtind
bull Configuration parameters
bull lthostnamegt target host DNS resolvable name or IP address
bull ltportgt TCPUDP socket port
bull ltprotocolgt t for TCP socket u for UDP socket
bull ind indicate when data has arrived (optional) Up to 4 consecutive ldquoPending
datardquo message (without any AT+SSOCKR) are guaranteed It is
suggested to empty the buffer using the AT+SSOCKR command and
to avoid exceeding 4 indications
107
Lab 9 Open TCP connection
bull Open the TCP socket server (disable the firewall to properly
run it)
bull Folder hands_on_wifitcp socket serverserverexe
bull The TCP server listens for incoming connections on the port
32000 It sends back all data received
108
Lab 9 Open TCP connection
bull Type AT+SSOCKON=17218151232000tind
bull The client and the server use the socket identifier (ID)
displayed
109
ID 00 OK
All
Tera Term output
Lab 9 Write data to socket
The SOCKW command allows to write data to the specified ID
socket
This command accepts data after the ltcrgt at the end of the
command line
bull Sintax
bull AT+SSOCKW=ltIDgtltlengt
bull Configuration parameters
bull ltIDgt socket identifier
bull ltlengt data length to send
110
Lab 9 Write data to socket
bull Write data
bull Type AT+SSOCKW=0013
bull Type hello worldltCRgt
bull SPWF shows that there are ltpending datagt and their amount
111
+WIND55Pending Data013
All
Tera Term output
ID
Pending
bytes
Note the module is waiting 13 bytes to be written to the socket As soon as 13 bytes (or characters) are sent from the terminal the module is going to write them to the socket and will be ready to receive new commands
Lab 9 Read data from socket
The SOCKR command allows to read data from socket
bull Sintax
bull AT+SSOCKR=ltIDgtltlengt
bull Configuration parameters
bull ltIDgt socket identifier
bull ltlengt data length to read
112
Lab 9 Read data from socket
bull Read data
bull Type AT+SSOCKR=0013
113
hello world OK
All
Tera Term output
Lab 9 Close socket
The SOCKC command allows to close socket
bull Sintax
bull AT+SSOCKC=ltIDgt
bull Configuration parameters
bull ltIDgt socket identifier
114
Tera Term output
Lab 9 Close socket
bull Close socket
bull Type AT+SSOCKC=00
115
OK
All
Proceed to the next LAB
Lab 10 Web server - MiniAP mode
bull Objective
bull Create a direct connection between
the module and an end device
bull Web server used in MiniAP mode
bull Prerequisites
bull Work alone
117
Tera Term output
Lab 10 Configuring the module in MiniAP mode
The Mini AP mode (available starting from the SPWF01S-131115-de4568d-RELEASE) also allows to use the module file system (both RAM and IntExt FLASH)
In order to set the module in Mini AP mode the following parameters are needed
bull Set the SSID
bull Type AT+SSSIDTXT=SPWF_AP
bull Set the network privacy mode
bull Type AT+SSCFG=wifi_priv_mode0
bull Set the network mode (1 = STA 2 = IBSS 3 = MiniAP)
bull Type AT+SSCFG=wifi_mode3
118
OK
All
Lab 10 Configuring the module in MiniAP mode
bull Save the settings on the flash memory and reset the module
bull Type ATampW
bull Type AT+CFUN=1
119
+WIND0Console active +WIND32WiFi Hardware Started +WIND26WiFi Started AP with network SPWF_AP +WIND24WiFi Up 172181511
All
Tera Term output
SPWF_AP
Lab 10 Mini AP mode
bull Connect your PC to the SPWF_AP
network
bull Find the SPWF_AP network and connect
the end device to the module
120
SPWF_AP +WIND2890187C960D0B Associated +WIND29DHCP reply for 17218151290187C960D0B to 172181512 +WIND29DHCP reply for 17218151290187C960D0B to 172181512
All
Tera Term output
Lab 10 Access to Web server - Mini AP mode
bull Open your web browser
bull In the address bar type
captiveportalnetindexhtml
bull The SPWF01S homepage will be
displayed
121
SPWF_AP Tip The Mini AP domain can be set using the variable ip_apdomainname The default value is ldquocaptiveportalnetrdquo
Lab 10 Access to Web server - Mini AP mode
bull Open the SPWF01S Device Status
bull click on the highlighted link
bull The SPWF01S Device Status will be
displayed
122
SPWF_AP Tip The Mini AP domain can be set using the variable ip_apdomainname The default value is ldquocaptiveportalnetrdquo
The Mini AP default homepage can be set using the variable ip_apredirect The default value is ldquofirstsethtmlrdquo
Proceed to the next LAB
Lab 11 Remotely control - GPIOs
bull Objective
bull write remotely a GPIO
bull configure remotely a GPIO
bull read remotely a GPIO
bull Prerequisites
bull module connected to the AP or
module configured in MiniAP mode
124
Lab 11 Remotely control - GPIO
This feature allows to remotely write configure and read a GPIO
The module should be connected to the AP (as shown in Lab 3) or
should be configured in Mini AP mode (as shown in Lab 8)
The external client have to open the remotehtml page stored in the
module
125
ENG-WPA AP
SPWF_AP
miniAP
Tera Term output
Lab 11 Joining a network
In order to be connected to an available Wifi network the AP parameters setting is needed
bull Set the SSID
bull Type AT+SSSIDTXT=ENG-WPA
bull Set the password
bull Type AT+SSCFG=wifi_wpa_psk_texthelloworld
bull Set the network privacy mode (0=none 1=WEP 2=WPA-Personal (TKIPAES) or WPA2-Personal (TKIPAES))
bull Type AT+SSCFG=wifi_priv_mode2
bull NB wifi_auth_type must be set to 0 AT+SSCFG=wifi_auth_type0
bull Set the network mode (1 = STA 2 = IBSS 3 = MiniAP)
bull Type AT+SSCFG=wifi_mode1
126
OK
All
Lab 11 Joining a network
bull Save the settings on the flash memory and reset the module
bull Type ATampW
bull Type AT+CFUN=1
127
+WIND0Console active +WIND46WPA Crunching PSK +WIND32WiFi Hardware Started +WIND21WiFi Scanning +WIND35WiFi Scan Complete (0x0) +WIND19WiFi Join 14D64D243600 +WIND25WiFi Association with ENG-WPA successful +WIND51WPA Handshake Complete +WIND24WiFi Up 19216801xx
All
ENG-WPA AP
Tera Term output
Lab 11 Remotely control in MiniAP mode - GPIO
bull Open your web browser
bull In the address bar type
192168x1xxremotehtml
128
ENG-WPA
AP
Lab 11 Remotely control in MiniAP mode - GPIO
bull Try to write the GPIO14 connected to the LED3 (check if the
LED3 is mounted on your EVAL BOARD otherwise can be used
the GPIO13)
bull Click on the laquoGOraquo button
and LED3 will switch on
129
ENG-WPA
AP
Proceed to the next LAB
Lab 12 Input demo
bull Objective
bull Send a message from the server (wifi
module) to an external client connected
to the same network
bull Prerequisites
bull module connected to the AP or module
configured in MiniAP mode
131
Lab 12 Input demo
The module provides some DEMOs to show the interaction between
the module and an external client connected to the same network
The module should be connected to the AP (as shown in Lab 3) or
should be configured in Mini AP mode (as shown in Lab 8)
In order to run this demo the client have to open the
input_demoshtml page stored in the module
132
ENG-WPA AP
SPWF_AP
miniAP
Tera Term output
Lab 12 Joining a network
In order to be connected to an available Wifi network the AP parameters setting is needed
bull Set the SSID
bull Type AT+SSSIDTXT=ENG-WPA
bull Set the password
bull Type AT+SSCFG=wifi_wpa_psk_texthelloworld
bull Set the network privacy mode (0=none 1=WEP 2=WPA-Personal (TKIPAES) or WPA2-Personal (TKIPAES))
bull Type AT+SSCFG=wifi_priv_mode2
bull NB wifi_auth_type must be set to 0 AT+SSCFG=wifi_auth_type0
bull Set the network mode (1 = STA 2 = IBSS 3 = MiniAP)
bull Type AT+SSCFG=wifi_mode1
133
OK
All
Lab 12 Joining a network
bull Save the settings on the flash memory and reset the module
bull Type ATampW
bull Type AT+CFUN=1
134
+WIND0Console active +WIND46WPA Crunching PSK +WIND32WiFi Hardware Started +WIND21WiFi Scanning +WIND35WiFi Scan Complete (0x0) +WIND19WiFi Join 14D64D243600 +WIND25WiFi Association with ENG-WPA successful +WIND51WPA Handshake Complete +WIND24WiFi Up 19216801xx
All
ENG-WPA AP
Tera Term output
Lab 12 Input demo
bull Open your web browser
bull In the address bar type
192168x1xxinput_demoshtml
bull Insert the message to the client
ie type laquotestraquo (suggested ndash copy
the string and paste it in the
terminal) and then send a carriage
return
135
VERY IMPORTANT
Both client and server are pending (2 sec) after the page
request If no message is sent from the module a timeout
mechanism will be triggered
The server shows the ldquo+WIND56 messagerdquo and it will
wait for a string to be inserted and terminated by [Cr] ldquo+WIND56Insert message to clientdrdquo d is the Nth input SSI into html page (please refer to CGIampSSI Application Notes for details)
Lab 12 Input demo
bull The module receives the HTML
page containing the string inserted
server-side
bull Below this string there are two
buttons to try again the demo or to
return to the homepage
136
Proceed to the next LAB
Lab 13 Socket Server functionality
bull Objective
bull Configure a Server Listening Port
bull Open a TCP connection from a
socket client to the module
bull Data modeCommand Mode usage
bull Prerequisites
bull module connected to the AP or
module configured in MiniAP mode
bull PC to be used as socket client
138
TCP socket
Socket
Server
Socket
Client
Lab 13 Socket Server
This feature allows to enable the socket server mode The module
can be able to listen for an incoming connection on the specified port
The module should be connected to the AP (as shown in Lab 3) or
should be configured in Mini AP mode (as shown in Lab 8)
Please refer to ldquoSocket Server Application Notesrdquo for more details
139
ENG-WPA AP
SPWF_AP
miniAP
Tera Term output
Lab 13 Joining a network
In order to be connected to an available Wifi network the AP parameters setting is needed
bull Set the SSID
bull Type AT+SSSIDTXT=ENG-WPA
bull Set the password
bull Type AT+SSCFG=wifi_wpa_psk_texthelloworld
bull Set the network privacy mode (0=none 1=WEP 2=WPA-Personal (TKIPAES) or WPA2-Personal (TKIPAES))
bull Type AT+SSCFG=wifi_priv_mode2
bull NB wifi_auth_type must be set to 0 AT+SSCFG=wifi_auth_type0
bull Set the network mode (1 = STA 2 = IBSS 3 = MiniAP)
bull Type AT+SSCFG=wifi_mode1
140
OK
All
Lab 13 Joining a network
bull Save the settings on the flash memory and reset the module
bull Type ATampW
bull Type AT+CFUN=1
141
+WIND0Console active +WIND46WPA Crunching PSK +WIND32WiFi Hardware Started +WIND21WiFi Scanning +WIND35WiFi Scan Complete (0x0) +WIND19WiFi Join 14D64D243600 +WIND25WiFi Association with ENG-WPA successful +WIND51WPA Handshake Complete +WIND24WiFi Up 19216801xx
All
ENG-WPA AP
Tera Term output
Lab 13 Socket Server
bull Socket server turn ON the TCP Socket Server (user must
specify the server listening port)
bull Type AT+SSOCKD=32000 (AT+SOCKD=32000u for UDP socket server)
bull Check the status of the socket server
bull Type AT+SSTS=ip_sockd_port
142
ENG-WPA
AP
Tera Term output
OK ip_sockd_port = 32000 OK
All
Tip you can Turn OFF the Socket Server using a server listening port = 0 (type AT+SSOCKD=0)
Lab 13 Socket Server
bull Socket client can be used a simple socket client in order to test the communication
(SocketTest ndash available on httpsourceforgenetprojectssockettest)
143
ENG-WPA
AP
Lab 13 Socket Server
bull Socket client
bull Insert the modulersquos IP Address and the port
bull Click on Connect button
144
Tera Term output
+WIND61Incoming Socket Client1921681102 +WIND60Now in Data Mode
All
Lab 13 Socket Server
bull The module (socket server) enters in data mode and a bidirectional channel is
created to allow exchanging data with the socket client
bull Try to send and receive data from the module
145
Tera Term output
test_1
All
Lab 13 Socket Server ndash escape sequence
bull From Data Mode to Command Mode
bull Configuration variable used escape_seq (default is ldquoat+srdquo case sensitive
suggested to be sent by the local host in a single complete packet with no CR or
LF in the sequence)
bull Type at+s
bull Now itrsquos possible to send AT commands while the socket connection
is still active
146
Tera Term output
+WIND59Back to Command Mode
All
Tip During the Command Mode you cannot send data to client but can receive data from it Every data chunk generates an URC (+WIND64Sockd Pending Data) with limit to 4 (x730 bytes) This is the max number of pending messages From the 5th chunk on messages are lost
Lab 13 Socket Server ndash return to data mode
bull From Command Mode to Data Mode
bull While in Command Mode
bull Type AT+S (this is an AT command AT+S must be followed by ltCRgt)
bull The module returns in data mode
147
ENG-WPA
AP
Tera Term output
+WIND60Now in Data Mode
All
Lab 13 Socket Server ndash turn off
bull Turn OFF the Socket Server
bull Type at+s (to enter in command mode)
bull Type AT+SSOCKD=0
148
ENG-WPA
AP
Tera Term output
OK +WIND62Socket Client Gone1921681102
All
Proceed to the next LAB
Lab 14 Low power modes
bull Objective
bull Practice with Radio Power Save
bull Sleep Mode
bull Standby Mode
bull Prerequisites
bull module connected to the AP
150
Lab 14 Low power modes
This feature allows to enable the low power states
The module supports the ldquoRadio Power Saverdquo mode the ldquoSleeprdquo
mode and the ldquoStandbyrdquo mode
The module should be connected to the AP (as shown in Lab 3) in
order to use the ldquoRadio Power Saverdquo mode
Please refer to ldquoSPWF01S Power Management Application Notesrdquo for
more details
151
ENG-WPA AP
Low Power
Tera Term output
Lab 14 Joining a network
In order to be connected to an available Wifi network the AP parameters setting is needed
bull Set the SSID
bull Type AT+SSSIDTXT=ENG-WPA
bull Set the password
bull Type AT+SSCFG=wifi_wpa_psk_texthelloworld
bull Set the network privacy mode (0=none 1=WEP 2=WPA-Personal (TKIPAES) or WPA2-Personal (TKIPAES))
bull Type AT+SSCFG=wifi_priv_mode2
bull NB wifi_auth_type must be set to 0 AT+SSCFG=wifi_auth_type0
bull Set the network mode (1 = STA 2 = IBSS 3 = MiniAP)
bull Type AT+SSCFG=wifi_mode1
152
OK
All
Lab 14 Joining a network
bull Save the settings on the flash memory and reset the module
bull Type ATampW
bull Type AT+CFUN=1
153
+WIND0Console active +WIND46WPA Crunching PSK +WIND32WiFi Hardware Started +WIND21WiFi Scanning +WIND35WiFi Scan Complete (0x0) +WIND19WiFi Join 14D64D243600 +WIND25WiFi Association with ENG-WPA successful +WIND51WPA Handshake Complete +WIND24WiFi Up 19216801xx
All
Tera Term output
ENG-WPA AP
Low Power
Lab 14 Low power modes ndash Power Save 154
Module
Power State STM32 WLAN
Standby Standby Standby
Sleep Stop PS
Power Save Run PS or Fast-PS
Active Rx Run Rx Idle Rx Active
Active Tx Run Tx Active
Lab 14 Low power modes ndash Power Save
bull By default the module starts in ACTIVE mode
bull Enable the Power Save Mode
bull Type at+sscfg=wifi_powersave1 (ldquowifi_powersave2rdquo enables the Fast-PS mode)
bull Enable the doze operational mode
bull Type at+sscfg=wifi_operational_mode11 (ldquowifi_operational_mode12rdquo enables the quiescent mode)
bull Choose the wake up mode
1 Wake up every n beacon (specified in the wifi_beacon_wakeup variable)
bull Type at+sscfg=wifi_listen_interval0
bull Type at+sscfg=wifi_beacon_wakeup1
OR
2 Wake up every n beacon adaptively (specified in the wifi_beacon_wakeup variable)
bull Type at+sscfg=wifi_listen_interval1
bull Type at+sscfg=wifi_beacon_wakeup1
155
Tip The Wifi Power Save (wifi_powersave1) can also be quickly enabled using the command AT+CFUN=2
Lab 14 Low power modes ndash Power Save
bull Save the settings on the flash memory and reset the module
bull Type ATampW
bull Type AT+CFUN=1
bull The WIND66 message related to Low Power Mode will be
displayed
156
+WIND1Poweron (--SPWF01S) +WIND13ST SPWF01S IWM Copyright (c) 2012-2014 STMicroelectronics Inc All rights Reserved +WIND3Watchdog Running +WIND0Console active +WIND32WiFi Hardware Started +WIND21WiFi Scanning +WIND35WiFi Scan Complete (0x0) +WIND19WiFi Join 02621F518F0B +WIND25WiFi Association with IoT successful +WIND51WPA Handshake Complete +WIND24WiFi Up 1921681104 +WIND66Low Power mode1
All
Tera Term output
ENG-WPA AP
Low Power
Lab 14 Low power modes ndash Sleep Mode 157
Module
Power State STM32 WLAN
Standby Standby Standby
Sleep Stop PS or Fast-PS
Power Save Run PS or Fast-PS
Active Rx Run Rx Idle Rx Active
Active Tx Run Tx Active
Lab 14 Low power modes ndash Sleep Mode
bull In the Sleep Mode the core STM32 is stopped
bull Enable the Sleep Mode
bull Type at+sscfg=sleep_enabled1
bull Enable the Power Save Mode
bull Type at+sscfg=wifi_powersave1 (ldquowifi_powersave2rdquo enables the Fast-PS mode)
bull Enable the doze operational mode
bull Type at+sscfg=wifi_operational_mode11 (ldquowifi_operational_mode12rdquo enables the quiescent mode)
bull Choose the wake up mode
1 Wake up every n beacon (specified in the wifi_beacon_wakeup variable)
bull Type at+sscfg=wifi_listen_interval0
bull Type at+sscfg=wifi_beacon_wakeup1
OR
2 Wake up every n beacon adaptively (specified in the wifi_beacon_wakeup variable)
bull Type at+sscfg=wifi_listen_interval1
bull Type at+sscfg=wifi_beacon_wakeup1
158
Tip The Wifi Sleep Mode (and wifi_powersave1) can also be quickly enabled using the command AT+CFUN=3
Lab 14 Low power modes ndash Sleep Mode
bull Save the settings on the flash memory and reset the module
bull Type ATampW
bull Type AT+CFUN=1
bull The WIND69 message related to Sleep Mode will be displayed
159
+WIND1Poweron (--SPWF01S) +WIND13ST SPWF01S IWM Copyright (c) 2012-2014 STMicroelectronics Inc All rights Reserved +WIND3Watchdog Running +WIND0Console active +WIND32WiFi Hardware Started +WIND21WiFi Scanning +WIND35WiFi Scan Complete (0x0) +WIND19WiFi Join 02621F518F0B +WIND25WiFi Association with IoT successful +WIND51WPA Handshake Complete +WIND24WiFi Up 1921681104 +WIND66Low Power mode1 +WIND69Going into DeepSleep
All
Tera Term output
ENG-WPA AP
Low Power
Lab 14 Low power modes ndash Sleep Mode
bull Wake STM32 up using the GPIO6
bull Put the GPIO6 to 25V (jumper on JP2 as in
the picture)
bull The WIND messages will be displayed
160
+WIND70Resuming from DeepSleep +WIND53Wakeup (GPIO6 High)
All
Tera Term output
Lab 14 Low power modes ndash Sleep Mode
bull Put STM32 in sleep mode using the
GPIO6
bull Go back the GPIO6 floating (remove jumper
- as default)
bull The WIND69 message will be
displayed
161
+WIND69Going into DeepSleep
All
Tera Term output
Lab 14 Low power modes ndash Sleep Mode
bull Wake STM32 up using the remote
page
bull Connect a device to the same modulersquos
network
bull Open the following link
http[module_IP_address]remotehtml
bull Select ldquoWakerdquo and click on ldquoGordquo button
to wake up the module
bull The WIND message will be displayed
162
+WIND70Resuming from DeepSleep
All
Tera Term output
Lab 14 Low power modes ndash Sleep Mode
bull Put STM32 in sleep mode using the
remote page
bull Connect a device to the same modulersquos
network
bull Open the following link
http[module_IP_address]remotehtml
bull Select ldquoSleeprdquo and click on ldquoGordquo button
to put the module in sleep mode
bull The WIND message will be displayed
163
+WIND69Going into DeepSleep
All
Tera Term output
Lab 14 Low power modes ndash Standby Mode 164
Module
Power State STM32 WLAN
Standby Standby Standby
Sleep Stop PS or Fast-PS
Power Save Run PS or Fast-PS
Active Rx Run Rx Idle Rx Active
Active Tx Run Tx Active
Lab 14 Low power modes ndash Standby Mode
bull During the Standby Mode both the STM32 and the Radio will be
put in standby mode The standby mode allows to achieve the
lowest power consumption
bull Enable the Standby Mode
bull Type at+sscfg=sleep_enabled0 (Sleep mode must be disabled)
bull Type at+sscfg=standby_enabled1
bull Please be sure that GPIO6 isnrsquot forced high
bull Set the standby time to wake up via RTC alarm
bull Type at+sscfg=standby_time15
165
Tip The Wifi Standby Mode can also be quickly enabled using the command AT+CFUN=4
Lab 14 Low power modes ndash Standby Mode
bull Save the settings on the flash
memory and reset the module
bull Type ATampW
bull Type AT+CFUN=1
bull After 15 seconds the module will be
rebooted and will return in the
ACTIVE state
166
+WIND0Console active +WIND32WiFi Hardware Started +WIND38WiFi Powered Down +WIND67Going into Standby15 +WIND68Resuming from Standby +WIND1Poweron (--SPWF01S) +WIND13ST SPWF01S IWM Copyright (c) 2012-2014 STMicroelectronics Inc All rights Reserved +WIND3Watchdog Running +WIND0Console active +WIND32WiFi Hardware Started +WIND21WiFi Scanning +WIND35WiFi Scan Complete (0x0) +WIND19WiFi Join02621F518F0B +WIND25WiFi Association with IoT successful +WIND51WPA Handshake Complete +WIND24WiFi Up1921681113
All
Tera Term output
Lab 14 Low power modes ndash Standby Mode
bull Wake up the module using the GPIO6
bull Enable the Standby Mode
bull Type at+sscfg=sleep_enabled0 (make sure that
Sleep mode is disabled)
bull Type at+sscfg=standby_enabled1
bull Type ATampW
bull Type AT+CFUN=1
bull Put the GPIO6 to 25V to wake up the module
bull The WIND message will be displayed and
the module will return in ACTIVE state
167
+WIND68Resuming from Standby +WIND1Poweron (--SPWF01S) helliphelliphellip
All
Tera Term output
Proceed to the next LAB
Lab 15 STAMINI AP switcher
bull Objective
bull HW ldquoSTA to MiniAPrdquo switcher
bull Prerequisites
bull Work alone
169
Lab 15 STAMINI AP switcher
This feature allows to force the module in Mini AP mode starting from
a preexistent state
ldquoRecovery Moderdquo this functionality could be useful to lead the module
in a known state and to reconfigure it (ie using the firstset page)
The GPIO7 will be used to drive this feature
170
Lab 15 STAMINI AP switcher
bull Press and hold the SW2 button on the
EVAL and then perform a reset (HW reset
via SW1 button or SW reset via AT
command)
bull Release the SW2 button
bull The MiniAP mode will be started and the
module is discoverable with the following
SSID
bull iwm-XX-YY-ZZ where XX-YY-ZZ are the last
six digits of modulersquos MAC ADDRESS
171
+WIND2Reset +WIND1Poweron (--SPWF01S) +WIND13ST SPWF01S IWM Copyright (c) 2012-2014 STMicroelectronics Inc All rights Reserved +WIND39HW in miniAP mode (GPIO7 Low) +WIND0Console active +WIND3Watchdog Running +WIND32WiFi Hardware Started +WIND26WiFi Started AP +WIND24WiFi Up172312551
All
Tera Term output
Tip To exit from ldquominiAP mode via GPIO7rdquo perform a modulersquos reset
Proceed to the next LAB
Lab 16 IBSS connection
bull Objective
bull Create an IBSS network
bull Prerequisites
bull Work alone
173
Lab 16 Create an IBSS network
In an IBSS network the SSID is chosen by the client device that
starts the network
Module settings to create an IBSS network
bull Set the IBSS SSID
bull Type AT+SSSIDTXT=ADHOC
bull Set the network privacy mode (0=OPEN or 1=WEP are supported)
bull Type AT+SSCFG=wifi_priv_mode0
bull Set the network mode (2 = IBSS)
bull Type AT+SSCFG=wifi_mode2
174
OK
All
Tera Term output
Lab 16 Create an IBSS network
bull Set IP address IP default gateway IP DNS and IP netmask
bull Type AT+SSCFG=ip_ipaddr192168y1xx
bull Type AT+SSCFG=ip_gw192168y1
bull Type AT+SSCFG=ip_dns192168y1
bull Type AT+SSCFG=ip_netmask2552552550
bull Turn off the DHCP
bull Type AT+SSCFG=ip_use_dhcp0
175
OK
All
Tera Term output
Lab 16 Create an IBSS network
bull Save the settings on the flash memory and reset the module
bull Type ATampW
bull Type AT+CFUN=1
176
+WIND0Console active +WIND32WiFi Hardware Started +WIND21WiFi Scanning +WIND35WiFi Scan Complete (0x0) +WIND19WiFi Join EE33CE002418 +WIND25WiFi Association with ADHOC successful +WIND51WiFi Handshake Complete +WIND24WiFi Up 19216813
All
AD-HOC
Tera Term output
Lab 16 Create an IBSS network
bull Associate the iOS device with the
ADHOC network (iOS gt 8 could not
support the IBSS mode)
177
AD-HOC
Tip manual configuration of static TCPIPv4 parameters is suggested using a PC Ie PC TCPIPv4 properties
Lab 16 Create an IBSS network
bull Find your IP address
bull Type AT+SSTS
bull Open Safari web browser
bull In the address bar type
ltSPWF IP addressgtindexhtml
bull Type 192168y1xxindexhtml
178
AD-HOC
THANK YOU

8
Lab 1 STEVAL-IDW001V1
STEVAL-IDW001V1 evaluation board of the WiFi module SPWF01SA11
8
9
Lab 1 STEVAL-PCC018V1
STEVAL-PCC018V1 USB to UART board
9
Lab 1 Hardware setup
STEVAL-IDW001V1 + STEVAL-PCC018V1
bull Insert the jumpers in the USB to
UART board as in the figure
bull Connect the Evaluation board to
the PC
bull Use the Device manager to find
the assigned COM port
10
Module automatically performs a reset Module automatically performs a scan for
available networks (if wifi_mode variable is ne 0) Module automatically enters in command mode STEVAL-PCC018V1 Yellow power LED will light up STEVAL-IDW001V1 Yellow power LED will light
up orange wifi link up LED will light up
Lab 1 Configuring the UART STEVAL-IDW001V1 + STEVAL-PCC018V1
bull Open Tera Term
bull Run Tera Term (open Tera term folder
and then run ttermproexe)
bull Open the assigned COM port
bull Tera Term Setup rarr Serial port
bull Baud rate 115200
bull Data 8 bit
bull Parity none
bull Stop 1 bit
bull Flow control none
bull Set CR in the Terminal setup
(default config)
bull Tera Term Setup rarr Terminal rarr
Transmit CR
11
Tip the modulersquos localecho is disabled by default The local echo option can be enabled on Tera Term in order to display the AT command entered
Lab 1 Configuring the UART STEVAL-IDW001V1 + STEVAL-PCC018V1
bull Open Tera Term
bull Command Mode
bull Type AT followed by a carriage return
(CR)
12
OK
All
Tera Term output
Lab 1 EVAL of the SPWF01Sxy1 module
X-NUCLEO-IDW01M1 amp X-CUBE-WIFI1 13
bull X-NUCLEO-IDW01M1
bull X-NUCLEO-IDW01M1 is a Wi-Fi evaluation board based on SPWF01SA module
bull X-CUBE-WIFI1
bull X-CUBE-WIFI1 is an expansion software package for STM32Cube
bull httpwww2stcomcontentst_comenproductsembedded-softwaremcus-embedded-softwarestm32-embedded-softwarestm32cube-expansion-softwarex-cube-wifi1html
Lab 1 Set Vcom binary in Nucleo X-NUCLEO-IDW01M1 amp X-CUBE-WIFI1
1 Flash VCOM binary into Nucleo drive
binaries
IDErsquos project
drag and drop
Projectbin
on Nucleo drive
14
NUCLEO-F401RE
F103RB
L053R8
L476RG
Lab 1 Configuring the UART X-NUCLEO-IDW01M1 amp X-CUBE-WIFI1
Setup TeraTerm window in order to send AT command to Wi-Fi module
2
Open Hyper terminal or TeraTerm Select correct COM port
Terminal setup Serial port setup
15
Lab 1 Configuring the UART X-NUCLEO-IDW01M1 amp X-CUBE-WIFI1
bull Open Tera Term
bull Command Mode
bull Type AT followed by a carriage return
(CR)
16
OK
All
Tera Term output
You are ready to use your Wi-Fi
EVAL board
Lab 2 Set the SPWF variables
bull Objective bull Run a command
bull Get the default configuration dump
bull Set host name
bull Set static IP parameters
bull Reset the module
bull Prerequisites bull Work alone
18
Lab 2 Run a command
Run a command - Syntax
- ATampx ltCRgt
- AT+S[Command] ltCRgt
Response - Syntax
xxxxxxxx
19
- OK
- Command output followed by OK
- ERROR Command not found
- ERROR Unrecognized key
AT Command Prefix
Not case sensitive
Lab 2 Set the SPWF variables
bull Get the default configuration dump
bull Type ATampV
bull Get a variable value
bull Type AT+SGCFG=console1_speed
Config dump frame
20
Variable
Name
Variable
Value
How to change the variable value
1 AT+SSCFG=[var name]xxxx
2 ATampW
Lab 2 Set the SPWF variables
bull Get the default configuration dump
bull Set host name
bull Type AT+SSCFG=ip_hostnamexxxxxxxx
21
Up to 31 characters (case sensitive) ldquospacebarrdquo is allowed
OK
All
Tera Term output
Lab 2 Set the SPWF variables
bull Get the default configuration dump
bull Set host name
bull Set IP address IP default gateway IP DNS and IP netmask (for
static usage)
bull Type AT+SSCFG=ip_ipaddr19216801xx
bull Type AT+SSCFG=ip_gw19216801
bull Type AT+SSCFG=ip_dns19216801
bull Type AT+SSCFG=ip_netmask2552552550
22
OK
All
Tera Term output
Tera Term output
Lab 2 Set the SPWF variables
bull Get the default configuration dump
bull Set host name
bull Set IP address IP default gateway IP
DNS and IP netmask (DHCP off)
bull Save settings on the flash memory
(mandatory after a variable change)
bull Type ATampW
bull Reset the module
bull Type AT+CFUN=1
23
+WIND21WiFi Scanning +WIND35WiFi Scan Complete (0x0)
All
Lab 2 Set the SPWF variables
bull Get the default configuration dump
bull Set host name
bull Set IP address IP default gateway IP
DNS and IP netmask (DHCP off)
bull Save settings on the flash memory
(mandatory after a variable change)
and reset the module
bull Check the new configuration dump
bull Type ATampV
24
Proceed to the next LAB
Lab 2a FOTA update
bull Objective
bull Upgrade the FW using the OTA file
bull Prerequisites
bull OTA file (provided in the SPWF01S FW
package)
bull External web server (ie Apache web
server running on PC)
26
Lab 2a FOTA update 27
The SPWF01Sx11 module (with external flash on board) allows
performing a Firmware Over-the-air update via a single HTTP GET
The SPWF01S will validate the firmware image it downloads load it
into a staging area then prompt the user to issue a reset command in
order to complete the update
Lab 2a FOTA update
The Apache Web Server will be used in this LAB
(Apache Web Server is available at this link
httparchiveapacheorgdisthttpdbinarieswin32httpd-2225-win32-x86-openssl-098ymsi)
Note please check that the local firewall is disabled or properly set It can
block the connection from module to Apache
bull Copy the OTA file (ie SPWF01S-xxxxxx-yyyyyyy-
RELEASE-mainota) in the Apache 22 htdocs folder
28
Lab 2a FOTA update
The FWUPDATE command allows to perform a Firmware Over-the-
air update via a single HTTP GET
bull Sintax
bull AT+SFWUPDATE=lthostnamegtltpathgtltportgt
bull Configuration parameters
bull lthostnamegt Target host DNS resolvable name or IP address
bull ltpathampqueryoptsgt Document path and optional query arguments
bull ltportgt Target host port
29
Lab 2a FOTA update
bull The module and the Apache Web server must be connected to the same network
bull In Tera Term type AT+SFWUPDATE=[Apache IP address][ota_fileota]
ie type AT+SFWUPDATE=192168xyyySPWF01S-150410-c2e37a3-RELEASE-
mainota
bull Reset the module to apply the new FW
bull Type AT+CFUN=1
bull Restore factory default settings (mandatory)
bull Type ATampF
30
Staging FW update for SPWF01SX11 version 1203-120918_01 FW length 276824 0x00002800 (offset 0x00000000 block len 4096) Write len 4096 -gt 0x0 Write len 4096 -gt 0x1000 (note - deleted extra output for clarity) Write len 4096 -gt 0x42000 Write len 2476 -gt 0x43000 (final) Wrote 276904 bytes Complete Update will be applied on next reboot (at+cfun=1)
All Tera Term output
Proceed to the next LAB
Lab 3 Access point connection
bull Objective
bull Scan for available networks
bull Join a network
bull Check the statusstatistics variables
bull Prerequisites
bull USB dongle and computer are set
up as described in Lab 2
bull Work alone
32
Lab 3 Scan for available networks
The SCAN command performs an immediate scan for available
networks Infrastructure (AP) and IBSS (Ad-Hoc) networks are both
reported Network type Channel BSSID SSID Signal strength (RSSI)
and 80211 capabilities are all reported
bull Type AT+SSCAN
bull Scan syntax AT+SSCAN [=lta|pgt[ltr|s|mgt[ltfnamegt]]] -- Perform a [activepassive]
network scan [filter offfilter on SSIDfilter on MAC] [print to file])
33
FOUND BSS 14D64D243600 CHAN 01 RSSI -28 SSID ENG-WPA CAPS 0431 WPA WPA2 FOUND BSS 00180A31EA78 CHAN 11 RSSI -82 SSID ZyckoItalyWireless CAPS 0531 WPA WPA2 FOUND BSS 06180A31E7E2 CHAN 11 RSSI -85 SSID ZyckoItalyGuest CAPS 0531 WPA WPA2 OK
All
Network type
Network MAC
Network
channel Network
RSSI
Network
SSID Network
capabilities
Tera Term output
Tera Term output
Lab 3 Joining a network (WPA Key)
In order to be connected to an available Wifi network the AP parameters setting is needed
bull Set the SSID
bull Type AT+SSSIDTXT=ENG-WPA
bull Set the password
bull Type AT+SSCFG=wifi_wpa_psk_texthelloworld
bull Set the network privacy mode (0=none 1=WEP 2=WPA-Personal (TKIPAES) or WPA2-Personal (TKIPAES))
bull Type AT+SSCFG=wifi_priv_mode2
bull NB wifi_auth_type must be set to 0 AT+SSCFG=wifi_auth_type0
bull Set the network mode (1 = STA 2 = IBSS 3 = MiniAP)
bull Type AT+SSCFG=wifi_mode1
34
OK
All
Lab 3 Joining a network (WPA Key)
bull Save the settings on the flash memory and reset the module
bull Type ATampW
bull Type AT+CFUN=1
35
+WIND0Console active +WIND46WPA Crunching PSK +WIND32WiFi Hardware Started +WIND21WiFi Scanning +WIND35WiFi Scan Complete (0x0) +WIND19WiFi Join 14D64D243600 +WIND25WiFi Association with ENG-WPA successful +WIND51WPA Handshake Complete +WIND24WiFi Up 19216801xx
All
ENG-WPA AP
Tera Term output
Lab 3 Joining a network (WPA Key)
bull Check the statusstatistics variables
bull Type AT+SSTS
bull Send a ping to the gateway (ip_gw)
bull Type AT+SPING=19216801
36
ENG-WPA AP
Tera Term output
OK
All
Lab 3 Joining a network (WEP Key)
Configure the module using the WEP key (4 possible combinations
available)
Sample table
37
AP configuration AT command to be used
Security Mode WEP
WEP Key Length 64 bit
(10 hex digits)
Authentication Open
Wep Key 1 1234567890
ie
at+sssidtxt=ENG-WEP
AT+SSCFG=wifi_wep_keys[0]1234567890
AT+SSCFG=wifi_wep_key_lens05
AT+SSCFG=wifi_auth_type0
AT+SSCFG=wifi_priv_mode1
AT+SSCFG=wifi_mode1
atampw
at+cfun=1
Security Mode WEP
WEP Key Length 64 bit
(10 hex digits)
Authentication Shared
Key
Wep Key 1 1234567890
ie
at+sssidtxt=ENG-WEP
AT+SSCFG=wifi_wep_keys[0]1234567890
AT+SSCFG=wifi_wep_key_lens05
AT+SSCFG=wifi_auth_type1
AT+SSCFG=wifi_priv_mode1
AT+SSCFG=wifi_mode1
atampw
at+cfun=1
AP configuration AT command to be used
Security Mode WEP
WEP Key Length
128 bit (26 hex digits)
Authentication Open
Wep Key 1
123456789012345678
90123456
ie
at+sssidtxt=ENG-WEP
AT+SSCFG=wifi_wep_keys[0]12345678
901234567890123456
AT+SSCFG=wifi_wep_key_lens0D
AT+SSCFG=wifi_auth_type0
AT+SSCFG=wifi_priv_mode1
AT+SSCFG=wifi_mode1
atampw
at+cfun=1
Security Mode WEP
WEP Key Length
128 bit (26 hex digits)
Authentication
Shared Key
Wep Key 1
123456789012345678
90123456
ie
at+sssidtxt=ENG-WEP
AT+SSCFG=wifi_wep_keys[0]12345678
901234567890123456
AT+SSCFG=wifi_wep_key_lens0D
AT+SSCFG=wifi_auth_type1
AT+SSCFG=wifi_priv_mode1
AT+SSCFG=wifi_mode1
atampw
at+cfun=1
Lab 3 Joining a network (WEP Key)
Notes
bull ldquowifi_wep_key_lensrdquo variable values 05 and 0D
bull Itrsquos possible to enter any text string into a WEP key box in the AP in which case it will be converted into a hexadecimal key using the ASCII values of the characters A maximum of 5 text characters can be entered for 64 bit keys and a maximum of 13 characters for 128 bit keys
In this case it needs to manually convert your ASCII password to HEX and complete the wifi_wep_keys[0] variable with the HEX value bull ie AP WEP key test1 ASCII to HEX 7465737431 So the AT command is AT+SSCFG=wifi_wep_keys[0]7465737431
bull Some APs allow user to insert a passphrase and then the AP automatically generates the hex keys In this scenario user have not to perform the ASCII to HEX conversion because the AP already gives it the hex value
38
Proceed to the next LAB
Lab 4 Web client mode
bull Objective
bull HTTP GET
bull HTTP POST
bull PUSH DATA ON SERIAL PORT
bull Prerequisites
bull USB dongle and computer are set up
as described in Lab 2
bull Work in couple
40
Lab 4 HTTP GET
The HTTP GET feature performs a single HTTP request to the specified
host and path The server response is printed on the UART enabled
bull Sintax
bull AT+SHTTPGET=lthostnamegtltpathgt[ltportgt]
bull Configuration parameters
bull lthostnamegt target host DNS resolvable name or IP address
bull ltpathgt document path
bull ltportgt target port
41
Lab 4 HTTP GET
bull Device A performs an HTTP GET to the Device B
bull Device A
AT+SHTTPGET=ltDevice B IP addrgtindexhtml
Type AT+SHTTPGET=19216801xxindexhtml
42
GET indexhtml HTTP10 User-Agent SPWF01S helliphelliphellip lth1gtST SPWF01Sx11 WiFi Modulelth1gt ltpgt Welcome to the ST SPWF01Sx11 WiFi Module ltpgt ltpgt This page was delivered from the SPWF01Sx11 internal HTTP server hellip lta href=statusshtmlgtSPWF01Sx11 Status Pageltagt ltpgt ltbodygt lthtmlgt OK
Device A
A B
Tera Term output
Lab 4 HTTP POST
The HTTP POST performs a post of the given path to the specified host The module can be only used as an HTTP POST client
bull Sintax
bull AT+SHTTPPOST =lthostnamegtltpathampqueryoptsgtltformcontentgt[ltportgt]
bull Configuration parameters
bull lthostnamegt target host DNS resolvable name or IP address
bull ltpathampqueryoptsgt document path
bull ltformcontentgt form to be submitted
bull ltportgt target port
43
Lab 4 HTTP POST
bull The SPWF01S performs an HTTP POST to an HTTP Post Test Server
bull Type
at+shttppost=posttestservercompostphpname=demoampemail=mymailampsubjec
t=subjampbody=message
bull The HTTP Post Test Server replies as
displayed in the Tera Term output if the HTTP
POST successfully
44
HTTP11 200 OK Date Fri 10 Jan 2014 132414 GMT Server Apache Access-Control-Allow-Origin Vary Accept-Encoding Content-Length 139 Connection close Content-Type texthtml Successfully dumped 4 post variables View it at httpwwwposttestservercomdata2014011005241443192628 Post body was 0 chars long OK
Device A
A B
Tera Term output
HTTP POST
SERVER
Lab 4 HTTPREQ bull The SPWF01S can perform a custom HTTP request to a specified
target Refer to the User Manual for more details
bull Type
AT+SHTTPREQ=wwwgooglecom8089
After ltCRgt the module accepts data We will try to open an non-existent web page
GET downloadTagphp HTTP10ltCRgtltLFgt
User-Agent SPWF01SltCRgtltLFgt
Host iwm-testltCRgtltLFgt
Connection closeltCRgtltLFgtltCRgtltLFgt
45
HTTP10 404 Not FoundltCRgtltLFgt Date Sun 31 Jan 2016 142704 GMTltCRgtltLFgt Content-Type texthtmlltCRgtltLFgt Server HTTP server (unknown)ltCRgtltLFgt Content-Length 49ltCRgtltLFgt X-XSS-Protection 1 mode=blockltCRgtltLFgt X-Frame-Options SAMEORIGINltCRgtltLFgt ltCRgtltLFgt lthtmlgtltbodygtlth1gt404 Not Foundlth1gtltbodygtlthtmlgtltLFgtltCRgt ltLFgt ltSUBgtltSUBgtltSUBgtltCRgtltLFgt ltCRgtltLFgt OKltCRgtltLFgt
All
A B
Tera Term output
[AT+SHTTPREQ =lthostnamegt[port]ltlengthgtltCRgtltdatagt]
Lab 4 Push data on serial port
A built-in html page ldquooutput_demohtmlrdquo allows to remotely push
characters on the serial port from a remote browser
46
output_demohtml
Modulersquos IP addressoutput_demohtml
Lab 4 Push data on serial port
bull Find your IP address
bull Type AT+SSTS
bull Associate your computer with the AP
bull Open your web browser
bull In the address bar type
ltmodulersquos IP
Addressgtoutput_demohtml
bull Type
19216801xxoutput_demohtml
47
Lab 4 Push data on serial port
bull Enter the text
bull In order to manage non-ASCII chars the ip_use_decoder variable must be modified (refer to the User Manual for more details)
bull Submit
bull The text will be sent to the serial port of the module
48
Proceed to the next LAB
Lab 5 Web Server use mode
bull Objective
bull List existing files
bull Print a file
bull Create a file
bull Append to an existing file
bull Delete an existing file
bull Prerequisites
bull USB dongle and computer are
set up as described in Lab 2
bull Work alone
50
Lab 5 Web server 51
The Web Server feature allows to create print and delete ASCII files in
the RAM memory of the module
Lab 5 List existing files
The FSL command lists type sizes and name of all the existing files
bull Type AT+SFSL
52
I 461 input_demoshtml I 180 messageshtml I 384 output_demohtml I 614 indexhtml I 157 peersshtml I 193 configshtml I 174 statusshtml I 212 404html I 2022 firstsethtml I 2898 remotehtml OK
All
Files stored in the STM32
FLASH memory
Tera Term output
Lab 5 Print a file
The FSP command prints the content
of an existing file
bull Type AT+SFSP=indexhtml
53
lthtmlgt ltheadgtlttitlegtST SPWF01Slttitlegtltheadgt ltbody bgcolor=white text=blackgt lth1gtST SPWF01S Intelligent WiFi Modulelth1gt ltpgtWelcome to the ST SPWF01S intelligent Wi-Fi moduleltpgt ltpgtThis page was delivered from the SPWF01S internal HTTP serverltpgt ltpgt lta href=configshtmlgtSPWF01S Configuration Settings Pageltagt ltpgt ltpgt lta href=statusshtmlgtSPWF01S Status Pageltagt ltpgt ltpgt lta href=peersshtmlgtSPWF01S Peers Pageltagt ltpgt ltpgtMore information about the SPWF01S and other ST products can be found at STs website lta href=httpwwwSTcomgthttpwwwSTcomltagtltpgt ltbodygt lthtmlgt OK
All Tera Term output
Tip How to use the offset and length parameters AT+SFSP=indexhtml[offset][length] ie Type AT+SFSP=indexhtml520 Length parameter is mandatory if is used the offset
Lab 5 Create a file
The FSC command allows to create a file inside the SPWF for
delivery by the SPWF HTTP server
bull Sintax
bull AT+SFSC =ltfnamegtltmax_lengt[lthttp_headergt]
bull Configuration parameters
bull lt filename gt filename to create
bull lt max_len gt amount of space to allocate for file max = 4096 bytes
bull lthttp_headergt 0=HTML header automatically added 1=HTML header not
added (as by default)
Type AT+SFSC=wifidemohtml1965
54
OK
All
Tera Term output
Lab 5 Configuring the UART
bull Set CR+LF in the Terminal setup
(to properly paste text in the
terminal)
bull Tera Term Setup rarr Terminal rarr
Transmit CR+LF
55
Tip The local echo option must be disabled on Tera Term
Added in FW 35 using the AT+SFSR command user can rename dynamic files stored in the RAM memory Refer to the User Manual for more details
Lab 5 Append to an existing file
The FSA command allows to append blocks of data to an existing file
This command accepts data after the ltcrgt at the end of the command
line
bull Sintax
bull AT+SFSA=ltfilenamegtltdatalengt
bull Configuration parameters
bull lt filename gt filename pre-created
bull lt datalen gt number of characters to append to the file
Type AT+SFSA=wifidemohtml1965
56
Now SPWF accepts data
Tips
Lab 5 Append to an existing file
bull Open wifidemotxt in the following
directory Hands_on
folderHTML_demo_page
bull Check you have set up CR+LF in the
Terminal setup (for more
information refer to the slide 48)
bull Copy the file content into Tera term
(paste with ALT+V or mouse right
button)
57
OK
All
Tera Term output
Lab 5 Append to an existing file
bull Open wifidemohtml
bull Open your Web browser (suggested Google
Chrome for HTML5 test)
bull In address bar type ltSPWF IP addrgtwifidemohtml
Type 19216801xxwifidemohtml
58
Lab 5 Configuring the UART
bull Re-set CR in the Terminal setup
as by default
bull Tera Term Setup rarr Terminal rarr
Transmit CR
59
Tip The local echo option can be re-enabled on Tera Term
Lab 5 List existing files
Lets list the files
bull Type AT+SFSL
60
D 1965 wifidemohtml I 461 input_demoshtml I 180 messageshtml I 384 output_demohtml I 614 indexhtml I 157 peersshtml I 193 configshtml I 174 statusshtml I 212 404html I 2022 firstsethtml I 2898 remotehtml OK
All
File stored in the RAM memory
Tera Term output
Lab 5 Delete an existing file
The FSD command allows to delete an existing file by name Static
files may not be deleted
bull Sintax
bull AT+SFSD=ltfilenamegt
Type AT+SFSD=wifidemohtml
61
OK
All
Tera Term output
Lab 5 Delete an existing file
bull Re-open wifidemohtml
bull Open your Web browser
bull In address bar ltSPWF IP addrgtwifidemohtml
Type 19216801xxwifidemohtml
62
Proceed to the next LAB
Lab 6 Web Server use mode
bull Objective
bull Create an image file
bull Filesystem update over-the-air
bull Filesystem update over UART
bull Prerequisites
bull Work alone
64
Lab 6 Web server 65
The Web Server feature also allows to upload generic files (PDF
HTML DOC JPEG and so on) in the EXTERNAL FLASH memory of
the module It needs to follow the below steps
- create an image file (IMG) using the tool provided in the Hands-on package
(the IMG contains the files to upload)
- Put the image in a generic and accessible Web Server (Apache Web server
will be used in the Hands-on as example)
- Using the proper AT command the IMG will be retrieved over-the-air and the
static files will be created in the external flash memory
Lab 6 Create an image file
bull Open the following folder and
extract all the files
hands_on_wififilesystem_update
bull Put your own files to upload in the
pages folder (max 512 Kbytes)
bull Run genbat
bull Open the pages folder and copy
outfileimg in your external Web
Server (Apache)
66
3
1
2
Lab 6 Create an image file
The Apache Web Server will be used in this tutorial
(Apache Web Server is available at this link
httparchiveapacheorgdisthttpdbinarieswin32httpd-2225-win32-x86-openssl-098ymsi)
Note please check that the local firewall is disabled or properly set It can
block the connection from module to Apache
bull Copy outfileimg in the Apache 22
htdocs folder (this is the default
root server directory)
67
4
Lab 6 Filesystem update
The HTTPDFSUPDATE command allows to create static files inside
the SPWF for delivery by the SPWF HTTP server
bull Sintax
bull AT+SHTTPDFSUPDATE=lthostnamegtltpathgt[port]
bull Configuration parameters
bull lthostnamegt external web server DNS resolvable name or IP address
bull ltpathgt document path
bull ltportgt target host port
68
Lab 6 Filesystem update
bull In Tera Term type
AT+SHTTPDFSUPDATE=192168x10xoutfileimg
bull Reset the module
bull Type AT+CFUN=1
69
Image length 357957 (offset 0x00080000 block len 4096) Write len 4096 -gt 0x80000 Write len 4096 -gt 0x81000 Write len 4096 -gt 0x82000 helliphelliphelliphellip helliphelliphelliphelliphelliphellip helliphelliphelliphelliphellip Write len 4096 -gt 0xD6000 Write len 1612 -gt 0xD7000 (final) Wrote 357964 bytes Complete Please reboot (at+cfun=1) OK
All
Tera Term output
The file system will be permanently deleted The new IMG will overwrite the existent files in the file system
Warning
Lab 6 Filesystem update
Lets list the files
bull Type AT+SFSL
70
E 2615 st766gif E 112374 modulepng E 2430 index1html E 419 indexhtml E 239887 MKTWiFipdf I 461 input_demoshtml I 180 messageshtml I 384 output_demohtml I 614 indexhtml I 157 peersshtml I 193 configshtml I 174 statusshtml I 212 404html I 2022 firstsethtml I 2898 remotehtml OK
All
Files stored in
the EXT FLASH memory
Tera Term output
Lab 6 Filesystem update
bull Open index1html page
bull Open your web browser
bull In the address bar ltSPWF IP addrgtindex1html
Type 192168x1xxindex1html
71
Lab 6 Filesystem erase
Erase the external httpd filesystem
bull Type AT+S HTTPDFSERASE
The files stored in the EXT FLASH memory will be erased
Lets list the files
bull Type AT+SFSL
72
I 461 input_demoshtml I 180 messageshtml I 384 output_demohtml I 614 indexhtml I 157 peersshtml I 193 configshtml I 174 statusshtml I 212 404html I 2022 firstsethtml I 2898 remotehtml OK
All
Tera Term output
Lab 6 Filesystem update
The HTTPDFSWRITE command allows to create static files inside
the SPWF via the UART interface The HW flow control MUST be
enabled in order to use the command
bull Sintax
bull AT+SHTTPDFSWRITE =ltdatalengtltCRgtltdatagt
bull Configuration parameters
bull ltdatalengt Amount of bytes to be sent
73
Lab 6 Filesystem update
bull Type AT+S HTTPDFSWRITE=357957
bull In Tera Term File ndash Send File
bull Reset the module
bull Type AT+CFUN=1
74
Image length 357957 (offset 0x00080000 block len 4096) Write len 4096 -gt 0x80000 Write len 4096 -gt 0x81000 Write len 4096 -gt 0x82000 helliphelliphelliphellip helliphelliphelliphelliphelliphellip helliphelliphelliphelliphellip Write len 4096 -gt 0xD6000 Write len 1612 -gt 0xD7000 (final) Wrote 357964 bytes Complete Please reboot (at+cfun=1) OK
All
Tera Term output
The file system will be permanently deleted The new IMG will overwrite the existent files in the file system
Warning
Proceed to the next LAB
Lab 7 Socket interface
bull Objective
bull Open TCPUDP connection
bull Write data to socket
bull Read data from socket
bull Close socket
bull Prerequisites
bull Work alone
76
TCPUDP socket
Socket
Client
Socket
Server
Lab 7 TCPUDPUART socket interface 77
The Socket interface allows communication via TCP UDP and UART
The SPWF is both a client and a server socket In this LAB will be
detailed the socket client feature
Ho
st
En
d P
rod
uct
Open TCPUDP connection
Write data to socket
Read data from socket
Close socket
Lab 7 Open TCPUDP connection
The SOCKON command allows to open a TCPUDP connection
to a specified host (up to 8 socket connections at same time)
bull Sintax
bull AT+SSOCKON=lthostnamegtltportgtltprotocolgtind
bull Configuration parameters
bull lthostnamegt target host DNS resolvable name or IP address
bull ltportgt TCPUDP socket port
bull ltprotocolgt t for TCP socket u for UDP socket
bull ind indicate when data has arrived (optional) Up to 4 (x730 bytes)
consecutive ldquoPending datardquo message (without any AT+SSOCKR) are
guaranteed It is suggested to empty the buffer using the AT+SSOCKR
command and to avoid exceeding 4 indications
78
Lab 7 Open TCPUDP connection
bull Open the TCP socket server (disable the firewall to properly
run it)
bull Folder hands_on_wifitcp socket serverserverexe
bull The TCP server listens for incoming connections on the port
32000 It sends back all data received
79
Optional - Lab 7 Open TCPUDP connection
bull Using an Android platform the socket server can be opened
using a specific APP (Socket Protocol available on Play Store)
bull The TCP socket server can be configured to listen for
incoming connections on the port 32000
bull Type 32000 on laquoPort Listen toraquo box
bull Click on Listen
80
Lab 7 Open TCPUDP connection
bull Type AT+SSOCKON=192168010x32000tind
bull The client and the server use the socket identifier (ID)
displayed
81
ID 00 OK
All
Tera Term output
Lab 7 Write data to socket
The SOCKW command allows to write data to the specified ID
socket
This command accepts data after the ltcrgt at the end of the
command line
bull Sintax
bull AT+SSOCKW=ltIDgtltlengt
bull Configuration parameters
bull ltIDgt socket identifier
bull ltlengt data length to send
82
Lab 7 Write data to socket
bull Write data
bull Type AT+SSOCKW=0013
bull Type hello worldltCRgt
bull SPWF shows that there are ltpending datagt and their amount
83
+WIND55Pending Data013
All
Tera Term output
ID
Pending
bytes
Note the module is waiting 13 bytes to be written to the socket As soon as 13 bytes (or characters) are sent from the terminal the module is going to write them to the socket and will be ready to receive new commands
Lab 7 Read data from socket
The SOCKR command allows to read data from socket
bull Sintax
bull AT+SSOCKR=ltIDgtltlengt
bull Configuration parameters
bull ltIDgt socket identifier
bull ltlengt data length to read
84
Lab 7 Read data from socket
bull Read data
bull Type AT+SSOCKR=0013
85
hello world OK
All
Tera Term output
Lab 7 Close socket
The SOCKC command allows to close socket
bull Sintax
bull AT+SSOCKC=ltIDgt
bull Configuration parameters
bull ltIDgt socket identifier
86
Tera Term output
Lab 7 Close socket
bull Close socket
bull Type AT+SSOCKC=00
87
OK
All
Proceed to the next LAB
Lab 8 MiniAP mode for the first set
bull Objective
bull Create a direct connection between
the module and an end device
bull First set of the module in order to
enable the connection between the
module and a generic AP
bull Prerequisites
bull Work alone
89
Tera Term output
Lab 8 Configuring the module in MiniAP mode
The Mini AP mode is available starting from the following FW release
SPWF01S-131115-de4568d-RELEASE
In order to set the module in Mini AP mode the following parameters
are needed
bull Set the SSID
bull Type AT+SSSIDTXT=SPWF_AP
bull Set the network privacy mode (0=OPEN or 1=WEP are supported)
bull Type AT+SSCFG=wifi_priv_mode0
bull Set the network mode (1 = STA 2 = IBSS 3 = MiniAP)
bull Type AT+SSCFG=wifi_mode3
90
OK
All
Lab 8 Configuring the module in MiniAP mode
bull Save the settings on the flash memory and reset the module
bull Type ATampW
bull Type AT+CFUN=1
91
+WIND0Console active +WIND32WiFi Hardware Started +WIND26WiFi Started AP with network SPWF_AP +WIND24WiFi Up 172181511
All
Tera Term output
SPWF_AP
Lab 8 Configuring the module in MiniAP mode (WEP Key)
Configure the module using the WEP key (2 possible combinations
available)
Sample table
92
AP configuration AT command to be used
Security Mode WEP
WEP Key Length 64 bit
(10 hex digits)
Authentication Open
Wep Key 1 1234567890
ie
at+sssidtxt=SPWF_AP
AT+SSCFG=wifi_wep_keys[0]1234567890
AT+SSCFG=wifi_wep_key_lens05
AT+SSCFG=wifi_auth_type0
AT+SSCFG=wifi_priv_mode1
AT+SSCFG=wifi_mode3
atampw
at+cfun=1
AP configuration AT command to be used
Security Mode WEP
WEP Key Length
128 bit (26 hex digits)
Authentication Open
Wep Key 1
123456789012345678
90123456
ie
at+sssidtxt=SPWF_AP
AT+SSCFG=wifi_wep_keys[0]12345678
901234567890123456
AT+SSCFG=wifi_wep_key_lens0D
AT+SSCFG=wifi_auth_type0
AT+SSCFG=wifi_priv_mode1
AT+SSCFG=wifi_mode3
atampw
at+cfun=1
Lab 8 Configuring the module in MiniAP mode (WEP Key)
Notes
bull ldquowifi_wep_key_lensrdquo variable values 05 and 0D
bull Itrsquos possible to enter any text string as WEP key It have to be converted into a
hexadecimal key using the ASCII values of the characters A maximum of 5 text
characters can be entered for 64 bit keys and a maximum of 13 characters for 128
bit keys
In this case it needs to manually convert your ASCII password to
HEX and complete the wifi_wep_keys[0] variable with the HEX
value
bull ie WEP key test1
ASCII to HEX 7465737431
So the AT command is AT+SSCFG=wifi_wep_keys[0]7465737431
93
Lab 8 Customizing the MiniAP address (optional)
Starting from FW 33 the module allows user to customize the IP address of the MiniAP
bull Set the SSID
bull Type AT+SSSIDTXT=SPWF_AP
bull Set the network privacy mode (0=OPEN or 1=WEP are supported)
bull Type AT+SSCFG=wifi_priv_mode0
bull Set the network mode (1 = STA 2 = IBSS 3 = MiniAP)
bull Type AT+SSCFG=wifi_mode3
bull Set the use_dhcp mode (0 = DHCP server off 1 = DHCP server on 2 = DHCP server on and customizable)
bull Type AT+SSCFG=ip_use_dhcp2
bull Set the MiniAP address
bull Type AT+SSCFG=ip_ipaddr19216801
bull Save the settings on the flash memory and reset the module
bull Type ATampW
bull Type AT+CFUN=1
94
Tera Term output
+WIND0Console active +WIND32WiFi Hardware Started +WIND26WiFi Started AP with network SPWF_AP +WIND24WiFi Up 19216801
All
Tip the MiniAP will assign sequential addresses to the client ie 1deg client 19216802 2deg client 19216803
Lab 8 Mini AP mode
bull Associate your end device to the
SPWF_AP network
bull Find the SPWF_AP network and connect
the end device to the module
95
SPWF_AP +WIND2890187C960D0B Associated +WIND29DHCP reply for 17218151290187C960D0B to 172181512 +WIND29DHCP reply for 17218151290187C960D0B to 172181512
All
Tera Term output
Lab 8 Mini AP mode
bull Open your web browser
bull In the address bar type captiveportalnet
96
SPWF_AP
Tip The Mini AP domain can be set using the variable ip_apdomainname The default value is ldquocaptiveportalnetrdquo
The Mini AP default homepage can be set using the variable ip_apredirect The default value is ldquofirstsethtmlrdquo
Tip If the AP domain name is not quickly opened itrsquos suggested to turn off an eventual proxy server (check the connection settings or browser preferences)
Lab 8 First Set Page
bull The first set page allows to configure the module in IDLE mode
STATION mode IBSS mode and MINI AP mode
97
Used for STA IBSS MINI AP
Mandatory for IDLE STA IBSS MINI AP
Used for STA IBSS (WEP) MINI AP (WEP)
Used for STA (if DHCP = OFF) IBSS
(mandatory) MINI AP (if DHCP = OFF)
Used for STA IBSS (mandatory DHCP = OFF) MINI AP
Used for STA (WEP key) IBSS (WEP) MINI AP (WEP)
Used for STA IBSS MINI AP
Lab 8 Mini AP mode
bull Set all the parameters required in order to enable the connection
between the module and a generic AP
ie AP configured in WPAWPA2 mode
bull MiniAP PassKey anonymous (by default)
bull SSID of the access point
bull Password of the access point
bull Authentication type of the access point
bull Use mode of the module
98
Tip The Mini AP PassKey can be set using the variable ldquouser_descrdquo The default value is ldquoanonymousrdquo
Note In order to manage non-ASCII chars the ip_use_decoder variable must be modified according as below at+sscfg=ip_use_decoder0 no decoding [default] at+sscfg=ip_use_decoder1 RAW decoding (the USER and PSK fields must be completed in HEX) at+sscfg=ip_use_decoder2 UTF-8 decoding at+sscfg=ip_use_decoder6 HTML entities decoding
Lab 8 Mini AP mode
bull Click on GO button and then send the
parameters confirming with OK
99
SPWF_AP
AP
SSID ciscosb2
Lab 8 Mini AP mode
bull The module will receive the parameters and will automatically
connect to the access point required
100
+WIND57Received SSID is ciscosb2 +WIND57Received PWD is +WIND57Received Auth mode is 2 +WIND57Received Mode is 1 +WIND2RESET +WIND1Poweron (--SPWF01S) +WIND13ST IWM Copyright (c) 2012-2013 STmicroelectronics +WIND3Watchdog Running +WIND0Console active +WIND46WPA Crunching PSK +WIND32WiFi Hardware Started +WIND21WiFi Scanning +WIND35WiFi Scan Complete (0x0) +WIND19WiFi Join 02621F518F0B +WIND25WiFi Association with ciscosb2 successful +WIND51WPA Handshake Complete +WIND24WiFi Up 1921681106
All
Tera Term output
ciscosb2
AP
Lab 8 Mini AP mode ndash RAW decoding example
101
Note In order to manage non-ASCII chars the ip_use_decoder variable must be modified according as below at+sscfg=ip_use_decoder0 no decoding [default] at+sscfg=ip_use_decoder1 RAW decoding (the USER and PSK fields must be completed in HEX) at+sscfg=ip_use_decoder2 UTF-8 decoding at+sscfg=ip_use_decoder6 HTML entities decoding
7177657261736466
AP SSIS
AP PSK
Proceed to the next LAB
Lab 9 Socket interface - MiniAP mode
bull Objective
bull Create a direct connection between
the module and an end device
bull Socket interface used in MiniAP
mode
bull Prerequisites
bull Work alone
103
Tera Term output
Lab 9 Configuring the module in MiniAP mode
The Mini AP mode (available starting from the SPWF01S-131115-de4568d-RELEASE) also allows to use the socket interface The procedure is the same as in Lab 7
In order to set the module in Mini AP mode the following parameters are needed
bull Set the SSID
bull Type AT+SSSIDTXT=SPWF_AP
bull Set the network privacy mode
bull Type AT+SSCFG=wifi_priv_mode0
bull Set the network mode (1 = STA 2 = IBSS 3 = MiniAP)
bull Type AT+SSCFG=wifi_mode3
104
OK
All
Lab 9 Configuring the module in MiniAP mode
bull Save the settings on the flash memory and reset the module
bull Type ATampW
bull Type AT+CFUN=1
105
+WIND0Console active +WIND32WiFi Hardware Started +WIND26WiFi Started AP with network SPWF_AP +WIND24WiFi Up 172181511
All
Tera Term output
SPWF_AP
Lab 9 Mini AP mode
bull Connect your PC to the SPWF_AP
network
bull Find the SPWF_AP network and connect
the end device to the module
106
SPWF_AP +WIND2890187C960D0B Associated +WIND29DHCP reply for 17218151290187C960D0B to 172181512 +WIND29DHCP reply for 17218151290187C960D0B to 172181512
All
Tera Term output
Lab 9 Open TCPUDP connection
As described in the Lab 7 the SOCKON command allows to
open a TCPUDP connection to a specified host
bull Sintax
bull AT+SSOCKON=lthostnamegtltportgtltprotocolgtind
bull Configuration parameters
bull lthostnamegt target host DNS resolvable name or IP address
bull ltportgt TCPUDP socket port
bull ltprotocolgt t for TCP socket u for UDP socket
bull ind indicate when data has arrived (optional) Up to 4 consecutive ldquoPending
datardquo message (without any AT+SSOCKR) are guaranteed It is
suggested to empty the buffer using the AT+SSOCKR command and
to avoid exceeding 4 indications
107
Lab 9 Open TCP connection
bull Open the TCP socket server (disable the firewall to properly
run it)
bull Folder hands_on_wifitcp socket serverserverexe
bull The TCP server listens for incoming connections on the port
32000 It sends back all data received
108
Lab 9 Open TCP connection
bull Type AT+SSOCKON=17218151232000tind
bull The client and the server use the socket identifier (ID)
displayed
109
ID 00 OK
All
Tera Term output
Lab 9 Write data to socket
The SOCKW command allows to write data to the specified ID
socket
This command accepts data after the ltcrgt at the end of the
command line
bull Sintax
bull AT+SSOCKW=ltIDgtltlengt
bull Configuration parameters
bull ltIDgt socket identifier
bull ltlengt data length to send
110
Lab 9 Write data to socket
bull Write data
bull Type AT+SSOCKW=0013
bull Type hello worldltCRgt
bull SPWF shows that there are ltpending datagt and their amount
111
+WIND55Pending Data013
All
Tera Term output
ID
Pending
bytes
Note the module is waiting 13 bytes to be written to the socket As soon as 13 bytes (or characters) are sent from the terminal the module is going to write them to the socket and will be ready to receive new commands
Lab 9 Read data from socket
The SOCKR command allows to read data from socket
bull Sintax
bull AT+SSOCKR=ltIDgtltlengt
bull Configuration parameters
bull ltIDgt socket identifier
bull ltlengt data length to read
112
Lab 9 Read data from socket
bull Read data
bull Type AT+SSOCKR=0013
113
hello world OK
All
Tera Term output
Lab 9 Close socket
The SOCKC command allows to close socket
bull Sintax
bull AT+SSOCKC=ltIDgt
bull Configuration parameters
bull ltIDgt socket identifier
114
Tera Term output
Lab 9 Close socket
bull Close socket
bull Type AT+SSOCKC=00
115
OK
All
Proceed to the next LAB
Lab 10 Web server - MiniAP mode
bull Objective
bull Create a direct connection between
the module and an end device
bull Web server used in MiniAP mode
bull Prerequisites
bull Work alone
117
Tera Term output
Lab 10 Configuring the module in MiniAP mode
The Mini AP mode (available starting from the SPWF01S-131115-de4568d-RELEASE) also allows to use the module file system (both RAM and IntExt FLASH)
In order to set the module in Mini AP mode the following parameters are needed
bull Set the SSID
bull Type AT+SSSIDTXT=SPWF_AP
bull Set the network privacy mode
bull Type AT+SSCFG=wifi_priv_mode0
bull Set the network mode (1 = STA 2 = IBSS 3 = MiniAP)
bull Type AT+SSCFG=wifi_mode3
118
OK
All
Lab 10 Configuring the module in MiniAP mode
bull Save the settings on the flash memory and reset the module
bull Type ATampW
bull Type AT+CFUN=1
119
+WIND0Console active +WIND32WiFi Hardware Started +WIND26WiFi Started AP with network SPWF_AP +WIND24WiFi Up 172181511
All
Tera Term output
SPWF_AP
Lab 10 Mini AP mode
bull Connect your PC to the SPWF_AP
network
bull Find the SPWF_AP network and connect
the end device to the module
120
SPWF_AP +WIND2890187C960D0B Associated +WIND29DHCP reply for 17218151290187C960D0B to 172181512 +WIND29DHCP reply for 17218151290187C960D0B to 172181512
All
Tera Term output
Lab 10 Access to Web server - Mini AP mode
bull Open your web browser
bull In the address bar type
captiveportalnetindexhtml
bull The SPWF01S homepage will be
displayed
121
SPWF_AP Tip The Mini AP domain can be set using the variable ip_apdomainname The default value is ldquocaptiveportalnetrdquo
Lab 10 Access to Web server - Mini AP mode
bull Open the SPWF01S Device Status
bull click on the highlighted link
bull The SPWF01S Device Status will be
displayed
122
SPWF_AP Tip The Mini AP domain can be set using the variable ip_apdomainname The default value is ldquocaptiveportalnetrdquo
The Mini AP default homepage can be set using the variable ip_apredirect The default value is ldquofirstsethtmlrdquo
Proceed to the next LAB
Lab 11 Remotely control - GPIOs
bull Objective
bull write remotely a GPIO
bull configure remotely a GPIO
bull read remotely a GPIO
bull Prerequisites
bull module connected to the AP or
module configured in MiniAP mode
124
Lab 11 Remotely control - GPIO
This feature allows to remotely write configure and read a GPIO
The module should be connected to the AP (as shown in Lab 3) or
should be configured in Mini AP mode (as shown in Lab 8)
The external client have to open the remotehtml page stored in the
module
125
ENG-WPA AP
SPWF_AP
miniAP
Tera Term output
Lab 11 Joining a network
In order to be connected to an available Wifi network the AP parameters setting is needed
bull Set the SSID
bull Type AT+SSSIDTXT=ENG-WPA
bull Set the password
bull Type AT+SSCFG=wifi_wpa_psk_texthelloworld
bull Set the network privacy mode (0=none 1=WEP 2=WPA-Personal (TKIPAES) or WPA2-Personal (TKIPAES))
bull Type AT+SSCFG=wifi_priv_mode2
bull NB wifi_auth_type must be set to 0 AT+SSCFG=wifi_auth_type0
bull Set the network mode (1 = STA 2 = IBSS 3 = MiniAP)
bull Type AT+SSCFG=wifi_mode1
126
OK
All
Lab 11 Joining a network
bull Save the settings on the flash memory and reset the module
bull Type ATampW
bull Type AT+CFUN=1
127
+WIND0Console active +WIND46WPA Crunching PSK +WIND32WiFi Hardware Started +WIND21WiFi Scanning +WIND35WiFi Scan Complete (0x0) +WIND19WiFi Join 14D64D243600 +WIND25WiFi Association with ENG-WPA successful +WIND51WPA Handshake Complete +WIND24WiFi Up 19216801xx
All
ENG-WPA AP
Tera Term output
Lab 11 Remotely control in MiniAP mode - GPIO
bull Open your web browser
bull In the address bar type
192168x1xxremotehtml
128
ENG-WPA
AP
Lab 11 Remotely control in MiniAP mode - GPIO
bull Try to write the GPIO14 connected to the LED3 (check if the
LED3 is mounted on your EVAL BOARD otherwise can be used
the GPIO13)
bull Click on the laquoGOraquo button
and LED3 will switch on
129
ENG-WPA
AP
Proceed to the next LAB
Lab 12 Input demo
bull Objective
bull Send a message from the server (wifi
module) to an external client connected
to the same network
bull Prerequisites
bull module connected to the AP or module
configured in MiniAP mode
131
Lab 12 Input demo
The module provides some DEMOs to show the interaction between
the module and an external client connected to the same network
The module should be connected to the AP (as shown in Lab 3) or
should be configured in Mini AP mode (as shown in Lab 8)
In order to run this demo the client have to open the
input_demoshtml page stored in the module
132
ENG-WPA AP
SPWF_AP
miniAP
Tera Term output
Lab 12 Joining a network
In order to be connected to an available Wifi network the AP parameters setting is needed
bull Set the SSID
bull Type AT+SSSIDTXT=ENG-WPA
bull Set the password
bull Type AT+SSCFG=wifi_wpa_psk_texthelloworld
bull Set the network privacy mode (0=none 1=WEP 2=WPA-Personal (TKIPAES) or WPA2-Personal (TKIPAES))
bull Type AT+SSCFG=wifi_priv_mode2
bull NB wifi_auth_type must be set to 0 AT+SSCFG=wifi_auth_type0
bull Set the network mode (1 = STA 2 = IBSS 3 = MiniAP)
bull Type AT+SSCFG=wifi_mode1
133
OK
All
Lab 12 Joining a network
bull Save the settings on the flash memory and reset the module
bull Type ATampW
bull Type AT+CFUN=1
134
+WIND0Console active +WIND46WPA Crunching PSK +WIND32WiFi Hardware Started +WIND21WiFi Scanning +WIND35WiFi Scan Complete (0x0) +WIND19WiFi Join 14D64D243600 +WIND25WiFi Association with ENG-WPA successful +WIND51WPA Handshake Complete +WIND24WiFi Up 19216801xx
All
ENG-WPA AP
Tera Term output
Lab 12 Input demo
bull Open your web browser
bull In the address bar type
192168x1xxinput_demoshtml
bull Insert the message to the client
ie type laquotestraquo (suggested ndash copy
the string and paste it in the
terminal) and then send a carriage
return
135
VERY IMPORTANT
Both client and server are pending (2 sec) after the page
request If no message is sent from the module a timeout
mechanism will be triggered
The server shows the ldquo+WIND56 messagerdquo and it will
wait for a string to be inserted and terminated by [Cr] ldquo+WIND56Insert message to clientdrdquo d is the Nth input SSI into html page (please refer to CGIampSSI Application Notes for details)
Lab 12 Input demo
bull The module receives the HTML
page containing the string inserted
server-side
bull Below this string there are two
buttons to try again the demo or to
return to the homepage
136
Proceed to the next LAB
Lab 13 Socket Server functionality
bull Objective
bull Configure a Server Listening Port
bull Open a TCP connection from a
socket client to the module
bull Data modeCommand Mode usage
bull Prerequisites
bull module connected to the AP or
module configured in MiniAP mode
bull PC to be used as socket client
138
TCP socket
Socket
Server
Socket
Client
Lab 13 Socket Server
This feature allows to enable the socket server mode The module
can be able to listen for an incoming connection on the specified port
The module should be connected to the AP (as shown in Lab 3) or
should be configured in Mini AP mode (as shown in Lab 8)
Please refer to ldquoSocket Server Application Notesrdquo for more details
139
ENG-WPA AP
SPWF_AP
miniAP
Tera Term output
Lab 13 Joining a network
In order to be connected to an available Wifi network the AP parameters setting is needed
bull Set the SSID
bull Type AT+SSSIDTXT=ENG-WPA
bull Set the password
bull Type AT+SSCFG=wifi_wpa_psk_texthelloworld
bull Set the network privacy mode (0=none 1=WEP 2=WPA-Personal (TKIPAES) or WPA2-Personal (TKIPAES))
bull Type AT+SSCFG=wifi_priv_mode2
bull NB wifi_auth_type must be set to 0 AT+SSCFG=wifi_auth_type0
bull Set the network mode (1 = STA 2 = IBSS 3 = MiniAP)
bull Type AT+SSCFG=wifi_mode1
140
OK
All
Lab 13 Joining a network
bull Save the settings on the flash memory and reset the module
bull Type ATampW
bull Type AT+CFUN=1
141
+WIND0Console active +WIND46WPA Crunching PSK +WIND32WiFi Hardware Started +WIND21WiFi Scanning +WIND35WiFi Scan Complete (0x0) +WIND19WiFi Join 14D64D243600 +WIND25WiFi Association with ENG-WPA successful +WIND51WPA Handshake Complete +WIND24WiFi Up 19216801xx
All
ENG-WPA AP
Tera Term output
Lab 13 Socket Server
bull Socket server turn ON the TCP Socket Server (user must
specify the server listening port)
bull Type AT+SSOCKD=32000 (AT+SOCKD=32000u for UDP socket server)
bull Check the status of the socket server
bull Type AT+SSTS=ip_sockd_port
142
ENG-WPA
AP
Tera Term output
OK ip_sockd_port = 32000 OK
All
Tip you can Turn OFF the Socket Server using a server listening port = 0 (type AT+SSOCKD=0)
Lab 13 Socket Server
bull Socket client can be used a simple socket client in order to test the communication
(SocketTest ndash available on httpsourceforgenetprojectssockettest)
143
ENG-WPA
AP
Lab 13 Socket Server
bull Socket client
bull Insert the modulersquos IP Address and the port
bull Click on Connect button
144
Tera Term output
+WIND61Incoming Socket Client1921681102 +WIND60Now in Data Mode
All
Lab 13 Socket Server
bull The module (socket server) enters in data mode and a bidirectional channel is
created to allow exchanging data with the socket client
bull Try to send and receive data from the module
145
Tera Term output
test_1
All
Lab 13 Socket Server ndash escape sequence
bull From Data Mode to Command Mode
bull Configuration variable used escape_seq (default is ldquoat+srdquo case sensitive
suggested to be sent by the local host in a single complete packet with no CR or
LF in the sequence)
bull Type at+s
bull Now itrsquos possible to send AT commands while the socket connection
is still active
146
Tera Term output
+WIND59Back to Command Mode
All
Tip During the Command Mode you cannot send data to client but can receive data from it Every data chunk generates an URC (+WIND64Sockd Pending Data) with limit to 4 (x730 bytes) This is the max number of pending messages From the 5th chunk on messages are lost
Lab 13 Socket Server ndash return to data mode
bull From Command Mode to Data Mode
bull While in Command Mode
bull Type AT+S (this is an AT command AT+S must be followed by ltCRgt)
bull The module returns in data mode
147
ENG-WPA
AP
Tera Term output
+WIND60Now in Data Mode
All
Lab 13 Socket Server ndash turn off
bull Turn OFF the Socket Server
bull Type at+s (to enter in command mode)
bull Type AT+SSOCKD=0
148
ENG-WPA
AP
Tera Term output
OK +WIND62Socket Client Gone1921681102
All
Proceed to the next LAB
Lab 14 Low power modes
bull Objective
bull Practice with Radio Power Save
bull Sleep Mode
bull Standby Mode
bull Prerequisites
bull module connected to the AP
150
Lab 14 Low power modes
This feature allows to enable the low power states
The module supports the ldquoRadio Power Saverdquo mode the ldquoSleeprdquo
mode and the ldquoStandbyrdquo mode
The module should be connected to the AP (as shown in Lab 3) in
order to use the ldquoRadio Power Saverdquo mode
Please refer to ldquoSPWF01S Power Management Application Notesrdquo for
more details
151
ENG-WPA AP
Low Power
Tera Term output
Lab 14 Joining a network
In order to be connected to an available Wifi network the AP parameters setting is needed
bull Set the SSID
bull Type AT+SSSIDTXT=ENG-WPA
bull Set the password
bull Type AT+SSCFG=wifi_wpa_psk_texthelloworld
bull Set the network privacy mode (0=none 1=WEP 2=WPA-Personal (TKIPAES) or WPA2-Personal (TKIPAES))
bull Type AT+SSCFG=wifi_priv_mode2
bull NB wifi_auth_type must be set to 0 AT+SSCFG=wifi_auth_type0
bull Set the network mode (1 = STA 2 = IBSS 3 = MiniAP)
bull Type AT+SSCFG=wifi_mode1
152
OK
All
Lab 14 Joining a network
bull Save the settings on the flash memory and reset the module
bull Type ATampW
bull Type AT+CFUN=1
153
+WIND0Console active +WIND46WPA Crunching PSK +WIND32WiFi Hardware Started +WIND21WiFi Scanning +WIND35WiFi Scan Complete (0x0) +WIND19WiFi Join 14D64D243600 +WIND25WiFi Association with ENG-WPA successful +WIND51WPA Handshake Complete +WIND24WiFi Up 19216801xx
All
Tera Term output
ENG-WPA AP
Low Power
Lab 14 Low power modes ndash Power Save 154
Module
Power State STM32 WLAN
Standby Standby Standby
Sleep Stop PS
Power Save Run PS or Fast-PS
Active Rx Run Rx Idle Rx Active
Active Tx Run Tx Active
Lab 14 Low power modes ndash Power Save
bull By default the module starts in ACTIVE mode
bull Enable the Power Save Mode
bull Type at+sscfg=wifi_powersave1 (ldquowifi_powersave2rdquo enables the Fast-PS mode)
bull Enable the doze operational mode
bull Type at+sscfg=wifi_operational_mode11 (ldquowifi_operational_mode12rdquo enables the quiescent mode)
bull Choose the wake up mode
1 Wake up every n beacon (specified in the wifi_beacon_wakeup variable)
bull Type at+sscfg=wifi_listen_interval0
bull Type at+sscfg=wifi_beacon_wakeup1
OR
2 Wake up every n beacon adaptively (specified in the wifi_beacon_wakeup variable)
bull Type at+sscfg=wifi_listen_interval1
bull Type at+sscfg=wifi_beacon_wakeup1
155
Tip The Wifi Power Save (wifi_powersave1) can also be quickly enabled using the command AT+CFUN=2
Lab 14 Low power modes ndash Power Save
bull Save the settings on the flash memory and reset the module
bull Type ATampW
bull Type AT+CFUN=1
bull The WIND66 message related to Low Power Mode will be
displayed
156
+WIND1Poweron (--SPWF01S) +WIND13ST SPWF01S IWM Copyright (c) 2012-2014 STMicroelectronics Inc All rights Reserved +WIND3Watchdog Running +WIND0Console active +WIND32WiFi Hardware Started +WIND21WiFi Scanning +WIND35WiFi Scan Complete (0x0) +WIND19WiFi Join 02621F518F0B +WIND25WiFi Association with IoT successful +WIND51WPA Handshake Complete +WIND24WiFi Up 1921681104 +WIND66Low Power mode1
All
Tera Term output
ENG-WPA AP
Low Power
Lab 14 Low power modes ndash Sleep Mode 157
Module
Power State STM32 WLAN
Standby Standby Standby
Sleep Stop PS or Fast-PS
Power Save Run PS or Fast-PS
Active Rx Run Rx Idle Rx Active
Active Tx Run Tx Active
Lab 14 Low power modes ndash Sleep Mode
bull In the Sleep Mode the core STM32 is stopped
bull Enable the Sleep Mode
bull Type at+sscfg=sleep_enabled1
bull Enable the Power Save Mode
bull Type at+sscfg=wifi_powersave1 (ldquowifi_powersave2rdquo enables the Fast-PS mode)
bull Enable the doze operational mode
bull Type at+sscfg=wifi_operational_mode11 (ldquowifi_operational_mode12rdquo enables the quiescent mode)
bull Choose the wake up mode
1 Wake up every n beacon (specified in the wifi_beacon_wakeup variable)
bull Type at+sscfg=wifi_listen_interval0
bull Type at+sscfg=wifi_beacon_wakeup1
OR
2 Wake up every n beacon adaptively (specified in the wifi_beacon_wakeup variable)
bull Type at+sscfg=wifi_listen_interval1
bull Type at+sscfg=wifi_beacon_wakeup1
158
Tip The Wifi Sleep Mode (and wifi_powersave1) can also be quickly enabled using the command AT+CFUN=3
Lab 14 Low power modes ndash Sleep Mode
bull Save the settings on the flash memory and reset the module
bull Type ATampW
bull Type AT+CFUN=1
bull The WIND69 message related to Sleep Mode will be displayed
159
+WIND1Poweron (--SPWF01S) +WIND13ST SPWF01S IWM Copyright (c) 2012-2014 STMicroelectronics Inc All rights Reserved +WIND3Watchdog Running +WIND0Console active +WIND32WiFi Hardware Started +WIND21WiFi Scanning +WIND35WiFi Scan Complete (0x0) +WIND19WiFi Join 02621F518F0B +WIND25WiFi Association with IoT successful +WIND51WPA Handshake Complete +WIND24WiFi Up 1921681104 +WIND66Low Power mode1 +WIND69Going into DeepSleep
All
Tera Term output
ENG-WPA AP
Low Power
Lab 14 Low power modes ndash Sleep Mode
bull Wake STM32 up using the GPIO6
bull Put the GPIO6 to 25V (jumper on JP2 as in
the picture)
bull The WIND messages will be displayed
160
+WIND70Resuming from DeepSleep +WIND53Wakeup (GPIO6 High)
All
Tera Term output
Lab 14 Low power modes ndash Sleep Mode
bull Put STM32 in sleep mode using the
GPIO6
bull Go back the GPIO6 floating (remove jumper
- as default)
bull The WIND69 message will be
displayed
161
+WIND69Going into DeepSleep
All
Tera Term output
Lab 14 Low power modes ndash Sleep Mode
bull Wake STM32 up using the remote
page
bull Connect a device to the same modulersquos
network
bull Open the following link
http[module_IP_address]remotehtml
bull Select ldquoWakerdquo and click on ldquoGordquo button
to wake up the module
bull The WIND message will be displayed
162
+WIND70Resuming from DeepSleep
All
Tera Term output
Lab 14 Low power modes ndash Sleep Mode
bull Put STM32 in sleep mode using the
remote page
bull Connect a device to the same modulersquos
network
bull Open the following link
http[module_IP_address]remotehtml
bull Select ldquoSleeprdquo and click on ldquoGordquo button
to put the module in sleep mode
bull The WIND message will be displayed
163
+WIND69Going into DeepSleep
All
Tera Term output
Lab 14 Low power modes ndash Standby Mode 164
Module
Power State STM32 WLAN
Standby Standby Standby
Sleep Stop PS or Fast-PS
Power Save Run PS or Fast-PS
Active Rx Run Rx Idle Rx Active
Active Tx Run Tx Active
Lab 14 Low power modes ndash Standby Mode
bull During the Standby Mode both the STM32 and the Radio will be
put in standby mode The standby mode allows to achieve the
lowest power consumption
bull Enable the Standby Mode
bull Type at+sscfg=sleep_enabled0 (Sleep mode must be disabled)
bull Type at+sscfg=standby_enabled1
bull Please be sure that GPIO6 isnrsquot forced high
bull Set the standby time to wake up via RTC alarm
bull Type at+sscfg=standby_time15
165
Tip The Wifi Standby Mode can also be quickly enabled using the command AT+CFUN=4
Lab 14 Low power modes ndash Standby Mode
bull Save the settings on the flash
memory and reset the module
bull Type ATampW
bull Type AT+CFUN=1
bull After 15 seconds the module will be
rebooted and will return in the
ACTIVE state
166
+WIND0Console active +WIND32WiFi Hardware Started +WIND38WiFi Powered Down +WIND67Going into Standby15 +WIND68Resuming from Standby +WIND1Poweron (--SPWF01S) +WIND13ST SPWF01S IWM Copyright (c) 2012-2014 STMicroelectronics Inc All rights Reserved +WIND3Watchdog Running +WIND0Console active +WIND32WiFi Hardware Started +WIND21WiFi Scanning +WIND35WiFi Scan Complete (0x0) +WIND19WiFi Join02621F518F0B +WIND25WiFi Association with IoT successful +WIND51WPA Handshake Complete +WIND24WiFi Up1921681113
All
Tera Term output
Lab 14 Low power modes ndash Standby Mode
bull Wake up the module using the GPIO6
bull Enable the Standby Mode
bull Type at+sscfg=sleep_enabled0 (make sure that
Sleep mode is disabled)
bull Type at+sscfg=standby_enabled1
bull Type ATampW
bull Type AT+CFUN=1
bull Put the GPIO6 to 25V to wake up the module
bull The WIND message will be displayed and
the module will return in ACTIVE state
167
+WIND68Resuming from Standby +WIND1Poweron (--SPWF01S) helliphelliphellip
All
Tera Term output
Proceed to the next LAB
Lab 15 STAMINI AP switcher
bull Objective
bull HW ldquoSTA to MiniAPrdquo switcher
bull Prerequisites
bull Work alone
169
Lab 15 STAMINI AP switcher
This feature allows to force the module in Mini AP mode starting from
a preexistent state
ldquoRecovery Moderdquo this functionality could be useful to lead the module
in a known state and to reconfigure it (ie using the firstset page)
The GPIO7 will be used to drive this feature
170
Lab 15 STAMINI AP switcher
bull Press and hold the SW2 button on the
EVAL and then perform a reset (HW reset
via SW1 button or SW reset via AT
command)
bull Release the SW2 button
bull The MiniAP mode will be started and the
module is discoverable with the following
SSID
bull iwm-XX-YY-ZZ where XX-YY-ZZ are the last
six digits of modulersquos MAC ADDRESS
171
+WIND2Reset +WIND1Poweron (--SPWF01S) +WIND13ST SPWF01S IWM Copyright (c) 2012-2014 STMicroelectronics Inc All rights Reserved +WIND39HW in miniAP mode (GPIO7 Low) +WIND0Console active +WIND3Watchdog Running +WIND32WiFi Hardware Started +WIND26WiFi Started AP +WIND24WiFi Up172312551
All
Tera Term output
Tip To exit from ldquominiAP mode via GPIO7rdquo perform a modulersquos reset
Proceed to the next LAB
Lab 16 IBSS connection
bull Objective
bull Create an IBSS network
bull Prerequisites
bull Work alone
173
Lab 16 Create an IBSS network
In an IBSS network the SSID is chosen by the client device that
starts the network
Module settings to create an IBSS network
bull Set the IBSS SSID
bull Type AT+SSSIDTXT=ADHOC
bull Set the network privacy mode (0=OPEN or 1=WEP are supported)
bull Type AT+SSCFG=wifi_priv_mode0
bull Set the network mode (2 = IBSS)
bull Type AT+SSCFG=wifi_mode2
174
OK
All
Tera Term output
Lab 16 Create an IBSS network
bull Set IP address IP default gateway IP DNS and IP netmask
bull Type AT+SSCFG=ip_ipaddr192168y1xx
bull Type AT+SSCFG=ip_gw192168y1
bull Type AT+SSCFG=ip_dns192168y1
bull Type AT+SSCFG=ip_netmask2552552550
bull Turn off the DHCP
bull Type AT+SSCFG=ip_use_dhcp0
175
OK
All
Tera Term output
Lab 16 Create an IBSS network
bull Save the settings on the flash memory and reset the module
bull Type ATampW
bull Type AT+CFUN=1
176
+WIND0Console active +WIND32WiFi Hardware Started +WIND21WiFi Scanning +WIND35WiFi Scan Complete (0x0) +WIND19WiFi Join EE33CE002418 +WIND25WiFi Association with ADHOC successful +WIND51WiFi Handshake Complete +WIND24WiFi Up 19216813
All
AD-HOC
Tera Term output
Lab 16 Create an IBSS network
bull Associate the iOS device with the
ADHOC network (iOS gt 8 could not
support the IBSS mode)
177
AD-HOC
Tip manual configuration of static TCPIPv4 parameters is suggested using a PC Ie PC TCPIPv4 properties
Lab 16 Create an IBSS network
bull Find your IP address
bull Type AT+SSTS
bull Open Safari web browser
bull In the address bar type
ltSPWF IP addressgtindexhtml
bull Type 192168y1xxindexhtml
178
AD-HOC
THANK YOU

9
Lab 1 STEVAL-PCC018V1
STEVAL-PCC018V1 USB to UART board
9
Lab 1 Hardware setup
STEVAL-IDW001V1 + STEVAL-PCC018V1
bull Insert the jumpers in the USB to
UART board as in the figure
bull Connect the Evaluation board to
the PC
bull Use the Device manager to find
the assigned COM port
10
Module automatically performs a reset Module automatically performs a scan for
available networks (if wifi_mode variable is ne 0) Module automatically enters in command mode STEVAL-PCC018V1 Yellow power LED will light up STEVAL-IDW001V1 Yellow power LED will light
up orange wifi link up LED will light up
Lab 1 Configuring the UART STEVAL-IDW001V1 + STEVAL-PCC018V1
bull Open Tera Term
bull Run Tera Term (open Tera term folder
and then run ttermproexe)
bull Open the assigned COM port
bull Tera Term Setup rarr Serial port
bull Baud rate 115200
bull Data 8 bit
bull Parity none
bull Stop 1 bit
bull Flow control none
bull Set CR in the Terminal setup
(default config)
bull Tera Term Setup rarr Terminal rarr
Transmit CR
11
Tip the modulersquos localecho is disabled by default The local echo option can be enabled on Tera Term in order to display the AT command entered
Lab 1 Configuring the UART STEVAL-IDW001V1 + STEVAL-PCC018V1
bull Open Tera Term
bull Command Mode
bull Type AT followed by a carriage return
(CR)
12
OK
All
Tera Term output
Lab 1 EVAL of the SPWF01Sxy1 module
X-NUCLEO-IDW01M1 amp X-CUBE-WIFI1 13
bull X-NUCLEO-IDW01M1
bull X-NUCLEO-IDW01M1 is a Wi-Fi evaluation board based on SPWF01SA module
bull X-CUBE-WIFI1
bull X-CUBE-WIFI1 is an expansion software package for STM32Cube
bull httpwww2stcomcontentst_comenproductsembedded-softwaremcus-embedded-softwarestm32-embedded-softwarestm32cube-expansion-softwarex-cube-wifi1html
Lab 1 Set Vcom binary in Nucleo X-NUCLEO-IDW01M1 amp X-CUBE-WIFI1
1 Flash VCOM binary into Nucleo drive
binaries
IDErsquos project
drag and drop
Projectbin
on Nucleo drive
14
NUCLEO-F401RE
F103RB
L053R8
L476RG
Lab 1 Configuring the UART X-NUCLEO-IDW01M1 amp X-CUBE-WIFI1
Setup TeraTerm window in order to send AT command to Wi-Fi module
2
Open Hyper terminal or TeraTerm Select correct COM port
Terminal setup Serial port setup
15
Lab 1 Configuring the UART X-NUCLEO-IDW01M1 amp X-CUBE-WIFI1
bull Open Tera Term
bull Command Mode
bull Type AT followed by a carriage return
(CR)
16
OK
All
Tera Term output
You are ready to use your Wi-Fi
EVAL board
Lab 2 Set the SPWF variables
bull Objective bull Run a command
bull Get the default configuration dump
bull Set host name
bull Set static IP parameters
bull Reset the module
bull Prerequisites bull Work alone
18
Lab 2 Run a command
Run a command - Syntax
- ATampx ltCRgt
- AT+S[Command] ltCRgt
Response - Syntax
xxxxxxxx
19
- OK
- Command output followed by OK
- ERROR Command not found
- ERROR Unrecognized key
AT Command Prefix
Not case sensitive
Lab 2 Set the SPWF variables
bull Get the default configuration dump
bull Type ATampV
bull Get a variable value
bull Type AT+SGCFG=console1_speed
Config dump frame
20
Variable
Name
Variable
Value
How to change the variable value
1 AT+SSCFG=[var name]xxxx
2 ATampW
Lab 2 Set the SPWF variables
bull Get the default configuration dump
bull Set host name
bull Type AT+SSCFG=ip_hostnamexxxxxxxx
21
Up to 31 characters (case sensitive) ldquospacebarrdquo is allowed
OK
All
Tera Term output
Lab 2 Set the SPWF variables
bull Get the default configuration dump
bull Set host name
bull Set IP address IP default gateway IP DNS and IP netmask (for
static usage)
bull Type AT+SSCFG=ip_ipaddr19216801xx
bull Type AT+SSCFG=ip_gw19216801
bull Type AT+SSCFG=ip_dns19216801
bull Type AT+SSCFG=ip_netmask2552552550
22
OK
All
Tera Term output
Tera Term output
Lab 2 Set the SPWF variables
bull Get the default configuration dump
bull Set host name
bull Set IP address IP default gateway IP
DNS and IP netmask (DHCP off)
bull Save settings on the flash memory
(mandatory after a variable change)
bull Type ATampW
bull Reset the module
bull Type AT+CFUN=1
23
+WIND21WiFi Scanning +WIND35WiFi Scan Complete (0x0)
All
Lab 2 Set the SPWF variables
bull Get the default configuration dump
bull Set host name
bull Set IP address IP default gateway IP
DNS and IP netmask (DHCP off)
bull Save settings on the flash memory
(mandatory after a variable change)
and reset the module
bull Check the new configuration dump
bull Type ATampV
24
Proceed to the next LAB
Lab 2a FOTA update
bull Objective
bull Upgrade the FW using the OTA file
bull Prerequisites
bull OTA file (provided in the SPWF01S FW
package)
bull External web server (ie Apache web
server running on PC)
26
Lab 2a FOTA update 27
The SPWF01Sx11 module (with external flash on board) allows
performing a Firmware Over-the-air update via a single HTTP GET
The SPWF01S will validate the firmware image it downloads load it
into a staging area then prompt the user to issue a reset command in
order to complete the update
Lab 2a FOTA update
The Apache Web Server will be used in this LAB
(Apache Web Server is available at this link
httparchiveapacheorgdisthttpdbinarieswin32httpd-2225-win32-x86-openssl-098ymsi)
Note please check that the local firewall is disabled or properly set It can
block the connection from module to Apache
bull Copy the OTA file (ie SPWF01S-xxxxxx-yyyyyyy-
RELEASE-mainota) in the Apache 22 htdocs folder
28
Lab 2a FOTA update
The FWUPDATE command allows to perform a Firmware Over-the-
air update via a single HTTP GET
bull Sintax
bull AT+SFWUPDATE=lthostnamegtltpathgtltportgt
bull Configuration parameters
bull lthostnamegt Target host DNS resolvable name or IP address
bull ltpathampqueryoptsgt Document path and optional query arguments
bull ltportgt Target host port
29
Lab 2a FOTA update
bull The module and the Apache Web server must be connected to the same network
bull In Tera Term type AT+SFWUPDATE=[Apache IP address][ota_fileota]
ie type AT+SFWUPDATE=192168xyyySPWF01S-150410-c2e37a3-RELEASE-
mainota
bull Reset the module to apply the new FW
bull Type AT+CFUN=1
bull Restore factory default settings (mandatory)
bull Type ATampF
30
Staging FW update for SPWF01SX11 version 1203-120918_01 FW length 276824 0x00002800 (offset 0x00000000 block len 4096) Write len 4096 -gt 0x0 Write len 4096 -gt 0x1000 (note - deleted extra output for clarity) Write len 4096 -gt 0x42000 Write len 2476 -gt 0x43000 (final) Wrote 276904 bytes Complete Update will be applied on next reboot (at+cfun=1)
All Tera Term output
Proceed to the next LAB
Lab 3 Access point connection
bull Objective
bull Scan for available networks
bull Join a network
bull Check the statusstatistics variables
bull Prerequisites
bull USB dongle and computer are set
up as described in Lab 2
bull Work alone
32
Lab 3 Scan for available networks
The SCAN command performs an immediate scan for available
networks Infrastructure (AP) and IBSS (Ad-Hoc) networks are both
reported Network type Channel BSSID SSID Signal strength (RSSI)
and 80211 capabilities are all reported
bull Type AT+SSCAN
bull Scan syntax AT+SSCAN [=lta|pgt[ltr|s|mgt[ltfnamegt]]] -- Perform a [activepassive]
network scan [filter offfilter on SSIDfilter on MAC] [print to file])
33
FOUND BSS 14D64D243600 CHAN 01 RSSI -28 SSID ENG-WPA CAPS 0431 WPA WPA2 FOUND BSS 00180A31EA78 CHAN 11 RSSI -82 SSID ZyckoItalyWireless CAPS 0531 WPA WPA2 FOUND BSS 06180A31E7E2 CHAN 11 RSSI -85 SSID ZyckoItalyGuest CAPS 0531 WPA WPA2 OK
All
Network type
Network MAC
Network
channel Network
RSSI
Network
SSID Network
capabilities
Tera Term output
Tera Term output
Lab 3 Joining a network (WPA Key)
In order to be connected to an available Wifi network the AP parameters setting is needed
bull Set the SSID
bull Type AT+SSSIDTXT=ENG-WPA
bull Set the password
bull Type AT+SSCFG=wifi_wpa_psk_texthelloworld
bull Set the network privacy mode (0=none 1=WEP 2=WPA-Personal (TKIPAES) or WPA2-Personal (TKIPAES))
bull Type AT+SSCFG=wifi_priv_mode2
bull NB wifi_auth_type must be set to 0 AT+SSCFG=wifi_auth_type0
bull Set the network mode (1 = STA 2 = IBSS 3 = MiniAP)
bull Type AT+SSCFG=wifi_mode1
34
OK
All
Lab 3 Joining a network (WPA Key)
bull Save the settings on the flash memory and reset the module
bull Type ATampW
bull Type AT+CFUN=1
35
+WIND0Console active +WIND46WPA Crunching PSK +WIND32WiFi Hardware Started +WIND21WiFi Scanning +WIND35WiFi Scan Complete (0x0) +WIND19WiFi Join 14D64D243600 +WIND25WiFi Association with ENG-WPA successful +WIND51WPA Handshake Complete +WIND24WiFi Up 19216801xx
All
ENG-WPA AP
Tera Term output
Lab 3 Joining a network (WPA Key)
bull Check the statusstatistics variables
bull Type AT+SSTS
bull Send a ping to the gateway (ip_gw)
bull Type AT+SPING=19216801
36
ENG-WPA AP
Tera Term output
OK
All
Lab 3 Joining a network (WEP Key)
Configure the module using the WEP key (4 possible combinations
available)
Sample table
37
AP configuration AT command to be used
Security Mode WEP
WEP Key Length 64 bit
(10 hex digits)
Authentication Open
Wep Key 1 1234567890
ie
at+sssidtxt=ENG-WEP
AT+SSCFG=wifi_wep_keys[0]1234567890
AT+SSCFG=wifi_wep_key_lens05
AT+SSCFG=wifi_auth_type0
AT+SSCFG=wifi_priv_mode1
AT+SSCFG=wifi_mode1
atampw
at+cfun=1
Security Mode WEP
WEP Key Length 64 bit
(10 hex digits)
Authentication Shared
Key
Wep Key 1 1234567890
ie
at+sssidtxt=ENG-WEP
AT+SSCFG=wifi_wep_keys[0]1234567890
AT+SSCFG=wifi_wep_key_lens05
AT+SSCFG=wifi_auth_type1
AT+SSCFG=wifi_priv_mode1
AT+SSCFG=wifi_mode1
atampw
at+cfun=1
AP configuration AT command to be used
Security Mode WEP
WEP Key Length
128 bit (26 hex digits)
Authentication Open
Wep Key 1
123456789012345678
90123456
ie
at+sssidtxt=ENG-WEP
AT+SSCFG=wifi_wep_keys[0]12345678
901234567890123456
AT+SSCFG=wifi_wep_key_lens0D
AT+SSCFG=wifi_auth_type0
AT+SSCFG=wifi_priv_mode1
AT+SSCFG=wifi_mode1
atampw
at+cfun=1
Security Mode WEP
WEP Key Length
128 bit (26 hex digits)
Authentication
Shared Key
Wep Key 1
123456789012345678
90123456
ie
at+sssidtxt=ENG-WEP
AT+SSCFG=wifi_wep_keys[0]12345678
901234567890123456
AT+SSCFG=wifi_wep_key_lens0D
AT+SSCFG=wifi_auth_type1
AT+SSCFG=wifi_priv_mode1
AT+SSCFG=wifi_mode1
atampw
at+cfun=1
Lab 3 Joining a network (WEP Key)
Notes
bull ldquowifi_wep_key_lensrdquo variable values 05 and 0D
bull Itrsquos possible to enter any text string into a WEP key box in the AP in which case it will be converted into a hexadecimal key using the ASCII values of the characters A maximum of 5 text characters can be entered for 64 bit keys and a maximum of 13 characters for 128 bit keys
In this case it needs to manually convert your ASCII password to HEX and complete the wifi_wep_keys[0] variable with the HEX value bull ie AP WEP key test1 ASCII to HEX 7465737431 So the AT command is AT+SSCFG=wifi_wep_keys[0]7465737431
bull Some APs allow user to insert a passphrase and then the AP automatically generates the hex keys In this scenario user have not to perform the ASCII to HEX conversion because the AP already gives it the hex value
38
Proceed to the next LAB
Lab 4 Web client mode
bull Objective
bull HTTP GET
bull HTTP POST
bull PUSH DATA ON SERIAL PORT
bull Prerequisites
bull USB dongle and computer are set up
as described in Lab 2
bull Work in couple
40
Lab 4 HTTP GET
The HTTP GET feature performs a single HTTP request to the specified
host and path The server response is printed on the UART enabled
bull Sintax
bull AT+SHTTPGET=lthostnamegtltpathgt[ltportgt]
bull Configuration parameters
bull lthostnamegt target host DNS resolvable name or IP address
bull ltpathgt document path
bull ltportgt target port
41
Lab 4 HTTP GET
bull Device A performs an HTTP GET to the Device B
bull Device A
AT+SHTTPGET=ltDevice B IP addrgtindexhtml
Type AT+SHTTPGET=19216801xxindexhtml
42
GET indexhtml HTTP10 User-Agent SPWF01S helliphelliphellip lth1gtST SPWF01Sx11 WiFi Modulelth1gt ltpgt Welcome to the ST SPWF01Sx11 WiFi Module ltpgt ltpgt This page was delivered from the SPWF01Sx11 internal HTTP server hellip lta href=statusshtmlgtSPWF01Sx11 Status Pageltagt ltpgt ltbodygt lthtmlgt OK
Device A
A B
Tera Term output
Lab 4 HTTP POST
The HTTP POST performs a post of the given path to the specified host The module can be only used as an HTTP POST client
bull Sintax
bull AT+SHTTPPOST =lthostnamegtltpathampqueryoptsgtltformcontentgt[ltportgt]
bull Configuration parameters
bull lthostnamegt target host DNS resolvable name or IP address
bull ltpathampqueryoptsgt document path
bull ltformcontentgt form to be submitted
bull ltportgt target port
43
Lab 4 HTTP POST
bull The SPWF01S performs an HTTP POST to an HTTP Post Test Server
bull Type
at+shttppost=posttestservercompostphpname=demoampemail=mymailampsubjec
t=subjampbody=message
bull The HTTP Post Test Server replies as
displayed in the Tera Term output if the HTTP
POST successfully
44
HTTP11 200 OK Date Fri 10 Jan 2014 132414 GMT Server Apache Access-Control-Allow-Origin Vary Accept-Encoding Content-Length 139 Connection close Content-Type texthtml Successfully dumped 4 post variables View it at httpwwwposttestservercomdata2014011005241443192628 Post body was 0 chars long OK
Device A
A B
Tera Term output
HTTP POST
SERVER
Lab 4 HTTPREQ bull The SPWF01S can perform a custom HTTP request to a specified
target Refer to the User Manual for more details
bull Type
AT+SHTTPREQ=wwwgooglecom8089
After ltCRgt the module accepts data We will try to open an non-existent web page
GET downloadTagphp HTTP10ltCRgtltLFgt
User-Agent SPWF01SltCRgtltLFgt
Host iwm-testltCRgtltLFgt
Connection closeltCRgtltLFgtltCRgtltLFgt
45
HTTP10 404 Not FoundltCRgtltLFgt Date Sun 31 Jan 2016 142704 GMTltCRgtltLFgt Content-Type texthtmlltCRgtltLFgt Server HTTP server (unknown)ltCRgtltLFgt Content-Length 49ltCRgtltLFgt X-XSS-Protection 1 mode=blockltCRgtltLFgt X-Frame-Options SAMEORIGINltCRgtltLFgt ltCRgtltLFgt lthtmlgtltbodygtlth1gt404 Not Foundlth1gtltbodygtlthtmlgtltLFgtltCRgt ltLFgt ltSUBgtltSUBgtltSUBgtltCRgtltLFgt ltCRgtltLFgt OKltCRgtltLFgt
All
A B
Tera Term output
[AT+SHTTPREQ =lthostnamegt[port]ltlengthgtltCRgtltdatagt]
Lab 4 Push data on serial port
A built-in html page ldquooutput_demohtmlrdquo allows to remotely push
characters on the serial port from a remote browser
46
output_demohtml
Modulersquos IP addressoutput_demohtml
Lab 4 Push data on serial port
bull Find your IP address
bull Type AT+SSTS
bull Associate your computer with the AP
bull Open your web browser
bull In the address bar type
ltmodulersquos IP
Addressgtoutput_demohtml
bull Type
19216801xxoutput_demohtml
47
Lab 4 Push data on serial port
bull Enter the text
bull In order to manage non-ASCII chars the ip_use_decoder variable must be modified (refer to the User Manual for more details)
bull Submit
bull The text will be sent to the serial port of the module
48
Proceed to the next LAB
Lab 5 Web Server use mode
bull Objective
bull List existing files
bull Print a file
bull Create a file
bull Append to an existing file
bull Delete an existing file
bull Prerequisites
bull USB dongle and computer are
set up as described in Lab 2
bull Work alone
50
Lab 5 Web server 51
The Web Server feature allows to create print and delete ASCII files in
the RAM memory of the module
Lab 5 List existing files
The FSL command lists type sizes and name of all the existing files
bull Type AT+SFSL
52
I 461 input_demoshtml I 180 messageshtml I 384 output_demohtml I 614 indexhtml I 157 peersshtml I 193 configshtml I 174 statusshtml I 212 404html I 2022 firstsethtml I 2898 remotehtml OK
All
Files stored in the STM32
FLASH memory
Tera Term output
Lab 5 Print a file
The FSP command prints the content
of an existing file
bull Type AT+SFSP=indexhtml
53
lthtmlgt ltheadgtlttitlegtST SPWF01Slttitlegtltheadgt ltbody bgcolor=white text=blackgt lth1gtST SPWF01S Intelligent WiFi Modulelth1gt ltpgtWelcome to the ST SPWF01S intelligent Wi-Fi moduleltpgt ltpgtThis page was delivered from the SPWF01S internal HTTP serverltpgt ltpgt lta href=configshtmlgtSPWF01S Configuration Settings Pageltagt ltpgt ltpgt lta href=statusshtmlgtSPWF01S Status Pageltagt ltpgt ltpgt lta href=peersshtmlgtSPWF01S Peers Pageltagt ltpgt ltpgtMore information about the SPWF01S and other ST products can be found at STs website lta href=httpwwwSTcomgthttpwwwSTcomltagtltpgt ltbodygt lthtmlgt OK
All Tera Term output
Tip How to use the offset and length parameters AT+SFSP=indexhtml[offset][length] ie Type AT+SFSP=indexhtml520 Length parameter is mandatory if is used the offset
Lab 5 Create a file
The FSC command allows to create a file inside the SPWF for
delivery by the SPWF HTTP server
bull Sintax
bull AT+SFSC =ltfnamegtltmax_lengt[lthttp_headergt]
bull Configuration parameters
bull lt filename gt filename to create
bull lt max_len gt amount of space to allocate for file max = 4096 bytes
bull lthttp_headergt 0=HTML header automatically added 1=HTML header not
added (as by default)
Type AT+SFSC=wifidemohtml1965
54
OK
All
Tera Term output
Lab 5 Configuring the UART
bull Set CR+LF in the Terminal setup
(to properly paste text in the
terminal)
bull Tera Term Setup rarr Terminal rarr
Transmit CR+LF
55
Tip The local echo option must be disabled on Tera Term
Added in FW 35 using the AT+SFSR command user can rename dynamic files stored in the RAM memory Refer to the User Manual for more details
Lab 5 Append to an existing file
The FSA command allows to append blocks of data to an existing file
This command accepts data after the ltcrgt at the end of the command
line
bull Sintax
bull AT+SFSA=ltfilenamegtltdatalengt
bull Configuration parameters
bull lt filename gt filename pre-created
bull lt datalen gt number of characters to append to the file
Type AT+SFSA=wifidemohtml1965
56
Now SPWF accepts data
Tips
Lab 5 Append to an existing file
bull Open wifidemotxt in the following
directory Hands_on
folderHTML_demo_page
bull Check you have set up CR+LF in the
Terminal setup (for more
information refer to the slide 48)
bull Copy the file content into Tera term
(paste with ALT+V or mouse right
button)
57
OK
All
Tera Term output
Lab 5 Append to an existing file
bull Open wifidemohtml
bull Open your Web browser (suggested Google
Chrome for HTML5 test)
bull In address bar type ltSPWF IP addrgtwifidemohtml
Type 19216801xxwifidemohtml
58
Lab 5 Configuring the UART
bull Re-set CR in the Terminal setup
as by default
bull Tera Term Setup rarr Terminal rarr
Transmit CR
59
Tip The local echo option can be re-enabled on Tera Term
Lab 5 List existing files
Lets list the files
bull Type AT+SFSL
60
D 1965 wifidemohtml I 461 input_demoshtml I 180 messageshtml I 384 output_demohtml I 614 indexhtml I 157 peersshtml I 193 configshtml I 174 statusshtml I 212 404html I 2022 firstsethtml I 2898 remotehtml OK
All
File stored in the RAM memory
Tera Term output
Lab 5 Delete an existing file
The FSD command allows to delete an existing file by name Static
files may not be deleted
bull Sintax
bull AT+SFSD=ltfilenamegt
Type AT+SFSD=wifidemohtml
61
OK
All
Tera Term output
Lab 5 Delete an existing file
bull Re-open wifidemohtml
bull Open your Web browser
bull In address bar ltSPWF IP addrgtwifidemohtml
Type 19216801xxwifidemohtml
62
Proceed to the next LAB
Lab 6 Web Server use mode
bull Objective
bull Create an image file
bull Filesystem update over-the-air
bull Filesystem update over UART
bull Prerequisites
bull Work alone
64
Lab 6 Web server 65
The Web Server feature also allows to upload generic files (PDF
HTML DOC JPEG and so on) in the EXTERNAL FLASH memory of
the module It needs to follow the below steps
- create an image file (IMG) using the tool provided in the Hands-on package
(the IMG contains the files to upload)
- Put the image in a generic and accessible Web Server (Apache Web server
will be used in the Hands-on as example)
- Using the proper AT command the IMG will be retrieved over-the-air and the
static files will be created in the external flash memory
Lab 6 Create an image file
bull Open the following folder and
extract all the files
hands_on_wififilesystem_update
bull Put your own files to upload in the
pages folder (max 512 Kbytes)
bull Run genbat
bull Open the pages folder and copy
outfileimg in your external Web
Server (Apache)
66
3
1
2
Lab 6 Create an image file
The Apache Web Server will be used in this tutorial
(Apache Web Server is available at this link
httparchiveapacheorgdisthttpdbinarieswin32httpd-2225-win32-x86-openssl-098ymsi)
Note please check that the local firewall is disabled or properly set It can
block the connection from module to Apache
bull Copy outfileimg in the Apache 22
htdocs folder (this is the default
root server directory)
67
4
Lab 6 Filesystem update
The HTTPDFSUPDATE command allows to create static files inside
the SPWF for delivery by the SPWF HTTP server
bull Sintax
bull AT+SHTTPDFSUPDATE=lthostnamegtltpathgt[port]
bull Configuration parameters
bull lthostnamegt external web server DNS resolvable name or IP address
bull ltpathgt document path
bull ltportgt target host port
68
Lab 6 Filesystem update
bull In Tera Term type
AT+SHTTPDFSUPDATE=192168x10xoutfileimg
bull Reset the module
bull Type AT+CFUN=1
69
Image length 357957 (offset 0x00080000 block len 4096) Write len 4096 -gt 0x80000 Write len 4096 -gt 0x81000 Write len 4096 -gt 0x82000 helliphelliphelliphellip helliphelliphelliphelliphelliphellip helliphelliphelliphelliphellip Write len 4096 -gt 0xD6000 Write len 1612 -gt 0xD7000 (final) Wrote 357964 bytes Complete Please reboot (at+cfun=1) OK
All
Tera Term output
The file system will be permanently deleted The new IMG will overwrite the existent files in the file system
Warning
Lab 6 Filesystem update
Lets list the files
bull Type AT+SFSL
70
E 2615 st766gif E 112374 modulepng E 2430 index1html E 419 indexhtml E 239887 MKTWiFipdf I 461 input_demoshtml I 180 messageshtml I 384 output_demohtml I 614 indexhtml I 157 peersshtml I 193 configshtml I 174 statusshtml I 212 404html I 2022 firstsethtml I 2898 remotehtml OK
All
Files stored in
the EXT FLASH memory
Tera Term output
Lab 6 Filesystem update
bull Open index1html page
bull Open your web browser
bull In the address bar ltSPWF IP addrgtindex1html
Type 192168x1xxindex1html
71
Lab 6 Filesystem erase
Erase the external httpd filesystem
bull Type AT+S HTTPDFSERASE
The files stored in the EXT FLASH memory will be erased
Lets list the files
bull Type AT+SFSL
72
I 461 input_demoshtml I 180 messageshtml I 384 output_demohtml I 614 indexhtml I 157 peersshtml I 193 configshtml I 174 statusshtml I 212 404html I 2022 firstsethtml I 2898 remotehtml OK
All
Tera Term output
Lab 6 Filesystem update
The HTTPDFSWRITE command allows to create static files inside
the SPWF via the UART interface The HW flow control MUST be
enabled in order to use the command
bull Sintax
bull AT+SHTTPDFSWRITE =ltdatalengtltCRgtltdatagt
bull Configuration parameters
bull ltdatalengt Amount of bytes to be sent
73
Lab 6 Filesystem update
bull Type AT+S HTTPDFSWRITE=357957
bull In Tera Term File ndash Send File
bull Reset the module
bull Type AT+CFUN=1
74
Image length 357957 (offset 0x00080000 block len 4096) Write len 4096 -gt 0x80000 Write len 4096 -gt 0x81000 Write len 4096 -gt 0x82000 helliphelliphelliphellip helliphelliphelliphelliphelliphellip helliphelliphelliphelliphellip Write len 4096 -gt 0xD6000 Write len 1612 -gt 0xD7000 (final) Wrote 357964 bytes Complete Please reboot (at+cfun=1) OK
All
Tera Term output
The file system will be permanently deleted The new IMG will overwrite the existent files in the file system
Warning
Proceed to the next LAB
Lab 7 Socket interface
bull Objective
bull Open TCPUDP connection
bull Write data to socket
bull Read data from socket
bull Close socket
bull Prerequisites
bull Work alone
76
TCPUDP socket
Socket
Client
Socket
Server
Lab 7 TCPUDPUART socket interface 77
The Socket interface allows communication via TCP UDP and UART
The SPWF is both a client and a server socket In this LAB will be
detailed the socket client feature
Ho
st
En
d P
rod
uct
Open TCPUDP connection
Write data to socket
Read data from socket
Close socket
Lab 7 Open TCPUDP connection
The SOCKON command allows to open a TCPUDP connection
to a specified host (up to 8 socket connections at same time)
bull Sintax
bull AT+SSOCKON=lthostnamegtltportgtltprotocolgtind
bull Configuration parameters
bull lthostnamegt target host DNS resolvable name or IP address
bull ltportgt TCPUDP socket port
bull ltprotocolgt t for TCP socket u for UDP socket
bull ind indicate when data has arrived (optional) Up to 4 (x730 bytes)
consecutive ldquoPending datardquo message (without any AT+SSOCKR) are
guaranteed It is suggested to empty the buffer using the AT+SSOCKR
command and to avoid exceeding 4 indications
78
Lab 7 Open TCPUDP connection
bull Open the TCP socket server (disable the firewall to properly
run it)
bull Folder hands_on_wifitcp socket serverserverexe
bull The TCP server listens for incoming connections on the port
32000 It sends back all data received
79
Optional - Lab 7 Open TCPUDP connection
bull Using an Android platform the socket server can be opened
using a specific APP (Socket Protocol available on Play Store)
bull The TCP socket server can be configured to listen for
incoming connections on the port 32000
bull Type 32000 on laquoPort Listen toraquo box
bull Click on Listen
80
Lab 7 Open TCPUDP connection
bull Type AT+SSOCKON=192168010x32000tind
bull The client and the server use the socket identifier (ID)
displayed
81
ID 00 OK
All
Tera Term output
Lab 7 Write data to socket
The SOCKW command allows to write data to the specified ID
socket
This command accepts data after the ltcrgt at the end of the
command line
bull Sintax
bull AT+SSOCKW=ltIDgtltlengt
bull Configuration parameters
bull ltIDgt socket identifier
bull ltlengt data length to send
82
Lab 7 Write data to socket
bull Write data
bull Type AT+SSOCKW=0013
bull Type hello worldltCRgt
bull SPWF shows that there are ltpending datagt and their amount
83
+WIND55Pending Data013
All
Tera Term output
ID
Pending
bytes
Note the module is waiting 13 bytes to be written to the socket As soon as 13 bytes (or characters) are sent from the terminal the module is going to write them to the socket and will be ready to receive new commands
Lab 7 Read data from socket
The SOCKR command allows to read data from socket
bull Sintax
bull AT+SSOCKR=ltIDgtltlengt
bull Configuration parameters
bull ltIDgt socket identifier
bull ltlengt data length to read
84
Lab 7 Read data from socket
bull Read data
bull Type AT+SSOCKR=0013
85
hello world OK
All
Tera Term output
Lab 7 Close socket
The SOCKC command allows to close socket
bull Sintax
bull AT+SSOCKC=ltIDgt
bull Configuration parameters
bull ltIDgt socket identifier
86
Tera Term output
Lab 7 Close socket
bull Close socket
bull Type AT+SSOCKC=00
87
OK
All
Proceed to the next LAB
Lab 8 MiniAP mode for the first set
bull Objective
bull Create a direct connection between
the module and an end device
bull First set of the module in order to
enable the connection between the
module and a generic AP
bull Prerequisites
bull Work alone
89
Tera Term output
Lab 8 Configuring the module in MiniAP mode
The Mini AP mode is available starting from the following FW release
SPWF01S-131115-de4568d-RELEASE
In order to set the module in Mini AP mode the following parameters
are needed
bull Set the SSID
bull Type AT+SSSIDTXT=SPWF_AP
bull Set the network privacy mode (0=OPEN or 1=WEP are supported)
bull Type AT+SSCFG=wifi_priv_mode0
bull Set the network mode (1 = STA 2 = IBSS 3 = MiniAP)
bull Type AT+SSCFG=wifi_mode3
90
OK
All
Lab 8 Configuring the module in MiniAP mode
bull Save the settings on the flash memory and reset the module
bull Type ATampW
bull Type AT+CFUN=1
91
+WIND0Console active +WIND32WiFi Hardware Started +WIND26WiFi Started AP with network SPWF_AP +WIND24WiFi Up 172181511
All
Tera Term output
SPWF_AP
Lab 8 Configuring the module in MiniAP mode (WEP Key)
Configure the module using the WEP key (2 possible combinations
available)
Sample table
92
AP configuration AT command to be used
Security Mode WEP
WEP Key Length 64 bit
(10 hex digits)
Authentication Open
Wep Key 1 1234567890
ie
at+sssidtxt=SPWF_AP
AT+SSCFG=wifi_wep_keys[0]1234567890
AT+SSCFG=wifi_wep_key_lens05
AT+SSCFG=wifi_auth_type0
AT+SSCFG=wifi_priv_mode1
AT+SSCFG=wifi_mode3
atampw
at+cfun=1
AP configuration AT command to be used
Security Mode WEP
WEP Key Length
128 bit (26 hex digits)
Authentication Open
Wep Key 1
123456789012345678
90123456
ie
at+sssidtxt=SPWF_AP
AT+SSCFG=wifi_wep_keys[0]12345678
901234567890123456
AT+SSCFG=wifi_wep_key_lens0D
AT+SSCFG=wifi_auth_type0
AT+SSCFG=wifi_priv_mode1
AT+SSCFG=wifi_mode3
atampw
at+cfun=1
Lab 8 Configuring the module in MiniAP mode (WEP Key)
Notes
bull ldquowifi_wep_key_lensrdquo variable values 05 and 0D
bull Itrsquos possible to enter any text string as WEP key It have to be converted into a
hexadecimal key using the ASCII values of the characters A maximum of 5 text
characters can be entered for 64 bit keys and a maximum of 13 characters for 128
bit keys
In this case it needs to manually convert your ASCII password to
HEX and complete the wifi_wep_keys[0] variable with the HEX
value
bull ie WEP key test1
ASCII to HEX 7465737431
So the AT command is AT+SSCFG=wifi_wep_keys[0]7465737431
93
Lab 8 Customizing the MiniAP address (optional)
Starting from FW 33 the module allows user to customize the IP address of the MiniAP
bull Set the SSID
bull Type AT+SSSIDTXT=SPWF_AP
bull Set the network privacy mode (0=OPEN or 1=WEP are supported)
bull Type AT+SSCFG=wifi_priv_mode0
bull Set the network mode (1 = STA 2 = IBSS 3 = MiniAP)
bull Type AT+SSCFG=wifi_mode3
bull Set the use_dhcp mode (0 = DHCP server off 1 = DHCP server on 2 = DHCP server on and customizable)
bull Type AT+SSCFG=ip_use_dhcp2
bull Set the MiniAP address
bull Type AT+SSCFG=ip_ipaddr19216801
bull Save the settings on the flash memory and reset the module
bull Type ATampW
bull Type AT+CFUN=1
94
Tera Term output
+WIND0Console active +WIND32WiFi Hardware Started +WIND26WiFi Started AP with network SPWF_AP +WIND24WiFi Up 19216801
All
Tip the MiniAP will assign sequential addresses to the client ie 1deg client 19216802 2deg client 19216803
Lab 8 Mini AP mode
bull Associate your end device to the
SPWF_AP network
bull Find the SPWF_AP network and connect
the end device to the module
95
SPWF_AP +WIND2890187C960D0B Associated +WIND29DHCP reply for 17218151290187C960D0B to 172181512 +WIND29DHCP reply for 17218151290187C960D0B to 172181512
All
Tera Term output
Lab 8 Mini AP mode
bull Open your web browser
bull In the address bar type captiveportalnet
96
SPWF_AP
Tip The Mini AP domain can be set using the variable ip_apdomainname The default value is ldquocaptiveportalnetrdquo
The Mini AP default homepage can be set using the variable ip_apredirect The default value is ldquofirstsethtmlrdquo
Tip If the AP domain name is not quickly opened itrsquos suggested to turn off an eventual proxy server (check the connection settings or browser preferences)
Lab 8 First Set Page
bull The first set page allows to configure the module in IDLE mode
STATION mode IBSS mode and MINI AP mode
97
Used for STA IBSS MINI AP
Mandatory for IDLE STA IBSS MINI AP
Used for STA IBSS (WEP) MINI AP (WEP)
Used for STA (if DHCP = OFF) IBSS
(mandatory) MINI AP (if DHCP = OFF)
Used for STA IBSS (mandatory DHCP = OFF) MINI AP
Used for STA (WEP key) IBSS (WEP) MINI AP (WEP)
Used for STA IBSS MINI AP
Lab 8 Mini AP mode
bull Set all the parameters required in order to enable the connection
between the module and a generic AP
ie AP configured in WPAWPA2 mode
bull MiniAP PassKey anonymous (by default)
bull SSID of the access point
bull Password of the access point
bull Authentication type of the access point
bull Use mode of the module
98
Tip The Mini AP PassKey can be set using the variable ldquouser_descrdquo The default value is ldquoanonymousrdquo
Note In order to manage non-ASCII chars the ip_use_decoder variable must be modified according as below at+sscfg=ip_use_decoder0 no decoding [default] at+sscfg=ip_use_decoder1 RAW decoding (the USER and PSK fields must be completed in HEX) at+sscfg=ip_use_decoder2 UTF-8 decoding at+sscfg=ip_use_decoder6 HTML entities decoding
Lab 8 Mini AP mode
bull Click on GO button and then send the
parameters confirming with OK
99
SPWF_AP
AP
SSID ciscosb2
Lab 8 Mini AP mode
bull The module will receive the parameters and will automatically
connect to the access point required
100
+WIND57Received SSID is ciscosb2 +WIND57Received PWD is +WIND57Received Auth mode is 2 +WIND57Received Mode is 1 +WIND2RESET +WIND1Poweron (--SPWF01S) +WIND13ST IWM Copyright (c) 2012-2013 STmicroelectronics +WIND3Watchdog Running +WIND0Console active +WIND46WPA Crunching PSK +WIND32WiFi Hardware Started +WIND21WiFi Scanning +WIND35WiFi Scan Complete (0x0) +WIND19WiFi Join 02621F518F0B +WIND25WiFi Association with ciscosb2 successful +WIND51WPA Handshake Complete +WIND24WiFi Up 1921681106
All
Tera Term output
ciscosb2
AP
Lab 8 Mini AP mode ndash RAW decoding example
101
Note In order to manage non-ASCII chars the ip_use_decoder variable must be modified according as below at+sscfg=ip_use_decoder0 no decoding [default] at+sscfg=ip_use_decoder1 RAW decoding (the USER and PSK fields must be completed in HEX) at+sscfg=ip_use_decoder2 UTF-8 decoding at+sscfg=ip_use_decoder6 HTML entities decoding
7177657261736466
AP SSIS
AP PSK
Proceed to the next LAB
Lab 9 Socket interface - MiniAP mode
bull Objective
bull Create a direct connection between
the module and an end device
bull Socket interface used in MiniAP
mode
bull Prerequisites
bull Work alone
103
Tera Term output
Lab 9 Configuring the module in MiniAP mode
The Mini AP mode (available starting from the SPWF01S-131115-de4568d-RELEASE) also allows to use the socket interface The procedure is the same as in Lab 7
In order to set the module in Mini AP mode the following parameters are needed
bull Set the SSID
bull Type AT+SSSIDTXT=SPWF_AP
bull Set the network privacy mode
bull Type AT+SSCFG=wifi_priv_mode0
bull Set the network mode (1 = STA 2 = IBSS 3 = MiniAP)
bull Type AT+SSCFG=wifi_mode3
104
OK
All
Lab 9 Configuring the module in MiniAP mode
bull Save the settings on the flash memory and reset the module
bull Type ATampW
bull Type AT+CFUN=1
105
+WIND0Console active +WIND32WiFi Hardware Started +WIND26WiFi Started AP with network SPWF_AP +WIND24WiFi Up 172181511
All
Tera Term output
SPWF_AP
Lab 9 Mini AP mode
bull Connect your PC to the SPWF_AP
network
bull Find the SPWF_AP network and connect
the end device to the module
106
SPWF_AP +WIND2890187C960D0B Associated +WIND29DHCP reply for 17218151290187C960D0B to 172181512 +WIND29DHCP reply for 17218151290187C960D0B to 172181512
All
Tera Term output
Lab 9 Open TCPUDP connection
As described in the Lab 7 the SOCKON command allows to
open a TCPUDP connection to a specified host
bull Sintax
bull AT+SSOCKON=lthostnamegtltportgtltprotocolgtind
bull Configuration parameters
bull lthostnamegt target host DNS resolvable name or IP address
bull ltportgt TCPUDP socket port
bull ltprotocolgt t for TCP socket u for UDP socket
bull ind indicate when data has arrived (optional) Up to 4 consecutive ldquoPending
datardquo message (without any AT+SSOCKR) are guaranteed It is
suggested to empty the buffer using the AT+SSOCKR command and
to avoid exceeding 4 indications
107
Lab 9 Open TCP connection
bull Open the TCP socket server (disable the firewall to properly
run it)
bull Folder hands_on_wifitcp socket serverserverexe
bull The TCP server listens for incoming connections on the port
32000 It sends back all data received
108
Lab 9 Open TCP connection
bull Type AT+SSOCKON=17218151232000tind
bull The client and the server use the socket identifier (ID)
displayed
109
ID 00 OK
All
Tera Term output
Lab 9 Write data to socket
The SOCKW command allows to write data to the specified ID
socket
This command accepts data after the ltcrgt at the end of the
command line
bull Sintax
bull AT+SSOCKW=ltIDgtltlengt
bull Configuration parameters
bull ltIDgt socket identifier
bull ltlengt data length to send
110
Lab 9 Write data to socket
bull Write data
bull Type AT+SSOCKW=0013
bull Type hello worldltCRgt
bull SPWF shows that there are ltpending datagt and their amount
111
+WIND55Pending Data013
All
Tera Term output
ID
Pending
bytes
Note the module is waiting 13 bytes to be written to the socket As soon as 13 bytes (or characters) are sent from the terminal the module is going to write them to the socket and will be ready to receive new commands
Lab 9 Read data from socket
The SOCKR command allows to read data from socket
bull Sintax
bull AT+SSOCKR=ltIDgtltlengt
bull Configuration parameters
bull ltIDgt socket identifier
bull ltlengt data length to read
112
Lab 9 Read data from socket
bull Read data
bull Type AT+SSOCKR=0013
113
hello world OK
All
Tera Term output
Lab 9 Close socket
The SOCKC command allows to close socket
bull Sintax
bull AT+SSOCKC=ltIDgt
bull Configuration parameters
bull ltIDgt socket identifier
114
Tera Term output
Lab 9 Close socket
bull Close socket
bull Type AT+SSOCKC=00
115
OK
All
Proceed to the next LAB
Lab 10 Web server - MiniAP mode
bull Objective
bull Create a direct connection between
the module and an end device
bull Web server used in MiniAP mode
bull Prerequisites
bull Work alone
117
Tera Term output
Lab 10 Configuring the module in MiniAP mode
The Mini AP mode (available starting from the SPWF01S-131115-de4568d-RELEASE) also allows to use the module file system (both RAM and IntExt FLASH)
In order to set the module in Mini AP mode the following parameters are needed
bull Set the SSID
bull Type AT+SSSIDTXT=SPWF_AP
bull Set the network privacy mode
bull Type AT+SSCFG=wifi_priv_mode0
bull Set the network mode (1 = STA 2 = IBSS 3 = MiniAP)
bull Type AT+SSCFG=wifi_mode3
118
OK
All
Lab 10 Configuring the module in MiniAP mode
bull Save the settings on the flash memory and reset the module
bull Type ATampW
bull Type AT+CFUN=1
119
+WIND0Console active +WIND32WiFi Hardware Started +WIND26WiFi Started AP with network SPWF_AP +WIND24WiFi Up 172181511
All
Tera Term output
SPWF_AP
Lab 10 Mini AP mode
bull Connect your PC to the SPWF_AP
network
bull Find the SPWF_AP network and connect
the end device to the module
120
SPWF_AP +WIND2890187C960D0B Associated +WIND29DHCP reply for 17218151290187C960D0B to 172181512 +WIND29DHCP reply for 17218151290187C960D0B to 172181512
All
Tera Term output
Lab 10 Access to Web server - Mini AP mode
bull Open your web browser
bull In the address bar type
captiveportalnetindexhtml
bull The SPWF01S homepage will be
displayed
121
SPWF_AP Tip The Mini AP domain can be set using the variable ip_apdomainname The default value is ldquocaptiveportalnetrdquo
Lab 10 Access to Web server - Mini AP mode
bull Open the SPWF01S Device Status
bull click on the highlighted link
bull The SPWF01S Device Status will be
displayed
122
SPWF_AP Tip The Mini AP domain can be set using the variable ip_apdomainname The default value is ldquocaptiveportalnetrdquo
The Mini AP default homepage can be set using the variable ip_apredirect The default value is ldquofirstsethtmlrdquo
Proceed to the next LAB
Lab 11 Remotely control - GPIOs
bull Objective
bull write remotely a GPIO
bull configure remotely a GPIO
bull read remotely a GPIO
bull Prerequisites
bull module connected to the AP or
module configured in MiniAP mode
124
Lab 11 Remotely control - GPIO
This feature allows to remotely write configure and read a GPIO
The module should be connected to the AP (as shown in Lab 3) or
should be configured in Mini AP mode (as shown in Lab 8)
The external client have to open the remotehtml page stored in the
module
125
ENG-WPA AP
SPWF_AP
miniAP
Tera Term output
Lab 11 Joining a network
In order to be connected to an available Wifi network the AP parameters setting is needed
bull Set the SSID
bull Type AT+SSSIDTXT=ENG-WPA
bull Set the password
bull Type AT+SSCFG=wifi_wpa_psk_texthelloworld
bull Set the network privacy mode (0=none 1=WEP 2=WPA-Personal (TKIPAES) or WPA2-Personal (TKIPAES))
bull Type AT+SSCFG=wifi_priv_mode2
bull NB wifi_auth_type must be set to 0 AT+SSCFG=wifi_auth_type0
bull Set the network mode (1 = STA 2 = IBSS 3 = MiniAP)
bull Type AT+SSCFG=wifi_mode1
126
OK
All
Lab 11 Joining a network
bull Save the settings on the flash memory and reset the module
bull Type ATampW
bull Type AT+CFUN=1
127
+WIND0Console active +WIND46WPA Crunching PSK +WIND32WiFi Hardware Started +WIND21WiFi Scanning +WIND35WiFi Scan Complete (0x0) +WIND19WiFi Join 14D64D243600 +WIND25WiFi Association with ENG-WPA successful +WIND51WPA Handshake Complete +WIND24WiFi Up 19216801xx
All
ENG-WPA AP
Tera Term output
Lab 11 Remotely control in MiniAP mode - GPIO
bull Open your web browser
bull In the address bar type
192168x1xxremotehtml
128
ENG-WPA
AP
Lab 11 Remotely control in MiniAP mode - GPIO
bull Try to write the GPIO14 connected to the LED3 (check if the
LED3 is mounted on your EVAL BOARD otherwise can be used
the GPIO13)
bull Click on the laquoGOraquo button
and LED3 will switch on
129
ENG-WPA
AP
Proceed to the next LAB
Lab 12 Input demo
bull Objective
bull Send a message from the server (wifi
module) to an external client connected
to the same network
bull Prerequisites
bull module connected to the AP or module
configured in MiniAP mode
131
Lab 12 Input demo
The module provides some DEMOs to show the interaction between
the module and an external client connected to the same network
The module should be connected to the AP (as shown in Lab 3) or
should be configured in Mini AP mode (as shown in Lab 8)
In order to run this demo the client have to open the
input_demoshtml page stored in the module
132
ENG-WPA AP
SPWF_AP
miniAP
Tera Term output
Lab 12 Joining a network
In order to be connected to an available Wifi network the AP parameters setting is needed
bull Set the SSID
bull Type AT+SSSIDTXT=ENG-WPA
bull Set the password
bull Type AT+SSCFG=wifi_wpa_psk_texthelloworld
bull Set the network privacy mode (0=none 1=WEP 2=WPA-Personal (TKIPAES) or WPA2-Personal (TKIPAES))
bull Type AT+SSCFG=wifi_priv_mode2
bull NB wifi_auth_type must be set to 0 AT+SSCFG=wifi_auth_type0
bull Set the network mode (1 = STA 2 = IBSS 3 = MiniAP)
bull Type AT+SSCFG=wifi_mode1
133
OK
All
Lab 12 Joining a network
bull Save the settings on the flash memory and reset the module
bull Type ATampW
bull Type AT+CFUN=1
134
+WIND0Console active +WIND46WPA Crunching PSK +WIND32WiFi Hardware Started +WIND21WiFi Scanning +WIND35WiFi Scan Complete (0x0) +WIND19WiFi Join 14D64D243600 +WIND25WiFi Association with ENG-WPA successful +WIND51WPA Handshake Complete +WIND24WiFi Up 19216801xx
All
ENG-WPA AP
Tera Term output
Lab 12 Input demo
bull Open your web browser
bull In the address bar type
192168x1xxinput_demoshtml
bull Insert the message to the client
ie type laquotestraquo (suggested ndash copy
the string and paste it in the
terminal) and then send a carriage
return
135
VERY IMPORTANT
Both client and server are pending (2 sec) after the page
request If no message is sent from the module a timeout
mechanism will be triggered
The server shows the ldquo+WIND56 messagerdquo and it will
wait for a string to be inserted and terminated by [Cr] ldquo+WIND56Insert message to clientdrdquo d is the Nth input SSI into html page (please refer to CGIampSSI Application Notes for details)
Lab 12 Input demo
bull The module receives the HTML
page containing the string inserted
server-side
bull Below this string there are two
buttons to try again the demo or to
return to the homepage
136
Proceed to the next LAB
Lab 13 Socket Server functionality
bull Objective
bull Configure a Server Listening Port
bull Open a TCP connection from a
socket client to the module
bull Data modeCommand Mode usage
bull Prerequisites
bull module connected to the AP or
module configured in MiniAP mode
bull PC to be used as socket client
138
TCP socket
Socket
Server
Socket
Client
Lab 13 Socket Server
This feature allows to enable the socket server mode The module
can be able to listen for an incoming connection on the specified port
The module should be connected to the AP (as shown in Lab 3) or
should be configured in Mini AP mode (as shown in Lab 8)
Please refer to ldquoSocket Server Application Notesrdquo for more details
139
ENG-WPA AP
SPWF_AP
miniAP
Tera Term output
Lab 13 Joining a network
In order to be connected to an available Wifi network the AP parameters setting is needed
bull Set the SSID
bull Type AT+SSSIDTXT=ENG-WPA
bull Set the password
bull Type AT+SSCFG=wifi_wpa_psk_texthelloworld
bull Set the network privacy mode (0=none 1=WEP 2=WPA-Personal (TKIPAES) or WPA2-Personal (TKIPAES))
bull Type AT+SSCFG=wifi_priv_mode2
bull NB wifi_auth_type must be set to 0 AT+SSCFG=wifi_auth_type0
bull Set the network mode (1 = STA 2 = IBSS 3 = MiniAP)
bull Type AT+SSCFG=wifi_mode1
140
OK
All
Lab 13 Joining a network
bull Save the settings on the flash memory and reset the module
bull Type ATampW
bull Type AT+CFUN=1
141
+WIND0Console active +WIND46WPA Crunching PSK +WIND32WiFi Hardware Started +WIND21WiFi Scanning +WIND35WiFi Scan Complete (0x0) +WIND19WiFi Join 14D64D243600 +WIND25WiFi Association with ENG-WPA successful +WIND51WPA Handshake Complete +WIND24WiFi Up 19216801xx
All
ENG-WPA AP
Tera Term output
Lab 13 Socket Server
bull Socket server turn ON the TCP Socket Server (user must
specify the server listening port)
bull Type AT+SSOCKD=32000 (AT+SOCKD=32000u for UDP socket server)
bull Check the status of the socket server
bull Type AT+SSTS=ip_sockd_port
142
ENG-WPA
AP
Tera Term output
OK ip_sockd_port = 32000 OK
All
Tip you can Turn OFF the Socket Server using a server listening port = 0 (type AT+SSOCKD=0)
Lab 13 Socket Server
bull Socket client can be used a simple socket client in order to test the communication
(SocketTest ndash available on httpsourceforgenetprojectssockettest)
143
ENG-WPA
AP
Lab 13 Socket Server
bull Socket client
bull Insert the modulersquos IP Address and the port
bull Click on Connect button
144
Tera Term output
+WIND61Incoming Socket Client1921681102 +WIND60Now in Data Mode
All
Lab 13 Socket Server
bull The module (socket server) enters in data mode and a bidirectional channel is
created to allow exchanging data with the socket client
bull Try to send and receive data from the module
145
Tera Term output
test_1
All
Lab 13 Socket Server ndash escape sequence
bull From Data Mode to Command Mode
bull Configuration variable used escape_seq (default is ldquoat+srdquo case sensitive
suggested to be sent by the local host in a single complete packet with no CR or
LF in the sequence)
bull Type at+s
bull Now itrsquos possible to send AT commands while the socket connection
is still active
146
Tera Term output
+WIND59Back to Command Mode
All
Tip During the Command Mode you cannot send data to client but can receive data from it Every data chunk generates an URC (+WIND64Sockd Pending Data) with limit to 4 (x730 bytes) This is the max number of pending messages From the 5th chunk on messages are lost
Lab 13 Socket Server ndash return to data mode
bull From Command Mode to Data Mode
bull While in Command Mode
bull Type AT+S (this is an AT command AT+S must be followed by ltCRgt)
bull The module returns in data mode
147
ENG-WPA
AP
Tera Term output
+WIND60Now in Data Mode
All
Lab 13 Socket Server ndash turn off
bull Turn OFF the Socket Server
bull Type at+s (to enter in command mode)
bull Type AT+SSOCKD=0
148
ENG-WPA
AP
Tera Term output
OK +WIND62Socket Client Gone1921681102
All
Proceed to the next LAB
Lab 14 Low power modes
bull Objective
bull Practice with Radio Power Save
bull Sleep Mode
bull Standby Mode
bull Prerequisites
bull module connected to the AP
150
Lab 14 Low power modes
This feature allows to enable the low power states
The module supports the ldquoRadio Power Saverdquo mode the ldquoSleeprdquo
mode and the ldquoStandbyrdquo mode
The module should be connected to the AP (as shown in Lab 3) in
order to use the ldquoRadio Power Saverdquo mode
Please refer to ldquoSPWF01S Power Management Application Notesrdquo for
more details
151
ENG-WPA AP
Low Power
Tera Term output
Lab 14 Joining a network
In order to be connected to an available Wifi network the AP parameters setting is needed
bull Set the SSID
bull Type AT+SSSIDTXT=ENG-WPA
bull Set the password
bull Type AT+SSCFG=wifi_wpa_psk_texthelloworld
bull Set the network privacy mode (0=none 1=WEP 2=WPA-Personal (TKIPAES) or WPA2-Personal (TKIPAES))
bull Type AT+SSCFG=wifi_priv_mode2
bull NB wifi_auth_type must be set to 0 AT+SSCFG=wifi_auth_type0
bull Set the network mode (1 = STA 2 = IBSS 3 = MiniAP)
bull Type AT+SSCFG=wifi_mode1
152
OK
All
Lab 14 Joining a network
bull Save the settings on the flash memory and reset the module
bull Type ATampW
bull Type AT+CFUN=1
153
+WIND0Console active +WIND46WPA Crunching PSK +WIND32WiFi Hardware Started +WIND21WiFi Scanning +WIND35WiFi Scan Complete (0x0) +WIND19WiFi Join 14D64D243600 +WIND25WiFi Association with ENG-WPA successful +WIND51WPA Handshake Complete +WIND24WiFi Up 19216801xx
All
Tera Term output
ENG-WPA AP
Low Power
Lab 14 Low power modes ndash Power Save 154
Module
Power State STM32 WLAN
Standby Standby Standby
Sleep Stop PS
Power Save Run PS or Fast-PS
Active Rx Run Rx Idle Rx Active
Active Tx Run Tx Active
Lab 14 Low power modes ndash Power Save
bull By default the module starts in ACTIVE mode
bull Enable the Power Save Mode
bull Type at+sscfg=wifi_powersave1 (ldquowifi_powersave2rdquo enables the Fast-PS mode)
bull Enable the doze operational mode
bull Type at+sscfg=wifi_operational_mode11 (ldquowifi_operational_mode12rdquo enables the quiescent mode)
bull Choose the wake up mode
1 Wake up every n beacon (specified in the wifi_beacon_wakeup variable)
bull Type at+sscfg=wifi_listen_interval0
bull Type at+sscfg=wifi_beacon_wakeup1
OR
2 Wake up every n beacon adaptively (specified in the wifi_beacon_wakeup variable)
bull Type at+sscfg=wifi_listen_interval1
bull Type at+sscfg=wifi_beacon_wakeup1
155
Tip The Wifi Power Save (wifi_powersave1) can also be quickly enabled using the command AT+CFUN=2
Lab 14 Low power modes ndash Power Save
bull Save the settings on the flash memory and reset the module
bull Type ATampW
bull Type AT+CFUN=1
bull The WIND66 message related to Low Power Mode will be
displayed
156
+WIND1Poweron (--SPWF01S) +WIND13ST SPWF01S IWM Copyright (c) 2012-2014 STMicroelectronics Inc All rights Reserved +WIND3Watchdog Running +WIND0Console active +WIND32WiFi Hardware Started +WIND21WiFi Scanning +WIND35WiFi Scan Complete (0x0) +WIND19WiFi Join 02621F518F0B +WIND25WiFi Association with IoT successful +WIND51WPA Handshake Complete +WIND24WiFi Up 1921681104 +WIND66Low Power mode1
All
Tera Term output
ENG-WPA AP
Low Power
Lab 14 Low power modes ndash Sleep Mode 157
Module
Power State STM32 WLAN
Standby Standby Standby
Sleep Stop PS or Fast-PS
Power Save Run PS or Fast-PS
Active Rx Run Rx Idle Rx Active
Active Tx Run Tx Active
Lab 14 Low power modes ndash Sleep Mode
bull In the Sleep Mode the core STM32 is stopped
bull Enable the Sleep Mode
bull Type at+sscfg=sleep_enabled1
bull Enable the Power Save Mode
bull Type at+sscfg=wifi_powersave1 (ldquowifi_powersave2rdquo enables the Fast-PS mode)
bull Enable the doze operational mode
bull Type at+sscfg=wifi_operational_mode11 (ldquowifi_operational_mode12rdquo enables the quiescent mode)
bull Choose the wake up mode
1 Wake up every n beacon (specified in the wifi_beacon_wakeup variable)
bull Type at+sscfg=wifi_listen_interval0
bull Type at+sscfg=wifi_beacon_wakeup1
OR
2 Wake up every n beacon adaptively (specified in the wifi_beacon_wakeup variable)
bull Type at+sscfg=wifi_listen_interval1
bull Type at+sscfg=wifi_beacon_wakeup1
158
Tip The Wifi Sleep Mode (and wifi_powersave1) can also be quickly enabled using the command AT+CFUN=3
Lab 14 Low power modes ndash Sleep Mode
bull Save the settings on the flash memory and reset the module
bull Type ATampW
bull Type AT+CFUN=1
bull The WIND69 message related to Sleep Mode will be displayed
159
+WIND1Poweron (--SPWF01S) +WIND13ST SPWF01S IWM Copyright (c) 2012-2014 STMicroelectronics Inc All rights Reserved +WIND3Watchdog Running +WIND0Console active +WIND32WiFi Hardware Started +WIND21WiFi Scanning +WIND35WiFi Scan Complete (0x0) +WIND19WiFi Join 02621F518F0B +WIND25WiFi Association with IoT successful +WIND51WPA Handshake Complete +WIND24WiFi Up 1921681104 +WIND66Low Power mode1 +WIND69Going into DeepSleep
All
Tera Term output
ENG-WPA AP
Low Power
Lab 14 Low power modes ndash Sleep Mode
bull Wake STM32 up using the GPIO6
bull Put the GPIO6 to 25V (jumper on JP2 as in
the picture)
bull The WIND messages will be displayed
160
+WIND70Resuming from DeepSleep +WIND53Wakeup (GPIO6 High)
All
Tera Term output
Lab 14 Low power modes ndash Sleep Mode
bull Put STM32 in sleep mode using the
GPIO6
bull Go back the GPIO6 floating (remove jumper
- as default)
bull The WIND69 message will be
displayed
161
+WIND69Going into DeepSleep
All
Tera Term output
Lab 14 Low power modes ndash Sleep Mode
bull Wake STM32 up using the remote
page
bull Connect a device to the same modulersquos
network
bull Open the following link
http[module_IP_address]remotehtml
bull Select ldquoWakerdquo and click on ldquoGordquo button
to wake up the module
bull The WIND message will be displayed
162
+WIND70Resuming from DeepSleep
All
Tera Term output
Lab 14 Low power modes ndash Sleep Mode
bull Put STM32 in sleep mode using the
remote page
bull Connect a device to the same modulersquos
network
bull Open the following link
http[module_IP_address]remotehtml
bull Select ldquoSleeprdquo and click on ldquoGordquo button
to put the module in sleep mode
bull The WIND message will be displayed
163
+WIND69Going into DeepSleep
All
Tera Term output
Lab 14 Low power modes ndash Standby Mode 164
Module
Power State STM32 WLAN
Standby Standby Standby
Sleep Stop PS or Fast-PS
Power Save Run PS or Fast-PS
Active Rx Run Rx Idle Rx Active
Active Tx Run Tx Active
Lab 14 Low power modes ndash Standby Mode
bull During the Standby Mode both the STM32 and the Radio will be
put in standby mode The standby mode allows to achieve the
lowest power consumption
bull Enable the Standby Mode
bull Type at+sscfg=sleep_enabled0 (Sleep mode must be disabled)
bull Type at+sscfg=standby_enabled1
bull Please be sure that GPIO6 isnrsquot forced high
bull Set the standby time to wake up via RTC alarm
bull Type at+sscfg=standby_time15
165
Tip The Wifi Standby Mode can also be quickly enabled using the command AT+CFUN=4
Lab 14 Low power modes ndash Standby Mode
bull Save the settings on the flash
memory and reset the module
bull Type ATampW
bull Type AT+CFUN=1
bull After 15 seconds the module will be
rebooted and will return in the
ACTIVE state
166
+WIND0Console active +WIND32WiFi Hardware Started +WIND38WiFi Powered Down +WIND67Going into Standby15 +WIND68Resuming from Standby +WIND1Poweron (--SPWF01S) +WIND13ST SPWF01S IWM Copyright (c) 2012-2014 STMicroelectronics Inc All rights Reserved +WIND3Watchdog Running +WIND0Console active +WIND32WiFi Hardware Started +WIND21WiFi Scanning +WIND35WiFi Scan Complete (0x0) +WIND19WiFi Join02621F518F0B +WIND25WiFi Association with IoT successful +WIND51WPA Handshake Complete +WIND24WiFi Up1921681113
All
Tera Term output
Lab 14 Low power modes ndash Standby Mode
bull Wake up the module using the GPIO6
bull Enable the Standby Mode
bull Type at+sscfg=sleep_enabled0 (make sure that
Sleep mode is disabled)
bull Type at+sscfg=standby_enabled1
bull Type ATampW
bull Type AT+CFUN=1
bull Put the GPIO6 to 25V to wake up the module
bull The WIND message will be displayed and
the module will return in ACTIVE state
167
+WIND68Resuming from Standby +WIND1Poweron (--SPWF01S) helliphelliphellip
All
Tera Term output
Proceed to the next LAB
Lab 15 STAMINI AP switcher
bull Objective
bull HW ldquoSTA to MiniAPrdquo switcher
bull Prerequisites
bull Work alone
169
Lab 15 STAMINI AP switcher
This feature allows to force the module in Mini AP mode starting from
a preexistent state
ldquoRecovery Moderdquo this functionality could be useful to lead the module
in a known state and to reconfigure it (ie using the firstset page)
The GPIO7 will be used to drive this feature
170
Lab 15 STAMINI AP switcher
bull Press and hold the SW2 button on the
EVAL and then perform a reset (HW reset
via SW1 button or SW reset via AT
command)
bull Release the SW2 button
bull The MiniAP mode will be started and the
module is discoverable with the following
SSID
bull iwm-XX-YY-ZZ where XX-YY-ZZ are the last
six digits of modulersquos MAC ADDRESS
171
+WIND2Reset +WIND1Poweron (--SPWF01S) +WIND13ST SPWF01S IWM Copyright (c) 2012-2014 STMicroelectronics Inc All rights Reserved +WIND39HW in miniAP mode (GPIO7 Low) +WIND0Console active +WIND3Watchdog Running +WIND32WiFi Hardware Started +WIND26WiFi Started AP +WIND24WiFi Up172312551
All
Tera Term output
Tip To exit from ldquominiAP mode via GPIO7rdquo perform a modulersquos reset
Proceed to the next LAB
Lab 16 IBSS connection
bull Objective
bull Create an IBSS network
bull Prerequisites
bull Work alone
173
Lab 16 Create an IBSS network
In an IBSS network the SSID is chosen by the client device that
starts the network
Module settings to create an IBSS network
bull Set the IBSS SSID
bull Type AT+SSSIDTXT=ADHOC
bull Set the network privacy mode (0=OPEN or 1=WEP are supported)
bull Type AT+SSCFG=wifi_priv_mode0
bull Set the network mode (2 = IBSS)
bull Type AT+SSCFG=wifi_mode2
174
OK
All
Tera Term output
Lab 16 Create an IBSS network
bull Set IP address IP default gateway IP DNS and IP netmask
bull Type AT+SSCFG=ip_ipaddr192168y1xx
bull Type AT+SSCFG=ip_gw192168y1
bull Type AT+SSCFG=ip_dns192168y1
bull Type AT+SSCFG=ip_netmask2552552550
bull Turn off the DHCP
bull Type AT+SSCFG=ip_use_dhcp0
175
OK
All
Tera Term output
Lab 16 Create an IBSS network
bull Save the settings on the flash memory and reset the module
bull Type ATampW
bull Type AT+CFUN=1
176
+WIND0Console active +WIND32WiFi Hardware Started +WIND21WiFi Scanning +WIND35WiFi Scan Complete (0x0) +WIND19WiFi Join EE33CE002418 +WIND25WiFi Association with ADHOC successful +WIND51WiFi Handshake Complete +WIND24WiFi Up 19216813
All
AD-HOC
Tera Term output
Lab 16 Create an IBSS network
bull Associate the iOS device with the
ADHOC network (iOS gt 8 could not
support the IBSS mode)
177
AD-HOC
Tip manual configuration of static TCPIPv4 parameters is suggested using a PC Ie PC TCPIPv4 properties
Lab 16 Create an IBSS network
bull Find your IP address
bull Type AT+SSTS
bull Open Safari web browser
bull In the address bar type
ltSPWF IP addressgtindexhtml
bull Type 192168y1xxindexhtml
178
AD-HOC
THANK YOU

Lab 1 Configuring the UART STEVAL-IDW001V1 + STEVAL-PCC018V1
bull Open Tera Term
bull Command Mode
bull Type AT followed by a carriage return
(CR)
12
OK
All
Tera Term output
Lab 1 EVAL of the SPWF01Sxy1 module
X-NUCLEO-IDW01M1 amp X-CUBE-WIFI1 13
bull X-NUCLEO-IDW01M1
bull X-NUCLEO-IDW01M1 is a Wi-Fi evaluation board based on SPWF01SA module
bull X-CUBE-WIFI1
bull X-CUBE-WIFI1 is an expansion software package for STM32Cube
bull httpwww2stcomcontentst_comenproductsembedded-softwaremcus-embedded-softwarestm32-embedded-softwarestm32cube-expansion-softwarex-cube-wifi1html
Lab 1 Set Vcom binary in Nucleo X-NUCLEO-IDW01M1 amp X-CUBE-WIFI1
1 Flash VCOM binary into Nucleo drive
binaries
IDErsquos project
drag and drop
Projectbin
on Nucleo drive
14
NUCLEO-F401RE
F103RB
L053R8
L476RG
Lab 1 Configuring the UART X-NUCLEO-IDW01M1 amp X-CUBE-WIFI1
Setup TeraTerm window in order to send AT command to Wi-Fi module
2
Open Hyper terminal or TeraTerm Select correct COM port
Terminal setup Serial port setup
15
Lab 1 Configuring the UART X-NUCLEO-IDW01M1 amp X-CUBE-WIFI1
bull Open Tera Term
bull Command Mode
bull Type AT followed by a carriage return
(CR)
16
OK
All
Tera Term output
You are ready to use your Wi-Fi
EVAL board
Lab 2 Set the SPWF variables
bull Objective bull Run a command
bull Get the default configuration dump
bull Set host name
bull Set static IP parameters
bull Reset the module
bull Prerequisites bull Work alone
18
Lab 2 Run a command
Run a command - Syntax
- ATampx ltCRgt
- AT+S[Command] ltCRgt
Response - Syntax
xxxxxxxx
19
- OK
- Command output followed by OK
- ERROR Command not found
- ERROR Unrecognized key
AT Command Prefix
Not case sensitive
Lab 2 Set the SPWF variables
bull Get the default configuration dump
bull Type ATampV
bull Get a variable value
bull Type AT+SGCFG=console1_speed
Config dump frame
20
Variable
Name
Variable
Value
How to change the variable value
1 AT+SSCFG=[var name]xxxx
2 ATampW
Lab 2 Set the SPWF variables
bull Get the default configuration dump
bull Set host name
bull Type AT+SSCFG=ip_hostnamexxxxxxxx
21
Up to 31 characters (case sensitive) ldquospacebarrdquo is allowed
OK
All
Tera Term output
Lab 2 Set the SPWF variables
bull Get the default configuration dump
bull Set host name
bull Set IP address IP default gateway IP DNS and IP netmask (for
static usage)
bull Type AT+SSCFG=ip_ipaddr19216801xx
bull Type AT+SSCFG=ip_gw19216801
bull Type AT+SSCFG=ip_dns19216801
bull Type AT+SSCFG=ip_netmask2552552550
22
OK
All
Tera Term output
Tera Term output
Lab 2 Set the SPWF variables
bull Get the default configuration dump
bull Set host name
bull Set IP address IP default gateway IP
DNS and IP netmask (DHCP off)
bull Save settings on the flash memory
(mandatory after a variable change)
bull Type ATampW
bull Reset the module
bull Type AT+CFUN=1
23
+WIND21WiFi Scanning +WIND35WiFi Scan Complete (0x0)
All
Lab 2 Set the SPWF variables
bull Get the default configuration dump
bull Set host name
bull Set IP address IP default gateway IP
DNS and IP netmask (DHCP off)
bull Save settings on the flash memory
(mandatory after a variable change)
and reset the module
bull Check the new configuration dump
bull Type ATampV
24
Proceed to the next LAB
Lab 2a FOTA update
bull Objective
bull Upgrade the FW using the OTA file
bull Prerequisites
bull OTA file (provided in the SPWF01S FW
package)
bull External web server (ie Apache web
server running on PC)
26
Lab 2a FOTA update 27
The SPWF01Sx11 module (with external flash on board) allows
performing a Firmware Over-the-air update via a single HTTP GET
The SPWF01S will validate the firmware image it downloads load it
into a staging area then prompt the user to issue a reset command in
order to complete the update
Lab 2a FOTA update
The Apache Web Server will be used in this LAB
(Apache Web Server is available at this link
httparchiveapacheorgdisthttpdbinarieswin32httpd-2225-win32-x86-openssl-098ymsi)
Note please check that the local firewall is disabled or properly set It can
block the connection from module to Apache
bull Copy the OTA file (ie SPWF01S-xxxxxx-yyyyyyy-
RELEASE-mainota) in the Apache 22 htdocs folder
28
Lab 2a FOTA update
The FWUPDATE command allows to perform a Firmware Over-the-
air update via a single HTTP GET
bull Sintax
bull AT+SFWUPDATE=lthostnamegtltpathgtltportgt
bull Configuration parameters
bull lthostnamegt Target host DNS resolvable name or IP address
bull ltpathampqueryoptsgt Document path and optional query arguments
bull ltportgt Target host port
29
Lab 2a FOTA update
bull The module and the Apache Web server must be connected to the same network
bull In Tera Term type AT+SFWUPDATE=[Apache IP address][ota_fileota]
ie type AT+SFWUPDATE=192168xyyySPWF01S-150410-c2e37a3-RELEASE-
mainota
bull Reset the module to apply the new FW
bull Type AT+CFUN=1
bull Restore factory default settings (mandatory)
bull Type ATampF
30
Staging FW update for SPWF01SX11 version 1203-120918_01 FW length 276824 0x00002800 (offset 0x00000000 block len 4096) Write len 4096 -gt 0x0 Write len 4096 -gt 0x1000 (note - deleted extra output for clarity) Write len 4096 -gt 0x42000 Write len 2476 -gt 0x43000 (final) Wrote 276904 bytes Complete Update will be applied on next reboot (at+cfun=1)
All Tera Term output
Proceed to the next LAB
Lab 3 Access point connection
bull Objective
bull Scan for available networks
bull Join a network
bull Check the statusstatistics variables
bull Prerequisites
bull USB dongle and computer are set
up as described in Lab 2
bull Work alone
32
Lab 3 Scan for available networks
The SCAN command performs an immediate scan for available
networks Infrastructure (AP) and IBSS (Ad-Hoc) networks are both
reported Network type Channel BSSID SSID Signal strength (RSSI)
and 80211 capabilities are all reported
bull Type AT+SSCAN
bull Scan syntax AT+SSCAN [=lta|pgt[ltr|s|mgt[ltfnamegt]]] -- Perform a [activepassive]
network scan [filter offfilter on SSIDfilter on MAC] [print to file])
33
FOUND BSS 14D64D243600 CHAN 01 RSSI -28 SSID ENG-WPA CAPS 0431 WPA WPA2 FOUND BSS 00180A31EA78 CHAN 11 RSSI -82 SSID ZyckoItalyWireless CAPS 0531 WPA WPA2 FOUND BSS 06180A31E7E2 CHAN 11 RSSI -85 SSID ZyckoItalyGuest CAPS 0531 WPA WPA2 OK
All
Network type
Network MAC
Network
channel Network
RSSI
Network
SSID Network
capabilities
Tera Term output
Tera Term output
Lab 3 Joining a network (WPA Key)
In order to be connected to an available Wifi network the AP parameters setting is needed
bull Set the SSID
bull Type AT+SSSIDTXT=ENG-WPA
bull Set the password
bull Type AT+SSCFG=wifi_wpa_psk_texthelloworld
bull Set the network privacy mode (0=none 1=WEP 2=WPA-Personal (TKIPAES) or WPA2-Personal (TKIPAES))
bull Type AT+SSCFG=wifi_priv_mode2
bull NB wifi_auth_type must be set to 0 AT+SSCFG=wifi_auth_type0
bull Set the network mode (1 = STA 2 = IBSS 3 = MiniAP)
bull Type AT+SSCFG=wifi_mode1
34
OK
All
Lab 3 Joining a network (WPA Key)
bull Save the settings on the flash memory and reset the module
bull Type ATampW
bull Type AT+CFUN=1
35
+WIND0Console active +WIND46WPA Crunching PSK +WIND32WiFi Hardware Started +WIND21WiFi Scanning +WIND35WiFi Scan Complete (0x0) +WIND19WiFi Join 14D64D243600 +WIND25WiFi Association with ENG-WPA successful +WIND51WPA Handshake Complete +WIND24WiFi Up 19216801xx
All
ENG-WPA AP
Tera Term output
Lab 3 Joining a network (WPA Key)
bull Check the statusstatistics variables
bull Type AT+SSTS
bull Send a ping to the gateway (ip_gw)
bull Type AT+SPING=19216801
36
ENG-WPA AP
Tera Term output
OK
All
Lab 3 Joining a network (WEP Key)
Configure the module using the WEP key (4 possible combinations
available)
Sample table
37
AP configuration AT command to be used
Security Mode WEP
WEP Key Length 64 bit
(10 hex digits)
Authentication Open
Wep Key 1 1234567890
ie
at+sssidtxt=ENG-WEP
AT+SSCFG=wifi_wep_keys[0]1234567890
AT+SSCFG=wifi_wep_key_lens05
AT+SSCFG=wifi_auth_type0
AT+SSCFG=wifi_priv_mode1
AT+SSCFG=wifi_mode1
atampw
at+cfun=1
Security Mode WEP
WEP Key Length 64 bit
(10 hex digits)
Authentication Shared
Key
Wep Key 1 1234567890
ie
at+sssidtxt=ENG-WEP
AT+SSCFG=wifi_wep_keys[0]1234567890
AT+SSCFG=wifi_wep_key_lens05
AT+SSCFG=wifi_auth_type1
AT+SSCFG=wifi_priv_mode1
AT+SSCFG=wifi_mode1
atampw
at+cfun=1
AP configuration AT command to be used
Security Mode WEP
WEP Key Length
128 bit (26 hex digits)
Authentication Open
Wep Key 1
123456789012345678
90123456
ie
at+sssidtxt=ENG-WEP
AT+SSCFG=wifi_wep_keys[0]12345678
901234567890123456
AT+SSCFG=wifi_wep_key_lens0D
AT+SSCFG=wifi_auth_type0
AT+SSCFG=wifi_priv_mode1
AT+SSCFG=wifi_mode1
atampw
at+cfun=1
Security Mode WEP
WEP Key Length
128 bit (26 hex digits)
Authentication
Shared Key
Wep Key 1
123456789012345678
90123456
ie
at+sssidtxt=ENG-WEP
AT+SSCFG=wifi_wep_keys[0]12345678
901234567890123456
AT+SSCFG=wifi_wep_key_lens0D
AT+SSCFG=wifi_auth_type1
AT+SSCFG=wifi_priv_mode1
AT+SSCFG=wifi_mode1
atampw
at+cfun=1
Lab 3 Joining a network (WEP Key)
Notes
bull ldquowifi_wep_key_lensrdquo variable values 05 and 0D
bull Itrsquos possible to enter any text string into a WEP key box in the AP in which case it will be converted into a hexadecimal key using the ASCII values of the characters A maximum of 5 text characters can be entered for 64 bit keys and a maximum of 13 characters for 128 bit keys
In this case it needs to manually convert your ASCII password to HEX and complete the wifi_wep_keys[0] variable with the HEX value bull ie AP WEP key test1 ASCII to HEX 7465737431 So the AT command is AT+SSCFG=wifi_wep_keys[0]7465737431
bull Some APs allow user to insert a passphrase and then the AP automatically generates the hex keys In this scenario user have not to perform the ASCII to HEX conversion because the AP already gives it the hex value
38
Proceed to the next LAB
Lab 4 Web client mode
bull Objective
bull HTTP GET
bull HTTP POST
bull PUSH DATA ON SERIAL PORT
bull Prerequisites
bull USB dongle and computer are set up
as described in Lab 2
bull Work in couple
40
Lab 4 HTTP GET
The HTTP GET feature performs a single HTTP request to the specified
host and path The server response is printed on the UART enabled
bull Sintax
bull AT+SHTTPGET=lthostnamegtltpathgt[ltportgt]
bull Configuration parameters
bull lthostnamegt target host DNS resolvable name or IP address
bull ltpathgt document path
bull ltportgt target port
41
Lab 4 HTTP GET
bull Device A performs an HTTP GET to the Device B
bull Device A
AT+SHTTPGET=ltDevice B IP addrgtindexhtml
Type AT+SHTTPGET=19216801xxindexhtml
42
GET indexhtml HTTP10 User-Agent SPWF01S helliphelliphellip lth1gtST SPWF01Sx11 WiFi Modulelth1gt ltpgt Welcome to the ST SPWF01Sx11 WiFi Module ltpgt ltpgt This page was delivered from the SPWF01Sx11 internal HTTP server hellip lta href=statusshtmlgtSPWF01Sx11 Status Pageltagt ltpgt ltbodygt lthtmlgt OK
Device A
A B
Tera Term output
Lab 4 HTTP POST
The HTTP POST performs a post of the given path to the specified host The module can be only used as an HTTP POST client
bull Sintax
bull AT+SHTTPPOST =lthostnamegtltpathampqueryoptsgtltformcontentgt[ltportgt]
bull Configuration parameters
bull lthostnamegt target host DNS resolvable name or IP address
bull ltpathampqueryoptsgt document path
bull ltformcontentgt form to be submitted
bull ltportgt target port
43
Lab 4 HTTP POST
bull The SPWF01S performs an HTTP POST to an HTTP Post Test Server
bull Type
at+shttppost=posttestservercompostphpname=demoampemail=mymailampsubjec
t=subjampbody=message
bull The HTTP Post Test Server replies as
displayed in the Tera Term output if the HTTP
POST successfully
44
HTTP11 200 OK Date Fri 10 Jan 2014 132414 GMT Server Apache Access-Control-Allow-Origin Vary Accept-Encoding Content-Length 139 Connection close Content-Type texthtml Successfully dumped 4 post variables View it at httpwwwposttestservercomdata2014011005241443192628 Post body was 0 chars long OK
Device A
A B
Tera Term output
HTTP POST
SERVER
Lab 4 HTTPREQ bull The SPWF01S can perform a custom HTTP request to a specified
target Refer to the User Manual for more details
bull Type
AT+SHTTPREQ=wwwgooglecom8089
After ltCRgt the module accepts data We will try to open an non-existent web page
GET downloadTagphp HTTP10ltCRgtltLFgt
User-Agent SPWF01SltCRgtltLFgt
Host iwm-testltCRgtltLFgt
Connection closeltCRgtltLFgtltCRgtltLFgt
45
HTTP10 404 Not FoundltCRgtltLFgt Date Sun 31 Jan 2016 142704 GMTltCRgtltLFgt Content-Type texthtmlltCRgtltLFgt Server HTTP server (unknown)ltCRgtltLFgt Content-Length 49ltCRgtltLFgt X-XSS-Protection 1 mode=blockltCRgtltLFgt X-Frame-Options SAMEORIGINltCRgtltLFgt ltCRgtltLFgt lthtmlgtltbodygtlth1gt404 Not Foundlth1gtltbodygtlthtmlgtltLFgtltCRgt ltLFgt ltSUBgtltSUBgtltSUBgtltCRgtltLFgt ltCRgtltLFgt OKltCRgtltLFgt
All
A B
Tera Term output
[AT+SHTTPREQ =lthostnamegt[port]ltlengthgtltCRgtltdatagt]
Lab 4 Push data on serial port
A built-in html page ldquooutput_demohtmlrdquo allows to remotely push
characters on the serial port from a remote browser
46
output_demohtml
Modulersquos IP addressoutput_demohtml
Lab 4 Push data on serial port
bull Find your IP address
bull Type AT+SSTS
bull Associate your computer with the AP
bull Open your web browser
bull In the address bar type
ltmodulersquos IP
Addressgtoutput_demohtml
bull Type
19216801xxoutput_demohtml
47
Lab 4 Push data on serial port
bull Enter the text
bull In order to manage non-ASCII chars the ip_use_decoder variable must be modified (refer to the User Manual for more details)
bull Submit
bull The text will be sent to the serial port of the module
48
Proceed to the next LAB
Lab 5 Web Server use mode
bull Objective
bull List existing files
bull Print a file
bull Create a file
bull Append to an existing file
bull Delete an existing file
bull Prerequisites
bull USB dongle and computer are
set up as described in Lab 2
bull Work alone
50
Lab 5 Web server 51
The Web Server feature allows to create print and delete ASCII files in
the RAM memory of the module
Lab 5 List existing files
The FSL command lists type sizes and name of all the existing files
bull Type AT+SFSL
52
I 461 input_demoshtml I 180 messageshtml I 384 output_demohtml I 614 indexhtml I 157 peersshtml I 193 configshtml I 174 statusshtml I 212 404html I 2022 firstsethtml I 2898 remotehtml OK
All
Files stored in the STM32
FLASH memory
Tera Term output
Lab 5 Print a file
The FSP command prints the content
of an existing file
bull Type AT+SFSP=indexhtml
53
lthtmlgt ltheadgtlttitlegtST SPWF01Slttitlegtltheadgt ltbody bgcolor=white text=blackgt lth1gtST SPWF01S Intelligent WiFi Modulelth1gt ltpgtWelcome to the ST SPWF01S intelligent Wi-Fi moduleltpgt ltpgtThis page was delivered from the SPWF01S internal HTTP serverltpgt ltpgt lta href=configshtmlgtSPWF01S Configuration Settings Pageltagt ltpgt ltpgt lta href=statusshtmlgtSPWF01S Status Pageltagt ltpgt ltpgt lta href=peersshtmlgtSPWF01S Peers Pageltagt ltpgt ltpgtMore information about the SPWF01S and other ST products can be found at STs website lta href=httpwwwSTcomgthttpwwwSTcomltagtltpgt ltbodygt lthtmlgt OK
All Tera Term output
Tip How to use the offset and length parameters AT+SFSP=indexhtml[offset][length] ie Type AT+SFSP=indexhtml520 Length parameter is mandatory if is used the offset
Lab 5 Create a file
The FSC command allows to create a file inside the SPWF for
delivery by the SPWF HTTP server
bull Sintax
bull AT+SFSC =ltfnamegtltmax_lengt[lthttp_headergt]
bull Configuration parameters
bull lt filename gt filename to create
bull lt max_len gt amount of space to allocate for file max = 4096 bytes
bull lthttp_headergt 0=HTML header automatically added 1=HTML header not
added (as by default)
Type AT+SFSC=wifidemohtml1965
54
OK
All
Tera Term output
Lab 5 Configuring the UART
bull Set CR+LF in the Terminal setup
(to properly paste text in the
terminal)
bull Tera Term Setup rarr Terminal rarr
Transmit CR+LF
55
Tip The local echo option must be disabled on Tera Term
Added in FW 35 using the AT+SFSR command user can rename dynamic files stored in the RAM memory Refer to the User Manual for more details
Lab 5 Append to an existing file
The FSA command allows to append blocks of data to an existing file
This command accepts data after the ltcrgt at the end of the command
line
bull Sintax
bull AT+SFSA=ltfilenamegtltdatalengt
bull Configuration parameters
bull lt filename gt filename pre-created
bull lt datalen gt number of characters to append to the file
Type AT+SFSA=wifidemohtml1965
56
Now SPWF accepts data
Tips
Lab 5 Append to an existing file
bull Open wifidemotxt in the following
directory Hands_on
folderHTML_demo_page
bull Check you have set up CR+LF in the
Terminal setup (for more
information refer to the slide 48)
bull Copy the file content into Tera term
(paste with ALT+V or mouse right
button)
57
OK
All
Tera Term output
Lab 5 Append to an existing file
bull Open wifidemohtml
bull Open your Web browser (suggested Google
Chrome for HTML5 test)
bull In address bar type ltSPWF IP addrgtwifidemohtml
Type 19216801xxwifidemohtml
58
Lab 5 Configuring the UART
bull Re-set CR in the Terminal setup
as by default
bull Tera Term Setup rarr Terminal rarr
Transmit CR
59
Tip The local echo option can be re-enabled on Tera Term
Lab 5 List existing files
Lets list the files
bull Type AT+SFSL
60
D 1965 wifidemohtml I 461 input_demoshtml I 180 messageshtml I 384 output_demohtml I 614 indexhtml I 157 peersshtml I 193 configshtml I 174 statusshtml I 212 404html I 2022 firstsethtml I 2898 remotehtml OK
All
File stored in the RAM memory
Tera Term output
Lab 5 Delete an existing file
The FSD command allows to delete an existing file by name Static
files may not be deleted
bull Sintax
bull AT+SFSD=ltfilenamegt
Type AT+SFSD=wifidemohtml
61
OK
All
Tera Term output
Lab 5 Delete an existing file
bull Re-open wifidemohtml
bull Open your Web browser
bull In address bar ltSPWF IP addrgtwifidemohtml
Type 19216801xxwifidemohtml
62
Proceed to the next LAB
Lab 6 Web Server use mode
bull Objective
bull Create an image file
bull Filesystem update over-the-air
bull Filesystem update over UART
bull Prerequisites
bull Work alone
64
Lab 6 Web server 65
The Web Server feature also allows to upload generic files (PDF
HTML DOC JPEG and so on) in the EXTERNAL FLASH memory of
the module It needs to follow the below steps
- create an image file (IMG) using the tool provided in the Hands-on package
(the IMG contains the files to upload)
- Put the image in a generic and accessible Web Server (Apache Web server
will be used in the Hands-on as example)
- Using the proper AT command the IMG will be retrieved over-the-air and the
static files will be created in the external flash memory
Lab 6 Create an image file
bull Open the following folder and
extract all the files
hands_on_wififilesystem_update
bull Put your own files to upload in the
pages folder (max 512 Kbytes)
bull Run genbat
bull Open the pages folder and copy
outfileimg in your external Web
Server (Apache)
66
3
1
2
Lab 6 Create an image file
The Apache Web Server will be used in this tutorial
(Apache Web Server is available at this link
httparchiveapacheorgdisthttpdbinarieswin32httpd-2225-win32-x86-openssl-098ymsi)
Note please check that the local firewall is disabled or properly set It can
block the connection from module to Apache
bull Copy outfileimg in the Apache 22
htdocs folder (this is the default
root server directory)
67
4
Lab 6 Filesystem update
The HTTPDFSUPDATE command allows to create static files inside
the SPWF for delivery by the SPWF HTTP server
bull Sintax
bull AT+SHTTPDFSUPDATE=lthostnamegtltpathgt[port]
bull Configuration parameters
bull lthostnamegt external web server DNS resolvable name or IP address
bull ltpathgt document path
bull ltportgt target host port
68
Lab 6 Filesystem update
bull In Tera Term type
AT+SHTTPDFSUPDATE=192168x10xoutfileimg
bull Reset the module
bull Type AT+CFUN=1
69
Image length 357957 (offset 0x00080000 block len 4096) Write len 4096 -gt 0x80000 Write len 4096 -gt 0x81000 Write len 4096 -gt 0x82000 helliphelliphelliphellip helliphelliphelliphelliphelliphellip helliphelliphelliphelliphellip Write len 4096 -gt 0xD6000 Write len 1612 -gt 0xD7000 (final) Wrote 357964 bytes Complete Please reboot (at+cfun=1) OK
All
Tera Term output
The file system will be permanently deleted The new IMG will overwrite the existent files in the file system
Warning
Lab 6 Filesystem update
Lets list the files
bull Type AT+SFSL
70
E 2615 st766gif E 112374 modulepng E 2430 index1html E 419 indexhtml E 239887 MKTWiFipdf I 461 input_demoshtml I 180 messageshtml I 384 output_demohtml I 614 indexhtml I 157 peersshtml I 193 configshtml I 174 statusshtml I 212 404html I 2022 firstsethtml I 2898 remotehtml OK
All
Files stored in
the EXT FLASH memory
Tera Term output
Lab 6 Filesystem update
bull Open index1html page
bull Open your web browser
bull In the address bar ltSPWF IP addrgtindex1html
Type 192168x1xxindex1html
71
Lab 6 Filesystem erase
Erase the external httpd filesystem
bull Type AT+S HTTPDFSERASE
The files stored in the EXT FLASH memory will be erased
Lets list the files
bull Type AT+SFSL
72
I 461 input_demoshtml I 180 messageshtml I 384 output_demohtml I 614 indexhtml I 157 peersshtml I 193 configshtml I 174 statusshtml I 212 404html I 2022 firstsethtml I 2898 remotehtml OK
All
Tera Term output
Lab 6 Filesystem update
The HTTPDFSWRITE command allows to create static files inside
the SPWF via the UART interface The HW flow control MUST be
enabled in order to use the command
bull Sintax
bull AT+SHTTPDFSWRITE =ltdatalengtltCRgtltdatagt
bull Configuration parameters
bull ltdatalengt Amount of bytes to be sent
73
Lab 6 Filesystem update
bull Type AT+S HTTPDFSWRITE=357957
bull In Tera Term File ndash Send File
bull Reset the module
bull Type AT+CFUN=1
74
Image length 357957 (offset 0x00080000 block len 4096) Write len 4096 -gt 0x80000 Write len 4096 -gt 0x81000 Write len 4096 -gt 0x82000 helliphelliphelliphellip helliphelliphelliphelliphelliphellip helliphelliphelliphelliphellip Write len 4096 -gt 0xD6000 Write len 1612 -gt 0xD7000 (final) Wrote 357964 bytes Complete Please reboot (at+cfun=1) OK
All
Tera Term output
The file system will be permanently deleted The new IMG will overwrite the existent files in the file system
Warning
Proceed to the next LAB
Lab 7 Socket interface
bull Objective
bull Open TCPUDP connection
bull Write data to socket
bull Read data from socket
bull Close socket
bull Prerequisites
bull Work alone
76
TCPUDP socket
Socket
Client
Socket
Server
Lab 7 TCPUDPUART socket interface 77
The Socket interface allows communication via TCP UDP and UART
The SPWF is both a client and a server socket In this LAB will be
detailed the socket client feature
Ho
st
En
d P
rod
uct
Open TCPUDP connection
Write data to socket
Read data from socket
Close socket
Lab 7 Open TCPUDP connection
The SOCKON command allows to open a TCPUDP connection
to a specified host (up to 8 socket connections at same time)
bull Sintax
bull AT+SSOCKON=lthostnamegtltportgtltprotocolgtind
bull Configuration parameters
bull lthostnamegt target host DNS resolvable name or IP address
bull ltportgt TCPUDP socket port
bull ltprotocolgt t for TCP socket u for UDP socket
bull ind indicate when data has arrived (optional) Up to 4 (x730 bytes)
consecutive ldquoPending datardquo message (without any AT+SSOCKR) are
guaranteed It is suggested to empty the buffer using the AT+SSOCKR
command and to avoid exceeding 4 indications
78
Lab 7 Open TCPUDP connection
bull Open the TCP socket server (disable the firewall to properly
run it)
bull Folder hands_on_wifitcp socket serverserverexe
bull The TCP server listens for incoming connections on the port
32000 It sends back all data received
79
Optional - Lab 7 Open TCPUDP connection
bull Using an Android platform the socket server can be opened
using a specific APP (Socket Protocol available on Play Store)
bull The TCP socket server can be configured to listen for
incoming connections on the port 32000
bull Type 32000 on laquoPort Listen toraquo box
bull Click on Listen
80
Lab 7 Open TCPUDP connection
bull Type AT+SSOCKON=192168010x32000tind
bull The client and the server use the socket identifier (ID)
displayed
81
ID 00 OK
All
Tera Term output
Lab 7 Write data to socket
The SOCKW command allows to write data to the specified ID
socket
This command accepts data after the ltcrgt at the end of the
command line
bull Sintax
bull AT+SSOCKW=ltIDgtltlengt
bull Configuration parameters
bull ltIDgt socket identifier
bull ltlengt data length to send
82
Lab 7 Write data to socket
bull Write data
bull Type AT+SSOCKW=0013
bull Type hello worldltCRgt
bull SPWF shows that there are ltpending datagt and their amount
83
+WIND55Pending Data013
All
Tera Term output
ID
Pending
bytes
Note the module is waiting 13 bytes to be written to the socket As soon as 13 bytes (or characters) are sent from the terminal the module is going to write them to the socket and will be ready to receive new commands
Lab 7 Read data from socket
The SOCKR command allows to read data from socket
bull Sintax
bull AT+SSOCKR=ltIDgtltlengt
bull Configuration parameters
bull ltIDgt socket identifier
bull ltlengt data length to read
84
Lab 7 Read data from socket
bull Read data
bull Type AT+SSOCKR=0013
85
hello world OK
All
Tera Term output
Lab 7 Close socket
The SOCKC command allows to close socket
bull Sintax
bull AT+SSOCKC=ltIDgt
bull Configuration parameters
bull ltIDgt socket identifier
86
Tera Term output
Lab 7 Close socket
bull Close socket
bull Type AT+SSOCKC=00
87
OK
All
Proceed to the next LAB
Lab 8 MiniAP mode for the first set
bull Objective
bull Create a direct connection between
the module and an end device
bull First set of the module in order to
enable the connection between the
module and a generic AP
bull Prerequisites
bull Work alone
89
Tera Term output
Lab 8 Configuring the module in MiniAP mode
The Mini AP mode is available starting from the following FW release
SPWF01S-131115-de4568d-RELEASE
In order to set the module in Mini AP mode the following parameters
are needed
bull Set the SSID
bull Type AT+SSSIDTXT=SPWF_AP
bull Set the network privacy mode (0=OPEN or 1=WEP are supported)
bull Type AT+SSCFG=wifi_priv_mode0
bull Set the network mode (1 = STA 2 = IBSS 3 = MiniAP)
bull Type AT+SSCFG=wifi_mode3
90
OK
All
Lab 8 Configuring the module in MiniAP mode
bull Save the settings on the flash memory and reset the module
bull Type ATampW
bull Type AT+CFUN=1
91
+WIND0Console active +WIND32WiFi Hardware Started +WIND26WiFi Started AP with network SPWF_AP +WIND24WiFi Up 172181511
All
Tera Term output
SPWF_AP
Lab 8 Configuring the module in MiniAP mode (WEP Key)
Configure the module using the WEP key (2 possible combinations
available)
Sample table
92
AP configuration AT command to be used
Security Mode WEP
WEP Key Length 64 bit
(10 hex digits)
Authentication Open
Wep Key 1 1234567890
ie
at+sssidtxt=SPWF_AP
AT+SSCFG=wifi_wep_keys[0]1234567890
AT+SSCFG=wifi_wep_key_lens05
AT+SSCFG=wifi_auth_type0
AT+SSCFG=wifi_priv_mode1
AT+SSCFG=wifi_mode3
atampw
at+cfun=1
AP configuration AT command to be used
Security Mode WEP
WEP Key Length
128 bit (26 hex digits)
Authentication Open
Wep Key 1
123456789012345678
90123456
ie
at+sssidtxt=SPWF_AP
AT+SSCFG=wifi_wep_keys[0]12345678
901234567890123456
AT+SSCFG=wifi_wep_key_lens0D
AT+SSCFG=wifi_auth_type0
AT+SSCFG=wifi_priv_mode1
AT+SSCFG=wifi_mode3
atampw
at+cfun=1
Lab 8 Configuring the module in MiniAP mode (WEP Key)
Notes
bull ldquowifi_wep_key_lensrdquo variable values 05 and 0D
bull Itrsquos possible to enter any text string as WEP key It have to be converted into a
hexadecimal key using the ASCII values of the characters A maximum of 5 text
characters can be entered for 64 bit keys and a maximum of 13 characters for 128
bit keys
In this case it needs to manually convert your ASCII password to
HEX and complete the wifi_wep_keys[0] variable with the HEX
value
bull ie WEP key test1
ASCII to HEX 7465737431
So the AT command is AT+SSCFG=wifi_wep_keys[0]7465737431
93
Lab 8 Customizing the MiniAP address (optional)
Starting from FW 33 the module allows user to customize the IP address of the MiniAP
bull Set the SSID
bull Type AT+SSSIDTXT=SPWF_AP
bull Set the network privacy mode (0=OPEN or 1=WEP are supported)
bull Type AT+SSCFG=wifi_priv_mode0
bull Set the network mode (1 = STA 2 = IBSS 3 = MiniAP)
bull Type AT+SSCFG=wifi_mode3
bull Set the use_dhcp mode (0 = DHCP server off 1 = DHCP server on 2 = DHCP server on and customizable)
bull Type AT+SSCFG=ip_use_dhcp2
bull Set the MiniAP address
bull Type AT+SSCFG=ip_ipaddr19216801
bull Save the settings on the flash memory and reset the module
bull Type ATampW
bull Type AT+CFUN=1
94
Tera Term output
+WIND0Console active +WIND32WiFi Hardware Started +WIND26WiFi Started AP with network SPWF_AP +WIND24WiFi Up 19216801
All
Tip the MiniAP will assign sequential addresses to the client ie 1deg client 19216802 2deg client 19216803
Lab 8 Mini AP mode
bull Associate your end device to the
SPWF_AP network
bull Find the SPWF_AP network and connect
the end device to the module
95
SPWF_AP +WIND2890187C960D0B Associated +WIND29DHCP reply for 17218151290187C960D0B to 172181512 +WIND29DHCP reply for 17218151290187C960D0B to 172181512
All
Tera Term output
Lab 8 Mini AP mode
bull Open your web browser
bull In the address bar type captiveportalnet
96
SPWF_AP
Tip The Mini AP domain can be set using the variable ip_apdomainname The default value is ldquocaptiveportalnetrdquo
The Mini AP default homepage can be set using the variable ip_apredirect The default value is ldquofirstsethtmlrdquo
Tip If the AP domain name is not quickly opened itrsquos suggested to turn off an eventual proxy server (check the connection settings or browser preferences)
Lab 8 First Set Page
bull The first set page allows to configure the module in IDLE mode
STATION mode IBSS mode and MINI AP mode
97
Used for STA IBSS MINI AP
Mandatory for IDLE STA IBSS MINI AP
Used for STA IBSS (WEP) MINI AP (WEP)
Used for STA (if DHCP = OFF) IBSS
(mandatory) MINI AP (if DHCP = OFF)
Used for STA IBSS (mandatory DHCP = OFF) MINI AP
Used for STA (WEP key) IBSS (WEP) MINI AP (WEP)
Used for STA IBSS MINI AP
Lab 8 Mini AP mode
bull Set all the parameters required in order to enable the connection
between the module and a generic AP
ie AP configured in WPAWPA2 mode
bull MiniAP PassKey anonymous (by default)
bull SSID of the access point
bull Password of the access point
bull Authentication type of the access point
bull Use mode of the module
98
Tip The Mini AP PassKey can be set using the variable ldquouser_descrdquo The default value is ldquoanonymousrdquo
Note In order to manage non-ASCII chars the ip_use_decoder variable must be modified according as below at+sscfg=ip_use_decoder0 no decoding [default] at+sscfg=ip_use_decoder1 RAW decoding (the USER and PSK fields must be completed in HEX) at+sscfg=ip_use_decoder2 UTF-8 decoding at+sscfg=ip_use_decoder6 HTML entities decoding
Lab 8 Mini AP mode
bull Click on GO button and then send the
parameters confirming with OK
99
SPWF_AP
AP
SSID ciscosb2
Lab 8 Mini AP mode
bull The module will receive the parameters and will automatically
connect to the access point required
100
+WIND57Received SSID is ciscosb2 +WIND57Received PWD is +WIND57Received Auth mode is 2 +WIND57Received Mode is 1 +WIND2RESET +WIND1Poweron (--SPWF01S) +WIND13ST IWM Copyright (c) 2012-2013 STmicroelectronics +WIND3Watchdog Running +WIND0Console active +WIND46WPA Crunching PSK +WIND32WiFi Hardware Started +WIND21WiFi Scanning +WIND35WiFi Scan Complete (0x0) +WIND19WiFi Join 02621F518F0B +WIND25WiFi Association with ciscosb2 successful +WIND51WPA Handshake Complete +WIND24WiFi Up 1921681106
All
Tera Term output
ciscosb2
AP
Lab 8 Mini AP mode ndash RAW decoding example
101
Note In order to manage non-ASCII chars the ip_use_decoder variable must be modified according as below at+sscfg=ip_use_decoder0 no decoding [default] at+sscfg=ip_use_decoder1 RAW decoding (the USER and PSK fields must be completed in HEX) at+sscfg=ip_use_decoder2 UTF-8 decoding at+sscfg=ip_use_decoder6 HTML entities decoding
7177657261736466
AP SSIS
AP PSK
Proceed to the next LAB
Lab 9 Socket interface - MiniAP mode
bull Objective
bull Create a direct connection between
the module and an end device
bull Socket interface used in MiniAP
mode
bull Prerequisites
bull Work alone
103
Tera Term output
Lab 9 Configuring the module in MiniAP mode
The Mini AP mode (available starting from the SPWF01S-131115-de4568d-RELEASE) also allows to use the socket interface The procedure is the same as in Lab 7
In order to set the module in Mini AP mode the following parameters are needed
bull Set the SSID
bull Type AT+SSSIDTXT=SPWF_AP
bull Set the network privacy mode
bull Type AT+SSCFG=wifi_priv_mode0
bull Set the network mode (1 = STA 2 = IBSS 3 = MiniAP)
bull Type AT+SSCFG=wifi_mode3
104
OK
All
Lab 9 Configuring the module in MiniAP mode
bull Save the settings on the flash memory and reset the module
bull Type ATampW
bull Type AT+CFUN=1
105
+WIND0Console active +WIND32WiFi Hardware Started +WIND26WiFi Started AP with network SPWF_AP +WIND24WiFi Up 172181511
All
Tera Term output
SPWF_AP
Lab 9 Mini AP mode
bull Connect your PC to the SPWF_AP
network
bull Find the SPWF_AP network and connect
the end device to the module
106
SPWF_AP +WIND2890187C960D0B Associated +WIND29DHCP reply for 17218151290187C960D0B to 172181512 +WIND29DHCP reply for 17218151290187C960D0B to 172181512
All
Tera Term output
Lab 9 Open TCPUDP connection
As described in the Lab 7 the SOCKON command allows to
open a TCPUDP connection to a specified host
bull Sintax
bull AT+SSOCKON=lthostnamegtltportgtltprotocolgtind
bull Configuration parameters
bull lthostnamegt target host DNS resolvable name or IP address
bull ltportgt TCPUDP socket port
bull ltprotocolgt t for TCP socket u for UDP socket
bull ind indicate when data has arrived (optional) Up to 4 consecutive ldquoPending
datardquo message (without any AT+SSOCKR) are guaranteed It is
suggested to empty the buffer using the AT+SSOCKR command and
to avoid exceeding 4 indications
107
Lab 9 Open TCP connection
bull Open the TCP socket server (disable the firewall to properly
run it)
bull Folder hands_on_wifitcp socket serverserverexe
bull The TCP server listens for incoming connections on the port
32000 It sends back all data received
108
Lab 9 Open TCP connection
bull Type AT+SSOCKON=17218151232000tind
bull The client and the server use the socket identifier (ID)
displayed
109
ID 00 OK
All
Tera Term output
Lab 9 Write data to socket
The SOCKW command allows to write data to the specified ID
socket
This command accepts data after the ltcrgt at the end of the
command line
bull Sintax
bull AT+SSOCKW=ltIDgtltlengt
bull Configuration parameters
bull ltIDgt socket identifier
bull ltlengt data length to send
110
Lab 9 Write data to socket
bull Write data
bull Type AT+SSOCKW=0013
bull Type hello worldltCRgt
bull SPWF shows that there are ltpending datagt and their amount
111
+WIND55Pending Data013
All
Tera Term output
ID
Pending
bytes
Note the module is waiting 13 bytes to be written to the socket As soon as 13 bytes (or characters) are sent from the terminal the module is going to write them to the socket and will be ready to receive new commands
Lab 9 Read data from socket
The SOCKR command allows to read data from socket
bull Sintax
bull AT+SSOCKR=ltIDgtltlengt
bull Configuration parameters
bull ltIDgt socket identifier
bull ltlengt data length to read
112
Lab 9 Read data from socket
bull Read data
bull Type AT+SSOCKR=0013
113
hello world OK
All
Tera Term output
Lab 9 Close socket
The SOCKC command allows to close socket
bull Sintax
bull AT+SSOCKC=ltIDgt
bull Configuration parameters
bull ltIDgt socket identifier
114
Tera Term output
Lab 9 Close socket
bull Close socket
bull Type AT+SSOCKC=00
115
OK
All
Proceed to the next LAB
Lab 10 Web server - MiniAP mode
bull Objective
bull Create a direct connection between
the module and an end device
bull Web server used in MiniAP mode
bull Prerequisites
bull Work alone
117
Tera Term output
Lab 10 Configuring the module in MiniAP mode
The Mini AP mode (available starting from the SPWF01S-131115-de4568d-RELEASE) also allows to use the module file system (both RAM and IntExt FLASH)
In order to set the module in Mini AP mode the following parameters are needed
bull Set the SSID
bull Type AT+SSSIDTXT=SPWF_AP
bull Set the network privacy mode
bull Type AT+SSCFG=wifi_priv_mode0
bull Set the network mode (1 = STA 2 = IBSS 3 = MiniAP)
bull Type AT+SSCFG=wifi_mode3
118
OK
All
Lab 10 Configuring the module in MiniAP mode
bull Save the settings on the flash memory and reset the module
bull Type ATampW
bull Type AT+CFUN=1
119
+WIND0Console active +WIND32WiFi Hardware Started +WIND26WiFi Started AP with network SPWF_AP +WIND24WiFi Up 172181511
All
Tera Term output
SPWF_AP
Lab 10 Mini AP mode
bull Connect your PC to the SPWF_AP
network
bull Find the SPWF_AP network and connect
the end device to the module
120
SPWF_AP +WIND2890187C960D0B Associated +WIND29DHCP reply for 17218151290187C960D0B to 172181512 +WIND29DHCP reply for 17218151290187C960D0B to 172181512
All
Tera Term output
Lab 10 Access to Web server - Mini AP mode
bull Open your web browser
bull In the address bar type
captiveportalnetindexhtml
bull The SPWF01S homepage will be
displayed
121
SPWF_AP Tip The Mini AP domain can be set using the variable ip_apdomainname The default value is ldquocaptiveportalnetrdquo
Lab 10 Access to Web server - Mini AP mode
bull Open the SPWF01S Device Status
bull click on the highlighted link
bull The SPWF01S Device Status will be
displayed
122
SPWF_AP Tip The Mini AP domain can be set using the variable ip_apdomainname The default value is ldquocaptiveportalnetrdquo
The Mini AP default homepage can be set using the variable ip_apredirect The default value is ldquofirstsethtmlrdquo
Proceed to the next LAB
Lab 11 Remotely control - GPIOs
bull Objective
bull write remotely a GPIO
bull configure remotely a GPIO
bull read remotely a GPIO
bull Prerequisites
bull module connected to the AP or
module configured in MiniAP mode
124
Lab 11 Remotely control - GPIO
This feature allows to remotely write configure and read a GPIO
The module should be connected to the AP (as shown in Lab 3) or
should be configured in Mini AP mode (as shown in Lab 8)
The external client have to open the remotehtml page stored in the
module
125
ENG-WPA AP
SPWF_AP
miniAP
Tera Term output
Lab 11 Joining a network
In order to be connected to an available Wifi network the AP parameters setting is needed
bull Set the SSID
bull Type AT+SSSIDTXT=ENG-WPA
bull Set the password
bull Type AT+SSCFG=wifi_wpa_psk_texthelloworld
bull Set the network privacy mode (0=none 1=WEP 2=WPA-Personal (TKIPAES) or WPA2-Personal (TKIPAES))
bull Type AT+SSCFG=wifi_priv_mode2
bull NB wifi_auth_type must be set to 0 AT+SSCFG=wifi_auth_type0
bull Set the network mode (1 = STA 2 = IBSS 3 = MiniAP)
bull Type AT+SSCFG=wifi_mode1
126
OK
All
Lab 11 Joining a network
bull Save the settings on the flash memory and reset the module
bull Type ATampW
bull Type AT+CFUN=1
127
+WIND0Console active +WIND46WPA Crunching PSK +WIND32WiFi Hardware Started +WIND21WiFi Scanning +WIND35WiFi Scan Complete (0x0) +WIND19WiFi Join 14D64D243600 +WIND25WiFi Association with ENG-WPA successful +WIND51WPA Handshake Complete +WIND24WiFi Up 19216801xx
All
ENG-WPA AP
Tera Term output
Lab 11 Remotely control in MiniAP mode - GPIO
bull Open your web browser
bull In the address bar type
192168x1xxremotehtml
128
ENG-WPA
AP
Lab 11 Remotely control in MiniAP mode - GPIO
bull Try to write the GPIO14 connected to the LED3 (check if the
LED3 is mounted on your EVAL BOARD otherwise can be used
the GPIO13)
bull Click on the laquoGOraquo button
and LED3 will switch on
129
ENG-WPA
AP
Proceed to the next LAB
Lab 12 Input demo
bull Objective
bull Send a message from the server (wifi
module) to an external client connected
to the same network
bull Prerequisites
bull module connected to the AP or module
configured in MiniAP mode
131
Lab 12 Input demo
The module provides some DEMOs to show the interaction between
the module and an external client connected to the same network
The module should be connected to the AP (as shown in Lab 3) or
should be configured in Mini AP mode (as shown in Lab 8)
In order to run this demo the client have to open the
input_demoshtml page stored in the module
132
ENG-WPA AP
SPWF_AP
miniAP
Tera Term output
Lab 12 Joining a network
In order to be connected to an available Wifi network the AP parameters setting is needed
bull Set the SSID
bull Type AT+SSSIDTXT=ENG-WPA
bull Set the password
bull Type AT+SSCFG=wifi_wpa_psk_texthelloworld
bull Set the network privacy mode (0=none 1=WEP 2=WPA-Personal (TKIPAES) or WPA2-Personal (TKIPAES))
bull Type AT+SSCFG=wifi_priv_mode2
bull NB wifi_auth_type must be set to 0 AT+SSCFG=wifi_auth_type0
bull Set the network mode (1 = STA 2 = IBSS 3 = MiniAP)
bull Type AT+SSCFG=wifi_mode1
133
OK
All
Lab 12 Joining a network
bull Save the settings on the flash memory and reset the module
bull Type ATampW
bull Type AT+CFUN=1
134
+WIND0Console active +WIND46WPA Crunching PSK +WIND32WiFi Hardware Started +WIND21WiFi Scanning +WIND35WiFi Scan Complete (0x0) +WIND19WiFi Join 14D64D243600 +WIND25WiFi Association with ENG-WPA successful +WIND51WPA Handshake Complete +WIND24WiFi Up 19216801xx
All
ENG-WPA AP
Tera Term output
Lab 12 Input demo
bull Open your web browser
bull In the address bar type
192168x1xxinput_demoshtml
bull Insert the message to the client
ie type laquotestraquo (suggested ndash copy
the string and paste it in the
terminal) and then send a carriage
return
135
VERY IMPORTANT
Both client and server are pending (2 sec) after the page
request If no message is sent from the module a timeout
mechanism will be triggered
The server shows the ldquo+WIND56 messagerdquo and it will
wait for a string to be inserted and terminated by [Cr] ldquo+WIND56Insert message to clientdrdquo d is the Nth input SSI into html page (please refer to CGIampSSI Application Notes for details)
Lab 12 Input demo
bull The module receives the HTML
page containing the string inserted
server-side
bull Below this string there are two
buttons to try again the demo or to
return to the homepage
136
Proceed to the next LAB
Lab 13 Socket Server functionality
bull Objective
bull Configure a Server Listening Port
bull Open a TCP connection from a
socket client to the module
bull Data modeCommand Mode usage
bull Prerequisites
bull module connected to the AP or
module configured in MiniAP mode
bull PC to be used as socket client
138
TCP socket
Socket
Server
Socket
Client
Lab 13 Socket Server
This feature allows to enable the socket server mode The module
can be able to listen for an incoming connection on the specified port
The module should be connected to the AP (as shown in Lab 3) or
should be configured in Mini AP mode (as shown in Lab 8)
Please refer to ldquoSocket Server Application Notesrdquo for more details
139
ENG-WPA AP
SPWF_AP
miniAP
Tera Term output
Lab 13 Joining a network
In order to be connected to an available Wifi network the AP parameters setting is needed
bull Set the SSID
bull Type AT+SSSIDTXT=ENG-WPA
bull Set the password
bull Type AT+SSCFG=wifi_wpa_psk_texthelloworld
bull Set the network privacy mode (0=none 1=WEP 2=WPA-Personal (TKIPAES) or WPA2-Personal (TKIPAES))
bull Type AT+SSCFG=wifi_priv_mode2
bull NB wifi_auth_type must be set to 0 AT+SSCFG=wifi_auth_type0
bull Set the network mode (1 = STA 2 = IBSS 3 = MiniAP)
bull Type AT+SSCFG=wifi_mode1
140
OK
All
Lab 13 Joining a network
bull Save the settings on the flash memory and reset the module
bull Type ATampW
bull Type AT+CFUN=1
141
+WIND0Console active +WIND46WPA Crunching PSK +WIND32WiFi Hardware Started +WIND21WiFi Scanning +WIND35WiFi Scan Complete (0x0) +WIND19WiFi Join 14D64D243600 +WIND25WiFi Association with ENG-WPA successful +WIND51WPA Handshake Complete +WIND24WiFi Up 19216801xx
All
ENG-WPA AP
Tera Term output
Lab 13 Socket Server
bull Socket server turn ON the TCP Socket Server (user must
specify the server listening port)
bull Type AT+SSOCKD=32000 (AT+SOCKD=32000u for UDP socket server)
bull Check the status of the socket server
bull Type AT+SSTS=ip_sockd_port
142
ENG-WPA
AP
Tera Term output
OK ip_sockd_port = 32000 OK
All
Tip you can Turn OFF the Socket Server using a server listening port = 0 (type AT+SSOCKD=0)
Lab 13 Socket Server
bull Socket client can be used a simple socket client in order to test the communication
(SocketTest ndash available on httpsourceforgenetprojectssockettest)
143
ENG-WPA
AP
Lab 13 Socket Server
bull Socket client
bull Insert the modulersquos IP Address and the port
bull Click on Connect button
144
Tera Term output
+WIND61Incoming Socket Client1921681102 +WIND60Now in Data Mode
All
Lab 13 Socket Server
bull The module (socket server) enters in data mode and a bidirectional channel is
created to allow exchanging data with the socket client
bull Try to send and receive data from the module
145
Tera Term output
test_1
All
Lab 13 Socket Server ndash escape sequence
bull From Data Mode to Command Mode
bull Configuration variable used escape_seq (default is ldquoat+srdquo case sensitive
suggested to be sent by the local host in a single complete packet with no CR or
LF in the sequence)
bull Type at+s
bull Now itrsquos possible to send AT commands while the socket connection
is still active
146
Tera Term output
+WIND59Back to Command Mode
All
Tip During the Command Mode you cannot send data to client but can receive data from it Every data chunk generates an URC (+WIND64Sockd Pending Data) with limit to 4 (x730 bytes) This is the max number of pending messages From the 5th chunk on messages are lost
Lab 13 Socket Server ndash return to data mode
bull From Command Mode to Data Mode
bull While in Command Mode
bull Type AT+S (this is an AT command AT+S must be followed by ltCRgt)
bull The module returns in data mode
147
ENG-WPA
AP
Tera Term output
+WIND60Now in Data Mode
All
Lab 13 Socket Server ndash turn off
bull Turn OFF the Socket Server
bull Type at+s (to enter in command mode)
bull Type AT+SSOCKD=0
148
ENG-WPA
AP
Tera Term output
OK +WIND62Socket Client Gone1921681102
All
Proceed to the next LAB
Lab 14 Low power modes
bull Objective
bull Practice with Radio Power Save
bull Sleep Mode
bull Standby Mode
bull Prerequisites
bull module connected to the AP
150
Lab 14 Low power modes
This feature allows to enable the low power states
The module supports the ldquoRadio Power Saverdquo mode the ldquoSleeprdquo
mode and the ldquoStandbyrdquo mode
The module should be connected to the AP (as shown in Lab 3) in
order to use the ldquoRadio Power Saverdquo mode
Please refer to ldquoSPWF01S Power Management Application Notesrdquo for
more details
151
ENG-WPA AP
Low Power
Tera Term output
Lab 14 Joining a network
In order to be connected to an available Wifi network the AP parameters setting is needed
bull Set the SSID
bull Type AT+SSSIDTXT=ENG-WPA
bull Set the password
bull Type AT+SSCFG=wifi_wpa_psk_texthelloworld
bull Set the network privacy mode (0=none 1=WEP 2=WPA-Personal (TKIPAES) or WPA2-Personal (TKIPAES))
bull Type AT+SSCFG=wifi_priv_mode2
bull NB wifi_auth_type must be set to 0 AT+SSCFG=wifi_auth_type0
bull Set the network mode (1 = STA 2 = IBSS 3 = MiniAP)
bull Type AT+SSCFG=wifi_mode1
152
OK
All
Lab 14 Joining a network
bull Save the settings on the flash memory and reset the module
bull Type ATampW
bull Type AT+CFUN=1
153
+WIND0Console active +WIND46WPA Crunching PSK +WIND32WiFi Hardware Started +WIND21WiFi Scanning +WIND35WiFi Scan Complete (0x0) +WIND19WiFi Join 14D64D243600 +WIND25WiFi Association with ENG-WPA successful +WIND51WPA Handshake Complete +WIND24WiFi Up 19216801xx
All
Tera Term output
ENG-WPA AP
Low Power
Lab 14 Low power modes ndash Power Save 154
Module
Power State STM32 WLAN
Standby Standby Standby
Sleep Stop PS
Power Save Run PS or Fast-PS
Active Rx Run Rx Idle Rx Active
Active Tx Run Tx Active
Lab 14 Low power modes ndash Power Save
bull By default the module starts in ACTIVE mode
bull Enable the Power Save Mode
bull Type at+sscfg=wifi_powersave1 (ldquowifi_powersave2rdquo enables the Fast-PS mode)
bull Enable the doze operational mode
bull Type at+sscfg=wifi_operational_mode11 (ldquowifi_operational_mode12rdquo enables the quiescent mode)
bull Choose the wake up mode
1 Wake up every n beacon (specified in the wifi_beacon_wakeup variable)
bull Type at+sscfg=wifi_listen_interval0
bull Type at+sscfg=wifi_beacon_wakeup1
OR
2 Wake up every n beacon adaptively (specified in the wifi_beacon_wakeup variable)
bull Type at+sscfg=wifi_listen_interval1
bull Type at+sscfg=wifi_beacon_wakeup1
155
Tip The Wifi Power Save (wifi_powersave1) can also be quickly enabled using the command AT+CFUN=2
Lab 14 Low power modes ndash Power Save
bull Save the settings on the flash memory and reset the module
bull Type ATampW
bull Type AT+CFUN=1
bull The WIND66 message related to Low Power Mode will be
displayed
156
+WIND1Poweron (--SPWF01S) +WIND13ST SPWF01S IWM Copyright (c) 2012-2014 STMicroelectronics Inc All rights Reserved +WIND3Watchdog Running +WIND0Console active +WIND32WiFi Hardware Started +WIND21WiFi Scanning +WIND35WiFi Scan Complete (0x0) +WIND19WiFi Join 02621F518F0B +WIND25WiFi Association with IoT successful +WIND51WPA Handshake Complete +WIND24WiFi Up 1921681104 +WIND66Low Power mode1
All
Tera Term output
ENG-WPA AP
Low Power
Lab 14 Low power modes ndash Sleep Mode 157
Module
Power State STM32 WLAN
Standby Standby Standby
Sleep Stop PS or Fast-PS
Power Save Run PS or Fast-PS
Active Rx Run Rx Idle Rx Active
Active Tx Run Tx Active
Lab 14 Low power modes ndash Sleep Mode
bull In the Sleep Mode the core STM32 is stopped
bull Enable the Sleep Mode
bull Type at+sscfg=sleep_enabled1
bull Enable the Power Save Mode
bull Type at+sscfg=wifi_powersave1 (ldquowifi_powersave2rdquo enables the Fast-PS mode)
bull Enable the doze operational mode
bull Type at+sscfg=wifi_operational_mode11 (ldquowifi_operational_mode12rdquo enables the quiescent mode)
bull Choose the wake up mode
1 Wake up every n beacon (specified in the wifi_beacon_wakeup variable)
bull Type at+sscfg=wifi_listen_interval0
bull Type at+sscfg=wifi_beacon_wakeup1
OR
2 Wake up every n beacon adaptively (specified in the wifi_beacon_wakeup variable)
bull Type at+sscfg=wifi_listen_interval1
bull Type at+sscfg=wifi_beacon_wakeup1
158
Tip The Wifi Sleep Mode (and wifi_powersave1) can also be quickly enabled using the command AT+CFUN=3
Lab 14 Low power modes ndash Sleep Mode
bull Save the settings on the flash memory and reset the module
bull Type ATampW
bull Type AT+CFUN=1
bull The WIND69 message related to Sleep Mode will be displayed
159
+WIND1Poweron (--SPWF01S) +WIND13ST SPWF01S IWM Copyright (c) 2012-2014 STMicroelectronics Inc All rights Reserved +WIND3Watchdog Running +WIND0Console active +WIND32WiFi Hardware Started +WIND21WiFi Scanning +WIND35WiFi Scan Complete (0x0) +WIND19WiFi Join 02621F518F0B +WIND25WiFi Association with IoT successful +WIND51WPA Handshake Complete +WIND24WiFi Up 1921681104 +WIND66Low Power mode1 +WIND69Going into DeepSleep
All
Tera Term output
ENG-WPA AP
Low Power
Lab 14 Low power modes ndash Sleep Mode
bull Wake STM32 up using the GPIO6
bull Put the GPIO6 to 25V (jumper on JP2 as in
the picture)
bull The WIND messages will be displayed
160
+WIND70Resuming from DeepSleep +WIND53Wakeup (GPIO6 High)
All
Tera Term output
Lab 14 Low power modes ndash Sleep Mode
bull Put STM32 in sleep mode using the
GPIO6
bull Go back the GPIO6 floating (remove jumper
- as default)
bull The WIND69 message will be
displayed
161
+WIND69Going into DeepSleep
All
Tera Term output
Lab 14 Low power modes ndash Sleep Mode
bull Wake STM32 up using the remote
page
bull Connect a device to the same modulersquos
network
bull Open the following link
http[module_IP_address]remotehtml
bull Select ldquoWakerdquo and click on ldquoGordquo button
to wake up the module
bull The WIND message will be displayed
162
+WIND70Resuming from DeepSleep
All
Tera Term output
Lab 14 Low power modes ndash Sleep Mode
bull Put STM32 in sleep mode using the
remote page
bull Connect a device to the same modulersquos
network
bull Open the following link
http[module_IP_address]remotehtml
bull Select ldquoSleeprdquo and click on ldquoGordquo button
to put the module in sleep mode
bull The WIND message will be displayed
163
+WIND69Going into DeepSleep
All
Tera Term output
Lab 14 Low power modes ndash Standby Mode 164
Module
Power State STM32 WLAN
Standby Standby Standby
Sleep Stop PS or Fast-PS
Power Save Run PS or Fast-PS
Active Rx Run Rx Idle Rx Active
Active Tx Run Tx Active
Lab 14 Low power modes ndash Standby Mode
bull During the Standby Mode both the STM32 and the Radio will be
put in standby mode The standby mode allows to achieve the
lowest power consumption
bull Enable the Standby Mode
bull Type at+sscfg=sleep_enabled0 (Sleep mode must be disabled)
bull Type at+sscfg=standby_enabled1
bull Please be sure that GPIO6 isnrsquot forced high
bull Set the standby time to wake up via RTC alarm
bull Type at+sscfg=standby_time15
165
Tip The Wifi Standby Mode can also be quickly enabled using the command AT+CFUN=4
Lab 14 Low power modes ndash Standby Mode
bull Save the settings on the flash
memory and reset the module
bull Type ATampW
bull Type AT+CFUN=1
bull After 15 seconds the module will be
rebooted and will return in the
ACTIVE state
166
+WIND0Console active +WIND32WiFi Hardware Started +WIND38WiFi Powered Down +WIND67Going into Standby15 +WIND68Resuming from Standby +WIND1Poweron (--SPWF01S) +WIND13ST SPWF01S IWM Copyright (c) 2012-2014 STMicroelectronics Inc All rights Reserved +WIND3Watchdog Running +WIND0Console active +WIND32WiFi Hardware Started +WIND21WiFi Scanning +WIND35WiFi Scan Complete (0x0) +WIND19WiFi Join02621F518F0B +WIND25WiFi Association with IoT successful +WIND51WPA Handshake Complete +WIND24WiFi Up1921681113
All
Tera Term output
Lab 14 Low power modes ndash Standby Mode
bull Wake up the module using the GPIO6
bull Enable the Standby Mode
bull Type at+sscfg=sleep_enabled0 (make sure that
Sleep mode is disabled)
bull Type at+sscfg=standby_enabled1
bull Type ATampW
bull Type AT+CFUN=1
bull Put the GPIO6 to 25V to wake up the module
bull The WIND message will be displayed and
the module will return in ACTIVE state
167
+WIND68Resuming from Standby +WIND1Poweron (--SPWF01S) helliphelliphellip
All
Tera Term output
Proceed to the next LAB
Lab 15 STAMINI AP switcher
bull Objective
bull HW ldquoSTA to MiniAPrdquo switcher
bull Prerequisites
bull Work alone
169
Lab 15 STAMINI AP switcher
This feature allows to force the module in Mini AP mode starting from
a preexistent state
ldquoRecovery Moderdquo this functionality could be useful to lead the module
in a known state and to reconfigure it (ie using the firstset page)
The GPIO7 will be used to drive this feature
170
Lab 15 STAMINI AP switcher
bull Press and hold the SW2 button on the
EVAL and then perform a reset (HW reset
via SW1 button or SW reset via AT
command)
bull Release the SW2 button
bull The MiniAP mode will be started and the
module is discoverable with the following
SSID
bull iwm-XX-YY-ZZ where XX-YY-ZZ are the last
six digits of modulersquos MAC ADDRESS
171
+WIND2Reset +WIND1Poweron (--SPWF01S) +WIND13ST SPWF01S IWM Copyright (c) 2012-2014 STMicroelectronics Inc All rights Reserved +WIND39HW in miniAP mode (GPIO7 Low) +WIND0Console active +WIND3Watchdog Running +WIND32WiFi Hardware Started +WIND26WiFi Started AP +WIND24WiFi Up172312551
All
Tera Term output
Tip To exit from ldquominiAP mode via GPIO7rdquo perform a modulersquos reset
Proceed to the next LAB
Lab 16 IBSS connection
bull Objective
bull Create an IBSS network
bull Prerequisites
bull Work alone
173
Lab 16 Create an IBSS network
In an IBSS network the SSID is chosen by the client device that
starts the network
Module settings to create an IBSS network
bull Set the IBSS SSID
bull Type AT+SSSIDTXT=ADHOC
bull Set the network privacy mode (0=OPEN or 1=WEP are supported)
bull Type AT+SSCFG=wifi_priv_mode0
bull Set the network mode (2 = IBSS)
bull Type AT+SSCFG=wifi_mode2
174
OK
All
Tera Term output
Lab 16 Create an IBSS network
bull Set IP address IP default gateway IP DNS and IP netmask
bull Type AT+SSCFG=ip_ipaddr192168y1xx
bull Type AT+SSCFG=ip_gw192168y1
bull Type AT+SSCFG=ip_dns192168y1
bull Type AT+SSCFG=ip_netmask2552552550
bull Turn off the DHCP
bull Type AT+SSCFG=ip_use_dhcp0
175
OK
All
Tera Term output
Lab 16 Create an IBSS network
bull Save the settings on the flash memory and reset the module
bull Type ATampW
bull Type AT+CFUN=1
176
+WIND0Console active +WIND32WiFi Hardware Started +WIND21WiFi Scanning +WIND35WiFi Scan Complete (0x0) +WIND19WiFi Join EE33CE002418 +WIND25WiFi Association with ADHOC successful +WIND51WiFi Handshake Complete +WIND24WiFi Up 19216813
All
AD-HOC
Tera Term output
Lab 16 Create an IBSS network
bull Associate the iOS device with the
ADHOC network (iOS gt 8 could not
support the IBSS mode)
177
AD-HOC
Tip manual configuration of static TCPIPv4 parameters is suggested using a PC Ie PC TCPIPv4 properties
Lab 16 Create an IBSS network
bull Find your IP address
bull Type AT+SSTS
bull Open Safari web browser
bull In the address bar type
ltSPWF IP addressgtindexhtml
bull Type 192168y1xxindexhtml
178
AD-HOC
THANK YOU

Lab 1 Configuring the UART X-NUCLEO-IDW01M1 amp X-CUBE-WIFI1
bull Open Tera Term
bull Command Mode
bull Type AT followed by a carriage return
(CR)
16
OK
All
Tera Term output
You are ready to use your Wi-Fi
EVAL board
Lab 2 Set the SPWF variables
bull Objective bull Run a command
bull Get the default configuration dump
bull Set host name
bull Set static IP parameters
bull Reset the module
bull Prerequisites bull Work alone
18
Lab 2 Run a command
Run a command - Syntax
- ATampx ltCRgt
- AT+S[Command] ltCRgt
Response - Syntax
xxxxxxxx
19
- OK
- Command output followed by OK
- ERROR Command not found
- ERROR Unrecognized key
AT Command Prefix
Not case sensitive
Lab 2 Set the SPWF variables
bull Get the default configuration dump
bull Type ATampV
bull Get a variable value
bull Type AT+SGCFG=console1_speed
Config dump frame
20
Variable
Name
Variable
Value
How to change the variable value
1 AT+SSCFG=[var name]xxxx
2 ATampW
Lab 2 Set the SPWF variables
bull Get the default configuration dump
bull Set host name
bull Type AT+SSCFG=ip_hostnamexxxxxxxx
21
Up to 31 characters (case sensitive) ldquospacebarrdquo is allowed
OK
All
Tera Term output
Lab 2 Set the SPWF variables
bull Get the default configuration dump
bull Set host name
bull Set IP address IP default gateway IP DNS and IP netmask (for
static usage)
bull Type AT+SSCFG=ip_ipaddr19216801xx
bull Type AT+SSCFG=ip_gw19216801
bull Type AT+SSCFG=ip_dns19216801
bull Type AT+SSCFG=ip_netmask2552552550
22
OK
All
Tera Term output
Tera Term output
Lab 2 Set the SPWF variables
bull Get the default configuration dump
bull Set host name
bull Set IP address IP default gateway IP
DNS and IP netmask (DHCP off)
bull Save settings on the flash memory
(mandatory after a variable change)
bull Type ATampW
bull Reset the module
bull Type AT+CFUN=1
23
+WIND21WiFi Scanning +WIND35WiFi Scan Complete (0x0)
All
Lab 2 Set the SPWF variables
bull Get the default configuration dump
bull Set host name
bull Set IP address IP default gateway IP
DNS and IP netmask (DHCP off)
bull Save settings on the flash memory
(mandatory after a variable change)
and reset the module
bull Check the new configuration dump
bull Type ATampV
24
Proceed to the next LAB
Lab 2a FOTA update
bull Objective
bull Upgrade the FW using the OTA file
bull Prerequisites
bull OTA file (provided in the SPWF01S FW
package)
bull External web server (ie Apache web
server running on PC)
26
Lab 2a FOTA update 27
The SPWF01Sx11 module (with external flash on board) allows
performing a Firmware Over-the-air update via a single HTTP GET
The SPWF01S will validate the firmware image it downloads load it
into a staging area then prompt the user to issue a reset command in
order to complete the update
Lab 2a FOTA update
The Apache Web Server will be used in this LAB
(Apache Web Server is available at this link
httparchiveapacheorgdisthttpdbinarieswin32httpd-2225-win32-x86-openssl-098ymsi)
Note please check that the local firewall is disabled or properly set It can
block the connection from module to Apache
bull Copy the OTA file (ie SPWF01S-xxxxxx-yyyyyyy-
RELEASE-mainota) in the Apache 22 htdocs folder
28
Lab 2a FOTA update
The FWUPDATE command allows to perform a Firmware Over-the-
air update via a single HTTP GET
bull Sintax
bull AT+SFWUPDATE=lthostnamegtltpathgtltportgt
bull Configuration parameters
bull lthostnamegt Target host DNS resolvable name or IP address
bull ltpathampqueryoptsgt Document path and optional query arguments
bull ltportgt Target host port
29
Lab 2a FOTA update
bull The module and the Apache Web server must be connected to the same network
bull In Tera Term type AT+SFWUPDATE=[Apache IP address][ota_fileota]
ie type AT+SFWUPDATE=192168xyyySPWF01S-150410-c2e37a3-RELEASE-
mainota
bull Reset the module to apply the new FW
bull Type AT+CFUN=1
bull Restore factory default settings (mandatory)
bull Type ATampF
30
Staging FW update for SPWF01SX11 version 1203-120918_01 FW length 276824 0x00002800 (offset 0x00000000 block len 4096) Write len 4096 -gt 0x0 Write len 4096 -gt 0x1000 (note - deleted extra output for clarity) Write len 4096 -gt 0x42000 Write len 2476 -gt 0x43000 (final) Wrote 276904 bytes Complete Update will be applied on next reboot (at+cfun=1)
All Tera Term output
Proceed to the next LAB
Lab 3 Access point connection
bull Objective
bull Scan for available networks
bull Join a network
bull Check the statusstatistics variables
bull Prerequisites
bull USB dongle and computer are set
up as described in Lab 2
bull Work alone
32
Lab 3 Scan for available networks
The SCAN command performs an immediate scan for available
networks Infrastructure (AP) and IBSS (Ad-Hoc) networks are both
reported Network type Channel BSSID SSID Signal strength (RSSI)
and 80211 capabilities are all reported
bull Type AT+SSCAN
bull Scan syntax AT+SSCAN [=lta|pgt[ltr|s|mgt[ltfnamegt]]] -- Perform a [activepassive]
network scan [filter offfilter on SSIDfilter on MAC] [print to file])
33
FOUND BSS 14D64D243600 CHAN 01 RSSI -28 SSID ENG-WPA CAPS 0431 WPA WPA2 FOUND BSS 00180A31EA78 CHAN 11 RSSI -82 SSID ZyckoItalyWireless CAPS 0531 WPA WPA2 FOUND BSS 06180A31E7E2 CHAN 11 RSSI -85 SSID ZyckoItalyGuest CAPS 0531 WPA WPA2 OK
All
Network type
Network MAC
Network
channel Network
RSSI
Network
SSID Network
capabilities
Tera Term output
Tera Term output
Lab 3 Joining a network (WPA Key)
In order to be connected to an available Wifi network the AP parameters setting is needed
bull Set the SSID
bull Type AT+SSSIDTXT=ENG-WPA
bull Set the password
bull Type AT+SSCFG=wifi_wpa_psk_texthelloworld
bull Set the network privacy mode (0=none 1=WEP 2=WPA-Personal (TKIPAES) or WPA2-Personal (TKIPAES))
bull Type AT+SSCFG=wifi_priv_mode2
bull NB wifi_auth_type must be set to 0 AT+SSCFG=wifi_auth_type0
bull Set the network mode (1 = STA 2 = IBSS 3 = MiniAP)
bull Type AT+SSCFG=wifi_mode1
34
OK
All
Lab 3 Joining a network (WPA Key)
bull Save the settings on the flash memory and reset the module
bull Type ATampW
bull Type AT+CFUN=1
35
+WIND0Console active +WIND46WPA Crunching PSK +WIND32WiFi Hardware Started +WIND21WiFi Scanning +WIND35WiFi Scan Complete (0x0) +WIND19WiFi Join 14D64D243600 +WIND25WiFi Association with ENG-WPA successful +WIND51WPA Handshake Complete +WIND24WiFi Up 19216801xx
All
ENG-WPA AP
Tera Term output
Lab 3 Joining a network (WPA Key)
bull Check the statusstatistics variables
bull Type AT+SSTS
bull Send a ping to the gateway (ip_gw)
bull Type AT+SPING=19216801
36
ENG-WPA AP
Tera Term output
OK
All
Lab 3 Joining a network (WEP Key)
Configure the module using the WEP key (4 possible combinations
available)
Sample table
37
AP configuration AT command to be used
Security Mode WEP
WEP Key Length 64 bit
(10 hex digits)
Authentication Open
Wep Key 1 1234567890
ie
at+sssidtxt=ENG-WEP
AT+SSCFG=wifi_wep_keys[0]1234567890
AT+SSCFG=wifi_wep_key_lens05
AT+SSCFG=wifi_auth_type0
AT+SSCFG=wifi_priv_mode1
AT+SSCFG=wifi_mode1
atampw
at+cfun=1
Security Mode WEP
WEP Key Length 64 bit
(10 hex digits)
Authentication Shared
Key
Wep Key 1 1234567890
ie
at+sssidtxt=ENG-WEP
AT+SSCFG=wifi_wep_keys[0]1234567890
AT+SSCFG=wifi_wep_key_lens05
AT+SSCFG=wifi_auth_type1
AT+SSCFG=wifi_priv_mode1
AT+SSCFG=wifi_mode1
atampw
at+cfun=1
AP configuration AT command to be used
Security Mode WEP
WEP Key Length
128 bit (26 hex digits)
Authentication Open
Wep Key 1
123456789012345678
90123456
ie
at+sssidtxt=ENG-WEP
AT+SSCFG=wifi_wep_keys[0]12345678
901234567890123456
AT+SSCFG=wifi_wep_key_lens0D
AT+SSCFG=wifi_auth_type0
AT+SSCFG=wifi_priv_mode1
AT+SSCFG=wifi_mode1
atampw
at+cfun=1
Security Mode WEP
WEP Key Length
128 bit (26 hex digits)
Authentication
Shared Key
Wep Key 1
123456789012345678
90123456
ie
at+sssidtxt=ENG-WEP
AT+SSCFG=wifi_wep_keys[0]12345678
901234567890123456
AT+SSCFG=wifi_wep_key_lens0D
AT+SSCFG=wifi_auth_type1
AT+SSCFG=wifi_priv_mode1
AT+SSCFG=wifi_mode1
atampw
at+cfun=1
Lab 3 Joining a network (WEP Key)
Notes
bull ldquowifi_wep_key_lensrdquo variable values 05 and 0D
bull Itrsquos possible to enter any text string into a WEP key box in the AP in which case it will be converted into a hexadecimal key using the ASCII values of the characters A maximum of 5 text characters can be entered for 64 bit keys and a maximum of 13 characters for 128 bit keys
In this case it needs to manually convert your ASCII password to HEX and complete the wifi_wep_keys[0] variable with the HEX value bull ie AP WEP key test1 ASCII to HEX 7465737431 So the AT command is AT+SSCFG=wifi_wep_keys[0]7465737431
bull Some APs allow user to insert a passphrase and then the AP automatically generates the hex keys In this scenario user have not to perform the ASCII to HEX conversion because the AP already gives it the hex value
38
Proceed to the next LAB
Lab 4 Web client mode
bull Objective
bull HTTP GET
bull HTTP POST
bull PUSH DATA ON SERIAL PORT
bull Prerequisites
bull USB dongle and computer are set up
as described in Lab 2
bull Work in couple
40
Lab 4 HTTP GET
The HTTP GET feature performs a single HTTP request to the specified
host and path The server response is printed on the UART enabled
bull Sintax
bull AT+SHTTPGET=lthostnamegtltpathgt[ltportgt]
bull Configuration parameters
bull lthostnamegt target host DNS resolvable name or IP address
bull ltpathgt document path
bull ltportgt target port
41
Lab 4 HTTP GET
bull Device A performs an HTTP GET to the Device B
bull Device A
AT+SHTTPGET=ltDevice B IP addrgtindexhtml
Type AT+SHTTPGET=19216801xxindexhtml
42
GET indexhtml HTTP10 User-Agent SPWF01S helliphelliphellip lth1gtST SPWF01Sx11 WiFi Modulelth1gt ltpgt Welcome to the ST SPWF01Sx11 WiFi Module ltpgt ltpgt This page was delivered from the SPWF01Sx11 internal HTTP server hellip lta href=statusshtmlgtSPWF01Sx11 Status Pageltagt ltpgt ltbodygt lthtmlgt OK
Device A
A B
Tera Term output
Lab 4 HTTP POST
The HTTP POST performs a post of the given path to the specified host The module can be only used as an HTTP POST client
bull Sintax
bull AT+SHTTPPOST =lthostnamegtltpathampqueryoptsgtltformcontentgt[ltportgt]
bull Configuration parameters
bull lthostnamegt target host DNS resolvable name or IP address
bull ltpathampqueryoptsgt document path
bull ltformcontentgt form to be submitted
bull ltportgt target port
43
Lab 4 HTTP POST
bull The SPWF01S performs an HTTP POST to an HTTP Post Test Server
bull Type
at+shttppost=posttestservercompostphpname=demoampemail=mymailampsubjec
t=subjampbody=message
bull The HTTP Post Test Server replies as
displayed in the Tera Term output if the HTTP
POST successfully
44
HTTP11 200 OK Date Fri 10 Jan 2014 132414 GMT Server Apache Access-Control-Allow-Origin Vary Accept-Encoding Content-Length 139 Connection close Content-Type texthtml Successfully dumped 4 post variables View it at httpwwwposttestservercomdata2014011005241443192628 Post body was 0 chars long OK
Device A
A B
Tera Term output
HTTP POST
SERVER
Lab 4 HTTPREQ bull The SPWF01S can perform a custom HTTP request to a specified
target Refer to the User Manual for more details
bull Type
AT+SHTTPREQ=wwwgooglecom8089
After ltCRgt the module accepts data We will try to open an non-existent web page
GET downloadTagphp HTTP10ltCRgtltLFgt
User-Agent SPWF01SltCRgtltLFgt
Host iwm-testltCRgtltLFgt
Connection closeltCRgtltLFgtltCRgtltLFgt
45
HTTP10 404 Not FoundltCRgtltLFgt Date Sun 31 Jan 2016 142704 GMTltCRgtltLFgt Content-Type texthtmlltCRgtltLFgt Server HTTP server (unknown)ltCRgtltLFgt Content-Length 49ltCRgtltLFgt X-XSS-Protection 1 mode=blockltCRgtltLFgt X-Frame-Options SAMEORIGINltCRgtltLFgt ltCRgtltLFgt lthtmlgtltbodygtlth1gt404 Not Foundlth1gtltbodygtlthtmlgtltLFgtltCRgt ltLFgt ltSUBgtltSUBgtltSUBgtltCRgtltLFgt ltCRgtltLFgt OKltCRgtltLFgt
All
A B
Tera Term output
[AT+SHTTPREQ =lthostnamegt[port]ltlengthgtltCRgtltdatagt]
Lab 4 Push data on serial port
A built-in html page ldquooutput_demohtmlrdquo allows to remotely push
characters on the serial port from a remote browser
46
output_demohtml
Modulersquos IP addressoutput_demohtml
Lab 4 Push data on serial port
bull Find your IP address
bull Type AT+SSTS
bull Associate your computer with the AP
bull Open your web browser
bull In the address bar type
ltmodulersquos IP
Addressgtoutput_demohtml
bull Type
19216801xxoutput_demohtml
47
Lab 4 Push data on serial port
bull Enter the text
bull In order to manage non-ASCII chars the ip_use_decoder variable must be modified (refer to the User Manual for more details)
bull Submit
bull The text will be sent to the serial port of the module
48
Proceed to the next LAB
Lab 5 Web Server use mode
bull Objective
bull List existing files
bull Print a file
bull Create a file
bull Append to an existing file
bull Delete an existing file
bull Prerequisites
bull USB dongle and computer are
set up as described in Lab 2
bull Work alone
50
Lab 5 Web server 51
The Web Server feature allows to create print and delete ASCII files in
the RAM memory of the module
Lab 5 List existing files
The FSL command lists type sizes and name of all the existing files
bull Type AT+SFSL
52
I 461 input_demoshtml I 180 messageshtml I 384 output_demohtml I 614 indexhtml I 157 peersshtml I 193 configshtml I 174 statusshtml I 212 404html I 2022 firstsethtml I 2898 remotehtml OK
All
Files stored in the STM32
FLASH memory
Tera Term output
Lab 5 Print a file
The FSP command prints the content
of an existing file
bull Type AT+SFSP=indexhtml
53
lthtmlgt ltheadgtlttitlegtST SPWF01Slttitlegtltheadgt ltbody bgcolor=white text=blackgt lth1gtST SPWF01S Intelligent WiFi Modulelth1gt ltpgtWelcome to the ST SPWF01S intelligent Wi-Fi moduleltpgt ltpgtThis page was delivered from the SPWF01S internal HTTP serverltpgt ltpgt lta href=configshtmlgtSPWF01S Configuration Settings Pageltagt ltpgt ltpgt lta href=statusshtmlgtSPWF01S Status Pageltagt ltpgt ltpgt lta href=peersshtmlgtSPWF01S Peers Pageltagt ltpgt ltpgtMore information about the SPWF01S and other ST products can be found at STs website lta href=httpwwwSTcomgthttpwwwSTcomltagtltpgt ltbodygt lthtmlgt OK
All Tera Term output
Tip How to use the offset and length parameters AT+SFSP=indexhtml[offset][length] ie Type AT+SFSP=indexhtml520 Length parameter is mandatory if is used the offset
Lab 5 Create a file
The FSC command allows to create a file inside the SPWF for
delivery by the SPWF HTTP server
bull Sintax
bull AT+SFSC =ltfnamegtltmax_lengt[lthttp_headergt]
bull Configuration parameters
bull lt filename gt filename to create
bull lt max_len gt amount of space to allocate for file max = 4096 bytes
bull lthttp_headergt 0=HTML header automatically added 1=HTML header not
added (as by default)
Type AT+SFSC=wifidemohtml1965
54
OK
All
Tera Term output
Lab 5 Configuring the UART
bull Set CR+LF in the Terminal setup
(to properly paste text in the
terminal)
bull Tera Term Setup rarr Terminal rarr
Transmit CR+LF
55
Tip The local echo option must be disabled on Tera Term
Added in FW 35 using the AT+SFSR command user can rename dynamic files stored in the RAM memory Refer to the User Manual for more details
Lab 5 Append to an existing file
The FSA command allows to append blocks of data to an existing file
This command accepts data after the ltcrgt at the end of the command
line
bull Sintax
bull AT+SFSA=ltfilenamegtltdatalengt
bull Configuration parameters
bull lt filename gt filename pre-created
bull lt datalen gt number of characters to append to the file
Type AT+SFSA=wifidemohtml1965
56
Now SPWF accepts data
Tips
Lab 5 Append to an existing file
bull Open wifidemotxt in the following
directory Hands_on
folderHTML_demo_page
bull Check you have set up CR+LF in the
Terminal setup (for more
information refer to the slide 48)
bull Copy the file content into Tera term
(paste with ALT+V or mouse right
button)
57
OK
All
Tera Term output
Lab 5 Append to an existing file
bull Open wifidemohtml
bull Open your Web browser (suggested Google
Chrome for HTML5 test)
bull In address bar type ltSPWF IP addrgtwifidemohtml
Type 19216801xxwifidemohtml
58
Lab 5 Configuring the UART
bull Re-set CR in the Terminal setup
as by default
bull Tera Term Setup rarr Terminal rarr
Transmit CR
59
Tip The local echo option can be re-enabled on Tera Term
Lab 5 List existing files
Lets list the files
bull Type AT+SFSL
60
D 1965 wifidemohtml I 461 input_demoshtml I 180 messageshtml I 384 output_demohtml I 614 indexhtml I 157 peersshtml I 193 configshtml I 174 statusshtml I 212 404html I 2022 firstsethtml I 2898 remotehtml OK
All
File stored in the RAM memory
Tera Term output
Lab 5 Delete an existing file
The FSD command allows to delete an existing file by name Static
files may not be deleted
bull Sintax
bull AT+SFSD=ltfilenamegt
Type AT+SFSD=wifidemohtml
61
OK
All
Tera Term output
Lab 5 Delete an existing file
bull Re-open wifidemohtml
bull Open your Web browser
bull In address bar ltSPWF IP addrgtwifidemohtml
Type 19216801xxwifidemohtml
62
Proceed to the next LAB
Lab 6 Web Server use mode
bull Objective
bull Create an image file
bull Filesystem update over-the-air
bull Filesystem update over UART
bull Prerequisites
bull Work alone
64
Lab 6 Web server 65
The Web Server feature also allows to upload generic files (PDF
HTML DOC JPEG and so on) in the EXTERNAL FLASH memory of
the module It needs to follow the below steps
- create an image file (IMG) using the tool provided in the Hands-on package
(the IMG contains the files to upload)
- Put the image in a generic and accessible Web Server (Apache Web server
will be used in the Hands-on as example)
- Using the proper AT command the IMG will be retrieved over-the-air and the
static files will be created in the external flash memory
Lab 6 Create an image file
bull Open the following folder and
extract all the files
hands_on_wififilesystem_update
bull Put your own files to upload in the
pages folder (max 512 Kbytes)
bull Run genbat
bull Open the pages folder and copy
outfileimg in your external Web
Server (Apache)
66
3
1
2
Lab 6 Create an image file
The Apache Web Server will be used in this tutorial
(Apache Web Server is available at this link
httparchiveapacheorgdisthttpdbinarieswin32httpd-2225-win32-x86-openssl-098ymsi)
Note please check that the local firewall is disabled or properly set It can
block the connection from module to Apache
bull Copy outfileimg in the Apache 22
htdocs folder (this is the default
root server directory)
67
4
Lab 6 Filesystem update
The HTTPDFSUPDATE command allows to create static files inside
the SPWF for delivery by the SPWF HTTP server
bull Sintax
bull AT+SHTTPDFSUPDATE=lthostnamegtltpathgt[port]
bull Configuration parameters
bull lthostnamegt external web server DNS resolvable name or IP address
bull ltpathgt document path
bull ltportgt target host port
68
Lab 6 Filesystem update
bull In Tera Term type
AT+SHTTPDFSUPDATE=192168x10xoutfileimg
bull Reset the module
bull Type AT+CFUN=1
69
Image length 357957 (offset 0x00080000 block len 4096) Write len 4096 -gt 0x80000 Write len 4096 -gt 0x81000 Write len 4096 -gt 0x82000 helliphelliphelliphellip helliphelliphelliphelliphelliphellip helliphelliphelliphelliphellip Write len 4096 -gt 0xD6000 Write len 1612 -gt 0xD7000 (final) Wrote 357964 bytes Complete Please reboot (at+cfun=1) OK
All
Tera Term output
The file system will be permanently deleted The new IMG will overwrite the existent files in the file system
Warning
Lab 6 Filesystem update
Lets list the files
bull Type AT+SFSL
70
E 2615 st766gif E 112374 modulepng E 2430 index1html E 419 indexhtml E 239887 MKTWiFipdf I 461 input_demoshtml I 180 messageshtml I 384 output_demohtml I 614 indexhtml I 157 peersshtml I 193 configshtml I 174 statusshtml I 212 404html I 2022 firstsethtml I 2898 remotehtml OK
All
Files stored in
the EXT FLASH memory
Tera Term output
Lab 6 Filesystem update
bull Open index1html page
bull Open your web browser
bull In the address bar ltSPWF IP addrgtindex1html
Type 192168x1xxindex1html
71
Lab 6 Filesystem erase
Erase the external httpd filesystem
bull Type AT+S HTTPDFSERASE
The files stored in the EXT FLASH memory will be erased
Lets list the files
bull Type AT+SFSL
72
I 461 input_demoshtml I 180 messageshtml I 384 output_demohtml I 614 indexhtml I 157 peersshtml I 193 configshtml I 174 statusshtml I 212 404html I 2022 firstsethtml I 2898 remotehtml OK
All
Tera Term output
Lab 6 Filesystem update
The HTTPDFSWRITE command allows to create static files inside
the SPWF via the UART interface The HW flow control MUST be
enabled in order to use the command
bull Sintax
bull AT+SHTTPDFSWRITE =ltdatalengtltCRgtltdatagt
bull Configuration parameters
bull ltdatalengt Amount of bytes to be sent
73
Lab 6 Filesystem update
bull Type AT+S HTTPDFSWRITE=357957
bull In Tera Term File ndash Send File
bull Reset the module
bull Type AT+CFUN=1
74
Image length 357957 (offset 0x00080000 block len 4096) Write len 4096 -gt 0x80000 Write len 4096 -gt 0x81000 Write len 4096 -gt 0x82000 helliphelliphelliphellip helliphelliphelliphelliphelliphellip helliphelliphelliphelliphellip Write len 4096 -gt 0xD6000 Write len 1612 -gt 0xD7000 (final) Wrote 357964 bytes Complete Please reboot (at+cfun=1) OK
All
Tera Term output
The file system will be permanently deleted The new IMG will overwrite the existent files in the file system
Warning
Proceed to the next LAB
Lab 7 Socket interface
bull Objective
bull Open TCPUDP connection
bull Write data to socket
bull Read data from socket
bull Close socket
bull Prerequisites
bull Work alone
76
TCPUDP socket
Socket
Client
Socket
Server
Lab 7 TCPUDPUART socket interface 77
The Socket interface allows communication via TCP UDP and UART
The SPWF is both a client and a server socket In this LAB will be
detailed the socket client feature
Ho
st
En
d P
rod
uct
Open TCPUDP connection
Write data to socket
Read data from socket
Close socket
Lab 7 Open TCPUDP connection
The SOCKON command allows to open a TCPUDP connection
to a specified host (up to 8 socket connections at same time)
bull Sintax
bull AT+SSOCKON=lthostnamegtltportgtltprotocolgtind
bull Configuration parameters
bull lthostnamegt target host DNS resolvable name or IP address
bull ltportgt TCPUDP socket port
bull ltprotocolgt t for TCP socket u for UDP socket
bull ind indicate when data has arrived (optional) Up to 4 (x730 bytes)
consecutive ldquoPending datardquo message (without any AT+SSOCKR) are
guaranteed It is suggested to empty the buffer using the AT+SSOCKR
command and to avoid exceeding 4 indications
78
Lab 7 Open TCPUDP connection
bull Open the TCP socket server (disable the firewall to properly
run it)
bull Folder hands_on_wifitcp socket serverserverexe
bull The TCP server listens for incoming connections on the port
32000 It sends back all data received
79
Optional - Lab 7 Open TCPUDP connection
bull Using an Android platform the socket server can be opened
using a specific APP (Socket Protocol available on Play Store)
bull The TCP socket server can be configured to listen for
incoming connections on the port 32000
bull Type 32000 on laquoPort Listen toraquo box
bull Click on Listen
80
Lab 7 Open TCPUDP connection
bull Type AT+SSOCKON=192168010x32000tind
bull The client and the server use the socket identifier (ID)
displayed
81
ID 00 OK
All
Tera Term output
Lab 7 Write data to socket
The SOCKW command allows to write data to the specified ID
socket
This command accepts data after the ltcrgt at the end of the
command line
bull Sintax
bull AT+SSOCKW=ltIDgtltlengt
bull Configuration parameters
bull ltIDgt socket identifier
bull ltlengt data length to send
82
Lab 7 Write data to socket
bull Write data
bull Type AT+SSOCKW=0013
bull Type hello worldltCRgt
bull SPWF shows that there are ltpending datagt and their amount
83
+WIND55Pending Data013
All
Tera Term output
ID
Pending
bytes
Note the module is waiting 13 bytes to be written to the socket As soon as 13 bytes (or characters) are sent from the terminal the module is going to write them to the socket and will be ready to receive new commands
Lab 7 Read data from socket
The SOCKR command allows to read data from socket
bull Sintax
bull AT+SSOCKR=ltIDgtltlengt
bull Configuration parameters
bull ltIDgt socket identifier
bull ltlengt data length to read
84
Lab 7 Read data from socket
bull Read data
bull Type AT+SSOCKR=0013
85
hello world OK
All
Tera Term output
Lab 7 Close socket
The SOCKC command allows to close socket
bull Sintax
bull AT+SSOCKC=ltIDgt
bull Configuration parameters
bull ltIDgt socket identifier
86
Tera Term output
Lab 7 Close socket
bull Close socket
bull Type AT+SSOCKC=00
87
OK
All
Proceed to the next LAB
Lab 8 MiniAP mode for the first set
bull Objective
bull Create a direct connection between
the module and an end device
bull First set of the module in order to
enable the connection between the
module and a generic AP
bull Prerequisites
bull Work alone
89
Tera Term output
Lab 8 Configuring the module in MiniAP mode
The Mini AP mode is available starting from the following FW release
SPWF01S-131115-de4568d-RELEASE
In order to set the module in Mini AP mode the following parameters
are needed
bull Set the SSID
bull Type AT+SSSIDTXT=SPWF_AP
bull Set the network privacy mode (0=OPEN or 1=WEP are supported)
bull Type AT+SSCFG=wifi_priv_mode0
bull Set the network mode (1 = STA 2 = IBSS 3 = MiniAP)
bull Type AT+SSCFG=wifi_mode3
90
OK
All
Lab 8 Configuring the module in MiniAP mode
bull Save the settings on the flash memory and reset the module
bull Type ATampW
bull Type AT+CFUN=1
91
+WIND0Console active +WIND32WiFi Hardware Started +WIND26WiFi Started AP with network SPWF_AP +WIND24WiFi Up 172181511
All
Tera Term output
SPWF_AP
Lab 8 Configuring the module in MiniAP mode (WEP Key)
Configure the module using the WEP key (2 possible combinations
available)
Sample table
92
AP configuration AT command to be used
Security Mode WEP
WEP Key Length 64 bit
(10 hex digits)
Authentication Open
Wep Key 1 1234567890
ie
at+sssidtxt=SPWF_AP
AT+SSCFG=wifi_wep_keys[0]1234567890
AT+SSCFG=wifi_wep_key_lens05
AT+SSCFG=wifi_auth_type0
AT+SSCFG=wifi_priv_mode1
AT+SSCFG=wifi_mode3
atampw
at+cfun=1
AP configuration AT command to be used
Security Mode WEP
WEP Key Length
128 bit (26 hex digits)
Authentication Open
Wep Key 1
123456789012345678
90123456
ie
at+sssidtxt=SPWF_AP
AT+SSCFG=wifi_wep_keys[0]12345678
901234567890123456
AT+SSCFG=wifi_wep_key_lens0D
AT+SSCFG=wifi_auth_type0
AT+SSCFG=wifi_priv_mode1
AT+SSCFG=wifi_mode3
atampw
at+cfun=1
Lab 8 Configuring the module in MiniAP mode (WEP Key)
Notes
bull ldquowifi_wep_key_lensrdquo variable values 05 and 0D
bull Itrsquos possible to enter any text string as WEP key It have to be converted into a
hexadecimal key using the ASCII values of the characters A maximum of 5 text
characters can be entered for 64 bit keys and a maximum of 13 characters for 128
bit keys
In this case it needs to manually convert your ASCII password to
HEX and complete the wifi_wep_keys[0] variable with the HEX
value
bull ie WEP key test1
ASCII to HEX 7465737431
So the AT command is AT+SSCFG=wifi_wep_keys[0]7465737431
93
Lab 8 Customizing the MiniAP address (optional)
Starting from FW 33 the module allows user to customize the IP address of the MiniAP
bull Set the SSID
bull Type AT+SSSIDTXT=SPWF_AP
bull Set the network privacy mode (0=OPEN or 1=WEP are supported)
bull Type AT+SSCFG=wifi_priv_mode0
bull Set the network mode (1 = STA 2 = IBSS 3 = MiniAP)
bull Type AT+SSCFG=wifi_mode3
bull Set the use_dhcp mode (0 = DHCP server off 1 = DHCP server on 2 = DHCP server on and customizable)
bull Type AT+SSCFG=ip_use_dhcp2
bull Set the MiniAP address
bull Type AT+SSCFG=ip_ipaddr19216801
bull Save the settings on the flash memory and reset the module
bull Type ATampW
bull Type AT+CFUN=1
94
Tera Term output
+WIND0Console active +WIND32WiFi Hardware Started +WIND26WiFi Started AP with network SPWF_AP +WIND24WiFi Up 19216801
All
Tip the MiniAP will assign sequential addresses to the client ie 1deg client 19216802 2deg client 19216803
Lab 8 Mini AP mode
bull Associate your end device to the
SPWF_AP network
bull Find the SPWF_AP network and connect
the end device to the module
95
SPWF_AP +WIND2890187C960D0B Associated +WIND29DHCP reply for 17218151290187C960D0B to 172181512 +WIND29DHCP reply for 17218151290187C960D0B to 172181512
All
Tera Term output
Lab 8 Mini AP mode
bull Open your web browser
bull In the address bar type captiveportalnet
96
SPWF_AP
Tip The Mini AP domain can be set using the variable ip_apdomainname The default value is ldquocaptiveportalnetrdquo
The Mini AP default homepage can be set using the variable ip_apredirect The default value is ldquofirstsethtmlrdquo
Tip If the AP domain name is not quickly opened itrsquos suggested to turn off an eventual proxy server (check the connection settings or browser preferences)
Lab 8 First Set Page
bull The first set page allows to configure the module in IDLE mode
STATION mode IBSS mode and MINI AP mode
97
Used for STA IBSS MINI AP
Mandatory for IDLE STA IBSS MINI AP
Used for STA IBSS (WEP) MINI AP (WEP)
Used for STA (if DHCP = OFF) IBSS
(mandatory) MINI AP (if DHCP = OFF)
Used for STA IBSS (mandatory DHCP = OFF) MINI AP
Used for STA (WEP key) IBSS (WEP) MINI AP (WEP)
Used for STA IBSS MINI AP
Lab 8 Mini AP mode
bull Set all the parameters required in order to enable the connection
between the module and a generic AP
ie AP configured in WPAWPA2 mode
bull MiniAP PassKey anonymous (by default)
bull SSID of the access point
bull Password of the access point
bull Authentication type of the access point
bull Use mode of the module
98
Tip The Mini AP PassKey can be set using the variable ldquouser_descrdquo The default value is ldquoanonymousrdquo
Note In order to manage non-ASCII chars the ip_use_decoder variable must be modified according as below at+sscfg=ip_use_decoder0 no decoding [default] at+sscfg=ip_use_decoder1 RAW decoding (the USER and PSK fields must be completed in HEX) at+sscfg=ip_use_decoder2 UTF-8 decoding at+sscfg=ip_use_decoder6 HTML entities decoding
Lab 8 Mini AP mode
bull Click on GO button and then send the
parameters confirming with OK
99
SPWF_AP
AP
SSID ciscosb2
Lab 8 Mini AP mode
bull The module will receive the parameters and will automatically
connect to the access point required
100
+WIND57Received SSID is ciscosb2 +WIND57Received PWD is +WIND57Received Auth mode is 2 +WIND57Received Mode is 1 +WIND2RESET +WIND1Poweron (--SPWF01S) +WIND13ST IWM Copyright (c) 2012-2013 STmicroelectronics +WIND3Watchdog Running +WIND0Console active +WIND46WPA Crunching PSK +WIND32WiFi Hardware Started +WIND21WiFi Scanning +WIND35WiFi Scan Complete (0x0) +WIND19WiFi Join 02621F518F0B +WIND25WiFi Association with ciscosb2 successful +WIND51WPA Handshake Complete +WIND24WiFi Up 1921681106
All
Tera Term output
ciscosb2
AP
Lab 8 Mini AP mode ndash RAW decoding example
101
Note In order to manage non-ASCII chars the ip_use_decoder variable must be modified according as below at+sscfg=ip_use_decoder0 no decoding [default] at+sscfg=ip_use_decoder1 RAW decoding (the USER and PSK fields must be completed in HEX) at+sscfg=ip_use_decoder2 UTF-8 decoding at+sscfg=ip_use_decoder6 HTML entities decoding
7177657261736466
AP SSIS
AP PSK
Proceed to the next LAB
Lab 9 Socket interface - MiniAP mode
bull Objective
bull Create a direct connection between
the module and an end device
bull Socket interface used in MiniAP
mode
bull Prerequisites
bull Work alone
103
Tera Term output
Lab 9 Configuring the module in MiniAP mode
The Mini AP mode (available starting from the SPWF01S-131115-de4568d-RELEASE) also allows to use the socket interface The procedure is the same as in Lab 7
In order to set the module in Mini AP mode the following parameters are needed
bull Set the SSID
bull Type AT+SSSIDTXT=SPWF_AP
bull Set the network privacy mode
bull Type AT+SSCFG=wifi_priv_mode0
bull Set the network mode (1 = STA 2 = IBSS 3 = MiniAP)
bull Type AT+SSCFG=wifi_mode3
104
OK
All
Lab 9 Configuring the module in MiniAP mode
bull Save the settings on the flash memory and reset the module
bull Type ATampW
bull Type AT+CFUN=1
105
+WIND0Console active +WIND32WiFi Hardware Started +WIND26WiFi Started AP with network SPWF_AP +WIND24WiFi Up 172181511
All
Tera Term output
SPWF_AP
Lab 9 Mini AP mode
bull Connect your PC to the SPWF_AP
network
bull Find the SPWF_AP network and connect
the end device to the module
106
SPWF_AP +WIND2890187C960D0B Associated +WIND29DHCP reply for 17218151290187C960D0B to 172181512 +WIND29DHCP reply for 17218151290187C960D0B to 172181512
All
Tera Term output
Lab 9 Open TCPUDP connection
As described in the Lab 7 the SOCKON command allows to
open a TCPUDP connection to a specified host
bull Sintax
bull AT+SSOCKON=lthostnamegtltportgtltprotocolgtind
bull Configuration parameters
bull lthostnamegt target host DNS resolvable name or IP address
bull ltportgt TCPUDP socket port
bull ltprotocolgt t for TCP socket u for UDP socket
bull ind indicate when data has arrived (optional) Up to 4 consecutive ldquoPending
datardquo message (without any AT+SSOCKR) are guaranteed It is
suggested to empty the buffer using the AT+SSOCKR command and
to avoid exceeding 4 indications
107
Lab 9 Open TCP connection
bull Open the TCP socket server (disable the firewall to properly
run it)
bull Folder hands_on_wifitcp socket serverserverexe
bull The TCP server listens for incoming connections on the port
32000 It sends back all data received
108
Lab 9 Open TCP connection
bull Type AT+SSOCKON=17218151232000tind
bull The client and the server use the socket identifier (ID)
displayed
109
ID 00 OK
All
Tera Term output
Lab 9 Write data to socket
The SOCKW command allows to write data to the specified ID
socket
This command accepts data after the ltcrgt at the end of the
command line
bull Sintax
bull AT+SSOCKW=ltIDgtltlengt
bull Configuration parameters
bull ltIDgt socket identifier
bull ltlengt data length to send
110
Lab 9 Write data to socket
bull Write data
bull Type AT+SSOCKW=0013
bull Type hello worldltCRgt
bull SPWF shows that there are ltpending datagt and their amount
111
+WIND55Pending Data013
All
Tera Term output
ID
Pending
bytes
Note the module is waiting 13 bytes to be written to the socket As soon as 13 bytes (or characters) are sent from the terminal the module is going to write them to the socket and will be ready to receive new commands
Lab 9 Read data from socket
The SOCKR command allows to read data from socket
bull Sintax
bull AT+SSOCKR=ltIDgtltlengt
bull Configuration parameters
bull ltIDgt socket identifier
bull ltlengt data length to read
112
Lab 9 Read data from socket
bull Read data
bull Type AT+SSOCKR=0013
113
hello world OK
All
Tera Term output
Lab 9 Close socket
The SOCKC command allows to close socket
bull Sintax
bull AT+SSOCKC=ltIDgt
bull Configuration parameters
bull ltIDgt socket identifier
114
Tera Term output
Lab 9 Close socket
bull Close socket
bull Type AT+SSOCKC=00
115
OK
All
Proceed to the next LAB
Lab 10 Web server - MiniAP mode
bull Objective
bull Create a direct connection between
the module and an end device
bull Web server used in MiniAP mode
bull Prerequisites
bull Work alone
117
Tera Term output
Lab 10 Configuring the module in MiniAP mode
The Mini AP mode (available starting from the SPWF01S-131115-de4568d-RELEASE) also allows to use the module file system (both RAM and IntExt FLASH)
In order to set the module in Mini AP mode the following parameters are needed
bull Set the SSID
bull Type AT+SSSIDTXT=SPWF_AP
bull Set the network privacy mode
bull Type AT+SSCFG=wifi_priv_mode0
bull Set the network mode (1 = STA 2 = IBSS 3 = MiniAP)
bull Type AT+SSCFG=wifi_mode3
118
OK
All
Lab 10 Configuring the module in MiniAP mode
bull Save the settings on the flash memory and reset the module
bull Type ATampW
bull Type AT+CFUN=1
119
+WIND0Console active +WIND32WiFi Hardware Started +WIND26WiFi Started AP with network SPWF_AP +WIND24WiFi Up 172181511
All
Tera Term output
SPWF_AP
Lab 10 Mini AP mode
bull Connect your PC to the SPWF_AP
network
bull Find the SPWF_AP network and connect
the end device to the module
120
SPWF_AP +WIND2890187C960D0B Associated +WIND29DHCP reply for 17218151290187C960D0B to 172181512 +WIND29DHCP reply for 17218151290187C960D0B to 172181512
All
Tera Term output
Lab 10 Access to Web server - Mini AP mode
bull Open your web browser
bull In the address bar type
captiveportalnetindexhtml
bull The SPWF01S homepage will be
displayed
121
SPWF_AP Tip The Mini AP domain can be set using the variable ip_apdomainname The default value is ldquocaptiveportalnetrdquo
Lab 10 Access to Web server - Mini AP mode
bull Open the SPWF01S Device Status
bull click on the highlighted link
bull The SPWF01S Device Status will be
displayed
122
SPWF_AP Tip The Mini AP domain can be set using the variable ip_apdomainname The default value is ldquocaptiveportalnetrdquo
The Mini AP default homepage can be set using the variable ip_apredirect The default value is ldquofirstsethtmlrdquo
Proceed to the next LAB
Lab 11 Remotely control - GPIOs
bull Objective
bull write remotely a GPIO
bull configure remotely a GPIO
bull read remotely a GPIO
bull Prerequisites
bull module connected to the AP or
module configured in MiniAP mode
124
Lab 11 Remotely control - GPIO
This feature allows to remotely write configure and read a GPIO
The module should be connected to the AP (as shown in Lab 3) or
should be configured in Mini AP mode (as shown in Lab 8)
The external client have to open the remotehtml page stored in the
module
125
ENG-WPA AP
SPWF_AP
miniAP
Tera Term output
Lab 11 Joining a network
In order to be connected to an available Wifi network the AP parameters setting is needed
bull Set the SSID
bull Type AT+SSSIDTXT=ENG-WPA
bull Set the password
bull Type AT+SSCFG=wifi_wpa_psk_texthelloworld
bull Set the network privacy mode (0=none 1=WEP 2=WPA-Personal (TKIPAES) or WPA2-Personal (TKIPAES))
bull Type AT+SSCFG=wifi_priv_mode2
bull NB wifi_auth_type must be set to 0 AT+SSCFG=wifi_auth_type0
bull Set the network mode (1 = STA 2 = IBSS 3 = MiniAP)
bull Type AT+SSCFG=wifi_mode1
126
OK
All
Lab 11 Joining a network
bull Save the settings on the flash memory and reset the module
bull Type ATampW
bull Type AT+CFUN=1
127
+WIND0Console active +WIND46WPA Crunching PSK +WIND32WiFi Hardware Started +WIND21WiFi Scanning +WIND35WiFi Scan Complete (0x0) +WIND19WiFi Join 14D64D243600 +WIND25WiFi Association with ENG-WPA successful +WIND51WPA Handshake Complete +WIND24WiFi Up 19216801xx
All
ENG-WPA AP
Tera Term output
Lab 11 Remotely control in MiniAP mode - GPIO
bull Open your web browser
bull In the address bar type
192168x1xxremotehtml
128
ENG-WPA
AP
Lab 11 Remotely control in MiniAP mode - GPIO
bull Try to write the GPIO14 connected to the LED3 (check if the
LED3 is mounted on your EVAL BOARD otherwise can be used
the GPIO13)
bull Click on the laquoGOraquo button
and LED3 will switch on
129
ENG-WPA
AP
Proceed to the next LAB
Lab 12 Input demo
bull Objective
bull Send a message from the server (wifi
module) to an external client connected
to the same network
bull Prerequisites
bull module connected to the AP or module
configured in MiniAP mode
131
Lab 12 Input demo
The module provides some DEMOs to show the interaction between
the module and an external client connected to the same network
The module should be connected to the AP (as shown in Lab 3) or
should be configured in Mini AP mode (as shown in Lab 8)
In order to run this demo the client have to open the
input_demoshtml page stored in the module
132
ENG-WPA AP
SPWF_AP
miniAP
Tera Term output
Lab 12 Joining a network
In order to be connected to an available Wifi network the AP parameters setting is needed
bull Set the SSID
bull Type AT+SSSIDTXT=ENG-WPA
bull Set the password
bull Type AT+SSCFG=wifi_wpa_psk_texthelloworld
bull Set the network privacy mode (0=none 1=WEP 2=WPA-Personal (TKIPAES) or WPA2-Personal (TKIPAES))
bull Type AT+SSCFG=wifi_priv_mode2
bull NB wifi_auth_type must be set to 0 AT+SSCFG=wifi_auth_type0
bull Set the network mode (1 = STA 2 = IBSS 3 = MiniAP)
bull Type AT+SSCFG=wifi_mode1
133
OK
All
Lab 12 Joining a network
bull Save the settings on the flash memory and reset the module
bull Type ATampW
bull Type AT+CFUN=1
134
+WIND0Console active +WIND46WPA Crunching PSK +WIND32WiFi Hardware Started +WIND21WiFi Scanning +WIND35WiFi Scan Complete (0x0) +WIND19WiFi Join 14D64D243600 +WIND25WiFi Association with ENG-WPA successful +WIND51WPA Handshake Complete +WIND24WiFi Up 19216801xx
All
ENG-WPA AP
Tera Term output
Lab 12 Input demo
bull Open your web browser
bull In the address bar type
192168x1xxinput_demoshtml
bull Insert the message to the client
ie type laquotestraquo (suggested ndash copy
the string and paste it in the
terminal) and then send a carriage
return
135
VERY IMPORTANT
Both client and server are pending (2 sec) after the page
request If no message is sent from the module a timeout
mechanism will be triggered
The server shows the ldquo+WIND56 messagerdquo and it will
wait for a string to be inserted and terminated by [Cr] ldquo+WIND56Insert message to clientdrdquo d is the Nth input SSI into html page (please refer to CGIampSSI Application Notes for details)
Lab 12 Input demo
bull The module receives the HTML
page containing the string inserted
server-side
bull Below this string there are two
buttons to try again the demo or to
return to the homepage
136
Proceed to the next LAB
Lab 13 Socket Server functionality
bull Objective
bull Configure a Server Listening Port
bull Open a TCP connection from a
socket client to the module
bull Data modeCommand Mode usage
bull Prerequisites
bull module connected to the AP or
module configured in MiniAP mode
bull PC to be used as socket client
138
TCP socket
Socket
Server
Socket
Client
Lab 13 Socket Server
This feature allows to enable the socket server mode The module
can be able to listen for an incoming connection on the specified port
The module should be connected to the AP (as shown in Lab 3) or
should be configured in Mini AP mode (as shown in Lab 8)
Please refer to ldquoSocket Server Application Notesrdquo for more details
139
ENG-WPA AP
SPWF_AP
miniAP
Tera Term output
Lab 13 Joining a network
In order to be connected to an available Wifi network the AP parameters setting is needed
bull Set the SSID
bull Type AT+SSSIDTXT=ENG-WPA
bull Set the password
bull Type AT+SSCFG=wifi_wpa_psk_texthelloworld
bull Set the network privacy mode (0=none 1=WEP 2=WPA-Personal (TKIPAES) or WPA2-Personal (TKIPAES))
bull Type AT+SSCFG=wifi_priv_mode2
bull NB wifi_auth_type must be set to 0 AT+SSCFG=wifi_auth_type0
bull Set the network mode (1 = STA 2 = IBSS 3 = MiniAP)
bull Type AT+SSCFG=wifi_mode1
140
OK
All
Lab 13 Joining a network
bull Save the settings on the flash memory and reset the module
bull Type ATampW
bull Type AT+CFUN=1
141
+WIND0Console active +WIND46WPA Crunching PSK +WIND32WiFi Hardware Started +WIND21WiFi Scanning +WIND35WiFi Scan Complete (0x0) +WIND19WiFi Join 14D64D243600 +WIND25WiFi Association with ENG-WPA successful +WIND51WPA Handshake Complete +WIND24WiFi Up 19216801xx
All
ENG-WPA AP
Tera Term output
Lab 13 Socket Server
bull Socket server turn ON the TCP Socket Server (user must
specify the server listening port)
bull Type AT+SSOCKD=32000 (AT+SOCKD=32000u for UDP socket server)
bull Check the status of the socket server
bull Type AT+SSTS=ip_sockd_port
142
ENG-WPA
AP
Tera Term output
OK ip_sockd_port = 32000 OK
All
Tip you can Turn OFF the Socket Server using a server listening port = 0 (type AT+SSOCKD=0)
Lab 13 Socket Server
bull Socket client can be used a simple socket client in order to test the communication
(SocketTest ndash available on httpsourceforgenetprojectssockettest)
143
ENG-WPA
AP
Lab 13 Socket Server
bull Socket client
bull Insert the modulersquos IP Address and the port
bull Click on Connect button
144
Tera Term output
+WIND61Incoming Socket Client1921681102 +WIND60Now in Data Mode
All
Lab 13 Socket Server
bull The module (socket server) enters in data mode and a bidirectional channel is
created to allow exchanging data with the socket client
bull Try to send and receive data from the module
145
Tera Term output
test_1
All
Lab 13 Socket Server ndash escape sequence
bull From Data Mode to Command Mode
bull Configuration variable used escape_seq (default is ldquoat+srdquo case sensitive
suggested to be sent by the local host in a single complete packet with no CR or
LF in the sequence)
bull Type at+s
bull Now itrsquos possible to send AT commands while the socket connection
is still active
146
Tera Term output
+WIND59Back to Command Mode
All
Tip During the Command Mode you cannot send data to client but can receive data from it Every data chunk generates an URC (+WIND64Sockd Pending Data) with limit to 4 (x730 bytes) This is the max number of pending messages From the 5th chunk on messages are lost
Lab 13 Socket Server ndash return to data mode
bull From Command Mode to Data Mode
bull While in Command Mode
bull Type AT+S (this is an AT command AT+S must be followed by ltCRgt)
bull The module returns in data mode
147
ENG-WPA
AP
Tera Term output
+WIND60Now in Data Mode
All
Lab 13 Socket Server ndash turn off
bull Turn OFF the Socket Server
bull Type at+s (to enter in command mode)
bull Type AT+SSOCKD=0
148
ENG-WPA
AP
Tera Term output
OK +WIND62Socket Client Gone1921681102
All
Proceed to the next LAB
Lab 14 Low power modes
bull Objective
bull Practice with Radio Power Save
bull Sleep Mode
bull Standby Mode
bull Prerequisites
bull module connected to the AP
150
Lab 14 Low power modes
This feature allows to enable the low power states
The module supports the ldquoRadio Power Saverdquo mode the ldquoSleeprdquo
mode and the ldquoStandbyrdquo mode
The module should be connected to the AP (as shown in Lab 3) in
order to use the ldquoRadio Power Saverdquo mode
Please refer to ldquoSPWF01S Power Management Application Notesrdquo for
more details
151
ENG-WPA AP
Low Power
Tera Term output
Lab 14 Joining a network
In order to be connected to an available Wifi network the AP parameters setting is needed
bull Set the SSID
bull Type AT+SSSIDTXT=ENG-WPA
bull Set the password
bull Type AT+SSCFG=wifi_wpa_psk_texthelloworld
bull Set the network privacy mode (0=none 1=WEP 2=WPA-Personal (TKIPAES) or WPA2-Personal (TKIPAES))
bull Type AT+SSCFG=wifi_priv_mode2
bull NB wifi_auth_type must be set to 0 AT+SSCFG=wifi_auth_type0
bull Set the network mode (1 = STA 2 = IBSS 3 = MiniAP)
bull Type AT+SSCFG=wifi_mode1
152
OK
All
Lab 14 Joining a network
bull Save the settings on the flash memory and reset the module
bull Type ATampW
bull Type AT+CFUN=1
153
+WIND0Console active +WIND46WPA Crunching PSK +WIND32WiFi Hardware Started +WIND21WiFi Scanning +WIND35WiFi Scan Complete (0x0) +WIND19WiFi Join 14D64D243600 +WIND25WiFi Association with ENG-WPA successful +WIND51WPA Handshake Complete +WIND24WiFi Up 19216801xx
All
Tera Term output
ENG-WPA AP
Low Power
Lab 14 Low power modes ndash Power Save 154
Module
Power State STM32 WLAN
Standby Standby Standby
Sleep Stop PS
Power Save Run PS or Fast-PS
Active Rx Run Rx Idle Rx Active
Active Tx Run Tx Active
Lab 14 Low power modes ndash Power Save
bull By default the module starts in ACTIVE mode
bull Enable the Power Save Mode
bull Type at+sscfg=wifi_powersave1 (ldquowifi_powersave2rdquo enables the Fast-PS mode)
bull Enable the doze operational mode
bull Type at+sscfg=wifi_operational_mode11 (ldquowifi_operational_mode12rdquo enables the quiescent mode)
bull Choose the wake up mode
1 Wake up every n beacon (specified in the wifi_beacon_wakeup variable)
bull Type at+sscfg=wifi_listen_interval0
bull Type at+sscfg=wifi_beacon_wakeup1
OR
2 Wake up every n beacon adaptively (specified in the wifi_beacon_wakeup variable)
bull Type at+sscfg=wifi_listen_interval1
bull Type at+sscfg=wifi_beacon_wakeup1
155
Tip The Wifi Power Save (wifi_powersave1) can also be quickly enabled using the command AT+CFUN=2
Lab 14 Low power modes ndash Power Save
bull Save the settings on the flash memory and reset the module
bull Type ATampW
bull Type AT+CFUN=1
bull The WIND66 message related to Low Power Mode will be
displayed
156
+WIND1Poweron (--SPWF01S) +WIND13ST SPWF01S IWM Copyright (c) 2012-2014 STMicroelectronics Inc All rights Reserved +WIND3Watchdog Running +WIND0Console active +WIND32WiFi Hardware Started +WIND21WiFi Scanning +WIND35WiFi Scan Complete (0x0) +WIND19WiFi Join 02621F518F0B +WIND25WiFi Association with IoT successful +WIND51WPA Handshake Complete +WIND24WiFi Up 1921681104 +WIND66Low Power mode1
All
Tera Term output
ENG-WPA AP
Low Power
Lab 14 Low power modes ndash Sleep Mode 157
Module
Power State STM32 WLAN
Standby Standby Standby
Sleep Stop PS or Fast-PS
Power Save Run PS or Fast-PS
Active Rx Run Rx Idle Rx Active
Active Tx Run Tx Active
Lab 14 Low power modes ndash Sleep Mode
bull In the Sleep Mode the core STM32 is stopped
bull Enable the Sleep Mode
bull Type at+sscfg=sleep_enabled1
bull Enable the Power Save Mode
bull Type at+sscfg=wifi_powersave1 (ldquowifi_powersave2rdquo enables the Fast-PS mode)
bull Enable the doze operational mode
bull Type at+sscfg=wifi_operational_mode11 (ldquowifi_operational_mode12rdquo enables the quiescent mode)
bull Choose the wake up mode
1 Wake up every n beacon (specified in the wifi_beacon_wakeup variable)
bull Type at+sscfg=wifi_listen_interval0
bull Type at+sscfg=wifi_beacon_wakeup1
OR
2 Wake up every n beacon adaptively (specified in the wifi_beacon_wakeup variable)
bull Type at+sscfg=wifi_listen_interval1
bull Type at+sscfg=wifi_beacon_wakeup1
158
Tip The Wifi Sleep Mode (and wifi_powersave1) can also be quickly enabled using the command AT+CFUN=3
Lab 14 Low power modes ndash Sleep Mode
bull Save the settings on the flash memory and reset the module
bull Type ATampW
bull Type AT+CFUN=1
bull The WIND69 message related to Sleep Mode will be displayed
159
+WIND1Poweron (--SPWF01S) +WIND13ST SPWF01S IWM Copyright (c) 2012-2014 STMicroelectronics Inc All rights Reserved +WIND3Watchdog Running +WIND0Console active +WIND32WiFi Hardware Started +WIND21WiFi Scanning +WIND35WiFi Scan Complete (0x0) +WIND19WiFi Join 02621F518F0B +WIND25WiFi Association with IoT successful +WIND51WPA Handshake Complete +WIND24WiFi Up 1921681104 +WIND66Low Power mode1 +WIND69Going into DeepSleep
All
Tera Term output
ENG-WPA AP
Low Power
Lab 14 Low power modes ndash Sleep Mode
bull Wake STM32 up using the GPIO6
bull Put the GPIO6 to 25V (jumper on JP2 as in
the picture)
bull The WIND messages will be displayed
160
+WIND70Resuming from DeepSleep +WIND53Wakeup (GPIO6 High)
All
Tera Term output
Lab 14 Low power modes ndash Sleep Mode
bull Put STM32 in sleep mode using the
GPIO6
bull Go back the GPIO6 floating (remove jumper
- as default)
bull The WIND69 message will be
displayed
161
+WIND69Going into DeepSleep
All
Tera Term output
Lab 14 Low power modes ndash Sleep Mode
bull Wake STM32 up using the remote
page
bull Connect a device to the same modulersquos
network
bull Open the following link
http[module_IP_address]remotehtml
bull Select ldquoWakerdquo and click on ldquoGordquo button
to wake up the module
bull The WIND message will be displayed
162
+WIND70Resuming from DeepSleep
All
Tera Term output
Lab 14 Low power modes ndash Sleep Mode
bull Put STM32 in sleep mode using the
remote page
bull Connect a device to the same modulersquos
network
bull Open the following link
http[module_IP_address]remotehtml
bull Select ldquoSleeprdquo and click on ldquoGordquo button
to put the module in sleep mode
bull The WIND message will be displayed
163
+WIND69Going into DeepSleep
All
Tera Term output
Lab 14 Low power modes ndash Standby Mode 164
Module
Power State STM32 WLAN
Standby Standby Standby
Sleep Stop PS or Fast-PS
Power Save Run PS or Fast-PS
Active Rx Run Rx Idle Rx Active
Active Tx Run Tx Active
Lab 14 Low power modes ndash Standby Mode
bull During the Standby Mode both the STM32 and the Radio will be
put in standby mode The standby mode allows to achieve the
lowest power consumption
bull Enable the Standby Mode
bull Type at+sscfg=sleep_enabled0 (Sleep mode must be disabled)
bull Type at+sscfg=standby_enabled1
bull Please be sure that GPIO6 isnrsquot forced high
bull Set the standby time to wake up via RTC alarm
bull Type at+sscfg=standby_time15
165
Tip The Wifi Standby Mode can also be quickly enabled using the command AT+CFUN=4
Lab 14 Low power modes ndash Standby Mode
bull Save the settings on the flash
memory and reset the module
bull Type ATampW
bull Type AT+CFUN=1
bull After 15 seconds the module will be
rebooted and will return in the
ACTIVE state
166
+WIND0Console active +WIND32WiFi Hardware Started +WIND38WiFi Powered Down +WIND67Going into Standby15 +WIND68Resuming from Standby +WIND1Poweron (--SPWF01S) +WIND13ST SPWF01S IWM Copyright (c) 2012-2014 STMicroelectronics Inc All rights Reserved +WIND3Watchdog Running +WIND0Console active +WIND32WiFi Hardware Started +WIND21WiFi Scanning +WIND35WiFi Scan Complete (0x0) +WIND19WiFi Join02621F518F0B +WIND25WiFi Association with IoT successful +WIND51WPA Handshake Complete +WIND24WiFi Up1921681113
All
Tera Term output
Lab 14 Low power modes ndash Standby Mode
bull Wake up the module using the GPIO6
bull Enable the Standby Mode
bull Type at+sscfg=sleep_enabled0 (make sure that
Sleep mode is disabled)
bull Type at+sscfg=standby_enabled1
bull Type ATampW
bull Type AT+CFUN=1
bull Put the GPIO6 to 25V to wake up the module
bull The WIND message will be displayed and
the module will return in ACTIVE state
167
+WIND68Resuming from Standby +WIND1Poweron (--SPWF01S) helliphelliphellip
All
Tera Term output
Proceed to the next LAB
Lab 15 STAMINI AP switcher
bull Objective
bull HW ldquoSTA to MiniAPrdquo switcher
bull Prerequisites
bull Work alone
169
Lab 15 STAMINI AP switcher
This feature allows to force the module in Mini AP mode starting from
a preexistent state
ldquoRecovery Moderdquo this functionality could be useful to lead the module
in a known state and to reconfigure it (ie using the firstset page)
The GPIO7 will be used to drive this feature
170
Lab 15 STAMINI AP switcher
bull Press and hold the SW2 button on the
EVAL and then perform a reset (HW reset
via SW1 button or SW reset via AT
command)
bull Release the SW2 button
bull The MiniAP mode will be started and the
module is discoverable with the following
SSID
bull iwm-XX-YY-ZZ where XX-YY-ZZ are the last
six digits of modulersquos MAC ADDRESS
171
+WIND2Reset +WIND1Poweron (--SPWF01S) +WIND13ST SPWF01S IWM Copyright (c) 2012-2014 STMicroelectronics Inc All rights Reserved +WIND39HW in miniAP mode (GPIO7 Low) +WIND0Console active +WIND3Watchdog Running +WIND32WiFi Hardware Started +WIND26WiFi Started AP +WIND24WiFi Up172312551
All
Tera Term output
Tip To exit from ldquominiAP mode via GPIO7rdquo perform a modulersquos reset
Proceed to the next LAB
Lab 16 IBSS connection
bull Objective
bull Create an IBSS network
bull Prerequisites
bull Work alone
173
Lab 16 Create an IBSS network
In an IBSS network the SSID is chosen by the client device that
starts the network
Module settings to create an IBSS network
bull Set the IBSS SSID
bull Type AT+SSSIDTXT=ADHOC
bull Set the network privacy mode (0=OPEN or 1=WEP are supported)
bull Type AT+SSCFG=wifi_priv_mode0
bull Set the network mode (2 = IBSS)
bull Type AT+SSCFG=wifi_mode2
174
OK
All
Tera Term output
Lab 16 Create an IBSS network
bull Set IP address IP default gateway IP DNS and IP netmask
bull Type AT+SSCFG=ip_ipaddr192168y1xx
bull Type AT+SSCFG=ip_gw192168y1
bull Type AT+SSCFG=ip_dns192168y1
bull Type AT+SSCFG=ip_netmask2552552550
bull Turn off the DHCP
bull Type AT+SSCFG=ip_use_dhcp0
175
OK
All
Tera Term output
Lab 16 Create an IBSS network
bull Save the settings on the flash memory and reset the module
bull Type ATampW
bull Type AT+CFUN=1
176
+WIND0Console active +WIND32WiFi Hardware Started +WIND21WiFi Scanning +WIND35WiFi Scan Complete (0x0) +WIND19WiFi Join EE33CE002418 +WIND25WiFi Association with ADHOC successful +WIND51WiFi Handshake Complete +WIND24WiFi Up 19216813
All
AD-HOC
Tera Term output
Lab 16 Create an IBSS network
bull Associate the iOS device with the
ADHOC network (iOS gt 8 could not
support the IBSS mode)
177
AD-HOC
Tip manual configuration of static TCPIPv4 parameters is suggested using a PC Ie PC TCPIPv4 properties
Lab 16 Create an IBSS network
bull Find your IP address
bull Type AT+SSTS
bull Open Safari web browser
bull In the address bar type
ltSPWF IP addressgtindexhtml
bull Type 192168y1xxindexhtml
178
AD-HOC
THANK YOU

Lab 2 Set the SPWF variables
bull Objective bull Run a command
bull Get the default configuration dump
bull Set host name
bull Set static IP parameters
bull Reset the module
bull Prerequisites bull Work alone
18
Lab 2 Run a command
Run a command - Syntax
- ATampx ltCRgt
- AT+S[Command] ltCRgt
Response - Syntax
xxxxxxxx
19
- OK
- Command output followed by OK
- ERROR Command not found
- ERROR Unrecognized key
AT Command Prefix
Not case sensitive
Lab 2 Set the SPWF variables
bull Get the default configuration dump
bull Type ATampV
bull Get a variable value
bull Type AT+SGCFG=console1_speed
Config dump frame
20
Variable
Name
Variable
Value
How to change the variable value
1 AT+SSCFG=[var name]xxxx
2 ATampW
Lab 2 Set the SPWF variables
bull Get the default configuration dump
bull Set host name
bull Type AT+SSCFG=ip_hostnamexxxxxxxx
21
Up to 31 characters (case sensitive) ldquospacebarrdquo is allowed
OK
All
Tera Term output
Lab 2 Set the SPWF variables
bull Get the default configuration dump
bull Set host name
bull Set IP address IP default gateway IP DNS and IP netmask (for
static usage)
bull Type AT+SSCFG=ip_ipaddr19216801xx
bull Type AT+SSCFG=ip_gw19216801
bull Type AT+SSCFG=ip_dns19216801
bull Type AT+SSCFG=ip_netmask2552552550
22
OK
All
Tera Term output
Tera Term output
Lab 2 Set the SPWF variables
bull Get the default configuration dump
bull Set host name
bull Set IP address IP default gateway IP
DNS and IP netmask (DHCP off)
bull Save settings on the flash memory
(mandatory after a variable change)
bull Type ATampW
bull Reset the module
bull Type AT+CFUN=1
23
+WIND21WiFi Scanning +WIND35WiFi Scan Complete (0x0)
All
Lab 2 Set the SPWF variables
bull Get the default configuration dump
bull Set host name
bull Set IP address IP default gateway IP
DNS and IP netmask (DHCP off)
bull Save settings on the flash memory
(mandatory after a variable change)
and reset the module
bull Check the new configuration dump
bull Type ATampV
24
Proceed to the next LAB
Lab 2a FOTA update
bull Objective
bull Upgrade the FW using the OTA file
bull Prerequisites
bull OTA file (provided in the SPWF01S FW
package)
bull External web server (ie Apache web
server running on PC)
26
Lab 2a FOTA update 27
The SPWF01Sx11 module (with external flash on board) allows
performing a Firmware Over-the-air update via a single HTTP GET
The SPWF01S will validate the firmware image it downloads load it
into a staging area then prompt the user to issue a reset command in
order to complete the update
Lab 2a FOTA update
The Apache Web Server will be used in this LAB
(Apache Web Server is available at this link
httparchiveapacheorgdisthttpdbinarieswin32httpd-2225-win32-x86-openssl-098ymsi)
Note please check that the local firewall is disabled or properly set It can
block the connection from module to Apache
bull Copy the OTA file (ie SPWF01S-xxxxxx-yyyyyyy-
RELEASE-mainota) in the Apache 22 htdocs folder
28
Lab 2a FOTA update
The FWUPDATE command allows to perform a Firmware Over-the-
air update via a single HTTP GET
bull Sintax
bull AT+SFWUPDATE=lthostnamegtltpathgtltportgt
bull Configuration parameters
bull lthostnamegt Target host DNS resolvable name or IP address
bull ltpathampqueryoptsgt Document path and optional query arguments
bull ltportgt Target host port
29
Lab 2a FOTA update
bull The module and the Apache Web server must be connected to the same network
bull In Tera Term type AT+SFWUPDATE=[Apache IP address][ota_fileota]
ie type AT+SFWUPDATE=192168xyyySPWF01S-150410-c2e37a3-RELEASE-
mainota
bull Reset the module to apply the new FW
bull Type AT+CFUN=1
bull Restore factory default settings (mandatory)
bull Type ATampF
30
Staging FW update for SPWF01SX11 version 1203-120918_01 FW length 276824 0x00002800 (offset 0x00000000 block len 4096) Write len 4096 -gt 0x0 Write len 4096 -gt 0x1000 (note - deleted extra output for clarity) Write len 4096 -gt 0x42000 Write len 2476 -gt 0x43000 (final) Wrote 276904 bytes Complete Update will be applied on next reboot (at+cfun=1)
All Tera Term output
Proceed to the next LAB
Lab 3 Access point connection
bull Objective
bull Scan for available networks
bull Join a network
bull Check the statusstatistics variables
bull Prerequisites
bull USB dongle and computer are set
up as described in Lab 2
bull Work alone
32
Lab 3 Scan for available networks
The SCAN command performs an immediate scan for available
networks Infrastructure (AP) and IBSS (Ad-Hoc) networks are both
reported Network type Channel BSSID SSID Signal strength (RSSI)
and 80211 capabilities are all reported
bull Type AT+SSCAN
bull Scan syntax AT+SSCAN [=lta|pgt[ltr|s|mgt[ltfnamegt]]] -- Perform a [activepassive]
network scan [filter offfilter on SSIDfilter on MAC] [print to file])
33
FOUND BSS 14D64D243600 CHAN 01 RSSI -28 SSID ENG-WPA CAPS 0431 WPA WPA2 FOUND BSS 00180A31EA78 CHAN 11 RSSI -82 SSID ZyckoItalyWireless CAPS 0531 WPA WPA2 FOUND BSS 06180A31E7E2 CHAN 11 RSSI -85 SSID ZyckoItalyGuest CAPS 0531 WPA WPA2 OK
All
Network type
Network MAC
Network
channel Network
RSSI
Network
SSID Network
capabilities
Tera Term output
Tera Term output
Lab 3 Joining a network (WPA Key)
In order to be connected to an available Wifi network the AP parameters setting is needed
bull Set the SSID
bull Type AT+SSSIDTXT=ENG-WPA
bull Set the password
bull Type AT+SSCFG=wifi_wpa_psk_texthelloworld
bull Set the network privacy mode (0=none 1=WEP 2=WPA-Personal (TKIPAES) or WPA2-Personal (TKIPAES))
bull Type AT+SSCFG=wifi_priv_mode2
bull NB wifi_auth_type must be set to 0 AT+SSCFG=wifi_auth_type0
bull Set the network mode (1 = STA 2 = IBSS 3 = MiniAP)
bull Type AT+SSCFG=wifi_mode1
34
OK
All
Lab 3 Joining a network (WPA Key)
bull Save the settings on the flash memory and reset the module
bull Type ATampW
bull Type AT+CFUN=1
35
+WIND0Console active +WIND46WPA Crunching PSK +WIND32WiFi Hardware Started +WIND21WiFi Scanning +WIND35WiFi Scan Complete (0x0) +WIND19WiFi Join 14D64D243600 +WIND25WiFi Association with ENG-WPA successful +WIND51WPA Handshake Complete +WIND24WiFi Up 19216801xx
All
ENG-WPA AP
Tera Term output
Lab 3 Joining a network (WPA Key)
bull Check the statusstatistics variables
bull Type AT+SSTS
bull Send a ping to the gateway (ip_gw)
bull Type AT+SPING=19216801
36
ENG-WPA AP
Tera Term output
OK
All
Lab 3 Joining a network (WEP Key)
Configure the module using the WEP key (4 possible combinations
available)
Sample table
37
AP configuration AT command to be used
Security Mode WEP
WEP Key Length 64 bit
(10 hex digits)
Authentication Open
Wep Key 1 1234567890
ie
at+sssidtxt=ENG-WEP
AT+SSCFG=wifi_wep_keys[0]1234567890
AT+SSCFG=wifi_wep_key_lens05
AT+SSCFG=wifi_auth_type0
AT+SSCFG=wifi_priv_mode1
AT+SSCFG=wifi_mode1
atampw
at+cfun=1
Security Mode WEP
WEP Key Length 64 bit
(10 hex digits)
Authentication Shared
Key
Wep Key 1 1234567890
ie
at+sssidtxt=ENG-WEP
AT+SSCFG=wifi_wep_keys[0]1234567890
AT+SSCFG=wifi_wep_key_lens05
AT+SSCFG=wifi_auth_type1
AT+SSCFG=wifi_priv_mode1
AT+SSCFG=wifi_mode1
atampw
at+cfun=1
AP configuration AT command to be used
Security Mode WEP
WEP Key Length
128 bit (26 hex digits)
Authentication Open
Wep Key 1
123456789012345678
90123456
ie
at+sssidtxt=ENG-WEP
AT+SSCFG=wifi_wep_keys[0]12345678
901234567890123456
AT+SSCFG=wifi_wep_key_lens0D
AT+SSCFG=wifi_auth_type0
AT+SSCFG=wifi_priv_mode1
AT+SSCFG=wifi_mode1
atampw
at+cfun=1
Security Mode WEP
WEP Key Length
128 bit (26 hex digits)
Authentication
Shared Key
Wep Key 1
123456789012345678
90123456
ie
at+sssidtxt=ENG-WEP
AT+SSCFG=wifi_wep_keys[0]12345678
901234567890123456
AT+SSCFG=wifi_wep_key_lens0D
AT+SSCFG=wifi_auth_type1
AT+SSCFG=wifi_priv_mode1
AT+SSCFG=wifi_mode1
atampw
at+cfun=1
Lab 3 Joining a network (WEP Key)
Notes
bull ldquowifi_wep_key_lensrdquo variable values 05 and 0D
bull Itrsquos possible to enter any text string into a WEP key box in the AP in which case it will be converted into a hexadecimal key using the ASCII values of the characters A maximum of 5 text characters can be entered for 64 bit keys and a maximum of 13 characters for 128 bit keys
In this case it needs to manually convert your ASCII password to HEX and complete the wifi_wep_keys[0] variable with the HEX value bull ie AP WEP key test1 ASCII to HEX 7465737431 So the AT command is AT+SSCFG=wifi_wep_keys[0]7465737431
bull Some APs allow user to insert a passphrase and then the AP automatically generates the hex keys In this scenario user have not to perform the ASCII to HEX conversion because the AP already gives it the hex value
38
Proceed to the next LAB
Lab 4 Web client mode
bull Objective
bull HTTP GET
bull HTTP POST
bull PUSH DATA ON SERIAL PORT
bull Prerequisites
bull USB dongle and computer are set up
as described in Lab 2
bull Work in couple
40
Lab 4 HTTP GET
The HTTP GET feature performs a single HTTP request to the specified
host and path The server response is printed on the UART enabled
bull Sintax
bull AT+SHTTPGET=lthostnamegtltpathgt[ltportgt]
bull Configuration parameters
bull lthostnamegt target host DNS resolvable name or IP address
bull ltpathgt document path
bull ltportgt target port
41
Lab 4 HTTP GET
bull Device A performs an HTTP GET to the Device B
bull Device A
AT+SHTTPGET=ltDevice B IP addrgtindexhtml
Type AT+SHTTPGET=19216801xxindexhtml
42
GET indexhtml HTTP10 User-Agent SPWF01S helliphelliphellip lth1gtST SPWF01Sx11 WiFi Modulelth1gt ltpgt Welcome to the ST SPWF01Sx11 WiFi Module ltpgt ltpgt This page was delivered from the SPWF01Sx11 internal HTTP server hellip lta href=statusshtmlgtSPWF01Sx11 Status Pageltagt ltpgt ltbodygt lthtmlgt OK
Device A
A B
Tera Term output
Lab 4 HTTP POST
The HTTP POST performs a post of the given path to the specified host The module can be only used as an HTTP POST client
bull Sintax
bull AT+SHTTPPOST =lthostnamegtltpathampqueryoptsgtltformcontentgt[ltportgt]
bull Configuration parameters
bull lthostnamegt target host DNS resolvable name or IP address
bull ltpathampqueryoptsgt document path
bull ltformcontentgt form to be submitted
bull ltportgt target port
43
Lab 4 HTTP POST
bull The SPWF01S performs an HTTP POST to an HTTP Post Test Server
bull Type
at+shttppost=posttestservercompostphpname=demoampemail=mymailampsubjec
t=subjampbody=message
bull The HTTP Post Test Server replies as
displayed in the Tera Term output if the HTTP
POST successfully
44
HTTP11 200 OK Date Fri 10 Jan 2014 132414 GMT Server Apache Access-Control-Allow-Origin Vary Accept-Encoding Content-Length 139 Connection close Content-Type texthtml Successfully dumped 4 post variables View it at httpwwwposttestservercomdata2014011005241443192628 Post body was 0 chars long OK
Device A
A B
Tera Term output
HTTP POST
SERVER
Lab 4 HTTPREQ bull The SPWF01S can perform a custom HTTP request to a specified
target Refer to the User Manual for more details
bull Type
AT+SHTTPREQ=wwwgooglecom8089
After ltCRgt the module accepts data We will try to open an non-existent web page
GET downloadTagphp HTTP10ltCRgtltLFgt
User-Agent SPWF01SltCRgtltLFgt
Host iwm-testltCRgtltLFgt
Connection closeltCRgtltLFgtltCRgtltLFgt
45
HTTP10 404 Not FoundltCRgtltLFgt Date Sun 31 Jan 2016 142704 GMTltCRgtltLFgt Content-Type texthtmlltCRgtltLFgt Server HTTP server (unknown)ltCRgtltLFgt Content-Length 49ltCRgtltLFgt X-XSS-Protection 1 mode=blockltCRgtltLFgt X-Frame-Options SAMEORIGINltCRgtltLFgt ltCRgtltLFgt lthtmlgtltbodygtlth1gt404 Not Foundlth1gtltbodygtlthtmlgtltLFgtltCRgt ltLFgt ltSUBgtltSUBgtltSUBgtltCRgtltLFgt ltCRgtltLFgt OKltCRgtltLFgt
All
A B
Tera Term output
[AT+SHTTPREQ =lthostnamegt[port]ltlengthgtltCRgtltdatagt]
Lab 4 Push data on serial port
A built-in html page ldquooutput_demohtmlrdquo allows to remotely push
characters on the serial port from a remote browser
46
output_demohtml
Modulersquos IP addressoutput_demohtml
Lab 4 Push data on serial port
bull Find your IP address
bull Type AT+SSTS
bull Associate your computer with the AP
bull Open your web browser
bull In the address bar type
ltmodulersquos IP
Addressgtoutput_demohtml
bull Type
19216801xxoutput_demohtml
47
Lab 4 Push data on serial port
bull Enter the text
bull In order to manage non-ASCII chars the ip_use_decoder variable must be modified (refer to the User Manual for more details)
bull Submit
bull The text will be sent to the serial port of the module
48
Proceed to the next LAB
Lab 5 Web Server use mode
bull Objective
bull List existing files
bull Print a file
bull Create a file
bull Append to an existing file
bull Delete an existing file
bull Prerequisites
bull USB dongle and computer are
set up as described in Lab 2
bull Work alone
50
Lab 5 Web server 51
The Web Server feature allows to create print and delete ASCII files in
the RAM memory of the module
Lab 5 List existing files
The FSL command lists type sizes and name of all the existing files
bull Type AT+SFSL
52
I 461 input_demoshtml I 180 messageshtml I 384 output_demohtml I 614 indexhtml I 157 peersshtml I 193 configshtml I 174 statusshtml I 212 404html I 2022 firstsethtml I 2898 remotehtml OK
All
Files stored in the STM32
FLASH memory
Tera Term output
Lab 5 Print a file
The FSP command prints the content
of an existing file
bull Type AT+SFSP=indexhtml
53
lthtmlgt ltheadgtlttitlegtST SPWF01Slttitlegtltheadgt ltbody bgcolor=white text=blackgt lth1gtST SPWF01S Intelligent WiFi Modulelth1gt ltpgtWelcome to the ST SPWF01S intelligent Wi-Fi moduleltpgt ltpgtThis page was delivered from the SPWF01S internal HTTP serverltpgt ltpgt lta href=configshtmlgtSPWF01S Configuration Settings Pageltagt ltpgt ltpgt lta href=statusshtmlgtSPWF01S Status Pageltagt ltpgt ltpgt lta href=peersshtmlgtSPWF01S Peers Pageltagt ltpgt ltpgtMore information about the SPWF01S and other ST products can be found at STs website lta href=httpwwwSTcomgthttpwwwSTcomltagtltpgt ltbodygt lthtmlgt OK
All Tera Term output
Tip How to use the offset and length parameters AT+SFSP=indexhtml[offset][length] ie Type AT+SFSP=indexhtml520 Length parameter is mandatory if is used the offset
Lab 5 Create a file
The FSC command allows to create a file inside the SPWF for
delivery by the SPWF HTTP server
bull Sintax
bull AT+SFSC =ltfnamegtltmax_lengt[lthttp_headergt]
bull Configuration parameters
bull lt filename gt filename to create
bull lt max_len gt amount of space to allocate for file max = 4096 bytes
bull lthttp_headergt 0=HTML header automatically added 1=HTML header not
added (as by default)
Type AT+SFSC=wifidemohtml1965
54
OK
All
Tera Term output
Lab 5 Configuring the UART
bull Set CR+LF in the Terminal setup
(to properly paste text in the
terminal)
bull Tera Term Setup rarr Terminal rarr
Transmit CR+LF
55
Tip The local echo option must be disabled on Tera Term
Added in FW 35 using the AT+SFSR command user can rename dynamic files stored in the RAM memory Refer to the User Manual for more details
Lab 5 Append to an existing file
The FSA command allows to append blocks of data to an existing file
This command accepts data after the ltcrgt at the end of the command
line
bull Sintax
bull AT+SFSA=ltfilenamegtltdatalengt
bull Configuration parameters
bull lt filename gt filename pre-created
bull lt datalen gt number of characters to append to the file
Type AT+SFSA=wifidemohtml1965
56
Now SPWF accepts data
Tips
Lab 5 Append to an existing file
bull Open wifidemotxt in the following
directory Hands_on
folderHTML_demo_page
bull Check you have set up CR+LF in the
Terminal setup (for more
information refer to the slide 48)
bull Copy the file content into Tera term
(paste with ALT+V or mouse right
button)
57
OK
All
Tera Term output
Lab 5 Append to an existing file
bull Open wifidemohtml
bull Open your Web browser (suggested Google
Chrome for HTML5 test)
bull In address bar type ltSPWF IP addrgtwifidemohtml
Type 19216801xxwifidemohtml
58
Lab 5 Configuring the UART
bull Re-set CR in the Terminal setup
as by default
bull Tera Term Setup rarr Terminal rarr
Transmit CR
59
Tip The local echo option can be re-enabled on Tera Term
Lab 5 List existing files
Lets list the files
bull Type AT+SFSL
60
D 1965 wifidemohtml I 461 input_demoshtml I 180 messageshtml I 384 output_demohtml I 614 indexhtml I 157 peersshtml I 193 configshtml I 174 statusshtml I 212 404html I 2022 firstsethtml I 2898 remotehtml OK
All
File stored in the RAM memory
Tera Term output
Lab 5 Delete an existing file
The FSD command allows to delete an existing file by name Static
files may not be deleted
bull Sintax
bull AT+SFSD=ltfilenamegt
Type AT+SFSD=wifidemohtml
61
OK
All
Tera Term output
Lab 5 Delete an existing file
bull Re-open wifidemohtml
bull Open your Web browser
bull In address bar ltSPWF IP addrgtwifidemohtml
Type 19216801xxwifidemohtml
62
Proceed to the next LAB
Lab 6 Web Server use mode
bull Objective
bull Create an image file
bull Filesystem update over-the-air
bull Filesystem update over UART
bull Prerequisites
bull Work alone
64
Lab 6 Web server 65
The Web Server feature also allows to upload generic files (PDF
HTML DOC JPEG and so on) in the EXTERNAL FLASH memory of
the module It needs to follow the below steps
- create an image file (IMG) using the tool provided in the Hands-on package
(the IMG contains the files to upload)
- Put the image in a generic and accessible Web Server (Apache Web server
will be used in the Hands-on as example)
- Using the proper AT command the IMG will be retrieved over-the-air and the
static files will be created in the external flash memory
Lab 6 Create an image file
bull Open the following folder and
extract all the files
hands_on_wififilesystem_update
bull Put your own files to upload in the
pages folder (max 512 Kbytes)
bull Run genbat
bull Open the pages folder and copy
outfileimg in your external Web
Server (Apache)
66
3
1
2
Lab 6 Create an image file
The Apache Web Server will be used in this tutorial
(Apache Web Server is available at this link
httparchiveapacheorgdisthttpdbinarieswin32httpd-2225-win32-x86-openssl-098ymsi)
Note please check that the local firewall is disabled or properly set It can
block the connection from module to Apache
bull Copy outfileimg in the Apache 22
htdocs folder (this is the default
root server directory)
67
4
Lab 6 Filesystem update
The HTTPDFSUPDATE command allows to create static files inside
the SPWF for delivery by the SPWF HTTP server
bull Sintax
bull AT+SHTTPDFSUPDATE=lthostnamegtltpathgt[port]
bull Configuration parameters
bull lthostnamegt external web server DNS resolvable name or IP address
bull ltpathgt document path
bull ltportgt target host port
68
Lab 6 Filesystem update
bull In Tera Term type
AT+SHTTPDFSUPDATE=192168x10xoutfileimg
bull Reset the module
bull Type AT+CFUN=1
69
Image length 357957 (offset 0x00080000 block len 4096) Write len 4096 -gt 0x80000 Write len 4096 -gt 0x81000 Write len 4096 -gt 0x82000 helliphelliphelliphellip helliphelliphelliphelliphelliphellip helliphelliphelliphelliphellip Write len 4096 -gt 0xD6000 Write len 1612 -gt 0xD7000 (final) Wrote 357964 bytes Complete Please reboot (at+cfun=1) OK
All
Tera Term output
The file system will be permanently deleted The new IMG will overwrite the existent files in the file system
Warning
Lab 6 Filesystem update
Lets list the files
bull Type AT+SFSL
70
E 2615 st766gif E 112374 modulepng E 2430 index1html E 419 indexhtml E 239887 MKTWiFipdf I 461 input_demoshtml I 180 messageshtml I 384 output_demohtml I 614 indexhtml I 157 peersshtml I 193 configshtml I 174 statusshtml I 212 404html I 2022 firstsethtml I 2898 remotehtml OK
All
Files stored in
the EXT FLASH memory
Tera Term output
Lab 6 Filesystem update
bull Open index1html page
bull Open your web browser
bull In the address bar ltSPWF IP addrgtindex1html
Type 192168x1xxindex1html
71
Lab 6 Filesystem erase
Erase the external httpd filesystem
bull Type AT+S HTTPDFSERASE
The files stored in the EXT FLASH memory will be erased
Lets list the files
bull Type AT+SFSL
72
I 461 input_demoshtml I 180 messageshtml I 384 output_demohtml I 614 indexhtml I 157 peersshtml I 193 configshtml I 174 statusshtml I 212 404html I 2022 firstsethtml I 2898 remotehtml OK
All
Tera Term output
Lab 6 Filesystem update
The HTTPDFSWRITE command allows to create static files inside
the SPWF via the UART interface The HW flow control MUST be
enabled in order to use the command
bull Sintax
bull AT+SHTTPDFSWRITE =ltdatalengtltCRgtltdatagt
bull Configuration parameters
bull ltdatalengt Amount of bytes to be sent
73
Lab 6 Filesystem update
bull Type AT+S HTTPDFSWRITE=357957
bull In Tera Term File ndash Send File
bull Reset the module
bull Type AT+CFUN=1
74
Image length 357957 (offset 0x00080000 block len 4096) Write len 4096 -gt 0x80000 Write len 4096 -gt 0x81000 Write len 4096 -gt 0x82000 helliphelliphelliphellip helliphelliphelliphelliphelliphellip helliphelliphelliphelliphellip Write len 4096 -gt 0xD6000 Write len 1612 -gt 0xD7000 (final) Wrote 357964 bytes Complete Please reboot (at+cfun=1) OK
All
Tera Term output
The file system will be permanently deleted The new IMG will overwrite the existent files in the file system
Warning
Proceed to the next LAB
Lab 7 Socket interface
bull Objective
bull Open TCPUDP connection
bull Write data to socket
bull Read data from socket
bull Close socket
bull Prerequisites
bull Work alone
76
TCPUDP socket
Socket
Client
Socket
Server
Lab 7 TCPUDPUART socket interface 77
The Socket interface allows communication via TCP UDP and UART
The SPWF is both a client and a server socket In this LAB will be
detailed the socket client feature
Ho
st
En
d P
rod
uct
Open TCPUDP connection
Write data to socket
Read data from socket
Close socket
Lab 7 Open TCPUDP connection
The SOCKON command allows to open a TCPUDP connection
to a specified host (up to 8 socket connections at same time)
bull Sintax
bull AT+SSOCKON=lthostnamegtltportgtltprotocolgtind
bull Configuration parameters
bull lthostnamegt target host DNS resolvable name or IP address
bull ltportgt TCPUDP socket port
bull ltprotocolgt t for TCP socket u for UDP socket
bull ind indicate when data has arrived (optional) Up to 4 (x730 bytes)
consecutive ldquoPending datardquo message (without any AT+SSOCKR) are
guaranteed It is suggested to empty the buffer using the AT+SSOCKR
command and to avoid exceeding 4 indications
78
Lab 7 Open TCPUDP connection
bull Open the TCP socket server (disable the firewall to properly
run it)
bull Folder hands_on_wifitcp socket serverserverexe
bull The TCP server listens for incoming connections on the port
32000 It sends back all data received
79
Optional - Lab 7 Open TCPUDP connection
bull Using an Android platform the socket server can be opened
using a specific APP (Socket Protocol available on Play Store)
bull The TCP socket server can be configured to listen for
incoming connections on the port 32000
bull Type 32000 on laquoPort Listen toraquo box
bull Click on Listen
80
Lab 7 Open TCPUDP connection
bull Type AT+SSOCKON=192168010x32000tind
bull The client and the server use the socket identifier (ID)
displayed
81
ID 00 OK
All
Tera Term output
Lab 7 Write data to socket
The SOCKW command allows to write data to the specified ID
socket
This command accepts data after the ltcrgt at the end of the
command line
bull Sintax
bull AT+SSOCKW=ltIDgtltlengt
bull Configuration parameters
bull ltIDgt socket identifier
bull ltlengt data length to send
82
Lab 7 Write data to socket
bull Write data
bull Type AT+SSOCKW=0013
bull Type hello worldltCRgt
bull SPWF shows that there are ltpending datagt and their amount
83
+WIND55Pending Data013
All
Tera Term output
ID
Pending
bytes
Note the module is waiting 13 bytes to be written to the socket As soon as 13 bytes (or characters) are sent from the terminal the module is going to write them to the socket and will be ready to receive new commands
Lab 7 Read data from socket
The SOCKR command allows to read data from socket
bull Sintax
bull AT+SSOCKR=ltIDgtltlengt
bull Configuration parameters
bull ltIDgt socket identifier
bull ltlengt data length to read
84
Lab 7 Read data from socket
bull Read data
bull Type AT+SSOCKR=0013
85
hello world OK
All
Tera Term output
Lab 7 Close socket
The SOCKC command allows to close socket
bull Sintax
bull AT+SSOCKC=ltIDgt
bull Configuration parameters
bull ltIDgt socket identifier
86
Tera Term output
Lab 7 Close socket
bull Close socket
bull Type AT+SSOCKC=00
87
OK
All
Proceed to the next LAB
Lab 8 MiniAP mode for the first set
bull Objective
bull Create a direct connection between
the module and an end device
bull First set of the module in order to
enable the connection between the
module and a generic AP
bull Prerequisites
bull Work alone
89
Tera Term output
Lab 8 Configuring the module in MiniAP mode
The Mini AP mode is available starting from the following FW release
SPWF01S-131115-de4568d-RELEASE
In order to set the module in Mini AP mode the following parameters
are needed
bull Set the SSID
bull Type AT+SSSIDTXT=SPWF_AP
bull Set the network privacy mode (0=OPEN or 1=WEP are supported)
bull Type AT+SSCFG=wifi_priv_mode0
bull Set the network mode (1 = STA 2 = IBSS 3 = MiniAP)
bull Type AT+SSCFG=wifi_mode3
90
OK
All
Lab 8 Configuring the module in MiniAP mode
bull Save the settings on the flash memory and reset the module
bull Type ATampW
bull Type AT+CFUN=1
91
+WIND0Console active +WIND32WiFi Hardware Started +WIND26WiFi Started AP with network SPWF_AP +WIND24WiFi Up 172181511
All
Tera Term output
SPWF_AP
Lab 8 Configuring the module in MiniAP mode (WEP Key)
Configure the module using the WEP key (2 possible combinations
available)
Sample table
92
AP configuration AT command to be used
Security Mode WEP
WEP Key Length 64 bit
(10 hex digits)
Authentication Open
Wep Key 1 1234567890
ie
at+sssidtxt=SPWF_AP
AT+SSCFG=wifi_wep_keys[0]1234567890
AT+SSCFG=wifi_wep_key_lens05
AT+SSCFG=wifi_auth_type0
AT+SSCFG=wifi_priv_mode1
AT+SSCFG=wifi_mode3
atampw
at+cfun=1
AP configuration AT command to be used
Security Mode WEP
WEP Key Length
128 bit (26 hex digits)
Authentication Open
Wep Key 1
123456789012345678
90123456
ie
at+sssidtxt=SPWF_AP
AT+SSCFG=wifi_wep_keys[0]12345678
901234567890123456
AT+SSCFG=wifi_wep_key_lens0D
AT+SSCFG=wifi_auth_type0
AT+SSCFG=wifi_priv_mode1
AT+SSCFG=wifi_mode3
atampw
at+cfun=1
Lab 8 Configuring the module in MiniAP mode (WEP Key)
Notes
bull ldquowifi_wep_key_lensrdquo variable values 05 and 0D
bull Itrsquos possible to enter any text string as WEP key It have to be converted into a
hexadecimal key using the ASCII values of the characters A maximum of 5 text
characters can be entered for 64 bit keys and a maximum of 13 characters for 128
bit keys
In this case it needs to manually convert your ASCII password to
HEX and complete the wifi_wep_keys[0] variable with the HEX
value
bull ie WEP key test1
ASCII to HEX 7465737431
So the AT command is AT+SSCFG=wifi_wep_keys[0]7465737431
93
Lab 8 Customizing the MiniAP address (optional)
Starting from FW 33 the module allows user to customize the IP address of the MiniAP
bull Set the SSID
bull Type AT+SSSIDTXT=SPWF_AP
bull Set the network privacy mode (0=OPEN or 1=WEP are supported)
bull Type AT+SSCFG=wifi_priv_mode0
bull Set the network mode (1 = STA 2 = IBSS 3 = MiniAP)
bull Type AT+SSCFG=wifi_mode3
bull Set the use_dhcp mode (0 = DHCP server off 1 = DHCP server on 2 = DHCP server on and customizable)
bull Type AT+SSCFG=ip_use_dhcp2
bull Set the MiniAP address
bull Type AT+SSCFG=ip_ipaddr19216801
bull Save the settings on the flash memory and reset the module
bull Type ATampW
bull Type AT+CFUN=1
94
Tera Term output
+WIND0Console active +WIND32WiFi Hardware Started +WIND26WiFi Started AP with network SPWF_AP +WIND24WiFi Up 19216801
All
Tip the MiniAP will assign sequential addresses to the client ie 1deg client 19216802 2deg client 19216803
Lab 8 Mini AP mode
bull Associate your end device to the
SPWF_AP network
bull Find the SPWF_AP network and connect
the end device to the module
95
SPWF_AP +WIND2890187C960D0B Associated +WIND29DHCP reply for 17218151290187C960D0B to 172181512 +WIND29DHCP reply for 17218151290187C960D0B to 172181512
All
Tera Term output
Lab 8 Mini AP mode
bull Open your web browser
bull In the address bar type captiveportalnet
96
SPWF_AP
Tip The Mini AP domain can be set using the variable ip_apdomainname The default value is ldquocaptiveportalnetrdquo
The Mini AP default homepage can be set using the variable ip_apredirect The default value is ldquofirstsethtmlrdquo
Tip If the AP domain name is not quickly opened itrsquos suggested to turn off an eventual proxy server (check the connection settings or browser preferences)
Lab 8 First Set Page
bull The first set page allows to configure the module in IDLE mode
STATION mode IBSS mode and MINI AP mode
97
Used for STA IBSS MINI AP
Mandatory for IDLE STA IBSS MINI AP
Used for STA IBSS (WEP) MINI AP (WEP)
Used for STA (if DHCP = OFF) IBSS
(mandatory) MINI AP (if DHCP = OFF)
Used for STA IBSS (mandatory DHCP = OFF) MINI AP
Used for STA (WEP key) IBSS (WEP) MINI AP (WEP)
Used for STA IBSS MINI AP
Lab 8 Mini AP mode
bull Set all the parameters required in order to enable the connection
between the module and a generic AP
ie AP configured in WPAWPA2 mode
bull MiniAP PassKey anonymous (by default)
bull SSID of the access point
bull Password of the access point
bull Authentication type of the access point
bull Use mode of the module
98
Tip The Mini AP PassKey can be set using the variable ldquouser_descrdquo The default value is ldquoanonymousrdquo
Note In order to manage non-ASCII chars the ip_use_decoder variable must be modified according as below at+sscfg=ip_use_decoder0 no decoding [default] at+sscfg=ip_use_decoder1 RAW decoding (the USER and PSK fields must be completed in HEX) at+sscfg=ip_use_decoder2 UTF-8 decoding at+sscfg=ip_use_decoder6 HTML entities decoding
Lab 8 Mini AP mode
bull Click on GO button and then send the
parameters confirming with OK
99
SPWF_AP
AP
SSID ciscosb2
Lab 8 Mini AP mode
bull The module will receive the parameters and will automatically
connect to the access point required
100
+WIND57Received SSID is ciscosb2 +WIND57Received PWD is +WIND57Received Auth mode is 2 +WIND57Received Mode is 1 +WIND2RESET +WIND1Poweron (--SPWF01S) +WIND13ST IWM Copyright (c) 2012-2013 STmicroelectronics +WIND3Watchdog Running +WIND0Console active +WIND46WPA Crunching PSK +WIND32WiFi Hardware Started +WIND21WiFi Scanning +WIND35WiFi Scan Complete (0x0) +WIND19WiFi Join 02621F518F0B +WIND25WiFi Association with ciscosb2 successful +WIND51WPA Handshake Complete +WIND24WiFi Up 1921681106
All
Tera Term output
ciscosb2
AP
Lab 8 Mini AP mode ndash RAW decoding example
101
Note In order to manage non-ASCII chars the ip_use_decoder variable must be modified according as below at+sscfg=ip_use_decoder0 no decoding [default] at+sscfg=ip_use_decoder1 RAW decoding (the USER and PSK fields must be completed in HEX) at+sscfg=ip_use_decoder2 UTF-8 decoding at+sscfg=ip_use_decoder6 HTML entities decoding
7177657261736466
AP SSIS
AP PSK
Proceed to the next LAB
Lab 9 Socket interface - MiniAP mode
bull Objective
bull Create a direct connection between
the module and an end device
bull Socket interface used in MiniAP
mode
bull Prerequisites
bull Work alone
103
Tera Term output
Lab 9 Configuring the module in MiniAP mode
The Mini AP mode (available starting from the SPWF01S-131115-de4568d-RELEASE) also allows to use the socket interface The procedure is the same as in Lab 7
In order to set the module in Mini AP mode the following parameters are needed
bull Set the SSID
bull Type AT+SSSIDTXT=SPWF_AP
bull Set the network privacy mode
bull Type AT+SSCFG=wifi_priv_mode0
bull Set the network mode (1 = STA 2 = IBSS 3 = MiniAP)
bull Type AT+SSCFG=wifi_mode3
104
OK
All
Lab 9 Configuring the module in MiniAP mode
bull Save the settings on the flash memory and reset the module
bull Type ATampW
bull Type AT+CFUN=1
105
+WIND0Console active +WIND32WiFi Hardware Started +WIND26WiFi Started AP with network SPWF_AP +WIND24WiFi Up 172181511
All
Tera Term output
SPWF_AP
Lab 9 Mini AP mode
bull Connect your PC to the SPWF_AP
network
bull Find the SPWF_AP network and connect
the end device to the module
106
SPWF_AP +WIND2890187C960D0B Associated +WIND29DHCP reply for 17218151290187C960D0B to 172181512 +WIND29DHCP reply for 17218151290187C960D0B to 172181512
All
Tera Term output
Lab 9 Open TCPUDP connection
As described in the Lab 7 the SOCKON command allows to
open a TCPUDP connection to a specified host
bull Sintax
bull AT+SSOCKON=lthostnamegtltportgtltprotocolgtind
bull Configuration parameters
bull lthostnamegt target host DNS resolvable name or IP address
bull ltportgt TCPUDP socket port
bull ltprotocolgt t for TCP socket u for UDP socket
bull ind indicate when data has arrived (optional) Up to 4 consecutive ldquoPending
datardquo message (without any AT+SSOCKR) are guaranteed It is
suggested to empty the buffer using the AT+SSOCKR command and
to avoid exceeding 4 indications
107
Lab 9 Open TCP connection
bull Open the TCP socket server (disable the firewall to properly
run it)
bull Folder hands_on_wifitcp socket serverserverexe
bull The TCP server listens for incoming connections on the port
32000 It sends back all data received
108
Lab 9 Open TCP connection
bull Type AT+SSOCKON=17218151232000tind
bull The client and the server use the socket identifier (ID)
displayed
109
ID 00 OK
All
Tera Term output
Lab 9 Write data to socket
The SOCKW command allows to write data to the specified ID
socket
This command accepts data after the ltcrgt at the end of the
command line
bull Sintax
bull AT+SSOCKW=ltIDgtltlengt
bull Configuration parameters
bull ltIDgt socket identifier
bull ltlengt data length to send
110
Lab 9 Write data to socket
bull Write data
bull Type AT+SSOCKW=0013
bull Type hello worldltCRgt
bull SPWF shows that there are ltpending datagt and their amount
111
+WIND55Pending Data013
All
Tera Term output
ID
Pending
bytes
Note the module is waiting 13 bytes to be written to the socket As soon as 13 bytes (or characters) are sent from the terminal the module is going to write them to the socket and will be ready to receive new commands
Lab 9 Read data from socket
The SOCKR command allows to read data from socket
bull Sintax
bull AT+SSOCKR=ltIDgtltlengt
bull Configuration parameters
bull ltIDgt socket identifier
bull ltlengt data length to read
112
Lab 9 Read data from socket
bull Read data
bull Type AT+SSOCKR=0013
113
hello world OK
All
Tera Term output
Lab 9 Close socket
The SOCKC command allows to close socket
bull Sintax
bull AT+SSOCKC=ltIDgt
bull Configuration parameters
bull ltIDgt socket identifier
114
Tera Term output
Lab 9 Close socket
bull Close socket
bull Type AT+SSOCKC=00
115
OK
All
Proceed to the next LAB
Lab 10 Web server - MiniAP mode
bull Objective
bull Create a direct connection between
the module and an end device
bull Web server used in MiniAP mode
bull Prerequisites
bull Work alone
117
Tera Term output
Lab 10 Configuring the module in MiniAP mode
The Mini AP mode (available starting from the SPWF01S-131115-de4568d-RELEASE) also allows to use the module file system (both RAM and IntExt FLASH)
In order to set the module in Mini AP mode the following parameters are needed
bull Set the SSID
bull Type AT+SSSIDTXT=SPWF_AP
bull Set the network privacy mode
bull Type AT+SSCFG=wifi_priv_mode0
bull Set the network mode (1 = STA 2 = IBSS 3 = MiniAP)
bull Type AT+SSCFG=wifi_mode3
118
OK
All
Lab 10 Configuring the module in MiniAP mode
bull Save the settings on the flash memory and reset the module
bull Type ATampW
bull Type AT+CFUN=1
119
+WIND0Console active +WIND32WiFi Hardware Started +WIND26WiFi Started AP with network SPWF_AP +WIND24WiFi Up 172181511
All
Tera Term output
SPWF_AP
Lab 10 Mini AP mode
bull Connect your PC to the SPWF_AP
network
bull Find the SPWF_AP network and connect
the end device to the module
120
SPWF_AP +WIND2890187C960D0B Associated +WIND29DHCP reply for 17218151290187C960D0B to 172181512 +WIND29DHCP reply for 17218151290187C960D0B to 172181512
All
Tera Term output
Lab 10 Access to Web server - Mini AP mode
bull Open your web browser
bull In the address bar type
captiveportalnetindexhtml
bull The SPWF01S homepage will be
displayed
121
SPWF_AP Tip The Mini AP domain can be set using the variable ip_apdomainname The default value is ldquocaptiveportalnetrdquo
Lab 10 Access to Web server - Mini AP mode
bull Open the SPWF01S Device Status
bull click on the highlighted link
bull The SPWF01S Device Status will be
displayed
122
SPWF_AP Tip The Mini AP domain can be set using the variable ip_apdomainname The default value is ldquocaptiveportalnetrdquo
The Mini AP default homepage can be set using the variable ip_apredirect The default value is ldquofirstsethtmlrdquo
Proceed to the next LAB
Lab 11 Remotely control - GPIOs
bull Objective
bull write remotely a GPIO
bull configure remotely a GPIO
bull read remotely a GPIO
bull Prerequisites
bull module connected to the AP or
module configured in MiniAP mode
124
Lab 11 Remotely control - GPIO
This feature allows to remotely write configure and read a GPIO
The module should be connected to the AP (as shown in Lab 3) or
should be configured in Mini AP mode (as shown in Lab 8)
The external client have to open the remotehtml page stored in the
module
125
ENG-WPA AP
SPWF_AP
miniAP
Tera Term output
Lab 11 Joining a network
In order to be connected to an available Wifi network the AP parameters setting is needed
bull Set the SSID
bull Type AT+SSSIDTXT=ENG-WPA
bull Set the password
bull Type AT+SSCFG=wifi_wpa_psk_texthelloworld
bull Set the network privacy mode (0=none 1=WEP 2=WPA-Personal (TKIPAES) or WPA2-Personal (TKIPAES))
bull Type AT+SSCFG=wifi_priv_mode2
bull NB wifi_auth_type must be set to 0 AT+SSCFG=wifi_auth_type0
bull Set the network mode (1 = STA 2 = IBSS 3 = MiniAP)
bull Type AT+SSCFG=wifi_mode1
126
OK
All
Lab 11 Joining a network
bull Save the settings on the flash memory and reset the module
bull Type ATampW
bull Type AT+CFUN=1
127
+WIND0Console active +WIND46WPA Crunching PSK +WIND32WiFi Hardware Started +WIND21WiFi Scanning +WIND35WiFi Scan Complete (0x0) +WIND19WiFi Join 14D64D243600 +WIND25WiFi Association with ENG-WPA successful +WIND51WPA Handshake Complete +WIND24WiFi Up 19216801xx
All
ENG-WPA AP
Tera Term output
Lab 11 Remotely control in MiniAP mode - GPIO
bull Open your web browser
bull In the address bar type
192168x1xxremotehtml
128
ENG-WPA
AP
Lab 11 Remotely control in MiniAP mode - GPIO
bull Try to write the GPIO14 connected to the LED3 (check if the
LED3 is mounted on your EVAL BOARD otherwise can be used
the GPIO13)
bull Click on the laquoGOraquo button
and LED3 will switch on
129
ENG-WPA
AP
Proceed to the next LAB
Lab 12 Input demo
bull Objective
bull Send a message from the server (wifi
module) to an external client connected
to the same network
bull Prerequisites
bull module connected to the AP or module
configured in MiniAP mode
131
Lab 12 Input demo
The module provides some DEMOs to show the interaction between
the module and an external client connected to the same network
The module should be connected to the AP (as shown in Lab 3) or
should be configured in Mini AP mode (as shown in Lab 8)
In order to run this demo the client have to open the
input_demoshtml page stored in the module
132
ENG-WPA AP
SPWF_AP
miniAP
Tera Term output
Lab 12 Joining a network
In order to be connected to an available Wifi network the AP parameters setting is needed
bull Set the SSID
bull Type AT+SSSIDTXT=ENG-WPA
bull Set the password
bull Type AT+SSCFG=wifi_wpa_psk_texthelloworld
bull Set the network privacy mode (0=none 1=WEP 2=WPA-Personal (TKIPAES) or WPA2-Personal (TKIPAES))
bull Type AT+SSCFG=wifi_priv_mode2
bull NB wifi_auth_type must be set to 0 AT+SSCFG=wifi_auth_type0
bull Set the network mode (1 = STA 2 = IBSS 3 = MiniAP)
bull Type AT+SSCFG=wifi_mode1
133
OK
All
Lab 12 Joining a network
bull Save the settings on the flash memory and reset the module
bull Type ATampW
bull Type AT+CFUN=1
134
+WIND0Console active +WIND46WPA Crunching PSK +WIND32WiFi Hardware Started +WIND21WiFi Scanning +WIND35WiFi Scan Complete (0x0) +WIND19WiFi Join 14D64D243600 +WIND25WiFi Association with ENG-WPA successful +WIND51WPA Handshake Complete +WIND24WiFi Up 19216801xx
All
ENG-WPA AP
Tera Term output
Lab 12 Input demo
bull Open your web browser
bull In the address bar type
192168x1xxinput_demoshtml
bull Insert the message to the client
ie type laquotestraquo (suggested ndash copy
the string and paste it in the
terminal) and then send a carriage
return
135
VERY IMPORTANT
Both client and server are pending (2 sec) after the page
request If no message is sent from the module a timeout
mechanism will be triggered
The server shows the ldquo+WIND56 messagerdquo and it will
wait for a string to be inserted and terminated by [Cr] ldquo+WIND56Insert message to clientdrdquo d is the Nth input SSI into html page (please refer to CGIampSSI Application Notes for details)
Lab 12 Input demo
bull The module receives the HTML
page containing the string inserted
server-side
bull Below this string there are two
buttons to try again the demo or to
return to the homepage
136
Proceed to the next LAB
Lab 13 Socket Server functionality
bull Objective
bull Configure a Server Listening Port
bull Open a TCP connection from a
socket client to the module
bull Data modeCommand Mode usage
bull Prerequisites
bull module connected to the AP or
module configured in MiniAP mode
bull PC to be used as socket client
138
TCP socket
Socket
Server
Socket
Client
Lab 13 Socket Server
This feature allows to enable the socket server mode The module
can be able to listen for an incoming connection on the specified port
The module should be connected to the AP (as shown in Lab 3) or
should be configured in Mini AP mode (as shown in Lab 8)
Please refer to ldquoSocket Server Application Notesrdquo for more details
139
ENG-WPA AP
SPWF_AP
miniAP
Tera Term output
Lab 13 Joining a network
In order to be connected to an available Wifi network the AP parameters setting is needed
bull Set the SSID
bull Type AT+SSSIDTXT=ENG-WPA
bull Set the password
bull Type AT+SSCFG=wifi_wpa_psk_texthelloworld
bull Set the network privacy mode (0=none 1=WEP 2=WPA-Personal (TKIPAES) or WPA2-Personal (TKIPAES))
bull Type AT+SSCFG=wifi_priv_mode2
bull NB wifi_auth_type must be set to 0 AT+SSCFG=wifi_auth_type0
bull Set the network mode (1 = STA 2 = IBSS 3 = MiniAP)
bull Type AT+SSCFG=wifi_mode1
140
OK
All
Lab 13 Joining a network
bull Save the settings on the flash memory and reset the module
bull Type ATampW
bull Type AT+CFUN=1
141
+WIND0Console active +WIND46WPA Crunching PSK +WIND32WiFi Hardware Started +WIND21WiFi Scanning +WIND35WiFi Scan Complete (0x0) +WIND19WiFi Join 14D64D243600 +WIND25WiFi Association with ENG-WPA successful +WIND51WPA Handshake Complete +WIND24WiFi Up 19216801xx
All
ENG-WPA AP
Tera Term output
Lab 13 Socket Server
bull Socket server turn ON the TCP Socket Server (user must
specify the server listening port)
bull Type AT+SSOCKD=32000 (AT+SOCKD=32000u for UDP socket server)
bull Check the status of the socket server
bull Type AT+SSTS=ip_sockd_port
142
ENG-WPA
AP
Tera Term output
OK ip_sockd_port = 32000 OK
All
Tip you can Turn OFF the Socket Server using a server listening port = 0 (type AT+SSOCKD=0)
Lab 13 Socket Server
bull Socket client can be used a simple socket client in order to test the communication
(SocketTest ndash available on httpsourceforgenetprojectssockettest)
143
ENG-WPA
AP
Lab 13 Socket Server
bull Socket client
bull Insert the modulersquos IP Address and the port
bull Click on Connect button
144
Tera Term output
+WIND61Incoming Socket Client1921681102 +WIND60Now in Data Mode
All
Lab 13 Socket Server
bull The module (socket server) enters in data mode and a bidirectional channel is
created to allow exchanging data with the socket client
bull Try to send and receive data from the module
145
Tera Term output
test_1
All
Lab 13 Socket Server ndash escape sequence
bull From Data Mode to Command Mode
bull Configuration variable used escape_seq (default is ldquoat+srdquo case sensitive
suggested to be sent by the local host in a single complete packet with no CR or
LF in the sequence)
bull Type at+s
bull Now itrsquos possible to send AT commands while the socket connection
is still active
146
Tera Term output
+WIND59Back to Command Mode
All
Tip During the Command Mode you cannot send data to client but can receive data from it Every data chunk generates an URC (+WIND64Sockd Pending Data) with limit to 4 (x730 bytes) This is the max number of pending messages From the 5th chunk on messages are lost
Lab 13 Socket Server ndash return to data mode
bull From Command Mode to Data Mode
bull While in Command Mode
bull Type AT+S (this is an AT command AT+S must be followed by ltCRgt)
bull The module returns in data mode
147
ENG-WPA
AP
Tera Term output
+WIND60Now in Data Mode
All
Lab 13 Socket Server ndash turn off
bull Turn OFF the Socket Server
bull Type at+s (to enter in command mode)
bull Type AT+SSOCKD=0
148
ENG-WPA
AP
Tera Term output
OK +WIND62Socket Client Gone1921681102
All
Proceed to the next LAB
Lab 14 Low power modes
bull Objective
bull Practice with Radio Power Save
bull Sleep Mode
bull Standby Mode
bull Prerequisites
bull module connected to the AP
150
Lab 14 Low power modes
This feature allows to enable the low power states
The module supports the ldquoRadio Power Saverdquo mode the ldquoSleeprdquo
mode and the ldquoStandbyrdquo mode
The module should be connected to the AP (as shown in Lab 3) in
order to use the ldquoRadio Power Saverdquo mode
Please refer to ldquoSPWF01S Power Management Application Notesrdquo for
more details
151
ENG-WPA AP
Low Power
Tera Term output
Lab 14 Joining a network
In order to be connected to an available Wifi network the AP parameters setting is needed
bull Set the SSID
bull Type AT+SSSIDTXT=ENG-WPA
bull Set the password
bull Type AT+SSCFG=wifi_wpa_psk_texthelloworld
bull Set the network privacy mode (0=none 1=WEP 2=WPA-Personal (TKIPAES) or WPA2-Personal (TKIPAES))
bull Type AT+SSCFG=wifi_priv_mode2
bull NB wifi_auth_type must be set to 0 AT+SSCFG=wifi_auth_type0
bull Set the network mode (1 = STA 2 = IBSS 3 = MiniAP)
bull Type AT+SSCFG=wifi_mode1
152
OK
All
Lab 14 Joining a network
bull Save the settings on the flash memory and reset the module
bull Type ATampW
bull Type AT+CFUN=1
153
+WIND0Console active +WIND46WPA Crunching PSK +WIND32WiFi Hardware Started +WIND21WiFi Scanning +WIND35WiFi Scan Complete (0x0) +WIND19WiFi Join 14D64D243600 +WIND25WiFi Association with ENG-WPA successful +WIND51WPA Handshake Complete +WIND24WiFi Up 19216801xx
All
Tera Term output
ENG-WPA AP
Low Power
Lab 14 Low power modes ndash Power Save 154
Module
Power State STM32 WLAN
Standby Standby Standby
Sleep Stop PS
Power Save Run PS or Fast-PS
Active Rx Run Rx Idle Rx Active
Active Tx Run Tx Active
Lab 14 Low power modes ndash Power Save
bull By default the module starts in ACTIVE mode
bull Enable the Power Save Mode
bull Type at+sscfg=wifi_powersave1 (ldquowifi_powersave2rdquo enables the Fast-PS mode)
bull Enable the doze operational mode
bull Type at+sscfg=wifi_operational_mode11 (ldquowifi_operational_mode12rdquo enables the quiescent mode)
bull Choose the wake up mode
1 Wake up every n beacon (specified in the wifi_beacon_wakeup variable)
bull Type at+sscfg=wifi_listen_interval0
bull Type at+sscfg=wifi_beacon_wakeup1
OR
2 Wake up every n beacon adaptively (specified in the wifi_beacon_wakeup variable)
bull Type at+sscfg=wifi_listen_interval1
bull Type at+sscfg=wifi_beacon_wakeup1
155
Tip The Wifi Power Save (wifi_powersave1) can also be quickly enabled using the command AT+CFUN=2
Lab 14 Low power modes ndash Power Save
bull Save the settings on the flash memory and reset the module
bull Type ATampW
bull Type AT+CFUN=1
bull The WIND66 message related to Low Power Mode will be
displayed
156
+WIND1Poweron (--SPWF01S) +WIND13ST SPWF01S IWM Copyright (c) 2012-2014 STMicroelectronics Inc All rights Reserved +WIND3Watchdog Running +WIND0Console active +WIND32WiFi Hardware Started +WIND21WiFi Scanning +WIND35WiFi Scan Complete (0x0) +WIND19WiFi Join 02621F518F0B +WIND25WiFi Association with IoT successful +WIND51WPA Handshake Complete +WIND24WiFi Up 1921681104 +WIND66Low Power mode1
All
Tera Term output
ENG-WPA AP
Low Power
Lab 14 Low power modes ndash Sleep Mode 157
Module
Power State STM32 WLAN
Standby Standby Standby
Sleep Stop PS or Fast-PS
Power Save Run PS or Fast-PS
Active Rx Run Rx Idle Rx Active
Active Tx Run Tx Active
Lab 14 Low power modes ndash Sleep Mode
bull In the Sleep Mode the core STM32 is stopped
bull Enable the Sleep Mode
bull Type at+sscfg=sleep_enabled1
bull Enable the Power Save Mode
bull Type at+sscfg=wifi_powersave1 (ldquowifi_powersave2rdquo enables the Fast-PS mode)
bull Enable the doze operational mode
bull Type at+sscfg=wifi_operational_mode11 (ldquowifi_operational_mode12rdquo enables the quiescent mode)
bull Choose the wake up mode
1 Wake up every n beacon (specified in the wifi_beacon_wakeup variable)
bull Type at+sscfg=wifi_listen_interval0
bull Type at+sscfg=wifi_beacon_wakeup1
OR
2 Wake up every n beacon adaptively (specified in the wifi_beacon_wakeup variable)
bull Type at+sscfg=wifi_listen_interval1
bull Type at+sscfg=wifi_beacon_wakeup1
158
Tip The Wifi Sleep Mode (and wifi_powersave1) can also be quickly enabled using the command AT+CFUN=3
Lab 14 Low power modes ndash Sleep Mode
bull Save the settings on the flash memory and reset the module
bull Type ATampW
bull Type AT+CFUN=1
bull The WIND69 message related to Sleep Mode will be displayed
159
+WIND1Poweron (--SPWF01S) +WIND13ST SPWF01S IWM Copyright (c) 2012-2014 STMicroelectronics Inc All rights Reserved +WIND3Watchdog Running +WIND0Console active +WIND32WiFi Hardware Started +WIND21WiFi Scanning +WIND35WiFi Scan Complete (0x0) +WIND19WiFi Join 02621F518F0B +WIND25WiFi Association with IoT successful +WIND51WPA Handshake Complete +WIND24WiFi Up 1921681104 +WIND66Low Power mode1 +WIND69Going into DeepSleep
All
Tera Term output
ENG-WPA AP
Low Power
Lab 14 Low power modes ndash Sleep Mode
bull Wake STM32 up using the GPIO6
bull Put the GPIO6 to 25V (jumper on JP2 as in
the picture)
bull The WIND messages will be displayed
160
+WIND70Resuming from DeepSleep +WIND53Wakeup (GPIO6 High)
All
Tera Term output
Lab 14 Low power modes ndash Sleep Mode
bull Put STM32 in sleep mode using the
GPIO6
bull Go back the GPIO6 floating (remove jumper
- as default)
bull The WIND69 message will be
displayed
161
+WIND69Going into DeepSleep
All
Tera Term output
Lab 14 Low power modes ndash Sleep Mode
bull Wake STM32 up using the remote
page
bull Connect a device to the same modulersquos
network
bull Open the following link
http[module_IP_address]remotehtml
bull Select ldquoWakerdquo and click on ldquoGordquo button
to wake up the module
bull The WIND message will be displayed
162
+WIND70Resuming from DeepSleep
All
Tera Term output
Lab 14 Low power modes ndash Sleep Mode
bull Put STM32 in sleep mode using the
remote page
bull Connect a device to the same modulersquos
network
bull Open the following link
http[module_IP_address]remotehtml
bull Select ldquoSleeprdquo and click on ldquoGordquo button
to put the module in sleep mode
bull The WIND message will be displayed
163
+WIND69Going into DeepSleep
All
Tera Term output
Lab 14 Low power modes ndash Standby Mode 164
Module
Power State STM32 WLAN
Standby Standby Standby
Sleep Stop PS or Fast-PS
Power Save Run PS or Fast-PS
Active Rx Run Rx Idle Rx Active
Active Tx Run Tx Active
Lab 14 Low power modes ndash Standby Mode
bull During the Standby Mode both the STM32 and the Radio will be
put in standby mode The standby mode allows to achieve the
lowest power consumption
bull Enable the Standby Mode
bull Type at+sscfg=sleep_enabled0 (Sleep mode must be disabled)
bull Type at+sscfg=standby_enabled1
bull Please be sure that GPIO6 isnrsquot forced high
bull Set the standby time to wake up via RTC alarm
bull Type at+sscfg=standby_time15
165
Tip The Wifi Standby Mode can also be quickly enabled using the command AT+CFUN=4
Lab 14 Low power modes ndash Standby Mode
bull Save the settings on the flash
memory and reset the module
bull Type ATampW
bull Type AT+CFUN=1
bull After 15 seconds the module will be
rebooted and will return in the
ACTIVE state
166
+WIND0Console active +WIND32WiFi Hardware Started +WIND38WiFi Powered Down +WIND67Going into Standby15 +WIND68Resuming from Standby +WIND1Poweron (--SPWF01S) +WIND13ST SPWF01S IWM Copyright (c) 2012-2014 STMicroelectronics Inc All rights Reserved +WIND3Watchdog Running +WIND0Console active +WIND32WiFi Hardware Started +WIND21WiFi Scanning +WIND35WiFi Scan Complete (0x0) +WIND19WiFi Join02621F518F0B +WIND25WiFi Association with IoT successful +WIND51WPA Handshake Complete +WIND24WiFi Up1921681113
All
Tera Term output
Lab 14 Low power modes ndash Standby Mode
bull Wake up the module using the GPIO6
bull Enable the Standby Mode
bull Type at+sscfg=sleep_enabled0 (make sure that
Sleep mode is disabled)
bull Type at+sscfg=standby_enabled1
bull Type ATampW
bull Type AT+CFUN=1
bull Put the GPIO6 to 25V to wake up the module
bull The WIND message will be displayed and
the module will return in ACTIVE state
167
+WIND68Resuming from Standby +WIND1Poweron (--SPWF01S) helliphelliphellip
All
Tera Term output
Proceed to the next LAB
Lab 15 STAMINI AP switcher
bull Objective
bull HW ldquoSTA to MiniAPrdquo switcher
bull Prerequisites
bull Work alone
169
Lab 15 STAMINI AP switcher
This feature allows to force the module in Mini AP mode starting from
a preexistent state
ldquoRecovery Moderdquo this functionality could be useful to lead the module
in a known state and to reconfigure it (ie using the firstset page)
The GPIO7 will be used to drive this feature
170
Lab 15 STAMINI AP switcher
bull Press and hold the SW2 button on the
EVAL and then perform a reset (HW reset
via SW1 button or SW reset via AT
command)
bull Release the SW2 button
bull The MiniAP mode will be started and the
module is discoverable with the following
SSID
bull iwm-XX-YY-ZZ where XX-YY-ZZ are the last
six digits of modulersquos MAC ADDRESS
171
+WIND2Reset +WIND1Poweron (--SPWF01S) +WIND13ST SPWF01S IWM Copyright (c) 2012-2014 STMicroelectronics Inc All rights Reserved +WIND39HW in miniAP mode (GPIO7 Low) +WIND0Console active +WIND3Watchdog Running +WIND32WiFi Hardware Started +WIND26WiFi Started AP +WIND24WiFi Up172312551
All
Tera Term output
Tip To exit from ldquominiAP mode via GPIO7rdquo perform a modulersquos reset
Proceed to the next LAB
Lab 16 IBSS connection
bull Objective
bull Create an IBSS network
bull Prerequisites
bull Work alone
173
Lab 16 Create an IBSS network
In an IBSS network the SSID is chosen by the client device that
starts the network
Module settings to create an IBSS network
bull Set the IBSS SSID
bull Type AT+SSSIDTXT=ADHOC
bull Set the network privacy mode (0=OPEN or 1=WEP are supported)
bull Type AT+SSCFG=wifi_priv_mode0
bull Set the network mode (2 = IBSS)
bull Type AT+SSCFG=wifi_mode2
174
OK
All
Tera Term output
Lab 16 Create an IBSS network
bull Set IP address IP default gateway IP DNS and IP netmask
bull Type AT+SSCFG=ip_ipaddr192168y1xx
bull Type AT+SSCFG=ip_gw192168y1
bull Type AT+SSCFG=ip_dns192168y1
bull Type AT+SSCFG=ip_netmask2552552550
bull Turn off the DHCP
bull Type AT+SSCFG=ip_use_dhcp0
175
OK
All
Tera Term output
Lab 16 Create an IBSS network
bull Save the settings on the flash memory and reset the module
bull Type ATampW
bull Type AT+CFUN=1
176
+WIND0Console active +WIND32WiFi Hardware Started +WIND21WiFi Scanning +WIND35WiFi Scan Complete (0x0) +WIND19WiFi Join EE33CE002418 +WIND25WiFi Association with ADHOC successful +WIND51WiFi Handshake Complete +WIND24WiFi Up 19216813
All
AD-HOC
Tera Term output
Lab 16 Create an IBSS network
bull Associate the iOS device with the
ADHOC network (iOS gt 8 could not
support the IBSS mode)
177
AD-HOC
Tip manual configuration of static TCPIPv4 parameters is suggested using a PC Ie PC TCPIPv4 properties
Lab 16 Create an IBSS network
bull Find your IP address
bull Type AT+SSTS
bull Open Safari web browser
bull In the address bar type
ltSPWF IP addressgtindexhtml
bull Type 192168y1xxindexhtml
178
AD-HOC
THANK YOU

Lab 2 Set the SPWF variables
bull Get the default configuration dump
bull Type ATampV
bull Get a variable value
bull Type AT+SGCFG=console1_speed
Config dump frame
20
Variable
Name
Variable
Value
How to change the variable value
1 AT+SSCFG=[var name]xxxx
2 ATampW
Lab 2 Set the SPWF variables
bull Get the default configuration dump
bull Set host name
bull Type AT+SSCFG=ip_hostnamexxxxxxxx
21
Up to 31 characters (case sensitive) ldquospacebarrdquo is allowed
OK
All
Tera Term output
Lab 2 Set the SPWF variables
bull Get the default configuration dump
bull Set host name
bull Set IP address IP default gateway IP DNS and IP netmask (for
static usage)
bull Type AT+SSCFG=ip_ipaddr19216801xx
bull Type AT+SSCFG=ip_gw19216801
bull Type AT+SSCFG=ip_dns19216801
bull Type AT+SSCFG=ip_netmask2552552550
22
OK
All
Tera Term output
Tera Term output
Lab 2 Set the SPWF variables
bull Get the default configuration dump
bull Set host name
bull Set IP address IP default gateway IP
DNS and IP netmask (DHCP off)
bull Save settings on the flash memory
(mandatory after a variable change)
bull Type ATampW
bull Reset the module
bull Type AT+CFUN=1
23
+WIND21WiFi Scanning +WIND35WiFi Scan Complete (0x0)
All
Lab 2 Set the SPWF variables
bull Get the default configuration dump
bull Set host name
bull Set IP address IP default gateway IP
DNS and IP netmask (DHCP off)
bull Save settings on the flash memory
(mandatory after a variable change)
and reset the module
bull Check the new configuration dump
bull Type ATampV
24
Proceed to the next LAB
Lab 2a FOTA update
bull Objective
bull Upgrade the FW using the OTA file
bull Prerequisites
bull OTA file (provided in the SPWF01S FW
package)
bull External web server (ie Apache web
server running on PC)
26
Lab 2a FOTA update 27
The SPWF01Sx11 module (with external flash on board) allows
performing a Firmware Over-the-air update via a single HTTP GET
The SPWF01S will validate the firmware image it downloads load it
into a staging area then prompt the user to issue a reset command in
order to complete the update
Lab 2a FOTA update
The Apache Web Server will be used in this LAB
(Apache Web Server is available at this link
httparchiveapacheorgdisthttpdbinarieswin32httpd-2225-win32-x86-openssl-098ymsi)
Note please check that the local firewall is disabled or properly set It can
block the connection from module to Apache
bull Copy the OTA file (ie SPWF01S-xxxxxx-yyyyyyy-
RELEASE-mainota) in the Apache 22 htdocs folder
28
Lab 2a FOTA update
The FWUPDATE command allows to perform a Firmware Over-the-
air update via a single HTTP GET
bull Sintax
bull AT+SFWUPDATE=lthostnamegtltpathgtltportgt
bull Configuration parameters
bull lthostnamegt Target host DNS resolvable name or IP address
bull ltpathampqueryoptsgt Document path and optional query arguments
bull ltportgt Target host port
29
Lab 2a FOTA update
bull The module and the Apache Web server must be connected to the same network
bull In Tera Term type AT+SFWUPDATE=[Apache IP address][ota_fileota]
ie type AT+SFWUPDATE=192168xyyySPWF01S-150410-c2e37a3-RELEASE-
mainota
bull Reset the module to apply the new FW
bull Type AT+CFUN=1
bull Restore factory default settings (mandatory)
bull Type ATampF
30
Staging FW update for SPWF01SX11 version 1203-120918_01 FW length 276824 0x00002800 (offset 0x00000000 block len 4096) Write len 4096 -gt 0x0 Write len 4096 -gt 0x1000 (note - deleted extra output for clarity) Write len 4096 -gt 0x42000 Write len 2476 -gt 0x43000 (final) Wrote 276904 bytes Complete Update will be applied on next reboot (at+cfun=1)
All Tera Term output
Proceed to the next LAB
Lab 3 Access point connection
bull Objective
bull Scan for available networks
bull Join a network
bull Check the statusstatistics variables
bull Prerequisites
bull USB dongle and computer are set
up as described in Lab 2
bull Work alone
32
Lab 3 Scan for available networks
The SCAN command performs an immediate scan for available
networks Infrastructure (AP) and IBSS (Ad-Hoc) networks are both
reported Network type Channel BSSID SSID Signal strength (RSSI)
and 80211 capabilities are all reported
bull Type AT+SSCAN
bull Scan syntax AT+SSCAN [=lta|pgt[ltr|s|mgt[ltfnamegt]]] -- Perform a [activepassive]
network scan [filter offfilter on SSIDfilter on MAC] [print to file])
33
FOUND BSS 14D64D243600 CHAN 01 RSSI -28 SSID ENG-WPA CAPS 0431 WPA WPA2 FOUND BSS 00180A31EA78 CHAN 11 RSSI -82 SSID ZyckoItalyWireless CAPS 0531 WPA WPA2 FOUND BSS 06180A31E7E2 CHAN 11 RSSI -85 SSID ZyckoItalyGuest CAPS 0531 WPA WPA2 OK
All
Network type
Network MAC
Network
channel Network
RSSI
Network
SSID Network
capabilities
Tera Term output
Tera Term output
Lab 3 Joining a network (WPA Key)
In order to be connected to an available Wifi network the AP parameters setting is needed
bull Set the SSID
bull Type AT+SSSIDTXT=ENG-WPA
bull Set the password
bull Type AT+SSCFG=wifi_wpa_psk_texthelloworld
bull Set the network privacy mode (0=none 1=WEP 2=WPA-Personal (TKIPAES) or WPA2-Personal (TKIPAES))
bull Type AT+SSCFG=wifi_priv_mode2
bull NB wifi_auth_type must be set to 0 AT+SSCFG=wifi_auth_type0
bull Set the network mode (1 = STA 2 = IBSS 3 = MiniAP)
bull Type AT+SSCFG=wifi_mode1
34
OK
All
Lab 3 Joining a network (WPA Key)
bull Save the settings on the flash memory and reset the module
bull Type ATampW
bull Type AT+CFUN=1
35
+WIND0Console active +WIND46WPA Crunching PSK +WIND32WiFi Hardware Started +WIND21WiFi Scanning +WIND35WiFi Scan Complete (0x0) +WIND19WiFi Join 14D64D243600 +WIND25WiFi Association with ENG-WPA successful +WIND51WPA Handshake Complete +WIND24WiFi Up 19216801xx
All
ENG-WPA AP
Tera Term output
Lab 3 Joining a network (WPA Key)
bull Check the statusstatistics variables
bull Type AT+SSTS
bull Send a ping to the gateway (ip_gw)
bull Type AT+SPING=19216801
36
ENG-WPA AP
Tera Term output
OK
All
Lab 3 Joining a network (WEP Key)
Configure the module using the WEP key (4 possible combinations
available)
Sample table
37
AP configuration AT command to be used
Security Mode WEP
WEP Key Length 64 bit
(10 hex digits)
Authentication Open
Wep Key 1 1234567890
ie
at+sssidtxt=ENG-WEP
AT+SSCFG=wifi_wep_keys[0]1234567890
AT+SSCFG=wifi_wep_key_lens05
AT+SSCFG=wifi_auth_type0
AT+SSCFG=wifi_priv_mode1
AT+SSCFG=wifi_mode1
atampw
at+cfun=1
Security Mode WEP
WEP Key Length 64 bit
(10 hex digits)
Authentication Shared
Key
Wep Key 1 1234567890
ie
at+sssidtxt=ENG-WEP
AT+SSCFG=wifi_wep_keys[0]1234567890
AT+SSCFG=wifi_wep_key_lens05
AT+SSCFG=wifi_auth_type1
AT+SSCFG=wifi_priv_mode1
AT+SSCFG=wifi_mode1
atampw
at+cfun=1
AP configuration AT command to be used
Security Mode WEP
WEP Key Length
128 bit (26 hex digits)
Authentication Open
Wep Key 1
123456789012345678
90123456
ie
at+sssidtxt=ENG-WEP
AT+SSCFG=wifi_wep_keys[0]12345678
901234567890123456
AT+SSCFG=wifi_wep_key_lens0D
AT+SSCFG=wifi_auth_type0
AT+SSCFG=wifi_priv_mode1
AT+SSCFG=wifi_mode1
atampw
at+cfun=1
Security Mode WEP
WEP Key Length
128 bit (26 hex digits)
Authentication
Shared Key
Wep Key 1
123456789012345678
90123456
ie
at+sssidtxt=ENG-WEP
AT+SSCFG=wifi_wep_keys[0]12345678
901234567890123456
AT+SSCFG=wifi_wep_key_lens0D
AT+SSCFG=wifi_auth_type1
AT+SSCFG=wifi_priv_mode1
AT+SSCFG=wifi_mode1
atampw
at+cfun=1
Lab 3 Joining a network (WEP Key)
Notes
bull ldquowifi_wep_key_lensrdquo variable values 05 and 0D
bull Itrsquos possible to enter any text string into a WEP key box in the AP in which case it will be converted into a hexadecimal key using the ASCII values of the characters A maximum of 5 text characters can be entered for 64 bit keys and a maximum of 13 characters for 128 bit keys
In this case it needs to manually convert your ASCII password to HEX and complete the wifi_wep_keys[0] variable with the HEX value bull ie AP WEP key test1 ASCII to HEX 7465737431 So the AT command is AT+SSCFG=wifi_wep_keys[0]7465737431
bull Some APs allow user to insert a passphrase and then the AP automatically generates the hex keys In this scenario user have not to perform the ASCII to HEX conversion because the AP already gives it the hex value
38
Proceed to the next LAB
Lab 4 Web client mode
bull Objective
bull HTTP GET
bull HTTP POST
bull PUSH DATA ON SERIAL PORT
bull Prerequisites
bull USB dongle and computer are set up
as described in Lab 2
bull Work in couple
40
Lab 4 HTTP GET
The HTTP GET feature performs a single HTTP request to the specified
host and path The server response is printed on the UART enabled
bull Sintax
bull AT+SHTTPGET=lthostnamegtltpathgt[ltportgt]
bull Configuration parameters
bull lthostnamegt target host DNS resolvable name or IP address
bull ltpathgt document path
bull ltportgt target port
41
Lab 4 HTTP GET
bull Device A performs an HTTP GET to the Device B
bull Device A
AT+SHTTPGET=ltDevice B IP addrgtindexhtml
Type AT+SHTTPGET=19216801xxindexhtml
42
GET indexhtml HTTP10 User-Agent SPWF01S helliphelliphellip lth1gtST SPWF01Sx11 WiFi Modulelth1gt ltpgt Welcome to the ST SPWF01Sx11 WiFi Module ltpgt ltpgt This page was delivered from the SPWF01Sx11 internal HTTP server hellip lta href=statusshtmlgtSPWF01Sx11 Status Pageltagt ltpgt ltbodygt lthtmlgt OK
Device A
A B
Tera Term output
Lab 4 HTTP POST
The HTTP POST performs a post of the given path to the specified host The module can be only used as an HTTP POST client
bull Sintax
bull AT+SHTTPPOST =lthostnamegtltpathampqueryoptsgtltformcontentgt[ltportgt]
bull Configuration parameters
bull lthostnamegt target host DNS resolvable name or IP address
bull ltpathampqueryoptsgt document path
bull ltformcontentgt form to be submitted
bull ltportgt target port
43
Lab 4 HTTP POST
bull The SPWF01S performs an HTTP POST to an HTTP Post Test Server
bull Type
at+shttppost=posttestservercompostphpname=demoampemail=mymailampsubjec
t=subjampbody=message
bull The HTTP Post Test Server replies as
displayed in the Tera Term output if the HTTP
POST successfully
44
HTTP11 200 OK Date Fri 10 Jan 2014 132414 GMT Server Apache Access-Control-Allow-Origin Vary Accept-Encoding Content-Length 139 Connection close Content-Type texthtml Successfully dumped 4 post variables View it at httpwwwposttestservercomdata2014011005241443192628 Post body was 0 chars long OK
Device A
A B
Tera Term output
HTTP POST
SERVER
Lab 4 HTTPREQ bull The SPWF01S can perform a custom HTTP request to a specified
target Refer to the User Manual for more details
bull Type
AT+SHTTPREQ=wwwgooglecom8089
After ltCRgt the module accepts data We will try to open an non-existent web page
GET downloadTagphp HTTP10ltCRgtltLFgt
User-Agent SPWF01SltCRgtltLFgt
Host iwm-testltCRgtltLFgt
Connection closeltCRgtltLFgtltCRgtltLFgt
45
HTTP10 404 Not FoundltCRgtltLFgt Date Sun 31 Jan 2016 142704 GMTltCRgtltLFgt Content-Type texthtmlltCRgtltLFgt Server HTTP server (unknown)ltCRgtltLFgt Content-Length 49ltCRgtltLFgt X-XSS-Protection 1 mode=blockltCRgtltLFgt X-Frame-Options SAMEORIGINltCRgtltLFgt ltCRgtltLFgt lthtmlgtltbodygtlth1gt404 Not Foundlth1gtltbodygtlthtmlgtltLFgtltCRgt ltLFgt ltSUBgtltSUBgtltSUBgtltCRgtltLFgt ltCRgtltLFgt OKltCRgtltLFgt
All
A B
Tera Term output
[AT+SHTTPREQ =lthostnamegt[port]ltlengthgtltCRgtltdatagt]
Lab 4 Push data on serial port
A built-in html page ldquooutput_demohtmlrdquo allows to remotely push
characters on the serial port from a remote browser
46
output_demohtml
Modulersquos IP addressoutput_demohtml
Lab 4 Push data on serial port
bull Find your IP address
bull Type AT+SSTS
bull Associate your computer with the AP
bull Open your web browser
bull In the address bar type
ltmodulersquos IP
Addressgtoutput_demohtml
bull Type
19216801xxoutput_demohtml
47
Lab 4 Push data on serial port
bull Enter the text
bull In order to manage non-ASCII chars the ip_use_decoder variable must be modified (refer to the User Manual for more details)
bull Submit
bull The text will be sent to the serial port of the module
48
Proceed to the next LAB
Lab 5 Web Server use mode
bull Objective
bull List existing files
bull Print a file
bull Create a file
bull Append to an existing file
bull Delete an existing file
bull Prerequisites
bull USB dongle and computer are
set up as described in Lab 2
bull Work alone
50
Lab 5 Web server 51
The Web Server feature allows to create print and delete ASCII files in
the RAM memory of the module
Lab 5 List existing files
The FSL command lists type sizes and name of all the existing files
bull Type AT+SFSL
52
I 461 input_demoshtml I 180 messageshtml I 384 output_demohtml I 614 indexhtml I 157 peersshtml I 193 configshtml I 174 statusshtml I 212 404html I 2022 firstsethtml I 2898 remotehtml OK
All
Files stored in the STM32
FLASH memory
Tera Term output
Lab 5 Print a file
The FSP command prints the content
of an existing file
bull Type AT+SFSP=indexhtml
53
lthtmlgt ltheadgtlttitlegtST SPWF01Slttitlegtltheadgt ltbody bgcolor=white text=blackgt lth1gtST SPWF01S Intelligent WiFi Modulelth1gt ltpgtWelcome to the ST SPWF01S intelligent Wi-Fi moduleltpgt ltpgtThis page was delivered from the SPWF01S internal HTTP serverltpgt ltpgt lta href=configshtmlgtSPWF01S Configuration Settings Pageltagt ltpgt ltpgt lta href=statusshtmlgtSPWF01S Status Pageltagt ltpgt ltpgt lta href=peersshtmlgtSPWF01S Peers Pageltagt ltpgt ltpgtMore information about the SPWF01S and other ST products can be found at STs website lta href=httpwwwSTcomgthttpwwwSTcomltagtltpgt ltbodygt lthtmlgt OK
All Tera Term output
Tip How to use the offset and length parameters AT+SFSP=indexhtml[offset][length] ie Type AT+SFSP=indexhtml520 Length parameter is mandatory if is used the offset
Lab 5 Create a file
The FSC command allows to create a file inside the SPWF for
delivery by the SPWF HTTP server
bull Sintax
bull AT+SFSC =ltfnamegtltmax_lengt[lthttp_headergt]
bull Configuration parameters
bull lt filename gt filename to create
bull lt max_len gt amount of space to allocate for file max = 4096 bytes
bull lthttp_headergt 0=HTML header automatically added 1=HTML header not
added (as by default)
Type AT+SFSC=wifidemohtml1965
54
OK
All
Tera Term output
Lab 5 Configuring the UART
bull Set CR+LF in the Terminal setup
(to properly paste text in the
terminal)
bull Tera Term Setup rarr Terminal rarr
Transmit CR+LF
55
Tip The local echo option must be disabled on Tera Term
Added in FW 35 using the AT+SFSR command user can rename dynamic files stored in the RAM memory Refer to the User Manual for more details
Lab 5 Append to an existing file
The FSA command allows to append blocks of data to an existing file
This command accepts data after the ltcrgt at the end of the command
line
bull Sintax
bull AT+SFSA=ltfilenamegtltdatalengt
bull Configuration parameters
bull lt filename gt filename pre-created
bull lt datalen gt number of characters to append to the file
Type AT+SFSA=wifidemohtml1965
56
Now SPWF accepts data
Tips
Lab 5 Append to an existing file
bull Open wifidemotxt in the following
directory Hands_on
folderHTML_demo_page
bull Check you have set up CR+LF in the
Terminal setup (for more
information refer to the slide 48)
bull Copy the file content into Tera term
(paste with ALT+V or mouse right
button)
57
OK
All
Tera Term output
Lab 5 Append to an existing file
bull Open wifidemohtml
bull Open your Web browser (suggested Google
Chrome for HTML5 test)
bull In address bar type ltSPWF IP addrgtwifidemohtml
Type 19216801xxwifidemohtml
58
Lab 5 Configuring the UART
bull Re-set CR in the Terminal setup
as by default
bull Tera Term Setup rarr Terminal rarr
Transmit CR
59
Tip The local echo option can be re-enabled on Tera Term
Lab 5 List existing files
Lets list the files
bull Type AT+SFSL
60
D 1965 wifidemohtml I 461 input_demoshtml I 180 messageshtml I 384 output_demohtml I 614 indexhtml I 157 peersshtml I 193 configshtml I 174 statusshtml I 212 404html I 2022 firstsethtml I 2898 remotehtml OK
All
File stored in the RAM memory
Tera Term output
Lab 5 Delete an existing file
The FSD command allows to delete an existing file by name Static
files may not be deleted
bull Sintax
bull AT+SFSD=ltfilenamegt
Type AT+SFSD=wifidemohtml
61
OK
All
Tera Term output
Lab 5 Delete an existing file
bull Re-open wifidemohtml
bull Open your Web browser
bull In address bar ltSPWF IP addrgtwifidemohtml
Type 19216801xxwifidemohtml
62
Proceed to the next LAB
Lab 6 Web Server use mode
bull Objective
bull Create an image file
bull Filesystem update over-the-air
bull Filesystem update over UART
bull Prerequisites
bull Work alone
64
Lab 6 Web server 65
The Web Server feature also allows to upload generic files (PDF
HTML DOC JPEG and so on) in the EXTERNAL FLASH memory of
the module It needs to follow the below steps
- create an image file (IMG) using the tool provided in the Hands-on package
(the IMG contains the files to upload)
- Put the image in a generic and accessible Web Server (Apache Web server
will be used in the Hands-on as example)
- Using the proper AT command the IMG will be retrieved over-the-air and the
static files will be created in the external flash memory
Lab 6 Create an image file
bull Open the following folder and
extract all the files
hands_on_wififilesystem_update
bull Put your own files to upload in the
pages folder (max 512 Kbytes)
bull Run genbat
bull Open the pages folder and copy
outfileimg in your external Web
Server (Apache)
66
3
1
2
Lab 6 Create an image file
The Apache Web Server will be used in this tutorial
(Apache Web Server is available at this link
httparchiveapacheorgdisthttpdbinarieswin32httpd-2225-win32-x86-openssl-098ymsi)
Note please check that the local firewall is disabled or properly set It can
block the connection from module to Apache
bull Copy outfileimg in the Apache 22
htdocs folder (this is the default
root server directory)
67
4
Lab 6 Filesystem update
The HTTPDFSUPDATE command allows to create static files inside
the SPWF for delivery by the SPWF HTTP server
bull Sintax
bull AT+SHTTPDFSUPDATE=lthostnamegtltpathgt[port]
bull Configuration parameters
bull lthostnamegt external web server DNS resolvable name or IP address
bull ltpathgt document path
bull ltportgt target host port
68
Lab 6 Filesystem update
bull In Tera Term type
AT+SHTTPDFSUPDATE=192168x10xoutfileimg
bull Reset the module
bull Type AT+CFUN=1
69
Image length 357957 (offset 0x00080000 block len 4096) Write len 4096 -gt 0x80000 Write len 4096 -gt 0x81000 Write len 4096 -gt 0x82000 helliphelliphelliphellip helliphelliphelliphelliphelliphellip helliphelliphelliphelliphellip Write len 4096 -gt 0xD6000 Write len 1612 -gt 0xD7000 (final) Wrote 357964 bytes Complete Please reboot (at+cfun=1) OK
All
Tera Term output
The file system will be permanently deleted The new IMG will overwrite the existent files in the file system
Warning
Lab 6 Filesystem update
Lets list the files
bull Type AT+SFSL
70
E 2615 st766gif E 112374 modulepng E 2430 index1html E 419 indexhtml E 239887 MKTWiFipdf I 461 input_demoshtml I 180 messageshtml I 384 output_demohtml I 614 indexhtml I 157 peersshtml I 193 configshtml I 174 statusshtml I 212 404html I 2022 firstsethtml I 2898 remotehtml OK
All
Files stored in
the EXT FLASH memory
Tera Term output
Lab 6 Filesystem update
bull Open index1html page
bull Open your web browser
bull In the address bar ltSPWF IP addrgtindex1html
Type 192168x1xxindex1html
71
Lab 6 Filesystem erase
Erase the external httpd filesystem
bull Type AT+S HTTPDFSERASE
The files stored in the EXT FLASH memory will be erased
Lets list the files
bull Type AT+SFSL
72
I 461 input_demoshtml I 180 messageshtml I 384 output_demohtml I 614 indexhtml I 157 peersshtml I 193 configshtml I 174 statusshtml I 212 404html I 2022 firstsethtml I 2898 remotehtml OK
All
Tera Term output
Lab 6 Filesystem update
The HTTPDFSWRITE command allows to create static files inside
the SPWF via the UART interface The HW flow control MUST be
enabled in order to use the command
bull Sintax
bull AT+SHTTPDFSWRITE =ltdatalengtltCRgtltdatagt
bull Configuration parameters
bull ltdatalengt Amount of bytes to be sent
73
Lab 6 Filesystem update
bull Type AT+S HTTPDFSWRITE=357957
bull In Tera Term File ndash Send File
bull Reset the module
bull Type AT+CFUN=1
74
Image length 357957 (offset 0x00080000 block len 4096) Write len 4096 -gt 0x80000 Write len 4096 -gt 0x81000 Write len 4096 -gt 0x82000 helliphelliphelliphellip helliphelliphelliphelliphelliphellip helliphelliphelliphelliphellip Write len 4096 -gt 0xD6000 Write len 1612 -gt 0xD7000 (final) Wrote 357964 bytes Complete Please reboot (at+cfun=1) OK
All
Tera Term output
The file system will be permanently deleted The new IMG will overwrite the existent files in the file system
Warning
Proceed to the next LAB
Lab 7 Socket interface
bull Objective
bull Open TCPUDP connection
bull Write data to socket
bull Read data from socket
bull Close socket
bull Prerequisites
bull Work alone
76
TCPUDP socket
Socket
Client
Socket
Server
Lab 7 TCPUDPUART socket interface 77
The Socket interface allows communication via TCP UDP and UART
The SPWF is both a client and a server socket In this LAB will be
detailed the socket client feature
Ho
st
En
d P
rod
uct
Open TCPUDP connection
Write data to socket
Read data from socket
Close socket
Lab 7 Open TCPUDP connection
The SOCKON command allows to open a TCPUDP connection
to a specified host (up to 8 socket connections at same time)
bull Sintax
bull AT+SSOCKON=lthostnamegtltportgtltprotocolgtind
bull Configuration parameters
bull lthostnamegt target host DNS resolvable name or IP address
bull ltportgt TCPUDP socket port
bull ltprotocolgt t for TCP socket u for UDP socket
bull ind indicate when data has arrived (optional) Up to 4 (x730 bytes)
consecutive ldquoPending datardquo message (without any AT+SSOCKR) are
guaranteed It is suggested to empty the buffer using the AT+SSOCKR
command and to avoid exceeding 4 indications
78
Lab 7 Open TCPUDP connection
bull Open the TCP socket server (disable the firewall to properly
run it)
bull Folder hands_on_wifitcp socket serverserverexe
bull The TCP server listens for incoming connections on the port
32000 It sends back all data received
79
Optional - Lab 7 Open TCPUDP connection
bull Using an Android platform the socket server can be opened
using a specific APP (Socket Protocol available on Play Store)
bull The TCP socket server can be configured to listen for
incoming connections on the port 32000
bull Type 32000 on laquoPort Listen toraquo box
bull Click on Listen
80
Lab 7 Open TCPUDP connection
bull Type AT+SSOCKON=192168010x32000tind
bull The client and the server use the socket identifier (ID)
displayed
81
ID 00 OK
All
Tera Term output
Lab 7 Write data to socket
The SOCKW command allows to write data to the specified ID
socket
This command accepts data after the ltcrgt at the end of the
command line
bull Sintax
bull AT+SSOCKW=ltIDgtltlengt
bull Configuration parameters
bull ltIDgt socket identifier
bull ltlengt data length to send
82
Lab 7 Write data to socket
bull Write data
bull Type AT+SSOCKW=0013
bull Type hello worldltCRgt
bull SPWF shows that there are ltpending datagt and their amount
83
+WIND55Pending Data013
All
Tera Term output
ID
Pending
bytes
Note the module is waiting 13 bytes to be written to the socket As soon as 13 bytes (or characters) are sent from the terminal the module is going to write them to the socket and will be ready to receive new commands
Lab 7 Read data from socket
The SOCKR command allows to read data from socket
bull Sintax
bull AT+SSOCKR=ltIDgtltlengt
bull Configuration parameters
bull ltIDgt socket identifier
bull ltlengt data length to read
84
Lab 7 Read data from socket
bull Read data
bull Type AT+SSOCKR=0013
85
hello world OK
All
Tera Term output
Lab 7 Close socket
The SOCKC command allows to close socket
bull Sintax
bull AT+SSOCKC=ltIDgt
bull Configuration parameters
bull ltIDgt socket identifier
86
Tera Term output
Lab 7 Close socket
bull Close socket
bull Type AT+SSOCKC=00
87
OK
All
Proceed to the next LAB
Lab 8 MiniAP mode for the first set
bull Objective
bull Create a direct connection between
the module and an end device
bull First set of the module in order to
enable the connection between the
module and a generic AP
bull Prerequisites
bull Work alone
89
Tera Term output
Lab 8 Configuring the module in MiniAP mode
The Mini AP mode is available starting from the following FW release
SPWF01S-131115-de4568d-RELEASE
In order to set the module in Mini AP mode the following parameters
are needed
bull Set the SSID
bull Type AT+SSSIDTXT=SPWF_AP
bull Set the network privacy mode (0=OPEN or 1=WEP are supported)
bull Type AT+SSCFG=wifi_priv_mode0
bull Set the network mode (1 = STA 2 = IBSS 3 = MiniAP)
bull Type AT+SSCFG=wifi_mode3
90
OK
All
Lab 8 Configuring the module in MiniAP mode
bull Save the settings on the flash memory and reset the module
bull Type ATampW
bull Type AT+CFUN=1
91
+WIND0Console active +WIND32WiFi Hardware Started +WIND26WiFi Started AP with network SPWF_AP +WIND24WiFi Up 172181511
All
Tera Term output
SPWF_AP
Lab 8 Configuring the module in MiniAP mode (WEP Key)
Configure the module using the WEP key (2 possible combinations
available)
Sample table
92
AP configuration AT command to be used
Security Mode WEP
WEP Key Length 64 bit
(10 hex digits)
Authentication Open
Wep Key 1 1234567890
ie
at+sssidtxt=SPWF_AP
AT+SSCFG=wifi_wep_keys[0]1234567890
AT+SSCFG=wifi_wep_key_lens05
AT+SSCFG=wifi_auth_type0
AT+SSCFG=wifi_priv_mode1
AT+SSCFG=wifi_mode3
atampw
at+cfun=1
AP configuration AT command to be used
Security Mode WEP
WEP Key Length
128 bit (26 hex digits)
Authentication Open
Wep Key 1
123456789012345678
90123456
ie
at+sssidtxt=SPWF_AP
AT+SSCFG=wifi_wep_keys[0]12345678
901234567890123456
AT+SSCFG=wifi_wep_key_lens0D
AT+SSCFG=wifi_auth_type0
AT+SSCFG=wifi_priv_mode1
AT+SSCFG=wifi_mode3
atampw
at+cfun=1
Lab 8 Configuring the module in MiniAP mode (WEP Key)
Notes
bull ldquowifi_wep_key_lensrdquo variable values 05 and 0D
bull Itrsquos possible to enter any text string as WEP key It have to be converted into a
hexadecimal key using the ASCII values of the characters A maximum of 5 text
characters can be entered for 64 bit keys and a maximum of 13 characters for 128
bit keys
In this case it needs to manually convert your ASCII password to
HEX and complete the wifi_wep_keys[0] variable with the HEX
value
bull ie WEP key test1
ASCII to HEX 7465737431
So the AT command is AT+SSCFG=wifi_wep_keys[0]7465737431
93
Lab 8 Customizing the MiniAP address (optional)
Starting from FW 33 the module allows user to customize the IP address of the MiniAP
bull Set the SSID
bull Type AT+SSSIDTXT=SPWF_AP
bull Set the network privacy mode (0=OPEN or 1=WEP are supported)
bull Type AT+SSCFG=wifi_priv_mode0
bull Set the network mode (1 = STA 2 = IBSS 3 = MiniAP)
bull Type AT+SSCFG=wifi_mode3
bull Set the use_dhcp mode (0 = DHCP server off 1 = DHCP server on 2 = DHCP server on and customizable)
bull Type AT+SSCFG=ip_use_dhcp2
bull Set the MiniAP address
bull Type AT+SSCFG=ip_ipaddr19216801
bull Save the settings on the flash memory and reset the module
bull Type ATampW
bull Type AT+CFUN=1
94
Tera Term output
+WIND0Console active +WIND32WiFi Hardware Started +WIND26WiFi Started AP with network SPWF_AP +WIND24WiFi Up 19216801
All
Tip the MiniAP will assign sequential addresses to the client ie 1deg client 19216802 2deg client 19216803
Lab 8 Mini AP mode
bull Associate your end device to the
SPWF_AP network
bull Find the SPWF_AP network and connect
the end device to the module
95
SPWF_AP +WIND2890187C960D0B Associated +WIND29DHCP reply for 17218151290187C960D0B to 172181512 +WIND29DHCP reply for 17218151290187C960D0B to 172181512
All
Tera Term output
Lab 8 Mini AP mode
bull Open your web browser
bull In the address bar type captiveportalnet
96
SPWF_AP
Tip The Mini AP domain can be set using the variable ip_apdomainname The default value is ldquocaptiveportalnetrdquo
The Mini AP default homepage can be set using the variable ip_apredirect The default value is ldquofirstsethtmlrdquo
Tip If the AP domain name is not quickly opened itrsquos suggested to turn off an eventual proxy server (check the connection settings or browser preferences)
Lab 8 First Set Page
bull The first set page allows to configure the module in IDLE mode
STATION mode IBSS mode and MINI AP mode
97
Used for STA IBSS MINI AP
Mandatory for IDLE STA IBSS MINI AP
Used for STA IBSS (WEP) MINI AP (WEP)
Used for STA (if DHCP = OFF) IBSS
(mandatory) MINI AP (if DHCP = OFF)
Used for STA IBSS (mandatory DHCP = OFF) MINI AP
Used for STA (WEP key) IBSS (WEP) MINI AP (WEP)
Used for STA IBSS MINI AP
Lab 8 Mini AP mode
bull Set all the parameters required in order to enable the connection
between the module and a generic AP
ie AP configured in WPAWPA2 mode
bull MiniAP PassKey anonymous (by default)
bull SSID of the access point
bull Password of the access point
bull Authentication type of the access point
bull Use mode of the module
98
Tip The Mini AP PassKey can be set using the variable ldquouser_descrdquo The default value is ldquoanonymousrdquo
Note In order to manage non-ASCII chars the ip_use_decoder variable must be modified according as below at+sscfg=ip_use_decoder0 no decoding [default] at+sscfg=ip_use_decoder1 RAW decoding (the USER and PSK fields must be completed in HEX) at+sscfg=ip_use_decoder2 UTF-8 decoding at+sscfg=ip_use_decoder6 HTML entities decoding
Lab 8 Mini AP mode
bull Click on GO button and then send the
parameters confirming with OK
99
SPWF_AP
AP
SSID ciscosb2
Lab 8 Mini AP mode
bull The module will receive the parameters and will automatically
connect to the access point required
100
+WIND57Received SSID is ciscosb2 +WIND57Received PWD is +WIND57Received Auth mode is 2 +WIND57Received Mode is 1 +WIND2RESET +WIND1Poweron (--SPWF01S) +WIND13ST IWM Copyright (c) 2012-2013 STmicroelectronics +WIND3Watchdog Running +WIND0Console active +WIND46WPA Crunching PSK +WIND32WiFi Hardware Started +WIND21WiFi Scanning +WIND35WiFi Scan Complete (0x0) +WIND19WiFi Join 02621F518F0B +WIND25WiFi Association with ciscosb2 successful +WIND51WPA Handshake Complete +WIND24WiFi Up 1921681106
All
Tera Term output
ciscosb2
AP
Lab 8 Mini AP mode ndash RAW decoding example
101
Note In order to manage non-ASCII chars the ip_use_decoder variable must be modified according as below at+sscfg=ip_use_decoder0 no decoding [default] at+sscfg=ip_use_decoder1 RAW decoding (the USER and PSK fields must be completed in HEX) at+sscfg=ip_use_decoder2 UTF-8 decoding at+sscfg=ip_use_decoder6 HTML entities decoding
7177657261736466
AP SSIS
AP PSK
Proceed to the next LAB
Lab 9 Socket interface - MiniAP mode
bull Objective
bull Create a direct connection between
the module and an end device
bull Socket interface used in MiniAP
mode
bull Prerequisites
bull Work alone
103
Tera Term output
Lab 9 Configuring the module in MiniAP mode
The Mini AP mode (available starting from the SPWF01S-131115-de4568d-RELEASE) also allows to use the socket interface The procedure is the same as in Lab 7
In order to set the module in Mini AP mode the following parameters are needed
bull Set the SSID
bull Type AT+SSSIDTXT=SPWF_AP
bull Set the network privacy mode
bull Type AT+SSCFG=wifi_priv_mode0
bull Set the network mode (1 = STA 2 = IBSS 3 = MiniAP)
bull Type AT+SSCFG=wifi_mode3
104
OK
All
Lab 9 Configuring the module in MiniAP mode
bull Save the settings on the flash memory and reset the module
bull Type ATampW
bull Type AT+CFUN=1
105
+WIND0Console active +WIND32WiFi Hardware Started +WIND26WiFi Started AP with network SPWF_AP +WIND24WiFi Up 172181511
All
Tera Term output
SPWF_AP
Lab 9 Mini AP mode
bull Connect your PC to the SPWF_AP
network
bull Find the SPWF_AP network and connect
the end device to the module
106
SPWF_AP +WIND2890187C960D0B Associated +WIND29DHCP reply for 17218151290187C960D0B to 172181512 +WIND29DHCP reply for 17218151290187C960D0B to 172181512
All
Tera Term output
Lab 9 Open TCPUDP connection
As described in the Lab 7 the SOCKON command allows to
open a TCPUDP connection to a specified host
bull Sintax
bull AT+SSOCKON=lthostnamegtltportgtltprotocolgtind
bull Configuration parameters
bull lthostnamegt target host DNS resolvable name or IP address
bull ltportgt TCPUDP socket port
bull ltprotocolgt t for TCP socket u for UDP socket
bull ind indicate when data has arrived (optional) Up to 4 consecutive ldquoPending
datardquo message (without any AT+SSOCKR) are guaranteed It is
suggested to empty the buffer using the AT+SSOCKR command and
to avoid exceeding 4 indications
107
Lab 9 Open TCP connection
bull Open the TCP socket server (disable the firewall to properly
run it)
bull Folder hands_on_wifitcp socket serverserverexe
bull The TCP server listens for incoming connections on the port
32000 It sends back all data received
108
Lab 9 Open TCP connection
bull Type AT+SSOCKON=17218151232000tind
bull The client and the server use the socket identifier (ID)
displayed
109
ID 00 OK
All
Tera Term output
Lab 9 Write data to socket
The SOCKW command allows to write data to the specified ID
socket
This command accepts data after the ltcrgt at the end of the
command line
bull Sintax
bull AT+SSOCKW=ltIDgtltlengt
bull Configuration parameters
bull ltIDgt socket identifier
bull ltlengt data length to send
110
Lab 9 Write data to socket
bull Write data
bull Type AT+SSOCKW=0013
bull Type hello worldltCRgt
bull SPWF shows that there are ltpending datagt and their amount
111
+WIND55Pending Data013
All
Tera Term output
ID
Pending
bytes
Note the module is waiting 13 bytes to be written to the socket As soon as 13 bytes (or characters) are sent from the terminal the module is going to write them to the socket and will be ready to receive new commands
Lab 9 Read data from socket
The SOCKR command allows to read data from socket
bull Sintax
bull AT+SSOCKR=ltIDgtltlengt
bull Configuration parameters
bull ltIDgt socket identifier
bull ltlengt data length to read
112
Lab 9 Read data from socket
bull Read data
bull Type AT+SSOCKR=0013
113
hello world OK
All
Tera Term output
Lab 9 Close socket
The SOCKC command allows to close socket
bull Sintax
bull AT+SSOCKC=ltIDgt
bull Configuration parameters
bull ltIDgt socket identifier
114
Tera Term output
Lab 9 Close socket
bull Close socket
bull Type AT+SSOCKC=00
115
OK
All
Proceed to the next LAB
Lab 10 Web server - MiniAP mode
bull Objective
bull Create a direct connection between
the module and an end device
bull Web server used in MiniAP mode
bull Prerequisites
bull Work alone
117
Tera Term output
Lab 10 Configuring the module in MiniAP mode
The Mini AP mode (available starting from the SPWF01S-131115-de4568d-RELEASE) also allows to use the module file system (both RAM and IntExt FLASH)
In order to set the module in Mini AP mode the following parameters are needed
bull Set the SSID
bull Type AT+SSSIDTXT=SPWF_AP
bull Set the network privacy mode
bull Type AT+SSCFG=wifi_priv_mode0
bull Set the network mode (1 = STA 2 = IBSS 3 = MiniAP)
bull Type AT+SSCFG=wifi_mode3
118
OK
All
Lab 10 Configuring the module in MiniAP mode
bull Save the settings on the flash memory and reset the module
bull Type ATampW
bull Type AT+CFUN=1
119
+WIND0Console active +WIND32WiFi Hardware Started +WIND26WiFi Started AP with network SPWF_AP +WIND24WiFi Up 172181511
All
Tera Term output
SPWF_AP
Lab 10 Mini AP mode
bull Connect your PC to the SPWF_AP
network
bull Find the SPWF_AP network and connect
the end device to the module
120
SPWF_AP +WIND2890187C960D0B Associated +WIND29DHCP reply for 17218151290187C960D0B to 172181512 +WIND29DHCP reply for 17218151290187C960D0B to 172181512
All
Tera Term output
Lab 10 Access to Web server - Mini AP mode
bull Open your web browser
bull In the address bar type
captiveportalnetindexhtml
bull The SPWF01S homepage will be
displayed
121
SPWF_AP Tip The Mini AP domain can be set using the variable ip_apdomainname The default value is ldquocaptiveportalnetrdquo
Lab 10 Access to Web server - Mini AP mode
bull Open the SPWF01S Device Status
bull click on the highlighted link
bull The SPWF01S Device Status will be
displayed
122
SPWF_AP Tip The Mini AP domain can be set using the variable ip_apdomainname The default value is ldquocaptiveportalnetrdquo
The Mini AP default homepage can be set using the variable ip_apredirect The default value is ldquofirstsethtmlrdquo
Proceed to the next LAB
Lab 11 Remotely control - GPIOs
bull Objective
bull write remotely a GPIO
bull configure remotely a GPIO
bull read remotely a GPIO
bull Prerequisites
bull module connected to the AP or
module configured in MiniAP mode
124
Lab 11 Remotely control - GPIO
This feature allows to remotely write configure and read a GPIO
The module should be connected to the AP (as shown in Lab 3) or
should be configured in Mini AP mode (as shown in Lab 8)
The external client have to open the remotehtml page stored in the
module
125
ENG-WPA AP
SPWF_AP
miniAP
Tera Term output
Lab 11 Joining a network
In order to be connected to an available Wifi network the AP parameters setting is needed
bull Set the SSID
bull Type AT+SSSIDTXT=ENG-WPA
bull Set the password
bull Type AT+SSCFG=wifi_wpa_psk_texthelloworld
bull Set the network privacy mode (0=none 1=WEP 2=WPA-Personal (TKIPAES) or WPA2-Personal (TKIPAES))
bull Type AT+SSCFG=wifi_priv_mode2
bull NB wifi_auth_type must be set to 0 AT+SSCFG=wifi_auth_type0
bull Set the network mode (1 = STA 2 = IBSS 3 = MiniAP)
bull Type AT+SSCFG=wifi_mode1
126
OK
All
Lab 11 Joining a network
bull Save the settings on the flash memory and reset the module
bull Type ATampW
bull Type AT+CFUN=1
127
+WIND0Console active +WIND46WPA Crunching PSK +WIND32WiFi Hardware Started +WIND21WiFi Scanning +WIND35WiFi Scan Complete (0x0) +WIND19WiFi Join 14D64D243600 +WIND25WiFi Association with ENG-WPA successful +WIND51WPA Handshake Complete +WIND24WiFi Up 19216801xx
All
ENG-WPA AP
Tera Term output
Lab 11 Remotely control in MiniAP mode - GPIO
bull Open your web browser
bull In the address bar type
192168x1xxremotehtml
128
ENG-WPA
AP
Lab 11 Remotely control in MiniAP mode - GPIO
bull Try to write the GPIO14 connected to the LED3 (check if the
LED3 is mounted on your EVAL BOARD otherwise can be used
the GPIO13)
bull Click on the laquoGOraquo button
and LED3 will switch on
129
ENG-WPA
AP
Proceed to the next LAB
Lab 12 Input demo
bull Objective
bull Send a message from the server (wifi
module) to an external client connected
to the same network
bull Prerequisites
bull module connected to the AP or module
configured in MiniAP mode
131
Lab 12 Input demo
The module provides some DEMOs to show the interaction between
the module and an external client connected to the same network
The module should be connected to the AP (as shown in Lab 3) or
should be configured in Mini AP mode (as shown in Lab 8)
In order to run this demo the client have to open the
input_demoshtml page stored in the module
132
ENG-WPA AP
SPWF_AP
miniAP
Tera Term output
Lab 12 Joining a network
In order to be connected to an available Wifi network the AP parameters setting is needed
bull Set the SSID
bull Type AT+SSSIDTXT=ENG-WPA
bull Set the password
bull Type AT+SSCFG=wifi_wpa_psk_texthelloworld
bull Set the network privacy mode (0=none 1=WEP 2=WPA-Personal (TKIPAES) or WPA2-Personal (TKIPAES))
bull Type AT+SSCFG=wifi_priv_mode2
bull NB wifi_auth_type must be set to 0 AT+SSCFG=wifi_auth_type0
bull Set the network mode (1 = STA 2 = IBSS 3 = MiniAP)
bull Type AT+SSCFG=wifi_mode1
133
OK
All
Lab 12 Joining a network
bull Save the settings on the flash memory and reset the module
bull Type ATampW
bull Type AT+CFUN=1
134
+WIND0Console active +WIND46WPA Crunching PSK +WIND32WiFi Hardware Started +WIND21WiFi Scanning +WIND35WiFi Scan Complete (0x0) +WIND19WiFi Join 14D64D243600 +WIND25WiFi Association with ENG-WPA successful +WIND51WPA Handshake Complete +WIND24WiFi Up 19216801xx
All
ENG-WPA AP
Tera Term output
Lab 12 Input demo
bull Open your web browser
bull In the address bar type
192168x1xxinput_demoshtml
bull Insert the message to the client
ie type laquotestraquo (suggested ndash copy
the string and paste it in the
terminal) and then send a carriage
return
135
VERY IMPORTANT
Both client and server are pending (2 sec) after the page
request If no message is sent from the module a timeout
mechanism will be triggered
The server shows the ldquo+WIND56 messagerdquo and it will
wait for a string to be inserted and terminated by [Cr] ldquo+WIND56Insert message to clientdrdquo d is the Nth input SSI into html page (please refer to CGIampSSI Application Notes for details)
Lab 12 Input demo
bull The module receives the HTML
page containing the string inserted
server-side
bull Below this string there are two
buttons to try again the demo or to
return to the homepage
136
Proceed to the next LAB
Lab 13 Socket Server functionality
bull Objective
bull Configure a Server Listening Port
bull Open a TCP connection from a
socket client to the module
bull Data modeCommand Mode usage
bull Prerequisites
bull module connected to the AP or
module configured in MiniAP mode
bull PC to be used as socket client
138
TCP socket
Socket
Server
Socket
Client
Lab 13 Socket Server
This feature allows to enable the socket server mode The module
can be able to listen for an incoming connection on the specified port
The module should be connected to the AP (as shown in Lab 3) or
should be configured in Mini AP mode (as shown in Lab 8)
Please refer to ldquoSocket Server Application Notesrdquo for more details
139
ENG-WPA AP
SPWF_AP
miniAP
Tera Term output
Lab 13 Joining a network
In order to be connected to an available Wifi network the AP parameters setting is needed
bull Set the SSID
bull Type AT+SSSIDTXT=ENG-WPA
bull Set the password
bull Type AT+SSCFG=wifi_wpa_psk_texthelloworld
bull Set the network privacy mode (0=none 1=WEP 2=WPA-Personal (TKIPAES) or WPA2-Personal (TKIPAES))
bull Type AT+SSCFG=wifi_priv_mode2
bull NB wifi_auth_type must be set to 0 AT+SSCFG=wifi_auth_type0
bull Set the network mode (1 = STA 2 = IBSS 3 = MiniAP)
bull Type AT+SSCFG=wifi_mode1
140
OK
All
Lab 13 Joining a network
bull Save the settings on the flash memory and reset the module
bull Type ATampW
bull Type AT+CFUN=1
141
+WIND0Console active +WIND46WPA Crunching PSK +WIND32WiFi Hardware Started +WIND21WiFi Scanning +WIND35WiFi Scan Complete (0x0) +WIND19WiFi Join 14D64D243600 +WIND25WiFi Association with ENG-WPA successful +WIND51WPA Handshake Complete +WIND24WiFi Up 19216801xx
All
ENG-WPA AP
Tera Term output
Lab 13 Socket Server
bull Socket server turn ON the TCP Socket Server (user must
specify the server listening port)
bull Type AT+SSOCKD=32000 (AT+SOCKD=32000u for UDP socket server)
bull Check the status of the socket server
bull Type AT+SSTS=ip_sockd_port
142
ENG-WPA
AP
Tera Term output
OK ip_sockd_port = 32000 OK
All
Tip you can Turn OFF the Socket Server using a server listening port = 0 (type AT+SSOCKD=0)
Lab 13 Socket Server
bull Socket client can be used a simple socket client in order to test the communication
(SocketTest ndash available on httpsourceforgenetprojectssockettest)
143
ENG-WPA
AP
Lab 13 Socket Server
bull Socket client
bull Insert the modulersquos IP Address and the port
bull Click on Connect button
144
Tera Term output
+WIND61Incoming Socket Client1921681102 +WIND60Now in Data Mode
All
Lab 13 Socket Server
bull The module (socket server) enters in data mode and a bidirectional channel is
created to allow exchanging data with the socket client
bull Try to send and receive data from the module
145
Tera Term output
test_1
All
Lab 13 Socket Server ndash escape sequence
bull From Data Mode to Command Mode
bull Configuration variable used escape_seq (default is ldquoat+srdquo case sensitive
suggested to be sent by the local host in a single complete packet with no CR or
LF in the sequence)
bull Type at+s
bull Now itrsquos possible to send AT commands while the socket connection
is still active
146
Tera Term output
+WIND59Back to Command Mode
All
Tip During the Command Mode you cannot send data to client but can receive data from it Every data chunk generates an URC (+WIND64Sockd Pending Data) with limit to 4 (x730 bytes) This is the max number of pending messages From the 5th chunk on messages are lost
Lab 13 Socket Server ndash return to data mode
bull From Command Mode to Data Mode
bull While in Command Mode
bull Type AT+S (this is an AT command AT+S must be followed by ltCRgt)
bull The module returns in data mode
147
ENG-WPA
AP
Tera Term output
+WIND60Now in Data Mode
All
Lab 13 Socket Server ndash turn off
bull Turn OFF the Socket Server
bull Type at+s (to enter in command mode)
bull Type AT+SSOCKD=0
148
ENG-WPA
AP
Tera Term output
OK +WIND62Socket Client Gone1921681102
All
Proceed to the next LAB
Lab 14 Low power modes
bull Objective
bull Practice with Radio Power Save
bull Sleep Mode
bull Standby Mode
bull Prerequisites
bull module connected to the AP
150
Lab 14 Low power modes
This feature allows to enable the low power states
The module supports the ldquoRadio Power Saverdquo mode the ldquoSleeprdquo
mode and the ldquoStandbyrdquo mode
The module should be connected to the AP (as shown in Lab 3) in
order to use the ldquoRadio Power Saverdquo mode
Please refer to ldquoSPWF01S Power Management Application Notesrdquo for
more details
151
ENG-WPA AP
Low Power
Tera Term output
Lab 14 Joining a network
In order to be connected to an available Wifi network the AP parameters setting is needed
bull Set the SSID
bull Type AT+SSSIDTXT=ENG-WPA
bull Set the password
bull Type AT+SSCFG=wifi_wpa_psk_texthelloworld
bull Set the network privacy mode (0=none 1=WEP 2=WPA-Personal (TKIPAES) or WPA2-Personal (TKIPAES))
bull Type AT+SSCFG=wifi_priv_mode2
bull NB wifi_auth_type must be set to 0 AT+SSCFG=wifi_auth_type0
bull Set the network mode (1 = STA 2 = IBSS 3 = MiniAP)
bull Type AT+SSCFG=wifi_mode1
152
OK
All
Lab 14 Joining a network
bull Save the settings on the flash memory and reset the module
bull Type ATampW
bull Type AT+CFUN=1
153
+WIND0Console active +WIND46WPA Crunching PSK +WIND32WiFi Hardware Started +WIND21WiFi Scanning +WIND35WiFi Scan Complete (0x0) +WIND19WiFi Join 14D64D243600 +WIND25WiFi Association with ENG-WPA successful +WIND51WPA Handshake Complete +WIND24WiFi Up 19216801xx
All
Tera Term output
ENG-WPA AP
Low Power
Lab 14 Low power modes ndash Power Save 154
Module
Power State STM32 WLAN
Standby Standby Standby
Sleep Stop PS
Power Save Run PS or Fast-PS
Active Rx Run Rx Idle Rx Active
Active Tx Run Tx Active
Lab 14 Low power modes ndash Power Save
bull By default the module starts in ACTIVE mode
bull Enable the Power Save Mode
bull Type at+sscfg=wifi_powersave1 (ldquowifi_powersave2rdquo enables the Fast-PS mode)
bull Enable the doze operational mode
bull Type at+sscfg=wifi_operational_mode11 (ldquowifi_operational_mode12rdquo enables the quiescent mode)
bull Choose the wake up mode
1 Wake up every n beacon (specified in the wifi_beacon_wakeup variable)
bull Type at+sscfg=wifi_listen_interval0
bull Type at+sscfg=wifi_beacon_wakeup1
OR
2 Wake up every n beacon adaptively (specified in the wifi_beacon_wakeup variable)
bull Type at+sscfg=wifi_listen_interval1
bull Type at+sscfg=wifi_beacon_wakeup1
155
Tip The Wifi Power Save (wifi_powersave1) can also be quickly enabled using the command AT+CFUN=2
Lab 14 Low power modes ndash Power Save
bull Save the settings on the flash memory and reset the module
bull Type ATampW
bull Type AT+CFUN=1
bull The WIND66 message related to Low Power Mode will be
displayed
156
+WIND1Poweron (--SPWF01S) +WIND13ST SPWF01S IWM Copyright (c) 2012-2014 STMicroelectronics Inc All rights Reserved +WIND3Watchdog Running +WIND0Console active +WIND32WiFi Hardware Started +WIND21WiFi Scanning +WIND35WiFi Scan Complete (0x0) +WIND19WiFi Join 02621F518F0B +WIND25WiFi Association with IoT successful +WIND51WPA Handshake Complete +WIND24WiFi Up 1921681104 +WIND66Low Power mode1
All
Tera Term output
ENG-WPA AP
Low Power
Lab 14 Low power modes ndash Sleep Mode 157
Module
Power State STM32 WLAN
Standby Standby Standby
Sleep Stop PS or Fast-PS
Power Save Run PS or Fast-PS
Active Rx Run Rx Idle Rx Active
Active Tx Run Tx Active
Lab 14 Low power modes ndash Sleep Mode
bull In the Sleep Mode the core STM32 is stopped
bull Enable the Sleep Mode
bull Type at+sscfg=sleep_enabled1
bull Enable the Power Save Mode
bull Type at+sscfg=wifi_powersave1 (ldquowifi_powersave2rdquo enables the Fast-PS mode)
bull Enable the doze operational mode
bull Type at+sscfg=wifi_operational_mode11 (ldquowifi_operational_mode12rdquo enables the quiescent mode)
bull Choose the wake up mode
1 Wake up every n beacon (specified in the wifi_beacon_wakeup variable)
bull Type at+sscfg=wifi_listen_interval0
bull Type at+sscfg=wifi_beacon_wakeup1
OR
2 Wake up every n beacon adaptively (specified in the wifi_beacon_wakeup variable)
bull Type at+sscfg=wifi_listen_interval1
bull Type at+sscfg=wifi_beacon_wakeup1
158
Tip The Wifi Sleep Mode (and wifi_powersave1) can also be quickly enabled using the command AT+CFUN=3
Lab 14 Low power modes ndash Sleep Mode
bull Save the settings on the flash memory and reset the module
bull Type ATampW
bull Type AT+CFUN=1
bull The WIND69 message related to Sleep Mode will be displayed
159
+WIND1Poweron (--SPWF01S) +WIND13ST SPWF01S IWM Copyright (c) 2012-2014 STMicroelectronics Inc All rights Reserved +WIND3Watchdog Running +WIND0Console active +WIND32WiFi Hardware Started +WIND21WiFi Scanning +WIND35WiFi Scan Complete (0x0) +WIND19WiFi Join 02621F518F0B +WIND25WiFi Association with IoT successful +WIND51WPA Handshake Complete +WIND24WiFi Up 1921681104 +WIND66Low Power mode1 +WIND69Going into DeepSleep
All
Tera Term output
ENG-WPA AP
Low Power
Lab 14 Low power modes ndash Sleep Mode
bull Wake STM32 up using the GPIO6
bull Put the GPIO6 to 25V (jumper on JP2 as in
the picture)
bull The WIND messages will be displayed
160
+WIND70Resuming from DeepSleep +WIND53Wakeup (GPIO6 High)
All
Tera Term output
Lab 14 Low power modes ndash Sleep Mode
bull Put STM32 in sleep mode using the
GPIO6
bull Go back the GPIO6 floating (remove jumper
- as default)
bull The WIND69 message will be
displayed
161
+WIND69Going into DeepSleep
All
Tera Term output
Lab 14 Low power modes ndash Sleep Mode
bull Wake STM32 up using the remote
page
bull Connect a device to the same modulersquos
network
bull Open the following link
http[module_IP_address]remotehtml
bull Select ldquoWakerdquo and click on ldquoGordquo button
to wake up the module
bull The WIND message will be displayed
162
+WIND70Resuming from DeepSleep
All
Tera Term output
Lab 14 Low power modes ndash Sleep Mode
bull Put STM32 in sleep mode using the
remote page
bull Connect a device to the same modulersquos
network
bull Open the following link
http[module_IP_address]remotehtml
bull Select ldquoSleeprdquo and click on ldquoGordquo button
to put the module in sleep mode
bull The WIND message will be displayed
163
+WIND69Going into DeepSleep
All
Tera Term output
Lab 14 Low power modes ndash Standby Mode 164
Module
Power State STM32 WLAN
Standby Standby Standby
Sleep Stop PS or Fast-PS
Power Save Run PS or Fast-PS
Active Rx Run Rx Idle Rx Active
Active Tx Run Tx Active
Lab 14 Low power modes ndash Standby Mode
bull During the Standby Mode both the STM32 and the Radio will be
put in standby mode The standby mode allows to achieve the
lowest power consumption
bull Enable the Standby Mode
bull Type at+sscfg=sleep_enabled0 (Sleep mode must be disabled)
bull Type at+sscfg=standby_enabled1
bull Please be sure that GPIO6 isnrsquot forced high
bull Set the standby time to wake up via RTC alarm
bull Type at+sscfg=standby_time15
165
Tip The Wifi Standby Mode can also be quickly enabled using the command AT+CFUN=4
Lab 14 Low power modes ndash Standby Mode
bull Save the settings on the flash
memory and reset the module
bull Type ATampW
bull Type AT+CFUN=1
bull After 15 seconds the module will be
rebooted and will return in the
ACTIVE state
166
+WIND0Console active +WIND32WiFi Hardware Started +WIND38WiFi Powered Down +WIND67Going into Standby15 +WIND68Resuming from Standby +WIND1Poweron (--SPWF01S) +WIND13ST SPWF01S IWM Copyright (c) 2012-2014 STMicroelectronics Inc All rights Reserved +WIND3Watchdog Running +WIND0Console active +WIND32WiFi Hardware Started +WIND21WiFi Scanning +WIND35WiFi Scan Complete (0x0) +WIND19WiFi Join02621F518F0B +WIND25WiFi Association with IoT successful +WIND51WPA Handshake Complete +WIND24WiFi Up1921681113
All
Tera Term output
Lab 14 Low power modes ndash Standby Mode
bull Wake up the module using the GPIO6
bull Enable the Standby Mode
bull Type at+sscfg=sleep_enabled0 (make sure that
Sleep mode is disabled)
bull Type at+sscfg=standby_enabled1
bull Type ATampW
bull Type AT+CFUN=1
bull Put the GPIO6 to 25V to wake up the module
bull The WIND message will be displayed and
the module will return in ACTIVE state
167
+WIND68Resuming from Standby +WIND1Poweron (--SPWF01S) helliphelliphellip
All
Tera Term output
Proceed to the next LAB
Lab 15 STAMINI AP switcher
bull Objective
bull HW ldquoSTA to MiniAPrdquo switcher
bull Prerequisites
bull Work alone
169
Lab 15 STAMINI AP switcher
This feature allows to force the module in Mini AP mode starting from
a preexistent state
ldquoRecovery Moderdquo this functionality could be useful to lead the module
in a known state and to reconfigure it (ie using the firstset page)
The GPIO7 will be used to drive this feature
170
Lab 15 STAMINI AP switcher
bull Press and hold the SW2 button on the
EVAL and then perform a reset (HW reset
via SW1 button or SW reset via AT
command)
bull Release the SW2 button
bull The MiniAP mode will be started and the
module is discoverable with the following
SSID
bull iwm-XX-YY-ZZ where XX-YY-ZZ are the last
six digits of modulersquos MAC ADDRESS
171
+WIND2Reset +WIND1Poweron (--SPWF01S) +WIND13ST SPWF01S IWM Copyright (c) 2012-2014 STMicroelectronics Inc All rights Reserved +WIND39HW in miniAP mode (GPIO7 Low) +WIND0Console active +WIND3Watchdog Running +WIND32WiFi Hardware Started +WIND26WiFi Started AP +WIND24WiFi Up172312551
All
Tera Term output
Tip To exit from ldquominiAP mode via GPIO7rdquo perform a modulersquos reset
Proceed to the next LAB
Lab 16 IBSS connection
bull Objective
bull Create an IBSS network
bull Prerequisites
bull Work alone
173
Lab 16 Create an IBSS network
In an IBSS network the SSID is chosen by the client device that
starts the network
Module settings to create an IBSS network
bull Set the IBSS SSID
bull Type AT+SSSIDTXT=ADHOC
bull Set the network privacy mode (0=OPEN or 1=WEP are supported)
bull Type AT+SSCFG=wifi_priv_mode0
bull Set the network mode (2 = IBSS)
bull Type AT+SSCFG=wifi_mode2
174
OK
All
Tera Term output
Lab 16 Create an IBSS network
bull Set IP address IP default gateway IP DNS and IP netmask
bull Type AT+SSCFG=ip_ipaddr192168y1xx
bull Type AT+SSCFG=ip_gw192168y1
bull Type AT+SSCFG=ip_dns192168y1
bull Type AT+SSCFG=ip_netmask2552552550
bull Turn off the DHCP
bull Type AT+SSCFG=ip_use_dhcp0
175
OK
All
Tera Term output
Lab 16 Create an IBSS network
bull Save the settings on the flash memory and reset the module
bull Type ATampW
bull Type AT+CFUN=1
176
+WIND0Console active +WIND32WiFi Hardware Started +WIND21WiFi Scanning +WIND35WiFi Scan Complete (0x0) +WIND19WiFi Join EE33CE002418 +WIND25WiFi Association with ADHOC successful +WIND51WiFi Handshake Complete +WIND24WiFi Up 19216813
All
AD-HOC
Tera Term output
Lab 16 Create an IBSS network
bull Associate the iOS device with the
ADHOC network (iOS gt 8 could not
support the IBSS mode)
177
AD-HOC
Tip manual configuration of static TCPIPv4 parameters is suggested using a PC Ie PC TCPIPv4 properties
Lab 16 Create an IBSS network
bull Find your IP address
bull Type AT+SSTS
bull Open Safari web browser
bull In the address bar type
ltSPWF IP addressgtindexhtml
bull Type 192168y1xxindexhtml
178
AD-HOC
THANK YOU

Lab 2 Set the SPWF variables
bull Get the default configuration dump
bull Set host name
bull Set IP address IP default gateway IP DNS and IP netmask (for
static usage)
bull Type AT+SSCFG=ip_ipaddr19216801xx
bull Type AT+SSCFG=ip_gw19216801
bull Type AT+SSCFG=ip_dns19216801
bull Type AT+SSCFG=ip_netmask2552552550
22
OK
All
Tera Term output
Tera Term output
Lab 2 Set the SPWF variables
bull Get the default configuration dump
bull Set host name
bull Set IP address IP default gateway IP
DNS and IP netmask (DHCP off)
bull Save settings on the flash memory
(mandatory after a variable change)
bull Type ATampW
bull Reset the module
bull Type AT+CFUN=1
23
+WIND21WiFi Scanning +WIND35WiFi Scan Complete (0x0)
All
Lab 2 Set the SPWF variables
bull Get the default configuration dump
bull Set host name
bull Set IP address IP default gateway IP
DNS and IP netmask (DHCP off)
bull Save settings on the flash memory
(mandatory after a variable change)
and reset the module
bull Check the new configuration dump
bull Type ATampV
24
Proceed to the next LAB
Lab 2a FOTA update
bull Objective
bull Upgrade the FW using the OTA file
bull Prerequisites
bull OTA file (provided in the SPWF01S FW
package)
bull External web server (ie Apache web
server running on PC)
26
Lab 2a FOTA update 27
The SPWF01Sx11 module (with external flash on board) allows
performing a Firmware Over-the-air update via a single HTTP GET
The SPWF01S will validate the firmware image it downloads load it
into a staging area then prompt the user to issue a reset command in
order to complete the update
Lab 2a FOTA update
The Apache Web Server will be used in this LAB
(Apache Web Server is available at this link
httparchiveapacheorgdisthttpdbinarieswin32httpd-2225-win32-x86-openssl-098ymsi)
Note please check that the local firewall is disabled or properly set It can
block the connection from module to Apache
bull Copy the OTA file (ie SPWF01S-xxxxxx-yyyyyyy-
RELEASE-mainota) in the Apache 22 htdocs folder
28
Lab 2a FOTA update
The FWUPDATE command allows to perform a Firmware Over-the-
air update via a single HTTP GET
bull Sintax
bull AT+SFWUPDATE=lthostnamegtltpathgtltportgt
bull Configuration parameters
bull lthostnamegt Target host DNS resolvable name or IP address
bull ltpathampqueryoptsgt Document path and optional query arguments
bull ltportgt Target host port
29
Lab 2a FOTA update
bull The module and the Apache Web server must be connected to the same network
bull In Tera Term type AT+SFWUPDATE=[Apache IP address][ota_fileota]
ie type AT+SFWUPDATE=192168xyyySPWF01S-150410-c2e37a3-RELEASE-
mainota
bull Reset the module to apply the new FW
bull Type AT+CFUN=1
bull Restore factory default settings (mandatory)
bull Type ATampF
30
Staging FW update for SPWF01SX11 version 1203-120918_01 FW length 276824 0x00002800 (offset 0x00000000 block len 4096) Write len 4096 -gt 0x0 Write len 4096 -gt 0x1000 (note - deleted extra output for clarity) Write len 4096 -gt 0x42000 Write len 2476 -gt 0x43000 (final) Wrote 276904 bytes Complete Update will be applied on next reboot (at+cfun=1)
All Tera Term output
Proceed to the next LAB
Lab 3 Access point connection
bull Objective
bull Scan for available networks
bull Join a network
bull Check the statusstatistics variables
bull Prerequisites
bull USB dongle and computer are set
up as described in Lab 2
bull Work alone
32
Lab 3 Scan for available networks
The SCAN command performs an immediate scan for available
networks Infrastructure (AP) and IBSS (Ad-Hoc) networks are both
reported Network type Channel BSSID SSID Signal strength (RSSI)
and 80211 capabilities are all reported
bull Type AT+SSCAN
bull Scan syntax AT+SSCAN [=lta|pgt[ltr|s|mgt[ltfnamegt]]] -- Perform a [activepassive]
network scan [filter offfilter on SSIDfilter on MAC] [print to file])
33
FOUND BSS 14D64D243600 CHAN 01 RSSI -28 SSID ENG-WPA CAPS 0431 WPA WPA2 FOUND BSS 00180A31EA78 CHAN 11 RSSI -82 SSID ZyckoItalyWireless CAPS 0531 WPA WPA2 FOUND BSS 06180A31E7E2 CHAN 11 RSSI -85 SSID ZyckoItalyGuest CAPS 0531 WPA WPA2 OK
All
Network type
Network MAC
Network
channel Network
RSSI
Network
SSID Network
capabilities
Tera Term output
Tera Term output
Lab 3 Joining a network (WPA Key)
In order to be connected to an available Wifi network the AP parameters setting is needed
bull Set the SSID
bull Type AT+SSSIDTXT=ENG-WPA
bull Set the password
bull Type AT+SSCFG=wifi_wpa_psk_texthelloworld
bull Set the network privacy mode (0=none 1=WEP 2=WPA-Personal (TKIPAES) or WPA2-Personal (TKIPAES))
bull Type AT+SSCFG=wifi_priv_mode2
bull NB wifi_auth_type must be set to 0 AT+SSCFG=wifi_auth_type0
bull Set the network mode (1 = STA 2 = IBSS 3 = MiniAP)
bull Type AT+SSCFG=wifi_mode1
34
OK
All
Lab 3 Joining a network (WPA Key)
bull Save the settings on the flash memory and reset the module
bull Type ATampW
bull Type AT+CFUN=1
35
+WIND0Console active +WIND46WPA Crunching PSK +WIND32WiFi Hardware Started +WIND21WiFi Scanning +WIND35WiFi Scan Complete (0x0) +WIND19WiFi Join 14D64D243600 +WIND25WiFi Association with ENG-WPA successful +WIND51WPA Handshake Complete +WIND24WiFi Up 19216801xx
All
ENG-WPA AP
Tera Term output
Lab 3 Joining a network (WPA Key)
bull Check the statusstatistics variables
bull Type AT+SSTS
bull Send a ping to the gateway (ip_gw)
bull Type AT+SPING=19216801
36
ENG-WPA AP
Tera Term output
OK
All
Lab 3 Joining a network (WEP Key)
Configure the module using the WEP key (4 possible combinations
available)
Sample table
37
AP configuration AT command to be used
Security Mode WEP
WEP Key Length 64 bit
(10 hex digits)
Authentication Open
Wep Key 1 1234567890
ie
at+sssidtxt=ENG-WEP
AT+SSCFG=wifi_wep_keys[0]1234567890
AT+SSCFG=wifi_wep_key_lens05
AT+SSCFG=wifi_auth_type0
AT+SSCFG=wifi_priv_mode1
AT+SSCFG=wifi_mode1
atampw
at+cfun=1
Security Mode WEP
WEP Key Length 64 bit
(10 hex digits)
Authentication Shared
Key
Wep Key 1 1234567890
ie
at+sssidtxt=ENG-WEP
AT+SSCFG=wifi_wep_keys[0]1234567890
AT+SSCFG=wifi_wep_key_lens05
AT+SSCFG=wifi_auth_type1
AT+SSCFG=wifi_priv_mode1
AT+SSCFG=wifi_mode1
atampw
at+cfun=1
AP configuration AT command to be used
Security Mode WEP
WEP Key Length
128 bit (26 hex digits)
Authentication Open
Wep Key 1
123456789012345678
90123456
ie
at+sssidtxt=ENG-WEP
AT+SSCFG=wifi_wep_keys[0]12345678
901234567890123456
AT+SSCFG=wifi_wep_key_lens0D
AT+SSCFG=wifi_auth_type0
AT+SSCFG=wifi_priv_mode1
AT+SSCFG=wifi_mode1
atampw
at+cfun=1
Security Mode WEP
WEP Key Length
128 bit (26 hex digits)
Authentication
Shared Key
Wep Key 1
123456789012345678
90123456
ie
at+sssidtxt=ENG-WEP
AT+SSCFG=wifi_wep_keys[0]12345678
901234567890123456
AT+SSCFG=wifi_wep_key_lens0D
AT+SSCFG=wifi_auth_type1
AT+SSCFG=wifi_priv_mode1
AT+SSCFG=wifi_mode1
atampw
at+cfun=1
Lab 3 Joining a network (WEP Key)
Notes
bull ldquowifi_wep_key_lensrdquo variable values 05 and 0D
bull Itrsquos possible to enter any text string into a WEP key box in the AP in which case it will be converted into a hexadecimal key using the ASCII values of the characters A maximum of 5 text characters can be entered for 64 bit keys and a maximum of 13 characters for 128 bit keys
In this case it needs to manually convert your ASCII password to HEX and complete the wifi_wep_keys[0] variable with the HEX value bull ie AP WEP key test1 ASCII to HEX 7465737431 So the AT command is AT+SSCFG=wifi_wep_keys[0]7465737431
bull Some APs allow user to insert a passphrase and then the AP automatically generates the hex keys In this scenario user have not to perform the ASCII to HEX conversion because the AP already gives it the hex value
38
Proceed to the next LAB
Lab 4 Web client mode
bull Objective
bull HTTP GET
bull HTTP POST
bull PUSH DATA ON SERIAL PORT
bull Prerequisites
bull USB dongle and computer are set up
as described in Lab 2
bull Work in couple
40
Lab 4 HTTP GET
The HTTP GET feature performs a single HTTP request to the specified
host and path The server response is printed on the UART enabled
bull Sintax
bull AT+SHTTPGET=lthostnamegtltpathgt[ltportgt]
bull Configuration parameters
bull lthostnamegt target host DNS resolvable name or IP address
bull ltpathgt document path
bull ltportgt target port
41
Lab 4 HTTP GET
bull Device A performs an HTTP GET to the Device B
bull Device A
AT+SHTTPGET=ltDevice B IP addrgtindexhtml
Type AT+SHTTPGET=19216801xxindexhtml
42
GET indexhtml HTTP10 User-Agent SPWF01S helliphelliphellip lth1gtST SPWF01Sx11 WiFi Modulelth1gt ltpgt Welcome to the ST SPWF01Sx11 WiFi Module ltpgt ltpgt This page was delivered from the SPWF01Sx11 internal HTTP server hellip lta href=statusshtmlgtSPWF01Sx11 Status Pageltagt ltpgt ltbodygt lthtmlgt OK
Device A
A B
Tera Term output
Lab 4 HTTP POST
The HTTP POST performs a post of the given path to the specified host The module can be only used as an HTTP POST client
bull Sintax
bull AT+SHTTPPOST =lthostnamegtltpathampqueryoptsgtltformcontentgt[ltportgt]
bull Configuration parameters
bull lthostnamegt target host DNS resolvable name or IP address
bull ltpathampqueryoptsgt document path
bull ltformcontentgt form to be submitted
bull ltportgt target port
43
Lab 4 HTTP POST
bull The SPWF01S performs an HTTP POST to an HTTP Post Test Server
bull Type
at+shttppost=posttestservercompostphpname=demoampemail=mymailampsubjec
t=subjampbody=message
bull The HTTP Post Test Server replies as
displayed in the Tera Term output if the HTTP
POST successfully
44
HTTP11 200 OK Date Fri 10 Jan 2014 132414 GMT Server Apache Access-Control-Allow-Origin Vary Accept-Encoding Content-Length 139 Connection close Content-Type texthtml Successfully dumped 4 post variables View it at httpwwwposttestservercomdata2014011005241443192628 Post body was 0 chars long OK
Device A
A B
Tera Term output
HTTP POST
SERVER
Lab 4 HTTPREQ bull The SPWF01S can perform a custom HTTP request to a specified
target Refer to the User Manual for more details
bull Type
AT+SHTTPREQ=wwwgooglecom8089
After ltCRgt the module accepts data We will try to open an non-existent web page
GET downloadTagphp HTTP10ltCRgtltLFgt
User-Agent SPWF01SltCRgtltLFgt
Host iwm-testltCRgtltLFgt
Connection closeltCRgtltLFgtltCRgtltLFgt
45
HTTP10 404 Not FoundltCRgtltLFgt Date Sun 31 Jan 2016 142704 GMTltCRgtltLFgt Content-Type texthtmlltCRgtltLFgt Server HTTP server (unknown)ltCRgtltLFgt Content-Length 49ltCRgtltLFgt X-XSS-Protection 1 mode=blockltCRgtltLFgt X-Frame-Options SAMEORIGINltCRgtltLFgt ltCRgtltLFgt lthtmlgtltbodygtlth1gt404 Not Foundlth1gtltbodygtlthtmlgtltLFgtltCRgt ltLFgt ltSUBgtltSUBgtltSUBgtltCRgtltLFgt ltCRgtltLFgt OKltCRgtltLFgt
All
A B
Tera Term output
[AT+SHTTPREQ =lthostnamegt[port]ltlengthgtltCRgtltdatagt]
Lab 4 Push data on serial port
A built-in html page ldquooutput_demohtmlrdquo allows to remotely push
characters on the serial port from a remote browser
46
output_demohtml
Modulersquos IP addressoutput_demohtml
Lab 4 Push data on serial port
bull Find your IP address
bull Type AT+SSTS
bull Associate your computer with the AP
bull Open your web browser
bull In the address bar type
ltmodulersquos IP
Addressgtoutput_demohtml
bull Type
19216801xxoutput_demohtml
47
Lab 4 Push data on serial port
bull Enter the text
bull In order to manage non-ASCII chars the ip_use_decoder variable must be modified (refer to the User Manual for more details)
bull Submit
bull The text will be sent to the serial port of the module
48
Proceed to the next LAB
Lab 5 Web Server use mode
bull Objective
bull List existing files
bull Print a file
bull Create a file
bull Append to an existing file
bull Delete an existing file
bull Prerequisites
bull USB dongle and computer are
set up as described in Lab 2
bull Work alone
50
Lab 5 Web server 51
The Web Server feature allows to create print and delete ASCII files in
the RAM memory of the module
Lab 5 List existing files
The FSL command lists type sizes and name of all the existing files
bull Type AT+SFSL
52
I 461 input_demoshtml I 180 messageshtml I 384 output_demohtml I 614 indexhtml I 157 peersshtml I 193 configshtml I 174 statusshtml I 212 404html I 2022 firstsethtml I 2898 remotehtml OK
All
Files stored in the STM32
FLASH memory
Tera Term output
Lab 5 Print a file
The FSP command prints the content
of an existing file
bull Type AT+SFSP=indexhtml
53
lthtmlgt ltheadgtlttitlegtST SPWF01Slttitlegtltheadgt ltbody bgcolor=white text=blackgt lth1gtST SPWF01S Intelligent WiFi Modulelth1gt ltpgtWelcome to the ST SPWF01S intelligent Wi-Fi moduleltpgt ltpgtThis page was delivered from the SPWF01S internal HTTP serverltpgt ltpgt lta href=configshtmlgtSPWF01S Configuration Settings Pageltagt ltpgt ltpgt lta href=statusshtmlgtSPWF01S Status Pageltagt ltpgt ltpgt lta href=peersshtmlgtSPWF01S Peers Pageltagt ltpgt ltpgtMore information about the SPWF01S and other ST products can be found at STs website lta href=httpwwwSTcomgthttpwwwSTcomltagtltpgt ltbodygt lthtmlgt OK
All Tera Term output
Tip How to use the offset and length parameters AT+SFSP=indexhtml[offset][length] ie Type AT+SFSP=indexhtml520 Length parameter is mandatory if is used the offset
Lab 5 Create a file
The FSC command allows to create a file inside the SPWF for
delivery by the SPWF HTTP server
bull Sintax
bull AT+SFSC =ltfnamegtltmax_lengt[lthttp_headergt]
bull Configuration parameters
bull lt filename gt filename to create
bull lt max_len gt amount of space to allocate for file max = 4096 bytes
bull lthttp_headergt 0=HTML header automatically added 1=HTML header not
added (as by default)
Type AT+SFSC=wifidemohtml1965
54
OK
All
Tera Term output
Lab 5 Configuring the UART
bull Set CR+LF in the Terminal setup
(to properly paste text in the
terminal)
bull Tera Term Setup rarr Terminal rarr
Transmit CR+LF
55
Tip The local echo option must be disabled on Tera Term
Added in FW 35 using the AT+SFSR command user can rename dynamic files stored in the RAM memory Refer to the User Manual for more details
Lab 5 Append to an existing file
The FSA command allows to append blocks of data to an existing file
This command accepts data after the ltcrgt at the end of the command
line
bull Sintax
bull AT+SFSA=ltfilenamegtltdatalengt
bull Configuration parameters
bull lt filename gt filename pre-created
bull lt datalen gt number of characters to append to the file
Type AT+SFSA=wifidemohtml1965
56
Now SPWF accepts data
Tips
Lab 5 Append to an existing file
bull Open wifidemotxt in the following
directory Hands_on
folderHTML_demo_page
bull Check you have set up CR+LF in the
Terminal setup (for more
information refer to the slide 48)
bull Copy the file content into Tera term
(paste with ALT+V or mouse right
button)
57
OK
All
Tera Term output
Lab 5 Append to an existing file
bull Open wifidemohtml
bull Open your Web browser (suggested Google
Chrome for HTML5 test)
bull In address bar type ltSPWF IP addrgtwifidemohtml
Type 19216801xxwifidemohtml
58
Lab 5 Configuring the UART
bull Re-set CR in the Terminal setup
as by default
bull Tera Term Setup rarr Terminal rarr
Transmit CR
59
Tip The local echo option can be re-enabled on Tera Term
Lab 5 List existing files
Lets list the files
bull Type AT+SFSL
60
D 1965 wifidemohtml I 461 input_demoshtml I 180 messageshtml I 384 output_demohtml I 614 indexhtml I 157 peersshtml I 193 configshtml I 174 statusshtml I 212 404html I 2022 firstsethtml I 2898 remotehtml OK
All
File stored in the RAM memory
Tera Term output
Lab 5 Delete an existing file
The FSD command allows to delete an existing file by name Static
files may not be deleted
bull Sintax
bull AT+SFSD=ltfilenamegt
Type AT+SFSD=wifidemohtml
61
OK
All
Tera Term output
Lab 5 Delete an existing file
bull Re-open wifidemohtml
bull Open your Web browser
bull In address bar ltSPWF IP addrgtwifidemohtml
Type 19216801xxwifidemohtml
62
Proceed to the next LAB
Lab 6 Web Server use mode
bull Objective
bull Create an image file
bull Filesystem update over-the-air
bull Filesystem update over UART
bull Prerequisites
bull Work alone
64
Lab 6 Web server 65
The Web Server feature also allows to upload generic files (PDF
HTML DOC JPEG and so on) in the EXTERNAL FLASH memory of
the module It needs to follow the below steps
- create an image file (IMG) using the tool provided in the Hands-on package
(the IMG contains the files to upload)
- Put the image in a generic and accessible Web Server (Apache Web server
will be used in the Hands-on as example)
- Using the proper AT command the IMG will be retrieved over-the-air and the
static files will be created in the external flash memory
Lab 6 Create an image file
bull Open the following folder and
extract all the files
hands_on_wififilesystem_update
bull Put your own files to upload in the
pages folder (max 512 Kbytes)
bull Run genbat
bull Open the pages folder and copy
outfileimg in your external Web
Server (Apache)
66
3
1
2
Lab 6 Create an image file
The Apache Web Server will be used in this tutorial
(Apache Web Server is available at this link
httparchiveapacheorgdisthttpdbinarieswin32httpd-2225-win32-x86-openssl-098ymsi)
Note please check that the local firewall is disabled or properly set It can
block the connection from module to Apache
bull Copy outfileimg in the Apache 22
htdocs folder (this is the default
root server directory)
67
4
Lab 6 Filesystem update
The HTTPDFSUPDATE command allows to create static files inside
the SPWF for delivery by the SPWF HTTP server
bull Sintax
bull AT+SHTTPDFSUPDATE=lthostnamegtltpathgt[port]
bull Configuration parameters
bull lthostnamegt external web server DNS resolvable name or IP address
bull ltpathgt document path
bull ltportgt target host port
68
Lab 6 Filesystem update
bull In Tera Term type
AT+SHTTPDFSUPDATE=192168x10xoutfileimg
bull Reset the module
bull Type AT+CFUN=1
69
Image length 357957 (offset 0x00080000 block len 4096) Write len 4096 -gt 0x80000 Write len 4096 -gt 0x81000 Write len 4096 -gt 0x82000 helliphelliphelliphellip helliphelliphelliphelliphelliphellip helliphelliphelliphelliphellip Write len 4096 -gt 0xD6000 Write len 1612 -gt 0xD7000 (final) Wrote 357964 bytes Complete Please reboot (at+cfun=1) OK
All
Tera Term output
The file system will be permanently deleted The new IMG will overwrite the existent files in the file system
Warning
Lab 6 Filesystem update
Lets list the files
bull Type AT+SFSL
70
E 2615 st766gif E 112374 modulepng E 2430 index1html E 419 indexhtml E 239887 MKTWiFipdf I 461 input_demoshtml I 180 messageshtml I 384 output_demohtml I 614 indexhtml I 157 peersshtml I 193 configshtml I 174 statusshtml I 212 404html I 2022 firstsethtml I 2898 remotehtml OK
All
Files stored in
the EXT FLASH memory
Tera Term output
Lab 6 Filesystem update
bull Open index1html page
bull Open your web browser
bull In the address bar ltSPWF IP addrgtindex1html
Type 192168x1xxindex1html
71
Lab 6 Filesystem erase
Erase the external httpd filesystem
bull Type AT+S HTTPDFSERASE
The files stored in the EXT FLASH memory will be erased
Lets list the files
bull Type AT+SFSL
72
I 461 input_demoshtml I 180 messageshtml I 384 output_demohtml I 614 indexhtml I 157 peersshtml I 193 configshtml I 174 statusshtml I 212 404html I 2022 firstsethtml I 2898 remotehtml OK
All
Tera Term output
Lab 6 Filesystem update
The HTTPDFSWRITE command allows to create static files inside
the SPWF via the UART interface The HW flow control MUST be
enabled in order to use the command
bull Sintax
bull AT+SHTTPDFSWRITE =ltdatalengtltCRgtltdatagt
bull Configuration parameters
bull ltdatalengt Amount of bytes to be sent
73
Lab 6 Filesystem update
bull Type AT+S HTTPDFSWRITE=357957
bull In Tera Term File ndash Send File
bull Reset the module
bull Type AT+CFUN=1
74
Image length 357957 (offset 0x00080000 block len 4096) Write len 4096 -gt 0x80000 Write len 4096 -gt 0x81000 Write len 4096 -gt 0x82000 helliphelliphelliphellip helliphelliphelliphelliphelliphellip helliphelliphelliphelliphellip Write len 4096 -gt 0xD6000 Write len 1612 -gt 0xD7000 (final) Wrote 357964 bytes Complete Please reboot (at+cfun=1) OK
All
Tera Term output
The file system will be permanently deleted The new IMG will overwrite the existent files in the file system
Warning
Proceed to the next LAB
Lab 7 Socket interface
bull Objective
bull Open TCPUDP connection
bull Write data to socket
bull Read data from socket
bull Close socket
bull Prerequisites
bull Work alone
76
TCPUDP socket
Socket
Client
Socket
Server
Lab 7 TCPUDPUART socket interface 77
The Socket interface allows communication via TCP UDP and UART
The SPWF is both a client and a server socket In this LAB will be
detailed the socket client feature
Ho
st
En
d P
rod
uct
Open TCPUDP connection
Write data to socket
Read data from socket
Close socket
Lab 7 Open TCPUDP connection
The SOCKON command allows to open a TCPUDP connection
to a specified host (up to 8 socket connections at same time)
bull Sintax
bull AT+SSOCKON=lthostnamegtltportgtltprotocolgtind
bull Configuration parameters
bull lthostnamegt target host DNS resolvable name or IP address
bull ltportgt TCPUDP socket port
bull ltprotocolgt t for TCP socket u for UDP socket
bull ind indicate when data has arrived (optional) Up to 4 (x730 bytes)
consecutive ldquoPending datardquo message (without any AT+SSOCKR) are
guaranteed It is suggested to empty the buffer using the AT+SSOCKR
command and to avoid exceeding 4 indications
78
Lab 7 Open TCPUDP connection
bull Open the TCP socket server (disable the firewall to properly
run it)
bull Folder hands_on_wifitcp socket serverserverexe
bull The TCP server listens for incoming connections on the port
32000 It sends back all data received
79
Optional - Lab 7 Open TCPUDP connection
bull Using an Android platform the socket server can be opened
using a specific APP (Socket Protocol available on Play Store)
bull The TCP socket server can be configured to listen for
incoming connections on the port 32000
bull Type 32000 on laquoPort Listen toraquo box
bull Click on Listen
80
Lab 7 Open TCPUDP connection
bull Type AT+SSOCKON=192168010x32000tind
bull The client and the server use the socket identifier (ID)
displayed
81
ID 00 OK
All
Tera Term output
Lab 7 Write data to socket
The SOCKW command allows to write data to the specified ID
socket
This command accepts data after the ltcrgt at the end of the
command line
bull Sintax
bull AT+SSOCKW=ltIDgtltlengt
bull Configuration parameters
bull ltIDgt socket identifier
bull ltlengt data length to send
82
Lab 7 Write data to socket
bull Write data
bull Type AT+SSOCKW=0013
bull Type hello worldltCRgt
bull SPWF shows that there are ltpending datagt and their amount
83
+WIND55Pending Data013
All
Tera Term output
ID
Pending
bytes
Note the module is waiting 13 bytes to be written to the socket As soon as 13 bytes (or characters) are sent from the terminal the module is going to write them to the socket and will be ready to receive new commands
Lab 7 Read data from socket
The SOCKR command allows to read data from socket
bull Sintax
bull AT+SSOCKR=ltIDgtltlengt
bull Configuration parameters
bull ltIDgt socket identifier
bull ltlengt data length to read
84
Lab 7 Read data from socket
bull Read data
bull Type AT+SSOCKR=0013
85
hello world OK
All
Tera Term output
Lab 7 Close socket
The SOCKC command allows to close socket
bull Sintax
bull AT+SSOCKC=ltIDgt
bull Configuration parameters
bull ltIDgt socket identifier
86
Tera Term output
Lab 7 Close socket
bull Close socket
bull Type AT+SSOCKC=00
87
OK
All
Proceed to the next LAB
Lab 8 MiniAP mode for the first set
bull Objective
bull Create a direct connection between
the module and an end device
bull First set of the module in order to
enable the connection between the
module and a generic AP
bull Prerequisites
bull Work alone
89
Tera Term output
Lab 8 Configuring the module in MiniAP mode
The Mini AP mode is available starting from the following FW release
SPWF01S-131115-de4568d-RELEASE
In order to set the module in Mini AP mode the following parameters
are needed
bull Set the SSID
bull Type AT+SSSIDTXT=SPWF_AP
bull Set the network privacy mode (0=OPEN or 1=WEP are supported)
bull Type AT+SSCFG=wifi_priv_mode0
bull Set the network mode (1 = STA 2 = IBSS 3 = MiniAP)
bull Type AT+SSCFG=wifi_mode3
90
OK
All
Lab 8 Configuring the module in MiniAP mode
bull Save the settings on the flash memory and reset the module
bull Type ATampW
bull Type AT+CFUN=1
91
+WIND0Console active +WIND32WiFi Hardware Started +WIND26WiFi Started AP with network SPWF_AP +WIND24WiFi Up 172181511
All
Tera Term output
SPWF_AP
Lab 8 Configuring the module in MiniAP mode (WEP Key)
Configure the module using the WEP key (2 possible combinations
available)
Sample table
92
AP configuration AT command to be used
Security Mode WEP
WEP Key Length 64 bit
(10 hex digits)
Authentication Open
Wep Key 1 1234567890
ie
at+sssidtxt=SPWF_AP
AT+SSCFG=wifi_wep_keys[0]1234567890
AT+SSCFG=wifi_wep_key_lens05
AT+SSCFG=wifi_auth_type0
AT+SSCFG=wifi_priv_mode1
AT+SSCFG=wifi_mode3
atampw
at+cfun=1
AP configuration AT command to be used
Security Mode WEP
WEP Key Length
128 bit (26 hex digits)
Authentication Open
Wep Key 1
123456789012345678
90123456
ie
at+sssidtxt=SPWF_AP
AT+SSCFG=wifi_wep_keys[0]12345678
901234567890123456
AT+SSCFG=wifi_wep_key_lens0D
AT+SSCFG=wifi_auth_type0
AT+SSCFG=wifi_priv_mode1
AT+SSCFG=wifi_mode3
atampw
at+cfun=1
Lab 8 Configuring the module in MiniAP mode (WEP Key)
Notes
bull ldquowifi_wep_key_lensrdquo variable values 05 and 0D
bull Itrsquos possible to enter any text string as WEP key It have to be converted into a
hexadecimal key using the ASCII values of the characters A maximum of 5 text
characters can be entered for 64 bit keys and a maximum of 13 characters for 128
bit keys
In this case it needs to manually convert your ASCII password to
HEX and complete the wifi_wep_keys[0] variable with the HEX
value
bull ie WEP key test1
ASCII to HEX 7465737431
So the AT command is AT+SSCFG=wifi_wep_keys[0]7465737431
93
Lab 8 Customizing the MiniAP address (optional)
Starting from FW 33 the module allows user to customize the IP address of the MiniAP
bull Set the SSID
bull Type AT+SSSIDTXT=SPWF_AP
bull Set the network privacy mode (0=OPEN or 1=WEP are supported)
bull Type AT+SSCFG=wifi_priv_mode0
bull Set the network mode (1 = STA 2 = IBSS 3 = MiniAP)
bull Type AT+SSCFG=wifi_mode3
bull Set the use_dhcp mode (0 = DHCP server off 1 = DHCP server on 2 = DHCP server on and customizable)
bull Type AT+SSCFG=ip_use_dhcp2
bull Set the MiniAP address
bull Type AT+SSCFG=ip_ipaddr19216801
bull Save the settings on the flash memory and reset the module
bull Type ATampW
bull Type AT+CFUN=1
94
Tera Term output
+WIND0Console active +WIND32WiFi Hardware Started +WIND26WiFi Started AP with network SPWF_AP +WIND24WiFi Up 19216801
All
Tip the MiniAP will assign sequential addresses to the client ie 1deg client 19216802 2deg client 19216803
Lab 8 Mini AP mode
bull Associate your end device to the
SPWF_AP network
bull Find the SPWF_AP network and connect
the end device to the module
95
SPWF_AP +WIND2890187C960D0B Associated +WIND29DHCP reply for 17218151290187C960D0B to 172181512 +WIND29DHCP reply for 17218151290187C960D0B to 172181512
All
Tera Term output
Lab 8 Mini AP mode
bull Open your web browser
bull In the address bar type captiveportalnet
96
SPWF_AP
Tip The Mini AP domain can be set using the variable ip_apdomainname The default value is ldquocaptiveportalnetrdquo
The Mini AP default homepage can be set using the variable ip_apredirect The default value is ldquofirstsethtmlrdquo
Tip If the AP domain name is not quickly opened itrsquos suggested to turn off an eventual proxy server (check the connection settings or browser preferences)
Lab 8 First Set Page
bull The first set page allows to configure the module in IDLE mode
STATION mode IBSS mode and MINI AP mode
97
Used for STA IBSS MINI AP
Mandatory for IDLE STA IBSS MINI AP
Used for STA IBSS (WEP) MINI AP (WEP)
Used for STA (if DHCP = OFF) IBSS
(mandatory) MINI AP (if DHCP = OFF)
Used for STA IBSS (mandatory DHCP = OFF) MINI AP
Used for STA (WEP key) IBSS (WEP) MINI AP (WEP)
Used for STA IBSS MINI AP
Lab 8 Mini AP mode
bull Set all the parameters required in order to enable the connection
between the module and a generic AP
ie AP configured in WPAWPA2 mode
bull MiniAP PassKey anonymous (by default)
bull SSID of the access point
bull Password of the access point
bull Authentication type of the access point
bull Use mode of the module
98
Tip The Mini AP PassKey can be set using the variable ldquouser_descrdquo The default value is ldquoanonymousrdquo
Note In order to manage non-ASCII chars the ip_use_decoder variable must be modified according as below at+sscfg=ip_use_decoder0 no decoding [default] at+sscfg=ip_use_decoder1 RAW decoding (the USER and PSK fields must be completed in HEX) at+sscfg=ip_use_decoder2 UTF-8 decoding at+sscfg=ip_use_decoder6 HTML entities decoding
Lab 8 Mini AP mode
bull Click on GO button and then send the
parameters confirming with OK
99
SPWF_AP
AP
SSID ciscosb2
Lab 8 Mini AP mode
bull The module will receive the parameters and will automatically
connect to the access point required
100
+WIND57Received SSID is ciscosb2 +WIND57Received PWD is +WIND57Received Auth mode is 2 +WIND57Received Mode is 1 +WIND2RESET +WIND1Poweron (--SPWF01S) +WIND13ST IWM Copyright (c) 2012-2013 STmicroelectronics +WIND3Watchdog Running +WIND0Console active +WIND46WPA Crunching PSK +WIND32WiFi Hardware Started +WIND21WiFi Scanning +WIND35WiFi Scan Complete (0x0) +WIND19WiFi Join 02621F518F0B +WIND25WiFi Association with ciscosb2 successful +WIND51WPA Handshake Complete +WIND24WiFi Up 1921681106
All
Tera Term output
ciscosb2
AP
Lab 8 Mini AP mode ndash RAW decoding example
101
Note In order to manage non-ASCII chars the ip_use_decoder variable must be modified according as below at+sscfg=ip_use_decoder0 no decoding [default] at+sscfg=ip_use_decoder1 RAW decoding (the USER and PSK fields must be completed in HEX) at+sscfg=ip_use_decoder2 UTF-8 decoding at+sscfg=ip_use_decoder6 HTML entities decoding
7177657261736466
AP SSIS
AP PSK
Proceed to the next LAB
Lab 9 Socket interface - MiniAP mode
bull Objective
bull Create a direct connection between
the module and an end device
bull Socket interface used in MiniAP
mode
bull Prerequisites
bull Work alone
103
Tera Term output
Lab 9 Configuring the module in MiniAP mode
The Mini AP mode (available starting from the SPWF01S-131115-de4568d-RELEASE) also allows to use the socket interface The procedure is the same as in Lab 7
In order to set the module in Mini AP mode the following parameters are needed
bull Set the SSID
bull Type AT+SSSIDTXT=SPWF_AP
bull Set the network privacy mode
bull Type AT+SSCFG=wifi_priv_mode0
bull Set the network mode (1 = STA 2 = IBSS 3 = MiniAP)
bull Type AT+SSCFG=wifi_mode3
104
OK
All
Lab 9 Configuring the module in MiniAP mode
bull Save the settings on the flash memory and reset the module
bull Type ATampW
bull Type AT+CFUN=1
105
+WIND0Console active +WIND32WiFi Hardware Started +WIND26WiFi Started AP with network SPWF_AP +WIND24WiFi Up 172181511
All
Tera Term output
SPWF_AP
Lab 9 Mini AP mode
bull Connect your PC to the SPWF_AP
network
bull Find the SPWF_AP network and connect
the end device to the module
106
SPWF_AP +WIND2890187C960D0B Associated +WIND29DHCP reply for 17218151290187C960D0B to 172181512 +WIND29DHCP reply for 17218151290187C960D0B to 172181512
All
Tera Term output
Lab 9 Open TCPUDP connection
As described in the Lab 7 the SOCKON command allows to
open a TCPUDP connection to a specified host
bull Sintax
bull AT+SSOCKON=lthostnamegtltportgtltprotocolgtind
bull Configuration parameters
bull lthostnamegt target host DNS resolvable name or IP address
bull ltportgt TCPUDP socket port
bull ltprotocolgt t for TCP socket u for UDP socket
bull ind indicate when data has arrived (optional) Up to 4 consecutive ldquoPending
datardquo message (without any AT+SSOCKR) are guaranteed It is
suggested to empty the buffer using the AT+SSOCKR command and
to avoid exceeding 4 indications
107
Lab 9 Open TCP connection
bull Open the TCP socket server (disable the firewall to properly
run it)
bull Folder hands_on_wifitcp socket serverserverexe
bull The TCP server listens for incoming connections on the port
32000 It sends back all data received
108
Lab 9 Open TCP connection
bull Type AT+SSOCKON=17218151232000tind
bull The client and the server use the socket identifier (ID)
displayed
109
ID 00 OK
All
Tera Term output
Lab 9 Write data to socket
The SOCKW command allows to write data to the specified ID
socket
This command accepts data after the ltcrgt at the end of the
command line
bull Sintax
bull AT+SSOCKW=ltIDgtltlengt
bull Configuration parameters
bull ltIDgt socket identifier
bull ltlengt data length to send
110
Lab 9 Write data to socket
bull Write data
bull Type AT+SSOCKW=0013
bull Type hello worldltCRgt
bull SPWF shows that there are ltpending datagt and their amount
111
+WIND55Pending Data013
All
Tera Term output
ID
Pending
bytes
Note the module is waiting 13 bytes to be written to the socket As soon as 13 bytes (or characters) are sent from the terminal the module is going to write them to the socket and will be ready to receive new commands
Lab 9 Read data from socket
The SOCKR command allows to read data from socket
bull Sintax
bull AT+SSOCKR=ltIDgtltlengt
bull Configuration parameters
bull ltIDgt socket identifier
bull ltlengt data length to read
112
Lab 9 Read data from socket
bull Read data
bull Type AT+SSOCKR=0013
113
hello world OK
All
Tera Term output
Lab 9 Close socket
The SOCKC command allows to close socket
bull Sintax
bull AT+SSOCKC=ltIDgt
bull Configuration parameters
bull ltIDgt socket identifier
114
Tera Term output
Lab 9 Close socket
bull Close socket
bull Type AT+SSOCKC=00
115
OK
All
Proceed to the next LAB
Lab 10 Web server - MiniAP mode
bull Objective
bull Create a direct connection between
the module and an end device
bull Web server used in MiniAP mode
bull Prerequisites
bull Work alone
117
Tera Term output
Lab 10 Configuring the module in MiniAP mode
The Mini AP mode (available starting from the SPWF01S-131115-de4568d-RELEASE) also allows to use the module file system (both RAM and IntExt FLASH)
In order to set the module in Mini AP mode the following parameters are needed
bull Set the SSID
bull Type AT+SSSIDTXT=SPWF_AP
bull Set the network privacy mode
bull Type AT+SSCFG=wifi_priv_mode0
bull Set the network mode (1 = STA 2 = IBSS 3 = MiniAP)
bull Type AT+SSCFG=wifi_mode3
118
OK
All
Lab 10 Configuring the module in MiniAP mode
bull Save the settings on the flash memory and reset the module
bull Type ATampW
bull Type AT+CFUN=1
119
+WIND0Console active +WIND32WiFi Hardware Started +WIND26WiFi Started AP with network SPWF_AP +WIND24WiFi Up 172181511
All
Tera Term output
SPWF_AP
Lab 10 Mini AP mode
bull Connect your PC to the SPWF_AP
network
bull Find the SPWF_AP network and connect
the end device to the module
120
SPWF_AP +WIND2890187C960D0B Associated +WIND29DHCP reply for 17218151290187C960D0B to 172181512 +WIND29DHCP reply for 17218151290187C960D0B to 172181512
All
Tera Term output
Lab 10 Access to Web server - Mini AP mode
bull Open your web browser
bull In the address bar type
captiveportalnetindexhtml
bull The SPWF01S homepage will be
displayed
121
SPWF_AP Tip The Mini AP domain can be set using the variable ip_apdomainname The default value is ldquocaptiveportalnetrdquo
Lab 10 Access to Web server - Mini AP mode
bull Open the SPWF01S Device Status
bull click on the highlighted link
bull The SPWF01S Device Status will be
displayed
122
SPWF_AP Tip The Mini AP domain can be set using the variable ip_apdomainname The default value is ldquocaptiveportalnetrdquo
The Mini AP default homepage can be set using the variable ip_apredirect The default value is ldquofirstsethtmlrdquo
Proceed to the next LAB
Lab 11 Remotely control - GPIOs
bull Objective
bull write remotely a GPIO
bull configure remotely a GPIO
bull read remotely a GPIO
bull Prerequisites
bull module connected to the AP or
module configured in MiniAP mode
124
Lab 11 Remotely control - GPIO
This feature allows to remotely write configure and read a GPIO
The module should be connected to the AP (as shown in Lab 3) or
should be configured in Mini AP mode (as shown in Lab 8)
The external client have to open the remotehtml page stored in the
module
125
ENG-WPA AP
SPWF_AP
miniAP
Tera Term output
Lab 11 Joining a network
In order to be connected to an available Wifi network the AP parameters setting is needed
bull Set the SSID
bull Type AT+SSSIDTXT=ENG-WPA
bull Set the password
bull Type AT+SSCFG=wifi_wpa_psk_texthelloworld
bull Set the network privacy mode (0=none 1=WEP 2=WPA-Personal (TKIPAES) or WPA2-Personal (TKIPAES))
bull Type AT+SSCFG=wifi_priv_mode2
bull NB wifi_auth_type must be set to 0 AT+SSCFG=wifi_auth_type0
bull Set the network mode (1 = STA 2 = IBSS 3 = MiniAP)
bull Type AT+SSCFG=wifi_mode1
126
OK
All
Lab 11 Joining a network
bull Save the settings on the flash memory and reset the module
bull Type ATampW
bull Type AT+CFUN=1
127
+WIND0Console active +WIND46WPA Crunching PSK +WIND32WiFi Hardware Started +WIND21WiFi Scanning +WIND35WiFi Scan Complete (0x0) +WIND19WiFi Join 14D64D243600 +WIND25WiFi Association with ENG-WPA successful +WIND51WPA Handshake Complete +WIND24WiFi Up 19216801xx
All
ENG-WPA AP
Tera Term output
Lab 11 Remotely control in MiniAP mode - GPIO
bull Open your web browser
bull In the address bar type
192168x1xxremotehtml
128
ENG-WPA
AP
Lab 11 Remotely control in MiniAP mode - GPIO
bull Try to write the GPIO14 connected to the LED3 (check if the
LED3 is mounted on your EVAL BOARD otherwise can be used
the GPIO13)
bull Click on the laquoGOraquo button
and LED3 will switch on
129
ENG-WPA
AP
Proceed to the next LAB
Lab 12 Input demo
bull Objective
bull Send a message from the server (wifi
module) to an external client connected
to the same network
bull Prerequisites
bull module connected to the AP or module
configured in MiniAP mode
131
Lab 12 Input demo
The module provides some DEMOs to show the interaction between
the module and an external client connected to the same network
The module should be connected to the AP (as shown in Lab 3) or
should be configured in Mini AP mode (as shown in Lab 8)
In order to run this demo the client have to open the
input_demoshtml page stored in the module
132
ENG-WPA AP
SPWF_AP
miniAP
Tera Term output
Lab 12 Joining a network
In order to be connected to an available Wifi network the AP parameters setting is needed
bull Set the SSID
bull Type AT+SSSIDTXT=ENG-WPA
bull Set the password
bull Type AT+SSCFG=wifi_wpa_psk_texthelloworld
bull Set the network privacy mode (0=none 1=WEP 2=WPA-Personal (TKIPAES) or WPA2-Personal (TKIPAES))
bull Type AT+SSCFG=wifi_priv_mode2
bull NB wifi_auth_type must be set to 0 AT+SSCFG=wifi_auth_type0
bull Set the network mode (1 = STA 2 = IBSS 3 = MiniAP)
bull Type AT+SSCFG=wifi_mode1
133
OK
All
Lab 12 Joining a network
bull Save the settings on the flash memory and reset the module
bull Type ATampW
bull Type AT+CFUN=1
134
+WIND0Console active +WIND46WPA Crunching PSK +WIND32WiFi Hardware Started +WIND21WiFi Scanning +WIND35WiFi Scan Complete (0x0) +WIND19WiFi Join 14D64D243600 +WIND25WiFi Association with ENG-WPA successful +WIND51WPA Handshake Complete +WIND24WiFi Up 19216801xx
All
ENG-WPA AP
Tera Term output
Lab 12 Input demo
bull Open your web browser
bull In the address bar type
192168x1xxinput_demoshtml
bull Insert the message to the client
ie type laquotestraquo (suggested ndash copy
the string and paste it in the
terminal) and then send a carriage
return
135
VERY IMPORTANT
Both client and server are pending (2 sec) after the page
request If no message is sent from the module a timeout
mechanism will be triggered
The server shows the ldquo+WIND56 messagerdquo and it will
wait for a string to be inserted and terminated by [Cr] ldquo+WIND56Insert message to clientdrdquo d is the Nth input SSI into html page (please refer to CGIampSSI Application Notes for details)
Lab 12 Input demo
bull The module receives the HTML
page containing the string inserted
server-side
bull Below this string there are two
buttons to try again the demo or to
return to the homepage
136
Proceed to the next LAB
Lab 13 Socket Server functionality
bull Objective
bull Configure a Server Listening Port
bull Open a TCP connection from a
socket client to the module
bull Data modeCommand Mode usage
bull Prerequisites
bull module connected to the AP or
module configured in MiniAP mode
bull PC to be used as socket client
138
TCP socket
Socket
Server
Socket
Client
Lab 13 Socket Server
This feature allows to enable the socket server mode The module
can be able to listen for an incoming connection on the specified port
The module should be connected to the AP (as shown in Lab 3) or
should be configured in Mini AP mode (as shown in Lab 8)
Please refer to ldquoSocket Server Application Notesrdquo for more details
139
ENG-WPA AP
SPWF_AP
miniAP
Tera Term output
Lab 13 Joining a network
In order to be connected to an available Wifi network the AP parameters setting is needed
bull Set the SSID
bull Type AT+SSSIDTXT=ENG-WPA
bull Set the password
bull Type AT+SSCFG=wifi_wpa_psk_texthelloworld
bull Set the network privacy mode (0=none 1=WEP 2=WPA-Personal (TKIPAES) or WPA2-Personal (TKIPAES))
bull Type AT+SSCFG=wifi_priv_mode2
bull NB wifi_auth_type must be set to 0 AT+SSCFG=wifi_auth_type0
bull Set the network mode (1 = STA 2 = IBSS 3 = MiniAP)
bull Type AT+SSCFG=wifi_mode1
140
OK
All
Lab 13 Joining a network
bull Save the settings on the flash memory and reset the module
bull Type ATampW
bull Type AT+CFUN=1
141
+WIND0Console active +WIND46WPA Crunching PSK +WIND32WiFi Hardware Started +WIND21WiFi Scanning +WIND35WiFi Scan Complete (0x0) +WIND19WiFi Join 14D64D243600 +WIND25WiFi Association with ENG-WPA successful +WIND51WPA Handshake Complete +WIND24WiFi Up 19216801xx
All
ENG-WPA AP
Tera Term output
Lab 13 Socket Server
bull Socket server turn ON the TCP Socket Server (user must
specify the server listening port)
bull Type AT+SSOCKD=32000 (AT+SOCKD=32000u for UDP socket server)
bull Check the status of the socket server
bull Type AT+SSTS=ip_sockd_port
142
ENG-WPA
AP
Tera Term output
OK ip_sockd_port = 32000 OK
All
Tip you can Turn OFF the Socket Server using a server listening port = 0 (type AT+SSOCKD=0)
Lab 13 Socket Server
bull Socket client can be used a simple socket client in order to test the communication
(SocketTest ndash available on httpsourceforgenetprojectssockettest)
143
ENG-WPA
AP
Lab 13 Socket Server
bull Socket client
bull Insert the modulersquos IP Address and the port
bull Click on Connect button
144
Tera Term output
+WIND61Incoming Socket Client1921681102 +WIND60Now in Data Mode
All
Lab 13 Socket Server
bull The module (socket server) enters in data mode and a bidirectional channel is
created to allow exchanging data with the socket client
bull Try to send and receive data from the module
145
Tera Term output
test_1
All
Lab 13 Socket Server ndash escape sequence
bull From Data Mode to Command Mode
bull Configuration variable used escape_seq (default is ldquoat+srdquo case sensitive
suggested to be sent by the local host in a single complete packet with no CR or
LF in the sequence)
bull Type at+s
bull Now itrsquos possible to send AT commands while the socket connection
is still active
146
Tera Term output
+WIND59Back to Command Mode
All
Tip During the Command Mode you cannot send data to client but can receive data from it Every data chunk generates an URC (+WIND64Sockd Pending Data) with limit to 4 (x730 bytes) This is the max number of pending messages From the 5th chunk on messages are lost
Lab 13 Socket Server ndash return to data mode
bull From Command Mode to Data Mode
bull While in Command Mode
bull Type AT+S (this is an AT command AT+S must be followed by ltCRgt)
bull The module returns in data mode
147
ENG-WPA
AP
Tera Term output
+WIND60Now in Data Mode
All
Lab 13 Socket Server ndash turn off
bull Turn OFF the Socket Server
bull Type at+s (to enter in command mode)
bull Type AT+SSOCKD=0
148
ENG-WPA
AP
Tera Term output
OK +WIND62Socket Client Gone1921681102
All
Proceed to the next LAB
Lab 14 Low power modes
bull Objective
bull Practice with Radio Power Save
bull Sleep Mode
bull Standby Mode
bull Prerequisites
bull module connected to the AP
150
Lab 14 Low power modes
This feature allows to enable the low power states
The module supports the ldquoRadio Power Saverdquo mode the ldquoSleeprdquo
mode and the ldquoStandbyrdquo mode
The module should be connected to the AP (as shown in Lab 3) in
order to use the ldquoRadio Power Saverdquo mode
Please refer to ldquoSPWF01S Power Management Application Notesrdquo for
more details
151
ENG-WPA AP
Low Power
Tera Term output
Lab 14 Joining a network
In order to be connected to an available Wifi network the AP parameters setting is needed
bull Set the SSID
bull Type AT+SSSIDTXT=ENG-WPA
bull Set the password
bull Type AT+SSCFG=wifi_wpa_psk_texthelloworld
bull Set the network privacy mode (0=none 1=WEP 2=WPA-Personal (TKIPAES) or WPA2-Personal (TKIPAES))
bull Type AT+SSCFG=wifi_priv_mode2
bull NB wifi_auth_type must be set to 0 AT+SSCFG=wifi_auth_type0
bull Set the network mode (1 = STA 2 = IBSS 3 = MiniAP)
bull Type AT+SSCFG=wifi_mode1
152
OK
All
Lab 14 Joining a network
bull Save the settings on the flash memory and reset the module
bull Type ATampW
bull Type AT+CFUN=1
153
+WIND0Console active +WIND46WPA Crunching PSK +WIND32WiFi Hardware Started +WIND21WiFi Scanning +WIND35WiFi Scan Complete (0x0) +WIND19WiFi Join 14D64D243600 +WIND25WiFi Association with ENG-WPA successful +WIND51WPA Handshake Complete +WIND24WiFi Up 19216801xx
All
Tera Term output
ENG-WPA AP
Low Power
Lab 14 Low power modes ndash Power Save 154
Module
Power State STM32 WLAN
Standby Standby Standby
Sleep Stop PS
Power Save Run PS or Fast-PS
Active Rx Run Rx Idle Rx Active
Active Tx Run Tx Active
Lab 14 Low power modes ndash Power Save
bull By default the module starts in ACTIVE mode
bull Enable the Power Save Mode
bull Type at+sscfg=wifi_powersave1 (ldquowifi_powersave2rdquo enables the Fast-PS mode)
bull Enable the doze operational mode
bull Type at+sscfg=wifi_operational_mode11 (ldquowifi_operational_mode12rdquo enables the quiescent mode)
bull Choose the wake up mode
1 Wake up every n beacon (specified in the wifi_beacon_wakeup variable)
bull Type at+sscfg=wifi_listen_interval0
bull Type at+sscfg=wifi_beacon_wakeup1
OR
2 Wake up every n beacon adaptively (specified in the wifi_beacon_wakeup variable)
bull Type at+sscfg=wifi_listen_interval1
bull Type at+sscfg=wifi_beacon_wakeup1
155
Tip The Wifi Power Save (wifi_powersave1) can also be quickly enabled using the command AT+CFUN=2
Lab 14 Low power modes ndash Power Save
bull Save the settings on the flash memory and reset the module
bull Type ATampW
bull Type AT+CFUN=1
bull The WIND66 message related to Low Power Mode will be
displayed
156
+WIND1Poweron (--SPWF01S) +WIND13ST SPWF01S IWM Copyright (c) 2012-2014 STMicroelectronics Inc All rights Reserved +WIND3Watchdog Running +WIND0Console active +WIND32WiFi Hardware Started +WIND21WiFi Scanning +WIND35WiFi Scan Complete (0x0) +WIND19WiFi Join 02621F518F0B +WIND25WiFi Association with IoT successful +WIND51WPA Handshake Complete +WIND24WiFi Up 1921681104 +WIND66Low Power mode1
All
Tera Term output
ENG-WPA AP
Low Power
Lab 14 Low power modes ndash Sleep Mode 157
Module
Power State STM32 WLAN
Standby Standby Standby
Sleep Stop PS or Fast-PS
Power Save Run PS or Fast-PS
Active Rx Run Rx Idle Rx Active
Active Tx Run Tx Active
Lab 14 Low power modes ndash Sleep Mode
bull In the Sleep Mode the core STM32 is stopped
bull Enable the Sleep Mode
bull Type at+sscfg=sleep_enabled1
bull Enable the Power Save Mode
bull Type at+sscfg=wifi_powersave1 (ldquowifi_powersave2rdquo enables the Fast-PS mode)
bull Enable the doze operational mode
bull Type at+sscfg=wifi_operational_mode11 (ldquowifi_operational_mode12rdquo enables the quiescent mode)
bull Choose the wake up mode
1 Wake up every n beacon (specified in the wifi_beacon_wakeup variable)
bull Type at+sscfg=wifi_listen_interval0
bull Type at+sscfg=wifi_beacon_wakeup1
OR
2 Wake up every n beacon adaptively (specified in the wifi_beacon_wakeup variable)
bull Type at+sscfg=wifi_listen_interval1
bull Type at+sscfg=wifi_beacon_wakeup1
158
Tip The Wifi Sleep Mode (and wifi_powersave1) can also be quickly enabled using the command AT+CFUN=3
Lab 14 Low power modes ndash Sleep Mode
bull Save the settings on the flash memory and reset the module
bull Type ATampW
bull Type AT+CFUN=1
bull The WIND69 message related to Sleep Mode will be displayed
159
+WIND1Poweron (--SPWF01S) +WIND13ST SPWF01S IWM Copyright (c) 2012-2014 STMicroelectronics Inc All rights Reserved +WIND3Watchdog Running +WIND0Console active +WIND32WiFi Hardware Started +WIND21WiFi Scanning +WIND35WiFi Scan Complete (0x0) +WIND19WiFi Join 02621F518F0B +WIND25WiFi Association with IoT successful +WIND51WPA Handshake Complete +WIND24WiFi Up 1921681104 +WIND66Low Power mode1 +WIND69Going into DeepSleep
All
Tera Term output
ENG-WPA AP
Low Power
Lab 14 Low power modes ndash Sleep Mode
bull Wake STM32 up using the GPIO6
bull Put the GPIO6 to 25V (jumper on JP2 as in
the picture)
bull The WIND messages will be displayed
160
+WIND70Resuming from DeepSleep +WIND53Wakeup (GPIO6 High)
All
Tera Term output
Lab 14 Low power modes ndash Sleep Mode
bull Put STM32 in sleep mode using the
GPIO6
bull Go back the GPIO6 floating (remove jumper
- as default)
bull The WIND69 message will be
displayed
161
+WIND69Going into DeepSleep
All
Tera Term output
Lab 14 Low power modes ndash Sleep Mode
bull Wake STM32 up using the remote
page
bull Connect a device to the same modulersquos
network
bull Open the following link
http[module_IP_address]remotehtml
bull Select ldquoWakerdquo and click on ldquoGordquo button
to wake up the module
bull The WIND message will be displayed
162
+WIND70Resuming from DeepSleep
All
Tera Term output
Lab 14 Low power modes ndash Sleep Mode
bull Put STM32 in sleep mode using the
remote page
bull Connect a device to the same modulersquos
network
bull Open the following link
http[module_IP_address]remotehtml
bull Select ldquoSleeprdquo and click on ldquoGordquo button
to put the module in sleep mode
bull The WIND message will be displayed
163
+WIND69Going into DeepSleep
All
Tera Term output
Lab 14 Low power modes ndash Standby Mode 164
Module
Power State STM32 WLAN
Standby Standby Standby
Sleep Stop PS or Fast-PS
Power Save Run PS or Fast-PS
Active Rx Run Rx Idle Rx Active
Active Tx Run Tx Active
Lab 14 Low power modes ndash Standby Mode
bull During the Standby Mode both the STM32 and the Radio will be
put in standby mode The standby mode allows to achieve the
lowest power consumption
bull Enable the Standby Mode
bull Type at+sscfg=sleep_enabled0 (Sleep mode must be disabled)
bull Type at+sscfg=standby_enabled1
bull Please be sure that GPIO6 isnrsquot forced high
bull Set the standby time to wake up via RTC alarm
bull Type at+sscfg=standby_time15
165
Tip The Wifi Standby Mode can also be quickly enabled using the command AT+CFUN=4
Lab 14 Low power modes ndash Standby Mode
bull Save the settings on the flash
memory and reset the module
bull Type ATampW
bull Type AT+CFUN=1
bull After 15 seconds the module will be
rebooted and will return in the
ACTIVE state
166
+WIND0Console active +WIND32WiFi Hardware Started +WIND38WiFi Powered Down +WIND67Going into Standby15 +WIND68Resuming from Standby +WIND1Poweron (--SPWF01S) +WIND13ST SPWF01S IWM Copyright (c) 2012-2014 STMicroelectronics Inc All rights Reserved +WIND3Watchdog Running +WIND0Console active +WIND32WiFi Hardware Started +WIND21WiFi Scanning +WIND35WiFi Scan Complete (0x0) +WIND19WiFi Join02621F518F0B +WIND25WiFi Association with IoT successful +WIND51WPA Handshake Complete +WIND24WiFi Up1921681113
All
Tera Term output
Lab 14 Low power modes ndash Standby Mode
bull Wake up the module using the GPIO6
bull Enable the Standby Mode
bull Type at+sscfg=sleep_enabled0 (make sure that
Sleep mode is disabled)
bull Type at+sscfg=standby_enabled1
bull Type ATampW
bull Type AT+CFUN=1
bull Put the GPIO6 to 25V to wake up the module
bull The WIND message will be displayed and
the module will return in ACTIVE state
167
+WIND68Resuming from Standby +WIND1Poweron (--SPWF01S) helliphelliphellip
All
Tera Term output
Proceed to the next LAB
Lab 15 STAMINI AP switcher
bull Objective
bull HW ldquoSTA to MiniAPrdquo switcher
bull Prerequisites
bull Work alone
169
Lab 15 STAMINI AP switcher
This feature allows to force the module in Mini AP mode starting from
a preexistent state
ldquoRecovery Moderdquo this functionality could be useful to lead the module
in a known state and to reconfigure it (ie using the firstset page)
The GPIO7 will be used to drive this feature
170
Lab 15 STAMINI AP switcher
bull Press and hold the SW2 button on the
EVAL and then perform a reset (HW reset
via SW1 button or SW reset via AT
command)
bull Release the SW2 button
bull The MiniAP mode will be started and the
module is discoverable with the following
SSID
bull iwm-XX-YY-ZZ where XX-YY-ZZ are the last
six digits of modulersquos MAC ADDRESS
171
+WIND2Reset +WIND1Poweron (--SPWF01S) +WIND13ST SPWF01S IWM Copyright (c) 2012-2014 STMicroelectronics Inc All rights Reserved +WIND39HW in miniAP mode (GPIO7 Low) +WIND0Console active +WIND3Watchdog Running +WIND32WiFi Hardware Started +WIND26WiFi Started AP +WIND24WiFi Up172312551
All
Tera Term output
Tip To exit from ldquominiAP mode via GPIO7rdquo perform a modulersquos reset
Proceed to the next LAB
Lab 16 IBSS connection
bull Objective
bull Create an IBSS network
bull Prerequisites
bull Work alone
173
Lab 16 Create an IBSS network
In an IBSS network the SSID is chosen by the client device that
starts the network
Module settings to create an IBSS network
bull Set the IBSS SSID
bull Type AT+SSSIDTXT=ADHOC
bull Set the network privacy mode (0=OPEN or 1=WEP are supported)
bull Type AT+SSCFG=wifi_priv_mode0
bull Set the network mode (2 = IBSS)
bull Type AT+SSCFG=wifi_mode2
174
OK
All
Tera Term output
Lab 16 Create an IBSS network
bull Set IP address IP default gateway IP DNS and IP netmask
bull Type AT+SSCFG=ip_ipaddr192168y1xx
bull Type AT+SSCFG=ip_gw192168y1
bull Type AT+SSCFG=ip_dns192168y1
bull Type AT+SSCFG=ip_netmask2552552550
bull Turn off the DHCP
bull Type AT+SSCFG=ip_use_dhcp0
175
OK
All
Tera Term output
Lab 16 Create an IBSS network
bull Save the settings on the flash memory and reset the module
bull Type ATampW
bull Type AT+CFUN=1
176
+WIND0Console active +WIND32WiFi Hardware Started +WIND21WiFi Scanning +WIND35WiFi Scan Complete (0x0) +WIND19WiFi Join EE33CE002418 +WIND25WiFi Association with ADHOC successful +WIND51WiFi Handshake Complete +WIND24WiFi Up 19216813
All
AD-HOC
Tera Term output
Lab 16 Create an IBSS network
bull Associate the iOS device with the
ADHOC network (iOS gt 8 could not
support the IBSS mode)
177
AD-HOC
Tip manual configuration of static TCPIPv4 parameters is suggested using a PC Ie PC TCPIPv4 properties
Lab 16 Create an IBSS network
bull Find your IP address
bull Type AT+SSTS
bull Open Safari web browser
bull In the address bar type
ltSPWF IP addressgtindexhtml
bull Type 192168y1xxindexhtml
178
AD-HOC
THANK YOU

Tera Term output
Lab 2 Set the SPWF variables
bull Get the default configuration dump
bull Set host name
bull Set IP address IP default gateway IP
DNS and IP netmask (DHCP off)
bull Save settings on the flash memory
(mandatory after a variable change)
bull Type ATampW
bull Reset the module
bull Type AT+CFUN=1
23
+WIND21WiFi Scanning +WIND35WiFi Scan Complete (0x0)
All
Lab 2 Set the SPWF variables
bull Get the default configuration dump
bull Set host name
bull Set IP address IP default gateway IP
DNS and IP netmask (DHCP off)
bull Save settings on the flash memory
(mandatory after a variable change)
and reset the module
bull Check the new configuration dump
bull Type ATampV
24
Proceed to the next LAB
Lab 2a FOTA update
bull Objective
bull Upgrade the FW using the OTA file
bull Prerequisites
bull OTA file (provided in the SPWF01S FW
package)
bull External web server (ie Apache web
server running on PC)
26
Lab 2a FOTA update 27
The SPWF01Sx11 module (with external flash on board) allows
performing a Firmware Over-the-air update via a single HTTP GET
The SPWF01S will validate the firmware image it downloads load it
into a staging area then prompt the user to issue a reset command in
order to complete the update
Lab 2a FOTA update
The Apache Web Server will be used in this LAB
(Apache Web Server is available at this link
httparchiveapacheorgdisthttpdbinarieswin32httpd-2225-win32-x86-openssl-098ymsi)
Note please check that the local firewall is disabled or properly set It can
block the connection from module to Apache
bull Copy the OTA file (ie SPWF01S-xxxxxx-yyyyyyy-
RELEASE-mainota) in the Apache 22 htdocs folder
28
Lab 2a FOTA update
The FWUPDATE command allows to perform a Firmware Over-the-
air update via a single HTTP GET
bull Sintax
bull AT+SFWUPDATE=lthostnamegtltpathgtltportgt
bull Configuration parameters
bull lthostnamegt Target host DNS resolvable name or IP address
bull ltpathampqueryoptsgt Document path and optional query arguments
bull ltportgt Target host port
29
Lab 2a FOTA update
bull The module and the Apache Web server must be connected to the same network
bull In Tera Term type AT+SFWUPDATE=[Apache IP address][ota_fileota]
ie type AT+SFWUPDATE=192168xyyySPWF01S-150410-c2e37a3-RELEASE-
mainota
bull Reset the module to apply the new FW
bull Type AT+CFUN=1
bull Restore factory default settings (mandatory)
bull Type ATampF
30
Staging FW update for SPWF01SX11 version 1203-120918_01 FW length 276824 0x00002800 (offset 0x00000000 block len 4096) Write len 4096 -gt 0x0 Write len 4096 -gt 0x1000 (note - deleted extra output for clarity) Write len 4096 -gt 0x42000 Write len 2476 -gt 0x43000 (final) Wrote 276904 bytes Complete Update will be applied on next reboot (at+cfun=1)
All Tera Term output
Proceed to the next LAB
Lab 3 Access point connection
bull Objective
bull Scan for available networks
bull Join a network
bull Check the statusstatistics variables
bull Prerequisites
bull USB dongle and computer are set
up as described in Lab 2
bull Work alone
32
Lab 3 Scan for available networks
The SCAN command performs an immediate scan for available
networks Infrastructure (AP) and IBSS (Ad-Hoc) networks are both
reported Network type Channel BSSID SSID Signal strength (RSSI)
and 80211 capabilities are all reported
bull Type AT+SSCAN
bull Scan syntax AT+SSCAN [=lta|pgt[ltr|s|mgt[ltfnamegt]]] -- Perform a [activepassive]
network scan [filter offfilter on SSIDfilter on MAC] [print to file])
33
FOUND BSS 14D64D243600 CHAN 01 RSSI -28 SSID ENG-WPA CAPS 0431 WPA WPA2 FOUND BSS 00180A31EA78 CHAN 11 RSSI -82 SSID ZyckoItalyWireless CAPS 0531 WPA WPA2 FOUND BSS 06180A31E7E2 CHAN 11 RSSI -85 SSID ZyckoItalyGuest CAPS 0531 WPA WPA2 OK
All
Network type
Network MAC
Network
channel Network
RSSI
Network
SSID Network
capabilities
Tera Term output
Tera Term output
Lab 3 Joining a network (WPA Key)
In order to be connected to an available Wifi network the AP parameters setting is needed
bull Set the SSID
bull Type AT+SSSIDTXT=ENG-WPA
bull Set the password
bull Type AT+SSCFG=wifi_wpa_psk_texthelloworld
bull Set the network privacy mode (0=none 1=WEP 2=WPA-Personal (TKIPAES) or WPA2-Personal (TKIPAES))
bull Type AT+SSCFG=wifi_priv_mode2
bull NB wifi_auth_type must be set to 0 AT+SSCFG=wifi_auth_type0
bull Set the network mode (1 = STA 2 = IBSS 3 = MiniAP)
bull Type AT+SSCFG=wifi_mode1
34
OK
All
Lab 3 Joining a network (WPA Key)
bull Save the settings on the flash memory and reset the module
bull Type ATampW
bull Type AT+CFUN=1
35
+WIND0Console active +WIND46WPA Crunching PSK +WIND32WiFi Hardware Started +WIND21WiFi Scanning +WIND35WiFi Scan Complete (0x0) +WIND19WiFi Join 14D64D243600 +WIND25WiFi Association with ENG-WPA successful +WIND51WPA Handshake Complete +WIND24WiFi Up 19216801xx
All
ENG-WPA AP
Tera Term output
Lab 3 Joining a network (WPA Key)
bull Check the statusstatistics variables
bull Type AT+SSTS
bull Send a ping to the gateway (ip_gw)
bull Type AT+SPING=19216801
36
ENG-WPA AP
Tera Term output
OK
All
Lab 3 Joining a network (WEP Key)
Configure the module using the WEP key (4 possible combinations
available)
Sample table
37
AP configuration AT command to be used
Security Mode WEP
WEP Key Length 64 bit
(10 hex digits)
Authentication Open
Wep Key 1 1234567890
ie
at+sssidtxt=ENG-WEP
AT+SSCFG=wifi_wep_keys[0]1234567890
AT+SSCFG=wifi_wep_key_lens05
AT+SSCFG=wifi_auth_type0
AT+SSCFG=wifi_priv_mode1
AT+SSCFG=wifi_mode1
atampw
at+cfun=1
Security Mode WEP
WEP Key Length 64 bit
(10 hex digits)
Authentication Shared
Key
Wep Key 1 1234567890
ie
at+sssidtxt=ENG-WEP
AT+SSCFG=wifi_wep_keys[0]1234567890
AT+SSCFG=wifi_wep_key_lens05
AT+SSCFG=wifi_auth_type1
AT+SSCFG=wifi_priv_mode1
AT+SSCFG=wifi_mode1
atampw
at+cfun=1
AP configuration AT command to be used
Security Mode WEP
WEP Key Length
128 bit (26 hex digits)
Authentication Open
Wep Key 1
123456789012345678
90123456
ie
at+sssidtxt=ENG-WEP
AT+SSCFG=wifi_wep_keys[0]12345678
901234567890123456
AT+SSCFG=wifi_wep_key_lens0D
AT+SSCFG=wifi_auth_type0
AT+SSCFG=wifi_priv_mode1
AT+SSCFG=wifi_mode1
atampw
at+cfun=1
Security Mode WEP
WEP Key Length
128 bit (26 hex digits)
Authentication
Shared Key
Wep Key 1
123456789012345678
90123456
ie
at+sssidtxt=ENG-WEP
AT+SSCFG=wifi_wep_keys[0]12345678
901234567890123456
AT+SSCFG=wifi_wep_key_lens0D
AT+SSCFG=wifi_auth_type1
AT+SSCFG=wifi_priv_mode1
AT+SSCFG=wifi_mode1
atampw
at+cfun=1
Lab 3 Joining a network (WEP Key)
Notes
bull ldquowifi_wep_key_lensrdquo variable values 05 and 0D
bull Itrsquos possible to enter any text string into a WEP key box in the AP in which case it will be converted into a hexadecimal key using the ASCII values of the characters A maximum of 5 text characters can be entered for 64 bit keys and a maximum of 13 characters for 128 bit keys
In this case it needs to manually convert your ASCII password to HEX and complete the wifi_wep_keys[0] variable with the HEX value bull ie AP WEP key test1 ASCII to HEX 7465737431 So the AT command is AT+SSCFG=wifi_wep_keys[0]7465737431
bull Some APs allow user to insert a passphrase and then the AP automatically generates the hex keys In this scenario user have not to perform the ASCII to HEX conversion because the AP already gives it the hex value
38
Proceed to the next LAB
Lab 4 Web client mode
bull Objective
bull HTTP GET
bull HTTP POST
bull PUSH DATA ON SERIAL PORT
bull Prerequisites
bull USB dongle and computer are set up
as described in Lab 2
bull Work in couple
40
Lab 4 HTTP GET
The HTTP GET feature performs a single HTTP request to the specified
host and path The server response is printed on the UART enabled
bull Sintax
bull AT+SHTTPGET=lthostnamegtltpathgt[ltportgt]
bull Configuration parameters
bull lthostnamegt target host DNS resolvable name or IP address
bull ltpathgt document path
bull ltportgt target port
41
Lab 4 HTTP GET
bull Device A performs an HTTP GET to the Device B
bull Device A
AT+SHTTPGET=ltDevice B IP addrgtindexhtml
Type AT+SHTTPGET=19216801xxindexhtml
42
GET indexhtml HTTP10 User-Agent SPWF01S helliphelliphellip lth1gtST SPWF01Sx11 WiFi Modulelth1gt ltpgt Welcome to the ST SPWF01Sx11 WiFi Module ltpgt ltpgt This page was delivered from the SPWF01Sx11 internal HTTP server hellip lta href=statusshtmlgtSPWF01Sx11 Status Pageltagt ltpgt ltbodygt lthtmlgt OK
Device A
A B
Tera Term output
Lab 4 HTTP POST
The HTTP POST performs a post of the given path to the specified host The module can be only used as an HTTP POST client
bull Sintax
bull AT+SHTTPPOST =lthostnamegtltpathampqueryoptsgtltformcontentgt[ltportgt]
bull Configuration parameters
bull lthostnamegt target host DNS resolvable name or IP address
bull ltpathampqueryoptsgt document path
bull ltformcontentgt form to be submitted
bull ltportgt target port
43
Lab 4 HTTP POST
bull The SPWF01S performs an HTTP POST to an HTTP Post Test Server
bull Type
at+shttppost=posttestservercompostphpname=demoampemail=mymailampsubjec
t=subjampbody=message
bull The HTTP Post Test Server replies as
displayed in the Tera Term output if the HTTP
POST successfully
44
HTTP11 200 OK Date Fri 10 Jan 2014 132414 GMT Server Apache Access-Control-Allow-Origin Vary Accept-Encoding Content-Length 139 Connection close Content-Type texthtml Successfully dumped 4 post variables View it at httpwwwposttestservercomdata2014011005241443192628 Post body was 0 chars long OK
Device A
A B
Tera Term output
HTTP POST
SERVER
Lab 4 HTTPREQ bull The SPWF01S can perform a custom HTTP request to a specified
target Refer to the User Manual for more details
bull Type
AT+SHTTPREQ=wwwgooglecom8089
After ltCRgt the module accepts data We will try to open an non-existent web page
GET downloadTagphp HTTP10ltCRgtltLFgt
User-Agent SPWF01SltCRgtltLFgt
Host iwm-testltCRgtltLFgt
Connection closeltCRgtltLFgtltCRgtltLFgt
45
HTTP10 404 Not FoundltCRgtltLFgt Date Sun 31 Jan 2016 142704 GMTltCRgtltLFgt Content-Type texthtmlltCRgtltLFgt Server HTTP server (unknown)ltCRgtltLFgt Content-Length 49ltCRgtltLFgt X-XSS-Protection 1 mode=blockltCRgtltLFgt X-Frame-Options SAMEORIGINltCRgtltLFgt ltCRgtltLFgt lthtmlgtltbodygtlth1gt404 Not Foundlth1gtltbodygtlthtmlgtltLFgtltCRgt ltLFgt ltSUBgtltSUBgtltSUBgtltCRgtltLFgt ltCRgtltLFgt OKltCRgtltLFgt
All
A B
Tera Term output
[AT+SHTTPREQ =lthostnamegt[port]ltlengthgtltCRgtltdatagt]
Lab 4 Push data on serial port
A built-in html page ldquooutput_demohtmlrdquo allows to remotely push
characters on the serial port from a remote browser
46
output_demohtml
Modulersquos IP addressoutput_demohtml
Lab 4 Push data on serial port
bull Find your IP address
bull Type AT+SSTS
bull Associate your computer with the AP
bull Open your web browser
bull In the address bar type
ltmodulersquos IP
Addressgtoutput_demohtml
bull Type
19216801xxoutput_demohtml
47
Lab 4 Push data on serial port
bull Enter the text
bull In order to manage non-ASCII chars the ip_use_decoder variable must be modified (refer to the User Manual for more details)
bull Submit
bull The text will be sent to the serial port of the module
48
Proceed to the next LAB
Lab 5 Web Server use mode
bull Objective
bull List existing files
bull Print a file
bull Create a file
bull Append to an existing file
bull Delete an existing file
bull Prerequisites
bull USB dongle and computer are
set up as described in Lab 2
bull Work alone
50
Lab 5 Web server 51
The Web Server feature allows to create print and delete ASCII files in
the RAM memory of the module
Lab 5 List existing files
The FSL command lists type sizes and name of all the existing files
bull Type AT+SFSL
52
I 461 input_demoshtml I 180 messageshtml I 384 output_demohtml I 614 indexhtml I 157 peersshtml I 193 configshtml I 174 statusshtml I 212 404html I 2022 firstsethtml I 2898 remotehtml OK
All
Files stored in the STM32
FLASH memory
Tera Term output
Lab 5 Print a file
The FSP command prints the content
of an existing file
bull Type AT+SFSP=indexhtml
53
lthtmlgt ltheadgtlttitlegtST SPWF01Slttitlegtltheadgt ltbody bgcolor=white text=blackgt lth1gtST SPWF01S Intelligent WiFi Modulelth1gt ltpgtWelcome to the ST SPWF01S intelligent Wi-Fi moduleltpgt ltpgtThis page was delivered from the SPWF01S internal HTTP serverltpgt ltpgt lta href=configshtmlgtSPWF01S Configuration Settings Pageltagt ltpgt ltpgt lta href=statusshtmlgtSPWF01S Status Pageltagt ltpgt ltpgt lta href=peersshtmlgtSPWF01S Peers Pageltagt ltpgt ltpgtMore information about the SPWF01S and other ST products can be found at STs website lta href=httpwwwSTcomgthttpwwwSTcomltagtltpgt ltbodygt lthtmlgt OK
All Tera Term output
Tip How to use the offset and length parameters AT+SFSP=indexhtml[offset][length] ie Type AT+SFSP=indexhtml520 Length parameter is mandatory if is used the offset
Lab 5 Create a file
The FSC command allows to create a file inside the SPWF for
delivery by the SPWF HTTP server
bull Sintax
bull AT+SFSC =ltfnamegtltmax_lengt[lthttp_headergt]
bull Configuration parameters
bull lt filename gt filename to create
bull lt max_len gt amount of space to allocate for file max = 4096 bytes
bull lthttp_headergt 0=HTML header automatically added 1=HTML header not
added (as by default)
Type AT+SFSC=wifidemohtml1965
54
OK
All
Tera Term output
Lab 5 Configuring the UART
bull Set CR+LF in the Terminal setup
(to properly paste text in the
terminal)
bull Tera Term Setup rarr Terminal rarr
Transmit CR+LF
55
Tip The local echo option must be disabled on Tera Term
Added in FW 35 using the AT+SFSR command user can rename dynamic files stored in the RAM memory Refer to the User Manual for more details
Lab 5 Append to an existing file
The FSA command allows to append blocks of data to an existing file
This command accepts data after the ltcrgt at the end of the command
line
bull Sintax
bull AT+SFSA=ltfilenamegtltdatalengt
bull Configuration parameters
bull lt filename gt filename pre-created
bull lt datalen gt number of characters to append to the file
Type AT+SFSA=wifidemohtml1965
56
Now SPWF accepts data
Tips
Lab 5 Append to an existing file
bull Open wifidemotxt in the following
directory Hands_on
folderHTML_demo_page
bull Check you have set up CR+LF in the
Terminal setup (for more
information refer to the slide 48)
bull Copy the file content into Tera term
(paste with ALT+V or mouse right
button)
57
OK
All
Tera Term output
Lab 5 Append to an existing file
bull Open wifidemohtml
bull Open your Web browser (suggested Google
Chrome for HTML5 test)
bull In address bar type ltSPWF IP addrgtwifidemohtml
Type 19216801xxwifidemohtml
58
Lab 5 Configuring the UART
bull Re-set CR in the Terminal setup
as by default
bull Tera Term Setup rarr Terminal rarr
Transmit CR
59
Tip The local echo option can be re-enabled on Tera Term
Lab 5 List existing files
Lets list the files
bull Type AT+SFSL
60
D 1965 wifidemohtml I 461 input_demoshtml I 180 messageshtml I 384 output_demohtml I 614 indexhtml I 157 peersshtml I 193 configshtml I 174 statusshtml I 212 404html I 2022 firstsethtml I 2898 remotehtml OK
All
File stored in the RAM memory
Tera Term output
Lab 5 Delete an existing file
The FSD command allows to delete an existing file by name Static
files may not be deleted
bull Sintax
bull AT+SFSD=ltfilenamegt
Type AT+SFSD=wifidemohtml
61
OK
All
Tera Term output
Lab 5 Delete an existing file
bull Re-open wifidemohtml
bull Open your Web browser
bull In address bar ltSPWF IP addrgtwifidemohtml
Type 19216801xxwifidemohtml
62
Proceed to the next LAB
Lab 6 Web Server use mode
bull Objective
bull Create an image file
bull Filesystem update over-the-air
bull Filesystem update over UART
bull Prerequisites
bull Work alone
64
Lab 6 Web server 65
The Web Server feature also allows to upload generic files (PDF
HTML DOC JPEG and so on) in the EXTERNAL FLASH memory of
the module It needs to follow the below steps
- create an image file (IMG) using the tool provided in the Hands-on package
(the IMG contains the files to upload)
- Put the image in a generic and accessible Web Server (Apache Web server
will be used in the Hands-on as example)
- Using the proper AT command the IMG will be retrieved over-the-air and the
static files will be created in the external flash memory
Lab 6 Create an image file
bull Open the following folder and
extract all the files
hands_on_wififilesystem_update
bull Put your own files to upload in the
pages folder (max 512 Kbytes)
bull Run genbat
bull Open the pages folder and copy
outfileimg in your external Web
Server (Apache)
66
3
1
2
Lab 6 Create an image file
The Apache Web Server will be used in this tutorial
(Apache Web Server is available at this link
httparchiveapacheorgdisthttpdbinarieswin32httpd-2225-win32-x86-openssl-098ymsi)
Note please check that the local firewall is disabled or properly set It can
block the connection from module to Apache
bull Copy outfileimg in the Apache 22
htdocs folder (this is the default
root server directory)
67
4
Lab 6 Filesystem update
The HTTPDFSUPDATE command allows to create static files inside
the SPWF for delivery by the SPWF HTTP server
bull Sintax
bull AT+SHTTPDFSUPDATE=lthostnamegtltpathgt[port]
bull Configuration parameters
bull lthostnamegt external web server DNS resolvable name or IP address
bull ltpathgt document path
bull ltportgt target host port
68
Lab 6 Filesystem update
bull In Tera Term type
AT+SHTTPDFSUPDATE=192168x10xoutfileimg
bull Reset the module
bull Type AT+CFUN=1
69
Image length 357957 (offset 0x00080000 block len 4096) Write len 4096 -gt 0x80000 Write len 4096 -gt 0x81000 Write len 4096 -gt 0x82000 helliphelliphelliphellip helliphelliphelliphelliphelliphellip helliphelliphelliphelliphellip Write len 4096 -gt 0xD6000 Write len 1612 -gt 0xD7000 (final) Wrote 357964 bytes Complete Please reboot (at+cfun=1) OK
All
Tera Term output
The file system will be permanently deleted The new IMG will overwrite the existent files in the file system
Warning
Lab 6 Filesystem update
Lets list the files
bull Type AT+SFSL
70
E 2615 st766gif E 112374 modulepng E 2430 index1html E 419 indexhtml E 239887 MKTWiFipdf I 461 input_demoshtml I 180 messageshtml I 384 output_demohtml I 614 indexhtml I 157 peersshtml I 193 configshtml I 174 statusshtml I 212 404html I 2022 firstsethtml I 2898 remotehtml OK
All
Files stored in
the EXT FLASH memory
Tera Term output
Lab 6 Filesystem update
bull Open index1html page
bull Open your web browser
bull In the address bar ltSPWF IP addrgtindex1html
Type 192168x1xxindex1html
71
Lab 6 Filesystem erase
Erase the external httpd filesystem
bull Type AT+S HTTPDFSERASE
The files stored in the EXT FLASH memory will be erased
Lets list the files
bull Type AT+SFSL
72
I 461 input_demoshtml I 180 messageshtml I 384 output_demohtml I 614 indexhtml I 157 peersshtml I 193 configshtml I 174 statusshtml I 212 404html I 2022 firstsethtml I 2898 remotehtml OK
All
Tera Term output
Lab 6 Filesystem update
The HTTPDFSWRITE command allows to create static files inside
the SPWF via the UART interface The HW flow control MUST be
enabled in order to use the command
bull Sintax
bull AT+SHTTPDFSWRITE =ltdatalengtltCRgtltdatagt
bull Configuration parameters
bull ltdatalengt Amount of bytes to be sent
73
Lab 6 Filesystem update
bull Type AT+S HTTPDFSWRITE=357957
bull In Tera Term File ndash Send File
bull Reset the module
bull Type AT+CFUN=1
74
Image length 357957 (offset 0x00080000 block len 4096) Write len 4096 -gt 0x80000 Write len 4096 -gt 0x81000 Write len 4096 -gt 0x82000 helliphelliphelliphellip helliphelliphelliphelliphelliphellip helliphelliphelliphelliphellip Write len 4096 -gt 0xD6000 Write len 1612 -gt 0xD7000 (final) Wrote 357964 bytes Complete Please reboot (at+cfun=1) OK
All
Tera Term output
The file system will be permanently deleted The new IMG will overwrite the existent files in the file system
Warning
Proceed to the next LAB
Lab 7 Socket interface
bull Objective
bull Open TCPUDP connection
bull Write data to socket
bull Read data from socket
bull Close socket
bull Prerequisites
bull Work alone
76
TCPUDP socket
Socket
Client
Socket
Server
Lab 7 TCPUDPUART socket interface 77
The Socket interface allows communication via TCP UDP and UART
The SPWF is both a client and a server socket In this LAB will be
detailed the socket client feature
Ho
st
En
d P
rod
uct
Open TCPUDP connection
Write data to socket
Read data from socket
Close socket
Lab 7 Open TCPUDP connection
The SOCKON command allows to open a TCPUDP connection
to a specified host (up to 8 socket connections at same time)
bull Sintax
bull AT+SSOCKON=lthostnamegtltportgtltprotocolgtind
bull Configuration parameters
bull lthostnamegt target host DNS resolvable name or IP address
bull ltportgt TCPUDP socket port
bull ltprotocolgt t for TCP socket u for UDP socket
bull ind indicate when data has arrived (optional) Up to 4 (x730 bytes)
consecutive ldquoPending datardquo message (without any AT+SSOCKR) are
guaranteed It is suggested to empty the buffer using the AT+SSOCKR
command and to avoid exceeding 4 indications
78
Lab 7 Open TCPUDP connection
bull Open the TCP socket server (disable the firewall to properly
run it)
bull Folder hands_on_wifitcp socket serverserverexe
bull The TCP server listens for incoming connections on the port
32000 It sends back all data received
79
Optional - Lab 7 Open TCPUDP connection
bull Using an Android platform the socket server can be opened
using a specific APP (Socket Protocol available on Play Store)
bull The TCP socket server can be configured to listen for
incoming connections on the port 32000
bull Type 32000 on laquoPort Listen toraquo box
bull Click on Listen
80
Lab 7 Open TCPUDP connection
bull Type AT+SSOCKON=192168010x32000tind
bull The client and the server use the socket identifier (ID)
displayed
81
ID 00 OK
All
Tera Term output
Lab 7 Write data to socket
The SOCKW command allows to write data to the specified ID
socket
This command accepts data after the ltcrgt at the end of the
command line
bull Sintax
bull AT+SSOCKW=ltIDgtltlengt
bull Configuration parameters
bull ltIDgt socket identifier
bull ltlengt data length to send
82
Lab 7 Write data to socket
bull Write data
bull Type AT+SSOCKW=0013
bull Type hello worldltCRgt
bull SPWF shows that there are ltpending datagt and their amount
83
+WIND55Pending Data013
All
Tera Term output
ID
Pending
bytes
Note the module is waiting 13 bytes to be written to the socket As soon as 13 bytes (or characters) are sent from the terminal the module is going to write them to the socket and will be ready to receive new commands
Lab 7 Read data from socket
The SOCKR command allows to read data from socket
bull Sintax
bull AT+SSOCKR=ltIDgtltlengt
bull Configuration parameters
bull ltIDgt socket identifier
bull ltlengt data length to read
84
Lab 7 Read data from socket
bull Read data
bull Type AT+SSOCKR=0013
85
hello world OK
All
Tera Term output
Lab 7 Close socket
The SOCKC command allows to close socket
bull Sintax
bull AT+SSOCKC=ltIDgt
bull Configuration parameters
bull ltIDgt socket identifier
86
Tera Term output
Lab 7 Close socket
bull Close socket
bull Type AT+SSOCKC=00
87
OK
All
Proceed to the next LAB
Lab 8 MiniAP mode for the first set
bull Objective
bull Create a direct connection between
the module and an end device
bull First set of the module in order to
enable the connection between the
module and a generic AP
bull Prerequisites
bull Work alone
89
Tera Term output
Lab 8 Configuring the module in MiniAP mode
The Mini AP mode is available starting from the following FW release
SPWF01S-131115-de4568d-RELEASE
In order to set the module in Mini AP mode the following parameters
are needed
bull Set the SSID
bull Type AT+SSSIDTXT=SPWF_AP
bull Set the network privacy mode (0=OPEN or 1=WEP are supported)
bull Type AT+SSCFG=wifi_priv_mode0
bull Set the network mode (1 = STA 2 = IBSS 3 = MiniAP)
bull Type AT+SSCFG=wifi_mode3
90
OK
All
Lab 8 Configuring the module in MiniAP mode
bull Save the settings on the flash memory and reset the module
bull Type ATampW
bull Type AT+CFUN=1
91
+WIND0Console active +WIND32WiFi Hardware Started +WIND26WiFi Started AP with network SPWF_AP +WIND24WiFi Up 172181511
All
Tera Term output
SPWF_AP
Lab 8 Configuring the module in MiniAP mode (WEP Key)
Configure the module using the WEP key (2 possible combinations
available)
Sample table
92
AP configuration AT command to be used
Security Mode WEP
WEP Key Length 64 bit
(10 hex digits)
Authentication Open
Wep Key 1 1234567890
ie
at+sssidtxt=SPWF_AP
AT+SSCFG=wifi_wep_keys[0]1234567890
AT+SSCFG=wifi_wep_key_lens05
AT+SSCFG=wifi_auth_type0
AT+SSCFG=wifi_priv_mode1
AT+SSCFG=wifi_mode3
atampw
at+cfun=1
AP configuration AT command to be used
Security Mode WEP
WEP Key Length
128 bit (26 hex digits)
Authentication Open
Wep Key 1
123456789012345678
90123456
ie
at+sssidtxt=SPWF_AP
AT+SSCFG=wifi_wep_keys[0]12345678
901234567890123456
AT+SSCFG=wifi_wep_key_lens0D
AT+SSCFG=wifi_auth_type0
AT+SSCFG=wifi_priv_mode1
AT+SSCFG=wifi_mode3
atampw
at+cfun=1
Lab 8 Configuring the module in MiniAP mode (WEP Key)
Notes
bull ldquowifi_wep_key_lensrdquo variable values 05 and 0D
bull Itrsquos possible to enter any text string as WEP key It have to be converted into a
hexadecimal key using the ASCII values of the characters A maximum of 5 text
characters can be entered for 64 bit keys and a maximum of 13 characters for 128
bit keys
In this case it needs to manually convert your ASCII password to
HEX and complete the wifi_wep_keys[0] variable with the HEX
value
bull ie WEP key test1
ASCII to HEX 7465737431
So the AT command is AT+SSCFG=wifi_wep_keys[0]7465737431
93
Lab 8 Customizing the MiniAP address (optional)
Starting from FW 33 the module allows user to customize the IP address of the MiniAP
bull Set the SSID
bull Type AT+SSSIDTXT=SPWF_AP
bull Set the network privacy mode (0=OPEN or 1=WEP are supported)
bull Type AT+SSCFG=wifi_priv_mode0
bull Set the network mode (1 = STA 2 = IBSS 3 = MiniAP)
bull Type AT+SSCFG=wifi_mode3
bull Set the use_dhcp mode (0 = DHCP server off 1 = DHCP server on 2 = DHCP server on and customizable)
bull Type AT+SSCFG=ip_use_dhcp2
bull Set the MiniAP address
bull Type AT+SSCFG=ip_ipaddr19216801
bull Save the settings on the flash memory and reset the module
bull Type ATampW
bull Type AT+CFUN=1
94
Tera Term output
+WIND0Console active +WIND32WiFi Hardware Started +WIND26WiFi Started AP with network SPWF_AP +WIND24WiFi Up 19216801
All
Tip the MiniAP will assign sequential addresses to the client ie 1deg client 19216802 2deg client 19216803
Lab 8 Mini AP mode
bull Associate your end device to the
SPWF_AP network
bull Find the SPWF_AP network and connect
the end device to the module
95
SPWF_AP +WIND2890187C960D0B Associated +WIND29DHCP reply for 17218151290187C960D0B to 172181512 +WIND29DHCP reply for 17218151290187C960D0B to 172181512
All
Tera Term output
Lab 8 Mini AP mode
bull Open your web browser
bull In the address bar type captiveportalnet
96
SPWF_AP
Tip The Mini AP domain can be set using the variable ip_apdomainname The default value is ldquocaptiveportalnetrdquo
The Mini AP default homepage can be set using the variable ip_apredirect The default value is ldquofirstsethtmlrdquo
Tip If the AP domain name is not quickly opened itrsquos suggested to turn off an eventual proxy server (check the connection settings or browser preferences)
Lab 8 First Set Page
bull The first set page allows to configure the module in IDLE mode
STATION mode IBSS mode and MINI AP mode
97
Used for STA IBSS MINI AP
Mandatory for IDLE STA IBSS MINI AP
Used for STA IBSS (WEP) MINI AP (WEP)
Used for STA (if DHCP = OFF) IBSS
(mandatory) MINI AP (if DHCP = OFF)
Used for STA IBSS (mandatory DHCP = OFF) MINI AP
Used for STA (WEP key) IBSS (WEP) MINI AP (WEP)
Used for STA IBSS MINI AP
Lab 8 Mini AP mode
bull Set all the parameters required in order to enable the connection
between the module and a generic AP
ie AP configured in WPAWPA2 mode
bull MiniAP PassKey anonymous (by default)
bull SSID of the access point
bull Password of the access point
bull Authentication type of the access point
bull Use mode of the module
98
Tip The Mini AP PassKey can be set using the variable ldquouser_descrdquo The default value is ldquoanonymousrdquo
Note In order to manage non-ASCII chars the ip_use_decoder variable must be modified according as below at+sscfg=ip_use_decoder0 no decoding [default] at+sscfg=ip_use_decoder1 RAW decoding (the USER and PSK fields must be completed in HEX) at+sscfg=ip_use_decoder2 UTF-8 decoding at+sscfg=ip_use_decoder6 HTML entities decoding
Lab 8 Mini AP mode
bull Click on GO button and then send the
parameters confirming with OK
99
SPWF_AP
AP
SSID ciscosb2
Lab 8 Mini AP mode
bull The module will receive the parameters and will automatically
connect to the access point required
100
+WIND57Received SSID is ciscosb2 +WIND57Received PWD is +WIND57Received Auth mode is 2 +WIND57Received Mode is 1 +WIND2RESET +WIND1Poweron (--SPWF01S) +WIND13ST IWM Copyright (c) 2012-2013 STmicroelectronics +WIND3Watchdog Running +WIND0Console active +WIND46WPA Crunching PSK +WIND32WiFi Hardware Started +WIND21WiFi Scanning +WIND35WiFi Scan Complete (0x0) +WIND19WiFi Join 02621F518F0B +WIND25WiFi Association with ciscosb2 successful +WIND51WPA Handshake Complete +WIND24WiFi Up 1921681106
All
Tera Term output
ciscosb2
AP
Lab 8 Mini AP mode ndash RAW decoding example
101
Note In order to manage non-ASCII chars the ip_use_decoder variable must be modified according as below at+sscfg=ip_use_decoder0 no decoding [default] at+sscfg=ip_use_decoder1 RAW decoding (the USER and PSK fields must be completed in HEX) at+sscfg=ip_use_decoder2 UTF-8 decoding at+sscfg=ip_use_decoder6 HTML entities decoding
7177657261736466
AP SSIS
AP PSK
Proceed to the next LAB
Lab 9 Socket interface - MiniAP mode
bull Objective
bull Create a direct connection between
the module and an end device
bull Socket interface used in MiniAP
mode
bull Prerequisites
bull Work alone
103
Tera Term output
Lab 9 Configuring the module in MiniAP mode
The Mini AP mode (available starting from the SPWF01S-131115-de4568d-RELEASE) also allows to use the socket interface The procedure is the same as in Lab 7
In order to set the module in Mini AP mode the following parameters are needed
bull Set the SSID
bull Type AT+SSSIDTXT=SPWF_AP
bull Set the network privacy mode
bull Type AT+SSCFG=wifi_priv_mode0
bull Set the network mode (1 = STA 2 = IBSS 3 = MiniAP)
bull Type AT+SSCFG=wifi_mode3
104
OK
All
Lab 9 Configuring the module in MiniAP mode
bull Save the settings on the flash memory and reset the module
bull Type ATampW
bull Type AT+CFUN=1
105
+WIND0Console active +WIND32WiFi Hardware Started +WIND26WiFi Started AP with network SPWF_AP +WIND24WiFi Up 172181511
All
Tera Term output
SPWF_AP
Lab 9 Mini AP mode
bull Connect your PC to the SPWF_AP
network
bull Find the SPWF_AP network and connect
the end device to the module
106
SPWF_AP +WIND2890187C960D0B Associated +WIND29DHCP reply for 17218151290187C960D0B to 172181512 +WIND29DHCP reply for 17218151290187C960D0B to 172181512
All
Tera Term output
Lab 9 Open TCPUDP connection
As described in the Lab 7 the SOCKON command allows to
open a TCPUDP connection to a specified host
bull Sintax
bull AT+SSOCKON=lthostnamegtltportgtltprotocolgtind
bull Configuration parameters
bull lthostnamegt target host DNS resolvable name or IP address
bull ltportgt TCPUDP socket port
bull ltprotocolgt t for TCP socket u for UDP socket
bull ind indicate when data has arrived (optional) Up to 4 consecutive ldquoPending
datardquo message (without any AT+SSOCKR) are guaranteed It is
suggested to empty the buffer using the AT+SSOCKR command and
to avoid exceeding 4 indications
107
Lab 9 Open TCP connection
bull Open the TCP socket server (disable the firewall to properly
run it)
bull Folder hands_on_wifitcp socket serverserverexe
bull The TCP server listens for incoming connections on the port
32000 It sends back all data received
108
Lab 9 Open TCP connection
bull Type AT+SSOCKON=17218151232000tind
bull The client and the server use the socket identifier (ID)
displayed
109
ID 00 OK
All
Tera Term output
Lab 9 Write data to socket
The SOCKW command allows to write data to the specified ID
socket
This command accepts data after the ltcrgt at the end of the
command line
bull Sintax
bull AT+SSOCKW=ltIDgtltlengt
bull Configuration parameters
bull ltIDgt socket identifier
bull ltlengt data length to send
110
Lab 9 Write data to socket
bull Write data
bull Type AT+SSOCKW=0013
bull Type hello worldltCRgt
bull SPWF shows that there are ltpending datagt and their amount
111
+WIND55Pending Data013
All
Tera Term output
ID
Pending
bytes
Note the module is waiting 13 bytes to be written to the socket As soon as 13 bytes (or characters) are sent from the terminal the module is going to write them to the socket and will be ready to receive new commands
Lab 9 Read data from socket
The SOCKR command allows to read data from socket
bull Sintax
bull AT+SSOCKR=ltIDgtltlengt
bull Configuration parameters
bull ltIDgt socket identifier
bull ltlengt data length to read
112
Lab 9 Read data from socket
bull Read data
bull Type AT+SSOCKR=0013
113
hello world OK
All
Tera Term output
Lab 9 Close socket
The SOCKC command allows to close socket
bull Sintax
bull AT+SSOCKC=ltIDgt
bull Configuration parameters
bull ltIDgt socket identifier
114
Tera Term output
Lab 9 Close socket
bull Close socket
bull Type AT+SSOCKC=00
115
OK
All
Proceed to the next LAB
Lab 10 Web server - MiniAP mode
bull Objective
bull Create a direct connection between
the module and an end device
bull Web server used in MiniAP mode
bull Prerequisites
bull Work alone
117
Tera Term output
Lab 10 Configuring the module in MiniAP mode
The Mini AP mode (available starting from the SPWF01S-131115-de4568d-RELEASE) also allows to use the module file system (both RAM and IntExt FLASH)
In order to set the module in Mini AP mode the following parameters are needed
bull Set the SSID
bull Type AT+SSSIDTXT=SPWF_AP
bull Set the network privacy mode
bull Type AT+SSCFG=wifi_priv_mode0
bull Set the network mode (1 = STA 2 = IBSS 3 = MiniAP)
bull Type AT+SSCFG=wifi_mode3
118
OK
All
Lab 10 Configuring the module in MiniAP mode
bull Save the settings on the flash memory and reset the module
bull Type ATampW
bull Type AT+CFUN=1
119
+WIND0Console active +WIND32WiFi Hardware Started +WIND26WiFi Started AP with network SPWF_AP +WIND24WiFi Up 172181511
All
Tera Term output
SPWF_AP
Lab 10 Mini AP mode
bull Connect your PC to the SPWF_AP
network
bull Find the SPWF_AP network and connect
the end device to the module
120
SPWF_AP +WIND2890187C960D0B Associated +WIND29DHCP reply for 17218151290187C960D0B to 172181512 +WIND29DHCP reply for 17218151290187C960D0B to 172181512
All
Tera Term output
Lab 10 Access to Web server - Mini AP mode
bull Open your web browser
bull In the address bar type
captiveportalnetindexhtml
bull The SPWF01S homepage will be
displayed
121
SPWF_AP Tip The Mini AP domain can be set using the variable ip_apdomainname The default value is ldquocaptiveportalnetrdquo
Lab 10 Access to Web server - Mini AP mode
bull Open the SPWF01S Device Status
bull click on the highlighted link
bull The SPWF01S Device Status will be
displayed
122
SPWF_AP Tip The Mini AP domain can be set using the variable ip_apdomainname The default value is ldquocaptiveportalnetrdquo
The Mini AP default homepage can be set using the variable ip_apredirect The default value is ldquofirstsethtmlrdquo
Proceed to the next LAB
Lab 11 Remotely control - GPIOs
bull Objective
bull write remotely a GPIO
bull configure remotely a GPIO
bull read remotely a GPIO
bull Prerequisites
bull module connected to the AP or
module configured in MiniAP mode
124
Lab 11 Remotely control - GPIO
This feature allows to remotely write configure and read a GPIO
The module should be connected to the AP (as shown in Lab 3) or
should be configured in Mini AP mode (as shown in Lab 8)
The external client have to open the remotehtml page stored in the
module
125
ENG-WPA AP
SPWF_AP
miniAP
Tera Term output
Lab 11 Joining a network
In order to be connected to an available Wifi network the AP parameters setting is needed
bull Set the SSID
bull Type AT+SSSIDTXT=ENG-WPA
bull Set the password
bull Type AT+SSCFG=wifi_wpa_psk_texthelloworld
bull Set the network privacy mode (0=none 1=WEP 2=WPA-Personal (TKIPAES) or WPA2-Personal (TKIPAES))
bull Type AT+SSCFG=wifi_priv_mode2
bull NB wifi_auth_type must be set to 0 AT+SSCFG=wifi_auth_type0
bull Set the network mode (1 = STA 2 = IBSS 3 = MiniAP)
bull Type AT+SSCFG=wifi_mode1
126
OK
All
Lab 11 Joining a network
bull Save the settings on the flash memory and reset the module
bull Type ATampW
bull Type AT+CFUN=1
127
+WIND0Console active +WIND46WPA Crunching PSK +WIND32WiFi Hardware Started +WIND21WiFi Scanning +WIND35WiFi Scan Complete (0x0) +WIND19WiFi Join 14D64D243600 +WIND25WiFi Association with ENG-WPA successful +WIND51WPA Handshake Complete +WIND24WiFi Up 19216801xx
All
ENG-WPA AP
Tera Term output
Lab 11 Remotely control in MiniAP mode - GPIO
bull Open your web browser
bull In the address bar type
192168x1xxremotehtml
128
ENG-WPA
AP
Lab 11 Remotely control in MiniAP mode - GPIO
bull Try to write the GPIO14 connected to the LED3 (check if the
LED3 is mounted on your EVAL BOARD otherwise can be used
the GPIO13)
bull Click on the laquoGOraquo button
and LED3 will switch on
129
ENG-WPA
AP
Proceed to the next LAB
Lab 12 Input demo
bull Objective
bull Send a message from the server (wifi
module) to an external client connected
to the same network
bull Prerequisites
bull module connected to the AP or module
configured in MiniAP mode
131
Lab 12 Input demo
The module provides some DEMOs to show the interaction between
the module and an external client connected to the same network
The module should be connected to the AP (as shown in Lab 3) or
should be configured in Mini AP mode (as shown in Lab 8)
In order to run this demo the client have to open the
input_demoshtml page stored in the module
132
ENG-WPA AP
SPWF_AP
miniAP
Tera Term output
Lab 12 Joining a network
In order to be connected to an available Wifi network the AP parameters setting is needed
bull Set the SSID
bull Type AT+SSSIDTXT=ENG-WPA
bull Set the password
bull Type AT+SSCFG=wifi_wpa_psk_texthelloworld
bull Set the network privacy mode (0=none 1=WEP 2=WPA-Personal (TKIPAES) or WPA2-Personal (TKIPAES))
bull Type AT+SSCFG=wifi_priv_mode2
bull NB wifi_auth_type must be set to 0 AT+SSCFG=wifi_auth_type0
bull Set the network mode (1 = STA 2 = IBSS 3 = MiniAP)
bull Type AT+SSCFG=wifi_mode1
133
OK
All
Lab 12 Joining a network
bull Save the settings on the flash memory and reset the module
bull Type ATampW
bull Type AT+CFUN=1
134
+WIND0Console active +WIND46WPA Crunching PSK +WIND32WiFi Hardware Started +WIND21WiFi Scanning +WIND35WiFi Scan Complete (0x0) +WIND19WiFi Join 14D64D243600 +WIND25WiFi Association with ENG-WPA successful +WIND51WPA Handshake Complete +WIND24WiFi Up 19216801xx
All
ENG-WPA AP
Tera Term output
Lab 12 Input demo
bull Open your web browser
bull In the address bar type
192168x1xxinput_demoshtml
bull Insert the message to the client
ie type laquotestraquo (suggested ndash copy
the string and paste it in the
terminal) and then send a carriage
return
135
VERY IMPORTANT
Both client and server are pending (2 sec) after the page
request If no message is sent from the module a timeout
mechanism will be triggered
The server shows the ldquo+WIND56 messagerdquo and it will
wait for a string to be inserted and terminated by [Cr] ldquo+WIND56Insert message to clientdrdquo d is the Nth input SSI into html page (please refer to CGIampSSI Application Notes for details)
Lab 12 Input demo
bull The module receives the HTML
page containing the string inserted
server-side
bull Below this string there are two
buttons to try again the demo or to
return to the homepage
136
Proceed to the next LAB
Lab 13 Socket Server functionality
bull Objective
bull Configure a Server Listening Port
bull Open a TCP connection from a
socket client to the module
bull Data modeCommand Mode usage
bull Prerequisites
bull module connected to the AP or
module configured in MiniAP mode
bull PC to be used as socket client
138
TCP socket
Socket
Server
Socket
Client
Lab 13 Socket Server
This feature allows to enable the socket server mode The module
can be able to listen for an incoming connection on the specified port
The module should be connected to the AP (as shown in Lab 3) or
should be configured in Mini AP mode (as shown in Lab 8)
Please refer to ldquoSocket Server Application Notesrdquo for more details
139
ENG-WPA AP
SPWF_AP
miniAP
Tera Term output
Lab 13 Joining a network
In order to be connected to an available Wifi network the AP parameters setting is needed
bull Set the SSID
bull Type AT+SSSIDTXT=ENG-WPA
bull Set the password
bull Type AT+SSCFG=wifi_wpa_psk_texthelloworld
bull Set the network privacy mode (0=none 1=WEP 2=WPA-Personal (TKIPAES) or WPA2-Personal (TKIPAES))
bull Type AT+SSCFG=wifi_priv_mode2
bull NB wifi_auth_type must be set to 0 AT+SSCFG=wifi_auth_type0
bull Set the network mode (1 = STA 2 = IBSS 3 = MiniAP)
bull Type AT+SSCFG=wifi_mode1
140
OK
All
Lab 13 Joining a network
bull Save the settings on the flash memory and reset the module
bull Type ATampW
bull Type AT+CFUN=1
141
+WIND0Console active +WIND46WPA Crunching PSK +WIND32WiFi Hardware Started +WIND21WiFi Scanning +WIND35WiFi Scan Complete (0x0) +WIND19WiFi Join 14D64D243600 +WIND25WiFi Association with ENG-WPA successful +WIND51WPA Handshake Complete +WIND24WiFi Up 19216801xx
All
ENG-WPA AP
Tera Term output
Lab 13 Socket Server
bull Socket server turn ON the TCP Socket Server (user must
specify the server listening port)
bull Type AT+SSOCKD=32000 (AT+SOCKD=32000u for UDP socket server)
bull Check the status of the socket server
bull Type AT+SSTS=ip_sockd_port
142
ENG-WPA
AP
Tera Term output
OK ip_sockd_port = 32000 OK
All
Tip you can Turn OFF the Socket Server using a server listening port = 0 (type AT+SSOCKD=0)
Lab 13 Socket Server
bull Socket client can be used a simple socket client in order to test the communication
(SocketTest ndash available on httpsourceforgenetprojectssockettest)
143
ENG-WPA
AP
Lab 13 Socket Server
bull Socket client
bull Insert the modulersquos IP Address and the port
bull Click on Connect button
144
Tera Term output
+WIND61Incoming Socket Client1921681102 +WIND60Now in Data Mode
All
Lab 13 Socket Server
bull The module (socket server) enters in data mode and a bidirectional channel is
created to allow exchanging data with the socket client
bull Try to send and receive data from the module
145
Tera Term output
test_1
All
Lab 13 Socket Server ndash escape sequence
bull From Data Mode to Command Mode
bull Configuration variable used escape_seq (default is ldquoat+srdquo case sensitive
suggested to be sent by the local host in a single complete packet with no CR or
LF in the sequence)
bull Type at+s
bull Now itrsquos possible to send AT commands while the socket connection
is still active
146
Tera Term output
+WIND59Back to Command Mode
All
Tip During the Command Mode you cannot send data to client but can receive data from it Every data chunk generates an URC (+WIND64Sockd Pending Data) with limit to 4 (x730 bytes) This is the max number of pending messages From the 5th chunk on messages are lost
Lab 13 Socket Server ndash return to data mode
bull From Command Mode to Data Mode
bull While in Command Mode
bull Type AT+S (this is an AT command AT+S must be followed by ltCRgt)
bull The module returns in data mode
147
ENG-WPA
AP
Tera Term output
+WIND60Now in Data Mode
All
Lab 13 Socket Server ndash turn off
bull Turn OFF the Socket Server
bull Type at+s (to enter in command mode)
bull Type AT+SSOCKD=0
148
ENG-WPA
AP
Tera Term output
OK +WIND62Socket Client Gone1921681102
All
Proceed to the next LAB
Lab 14 Low power modes
bull Objective
bull Practice with Radio Power Save
bull Sleep Mode
bull Standby Mode
bull Prerequisites
bull module connected to the AP
150
Lab 14 Low power modes
This feature allows to enable the low power states
The module supports the ldquoRadio Power Saverdquo mode the ldquoSleeprdquo
mode and the ldquoStandbyrdquo mode
The module should be connected to the AP (as shown in Lab 3) in
order to use the ldquoRadio Power Saverdquo mode
Please refer to ldquoSPWF01S Power Management Application Notesrdquo for
more details
151
ENG-WPA AP
Low Power
Tera Term output
Lab 14 Joining a network
In order to be connected to an available Wifi network the AP parameters setting is needed
bull Set the SSID
bull Type AT+SSSIDTXT=ENG-WPA
bull Set the password
bull Type AT+SSCFG=wifi_wpa_psk_texthelloworld
bull Set the network privacy mode (0=none 1=WEP 2=WPA-Personal (TKIPAES) or WPA2-Personal (TKIPAES))
bull Type AT+SSCFG=wifi_priv_mode2
bull NB wifi_auth_type must be set to 0 AT+SSCFG=wifi_auth_type0
bull Set the network mode (1 = STA 2 = IBSS 3 = MiniAP)
bull Type AT+SSCFG=wifi_mode1
152
OK
All
Lab 14 Joining a network
bull Save the settings on the flash memory and reset the module
bull Type ATampW
bull Type AT+CFUN=1
153
+WIND0Console active +WIND46WPA Crunching PSK +WIND32WiFi Hardware Started +WIND21WiFi Scanning +WIND35WiFi Scan Complete (0x0) +WIND19WiFi Join 14D64D243600 +WIND25WiFi Association with ENG-WPA successful +WIND51WPA Handshake Complete +WIND24WiFi Up 19216801xx
All
Tera Term output
ENG-WPA AP
Low Power
Lab 14 Low power modes ndash Power Save 154
Module
Power State STM32 WLAN
Standby Standby Standby
Sleep Stop PS
Power Save Run PS or Fast-PS
Active Rx Run Rx Idle Rx Active
Active Tx Run Tx Active
Lab 14 Low power modes ndash Power Save
bull By default the module starts in ACTIVE mode
bull Enable the Power Save Mode
bull Type at+sscfg=wifi_powersave1 (ldquowifi_powersave2rdquo enables the Fast-PS mode)
bull Enable the doze operational mode
bull Type at+sscfg=wifi_operational_mode11 (ldquowifi_operational_mode12rdquo enables the quiescent mode)
bull Choose the wake up mode
1 Wake up every n beacon (specified in the wifi_beacon_wakeup variable)
bull Type at+sscfg=wifi_listen_interval0
bull Type at+sscfg=wifi_beacon_wakeup1
OR
2 Wake up every n beacon adaptively (specified in the wifi_beacon_wakeup variable)
bull Type at+sscfg=wifi_listen_interval1
bull Type at+sscfg=wifi_beacon_wakeup1
155
Tip The Wifi Power Save (wifi_powersave1) can also be quickly enabled using the command AT+CFUN=2
Lab 14 Low power modes ndash Power Save
bull Save the settings on the flash memory and reset the module
bull Type ATampW
bull Type AT+CFUN=1
bull The WIND66 message related to Low Power Mode will be
displayed
156
+WIND1Poweron (--SPWF01S) +WIND13ST SPWF01S IWM Copyright (c) 2012-2014 STMicroelectronics Inc All rights Reserved +WIND3Watchdog Running +WIND0Console active +WIND32WiFi Hardware Started +WIND21WiFi Scanning +WIND35WiFi Scan Complete (0x0) +WIND19WiFi Join 02621F518F0B +WIND25WiFi Association with IoT successful +WIND51WPA Handshake Complete +WIND24WiFi Up 1921681104 +WIND66Low Power mode1
All
Tera Term output
ENG-WPA AP
Low Power
Lab 14 Low power modes ndash Sleep Mode 157
Module
Power State STM32 WLAN
Standby Standby Standby
Sleep Stop PS or Fast-PS
Power Save Run PS or Fast-PS
Active Rx Run Rx Idle Rx Active
Active Tx Run Tx Active
Lab 14 Low power modes ndash Sleep Mode
bull In the Sleep Mode the core STM32 is stopped
bull Enable the Sleep Mode
bull Type at+sscfg=sleep_enabled1
bull Enable the Power Save Mode
bull Type at+sscfg=wifi_powersave1 (ldquowifi_powersave2rdquo enables the Fast-PS mode)
bull Enable the doze operational mode
bull Type at+sscfg=wifi_operational_mode11 (ldquowifi_operational_mode12rdquo enables the quiescent mode)
bull Choose the wake up mode
1 Wake up every n beacon (specified in the wifi_beacon_wakeup variable)
bull Type at+sscfg=wifi_listen_interval0
bull Type at+sscfg=wifi_beacon_wakeup1
OR
2 Wake up every n beacon adaptively (specified in the wifi_beacon_wakeup variable)
bull Type at+sscfg=wifi_listen_interval1
bull Type at+sscfg=wifi_beacon_wakeup1
158
Tip The Wifi Sleep Mode (and wifi_powersave1) can also be quickly enabled using the command AT+CFUN=3
Lab 14 Low power modes ndash Sleep Mode
bull Save the settings on the flash memory and reset the module
bull Type ATampW
bull Type AT+CFUN=1
bull The WIND69 message related to Sleep Mode will be displayed
159
+WIND1Poweron (--SPWF01S) +WIND13ST SPWF01S IWM Copyright (c) 2012-2014 STMicroelectronics Inc All rights Reserved +WIND3Watchdog Running +WIND0Console active +WIND32WiFi Hardware Started +WIND21WiFi Scanning +WIND35WiFi Scan Complete (0x0) +WIND19WiFi Join 02621F518F0B +WIND25WiFi Association with IoT successful +WIND51WPA Handshake Complete +WIND24WiFi Up 1921681104 +WIND66Low Power mode1 +WIND69Going into DeepSleep
All
Tera Term output
ENG-WPA AP
Low Power
Lab 14 Low power modes ndash Sleep Mode
bull Wake STM32 up using the GPIO6
bull Put the GPIO6 to 25V (jumper on JP2 as in
the picture)
bull The WIND messages will be displayed
160
+WIND70Resuming from DeepSleep +WIND53Wakeup (GPIO6 High)
All
Tera Term output
Lab 14 Low power modes ndash Sleep Mode
bull Put STM32 in sleep mode using the
GPIO6
bull Go back the GPIO6 floating (remove jumper
- as default)
bull The WIND69 message will be
displayed
161
+WIND69Going into DeepSleep
All
Tera Term output
Lab 14 Low power modes ndash Sleep Mode
bull Wake STM32 up using the remote
page
bull Connect a device to the same modulersquos
network
bull Open the following link
http[module_IP_address]remotehtml
bull Select ldquoWakerdquo and click on ldquoGordquo button
to wake up the module
bull The WIND message will be displayed
162
+WIND70Resuming from DeepSleep
All
Tera Term output
Lab 14 Low power modes ndash Sleep Mode
bull Put STM32 in sleep mode using the
remote page
bull Connect a device to the same modulersquos
network
bull Open the following link
http[module_IP_address]remotehtml
bull Select ldquoSleeprdquo and click on ldquoGordquo button
to put the module in sleep mode
bull The WIND message will be displayed
163
+WIND69Going into DeepSleep
All
Tera Term output
Lab 14 Low power modes ndash Standby Mode 164
Module
Power State STM32 WLAN
Standby Standby Standby
Sleep Stop PS or Fast-PS
Power Save Run PS or Fast-PS
Active Rx Run Rx Idle Rx Active
Active Tx Run Tx Active
Lab 14 Low power modes ndash Standby Mode
bull During the Standby Mode both the STM32 and the Radio will be
put in standby mode The standby mode allows to achieve the
lowest power consumption
bull Enable the Standby Mode
bull Type at+sscfg=sleep_enabled0 (Sleep mode must be disabled)
bull Type at+sscfg=standby_enabled1
bull Please be sure that GPIO6 isnrsquot forced high
bull Set the standby time to wake up via RTC alarm
bull Type at+sscfg=standby_time15
165
Tip The Wifi Standby Mode can also be quickly enabled using the command AT+CFUN=4
Lab 14 Low power modes ndash Standby Mode
bull Save the settings on the flash
memory and reset the module
bull Type ATampW
bull Type AT+CFUN=1
bull After 15 seconds the module will be
rebooted and will return in the
ACTIVE state
166
+WIND0Console active +WIND32WiFi Hardware Started +WIND38WiFi Powered Down +WIND67Going into Standby15 +WIND68Resuming from Standby +WIND1Poweron (--SPWF01S) +WIND13ST SPWF01S IWM Copyright (c) 2012-2014 STMicroelectronics Inc All rights Reserved +WIND3Watchdog Running +WIND0Console active +WIND32WiFi Hardware Started +WIND21WiFi Scanning +WIND35WiFi Scan Complete (0x0) +WIND19WiFi Join02621F518F0B +WIND25WiFi Association with IoT successful +WIND51WPA Handshake Complete +WIND24WiFi Up1921681113
All
Tera Term output
Lab 14 Low power modes ndash Standby Mode
bull Wake up the module using the GPIO6
bull Enable the Standby Mode
bull Type at+sscfg=sleep_enabled0 (make sure that
Sleep mode is disabled)
bull Type at+sscfg=standby_enabled1
bull Type ATampW
bull Type AT+CFUN=1
bull Put the GPIO6 to 25V to wake up the module
bull The WIND message will be displayed and
the module will return in ACTIVE state
167
+WIND68Resuming from Standby +WIND1Poweron (--SPWF01S) helliphelliphellip
All
Tera Term output
Proceed to the next LAB
Lab 15 STAMINI AP switcher
bull Objective
bull HW ldquoSTA to MiniAPrdquo switcher
bull Prerequisites
bull Work alone
169
Lab 15 STAMINI AP switcher
This feature allows to force the module in Mini AP mode starting from
a preexistent state
ldquoRecovery Moderdquo this functionality could be useful to lead the module
in a known state and to reconfigure it (ie using the firstset page)
The GPIO7 will be used to drive this feature
170
Lab 15 STAMINI AP switcher
bull Press and hold the SW2 button on the
EVAL and then perform a reset (HW reset
via SW1 button or SW reset via AT
command)
bull Release the SW2 button
bull The MiniAP mode will be started and the
module is discoverable with the following
SSID
bull iwm-XX-YY-ZZ where XX-YY-ZZ are the last
six digits of modulersquos MAC ADDRESS
171
+WIND2Reset +WIND1Poweron (--SPWF01S) +WIND13ST SPWF01S IWM Copyright (c) 2012-2014 STMicroelectronics Inc All rights Reserved +WIND39HW in miniAP mode (GPIO7 Low) +WIND0Console active +WIND3Watchdog Running +WIND32WiFi Hardware Started +WIND26WiFi Started AP +WIND24WiFi Up172312551
All
Tera Term output
Tip To exit from ldquominiAP mode via GPIO7rdquo perform a modulersquos reset
Proceed to the next LAB
Lab 16 IBSS connection
bull Objective
bull Create an IBSS network
bull Prerequisites
bull Work alone
173
Lab 16 Create an IBSS network
In an IBSS network the SSID is chosen by the client device that
starts the network
Module settings to create an IBSS network
bull Set the IBSS SSID
bull Type AT+SSSIDTXT=ADHOC
bull Set the network privacy mode (0=OPEN or 1=WEP are supported)
bull Type AT+SSCFG=wifi_priv_mode0
bull Set the network mode (2 = IBSS)
bull Type AT+SSCFG=wifi_mode2
174
OK
All
Tera Term output
Lab 16 Create an IBSS network
bull Set IP address IP default gateway IP DNS and IP netmask
bull Type AT+SSCFG=ip_ipaddr192168y1xx
bull Type AT+SSCFG=ip_gw192168y1
bull Type AT+SSCFG=ip_dns192168y1
bull Type AT+SSCFG=ip_netmask2552552550
bull Turn off the DHCP
bull Type AT+SSCFG=ip_use_dhcp0
175
OK
All
Tera Term output
Lab 16 Create an IBSS network
bull Save the settings on the flash memory and reset the module
bull Type ATampW
bull Type AT+CFUN=1
176
+WIND0Console active +WIND32WiFi Hardware Started +WIND21WiFi Scanning +WIND35WiFi Scan Complete (0x0) +WIND19WiFi Join EE33CE002418 +WIND25WiFi Association with ADHOC successful +WIND51WiFi Handshake Complete +WIND24WiFi Up 19216813
All
AD-HOC
Tera Term output
Lab 16 Create an IBSS network
bull Associate the iOS device with the
ADHOC network (iOS gt 8 could not
support the IBSS mode)
177
AD-HOC
Tip manual configuration of static TCPIPv4 parameters is suggested using a PC Ie PC TCPIPv4 properties
Lab 16 Create an IBSS network
bull Find your IP address
bull Type AT+SSTS
bull Open Safari web browser
bull In the address bar type
ltSPWF IP addressgtindexhtml
bull Type 192168y1xxindexhtml
178
AD-HOC
THANK YOU

Proceed to the next LAB
Lab 2a FOTA update
bull Objective
bull Upgrade the FW using the OTA file
bull Prerequisites
bull OTA file (provided in the SPWF01S FW
package)
bull External web server (ie Apache web
server running on PC)
26
Lab 2a FOTA update 27
The SPWF01Sx11 module (with external flash on board) allows
performing a Firmware Over-the-air update via a single HTTP GET
The SPWF01S will validate the firmware image it downloads load it
into a staging area then prompt the user to issue a reset command in
order to complete the update
Lab 2a FOTA update
The Apache Web Server will be used in this LAB
(Apache Web Server is available at this link
httparchiveapacheorgdisthttpdbinarieswin32httpd-2225-win32-x86-openssl-098ymsi)
Note please check that the local firewall is disabled or properly set It can
block the connection from module to Apache
bull Copy the OTA file (ie SPWF01S-xxxxxx-yyyyyyy-
RELEASE-mainota) in the Apache 22 htdocs folder
28
Lab 2a FOTA update
The FWUPDATE command allows to perform a Firmware Over-the-
air update via a single HTTP GET
bull Sintax
bull AT+SFWUPDATE=lthostnamegtltpathgtltportgt
bull Configuration parameters
bull lthostnamegt Target host DNS resolvable name or IP address
bull ltpathampqueryoptsgt Document path and optional query arguments
bull ltportgt Target host port
29
Lab 2a FOTA update
bull The module and the Apache Web server must be connected to the same network
bull In Tera Term type AT+SFWUPDATE=[Apache IP address][ota_fileota]
ie type AT+SFWUPDATE=192168xyyySPWF01S-150410-c2e37a3-RELEASE-
mainota
bull Reset the module to apply the new FW
bull Type AT+CFUN=1
bull Restore factory default settings (mandatory)
bull Type ATampF
30
Staging FW update for SPWF01SX11 version 1203-120918_01 FW length 276824 0x00002800 (offset 0x00000000 block len 4096) Write len 4096 -gt 0x0 Write len 4096 -gt 0x1000 (note - deleted extra output for clarity) Write len 4096 -gt 0x42000 Write len 2476 -gt 0x43000 (final) Wrote 276904 bytes Complete Update will be applied on next reboot (at+cfun=1)
All Tera Term output
Proceed to the next LAB
Lab 3 Access point connection
bull Objective
bull Scan for available networks
bull Join a network
bull Check the statusstatistics variables
bull Prerequisites
bull USB dongle and computer are set
up as described in Lab 2
bull Work alone
32
Lab 3 Scan for available networks
The SCAN command performs an immediate scan for available
networks Infrastructure (AP) and IBSS (Ad-Hoc) networks are both
reported Network type Channel BSSID SSID Signal strength (RSSI)
and 80211 capabilities are all reported
bull Type AT+SSCAN
bull Scan syntax AT+SSCAN [=lta|pgt[ltr|s|mgt[ltfnamegt]]] -- Perform a [activepassive]
network scan [filter offfilter on SSIDfilter on MAC] [print to file])
33
FOUND BSS 14D64D243600 CHAN 01 RSSI -28 SSID ENG-WPA CAPS 0431 WPA WPA2 FOUND BSS 00180A31EA78 CHAN 11 RSSI -82 SSID ZyckoItalyWireless CAPS 0531 WPA WPA2 FOUND BSS 06180A31E7E2 CHAN 11 RSSI -85 SSID ZyckoItalyGuest CAPS 0531 WPA WPA2 OK
All
Network type
Network MAC
Network
channel Network
RSSI
Network
SSID Network
capabilities
Tera Term output
Tera Term output
Lab 3 Joining a network (WPA Key)
In order to be connected to an available Wifi network the AP parameters setting is needed
bull Set the SSID
bull Type AT+SSSIDTXT=ENG-WPA
bull Set the password
bull Type AT+SSCFG=wifi_wpa_psk_texthelloworld
bull Set the network privacy mode (0=none 1=WEP 2=WPA-Personal (TKIPAES) or WPA2-Personal (TKIPAES))
bull Type AT+SSCFG=wifi_priv_mode2
bull NB wifi_auth_type must be set to 0 AT+SSCFG=wifi_auth_type0
bull Set the network mode (1 = STA 2 = IBSS 3 = MiniAP)
bull Type AT+SSCFG=wifi_mode1
34
OK
All
Lab 3 Joining a network (WPA Key)
bull Save the settings on the flash memory and reset the module
bull Type ATampW
bull Type AT+CFUN=1
35
+WIND0Console active +WIND46WPA Crunching PSK +WIND32WiFi Hardware Started +WIND21WiFi Scanning +WIND35WiFi Scan Complete (0x0) +WIND19WiFi Join 14D64D243600 +WIND25WiFi Association with ENG-WPA successful +WIND51WPA Handshake Complete +WIND24WiFi Up 19216801xx
All
ENG-WPA AP
Tera Term output
Lab 3 Joining a network (WPA Key)
bull Check the statusstatistics variables
bull Type AT+SSTS
bull Send a ping to the gateway (ip_gw)
bull Type AT+SPING=19216801
36
ENG-WPA AP
Tera Term output
OK
All
Lab 3 Joining a network (WEP Key)
Configure the module using the WEP key (4 possible combinations
available)
Sample table
37
AP configuration AT command to be used
Security Mode WEP
WEP Key Length 64 bit
(10 hex digits)
Authentication Open
Wep Key 1 1234567890
ie
at+sssidtxt=ENG-WEP
AT+SSCFG=wifi_wep_keys[0]1234567890
AT+SSCFG=wifi_wep_key_lens05
AT+SSCFG=wifi_auth_type0
AT+SSCFG=wifi_priv_mode1
AT+SSCFG=wifi_mode1
atampw
at+cfun=1
Security Mode WEP
WEP Key Length 64 bit
(10 hex digits)
Authentication Shared
Key
Wep Key 1 1234567890
ie
at+sssidtxt=ENG-WEP
AT+SSCFG=wifi_wep_keys[0]1234567890
AT+SSCFG=wifi_wep_key_lens05
AT+SSCFG=wifi_auth_type1
AT+SSCFG=wifi_priv_mode1
AT+SSCFG=wifi_mode1
atampw
at+cfun=1
AP configuration AT command to be used
Security Mode WEP
WEP Key Length
128 bit (26 hex digits)
Authentication Open
Wep Key 1
123456789012345678
90123456
ie
at+sssidtxt=ENG-WEP
AT+SSCFG=wifi_wep_keys[0]12345678
901234567890123456
AT+SSCFG=wifi_wep_key_lens0D
AT+SSCFG=wifi_auth_type0
AT+SSCFG=wifi_priv_mode1
AT+SSCFG=wifi_mode1
atampw
at+cfun=1
Security Mode WEP
WEP Key Length
128 bit (26 hex digits)
Authentication
Shared Key
Wep Key 1
123456789012345678
90123456
ie
at+sssidtxt=ENG-WEP
AT+SSCFG=wifi_wep_keys[0]12345678
901234567890123456
AT+SSCFG=wifi_wep_key_lens0D
AT+SSCFG=wifi_auth_type1
AT+SSCFG=wifi_priv_mode1
AT+SSCFG=wifi_mode1
atampw
at+cfun=1
Lab 3 Joining a network (WEP Key)
Notes
bull ldquowifi_wep_key_lensrdquo variable values 05 and 0D
bull Itrsquos possible to enter any text string into a WEP key box in the AP in which case it will be converted into a hexadecimal key using the ASCII values of the characters A maximum of 5 text characters can be entered for 64 bit keys and a maximum of 13 characters for 128 bit keys
In this case it needs to manually convert your ASCII password to HEX and complete the wifi_wep_keys[0] variable with the HEX value bull ie AP WEP key test1 ASCII to HEX 7465737431 So the AT command is AT+SSCFG=wifi_wep_keys[0]7465737431
bull Some APs allow user to insert a passphrase and then the AP automatically generates the hex keys In this scenario user have not to perform the ASCII to HEX conversion because the AP already gives it the hex value
38
Proceed to the next LAB
Lab 4 Web client mode
bull Objective
bull HTTP GET
bull HTTP POST
bull PUSH DATA ON SERIAL PORT
bull Prerequisites
bull USB dongle and computer are set up
as described in Lab 2
bull Work in couple
40
Lab 4 HTTP GET
The HTTP GET feature performs a single HTTP request to the specified
host and path The server response is printed on the UART enabled
bull Sintax
bull AT+SHTTPGET=lthostnamegtltpathgt[ltportgt]
bull Configuration parameters
bull lthostnamegt target host DNS resolvable name or IP address
bull ltpathgt document path
bull ltportgt target port
41
Lab 4 HTTP GET
bull Device A performs an HTTP GET to the Device B
bull Device A
AT+SHTTPGET=ltDevice B IP addrgtindexhtml
Type AT+SHTTPGET=19216801xxindexhtml
42
GET indexhtml HTTP10 User-Agent SPWF01S helliphelliphellip lth1gtST SPWF01Sx11 WiFi Modulelth1gt ltpgt Welcome to the ST SPWF01Sx11 WiFi Module ltpgt ltpgt This page was delivered from the SPWF01Sx11 internal HTTP server hellip lta href=statusshtmlgtSPWF01Sx11 Status Pageltagt ltpgt ltbodygt lthtmlgt OK
Device A
A B
Tera Term output
Lab 4 HTTP POST
The HTTP POST performs a post of the given path to the specified host The module can be only used as an HTTP POST client
bull Sintax
bull AT+SHTTPPOST =lthostnamegtltpathampqueryoptsgtltformcontentgt[ltportgt]
bull Configuration parameters
bull lthostnamegt target host DNS resolvable name or IP address
bull ltpathampqueryoptsgt document path
bull ltformcontentgt form to be submitted
bull ltportgt target port
43
Lab 4 HTTP POST
bull The SPWF01S performs an HTTP POST to an HTTP Post Test Server
bull Type
at+shttppost=posttestservercompostphpname=demoampemail=mymailampsubjec
t=subjampbody=message
bull The HTTP Post Test Server replies as
displayed in the Tera Term output if the HTTP
POST successfully
44
HTTP11 200 OK Date Fri 10 Jan 2014 132414 GMT Server Apache Access-Control-Allow-Origin Vary Accept-Encoding Content-Length 139 Connection close Content-Type texthtml Successfully dumped 4 post variables View it at httpwwwposttestservercomdata2014011005241443192628 Post body was 0 chars long OK
Device A
A B
Tera Term output
HTTP POST
SERVER
Lab 4 HTTPREQ bull The SPWF01S can perform a custom HTTP request to a specified
target Refer to the User Manual for more details
bull Type
AT+SHTTPREQ=wwwgooglecom8089
After ltCRgt the module accepts data We will try to open an non-existent web page
GET downloadTagphp HTTP10ltCRgtltLFgt
User-Agent SPWF01SltCRgtltLFgt
Host iwm-testltCRgtltLFgt
Connection closeltCRgtltLFgtltCRgtltLFgt
45
HTTP10 404 Not FoundltCRgtltLFgt Date Sun 31 Jan 2016 142704 GMTltCRgtltLFgt Content-Type texthtmlltCRgtltLFgt Server HTTP server (unknown)ltCRgtltLFgt Content-Length 49ltCRgtltLFgt X-XSS-Protection 1 mode=blockltCRgtltLFgt X-Frame-Options SAMEORIGINltCRgtltLFgt ltCRgtltLFgt lthtmlgtltbodygtlth1gt404 Not Foundlth1gtltbodygtlthtmlgtltLFgtltCRgt ltLFgt ltSUBgtltSUBgtltSUBgtltCRgtltLFgt ltCRgtltLFgt OKltCRgtltLFgt
All
A B
Tera Term output
[AT+SHTTPREQ =lthostnamegt[port]ltlengthgtltCRgtltdatagt]
Lab 4 Push data on serial port
A built-in html page ldquooutput_demohtmlrdquo allows to remotely push
characters on the serial port from a remote browser
46
output_demohtml
Modulersquos IP addressoutput_demohtml
Lab 4 Push data on serial port
bull Find your IP address
bull Type AT+SSTS
bull Associate your computer with the AP
bull Open your web browser
bull In the address bar type
ltmodulersquos IP
Addressgtoutput_demohtml
bull Type
19216801xxoutput_demohtml
47
Lab 4 Push data on serial port
bull Enter the text
bull In order to manage non-ASCII chars the ip_use_decoder variable must be modified (refer to the User Manual for more details)
bull Submit
bull The text will be sent to the serial port of the module
48
Proceed to the next LAB
Lab 5 Web Server use mode
bull Objective
bull List existing files
bull Print a file
bull Create a file
bull Append to an existing file
bull Delete an existing file
bull Prerequisites
bull USB dongle and computer are
set up as described in Lab 2
bull Work alone
50
Lab 5 Web server 51
The Web Server feature allows to create print and delete ASCII files in
the RAM memory of the module
Lab 5 List existing files
The FSL command lists type sizes and name of all the existing files
bull Type AT+SFSL
52
I 461 input_demoshtml I 180 messageshtml I 384 output_demohtml I 614 indexhtml I 157 peersshtml I 193 configshtml I 174 statusshtml I 212 404html I 2022 firstsethtml I 2898 remotehtml OK
All
Files stored in the STM32
FLASH memory
Tera Term output
Lab 5 Print a file
The FSP command prints the content
of an existing file
bull Type AT+SFSP=indexhtml
53
lthtmlgt ltheadgtlttitlegtST SPWF01Slttitlegtltheadgt ltbody bgcolor=white text=blackgt lth1gtST SPWF01S Intelligent WiFi Modulelth1gt ltpgtWelcome to the ST SPWF01S intelligent Wi-Fi moduleltpgt ltpgtThis page was delivered from the SPWF01S internal HTTP serverltpgt ltpgt lta href=configshtmlgtSPWF01S Configuration Settings Pageltagt ltpgt ltpgt lta href=statusshtmlgtSPWF01S Status Pageltagt ltpgt ltpgt lta href=peersshtmlgtSPWF01S Peers Pageltagt ltpgt ltpgtMore information about the SPWF01S and other ST products can be found at STs website lta href=httpwwwSTcomgthttpwwwSTcomltagtltpgt ltbodygt lthtmlgt OK
All Tera Term output
Tip How to use the offset and length parameters AT+SFSP=indexhtml[offset][length] ie Type AT+SFSP=indexhtml520 Length parameter is mandatory if is used the offset
Lab 5 Create a file
The FSC command allows to create a file inside the SPWF for
delivery by the SPWF HTTP server
bull Sintax
bull AT+SFSC =ltfnamegtltmax_lengt[lthttp_headergt]
bull Configuration parameters
bull lt filename gt filename to create
bull lt max_len gt amount of space to allocate for file max = 4096 bytes
bull lthttp_headergt 0=HTML header automatically added 1=HTML header not
added (as by default)
Type AT+SFSC=wifidemohtml1965
54
OK
All
Tera Term output
Lab 5 Configuring the UART
bull Set CR+LF in the Terminal setup
(to properly paste text in the
terminal)
bull Tera Term Setup rarr Terminal rarr
Transmit CR+LF
55
Tip The local echo option must be disabled on Tera Term
Added in FW 35 using the AT+SFSR command user can rename dynamic files stored in the RAM memory Refer to the User Manual for more details
Lab 5 Append to an existing file
The FSA command allows to append blocks of data to an existing file
This command accepts data after the ltcrgt at the end of the command
line
bull Sintax
bull AT+SFSA=ltfilenamegtltdatalengt
bull Configuration parameters
bull lt filename gt filename pre-created
bull lt datalen gt number of characters to append to the file
Type AT+SFSA=wifidemohtml1965
56
Now SPWF accepts data
Tips
Lab 5 Append to an existing file
bull Open wifidemotxt in the following
directory Hands_on
folderHTML_demo_page
bull Check you have set up CR+LF in the
Terminal setup (for more
information refer to the slide 48)
bull Copy the file content into Tera term
(paste with ALT+V or mouse right
button)
57
OK
All
Tera Term output
Lab 5 Append to an existing file
bull Open wifidemohtml
bull Open your Web browser (suggested Google
Chrome for HTML5 test)
bull In address bar type ltSPWF IP addrgtwifidemohtml
Type 19216801xxwifidemohtml
58
Lab 5 Configuring the UART
bull Re-set CR in the Terminal setup
as by default
bull Tera Term Setup rarr Terminal rarr
Transmit CR
59
Tip The local echo option can be re-enabled on Tera Term
Lab 5 List existing files
Lets list the files
bull Type AT+SFSL
60
D 1965 wifidemohtml I 461 input_demoshtml I 180 messageshtml I 384 output_demohtml I 614 indexhtml I 157 peersshtml I 193 configshtml I 174 statusshtml I 212 404html I 2022 firstsethtml I 2898 remotehtml OK
All
File stored in the RAM memory
Tera Term output
Lab 5 Delete an existing file
The FSD command allows to delete an existing file by name Static
files may not be deleted
bull Sintax
bull AT+SFSD=ltfilenamegt
Type AT+SFSD=wifidemohtml
61
OK
All
Tera Term output
Lab 5 Delete an existing file
bull Re-open wifidemohtml
bull Open your Web browser
bull In address bar ltSPWF IP addrgtwifidemohtml
Type 19216801xxwifidemohtml
62
Proceed to the next LAB
Lab 6 Web Server use mode
bull Objective
bull Create an image file
bull Filesystem update over-the-air
bull Filesystem update over UART
bull Prerequisites
bull Work alone
64
Lab 6 Web server 65
The Web Server feature also allows to upload generic files (PDF
HTML DOC JPEG and so on) in the EXTERNAL FLASH memory of
the module It needs to follow the below steps
- create an image file (IMG) using the tool provided in the Hands-on package
(the IMG contains the files to upload)
- Put the image in a generic and accessible Web Server (Apache Web server
will be used in the Hands-on as example)
- Using the proper AT command the IMG will be retrieved over-the-air and the
static files will be created in the external flash memory
Lab 6 Create an image file
bull Open the following folder and
extract all the files
hands_on_wififilesystem_update
bull Put your own files to upload in the
pages folder (max 512 Kbytes)
bull Run genbat
bull Open the pages folder and copy
outfileimg in your external Web
Server (Apache)
66
3
1
2
Lab 6 Create an image file
The Apache Web Server will be used in this tutorial
(Apache Web Server is available at this link
httparchiveapacheorgdisthttpdbinarieswin32httpd-2225-win32-x86-openssl-098ymsi)
Note please check that the local firewall is disabled or properly set It can
block the connection from module to Apache
bull Copy outfileimg in the Apache 22
htdocs folder (this is the default
root server directory)
67
4
Lab 6 Filesystem update
The HTTPDFSUPDATE command allows to create static files inside
the SPWF for delivery by the SPWF HTTP server
bull Sintax
bull AT+SHTTPDFSUPDATE=lthostnamegtltpathgt[port]
bull Configuration parameters
bull lthostnamegt external web server DNS resolvable name or IP address
bull ltpathgt document path
bull ltportgt target host port
68
Lab 6 Filesystem update
bull In Tera Term type
AT+SHTTPDFSUPDATE=192168x10xoutfileimg
bull Reset the module
bull Type AT+CFUN=1
69
Image length 357957 (offset 0x00080000 block len 4096) Write len 4096 -gt 0x80000 Write len 4096 -gt 0x81000 Write len 4096 -gt 0x82000 helliphelliphelliphellip helliphelliphelliphelliphelliphellip helliphelliphelliphelliphellip Write len 4096 -gt 0xD6000 Write len 1612 -gt 0xD7000 (final) Wrote 357964 bytes Complete Please reboot (at+cfun=1) OK
All
Tera Term output
The file system will be permanently deleted The new IMG will overwrite the existent files in the file system
Warning
Lab 6 Filesystem update
Lets list the files
bull Type AT+SFSL
70
E 2615 st766gif E 112374 modulepng E 2430 index1html E 419 indexhtml E 239887 MKTWiFipdf I 461 input_demoshtml I 180 messageshtml I 384 output_demohtml I 614 indexhtml I 157 peersshtml I 193 configshtml I 174 statusshtml I 212 404html I 2022 firstsethtml I 2898 remotehtml OK
All
Files stored in
the EXT FLASH memory
Tera Term output
Lab 6 Filesystem update
bull Open index1html page
bull Open your web browser
bull In the address bar ltSPWF IP addrgtindex1html
Type 192168x1xxindex1html
71
Lab 6 Filesystem erase
Erase the external httpd filesystem
bull Type AT+S HTTPDFSERASE
The files stored in the EXT FLASH memory will be erased
Lets list the files
bull Type AT+SFSL
72
I 461 input_demoshtml I 180 messageshtml I 384 output_demohtml I 614 indexhtml I 157 peersshtml I 193 configshtml I 174 statusshtml I 212 404html I 2022 firstsethtml I 2898 remotehtml OK
All
Tera Term output
Lab 6 Filesystem update
The HTTPDFSWRITE command allows to create static files inside
the SPWF via the UART interface The HW flow control MUST be
enabled in order to use the command
bull Sintax
bull AT+SHTTPDFSWRITE =ltdatalengtltCRgtltdatagt
bull Configuration parameters
bull ltdatalengt Amount of bytes to be sent
73
Lab 6 Filesystem update
bull Type AT+S HTTPDFSWRITE=357957
bull In Tera Term File ndash Send File
bull Reset the module
bull Type AT+CFUN=1
74
Image length 357957 (offset 0x00080000 block len 4096) Write len 4096 -gt 0x80000 Write len 4096 -gt 0x81000 Write len 4096 -gt 0x82000 helliphelliphelliphellip helliphelliphelliphelliphelliphellip helliphelliphelliphelliphellip Write len 4096 -gt 0xD6000 Write len 1612 -gt 0xD7000 (final) Wrote 357964 bytes Complete Please reboot (at+cfun=1) OK
All
Tera Term output
The file system will be permanently deleted The new IMG will overwrite the existent files in the file system
Warning
Proceed to the next LAB
Lab 7 Socket interface
bull Objective
bull Open TCPUDP connection
bull Write data to socket
bull Read data from socket
bull Close socket
bull Prerequisites
bull Work alone
76
TCPUDP socket
Socket
Client
Socket
Server
Lab 7 TCPUDPUART socket interface 77
The Socket interface allows communication via TCP UDP and UART
The SPWF is both a client and a server socket In this LAB will be
detailed the socket client feature
Ho
st
En
d P
rod
uct
Open TCPUDP connection
Write data to socket
Read data from socket
Close socket
Lab 7 Open TCPUDP connection
The SOCKON command allows to open a TCPUDP connection
to a specified host (up to 8 socket connections at same time)
bull Sintax
bull AT+SSOCKON=lthostnamegtltportgtltprotocolgtind
bull Configuration parameters
bull lthostnamegt target host DNS resolvable name or IP address
bull ltportgt TCPUDP socket port
bull ltprotocolgt t for TCP socket u for UDP socket
bull ind indicate when data has arrived (optional) Up to 4 (x730 bytes)
consecutive ldquoPending datardquo message (without any AT+SSOCKR) are
guaranteed It is suggested to empty the buffer using the AT+SSOCKR
command and to avoid exceeding 4 indications
78
Lab 7 Open TCPUDP connection
bull Open the TCP socket server (disable the firewall to properly
run it)
bull Folder hands_on_wifitcp socket serverserverexe
bull The TCP server listens for incoming connections on the port
32000 It sends back all data received
79
Optional - Lab 7 Open TCPUDP connection
bull Using an Android platform the socket server can be opened
using a specific APP (Socket Protocol available on Play Store)
bull The TCP socket server can be configured to listen for
incoming connections on the port 32000
bull Type 32000 on laquoPort Listen toraquo box
bull Click on Listen
80
Lab 7 Open TCPUDP connection
bull Type AT+SSOCKON=192168010x32000tind
bull The client and the server use the socket identifier (ID)
displayed
81
ID 00 OK
All
Tera Term output
Lab 7 Write data to socket
The SOCKW command allows to write data to the specified ID
socket
This command accepts data after the ltcrgt at the end of the
command line
bull Sintax
bull AT+SSOCKW=ltIDgtltlengt
bull Configuration parameters
bull ltIDgt socket identifier
bull ltlengt data length to send
82
Lab 7 Write data to socket
bull Write data
bull Type AT+SSOCKW=0013
bull Type hello worldltCRgt
bull SPWF shows that there are ltpending datagt and their amount
83
+WIND55Pending Data013
All
Tera Term output
ID
Pending
bytes
Note the module is waiting 13 bytes to be written to the socket As soon as 13 bytes (or characters) are sent from the terminal the module is going to write them to the socket and will be ready to receive new commands
Lab 7 Read data from socket
The SOCKR command allows to read data from socket
bull Sintax
bull AT+SSOCKR=ltIDgtltlengt
bull Configuration parameters
bull ltIDgt socket identifier
bull ltlengt data length to read
84
Lab 7 Read data from socket
bull Read data
bull Type AT+SSOCKR=0013
85
hello world OK
All
Tera Term output
Lab 7 Close socket
The SOCKC command allows to close socket
bull Sintax
bull AT+SSOCKC=ltIDgt
bull Configuration parameters
bull ltIDgt socket identifier
86
Tera Term output
Lab 7 Close socket
bull Close socket
bull Type AT+SSOCKC=00
87
OK
All
Proceed to the next LAB
Lab 8 MiniAP mode for the first set
bull Objective
bull Create a direct connection between
the module and an end device
bull First set of the module in order to
enable the connection between the
module and a generic AP
bull Prerequisites
bull Work alone
89
Tera Term output
Lab 8 Configuring the module in MiniAP mode
The Mini AP mode is available starting from the following FW release
SPWF01S-131115-de4568d-RELEASE
In order to set the module in Mini AP mode the following parameters
are needed
bull Set the SSID
bull Type AT+SSSIDTXT=SPWF_AP
bull Set the network privacy mode (0=OPEN or 1=WEP are supported)
bull Type AT+SSCFG=wifi_priv_mode0
bull Set the network mode (1 = STA 2 = IBSS 3 = MiniAP)
bull Type AT+SSCFG=wifi_mode3
90
OK
All
Lab 8 Configuring the module in MiniAP mode
bull Save the settings on the flash memory and reset the module
bull Type ATampW
bull Type AT+CFUN=1
91
+WIND0Console active +WIND32WiFi Hardware Started +WIND26WiFi Started AP with network SPWF_AP +WIND24WiFi Up 172181511
All
Tera Term output
SPWF_AP
Lab 8 Configuring the module in MiniAP mode (WEP Key)
Configure the module using the WEP key (2 possible combinations
available)
Sample table
92
AP configuration AT command to be used
Security Mode WEP
WEP Key Length 64 bit
(10 hex digits)
Authentication Open
Wep Key 1 1234567890
ie
at+sssidtxt=SPWF_AP
AT+SSCFG=wifi_wep_keys[0]1234567890
AT+SSCFG=wifi_wep_key_lens05
AT+SSCFG=wifi_auth_type0
AT+SSCFG=wifi_priv_mode1
AT+SSCFG=wifi_mode3
atampw
at+cfun=1
AP configuration AT command to be used
Security Mode WEP
WEP Key Length
128 bit (26 hex digits)
Authentication Open
Wep Key 1
123456789012345678
90123456
ie
at+sssidtxt=SPWF_AP
AT+SSCFG=wifi_wep_keys[0]12345678
901234567890123456
AT+SSCFG=wifi_wep_key_lens0D
AT+SSCFG=wifi_auth_type0
AT+SSCFG=wifi_priv_mode1
AT+SSCFG=wifi_mode3
atampw
at+cfun=1
Lab 8 Configuring the module in MiniAP mode (WEP Key)
Notes
bull ldquowifi_wep_key_lensrdquo variable values 05 and 0D
bull Itrsquos possible to enter any text string as WEP key It have to be converted into a
hexadecimal key using the ASCII values of the characters A maximum of 5 text
characters can be entered for 64 bit keys and a maximum of 13 characters for 128
bit keys
In this case it needs to manually convert your ASCII password to
HEX and complete the wifi_wep_keys[0] variable with the HEX
value
bull ie WEP key test1
ASCII to HEX 7465737431
So the AT command is AT+SSCFG=wifi_wep_keys[0]7465737431
93
Lab 8 Customizing the MiniAP address (optional)
Starting from FW 33 the module allows user to customize the IP address of the MiniAP
bull Set the SSID
bull Type AT+SSSIDTXT=SPWF_AP
bull Set the network privacy mode (0=OPEN or 1=WEP are supported)
bull Type AT+SSCFG=wifi_priv_mode0
bull Set the network mode (1 = STA 2 = IBSS 3 = MiniAP)
bull Type AT+SSCFG=wifi_mode3
bull Set the use_dhcp mode (0 = DHCP server off 1 = DHCP server on 2 = DHCP server on and customizable)
bull Type AT+SSCFG=ip_use_dhcp2
bull Set the MiniAP address
bull Type AT+SSCFG=ip_ipaddr19216801
bull Save the settings on the flash memory and reset the module
bull Type ATampW
bull Type AT+CFUN=1
94
Tera Term output
+WIND0Console active +WIND32WiFi Hardware Started +WIND26WiFi Started AP with network SPWF_AP +WIND24WiFi Up 19216801
All
Tip the MiniAP will assign sequential addresses to the client ie 1deg client 19216802 2deg client 19216803
Lab 8 Mini AP mode
bull Associate your end device to the
SPWF_AP network
bull Find the SPWF_AP network and connect
the end device to the module
95
SPWF_AP +WIND2890187C960D0B Associated +WIND29DHCP reply for 17218151290187C960D0B to 172181512 +WIND29DHCP reply for 17218151290187C960D0B to 172181512
All
Tera Term output
Lab 8 Mini AP mode
bull Open your web browser
bull In the address bar type captiveportalnet
96
SPWF_AP
Tip The Mini AP domain can be set using the variable ip_apdomainname The default value is ldquocaptiveportalnetrdquo
The Mini AP default homepage can be set using the variable ip_apredirect The default value is ldquofirstsethtmlrdquo
Tip If the AP domain name is not quickly opened itrsquos suggested to turn off an eventual proxy server (check the connection settings or browser preferences)
Lab 8 First Set Page
bull The first set page allows to configure the module in IDLE mode
STATION mode IBSS mode and MINI AP mode
97
Used for STA IBSS MINI AP
Mandatory for IDLE STA IBSS MINI AP
Used for STA IBSS (WEP) MINI AP (WEP)
Used for STA (if DHCP = OFF) IBSS
(mandatory) MINI AP (if DHCP = OFF)
Used for STA IBSS (mandatory DHCP = OFF) MINI AP
Used for STA (WEP key) IBSS (WEP) MINI AP (WEP)
Used for STA IBSS MINI AP
Lab 8 Mini AP mode
bull Set all the parameters required in order to enable the connection
between the module and a generic AP
ie AP configured in WPAWPA2 mode
bull MiniAP PassKey anonymous (by default)
bull SSID of the access point
bull Password of the access point
bull Authentication type of the access point
bull Use mode of the module
98
Tip The Mini AP PassKey can be set using the variable ldquouser_descrdquo The default value is ldquoanonymousrdquo
Note In order to manage non-ASCII chars the ip_use_decoder variable must be modified according as below at+sscfg=ip_use_decoder0 no decoding [default] at+sscfg=ip_use_decoder1 RAW decoding (the USER and PSK fields must be completed in HEX) at+sscfg=ip_use_decoder2 UTF-8 decoding at+sscfg=ip_use_decoder6 HTML entities decoding
Lab 8 Mini AP mode
bull Click on GO button and then send the
parameters confirming with OK
99
SPWF_AP
AP
SSID ciscosb2
Lab 8 Mini AP mode
bull The module will receive the parameters and will automatically
connect to the access point required
100
+WIND57Received SSID is ciscosb2 +WIND57Received PWD is +WIND57Received Auth mode is 2 +WIND57Received Mode is 1 +WIND2RESET +WIND1Poweron (--SPWF01S) +WIND13ST IWM Copyright (c) 2012-2013 STmicroelectronics +WIND3Watchdog Running +WIND0Console active +WIND46WPA Crunching PSK +WIND32WiFi Hardware Started +WIND21WiFi Scanning +WIND35WiFi Scan Complete (0x0) +WIND19WiFi Join 02621F518F0B +WIND25WiFi Association with ciscosb2 successful +WIND51WPA Handshake Complete +WIND24WiFi Up 1921681106
All
Tera Term output
ciscosb2
AP
Lab 8 Mini AP mode ndash RAW decoding example
101
Note In order to manage non-ASCII chars the ip_use_decoder variable must be modified according as below at+sscfg=ip_use_decoder0 no decoding [default] at+sscfg=ip_use_decoder1 RAW decoding (the USER and PSK fields must be completed in HEX) at+sscfg=ip_use_decoder2 UTF-8 decoding at+sscfg=ip_use_decoder6 HTML entities decoding
7177657261736466
AP SSIS
AP PSK
Proceed to the next LAB
Lab 9 Socket interface - MiniAP mode
bull Objective
bull Create a direct connection between
the module and an end device
bull Socket interface used in MiniAP
mode
bull Prerequisites
bull Work alone
103
Tera Term output
Lab 9 Configuring the module in MiniAP mode
The Mini AP mode (available starting from the SPWF01S-131115-de4568d-RELEASE) also allows to use the socket interface The procedure is the same as in Lab 7
In order to set the module in Mini AP mode the following parameters are needed
bull Set the SSID
bull Type AT+SSSIDTXT=SPWF_AP
bull Set the network privacy mode
bull Type AT+SSCFG=wifi_priv_mode0
bull Set the network mode (1 = STA 2 = IBSS 3 = MiniAP)
bull Type AT+SSCFG=wifi_mode3
104
OK
All
Lab 9 Configuring the module in MiniAP mode
bull Save the settings on the flash memory and reset the module
bull Type ATampW
bull Type AT+CFUN=1
105
+WIND0Console active +WIND32WiFi Hardware Started +WIND26WiFi Started AP with network SPWF_AP +WIND24WiFi Up 172181511
All
Tera Term output
SPWF_AP
Lab 9 Mini AP mode
bull Connect your PC to the SPWF_AP
network
bull Find the SPWF_AP network and connect
the end device to the module
106
SPWF_AP +WIND2890187C960D0B Associated +WIND29DHCP reply for 17218151290187C960D0B to 172181512 +WIND29DHCP reply for 17218151290187C960D0B to 172181512
All
Tera Term output
Lab 9 Open TCPUDP connection
As described in the Lab 7 the SOCKON command allows to
open a TCPUDP connection to a specified host
bull Sintax
bull AT+SSOCKON=lthostnamegtltportgtltprotocolgtind
bull Configuration parameters
bull lthostnamegt target host DNS resolvable name or IP address
bull ltportgt TCPUDP socket port
bull ltprotocolgt t for TCP socket u for UDP socket
bull ind indicate when data has arrived (optional) Up to 4 consecutive ldquoPending
datardquo message (without any AT+SSOCKR) are guaranteed It is
suggested to empty the buffer using the AT+SSOCKR command and
to avoid exceeding 4 indications
107
Lab 9 Open TCP connection
bull Open the TCP socket server (disable the firewall to properly
run it)
bull Folder hands_on_wifitcp socket serverserverexe
bull The TCP server listens for incoming connections on the port
32000 It sends back all data received
108
Lab 9 Open TCP connection
bull Type AT+SSOCKON=17218151232000tind
bull The client and the server use the socket identifier (ID)
displayed
109
ID 00 OK
All
Tera Term output
Lab 9 Write data to socket
The SOCKW command allows to write data to the specified ID
socket
This command accepts data after the ltcrgt at the end of the
command line
bull Sintax
bull AT+SSOCKW=ltIDgtltlengt
bull Configuration parameters
bull ltIDgt socket identifier
bull ltlengt data length to send
110
Lab 9 Write data to socket
bull Write data
bull Type AT+SSOCKW=0013
bull Type hello worldltCRgt
bull SPWF shows that there are ltpending datagt and their amount
111
+WIND55Pending Data013
All
Tera Term output
ID
Pending
bytes
Note the module is waiting 13 bytes to be written to the socket As soon as 13 bytes (or characters) are sent from the terminal the module is going to write them to the socket and will be ready to receive new commands
Lab 9 Read data from socket
The SOCKR command allows to read data from socket
bull Sintax
bull AT+SSOCKR=ltIDgtltlengt
bull Configuration parameters
bull ltIDgt socket identifier
bull ltlengt data length to read
112
Lab 9 Read data from socket
bull Read data
bull Type AT+SSOCKR=0013
113
hello world OK
All
Tera Term output
Lab 9 Close socket
The SOCKC command allows to close socket
bull Sintax
bull AT+SSOCKC=ltIDgt
bull Configuration parameters
bull ltIDgt socket identifier
114
Tera Term output
Lab 9 Close socket
bull Close socket
bull Type AT+SSOCKC=00
115
OK
All
Proceed to the next LAB
Lab 10 Web server - MiniAP mode
bull Objective
bull Create a direct connection between
the module and an end device
bull Web server used in MiniAP mode
bull Prerequisites
bull Work alone
117
Tera Term output
Lab 10 Configuring the module in MiniAP mode
The Mini AP mode (available starting from the SPWF01S-131115-de4568d-RELEASE) also allows to use the module file system (both RAM and IntExt FLASH)
In order to set the module in Mini AP mode the following parameters are needed
bull Set the SSID
bull Type AT+SSSIDTXT=SPWF_AP
bull Set the network privacy mode
bull Type AT+SSCFG=wifi_priv_mode0
bull Set the network mode (1 = STA 2 = IBSS 3 = MiniAP)
bull Type AT+SSCFG=wifi_mode3
118
OK
All
Lab 10 Configuring the module in MiniAP mode
bull Save the settings on the flash memory and reset the module
bull Type ATampW
bull Type AT+CFUN=1
119
+WIND0Console active +WIND32WiFi Hardware Started +WIND26WiFi Started AP with network SPWF_AP +WIND24WiFi Up 172181511
All
Tera Term output
SPWF_AP
Lab 10 Mini AP mode
bull Connect your PC to the SPWF_AP
network
bull Find the SPWF_AP network and connect
the end device to the module
120
SPWF_AP +WIND2890187C960D0B Associated +WIND29DHCP reply for 17218151290187C960D0B to 172181512 +WIND29DHCP reply for 17218151290187C960D0B to 172181512
All
Tera Term output
Lab 10 Access to Web server - Mini AP mode
bull Open your web browser
bull In the address bar type
captiveportalnetindexhtml
bull The SPWF01S homepage will be
displayed
121
SPWF_AP Tip The Mini AP domain can be set using the variable ip_apdomainname The default value is ldquocaptiveportalnetrdquo
Lab 10 Access to Web server - Mini AP mode
bull Open the SPWF01S Device Status
bull click on the highlighted link
bull The SPWF01S Device Status will be
displayed
122
SPWF_AP Tip The Mini AP domain can be set using the variable ip_apdomainname The default value is ldquocaptiveportalnetrdquo
The Mini AP default homepage can be set using the variable ip_apredirect The default value is ldquofirstsethtmlrdquo
Proceed to the next LAB
Lab 11 Remotely control - GPIOs
bull Objective
bull write remotely a GPIO
bull configure remotely a GPIO
bull read remotely a GPIO
bull Prerequisites
bull module connected to the AP or
module configured in MiniAP mode
124
Lab 11 Remotely control - GPIO
This feature allows to remotely write configure and read a GPIO
The module should be connected to the AP (as shown in Lab 3) or
should be configured in Mini AP mode (as shown in Lab 8)
The external client have to open the remotehtml page stored in the
module
125
ENG-WPA AP
SPWF_AP
miniAP
Tera Term output
Lab 11 Joining a network
In order to be connected to an available Wifi network the AP parameters setting is needed
bull Set the SSID
bull Type AT+SSSIDTXT=ENG-WPA
bull Set the password
bull Type AT+SSCFG=wifi_wpa_psk_texthelloworld
bull Set the network privacy mode (0=none 1=WEP 2=WPA-Personal (TKIPAES) or WPA2-Personal (TKIPAES))
bull Type AT+SSCFG=wifi_priv_mode2
bull NB wifi_auth_type must be set to 0 AT+SSCFG=wifi_auth_type0
bull Set the network mode (1 = STA 2 = IBSS 3 = MiniAP)
bull Type AT+SSCFG=wifi_mode1
126
OK
All
Lab 11 Joining a network
bull Save the settings on the flash memory and reset the module
bull Type ATampW
bull Type AT+CFUN=1
127
+WIND0Console active +WIND46WPA Crunching PSK +WIND32WiFi Hardware Started +WIND21WiFi Scanning +WIND35WiFi Scan Complete (0x0) +WIND19WiFi Join 14D64D243600 +WIND25WiFi Association with ENG-WPA successful +WIND51WPA Handshake Complete +WIND24WiFi Up 19216801xx
All
ENG-WPA AP
Tera Term output
Lab 11 Remotely control in MiniAP mode - GPIO
bull Open your web browser
bull In the address bar type
192168x1xxremotehtml
128
ENG-WPA
AP
Lab 11 Remotely control in MiniAP mode - GPIO
bull Try to write the GPIO14 connected to the LED3 (check if the
LED3 is mounted on your EVAL BOARD otherwise can be used
the GPIO13)
bull Click on the laquoGOraquo button
and LED3 will switch on
129
ENG-WPA
AP
Proceed to the next LAB
Lab 12 Input demo
bull Objective
bull Send a message from the server (wifi
module) to an external client connected
to the same network
bull Prerequisites
bull module connected to the AP or module
configured in MiniAP mode
131
Lab 12 Input demo
The module provides some DEMOs to show the interaction between
the module and an external client connected to the same network
The module should be connected to the AP (as shown in Lab 3) or
should be configured in Mini AP mode (as shown in Lab 8)
In order to run this demo the client have to open the
input_demoshtml page stored in the module
132
ENG-WPA AP
SPWF_AP
miniAP
Tera Term output
Lab 12 Joining a network
In order to be connected to an available Wifi network the AP parameters setting is needed
bull Set the SSID
bull Type AT+SSSIDTXT=ENG-WPA
bull Set the password
bull Type AT+SSCFG=wifi_wpa_psk_texthelloworld
bull Set the network privacy mode (0=none 1=WEP 2=WPA-Personal (TKIPAES) or WPA2-Personal (TKIPAES))
bull Type AT+SSCFG=wifi_priv_mode2
bull NB wifi_auth_type must be set to 0 AT+SSCFG=wifi_auth_type0
bull Set the network mode (1 = STA 2 = IBSS 3 = MiniAP)
bull Type AT+SSCFG=wifi_mode1
133
OK
All
Lab 12 Joining a network
bull Save the settings on the flash memory and reset the module
bull Type ATampW
bull Type AT+CFUN=1
134
+WIND0Console active +WIND46WPA Crunching PSK +WIND32WiFi Hardware Started +WIND21WiFi Scanning +WIND35WiFi Scan Complete (0x0) +WIND19WiFi Join 14D64D243600 +WIND25WiFi Association with ENG-WPA successful +WIND51WPA Handshake Complete +WIND24WiFi Up 19216801xx
All
ENG-WPA AP
Tera Term output
Lab 12 Input demo
bull Open your web browser
bull In the address bar type
192168x1xxinput_demoshtml
bull Insert the message to the client
ie type laquotestraquo (suggested ndash copy
the string and paste it in the
terminal) and then send a carriage
return
135
VERY IMPORTANT
Both client and server are pending (2 sec) after the page
request If no message is sent from the module a timeout
mechanism will be triggered
The server shows the ldquo+WIND56 messagerdquo and it will
wait for a string to be inserted and terminated by [Cr] ldquo+WIND56Insert message to clientdrdquo d is the Nth input SSI into html page (please refer to CGIampSSI Application Notes for details)
Lab 12 Input demo
bull The module receives the HTML
page containing the string inserted
server-side
bull Below this string there are two
buttons to try again the demo or to
return to the homepage
136
Proceed to the next LAB
Lab 13 Socket Server functionality
bull Objective
bull Configure a Server Listening Port
bull Open a TCP connection from a
socket client to the module
bull Data modeCommand Mode usage
bull Prerequisites
bull module connected to the AP or
module configured in MiniAP mode
bull PC to be used as socket client
138
TCP socket
Socket
Server
Socket
Client
Lab 13 Socket Server
This feature allows to enable the socket server mode The module
can be able to listen for an incoming connection on the specified port
The module should be connected to the AP (as shown in Lab 3) or
should be configured in Mini AP mode (as shown in Lab 8)
Please refer to ldquoSocket Server Application Notesrdquo for more details
139
ENG-WPA AP
SPWF_AP
miniAP
Tera Term output
Lab 13 Joining a network
In order to be connected to an available Wifi network the AP parameters setting is needed
bull Set the SSID
bull Type AT+SSSIDTXT=ENG-WPA
bull Set the password
bull Type AT+SSCFG=wifi_wpa_psk_texthelloworld
bull Set the network privacy mode (0=none 1=WEP 2=WPA-Personal (TKIPAES) or WPA2-Personal (TKIPAES))
bull Type AT+SSCFG=wifi_priv_mode2
bull NB wifi_auth_type must be set to 0 AT+SSCFG=wifi_auth_type0
bull Set the network mode (1 = STA 2 = IBSS 3 = MiniAP)
bull Type AT+SSCFG=wifi_mode1
140
OK
All
Lab 13 Joining a network
bull Save the settings on the flash memory and reset the module
bull Type ATampW
bull Type AT+CFUN=1
141
+WIND0Console active +WIND46WPA Crunching PSK +WIND32WiFi Hardware Started +WIND21WiFi Scanning +WIND35WiFi Scan Complete (0x0) +WIND19WiFi Join 14D64D243600 +WIND25WiFi Association with ENG-WPA successful +WIND51WPA Handshake Complete +WIND24WiFi Up 19216801xx
All
ENG-WPA AP
Tera Term output
Lab 13 Socket Server
bull Socket server turn ON the TCP Socket Server (user must
specify the server listening port)
bull Type AT+SSOCKD=32000 (AT+SOCKD=32000u for UDP socket server)
bull Check the status of the socket server
bull Type AT+SSTS=ip_sockd_port
142
ENG-WPA
AP
Tera Term output
OK ip_sockd_port = 32000 OK
All
Tip you can Turn OFF the Socket Server using a server listening port = 0 (type AT+SSOCKD=0)
Lab 13 Socket Server
bull Socket client can be used a simple socket client in order to test the communication
(SocketTest ndash available on httpsourceforgenetprojectssockettest)
143
ENG-WPA
AP
Lab 13 Socket Server
bull Socket client
bull Insert the modulersquos IP Address and the port
bull Click on Connect button
144
Tera Term output
+WIND61Incoming Socket Client1921681102 +WIND60Now in Data Mode
All
Lab 13 Socket Server
bull The module (socket server) enters in data mode and a bidirectional channel is
created to allow exchanging data with the socket client
bull Try to send and receive data from the module
145
Tera Term output
test_1
All
Lab 13 Socket Server ndash escape sequence
bull From Data Mode to Command Mode
bull Configuration variable used escape_seq (default is ldquoat+srdquo case sensitive
suggested to be sent by the local host in a single complete packet with no CR or
LF in the sequence)
bull Type at+s
bull Now itrsquos possible to send AT commands while the socket connection
is still active
146
Tera Term output
+WIND59Back to Command Mode
All
Tip During the Command Mode you cannot send data to client but can receive data from it Every data chunk generates an URC (+WIND64Sockd Pending Data) with limit to 4 (x730 bytes) This is the max number of pending messages From the 5th chunk on messages are lost
Lab 13 Socket Server ndash return to data mode
bull From Command Mode to Data Mode
bull While in Command Mode
bull Type AT+S (this is an AT command AT+S must be followed by ltCRgt)
bull The module returns in data mode
147
ENG-WPA
AP
Tera Term output
+WIND60Now in Data Mode
All
Lab 13 Socket Server ndash turn off
bull Turn OFF the Socket Server
bull Type at+s (to enter in command mode)
bull Type AT+SSOCKD=0
148
ENG-WPA
AP
Tera Term output
OK +WIND62Socket Client Gone1921681102
All
Proceed to the next LAB
Lab 14 Low power modes
bull Objective
bull Practice with Radio Power Save
bull Sleep Mode
bull Standby Mode
bull Prerequisites
bull module connected to the AP
150
Lab 14 Low power modes
This feature allows to enable the low power states
The module supports the ldquoRadio Power Saverdquo mode the ldquoSleeprdquo
mode and the ldquoStandbyrdquo mode
The module should be connected to the AP (as shown in Lab 3) in
order to use the ldquoRadio Power Saverdquo mode
Please refer to ldquoSPWF01S Power Management Application Notesrdquo for
more details
151
ENG-WPA AP
Low Power
Tera Term output
Lab 14 Joining a network
In order to be connected to an available Wifi network the AP parameters setting is needed
bull Set the SSID
bull Type AT+SSSIDTXT=ENG-WPA
bull Set the password
bull Type AT+SSCFG=wifi_wpa_psk_texthelloworld
bull Set the network privacy mode (0=none 1=WEP 2=WPA-Personal (TKIPAES) or WPA2-Personal (TKIPAES))
bull Type AT+SSCFG=wifi_priv_mode2
bull NB wifi_auth_type must be set to 0 AT+SSCFG=wifi_auth_type0
bull Set the network mode (1 = STA 2 = IBSS 3 = MiniAP)
bull Type AT+SSCFG=wifi_mode1
152
OK
All
Lab 14 Joining a network
bull Save the settings on the flash memory and reset the module
bull Type ATampW
bull Type AT+CFUN=1
153
+WIND0Console active +WIND46WPA Crunching PSK +WIND32WiFi Hardware Started +WIND21WiFi Scanning +WIND35WiFi Scan Complete (0x0) +WIND19WiFi Join 14D64D243600 +WIND25WiFi Association with ENG-WPA successful +WIND51WPA Handshake Complete +WIND24WiFi Up 19216801xx
All
Tera Term output
ENG-WPA AP
Low Power
Lab 14 Low power modes ndash Power Save 154
Module
Power State STM32 WLAN
Standby Standby Standby
Sleep Stop PS
Power Save Run PS or Fast-PS
Active Rx Run Rx Idle Rx Active
Active Tx Run Tx Active
Lab 14 Low power modes ndash Power Save
bull By default the module starts in ACTIVE mode
bull Enable the Power Save Mode
bull Type at+sscfg=wifi_powersave1 (ldquowifi_powersave2rdquo enables the Fast-PS mode)
bull Enable the doze operational mode
bull Type at+sscfg=wifi_operational_mode11 (ldquowifi_operational_mode12rdquo enables the quiescent mode)
bull Choose the wake up mode
1 Wake up every n beacon (specified in the wifi_beacon_wakeup variable)
bull Type at+sscfg=wifi_listen_interval0
bull Type at+sscfg=wifi_beacon_wakeup1
OR
2 Wake up every n beacon adaptively (specified in the wifi_beacon_wakeup variable)
bull Type at+sscfg=wifi_listen_interval1
bull Type at+sscfg=wifi_beacon_wakeup1
155
Tip The Wifi Power Save (wifi_powersave1) can also be quickly enabled using the command AT+CFUN=2
Lab 14 Low power modes ndash Power Save
bull Save the settings on the flash memory and reset the module
bull Type ATampW
bull Type AT+CFUN=1
bull The WIND66 message related to Low Power Mode will be
displayed
156
+WIND1Poweron (--SPWF01S) +WIND13ST SPWF01S IWM Copyright (c) 2012-2014 STMicroelectronics Inc All rights Reserved +WIND3Watchdog Running +WIND0Console active +WIND32WiFi Hardware Started +WIND21WiFi Scanning +WIND35WiFi Scan Complete (0x0) +WIND19WiFi Join 02621F518F0B +WIND25WiFi Association with IoT successful +WIND51WPA Handshake Complete +WIND24WiFi Up 1921681104 +WIND66Low Power mode1
All
Tera Term output
ENG-WPA AP
Low Power
Lab 14 Low power modes ndash Sleep Mode 157
Module
Power State STM32 WLAN
Standby Standby Standby
Sleep Stop PS or Fast-PS
Power Save Run PS or Fast-PS
Active Rx Run Rx Idle Rx Active
Active Tx Run Tx Active
Lab 14 Low power modes ndash Sleep Mode
bull In the Sleep Mode the core STM32 is stopped
bull Enable the Sleep Mode
bull Type at+sscfg=sleep_enabled1
bull Enable the Power Save Mode
bull Type at+sscfg=wifi_powersave1 (ldquowifi_powersave2rdquo enables the Fast-PS mode)
bull Enable the doze operational mode
bull Type at+sscfg=wifi_operational_mode11 (ldquowifi_operational_mode12rdquo enables the quiescent mode)
bull Choose the wake up mode
1 Wake up every n beacon (specified in the wifi_beacon_wakeup variable)
bull Type at+sscfg=wifi_listen_interval0
bull Type at+sscfg=wifi_beacon_wakeup1
OR
2 Wake up every n beacon adaptively (specified in the wifi_beacon_wakeup variable)
bull Type at+sscfg=wifi_listen_interval1
bull Type at+sscfg=wifi_beacon_wakeup1
158
Tip The Wifi Sleep Mode (and wifi_powersave1) can also be quickly enabled using the command AT+CFUN=3
Lab 14 Low power modes ndash Sleep Mode
bull Save the settings on the flash memory and reset the module
bull Type ATampW
bull Type AT+CFUN=1
bull The WIND69 message related to Sleep Mode will be displayed
159
+WIND1Poweron (--SPWF01S) +WIND13ST SPWF01S IWM Copyright (c) 2012-2014 STMicroelectronics Inc All rights Reserved +WIND3Watchdog Running +WIND0Console active +WIND32WiFi Hardware Started +WIND21WiFi Scanning +WIND35WiFi Scan Complete (0x0) +WIND19WiFi Join 02621F518F0B +WIND25WiFi Association with IoT successful +WIND51WPA Handshake Complete +WIND24WiFi Up 1921681104 +WIND66Low Power mode1 +WIND69Going into DeepSleep
All
Tera Term output
ENG-WPA AP
Low Power
Lab 14 Low power modes ndash Sleep Mode
bull Wake STM32 up using the GPIO6
bull Put the GPIO6 to 25V (jumper on JP2 as in
the picture)
bull The WIND messages will be displayed
160
+WIND70Resuming from DeepSleep +WIND53Wakeup (GPIO6 High)
All
Tera Term output
Lab 14 Low power modes ndash Sleep Mode
bull Put STM32 in sleep mode using the
GPIO6
bull Go back the GPIO6 floating (remove jumper
- as default)
bull The WIND69 message will be
displayed
161
+WIND69Going into DeepSleep
All
Tera Term output
Lab 14 Low power modes ndash Sleep Mode
bull Wake STM32 up using the remote
page
bull Connect a device to the same modulersquos
network
bull Open the following link
http[module_IP_address]remotehtml
bull Select ldquoWakerdquo and click on ldquoGordquo button
to wake up the module
bull The WIND message will be displayed
162
+WIND70Resuming from DeepSleep
All
Tera Term output
Lab 14 Low power modes ndash Sleep Mode
bull Put STM32 in sleep mode using the
remote page
bull Connect a device to the same modulersquos
network
bull Open the following link
http[module_IP_address]remotehtml
bull Select ldquoSleeprdquo and click on ldquoGordquo button
to put the module in sleep mode
bull The WIND message will be displayed
163
+WIND69Going into DeepSleep
All
Tera Term output
Lab 14 Low power modes ndash Standby Mode 164
Module
Power State STM32 WLAN
Standby Standby Standby
Sleep Stop PS or Fast-PS
Power Save Run PS or Fast-PS
Active Rx Run Rx Idle Rx Active
Active Tx Run Tx Active
Lab 14 Low power modes ndash Standby Mode
bull During the Standby Mode both the STM32 and the Radio will be
put in standby mode The standby mode allows to achieve the
lowest power consumption
bull Enable the Standby Mode
bull Type at+sscfg=sleep_enabled0 (Sleep mode must be disabled)
bull Type at+sscfg=standby_enabled1
bull Please be sure that GPIO6 isnrsquot forced high
bull Set the standby time to wake up via RTC alarm
bull Type at+sscfg=standby_time15
165
Tip The Wifi Standby Mode can also be quickly enabled using the command AT+CFUN=4
Lab 14 Low power modes ndash Standby Mode
bull Save the settings on the flash
memory and reset the module
bull Type ATampW
bull Type AT+CFUN=1
bull After 15 seconds the module will be
rebooted and will return in the
ACTIVE state
166
+WIND0Console active +WIND32WiFi Hardware Started +WIND38WiFi Powered Down +WIND67Going into Standby15 +WIND68Resuming from Standby +WIND1Poweron (--SPWF01S) +WIND13ST SPWF01S IWM Copyright (c) 2012-2014 STMicroelectronics Inc All rights Reserved +WIND3Watchdog Running +WIND0Console active +WIND32WiFi Hardware Started +WIND21WiFi Scanning +WIND35WiFi Scan Complete (0x0) +WIND19WiFi Join02621F518F0B +WIND25WiFi Association with IoT successful +WIND51WPA Handshake Complete +WIND24WiFi Up1921681113
All
Tera Term output
Lab 14 Low power modes ndash Standby Mode
bull Wake up the module using the GPIO6
bull Enable the Standby Mode
bull Type at+sscfg=sleep_enabled0 (make sure that
Sleep mode is disabled)
bull Type at+sscfg=standby_enabled1
bull Type ATampW
bull Type AT+CFUN=1
bull Put the GPIO6 to 25V to wake up the module
bull The WIND message will be displayed and
the module will return in ACTIVE state
167
+WIND68Resuming from Standby +WIND1Poweron (--SPWF01S) helliphelliphellip
All
Tera Term output
Proceed to the next LAB
Lab 15 STAMINI AP switcher
bull Objective
bull HW ldquoSTA to MiniAPrdquo switcher
bull Prerequisites
bull Work alone
169
Lab 15 STAMINI AP switcher
This feature allows to force the module in Mini AP mode starting from
a preexistent state
ldquoRecovery Moderdquo this functionality could be useful to lead the module
in a known state and to reconfigure it (ie using the firstset page)
The GPIO7 will be used to drive this feature
170
Lab 15 STAMINI AP switcher
bull Press and hold the SW2 button on the
EVAL and then perform a reset (HW reset
via SW1 button or SW reset via AT
command)
bull Release the SW2 button
bull The MiniAP mode will be started and the
module is discoverable with the following
SSID
bull iwm-XX-YY-ZZ where XX-YY-ZZ are the last
six digits of modulersquos MAC ADDRESS
171
+WIND2Reset +WIND1Poweron (--SPWF01S) +WIND13ST SPWF01S IWM Copyright (c) 2012-2014 STMicroelectronics Inc All rights Reserved +WIND39HW in miniAP mode (GPIO7 Low) +WIND0Console active +WIND3Watchdog Running +WIND32WiFi Hardware Started +WIND26WiFi Started AP +WIND24WiFi Up172312551
All
Tera Term output
Tip To exit from ldquominiAP mode via GPIO7rdquo perform a modulersquos reset
Proceed to the next LAB
Lab 16 IBSS connection
bull Objective
bull Create an IBSS network
bull Prerequisites
bull Work alone
173
Lab 16 Create an IBSS network
In an IBSS network the SSID is chosen by the client device that
starts the network
Module settings to create an IBSS network
bull Set the IBSS SSID
bull Type AT+SSSIDTXT=ADHOC
bull Set the network privacy mode (0=OPEN or 1=WEP are supported)
bull Type AT+SSCFG=wifi_priv_mode0
bull Set the network mode (2 = IBSS)
bull Type AT+SSCFG=wifi_mode2
174
OK
All
Tera Term output
Lab 16 Create an IBSS network
bull Set IP address IP default gateway IP DNS and IP netmask
bull Type AT+SSCFG=ip_ipaddr192168y1xx
bull Type AT+SSCFG=ip_gw192168y1
bull Type AT+SSCFG=ip_dns192168y1
bull Type AT+SSCFG=ip_netmask2552552550
bull Turn off the DHCP
bull Type AT+SSCFG=ip_use_dhcp0
175
OK
All
Tera Term output
Lab 16 Create an IBSS network
bull Save the settings on the flash memory and reset the module
bull Type ATampW
bull Type AT+CFUN=1
176
+WIND0Console active +WIND32WiFi Hardware Started +WIND21WiFi Scanning +WIND35WiFi Scan Complete (0x0) +WIND19WiFi Join EE33CE002418 +WIND25WiFi Association with ADHOC successful +WIND51WiFi Handshake Complete +WIND24WiFi Up 19216813
All
AD-HOC
Tera Term output
Lab 16 Create an IBSS network
bull Associate the iOS device with the
ADHOC network (iOS gt 8 could not
support the IBSS mode)
177
AD-HOC
Tip manual configuration of static TCPIPv4 parameters is suggested using a PC Ie PC TCPIPv4 properties
Lab 16 Create an IBSS network
bull Find your IP address
bull Type AT+SSTS
bull Open Safari web browser
bull In the address bar type
ltSPWF IP addressgtindexhtml
bull Type 192168y1xxindexhtml
178
AD-HOC
THANK YOU

Lab 2a FOTA update
bull Objective
bull Upgrade the FW using the OTA file
bull Prerequisites
bull OTA file (provided in the SPWF01S FW
package)
bull External web server (ie Apache web
server running on PC)
26
Lab 2a FOTA update 27
The SPWF01Sx11 module (with external flash on board) allows
performing a Firmware Over-the-air update via a single HTTP GET
The SPWF01S will validate the firmware image it downloads load it
into a staging area then prompt the user to issue a reset command in
order to complete the update
Lab 2a FOTA update
The Apache Web Server will be used in this LAB
(Apache Web Server is available at this link
httparchiveapacheorgdisthttpdbinarieswin32httpd-2225-win32-x86-openssl-098ymsi)
Note please check that the local firewall is disabled or properly set It can
block the connection from module to Apache
bull Copy the OTA file (ie SPWF01S-xxxxxx-yyyyyyy-
RELEASE-mainota) in the Apache 22 htdocs folder
28
Lab 2a FOTA update
The FWUPDATE command allows to perform a Firmware Over-the-
air update via a single HTTP GET
bull Sintax
bull AT+SFWUPDATE=lthostnamegtltpathgtltportgt
bull Configuration parameters
bull lthostnamegt Target host DNS resolvable name or IP address
bull ltpathampqueryoptsgt Document path and optional query arguments
bull ltportgt Target host port
29
Lab 2a FOTA update
bull The module and the Apache Web server must be connected to the same network
bull In Tera Term type AT+SFWUPDATE=[Apache IP address][ota_fileota]
ie type AT+SFWUPDATE=192168xyyySPWF01S-150410-c2e37a3-RELEASE-
mainota
bull Reset the module to apply the new FW
bull Type AT+CFUN=1
bull Restore factory default settings (mandatory)
bull Type ATampF
30
Staging FW update for SPWF01SX11 version 1203-120918_01 FW length 276824 0x00002800 (offset 0x00000000 block len 4096) Write len 4096 -gt 0x0 Write len 4096 -gt 0x1000 (note - deleted extra output for clarity) Write len 4096 -gt 0x42000 Write len 2476 -gt 0x43000 (final) Wrote 276904 bytes Complete Update will be applied on next reboot (at+cfun=1)
All Tera Term output
Proceed to the next LAB
Lab 3 Access point connection
bull Objective
bull Scan for available networks
bull Join a network
bull Check the statusstatistics variables
bull Prerequisites
bull USB dongle and computer are set
up as described in Lab 2
bull Work alone
32
Lab 3 Scan for available networks
The SCAN command performs an immediate scan for available
networks Infrastructure (AP) and IBSS (Ad-Hoc) networks are both
reported Network type Channel BSSID SSID Signal strength (RSSI)
and 80211 capabilities are all reported
bull Type AT+SSCAN
bull Scan syntax AT+SSCAN [=lta|pgt[ltr|s|mgt[ltfnamegt]]] -- Perform a [activepassive]
network scan [filter offfilter on SSIDfilter on MAC] [print to file])
33
FOUND BSS 14D64D243600 CHAN 01 RSSI -28 SSID ENG-WPA CAPS 0431 WPA WPA2 FOUND BSS 00180A31EA78 CHAN 11 RSSI -82 SSID ZyckoItalyWireless CAPS 0531 WPA WPA2 FOUND BSS 06180A31E7E2 CHAN 11 RSSI -85 SSID ZyckoItalyGuest CAPS 0531 WPA WPA2 OK
All
Network type
Network MAC
Network
channel Network
RSSI
Network
SSID Network
capabilities
Tera Term output
Tera Term output
Lab 3 Joining a network (WPA Key)
In order to be connected to an available Wifi network the AP parameters setting is needed
bull Set the SSID
bull Type AT+SSSIDTXT=ENG-WPA
bull Set the password
bull Type AT+SSCFG=wifi_wpa_psk_texthelloworld
bull Set the network privacy mode (0=none 1=WEP 2=WPA-Personal (TKIPAES) or WPA2-Personal (TKIPAES))
bull Type AT+SSCFG=wifi_priv_mode2
bull NB wifi_auth_type must be set to 0 AT+SSCFG=wifi_auth_type0
bull Set the network mode (1 = STA 2 = IBSS 3 = MiniAP)
bull Type AT+SSCFG=wifi_mode1
34
OK
All
Lab 3 Joining a network (WPA Key)
bull Save the settings on the flash memory and reset the module
bull Type ATampW
bull Type AT+CFUN=1
35
+WIND0Console active +WIND46WPA Crunching PSK +WIND32WiFi Hardware Started +WIND21WiFi Scanning +WIND35WiFi Scan Complete (0x0) +WIND19WiFi Join 14D64D243600 +WIND25WiFi Association with ENG-WPA successful +WIND51WPA Handshake Complete +WIND24WiFi Up 19216801xx
All
ENG-WPA AP
Tera Term output
Lab 3 Joining a network (WPA Key)
bull Check the statusstatistics variables
bull Type AT+SSTS
bull Send a ping to the gateway (ip_gw)
bull Type AT+SPING=19216801
36
ENG-WPA AP
Tera Term output
OK
All
Lab 3 Joining a network (WEP Key)
Configure the module using the WEP key (4 possible combinations
available)
Sample table
37
AP configuration AT command to be used
Security Mode WEP
WEP Key Length 64 bit
(10 hex digits)
Authentication Open
Wep Key 1 1234567890
ie
at+sssidtxt=ENG-WEP
AT+SSCFG=wifi_wep_keys[0]1234567890
AT+SSCFG=wifi_wep_key_lens05
AT+SSCFG=wifi_auth_type0
AT+SSCFG=wifi_priv_mode1
AT+SSCFG=wifi_mode1
atampw
at+cfun=1
Security Mode WEP
WEP Key Length 64 bit
(10 hex digits)
Authentication Shared
Key
Wep Key 1 1234567890
ie
at+sssidtxt=ENG-WEP
AT+SSCFG=wifi_wep_keys[0]1234567890
AT+SSCFG=wifi_wep_key_lens05
AT+SSCFG=wifi_auth_type1
AT+SSCFG=wifi_priv_mode1
AT+SSCFG=wifi_mode1
atampw
at+cfun=1
AP configuration AT command to be used
Security Mode WEP
WEP Key Length
128 bit (26 hex digits)
Authentication Open
Wep Key 1
123456789012345678
90123456
ie
at+sssidtxt=ENG-WEP
AT+SSCFG=wifi_wep_keys[0]12345678
901234567890123456
AT+SSCFG=wifi_wep_key_lens0D
AT+SSCFG=wifi_auth_type0
AT+SSCFG=wifi_priv_mode1
AT+SSCFG=wifi_mode1
atampw
at+cfun=1
Security Mode WEP
WEP Key Length
128 bit (26 hex digits)
Authentication
Shared Key
Wep Key 1
123456789012345678
90123456
ie
at+sssidtxt=ENG-WEP
AT+SSCFG=wifi_wep_keys[0]12345678
901234567890123456
AT+SSCFG=wifi_wep_key_lens0D
AT+SSCFG=wifi_auth_type1
AT+SSCFG=wifi_priv_mode1
AT+SSCFG=wifi_mode1
atampw
at+cfun=1
Lab 3 Joining a network (WEP Key)
Notes
bull ldquowifi_wep_key_lensrdquo variable values 05 and 0D
bull Itrsquos possible to enter any text string into a WEP key box in the AP in which case it will be converted into a hexadecimal key using the ASCII values of the characters A maximum of 5 text characters can be entered for 64 bit keys and a maximum of 13 characters for 128 bit keys
In this case it needs to manually convert your ASCII password to HEX and complete the wifi_wep_keys[0] variable with the HEX value bull ie AP WEP key test1 ASCII to HEX 7465737431 So the AT command is AT+SSCFG=wifi_wep_keys[0]7465737431
bull Some APs allow user to insert a passphrase and then the AP automatically generates the hex keys In this scenario user have not to perform the ASCII to HEX conversion because the AP already gives it the hex value
38
Proceed to the next LAB
Lab 4 Web client mode
bull Objective
bull HTTP GET
bull HTTP POST
bull PUSH DATA ON SERIAL PORT
bull Prerequisites
bull USB dongle and computer are set up
as described in Lab 2
bull Work in couple
40
Lab 4 HTTP GET
The HTTP GET feature performs a single HTTP request to the specified
host and path The server response is printed on the UART enabled
bull Sintax
bull AT+SHTTPGET=lthostnamegtltpathgt[ltportgt]
bull Configuration parameters
bull lthostnamegt target host DNS resolvable name or IP address
bull ltpathgt document path
bull ltportgt target port
41
Lab 4 HTTP GET
bull Device A performs an HTTP GET to the Device B
bull Device A
AT+SHTTPGET=ltDevice B IP addrgtindexhtml
Type AT+SHTTPGET=19216801xxindexhtml
42
GET indexhtml HTTP10 User-Agent SPWF01S helliphelliphellip lth1gtST SPWF01Sx11 WiFi Modulelth1gt ltpgt Welcome to the ST SPWF01Sx11 WiFi Module ltpgt ltpgt This page was delivered from the SPWF01Sx11 internal HTTP server hellip lta href=statusshtmlgtSPWF01Sx11 Status Pageltagt ltpgt ltbodygt lthtmlgt OK
Device A
A B
Tera Term output
Lab 4 HTTP POST
The HTTP POST performs a post of the given path to the specified host The module can be only used as an HTTP POST client
bull Sintax
bull AT+SHTTPPOST =lthostnamegtltpathampqueryoptsgtltformcontentgt[ltportgt]
bull Configuration parameters
bull lthostnamegt target host DNS resolvable name or IP address
bull ltpathampqueryoptsgt document path
bull ltformcontentgt form to be submitted
bull ltportgt target port
43
Lab 4 HTTP POST
bull The SPWF01S performs an HTTP POST to an HTTP Post Test Server
bull Type
at+shttppost=posttestservercompostphpname=demoampemail=mymailampsubjec
t=subjampbody=message
bull The HTTP Post Test Server replies as
displayed in the Tera Term output if the HTTP
POST successfully
44
HTTP11 200 OK Date Fri 10 Jan 2014 132414 GMT Server Apache Access-Control-Allow-Origin Vary Accept-Encoding Content-Length 139 Connection close Content-Type texthtml Successfully dumped 4 post variables View it at httpwwwposttestservercomdata2014011005241443192628 Post body was 0 chars long OK
Device A
A B
Tera Term output
HTTP POST
SERVER
Lab 4 HTTPREQ bull The SPWF01S can perform a custom HTTP request to a specified
target Refer to the User Manual for more details
bull Type
AT+SHTTPREQ=wwwgooglecom8089
After ltCRgt the module accepts data We will try to open an non-existent web page
GET downloadTagphp HTTP10ltCRgtltLFgt
User-Agent SPWF01SltCRgtltLFgt
Host iwm-testltCRgtltLFgt
Connection closeltCRgtltLFgtltCRgtltLFgt
45
HTTP10 404 Not FoundltCRgtltLFgt Date Sun 31 Jan 2016 142704 GMTltCRgtltLFgt Content-Type texthtmlltCRgtltLFgt Server HTTP server (unknown)ltCRgtltLFgt Content-Length 49ltCRgtltLFgt X-XSS-Protection 1 mode=blockltCRgtltLFgt X-Frame-Options SAMEORIGINltCRgtltLFgt ltCRgtltLFgt lthtmlgtltbodygtlth1gt404 Not Foundlth1gtltbodygtlthtmlgtltLFgtltCRgt ltLFgt ltSUBgtltSUBgtltSUBgtltCRgtltLFgt ltCRgtltLFgt OKltCRgtltLFgt
All
A B
Tera Term output
[AT+SHTTPREQ =lthostnamegt[port]ltlengthgtltCRgtltdatagt]
Lab 4 Push data on serial port
A built-in html page ldquooutput_demohtmlrdquo allows to remotely push
characters on the serial port from a remote browser
46
output_demohtml
Modulersquos IP addressoutput_demohtml
Lab 4 Push data on serial port
bull Find your IP address
bull Type AT+SSTS
bull Associate your computer with the AP
bull Open your web browser
bull In the address bar type
ltmodulersquos IP
Addressgtoutput_demohtml
bull Type
19216801xxoutput_demohtml
47
Lab 4 Push data on serial port
bull Enter the text
bull In order to manage non-ASCII chars the ip_use_decoder variable must be modified (refer to the User Manual for more details)
bull Submit
bull The text will be sent to the serial port of the module
48
Proceed to the next LAB
Lab 5 Web Server use mode
bull Objective
bull List existing files
bull Print a file
bull Create a file
bull Append to an existing file
bull Delete an existing file
bull Prerequisites
bull USB dongle and computer are
set up as described in Lab 2
bull Work alone
50
Lab 5 Web server 51
The Web Server feature allows to create print and delete ASCII files in
the RAM memory of the module
Lab 5 List existing files
The FSL command lists type sizes and name of all the existing files
bull Type AT+SFSL
52
I 461 input_demoshtml I 180 messageshtml I 384 output_demohtml I 614 indexhtml I 157 peersshtml I 193 configshtml I 174 statusshtml I 212 404html I 2022 firstsethtml I 2898 remotehtml OK
All
Files stored in the STM32
FLASH memory
Tera Term output
Lab 5 Print a file
The FSP command prints the content
of an existing file
bull Type AT+SFSP=indexhtml
53
lthtmlgt ltheadgtlttitlegtST SPWF01Slttitlegtltheadgt ltbody bgcolor=white text=blackgt lth1gtST SPWF01S Intelligent WiFi Modulelth1gt ltpgtWelcome to the ST SPWF01S intelligent Wi-Fi moduleltpgt ltpgtThis page was delivered from the SPWF01S internal HTTP serverltpgt ltpgt lta href=configshtmlgtSPWF01S Configuration Settings Pageltagt ltpgt ltpgt lta href=statusshtmlgtSPWF01S Status Pageltagt ltpgt ltpgt lta href=peersshtmlgtSPWF01S Peers Pageltagt ltpgt ltpgtMore information about the SPWF01S and other ST products can be found at STs website lta href=httpwwwSTcomgthttpwwwSTcomltagtltpgt ltbodygt lthtmlgt OK
All Tera Term output
Tip How to use the offset and length parameters AT+SFSP=indexhtml[offset][length] ie Type AT+SFSP=indexhtml520 Length parameter is mandatory if is used the offset
Lab 5 Create a file
The FSC command allows to create a file inside the SPWF for
delivery by the SPWF HTTP server
bull Sintax
bull AT+SFSC =ltfnamegtltmax_lengt[lthttp_headergt]
bull Configuration parameters
bull lt filename gt filename to create
bull lt max_len gt amount of space to allocate for file max = 4096 bytes
bull lthttp_headergt 0=HTML header automatically added 1=HTML header not
added (as by default)
Type AT+SFSC=wifidemohtml1965
54
OK
All
Tera Term output
Lab 5 Configuring the UART
bull Set CR+LF in the Terminal setup
(to properly paste text in the
terminal)
bull Tera Term Setup rarr Terminal rarr
Transmit CR+LF
55
Tip The local echo option must be disabled on Tera Term
Added in FW 35 using the AT+SFSR command user can rename dynamic files stored in the RAM memory Refer to the User Manual for more details
Lab 5 Append to an existing file
The FSA command allows to append blocks of data to an existing file
This command accepts data after the ltcrgt at the end of the command
line
bull Sintax
bull AT+SFSA=ltfilenamegtltdatalengt
bull Configuration parameters
bull lt filename gt filename pre-created
bull lt datalen gt number of characters to append to the file
Type AT+SFSA=wifidemohtml1965
56
Now SPWF accepts data
Tips
Lab 5 Append to an existing file
bull Open wifidemotxt in the following
directory Hands_on
folderHTML_demo_page
bull Check you have set up CR+LF in the
Terminal setup (for more
information refer to the slide 48)
bull Copy the file content into Tera term
(paste with ALT+V or mouse right
button)
57
OK
All
Tera Term output
Lab 5 Append to an existing file
bull Open wifidemohtml
bull Open your Web browser (suggested Google
Chrome for HTML5 test)
bull In address bar type ltSPWF IP addrgtwifidemohtml
Type 19216801xxwifidemohtml
58
Lab 5 Configuring the UART
bull Re-set CR in the Terminal setup
as by default
bull Tera Term Setup rarr Terminal rarr
Transmit CR
59
Tip The local echo option can be re-enabled on Tera Term
Lab 5 List existing files
Lets list the files
bull Type AT+SFSL
60
D 1965 wifidemohtml I 461 input_demoshtml I 180 messageshtml I 384 output_demohtml I 614 indexhtml I 157 peersshtml I 193 configshtml I 174 statusshtml I 212 404html I 2022 firstsethtml I 2898 remotehtml OK
All
File stored in the RAM memory
Tera Term output
Lab 5 Delete an existing file
The FSD command allows to delete an existing file by name Static
files may not be deleted
bull Sintax
bull AT+SFSD=ltfilenamegt
Type AT+SFSD=wifidemohtml
61
OK
All
Tera Term output
Lab 5 Delete an existing file
bull Re-open wifidemohtml
bull Open your Web browser
bull In address bar ltSPWF IP addrgtwifidemohtml
Type 19216801xxwifidemohtml
62
Proceed to the next LAB
Lab 6 Web Server use mode
bull Objective
bull Create an image file
bull Filesystem update over-the-air
bull Filesystem update over UART
bull Prerequisites
bull Work alone
64
Lab 6 Web server 65
The Web Server feature also allows to upload generic files (PDF
HTML DOC JPEG and so on) in the EXTERNAL FLASH memory of
the module It needs to follow the below steps
- create an image file (IMG) using the tool provided in the Hands-on package
(the IMG contains the files to upload)
- Put the image in a generic and accessible Web Server (Apache Web server
will be used in the Hands-on as example)
- Using the proper AT command the IMG will be retrieved over-the-air and the
static files will be created in the external flash memory
Lab 6 Create an image file
bull Open the following folder and
extract all the files
hands_on_wififilesystem_update
bull Put your own files to upload in the
pages folder (max 512 Kbytes)
bull Run genbat
bull Open the pages folder and copy
outfileimg in your external Web
Server (Apache)
66
3
1
2
Lab 6 Create an image file
The Apache Web Server will be used in this tutorial
(Apache Web Server is available at this link
httparchiveapacheorgdisthttpdbinarieswin32httpd-2225-win32-x86-openssl-098ymsi)
Note please check that the local firewall is disabled or properly set It can
block the connection from module to Apache
bull Copy outfileimg in the Apache 22
htdocs folder (this is the default
root server directory)
67
4
Lab 6 Filesystem update
The HTTPDFSUPDATE command allows to create static files inside
the SPWF for delivery by the SPWF HTTP server
bull Sintax
bull AT+SHTTPDFSUPDATE=lthostnamegtltpathgt[port]
bull Configuration parameters
bull lthostnamegt external web server DNS resolvable name or IP address
bull ltpathgt document path
bull ltportgt target host port
68
Lab 6 Filesystem update
bull In Tera Term type
AT+SHTTPDFSUPDATE=192168x10xoutfileimg
bull Reset the module
bull Type AT+CFUN=1
69
Image length 357957 (offset 0x00080000 block len 4096) Write len 4096 -gt 0x80000 Write len 4096 -gt 0x81000 Write len 4096 -gt 0x82000 helliphelliphelliphellip helliphelliphelliphelliphelliphellip helliphelliphelliphelliphellip Write len 4096 -gt 0xD6000 Write len 1612 -gt 0xD7000 (final) Wrote 357964 bytes Complete Please reboot (at+cfun=1) OK
All
Tera Term output
The file system will be permanently deleted The new IMG will overwrite the existent files in the file system
Warning
Lab 6 Filesystem update
Lets list the files
bull Type AT+SFSL
70
E 2615 st766gif E 112374 modulepng E 2430 index1html E 419 indexhtml E 239887 MKTWiFipdf I 461 input_demoshtml I 180 messageshtml I 384 output_demohtml I 614 indexhtml I 157 peersshtml I 193 configshtml I 174 statusshtml I 212 404html I 2022 firstsethtml I 2898 remotehtml OK
All
Files stored in
the EXT FLASH memory
Tera Term output
Lab 6 Filesystem update
bull Open index1html page
bull Open your web browser
bull In the address bar ltSPWF IP addrgtindex1html
Type 192168x1xxindex1html
71
Lab 6 Filesystem erase
Erase the external httpd filesystem
bull Type AT+S HTTPDFSERASE
The files stored in the EXT FLASH memory will be erased
Lets list the files
bull Type AT+SFSL
72
I 461 input_demoshtml I 180 messageshtml I 384 output_demohtml I 614 indexhtml I 157 peersshtml I 193 configshtml I 174 statusshtml I 212 404html I 2022 firstsethtml I 2898 remotehtml OK
All
Tera Term output
Lab 6 Filesystem update
The HTTPDFSWRITE command allows to create static files inside
the SPWF via the UART interface The HW flow control MUST be
enabled in order to use the command
bull Sintax
bull AT+SHTTPDFSWRITE =ltdatalengtltCRgtltdatagt
bull Configuration parameters
bull ltdatalengt Amount of bytes to be sent
73
Lab 6 Filesystem update
bull Type AT+S HTTPDFSWRITE=357957
bull In Tera Term File ndash Send File
bull Reset the module
bull Type AT+CFUN=1
74
Image length 357957 (offset 0x00080000 block len 4096) Write len 4096 -gt 0x80000 Write len 4096 -gt 0x81000 Write len 4096 -gt 0x82000 helliphelliphelliphellip helliphelliphelliphelliphelliphellip helliphelliphelliphelliphellip Write len 4096 -gt 0xD6000 Write len 1612 -gt 0xD7000 (final) Wrote 357964 bytes Complete Please reboot (at+cfun=1) OK
All
Tera Term output
The file system will be permanently deleted The new IMG will overwrite the existent files in the file system
Warning
Proceed to the next LAB
Lab 7 Socket interface
bull Objective
bull Open TCPUDP connection
bull Write data to socket
bull Read data from socket
bull Close socket
bull Prerequisites
bull Work alone
76
TCPUDP socket
Socket
Client
Socket
Server
Lab 7 TCPUDPUART socket interface 77
The Socket interface allows communication via TCP UDP and UART
The SPWF is both a client and a server socket In this LAB will be
detailed the socket client feature
Ho
st
En
d P
rod
uct
Open TCPUDP connection
Write data to socket
Read data from socket
Close socket
Lab 7 Open TCPUDP connection
The SOCKON command allows to open a TCPUDP connection
to a specified host (up to 8 socket connections at same time)
bull Sintax
bull AT+SSOCKON=lthostnamegtltportgtltprotocolgtind
bull Configuration parameters
bull lthostnamegt target host DNS resolvable name or IP address
bull ltportgt TCPUDP socket port
bull ltprotocolgt t for TCP socket u for UDP socket
bull ind indicate when data has arrived (optional) Up to 4 (x730 bytes)
consecutive ldquoPending datardquo message (without any AT+SSOCKR) are
guaranteed It is suggested to empty the buffer using the AT+SSOCKR
command and to avoid exceeding 4 indications
78
Lab 7 Open TCPUDP connection
bull Open the TCP socket server (disable the firewall to properly
run it)
bull Folder hands_on_wifitcp socket serverserverexe
bull The TCP server listens for incoming connections on the port
32000 It sends back all data received
79
Optional - Lab 7 Open TCPUDP connection
bull Using an Android platform the socket server can be opened
using a specific APP (Socket Protocol available on Play Store)
bull The TCP socket server can be configured to listen for
incoming connections on the port 32000
bull Type 32000 on laquoPort Listen toraquo box
bull Click on Listen
80
Lab 7 Open TCPUDP connection
bull Type AT+SSOCKON=192168010x32000tind
bull The client and the server use the socket identifier (ID)
displayed
81
ID 00 OK
All
Tera Term output
Lab 7 Write data to socket
The SOCKW command allows to write data to the specified ID
socket
This command accepts data after the ltcrgt at the end of the
command line
bull Sintax
bull AT+SSOCKW=ltIDgtltlengt
bull Configuration parameters
bull ltIDgt socket identifier
bull ltlengt data length to send
82
Lab 7 Write data to socket
bull Write data
bull Type AT+SSOCKW=0013
bull Type hello worldltCRgt
bull SPWF shows that there are ltpending datagt and their amount
83
+WIND55Pending Data013
All
Tera Term output
ID
Pending
bytes
Note the module is waiting 13 bytes to be written to the socket As soon as 13 bytes (or characters) are sent from the terminal the module is going to write them to the socket and will be ready to receive new commands
Lab 7 Read data from socket
The SOCKR command allows to read data from socket
bull Sintax
bull AT+SSOCKR=ltIDgtltlengt
bull Configuration parameters
bull ltIDgt socket identifier
bull ltlengt data length to read
84
Lab 7 Read data from socket
bull Read data
bull Type AT+SSOCKR=0013
85
hello world OK
All
Tera Term output
Lab 7 Close socket
The SOCKC command allows to close socket
bull Sintax
bull AT+SSOCKC=ltIDgt
bull Configuration parameters
bull ltIDgt socket identifier
86
Tera Term output
Lab 7 Close socket
bull Close socket
bull Type AT+SSOCKC=00
87
OK
All
Proceed to the next LAB
Lab 8 MiniAP mode for the first set
bull Objective
bull Create a direct connection between
the module and an end device
bull First set of the module in order to
enable the connection between the
module and a generic AP
bull Prerequisites
bull Work alone
89
Tera Term output
Lab 8 Configuring the module in MiniAP mode
The Mini AP mode is available starting from the following FW release
SPWF01S-131115-de4568d-RELEASE
In order to set the module in Mini AP mode the following parameters
are needed
bull Set the SSID
bull Type AT+SSSIDTXT=SPWF_AP
bull Set the network privacy mode (0=OPEN or 1=WEP are supported)
bull Type AT+SSCFG=wifi_priv_mode0
bull Set the network mode (1 = STA 2 = IBSS 3 = MiniAP)
bull Type AT+SSCFG=wifi_mode3
90
OK
All
Lab 8 Configuring the module in MiniAP mode
bull Save the settings on the flash memory and reset the module
bull Type ATampW
bull Type AT+CFUN=1
91
+WIND0Console active +WIND32WiFi Hardware Started +WIND26WiFi Started AP with network SPWF_AP +WIND24WiFi Up 172181511
All
Tera Term output
SPWF_AP
Lab 8 Configuring the module in MiniAP mode (WEP Key)
Configure the module using the WEP key (2 possible combinations
available)
Sample table
92
AP configuration AT command to be used
Security Mode WEP
WEP Key Length 64 bit
(10 hex digits)
Authentication Open
Wep Key 1 1234567890
ie
at+sssidtxt=SPWF_AP
AT+SSCFG=wifi_wep_keys[0]1234567890
AT+SSCFG=wifi_wep_key_lens05
AT+SSCFG=wifi_auth_type0
AT+SSCFG=wifi_priv_mode1
AT+SSCFG=wifi_mode3
atampw
at+cfun=1
AP configuration AT command to be used
Security Mode WEP
WEP Key Length
128 bit (26 hex digits)
Authentication Open
Wep Key 1
123456789012345678
90123456
ie
at+sssidtxt=SPWF_AP
AT+SSCFG=wifi_wep_keys[0]12345678
901234567890123456
AT+SSCFG=wifi_wep_key_lens0D
AT+SSCFG=wifi_auth_type0
AT+SSCFG=wifi_priv_mode1
AT+SSCFG=wifi_mode3
atampw
at+cfun=1
Lab 8 Configuring the module in MiniAP mode (WEP Key)
Notes
bull ldquowifi_wep_key_lensrdquo variable values 05 and 0D
bull Itrsquos possible to enter any text string as WEP key It have to be converted into a
hexadecimal key using the ASCII values of the characters A maximum of 5 text
characters can be entered for 64 bit keys and a maximum of 13 characters for 128
bit keys
In this case it needs to manually convert your ASCII password to
HEX and complete the wifi_wep_keys[0] variable with the HEX
value
bull ie WEP key test1
ASCII to HEX 7465737431
So the AT command is AT+SSCFG=wifi_wep_keys[0]7465737431
93
Lab 8 Customizing the MiniAP address (optional)
Starting from FW 33 the module allows user to customize the IP address of the MiniAP
bull Set the SSID
bull Type AT+SSSIDTXT=SPWF_AP
bull Set the network privacy mode (0=OPEN or 1=WEP are supported)
bull Type AT+SSCFG=wifi_priv_mode0
bull Set the network mode (1 = STA 2 = IBSS 3 = MiniAP)
bull Type AT+SSCFG=wifi_mode3
bull Set the use_dhcp mode (0 = DHCP server off 1 = DHCP server on 2 = DHCP server on and customizable)
bull Type AT+SSCFG=ip_use_dhcp2
bull Set the MiniAP address
bull Type AT+SSCFG=ip_ipaddr19216801
bull Save the settings on the flash memory and reset the module
bull Type ATampW
bull Type AT+CFUN=1
94
Tera Term output
+WIND0Console active +WIND32WiFi Hardware Started +WIND26WiFi Started AP with network SPWF_AP +WIND24WiFi Up 19216801
All
Tip the MiniAP will assign sequential addresses to the client ie 1deg client 19216802 2deg client 19216803
Lab 8 Mini AP mode
bull Associate your end device to the
SPWF_AP network
bull Find the SPWF_AP network and connect
the end device to the module
95
SPWF_AP +WIND2890187C960D0B Associated +WIND29DHCP reply for 17218151290187C960D0B to 172181512 +WIND29DHCP reply for 17218151290187C960D0B to 172181512
All
Tera Term output
Lab 8 Mini AP mode
bull Open your web browser
bull In the address bar type captiveportalnet
96
SPWF_AP
Tip The Mini AP domain can be set using the variable ip_apdomainname The default value is ldquocaptiveportalnetrdquo
The Mini AP default homepage can be set using the variable ip_apredirect The default value is ldquofirstsethtmlrdquo
Tip If the AP domain name is not quickly opened itrsquos suggested to turn off an eventual proxy server (check the connection settings or browser preferences)
Lab 8 First Set Page
bull The first set page allows to configure the module in IDLE mode
STATION mode IBSS mode and MINI AP mode
97
Used for STA IBSS MINI AP
Mandatory for IDLE STA IBSS MINI AP
Used for STA IBSS (WEP) MINI AP (WEP)
Used for STA (if DHCP = OFF) IBSS
(mandatory) MINI AP (if DHCP = OFF)
Used for STA IBSS (mandatory DHCP = OFF) MINI AP
Used for STA (WEP key) IBSS (WEP) MINI AP (WEP)
Used for STA IBSS MINI AP
Lab 8 Mini AP mode
bull Set all the parameters required in order to enable the connection
between the module and a generic AP
ie AP configured in WPAWPA2 mode
bull MiniAP PassKey anonymous (by default)
bull SSID of the access point
bull Password of the access point
bull Authentication type of the access point
bull Use mode of the module
98
Tip The Mini AP PassKey can be set using the variable ldquouser_descrdquo The default value is ldquoanonymousrdquo
Note In order to manage non-ASCII chars the ip_use_decoder variable must be modified according as below at+sscfg=ip_use_decoder0 no decoding [default] at+sscfg=ip_use_decoder1 RAW decoding (the USER and PSK fields must be completed in HEX) at+sscfg=ip_use_decoder2 UTF-8 decoding at+sscfg=ip_use_decoder6 HTML entities decoding
Lab 8 Mini AP mode
bull Click on GO button and then send the
parameters confirming with OK
99
SPWF_AP
AP
SSID ciscosb2
Lab 8 Mini AP mode
bull The module will receive the parameters and will automatically
connect to the access point required
100
+WIND57Received SSID is ciscosb2 +WIND57Received PWD is +WIND57Received Auth mode is 2 +WIND57Received Mode is 1 +WIND2RESET +WIND1Poweron (--SPWF01S) +WIND13ST IWM Copyright (c) 2012-2013 STmicroelectronics +WIND3Watchdog Running +WIND0Console active +WIND46WPA Crunching PSK +WIND32WiFi Hardware Started +WIND21WiFi Scanning +WIND35WiFi Scan Complete (0x0) +WIND19WiFi Join 02621F518F0B +WIND25WiFi Association with ciscosb2 successful +WIND51WPA Handshake Complete +WIND24WiFi Up 1921681106
All
Tera Term output
ciscosb2
AP
Lab 8 Mini AP mode ndash RAW decoding example
101
Note In order to manage non-ASCII chars the ip_use_decoder variable must be modified according as below at+sscfg=ip_use_decoder0 no decoding [default] at+sscfg=ip_use_decoder1 RAW decoding (the USER and PSK fields must be completed in HEX) at+sscfg=ip_use_decoder2 UTF-8 decoding at+sscfg=ip_use_decoder6 HTML entities decoding
7177657261736466
AP SSIS
AP PSK
Proceed to the next LAB
Lab 9 Socket interface - MiniAP mode
bull Objective
bull Create a direct connection between
the module and an end device
bull Socket interface used in MiniAP
mode
bull Prerequisites
bull Work alone
103
Tera Term output
Lab 9 Configuring the module in MiniAP mode
The Mini AP mode (available starting from the SPWF01S-131115-de4568d-RELEASE) also allows to use the socket interface The procedure is the same as in Lab 7
In order to set the module in Mini AP mode the following parameters are needed
bull Set the SSID
bull Type AT+SSSIDTXT=SPWF_AP
bull Set the network privacy mode
bull Type AT+SSCFG=wifi_priv_mode0
bull Set the network mode (1 = STA 2 = IBSS 3 = MiniAP)
bull Type AT+SSCFG=wifi_mode3
104
OK
All
Lab 9 Configuring the module in MiniAP mode
bull Save the settings on the flash memory and reset the module
bull Type ATampW
bull Type AT+CFUN=1
105
+WIND0Console active +WIND32WiFi Hardware Started +WIND26WiFi Started AP with network SPWF_AP +WIND24WiFi Up 172181511
All
Tera Term output
SPWF_AP
Lab 9 Mini AP mode
bull Connect your PC to the SPWF_AP
network
bull Find the SPWF_AP network and connect
the end device to the module
106
SPWF_AP +WIND2890187C960D0B Associated +WIND29DHCP reply for 17218151290187C960D0B to 172181512 +WIND29DHCP reply for 17218151290187C960D0B to 172181512
All
Tera Term output
Lab 9 Open TCPUDP connection
As described in the Lab 7 the SOCKON command allows to
open a TCPUDP connection to a specified host
bull Sintax
bull AT+SSOCKON=lthostnamegtltportgtltprotocolgtind
bull Configuration parameters
bull lthostnamegt target host DNS resolvable name or IP address
bull ltportgt TCPUDP socket port
bull ltprotocolgt t for TCP socket u for UDP socket
bull ind indicate when data has arrived (optional) Up to 4 consecutive ldquoPending
datardquo message (without any AT+SSOCKR) are guaranteed It is
suggested to empty the buffer using the AT+SSOCKR command and
to avoid exceeding 4 indications
107
Lab 9 Open TCP connection
bull Open the TCP socket server (disable the firewall to properly
run it)
bull Folder hands_on_wifitcp socket serverserverexe
bull The TCP server listens for incoming connections on the port
32000 It sends back all data received
108
Lab 9 Open TCP connection
bull Type AT+SSOCKON=17218151232000tind
bull The client and the server use the socket identifier (ID)
displayed
109
ID 00 OK
All
Tera Term output
Lab 9 Write data to socket
The SOCKW command allows to write data to the specified ID
socket
This command accepts data after the ltcrgt at the end of the
command line
bull Sintax
bull AT+SSOCKW=ltIDgtltlengt
bull Configuration parameters
bull ltIDgt socket identifier
bull ltlengt data length to send
110
Lab 9 Write data to socket
bull Write data
bull Type AT+SSOCKW=0013
bull Type hello worldltCRgt
bull SPWF shows that there are ltpending datagt and their amount
111
+WIND55Pending Data013
All
Tera Term output
ID
Pending
bytes
Note the module is waiting 13 bytes to be written to the socket As soon as 13 bytes (or characters) are sent from the terminal the module is going to write them to the socket and will be ready to receive new commands
Lab 9 Read data from socket
The SOCKR command allows to read data from socket
bull Sintax
bull AT+SSOCKR=ltIDgtltlengt
bull Configuration parameters
bull ltIDgt socket identifier
bull ltlengt data length to read
112
Lab 9 Read data from socket
bull Read data
bull Type AT+SSOCKR=0013
113
hello world OK
All
Tera Term output
Lab 9 Close socket
The SOCKC command allows to close socket
bull Sintax
bull AT+SSOCKC=ltIDgt
bull Configuration parameters
bull ltIDgt socket identifier
114
Tera Term output
Lab 9 Close socket
bull Close socket
bull Type AT+SSOCKC=00
115
OK
All
Proceed to the next LAB
Lab 10 Web server - MiniAP mode
bull Objective
bull Create a direct connection between
the module and an end device
bull Web server used in MiniAP mode
bull Prerequisites
bull Work alone
117
Tera Term output
Lab 10 Configuring the module in MiniAP mode
The Mini AP mode (available starting from the SPWF01S-131115-de4568d-RELEASE) also allows to use the module file system (both RAM and IntExt FLASH)
In order to set the module in Mini AP mode the following parameters are needed
bull Set the SSID
bull Type AT+SSSIDTXT=SPWF_AP
bull Set the network privacy mode
bull Type AT+SSCFG=wifi_priv_mode0
bull Set the network mode (1 = STA 2 = IBSS 3 = MiniAP)
bull Type AT+SSCFG=wifi_mode3
118
OK
All
Lab 10 Configuring the module in MiniAP mode
bull Save the settings on the flash memory and reset the module
bull Type ATampW
bull Type AT+CFUN=1
119
+WIND0Console active +WIND32WiFi Hardware Started +WIND26WiFi Started AP with network SPWF_AP +WIND24WiFi Up 172181511
All
Tera Term output
SPWF_AP
Lab 10 Mini AP mode
bull Connect your PC to the SPWF_AP
network
bull Find the SPWF_AP network and connect
the end device to the module
120
SPWF_AP +WIND2890187C960D0B Associated +WIND29DHCP reply for 17218151290187C960D0B to 172181512 +WIND29DHCP reply for 17218151290187C960D0B to 172181512
All
Tera Term output
Lab 10 Access to Web server - Mini AP mode
bull Open your web browser
bull In the address bar type
captiveportalnetindexhtml
bull The SPWF01S homepage will be
displayed
121
SPWF_AP Tip The Mini AP domain can be set using the variable ip_apdomainname The default value is ldquocaptiveportalnetrdquo
Lab 10 Access to Web server - Mini AP mode
bull Open the SPWF01S Device Status
bull click on the highlighted link
bull The SPWF01S Device Status will be
displayed
122
SPWF_AP Tip The Mini AP domain can be set using the variable ip_apdomainname The default value is ldquocaptiveportalnetrdquo
The Mini AP default homepage can be set using the variable ip_apredirect The default value is ldquofirstsethtmlrdquo
Proceed to the next LAB
Lab 11 Remotely control - GPIOs
bull Objective
bull write remotely a GPIO
bull configure remotely a GPIO
bull read remotely a GPIO
bull Prerequisites
bull module connected to the AP or
module configured in MiniAP mode
124
Lab 11 Remotely control - GPIO
This feature allows to remotely write configure and read a GPIO
The module should be connected to the AP (as shown in Lab 3) or
should be configured in Mini AP mode (as shown in Lab 8)
The external client have to open the remotehtml page stored in the
module
125
ENG-WPA AP
SPWF_AP
miniAP
Tera Term output
Lab 11 Joining a network
In order to be connected to an available Wifi network the AP parameters setting is needed
bull Set the SSID
bull Type AT+SSSIDTXT=ENG-WPA
bull Set the password
bull Type AT+SSCFG=wifi_wpa_psk_texthelloworld
bull Set the network privacy mode (0=none 1=WEP 2=WPA-Personal (TKIPAES) or WPA2-Personal (TKIPAES))
bull Type AT+SSCFG=wifi_priv_mode2
bull NB wifi_auth_type must be set to 0 AT+SSCFG=wifi_auth_type0
bull Set the network mode (1 = STA 2 = IBSS 3 = MiniAP)
bull Type AT+SSCFG=wifi_mode1
126
OK
All
Lab 11 Joining a network
bull Save the settings on the flash memory and reset the module
bull Type ATampW
bull Type AT+CFUN=1
127
+WIND0Console active +WIND46WPA Crunching PSK +WIND32WiFi Hardware Started +WIND21WiFi Scanning +WIND35WiFi Scan Complete (0x0) +WIND19WiFi Join 14D64D243600 +WIND25WiFi Association with ENG-WPA successful +WIND51WPA Handshake Complete +WIND24WiFi Up 19216801xx
All
ENG-WPA AP
Tera Term output
Lab 11 Remotely control in MiniAP mode - GPIO
bull Open your web browser
bull In the address bar type
192168x1xxremotehtml
128
ENG-WPA
AP
Lab 11 Remotely control in MiniAP mode - GPIO
bull Try to write the GPIO14 connected to the LED3 (check if the
LED3 is mounted on your EVAL BOARD otherwise can be used
the GPIO13)
bull Click on the laquoGOraquo button
and LED3 will switch on
129
ENG-WPA
AP
Proceed to the next LAB
Lab 12 Input demo
bull Objective
bull Send a message from the server (wifi
module) to an external client connected
to the same network
bull Prerequisites
bull module connected to the AP or module
configured in MiniAP mode
131
Lab 12 Input demo
The module provides some DEMOs to show the interaction between
the module and an external client connected to the same network
The module should be connected to the AP (as shown in Lab 3) or
should be configured in Mini AP mode (as shown in Lab 8)
In order to run this demo the client have to open the
input_demoshtml page stored in the module
132
ENG-WPA AP
SPWF_AP
miniAP
Tera Term output
Lab 12 Joining a network
In order to be connected to an available Wifi network the AP parameters setting is needed
bull Set the SSID
bull Type AT+SSSIDTXT=ENG-WPA
bull Set the password
bull Type AT+SSCFG=wifi_wpa_psk_texthelloworld
bull Set the network privacy mode (0=none 1=WEP 2=WPA-Personal (TKIPAES) or WPA2-Personal (TKIPAES))
bull Type AT+SSCFG=wifi_priv_mode2
bull NB wifi_auth_type must be set to 0 AT+SSCFG=wifi_auth_type0
bull Set the network mode (1 = STA 2 = IBSS 3 = MiniAP)
bull Type AT+SSCFG=wifi_mode1
133
OK
All
Lab 12 Joining a network
bull Save the settings on the flash memory and reset the module
bull Type ATampW
bull Type AT+CFUN=1
134
+WIND0Console active +WIND46WPA Crunching PSK +WIND32WiFi Hardware Started +WIND21WiFi Scanning +WIND35WiFi Scan Complete (0x0) +WIND19WiFi Join 14D64D243600 +WIND25WiFi Association with ENG-WPA successful +WIND51WPA Handshake Complete +WIND24WiFi Up 19216801xx
All
ENG-WPA AP
Tera Term output
Lab 12 Input demo
bull Open your web browser
bull In the address bar type
192168x1xxinput_demoshtml
bull Insert the message to the client
ie type laquotestraquo (suggested ndash copy
the string and paste it in the
terminal) and then send a carriage
return
135
VERY IMPORTANT
Both client and server are pending (2 sec) after the page
request If no message is sent from the module a timeout
mechanism will be triggered
The server shows the ldquo+WIND56 messagerdquo and it will
wait for a string to be inserted and terminated by [Cr] ldquo+WIND56Insert message to clientdrdquo d is the Nth input SSI into html page (please refer to CGIampSSI Application Notes for details)
Lab 12 Input demo
bull The module receives the HTML
page containing the string inserted
server-side
bull Below this string there are two
buttons to try again the demo or to
return to the homepage
136
Proceed to the next LAB
Lab 13 Socket Server functionality
bull Objective
bull Configure a Server Listening Port
bull Open a TCP connection from a
socket client to the module
bull Data modeCommand Mode usage
bull Prerequisites
bull module connected to the AP or
module configured in MiniAP mode
bull PC to be used as socket client
138
TCP socket
Socket
Server
Socket
Client
Lab 13 Socket Server
This feature allows to enable the socket server mode The module
can be able to listen for an incoming connection on the specified port
The module should be connected to the AP (as shown in Lab 3) or
should be configured in Mini AP mode (as shown in Lab 8)
Please refer to ldquoSocket Server Application Notesrdquo for more details
139
ENG-WPA AP
SPWF_AP
miniAP
Tera Term output
Lab 13 Joining a network
In order to be connected to an available Wifi network the AP parameters setting is needed
bull Set the SSID
bull Type AT+SSSIDTXT=ENG-WPA
bull Set the password
bull Type AT+SSCFG=wifi_wpa_psk_texthelloworld
bull Set the network privacy mode (0=none 1=WEP 2=WPA-Personal (TKIPAES) or WPA2-Personal (TKIPAES))
bull Type AT+SSCFG=wifi_priv_mode2
bull NB wifi_auth_type must be set to 0 AT+SSCFG=wifi_auth_type0
bull Set the network mode (1 = STA 2 = IBSS 3 = MiniAP)
bull Type AT+SSCFG=wifi_mode1
140
OK
All
Lab 13 Joining a network
bull Save the settings on the flash memory and reset the module
bull Type ATampW
bull Type AT+CFUN=1
141
+WIND0Console active +WIND46WPA Crunching PSK +WIND32WiFi Hardware Started +WIND21WiFi Scanning +WIND35WiFi Scan Complete (0x0) +WIND19WiFi Join 14D64D243600 +WIND25WiFi Association with ENG-WPA successful +WIND51WPA Handshake Complete +WIND24WiFi Up 19216801xx
All
ENG-WPA AP
Tera Term output
Lab 13 Socket Server
bull Socket server turn ON the TCP Socket Server (user must
specify the server listening port)
bull Type AT+SSOCKD=32000 (AT+SOCKD=32000u for UDP socket server)
bull Check the status of the socket server
bull Type AT+SSTS=ip_sockd_port
142
ENG-WPA
AP
Tera Term output
OK ip_sockd_port = 32000 OK
All
Tip you can Turn OFF the Socket Server using a server listening port = 0 (type AT+SSOCKD=0)
Lab 13 Socket Server
bull Socket client can be used a simple socket client in order to test the communication
(SocketTest ndash available on httpsourceforgenetprojectssockettest)
143
ENG-WPA
AP
Lab 13 Socket Server
bull Socket client
bull Insert the modulersquos IP Address and the port
bull Click on Connect button
144
Tera Term output
+WIND61Incoming Socket Client1921681102 +WIND60Now in Data Mode
All
Lab 13 Socket Server
bull The module (socket server) enters in data mode and a bidirectional channel is
created to allow exchanging data with the socket client
bull Try to send and receive data from the module
145
Tera Term output
test_1
All
Lab 13 Socket Server ndash escape sequence
bull From Data Mode to Command Mode
bull Configuration variable used escape_seq (default is ldquoat+srdquo case sensitive
suggested to be sent by the local host in a single complete packet with no CR or
LF in the sequence)
bull Type at+s
bull Now itrsquos possible to send AT commands while the socket connection
is still active
146
Tera Term output
+WIND59Back to Command Mode
All
Tip During the Command Mode you cannot send data to client but can receive data from it Every data chunk generates an URC (+WIND64Sockd Pending Data) with limit to 4 (x730 bytes) This is the max number of pending messages From the 5th chunk on messages are lost
Lab 13 Socket Server ndash return to data mode
bull From Command Mode to Data Mode
bull While in Command Mode
bull Type AT+S (this is an AT command AT+S must be followed by ltCRgt)
bull The module returns in data mode
147
ENG-WPA
AP
Tera Term output
+WIND60Now in Data Mode
All
Lab 13 Socket Server ndash turn off
bull Turn OFF the Socket Server
bull Type at+s (to enter in command mode)
bull Type AT+SSOCKD=0
148
ENG-WPA
AP
Tera Term output
OK +WIND62Socket Client Gone1921681102
All
Proceed to the next LAB
Lab 14 Low power modes
bull Objective
bull Practice with Radio Power Save
bull Sleep Mode
bull Standby Mode
bull Prerequisites
bull module connected to the AP
150
Lab 14 Low power modes
This feature allows to enable the low power states
The module supports the ldquoRadio Power Saverdquo mode the ldquoSleeprdquo
mode and the ldquoStandbyrdquo mode
The module should be connected to the AP (as shown in Lab 3) in
order to use the ldquoRadio Power Saverdquo mode
Please refer to ldquoSPWF01S Power Management Application Notesrdquo for
more details
151
ENG-WPA AP
Low Power
Tera Term output
Lab 14 Joining a network
In order to be connected to an available Wifi network the AP parameters setting is needed
bull Set the SSID
bull Type AT+SSSIDTXT=ENG-WPA
bull Set the password
bull Type AT+SSCFG=wifi_wpa_psk_texthelloworld
bull Set the network privacy mode (0=none 1=WEP 2=WPA-Personal (TKIPAES) or WPA2-Personal (TKIPAES))
bull Type AT+SSCFG=wifi_priv_mode2
bull NB wifi_auth_type must be set to 0 AT+SSCFG=wifi_auth_type0
bull Set the network mode (1 = STA 2 = IBSS 3 = MiniAP)
bull Type AT+SSCFG=wifi_mode1
152
OK
All
Lab 14 Joining a network
bull Save the settings on the flash memory and reset the module
bull Type ATampW
bull Type AT+CFUN=1
153
+WIND0Console active +WIND46WPA Crunching PSK +WIND32WiFi Hardware Started +WIND21WiFi Scanning +WIND35WiFi Scan Complete (0x0) +WIND19WiFi Join 14D64D243600 +WIND25WiFi Association with ENG-WPA successful +WIND51WPA Handshake Complete +WIND24WiFi Up 19216801xx
All
Tera Term output
ENG-WPA AP
Low Power
Lab 14 Low power modes ndash Power Save 154
Module
Power State STM32 WLAN
Standby Standby Standby
Sleep Stop PS
Power Save Run PS or Fast-PS
Active Rx Run Rx Idle Rx Active
Active Tx Run Tx Active
Lab 14 Low power modes ndash Power Save
bull By default the module starts in ACTIVE mode
bull Enable the Power Save Mode
bull Type at+sscfg=wifi_powersave1 (ldquowifi_powersave2rdquo enables the Fast-PS mode)
bull Enable the doze operational mode
bull Type at+sscfg=wifi_operational_mode11 (ldquowifi_operational_mode12rdquo enables the quiescent mode)
bull Choose the wake up mode
1 Wake up every n beacon (specified in the wifi_beacon_wakeup variable)
bull Type at+sscfg=wifi_listen_interval0
bull Type at+sscfg=wifi_beacon_wakeup1
OR
2 Wake up every n beacon adaptively (specified in the wifi_beacon_wakeup variable)
bull Type at+sscfg=wifi_listen_interval1
bull Type at+sscfg=wifi_beacon_wakeup1
155
Tip The Wifi Power Save (wifi_powersave1) can also be quickly enabled using the command AT+CFUN=2
Lab 14 Low power modes ndash Power Save
bull Save the settings on the flash memory and reset the module
bull Type ATampW
bull Type AT+CFUN=1
bull The WIND66 message related to Low Power Mode will be
displayed
156
+WIND1Poweron (--SPWF01S) +WIND13ST SPWF01S IWM Copyright (c) 2012-2014 STMicroelectronics Inc All rights Reserved +WIND3Watchdog Running +WIND0Console active +WIND32WiFi Hardware Started +WIND21WiFi Scanning +WIND35WiFi Scan Complete (0x0) +WIND19WiFi Join 02621F518F0B +WIND25WiFi Association with IoT successful +WIND51WPA Handshake Complete +WIND24WiFi Up 1921681104 +WIND66Low Power mode1
All
Tera Term output
ENG-WPA AP
Low Power
Lab 14 Low power modes ndash Sleep Mode 157
Module
Power State STM32 WLAN
Standby Standby Standby
Sleep Stop PS or Fast-PS
Power Save Run PS or Fast-PS
Active Rx Run Rx Idle Rx Active
Active Tx Run Tx Active
Lab 14 Low power modes ndash Sleep Mode
bull In the Sleep Mode the core STM32 is stopped
bull Enable the Sleep Mode
bull Type at+sscfg=sleep_enabled1
bull Enable the Power Save Mode
bull Type at+sscfg=wifi_powersave1 (ldquowifi_powersave2rdquo enables the Fast-PS mode)
bull Enable the doze operational mode
bull Type at+sscfg=wifi_operational_mode11 (ldquowifi_operational_mode12rdquo enables the quiescent mode)
bull Choose the wake up mode
1 Wake up every n beacon (specified in the wifi_beacon_wakeup variable)
bull Type at+sscfg=wifi_listen_interval0
bull Type at+sscfg=wifi_beacon_wakeup1
OR
2 Wake up every n beacon adaptively (specified in the wifi_beacon_wakeup variable)
bull Type at+sscfg=wifi_listen_interval1
bull Type at+sscfg=wifi_beacon_wakeup1
158
Tip The Wifi Sleep Mode (and wifi_powersave1) can also be quickly enabled using the command AT+CFUN=3
Lab 14 Low power modes ndash Sleep Mode
bull Save the settings on the flash memory and reset the module
bull Type ATampW
bull Type AT+CFUN=1
bull The WIND69 message related to Sleep Mode will be displayed
159
+WIND1Poweron (--SPWF01S) +WIND13ST SPWF01S IWM Copyright (c) 2012-2014 STMicroelectronics Inc All rights Reserved +WIND3Watchdog Running +WIND0Console active +WIND32WiFi Hardware Started +WIND21WiFi Scanning +WIND35WiFi Scan Complete (0x0) +WIND19WiFi Join 02621F518F0B +WIND25WiFi Association with IoT successful +WIND51WPA Handshake Complete +WIND24WiFi Up 1921681104 +WIND66Low Power mode1 +WIND69Going into DeepSleep
All
Tera Term output
ENG-WPA AP
Low Power
Lab 14 Low power modes ndash Sleep Mode
bull Wake STM32 up using the GPIO6
bull Put the GPIO6 to 25V (jumper on JP2 as in
the picture)
bull The WIND messages will be displayed
160
+WIND70Resuming from DeepSleep +WIND53Wakeup (GPIO6 High)
All
Tera Term output
Lab 14 Low power modes ndash Sleep Mode
bull Put STM32 in sleep mode using the
GPIO6
bull Go back the GPIO6 floating (remove jumper
- as default)
bull The WIND69 message will be
displayed
161
+WIND69Going into DeepSleep
All
Tera Term output
Lab 14 Low power modes ndash Sleep Mode
bull Wake STM32 up using the remote
page
bull Connect a device to the same modulersquos
network
bull Open the following link
http[module_IP_address]remotehtml
bull Select ldquoWakerdquo and click on ldquoGordquo button
to wake up the module
bull The WIND message will be displayed
162
+WIND70Resuming from DeepSleep
All
Tera Term output
Lab 14 Low power modes ndash Sleep Mode
bull Put STM32 in sleep mode using the
remote page
bull Connect a device to the same modulersquos
network
bull Open the following link
http[module_IP_address]remotehtml
bull Select ldquoSleeprdquo and click on ldquoGordquo button
to put the module in sleep mode
bull The WIND message will be displayed
163
+WIND69Going into DeepSleep
All
Tera Term output
Lab 14 Low power modes ndash Standby Mode 164
Module
Power State STM32 WLAN
Standby Standby Standby
Sleep Stop PS or Fast-PS
Power Save Run PS or Fast-PS
Active Rx Run Rx Idle Rx Active
Active Tx Run Tx Active
Lab 14 Low power modes ndash Standby Mode
bull During the Standby Mode both the STM32 and the Radio will be
put in standby mode The standby mode allows to achieve the
lowest power consumption
bull Enable the Standby Mode
bull Type at+sscfg=sleep_enabled0 (Sleep mode must be disabled)
bull Type at+sscfg=standby_enabled1
bull Please be sure that GPIO6 isnrsquot forced high
bull Set the standby time to wake up via RTC alarm
bull Type at+sscfg=standby_time15
165
Tip The Wifi Standby Mode can also be quickly enabled using the command AT+CFUN=4
Lab 14 Low power modes ndash Standby Mode
bull Save the settings on the flash
memory and reset the module
bull Type ATampW
bull Type AT+CFUN=1
bull After 15 seconds the module will be
rebooted and will return in the
ACTIVE state
166
+WIND0Console active +WIND32WiFi Hardware Started +WIND38WiFi Powered Down +WIND67Going into Standby15 +WIND68Resuming from Standby +WIND1Poweron (--SPWF01S) +WIND13ST SPWF01S IWM Copyright (c) 2012-2014 STMicroelectronics Inc All rights Reserved +WIND3Watchdog Running +WIND0Console active +WIND32WiFi Hardware Started +WIND21WiFi Scanning +WIND35WiFi Scan Complete (0x0) +WIND19WiFi Join02621F518F0B +WIND25WiFi Association with IoT successful +WIND51WPA Handshake Complete +WIND24WiFi Up1921681113
All
Tera Term output
Lab 14 Low power modes ndash Standby Mode
bull Wake up the module using the GPIO6
bull Enable the Standby Mode
bull Type at+sscfg=sleep_enabled0 (make sure that
Sleep mode is disabled)
bull Type at+sscfg=standby_enabled1
bull Type ATampW
bull Type AT+CFUN=1
bull Put the GPIO6 to 25V to wake up the module
bull The WIND message will be displayed and
the module will return in ACTIVE state
167
+WIND68Resuming from Standby +WIND1Poweron (--SPWF01S) helliphelliphellip
All
Tera Term output
Proceed to the next LAB
Lab 15 STAMINI AP switcher
bull Objective
bull HW ldquoSTA to MiniAPrdquo switcher
bull Prerequisites
bull Work alone
169
Lab 15 STAMINI AP switcher
This feature allows to force the module in Mini AP mode starting from
a preexistent state
ldquoRecovery Moderdquo this functionality could be useful to lead the module
in a known state and to reconfigure it (ie using the firstset page)
The GPIO7 will be used to drive this feature
170
Lab 15 STAMINI AP switcher
bull Press and hold the SW2 button on the
EVAL and then perform a reset (HW reset
via SW1 button or SW reset via AT
command)
bull Release the SW2 button
bull The MiniAP mode will be started and the
module is discoverable with the following
SSID
bull iwm-XX-YY-ZZ where XX-YY-ZZ are the last
six digits of modulersquos MAC ADDRESS
171
+WIND2Reset +WIND1Poweron (--SPWF01S) +WIND13ST SPWF01S IWM Copyright (c) 2012-2014 STMicroelectronics Inc All rights Reserved +WIND39HW in miniAP mode (GPIO7 Low) +WIND0Console active +WIND3Watchdog Running +WIND32WiFi Hardware Started +WIND26WiFi Started AP +WIND24WiFi Up172312551
All
Tera Term output
Tip To exit from ldquominiAP mode via GPIO7rdquo perform a modulersquos reset
Proceed to the next LAB
Lab 16 IBSS connection
bull Objective
bull Create an IBSS network
bull Prerequisites
bull Work alone
173
Lab 16 Create an IBSS network
In an IBSS network the SSID is chosen by the client device that
starts the network
Module settings to create an IBSS network
bull Set the IBSS SSID
bull Type AT+SSSIDTXT=ADHOC
bull Set the network privacy mode (0=OPEN or 1=WEP are supported)
bull Type AT+SSCFG=wifi_priv_mode0
bull Set the network mode (2 = IBSS)
bull Type AT+SSCFG=wifi_mode2
174
OK
All
Tera Term output
Lab 16 Create an IBSS network
bull Set IP address IP default gateway IP DNS and IP netmask
bull Type AT+SSCFG=ip_ipaddr192168y1xx
bull Type AT+SSCFG=ip_gw192168y1
bull Type AT+SSCFG=ip_dns192168y1
bull Type AT+SSCFG=ip_netmask2552552550
bull Turn off the DHCP
bull Type AT+SSCFG=ip_use_dhcp0
175
OK
All
Tera Term output
Lab 16 Create an IBSS network
bull Save the settings on the flash memory and reset the module
bull Type ATampW
bull Type AT+CFUN=1
176
+WIND0Console active +WIND32WiFi Hardware Started +WIND21WiFi Scanning +WIND35WiFi Scan Complete (0x0) +WIND19WiFi Join EE33CE002418 +WIND25WiFi Association with ADHOC successful +WIND51WiFi Handshake Complete +WIND24WiFi Up 19216813
All
AD-HOC
Tera Term output
Lab 16 Create an IBSS network
bull Associate the iOS device with the
ADHOC network (iOS gt 8 could not
support the IBSS mode)
177
AD-HOC
Tip manual configuration of static TCPIPv4 parameters is suggested using a PC Ie PC TCPIPv4 properties
Lab 16 Create an IBSS network
bull Find your IP address
bull Type AT+SSTS
bull Open Safari web browser
bull In the address bar type
ltSPWF IP addressgtindexhtml
bull Type 192168y1xxindexhtml
178
AD-HOC
THANK YOU

Lab 2a FOTA update
The Apache Web Server will be used in this LAB
(Apache Web Server is available at this link
httparchiveapacheorgdisthttpdbinarieswin32httpd-2225-win32-x86-openssl-098ymsi)
Note please check that the local firewall is disabled or properly set It can
block the connection from module to Apache
bull Copy the OTA file (ie SPWF01S-xxxxxx-yyyyyyy-
RELEASE-mainota) in the Apache 22 htdocs folder
28
Lab 2a FOTA update
The FWUPDATE command allows to perform a Firmware Over-the-
air update via a single HTTP GET
bull Sintax
bull AT+SFWUPDATE=lthostnamegtltpathgtltportgt
bull Configuration parameters
bull lthostnamegt Target host DNS resolvable name or IP address
bull ltpathampqueryoptsgt Document path and optional query arguments
bull ltportgt Target host port
29
Lab 2a FOTA update
bull The module and the Apache Web server must be connected to the same network
bull In Tera Term type AT+SFWUPDATE=[Apache IP address][ota_fileota]
ie type AT+SFWUPDATE=192168xyyySPWF01S-150410-c2e37a3-RELEASE-
mainota
bull Reset the module to apply the new FW
bull Type AT+CFUN=1
bull Restore factory default settings (mandatory)
bull Type ATampF
30
Staging FW update for SPWF01SX11 version 1203-120918_01 FW length 276824 0x00002800 (offset 0x00000000 block len 4096) Write len 4096 -gt 0x0 Write len 4096 -gt 0x1000 (note - deleted extra output for clarity) Write len 4096 -gt 0x42000 Write len 2476 -gt 0x43000 (final) Wrote 276904 bytes Complete Update will be applied on next reboot (at+cfun=1)
All Tera Term output
Proceed to the next LAB
Lab 3 Access point connection
bull Objective
bull Scan for available networks
bull Join a network
bull Check the statusstatistics variables
bull Prerequisites
bull USB dongle and computer are set
up as described in Lab 2
bull Work alone
32
Lab 3 Scan for available networks
The SCAN command performs an immediate scan for available
networks Infrastructure (AP) and IBSS (Ad-Hoc) networks are both
reported Network type Channel BSSID SSID Signal strength (RSSI)
and 80211 capabilities are all reported
bull Type AT+SSCAN
bull Scan syntax AT+SSCAN [=lta|pgt[ltr|s|mgt[ltfnamegt]]] -- Perform a [activepassive]
network scan [filter offfilter on SSIDfilter on MAC] [print to file])
33
FOUND BSS 14D64D243600 CHAN 01 RSSI -28 SSID ENG-WPA CAPS 0431 WPA WPA2 FOUND BSS 00180A31EA78 CHAN 11 RSSI -82 SSID ZyckoItalyWireless CAPS 0531 WPA WPA2 FOUND BSS 06180A31E7E2 CHAN 11 RSSI -85 SSID ZyckoItalyGuest CAPS 0531 WPA WPA2 OK
All
Network type
Network MAC
Network
channel Network
RSSI
Network
SSID Network
capabilities
Tera Term output
Tera Term output
Lab 3 Joining a network (WPA Key)
In order to be connected to an available Wifi network the AP parameters setting is needed
bull Set the SSID
bull Type AT+SSSIDTXT=ENG-WPA
bull Set the password
bull Type AT+SSCFG=wifi_wpa_psk_texthelloworld
bull Set the network privacy mode (0=none 1=WEP 2=WPA-Personal (TKIPAES) or WPA2-Personal (TKIPAES))
bull Type AT+SSCFG=wifi_priv_mode2
bull NB wifi_auth_type must be set to 0 AT+SSCFG=wifi_auth_type0
bull Set the network mode (1 = STA 2 = IBSS 3 = MiniAP)
bull Type AT+SSCFG=wifi_mode1
34
OK
All
Lab 3 Joining a network (WPA Key)
bull Save the settings on the flash memory and reset the module
bull Type ATampW
bull Type AT+CFUN=1
35
+WIND0Console active +WIND46WPA Crunching PSK +WIND32WiFi Hardware Started +WIND21WiFi Scanning +WIND35WiFi Scan Complete (0x0) +WIND19WiFi Join 14D64D243600 +WIND25WiFi Association with ENG-WPA successful +WIND51WPA Handshake Complete +WIND24WiFi Up 19216801xx
All
ENG-WPA AP
Tera Term output
Lab 3 Joining a network (WPA Key)
bull Check the statusstatistics variables
bull Type AT+SSTS
bull Send a ping to the gateway (ip_gw)
bull Type AT+SPING=19216801
36
ENG-WPA AP
Tera Term output
OK
All
Lab 3 Joining a network (WEP Key)
Configure the module using the WEP key (4 possible combinations
available)
Sample table
37
AP configuration AT command to be used
Security Mode WEP
WEP Key Length 64 bit
(10 hex digits)
Authentication Open
Wep Key 1 1234567890
ie
at+sssidtxt=ENG-WEP
AT+SSCFG=wifi_wep_keys[0]1234567890
AT+SSCFG=wifi_wep_key_lens05
AT+SSCFG=wifi_auth_type0
AT+SSCFG=wifi_priv_mode1
AT+SSCFG=wifi_mode1
atampw
at+cfun=1
Security Mode WEP
WEP Key Length 64 bit
(10 hex digits)
Authentication Shared
Key
Wep Key 1 1234567890
ie
at+sssidtxt=ENG-WEP
AT+SSCFG=wifi_wep_keys[0]1234567890
AT+SSCFG=wifi_wep_key_lens05
AT+SSCFG=wifi_auth_type1
AT+SSCFG=wifi_priv_mode1
AT+SSCFG=wifi_mode1
atampw
at+cfun=1
AP configuration AT command to be used
Security Mode WEP
WEP Key Length
128 bit (26 hex digits)
Authentication Open
Wep Key 1
123456789012345678
90123456
ie
at+sssidtxt=ENG-WEP
AT+SSCFG=wifi_wep_keys[0]12345678
901234567890123456
AT+SSCFG=wifi_wep_key_lens0D
AT+SSCFG=wifi_auth_type0
AT+SSCFG=wifi_priv_mode1
AT+SSCFG=wifi_mode1
atampw
at+cfun=1
Security Mode WEP
WEP Key Length
128 bit (26 hex digits)
Authentication
Shared Key
Wep Key 1
123456789012345678
90123456
ie
at+sssidtxt=ENG-WEP
AT+SSCFG=wifi_wep_keys[0]12345678
901234567890123456
AT+SSCFG=wifi_wep_key_lens0D
AT+SSCFG=wifi_auth_type1
AT+SSCFG=wifi_priv_mode1
AT+SSCFG=wifi_mode1
atampw
at+cfun=1
Lab 3 Joining a network (WEP Key)
Notes
bull ldquowifi_wep_key_lensrdquo variable values 05 and 0D
bull Itrsquos possible to enter any text string into a WEP key box in the AP in which case it will be converted into a hexadecimal key using the ASCII values of the characters A maximum of 5 text characters can be entered for 64 bit keys and a maximum of 13 characters for 128 bit keys
In this case it needs to manually convert your ASCII password to HEX and complete the wifi_wep_keys[0] variable with the HEX value bull ie AP WEP key test1 ASCII to HEX 7465737431 So the AT command is AT+SSCFG=wifi_wep_keys[0]7465737431
bull Some APs allow user to insert a passphrase and then the AP automatically generates the hex keys In this scenario user have not to perform the ASCII to HEX conversion because the AP already gives it the hex value
38
Proceed to the next LAB
Lab 4 Web client mode
bull Objective
bull HTTP GET
bull HTTP POST
bull PUSH DATA ON SERIAL PORT
bull Prerequisites
bull USB dongle and computer are set up
as described in Lab 2
bull Work in couple
40
Lab 4 HTTP GET
The HTTP GET feature performs a single HTTP request to the specified
host and path The server response is printed on the UART enabled
bull Sintax
bull AT+SHTTPGET=lthostnamegtltpathgt[ltportgt]
bull Configuration parameters
bull lthostnamegt target host DNS resolvable name or IP address
bull ltpathgt document path
bull ltportgt target port
41
Lab 4 HTTP GET
bull Device A performs an HTTP GET to the Device B
bull Device A
AT+SHTTPGET=ltDevice B IP addrgtindexhtml
Type AT+SHTTPGET=19216801xxindexhtml
42
GET indexhtml HTTP10 User-Agent SPWF01S helliphelliphellip lth1gtST SPWF01Sx11 WiFi Modulelth1gt ltpgt Welcome to the ST SPWF01Sx11 WiFi Module ltpgt ltpgt This page was delivered from the SPWF01Sx11 internal HTTP server hellip lta href=statusshtmlgtSPWF01Sx11 Status Pageltagt ltpgt ltbodygt lthtmlgt OK
Device A
A B
Tera Term output
Lab 4 HTTP POST
The HTTP POST performs a post of the given path to the specified host The module can be only used as an HTTP POST client
bull Sintax
bull AT+SHTTPPOST =lthostnamegtltpathampqueryoptsgtltformcontentgt[ltportgt]
bull Configuration parameters
bull lthostnamegt target host DNS resolvable name or IP address
bull ltpathampqueryoptsgt document path
bull ltformcontentgt form to be submitted
bull ltportgt target port
43
Lab 4 HTTP POST
bull The SPWF01S performs an HTTP POST to an HTTP Post Test Server
bull Type
at+shttppost=posttestservercompostphpname=demoampemail=mymailampsubjec
t=subjampbody=message
bull The HTTP Post Test Server replies as
displayed in the Tera Term output if the HTTP
POST successfully
44
HTTP11 200 OK Date Fri 10 Jan 2014 132414 GMT Server Apache Access-Control-Allow-Origin Vary Accept-Encoding Content-Length 139 Connection close Content-Type texthtml Successfully dumped 4 post variables View it at httpwwwposttestservercomdata2014011005241443192628 Post body was 0 chars long OK
Device A
A B
Tera Term output
HTTP POST
SERVER
Lab 4 HTTPREQ bull The SPWF01S can perform a custom HTTP request to a specified
target Refer to the User Manual for more details
bull Type
AT+SHTTPREQ=wwwgooglecom8089
After ltCRgt the module accepts data We will try to open an non-existent web page
GET downloadTagphp HTTP10ltCRgtltLFgt
User-Agent SPWF01SltCRgtltLFgt
Host iwm-testltCRgtltLFgt
Connection closeltCRgtltLFgtltCRgtltLFgt
45
HTTP10 404 Not FoundltCRgtltLFgt Date Sun 31 Jan 2016 142704 GMTltCRgtltLFgt Content-Type texthtmlltCRgtltLFgt Server HTTP server (unknown)ltCRgtltLFgt Content-Length 49ltCRgtltLFgt X-XSS-Protection 1 mode=blockltCRgtltLFgt X-Frame-Options SAMEORIGINltCRgtltLFgt ltCRgtltLFgt lthtmlgtltbodygtlth1gt404 Not Foundlth1gtltbodygtlthtmlgtltLFgtltCRgt ltLFgt ltSUBgtltSUBgtltSUBgtltCRgtltLFgt ltCRgtltLFgt OKltCRgtltLFgt
All
A B
Tera Term output
[AT+SHTTPREQ =lthostnamegt[port]ltlengthgtltCRgtltdatagt]
Lab 4 Push data on serial port
A built-in html page ldquooutput_demohtmlrdquo allows to remotely push
characters on the serial port from a remote browser
46
output_demohtml
Modulersquos IP addressoutput_demohtml
Lab 4 Push data on serial port
bull Find your IP address
bull Type AT+SSTS
bull Associate your computer with the AP
bull Open your web browser
bull In the address bar type
ltmodulersquos IP
Addressgtoutput_demohtml
bull Type
19216801xxoutput_demohtml
47
Lab 4 Push data on serial port
bull Enter the text
bull In order to manage non-ASCII chars the ip_use_decoder variable must be modified (refer to the User Manual for more details)
bull Submit
bull The text will be sent to the serial port of the module
48
Proceed to the next LAB
Lab 5 Web Server use mode
bull Objective
bull List existing files
bull Print a file
bull Create a file
bull Append to an existing file
bull Delete an existing file
bull Prerequisites
bull USB dongle and computer are
set up as described in Lab 2
bull Work alone
50
Lab 5 Web server 51
The Web Server feature allows to create print and delete ASCII files in
the RAM memory of the module
Lab 5 List existing files
The FSL command lists type sizes and name of all the existing files
bull Type AT+SFSL
52
I 461 input_demoshtml I 180 messageshtml I 384 output_demohtml I 614 indexhtml I 157 peersshtml I 193 configshtml I 174 statusshtml I 212 404html I 2022 firstsethtml I 2898 remotehtml OK
All
Files stored in the STM32
FLASH memory
Tera Term output
Lab 5 Print a file
The FSP command prints the content
of an existing file
bull Type AT+SFSP=indexhtml
53
lthtmlgt ltheadgtlttitlegtST SPWF01Slttitlegtltheadgt ltbody bgcolor=white text=blackgt lth1gtST SPWF01S Intelligent WiFi Modulelth1gt ltpgtWelcome to the ST SPWF01S intelligent Wi-Fi moduleltpgt ltpgtThis page was delivered from the SPWF01S internal HTTP serverltpgt ltpgt lta href=configshtmlgtSPWF01S Configuration Settings Pageltagt ltpgt ltpgt lta href=statusshtmlgtSPWF01S Status Pageltagt ltpgt ltpgt lta href=peersshtmlgtSPWF01S Peers Pageltagt ltpgt ltpgtMore information about the SPWF01S and other ST products can be found at STs website lta href=httpwwwSTcomgthttpwwwSTcomltagtltpgt ltbodygt lthtmlgt OK
All Tera Term output
Tip How to use the offset and length parameters AT+SFSP=indexhtml[offset][length] ie Type AT+SFSP=indexhtml520 Length parameter is mandatory if is used the offset
Lab 5 Create a file
The FSC command allows to create a file inside the SPWF for
delivery by the SPWF HTTP server
bull Sintax
bull AT+SFSC =ltfnamegtltmax_lengt[lthttp_headergt]
bull Configuration parameters
bull lt filename gt filename to create
bull lt max_len gt amount of space to allocate for file max = 4096 bytes
bull lthttp_headergt 0=HTML header automatically added 1=HTML header not
added (as by default)
Type AT+SFSC=wifidemohtml1965
54
OK
All
Tera Term output
Lab 5 Configuring the UART
bull Set CR+LF in the Terminal setup
(to properly paste text in the
terminal)
bull Tera Term Setup rarr Terminal rarr
Transmit CR+LF
55
Tip The local echo option must be disabled on Tera Term
Added in FW 35 using the AT+SFSR command user can rename dynamic files stored in the RAM memory Refer to the User Manual for more details
Lab 5 Append to an existing file
The FSA command allows to append blocks of data to an existing file
This command accepts data after the ltcrgt at the end of the command
line
bull Sintax
bull AT+SFSA=ltfilenamegtltdatalengt
bull Configuration parameters
bull lt filename gt filename pre-created
bull lt datalen gt number of characters to append to the file
Type AT+SFSA=wifidemohtml1965
56
Now SPWF accepts data
Tips
Lab 5 Append to an existing file
bull Open wifidemotxt in the following
directory Hands_on
folderHTML_demo_page
bull Check you have set up CR+LF in the
Terminal setup (for more
information refer to the slide 48)
bull Copy the file content into Tera term
(paste with ALT+V or mouse right
button)
57
OK
All
Tera Term output
Lab 5 Append to an existing file
bull Open wifidemohtml
bull Open your Web browser (suggested Google
Chrome for HTML5 test)
bull In address bar type ltSPWF IP addrgtwifidemohtml
Type 19216801xxwifidemohtml
58
Lab 5 Configuring the UART
bull Re-set CR in the Terminal setup
as by default
bull Tera Term Setup rarr Terminal rarr
Transmit CR
59
Tip The local echo option can be re-enabled on Tera Term
Lab 5 List existing files
Lets list the files
bull Type AT+SFSL
60
D 1965 wifidemohtml I 461 input_demoshtml I 180 messageshtml I 384 output_demohtml I 614 indexhtml I 157 peersshtml I 193 configshtml I 174 statusshtml I 212 404html I 2022 firstsethtml I 2898 remotehtml OK
All
File stored in the RAM memory
Tera Term output
Lab 5 Delete an existing file
The FSD command allows to delete an existing file by name Static
files may not be deleted
bull Sintax
bull AT+SFSD=ltfilenamegt
Type AT+SFSD=wifidemohtml
61
OK
All
Tera Term output
Lab 5 Delete an existing file
bull Re-open wifidemohtml
bull Open your Web browser
bull In address bar ltSPWF IP addrgtwifidemohtml
Type 19216801xxwifidemohtml
62
Proceed to the next LAB
Lab 6 Web Server use mode
bull Objective
bull Create an image file
bull Filesystem update over-the-air
bull Filesystem update over UART
bull Prerequisites
bull Work alone
64
Lab 6 Web server 65
The Web Server feature also allows to upload generic files (PDF
HTML DOC JPEG and so on) in the EXTERNAL FLASH memory of
the module It needs to follow the below steps
- create an image file (IMG) using the tool provided in the Hands-on package
(the IMG contains the files to upload)
- Put the image in a generic and accessible Web Server (Apache Web server
will be used in the Hands-on as example)
- Using the proper AT command the IMG will be retrieved over-the-air and the
static files will be created in the external flash memory
Lab 6 Create an image file
bull Open the following folder and
extract all the files
hands_on_wififilesystem_update
bull Put your own files to upload in the
pages folder (max 512 Kbytes)
bull Run genbat
bull Open the pages folder and copy
outfileimg in your external Web
Server (Apache)
66
3
1
2
Lab 6 Create an image file
The Apache Web Server will be used in this tutorial
(Apache Web Server is available at this link
httparchiveapacheorgdisthttpdbinarieswin32httpd-2225-win32-x86-openssl-098ymsi)
Note please check that the local firewall is disabled or properly set It can
block the connection from module to Apache
bull Copy outfileimg in the Apache 22
htdocs folder (this is the default
root server directory)
67
4
Lab 6 Filesystem update
The HTTPDFSUPDATE command allows to create static files inside
the SPWF for delivery by the SPWF HTTP server
bull Sintax
bull AT+SHTTPDFSUPDATE=lthostnamegtltpathgt[port]
bull Configuration parameters
bull lthostnamegt external web server DNS resolvable name or IP address
bull ltpathgt document path
bull ltportgt target host port
68
Lab 6 Filesystem update
bull In Tera Term type
AT+SHTTPDFSUPDATE=192168x10xoutfileimg
bull Reset the module
bull Type AT+CFUN=1
69
Image length 357957 (offset 0x00080000 block len 4096) Write len 4096 -gt 0x80000 Write len 4096 -gt 0x81000 Write len 4096 -gt 0x82000 helliphelliphelliphellip helliphelliphelliphelliphelliphellip helliphelliphelliphelliphellip Write len 4096 -gt 0xD6000 Write len 1612 -gt 0xD7000 (final) Wrote 357964 bytes Complete Please reboot (at+cfun=1) OK
All
Tera Term output
The file system will be permanently deleted The new IMG will overwrite the existent files in the file system
Warning
Lab 6 Filesystem update
Lets list the files
bull Type AT+SFSL
70
E 2615 st766gif E 112374 modulepng E 2430 index1html E 419 indexhtml E 239887 MKTWiFipdf I 461 input_demoshtml I 180 messageshtml I 384 output_demohtml I 614 indexhtml I 157 peersshtml I 193 configshtml I 174 statusshtml I 212 404html I 2022 firstsethtml I 2898 remotehtml OK
All
Files stored in
the EXT FLASH memory
Tera Term output
Lab 6 Filesystem update
bull Open index1html page
bull Open your web browser
bull In the address bar ltSPWF IP addrgtindex1html
Type 192168x1xxindex1html
71
Lab 6 Filesystem erase
Erase the external httpd filesystem
bull Type AT+S HTTPDFSERASE
The files stored in the EXT FLASH memory will be erased
Lets list the files
bull Type AT+SFSL
72
I 461 input_demoshtml I 180 messageshtml I 384 output_demohtml I 614 indexhtml I 157 peersshtml I 193 configshtml I 174 statusshtml I 212 404html I 2022 firstsethtml I 2898 remotehtml OK
All
Tera Term output
Lab 6 Filesystem update
The HTTPDFSWRITE command allows to create static files inside
the SPWF via the UART interface The HW flow control MUST be
enabled in order to use the command
bull Sintax
bull AT+SHTTPDFSWRITE =ltdatalengtltCRgtltdatagt
bull Configuration parameters
bull ltdatalengt Amount of bytes to be sent
73
Lab 6 Filesystem update
bull Type AT+S HTTPDFSWRITE=357957
bull In Tera Term File ndash Send File
bull Reset the module
bull Type AT+CFUN=1
74
Image length 357957 (offset 0x00080000 block len 4096) Write len 4096 -gt 0x80000 Write len 4096 -gt 0x81000 Write len 4096 -gt 0x82000 helliphelliphelliphellip helliphelliphelliphelliphelliphellip helliphelliphelliphelliphellip Write len 4096 -gt 0xD6000 Write len 1612 -gt 0xD7000 (final) Wrote 357964 bytes Complete Please reboot (at+cfun=1) OK
All
Tera Term output
The file system will be permanently deleted The new IMG will overwrite the existent files in the file system
Warning
Proceed to the next LAB
Lab 7 Socket interface
bull Objective
bull Open TCPUDP connection
bull Write data to socket
bull Read data from socket
bull Close socket
bull Prerequisites
bull Work alone
76
TCPUDP socket
Socket
Client
Socket
Server
Lab 7 TCPUDPUART socket interface 77
The Socket interface allows communication via TCP UDP and UART
The SPWF is both a client and a server socket In this LAB will be
detailed the socket client feature
Ho
st
En
d P
rod
uct
Open TCPUDP connection
Write data to socket
Read data from socket
Close socket
Lab 7 Open TCPUDP connection
The SOCKON command allows to open a TCPUDP connection
to a specified host (up to 8 socket connections at same time)
bull Sintax
bull AT+SSOCKON=lthostnamegtltportgtltprotocolgtind
bull Configuration parameters
bull lthostnamegt target host DNS resolvable name or IP address
bull ltportgt TCPUDP socket port
bull ltprotocolgt t for TCP socket u for UDP socket
bull ind indicate when data has arrived (optional) Up to 4 (x730 bytes)
consecutive ldquoPending datardquo message (without any AT+SSOCKR) are
guaranteed It is suggested to empty the buffer using the AT+SSOCKR
command and to avoid exceeding 4 indications
78
Lab 7 Open TCPUDP connection
bull Open the TCP socket server (disable the firewall to properly
run it)
bull Folder hands_on_wifitcp socket serverserverexe
bull The TCP server listens for incoming connections on the port
32000 It sends back all data received
79
Optional - Lab 7 Open TCPUDP connection
bull Using an Android platform the socket server can be opened
using a specific APP (Socket Protocol available on Play Store)
bull The TCP socket server can be configured to listen for
incoming connections on the port 32000
bull Type 32000 on laquoPort Listen toraquo box
bull Click on Listen
80
Lab 7 Open TCPUDP connection
bull Type AT+SSOCKON=192168010x32000tind
bull The client and the server use the socket identifier (ID)
displayed
81
ID 00 OK
All
Tera Term output
Lab 7 Write data to socket
The SOCKW command allows to write data to the specified ID
socket
This command accepts data after the ltcrgt at the end of the
command line
bull Sintax
bull AT+SSOCKW=ltIDgtltlengt
bull Configuration parameters
bull ltIDgt socket identifier
bull ltlengt data length to send
82
Lab 7 Write data to socket
bull Write data
bull Type AT+SSOCKW=0013
bull Type hello worldltCRgt
bull SPWF shows that there are ltpending datagt and their amount
83
+WIND55Pending Data013
All
Tera Term output
ID
Pending
bytes
Note the module is waiting 13 bytes to be written to the socket As soon as 13 bytes (or characters) are sent from the terminal the module is going to write them to the socket and will be ready to receive new commands
Lab 7 Read data from socket
The SOCKR command allows to read data from socket
bull Sintax
bull AT+SSOCKR=ltIDgtltlengt
bull Configuration parameters
bull ltIDgt socket identifier
bull ltlengt data length to read
84
Lab 7 Read data from socket
bull Read data
bull Type AT+SSOCKR=0013
85
hello world OK
All
Tera Term output
Lab 7 Close socket
The SOCKC command allows to close socket
bull Sintax
bull AT+SSOCKC=ltIDgt
bull Configuration parameters
bull ltIDgt socket identifier
86
Tera Term output
Lab 7 Close socket
bull Close socket
bull Type AT+SSOCKC=00
87
OK
All
Proceed to the next LAB
Lab 8 MiniAP mode for the first set
bull Objective
bull Create a direct connection between
the module and an end device
bull First set of the module in order to
enable the connection between the
module and a generic AP
bull Prerequisites
bull Work alone
89
Tera Term output
Lab 8 Configuring the module in MiniAP mode
The Mini AP mode is available starting from the following FW release
SPWF01S-131115-de4568d-RELEASE
In order to set the module in Mini AP mode the following parameters
are needed
bull Set the SSID
bull Type AT+SSSIDTXT=SPWF_AP
bull Set the network privacy mode (0=OPEN or 1=WEP are supported)
bull Type AT+SSCFG=wifi_priv_mode0
bull Set the network mode (1 = STA 2 = IBSS 3 = MiniAP)
bull Type AT+SSCFG=wifi_mode3
90
OK
All
Lab 8 Configuring the module in MiniAP mode
bull Save the settings on the flash memory and reset the module
bull Type ATampW
bull Type AT+CFUN=1
91
+WIND0Console active +WIND32WiFi Hardware Started +WIND26WiFi Started AP with network SPWF_AP +WIND24WiFi Up 172181511
All
Tera Term output
SPWF_AP
Lab 8 Configuring the module in MiniAP mode (WEP Key)
Configure the module using the WEP key (2 possible combinations
available)
Sample table
92
AP configuration AT command to be used
Security Mode WEP
WEP Key Length 64 bit
(10 hex digits)
Authentication Open
Wep Key 1 1234567890
ie
at+sssidtxt=SPWF_AP
AT+SSCFG=wifi_wep_keys[0]1234567890
AT+SSCFG=wifi_wep_key_lens05
AT+SSCFG=wifi_auth_type0
AT+SSCFG=wifi_priv_mode1
AT+SSCFG=wifi_mode3
atampw
at+cfun=1
AP configuration AT command to be used
Security Mode WEP
WEP Key Length
128 bit (26 hex digits)
Authentication Open
Wep Key 1
123456789012345678
90123456
ie
at+sssidtxt=SPWF_AP
AT+SSCFG=wifi_wep_keys[0]12345678
901234567890123456
AT+SSCFG=wifi_wep_key_lens0D
AT+SSCFG=wifi_auth_type0
AT+SSCFG=wifi_priv_mode1
AT+SSCFG=wifi_mode3
atampw
at+cfun=1
Lab 8 Configuring the module in MiniAP mode (WEP Key)
Notes
bull ldquowifi_wep_key_lensrdquo variable values 05 and 0D
bull Itrsquos possible to enter any text string as WEP key It have to be converted into a
hexadecimal key using the ASCII values of the characters A maximum of 5 text
characters can be entered for 64 bit keys and a maximum of 13 characters for 128
bit keys
In this case it needs to manually convert your ASCII password to
HEX and complete the wifi_wep_keys[0] variable with the HEX
value
bull ie WEP key test1
ASCII to HEX 7465737431
So the AT command is AT+SSCFG=wifi_wep_keys[0]7465737431
93
Lab 8 Customizing the MiniAP address (optional)
Starting from FW 33 the module allows user to customize the IP address of the MiniAP
bull Set the SSID
bull Type AT+SSSIDTXT=SPWF_AP
bull Set the network privacy mode (0=OPEN or 1=WEP are supported)
bull Type AT+SSCFG=wifi_priv_mode0
bull Set the network mode (1 = STA 2 = IBSS 3 = MiniAP)
bull Type AT+SSCFG=wifi_mode3
bull Set the use_dhcp mode (0 = DHCP server off 1 = DHCP server on 2 = DHCP server on and customizable)
bull Type AT+SSCFG=ip_use_dhcp2
bull Set the MiniAP address
bull Type AT+SSCFG=ip_ipaddr19216801
bull Save the settings on the flash memory and reset the module
bull Type ATampW
bull Type AT+CFUN=1
94
Tera Term output
+WIND0Console active +WIND32WiFi Hardware Started +WIND26WiFi Started AP with network SPWF_AP +WIND24WiFi Up 19216801
All
Tip the MiniAP will assign sequential addresses to the client ie 1deg client 19216802 2deg client 19216803
Lab 8 Mini AP mode
bull Associate your end device to the
SPWF_AP network
bull Find the SPWF_AP network and connect
the end device to the module
95
SPWF_AP +WIND2890187C960D0B Associated +WIND29DHCP reply for 17218151290187C960D0B to 172181512 +WIND29DHCP reply for 17218151290187C960D0B to 172181512
All
Tera Term output
Lab 8 Mini AP mode
bull Open your web browser
bull In the address bar type captiveportalnet
96
SPWF_AP
Tip The Mini AP domain can be set using the variable ip_apdomainname The default value is ldquocaptiveportalnetrdquo
The Mini AP default homepage can be set using the variable ip_apredirect The default value is ldquofirstsethtmlrdquo
Tip If the AP domain name is not quickly opened itrsquos suggested to turn off an eventual proxy server (check the connection settings or browser preferences)
Lab 8 First Set Page
bull The first set page allows to configure the module in IDLE mode
STATION mode IBSS mode and MINI AP mode
97
Used for STA IBSS MINI AP
Mandatory for IDLE STA IBSS MINI AP
Used for STA IBSS (WEP) MINI AP (WEP)
Used for STA (if DHCP = OFF) IBSS
(mandatory) MINI AP (if DHCP = OFF)
Used for STA IBSS (mandatory DHCP = OFF) MINI AP
Used for STA (WEP key) IBSS (WEP) MINI AP (WEP)
Used for STA IBSS MINI AP
Lab 8 Mini AP mode
bull Set all the parameters required in order to enable the connection
between the module and a generic AP
ie AP configured in WPAWPA2 mode
bull MiniAP PassKey anonymous (by default)
bull SSID of the access point
bull Password of the access point
bull Authentication type of the access point
bull Use mode of the module
98
Tip The Mini AP PassKey can be set using the variable ldquouser_descrdquo The default value is ldquoanonymousrdquo
Note In order to manage non-ASCII chars the ip_use_decoder variable must be modified according as below at+sscfg=ip_use_decoder0 no decoding [default] at+sscfg=ip_use_decoder1 RAW decoding (the USER and PSK fields must be completed in HEX) at+sscfg=ip_use_decoder2 UTF-8 decoding at+sscfg=ip_use_decoder6 HTML entities decoding
Lab 8 Mini AP mode
bull Click on GO button and then send the
parameters confirming with OK
99
SPWF_AP
AP
SSID ciscosb2
Lab 8 Mini AP mode
bull The module will receive the parameters and will automatically
connect to the access point required
100
+WIND57Received SSID is ciscosb2 +WIND57Received PWD is +WIND57Received Auth mode is 2 +WIND57Received Mode is 1 +WIND2RESET +WIND1Poweron (--SPWF01S) +WIND13ST IWM Copyright (c) 2012-2013 STmicroelectronics +WIND3Watchdog Running +WIND0Console active +WIND46WPA Crunching PSK +WIND32WiFi Hardware Started +WIND21WiFi Scanning +WIND35WiFi Scan Complete (0x0) +WIND19WiFi Join 02621F518F0B +WIND25WiFi Association with ciscosb2 successful +WIND51WPA Handshake Complete +WIND24WiFi Up 1921681106
All
Tera Term output
ciscosb2
AP
Lab 8 Mini AP mode ndash RAW decoding example
101
Note In order to manage non-ASCII chars the ip_use_decoder variable must be modified according as below at+sscfg=ip_use_decoder0 no decoding [default] at+sscfg=ip_use_decoder1 RAW decoding (the USER and PSK fields must be completed in HEX) at+sscfg=ip_use_decoder2 UTF-8 decoding at+sscfg=ip_use_decoder6 HTML entities decoding
7177657261736466
AP SSIS
AP PSK
Proceed to the next LAB
Lab 9 Socket interface - MiniAP mode
bull Objective
bull Create a direct connection between
the module and an end device
bull Socket interface used in MiniAP
mode
bull Prerequisites
bull Work alone
103
Tera Term output
Lab 9 Configuring the module in MiniAP mode
The Mini AP mode (available starting from the SPWF01S-131115-de4568d-RELEASE) also allows to use the socket interface The procedure is the same as in Lab 7
In order to set the module in Mini AP mode the following parameters are needed
bull Set the SSID
bull Type AT+SSSIDTXT=SPWF_AP
bull Set the network privacy mode
bull Type AT+SSCFG=wifi_priv_mode0
bull Set the network mode (1 = STA 2 = IBSS 3 = MiniAP)
bull Type AT+SSCFG=wifi_mode3
104
OK
All
Lab 9 Configuring the module in MiniAP mode
bull Save the settings on the flash memory and reset the module
bull Type ATampW
bull Type AT+CFUN=1
105
+WIND0Console active +WIND32WiFi Hardware Started +WIND26WiFi Started AP with network SPWF_AP +WIND24WiFi Up 172181511
All
Tera Term output
SPWF_AP
Lab 9 Mini AP mode
bull Connect your PC to the SPWF_AP
network
bull Find the SPWF_AP network and connect
the end device to the module
106
SPWF_AP +WIND2890187C960D0B Associated +WIND29DHCP reply for 17218151290187C960D0B to 172181512 +WIND29DHCP reply for 17218151290187C960D0B to 172181512
All
Tera Term output
Lab 9 Open TCPUDP connection
As described in the Lab 7 the SOCKON command allows to
open a TCPUDP connection to a specified host
bull Sintax
bull AT+SSOCKON=lthostnamegtltportgtltprotocolgtind
bull Configuration parameters
bull lthostnamegt target host DNS resolvable name or IP address
bull ltportgt TCPUDP socket port
bull ltprotocolgt t for TCP socket u for UDP socket
bull ind indicate when data has arrived (optional) Up to 4 consecutive ldquoPending
datardquo message (without any AT+SSOCKR) are guaranteed It is
suggested to empty the buffer using the AT+SSOCKR command and
to avoid exceeding 4 indications
107
Lab 9 Open TCP connection
bull Open the TCP socket server (disable the firewall to properly
run it)
bull Folder hands_on_wifitcp socket serverserverexe
bull The TCP server listens for incoming connections on the port
32000 It sends back all data received
108
Lab 9 Open TCP connection
bull Type AT+SSOCKON=17218151232000tind
bull The client and the server use the socket identifier (ID)
displayed
109
ID 00 OK
All
Tera Term output
Lab 9 Write data to socket
The SOCKW command allows to write data to the specified ID
socket
This command accepts data after the ltcrgt at the end of the
command line
bull Sintax
bull AT+SSOCKW=ltIDgtltlengt
bull Configuration parameters
bull ltIDgt socket identifier
bull ltlengt data length to send
110
Lab 9 Write data to socket
bull Write data
bull Type AT+SSOCKW=0013
bull Type hello worldltCRgt
bull SPWF shows that there are ltpending datagt and their amount
111
+WIND55Pending Data013
All
Tera Term output
ID
Pending
bytes
Note the module is waiting 13 bytes to be written to the socket As soon as 13 bytes (or characters) are sent from the terminal the module is going to write them to the socket and will be ready to receive new commands
Lab 9 Read data from socket
The SOCKR command allows to read data from socket
bull Sintax
bull AT+SSOCKR=ltIDgtltlengt
bull Configuration parameters
bull ltIDgt socket identifier
bull ltlengt data length to read
112
Lab 9 Read data from socket
bull Read data
bull Type AT+SSOCKR=0013
113
hello world OK
All
Tera Term output
Lab 9 Close socket
The SOCKC command allows to close socket
bull Sintax
bull AT+SSOCKC=ltIDgt
bull Configuration parameters
bull ltIDgt socket identifier
114
Tera Term output
Lab 9 Close socket
bull Close socket
bull Type AT+SSOCKC=00
115
OK
All
Proceed to the next LAB
Lab 10 Web server - MiniAP mode
bull Objective
bull Create a direct connection between
the module and an end device
bull Web server used in MiniAP mode
bull Prerequisites
bull Work alone
117
Tera Term output
Lab 10 Configuring the module in MiniAP mode
The Mini AP mode (available starting from the SPWF01S-131115-de4568d-RELEASE) also allows to use the module file system (both RAM and IntExt FLASH)
In order to set the module in Mini AP mode the following parameters are needed
bull Set the SSID
bull Type AT+SSSIDTXT=SPWF_AP
bull Set the network privacy mode
bull Type AT+SSCFG=wifi_priv_mode0
bull Set the network mode (1 = STA 2 = IBSS 3 = MiniAP)
bull Type AT+SSCFG=wifi_mode3
118
OK
All
Lab 10 Configuring the module in MiniAP mode
bull Save the settings on the flash memory and reset the module
bull Type ATampW
bull Type AT+CFUN=1
119
+WIND0Console active +WIND32WiFi Hardware Started +WIND26WiFi Started AP with network SPWF_AP +WIND24WiFi Up 172181511
All
Tera Term output
SPWF_AP
Lab 10 Mini AP mode
bull Connect your PC to the SPWF_AP
network
bull Find the SPWF_AP network and connect
the end device to the module
120
SPWF_AP +WIND2890187C960D0B Associated +WIND29DHCP reply for 17218151290187C960D0B to 172181512 +WIND29DHCP reply for 17218151290187C960D0B to 172181512
All
Tera Term output
Lab 10 Access to Web server - Mini AP mode
bull Open your web browser
bull In the address bar type
captiveportalnetindexhtml
bull The SPWF01S homepage will be
displayed
121
SPWF_AP Tip The Mini AP domain can be set using the variable ip_apdomainname The default value is ldquocaptiveportalnetrdquo
Lab 10 Access to Web server - Mini AP mode
bull Open the SPWF01S Device Status
bull click on the highlighted link
bull The SPWF01S Device Status will be
displayed
122
SPWF_AP Tip The Mini AP domain can be set using the variable ip_apdomainname The default value is ldquocaptiveportalnetrdquo
The Mini AP default homepage can be set using the variable ip_apredirect The default value is ldquofirstsethtmlrdquo
Proceed to the next LAB
Lab 11 Remotely control - GPIOs
bull Objective
bull write remotely a GPIO
bull configure remotely a GPIO
bull read remotely a GPIO
bull Prerequisites
bull module connected to the AP or
module configured in MiniAP mode
124
Lab 11 Remotely control - GPIO
This feature allows to remotely write configure and read a GPIO
The module should be connected to the AP (as shown in Lab 3) or
should be configured in Mini AP mode (as shown in Lab 8)
The external client have to open the remotehtml page stored in the
module
125
ENG-WPA AP
SPWF_AP
miniAP
Tera Term output
Lab 11 Joining a network
In order to be connected to an available Wifi network the AP parameters setting is needed
bull Set the SSID
bull Type AT+SSSIDTXT=ENG-WPA
bull Set the password
bull Type AT+SSCFG=wifi_wpa_psk_texthelloworld
bull Set the network privacy mode (0=none 1=WEP 2=WPA-Personal (TKIPAES) or WPA2-Personal (TKIPAES))
bull Type AT+SSCFG=wifi_priv_mode2
bull NB wifi_auth_type must be set to 0 AT+SSCFG=wifi_auth_type0
bull Set the network mode (1 = STA 2 = IBSS 3 = MiniAP)
bull Type AT+SSCFG=wifi_mode1
126
OK
All
Lab 11 Joining a network
bull Save the settings on the flash memory and reset the module
bull Type ATampW
bull Type AT+CFUN=1
127
+WIND0Console active +WIND46WPA Crunching PSK +WIND32WiFi Hardware Started +WIND21WiFi Scanning +WIND35WiFi Scan Complete (0x0) +WIND19WiFi Join 14D64D243600 +WIND25WiFi Association with ENG-WPA successful +WIND51WPA Handshake Complete +WIND24WiFi Up 19216801xx
All
ENG-WPA AP
Tera Term output
Lab 11 Remotely control in MiniAP mode - GPIO
bull Open your web browser
bull In the address bar type
192168x1xxremotehtml
128
ENG-WPA
AP
Lab 11 Remotely control in MiniAP mode - GPIO
bull Try to write the GPIO14 connected to the LED3 (check if the
LED3 is mounted on your EVAL BOARD otherwise can be used
the GPIO13)
bull Click on the laquoGOraquo button
and LED3 will switch on
129
ENG-WPA
AP
Proceed to the next LAB
Lab 12 Input demo
bull Objective
bull Send a message from the server (wifi
module) to an external client connected
to the same network
bull Prerequisites
bull module connected to the AP or module
configured in MiniAP mode
131
Lab 12 Input demo
The module provides some DEMOs to show the interaction between
the module and an external client connected to the same network
The module should be connected to the AP (as shown in Lab 3) or
should be configured in Mini AP mode (as shown in Lab 8)
In order to run this demo the client have to open the
input_demoshtml page stored in the module
132
ENG-WPA AP
SPWF_AP
miniAP
Tera Term output
Lab 12 Joining a network
In order to be connected to an available Wifi network the AP parameters setting is needed
bull Set the SSID
bull Type AT+SSSIDTXT=ENG-WPA
bull Set the password
bull Type AT+SSCFG=wifi_wpa_psk_texthelloworld
bull Set the network privacy mode (0=none 1=WEP 2=WPA-Personal (TKIPAES) or WPA2-Personal (TKIPAES))
bull Type AT+SSCFG=wifi_priv_mode2
bull NB wifi_auth_type must be set to 0 AT+SSCFG=wifi_auth_type0
bull Set the network mode (1 = STA 2 = IBSS 3 = MiniAP)
bull Type AT+SSCFG=wifi_mode1
133
OK
All
Lab 12 Joining a network
bull Save the settings on the flash memory and reset the module
bull Type ATampW
bull Type AT+CFUN=1
134
+WIND0Console active +WIND46WPA Crunching PSK +WIND32WiFi Hardware Started +WIND21WiFi Scanning +WIND35WiFi Scan Complete (0x0) +WIND19WiFi Join 14D64D243600 +WIND25WiFi Association with ENG-WPA successful +WIND51WPA Handshake Complete +WIND24WiFi Up 19216801xx
All
ENG-WPA AP
Tera Term output
Lab 12 Input demo
bull Open your web browser
bull In the address bar type
192168x1xxinput_demoshtml
bull Insert the message to the client
ie type laquotestraquo (suggested ndash copy
the string and paste it in the
terminal) and then send a carriage
return
135
VERY IMPORTANT
Both client and server are pending (2 sec) after the page
request If no message is sent from the module a timeout
mechanism will be triggered
The server shows the ldquo+WIND56 messagerdquo and it will
wait for a string to be inserted and terminated by [Cr] ldquo+WIND56Insert message to clientdrdquo d is the Nth input SSI into html page (please refer to CGIampSSI Application Notes for details)
Lab 12 Input demo
bull The module receives the HTML
page containing the string inserted
server-side
bull Below this string there are two
buttons to try again the demo or to
return to the homepage
136
Proceed to the next LAB
Lab 13 Socket Server functionality
bull Objective
bull Configure a Server Listening Port
bull Open a TCP connection from a
socket client to the module
bull Data modeCommand Mode usage
bull Prerequisites
bull module connected to the AP or
module configured in MiniAP mode
bull PC to be used as socket client
138
TCP socket
Socket
Server
Socket
Client
Lab 13 Socket Server
This feature allows to enable the socket server mode The module
can be able to listen for an incoming connection on the specified port
The module should be connected to the AP (as shown in Lab 3) or
should be configured in Mini AP mode (as shown in Lab 8)
Please refer to ldquoSocket Server Application Notesrdquo for more details
139
ENG-WPA AP
SPWF_AP
miniAP
Tera Term output
Lab 13 Joining a network
In order to be connected to an available Wifi network the AP parameters setting is needed
bull Set the SSID
bull Type AT+SSSIDTXT=ENG-WPA
bull Set the password
bull Type AT+SSCFG=wifi_wpa_psk_texthelloworld
bull Set the network privacy mode (0=none 1=WEP 2=WPA-Personal (TKIPAES) or WPA2-Personal (TKIPAES))
bull Type AT+SSCFG=wifi_priv_mode2
bull NB wifi_auth_type must be set to 0 AT+SSCFG=wifi_auth_type0
bull Set the network mode (1 = STA 2 = IBSS 3 = MiniAP)
bull Type AT+SSCFG=wifi_mode1
140
OK
All
Lab 13 Joining a network
bull Save the settings on the flash memory and reset the module
bull Type ATampW
bull Type AT+CFUN=1
141
+WIND0Console active +WIND46WPA Crunching PSK +WIND32WiFi Hardware Started +WIND21WiFi Scanning +WIND35WiFi Scan Complete (0x0) +WIND19WiFi Join 14D64D243600 +WIND25WiFi Association with ENG-WPA successful +WIND51WPA Handshake Complete +WIND24WiFi Up 19216801xx
All
ENG-WPA AP
Tera Term output
Lab 13 Socket Server
bull Socket server turn ON the TCP Socket Server (user must
specify the server listening port)
bull Type AT+SSOCKD=32000 (AT+SOCKD=32000u for UDP socket server)
bull Check the status of the socket server
bull Type AT+SSTS=ip_sockd_port
142
ENG-WPA
AP
Tera Term output
OK ip_sockd_port = 32000 OK
All
Tip you can Turn OFF the Socket Server using a server listening port = 0 (type AT+SSOCKD=0)
Lab 13 Socket Server
bull Socket client can be used a simple socket client in order to test the communication
(SocketTest ndash available on httpsourceforgenetprojectssockettest)
143
ENG-WPA
AP
Lab 13 Socket Server
bull Socket client
bull Insert the modulersquos IP Address and the port
bull Click on Connect button
144
Tera Term output
+WIND61Incoming Socket Client1921681102 +WIND60Now in Data Mode
All
Lab 13 Socket Server
bull The module (socket server) enters in data mode and a bidirectional channel is
created to allow exchanging data with the socket client
bull Try to send and receive data from the module
145
Tera Term output
test_1
All
Lab 13 Socket Server ndash escape sequence
bull From Data Mode to Command Mode
bull Configuration variable used escape_seq (default is ldquoat+srdquo case sensitive
suggested to be sent by the local host in a single complete packet with no CR or
LF in the sequence)
bull Type at+s
bull Now itrsquos possible to send AT commands while the socket connection
is still active
146
Tera Term output
+WIND59Back to Command Mode
All
Tip During the Command Mode you cannot send data to client but can receive data from it Every data chunk generates an URC (+WIND64Sockd Pending Data) with limit to 4 (x730 bytes) This is the max number of pending messages From the 5th chunk on messages are lost
Lab 13 Socket Server ndash return to data mode
bull From Command Mode to Data Mode
bull While in Command Mode
bull Type AT+S (this is an AT command AT+S must be followed by ltCRgt)
bull The module returns in data mode
147
ENG-WPA
AP
Tera Term output
+WIND60Now in Data Mode
All
Lab 13 Socket Server ndash turn off
bull Turn OFF the Socket Server
bull Type at+s (to enter in command mode)
bull Type AT+SSOCKD=0
148
ENG-WPA
AP
Tera Term output
OK +WIND62Socket Client Gone1921681102
All
Proceed to the next LAB
Lab 14 Low power modes
bull Objective
bull Practice with Radio Power Save
bull Sleep Mode
bull Standby Mode
bull Prerequisites
bull module connected to the AP
150
Lab 14 Low power modes
This feature allows to enable the low power states
The module supports the ldquoRadio Power Saverdquo mode the ldquoSleeprdquo
mode and the ldquoStandbyrdquo mode
The module should be connected to the AP (as shown in Lab 3) in
order to use the ldquoRadio Power Saverdquo mode
Please refer to ldquoSPWF01S Power Management Application Notesrdquo for
more details
151
ENG-WPA AP
Low Power
Tera Term output
Lab 14 Joining a network
In order to be connected to an available Wifi network the AP parameters setting is needed
bull Set the SSID
bull Type AT+SSSIDTXT=ENG-WPA
bull Set the password
bull Type AT+SSCFG=wifi_wpa_psk_texthelloworld
bull Set the network privacy mode (0=none 1=WEP 2=WPA-Personal (TKIPAES) or WPA2-Personal (TKIPAES))
bull Type AT+SSCFG=wifi_priv_mode2
bull NB wifi_auth_type must be set to 0 AT+SSCFG=wifi_auth_type0
bull Set the network mode (1 = STA 2 = IBSS 3 = MiniAP)
bull Type AT+SSCFG=wifi_mode1
152
OK
All
Lab 14 Joining a network
bull Save the settings on the flash memory and reset the module
bull Type ATampW
bull Type AT+CFUN=1
153
+WIND0Console active +WIND46WPA Crunching PSK +WIND32WiFi Hardware Started +WIND21WiFi Scanning +WIND35WiFi Scan Complete (0x0) +WIND19WiFi Join 14D64D243600 +WIND25WiFi Association with ENG-WPA successful +WIND51WPA Handshake Complete +WIND24WiFi Up 19216801xx
All
Tera Term output
ENG-WPA AP
Low Power
Lab 14 Low power modes ndash Power Save 154
Module
Power State STM32 WLAN
Standby Standby Standby
Sleep Stop PS
Power Save Run PS or Fast-PS
Active Rx Run Rx Idle Rx Active
Active Tx Run Tx Active
Lab 14 Low power modes ndash Power Save
bull By default the module starts in ACTIVE mode
bull Enable the Power Save Mode
bull Type at+sscfg=wifi_powersave1 (ldquowifi_powersave2rdquo enables the Fast-PS mode)
bull Enable the doze operational mode
bull Type at+sscfg=wifi_operational_mode11 (ldquowifi_operational_mode12rdquo enables the quiescent mode)
bull Choose the wake up mode
1 Wake up every n beacon (specified in the wifi_beacon_wakeup variable)
bull Type at+sscfg=wifi_listen_interval0
bull Type at+sscfg=wifi_beacon_wakeup1
OR
2 Wake up every n beacon adaptively (specified in the wifi_beacon_wakeup variable)
bull Type at+sscfg=wifi_listen_interval1
bull Type at+sscfg=wifi_beacon_wakeup1
155
Tip The Wifi Power Save (wifi_powersave1) can also be quickly enabled using the command AT+CFUN=2
Lab 14 Low power modes ndash Power Save
bull Save the settings on the flash memory and reset the module
bull Type ATampW
bull Type AT+CFUN=1
bull The WIND66 message related to Low Power Mode will be
displayed
156
+WIND1Poweron (--SPWF01S) +WIND13ST SPWF01S IWM Copyright (c) 2012-2014 STMicroelectronics Inc All rights Reserved +WIND3Watchdog Running +WIND0Console active +WIND32WiFi Hardware Started +WIND21WiFi Scanning +WIND35WiFi Scan Complete (0x0) +WIND19WiFi Join 02621F518F0B +WIND25WiFi Association with IoT successful +WIND51WPA Handshake Complete +WIND24WiFi Up 1921681104 +WIND66Low Power mode1
All
Tera Term output
ENG-WPA AP
Low Power
Lab 14 Low power modes ndash Sleep Mode 157
Module
Power State STM32 WLAN
Standby Standby Standby
Sleep Stop PS or Fast-PS
Power Save Run PS or Fast-PS
Active Rx Run Rx Idle Rx Active
Active Tx Run Tx Active
Lab 14 Low power modes ndash Sleep Mode
bull In the Sleep Mode the core STM32 is stopped
bull Enable the Sleep Mode
bull Type at+sscfg=sleep_enabled1
bull Enable the Power Save Mode
bull Type at+sscfg=wifi_powersave1 (ldquowifi_powersave2rdquo enables the Fast-PS mode)
bull Enable the doze operational mode
bull Type at+sscfg=wifi_operational_mode11 (ldquowifi_operational_mode12rdquo enables the quiescent mode)
bull Choose the wake up mode
1 Wake up every n beacon (specified in the wifi_beacon_wakeup variable)
bull Type at+sscfg=wifi_listen_interval0
bull Type at+sscfg=wifi_beacon_wakeup1
OR
2 Wake up every n beacon adaptively (specified in the wifi_beacon_wakeup variable)
bull Type at+sscfg=wifi_listen_interval1
bull Type at+sscfg=wifi_beacon_wakeup1
158
Tip The Wifi Sleep Mode (and wifi_powersave1) can also be quickly enabled using the command AT+CFUN=3
Lab 14 Low power modes ndash Sleep Mode
bull Save the settings on the flash memory and reset the module
bull Type ATampW
bull Type AT+CFUN=1
bull The WIND69 message related to Sleep Mode will be displayed
159
+WIND1Poweron (--SPWF01S) +WIND13ST SPWF01S IWM Copyright (c) 2012-2014 STMicroelectronics Inc All rights Reserved +WIND3Watchdog Running +WIND0Console active +WIND32WiFi Hardware Started +WIND21WiFi Scanning +WIND35WiFi Scan Complete (0x0) +WIND19WiFi Join 02621F518F0B +WIND25WiFi Association with IoT successful +WIND51WPA Handshake Complete +WIND24WiFi Up 1921681104 +WIND66Low Power mode1 +WIND69Going into DeepSleep
All
Tera Term output
ENG-WPA AP
Low Power
Lab 14 Low power modes ndash Sleep Mode
bull Wake STM32 up using the GPIO6
bull Put the GPIO6 to 25V (jumper on JP2 as in
the picture)
bull The WIND messages will be displayed
160
+WIND70Resuming from DeepSleep +WIND53Wakeup (GPIO6 High)
All
Tera Term output
Lab 14 Low power modes ndash Sleep Mode
bull Put STM32 in sleep mode using the
GPIO6
bull Go back the GPIO6 floating (remove jumper
- as default)
bull The WIND69 message will be
displayed
161
+WIND69Going into DeepSleep
All
Tera Term output
Lab 14 Low power modes ndash Sleep Mode
bull Wake STM32 up using the remote
page
bull Connect a device to the same modulersquos
network
bull Open the following link
http[module_IP_address]remotehtml
bull Select ldquoWakerdquo and click on ldquoGordquo button
to wake up the module
bull The WIND message will be displayed
162
+WIND70Resuming from DeepSleep
All
Tera Term output
Lab 14 Low power modes ndash Sleep Mode
bull Put STM32 in sleep mode using the
remote page
bull Connect a device to the same modulersquos
network
bull Open the following link
http[module_IP_address]remotehtml
bull Select ldquoSleeprdquo and click on ldquoGordquo button
to put the module in sleep mode
bull The WIND message will be displayed
163
+WIND69Going into DeepSleep
All
Tera Term output
Lab 14 Low power modes ndash Standby Mode 164
Module
Power State STM32 WLAN
Standby Standby Standby
Sleep Stop PS or Fast-PS
Power Save Run PS or Fast-PS
Active Rx Run Rx Idle Rx Active
Active Tx Run Tx Active
Lab 14 Low power modes ndash Standby Mode
bull During the Standby Mode both the STM32 and the Radio will be
put in standby mode The standby mode allows to achieve the
lowest power consumption
bull Enable the Standby Mode
bull Type at+sscfg=sleep_enabled0 (Sleep mode must be disabled)
bull Type at+sscfg=standby_enabled1
bull Please be sure that GPIO6 isnrsquot forced high
bull Set the standby time to wake up via RTC alarm
bull Type at+sscfg=standby_time15
165
Tip The Wifi Standby Mode can also be quickly enabled using the command AT+CFUN=4
Lab 14 Low power modes ndash Standby Mode
bull Save the settings on the flash
memory and reset the module
bull Type ATampW
bull Type AT+CFUN=1
bull After 15 seconds the module will be
rebooted and will return in the
ACTIVE state
166
+WIND0Console active +WIND32WiFi Hardware Started +WIND38WiFi Powered Down +WIND67Going into Standby15 +WIND68Resuming from Standby +WIND1Poweron (--SPWF01S) +WIND13ST SPWF01S IWM Copyright (c) 2012-2014 STMicroelectronics Inc All rights Reserved +WIND3Watchdog Running +WIND0Console active +WIND32WiFi Hardware Started +WIND21WiFi Scanning +WIND35WiFi Scan Complete (0x0) +WIND19WiFi Join02621F518F0B +WIND25WiFi Association with IoT successful +WIND51WPA Handshake Complete +WIND24WiFi Up1921681113
All
Tera Term output
Lab 14 Low power modes ndash Standby Mode
bull Wake up the module using the GPIO6
bull Enable the Standby Mode
bull Type at+sscfg=sleep_enabled0 (make sure that
Sleep mode is disabled)
bull Type at+sscfg=standby_enabled1
bull Type ATampW
bull Type AT+CFUN=1
bull Put the GPIO6 to 25V to wake up the module
bull The WIND message will be displayed and
the module will return in ACTIVE state
167
+WIND68Resuming from Standby +WIND1Poweron (--SPWF01S) helliphelliphellip
All
Tera Term output
Proceed to the next LAB
Lab 15 STAMINI AP switcher
bull Objective
bull HW ldquoSTA to MiniAPrdquo switcher
bull Prerequisites
bull Work alone
169
Lab 15 STAMINI AP switcher
This feature allows to force the module in Mini AP mode starting from
a preexistent state
ldquoRecovery Moderdquo this functionality could be useful to lead the module
in a known state and to reconfigure it (ie using the firstset page)
The GPIO7 will be used to drive this feature
170
Lab 15 STAMINI AP switcher
bull Press and hold the SW2 button on the
EVAL and then perform a reset (HW reset
via SW1 button or SW reset via AT
command)
bull Release the SW2 button
bull The MiniAP mode will be started and the
module is discoverable with the following
SSID
bull iwm-XX-YY-ZZ where XX-YY-ZZ are the last
six digits of modulersquos MAC ADDRESS
171
+WIND2Reset +WIND1Poweron (--SPWF01S) +WIND13ST SPWF01S IWM Copyright (c) 2012-2014 STMicroelectronics Inc All rights Reserved +WIND39HW in miniAP mode (GPIO7 Low) +WIND0Console active +WIND3Watchdog Running +WIND32WiFi Hardware Started +WIND26WiFi Started AP +WIND24WiFi Up172312551
All
Tera Term output
Tip To exit from ldquominiAP mode via GPIO7rdquo perform a modulersquos reset
Proceed to the next LAB
Lab 16 IBSS connection
bull Objective
bull Create an IBSS network
bull Prerequisites
bull Work alone
173
Lab 16 Create an IBSS network
In an IBSS network the SSID is chosen by the client device that
starts the network
Module settings to create an IBSS network
bull Set the IBSS SSID
bull Type AT+SSSIDTXT=ADHOC
bull Set the network privacy mode (0=OPEN or 1=WEP are supported)
bull Type AT+SSCFG=wifi_priv_mode0
bull Set the network mode (2 = IBSS)
bull Type AT+SSCFG=wifi_mode2
174
OK
All
Tera Term output
Lab 16 Create an IBSS network
bull Set IP address IP default gateway IP DNS and IP netmask
bull Type AT+SSCFG=ip_ipaddr192168y1xx
bull Type AT+SSCFG=ip_gw192168y1
bull Type AT+SSCFG=ip_dns192168y1
bull Type AT+SSCFG=ip_netmask2552552550
bull Turn off the DHCP
bull Type AT+SSCFG=ip_use_dhcp0
175
OK
All
Tera Term output
Lab 16 Create an IBSS network
bull Save the settings on the flash memory and reset the module
bull Type ATampW
bull Type AT+CFUN=1
176
+WIND0Console active +WIND32WiFi Hardware Started +WIND21WiFi Scanning +WIND35WiFi Scan Complete (0x0) +WIND19WiFi Join EE33CE002418 +WIND25WiFi Association with ADHOC successful +WIND51WiFi Handshake Complete +WIND24WiFi Up 19216813
All
AD-HOC
Tera Term output
Lab 16 Create an IBSS network
bull Associate the iOS device with the
ADHOC network (iOS gt 8 could not
support the IBSS mode)
177
AD-HOC
Tip manual configuration of static TCPIPv4 parameters is suggested using a PC Ie PC TCPIPv4 properties
Lab 16 Create an IBSS network
bull Find your IP address
bull Type AT+SSTS
bull Open Safari web browser
bull In the address bar type
ltSPWF IP addressgtindexhtml
bull Type 192168y1xxindexhtml
178
AD-HOC
THANK YOU