winged bowl - detroit area...
TRANSCRIPT

9/9/2014
1
Winged Bowl
Preparing the stock Cut a piece of wood 3.5” wide by 8” long and at least 2” thick.
1. Make sure that both sides are absolutely flat.
2. Find the EXACT center on both sides.
Turning a winged bowl can be hazardous. It is recommended that you wear a solid face
shield and gloves.
Also, do not use soft woods such as pine or poplar since they may not be strong enough to
be held in a chuck.
Keep tools well-sharpened.
Body armor or force fields are optional.
Jimmie Clewse-style winged box
9/9/2014
2
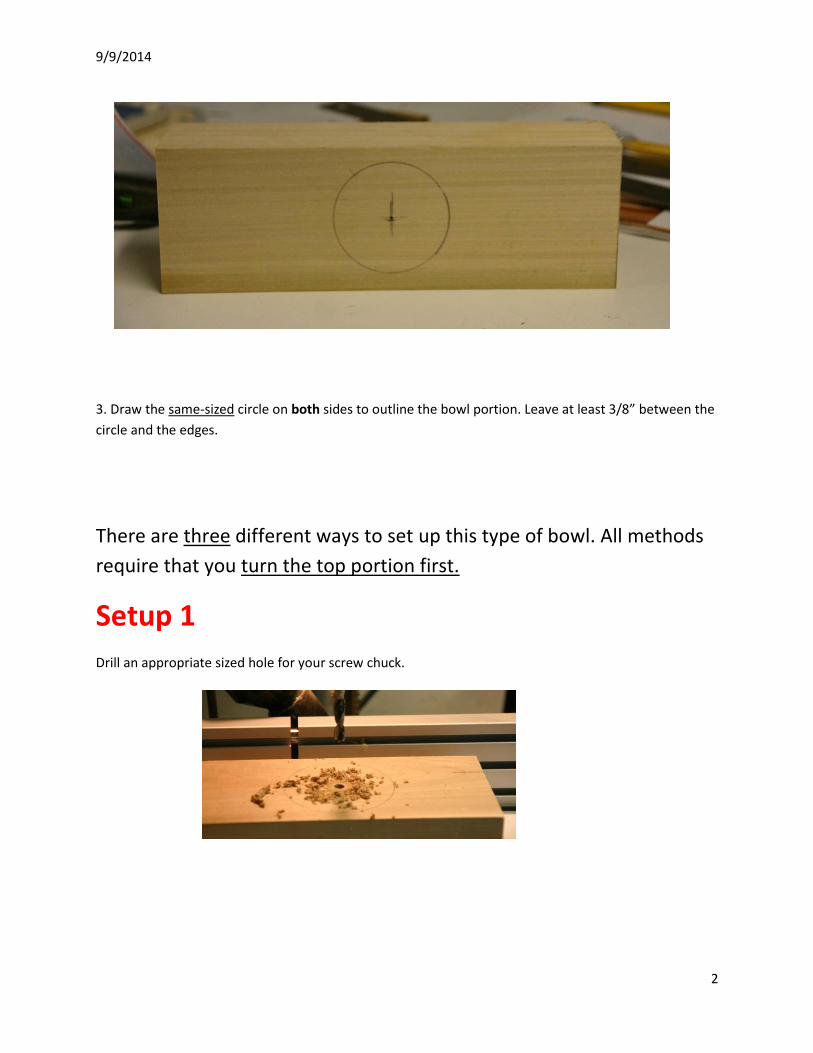
3. Draw the same-sized circle on both sides to outline the bowl portion. Leave at least 3/8” between the
circle and the edges.
There are three different ways to set up this type of bowl. All methods
require that you turn the top portion first.
Setup 1
Drill an appropriate sized hole for your screw chuck.

9/9/2014
3
5. Mount on the lathe with a SCREW CHUCK.
Setup 2
Drill a 3/16th” or a ¼”deep hole with a Forstner
bit.
The hole should be wide (or small) enough to fit
your chuck jaws in the expansion mode.

9/9/2014
4
Mount the wood in chuck in the expansion mode.
Setup 3 Mount the wood between centers.
http://www.youtube.com/watch?v=JLhzOumPFKo
Mount the wood on the chuck.
Turning a winged box using SETUP 2

9/9/2014
5
Using a parting tool, cut away an area around
the circle, leaving a 3/16” tenon and sufficient
space for the chuck jaws.
This is now the bottom.
Reverse the wood on the
chuck.
Secure the tenon on the chuck.
This will become the top.
Top

9/9/2014
6
Using a parting tool, form a shallow recess on
the scribed line.
This is to keep track of the opening as you form
the top portion of the wings.
True the face if necessary.
Using a depth gauge, measure about half way
down the width of the wood.
This will be the depth of the small bowl to will
form later.
Drill a hole to that depth.

9/9/2014
7
Turn the convex (top) portion of the wings.
Lathe speed: Whatever you’re comfortable
with.
Start on the ends and form whatever curve you
desire.
Turn the outer portion of the wing down to
about ½” from the edge.

9/9/2014
8
Sand
Hollow the inside of the bowl and turn a solid,
robust rabbet for a lid.
The rabbet will be used to grip the piece when
it is reversed.
Use a depth gauge.

9/9/2014
9
Reverse the wood.
Begin shaping the underside of the wings.
Start at the ends and slowly work your way toward
the center.
Try to maintain a thickness that is parallel to the
top.
Lathe speed should be fairly fast, but turn at a
speed that you’re comfortable with.

9/9/2014
10
Keep the tailstock in place as long as
possible.
Use a ruler to make sure that the bottom of
the bowl is slightly less than the level of the
edges of the wings.
Round out the bottom portion of the bowl

9/9/2014
11
Sand
Form a lid for the top.