wireless-n mini router quick installation · pdf filewireless-n mini router quick installation...
TRANSCRIPT

Wireless-N Mini Router
Quick Installation Guide


INHOUD
INTRODUCTION ..................................... 8
Main Features ....................................... 9
GETTING STARTED ............................... 10
Setting up a Wireless Infrastructure
Network ............................................... 10
Repeater: ........................................ 11
Access Point: .................................. 13
Router: ............................................. 16
Connecting to the Wireless N Mini
Router for setup ................................. 23
CONFIGURING ROUTER VIA WEB
BROWSER ............................................. 37

SETUP WIZARD ..................................... 39
Repeater Mode ................................. 40
AP Mode ............................................. 48
Router Mode ...................................... 53
Bridge Mode ....................................... 57
Client Mode ........................................ 61
LAN SETTINGS ...................................... 65
CONNECT TO INTERNET ..................... 68
WIRELESS BASE CONFIGURATION .... 72
WIRELESS SECURITY CONFIGURATION
.............................................................. 75
ROUTER ADMINISTRATOR SETUP ....... 79
FIRMWARE UPGRADE ........................ 82

IMPORTANT NOTE
You can reset your Wireless-N Router
to default setting by pressing the
‘RESET’ button on the back side of
the Router.
You can use this solution if you forget
your password.

Thank you for purchasing this Wi-Fi
Repeater. We encourage you to
read this manual carefully before
using it.
Please read the following instructions
carefully for your safety and to
prevent property damage.
Do not use the Wi-Fi Repeater in the
extreme hot, cold, dusty or humid
environments.
Prevent friction with hard objects, or
it may damage the surface of the
product.
Avoid the product from falling down
from a high place as it may damage
the hardware.

The Wi-Fi Repeater is not water
proofed so please do not get any
liquid into the unit.
Do not wipe the surface of the Wi-Fi
Repeater with alcohol, benzene or
thinners.
Do not dismantle, assemble or alter
the product arbitrarily.
Please keep the Wi-Fi Repeater away
from strong magnetic or electrical
area.
Accession cannot be held
responsible for any data loss or
hardware damage caused by a
malfunction, wrong operation or
other reasons.

INTRODUCTION
The Wireless N Router is a combined
wired/wireless network connection
device designed specifically for small
business, office, and home office
networking requirements. It complies
with the IEEE 802.11n (Draft 2.0)
standard. It adopts MIMO as well as
SST technologies. It also works well
with other 11b/g and 11n protocol
wireless products. Create instant WiFi
hotspots at any location where you
have Internet connection.

Main Features
Complies with IEEE 802.11n,
IEEE 802.11g, IEEE 802.11b
standards
Supports Router, Client, Bridge,
Repeater, AP mode
QoS function assures the
quality of VoIP and multimedia
streaming
Wireless N speed up to
300Mbps and Backward
compatible with 802.11b/g
products
Compact and portable,
powerful wireless signal as well
Travel size design, ideal for
home or travel use

Supports WEP, WPA/WPA2,
WPA-PSK/WPA2-PSK
encryptions
GETTING STARTED
Setting up a Wireless
Infrastructure Network
The Wireless-N Mini Router is able to
be setup as a Repeater, Access
Point, Router, Bridge and as an
Client. Depending on how you want
to use the Wireless-N Mini Router, you
have to connect cables differently.

Repeater:
How Network Infrastructure will look after setup
Repeater Mode allows you to extend
the Wi-Fi signal of an existing Wi-Fi
signal in your home or office without
the need of connecting an RJ-45
network cable between the Wireless-
N Mini router and your existing
Access Point/Router. As default the
Wireless-N Mini Router will use the
same name (SSID) as the Access
Point/Router that it is repeating the
signal from.

After the setup is done, you will be
able to connect to the Wireless-N
Mini router wirelessly or with a
network cable through the LAN port
on the Wireless-N Mini Router to
access your local network. The
password of the Wi-Fi signal from the
Wireless-N Mini Router will be the
same as the password used on your
AP/Router.
If you want to log into the router
management page after the setup is
done, you need to manually set the
computer's IP address to 192.168.10.x.
See chapter Setup, for information
how to change a computers IP
address.

1. Plug the power plug of the
Wireless-N Mini Router into an
electrical wall socket.
2. Connect a PC to the LAN port on
the Wireless-N Mini Router with an
RJ-45 cable to do the setup of Wi-
Fi Repeater mode.
Access Point:
How Network Infrastructure will look after setup
Access Point (AP) mode is used to
create a wireless signal, if you have a
router without built-in Wi-Fi. The
Wireless-N Mini Router needs to be

connected directly to your router
with an RJ-45 network cable.
After the setup is done, you will be
able to connect to the Wireless-N
Mini router wirelessly or with a
network cable through the LAN port
on the Wireless-N Mini Router to
access your local network. In this
mode you decide yourself if you
want your Wi-Fi signal password to be
protected, and what the password
should be.
If you want to log into the router
management page after the setup is
done, you need to manually set the
computer's IP address to 192.168.10.x.

See chapter Setup, for information
how to change a computers IP
address.
1. You need to have a Router at
home. Your router at home has to
be connected to the Wireless-N
Mini Router at all time to use
Access Point Mode.
2. Connect one end of a RJ-45
network cable to the WAN port on
the Wireless-N Mini Router and the
other end of the RJ-45 cable to a
free port in your router.
3. Plug the power plug of the
Wireless-N Mini Router into an
electrical wall socket.

4. Connect a PC to the LAN port on
the Wireless-N Mini Router with an
RJ-45 cable to do the setup of
Access Point Mode.
Router:
How Network Infrastructure will look after setup
Router mode is used if you don't
already have a router in your home.
In router mode the Wireless-N Mini
Router will automatically assign IP
addresses to connected network
devices. For router mode the
Wireless-N Mini Router needs to be
connected to your ADS/Cable

Modem with a network cable. In this
mode you decide on the
Name(SSID) and password of the Wi-
Fi network created by the Wireless-N
Mini Router. As default Security Mode
is set to Disable, change this during
the setup wizard, to make your Wi-Fi
network password protected.
After the setup is done, you will be
able to connect to the Wireless-N
Mini router wirelessly or with a
network cable through the LAN port
on the Wireless-N Mini Router to
access your local network. The
password of the Wi-Fi signal from the
Wireless-N Mini Router will be the
password you have entered.

1. You will need broadband Internet
access (an ADSL, Cable Modem
line into your home or office).
2. Consult with your ADSL or Cable
Modem provider for proper
installation of the modem.
3. Connect the ADSL or Cable
modem to the Wireless N Mini
Router's WAN port with a RJ-45
network cable.
4. Plug the power plug of the
Wireless-N Mini Router into an
electrical wall socket.
5. Connect a PC to the LAN port on
the Wireless-N Mini Router with an
RJ-45 cable to do the setup of
Router Mode.

Bridge:
How Network Infrastructure will look after setup
Bridge Mode allows you to extend
the Wi-Fi signal of an existing Wi-Fi
signal in your home or office without
the need of connecting an RJ-45
network cable between the Wireless-
N Mini router and your existing
Access Point/Router. In this mode
you decide on the Name(SSID) and
password of the Wi-Fi network
created by the Wireless-N Mini
Router.

After the setup is done, you will be
able to connect to the Wireless-N
Mini router wirelessly or with a
network cable through the LAN port
on the Wireless-N Mini Router to
access your local network. The
password of the Wi-Fi signal from the
Wireless-N Mini Router will be the
password you have entered.
If you want to log into the router
management page after the setup is
done, you need to manually set the
computer's IP address to 192.168.10.x.
See chapter Setup, for information
how to change a computers IP
address.

1. Plug the power plug of the
Wireless-N Mini Router into an
electrical wall socket.
2. Connect a PC to the LAN port on
the Wireless-N Mini Router with an
RJ-45 cable to do the setup of Wi-
Fi Repeater mode.
Client:
How Network Infrastructure will look after setup
Client Mode is useful if you have a
desktop that does not have a
Wireless network adaptor, but have
an RJ-45 Ethernet port. Then the
Wireless-N Mini Router can receive

the Wi-Fi signal from you AP/Router
and share it though it´s RJ-45 Ethernet
port to the computer, and the
computer will be connected to the
private network. In this mode you will
only be able to connect to the
Wireless-N Mini Router with a network
cable.
1. Connect a PC to the LAN port on
the Wireless-N Mini Router with an
RJ-45 cable to do the setup of
Client Mode.

Connecting to the Wireless N Mini
Router for setup
In order to use the device you must
have access to a PC you can
connect to the repeater port (port
’LAN’). It would be best if you use a
PC, which only has a wired network
card, and no Wi-Fi, not to be
disturbed by two simultaneous LAN
connections. If you use a laptop with
also Wi-Fi on board, we advise you to
temporarily turn off Wi-Fi.
Take the Wolfgang device from its
package and connect it to current
by putting it in an outlet. Keep the
computer turned off. Create a
network between the computer and

Wi-Fi repeater using the supplied RJ45
network cable.
Start the computer.
Most PCs are configured to obtain an
IP address automatically using the
DHCP mechanism. If the computer is
connected to the Wi-Fi Repeater, this
will fail. You should temporarily
change the network adapter settings
as follows:
Open the Control Panel

Double-click on "Network and
Sharing Centre", and the following
screen will appear:

Click on the left on "Change adapter
settings". The following screen will
appear:

Depending on the hardware of your
computer, several adapters could be
shown here. Right-click on the
adapter that is now connected to
the Wi-Fi Repeater.
A context-menu will appear where
you choose the bottom option

"Properties." The following screen will
pop up:

Click once to select Internet Protocol
version 4 (TCP/IPv4):

Click on the button "Properties". The
following screen will pop up:

As stated before, the computer will
usually be set to automatically obtain
an IP address and DNS server

addresses, as shown in the
screenshot above. If your computer
has a static address, note minutely
the settings on this screen. If the
setting procedure of the repeater is
finished, you should in any case be
able to recover the original settings.
Change the settings in this screen as
follows to be able to access the
setup page of the Wi-Fi Repeater:
Please make sure the figures and the
radio buttons are taken over exactly
as in the picture.


Press the 'OK' button. The following
screen will appear: (Network 6 will
most likely have a different number
on your PC)
You choose "Home Network".

The following screen will appear to
confirm:
Close this window. The PC can now
connect to the Wi-Fi Repeater via the
HTTP
protocol. To do this, open an Internet

browser (Internet Explorer, Firefox,
Safari ...), and type
the following address in the address
bar: 192.168.10.253.

CONFIGURING ROUTER VIA WEB
BROWSER
Open web browser and type in the
browser's address box:
"192.168.10.253". This is the address of
the Wi-Fi Repeater.
The repeater will answer you with a
login screen. By default the
username and password is "admin"
(note: lowercase, this entry is case
sensitive).
After this, the home page of the Wi-Fi
Repeater will be displayed.

SETUP WIZARD
After a successfully login, you can
click on Wizard in the left menu to
quickly configure your Router.
Choose the Operation Mode you
need, and then click Next.
See chapter "Setting up a Wireless
Infrastructure Network" for
explanation of the different modes.

Repeater Mode
In the menu on the left you choose
the 'Wizard'. Next page will be
shown:
By default, the radio button is set to
"Router". Change this selection to
“Repeater”.

Press “Next”.

You will see the following (a listing of
the available access points):
You choose the access point that
you want to enhance.
If the access point that you want to
enhance is not listed, this could have
several reasons:
a) You are out of range of the
access point: you should
move, so you are in the

immediate vicinity of the
access point is.
b) The access point is set to not
broadcast the SSID (Service Set
Identifier), to enhance security.
You will need to change the
‘SSID Broadcast' settings of the
access point (see the manual
of the access point or the
router with built-in access
point).
Optionally you could press the
‘Refresh’ button a few times if not all
stations are listed.
Press one of the "Select" buttons.

You will then see the following page,
where you should enter the
credentials of the access point.
The encryption and the password of
the original AP automatically taken,
unless you change this afterwards
manually.
The Key text box displays the number
of characters entered. You could
unmask the password by checking

the Unmask box. The password will
then be displayed in real symbols.
This password is case sensitive so
ensure an accurate entry.
Then press the button "Save &
Reboot".
The repeater starts again, and will try
to connect to the access point of the
network. If, after the repeater is fully

booted, the status screen not
appears, press the "refresh" button of
the web browser once.
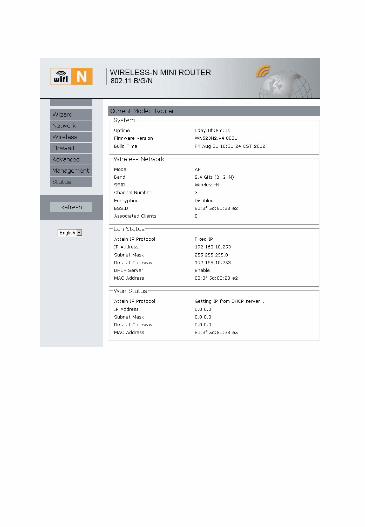
You will see a screen similar to the
one shown below:

Under "Wireless Network" - State you
read Connected; this means that the
repeater successfully connected to
the Access Point. If it shows Disabled,
this means that the connection
failed. The reason for this could be
one of the following:
a) You have entered an incorrect
password. Open in the menu
on the left Wireless - Security.
You are then able to re-enter
the password. Afterwards,
press the "Save and Reboot"
button.
b) Your access point is configured
to only accept logon requests
from previously known devices.
These devices are identified by
their MAC address (which is a
globally unique key, provided
to each network device). You

can find the MAC address of
the repeater at the bottom of
the status screen, under ‘TCP /
IP Configuration’ MAC
Address. You should add the
address to the list of authorized
devices in the setup of the
access point. Consult the
manual of your access point.
If the setup is successful, remember
to change the network settings back
to as previously, otherwise the
network will not function properly.
AP Mode
In the menu on the left you choose
the 'Wizard'. Next page will be
shown:

By default, the radio button is set to
"Router". Change this selection to
“AP”.

Press "Next".
Set the wireless parameter. It's
recommended that you rename the

SSID. The SSID can be named
anything you want, so that you can
remember which network is yours (if
you are in a neighborhood with a lot
of wireless networks).
The point of choosing AP Mode is if
you have a router that does not
have built-in Wi-Fi, and you want to
make your private network wireless.
If you already have a wireless
network you should choose Repeater
Mode, then you won't have 2
networks but just 1 network.
It is recommended that you choose
"WPA/WPA2 Mixed mode" as your
security mode. The password length
must be between 8-63
letters/numbers.

Click on Save&Reboot to reboot the
Router and make the settings take
effect.
The device will try and start again,
and will show a page similar to the
page below:

Router Mode
In the menu on the left you choose
the 'Wizard'. Next page will be
shown:

By default, the radio button is set to
"Router". so no need to change it.
Click on "Next"

Set the wireless parameter. It's
recommended that you rename the
SSID, choose a Security Mode and
enter a Key.
Choose your WAN Connection Type.

If Dynamic IP is selected, the Router
gets the IP address automatically
from the DHCP server or the ISP. No
configuration should be set and you
can go on with the wireless
configuration.
If PPPoE is selected, please enter the
User Name and Password given by
your ISP. These fields are case-
sensitive.

Click on Save&Reboot to reboot the
Router and make the settings take
effect.
Bridge Mode
In the menu on the left you choose
the 'Wizard'. Next page will be
shown:

By default, the radio button is set to
"Router". Change this selection to
“Bridge”.
Click on "Next"

Select the SSID of the Access Point
you want to access and click Select.
Note: The target network needs to be
broadcasting on channel 1-11,
otherwise you will not be able to
repeat its signal.

Set the wireless parameter at the top.
It's recommended that you rename
the SSID, choose a Security Mode
and enter a Key.
The target network's SSID will be
automatically filled into the wireless
setting figure. Type the Password of
the selected network at the bottom.
Then click Save&Reboot to reboot

the Router and make the settings
take effect.
Client Mode
Client Mode is useful if you have a
desktop that does not have a
Wireless network adaptor, but have a
RJ-45 Ethernet port. Then the Wireless-
N Mini Router can receive the signal
and share it though it´s RJ-45 Ethernet
port to the desktop and the desktop
will be connected to the private
network.
In the menu on the left you choose
the 'Wizard'. Next page will be
shown:

By default, the radio button is set to
"Router". Change this selection to
“Client”.
Click on "Next"

Select the SSID of the Access Point
you want to access and click Select.

The target network's SSID will be
automatically filled into the wireless
setting figure. Type the Password of
the selected network. Then click
Save&Reboot to reboot the Router
and make the settings take effect.

LAN SETTINGS
Please click “Network LAN
Settings” located at the web
management interface. The
following will be displayed on your
web browser:

IP
Address:
Enter the IP address of your
Router or reset it in dotted-
decimal notation Wireless-
N Router (factory default:
192.168.10.253).
Subnet
Mask:
An address code that
determines the size of
the network. Normally use
255.255.255.0 as
the subnet mask.
DHCP
Type:
Server, Client or Disable

Note:
If you change the IP Address of
LAN, you must use the new IP
Address to login the Router.
If the new LAN IP Address you
set is not in the same the
subnet, then the IP Address
pool of the DHCP server will
change accordingly at the
same time,while the Virtual
Server and DMZ Host will not
take effect until they are
reconfigured.

CONNECT TO INTERNET
Please click “Network WAN
Settings” located at the web
management interface, the
following example is for “PPPoE” WAN
setting.

Enter the “PPPoE Username” and
“PPPoE Password” that ISP provided
and leave the others. (The “Service
Name” can be blank).
Click “Apply Settings” button to save
the settings then reboot the router.
After reboot, your router is now ready
for Internet connection.
If your ISP provides a static or fixed IP
Address, Subnet Mask, Gateway and
DNS setting, select ‘Static IP’.
Enter the IP address / Subnet Mask /
Default Gateway / MTU / Primary /
Secondary DNS in dotted-decimal
notation provided by your ISP.

If your ISP provides the DHCP service,
please choose ‘DHCP Client’, and
the Router will automatically get IP
parameters from your ISP.
This page displays the WAN IP
parameters assigned dynamically by
your ISP, including IP address, Subnet
Mask, Default Gateway, etc.


WIRELESS BASE CONFIGURATION
Please click “Wireless Basic
Settings” located at the web
management interface, the
following message will be displayed
on your web browser:
You can configure the minimum
number of Wireless settings for
communication, such as Network
Name (SSID) and Channel. The
Access
Point can be set simply with only the
minimum setting items.


Disable
Wireless
Wireless On/Off
Band Supports 11B/11G/11N
mixed modes.
SSID Main Service Set Identifier.
It’s the "name" of your
wireless network.
Broadcast
SSID
Select “Enable” to enable
the device's SSID to be
visible by wireless clients
Channel
Number
This field determines which
operating frequency will be
used. The default channel is
set to Auto, so the AP will
choose the best channel
automatically. It is not
necessary to change the
wireless channel unless you
notice interference
problems with another
nearby access point.

WIRELESS SECURITY
CONFIGURATION
Please click “Wireless Wireless
Security” located at the web
management interface, the
following message will be displayed
on your web browser:
Setup the wireless security and
encryption to prevent from
unauthorized access and monitoring.
Supports 64/128-bit WEP, WPA, WPA2
encryption.

When you finish, click ‘Apply
Settings‘.
Please click “Wireless WPS”
located at the web management
interface, and the following will be
displayed on your web browser: You
can establish a wireless connection

between wireless adapter and
Router using either Push Button
Configuration (PBC) method or PIN
method.
Disable WPS: Enable / Disable
Self-PIN Number: If the new device
supports Wi-Fi Protected Setup and

the PIN method, you can add it to
the network by PIN Number.
PBC method: If the wireless adapter
supports Wi-Fi Protected Setup and
the Push Button Configuration (PBC)
Step 1: Press the WPS button of
the Router directly for 2 – 3 seconds
or Click web management interface
‘Start PBC’ button.
Step 2: Press the WPS button of
the Adapter directly for 3 seconds.
Step 3: Wait for a while until the
next screen appears.
Click Finish to complete
the WPS configuration.

ROUTER ADMINISTRATOR SETUP
Factory Default, Settings Backup and
Restore
You can backup the setting of this
router to a file, so you can make
several copies of the router
configuration for security reason.
To backup or restore router setting,
please follow the following
instructions:
Please click click ‘Management
Backup&Reset’ located at the web
management interface, then the
following will be displayed on your
web browser:


Save
Settings
Press ‘Save...’ button, and
you’ll be prompted to
download the configuration as
a file. You can
save it as another filename for
different versions, and
keep it in a safe place.
Load
Settings
Press ‘Browse…’ to pick a
previously-saved
configuration file from your
computer, and then click
‘Upload’ to transfer the
configuration file to router.
After the configuration is
uploaded, the router’s
configuration will be replaced
by the file you just uploaded.
Reset
Settings
Click this ‘Reset Setting to
Default‘ button to remove
All the settings you have
made, and restore the

configuration of this router
back to factory default
settings.
FIRMWARE UPGRADE
The system software used by this
router is called as ‘firmware’, just like
any applications on your computer.
When you replace the old
application with a new, your
computer will be equipped with new
function. You can also use this
firmware upgrade function to add
new functions to your router, even fix
the bugs of this router.
Please click ‘Management
Firmware Upgrade’ located at the
web management interface, then

the following will be displayed on
your web browser:
Click on the ‘Browse…’ button first,
and you’ll be prompted to find and
select the firmware file. Please
download the latest firmware file
from our website, and use it to
upgrade your router.

After a firmware upgrade file is
selected, click on the ‘Upgrade‘
button, and the router will start the
firmware upgrading procedure
automatically. The procedure may
take several minutes, please be
patient.
NOTE: Never interrupt the upgrade
procedure by closing the web
browser or physically disconnect your
computer from router. If the firmware
you uploaded is corrupt, the
firmware upgrade will fail, and you
may have to return this router to the
dealer of purchase to ask for help.
(Warranty voids if you interrupted the
upgrade procedure).

CHANGE MANAGEMENT PASSWORD
Default password of the Wireless
Router is “admin”, and it’s displayed
on the login prompt when accessed
from web browser. There’s a security
risk if you don’t change the default
password, since everyone can see it.
This is very important when you have
wireless function enabled.
To change password, please follow
the following instructions:
Please click ‘Management
Management‘ on the web
management interface, the
following will be displayed on your
web browser:

When you finish, click ‘Apply
Settings‘. If you want to keep original
password unchanged, click ‘Reset‘.