with adobe connect ://as.exeter.ac.uk/media/level1/academicserviceswebsite/it/... · on the day of...
TRANSCRIPT
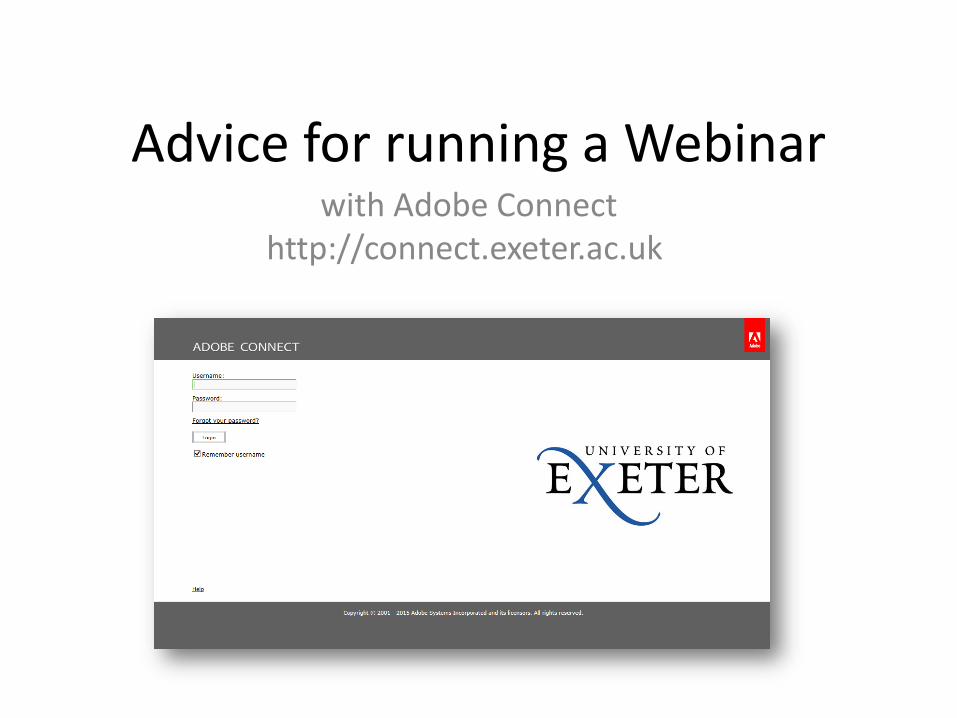
Advice for running a Webinarwith Adobe Connect
http://connect.exeter.ac.uk

2 days before the Webinar
• Email the webinar access information (or link to ELE page) to students.
• Include in the email the time, date and URL and remind everyone that they will need audio and video capabilities in a quiet space.

On the day of the Webinar2 hours before
• Email a final reminder to students that the webinar starts in 2 hours.
• Log in to Adobe Connect using Internet Explorer and run an audio check – instructions on the following pages

1 hour before
• Log into Adobe Connect – using Internet Explorer

Log in to Adobe Connect
Log in using your UoE usernameand password
Tick the remember username to make logging on next time quicker!

Adobe Connect Home page
2. Click the link to open thewebinar room
3. The virtual room will open in an new window and will be shown on the task bar with this icon. Click here to return to the webinar if you lose the Virtual Room!
1. Select the correct session from the My Meetings list
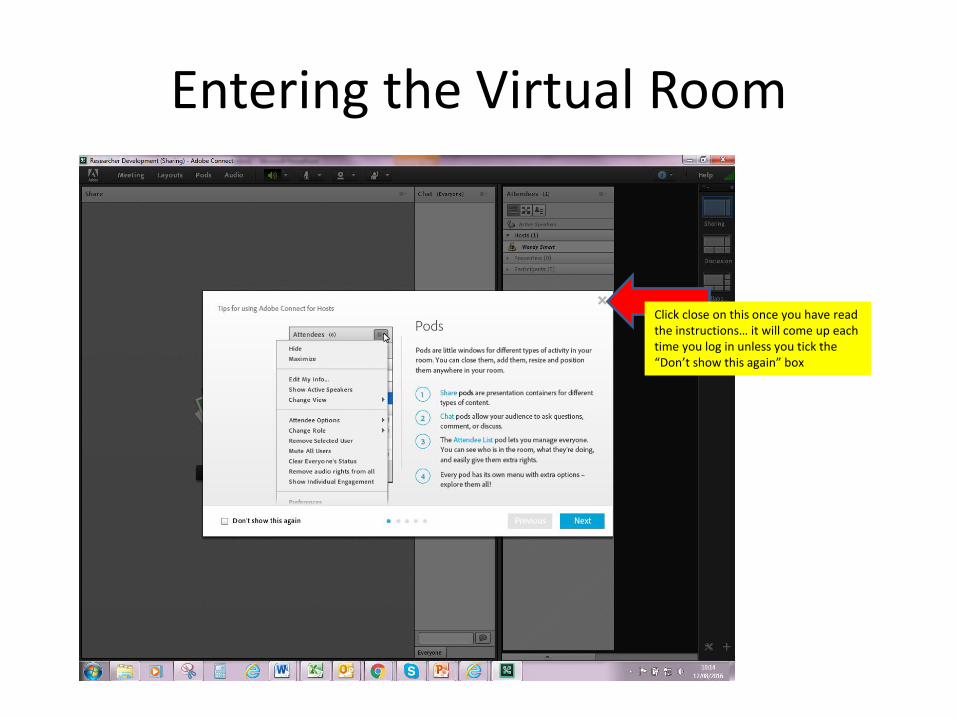
Entering the Virtual Room
Click close on this once you have read the instructions… it will come up each time you log in unless you tick the “Don’t show this again” box

Overview of the Adobe Connect room
You can see who hosting the webinar here
Participants will be listed here
The green Speaker Icon shows your speakers are working, click the down arrow next to the speaker to change the volume or use the taskbar volume control
The Microphone Icon.When grey this means your microphone is not connected.Further information on connecting the microphone and setting up audio will follow
Click here to upload presentations, videos and share the desktop.Further information to follow
Enter text here in the Chat Box.Participants are instructed to use the chat box to inform us should they have issues hearing the presenter. The Chat conversation will populate in the chat column above.
Use the adjuster (slide to the right) to move the participant list to the right hand side this will ensure the sharing window is large enough for students to see the text during the presentation.
NB IMAGE has been enlarged . To the right of this line is the presenter area – i.e. students cannot see the other participants names

Connect the Audio/Microphone
Once the presenter has plugged their headset in proceed to the Audio Set Up Wizard on the following pages.
NB This should be done 1 hour before the webinar starts to allow time to sort any issues that arise
If this is the first time you are setting up the audio you may have a popup asking you to allow FLASH PLAYER ACCESS.
- Select YES
Click the dropdown arrow on the Microphone Icon to set up the Microphone/audio for the PRESENTER ONLY.

Connect the Audio/Microphone cont’d
Click the Meeting Tab and then select Audio Setup Wizard
NB the Microphone Icon is now Green
The Audio Setup Wizard will open the box below
Click next and follow the setup instructionsSee following pages…

Audio Setup Wizard
Click play sound – adjust your volume on the computer volume settings on the task barClick NEXT
Click Record. If the headset is working properly a blue line will appear in the box … see picture 3.2
NB if the blue line does not appear check the headset is not set to MUTE (in line)
Click Play recording to check the microphone is working Click NEXT
From the dropdown menu select the Microphone you are using. Click NEXT

Audio Setup Wizard cont’d
Click test silence. This assesses the level of background noise in the room.Click NEXT
The headset and microphone are setup successfullyClick FINISH
This should be done before the participants have logged in and at least 1 hour before the webinar starts.Mute microphone until webinar begins… instructions on next page.

Mute Microphone until webinar begins
Click the microphone dropdown menu and select mute microphone.
NB remember to UNMUTE when the webinar starts!
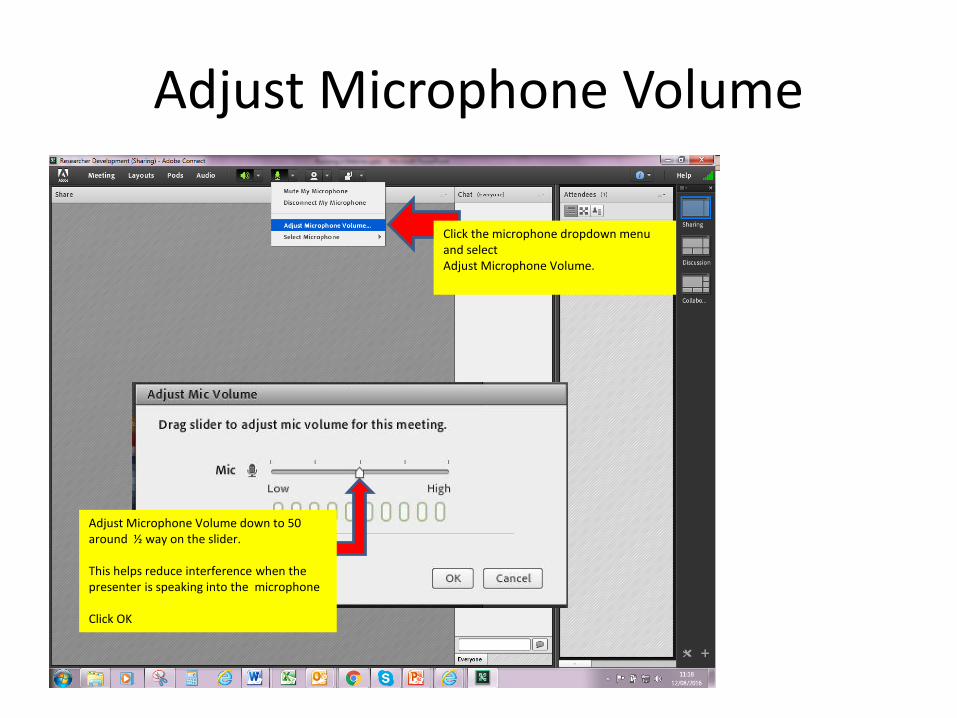
Adjust Microphone Volume
Click the microphone dropdown menu and select Adjust Microphone Volume.
Adjust Microphone Volume down to 50 around ½ way on the slider.
This helps reduce interference when the presenter is speaking into the microphone
Click OK
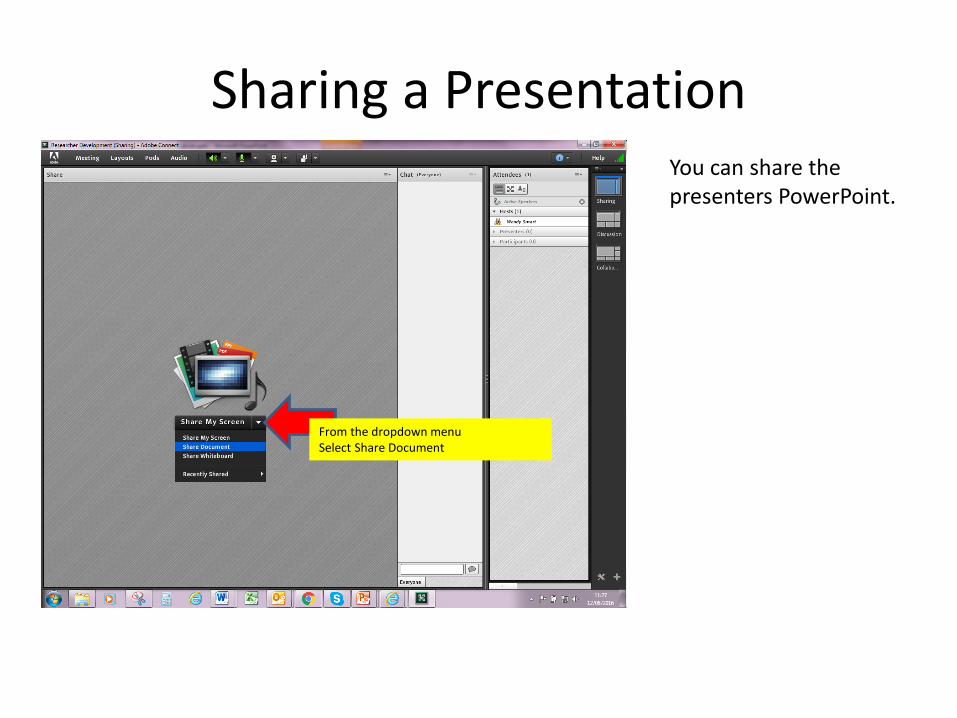
Sharing a Presentation
From the dropdown menu Select Share Document
You can share the presenters PowerPoint.
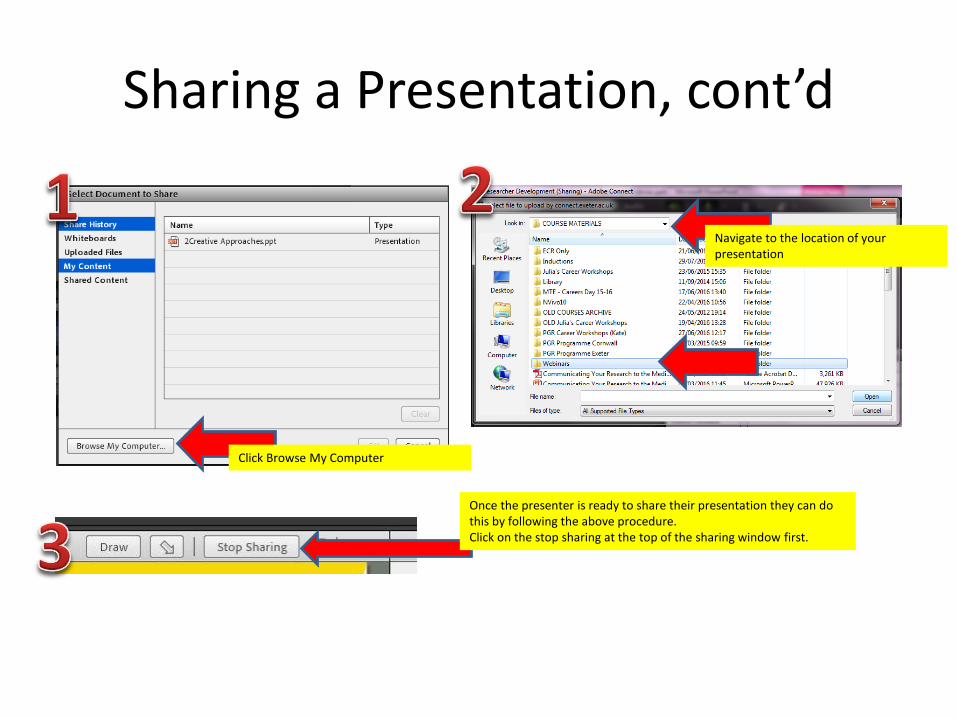
Sharing a Presentation, cont’d
Click Browse My Computer
Navigate to the location of your presentation
Once the presenter is ready to share their presentation they can do this by following the above procedure.Click on the stop sharing at the top of the sharing window first.
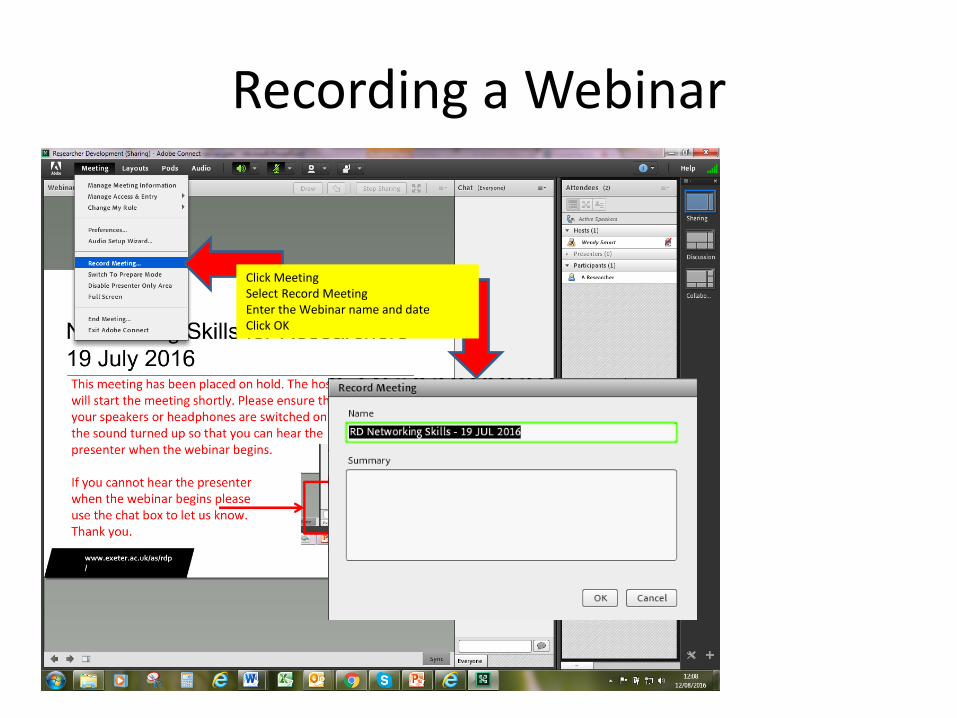
Recording a Webinar
Click MeetingSelect Record MeetingEnter the Webinar name and dateClick OK
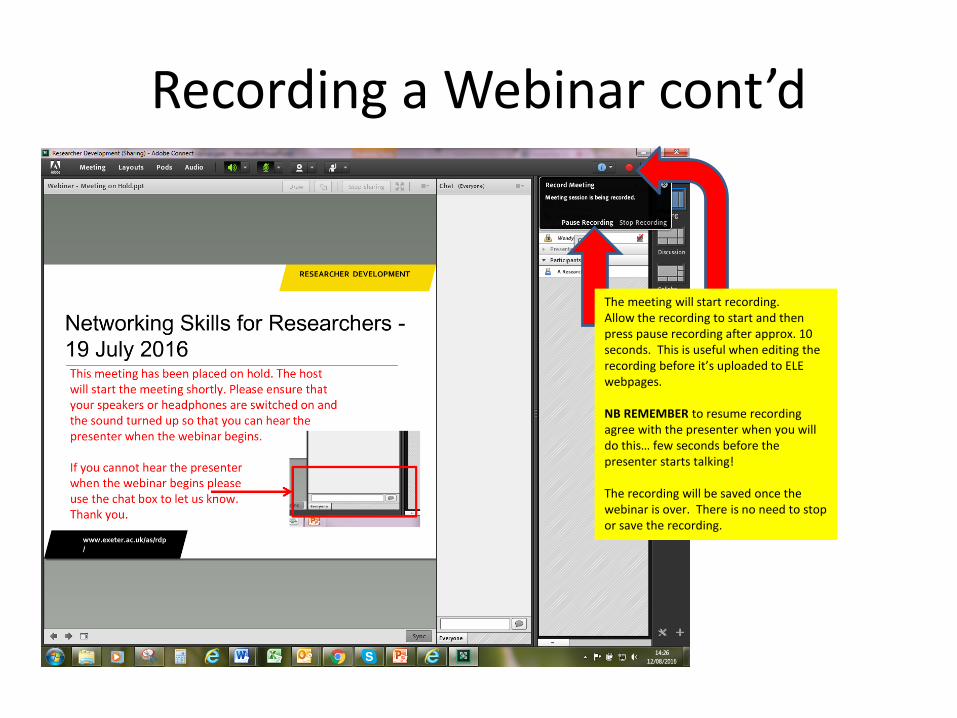
Recording a Webinar cont’d
The meeting will start recording.Allow the recording to start and then press pause recording after approx. 10 seconds. This is useful when editing the recording before it’s uploaded to ELE webpages.
NB REMEMBER to resume recording agree with the presenter when you will do this… few seconds before the presenter starts talking!
The recording will be saved once the webinar is over. There is no need to stop or save the recording.
WEBINAR in progress door sign
• We recommend that you put a “Webinar in progress” sign on your door before you begin the webinar so no-one enters the room and disturbs you
• Ensure all phones (log out of staff Nortel phones), and mobiles switched off/on silent
• Have attendance sheets to hand so you can mark off participants as they enter the Virtual room

Student Access to the Webinar
Students are requested to log on using their full name i.e. First Name, Last name
Students see this at the log in screen

Once the webinar is underway
• The attendance record will be taken at the end of the session. Take a screenshot i.e. PrintScreen as evidence of attendance. This may have to be done several times if the session has many participants.
• Some students may experience issues logging in and will sometimes log in twice, their names will appear with a (2) at the end.
• You should monitor the attendance as the webinar session progresses as students who have connection issues may leave the webinar before the session is completed.

Helpful Information
The presenter will use the forward and back arrows to navigate the presentation.
Raise your hand.
This is for students use. Ask students to use the chat box to ask questions.
As mentioned before the participants are listed here.
Once the webinar is underway mark the attendance sheets as students arrive to the webinar room.
Email Chat history from the chat box dropdown box and clear chat. The chat history should be edited by the presenter and circulated to all attendees as part of the resources for the session (this could be done at the same time the feedback goes out?).

Edit Student Info
There have been occasional issues with students names being incorrectly displayed in the participants list.
You can amend the participants name by clicking once on their name in the list
Click the option here.
Then select Edit My Info
Enter the correct information here.Click OK
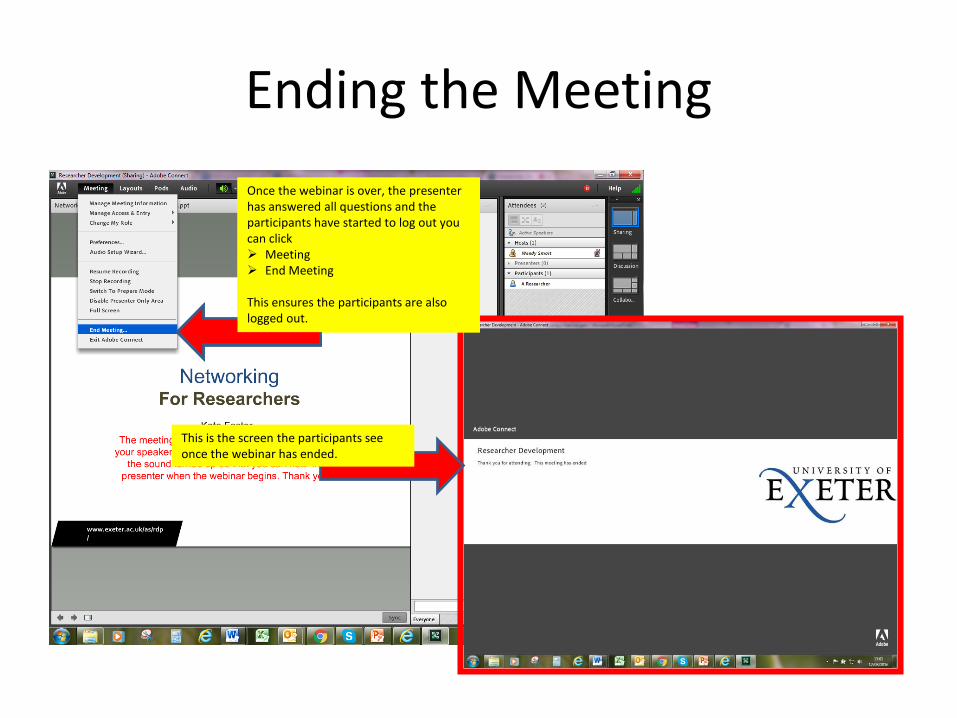
Ending the Meeting
Once the webinar is over, the presenter has answered all questions and the participants have started to log out you can click Meeting End Meeting
This ensures the participants are also logged out.
Once the webinar is over, the presenter has answered all questions and the participants have started to log out you can click Meeting End Meeting
This ensures the participants are also logged out.
This is the screen the participants see once the webinar has ended.

Once the webinar has finished
• Once you have clicked End Meeting the recording will be saved and should be uploaded to ELE as soon as possible.
• To find your recording:– Click the Meetings tab at the top of the Adobe
Connect Central home page
– Click the meeting name in the list
– In the Meeting Information page, click the Recordings link on the navigation bar
Trouble shooting
• No sound can be heard – check the headset isn’t muted. Log out and back in and run through the Audio Setup Wizard. If persistent issues log a call with SID desk.
• Wi-Fi connection lost – presenter will have to log back in to resume the meeting
• Battery connection – ensure the laptop is plugged into the mains
• If participants have issues logging in – you can email the participants the ELE course link so they can listen again to the recording.
• Presentation won’t load – check the title isn’t too long check images – Remove any gif images.