word 2000 - maine.gov · web viewidentify database design process steps. why build a relational...
TRANSCRIPT

DATABASE DESIGN
Table of Contents
Page
LESSON 1: INTRODUCTION......................................................................1
Why Build a Relational Database?........................................................1 The Database Design Process................................................................3
LESSON 2: DETERMINE THE PURPOSE...............................................4
Gathering Information...........................................................................4 Writing a Purpose Statement.................................................................4 Determine Outputs................................................................................5 Data Collection.....................................................................................6 Determine Fields...................................................................................7
LESSON 3: DETERMINE TABLES...........................................................8
Group Common Fields..........................................................................8 Determine Field Characteristics.............................................................9 Determine Primary Keys.......................................................................10
LESSON 4: NORMALIZATION.................................................................11
First Normal Form................................................................................11 Second Normal Form............................................................................12 Third Normal Form...............................................................................12
LESSON 5: ESTABLISH TABLE RELATIONSHIPS..............................14
Determine When to Use Relationships..................................................14 Decide on Relationship Type.................................................................15 One-To-One..........................................................................................15 One-to-Many......................................................................................... 16 Many-to-Many......................................................................................17 Determine Table Relationships..............................................................18
LESSON 6: NEXT STEPS............................................................................19
Next Steps............................................................................................. 19
HELPFUL INFORMATION............................................................................20
Parts of an Access Database..................................................................20 Creating a Primary Key.........................................................................21 Performance Analyzer...........................................................................22 Database Design Worksheets.................................................................23
This workbook may be reproduced in whole or in part by an employee of the Department of Health and Human Services. All other reproduction is prohibited unless written permission is obtained from the Training Institute.
Last Updated: 05/20/2005

NOTES
LESSON 1: INTRODUCTION
OBJECTIVES: Identify when you need a database.Identify database design process steps.
Why Build a Relational Database?
OVERVIEW
A database is simply a computerized record-keeping system. Databases are maintained to make information available on demand to one or more users or applications. Microsoft Access is a database software program that allows you to create a Relational Database.
A Relational Database is organized into individual tables, each with their own purpose. These tables include connecting data that allows them to “relate” to one another. Therefore, the user is able to combine data from many tables to analyze the data and gain useful information. An example of this is a system to track students, the classes they attend, and who taught those classes, which may consist of the following tables:
a Student table to track information about each student a Class table for tracking each class that can be provided an Instructor table to track information on Instructors
The advantages of having a relational database include: Duplicate data is minimized: Since the tables are able to communicate
with each other, there is never a need to enter the same information into different tables.
Information is more accurate: Because there is no duplicate data, the information is more accurate, reliable, and consistent. Plus, it is easier to maintain since the information is only being change in one location.
Data entry is faster and easier: Forms are able to communicate with many tables, so data entry is being done in one location, but updating multiple tables.
Information retrieval is faster and easier: Information can quickly be found, displayed, and printed from multiple tables.
Regardless of size, all databases share certain basic qualities. For instance, every useful relational database:
Requires time for thoughtful design Has to be built within an appropriate database application Contains at least two tables Allows for the addition, deletion, and exploration of information
Database Design Page 1

NOTES
Beyond these basic similarities, databases can range tremendously in terms of purpose and design.
Some examples of databases in wide use today are: Student Registration Client Services Human Resource s Product Inventories Medical records Computerized library
If your design contains a single table of information, then use a spreadsheet application, such as Excel, to track your data. A spreadsheet application has the capability to sort, query and organize your data in similar ways to a database application, but is usually much quicker and easier to build. If the creation of a new database causes you or others to enter the same information more than once (i.e. there is another system requiring the entry of this data) DO NOT create another database! You need to identify what you need the outputs to be and create, or request the creation of, queries and/or reports within the original system.
Page 2 Database Design

NOTES
The Database Design Process
OVERVIEW
The most crucial thing you need to do whenever you create a database is plan ahead. You need to look at the information you want to store and the ways you want to retrieve that information before you start working on the computer.
The steps below are a broad outline for designing a database. Each step will be broken down into smaller pieces and discussed throughout the course.
STEPS
1. Determine the purpose of your database. This will help you start forming the big picture of what to include in the database.
2. Determine the fields you need. Decide what information you want your database to include.
3. Determine the tables you need. Once you have determined the fields, you can group them by common themes, which will become your tables.
4. Determine the relationships. Look at each table and decide how the data in one table is related to the data in other tables. Add fields to tables or create new tables to join the relationships where necessary.
Database Design Page 3

NOTES
LESSON 2: DETERMINE THE PURPOSE
OBJECTIVES: Compile information to write the purpose statement.Determine the outputs of the database.Identify how you acquire information.
Gathering Information
OVERVIEW
When designing a database, it is essential to include as many people as possible. Seek input from everybody who will be using, or requesting information from, the database. A few ideas for gathering this information include:
Brainstorming Questionnaires E-Mail asking for input Staff meetings
Writing a Purpose Statement
OVERVIEW
The first step in designing a database is to determine the purpose of the database and how it is to be used. The purpose statement will identify the ‘who, what, when, where’ and sometimes even ‘how’, of your database. This will help the group look at the type of information to collect, while helping the group still focus on the big picture.
STEPS (Complete the Who, What, Where, When, and How Worksheet)
1. Talk to the people who will use the database. Brainstorm with everybody who will use or want information from the database.
2. Identify who you want to capture information about; such as clients, providers, employees, students.
3. Identify what you want to track; such as classes, products, services, etc.
Page 4 Database Design

NOTES
4. Identify any when’s that you want to track; such as class times, service dates, due dates, order dates, etc.
5. Identify the locations (where) that you want to track; such as class room, service location, employee office number, “Ship To” location, etc.
6. If appropriate, identify the how of what you want to track; such as how to administer medicine, how a class was delivered; etc.
7. Looking at the above list, write a complete statement that incorporates all of the items. (Complete the What is the Purpose of the Database? Worksheet)
Determine Outputs
OVERVIEW
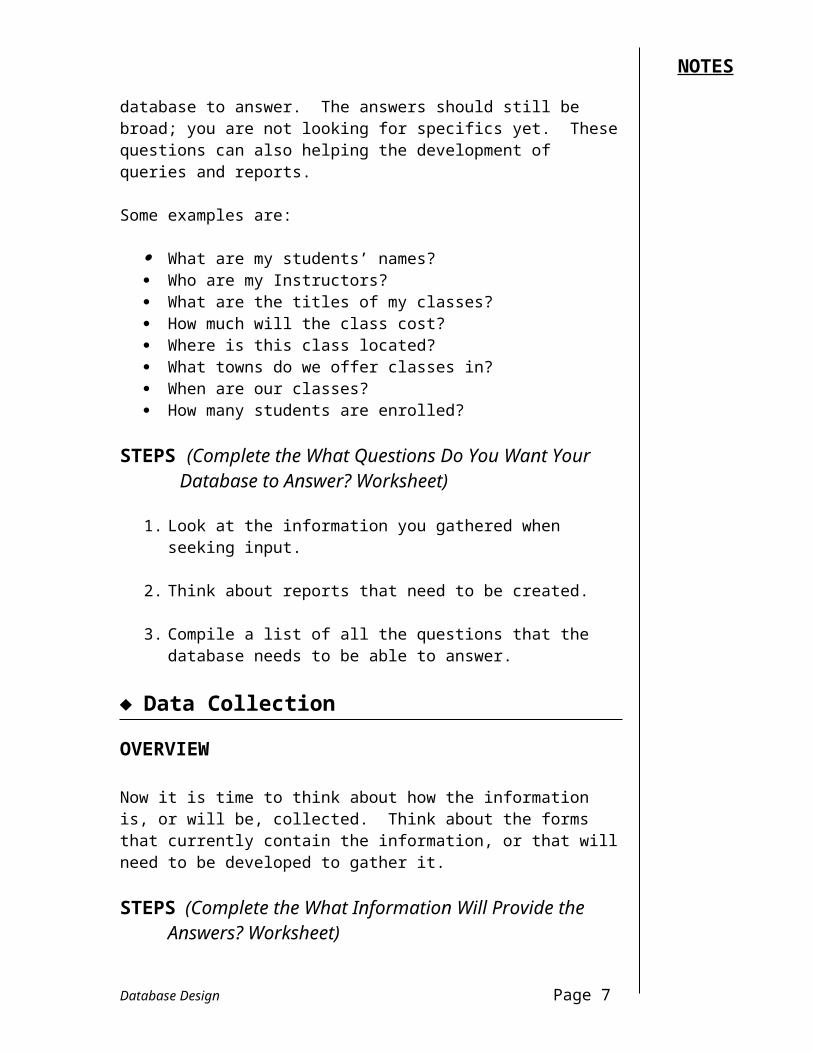
What reports do you think you will be asked to create? Think about the outputs that might be requested. These should be questions that you, and all those involved in the process, would like the database to answer. The answers should still be broad; you are not looking for specifics yet. These questions can also helping the development of queries and reports.
Some examples are:
What are my students’ names? Who are my Instructors? What are the titles of my classes? How much will the class cost? Where is this class located? What towns do we offer classes in? When are our classes? How many students are enrolled?
STEPS (Complete the What Questions Do You Want Your Database to Answer? Worksheet)
1. Look at the information you gathered when seeking input.
2. Think about reports that need to be created.
3. Compile a list of all the questions that the database needs to be able to answer.
Database Design Page 5

NOTES
Data Collection
OVERVIEW
Now it is time to think about how the information is, or will be, collected. Think about the forms that currently contain the information, or that will need to be developed to gather it.
STEPS (Complete the What Information Will Provide the Answers? Worksheet)
1. Gather all of the forms and reports that contain the information that the database should include.
2. If this information has never been collected before, consider how you will gather it.
3. Ensure that you are not leaving a necessary part out of the database.
4. If there is any missing information, evaluate it:a. Do you really need this information?b. Why do you need it?
5. Add any new items to your Questions worksheet and your Purpose Statement.
Page 6 Database Design

NOTES
Determine Fields
OVERVIEW
Each field stores a piece of data about a particular subject. For example, you may want to store information about your students: their first name, last name, address, city, state, zip. You need to create a separate field for each of these pieces of data.
STEPS (Complete the Identify Your Fields Worksheet)
1. Make a list of all of the fields you think you will need.
2. Look at the questions that were developed in Lesson 2, evaluate them to ensure that your database will answer those questions.
3. Break all of the fields into the smallest logical parts. This will make it easier to retrieve individual pieces of information later.
Instead of having one field for the student name, have one for the first name and one for the last name.
Additionally, do not create fields for data that consists of lists of multiple items; such as having one field that lists the service name, date, and location.
4. Check for derived or calculated data; such as a field to capture the total cost of all services for a student. These represent outputs (answers to questions) and will appear in queries and/or reports.
5. Look for fields that are nearly identical to each other; such as having fields “Class1”, “Class2”, “Class3” in the student table. If you see a pattern like this when you are designing your database, it is a good indicator that a separate table is needed.
6. Review the Output Questions, the Purpose Statement, and the Original Questions List to make sure that every item has been addressed.
7. Add new items to each of these as necessary.
Database Design Page 7
NOTES
LESSON 3: DETERMINE TABLES
OBJECTIVES: Group common fields to identify tables.Determine field properties.Determine a primary key for each table.
Group Common Fields
OVERVIEW
Tables generally collect data related to a particular subject, such as students, clients, instructors, classes, services you provide, and so on. Categorizing your fields by subject will to the identification of logical tables.
STEPS (Complete the What Are the Common Fields Worksheet)
1. Evaluate each field to determine what it is based on; for example, the student’s name is based on the student, and group the fields together. These groupings will be your tables.
2. Make sure each field directly relates to the subject of the table.
3. Add the field to only one table.
4. You may have some fields that do not clearly belong in any of the tables you have identified. This is perfectly acceptable. Just make sure to keep track of them, we will identify where they go in a later section of this book
Page 8 Database Design

NOTES
Determine Field Characteristics
OVERVIEW
Identifying specific field properties during the design process will enable you to develop your database more quickly.
STEPS (Complete the Table Worksheets, one for each table)
1. Date Type:
Text – use for text, zip codes, phone numbers, etc.
Memo - for longer text such as notes and descriptions.
Number - when you want to be able to do mathematical calculations with the field.
Date/Time - use for dates and times.
Currency - use for money.
AutoNumber - use to have records numbered in the order they are entered.
Yes/No - use whenever you want "yes/no" or "true/false" choices.
OLE Object - Object Linking and Embedding - use to add pictures or charts.
Hyperlink - text or combination of text and numbers stored as text and used as a hyperlink address.
Lookup Wizard – uses a Wizard to help you create a drop-down list.
2. Field Size: Text fields are limited to 255 characters and spaces of entry, and memo fields 65,535. However, it is possible to limit these fields to a particular number of characters and spaces of entry. For example, in a text field that collects State data, you may be limited to entering only the two-character abbreviation
3. Default Values: If a field will often contain the same data, a default value eliminates the need to enter that data repeatedly. However, it will allow you to enter alternate data whenever necessary.
Database Design Page 9

NOTES
4. Identify any other properties, such as input masks that would make data entry easier or improve the functioning of your database.
Determine Primary Keys
OVERVIEW
Before your database can connect information stored in separate tables, each table must include a field that uniquely identifies each individual record in the table. Such a field is called a primary key. A primary key is called a foreign key when it also appears in a different table.
A person’s MaineCare Number or Employee Identification Number are examples of natural primary keys. An artificial key is when you have your primary key set to automatically number the records for you (known as AutoNumber).
STEPS (Complete the Identify the Primary Keys Worksheet)
1. Look for natural unique identifiers in your table, such as the client’s “MaineCare” number.
2. If none exist, create an artificial identifier by adding an AutoNumber field to your table, such as ServiceID.
3. Establish the unique field as the primary key.
Page 10 Database Design
Helpful Hint:
Information on creating Primary Keys can be found in the Helpful Information section of this book.

NOTES
LESSON 4: NORMALIZATION
OBJECTIVES: Understand and apply the three normal forms.
OVERVIEW
Normalization is the process of determining the appropriate fields, tables, and table relationships in a database. There are three normal forms, also called rules, designed to eliminate redundancy and inconsistent dependency. Inconsistent dependency is having data in unexpected tables, like having to look in the Classes table for the Instructor’s telephone number.
Normalization is a process that is incorporated in every step of Database Design. The following steps ask you to double check the design to ensure that the database will be in Normal Form.
First Normal Form
OVERVIEW
First normal form eliminates repeating fields in individual tables, for example Class1, Class2, Class3 in a Student table.
STEPS (Refine the Identify Your Fields Worksheet)
1. Look for repeating fields.
2. If repeating fields are present, normalize each set of related data by developing separate tables.
3. Ensure each field is a smallest unit, i.e. separate FirstName and LastName.
Database Design Page 11

NOTES
Second Normal Form
OVERVIEW
Second normal form eliminates redundant data across tables and records. For example, if you put the address of the instructor in the class table, that information will be repeated because the instructor will probably teach more than one class and you will also have the information in the instructor table. Keeping a field in only one table reduces repetitive entry and makes updating data simpler as it appears in only one location.
STEPS (Refine the Table Worksheets)
1. Ensure that each field is in only one table.
2. In cases where a field appears more than once, look for inconsistent dependency, which means the data is stored in an unexpected table.
3. Remove the fields from the inappropriate table.
Third Normal Form
OVERVIEW
Third normal form makes sure that each field is in the appropriate table, also known as Inconsistent Dependency.
STEPS (Refine the Table Worksheets)
1. Ensure that each field depends on the table subject.
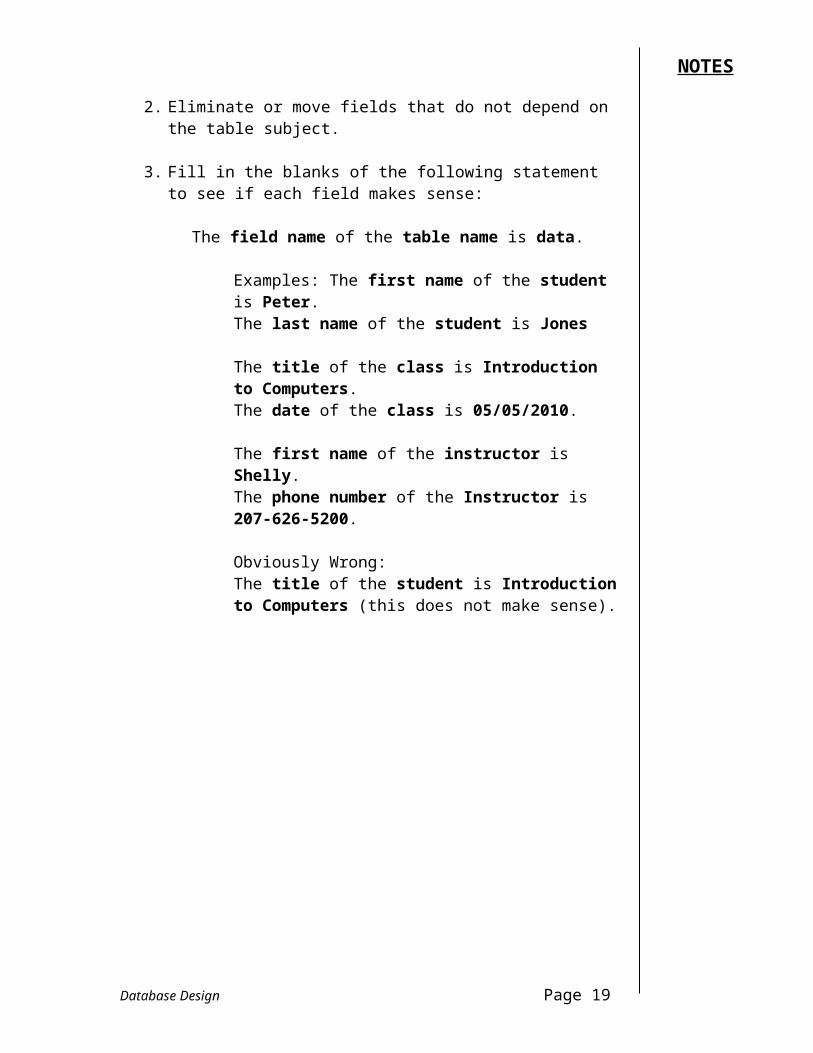
2. Eliminate or move fields that do not depend on the table subject.
3. Fill in the blanks of the following statement to see if each field makes sense:
The field name of the table name is data.
Examples: The first name of the student is Peter.The last name of the student is Jones
The title of the class is Introduction to Computers.The date of the class is 05/05/2010.
Page 12 Database Design

NOTES
The first name of the instructor is Shelly.The phone number of the Instructor is 207-626-5200.
Obviously Wrong:The title of the student is Introduction to Computers (this does not make sense).
Database Design Page 13

NOTES
LESSON 5: ESTABLISH TABLE RELATIONSHIPS
OBJECTIVES: Identify when to use relationships.Define the different types of relationship.Decide on relationship types.
Determine When to Use Relationships
OVERVIEW
Relationships allow multiple tables to share information without repeating the data in each table. This makes maintaining and updating the database easy because you only have to change data in one table to see that it is reflected in other areas of your database.
STEPS
1. Identify where data should be shared between two tables; for example the Instructor should be shared between the Instructor table and the Classes table, rather than storing the data in both places.
2. Ensure that the primary/foreign key is the only field that gets repeated in both tables. For example, InstructorID is the primary key in the Instructor table, so we would see InstructorID in the Classes table as the foreign key.
Page 14 Database Design
Primary Key
Foreign Key

NOTES
Decide on a Relationship Type
OVERVIEW
There are three types of relationships that exist in relational databases. One-to-one, one-to-many, and many-to-many.
One-To-One
OVERVIEW
A one-to-one relationship means that only one record in the first table can match only one record in the second. This type of relationship is rare, because these records should actually appear together in one table. It usually exists when the table's information must be split into separate tables for data entry or security reasons.
Explanation: A record in the HRConfidential Table has only one matching record in the HR Table.
Database Design Page 15

NOTES
One-to-Many
OVERVIEW
A one-to-many relationship is the most common type of relationship. In a one-to-many relationship, a record in the first table can have many matching records in the second, but a record in the second table has only one matching record in the first.
In a One-to-Many relationship, the primary key of one table is linked to the foreign key of another table. The foreign key is always the primary key of the other table.
Explanation: A single record in Instructor Table has many records in the Classes Table.
InstructorID#3 can teach many classes, however ClassID#8 is being taught only by InstructorID#3.
(Complete the Design a One-to-Many Relationship Worksheet)
Page 16 Database Design

NOTES
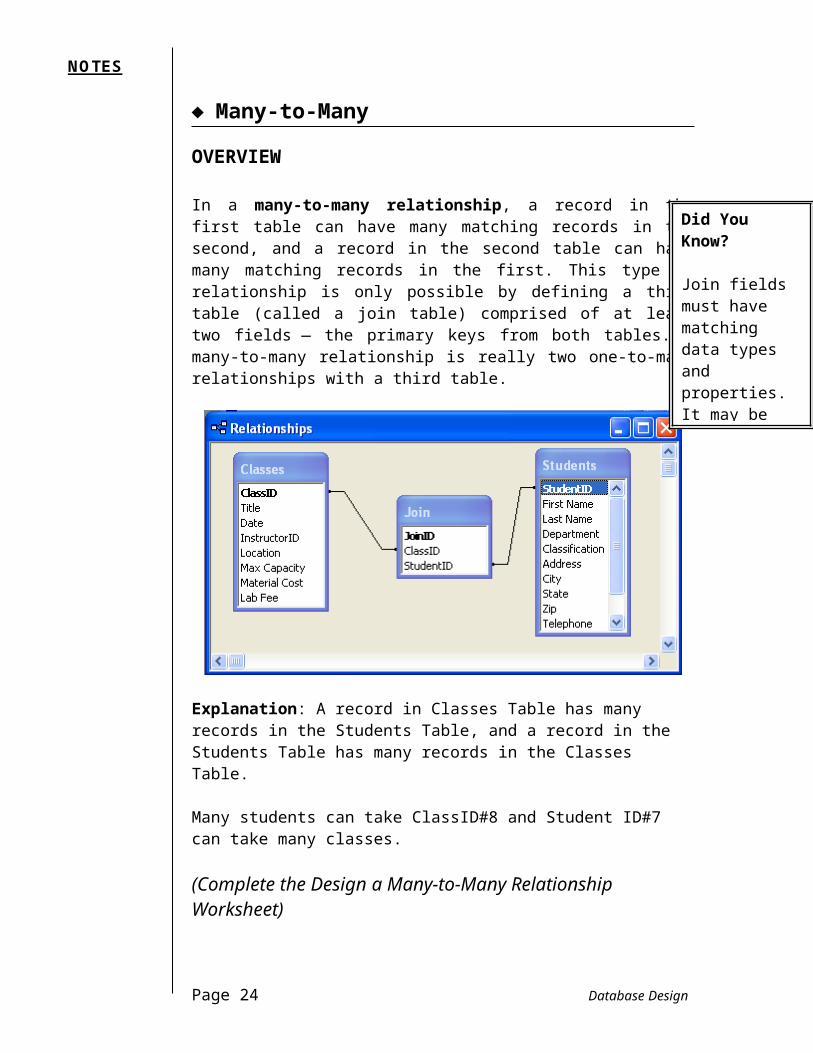
Many-to-Many
OVERVIEW
In a many-to-many relationship, a record in the first table can have many matching records in the second, and a record in the second table can have many matching records in the first. This type of relationship is only possible by defining a third table (called a join table) comprised of at least two fields — the primary keys from both tables. A many-to-many relationship is really two one-to-many relationships with a third table.
Explanation: A record in Classes Table has many records in the Students Table, and a record in the Students Table has many records in the Classes Table.
Many students can take ClassID#8 and Student ID#7 can take many classes.
(Complete the Design a Many-to-Many Relationship Worksheet)
Database Design Page 17
Did You Know?
Join fields must have matching data types and properties. It may be necessary to check these before creating a join table.

NOTES
Determine Table Relationships
OVERVIEW
Deciding on the type of relationship to use is relatively simple. All you need to do is ask the following questions.
STEPS (Complete the Determine Table Relationship Worksheet)
1. Can 1 from Table A have 5 of Table B?
2. Can 1 from Table B have 5 of Table A?
3. If the answer is Yes/No, then use a One-to-Many relationship type.
4. If the answer is Yes/Yes, it is a Many-to-Many relationship type.
Examples are:
Can 1 instructor (Table A) teach 5 classes (Table B)? YesCan 1class (Table B) be taught by 5 instructors(Table A)? No
Can 1 student take 5 classes? YesCan 1 class have 5 students? Yes
Page 18 Database Design
= One-to-Many
= Many-to-Many

NOTES
LESSON 6: NEXT STEPS
OBJECTIVES: Refine the design.
Next Steps
OVERVIEW
After you have designed the tables, fields, and relationships that you need, it is time to study the design and detect any flaws that might remain. It is a lot easier to change the design now than it is after you have filled your tables with data.
STEPS
1. Create your tables, specify the relationships between the tables, and enter some sample data in your tables so you can test your design.
2. To test the relationships in your database, see if you can create queries to get the answers you want. If you do not get the answers you are looking for, re-evaluate your relationships and table design.
3. Create rough drafts of your forms and reports and see if they show the data you expect. Look for unnecessary duplications of data and eliminate them. If you do not get the answers you are looking for, re-evaluate your relationships and table design.
4. When you are satisfied that the table structures meet the design principles that you need, it is time to add all your existing data to the tables. Then create your other database objects (forms, queries, macros, and reports).
5. Microsoft Access has an analyzer tool to help you refine your design. The Performance Analyzer can analyze your entire database and make recommendations and suggestions for improving it. This wizard can also implement the recommend actions and suggestions. The directions for using the Performance Analyzer can be found in the Helpful Information section of this book.
Database Design Page 19
HELPFUL INFORMATION
Parts of an Access Database
Database Window - the portion of the screen dedicated to the active database. It contains all of the objects that comprise the database. Access only allows one database to be open at a time (unless you open Microsoft Access twice).
Objects Bar - vertical panel on the left of the database window that displays the names of the various objects available in a database.
Tables - the only essential element of a database. Tables store data.
Field - a single element of a table. A field is an individual piece of data. Field names become the column headings of tables.
Record - a single row of fields that represent the data for one entity; such as a person or organization.
Queries - answer questions you may have about the data in your tables.
Forms - provide you with a user-friendly format for entering and editing your data.
Reports - nicely formatted, printable versions of complete or partial tables and queries.
Pages - allow users to create Web versions of Access databases
Macros - perform a series of actions automatically, such as opening a form directly to a new record or printing and closing a report.
Modules - a collection of Visual Basic for Application statements stored together as a unit.
Page 20 Database Design

Creating a Primary Key
OVERVIEW
A Primary Key identifies each record as unique. A Primary Key field cannot be null (empty) or a duplication. If your table has a field that will fit this description, it is best to use that field as the primary key. For example, if the table you are creating will track a unique Student ID, that should be used as your primary key field. However, if no field will be unique for every record, Access can actually create a field expressly for this purpose using a data type called AutoNumber.
STEPS – Creating a Manual Primary Key
1. In Design View of your table, type the name of the field you will use as the primary key. Press the TAB key.
2. Select an appropriate data type for the field, and press the TAB key.
3. Type a description if desired.
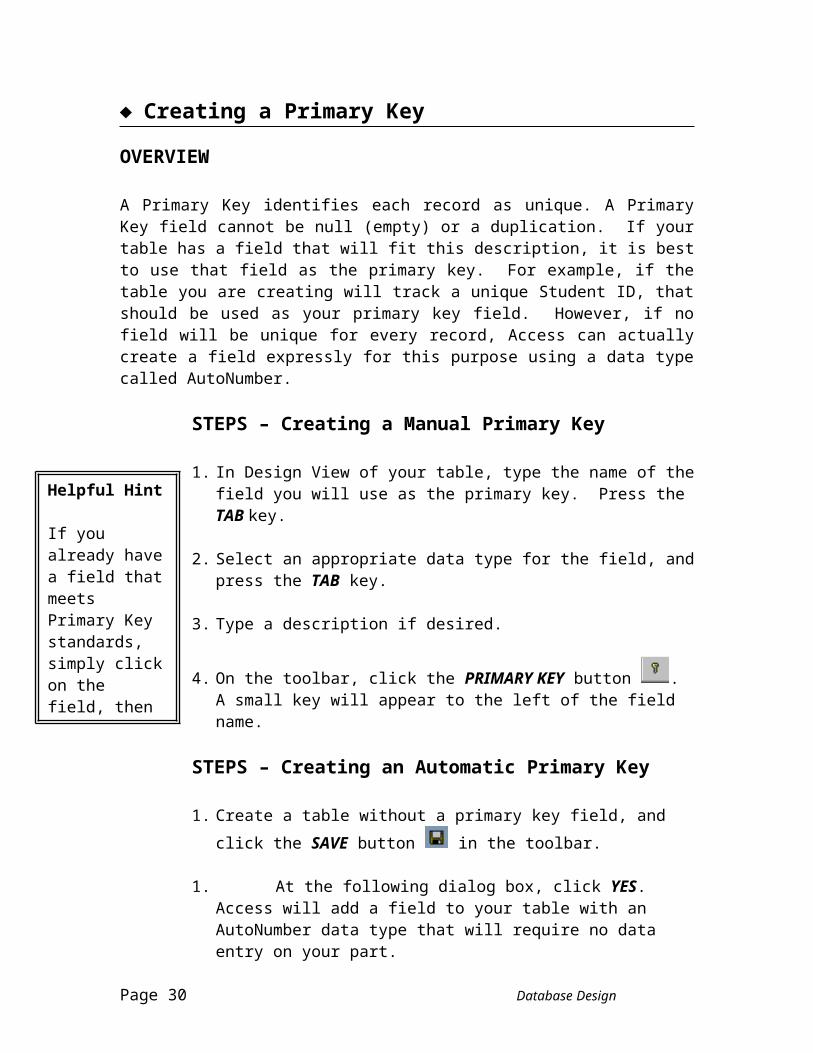
4. On the toolbar, click the PRIMARY KEY button . A small key will appear to the left of the field name.
STEPS – Creating an Automatic Primary Key
1. Create a table without a primary key field, and click the SAVE button in the toolbar.
1. At the following dialog box, click YES. Access will add a field to your table with an AutoNumber data type that will require no data entry on your part.
Database Design Page 21
Helpful Hint
If you already have a field that meets Primary Key standards, simply click on the field, then click the PRIMARY KEY button on the toolbar.

Performance Analyzer
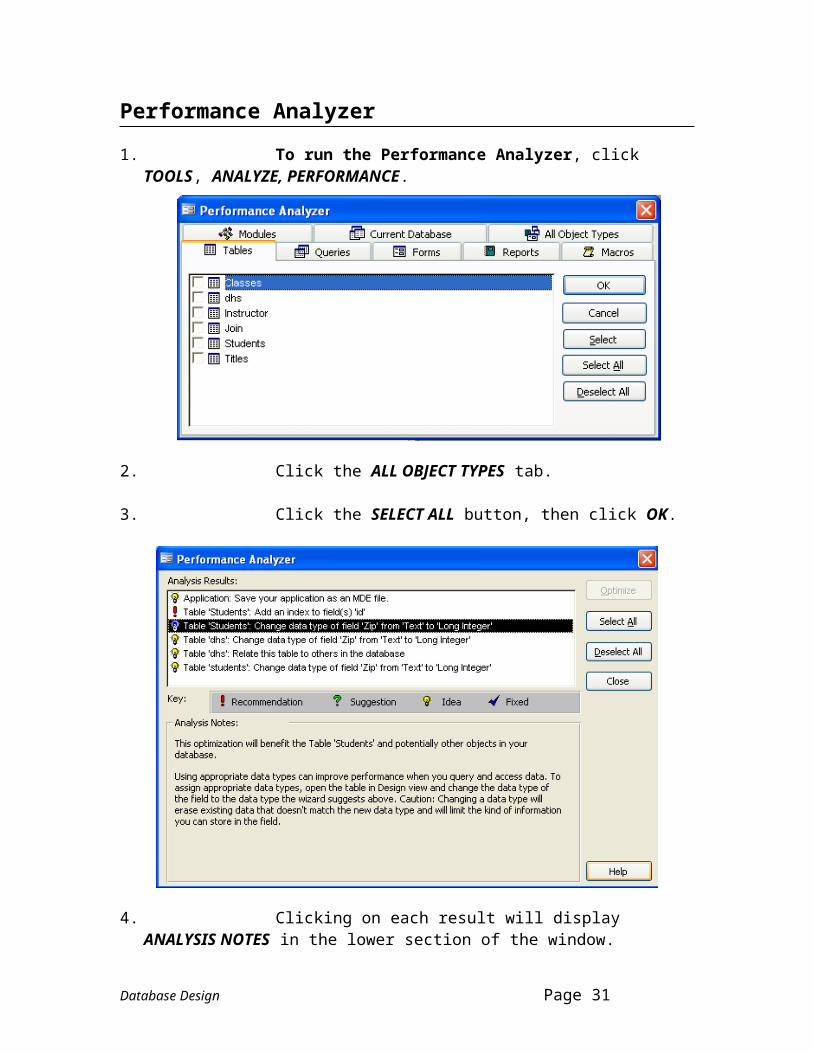
1. To run the Performance Analyzer, click TOOLS, ANALYZE, PERFORMANCE.
2. Click the ALL OBJECT TYPES tab.
3. Click the SELECT ALL button, then click OK.
4. Clicking on each result will display ANALYSIS NOTES in the lower section of the window.
5. To have Access repair a problem, click on the item, then click the OPTIMIZE button.
Page 22 Database Design

6. Click the CLOSE button to close the Performance Analyzer window.
Database Design Page 23

Database Design Worksheets
Identify Who, What, Where, When, and How
Page 24 Database Design
What is the Purpose of the Database?
Database Design Page 25

What Questions Do You Want Your Database to Answer?
Page 26 Database Design

What Information Will Provide the Answers?(Think globally-you do not get too specific)
Database Design Page 27

Identify Your Fields
Page 28 Database Design

What Are the Common Themes?
Database Design Page 29

Table :
Field Name Data Type Field Size Properties
Page 30 Database Design
Identify each table’s primary key. Another important decision is whether it will be an autonumber field which Access automatically populates, or a unique identifier that you enter, like a MaineCare number or case number.
Identify the Primary Keys
Table Name: Field Name: Field Type:
Database Design Page 31
First Normal Form:Go back to the Identify your fields worksheet. Do any of your fields repeat within a table? Break the sets out into their own table. Is each field broken down as small as possible? Double check to make sure that each field is in the smallest possible piece.
Second Normal Form:Look at the Table worksheets and make sure that there are fields repeated across tables.
Third Normal Form:Look at your Table worksheets and fill in the statement:
The field name of the table name is data.
If there are obviously wrong answers, reorganize the fields to fit the tables appropriately.
Page 32 Database Design

Design a One-to-Many RelationshipIn a One-to-Many relationship, the primary key of one table is linked to the foreign key of another table. The Foreign Key is always the Primary Key of the other table.
Design a Many-to-Many RelationshipA Join Table usually has three fields. A Join ID, which is the Primary Key, and two Foreign keys, which are the Primary keys of the two tables to be joined.
All tables in your database should be connected. Here is an example of connected tables. Notice that even though Instructor is not connected to Students, the two tables can still communicate through Classes and Join.
Database Design Page 33
Draw the connecting lines for the Relationship
Draw the connecting lines for the Relationship

Determine Table RelationshipsAsk yourself the questions:Can 1 instructor (Table A) teach 9 classes (Table B)? YesCan 1class (Table B) be taught by 9 instructors (Table A)? No
Can 1 student take 9 classes? YesCan 1 class have 9 students? Yes
Assign the table relationships tables to relate and the relationship types of the database.Tables Relationship Type
Identify the Primary Key and the Foreign Key of your One-to-Many relationships.
Table 1 Table 2 Primary/Foreign Key
Does your database have any Many-to-Many relationships?If you answered yes, identify what fields are needed in the Join table(s) as well as their data type and field size from the Table worksheets.
Field Data type Field Size
Page 34 Database Design
= One-to-Many
= Many-to-Many