archive.lib.msu.eduarchive.lib.msu.edu/maps/workshops/workshopprep/3d workshop... · web viewyou...
TRANSCRIPT

3D Printing Terrain Workshop
Before you start, there are two pieces of software to get and install. AutoDesk 123D and Meshmixer.
AutoDesk123Design: http://www.123dapp.com/design
Meshmixer: http://www.meshmixer.com/download.html
1) Go to this website: http://jthatch.com/terrain2stl/
Here we will select an area for our terrain model. Zoom to a place you want to map or enter your desired latitude/longitude in those fields.
You can then place a box which will be your terrain .stl file. There is no way to change the shape of the box, but we can trim the result later on. The box can be moved/adjusted for size.
Put 2 in the first blank for water drop, and zero in the second for base height (this is a suggestion, default usually works okay too).
Then take a screen shot of your selected place – if you hit the alt key with print screen it will just take a photo of your active window. You can then paste this in a word doc or other program for reference. This will be a reference to orient your final product.
When you have it set how you like, hit Create STL File and then DOWNLOAD. An stl file is a file that can be 3D printed. STL has several after-the-fact backronyms (because it didn’t initially stand for anything) such as "Standard Triangle Language" and "Standard Tessellation Language".
Then SAVE FILE. The .stl file will then wind up in your download folder.
1

2) You should find the .stl file in your download folder and move it to a workspace (desktop, whatever). Notice the .stl file name is the Latitude, Longitude, and the Box Size in arc-seconds (an arc-second of longitude equals 30.87 meters * 0.6561 (cos 49°) or 20.250 meters). You can rename the file if you want or keep the reference information in the file name.
3) In theory, you could send your .stl file to the printer as is. But there are two possible additional steps – doing basic editing on your file and verifying that it is water tight (e.g. there are no gaps in the mesh model that make it unprintable).
There are two free programs we will use to do this: 123D from AutoCad to edit the file, and Meshmixer to verify that it is water tight.
They can be downloaded from here: Meshmixer: http://www.meshmixer.com/download.html123D Design: http://www.123dapp.com/design
If you have not downloaded an installed these programs, you can do so now.
4) Next step is to make sure your .stl is water tight. This is a good thing to do with all things that you want to print. Open the file in Meshmixer. This program does allow for editing, but I have found the editing to be messy and irregular, so we aren’t editing here. Hit “Print” and then “Repair Selected.” This will plug any holes in your model.
Then hit “Export” – you can click on your original .stl file to re-use the name and add “Repaired” to indicate the step you are on or save over it. After you have repaired and saved the file, close Meshmixer.
2

5) Now open 123D Design. There will be a window that appears with choices, you can close it with the nearly hidden x in the upper right.
6) Notice a few things about the interface – the cube in the upper right is for navigation. The grid space can be set by changing the units, grid size etc. in the lower right. Change units to inches. Our final model can but up to 8 X 6 inches, but for printing under 10 dollars 4 X 3 inches is recommended. Making the grid 5 X 4 will help you scale your final product.
7) Go to the AutoDesk Icon at the left, mouse over, select Import from the menu, and then a new window will open. Select the Browse My Computer tab, navigate to and open your file.
8) First we will trim our terrain (if you want). To do this, we will create a box and then delete a portion of the model based on the box. The first step is to see how big our model is, to do this, select the model, then select the smart scale tool. This will give us dimensions. Because of how tessellated it is, the measure tool will not work.
3

So now we can create a box – in the top menu icons, click the second icon at the top (primitive) and select box. Note it does not let you drag the box to size, so it is easier if you know what dimensions to assign – making them longer than the terrain is good. These can be adjusted after the box is made with smart scale (see above – located in bottom menu).
4

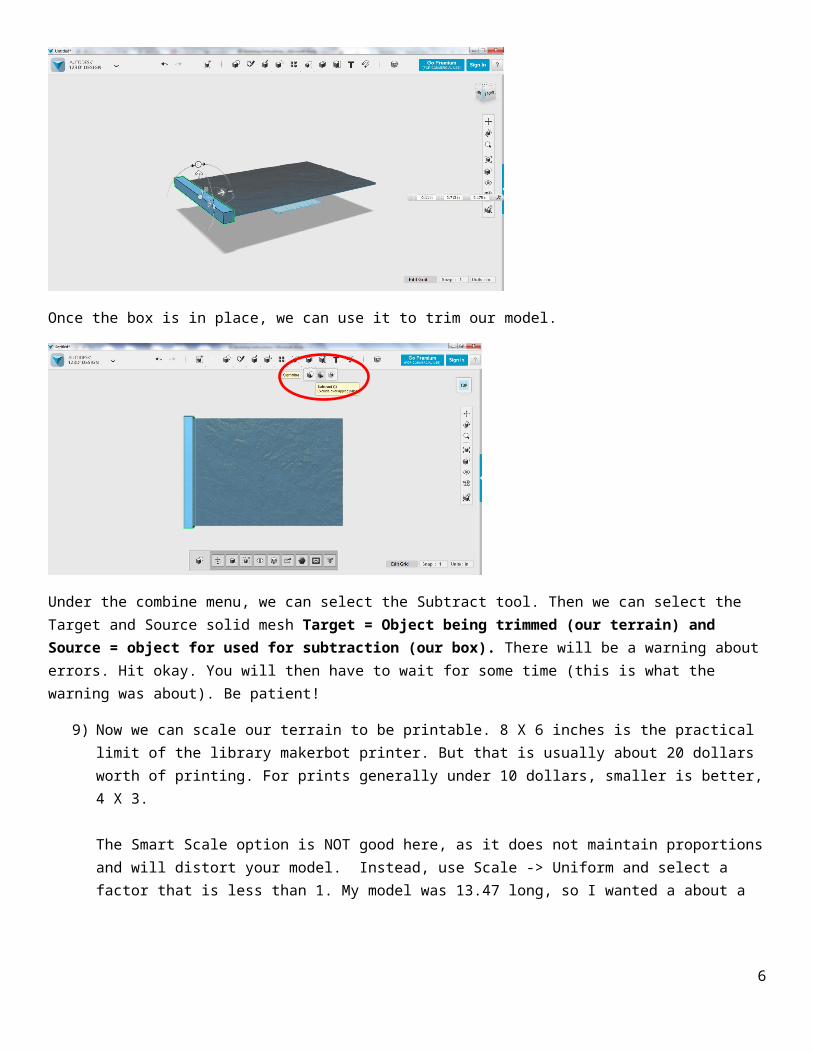
Selecting the box, we can use the move tool to drag it into place. The view box can be used to make sure it is placed properly. This is tricky, and will require fiddling.
Once the box is in place, we can use it to trim our model.
Under the combine menu, we can select the Subtract tool. Then we can select the Target and Source solid mesh Target = Object being trimmed (our terrain) and Source = object for used for subtraction (our box). There will be a warning about errors. Hit okay. You will then have to wait for some time (this is what the warning was about). Be patient!
9) Now we can scale our terrain to be printable. 8 X 6 inches is the practical limit of the library makerbot printer. But that is usually about 20 dollars worth of printing. For prints generally under 10 dollars, smaller is better, 4 X 3.
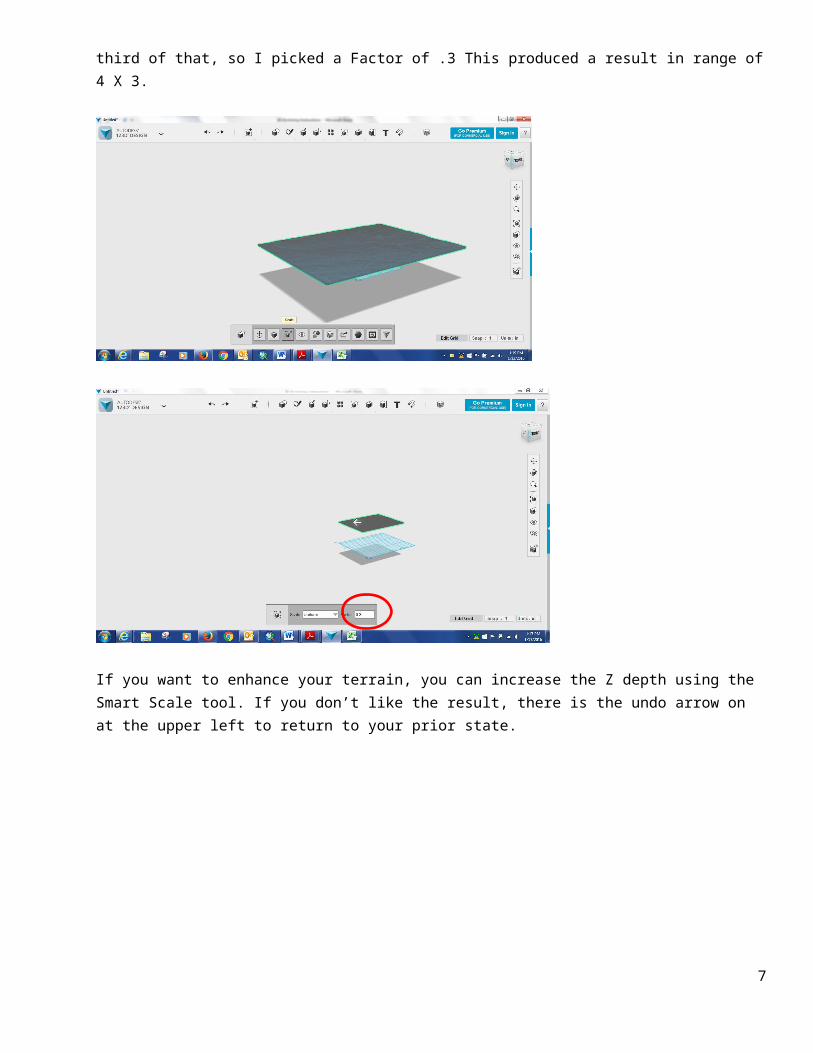
The Smart Scale option is NOT good here, as it does not maintain proportions and will distort your model. Instead, use Scale -> Uniform and select a factor that is less than 1. My model was 13.47 long, so I wanted a about a third of that, so I picked a Factor of .3 This produced a result in range of 4 X 3.
5
If you want to enhance your terrain, you can increase the Z depth using the Smart Scale tool. If you don’t like the result, there is the undo arrow on at the upper left to return to your prior state.
6
After you are happy with the size and relief of your terrain, you can save your model for printing.
Go to Export – as 3D - Save the file as an .stl Set the tessellation to medium and save your final file.
Voila! You now have an edited 3D printable model of terrain.
10) Here is a link for submitting your file for printing at the library: https://www.lib.msu.edu/3DPrinting/requestform/
7