writing your thesis with latex with a very, very, very ... · writing your thesis with latex with a...
TRANSCRIPT

WRITING YOUR THESIS WITH LATEX WITH AVERY, VERY, VERY LONG TITLE
LIM LIAN TZE
UNIVERSITI SAINS MALAYSIA
2015

WRITING YOUR THESIS WITH LATEX WITH AVERY, VERY, VERY LONG TITLE
by
LIM LIAN TZE
Thesis submitted in fulfilment of the requirementsfor the degree of
Doctor of Philosphy
December 2015
ACKNOWLEDGEMENT
Many thanks to Prof. Donald Knuth for giving us TEX, and Leslie Lamport for
LATEX.
I first learned LATEX as an undergraduate student in Computer Science at the Uni-
versity of Warwick. Back in Malaysia, I picked it up again while doing my M.Sc. at
USM, as part of some productive procrastination (there I’ve admitted it!!). This co-
incided with Dr. Dhanesh’s and Dr. Azman’s efforts in raising awareness about LATEX
at USM during NaCSPC’05 – somehow one thing led to another, and I now conduct
trainings and consultatons on LATEX. ©
Since then, many friends and fellow LATEX users have given feedback and helped re-
layed important updates from IPS to me, to help improve the class and template. It has
actually come to a point where you are too numerous to name! Thank you all, as well
as everyone who has attended my talks and workshops, used my various templates,
downloaded examples from my website (http://liantze.penguinattack.org/
latextypesetting.html).
Hope everyone graduates quickly then!
ii

TABLE OF CONTENTS
Page
Acknowledgement . . . . . . . . . . . . . . . . . . . . . . . . . . . . . . . . . . . . . . . . . . . . . . . . . . . . . . . . . . . . . . . . . . . . ii
Table of Contents . . . . . . . . . . . . . . . . . . . . . . . . . . . . . . . . . . . . . . . . . . . . . . . . . . . . . . . . . . . . . . . . . . . . . iii
List of Tables . . . . . . . . . . . . . . . . . . . . . . . . . . . . . . . . . . . . . . . . . . . . . . . . . . . . . . . . . . . . . . . . . . . . . . . . . vi
List of Figures . . . . . . . . . . . . . . . . . . . . . . . . . . . . . . . . . . . . . . . . . . . . . . . . . . . . . . . . . . . . . . . . . . . . . . . . vii
List of Plates . . . . . . . . . . . . . . . . . . . . . . . . . . . . . . . . . . . . . . . . . . . . . . . . . . . . . . . . . . . . . . . . . . . . . . . . . . ix
List of Abbreviations . . . . . . . . . . . . . . . . . . . . . . . . . . . . . . . . . . . . . . . . . . . . . . . . . . . . . . . . . . . . . . . . . x
List of Symbols . . . . . . . . . . . . . . . . . . . . . . . . . . . . . . . . . . . . . . . . . . . . . . . . . . . . . . . . . . . . . . . . . . . . . . . xi
Abstrak . . . . . . . . . . . . . . . . . . . . . . . . . . . . . . . . . . . . . . . . . . . . . . . . . . . . . . . . . . . . . . . . . . . . . . . . . . . . . . . . xii
Abstract . . . . . . . . . . . . . . . . . . . . . . . . . . . . . . . . . . . . . . . . . . . . . . . . . . . . . . . . . . . . . . . . . . . . . . . . . . . . . . . xiii
CHAPTER 1 – HOW TO USE THE USMTHESIS LATEX TEMPLATE
1.1 Bundled Files . . . . . . . . . . . . . . . . . . . . . . . . . . . . . . . . . . . . . . . . . . . . . . . . . . . . . . . . . . . . . . . . . . 1
1.2 Class Options . . . . . . . . . . . . . . . . . . . . . . . . . . . . . . . . . . . . . . . . . . . . . . . . . . . . . . . . . . . . . . . . . . 2
1.3 Providing details about your thesis . . . . . . . . . . . . . . . . . . . . . . . . . . . . . . . . . . . . . . . . . . . 3
1.4 Acknowledgements and Abstracts . . . . . . . . . . . . . . . . . . . . . . . . . . . . . . . . . . . . . . . . . . . . 3
1.5 List of Acronyms and Symbols . . . . . . . . . . . . . . . . . . . . . . . . . . . . . . . . . . . . . . . . . . . . . . . 3
1.6 Main Chapters . . . . . . . . . . . . . . . . . . . . . . . . . . . . . . . . . . . . . . . . . . . . . . . . . . . . . . . . . . . . . . . . . 4
1.7 Appendices. . . . . . . . . . . . . . . . . . . . . . . . . . . . . . . . . . . . . . . . . . . . . . . . . . . . . . . . . . . . . . . . . . . . . 4
1.8 Bibliographies and Citations . . . . . . . . . . . . . . . . . . . . . . . . . . . . . . . . . . . . . . . . . . . . . . . . . . 5
1.9 List of Own Publications . . . . . . . . . . . . . . . . . . . . . . . . . . . . . . . . . . . . . . . . . . . . . . . . . . . . . . 5
CHAPTER 2 – INTRODUCTION: SAMPLES OF BASIC LATEX
iii

2.1 Some Simple Command Usages. . . . . . . . . . . . . . . . . . . . . . . . . . . . . . . . . . . . . . . . . . . . . . 6
2.2 Special Characters . . . . . . . . . . . . . . . . . . . . . . . . . . . . . . . . . . . . . . . . . . . . . . . . . . . . . . . . . . . . . 8
2.3 Useful Resources . . . . . . . . . . . . . . . . . . . . . . . . . . . . . . . . . . . . . . . . . . . . . . . . . . . . . . . . . . . . . . 9
CHAPTER 3 – CITATIONS AND BIBLIOGRAPHY
3.1 The *.bib File . . . . . . . . . . . . . . . . . . . . . . . . . . . . . . . . . . . . . . . . . . . . . . . . . . . . . . . . . . . . . . . . 10
3.2 Citations using the natbib package . . . . . . . . . . . . . . . . . . . . . . . . . . . . . . . . . . . . . . . . . . 11
3.2.1 Author-Year System . . . . . . . . . . . . . . . . . . . . . . . . . . . . . . . . . . . . . . . . . . . . . . . . . . 11
3.2.2 Numeric System. . . . . . . . . . . . . . . . . . . . . . . . . . . . . . . . . . . . . . . . . . . . . . . . . . . . . . . 12
CHAPTER 4 – FIGURES, TABLES, EQUATIONS, ALGORITHMS,ETC
4.1 Inserting Figures . . . . . . . . . . . . . . . . . . . . . . . . . . . . . . . . . . . . . . . . . . . . . . . . . . . . . . . . . . . . . . . 14
4.2 How Do I Do Subfigures? . . . . . . . . . . . . . . . . . . . . . . . . . . . . . . . . . . . . . . . . . . . . . . . . . . . . . 16
4.3 Inserting Plates . . . . . . . . . . . . . . . . . . . . . . . . . . . . . . . . . . . . . . . . . . . . . . . . . . . . . . . . . . . . . . . . 16
4.4 Inserting Tables . . . . . . . . . . . . . . . . . . . . . . . . . . . . . . . . . . . . . . . . . . . . . . . . . . . . . . . . . . . . . . . . 18
4.5 Full-paged, Sideways Figures and Tables . . . . . . . . . . . . . . . . . . . . . . . . . . . . . . . . . . . . 20
4.6 Mathematical Equations. . . . . . . . . . . . . . . . . . . . . . . . . . . . . . . . . . . . . . . . . . . . . . . . . . . . . . . 22
4.7 Acronyms . . . . . . . . . . . . . . . . . . . . . . . . . . . . . . . . . . . . . . . . . . . . . . . . . . . . . . . . . . . . . . . . . . . . . . 23
4.8 Typesetting Algorithms . . . . . . . . . . . . . . . . . . . . . . . . . . . . . . . . . . . . . . . . . . . . . . . . . . . . . . . 24
4.9 Program Listings . . . . . . . . . . . . . . . . . . . . . . . . . . . . . . . . . . . . . . . . . . . . . . . . . . . . . . . . . . . . . . 25
iv

CHAPTER 5 – IMPLEMENTATION
5.1 Printing Your Thesis . . . . . . . . . . . . . . . . . . . . . . . . . . . . . . . . . . . . . . . . . . . . . . . . . . . . . . . . . . . 28
CHAPTER 6 – DISCUSSION
CHAPTER 7 – CONCLUSION
References . . . . . . . . . . . . . . . . . . . . . . . . . . . . . . . . . . . . . . . . . . . . . . . . . . . . . . . . . . . . . . . . . . . . . . . . . . . . 31
Appendices
Appendix A – Data Used
Appendix B – UML Diagrams
List of Publications
v

LIST OF TABLES
Table 2.1 Special Characters in LATEX 9
Table 4.1 Sample Table Only 19
Table 4.2 A table with decimal data 20
Table 4.3 A table with decimal data (mis-aligned) 20
vi

LIST OF FIGURES
Figure 2.1 Common Layout and Formatting Tasks. Note how this longtitle wraps around I hope it works anyway. Look it needsmore, so here’s some more longer text. Is that enough? Ihope it is.
7
Figure 2.2 Compact Lists 8
Figure 3.1 A BibTeX Entry 10
Figure 4.1 Including a Graphics File 15
Figure 4.2 Pythagoras’ Theroem 15
Figure 4.3 Creating subfigures within figures 17
Figure 4.4 This is the main caption of the figure. 17
Figure 4.4(a) First Caption 17
Figure 4.4(b) Second Caption 17
Figure 4.5 Inserting a Plate 18
Figure 4.6 Typesetting Tables 19
Figure 4.7 Aligning decimal data in tables 20
Figure 4.8 Including a sideway, full-page graphic 20
Figure 4.9 A full-page, sideways figure 21
Figure 4.10 Typesetting Mathematical Equations 22
Figure 4.11 The template loa.tex for acronyms 23
Figure 4.12 Typesetting Algorithms 24
Figure 4.13 Typesetting a Java program listing 25
Figure 4.14 A pretty-printed Java program listing with syntax highlight-ing
26
Figure 4.15 Typesetting a C program listing 26
vii

Figure 4.16 A pretty-printed C program listing with syntax highlighting 26
Figure 4.17 A C program listing without syntax highlighting 27
viii
LIST OF PLATES
Plate 4.1 School of Computer Sciences, USM 18
ix

LIST OF ABBREVIATIONS
IPS Institut Pengajian Siswazah
PPSK Pusat Pengajian Sains Komputer
USM Universiti Sains Malaysia
UTMK Unit Terjemahan Melalui Komputer
x

LIST OF SYMBOLS
lim limit
θ angle in radians
xi

PENULISAN TESIS DENGAN LATEX
ABSTRAK
Ini merupakan abstrak Melayu untuk tesis USM. Ianya disediakan dengan sistem
penyediaan dokumen LATEX.
xii

WRITING YOUR THESIS WITH LATEX WITH A VERY, VERY, VERY
LONG TITLE
ABSTRACT
This is the English abstract of a USM thesis. It was prepared with the LATEX docu-
ment typesetting system.
xiii

CHAPTER 1
HOW TO USE THE USMTHESIS LATEX TEMPLATE
Hello and welcome, Universiti Sains Malaysia (USM) research postgrad! The
usmthesis package and template files were written in the hope that they may help
you prepare your research thesis using LATEX, based on the Institut Pengajian Siswazah
(IPS) requirements (IPS USM, 2007). Please note that this version is based on the
new guidelines, in force 17 Dec 2007 onwards, incorporating feedback received
from IPS in August 2015.
LATEX is powerful and produces beautiful documents. However, there is definitely
a learning curve to it – one that is worth the effort. If you find any errors in these
templates or documents, or have any suggestions or feedback, do e-mail me about it
([email protected]). The author cannot always guarantee prompt response, how-
ever. ©
1.1 Bundled Files
The bundled *.tex files are meant as template files which you modify or replace
to suit your own needs: they hold the actual contents of your own thesis. Let’s see how
to do this, step by step.
You should have the following files:
usmthesis.cls The USMthesis document class file which contains most of the format
1

specifications and configurations, conforming to the requirements set out in the
thesis preparation guide issued by IPS.
usmthesis.tex The “main driver” file. Think of this as the equivalent of int main()
or public static void main(String []).
mybib.bib The bibliography database file.
acknowledgements.tex File containing the acknowledgements.
abs-mal.tex File containing the Malay abstract.
abs-eng.tex File containing the English abstract.
loa.tex (Optional) Contains the lists of abbreviations and symbols.
mainchaps.tex Listing of files containing the main chapters.
appendices.tex (Optional) Listing of files containing the appendices.
chap-*.tex The main chapters, one in each file.
app-*.tex The appendices, one in each file.
*.pdf, *.png, *.jpg Any graphic files that need to be included.
There is no need for creating separate files for the cover page, table of contents, and
list of figures and tables. These will be automatically generated when LATEX processes
the input files.
1.2 Class Options
There are a bunch of document class options you can set (or unset) to fulfil some
common instruction sets given by IPS to different candidates on different occasions.
Please read the comments at the top of and throughout usmthesis.tex.
2

1.3 Providing details about your thesis
Telling the world who you are, and what your research thesis is about, is a good
place to start. Open up usmthesis.tex (your “main” file) and look for the line
%% Enter particulars about your thesis HERE
Now on the lines that follow, replace the default text between the curly braces:
\author{Your Name e.g. Ace Student}\title{Your Thesis Title in English e.g. Doing Research}\titlems{Your Thesis Title in Malay e.g. Kerja Penyelidikan}\submityear{Year Submitted e.g. 2006}\submitmonth{Month Submitted e.g. August}\degreetype{Degree Type e.g. Doctor of Philosophy}
1.4 Acknowledgements and Abstracts
Open up acknowledgements.tex, abs-mal.tex and abs-eng.tex, and replace
the default text there with your own material. The titles for your English and Malay
abstracts will be inserted automatically in the Preview/PDF.
1.5 List of Acronyms and Symbols
If you don’t have any list of acronyms or symbols, open usmthesis.tex and
comment out the line that includes the loa.tex file. This is done by adding a percentage
sign (%) in front of the line, like this:
%\include{loa}
If you do need such a list, open up loa.tex. It contains a List of Abbreviations as
3

well as a List of Symbols. You may delete off one or the other if you don’t need either
of them.
You can list down abbreviations and symbols that are used in your thesis follow-
ing the examples there. Also, specify the longest acronym in your list in the square
brackets: \begin{acronym}[HERE]. This will align your list nicely.
For more information, see the documentation of the acronym package at http://
texdoc.net/pkg/acronym.
1.6 Main Chapters
I recommend that you have a separate file for each individual chapter. Each file
should start off with the chapter title, so chap-review.tex might start with:
\chapter{Literature Review}
Next, in mainchaps.tex, list down the file names of your main chapter files. No-
tice that you may omit the .tex suffix when doing so.
1.7 Appendices
This goes pretty much the same way as the main chapters, but you specify the files
containing your appendix material in appendices.tex instead.
If you do not have any appendix to include, you may comment out the lines starting
with \appendix, right up until after \input{appendices}, which are near the end of
usmthesis.tex.
4
1.8 Bibliographies and Citations
You can replace mybib.bib with your own bibliography database .bib file. For
more information on how to do citations inside the main text, see Chapter 3 in the
sample usmthesis.pdf for a brief overview, including how to select an author-year
or numbers only citation system. (Author-year is the default in the sample files.)
1.9 List of Own Publications
First, make sure that you enter details about your own publications in mybib.bib.
Then in usmthesis.tex, search for the following line:
\nociteown{lim:2005}
Replace the BibTeX key between the curly braces with that of your own publication.
If you have more than one publications, simply separate them with commas inside the
curly braces, like this:
\nociteown{lim:tang:2004,lim:2005}
If you don’t have a list of own publications, comment out both these lines like this:
%\nociteown{lim:2005}...%\bibliographyown{mybib}
5

CHAPTER 2
INTRODUCTION: SAMPLES OF BASIC LATEX
Hello and welcome, fellow USM research postgrad! The usmthesis package and
template files were written in the hope that they may help you prepare your research
thesis using LATEX, based on the IPS requirements (IPS USM, 2007). Please note that
this version is based on the new guidelines, in force 17 Dec 2007 onwards.
LATEX is powerful and produces beautiful documents. However, there is definitely
a learning curve to it – one that is worth the effort. If you find any errors in these
templates or documents, or have any suggestions or feedback, do e-mail me about it
([email protected]). The author cannot always guarantee prompt response, how-
ever. ©
MiKTEX, my recommended LATEX distribution for Windows, is available on the
CSPC’07 CD. A step-by-step installation walkthrough is available at (Lim, 2007).
2.1 Some Simple Command Usages.
There are plenty of free LATEX tutorials online, some of which are listed in the bibli-
ographies or available at http://e-office.cs.usm.my. This sample thesis includes
some examples to do some common tasks. We start with some examples for lists (both
bulleted and numbered), highlighting texts in bold and italic, and URLs:
1. bulleted and numbered lists,
6

\begin{enumerate}\item bulleted and numbered lists,\item footnotes\footnote{This is a footnote. However note that
footnotes are not encouraged for the sciences.},\item font effects such as
\begin{itemize}\item \textbf{bold},\item \emph{italic}, and\item \texttt{typewriter-like}\end{itemize}
\item URLs and e-mail addresses: \url{http://www.cs.usm.my/~llt/}, \url{[email protected]};
\item citations: see Chapter \ref{chap:review}.\end{enumerate}
Figure 2.1: Common Layout and Formatting Tasks. Note how this long title wrapsaround I hope it works anyway. Look it needs more, so here’s some more longer text.Is that enough? I hope it is.
2. footnotes1,
3. font effects such as
• bold,
• italic, and
• typewriter-like
4. URLs and e-mail addresses: http://www.cs.usm.my/~llt/, dummy@hotmail
.com;
5. citations: see Chapter 3
Incidentally, if you feel that the lists above are too far apart vertically, you can
customise them using the enumitem package. The effect is then like the following:
1This is a footnote. However note that footnotes are not encouraged for the sciences.
7
\begin{enumerate}[nosep]\item item one,\item item two,\item item three.\end{enumerate}
\begin{itemize}[nosep]\item item one,\item item two,\item item three.\end{itemize}
Figure 2.2: Compact Lists
1. item one,
2. item two,
3. item three.
• item one,
• item two,
• item three.
Granted, the lists are still wide, but this is because we need to honour the require-
ment for double line-spacing.
2.2 Special Characters
Bear in mind that certain characters are special LATEX symbols and need to be es-
caped, as shown in Table 2.1.
Note that for quotation marks, you might prefer ‘‘this’’ and ‘that’ (“this”
and ‘that’) instead of "this" and ’that’ ("this" and ’that’).
If you need to typeset special characters (such as !, h, ©, y, etc), take a look
8

Table 2.1: Special Characters in LATEX
Symbol Name Escape code# hash, pound \#$ dollar \$% percent \%ˆ “hat” \^{}& ampersand \&_ underscore \_{ left brace \{} right brace \}˜ tilde \~{}∼ wide tilde $\sim$“ open double quotes ‘‘” close double quotes ’’
at the Comprehensive LATEX Symbol List. It should be under C:\ProgramFiles\
MiKTeX2.9\doc\info\symbols\comprehensive\symbols-a4.pdf if you installed
MiKTeX on a Windows machine.
2.3 Useful Resources
(Mittelbach, Goossens, Braams, Carlisle, & Rowley, 2004) is a very useful book —
but it’s quite an investment at RM180++. A worthy one, nevertheless. Roberts (2005)
has a website with very good LATEX tutorials at http://www.comp.leeds.ac.uk/
andyr/misc/latex/, too. Don’t forget the famous lshort tutorial (Oetiker, Partl,
Hyna, & Schlegl, 2006).
I’ve also compiled a list that I find useful at http://liantze.penguinattack
.org/latextypesetting (Lim, 2007).
9

CHAPTER 3
CITATIONS AND BIBLIOGRAPHY
This chapter should have been a survey on the history of TEX and LATEX, and a
comparison to conventional word processors in preparing academic documents. Due
to lack of time on the author’s part, and also the abundance of such discussions on the
web, we look at ways to prepare the bibliography and citations instead.
3.1 The *.bib File
First of all, bear in mind that your bibliography file (*.bib files) is like a database.
That means you can maintain a centralised list, and reuse it for all your publications.
LATEX will only list sources that you actually cite in the text for each document, ac-
cording to the bibliography and citation style you select in each document. But you
can still hack it so that your own publications are listed, even if you did not cite it.
@BOOK{latex:companion,title = {The \LaTeX{} Companion},publisher = {Addison-Wesley},year = {2004},author = {Frank Mittelbach and Michel Goosens and Johannes Braams
and David Carlisle and Chris Rowley},series = {Addison-Wesley Series on Tools and Techniques for
Computer Typesetting},address = {Boston, MA, USA},edition = {2nd}
}
Figure 3.1: A BibTeX Entry
As an example, in mybib.bib I created a BibTEX entry with JabRef, the source
10

text of which is shown in Figure 3.1.
One thing to note about authors’ names: BibTEX recognises “Mittelbach” as the
last name for both Frank Mittelbach and Mittelbach, Frank. So for a name like
“Lim Lian Tze”, you would have to specify it as either Lian Tze Lim or Lim, Lian
Tze for BibTEX to recognise “Lim” as the last name correctly. In addition, if the
surname or family name of an author consists of multiple words, enclose it with braces
to avoid surprises, like so: Syed Muhammad Naquib {al-Attas}.
3.2 Citations using the natbib package
The usmthesis package imports the natbib and apacite package which pro-
vides flexible citation mechanisms, so see its documentation for more details. On
a MiKTEX installation, use the command prompt to issue mthelp --view natbib
and mthelp --view apacite to access the documentation. On TeXLive, simply type
texdoc natbib and texdoc apacite and the documentation will be displayed auto-
matically, if it’s found on your machine.
The basic citation commands are \citet and \citep, which stands for textual and
parenthetical citation respectively. They take extra arguments, too, for adding notes in
the citations.
3.2.1 Author-Year System
The default bibliography style is APA:
• \citet{latex:companion}→Mittelbach et al. (2004)
11

• \citet[chap.~2]{latex:companion}→Mittelbach et al. (2004, chap. 2)
• \citep{latex:companion}→ (Mittelbach et al., 2004)
• \citep[chap.~2]{latex:companion}→ (Mittelbach et al., 2004, chap. 2)
• \citep[see also][]{latex:companion}→ (see also Mittelbach et al., 2004)
• \citep[see also][chap.~2]{latex:companion}→ (see also Mittelbach et
al., 2004, chap. 2)
• \citet{latex:companion,roberts}→Mittelbach et al. (2004); Roberts (2005)
• \citep{latex:companion,roberts}→ (Mittelbach et al., 2004; Roberts, 2005)
You may also want to write only the author’s name or year occassionally:
• \citeauthor{latex:companion}→Mittelbach et al.
• \citeyear{latex:companion}→ 2004
• \citeyearpar{latex:companion}→ (2004)
3.2.2 Numeric System
If you prefer the plain, numerical system, do the following steps first:
1. In usmthesis.cls, search for the line \RequirePackage{natbib} and modify
it to:
\RequirePackage[numbers]{natbib}
2. In usmthesis.tex:
• comment out the line starting with \citestyle{...}
• modify the biblography styles to:
\bibliographystyle{plainnat}
12

\bibliographystyleown{plainnat}
or any other number system style that you prefer.
You will then get the following citation outputs:
• \citet{latex:companion}→Mittelbach et al. [1]
• \citet[chap.~2]{latex:companion}→Mittelbach et al. [1, chap. 2]
• \citep{latex:companion}→ [1]
• \citep[chap.~2]{latex:companion}→ [1, chap. 2]
• \citep[see also][]{latex:companion}→ [see also 1]
• \citep[see also][chap.~2]{latex:companion}→ [see also 1, chap. 2]
• \citet{latex:companion,roberts}→Mittelbach et al. [1], Roberts [3]
• \citep{latex:companion,roberts}→ [1, 3]
• \citeauthor{latex:companion}→Mittelbach et al.
• \citeyear{latex:companion}→ 2004
• \citeyearpar{latex:companion}→ [2004]
13
CHAPTER 4
FIGURES, TABLES, EQUATIONS, ALGORITHMS, ETC
(This is supposed to be the design or methodology chapter. Instead, we include
examples on inserting figures, tables, mathematical equations. . . i.e. things that you
might want to include in your thesis.)
4.1 Inserting Figures
You can draw diagrams with special LATEX commands, but this may take some
extra time to learn. I’ve had some forays into the pgf and tikz packages and must
say I quite like the results; but as I said, they take time to learn. If you want a faster
solution, you can draw your diagrams using other applications, and saving them as
graphic files (EPS, PNG, JPG, PDF).
LATEX requires EPS (encapsulated postscript) graphic files when generating DVI
output, and PNG, JPG or PDF when generating PDF output.
For exporting to EPS, try http://www.cloudconvert.com. It’s like a Swiss knife
for converting from almost any format, to almost any format.
Do note that IPS discourages the use of colours in your thesis, including diagrams
and figures. Phographs and colour plates are exceptions to this rule: see Section 4.3.
Here’s how to insert a picture with the filename pythag.eps or pythag.png. I’m
going to display it here with 5cm width, and the caption “Pythagoras’ Theorem”.
14

\begin{figure}[hbt!]\centering\includegraphics[width=50mm]{pythag}\caption{Pythagoras’ Theorem}\label{fig:pythagoras}\end{figure}
Figure 4.1: Including a Graphics File
The result would be:
Figure 4.2: Pythagoras’ Theroem
Don’t specify the extension of the graphic file. The template will automatically
look for the EPS or the PNG (or otherwise) versions, depending on whether latex
or pdflatex was used. The figure environment will also ensure that that an entry
is inserted into the List of Figures automatically – including the figure numbering,
caption and page number.
In addition, the width of the included graphics can also be specified as a percentage
of the text width, e.g. width=.2\textwidth would cause the graphics to occupy 20%
of the text width.
Notice that I inserted a \label just after the \caption. This can be used for
15

referencing the figure number, like this:
Figure \ref{fig:pythagoras}→ Figure 4.2
This works the same for chapters, sections, tables, equations too. In chap-intro.tex,
I labelled the Introduction chapter with \label{chap:intro}. I also labelled the sec-
tion on inserting figures, \label{sec:figure}. So now I can do
Chapter \ref{chap:intro}→ Chapter 2
section \ref{sec:figure}→ section 4.1
Everytime the numbering of the heading changes, the reference will change auto-
matically as well. This is another advantage of using LATEX: you do not need to
manually update the reference counters (nor the Table of Contents, List of Figures and
Tables) whenever you add or remove figures, tables, sections or chapters.
You might also want to try out JpgfDraw: it is a vector graphics and drawing
application (requiring Java), and can export to LATEX code which you can paste into
your LATEX source. JpgfDraw is available from http://theoval.cmp.uea.ac.uk/
~nlct/jpgfdraw/index.html.
4.2 How Do I Do Subfigures?
Here’s an example on how to do subfigures (and similarly subtables):
4.3 Inserting Plates
Colour photographs are now regarded as plates. They must be listed in the List of
Plates instead of the List of Figures, and should be printed in colour on glossy photo
16
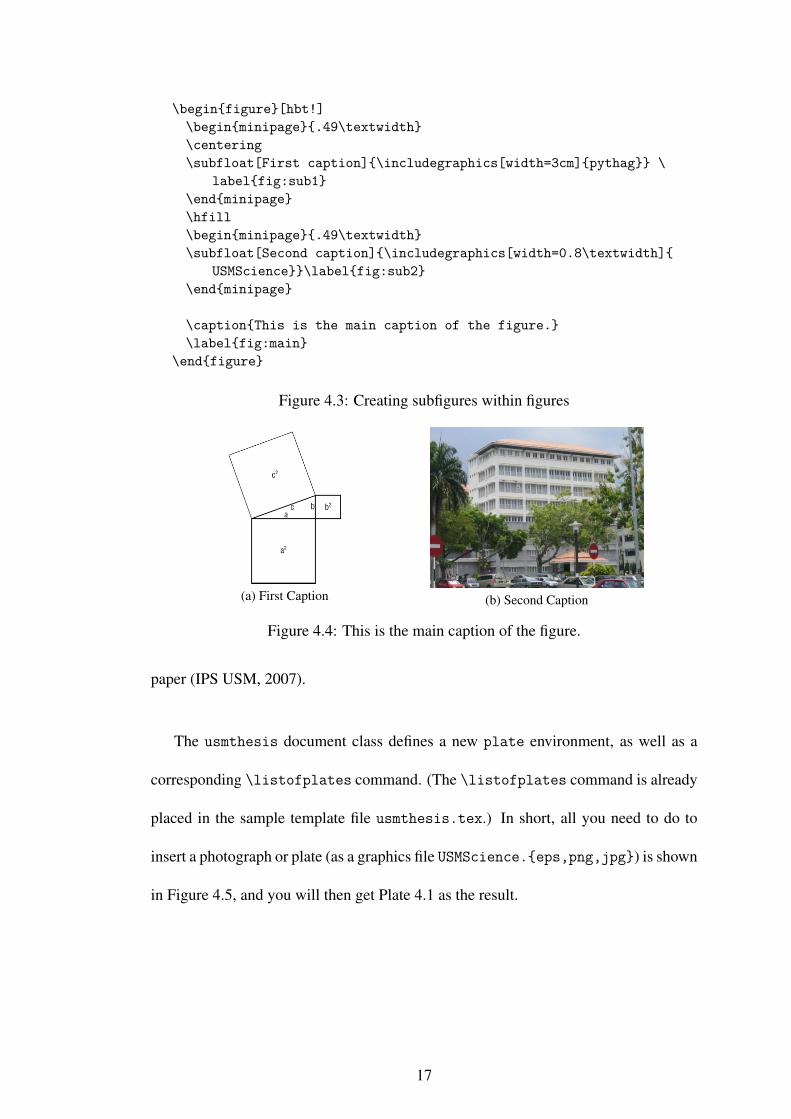
\begin{figure}[hbt!]\begin{minipage}{.49\textwidth}\centering\subfloat[First caption]{\includegraphics[width=3cm]{pythag}} \
label{fig:sub1}\end{minipage}\hfill\begin{minipage}{.49\textwidth}\subfloat[Second caption]{\includegraphics[width=0.8\textwidth]{
USMScience}}\label{fig:sub2}\end{minipage}
\caption{This is the main caption of the figure.}\label{fig:main}
\end{figure}
Figure 4.3: Creating subfigures within figures
(a) First Caption (b) Second Caption
Figure 4.4: This is the main caption of the figure.
paper (IPS USM, 2007).
The usmthesis document class defines a new plate environment, as well as a
corresponding \listofplates command. (The \listofplates command is already
placed in the sample template file usmthesis.tex.) In short, all you need to do to
insert a photograph or plate (as a graphics file USMScience.{eps,png,jpg}) is shown
in Figure 4.5, and you will then get Plate 4.1 as the result.
17

\begin{plate}[hbt!]\centering\includegraphics[width=.9\textwidth]{USMScience}\caption{School of Computer Sciences, USM}\label{plate:ppsk:usm}\end{plate}
Figure 4.5: Inserting a Plate
Plate 4.1: School of Computer Sciences, USM
4.4 Inserting Tables
Typesetting tables can be a little troublesome especially with complex layouts.
Look up (Roberts, 2005) to learn about some tips, or you can use the LaTable pro-
gram (http://www.g32.org/latable/) to help you.
If using LaTable, when you’re done designing the table, copy the whole table as
LATEX code, and paste it in your source file. (You may add additional formatting com-
mands, like bold, italics, etc.) If this is going to be a numbered table, remember to
surround it with \begin{table} and \end{table}, and give it a caption, like this:
18

\begin{table}[hbt!]\centering\begin{tabular}{| l | c || r |}\hline\textbf{Name} & \textbf{Category} & \textbf{Quantity} \\\hline\hlineApple & Fruit & 10 \\\hlineCucumber & Vegetable & 25 \\\hlineDaisy & Flower & 5 \\\hline\end{tabular}\caption{Sample Table Only} \label{table:sample}\end{table}
Figure 4.6: Typesetting Tables
Table 4.1: Sample Table Only
Name Category QuantityApple Fruit 10Cucumber Vegetable 25Daisy Flower 5
Note also that usmthesis is configured such that captions for figures are placed
below the figures, and captions for tables are placed above them, in accordance with
the formatting guidelines.
Many of us would have had massive headaches about lining up decimal places in
table columns (as mentioned in the IPS guidelines) if not for this tip from (Mittelbach
et al., 2004, pp. 274–276). This method uses the dcolumn package (already loaded
by usmthesis.cls). Instead of using l,c or r as the column type in the tabular
declaration, use
D{input sep }{output sep }{decimal places }.
The LATEX code in Figure 4.7 will give you Table 4.2.
Without using dcolumn, you’d get something like this:
19

\begin{table}[htb!]\centering\begin{tabular}{| c | D{.}{.}{2} |}\hlineItem & \multicolumn{1}{c|}{Reading}\\\hlineA & 1.11\\\hlineB & 3.99\\\hlineC & 2.27\\\hline\end{tabular}\caption{A table with decimal data}\end{table}
Figure 4.7: Aligning decimal data in tables
Table 4.2: A table with decimal data
Item ReadingA 1.11B 3.999C 22.2
Table 4.3: A table with decimal data (mis-aligned)
Item ReadingA 1.11B 3.999C 22.2
4.5 Full-paged, Sideways Figures and Tables
To make a figure appear on a landscape, full-page layout, put your \includegraphics
command in a sidewaysfigure environment (Figure 4.8).
\begin{sidewaysfigure}\centering\includegraphics[width=\textheight]{latex-win-comp}\caption{A full-page, sideways figure}\label{fig:sidewaysfig}\end{sidewaysfigure}
Figure 4.8: Including a sideway, full-page graphic
The resultant figure (Figure 4.9) should appear on the next page.
For a sideways table, use the sidewaystable environment instead around your
20

Figu
re4.
9:A
full-
page
,sid
eway
sfig
ure
21

usual tabular material.
4.6 Mathematical Equations
Typesetting mathematical material is one of, if not the, strongest capabilities of
LATEX. After all, that was the Knuth’s main motivation for creating TEX. As it is
impossible to enumerate all possible mathematically-related commands and macros
here, we will just give some examples. The reader is directed to the many well-written
online tutorials, such as (Roberts, 2005), for more elaborate examples. TeXnicCenter
also provides many shortcut buttons for inserting mathematical symbols.
\begin{equation}\label{eq:pythagoras}z^2 = x^2 + y^2\end{equation}
\begin{equation}\label{eq:golden:ratio}\phi = \frac{1}{2} (1 + \sqrt{5})\end{equation}
\begin{equation}\label{eq:golden:ratio}\phi = \frac{1}{2} (1 + \sqrt{5})\end{equation}\begin{equation}\label{eq:golden:ratio:fibonacci}\phi = 1 + \sum ^ {\infty} _ {n=1}
\frac{ (-1) ^ {n+1} }{ F_n F_{n+1} }\end{equation}
Equation~\ref{eq:pythagoras} is the Pythagoras Theorem.\eqref{eq:golden:ratio} gives the golden ratio $\phi$, and\eqref{eq:golden:ratio:fibonacci} relates it to the Fibonacciseries.
Figure 4.10: Typesetting Mathematical Equations
z2 = x2 + y2 (4.1)
22

φ =12(1+√
5) (4.2)
φ = 1+∞
∑n=1
(−1)n+1
FnFn+1(4.3)
Equation 4.1 is the Pythagoras Theorem. (4.2) gives the golden ratio φ , and (4.3)
relates it to the Fibonacci series.
The LATEX code to generate the above mathematics materials are shown in Fig-
ure 4.10. As you can see, references to equations can be achieved with either \ref or
\eqref.
A disclaimer: if you think the mathematic equations don’t look as great as all those
LATEX advocates make them out to be, that’s because IPS requires Times to be used and
the current offerings of free LATEX math fonts for Times don’t look great. It would’ve
been a different picture if we used Computer Modern.
4.7 Acronyms
If you have a list of acronyms or symbols, edit the file loa.tex as in Figure 4.11.
\begin{acronym}[UTMK] %% replace ’UTMK’ with the longest acronym inyour list
\acro{IPS}{Institut Pengajian Siswazah}\acro{PPSK}{Pusat Pengajian Sains Komputer}\acro{USM}{Universiti Sains Malaysia}\acro{UTMK}{Unit Terjemahan Melalui Komputer}\end{acronym}
Figure 4.11: The template loa.tex for acronyms
You can also use this acronym list to help expand it the first time you mention it in
23
your text. For example, the first time you use \ac{USM}, ‘Universiti Sains Malaysia
(USM)’ will be the output (without the quotes). After that, all calls to \ac{USM} will
give ‘USM’ (without the quotes). For more information, see the documentation for the
acronym package.
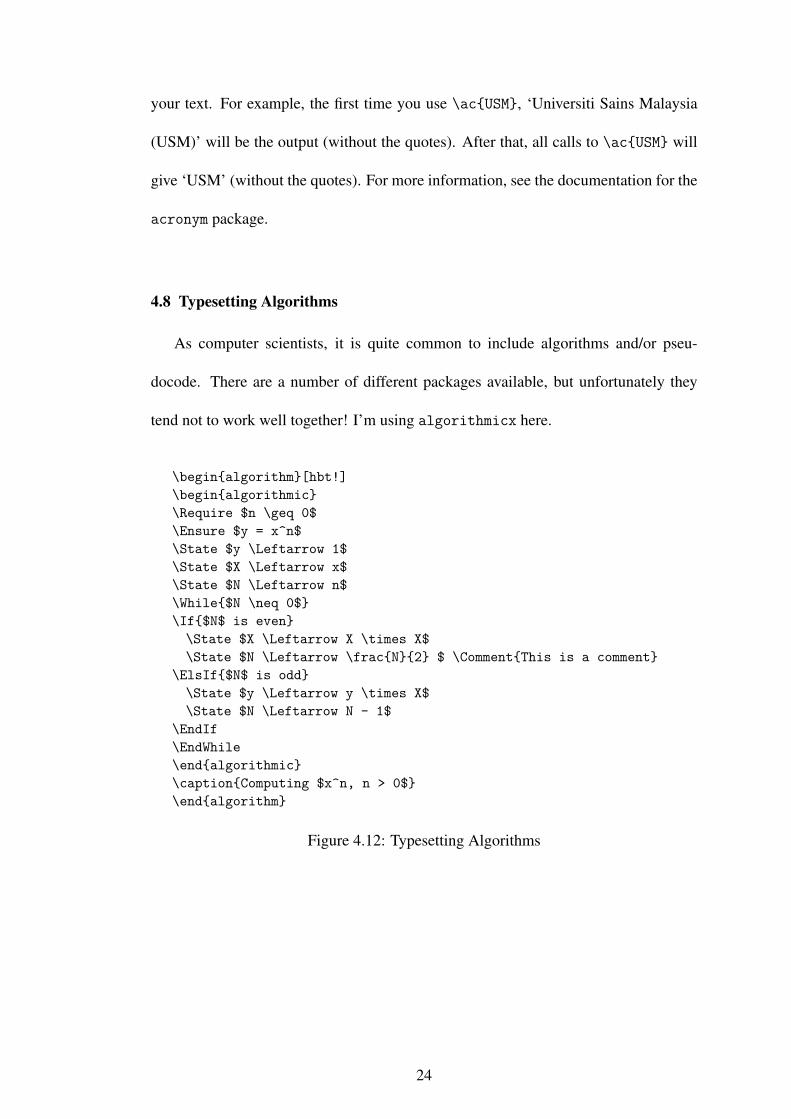
4.8 Typesetting Algorithms
As computer scientists, it is quite common to include algorithms and/or pseu-
docode. There are a number of different packages available, but unfortunately they
tend not to work well together! I’m using algorithmicx here.
\begin{algorithm}[hbt!]\begin{algorithmic}\Require $n \geq 0$\Ensure $y = x^n$\State $y \Leftarrow 1$\State $X \Leftarrow x$\State $N \Leftarrow n$\While{$N \neq 0$}\If{$N$ is even}\State $X \Leftarrow X \times X$\State $N \Leftarrow \frac{N}{2} $ \Comment{This is a comment}
\ElsIf{$N$ is odd}\State $y \Leftarrow y \times X$\State $N \Leftarrow N - 1$
\EndIf\EndWhile\end{algorithmic}\caption{Computing $x^n, n > 0$}\end{algorithm}
Figure 4.12: Typesetting Algorithms
24

Algorithm 1 Computing xn,n > 0Require: n≥ 0Ensure: y = xn
y⇐ 1X ⇐ xN⇐ nwhile N 6= 0 do
if N is even thenX ⇐ X×XN⇐ N
2 . This is a commentelse if N is odd then
y⇐ y×XN⇐ N−1
end ifend while
4.9 Program Listings
You may have noticed that I used the lstlisting environment to typeset some
of the LATEX examples – with pretty-printing1, too, including automatic line-breaking.
For more information, see the documentation for the listings package: it’s available
online at http://www.texdoc.net/pkg/listings.
Just to give some simple example here. For example, to typeset a “Hello World”
Java program with syntax highlighting, you can use the following code:
\lstset{basicstyle=\small\ttfamily, language=Java, breaklines=true,columns=fullflexible, tabsize=2}
\begin{lstlisting}public class HelloWorld {
public static void main( String arg[] ) {for (int i = 0; i < 10; i++) {
System.out.println( "Hello World!" + i);}
}}\end{lstlisting}
Figure 4.13: Typesetting a Java program listing
1Whether you agree that it is pretty is another story altogether.
25

public class HelloWorld {public static void main( String arg[] ) {
for (int i = 0; i < 10; i++) {System.out.println( "Hello␣World!" + i);
}}
}
Figure 4.14: A pretty-printed Java program listing with syntax highlighting
If you want to turn off the syntax highlighting, set language={}. (See the listings
documentation for a list of programming languages for which syntax highlighting is
supported.) You can also change the basicstyle value to get different effects: e.g. a
different font family, size or text formatting.
Here’s another example for a C program:
\lstset{basicstyle=\sffamily, language=C, breaklines=true, columns=fullflexible, tabsize=2}
\begin{lstlisting}int main() {
int c = 0;c = c + 1;printf( "%d", c );return 0;
}\end{lstlisting}
Figure 4.15: Typesetting a C program listing
int main() {int c = 0;c = c + 1;printf( "%d", c );return 0;
}
Figure 4.16: A pretty-printed C program listing with syntax highlighting
And here is the same C program listing without syntax highlighting (by setting
26

language={}):
int main() {int c = 0;c = c + 1;printf( "%d", c );return 0;
}
Figure 4.17: A C program listing without syntax highlighting
27

CHAPTER 5
IMPLEMENTATION
Now is the time to “implement” your thesis with LATEX. Go forth and typeset!
Happy LATEXing! ©
5.1 Printing Your Thesis
This is very important. Assuming you’re printing your thesis from Acrobat Reader,
make sure the following settings are chosen correctly in the Print window:
• A4 paper size is selected.
• Make sure your Printer settings is using A4 too.
• No page scaling.
Otherwise, the margins of your printed outputs may go horribly wrong. Print one
or two pages first to make sure everything looks fine before printing your entire thesis.
28

CHAPTER 6
DISCUSSION
Just a placeholder for the discussion chapter.
29

CHAPTER 7
CONCLUSION
T-that’s all folks. Have fun with LATEX!
30
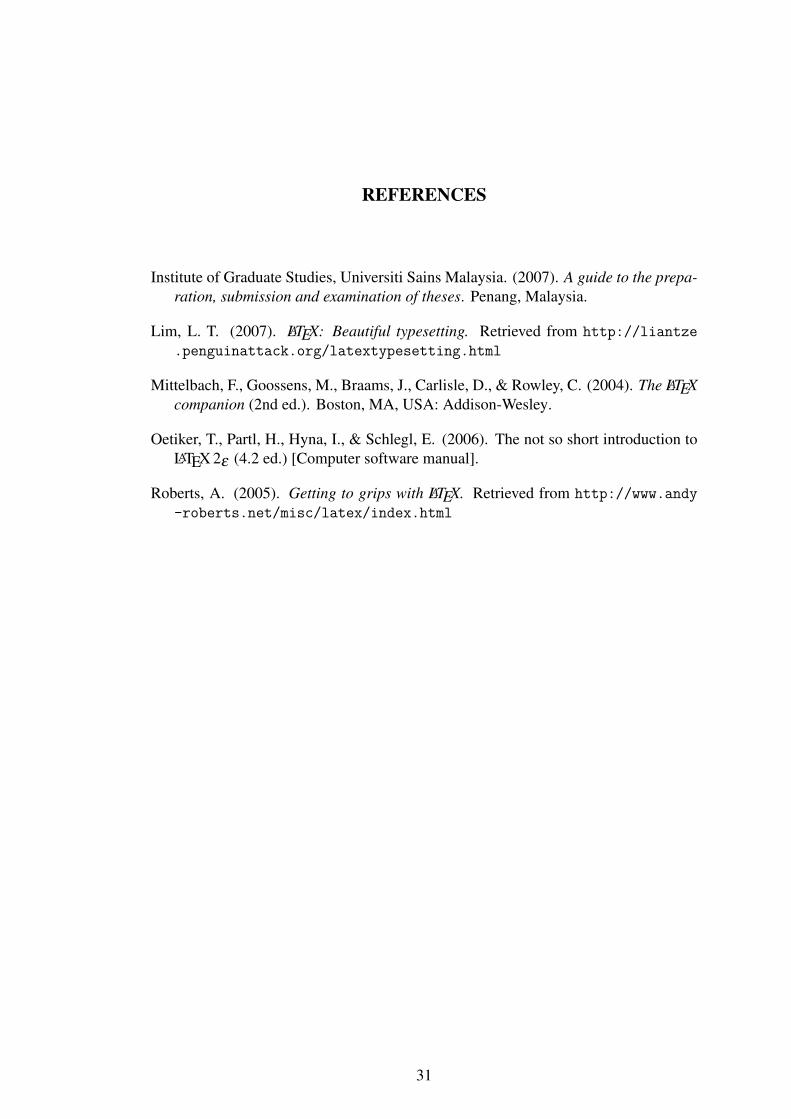
REFERENCES
Institute of Graduate Studies, Universiti Sains Malaysia. (2007). A guide to the prepa-ration, submission and examination of theses. Penang, Malaysia.
Lim, L. T. (2007). LATEX: Beautiful typesetting. Retrieved from http://liantze.penguinattack.org/latextypesetting.html
Mittelbach, F., Goossens, M., Braams, J., Carlisle, D., & Rowley, C. (2004). The LATEXcompanion (2nd ed.). Boston, MA, USA: Addison-Wesley.
Oetiker, T., Partl, H., Hyna, I., & Schlegl, E. (2006). The not so short introduction toLATEX 2ε (4.2 ed.) [Computer software manual].
Roberts, A. (2005). Getting to grips with LATEX. Retrieved from http://www.andy-roberts.net/misc/latex/index.html
31

APPENDICES

APPENDIX A
DATA USED
Put some test data here.

APPENDIX B
UML DIAGRAMS
Yet another dummy placeholder for appendix material.

LIST OF PUBLICATIONS
Lim, L. T. (2007a). LATEX: Beautiful typesetting. Retrieved from http://liantze.penguinattack.org/latextypesetting.html
Lim, L. T. (2007b). Writing your thesis with LATEX. Internal circulation, School ofComputer Sciences, Universiti Sains Malaysia.
35