wsus deployment guide
TRANSCRIPT
8/7/2019 WSUS Deployment Guide
http://slidepdf.com/reader/full/wsus-deployment-guide 1/22
Step-by-Step Guide to Getting Startedwith Microsoft Windows Server UpdateServices
Microsoft Corporation
Published: March 14, 2005
Author: Tim Elhajj
Editor: Sean Bentley
Abstract
This paper provides step-by-step instructions for getting started with Microsoft® Windows
Server™ Update Services (WSUS). You will find instruction for basic tasks involved with
deploying WSUS on your network, including installing WSUS on Microsoft
Windows Server 2003 operating systems, configuring WSUS to obtain updates,
configuring client computers to install updates from WSUS, and approving, testing, and
distributing updates. Although WSUS is a feature-rich update-management solution, this
guide offers only a single way to accomplish any of these tasks. You can find more
comprehensive instructions in the “Deploying Microsoft Windows Server Update
Services” white paper.

8/7/2019 WSUS Deployment Guide
http://slidepdf.com/reader/full/wsus-deployment-guide 2/22
8/7/2019 WSUS Deployment Guide
http://slidepdf.com/reader/full/wsus-deployment-guide 3/22
The information contained in this document represents the current view of Microsoft
Corporation on the issues discussed as of the date of publication. Because Microsoft
must respond to changing market conditions, it should not be interpreted to be a
commitment on the part of Microsoft, and Microsoft cannot guarantee the accuracy of any
information presented after the date of publication.
This White Paper is for informational purposes only. MICROSOFT MAKES NO
WARRANTIES, EXPRESS, IMPLIED OR STATUTORY, AS TO THE INFORMATION IN
THIS DOCUMENT.
Complying with all applicable copyright laws is the responsibility of the user. Without
limiting the rights under copyright, no part of this document may be reproduced, stored in
or introduced into a retrieval system, or transmitted in any form or by any means
(electronic, mechanical, photocopying, recording, or otherwise), or for any purpose,
without the express written permission of Microsoft Corporation.
Microsoft may have patents, patent applications, trademarks, copyrights, or other
intellectual property rights covering subject matter in this document. Except as expressly
provided in any written license agreement from Microsoft, the furnishing of this document
does not give you any license to these patents, trademarks, copyrights, or other
intellectual property.
Unless otherwise noted, the example companies, organizations, products, domain
names, e-mail addresses, logos, people, places, and events depicted herein are
fictitious, and no association with any real company, organization, product, domain name,
e-mail address, logo, person, place, or event is intended or should be inferred.
©2005 Microsoft Corporation. All rights reserved.
Microsoft, SQL Server, Windows, and Windows Server are either registered trademarks
or trademarks of Microsoft Corporation in the United States and/or other countries.
All other trademarks are property of their respective owners.
8/7/2019 WSUS Deployment Guide
http://slidepdf.com/reader/full/wsus-deployment-guide 4/22
ContentsStep-by-Step Guide to Getting Started with Microsoft Windows Server Update Services ..1
Contents .............................................................................................................................4
Step-byStep Guide to Getting Started with Microsoft Windows Server Update Services
........................................................................................................................................5
Step 1: Review WSUS Installation Requirements .................................................5
Software Requirements ..................................................................................................6
Disk Requirements and Recommendations ....................................................................6
Automatic Updates Requirements ..................................................................................7
Step 2: Install WSUS on Your Server ................................................................. ...7
Step 3: Configure the Network Connection ....................................................... ..13
Step 4: Synchronize the Server ...........................................................................16
Step 5: Update and Configure Automatic Updates ..............................................17
Step 6: Create a Computer Group .......................................................................20
Step 7: Approve and Deploy Updates ............................................................... ..21
8/7/2019 WSUS Deployment Guide
http://slidepdf.com/reader/full/wsus-deployment-guide 5/22
Step-by-Step Guide to Getting Started with Microsoft Windows Server UpdateServices
Step-byStep Guide to Getting Startedwith Microsoft Windows Server UpdateServices
Microsoft Windows Server Update Services (WSUS) provides a comprehensive solution
for managing updates within your network. This document offers step-by-step instructions
for basic tasks involved with deploying WSUS on your network. Use this guide to perform
the following tasks:
• Install WSUS to Microsoft Windows Server 2003 operating systems.
• Configure WSUS to obtain updates from Microsoft.
• Configure client computers to install updates from WSUS.
• Approve, test, and distribute updates.
Although WSUS is a feature-rich update-management solution, this guide offers only a
single way to accomplish any of these tasks. When there are options to perform a task in
different ways, a note calls out these choices and points to more comprehensive
instructions in the “Deploying Microsoft Windows Server Update Services” white paper or
the “Microsoft Windows Server Update Services Operations Guide” white paper. The
latest versions of these documents are available on the Microsoft Web site for Windows
Server Update Services at http://go.microsoft.com/fwlink/?LinkId=47374.
Step 1: Review WSUS InstallationRequirements
This guide offers instruction for installing Microsoft Windows Server Update Services
(WSUS) on Microsoft Windows Server 2003 operating systems (except for Web Edition
and all 64-bit versions). If you have a server running Microsoft Windows 2000 Server and
need more information, see the “Deploying Microsoft Windows Server Update Services”
white paper.
The following are the baseline installation requirements for installations that use the
default options. You can find hardware and software requirements for other installations
in the “Deploying Microsoft Windows Server Update Services” white paper.
5
8/7/2019 WSUS Deployment Guide
http://slidepdf.com/reader/full/wsus-deployment-guide 6/22
Step-by-Step Guide to Getting Started with Microsoft Windows Server UpdateServices
Hardware recommendations for a server with up to 500 clients are as follows:
• 1 gigahertz (GHz) processor
• 1 gigabyte (GB) RAM
Software RequirementsTo install WSUS with default options, you must have the following installed on your
computer. For more information about WSUS software requirements, see the “Deploying
Microsoft Windows Server Update Services” white paper. If any of these updates require
restarting the computer when installation is completed, you should restart your server
prior to installing WSUS.
• Microsoft Internet Information Services (IIS) 6.0. For instruction about how to
install IIS, see the “Deploying Microsoft Windows Server Update Services” white
paper or Help and Support Center in Windows Server 2003.
• Microsoft .NET Framework 1.1 Service Pack 1 for Windows Server 2003. To
obtain this software, go to the Download Center at http://go.microsoft.com/fwlink/?
LinkId=47358.
An alternative is to go to http://www.windowsupdate.com and scan for Critical
Updates and Service Packs – Install Microsoft .NET Framework 1.1 Service Pack 1
for Windows Server 2003.
• Background Intelligent Transfer Service (BITS) 2.0. BITS 2.0 for
Windows Server 2003 is not available from the Download Center at this time. Toobtain this software, go to the Microsoft Web site for Windows Server Update
Services Open Evaluation at http://go.microsoft.com/fwlink/?LinkId=47357.
Note:
Although database software is required to install WSUS, it is not listed here
because the default WSUS installation on Windows Server 2003 includes
Windows SQL Server™ 2000 Desktop Engine (WMSDE) database software.
Disk Requirements and RecommendationsTo install WSUS, the file system of the server must meet the following requirements:
• Both the system partition and the partition on which you install WSUS must be
formatted with the NTFS file system.
• A minimum of 1 GB free space is required for the system partition.
6
8/7/2019 WSUS Deployment Guide
http://slidepdf.com/reader/full/wsus-deployment-guide 7/22
Step-by-Step Guide to Getting Started with Microsoft Windows Server UpdateServices
• A minimum of 6 GB free space is required for the volume where WSUS stores
content; 30 GB is recommended.
• A minimum of 2 GB free space is required on the volume where WSUS Setup
installs Windows SQL Server 2000 Desktop Engine (WMSDE).
Automatic Updates RequirementsAutomatic Updates is the client component of WSUS. Automatic Updates has no
hardware requirements other than being connected to the network. You can use
Automatic Updates with WSUS on computers running any of the following operating
systems:
• Microsoft Windows 2000 Professional with Service Pack 3 (SP3) or Service
Pack 4 (SP4), Windows 2000 Server with SP3 or SP4, or Windows 2000 AdvancedServer with SP3 or SP4.
• Microsoft Windows XP Professional, with or without Service Pack 1 or Service
Pack 2.
• Microsoft Windows Server 2003, Standard Edition; Windows Server 2003,
Enterprise Edition; Windows Server 2003, Datacenter Edition; or
Windows Server 2003, Web Edition.
Step 2: Install WSUS on Your Server After reviewing the installation requirements, you are ready to install WSUS. You must log
on to the server you plan to install WSUS on by using an account that is a member of the
local Administrators group. Only members of the local Administrators group can install
WSUS.
The following procedure uses the default WSUS installation options for
Windows Server 2003, which include installing Windows SQL Server 2000 Desktop
Engine (WMSDE) for the WSUS database software, storing updates locally, and using
the IIS Default Web site on port 80. You can find procedures for custom installation
options, such as using a different operating system, different database software, or a
Web site using a custom port number, in the “Deploying Microsoft Windows Server
Update Services” white paper.
7
8/7/2019 WSUS Deployment Guide
http://slidepdf.com/reader/full/wsus-deployment-guide 8/22
Step-by-Step Guide to Getting Started with Microsoft Windows Server UpdateServices
To install WSUS on Windows Server 2003
1. Double-click the installer file WSUSSetup.exe.
Note:
The latest version of WSUSSetup.exe is available on the Microsoft Web site
for Windows Server Update Services at http://go.microsoft.com/fwlink/?
LinkId=47374.
2. On the Welcome page of the wizard, click Next.
3. Read the terms of the license agreement carefully, click I accept the terms of
the License Agreement, and then click Next.
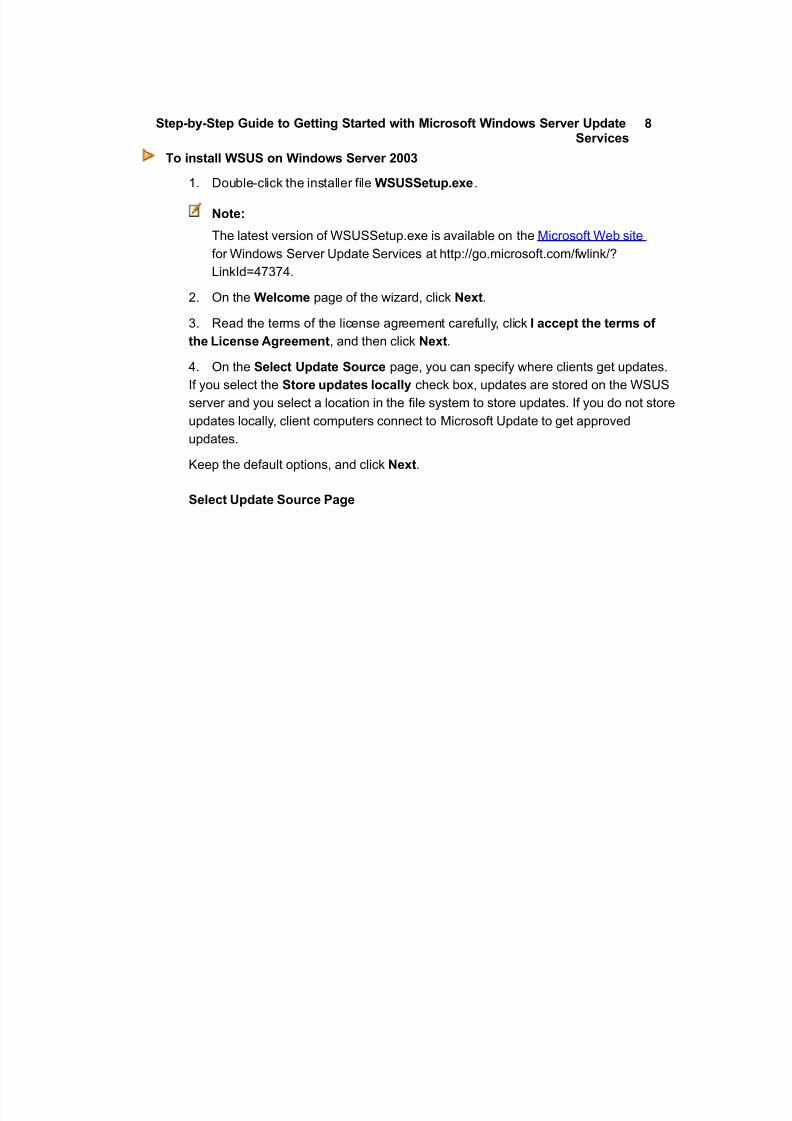
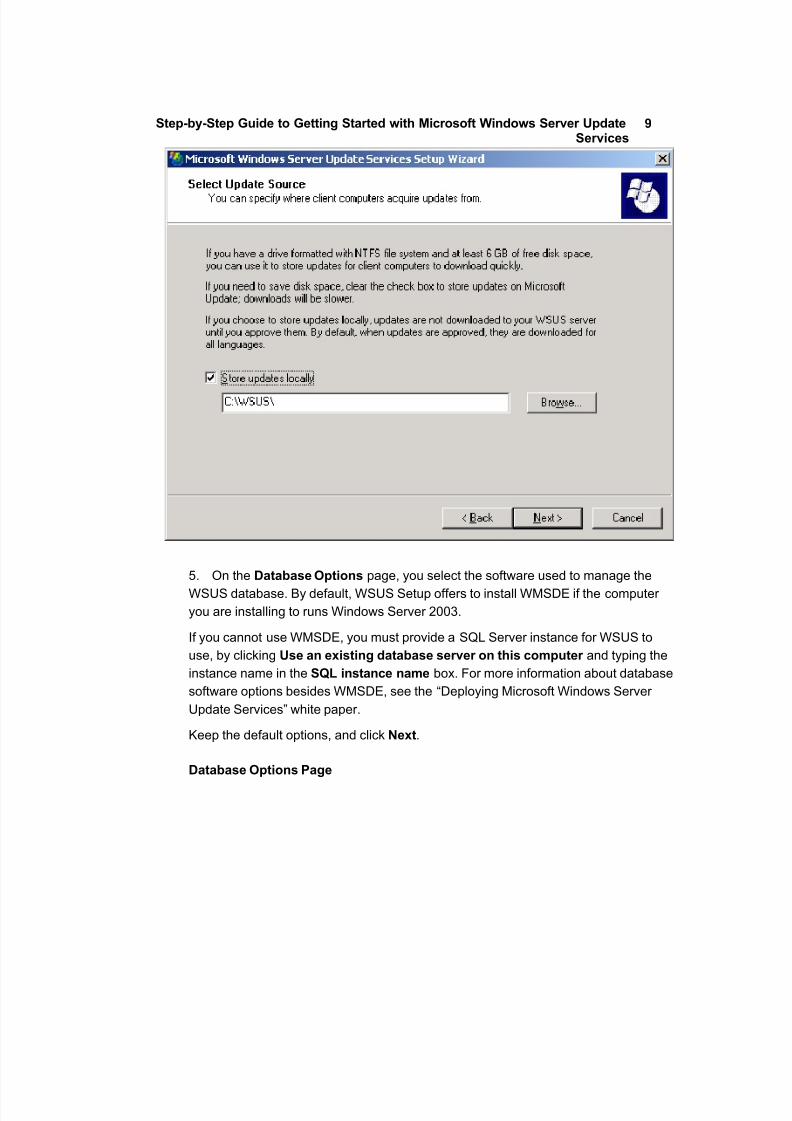
4. On the Select Update Source page, you can specify where clients get updates.
If you select the Store updates locally check box, updates are stored on the WSUS
server and you select a location in the file system to store updates. If you do not store
updates locally, client computers connect to Microsoft Update to get approved
updates.
Keep the default options, and click Next.
Select Update Source Page
8
8/7/2019 WSUS Deployment Guide
http://slidepdf.com/reader/full/wsus-deployment-guide 9/22
Step-by-Step Guide to Getting Started with Microsoft Windows Server UpdateServices
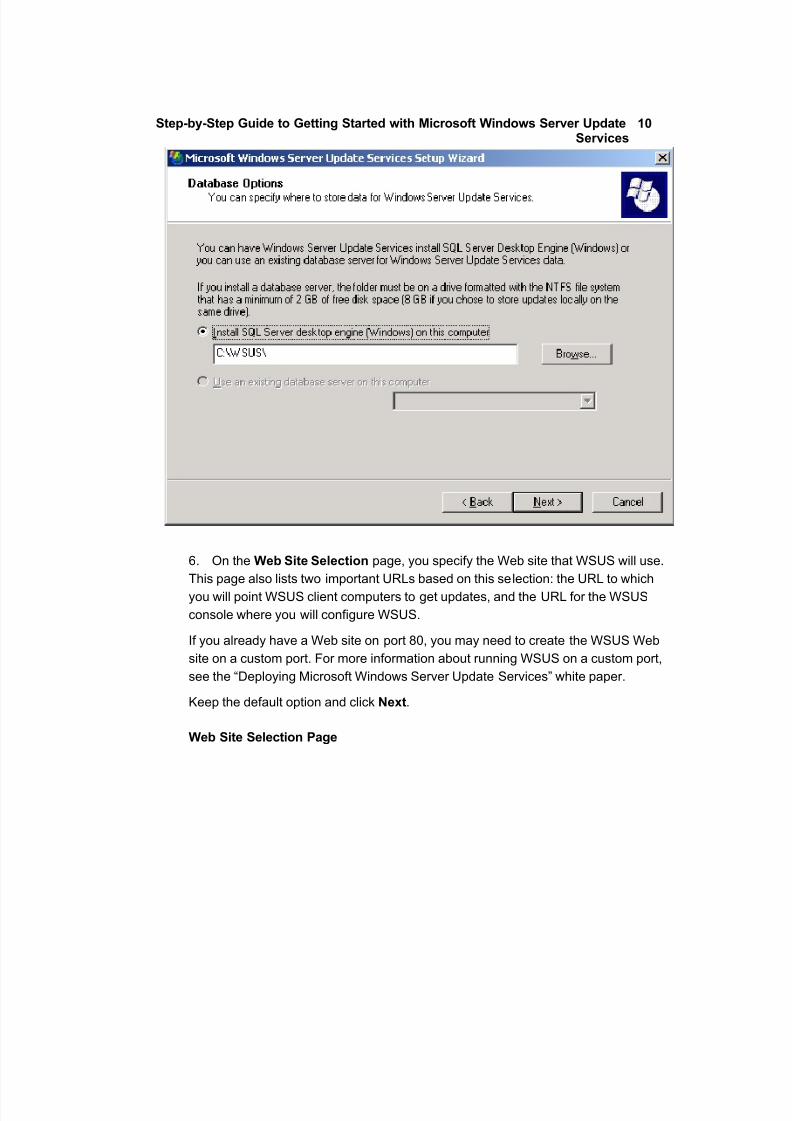
5. On the Database Options page, you select the software used to manage the
WSUS database. By default, WSUS Setup offers to install WMSDE if the computer
you are installing to runs Windows Server 2003.
If you cannot use WMSDE, you must provide a SQL Server instance for WSUS to
use, by clicking Use an existing database server on this computer and typing the
instance name in the SQL instance name box. For more information about database
software options besides WMSDE, see the “Deploying Microsoft Windows Server
Update Services” white paper.
Keep the default options, and click Next.
Database Options Page
9
8/7/2019 WSUS Deployment Guide
http://slidepdf.com/reader/full/wsus-deployment-guide 10/22
Step-by-Step Guide to Getting Started with Microsoft Windows Server UpdateServices
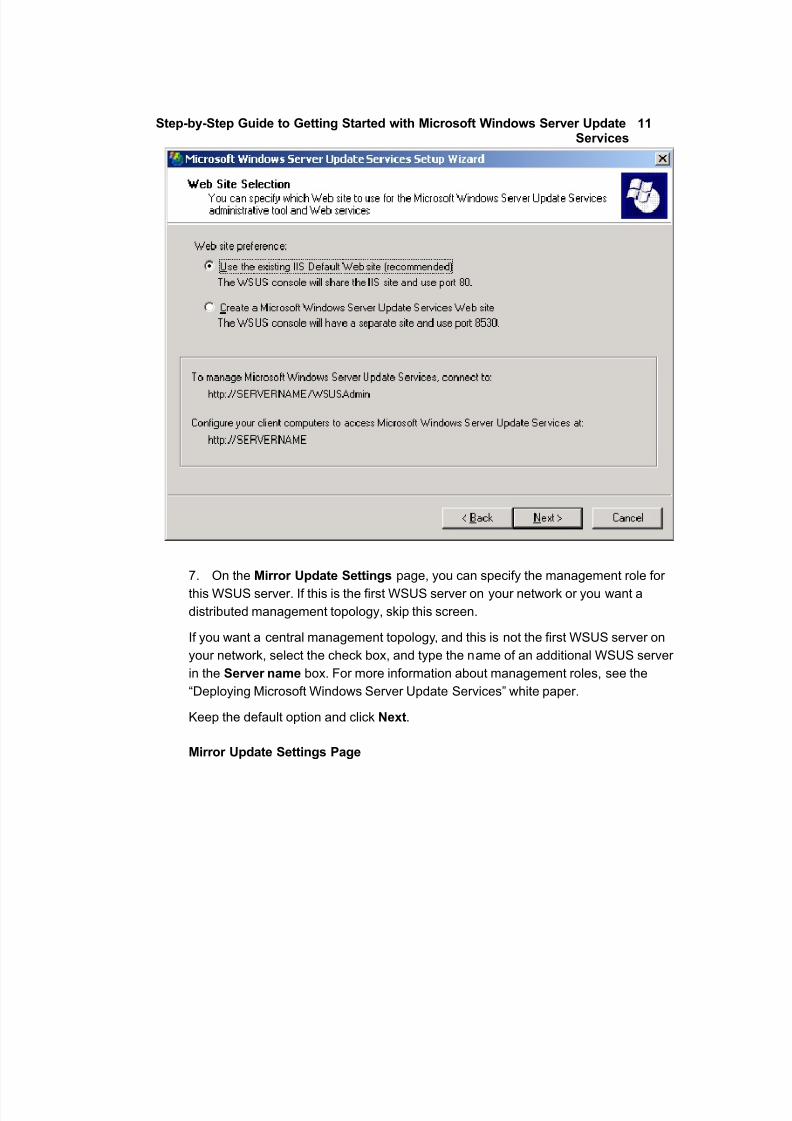
6. On the Web Site Selection page, you specify the Web site that WSUS will use.
This page also lists two important URLs based on this selection: the URL to which
you will point WSUS client computers to get updates, and the URL for the WSUS
console where you will configure WSUS.
If you already have a Web site on port 80, you may need to create the WSUS Web
site on a custom port. For more information about running WSUS on a custom port,
see the “Deploying Microsoft Windows Server Update Services” white paper.
Keep the default option and click Next.
Web Site Selection Page
10
8/7/2019 WSUS Deployment Guide
http://slidepdf.com/reader/full/wsus-deployment-guide 11/22
Step-by-Step Guide to Getting Started with Microsoft Windows Server UpdateServices
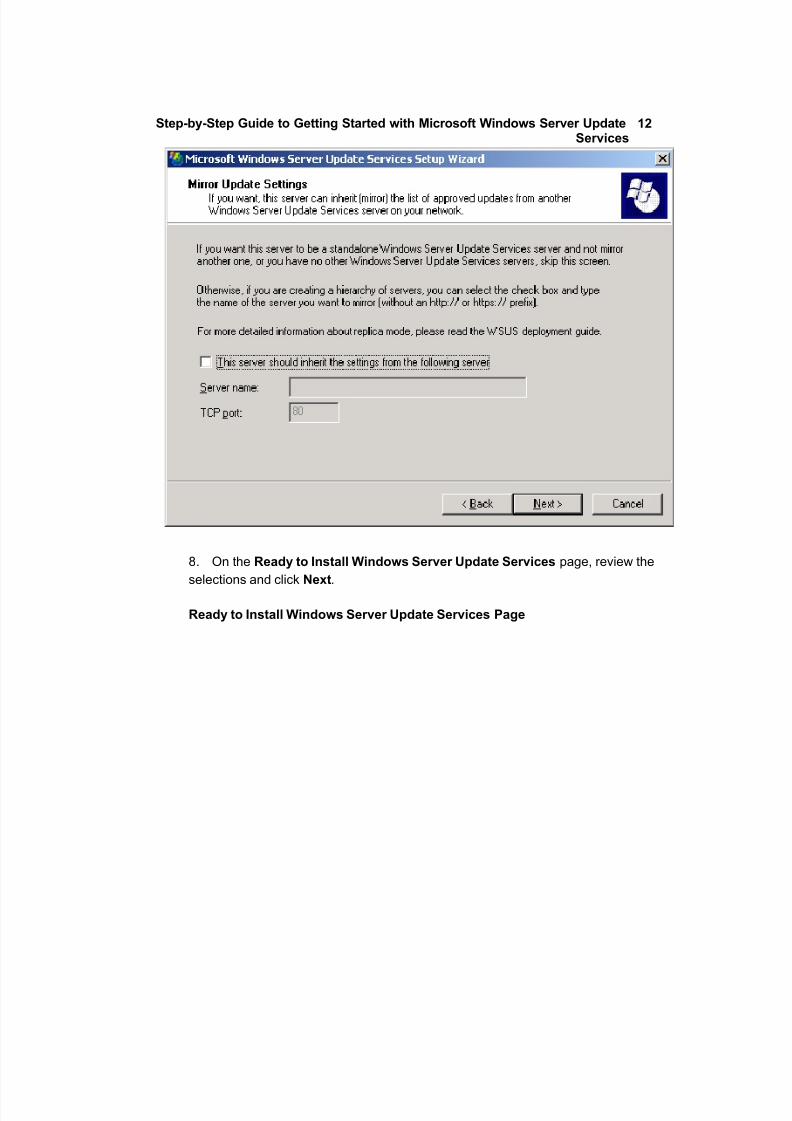
7. On the Mirror Update Settings page, you can specify the management role for
this WSUS server. If this is the first WSUS server on your network or you want a
distributed management topology, skip this screen.
If you want a central management topology, and this is not the first WSUS server on
your network, select the check box, and type the name of an additional WSUS server
in the Server name box. For more information about management roles, see the
“Deploying Microsoft Windows Server Update Services” white paper.
Keep the default option and click Next.
Mirror Update Settings Page
11
8/7/2019 WSUS Deployment Guide
http://slidepdf.com/reader/full/wsus-deployment-guide 12/22
Step-by-Step Guide to Getting Started with Microsoft Windows Server UpdateServices
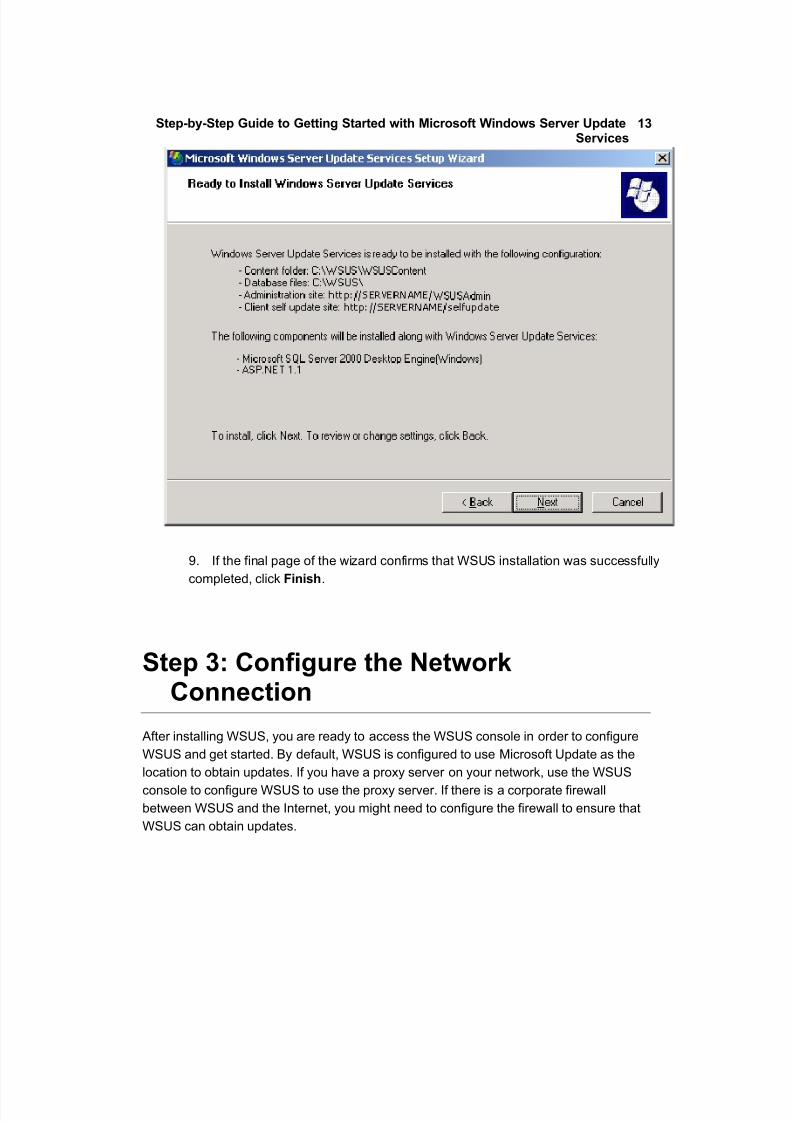
8. On the Ready to Install Windows Server Update Services page, review the
selections and click Next.
Ready to Install Windows Server Update Services Page
12
8/7/2019 WSUS Deployment Guide
http://slidepdf.com/reader/full/wsus-deployment-guide 13/22
Step-by-Step Guide to Getting Started with Microsoft Windows Server UpdateServices
9. If the final page of the wizard confirms that WSUS installation was successfully
completed, click Finish.
Step 3: Configure the NetworkConnection
After installing WSUS, you are ready to access the WSUS console in order to configure
WSUS and get started. By default, WSUS is configured to use Microsoft Update as the
location to obtain updates. If you have a proxy server on your network, use the WSUS
console to configure WSUS to use the proxy server. If there is a corporate firewall
between WSUS and the Internet, you might need to configure the firewall to ensure that
WSUS can obtain updates.
13
8/7/2019 WSUS Deployment Guide
http://slidepdf.com/reader/full/wsus-deployment-guide 14/22
Step-by-Step Guide to Getting Started with Microsoft Windows Server UpdateServices
Note:
Although you must have Internet connectivity to download updates from
Microsoft Update, WSUS offers you the ability to import updates onto networksnot connected to the Internet. For more information, see the “Deploying Microsoft
Windows Server Update Services” white paper.
Step 3 contains the following procedures:
• Configure your firewall so that WSUS can obtain updates.
• Open the WSUS console.
• Configure proxy-server settings so that WSUS can obtain updates.
To configure your firewall
• If there is a corporate firewall between WSUS and the Internet, you might
need to configure that firewall to ensure that WSUS can obtain updates. To
obtain updates from Microsoft Update, the WSUS server uses port 80 for HTTP
protocol and port 443 for HTTPS protocol. This is not configurable.
• If your organization does not allow those ports and protocols open to all
addresses, you can restrict access to only the following domains so that WSUS
and Automatic Updates can communicate with Microsoft Update:
• http://windowsupdate.microsoft.com
• http://*.windowsupdate.microsoft.com
• https://*.windowsupdate.microsoft.com
• http://*.update.microsoft.com
• https://*.update.microsoft.com
• http://*.windowsupdate.com
• http://download.windowsupdate.com
• http://download.microsoft.com
• http://*.download.windowsupdate.com
• http://wustat.windows.com
• http://ntservicepack.microsoft.com
Note:
The steps for configuring the firewall above are meant for a corporate firewall
positioned between WSUS and the Internet. Because WSUS initiates all its
14
8/7/2019 WSUS Deployment Guide
http://slidepdf.com/reader/full/wsus-deployment-guide 15/22
Step-by-Step Guide to Getting Started with Microsoft Windows Server UpdateServices
network traffic, there is no need to configure Windows Firewall on the WSUS
server.
Although the connection between Microsoft Update and WSUS requires
ports 80 and 443 to be open, you can configure multiple WSUS servers to
synchronize with a custom port. For more information about synchronizing
WSUS servers with a custom port, see the “Deploying Microsoft Windows
Server Update Services” white paper.
To open the WSUS console
• On your WSUS server, click Start, point to All Programs, point to
Administrative Tools, and then click Microsoft Windows Server Update
Services.
Note:
You must be a member of either the WSUS Administrators or the local
Administrators security groups on the server on which WSUS is installed in
order to use the WSUS console.
If you do not add http://<WSUS Web site name> to the list of sites in the
Local Intranet zone in Internet Explorer on Windows Server 2003, you might
be prompted for credentials each time you open the WSUS console.
If you change the port assignment in IIS after you install WSUS, you need to
manually update the shortcut on the Start menu.
You can also open the WSUS console from Internet Explorer on any server
or computer on your network by entering the following URL:
http://WSUSservername /WSUSAdmin
To specify a proxy server
1. On the WSUS console toolbar, click Options, and then click
Synchronization Options.
2. In the Proxy server box, select the Use a proxy server when
synchronizing check box, and then type the proxy server name and port
number (port 80 by default) in the corresponding boxes.
3. If you want to connect to the proxy server by using specific user credentials,
select the Use user credentials to connect to the proxy server check box, and
then type the user name, domain, and password of the user in the corresponding
boxes. If you want to enable basic authentication for the user connecting to the
15
8/7/2019 WSUS Deployment Guide
http://slidepdf.com/reader/full/wsus-deployment-guide 16/22
Step-by-Step Guide to Getting Started with Microsoft Windows Server UpdateServices
proxy server, select the Allow basic authentication (password in clear text)
check box.
4. Under Tasks, click Save settings, and then click OK in the confirmation
dialog box.
Step 4: Synchronize the Server
After you configure the network connection, you can obtain updates. By default, WSUS is
configured to download Critical and Security Updates for all Microsoft products. To get
updates, you must synchronize the WSUS server.
Synchronization involves the WSUS server contacting Microsoft Update. After making
contact, WSUS determines if any new updates have been made available since the last
time you synchronized. Because this is the first time you are synchronizing the WSUS
server, all of the updates are available and are ready for your approval for installation.
Note:
This paper describes synchronizing using the default settings, but WSUS
includes options that enable you to minimize bandwidth use during
synchronization. For more information, see the “Deploying Microsoft Server
Windows Update Services” white paper.
To synchronize your WSUS server
1. On the WSUS console toolbar, click Options, and then click
Synchronization Options.
2. Under Tasks, click Synchronize now.
After the synchronization finishes, click Updates on the WSUS console toolbar to view
the list of updates.
16
8/7/2019 WSUS Deployment Guide
http://slidepdf.com/reader/full/wsus-deployment-guide 17/22
Step-by-Step Guide to Getting Started with Microsoft Windows Server UpdateServices
Step 5: Update and Configure Automatic
UpdatesWSUS client computers require a compatible version of Automatic Updates. WSUS
Setup automatically configures IIS to distribute the latest version of Automatic Updates to
each client computer that contacts the WSUS server.
Note:
Although most versions of Automatic Updates can be pointed to the WSUS
server and they will automatically self-update to the WSUS-compatible version,
the version of Automatic Updates included with Windows XP without any service
packs cannot update itself automatically. If you have Windows XP without any
service packs in your environment, and you have never used Software UpdateServices (SUS), see the “Deploying Microsoft Windows Server Update Services”
white paper for instruction.
The best way to configure Automatic Updates depends upon your network environment.
In an Active Directory environment, you can use an Active Directory-based Group Policy
object (GPO). In a non-Active Directory environment, use the Local Group Policy object.
Whether you use the Local Group Policy object or a GPO stored on a domain controller,
you must point your client computers to the WSUS server, and then configure Automatic
Updates.
The following instructions assume that your network runs Active Directory. These
procedures also assume that you have already set up and are familiar with Group Policyand use it to manage your network. You need to create a new Group Policy object (GPO)
for WSUS settings, and link the GPO on the domain level.
For more information about Group Policy, see the Group Policy page at
http://go.microsoft.com/fwlink/?LinkID=47375.
Step 5 contains the following procedures:
• Load the WSUS Administrative Template.
• Configure Automatic Updates.
• Point client computers to your WSUS server.
• Manually initiate detection on the client computer.
Perform the next three procedures on an Active Directory-based Group Policy object.
17
8/7/2019 WSUS Deployment Guide
http://slidepdf.com/reader/full/wsus-deployment-guide 18/22
Step-by-Step Guide to Getting Started with Microsoft Windows Server UpdateServices
To add the WSUS Administrative Template
1. In Group Policy Object Editor, click either of the Administrative Templates
nodes.
2. On the Action menu, click Add/Remove Templates.
3. Click Add.
4. In the Policy Templates dialog box, click wuau.adm, and then click Open.
5. In the Add/Remove Templates dialog box, click Close.
To configure the behavior of Automatic Updates
1. In Group Policy Object Editor, expand Computer Configuration, expand
Administrative Templates, expand Windows Components, and then clickWindows Update.
2. In the details pane, double-click Configure Automatic Updates.
3. Click Enabled, and then click one of the following options:
• Notify for download and notify for install. This option notifies a
logged-on administrative user prior to the download and prior to the
installation of the updates.
• Auto download and notify for install. This option automatically begins
downloading updates and then notifies a logged-on administrative user prior
to installing the updates.
• Auto download and schedule the install. If Automatic Updates is
configured to perform a scheduled installation, you must also set the day and
time for the recurring scheduled installation.
• Allow local admin to choose setting. With this option, the local
administrators are allowed to use Automatic Updates in Control Panel to
select a configuration option of their choice. For example, they can choose
their own scheduled installation time. Local administrators are not allowed to
disable Automatic Updates.
4. Click OK.
Note:
The setting Allow local admin to choose setting only appears if Automatic
Updates has updated itself to the version compatible with WSUS.
18
8/7/2019 WSUS Deployment Guide
http://slidepdf.com/reader/full/wsus-deployment-guide 19/22
Step-by-Step Guide to Getting Started with Microsoft Windows Server UpdateServices
To point the client computer to your WSUS server
1. In Group Policy Object Editor, expand Computer Configuration, expand
Administrative Templates, expand Windows Components, and then click
Windows Update.
2. In the details pane, double-click Specify intranet Microsoft update service
location.
3. Click Enabled, and type the HTTP URL of the same WSUS server in the Set
the intranet update service for detecting updates box and in the Set the
intranet statistics server box. For example, type http://servername in both
boxes.
4. Click OK.
Note:
If you are using the Local Group Policy object to point this computer to
WSUS, this setting takes effect immediately and this computer should appear
in the WSUS administrative console in about 20 minutes. You can speed this
process up by manually initiating a detection cycle.
After you set up a client computer, it will take a few minutes before it appears on the
Computers page in the WSUS console. For client computers configured with an Active
Directory-based GPO, it will take about 20 minutes after Group Policy refreshes (that is,
applies any new settings to the client computer). By default, Group Policy refreshes in the
background every 90 minutes, with a random offset of 0 to 30 minutes. If you want to
refresh Group Policy sooner, you can go to a command prompt on the client computer and type: gpupdate /force.
For client computers configured with the Local GPO, Group Policy is applied immediately
and it will take about 20 minutes.
Once Group Policy is applied, you can initiate detection manually. If you perform this
step, you do not have to wait 20 minutes for the client computer to contact WSUS.
To manually initiate detection by the WSUS server
1. On the client computer click Start, and then click Run.
2. Type cmd, and then click OK.
3. At the command prompt, type wuauclt.exe /detectnow. This command-line
option instructs Automatic Updates to contact the WSUS server immediately.
19
8/7/2019 WSUS Deployment Guide
http://slidepdf.com/reader/full/wsus-deployment-guide 20/22
Step-by-Step Guide to Getting Started with Microsoft Windows Server UpdateServices
Step 6: Create a Computer Group
Computer groups are an important part of WSUS deployments, even a basic deployment.
Computer groups enable you to target updates to specific computers. There are two
default computer groups: All Computers and Unassigned Computers. By default, when
each client computer initially contacts the WSUS server, the server adds it to both these
groups.
You can create custom computer groups. One benefit of creating computer groups is that
it enables you to test updates before deploying them widely. If the testing goes well, you
can roll out the updates to the All Computers group. There is no limit to the number of
custom groups you can create.
Setting up computer groups is a three-step process. First, you specify how you are going
to assign computers to the computer groups. There are two options: server-side targeting
and client-side targeting . Server-side targeting involves manually adding each computer
to its group by using WSUS. Client-side targeting involves automatically adding the
clients by using either Group Policy or registry keys. Second, you create the computer
group on WSUS. Third, you move the computers into groups by using whichever method
you chose in the first step.
This paper explains how to use server-side targeting and manually move computers to
their groups by using the WSUS console. If you had numerous client computers to assign
to computer groups you could use client-side targeting, which would automate moving
computers into computer groups.
You can use Step 6 to set up a test group that contains at least one test computer.
This step contains the following procedures:
• Specify server-side targeting.
• Create a group.
• Move computers to the group.
To specify the method for assigning computers to groups
1. On the WSUS console toolbar, click Options, and then click Computer
Options.
2. In the Computer Options box, click Use the Move computers task in
Windows Server Update Services.
3. Under Tasks, click Save settings, and then click OK when the confirmation
20
8/7/2019 WSUS Deployment Guide
http://slidepdf.com/reader/full/wsus-deployment-guide 21/22
Step-by-Step Guide to Getting Started with Microsoft Windows Server UpdateServices
dialog box appears.
To create a group
1. On the WSUS console toolbar, click Computers.
2. Under Tasks, click Create a computer group.
3. In the Group name box, type Test, and then click OK.
Use the next procedure to assign a client computer appropriate for testing to the test
group. A client computer appropriate for testing is any computer with software and
hardware indicative of the majority of computers on your network, but not a computer
assigned to a critical role. In this way, you can tell how well the computers comparable to
the test computer will fare with the updates you approve.
To manually add a computer to the Test group
1. On the WSUS console toolbar, click Computers.
2. In the Groups box, click the group of the computer you want to move.
3. In the list of computers, click the computer you want to move.
4. Under Tasks, click Move the selected computer .
5. In the Computer group list, select the group you want to move the computer
to, and then click OK.
Step 7: Approve and Deploy Updates
In this step you approve an update for any test client computers in the Test group.
Computers in the group will check in with the WSUS server over the next 24 hours. After
this period, you can use the WSUS reporting feature to determine if those updates have
been deployed to the computers. If testing goes well, you can then approve the same
update for the rest of the computers in your organization.
Step 7 contains the following procedures:
• Approve and deploy an update.
• Check the Status of Updates report.
21
8/7/2019 WSUS Deployment Guide
http://slidepdf.com/reader/full/wsus-deployment-guide 22/22
Step-by-Step Guide to Getting Started with Microsoft Windows Server UpdateServices
To approve and deploy an update
1. On the WSUS console toolbar, click Updates. By default, the list of updates
is filtered to show only Critical and Security Updates that have been approved for
detection on client computers. Use the default filter for this procedure.
2. On the list of updates, select the updates you want to approve for installation.
Information about a selected update is available on the Details tab. To select
multiple contiguous updates, press and hold down the SHIFT key while selecting;
to select multiple non-contiguous updates, press and hold down the CTRL key
while selecting.
3. Under Update Tasks, click Change approval. The Approve Updates dialog
box appears.
4. In the Group approval settings for the selected updates list, click Installfrom the list in the Approval column for the Test group, and then click OK.
Note:
There are many options associated with approving updates, such as setting
deadlines and uninstalling updates. These are discussed in the “Microsoft
Windows Server Update Services Operations Guide” white paper.
After 24 hours, you can use the WSUS reporting feature to determine if those updates
have been deployed to the computers.
To check Status of Updates report
1. On the WSUS console toolbar, click Reports.
2. On the Reports page, click Status of Updates.
3. If you want to filter the list of updates, under View, select the criteria you
want to use, and then click Apply.
4. If you want to see the status of an update by computer group and then by
computer, expand the view of the update as necessary.
5. If you want to print the Status of Updates report, under Tasks, click Print
report.
If the updates were successfully deployed to the Test group, you can approve the sameupdates for the rest of the computers in your organization.
22