xerox freeflow print server...
TRANSCRIPT
1
Welcome!
Congratulations! You have the latest software and documentation package for your Xerox FreeFlow
Print Server. The changes will impress you. The new interface and workflow options will raise the bar
on your productivity. The additional color options and new features will enable new ways for you to grow
your business.
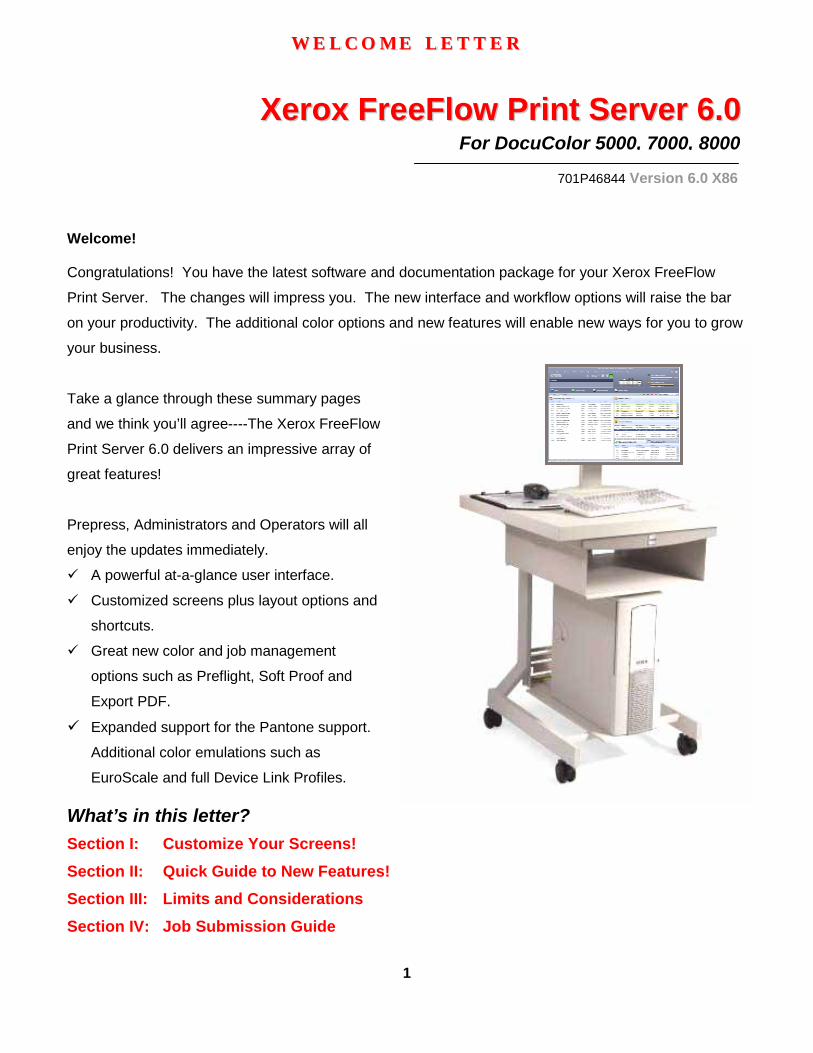
Take a glance through these summary pages
and we think you’ll agree----The Xerox FreeFlow
Print Server 6.0 delivers an impressive array of
great features!
Prepress, Administrators and Operators will all
enjoy the updates immediately.
A powerful at-a-glance user interface.
Customized screens plus layout options and
shortcuts.
Great new color and job management
options such as Preflight, Soft Proof and
Export PDF.
Expanded support for the Pantone support.
Additional color emulations such as
EuroScale and full Device Link Profiles.
What’s in this letter? Section I: Customize Your Screens!
Section II: Quick Guide to New Features!
Section III: Limits and Considerations
Section IV: Job Submission Guide
WW EE LL CC OO MM EE LL EE TT TT EE RR
XXeerrooxx FFrreeeeFFllooww PPrriinntt SSeerrvveerr 66..00
701P46844 Version 6.0 X86
For DocuColor 5000, 7000, 8000

2
Section I: Customize Your FreeFlow Server! The new FreeFlow Server allows you to customize the user interface. Choose your Shortcuts, Queue Alignment and other options. Most settings now retain between restarts, reboots etc.
Customize SHORTCUTS Set your Shortcuts “Add” or
“Remove” options like Queue Manager, Image
Quality
Customize QUEUES Set Job Manage Queues to your taste. Settings hold
over restarts.

3
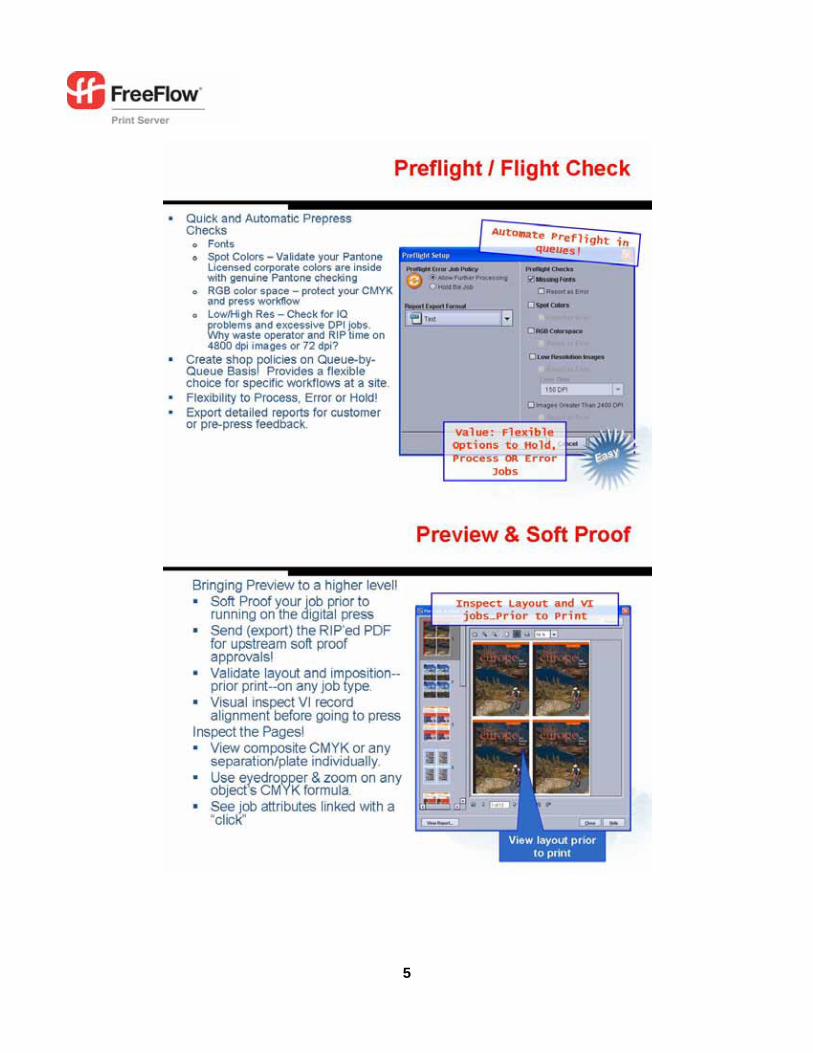
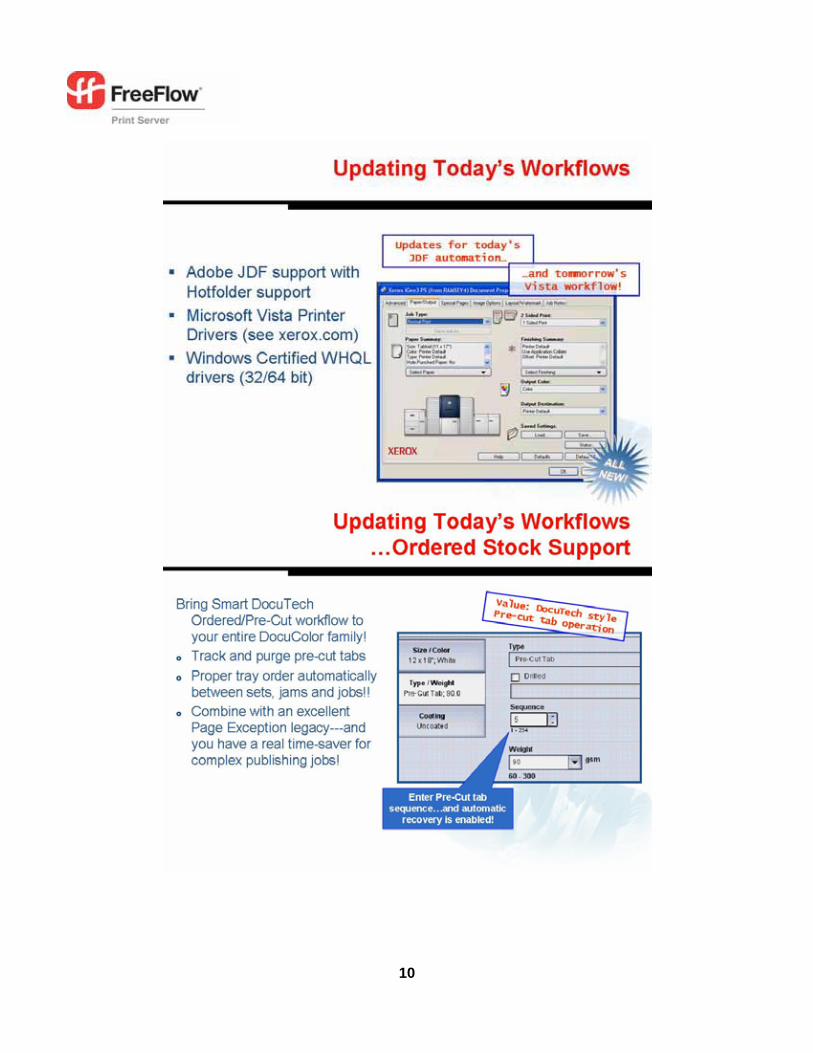
Section II: Quick Guide to New Features

4
5

6

7

8

9
10

11
III. Limits and Considerations
Make sure you go to the “CUSTOMIZE” window/pulldown. You can set and align your queues to your taste. You can, for example, set your queues in a Wide format or a Left/Right format (Default). Changing these queue alignments keeps over reboots and is a popular item with operators.
The Microsoft Vista Driver should be downloaded from Xerox.com for the latest version.
The mainframe language support, IPDS, is available through a separate kit. See Xerox for specifics.
The Remote Workflow software can not connect to a 5.1 system, only to a 6.0 software version.

12
IV. Job Submission Guide Web Submissions: Pointing most browsers to the FreeFlow Print Server’s’s address will result in an easy method to submit print-ready files (e.g, PDF, PS) http://192.12.233.56/ http://myprintername/ Hotfolder Drag/Drop Submits Right click on any queue and select Enable Hotfolder. Then you can drag and drop print ready files to that same queue (e.g, PostScript, PDF etc). The line below show one example! \\192.12.233.56\ \\myprintername\ Printer Driver Remember to use the CentreWare Printer Drivers for job submissions from applications! See the CentreWare driver documents and software included here. Please visit xerox.com for updated drivers. In particular, the Vista OS driver will be available at xerox.com Print from File On the main screen of the FreeFlow Server, “Print-from-File” provides an easy and popular way to submit Print Ready files such as PDF. In 6.0, you can submit batches of jobs from your USB drive with ease.

FreeFlow Print Server DocuSP Network Quick Connect Guide Purpose: Refer to this guide to modify the Digital Front End (DFE) network settings at the DFE Local User Interface (UI. For complete instructions refer to the DocuSP documentation. Note: A Network Administrator is required to ensure that the DFE is configured properly. To properly configure the DFE, the Network Administrator must supply an IP Address, a Subnet Mask, and a Gateway Address if applicable (as well as a Cat 5 Ethernet drop cable). For complete instructions to configure the DFE on a Novell network refer the DocuSP Customer documentation. Procedure: This product was designed to connect to most networks with minimal changes. Connect the DFE to the network. Step 1 provides the machine default settings. Steps 2 - 5 provide instructions on how to modify the machine settings and connect clients for printing
Step 1 Default Server and Network Settings Default Port Settings Default Network Settings Web Services - Enabled IP Address: Get IP Address (DHCP). LPD - Enabled Server Name: The default server name is Windows Printing - Enabled "XRX_hostID" Netware – Enabled IPP - Enabled Print Queues: AppleTalk – Enabled XRX_hostID_Print Socket - Disabled XRX_hostID_Save
XRX_hostID_Hold
Step 2 IP Protocol Setup - using the Local UI Note: If you intend to use a Name Service (NIS, NIS+ etc) then please reference the Customer Documentation. The Name Service options are not addressed in this quick setup guide. Auto IP (DHCP): No action required. Static IP Configuration: Follow this procedure to make changes. If no changes are required, continue to Step 3. Local UI
1. Make sure the DocuSP status displays "printer ready". 2. Select Logon from the pull-down menu on the DocuSP. 3. Login in as System Administrator. Enter the password. The
default password is ‘administ’ and is case sensitive. 4. Click OK. 5. Click Setup > Network Configuration. 6. Select the “Configuration Method” from the IP Address tab. 7. Enter the Hostname, Default Gateway, IP Address, and
Subnet Mask 8. Click OK. 9. Select System > Shutdown. 10. Click Yes.
11. After the system has completely shutdown, wait 5 seconds and then press the power button to bring the DocuSP back up.
Step 3 Load Print Drivers - installation information for printing using LPR Note: Win 95/98/Me/NT are NOT supported. Windows 2000, Windows XP, and Server 2003 1. Insert the “CentreWare Services 6.20 Network Print Drivers CD
in the client CD-ROM drive. 2. Select “Install Drivers”.
The “License Agreement” frame is displayed. Select “I Agree”.
The driver install routine will search for DocuSP DocuColor printers. 3. If the correct DFE is not found automatically, enter the correct
IP manually. Note: The default driver will be the Post Script Driver. Select the “Options” button if PCL is desired. 4. Select “Install” and follow the prompts. 5. An “Installation Complete” window will now open and Print Test
Page will be checked. Uncheck it if you do not want to print a test page upon clicking “Finish”.
6. Select “Close” to exit the installation utility. 7. Eject the CD. 8. On a Windows client, click Start > Settings > Printers and
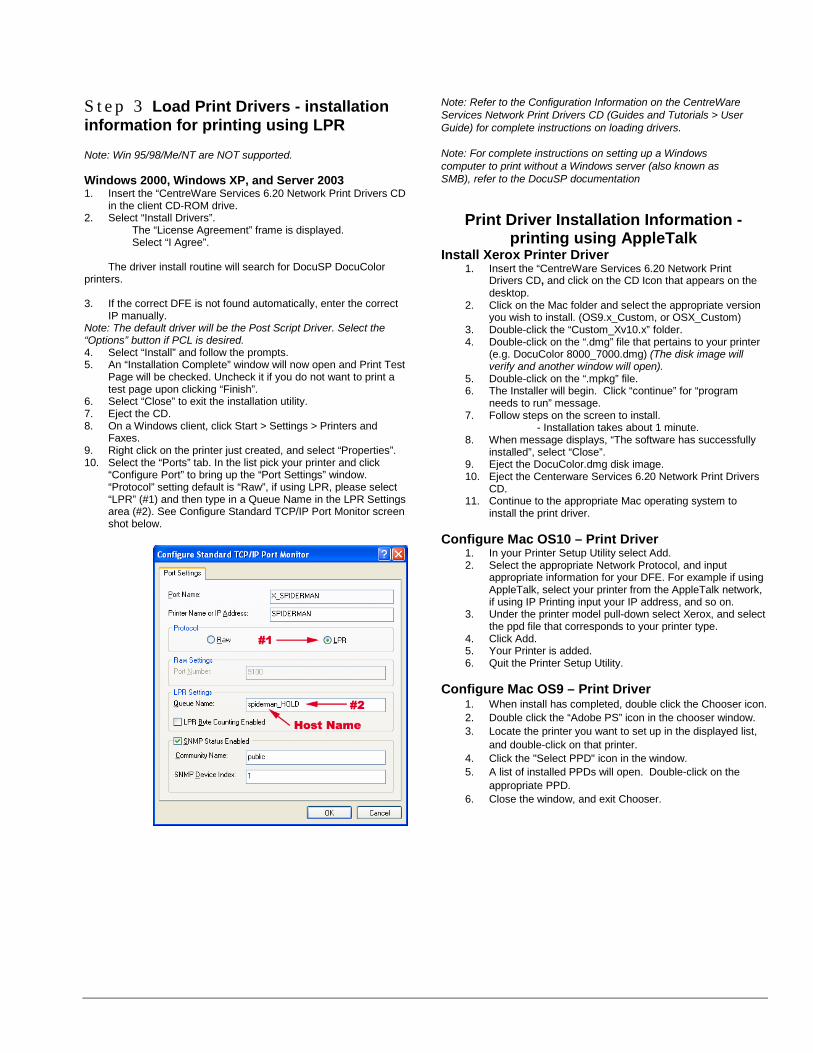
Faxes. 9. Right click on the printer just created, and select “Properties”. 10. Select the “Ports” tab. In the list pick your printer and click
“Configure Port” to bring up the “Port Settings” window. “Protocol” setting default is “Raw”, if using LPR, please select “LPR” (#1) and then type in a Queue Name in the LPR Settings area (#2). See Configure Standard TCP/IP Port Monitor screen shot below.
Note: Refer to the Configuration Information on the CentreWare Services Network Print Drivers CD (Guides and Tutorials > User Guide) for complete instructions on loading drivers. Note: For complete instructions on setting up a Windows computer to print without a Windows server (also known as SMB), refer to the DocuSP documentation
Print Driver Installation Information - printing using AppleTalk
Install Xerox Printer Driver 1. Insert the “CentreWare Services 6.20 Network Print
Drivers CD, and click on the CD Icon that appears on the desktop.
2. Click on the Mac folder and select the appropriate version you wish to install. (OS9.x_Custom, or OSX_Custom)
3. Double-click the “Custom_Xv10.x” folder. 4. Double-click on the “.dmg” file that pertains to your printer
(e.g. DocuColor 8000_7000.dmg) (The disk image will verify and another window will open).
5. Double-click on the “.mpkg” file. 6. The Installer will begin. Click “continue” for “program
needs to run” message. 7. Follow steps on the screen to install.
- Installation takes about 1 minute. 8. When message displays, “The software has successfully
installed”, select “Close”. 9. Eject the DocuColor.dmg disk image. 10. Eject the Centerware Services 6.20 Network Print Drivers
CD. 11. Continue to the appropriate Mac operating system to
install the print driver. Configure Mac OS10 – Print Driver
1. In your Printer Setup Utility select Add. 2. Select the appropriate Network Protocol, and input
appropriate information for your DFE. For example if using AppleTalk, select your printer from the AppleTalk network, if using IP Printing input your IP address, and so on.
3. Under the printer model pull-down select Xerox, and select the ppd file that corresponds to your printer type.
4. Click Add. 5. Your Printer is added. 6. Quit the Printer Setup Utility.
Configure Mac OS9 – Print Driver
1. When install has completed, double click the Chooser icon. 2. Double click the “Adobe PS” icon in the chooser window. 3. Locate the printer you want to set up in the displayed list,
and double-click on that printer. 4. Click the "Select PPD" icon in the window. 5. A list of installed PPDs will open. Double-click on the
appropriate PPD. 6. Close the window, and exit Chooser.