xp12000 for windows conf guide rootsan technologies pvt ltd
TRANSCRIPT
8/6/2019 XP12000 for Windows Conf Guide Rootsan technologies Pvt Ltd
http://slidepdf.com/reader/full/xp12000-for-windows-conf-guide-rootsan-technologies-pvt-ltd 1/38
HP StorageWorks Disk Array XP operatingsystem configuration guide: Windows2000/2003
XP12000XP10000
SVS200
Part number: A5951-96194Fifth edition: June 2006

8/6/2019 XP12000 for Windows Conf Guide Rootsan technologies Pvt Ltd
http://slidepdf.com/reader/full/xp12000-for-windows-conf-guide-rootsan-technologies-pvt-ltd 2/38
Legal and notice information
© Copyright 2003-2006 Hewlett-Packard Development Company, L.P.
Confidential computer software. Valid license from HP required for possession, use or copying. Consistent with FAR 12.211 and12.212, Commercial Computer Software, Computer Software Documentation, and Technical Data for Commercial Items arelicensed to the U.S. Government under vendor’s standard commercial license.
The information contained herein is subject to change without notice. The only warranties for HP products and services are set forthin the express warranty statements accompanying such products and services. Nothing herein should be construed as constitutingan additional warranty. HP shall not be liable for technical or editorial errors or omissions contained herein.
Microsoft, Windows, Windows XP, and Windows NT are U.S. registered trademarks of Microsoft Corporation.

8/6/2019 XP12000 for Windows Conf Guide Rootsan technologies Pvt Ltd
http://slidepdf.com/reader/full/xp12000-for-windows-conf-guide-rootsan-technologies-pvt-ltd 3/38
Contents
Preface . . . . . . . . . . . . . . . . . . . . . . . . . . . . . . 5 About this guide . . . . . . . . . . . . . . . . . . . . . . . . . . . . . . . . . . . . . . . 5Intended audience . . . . . . . . . . . . . . . . . . . . . . . . . . . . . . . . . . . . . . 5Disk arrays . . . . . . . . . . . . . . . . . . . . . . . . . . . . . . . . . . . . . . . . . 5Related documentation . . . . . . . . . . . . . . . . . . . . . . . . . . . . . . . . . . . . 5Document conventions and symbols . . . . . . . . . . . . . . . . . . . . . . . . . . . . . . 6HP technical support . . . . . . . . . . . . . . . . . . . . . . . . . . . . . . . . . . . . . 7Subscription service . . . . . . . . . . . . . . . . . . . . . . . . . . . . . . . . . . . . . 7Other HP web sites . . . . . . . . . . . . . . . . . . . . . . . . . . . . . . . . . . . . . 7Documentation feedback . . . . . . . . . . . . . . . . . . . . . . . . . . . . . . . . . . . 7
1 Installation . . . . . . . . . . . . . . . . . . . . . . . . . . . . 9Features and requirements . . . . . . . . . . . . . . . . . . . . . . . . . . . . . . . . . . 9
Fibre Channel interface . . . . . . . . . . . . . . . . . . . . . . . . . . . . . . . . . 10
Device emulation types . . . . . . . . . . . . . . . . . . . . . . . . . . . . . . . . . 10Failover . . . . . . . . . . . . . . . . . . . . . . . . . . . . . . . . . . . . . . . 10SNMP configuration . . . . . . . . . . . . . . . . . . . . . . . . . . . . . . . . . . 11RAID Manager command devices . . . . . . . . . . . . . . . . . . . . . . . . . . . . 11
Installation procedures . . . . . . . . . . . . . . . . . . . . . . . . . . . . . . . . . . . 12Install and configure the disk array . . . . . . . . . . . . . . . . . . . . . . . . . . . . . . 12
Setting the host mode and host group mode for the disk array port s . . . . . . . . . . . . . . 13Setting the System Option Mode . . . . . . . . . . . . . . . . . . . . . . . . . . . . . 14Configuring the Fibre Channel ports . . . . . . . . . . . . . . . . . . . . . . . . . . . 15
Fibre address . . . . . . . . . . . . . . . . . . . . . . . . . . . . . . . . . . . 15Fabric and connection parameter settings . . . . . . . . . . . . . . . . . . . . . . . 16
Install and configure the host . . . . . . . . . . . . . . . . . . . . . . . . . . . . . . . . 16Loading the OS and software . . . . . . . . . . . . . . . . . . . . . . . . . . . . . . 16Installing and configuring the HBAs . . . . . . . . . . . . . . . . . . . . . . . . . . . . 16
Cross-referencing HBAs . . . . . . . . . . . . . . . . . . . . . . . . . . . . . . . 17Fabric zoning and LUN security . . . . . . . . . . . . . . . . . . . . . . . . . . . . . 18Connect the disk array . . . . . . . . . . . . . . . . . . . . . . . . . . . . . . . . . . . 19
Defining the paths . . . . . . . . . . . . . . . . . . . . . . . . . . . . . . . . . . . 19 Verifying the host recognizes array devices . . . . . . . . . . . . . . . . . . . . . . . . 20
Configure disk devices . . . . . . . . . . . . . . . . . . . . . . . . . . . . . . . . . . . 20 Writing signatures . . . . . . . . . . . . . . . . . . . . . . . . . . . . . . . . . . . 20Creating and formatting disk partitions . . . . . . . . . . . . . . . . . . . . . . . . . . 21 Verifying file system operations . . . . . . . . . . . . . . . . . . . . . . . . . . . . . 21
2 Troubleshooting . . . . . . . . . . . . . . . . . . . . . . . . . 23Error conditions . . . . . . . . . . . . . . . . . . . . . . . . . . . . . . . . . . . . . . 24Calling the HP support center . . . . . . . . . . . . . . . . . . . . . . . . . . . . . . . . 25
Contact information . . . . . . . . . . . . . . . . . . . . . . . . . . . . . . . . . . 25Before you call . . . . . . . . . . . . . . . . . . . . . . . . . . . . . . . . . . . . 25
A Path worksheet . . . . . . . . . . . . . . . . . . . . . . . . . 27
B Disk array supported emulations . . . . . . . . . . . . . . . . . . 29Supported emulations . . . . . . . . . . . . . . . . . . . . . . . . . . . . . . . . . . . 29
HP StorageWorks Disk Array XP operating system configuration guide: Windows 2000/2003 3

8/6/2019 XP12000 for Windows Conf Guide Rootsan technologies Pvt Ltd
http://slidepdf.com/reader/full/xp12000-for-windows-conf-guide-rootsan-technologies-pvt-ltd 4/38
Emulation specifications . . . . . . . . . . . . . . . . . . . . . . . . . . . . . . . . . . 30
Glossary . . . . . . . . . . . . . . . . . . . . . . . . . . . . . 33
Index . . . . . . . . . . . . . . . . . . . . . . . . . . . . . . 37
4

8/6/2019 XP12000 for Windows Conf Guide Rootsan technologies Pvt Ltd
http://slidepdf.com/reader/full/xp12000-for-windows-conf-guide-rootsan-technologies-pvt-ltd 5/38
Preface
About this guide
This guide provides information about:• Requirements and procedures for connecting an XP disk array or the SVS200 to a host system
• Configuring the disk array for use with the Windows 2000/2003 operating system
Intended audienceThis guide is intended for system administrators with knowledge of:
• The host hardware
• Windows 2000/2003 operating system
• XP disk arrays and/or the SVS200
Disk arraysUnless otherwise noted, the term “disk array” refers to these systems:
• HP StorageWorks XP10000 Disk Array
• HP StorageWorks XP12000 Disk Array
• HP StorageWorks 200 Storage Virtualization System
Related documentationThe following documents provide related information:
• HP StorageWorks XP10000 Disk Array: Owner’s Guide
• HP StorageWorks XP12000 Disk Array: Owner’s Guide
• HP StorageWorks 200 Storage Virtualization System: Owner’s Guide
You can find these documents from the Manuals page of the HP Business Support Center web site:
http://www.hp.com/support/manuals
In the Storage section, click Storage array systems and then select your product.
HP StorageWorks Disk Array XP operating system configuration guide: Windows 2000/2003 5
8/6/2019 XP12000 for Windows Conf Guide Rootsan technologies Pvt Ltd
http://slidepdf.com/reader/full/xp12000-for-windows-conf-guide-rootsan-technologies-pvt-ltd 6/38
Document conventions and symbolsConvention Element
Blue text: Document conventions andsymbols
Cross-reference links and e-mail addresses
Blue, underlined text: http://www.hp.com
Web site addresses
Italic text Text emphasis and book titlesBold text • Keys that are pressed
• Text typed into a GUI element, such as a box
• GUI elements that are clicked or selected, such as menu andlist items, buttons, tabs, and check boxes
Monospace text • File and directory names
• System output
• Code
• Commands, their arguments, and argument values
Monospace, italictext • Code variables
• Command variables
Monospace, boldtext Emphasized monospace text
WARNING!
Indicates that failure to follow directions could result in bodily harm or death.
CAUTION:
Indicates that failure to follow directions could result in damage to equipment or data.
IMPORTANT:
Provides clarifying information or specific instructions.
NOTE:
Provides additional information.
TIP:
Provides helpful hints and shortcuts.
6 Preface

8/6/2019 XP12000 for Windows Conf Guide Rootsan technologies Pvt Ltd
http://slidepdf.com/reader/full/xp12000-for-windows-conf-guide-rootsan-technologies-pvt-ltd 7/38
HP technical supportTelephone numbers for worldwide technical support are listed on the HP support web site:http://www.hp.com/support/.
Collect the following information before calling:
• Technical support registration number (if applicable)
• Product serial numbers
• Product model names and numbers• Error messages
• Operating system type and revision level
• Detailed questions
For continuous quality improvement, calls may be recorded or monitored.
Subscription serviceHP recommends that you register your product at the Subscriber’s Choice for Business web site:http://www.hp.com/go/e-updates.
After registering, you will receive e-mail notification of product enhancements, new driver versions,
firmware updates, and other product resources.
Other HP web sitesFor additional information, see the following HP web sites:
• http://www.hp.com
• http://www.hp.com/go/storage
• http://www.hp.com/service_locator
• http://www.hp.com/support/manuals
Documentation feedbackHP welcomes your feedback.
To make comments and suggestions about product documentation, please send a message [email protected]. All submissions become the property of HP.
HP StorageWorks Disk Array XP operating system configuration guide: Windows 2000/2003 7

8/6/2019 XP12000 for Windows Conf Guide Rootsan technologies Pvt Ltd
http://slidepdf.com/reader/full/xp12000-for-windows-conf-guide-rootsan-technologies-pvt-ltd 8/38
8 Preface

8/6/2019 XP12000 for Windows Conf Guide Rootsan technologies Pvt Ltd
http://slidepdf.com/reader/full/xp12000-for-windows-conf-guide-rootsan-technologies-pvt-ltd 9/38
1 Installation
You and your HP service representative each play a role in installation. Your HP service representativeis responsible for installing the disk array and formatting the disk devices. You are responsible forconfiguring the host server for the new devices with assistance from your HP service representative.
Features and requirements Ask your HP service representative about the latest supported hardware and software.
The disk array has the following features:
• Storage capacity. The storage capacity for each model is listed below:
XP10000: Up to 240 drives for up to 69.2 TB, 48 FC ports
XP12000: Up to 1152 drives for up to 332 TB, 128 FC ports
SVS200 Up to 127 TB of external storage, 48 FC ports
• Server support. Windows 2000/2003 PC server with the latest HP supported patches
• Operating system support. Windows 2000/2003
Before installing the disk array, ensure the environment conforms to these requirements:
• Host Bus Adapters (HBAs) Install HBAs and all utilities and drivers. Refer to the adapterdocumentation for installation details.
• (Recommended) HP StorageWorks Remote Web Console XP, Command View XP AdvancedEdition or Command View XP with LUN management feature for configuring disk array portsand paths
• (Recommended) HP StorageWorks LUN Configuration and Security Manager XP
• (Optional) Other available XP software (some may not apply to your system):
HP Storage Works Business Copy XP
HP StorageWorks Continuous Access XP
HP StorageWorks Continuous Access Extension XP
HP StorageWorks Continuous Access XP Journal
HP StorageWorks Auto LUN XP
HP StorageWorks Data Exchange XP
HP StorageW orks RAID Manager XP
HP StorageWorks Cache LUN XP
HP StorageWorks Auto Path XP
HP StorageWorks Cluster Extension XP
HP StorageWorks Performance Advisor XP Software
HP StorageWorks External Storage XP
HP StorageWorks XP Disk/Cache Partition Software
HP StorageWorks Flex Copy XP
HP StorageWorks XP Data Shredder Software
HP StorageWorks Performance Control XP
HP StorageWorks Disk Array XP operating system configuration guide: Windows 2000/2003 9

8/6/2019 XP12000 for Windows Conf Guide Rootsan technologies Pvt Ltd
http://slidepdf.com/reader/full/xp12000-for-windows-conf-guide-rootsan-technologies-pvt-ltd 10/38
Fibre Channel interfaceThe XP family of disk arrays and the SVS200 support these Fibre Channel elements:
• Connection speeds of 1 Gbps, 2 Gbps, and 4 Gbps (XP12000/XP10000 only)
• Short-wave non-OFC (open fiber control) optical interface
• Multimode optical cables with SC or LC connectors
• Public or private arbitrated loop (FC-AL) or direct fabric attach
Even though the interface is Fibre Channel, this guide uses the term “SCSI disk” because disk arraydevices are defined to the host as SCSI disks.
Device emulation typesThe XP family of disk arrays and the SVS200 support these device emulation types:
• OPEN-3/8/9/E/L/V devices: OPEN-x logical units represent disk devices. Except for OPEN-V,these devices are based on fixed sizes. OPEN-V is a user-defined size. Supported emulationsinclude OPEN-3, OPEN-8, OPEN-9, OPEN-E, OPEN-L, and OPEN-V devices.
• LUSE devices (OPEN-x*n): Logical Unit Size Expansion (LUSE) devices combine 2 to 36 OPEN-xdevices to create expanded LDEVs larger than standard OPEN-3/8/9/E/L/V disk devices.For example, an OPEN-x LUSE volume created from ten OPEN-x volumes is designated asOPEN-x*10.
• CVS devices (OPEN-x CVS): Volume Size Configuration (VSC) defines custom volumes (CVS) thatare smaller than normal fixed-sized logical disk devices (volumes). (OPEN-V is a CVS-basedcustom disk size that you determine. OPEN-L does not support CVS.)
• LUSE (expanded) CVS devices (OPEN-x*n CVS): LUSE CVS combines CVS devices to create anexpanded device. This is done by first creating CVS custom-sized devices and then using LUSE tocombine from 2 to 36 CVS devices. For example, if three OPEN-9 CVS volumes are combined tocreate an expanded device, this device is designated as OPEN-9*3-CVS.
NOTE:
For the SVS200, and the XP12000/XP10000 when connected to external storage devices, HPrecommends using OPEN-V as the emulation the array makes visible to the host. This allows externalstorage LDEVs to be configured without losing data. Using any other emulation may cause data loss
in the external storage LUNs.
FailoverThe disk arrays support many standard software products that provide host, application, or I/O pathfailover and management.
10 Installation

8/6/2019 XP12000 for Windows Conf Guide Rootsan technologies Pvt Ltd
http://slidepdf.com/reader/full/xp12000-for-windows-conf-guide-rootsan-technologies-pvt-ltd 11/38
SNMP configurationThe XP family of disk arrays and the SVS200 support standard Simple Network Management Protocol(SNMP) for remotely managing arrays. The SNMP agent on the service processor (SVP) performserror-reporting operations requested by the SNMP manager. SNMP properties are usually set from theSVP but they can also be set remotely using Command View (XP arrays only), Remote Web Console, orCommand View XP Advanced Edition. Refer to the applicable user’s guide for procedures.
RAID Manager command devicesRAID Manager manages Business Copy (BC) or Continuous Access (CA) operations from a host server.To use RAID Manager you must designate at least one LDEV as a command device. This can be donewith Command View (XP arrays only), Remote Web Console , or Command View XP Advanced Edition.Refer to the applicable user guide for information about how to designate a command device.
HP StorageWorks Disk Array XP operating system configuration guide: Windows 2000/2003 11

8/6/2019 XP12000 for Windows Conf Guide Rootsan technologies Pvt Ltd
http://slidepdf.com/reader/full/xp12000-for-windows-conf-guide-rootsan-technologies-pvt-ltd 12/38
Installation proceduresPerform these actions to install and configure the disk array:
1. Install and configure the disk array
• Setting the host mode and host group mode
• Setting the System Option Mode
• Configuring the Fibre Channel ports
2. Install and configure the host
• Loading the OS and software
• Installing and configuring the HBAs
• Fabric zoning and LUN security
3. Connect the disk array
• Defining the paths
• Verifying the host recognizes array devices
4. Configure disk devices
• Writing signatures
• Creating and formatting disk partitions
• Verifying file system operations
Install and configure the disk arrayThe HP service representative performs these tasks:
• Assembling hardware and installing software
• Loading the microcode updates
• Installing and formatting devices
After these tasks are finished, use Command View (XP arrays only), Remote Web Console, Command View XP Advanced Edition, or LUN Configuration and Security Manager to complete the remainingtasks listed below. If you do not have these programs, your HP service representative can perform
these tasks for you.
12 Installation

8/6/2019 XP12000 for Windows Conf Guide Rootsan technologies Pvt Ltd
http://slidepdf.com/reader/full/xp12000-for-windows-conf-guide-rootsan-technologies-pvt-ltd 13/38
Setting the host mode and host group mode for the disk array ports After the disk array is installed, you must set the host mode for each disk array port to match the host OS.Set the host mode using LUN Manager in Remote Web Console (shown), Command View (XP arraysonly), or Command View XP Advanced Edition. If these are not available, the HP service representativecan set the host mode using the SVP.
The available host mode settings for Windows 2000/2003 are as follows:
Host mode Description
2C (available on some array models) HP recommended. (For use with LUSE volumes whenonline LUN expansion is required or may be requiredin the future.)
0C HP recommended. (Use if future online LUNexpansion is not required or planned.)
Volume name as seen on host Volume on XP array (examples)
host mode = 0C host mode = 2C
OPEN-E OPEN-E OPEN-E
OPEN-9 OPEN-9 OPEN-9
OPEN-9*2 OPEN-9*2 OPEN-9
OPEN-9*3-CVS OPEN-9*3-CVS OPEN-9-CVS
CAUTION:
The correct host mode must be set for all new installations (newly connected ports) to Windows2000 /2003 hosts. Do not select a mode other than 2C and 0C for Windows 2000/2003. Changing ahost mode after the host has been connected is disruptive and requires the server to be rebooted.
HP StorageWorks Disk Array XP operating system configuration guide: Windows 2000/2003 13

8/6/2019 XP12000 for Windows Conf Guide Rootsan technologies Pvt Ltd
http://slidepdf.com/reader/full/xp12000-for-windows-conf-guide-rootsan-technologies-pvt-ltd 14/38
When a new host group is added, additional host group modes (options) may be configured. Thestorage administrator must verify if an additional host group mode is required for the host group.
The following host group modes are available for Windows 2000/2003:
HostGroupMode Function Default Comments
2(Windows2003 only)
VERITAS DBE+RAC DatabaseEdition/Advanced Cluster for Real
Application Clusters or VERITAS® ClusterServer 4.0 with I/O fencing is used.
Inactive
6 Parameter Setting Failure for TPRLO When using the Emulex HBA in the Windows environment, the parametersetting for TPRLO failed. After receivingTPRLO and FCP_CMD, respectively. PRLOwill respond when HostMode=0x0C/0x2Cand HostModeOption=0x06. (MAIN
Ver.50-03-14-00/00 and later)
Inactive
CAUTION:
Changing host group modes for ports where servers are already installed and configured is disruptiveand requires the server to be rebooted.
Setting the System Option ModeThe HP service representative sets the System Option Mode(s) based on the operating system andsoftware configuration of the host.
14 Installation

8/6/2019 XP12000 for Windows Conf Guide Rootsan technologies Pvt Ltd
http://slidepdf.com/reader/full/xp12000-for-windows-conf-guide-rootsan-technologies-pvt-ltd 15/38
Configuring the Fibre Channel portsConfigure the disk array Fibre Channel ports by using Remote Web Console (shown), Command View(XP arrays only), or Command View XP Advanced Edition. Select the settings for each port based onyour storage area network topology. Use switch zoning if you connect different types of hosts to thearray through the same switch.
Fibre address
In fabric environments, the port addresses are assigned automatically. In arbitrated loop environments,set the port addresses by selecting a unique arbitrated loop physical address (AL-PA) or loop ID for eachport. For specific values, refer to the HP StorageWorks LUN Confi guration and Security Manager XP User Guide applicable to your array.
HP StorageWorks Disk Array XP operating system configuration guide: Windows 2000/2003 15

8/6/2019 XP12000 for Windows Conf Guide Rootsan technologies Pvt Ltd
http://slidepdf.com/reader/full/xp12000-for-windows-conf-guide-rootsan-technologies-pvt-ltd 16/38
Fabric and connection parameter settings
Set each array port to FABRIC ON or OFF with connections of POINT-TO-POINT or FC-AL as shown inthe following table and figures. For detailed topology information, refer to the HP StorageWorks SAN Design Reference Guide on the www.hp.com website.
Fabric parameter Connection parameter Provides
OFF FC-AL NL-port (private arbitrated loop)
ON FC-AL FL-port (public loop) for loop connection to aswitch
ON POINT-TO-POINT N-port (fabric port) for connection to a switch
OFF POINT-TO-POINT Not supported
Install and configure the hostThis section explains how to install and configure the host and host bus adapters (HBAs) that connect thehost to the disk array.
Loading the OS and softwareFollow the manufacturer’s instructions to load the operating system and software onto the host. Load allOS patches and configuration utilities supported by HP and the HBA manufacturer.
If you purchased multipath software, install it according to the manufacturer’s instructions.
Installing and configuring the HBAsInstall and configure the host bus adapters using the HBA manufacturer’s instructions.
HP supplies driver, firmware, and BIOS downloads for commonly available HBAs. These downloadscontain HBA settings that are tested and approved by HP. To obtain a download, log onto the HP websiteat www.hp.com and search for the model name or number of your HBA. Download the file, and followthe installation instructions in the “readme” or documentation file supplied with each download.
16 Installation

8/6/2019 XP12000 for Windows Conf Guide Rootsan technologies Pvt Ltd
http://slidepdf.com/reader/full/xp12000-for-windows-conf-guide-rootsan-technologies-pvt-ltd 17/38
Cross-referencing HBAs
The following table identifies both the HP part number and the HBA manufacturer’s number for commonHBAs.
HP part OEM partner OEM adapter Family (*1)
KGPSA-CB Emulex LP8000 1
FCA2355 Emulex LP9002DC 1
FCA2101 Emulex LP952 1
FCA2408 / A7298A Emulex LP982 2
FCA2404 / AB232A Emulex LP9802 2
FCA2404DC Emulex LP9802DC 2
A7388A / AB467A Emulex LP1050 3
A7387A / AB466A Emulex LP1050DC 3
A7560A Emulex LP1050EX 3
None Emulex LP10000 3
FCA2142/A8002A Emulex LPe11002 6
FCA2242/A8003A Emulex LPe1150 6
FC2143 Emulex LP1150 7
FC2243 Emulex LP11002 7
FCA2214 QLogic QLA2340 4
FCA2214DC QLogic QLA2342 4
FC1142SR QLogic QLE2460 8
FC1242SR QLogic QLE2462 8
BL20p G2 (FC MezzanineCard) BL20p G3 (FC AdapterCard)
QLogic Chipset None 4
BL25p, BL45p (HPALCF 105) QLogic Chipset None 4
BL30p, BL35p (FC BalconyCard)
QLogic Chipset None 4
394757–B2 (E-FC AdapterCard): BL20p G3
Emulex Chipset None 5
394588–B2 (E-FC AdapterCard): BL25p, BL30p, BL35p,BL45p
Emulex Chipset None 5
Note *1: Family number shows which HBAs can use similar driver/BIOS/ fi rmware.
HP StorageWorks Disk Array XP operating system configuration guide: Windows 2000/2003 17

8/6/2019 XP12000 for Windows Conf Guide Rootsan technologies Pvt Ltd
http://slidepdf.com/reader/full/xp12000-for-windows-conf-guide-rootsan-technologies-pvt-ltd 18/38
Fabric zoning and LUN securityBy using appropriate zoning and LUN security, you can connect various servers with various operatingsystems to the same switch and fabric:
• Storage port zones may overlap if more than one operating system needs to share an array port.
• Heterogeneous operating systems may share an XP array port if you use Secure Manager and setthe appropriate host group and mode. All others must connect to a dedicated XP array port.
• Use Secure Manager for LUN isolation when multiple hosts connect through a shared arrayport. Secure Manager provides LUN security by allowing you to restrict which LUNs each hostcan access.
• QLogic and Emulex HBAs must be in separate zones (a QLogic zone and an Emulex zone)whether the HBAs are in the same or separate servers.
• If booting over the SAN, within a server, the booting HBAs must be from the same vendor. Additional data storage HBAs can be from a different vendor.
Environment OS mix Fabric zoning LUN security
homogeneous (a singleOS type present in theSAN)
Not requiredStandalone SAN(non-clustered)Clustered SANMulti-Cluster SAN
heterogeneous (morethan one OS typepresent in the SAN)
Required
Must be used whenmultiple hosts or clusternodes connect througha shared port
• If you plan to use clustering, install and configure the clustering software on the servers. Clusteringis the organization of multiple servers into groups. Within a cluster, each server is a node.Multiple clusters compose a multi-cluster environment. The following example shows a multi-clusterenvironment with three clusters, each containing two nodes. The nodes share access to thedisk array.
18 Installation

8/6/2019 XP12000 for Windows Conf Guide Rootsan technologies Pvt Ltd
http://slidepdf.com/reader/full/xp12000-for-windows-conf-guide-rootsan-technologies-pvt-ltd 19/38
Connect the disk arrayThe HP representative connects the cables between the array and the host or between the array and theSAN.
Defining the pathsUse Remote Web Console (shown), Command View (XP arrays only), or Command View XP Advanced
Edition to define paths (LUNs) between hosts and volumes in the disk array.This process is also called “LUN mapping.” In Remote Web Console and Command View, LUN mappingincludes:
• Configuring ports
• Enabling LUN security on the ports
• Creating host groups
• Assigning host bus adapter WWNs to host groups
• Mapping volumes to host groups (by assigning LUNs
In Command View XP Advanced Edition, LUN mapping includes:
• Configuring ports
• Creating storage groups
• Mapping volumes and WWN/host access permissions to the storage groups
For details see the LUN Confi guration and Security Manager User’s Guide or Command View XP Advanced Edition Device Manager Web Client User’s Guide . Note the LUNS and their ports, WWNs,nicknames, and LDEVs for later use in verifying host and device configuration.
NOTE:
A LUN assigned a number greater than FF is outside the accepted range of numbers for a Windowsserver (00 to FE) and will not be recognized by the server or be visible for use.
Windows 2003: To see LUNs, you must create a LUN 0 when using the SCSIPort Miniport Driver. This isnot necessary if using the StorPort Miniport Driver.
Windows 2000: A LUN 0 must be created to discover more than LUNs 0 to 7.
HP StorageWorks Disk Array XP operating system configuration guide: Windows 2000/2003 19

8/6/2019 XP12000 for Windows Conf Guide Rootsan technologies Pvt Ltd
http://slidepdf.com/reader/full/xp12000-for-windows-conf-guide-rootsan-technologies-pvt-ltd 20/38
Verifying the host recognizes array devices1. Log into the host as an administrator.
2. Right-click the My Computer desktop icon, and click Manage.
3. Click Device Manager .
4. Click SCSI and RAID Controllers.
5. Click the host bus adapter to open it, and verify all devices are displayed.
6. Click each device, click Properties, and then click Settings.
7. Record the device information on the worksheet in Appendix A.
Configure disk devicesDisk arrays are configured using the same procedure for configuring any new disk on the host. Thisincludes the following procedures:
• Writing signatures
• Creating and formatting disk partitions
• Verifying file system operations
Writing signatures1. Right-click on the My Computer desktop icon and click Manage.
2. Click Disk Management. A message notifies you that disks have been added.
3. Click OK to update the system configuration and start the Write Signature wizard, which allowsyou to write signatures to the disks.
4. For each new disk, click OK to write a signature, or click No to prevent writing a signature.
5. When you have performed this process for all new disks, the Disk Management main windowopens and displays the added disks.
20 Installation
8/6/2019 XP12000 for Windows Conf Guide Rootsan technologies Pvt Ltd
http://slidepdf.com/reader/full/xp12000-for-windows-conf-guide-rootsan-technologies-pvt-ltd 21/38
Creating and formatting disk partitionsDynamic Disk is supported with no restrictions for a disk array connected to a Windows 2000/ 2003system. Refer to Microsoft’s online help for details.
CAUTION:
Do not partition or create a file system on a device that will be used as a raw device (for example,some database applications use raw devices.)
1. In the Disk Management main window, select the unallocated area for the SCSI disk you wantto partition.
2. Click the Action menu, and click Create Partition to launch the New Partition Wizard. Follow thePartition Wizard to create and format partitions and assign drive letters. Format partitions with thefollowing settings and format options.
File System: NTFS (enables Windows to write to the disk).
Allocation unit size: “Default.” Do not change this entry.
Volume label: Enter a volume label, or leave this field blank for no label.
Format Options: Click Perform a Quick Format to decrease the time required to format the partition.Click Enable file and folder compression only if you want to enable compression.
3. Verify the Disk Management main window displays the correct file system (NTFS) for the formattedpartition. The word “Healthy” indicates that the partition has been created and formatted successfully.
4. Repeat this procedure for each new disk device.
5. Exit Disk Management, clicking Yes to save your changes.
Verifying file system operations1. Open My Computer and check that the new disks are present.
2. Right-click each disk to view Properties and verify the properties are correct (label, type, capacity,and file system).
3. Copy a file from an existing drive to each new drive to verify the new drives are working, andthen delete the copies.
HP StorageWorks Disk Array XP operating system configuration guide: Windows 2000/2003 21

8/6/2019 XP12000 for Windows Conf Guide Rootsan technologies Pvt Ltd
http://slidepdf.com/reader/full/xp12000-for-windows-conf-guide-rootsan-technologies-pvt-ltd 22/38
22 Installation

8/6/2019 XP12000 for Windows Conf Guide Rootsan technologies Pvt Ltd
http://slidepdf.com/reader/full/xp12000-for-windows-conf-guide-rootsan-technologies-pvt-ltd 23/38
2 Troubleshooting
This section includes resolutions for various error conditions you may encounter.
If you are unable to resolve an error condition, ask your HP support representative for assistance. See
Calling the HP support center.
HP StorageWorks Disk Array XP operating system configuration guide: Windows 2000/2003 23

8/6/2019 XP12000 for Windows Conf Guide Rootsan technologies Pvt Ltd
http://slidepdf.com/reader/full/xp12000-for-windows-conf-guide-rootsan-technologies-pvt-ltd 24/38
Error conditionsDepending on your system configuration, you may be able to view error messages (R-SIMS) as follows:
• In Remote Web Console XP (Status tab)
• In Command View XP Advanced Edition (“Alerts” panel).
• In Command View XP (Event History or Event Notification panels) (XP arrays only)
Error condition Recommended action
The logical devices are not recognized by the host. Verify that the READY indicator lights on the diskarray are ON.
Verify that fiber cables are correctly installed andfirmly connected.
Verify that the target IDs are properly configured.The LUNs for each TID must start at 0 and continuesequentially without skipping any numbers.
Verify that the TIDs/WWNs on each bus are unique.Do not install two devices with the same ID on thesame bus.
Recheck the buses for new devices.
Verify that LUSE devices are not intermixed withnormal LUNs on the same port.
Verify that the maximum number of LUSE devices perport has not been exceeded.
Verify that the disk array host mode is set correctly.
The host does not reboot properly after hardshutdown.
If you power off the host without executing theshutdown process, wait three minutes to allow thedisk array’s internal timeout process to purge queuedcommands. If the host restarts while the disk arrayis processing queued commands, the host may notreboot successfully.
Physical volumes cannot be created. Verify that the disk array logical devices are correctlyformatted.
Logical volumes cannot be created. Verify that the volume capacity for OPEN-x volumes is
not greater than the maximum capacity allowed. Seethe Device Emulations Appendix.
Verify that the capacity of the volume group is notless than the total capacity of the partitioned logicalvolume.
A file system is not mounted after rebooting. Verify that the host was restarted correctly.
Verify that the file system attributes are correct.
The disk array performs a self reboot because thedisk array was busy or it logged a panic message.
Reboot the host.
The disk array responds “Not Ready” or the diskarray has displayed “Not Ready” and timed out.
Contact HP.
The host detects a parity error. Check the HBA and make sure it was installed
properly. Reboot the host.The host hangs or devices are declared and the hosthangs.
Make sure there are no duplicate disk array TIDs andthat disk array TIDs do not conflict with any host TIDs.
24 Troubleshooting

8/6/2019 XP12000 for Windows Conf Guide Rootsan technologies Pvt Ltd
http://slidepdf.com/reader/full/xp12000-for-windows-conf-guide-rootsan-technologies-pvt-ltd 25/38
Calling the HP support centerIf you are unable to resolve an error condition, contact the HP support center for assistance.
Contact informationTelephone numbers for worldwide technical support are listed on the HP support web site:http://www.hp.com/support/.
Before you callBe sure to have the following information available:
• Technical support registration number (if applicable)
• Product serial numbers
• Product model names and numbers
• Applicable error messages
• Operating system type and revision level
• Detailed, specific questions
For continuous quality improvement, calls may be recorded or monitored.
HP StorageWorks Disk Array XP operating system configuration guide: Windows 2000/2003 25

8/6/2019 XP12000 for Windows Conf Guide Rootsan technologies Pvt Ltd
http://slidepdf.com/reader/full/xp12000-for-windows-conf-guide-rootsan-technologies-pvt-ltd 26/38
26 Troubleshooting

8/6/2019 XP12000 for Windows Conf Guide Rootsan technologies Pvt Ltd
http://slidepdf.com/reader/full/xp12000-for-windows-conf-guide-rootsan-technologies-pvt-ltd 27/38
A Path worksheet
LDEV (CU:LDEV) (CU =control unit)
Device Type SCSI BusNumber
Path 1 Alternate Paths
0:00 TID:LUN: TID:LUN: TID:LUN:
0:01 TID:
LUN:
TID:
LUN:
TID:
LUN:
0:02 TID:
LUN:
TID:
LUN:
TID:
LUN:
0:03 TID:
LUN:
TID:
LUN:
TID:
LUN:
0:04 TID:
LUN:
TID:
LUN:
TID:
LUN:
0:05 TID:
LUN:
TID:
LUN:
TID:
LUN:
0:06 TID:
LUN:
TID:
LUN:
TID:
LUN:
0:07 TID:
LUN:
TID:
LUN:
TID:
LUN:
0:08 TID:
LUN:
TID:
LUN:
TID:
LUN:
0:09 TID:
LUN:
TID:
LUN:
TID:
LUN:
0:10 TID:
LUN:
TID:
LUN:
TID:
LUN:0:11 TID:
LUN:
TID:
LUN:
TID:
LUN:
0:12 TID:
LUN:
TID:
LUN:
TID:
LUN:
0:13 TID:
LUN:
TID:
LUN:
TID:
LUN:
0:13 TID:
LUN:
TID:
LUN:
TID:
LUN:
0:14 TID:
LUN:
TID:
LUN:
TID:
LUN:0:15 TID:
LUN:
TID:
LUN:
TID:
LUN:
0:16 TID:
LUN:
TID:
LUN:
TID:
LUN:
0:17 TID:
LUN:
TID:
LUN:
TID:
LUN:
HP StorageWorks Disk Array XP operating system configuration guide: Windows 2000/2003 27

8/6/2019 XP12000 for Windows Conf Guide Rootsan technologies Pvt Ltd
http://slidepdf.com/reader/full/xp12000-for-windows-conf-guide-rootsan-technologies-pvt-ltd 28/38
28 Path worksheet

8/6/2019 XP12000 for Windows Conf Guide Rootsan technologies Pvt Ltd
http://slidepdf.com/reader/full/xp12000-for-windows-conf-guide-rootsan-technologies-pvt-ltd 29/38
B Disk array supported emulations
This appendix provides information about supported emulations and emulation specifications. Someparameters may not be relevant to your array. Consult your HP representative for information aboutsupported configurations for your system.
Supported emulations
XP model EmulationEmulationsupported LUSE CVS LUSE & CVS
OPEN-3 Yes Yes Yes Yes
OPEN-8 Yes Yes Yes Yes
XP10000 OPEN-9 Yes Yes Yes Yes
XP12000 OPEN-E Yes Yes Yes Yes
SVS200 OPEN-K
OPEN-L Yes Yes
OPEN-M
OPEN-V Yes Yes
NOTE:
For the SVS200, and the XP12000/XP10000 when connected to external storage devices, HPrecommends using OPEN-V as the emulation the array makes visible to the host. This allows externalstorage LDEVs to be configured without losing data. Using any other emulation may cause data lossin the external storage LUNs.
HP StorageWorks Disk Array XP operating system configuration guide: Windows 2000/2003 29
8/6/2019 XP12000 for Windows Conf Guide Rootsan technologies Pvt Ltd
http://slidepdf.com/reader/full/xp12000-for-windows-conf-guide-rootsan-technologies-pvt-ltd 30/38
Emulation specificationsEmulation (Note
1) Category(Note 2)
Blocks (512bytes )
Sector Size
(bytes)
# ofCylinders
Heads Sectorsper
track
CapacityMB* (Note
3)
OPEN-3 SCSI disk 4806720 512 3338 15 96 2347
OPEN-8 SCSI disk 14351040 512 9966 15 96 7007
OPEN-9 SCSI disk 14423040 512 10016 15 96 7042
OPEN-E SCSI disk 28452960 512 19759 15 96 13893
OPEN-L SCSI disk 71192160 512 49439 15 96 34761
OPEN-V SCSI disk max=125827200 512 Note 5 15 128 Note 6
LUSE
OPEN-3*n SCSI disk 4806720*n 512 3338*n 15 96 2347*n
OPEN-8*n SCSI disk 14351040*n 512 9966*n 15 96 7007*n
OPEN-9*n SCSI disk 14423040*n 512 10016*n 15 96 7042*n
OPEN-E*n SCSI disk 28452960*n 512 19759*n 15 96 13893*n
OPEN-L*n SCSI disk 71192160*n 512 49439*n 15 96 34761*n
OPEN-V*n SCSI disk max=125827200Note 4
512 Note 5 15 128 Note 6
CVS
OPEN-3 CVS SCSI disk Note 4 512 Note 5 15 96 Note 6
OPEN-8 CVS SCSI disk Note 4 512 Note 5 15 96 Note 6
OPEN-9 CVS SCSI disk Note 4 512 Note 5 15 96 Note 6
OPEN-E CVS SCSI disk Note 4 512 Note 5 15 96 Note 6
CVS LUSE
OPEN-3*n CVS SCSI disk Note 4 512 Note 5 15 96 Note 6
OPEN-8*n CVS SCSI disk Note 4 512 Note 5 15 96 Note 6
OPEN-9*n CVS SCSI disk Note 4 512 Note 5 15 96 Note 6
OPEN-E*n CVS SCSI disk Note 4 512 Note 5 15 96 Note 6
OPEN-V*n SCSI disk Note 4 512 Note 5 15 128 Note 6
*Capacity = (512 x number of blocks) ÷ 10242
Note 1:
The availability of an emulation depends on the disk array.
Note 2:
The devices are defined to the host as SCSI disk devices, even though the interface is Fibre Channel.
Note 3:
The device capacity can sometimes be changed by the BIOS or host adapter board. This may makeactual capacity different from that listed in the table.
30 Disk array supported emulations

8/6/2019 XP12000 for Windows Conf Guide Rootsan technologies Pvt Ltd
http://slidepdf.com/reader/full/xp12000-for-windows-conf-guide-rootsan-technologies-pvt-ltd 31/38
Note 4:
The number of blocks for a CVS volume is calculated as follows:
# of blocks = (# of cylinders) × (# of heads) × (# of sectors per track)
Example
For an OPEN-3 CVS volume with capacity = 37 MB:# of blocks = (53 cylinders–see Note 5) × (15 heads) ×
(96 sectors per track) = 76320
Example For an OPEN-V CVS volume with capacity = 49 MB:
# of blocks = (53 cylinders–see Note 5) × (15 heads) ×
(128 sectors per track) = 101760
Note 5:
The number of cylinders for a CVS volume is calculated as follows (↑…↑ means that the value should berounded up to the next integer):
OPEN-3/8/9/E: The number of cylinders for a CVS volume = # of cylinders = ↑ (capacity (MB) specifiedby user) × 1024/720 ↑
Example
For an OPEN-3 CVS volume with capacity = 37 MB:
# of cylinders = ↑37 × 1024/720↑ = ↑52.62↑
(rounded up to next integer) = 53 cylinders
OPEN-V: The number of cylinders for a CVS volume = # of cylinders = ↑ (capacity (MB) specified byuser) × 16/15 ↑
Example
For an OPEN-V CVS volume with capacity = 49 MB:# of cylinders = ↑49 × 16/15↑ = ↑52.26↑
(rounded up to next integer) = 53 cylinders
OPEN-3/8/9/E: The number of cylinders for a CVS LUSE volume = # of cylinders = ↑ (capacity (MB)
specifi
ed by user) × 1024/720↑
× nExample
For a CVS LUSE volume with capacity = 37 MB and n = 4:# of cylinders = ↑37 × 1024/720↑ × 4 = ↑52.62↑× 4 = 5 3 × 4 = 2 1 2
OPEN-V: The number of cylinders for a CVS LUSE volume = # of cylinders = ↑ (capacity (MB) specifiedby user) × 16/15 ↑ × n
Example
For an OPEN-V CVS LUSE volume with capacity = 49 MB and n = 4:
# of cylinders = ↑49 × 16/15↑ × 4 = ↑52.26↑× 4 = 5 3 × 4 = 2 1 2
Note 6:The capacity of an OPEN-3/8/9/E CVS volume is specified in MB, not number of cylinders. The capacityof an OPEN-V CVS volume can be specified in MB or number of cylinders. You set the volume size usingRemote Web Console, Command View (XP arrays only), or Command View XP Advanced Edition.
HP StorageWorks Disk Array XP operating system configuration guide: Windows 2000/2003 31

8/6/2019 XP12000 for Windows Conf Guide Rootsan technologies Pvt Ltd
http://slidepdf.com/reader/full/xp12000-for-windows-conf-guide-rootsan-technologies-pvt-ltd 32/38
32 Disk array supported emulations

8/6/2019 XP12000 for Windows Conf Guide Rootsan technologies Pvt Ltd
http://slidepdf.com/reader/full/xp12000-for-windows-conf-guide-rootsan-technologies-pvt-ltd 33/38
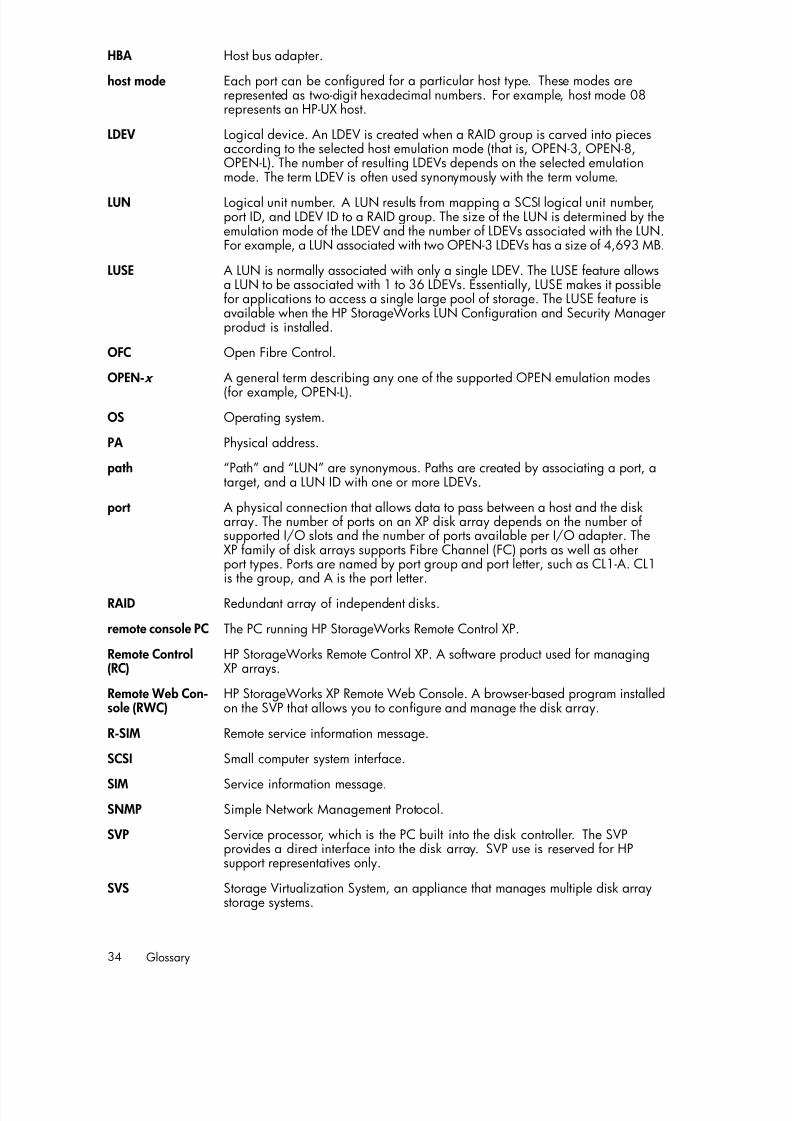
Glossary
AL Arbitrated loop.
AL-PA Arbitrated loop physical address.
array group A group of 4 or 8 physical hard disk drives (HDDs) installed in an XP disk arrayand assigned a common RAID level. RAID1 array groups consist of 4 (2D+2D)or 8 HDDs (4D+4D). RAID5 array groups include a parity disk but also consistof 4 (3D+1P) or 8 HDDs (7D+1P). All RAID6 array groups are made up of 8HDDs (6D+2P).
BC HP StorageWorks Business Copy XP. BC lets you maintain up to nine localcopies of logical volumes on the disk array.
CA HP StorageWorks Continuous Access XP. CA lets you create and maintainduplicate copies of local logical volumes on a remote disk array.
Command View(CVXP)
HP StorageWorks Command View XP, a software product for managing XParrays. Command View runs on a Windows-based management workstation.
Command ViewXP Advanced Edi-tion (CVXP AE)
HP StorageWorks Command View XP Advanced Edition, installs on theuser-provided Device Manager server and provides a browser-based platformfrom which you can manage the SVS200 and the XP family of disk arrays—evenglobally distributed arrays.
command device A volume on the disk array that accepts Continuous Access or Business Copycontrol operations which are then executed by the disk array.
CU Control Unit. Contains LDEVs and is approximately equivalent to SCSI Target ID.
CVS Custom volume size. CVS devices (OPEN-x CVS) are custom volumes configuredusing array management software to be smaller than normal fixed-size OPENsystem volumes. Synonymous with volume size customization (VSC).
DKC The array cabinet that houses the channel adapters and service processor (SVP).
DKU (disk cabinetunit)
The array cabinets that house the disk array physical disks.
emulation modes The logical devices (LDEVs) associated with each RAID group are assigned anemulation mode that makes them operate like OPEN system disk drives. Theemulation mode determines the size of an LDEV:OPEN-3: 2.46 GBOPEN-8: 7.38 GBOPEN-9: 7.42 GBOPEN-E: 13.56 GBOPEN-L: 36 GBOPEN-V: User-defined custom size
failover Disconnecting a failed unit or path and replacing it with an alternative unit orpath in order to continue functioning.
FC Fibre Channel.
FC-AL Fibre Channel arbitrated loop.
FCP Fibre Channel Protocol.
GB Gigabytes.
HP StorageWorks Disk Array XP operating system configuration guide: Windows 2000/2003 33
8/6/2019 XP12000 for Windows Conf Guide Rootsan technologies Pvt Ltd
http://slidepdf.com/reader/full/xp12000-for-windows-conf-guide-rootsan-technologies-pvt-ltd 34/38
HBA Host bus adapter.
host mode Each port can be configured for a particular host type. These modes arerepresented as two-digit hexadecimal numbers. For example, host mode 08represents an HP-UX host.
LDEV Logical device. An LDEV is created when a RAID group is carved into piecesaccording to the selected host emulation mode (that is, OPEN-3, OPEN-8,OPEN-L). The number of resulting LDEVs depends on the selected emulationmode. The term LDEV is often used synonymously with the term volume.
LUN Logical unit number. A LUN results from mapping a SCSI logical unit number,port ID, and LDEV ID to a RAID group. The size of the LUN is determined by theemulation mode of the LDEV and the number of LDEVs associated with the LUN.For example, a LUN associated with two OPEN-3 LDEVs has a size of 4,693 MB.
LUSE A LUN is normally associated with only a single LDEV. The LUSE feature allowsa LUN to be associated with 1 to 36 LDEVs. Essentially, LUSE makes it possiblefor applications to access a single large pool of storage. The LUSE feature isavailable when the HP StorageWorks LUN Configuration and Security Managerproduct is installed.
OFC Open Fibre Control.
OPEN- x A general term describing any one of the supported OPEN emulation modes
(for example, OPEN-L).
OS Operating system.
PA Physical address.
path “Path” and “LUN” are synonymous. Paths are created by associating a port, atarget, and a LUN ID with one or more LDEVs.
port A physical connection that allows data to pass between a host and the diskarray. The number of ports on an XP disk array depends on the number ofsupported I/O slots and the number of ports available per I/O adapter. TheXP family of disk arrays supports Fibre Channel (FC) ports as well as otherport types. Ports are named by port group and port letter, such as CL1-A. CL1is the group, and A is the port letter.
RAID Redundant array of independent disks.
remote console PC The PC running HP StorageWorks Remote Control XP.
Remote Control(RC)
HP StorageWorks Remote Control XP. A software product used for managingXP arrays.
Remote Web Con-sole (RWC)
HP StorageWorks XP Remote Web Console. A browser-based program installedon the SVP that allows you to configure and manage the disk array.
R-SIM Remote service information message.
SCSI Small computer system interface.
SIM Service information message.SNMP Simple Network Management Protocol.
SVP Service processor, which is the PC built into the disk controller. The SVPprovides a direct interface into the disk array. SVP use is reserved for HPsupport representatives only.
SVS Storage Virtualization System, an appliance that manages multiple disk arraystorage systems.
34 Glossary
8/6/2019 XP12000 for Windows Conf Guide Rootsan technologies Pvt Ltd
http://slidepdf.com/reader/full/xp12000-for-windows-conf-guide-rootsan-technologies-pvt-ltd 35/38
TB Terabyte.
TID Target ID.
Volume On the XP array, a volume is a uniquely identified virtual storage devicecomposed of a control unit (CU) component and a logical device (LDEV)component separated by a colon. For example 00:00 and 01:00 are twouniquely identified volumes; one is identified as CU = 00 and LDEV = 00, andthe other as CU = 01 and LDEV = 00; they are two unique separate virtualstorage devices within the XP array.
VSC Volume size customization. Synonymous with CVS.
WWN World Wide Name. A unique identifier assigned to a Fibre Channel device.
HP StorageWorks Disk Array XP operating system configuration guide: Windows 2000/2003 35

8/6/2019 XP12000 for Windows Conf Guide Rootsan technologies Pvt Ltd
http://slidepdf.com/reader/full/xp12000-for-windows-conf-guide-rootsan-technologies-pvt-ltd 36/38
36 Glossary
8/6/2019 XP12000 for Windows Conf Guide Rootsan technologies Pvt Ltd
http://slidepdf.com/reader/full/xp12000-for-windows-conf-guide-rootsan-technologies-pvt-ltd 37/38
Index
A AL-PA, 15
arbitrated-loop physical address, 15audience, 5 Auto LUN XP, 9 Auto Path XP, 9
BBusiness Copy XP, 9, 11
CCache LUN XP, 9Cluster Extension XP, 9command device(s)
RAID Manager, 11Command View, 9, 11, 15, 19Command View XP Advanced Edition, 9, 11,15, 19configuration
Fibre Channel ports, 15host mode, setting, 13port, 15
configure devices, 20Continuous Access Extension XP, 9Continuous Access XP, 9, 11Continuous Access XP Journal, 9conventions
document, 6
text symbols, 6
DData Exchange XP, 9device(s)
configuring, 20logical, not recognized by host, 24type specifications, 30types supported, 10
disk array(s)connecting, 19installation, 12Not Ready error message, 24
self reboots, 24disk partitions
create, 21format, 21
documentconventions, 6related documentation, 5
documentationHP web site, 5
providing feedback, 7
Eemulation(s)
supported, 30error conditions, 24External Storage XP, 9
Ffabric topology settings, 16failover, 10Fibre Channel
interface, 10Fibre Channeladapters, configuring, 16
file system(s)not mounted after rebooting, 24verify operations, 21
Flex Copy XP, 9
Gglossary, 33
Hhelp
obtaining, 7host
doesn’t reboot properly, 24hangs up, 24
Host Bus adapterconfiguring, 17
host mode, setting, 13HP
technical support, 7
Iinstallation
disk array, 12interface
Fibre Channel, 10
LLDEV(s)
designate at least one as a command device,11
HP StorageWorks Disk Array XP operating system configuration guide: Windows 2000/2003 37

8/6/2019 XP12000 for Windows Conf Guide Rootsan technologies Pvt Ltd
http://slidepdf.com/reader/full/xp12000-for-windows-conf-guide-rootsan-technologies-pvt-ltd 38/38
logical volumes, cannot be created, 24LUN Configuration and Security Manager XP,9, 19LUN(s)
creating, 19mapping, 19
Ooptional software, 9
Pparity error, 24path(s)
defining, 19worksheet, 27
Performance Advisor XP Software, 9Performance Control XP, 9physical volumes, cannot be created, 24port(s)
Fibre Channel, 15host mode, setting, 13
RRAID Manager command devices, 11RAID Manager XP, 9related documentation, 5Remote Web Console, 9, 11, 15, 19
SSNMP configuration, 11
software, optional, 9Subscriber’s Choice, HP, 7symbols in text, 6system option mode, 14
Ttechnical support
HP, 7, 25service locator web site, 7
text symbols, 6troubleshooting
error conditions, 24technical support, 25
Vvolume(s)
logical, cannot be created, 24physical, cannot be created, 24
W web sites
HP , 7HP Subscriber’s Choice for Business, 7product manuals, 5
worksheet, path, 27
XXP Data Shredder SW , 9XP Disk/Cache Partition SW , 9