year / brand / type / model # - newmar level legs service training manual 009 year / brand / type /...
TRANSCRIPT

72185 County Rd 3 Newmar Corporation 866.290.5371
Nappanee, IN 46550 Fax 574.773.2007
If you have any questions regarding this P.I.B., please contact a Warranty Service Representative at Newmar Corporation.
Product Information Bulletin Date Issued PIB #
01/24/11 Atwood Level Legs Service
Training Manual 009
YEAR / BRAND / TYPE / MODEL #
This information is for all Newmar models that currently have Atwood’s Auto Position Levelegs system installed.
Product Information
These current Newmar models include:
2007 - Current Bay Star, Class A
2007 – Current Canyon Stars Class A, under 38’ of length
2006 – Current Dutch Star, Diesel Pusher
2006 – 2011 Ventana, Diesel Pusher, under 39’ of length
Please reference the attached instructions from Atwood when installing, programming, operating or troubleshooting their Auto Position Levelegs system.

1
Auto Position
Levelegs™
Revised 03/26/07

2
Leveleg Training & Service Outline
Page(s) Topic
3 What is the Atwood Leveleg™ System? Leveleg Models
4-7 Leveleg System Components
8 Recommended Tools and Equipment
9-12 Installation Recommendations/Procedures
13-17 Initial programming
18 Operating Procedure
19 Entering manual air dump
20-26 Trouble Shooting
27 Wiring Diagram
28-29 Replacement Parts List
30 Return Goods Policy
31 Warranty

3
What is the Atwood Leveleg System?
Class A Auto Position Electromechanical Jack System – Electric Ball Screw Jacks 66280 - 7.5K Lifting capacity jack w/ 15” of travel
66302 - 7.5K Lifting capacity jack w/ 13” of travel
66334 - 7.5K Lifting capacity jack w/ 15” of travel, 4” taller
66070 - 10K Lifting capacity jack w/ 15” of travel
– Auto Position Controls 66272 - Auto position controls kit for Ford chassis
66276 - Auto position controls kit for Workhorse chassis
– Jack Mounting Bracket Kits One of the following for each Jack
61023 - Bolt on universal kit, 7.5K(same as 61025 but has bolts)
61025 - Weld on universal kit, 7.5K (61011 jack bracket side slots)
61030 - Weld on universal kit,7.5K (61031 jack bracket front slots)
66031 - Weld on P chassis rear kit, 7.5K
66032 - Weld on P chassis front kit, 7.5K
61039 - Bolt on ’06 F53 chassis front kit, 7.5K
66060 - Bolt/Weld on universal kit, 10K

4
Leveleg System Components
Components List
A – Front Leveleg (2)
B – Front Leveleg mounting bracket kit (2)
C – Rear Leveleg (2)
D – Rear Leveleg mounting bracket kit (2)
E – Auto Position control module
F – Keypad
G – 120 Amp circuit breaker
H – 4-Pin connector cable (wire harness)
J – 8-Pin connector cable (wire harness)
K – Front Leveleg harness
L – Rear Leveleg harness
M – Power wiring
A,B A,B
C,D C,D
Atw
ood
Auto
Contr
oller
Part
#
C
hassis
REV
ISIO
N #
E
F
G
MOTORHOME FRONT
MOTORHOME REAR
H
J
K
L
M

5
Leveleg Components Continued
A,C – Leveleg
- 7.5K or 10K rating per Leveleg
- Two brackets Frame and Jack
- Square tube, ball screw system
- Typically matched fronts and matched rear levelegs based on axle rating
B,D – Mounting Bracket Kits
- Frame Bracket can be Welded or Bolted
- Four Bolts to Remove Leveler
- Built in Vertical Adjustment in Leveler Bracket
- Four Inches in 7.5K System
- Three Inches in 10K System
10,000 lbs. Leveleg and mounting bracket
7,500 lbs. Leveleg and mounting brackets
10K – Frame
Bracket - 66060
Jack bracket
61011
7.5K – Frame
bracket - 61022

6
Leveleg Components Continued
E - Control Module
– Either 66274 used on Ford
Chassis or 66275 used on
Workhorse Chassis (difference
in transmissions signals)
– Contains Electrolytic Fluid for
Auto Position
– Must Mount Up and Forward
– Connections are Molex Style
F - Key Pad
– User Interface with System
– Screw Mounts to Dash Board
– Shows Safety State of System
– Shows Jack Position

7
Leveleg Components Continued
K L G J H
G - 120 Amp Breaker – On (+) battery Lead(2 gage wire recommended)
H - Keypad Wiring – (4) pin connector at control board and keypad
J - Coach Wiring – (8) pin connector at control board and to coach
for Ignition, Transmission signal, Parking brake, and Foot brake
K/L - Leveleg Wiring – 10 gage wire connecting to leveler motor with
watertight connector and to control board with quick connector for
both front or both rear levelegs

8
Recommended Tools and Equipment
Equipment and tools
• Welder and welding supplies(optional bracket
mounting method)
• (2) 3/4 Inch wrenches
• 3/4 Inch socket and rachet
• Torque wrench (65 foot lbs. min.)
• 7/16 Inch nut driver
• Wire cutters
• Wire strippers and crimpers
• Phillips screwdriver
• Standard screwdriver
• 20 feet of red #2 wire
• 20 feet of black #2 wire

9
Installation
10K Leveleg
7.5K Leveleg
Mounting Brackets
– (4) ½”-13 x 1-1/2” Grade 8 bolts (at widest spread possible) or weld to frame (min. 6” of weld per side)
– Brackets reversible for Leveleg height adjustment
– 7.5K has reversible Leveleg bracket which holds Leveleg and bolts to mounting bracket with (4) ½”-13 bolts
– 10K Bolts directly to mounting bracket with (4) ½”-13 x 1-1/2” Grade 8 bolts
– Some frames do require specific mounting bracket kit
Levelegs™
– Motor mounted toward front or rear of coach also available for motor to face out from frame
– Recommended 3” of clearance to outside of leg for service removal
– Ground clearance requirement is 7”-10” on a loaded coach.
– 7.5K Leveleg 2.5” square tube and 10K Leveleg 3” square tube
7.5K Mounting
bracket bolted 10K Mounting
bracket welded

10
Installation Continued
Control Module
– Mount securely by (4) mounting holes in corners in a dry stable compartment. For best leveling results mount over frame between front and rear axles of coach.
– Control must be mounted face up within 8 degrees of level and the arrow pointing toward the front of the coach.
Keypad
– Mount near driver using (4)mounting holes in corners. Snug tight only, use of air tools could damage keypad.
– Single 4-pin connector from control board to keypad.
Keypad
Control Module

11
Installation Continued
Power and Leveleg Wiring - Connect watertight connector for each 2-wire Leveleg harness to each of the Leveleg motors.
Route harness back to control module leaving some disconnect slack and avoiding sharp edges
and moving parts.
- Cut, and strip wires at control board. Crimp to appropriate molex connector lead as marked on
short wires. (DR, PR, DF, PF and match lead color)
- If installing system with air dump connect fill lead to extra connection point of rear harness and
dump lead to extra connection point of front harness.
- Snap Molex™ connectors into control module as marked on control module.
- 2 gage power wires with ring terminal connections recommended for supplying power and
ground. The Battery (+) side connects to the P1 post on the board using a nut. The 120 amp
breaker is required in this (+) line approximately 18 inches from the battery. Ground wire connects
to the P2 post. Both lines are recommended directly from the battery.
120 Amp breaker
Leveleg harness Molex connection

12
Installation Continued
Signal Wiring
- Coach wiring, 8-pin connector
Connect at control module and coach
Signal Wiring:
All signals are ground except
“Workhorse” transmission is positive.
Wire Color Ford Connection Workhorse
Connection Wire
Red #3 IP (-) F-6 (-) Foot Brake
Yellow / White #15 IP (-) D-4 (-) Park Brake
Blue / Green 14401 Crank enable”(-) C-9 (+) Transmission
Black #5 IP (& 3 amp fuse) (+) F-5 (& 3 amp fuse)
(+) Ignition
4 & 8 Pin connectors
at control module
• Keypad wiring, 4-pin connector
• Connect at control module (right) and
keypad (pg.10)
• (1) Ground wire
• (1) 12 volt wire
• (2) Signal wires (0 – 12 volts)

13
Initial Setup
Insure Three Green Lights on
Key Pad
– Engine Running
– Park Brake Set
– Park/Neutral Engaged
No Low Voltage Light
Control Module Shipped in
Error State
– All Leveler Lights Blinking
Press ALL and RET to get out
of Error Mode

14
Initial Setup Continued
Press and Release EXT and ALL
– All Levelegs will go down and Touch Ground
Press and Release EXT Button
Press and Hold Leveler Buttons
– Levelers always work in Pairs
– For every 6 seconds of extension opposite pair will retract for 2 seconds
Press and Release RET Button to put into Retract Mode if Needed.

15
Initial Setup Continued
To Set Auto Position Memory -
Once Coach is in Desired
Position
– Press On to Turn Key Pad Off
– Press EXT Button 5 Times
– Press RET Button 5 Times
All Lights will Blink
– Press ALL 3 Times
All Lights will Turn Off

16
Initial Setup Continued
Diesel Auto Air Dump Setup
– Once Auto Position is set up for the First Time
Levelers’ Lights will Scroll Back and Forth
Press PASS Button 3 Times to Turn Off
Press DRIVER Button 3 Times to Turn On
This will only happen the first time the Auto Position is set.
– To Return to Air Dump Setup mode:
Turn keypad off
Press EXT (10) times
Press RET (10) times
Leveleg lights will scroll back and forth
Press DRIVER (3) times to turn on or PASS (3) times to turn off

17
Initial Setup Continued
To Retract Levelegs
– Press and Release the ALL
and RET Buttons Together
– All Levelegs will come up and
turn off
Emergency Stop
– Press any Button While
Levelegs are Moving
– All Levelegs will Stop Moving
– Must Retract Levelegs Once
Emergency Stop is Pressed

18
Operating Procedure – Auto Mode
Ready to Level:
Turn Keypad ON and Press AUTO
Levelegs will go down and touch ground
Then they will Auto Position the Coach
Once Positioned – System will insure all levelegs are on the ground
Turn unit off, or the unit will go off on its own after 5 minutes
Ready to Leave:
Turn Keypad on and Press RET and ALL
Levelegs will come up to fully retracted position and lights will indicate fully retracted
Turn unit off, or the unit will go off on its own after 5 minutes

19
1.) Turn Level Leg Key pad off.
2.) The engine is running depress foot brake.
3.) The park brake is released.
4.) The transmission in gear ( Drive or Reverse).
5.) The following three buttons push simultaneously on the key pad, Front,
Rear, and All.
6.) This will momentarily dump the air bags to allow the vehicle to be driven
through a door way that was too low for the vehicle to be driven through
with the air bags filled.
Entering - manual air dump

20
No LED’s and no response from keypad
Check battery voltage. (12.5 Volts minimum)
Check ignition wire voltage. (12 volts on pin 7 w/ RV on)
Check 4 Pin connector voltage at keypad.
(3 with 12 volts, 1 ground)
Check for moisture on or near control board or keypad.
OKAY
YES
OKAY
NO
NO
12V to board
LOW Correct low battery issue. (System required voltage)
NO
Check ignition voltage at RV connection (12 volts w/ RV on)
Replace control board, see Determining Service Kit
Allow control board/keypad to dry
YES
NO
YES Check 4 Pin connector
voltage at control board (3 w/ 12 volts, 1 ground)
NO
Fix or Replace 8 Pin connection cable
Fix or Replace 4 wire cable
Fix or Replace 4 Pin connection cable
Replace keypad, see Determining Service Kit
Leveleg Trouble Shooting
Check 120 amp fuse, Check 3 amp fuse
TRIPPED Reset 120 amp breaker, Or change 3 amp fuse
OKAY

21
Leveleg Trouble Shooting
Some LED’s light with no operation
of keypad All LED’s blinking
Red/Green LED’s bouncing side to side
(4) Vertical LED’s blinking, not “wait”
No “Park Brake Engaged” LED, but others lit
Low Voltage LED lit
Retract All, then Configure Level Point
YES
NO
YES
Configure Air Dump, or wait 30 sec. for no Air Dump
NO
System Requires a minimum of 12.5 Volts to operate
YES
NO
Motor overheat – Wait ½ hour and try again
YES NO
NO
Brake set, Check Park Brake signal at control module (12
Volts, see pg. 12)
Check Park Brake signal at coach connection (12
Volts, see pg. 12)
NO YES YES Check connections, change 8-pin wire
YES NO
Check connection, change control module
Contact RV service, System requires signal
Continued next page

22
Leveleg Trouble Shooting
(5) Vertical LED’s blinking
No communication keypad to control module. Check 4-pin signals at keypad, see pg. 12
(3 leads 12V, 1 ground)
NO YES
NO
Check connection, change keypad
No “Park/Neutral” LED, but others lit
NO
In Park/Neutral, Check Trans. signal at control
module, see pg. 12(12 Volts-Workhorse / Ground-Ford)
Check Trans. signal at coach connection,
see pg. 12 (12 Volts-Workhorse /
Ground-Ford)
NO YES YES Check connections, change 8-pin wire
YES NO
Check connection, change control module
Contact RV service, System requires
signal
Check Trans. Signals in/out of gear to determine correct
control module
Some LED’s light with no operation of
keypad, Continued
12V- Park/Neutral Gnd- In gear
Gnd- Park/Neutral 12V- In gear
Workhorse board, 66274 Ford board, 66275
OTHER
Check connection, change control module
Replace with other control module
YES
NO
NO Check 4-pin signals at
control module, see pg. 12 (3 leads 12V, 1 ground)
YES YES
NO
Check connections, change 4-Pin conn. Lead
Press RET+ALL to clear mode

23
Leveleg Trouble Shooting
Jack Continues to Clutch and will not Turn Off
Send into error mode, disconnect a Leveleg,
press RET+ALL
Press any button to stop clutching
SEE PAGE 23 TO CLEAR ERROR
NO ALARM
UNIT CONTINUES TO CLUTCH
Press ON to shut warning alarm off
W/ ALARM
Complete a RET+All to return to normal operation
Press FRONT+DRIVER+REAR+PASS+ALL
to reset internal timers

24
Leveleg Trouble Shooting
Red and Green Lights come on for a Leveler Location(Error Mode)
Press ON to shut warning alarm off
W/ ALARM
Hold RET+ALL until retract begins(2-3 seconds) to
return to normal operation
Press FRONT+DRIVER+REAR+PASS+ALL
to reset internal timers
Extend each leg 3-4 seconds if close to
retraction. Press EXT+(Leg position buttons)
ALL LEVELEGS EXTEND/RETRACT
ANY LEVELEG MOTOR WILL NOT RUN
ANY LEVELEG WILL NOT MOVE WHILE MOTOR RUNNING
Replace Leveleg, Part number label on lower
front of leveler
Check voltage at motor connection during Ext./Ret.(12volts)
NO Check voltage at Control Board connection during
Ext./Ret.(12volts)
YES
YES NO
Replace Control Board Replace Harness wiring to problem leveler

25
Leveleg Trouble Shooting
Auto Level does not level coach
SYSTEM REACTION, BUT NOT LEVEL
NO SYSTEM REACTION
Press RET+ALL to send system to home position, then Press AUTO to level
Check the mounting of the control board to be solid
and reasonably horizontal(<10 degrees)
Send into error mode, disconnect a Leveleg,
press RET+ALL
MANUALLY LEVEL COACH
Extend each leg to ground and manually level coach. Press EXT+(Leg position
buttons until level)
RESET LEVEL INTO MEMORY
Press ON(turn keypad off), Press EXT (5) times, Press RET (5) times, (all lights will blink), Press ALL (3) times,
(all lights will stop blinking)
DID NOT LEVEL
Press RET+ALL to send system to home position
Press AUTO to level

26
Leveleg Trouble Shooting
Notes: ___________________________________
_________________________________________
_________________________________________
_________________________________________
_________________________________________
_________________________________________

27
Wiring Diagram
WIRING DIAGRAM KEY
A – Driver Front Leveleg
B – Passenger Front Leveleg
C – Driver Rear Leveleg
D – Passenger Rear Leveleg
E – 120 Amp reset breaker
F/G – Motor leads
H – Keypad wiring, 4-Pin connector
I – Coach wiring, 8-Pin connector
J – 4-Pin connection at control module
K – 8-Pin connection at control module
L – Keypad
M –
N – Power Leads, 2 Gage
P – Wire harness Molex connector
Q – Motor Molex connector
R – Air Bag dump connection
point (opt.)
S – Air Bag fill connection point (opt.)
L
L - Keypad
28
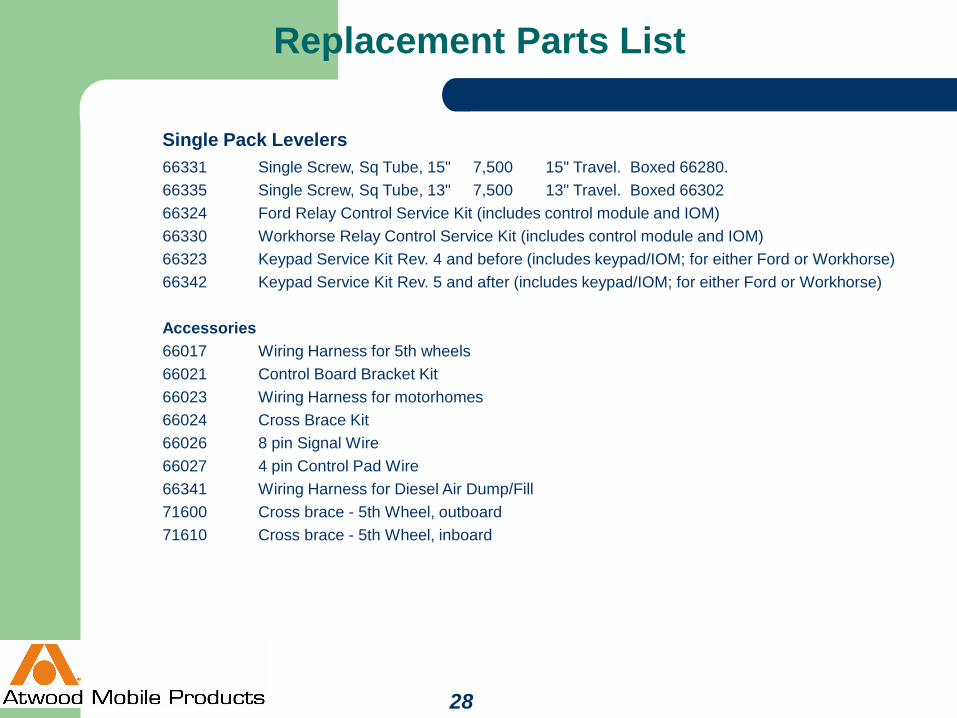
Replacement Parts List
Single Pack Levelers 66331 Single Screw, Sq Tube, 15" 7,500 15" Travel. Boxed 66280.
66335 Single Screw, Sq Tube, 13" 7,500 13" Travel. Boxed 66302
66324 Ford Relay Control Service Kit (includes control module and IOM)
66330 Workhorse Relay Control Service Kit (includes control module and IOM)
66323 Keypad Service Kit Rev. 4 and before (includes keypad/IOM; for either Ford or Workhorse)
66342 Keypad Service Kit Rev. 5 and after (includes keypad/IOM; for either Ford or Workhorse)
Accessories
66017 Wiring Harness for 5th wheels
66021 Control Board Bracket Kit
66023 Wiring Harness for motorhomes
66024 Cross Brace Kit
66026 8 pin Signal Wire
66027 4 pin Control Pad Wire
66341 Wiring Harness for Diesel Air Dump/Fill
71600 Cross brace - 5th Wheel, outboard
71610 Cross brace - 5th Wheel, inboard

29
Does customer need control board, keypad, or both?
Does the keypad have a revision # sticker on the back?
Is it a Workhorse chassis or a Ford chassis? Or do they have the part # off the control board?
Does the keypad have two LED’s(lights) between the EXT and RET buttons?
BOTH
Is it a Workhorse chassis or a Ford chassis? Or do they have the part # off the control board?
CONTROL BOARD
REV. 4
FORD/66275
Workhorse/66274
KEYPAD
FORD/66275
Workhorse/66274
REV. 5 or higher NO
NO
YES
#66276
#66272
#66330
#66324
#66342
#66323
#66323
#66342
SERVICE KIT
Replacement Parts Board/Keypad Determination

30
Return Goods Policy and Warranty
Atwood warrants that our products will be free of defects of material or
workmanship for a period of two years from the original date of purchase. Our
liability is limited to the replacement of the product, repair of the product, or
replacement with a reconditioned product at our discretion.
In the event of a warranty claim, you must contact, in advance, either an
authorized Atwood Service Center, or the Atwood Service Department at 564-
262-2655.
Return parts must be shipped prepaid to Atwood Mobile Products, 800 Hwy 150
S, West Union, IA 52175. The Return Goods Number (RGN) must be clearly
marked on the paperwork and on the carton. No returns will be accepted without
an RGN.
The returned parts become the property of Atwood. We will inspect the parts
and determine causality. If it is a defect in material or workmanship, Atwood will
replace the product at no charge, pay all reasonable labor charges in
accordance with our Hardware Flat Rate Schedule, and freight. Damage or
failure resulting from misuse (including failure to seek proper repair service),
misapplication or alterations are the owner’s responsibility.

31
Auto Position
Levelegs
Questions