your tripod is fairly simple to set-up - napa valley tv manual - simplified.pdf · sony hxr-nx70...
TRANSCRIPT

SONY HXR-NX70
Welcome to the SONY-NX70 This manual was created to provide our members at Napa Valley TV with a basic tutorial on the operation of our camera. If you have a question that this manual cannot answer, please ask a staff member for assistance.

Table of Contents
Tripod & Camera Mounting Set-up ............................................................. 1
Inserting Battery .......................................................................................... 2
Power Switch ............................................................................................. 3
Iris and Gain Controls ................................................................................ 4
White Balance ............................................................................................. 6
Focus ......................................................................................................... 7
Connecting a Microphone, Audio Settings .................................................. 8
Charging Battery ......................................................................................... 9

Tripod
The tripod is fairly simple to set-up. Once the tripod legs are extended to the desired height, the “Tripod Plate” will need to be attached to the tripod. Attach and lock tripod plate. Now the camera is ready to be attached to the Tripod Plate. First, make sure Tilt & Pan levers are in the “locked” position so the camera will not suddenly fall or move when being attached. Set the camera in place and slide forward until it locks. When taking the plate off the tripod, use the “Tripod Plate Release.”

Inserting the battery
(1) Open the LCD screen (2) Unlock the battery cover (3) Open battery cover

Turning the Camera On
Set the POWER switch to ON while pressing the small green button.
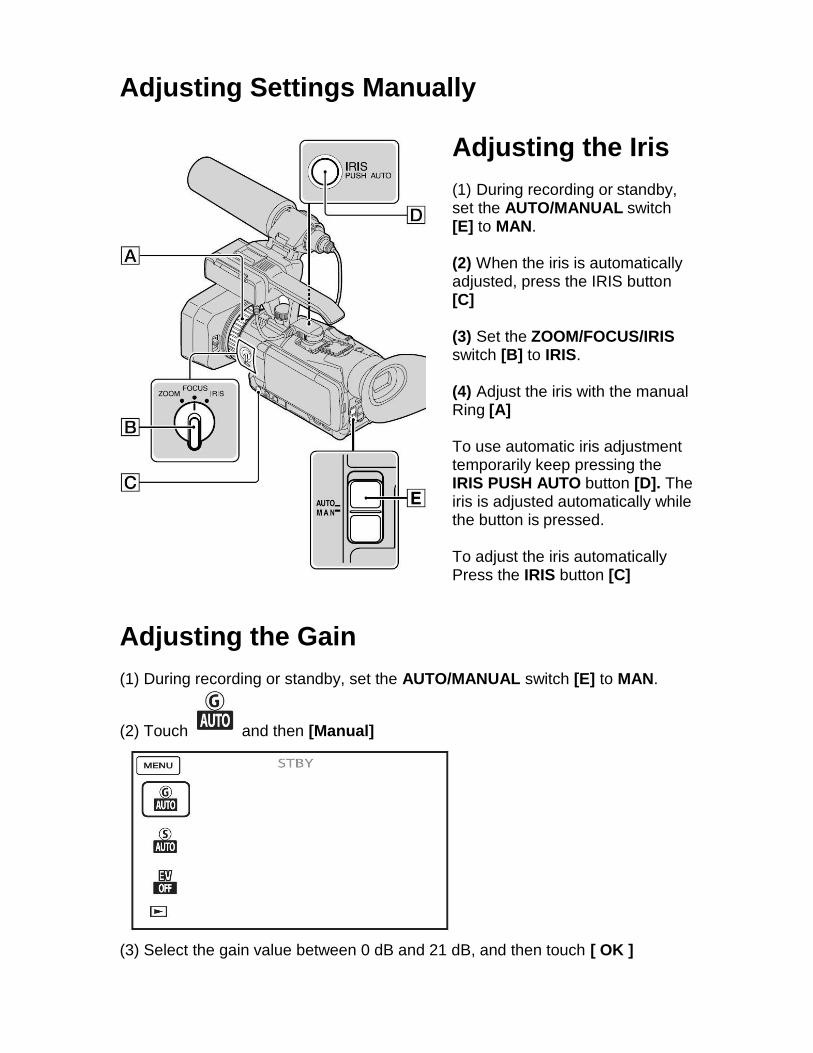
Adjusting Settings Manually
Adjusting the Iris
(1) During recording or standby, set the AUTO/MANUAL switch [E] to MAN.
(2) When the iris is automatically adjusted, press the IRIS button [C]
(3) Set the ZOOM/FOCUS/IRIS switch [B] to IRIS.
(4) Adjust the iris with the manual Ring [A]
To use automatic iris adjustment temporarily keep pressing the IRIS PUSH AUTO button [D]. The iris is adjusted automatically while the button is pressed.
To adjust the iris automatically Press the IRIS button [C]
Adjusting the Gain
(1) During recording or standby, set the AUTO/MANUAL switch [E] to MAN.
(3) Select the gain value between 0 dB and 21 dB, and then touch [ OK ]
(2) Touch and then [Manual]
Adjusting White Balance
(1) During recording or standby, set the AUTO/MANUAL switch [E] to MAN.
(2) Touch [MENU], [Camera/Audio], [Manual Settings], [White Balance]
(3) Touch the desired setting.
Auto The white balance is adjusted automatically.
Outdoor The white balance is appropriately adjusted for the following recording conditions:
- Outdoors - Night views, neon signs and fireworks - Sunrise or sunset - Under daylight fluorescent lamps
Indoor The white balance is appropriately adjusted for the following recording conditions:
- Indoors - At party scenes or studios where the lighting conditions change quickly - Under video lamps in a studio, or under sodium lamps or incandescent-like color lamps
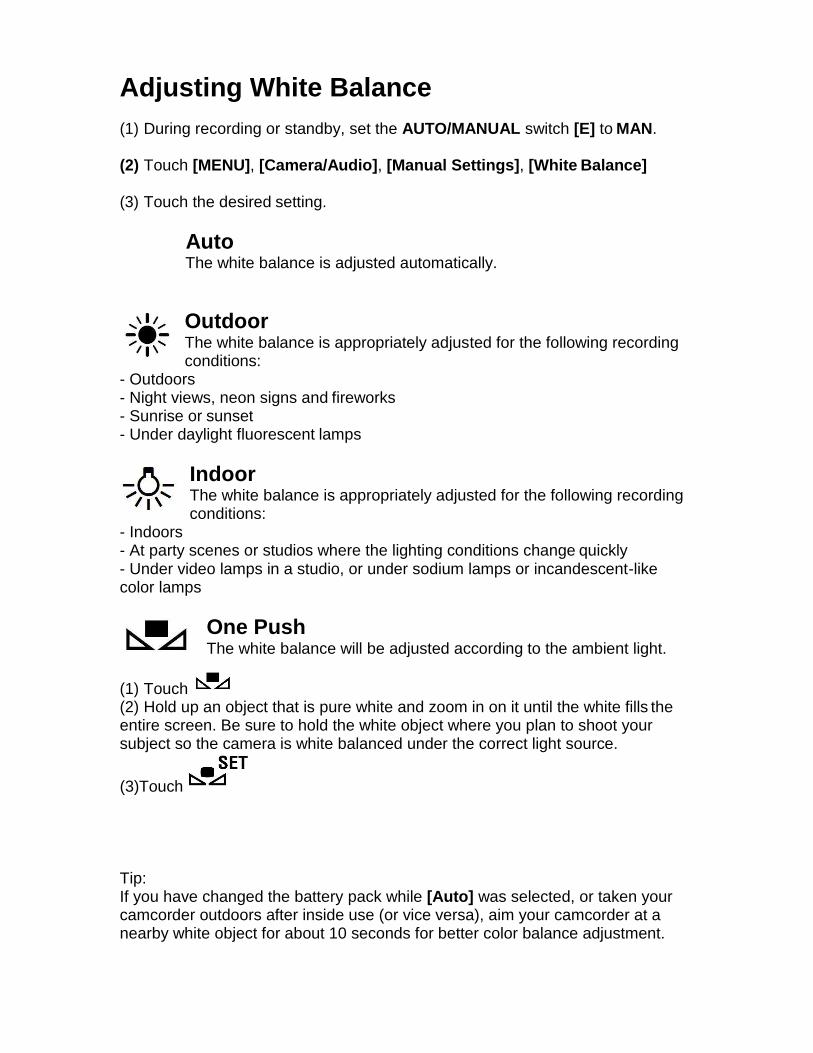
One Push The white balance will be adjusted according to the ambient light.
(1) Touch (2) Hold up an object that is pure white and zoom in on it until the white fills the entire screen. Be sure to hold the white object where you plan to shoot your subject so the camera is white balanced under the correct light source.
(3)Touch
Tip: If you have changed the battery pack while [Auto] was selected, or taken your camcorder outdoors after inside use (or vice versa), aim your camcorder at a nearby white object for about 10 seconds for better color balance adjustment.

Adjusting Focus
To focus, simply zoom in all the way on your subject, as close as you can and
(1) Push the FOCUS button [C] until your subject is perfectly in focus
Or
(1) Set the ZOOM/FOCUS/IRIS switch [B] to FOCUS.
(2) Rotate the manual ring [A] until your subject is perfectly in focus.
As long as the distance from the subject to the lens does not change, you will always be in focus!

Audio
(1) Connect the microphone(s) to the INPUT1 [A] and/or INPUT2 [B] connectors.
(2) Match all the settings on the diagram below to the camera’s settings.
(3) When connecting a microphone, or using attached microphone set [M] to MIC+48V (At the bottom)
(4) When connecting audio equipment from a mixing board or other external source set [M] to LINE.
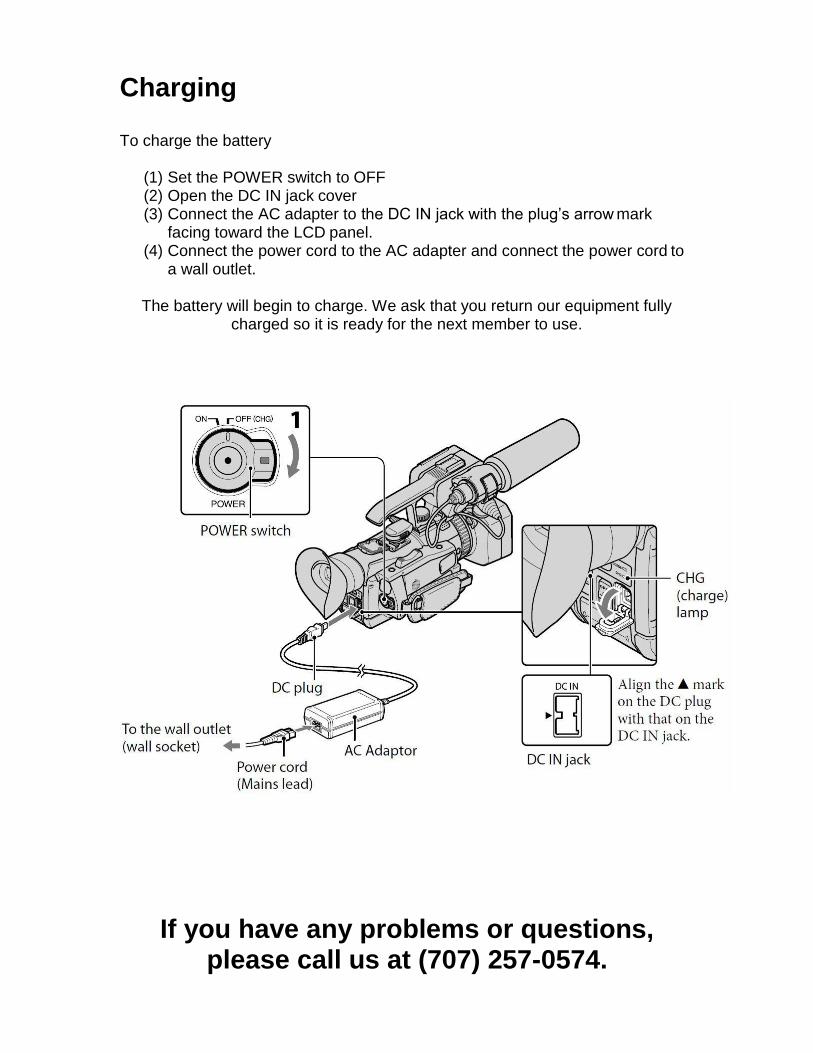
Charging
To charge the battery
(1) Set the POWER switch to OFF (2) Open the DC IN jack cover (3) Connect the AC adapter to the DC IN jack with the plug’s arrow mark
facing toward the LCD panel. (4) Connect the power cord to the AC adapter and connect the power cord to
a wall outlet.
The battery will begin to charge. We ask that you return our equipment fully charged so it is ready for the next member to use.
If you have any problems or questions, please call us at (707) 257-0574.