0639 ss xl6000 wrkbk - singer sewing co. in regular sewing machine mode. .. 22 embroidery section of...
TRANSCRIPT
Workbook
QUANTUM XL-6000®
0639_SS_XL6000_WRKBK 6/9/04, 3:47 PM1
Quantum® XL-6000
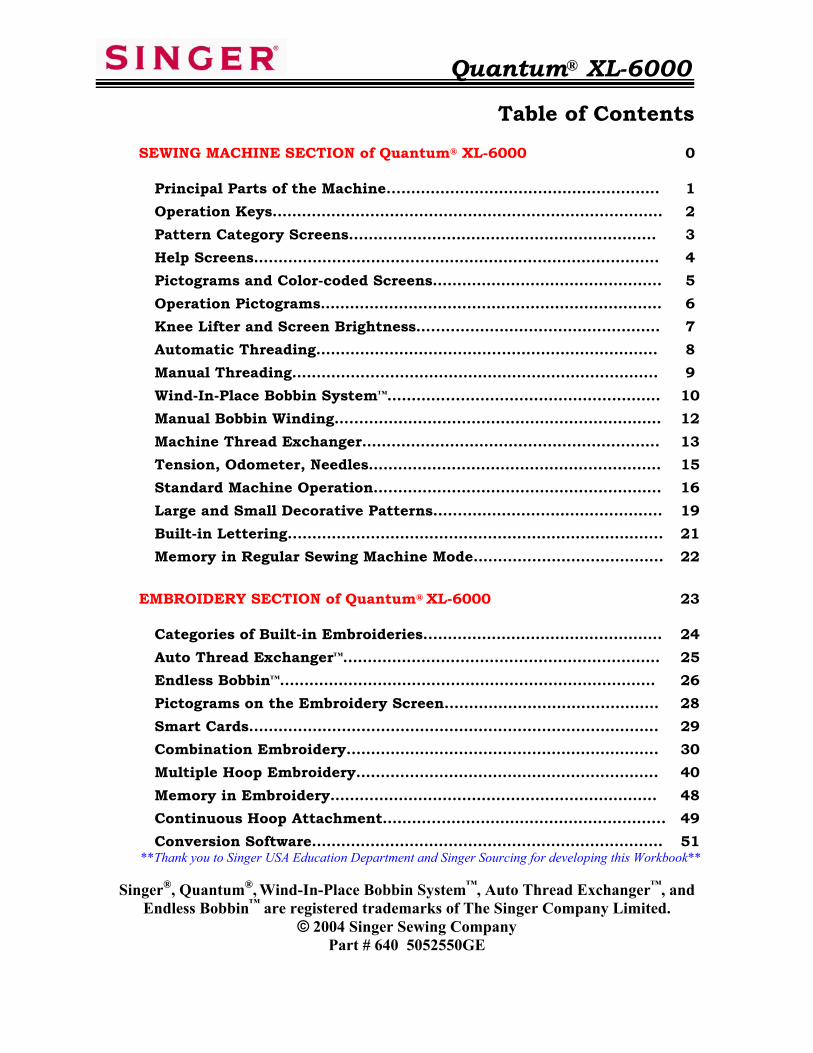
Table of Contents
SEWING MACHINE SECTION of Quantum® XL-6000 0 Principal Parts of the Machine....……………………………………………. 1 Operation Keys..……………….………….………………………………………. 2 Pattern Category Screens...…….…………………………………………….. 3 Help Screens………………………….......…………………………………….… 4 Pictograms and Color-coded Screens……………………………………….. 5 Operation Pictograms……………………………………………………………. 6 Knee Lifter and Screen Brightness…..……………………………………… 7 Automatic Threading………………………………...…………………………. 8 Manual Threading……………....……………………………………………….. 9 Wind-In-Place Bobbin System™…………....…………………………………. 10 Manual Bobbin Winding…....…………………………………………………… 12 Machine Thread Exchanger…………………………………….………….….. 13 Tension, Odometer, Needles…………………………………………………… 15 Standard Machine Operation…..……………..………………………………. 16 Large and Small Decorative Patterns.…...…………………………………. 19 Built-in Lettering...……………………………………………………………….. 21 Memory in Regular Sewing Machine Mode.……………………………….. 22 EMBROIDERY SECTION of Quantum® XL-6000 23 Categories of Built-in Embroideries...………………………………………. 24 Auto Thread Exchanger™..……………………………………………………… 25 Endless Bobbin™..………………………………………………………………… 26 Pictograms on the Embroidery Screen..…………………………………… 28 Smart Cards..………………………………………………………………………. 29 Combination Embroidery..…………………………………………………….. 30 Multiple Hoop Embroidery.……………………………………………………. 40 Memory in Embroidery…………………………………………………………. 48 Continuous Hoop Attachment………....……………………………………... 49 Conversion Software……………………………………………………………… 51
**Thank you to Singer USA Education Department and Singer Sourcing for developing this Workbook**
Singer®, Quantum®, Wind-In-Place Bobbin System™, Auto Thread Exchanger™, and Endless Bobbin™ are registered trademarks of The Singer Company Limited.
© 2004 Singer Sewing Company Part # 640 5052550GE

Quantum® XL-6000 SEWING MACHINE SECTION

Quantum® XL-6000
Principal Parts of the Machine
- 1 -

Quantum® XL-6000
Operation Keys
- 2 -
When this key is pressed “stitching procedure” is shown on LCD Screen
Used to save and recall patterns and letter strings
Used to change thread tension, stitch length, needle position and zigzag width
Used to automatically thread sewing machine
Used to automatically wind a bobbin
Used to pause to take a break during embroidery sewing. The machine may be turned off and the current status will be saved to be used when returning to the machine and turning on the power.

Quantum® XL-6000
Pattern Category Screens
- 3 -
The Quantum® XL-6000 has a 256 color 3-D appearance LCD screen. All commands are input with a light touch on the LCD Screen. Do not press on the screen*. The Utility Patterns are provided on four different screens.
Touch the file folder pictograms to access the four “Utility” screens (green). Touch the numbered arrows to access
the “Continuous Pattern” screens (rose).
Initial Screen First Utility Screen
Touch lightly on screen
* If the Pictograms do not line up directly under your finger please refer to the 4-Point Adjustment Procedure detailed on Page 25 of your Instruction Book.

Quantum® XL-6000
Help Screens
- 4 -
The Help Screens give different types of guidance including Machine Usage, Advice, and Sewing Methods. Each “guidance” category gives detailed information and easy-to-understand graphics. Turn the machine on and touch anywhere on the screen. Stitching Procedure (Obtain information on “how to sew” methods) Select STRAIGHT STITCH. Touch advice key. Touch the ‘forward page turning” pictogram, and it will advance to the next screen. Touch the “backward page turning” pictogram, and it will return to the previous screen. To return to Utility Pattern screen, touch Return Arrow pictogram. Use of sewing machine (Help in machine set up and for customizing options) (Pink pictograms) Example: Get information on how to perform “Manual Needle Threading”: Touch advice key. Advice screen comes up. Touch pictogram. Touch Hand pictogram. This brings up screen showing “Manual Needle Threading”. To return to Utility Pattern screen, touch Return Arrow pictogram 3 times. Tips (Obtain sewing tips) (Yellow pictograms)
Example: For information about “Inadequate Thread Tension”: Touch advice key. Advice screen comes up. Touch pictogram. Touch pictogram.

Quantum® XL-6000
Pictograms and Color-coded Screens
- 5 -
Now is the time to scroll through the vast assortment of Stitch Patterns available on the Quantum® XL-6000. The Stitch Selection Process of the Quantum® XL-6000 is a simple touch of the Pictograms which is all it takes to change groupings and select Stitch Patterns. All Stitch
Patterns are grouped by general function and are color coded for easy identification.
Utility Patterns are grouped on 4 screens and are color-coded green.
Continuous, Functional and Decorative Patterns are grouped on 10 screens and are color-coded rose.
Large [X-Y Feed] Decorative Patterns are grouped on 6 screens and are color-coded orange. Note: To access the Large Decorative
Patterns first touch the Pictogram.
Small Decorative Patterns are grouped on 4 screens and are color-coded purple.
Alphabet and Numeric Screens are grouped by fonts on 25 screens and are color-coded blue.

Quantum® XL-6000
Operation Pictograms
-6-
Used to vertically invert - turn over - a pattern
Used to mirror image a pattern
Used to select straight stitch and to return quickly to “Utility Stitch Pattern” screen (green)
Used to activate “Large Decorative Pattern” screen (orange] and leads to Small Decorative Patterns and Alphabets
Pattern Elongation - Change visible on screen
Pattern Positioning
Enlarge Size Pictogram
Regular Size Pictogram
Reduce Size Pictogram
Used for sewing with Twin Needle
Used to activate Two-Color Sewing
Used to make single pattern designs sew continuously
Used to clear patterns stored in memory
Used to scroll and check patterns stored in memory

Quantum® XL-6000
Knee Lift and Screen Brightness
- 7 -
LCD Screen Brightness / Contrast Adjustment
Knee Lift
The Knee Lift attachment fits into the slot, located at the front of the machine just below the LCD screen. It is used to raise and lower the presser foot, when the presser foot is down.
Fit the smallest part of the screwdriver into the brightness adjustment hole.
To increase the screen brightness (make lighter) turn the screwdriver clockwise.
To decrease the screen brightness (make darker) turn the screwdriver counter clockwise.
LighterDarker

Quantum® XL-6000
Automatic Threading
- 8 -
Automatic Threading in Regular Sewing Machine Mode: 1. Place the spool of thread and Spool Cap onto the spool pin.
Horizontal Spool Pin 2. Use both hands to pull the thread into the primary thread guide.
Note: This thread guide is only used with the horizontal spool pin. With the Auto Thread Exchanger™ you must use the guides specifically designed for use with the Exchanger.
3. Hold the thread in your right hand and thread the top of the machine along the groove. Pull it in the direction of the arrow and cut it with the thread cutter blade A.
4. Lower the presser foot lifter.
5. Touch the “thread” key.
6. Touch the needle pictogram
7. Touch to return to active screen.
Align mark on handwheel with mark on machine.
A
It is strongly recommended that you use name brand high quality thread with the Quantum®
XL-6000. High quality thread
performs better and does not leave as
much lint and debris in the threading and sewing mechanisms.

Quantum® XL-6000
Manual Threading
- 9 -
1. Remove thread from thread path. 2. Align mark on handwheel with mark on machine. 3. Raise presser foot lifter. 4. Open faceplate cover. 5. Place thread and spool cap onto spool pin. 6. Draw thread toward you with both hands.
7. Hold end of thread and guide it through the thread path as shown.
8. Thread needle using automatic needle threading mechanism.
Align mark on handwheel with mark on machine.

Quantum® XL-6000
Wind-in-Place Bobbin System™
- 10 -
The Wind-in-Place Bobbin System™ feature is for regular sewing mode only, as it winds the bobbin from the top spool directly to the bobbin. The Endless Bobbin™ feature is for Embroidery Sewing. 1. Remove the bobbin cover.
2. Load an empty special bobbin and replace the cover.
3. Place the Standard “A” foot on the machine.
4. Thread the machine for regular sewing.
5. Press the “bobbin” key.
6. Select the amount of thread to be wound on the bobbin.
7. Move the drop feed lever to the right to lower the feed dogs.
Be sure to use the special bobbin shown. The machine cannot perform the automatic bobbin winding without this special bobbin.
Align mark on handwheel with mark on machine.

Quantum® XL-6000
Wind-in-Place Bobbin System™
- 11 -
8. Hold the thread taut and pass it under the presser foot. Lower the presser foot and pull the thread into the Thread End Retaining Spring.
9. Press the bobbin-winding pictogram on
the LCD screen. 10. When the bobbin is filled, the thread will be automatically cut. Remove
the remaining thread from the Thread End Retaining Spring. 11. Return the dropped feed dog lever to the left to raise the feed dogs.
Thread End Retaining Spring
Note: If you want to temporarily stop winding the bobbin before automatic completion, press the
start/stop button.
Note: Be aware that the appearance of the thread on a bobbin wound with
the Wind-in-Place Bobbin System™ feature will not appear the same as with Manual Bobbin winding. The loose appearance is natural and will
cause no sewing problems.

Quantum® XL-6000
Manual Bobbin Winding
- 12 -
1. Place a spool of thread on the spool pin and place the spool cap securely
in place. 2. Draw the thread into the primary thread guide as shown on Page 8. 7. Start the machine and wind the bobbin. 8. When the bobbin is full, push the bobbin back to the left. Remove it from
the shaft and cut the thread.
3. Pass the thread over the top of the thread guide.
4. Open the cover of bobbin winding shaft hole. Shaft is stored in accessory box. Place the bobbin on the shaft and fit it into the hole.
5. Pass the thread through the hole in the bobbin.
6. Push the bobbin against the bobbin winding regulator.
Note: Although the manual bobbin winding system uses
Standard 15 Class Bobbins, it is suggested that you use genuine
Singer® branded bobbins. Generic bobbins may be a different size
and weight. Additionally, Singer® does not endorse the use of
pre-wound bobbins.

Quantum® XL-6000
Auto Thread Exchanger™ in Regular Sewing Mode
- 13 -
1. Install Auto Thread Exchanger™….
2. Install Thread Spools and Caps….
The Auto Thread Exchanger™ is a Singer® Exclusive Feature that may be used semi-automatically on the Sewing Machine side and fully automatically on the Embroidery Side of the Quantum® XL-6000. The Auto Thread Exchanger™ is a true time saving feature and is easy to use once the procedure for threading and operation is learned. Use this time to learn the correct operation.
Installation of the Auto Thread Exchanger™ is self-evident. Holding the exchanger at a slight angle with the lever pressed; slide the projections into the grooves on the back of the machine.
Projection Groove
Proper installation of the thread spools and spool caps is vital to the Auto Thread Exchanger™
operation. Refer to the drawings at the left for proper direction to lead the thread from the spool and proper thread spools to use with the selected thread. Please note that when using the small cross-wound spools sometimes the final 10% of the thread will not reel off smoothly. In this case, use the Auxiliary Spool Pin to use up the remaining thread.

Quantum® XL-6000
Auto Thread Exchanger™ in Regular Sewing Mode
- 14 -
3. Stage Left Thread through Mast and through Exchanger Thread Guide A…
4. Stage Thread into Automatic Threading Mechanism
4. Automatically Thread Left Spool A and Stage Right Spool B…
Thread the mast as
illustrated
This Specific Thread Guide must be used. Failure to use
will cause failure when rewinding.
Spool A
Spool B
This step is vital to the success of the Auto Thread Exchanger™. Hold the thread tightly in your right hand as shown and guide the thread with your left hand. Be sure you pull the thread into the holding pinch plate of the threading mechanism before cutting the thread. You will actually feel a light “snap” and may hear a slight “click” when the thread is properly engaged in the Threading Pinch Plate.
Touch Automatic Threading Key
Touch Automatic Threading Pictogram to thread Left Spool A
Stage Right Spool B through Mast Guide and into Automatic Threading Mechanism holding pinch plate
Upon completion of sewing with Left Thread A, touch pictogram to rewind left spool
Thread right thread B
Rewind right thread B

Quantum® XL-6000
Tension, Odometer, Needles
-15-
How to adjust thread tension (manually): The sewing machine has an automatic computer controlled thread metering system that calculates and delivers the precise amount of thread for each needle penetration to create the optimum appearance of each stitch. An override control is available to allow for individual modification for specialized effects. To change thread tension for special-purpose stitching style, follow procedure described below: Tension shows automatically on the 4 Utility Screens. For all other screens, tension will be shown on a “pop-up” screen accessed by pressing key.
Stitch Count Odometer:
Stitch Count Odometer:
Your sewing machine has an Odometer that keeps track of how many stitches you have sewn in both Regular Sewing Mode and Embroidery Mode. A count of 1 is equal to 100,000 stitches. It is a good idea to change needles every 200,000 stitches. Clean your machine every 500,000 stitches. Have your sewing machine and embroidery unit professionally cleaned and serviced every 3,000,000 stitches.
To access Odometer: touch key, then pictogram, then pictogram.
Sewing Machine Needles:
SINGER® has developed a new style needle for use in the Quantum® XL-6000 and other top quality sewing machines. These chromium needles are available in Universal/Round Point Style 2000 and Ball Point Style 2001 in sizes 11/80, 14/90 and 16/100.
Marketed under the Name of “Platinum”, the needles have special features including an eye specially suited for the Quantum® XL-6000 Automatic Threading System. They also deliver exceptional performance for regular sewing and embroidery sewing. Additionally, the needles are chromium plated the same as Industrial Needles and will last substantially longer than normal household needles. The Style 2000 and 2001 Chromium Needles will improve sewing in all Household Sewing Machines and Overlock Machines designed to use 15x1RS, HAx1and 130/705H Household Needles.
To increase tension, touch the + pictogram. To decrease tension, touch the – pictogram. Tension increases and decreases in 8 steps.

Quantum® XL-6000
Standard Machine Operations
- 16 -
Utility Stitches Turn the machine on and touch anywhere on the “Welcome Screen” to begin. Note: The sewing speed of the Quantum® XL-6000 is 850 stitches per minute for straight stitch regular sewing. Exercise #1 – Basting (5, 10, 15 and 20mm) 1. Select the basting stitch in Folder 1, Row 2, Stitch 6. 2. The default setting for the basting stitch length is 10mm; sew the basting
stitch lengthwise down the center of the fabric. 3. Change the basting stitch length to 5mm; sew down the left side of the
fabric. 4. Change basting stitch length to 20mm; sew along the right side of the
fabric. The basting stitch aids in securing fabrics in place for various techniques such as blind hemming, zipper insertion, and quilting. Use it also to gather ruffles or ease sleeve caps. It removes from the fabric easily. Exercise #2 – Patented Quilting Stitch Every quilter needs the Patented Quilting Stitch because this stitch looks just like “hand-sewn” quilting. 1. Select the Patented Quilting Stitch (Folder 3, Row 2, Stitch 3). 2. Place contrasting thread in the bobbin and thread to color-blend with
fabric in the needle. Monofilament nylon thread may be used as an alternative. However, be aware that nylon thread may present problems when ironing your completed project.
3. Change stitch length to 3mm. Stitch length available: 2.0, 2.3, 2.5, 3.0,
3.5 and 4.0mm. 4. Sew, with no need to trim between stitches.
Note: Depending upon the fabric and thread combination, it may be necessary to increase the tension setting to make the stitch more prominent looking. Experiment to achieve desired results.

Quantum® XL-6000
Standard Machine Operations
- 17 -
Buttonholes (18 built-in buttonholes)
Exercise #1 – Large Buttonhole 1. Select Folder 2, Row 1, Buttonhole 3.
2. Place thread in needle and bobbin.
3. Attach buttonhole foot “E” onto machine.
4. Fold the woven fabric in half, cross-wise, placing interfacing between
layers.
5. Place fabric between foot and underplate.
6. Place button in buttonhole foot, pushing slide to set buttonhole length;
remove button.
7. Lower buttonhole lever and sew.
8. Machine will stop when buttonhole is complete; use thread cutter button
to finish.
Note: To create a Purl Stitch buttonhole simply press the pictogram. Needle thread and bobbin thread interlace with each other on right side of fabric to create a finished appearance that resembles a hand-sewn buttonhole. Exercise #2 – Stretch Buttonhole Repeat the same procedure as in Exercise 1, except: Select the Stretch Buttonhole in Screen 3, Row 1, Buttonhole 5. Fold the knit fabric in half, cross-wise, placing interfacing between layers of fabric.
* The Quantum® XL-6000 has 18 built-in buttonhole styles! Note: Simply decreasing the stitch length can change the density of the zigzag stitches on any buttonhole. This will create a satin-looking buttonhole.

Quantum® XL-6000
Standard Machine Operations
- 18 -
Continuous Pattern Sewing Exercise #1 – Pin Stitch 1. Fabric preparation:
Apply a heart-shaped piece of fabric onto a 4” x 4” piece of background fabric using fusible web or fabric spray adhesive.
2. Select PIN-STITCH - Continuous Patterns (rose-colored) screen -
Folder 1, Row 2, Stitch 1. 3. Touch “3-size” pictogram until the smallest size is highlighted. 4. Sew around Heart.
• This is an easy way to create a “hand-sewn look” to an appliqué, and is very popular with quilters and crafters.
Exercise #2 – Cross Stitch Patterns 1. Replace standard presser foot with Decorative stitch foot (T). 2. Select Cross Stitch design - Continuous Patterns (rose) screen –
Folder 10, Stitch 3. Press to vertically invert pattern. 3. Sew the Cross Stitch design on the left side of the fabric. 4. Select Cross Stitch design - Continuous Patterns (rose) screen –
Folder 5, Stitch 5. 5. Place the left edge of the “T” foot along the edge of the first row of stitches
already sewn. Sew the next row. 6. Select Cross Stitch design - Continuous Patterns (rose) screen –
Folder 10, Stitch 3. 7. Sew the Cross Stitch design on the opposite side of the center stitches. Use various combinations of the beautiful Cross Stitch designs together, and create magnificent borders on garments, table linens, pillowcases, and more.

Quantum® XL-6000 Large and Small Decorative Patterns
- 19 -
Large Decorative Patterns Exercise #1 – Balance A Pattern 1. Place the Decorative stitch foot (T) on the machine. 2. It is recommended that a test sample of a chosen pattern be sewn using
the same fabric, interfacing and thread before sewing on the finished project. Note: Interfacing is very important when sewing decorative patterns, especially the large patterns.
3. The Balancing Pictogram is the “STAR”, located in the upper right corner
of the LCD screen. 4. Touch the “STAR” Pictogram. 5. Begin to sew a complete trial pattern. 6. The star should line up evenly. 7. If adjustment needs to be made, select the height or the width with
either the minus or the plus. Exercise #2 – New 25mm Border Stitches Several additional new 25mm border stitches are built into the Quantum®
XL-6000. 1. Touch the ABC Pictogram, located in the lower right corner of the LCD
screen – Large Decorative Patterns (orange) screen. 2. Select Folder 4, Row 2, Stitch 4 (Daisy). 3. Touch the Continuous Key. 4. Sew down the left side of the fabric lengthwise. 5. Touch the “Trash Can” Pictogram to clear the design. 6. Select Folder 4, Row 2, Stitch 5. 7. Select Folder 4, Row 2, Stitch 5 again; press the Turn-over Pictogram. 8. Touch the Continuous Pictogram. 9. Sew down the right side of the fabric.

Quantum® XL-6000 Large and Small Decorative Patterns
- 20 -
Small Decorative Stitches Select Folder 7 – (Purple screen) Exercise #1 – How To Elongate A Stitch 1. Touch and hold the Trash Can Pictogram, to delete all patterns from the
screen.
2. Touch the ABC Pictogram in the lower right of the LCD screen.
3. Select the Crescent Stitch, Folder 7, Row 1, Stitch 1.
4. Select the Crescent Stitch again.
5. Touch the 1X Pictogram until it reads “2X”.
6. Touch the Crescent Stitch, and then touch 1X Pictogram until it reads
“3X”.
7. Touch the Crescent Stitch, and then touch 1X icon until it reads “4X”.
8. Touch the Crescent Stitch, and then touch 1X icon until it reads “5X”.
9. Touch the Crescent Stitch, and then touch 1X icon until it reads 10X.
10. Sew lengthwise along the fabric.
*Design is elongated without losing density.
Helpful Note: The density may be fine tuned with use of the Length Control. Length Control and Thread Tension are available on a “pop-up” screen accessed by touching the Key.
It is mathematically possible to modify each stitch pattern in Folder 7 a total of 120 different ways, including making every other pattern an alternating color. For two color sewing, thread the machine with alternate color threads on the top and in the bobbin, select the desired pattern, modify it as desired, touch the 2-color sewing pictogram and sew. Have fun!
Quantum® XL-6000 Built-in Lettering
- 21 -
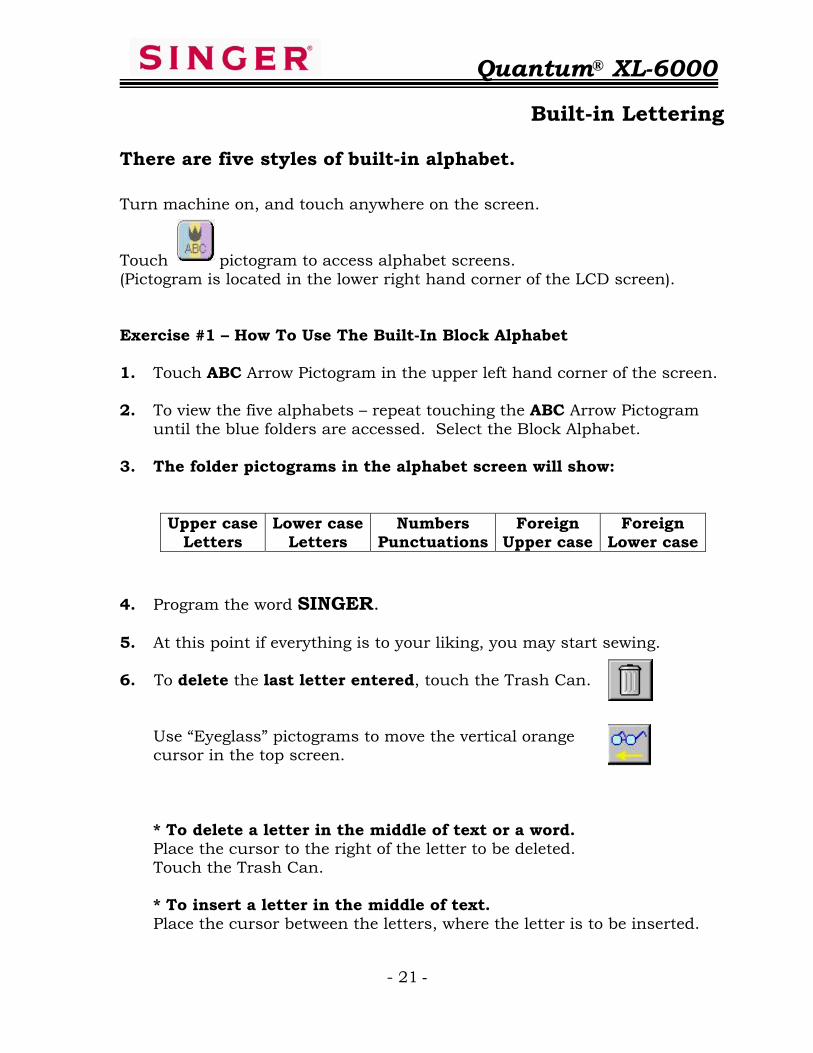
There are five styles of built-in alphabet. Turn machine on, and touch anywhere on the screen. Touch pictogram to access alphabet screens. (Pictogram is located in the lower right hand corner of the LCD screen). Exercise #1 – How To Use The Built-In Block Alphabet 1. Touch ABC Arrow Pictogram in the upper left hand corner of the screen. 2. To view the five alphabets – repeat touching the ABC Arrow Pictogram
until the blue folders are accessed. Select the Block Alphabet. 3. The folder pictograms in the alphabet screen will show:
Upper case Letters
Lower case Letters
Numbers Punctuations
Foreign Upper case
Foreign Lower case
4. Program the word SINGER.
5. At this point if everything is to your liking, you may start sewing. 6. To delete the last letter entered, touch the Trash Can.
Use “Eyeglass” pictograms to move the vertical orange cursor in the top screen. * To delete a letter in the middle of text or a word. Place the cursor to the right of the letter to be deleted. Touch the Trash Can. * To insert a letter in the middle of text. Place the cursor between the letters, where the letter is to be inserted.

Quantum® XL-6000
Memory
- 22 -
MEMORY IN STANDARD SEWING MACHINE There are 20 Memory Folders available within the machine when in the standard sewing mode. Each one of the folders holds up to 120 entries. To save a stitch sequence:
1. Touch the Operation Key.
2. Touch the folder where the stitch sequence is to be stored.
3. Touch the Pictogram. Wait until the memorizing is complete.
4. Touch the Pictogram to return to previous screen. To retrieve a stitch sequence: 1. Turn machine on and touch Welcome Screen.
2. Touch the Pictogram.
3. Touch the Operation Key. 4. Touch the folder in which the stitch sequence was saved. 5. Touch the Pictogram. 6. Touch OK.

Quantum® XL-6000
EMBROIDERY SECTION
- 23 -

Quantum® XL-6000
Categories of Built-in Embroideries
- 24 -
1) 3 Extra-Large Floral Arrangement Designs
(Folder 1, 2, & 3) (Green screen) 2) 2 Large Floral Border Designs with Matching Corners [Total
4 Designs] (Folder 10) (Green screen)
3) 6 Long Floral Borders (Folder 11) (Green screen) (Folders 1, 2, & 3) (Green screen)
4) 35 Various Large Individual Floral Designs (Folders 4, 5, 6, 7, 8 & 9) (Green screen) 5) 6 Floral Corners Borders matching screen 11 Borders
(Folder 12) (Green screen) 6) 43 Small Individual Floral Designs
(Folders 13, 14, 15, 16, & 17) (Green screen)
7) Extra Large Monograms
2 Sizes in 2 Fonts & 16 Floral Designs (Pink screen) (Same as Memory Card #VI)
8) Traditional Monograms 2 Sizes in 2 or 3 letters & 15 Frames (Pink screen) (Same as Memory Card #12)
9) Block Lettering [size in 1 degree increments 7 ~ 60mm]
(Blue screen) 10) Script Lettering [size in 1 degree increments 7 ~ 60mm]
(Blue screen) 11) Euro-style Lettering [sizes15-20-30-40-50mm] (Blue screen)
12) Grids (help in placement) (Orange screen)
Note: Grids are actually stitch data
so delete them before sewing your
design.
Quantum® XL-6000
Auto Thread Exchanger™
- 25 -
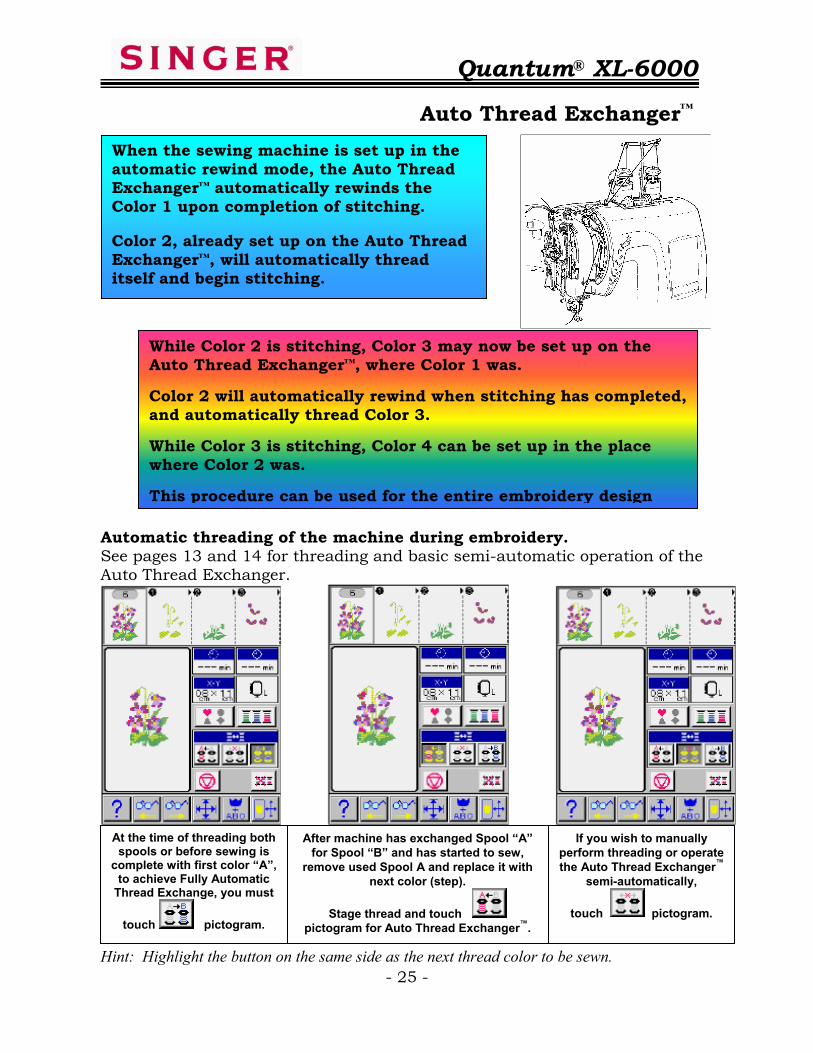
Automatic threading of the machine during embroidery. See pages 13 and 14 for threading and basic semi-automatic operation of the Auto Thread Exchanger.
H5- Hint: Highlight the button on the same side as the next thread color to be sewn.
When the sewing machine is set up in the automatic rewind mode, the Auto Thread Exchanger™ automatically rewinds the Color 1 upon completion of stitching. Color 2, already set up on the Auto Thread Exchanger™, will automatically thread itself and begin stitching.
While Color 2 is stitching, Color 3 may now be set up on the Auto Thread Exchanger™, where Color 1 was. Color 2 will automatically rewind when stitching has completed, and automatically thread Color 3. While Color 3 is stitching, Color 4 can be set up in the place where Color 2 was. This procedure can be used for the entire embroidery design
At the time of threading both spools or before sewing is
complete with first color “A”, to achieve Fully Automatic
Thread Exchange, you must
touch pictogram.
After machine has exchanged Spool “A” for Spool “B” and has started to sew,
remove used Spool A and replace it with next color (step).
Stage thread and touch pictogram for Auto Thread Exchanger™.
If you wish to manually perform threading or operate the Auto Thread Exchanger™
semi-automatically,
touch pictogram.

Quantum® XL-6000
Endless Bobbin™
- 26 -
Automatic rewinding of bobbin during embroidery: How to set up for Endless Bobbin™ Winding: 1. Install an empty bobbin and close the
bobbin case cover. Be sure to use the special bobbins provided for this operation, not the standard 15 class bobbin.
2. Touch the Operation Key. 3. Select the amount of thread to be wound on the bobbin. 4. Open the cover of the Endless Bobbin™
compartment and open the thread retaining plate cover.
5. Place the spool of bobbin fill thread onto the spool pin.
Thread retaining plate cover - A
A
How the Endless Bobbin™ Works
*When the bobbin has run out of thread while machine is engaged in sewing an embroidery pattern, the machine will reposition the embroidery frame and will start the Endless Automatic Bobbin Winding Sequence. *After completion of automatic bobbin winding, the machine will automatically re-start sewing the embroidery pattern.
* Be sure to use bobbin illustrated. If the special bobbin is not used, machine cannot perform Endless Bobbin™ winding function. * Use Bobbin Fill Thread of 60 ~ 100 weight. Heavier weight thread will not wind correctly.

Quantum® XL-6000
Endless Bobbin™
- 27 -
6. Thread the first thread guide. 7. Install the Bobbin Winder Threading guide. 8. Follow the Threading Track around
all the turns and thread points [1] though [5]. At numbered positions 1 ~ 3, lightly pull thread to assure it slips into position. At Position 4, pull thread slightly harder to assure thread passes under final spring.
9. Cut thread at the cutter blade 5, by
drawing the thread toward you. 10. Remove the Threading Guide and close thread retaining cover plate. 11. Touch Pictogram located directly above Bobbin Winding Operation
Key on LCD Screen. To stop for any reason, touch the start/stop button, which is yellow while in winding mode.
12. Upon completion of winding of bobbin, bobbin thread is automatically cut.
You can now start embroidery with no additional preparation. When bobbin thread runs out during embroidery, the bobbin will re-thread itself.
3
5
It is important that you keep the Endless Bobbin™ area clean of lint and thread scraps. Lint and short cut pieces of thread can be drawn into the Endless Bobbin™ threading path and become lodged under the Pinch Plate Spring Finger that threads the bobbin. In the event that the Endless Bobbin™ malfunctions, check the threading path and if necessary clean out thread and debris from under the Pinch Plate Spring.
1 2
4

Quantum® XL-6000
Pictograms on the Embroidery Screen
- 28 -
Used to activate the Layout Screen, or return to Layout Screen.
Used to Combine patterns in a Single or Multiple Hooping.
Used to delete an individual pattern or letter. Clears all entered designs
or letters when pictogram is touched for 5 seconds or longer.
Used to move the embroidery carriage to check sewing area.
Used to add a Layout Grid that aids in design placement.
Used to review design elements, which display across the top of the screen. Also used to select a particular design element to be edited.
Used to set letter orientation to read across (as normal), or vertically with letters aligned one above the other.
Used to activate “Kern Function” to decrease interval between Kern Combinations of letters such as A F J L P T V W Y.
Used to change letter size.
Used to divide letters into groups such as next line of text.
Used to set orientation of lettering from reading and sewing Portrait or
Landscape within the hoop. Used to finish entering design elements and editing, and preparing to
sew. Used to access the Move Carriage function and Correction Function.
Correction Function is used for backing up/advancing stitches.

Quantum® XL-6000
SmartMedia Cards
- 29 -
The Quantum® XL-6000 uses SmartMedia Cards to store embroidery designs. A large selection of Cards is available. Open the card cover. Hold the embroidery card with its notched edge to the lower left. Insert the card.
Touch Pictogram. Designs and patterns stored on the embroidery cards will appear on the LCD screen. The contents of the card can be viewed by touching the Pictograms.
Be sure to close the door or the embroidery card will not work.

Quantum® XL-6000
Combination Embroidery
- 30 -
Combination Embroidery is used for arranging design elements to be sewn within a single hooping. The sewing field size of the hoop area in Combination Embroidery is 140mm x 240mm (approximately 5.5 x 9.5 inches). Machine Set Up: 1. Turn machine off. 2. Remove bed from standard machine. 3. Install the embroidery unit. 4. Slide lever (at the front of embroidery unit) to the right, until it “clicks”. 5. Remove Standard presser foot and shank. 6. Attach the “J” Embroidery foot. 7. Turn machine on. 8. Touch anywhere on the Welcome Screen. 9. Touch OK to position the hoop. Built-in Embroidery Designs: The Quantum® XL-6000 has 99 built-in floral designs. These are stored in numbered folders and displayed on the machine screen. 1. Folder #1 that automatically opens shows a very large Floral Arrangement.
Touch Folder #2, then Folder #3. To continue viewing the built-in designs, touch the #4 Arrow Pictogram in the upper right area of screen.
2. Continue moving through the design patterns by touching the numbered
folders, up to Folder #17. To select a design from Folders #1 through #10, touch the small “button”, located within the box of the selected design. To select a design from Folders #13 through #17, touch the design itself on screen.
CREATING A DESIGN LAYOUT 1. Touch either Arrow Key (located in upper left/right areas of screen) to
move to Folder #14. 2. Touch the Flower in Row 1, Pattern 1. 3. The design appears on the top of the screen. To enter the design and
access the Editing screen, touch the Pictogram.
4. The Editing functions are now displayed on screen:
Hoop Icon, Position/Zoom/Rotate, Design Sizing, Letter Sizing, and Mirror Image
IMPORTANT: The footprint of the Quantum® XL-6000 with the Embroidery Unit installed is quite large. To avoid hoop-positioning problems it is very important that Embroidery Sewing is done on a firm, flat table, large enough to support the entire unit. The work area must be free of any obstructions allowing the hoop to move freely. The Embroidery Unit must be at the same height or even slightly higher than the portion of the Quantum® XL-6000 freearm bed located to the left of the needle.

Quantum® XL-6000
Combination Embroidery
- 31 -
5. The Hoop Pictogram allows the choice of Hoop Size
(large, medium or small), Multi-Hoop or Continuous Hoop. Touching this Pictogram automatically selects the default large hoop size.
6. Return to the Edit screen by touching the Pictogram.
7. Touch Pictogram.
8. The 8 Directional Arrows can be used to move the design position, a touch at a time.
Note: The design may be quickly moved to the extreme distance from center, by touching the Pictogram (located just below the down-arrow key), and then touching the desired direction arrow. The Pictogram will return the design to the center.
9. Move the design down, just below the center area of the screen. 10. To rotate the design, touch the Rotate Pictogram.
11. Designs can be rotated in increments of 100 degrees, 10 degrees and/or 1 degree. Rotate the design 12 degrees. (touch: 10 + 2 x 1 degrees),
then touch the Pictogram.

Quantum® XL-6000
Combination Embroidery
- 32 -
12. Return to the Edit screen with the Pictogram.
13. Touch the Pictogram (center pictogram in Edit column).
14. This screen allows the size of the design to increase up to 120%, or decrease to 90%, by touching a specific % Pictogram on screen.
15. Touch the 110% Pictogram.
Note: The change can be viewed on screen. By touching the minus (-) or plus (+), the design size can be changed in increments of 1%. Increase the design size to read 114%.
16. Touch the Pictogram to return to the Edit screen.
17. Touch Pictogram.
18. To try the Zoom function, Touch the Zoom Pictogram. Touch the x2, and then touch the design on screen to zoom in on a selected area. Note that in the Zoom Function Mode the stitches are converted to “Needle Penetration Dots.” This is highly useful when joining sections or blocks of designs. Return to the regular-size screen by pressing the x1.
19. Touch the Pictogram to return to Edit screen. COMBINING DESIGN WITH LETTERING 1. Touch the Pictogram to introduce a new design to the layout. 2. Touch either Arrow Pictogram, located in upper left/right areas of the
screen. Continue touching the arrow pictogram until the Block Alphabet is on the screen (blue screen).

Quantum® XL-6000
Combination Embroidery
- 33 -
3. Spell out by touching the word ‘Singer’ (one letter at a time) using upper and lower case letters.
4. Touch the Pictogram to Enter. EDITING LETTERING 1. Touch the Letter-sizing Pictogram in the Editing column.
Note: Text can be easily increased or decreased in size by increments of 5mm. When using the minus ( - ) or plus ( + ) pictogram (located on upper screen, (above sizing pictograms), text size can be changed in increments of 1mm from 7mm ~ 60mm.
2. The Pictogram (below the size pictograms) spaces letters closer together or farther apart. Press the minus (-) pictogram two times. Note how the letters change position on screen.
3. Increase the size of the letters to 32mm. 4. Touch the Grid Pictogram. The Grid is specially helpful when
positioning several lines of text.
5. Return to the Edit screen with the Pictogram.
6. Touch the Pictogram.
7. Move the word ‘Singer’ to the upper area of the screen, above the flower.

Quantum® XL-6000
Combination Embroidery
- 34 -
8. Return to Edit screen with the Pictogram. 9. Touch the Pictogram to introduce a new design element. 10. Touch the Pictogram, located to the left of the Smart Card
Pictogram. This will put a “break” between the word “Singer” and the next line of text to be entered, in order that they may be edited as 2 separate groups of stitches.
11. Touch the Letter Pictograms on screen to spell out “Quantum”.
12. Touch the Pictogram to Enter.
13. The word is highlighted, so it may now be edited. Touch the Letter-
sizing Pictogram and change the size to 20 mm.
14. Touch the ‘minus’ Pictogram (just below the size Pictograms)
2 times, to bring the letters closer together.
15. Touch the Pictogram to go back to the Edit screen.
16. Touch the Pictogram to move letters into place, just below the flower.
17. Touch the Pictogram to return to Edit screen.
18. Touch to enter a new design element.
19. Touch the Pictogram, located to the left of the Smart Card icon.
This will put a “break” between the word “Quantum” and the next line of text to be entered, in order that they may be edited as 2 separated groups of stitches.
20. Now touch the Letter Pictograms on screen to spell out “XL-6000”.

Quantum® XL-6000
Combination Embroidery
- 35 -
21. Touch the Pictogram to Enter. 22. The word is highlighted, so it may now be edited. Touch the Letter-sizing
Pictogram and change the size to 18mm.
23. Touch the ‘minus’ Pictogram (just below the size
pictograms) 2 times, to bring the letters closer together. 24. Touch the Pictogram to go back to the Edit screen.
25. Touch the Pictogram; then position “XL-6000” into place, just below the word “Quantum”.
26. Touch Pictogram to return to Edit screen. DELETING, ADDING and/or EDITING SELECTED DESIGN Once they are selected, the design elements display across the top area of the screen. There are 2 “eyeglasses” Pictograms, located near the bottom of the screen: one with a left-arrow and one with a right-arrow. The “eyeglass” Pictograms are used to move the orange-colored vertical cursor back and forth through the display area on screen. The cursor is placed (in the upper screen area) just to the right of the particular design element that is to be edited, added or deleted.
1. To Delete a design element, place the cursor just to the right of the
element to be deleted. Then, touch the pictogram to delete the
design. 2. To Add a design element, place the cursor in the place where the
design is to be introduced. Touch the Pictogram, and then select a
new design. It will automatically be placed in the designated area.

Quantum® XL-6000
Combination Embroidery
- 36 -
3. To Edit a design element, place the cursor to the immediate right of the
design to be edited, as it appears in the display area of the upper screen. This designated element will now be highlighted within the “hoop” area on screen. Make desired changes and then touch the Pictogram to return to the previous screen. Note: This function can be used to select a given design to sew next.
MOVING THROUGH A DESIGN This function may be used to restart embroidery from a position at which thread has broken, or to move through a design to a selected area. 1. Stop the machine. Raise the needle and lift the presser foot.
2. Touch the Pictogram.
3. Should thread breakage occur, it is possible to move the needle and re-stitch the area.
4. To change the needle position, touch located to the left and right
of the Pictogram. Each touch of the minus (-) Pictogram will back up the needle position, in increments of 10 stitches. The plus (+) is fixed and will always move the needle forward one (1) stitch at a time.
Note: The 10-stitch increment is a default setting, but can be changed as desired, in the Options Screens (see instruction manual).
5. To select a portion of the design to sew:
• Touch the Pictogram. Move forward or backward
through the entire design element by percentage. To move forward through the design, touch the (+) Pictogram. To move backward through the design, touch the (-). The ratio of %-of-stitches is with respect to the total number of stitches in the pattern.
• To return the needle position to the beginning of the current
design, touch the Pictogram.

Quantum® XL-6000
Combination Embroidery
- 37 -
• Touch , to return to the previous screen.
• Lower the Embroidery foot and resume sewing.
PREPARING TO SEW THE COMBINATION DESIGN 1. Place the fabric in the embroidery hoop, and then place the hoop onto the
embroidery unit.
2. Touch the Pictogram, to finish combining designs and prepare to sew.
3. To view the entire design layout, touch the Pictogram. 4. To review the order of the color changes, touch the Pictogram. 5. Thread the left spool pin of the Auto Thread Exchanger™ with color #1
[light yellow], making sure the spool turns in a “clockwise” direction.
Touch the Key for Automatic Threading of the needle. 6. “Stage” the right spool pin of the Auto Thread Exchanger™ with color #2
[gold]. 7. Touch the Pictogram, to engage the Auto Thread Exchanger™. 8. After color #1 is finished, the Auto Thread Exchanger™ will rewind color
#1, automatically thread color #2 and begin to sew. 9. While color #2 is sewing, remove color #1 and replace it with color #3
[green]. Stage the green thread. 10. Touch the Pictogram, to engage the Auto Thread Exchanger™. 11. After color #2 is finished, the Auto Thread Exchanger™ will rewind color
#2, automatically thread color #3 and begin to sew. Note: Continue changing thread colors for each segment of the design and touching the Spool Direction Pictograms until the pattern is completed.

Quantum® XL-6000
Combination Embroidery
- 38 -
12. While color #3 is sewing the last part of the flower, stage the Auto Thread Exchanger with color #4 [red] for the text.
13. Touch then touch .
14. Touch Pictogram – touch start button to sew the text from the design layout in red.
POSTPONE SEWING/POWER OFF FUNCTION This function is used to temporarily save your layout and sewing in the exact position it was in before activating the Postpone Function. Before turning power off: 1. Touch the key in the lower right corner.
2. Touch the OK key.
3. Do not turn off power to machine while design is being saved.
4. When machine is finished saving the design, touch OK. To retrieve the design after the machine has been turned off longer than 10-15 minutes: 1. Turn machine on.
2. Touch LCD screen. 3. Touch OK Pictogram to position the hoop. 4. When design appears on screen, touch the OK Pictogram. 5. Do not to turn off the machine while it is retrieving stitch data. 6. The design now appears on screen, ready to start sewing in the exact
position you were in before activating the Postpone Function.

Quantum® XL-6000
Combination Embroidery
- 39 -
To Achieve Best Embroidery Sewing Results:
Fabric, Thread and needle:
o Most fabrics require interfacing for embroidery. Failure to use interfacing can result in steps of the design not aligning with other steps. Use lighter weight stabilizer for less dense designs and heavier cut-away stabilizers for designs which are denser.
o The built-in designs and the designs on the Quantum® XL-6000
Embroidery Cards are digitized to be sewn with #40 weight Rayon thread. When enlarging the design to 110 ~ 120%, you may wish to use 30 weight or heavier as an alternative.
o Always use Bobbin Fill Thread in your bobbin. Bobbin fill is lighter in
weight, providing for less dense stitching on the back side of the embroidery.
o Always use Singer® Chromium Needles, Style 2000 or 2001 in size 11/80
or 14/90 when embroidering. These needles are designed to work best with the Exclusive Auto Thread Exchanger™.
Types of Embroidery Frames:
o Always use a frame most appropriate for the size of embroidery you wish to sew.
Large Frame Embroidery range is 140mm x
240mm. It is used for large patterns, combined
patterns and Multiple Hoop Embroidery.
Medium Frame
Embroidery range is 114mm x 114mm.
Small Frame Embroidery range is 55mm x 55mm. It
is used for small embroideries such as a
name on a handkerchief.

Quantum® XL-6000
Multiple Hoop Embroidery
- 40 -
Large design layouts are easily accomplished with the Multiple-Hoop function of the Quantum® XL-6000. Design layouts too large to fit within a single hoop can be sewn in sections, while maintaining perfect alignment and placement. The joining of the sections is smooth, simple and accurate using the X-Y Axis feature. The total sewing field area of the basic Multiple-Hoop layout is 250mm x 450mm, or approximately 10” x 18”. It is also possible to build design layouts even larger than the 10” x 18” area seen on the screen of the Multiple-Hoop layout by using the X-Y Axis feature as a placement tool. EXERCISE IN USING MULTIPLE HOOP EMBROIDERY FABRIC PREPARATION 1. A design layout large enough to fill all 4 quadrants on the sewing machine
screen requires a fabric at least 15 x 25 inches [38 cm x 63 cm]. 2. As appropriate for the selected fabric, apply stabilizer(s) following
manufacturer’s instructions. 3. Using a fabric marking pen/pencil and a ruler with 90 degree angle
markings, draw a long horizontal line across the center of the fabric. 4. Draw a long vertical line to intersect the center of horizontal line at an
accurate 90 degree angle. PREPARING THE SEWING MACHINE 1. While sewing machine is off, install the embroidery unit. 2. Attach the embroidery foot, turn machine on. 3. Touch anywhere on screen to activate. 4. Touch “OK” for carriage to move and center itself. BUILDING THE DESIGN LAYOUT - LETTERS 1. Touch the Right Arrow Pictogram at top right of screen 7 times, to select
the Block Lettering folder (letters appear in blue-colored boxes). 2. Enter the word S-I-N-G-E-R.
X
Y Note: The Layout Screen of the Quantum® XL-6000 has a huge capacity and ability to layout and sew the most complicated of designs whether they are a combination of individual designs and letters or one very large multiple color design. There is, however, a limitation for one layout of 180,000 stitches and 128 colors. If your design has more than 180,000 stitches or more than 128 colors, divide the design into 2 or more layout segments. You can easily join 2 or more layouts with the X – Y Axis Feature.

Quantum® XL-6000
Multiple Hoop Embroidery
- 41 -
3. Touch the Pictogram to arrange letters vertically. 4. Touch Pictogram to change the orientation of the letters from portrait to landscape in the hoop.
5. Touch Pictogram. Letters appear within a single hoop-sized area.
6. To go to Hoop selection screen, touch (top right Pictogram).
7. Touch to enter the Multiple-hoop screen.
8. Touch to return to the Edit screen.
9. Touch to access the Letter Sizing function. 10. Touch the 50 Pictogram to select 50mm lettering. 11. Using the Pictogram. Press (+) to increase letter size to
56mm.
12. Touch to exit Letter Sizing.
13. Touch to continue on and add the borders. BUILDING THE DESIGN LAYOUT – FLORAL BORDERS 1. Continue repeatedly touching the Right Arrow Pictogram at top right of
screen. Select Folder #11 - Floral Borders.
2. Select Border #3 by touching the “button” (just below the border).
3. Touch Pictogram (border now appears in center of screen).
4. To move border, touch the Pictogram.

Quantum® XL-6000
Multiple Hoop Embroidery
- 42 -
5. Use “left” Arrow Pictogram to move border to the left in 23 moves. Use “up” Arrow Key to move border up, until bottom of the border touches the X-axis on screen.
6. To check placement, touch Pictogram. Touch zoom.
7. Touch the border where it meets the axis, to check placement.
8. Touch the Pictogram to access the Positioning Arrows. Use the Arrow pictograms to move the border to line up on the X-axis line (allow the image to slightly overlap the line, to allow for pull compensation during embroidery).
9. Touch Pictogram and Zoom to return to full screen.
10. Touch to return to the Edit Screen. 11. Touch to combine with another border.
1. Select Border #3 again.
2. Touch Pictogram (border appears in center of screen).
3. Touch the Pictogram.
4. Touch the Rotate Pictogram.
5. Touch 100 degrees once, then press 10 degrees a total of 8 times, until the angle of rotation displayed is 180 degrees.
6. Touch to register this change.
7. Touch to return to the Edit screen.
8. Touch Pictogram
x8

Quantum® XL-6000
Multiple Hoop Embroidery
- 43 -
9. Touch Pictogram again. 10. Use “left” Arrow Pictogram to move design to the left, then the “down”
Arrow Pictogram to move design down. Borders should line up vertically as one long border.
11. To check placement, touch the Pictogram. Touch zoom.
12. Touch location on screen where the borders meet, to check the placement.
13. Touch Pictogram to access Positioning Arrows and move border.
14. Touch and to return to full screen. 15. Touch to return to the Edit screen. 16. Touch to combine with another border.
1. Select Border #3 again. 2. Touch Pictogram (border appears in center of screen).
3. Touch Pictogram.
4. Touch Pictogram.
5. Use “right” Arrow Key to move border to the right in 23 moves. Use “up” Arrow Key to move border up, until bottom of the border touches the X-axis on screen.
6. To check placement, touch Pictogram. Touch zoom.
7. Touch screen where border meets the X-axis line.
8. Touch Pictogram to activate Positioning Arrows and move border.
9. Touch and Zoom to return to full screen.
x8
x8

Quantum® XL-6000
Multiple Hoop Embroidery
- 44 -
10. Touch to return to the Edit screen.
11. Touch to combine with another border.
1. Select Border #3 again. 2. Touch Pictogram (border appears in center of screen).
3. Touch Pictogram.
4. Touch Rotate Pictogram. 5. Touch 100 degrees, then touch 10 degrees a total of 8 times, until the
angle of rotation displayed reads 180 degrees.
6. Touch to register this change.
7. Touch Pictogram to access Positioning Arrows and move border. 8. Use the arrow pictograms to position the border to line up vertically with
the upper border and meeting at the X-axis. 9. To check placement, touch Pictogram. Touch zoom. 10. Touch spot on screen where the borders meet, to check the placement. 11. Touch Pictogram to activate Positioning Arrows. Make the final
adjustments to the border placement.
12. Touch and Zoom to return to full screen.
13. Touch to return to the Edit screen.
14. Touch to select Multi-hoop End.
x8

Quantum® XL-6000
Multiple Hoop Embroidery
- 45 -
DEFINE AN AREA TO BEGIN EMBROIDERING 1. Use the arrow keys to move the “Hoop” on screen,
to select the 1st area to be embroidered. 2. Select OK. 3. Place fabric in hoop, so X and Y axis lines drawn
on the fabric are set in the hoop in similar placement to the display on screen.
4. Place hoop and fabric onto the embroidery unit. 5. Touch OK. 6. Touch OK again. PREPARING TO SEW – SPECIFYING THE MULTIHOOP POINTS Specifying the needle entry points is the way the sewing machine receives the information it needs to stitch the design elements in correct position. Only 3 needle entry points are needed to accomplish this… 2 on the Y-axis line (points a and b), and one on the X-axis line (point c) Specifying Point a on the Y-axis line:
1. Touch screen on the upper end of the vertical line, to move the frame.
2. If needle is not directly on the vertical line, use the Position Keys on the sewing machine screen to move the needle until it is directly over the vertical line drawn on the fabric.
3. Turn handwheel to check that needle touches the vertical line drawn on the fabric.
4. When needle is in correct position, touch the Y-1 Position Memory key on screen, to register this first point.
S I N
E R
a
bc
a
If you look carefully at your Embroidery Frame you will see two raised marks in each corner. One mark looks like a small oval [ ] and the other looks like a small triangle [ ]. These marks are used to aid in hooping and aligning the X and Y Axis lines. Aligning the X and Y lines with the marks allows a maximum size design of 220mm x 430mm. Aligning with the marks allows a maximum size design of 250mm x 450mm. When laying out a pattern and moving an element to the farthest point in the hoop always use the marks.

Quantum® XL-6000
Multiple Hoop Embroidery
- 46 -
Specifying Point b on the Y-axis line: 1. Touch on screen at the opposite end of the vertical
line, to move the frame. 2. If needle is not directly on the vertical line, use the
Position Keys on the sewing machine screen, to move the needle until it is directly over the vertical line drawn on the fabric.
3. Turn handwheel to check that needle touches the vertical line drawn on the fabric.
4. When the needle is in correct position, touch the Y-2 Position Memory key on screen to register this second point.
Specifying Point c on the X-axis line:
1. Touch on screen at one end of the horizontal line, to move the frame.
2. If needle is not directly on the horizontal line, use the Position Keys on the sewing machine screen to move the needle until it is directly over the horizontal line drawn on the fabric.
3. Turn handwheel to check that needle touches the horizontal line drawn on the fabric.
4. When needle is in correct position, touch the X-1 Position Memory key on screen, to register this third point.
5. Stitch out the design elements.
PREPARING TO SEW NEXT AREA OF DESIGN LAYOUT 1. When stitching is complete, touch OK on screen
to proceed to the next group of design elements in the layout.
2. Use the Arrow Keys on screen, to move the “hoop” and select the next area to be sewn. Touch OK.
3. Place fabric in the hoop so X and Y lines drawn on the fabric are set in the hoop in similar placement to the display on screen.
4. Place fabric and hoop onto embroidery unit. 5. Touch OK two times.
S I N G E R
b
c

Quantum® XL-6000
Multiple Hoop Embroidery
- 47 -
Specifying Point d on the Y-axis line: 1. Touch on screen at one end of the vertical line, to
move the frame. 2. If needle is not directly on the vertical line, use the
Position Keys on the sewing machine screen to move the needle until it is directly over the vertical line drawn on the fabric.
3. Turn handwheel to check that needle touches the vertical line drawn on the fabric.
4. When needle is in correct position, touch the Y-1 Position Memory key on screen to register this point.
Specifying Point e on the Y-axis line:
1. Touch on screen at the opposite end of the vertical line, to move the frame.
2. If needle is not directly on the vertical line, use the Position Keys on the sewing machine screen to move the needle until it is directly over the vertical line drawn on the fabric.
3. Turn handwheel to check that needle touches the vertical line drawn on the fabric.
4. When needle is in correct position, touch the Y-2 Position Memory key on screen to register this point.
Specifying Point f on the X-axis line: 1. Touch on screen at one end of the horizontal line,
to move the frame. 2. If needle is not directly over the horizontal line, use
the Position Keys on the sewing machine screen to move the needle until it is directly over the horizontal line drawn on the fabric.
3. Turn handwheel to check that needle touches the horizontal line drawn on the fabric.
4. When needle is in correct position, touch the X-1 Position Memory key on screen to register this point.
5. Stitch out the design elements.
d
f
e

Quantum® XL-6000
Memory in Embroidery
- 48 -
There are 32 memory folders available within the machine when in embroidery mode. Each one of these folders can hold as much as 180,000 stitches. Each file folder stores all stitch data from a design layout. Since all stitch data is saved, it is not necessary to place memory cards in the machine so that stitch data can be retrieved. The Quantum® XL-6000 can do this in all 32 folders. To save a design layout:
1. Touch the key. 2. Touch the folder where the design is to be stored. 3. Touch the Pictogram. 4. Touch the Pictogram to return to previous screen. To retrieve a stored design layout from a folder: 1. Turn machine on. Touch anywhere on screen. 2. Touch OK.
3. Touch the key. 4. Touch the folder in which the design was saved.
5. Touch the Pictogram. 6. Touch OK.

Quantum® XL-6000
Continuous Hoop Attachment
- 49 -
The Quantum® XL-6000 comes with the Continuous Hoop Attachment. You can create borders for garments and home decorator projects. Heirloom insertions can be created at a fraction of the cost of purchased Swiss insertions, by embroidering borders on organza or batiste. Make interesting sashings and borders for quilts, in contrast colors or tone-on-tone. You can even embroider borders on ribbon. HOW THE CONTINUOUS HOOP WORKS This hoop is amazingly simple to use! There are 6 Continuous Hoop embroidery designs built into the Quantum® XL-6000 that are capable of being sewn only when using the Continuous Hoop Attachment. It even comes with a SmartMedia design card (#5006) which has a large assortment of borders in various styles such as floral, Celtic, southwest, lace, heirloom, and more that are ready to embroider.
This accessory is for continuous border sewing when the machine is set up in the embroidery mode. The sewing field is 50mm x 120mm, which is approximately 2” x 4¾”. There is an adjustable Edge Guide at the right of the hoop which is used for keeping fabric aligned when moving to the next area to be embroidered. At the end of each embroidered segment, the machine stitches a “v”-shaped marking stitch. The hoop has a clamp which is simply lifted up, and then the fabric is pulled toward the back of the machine. The needle is placed into the point of the “V”-shaped stitch, keeping the right edge of the fabric aligned with the Edge Guide. Put the clamp back down and begin embroidering the next section of the design. It is that easy!

Quantum® XL-6000
Continuous Hoop Attachment
- 50 -
CREATING ORIGINAL OBRDER DESIGNS FOR THE CONTINUOUS HOOP The optional Professional Sew-Ware™ 2.00a has a function that provides for creating original borders. The software will automatically insert the “marking” stitches, which indicate the “V”-shaped placement for the needle when moving the fabric to the next area for embroidery. Edit an existing design, or digitize your own! Mix designs from cards, create cross-stitch borders, etc. There is no limit to what one can create. This software makes it so easy!
Note: The Continuous Embroidery Sewing Screen has a Monochromatic Pictogram Option that looks like three spools of thread with a line through two of the spools. Activating this Option allows you to sew any multiple color design with only one color and not stop for color changes.

Quantum® XL-6000
Conversion Software
- 51 -
What the Conversion Software is:
The Conversion Software is a tool designed to allow easy and direct transfer of pre-digitized embroidery designs from the PC to the Quantum® XL-6000 Sewing machine. Simply open the desired design from the Conversion software and transmit it to the Quantum® XL-6000 machine. Nearly all popular embroidery formats are available to allow to importing almost any design. Basic editing functions are included, such as clean up, center or change a design’s color.
What the Conversion Software is not:
The Conversion Software is not a program that allows creating or digitizing original designs. Stitch placement may not be altered in anyway. Stitches may not be moved, added to or deleted. The design may not be resized. Basically the design is exactly the way it appears on the screen.
How Conversion Software Communicates with Quantum® XL-6000:
The Conversion Software and the PC communicates with the Quantum® XL-6000 through a special serial port cable called a Null Modem Cable, (Singer Part # 270-10D1-20206 for 6-foot cable, Part # 270-10D1-20210 for 10-foot cable). This special cable is a 9-pin cable with both a male and female end, one for the PC and one for the sewing machine. The wiring in a Null Modem cable is configured in a way to allow communication to flow both ways between the two devices, the PC and the machine. A straight serial port cable will not allow the information to flow back and forth. However, a Null Modem Adapter may be added to a straight serial port cable, creating the same effect.
Using a USB Cable:
A USB cable may be used. However, a USB to 9-pin conversion cable must be used. Unless Window® XP is used, these conversion cables usually require that an accompanied software program be installed on the PC in order for the computer to recognize the cable.
Quantum® XL-6000
Conversion Software
- 52 -
How to Use the Conversion Software:
Loading a Design –
a. First, click on the Open icon on the horizontal tool bar.
b. Select the desired design from the hard drive, floppy disk or CD.
o Select the drive specific Drive in which designs have been stored. o Preview the design icons next to their names o If known, the name of the design can be typed into the File Text Box. o Select the type of file to be loaded, for example: psw or xxx.
Editing Features –
a. Centering Design – The design will center according to the frame center. Click on Modify from the horizontal tool bar, click on Center Design.
b. Clean Up – The clean up function deletes small stitches in your design,
the length of which can be defined by typing the values in the dialog box. Click on Modify from the horizontal tool bar, click on Center Design.
c. Changing the Thread Colors – This option allows changing the thread
and screen colors used by the program.
o Click on the Stitch Colors icon on the tool bar (looks like a “painter’s palette”). On the window which appears, select the color to be changed and then change it by selecting a different value from the color bar. Color intensity may also be adjusted. Colors can also be selected with the use of the thread catalog. Select the thread palette and click on the Thread Palette button to view and select from the range of colors provided. Click on the OK to confirm the changes made.
o Change the background color simply by clicking on the related button on the “Colors” window (the little “TV screen”), then select the desired color for the background from the color bar and click on the OK to confirm the changes made.
Quantum® XL-6000
Conversion Software
- 53 -
Saving a Design –
a. Save – Will allow saving the file under the current name. b. Save As – Will allow saving the file under a new name.
Printing a Design –
The print function provides all the necessary controls needed to choose the exact se-up of the final printout. It also acts as a preview window for the final printed design. It is possible to manipulate and customize every aspect of the page or pages that will be printed. Click on the Print icon on the tool bar. Select the desired buttons to set up the page as desired.
Measuring a Design –
The Ruler function will allow for measuring a design. Click on the Ruler icon. Click on one edge of the design, bring the cursor over to the other side of the design. The message in the status bar at the bottom of the screen will display the measurement of the design. Measure can be displayed as metric or standard units. To change the unit of measure, click on the small box in the upper left hand corner where the rulers meet, and select the unit of measure.
Enlarging the View of the Design – The Zoom function allows enlarging any part of the design on the Screen. It works by dragging a constant shaped rectangle, (by using the mouse) across the area to be enlarged. Click on the Zoom icon, click, hold and drag the mouse over the area to be zoomed, and release the button.
Sending the Design to the Machine –
o Click on the Transmit to Machine icon. o In the Send to Machine Dialogue Box, select the Port the sewing machine
is connected to.

Quantum® XL-6000
Conversion Software
- 54 -
o Define the Bits per Second parameter (also referred to as the “Baudrate”).
This value defines the speed at which the Quantum® XL-6000 Conversion Software will transmit the design to the sewing machine and the speed at which the machine will accept it. The Bits per Second value at the software side has to have the same value as the “Baudrate value at the sewing machine side, in order to be able to transmit a design to the sewing machine. (Instructions for setting the sewing machine Baudrate will follow).
o Choose the 38400 setting. o When ready, click on the Wait to Send icon. At the same time go to the
sewing machine and request to receive the it. (Instructions below) o Changing the Baudrate at the machine –
a. Select the Help key (the white book with the red “?”). b. From the right hand row of Pink Boxes, select the bottom Pink Icon (the
automatic settings) c. Press the page back (the white book with the yellow page on the left). d. Select the 38400 setting. e. Press OK.
o Receiving the design – From the help screen, press the pictogram of the “Computer”, the machine will request the design from the PC and transmission will begin. A progress bar at both the machine and the PC will indicate the action in progress.
o When all of the transmitted data is received, the progress bar will stop, indicating the transmission is complete. The design can now be used on the sewing machine side, in the same way as any other design read into the machine.