2008 versa audio system - wordpress.com this manual iii about this manual getting the most out of...
TRANSCRIPT

2008 Versa Audio System
FM/AM Radio with 6 CD Changer
Owner’s Manual
For your safety, read carefully and keep inside your vehicle. Daniel Verbin • Technical Writing II TWR2004 • Algonquin College • December 2013


i
WARNING
IMPORTANT SAFETY INFORMATION. FOLLOW THESE DRIVING RULES.
NEVER drive under the influence of alcohol or drugs.
ALWAYS observe posted speed limits and never drive too fast for conditions.
ALWAYS give your full attention to driving and avoid using features of the audio system that could distract you.
DO NOT change discs while operating the vehicle. Wait until you are parked or at a standstill.
DO NOT operate a media player attached through the AUX port while driving the vehicle. Wait until you are parked or safely at a standstill.
DO NOT turn up the volume of your audio system beyond a comfortable level for all those in the vehicle. Turning the volume up too loud could cause permanent damage to your hearing. NISSAN is not responsible for misuse of your audio system.
© Nissan Cannada, 2013. All rights reserved. No part of this Owner’s Manual may be reproduced or stored in a retrieval system, or transmitted in any form, or by any means, electronic, mechanical, photocopying, recording or otherwise, without the prior written permission of Nissan Canada.

Table of contents About this manual.........................................................................................................iii Getting the most out of your audio system....................................................................................................................iii NISSAN Customer Care Program.................................................................................................................................iii Explanation of Symbols.................................................................................................................................................iv Getting started................................................................................................................v Radio..............................................................................................................................................................................vi Radio reception..............................................................................................................................................................vi FM radio reception........................................................................................................................................................vii AM radio reception.......................................................................................................................................................vii Compact disc (CD) player............................................................................................................................................vii MP3 discs......................................................................................................................................................................vii Audio system explanation chart...................................................................................................................................viii Chapter 1: Setting the audio system............................................................................1 To set the clock...............................................................................................................................................................2 To set the volume............................................................................................................................................................2 To adjust the audio settings.............................................................................................................................................3 Chapter 2: Listening to the FM/AM Radio....................................................................5 To turn on the radio.........................................................................................................................................................6 To change the display.....................................................................................................................................................6 To listen to a radio station...............................................................................................................................................7 To set radio station presets (A,B,C)................................................................................................................................8 Chapter 3: Playing compact discs (CDs)......................................................................9 To play a CD.................................................................................................................................................................10 To insert another CD.....................................................................................................................................................11 To eject a CD................................................................................................................................................................11 To change tracks or FF/REV........................................................................................................................................12 To change the CD display.............................................................................................................................................13 To repeat or randomize tracks.......................................................................................................................................13 To scan tracks of a CD..................................................................................................................................................14 Chapter 4: Playing MP3 Discs.....................................................................................15 To play an MP3 Disc....................................................................................................................................................16 To skip songs................................................................................................................................................................17 To navigate folders........................................................................................................................................................17 To change the MP3 display...........................................................................................................................................18 To repeat an MP3 disc..................................................................................................................................................19 To use the AUX port for a media player.......................................................................................................................20 Appendix A: Troubleshooting.....................................................................................21 Appendix B: NISSAN customer support information...............................................24 Appendix C: Safe handling of CDs.............................................................................26 Index..............................................................................................................................27

About this manual
iii
About this manual
Getting the most out of your audio system This manual is a guide to the 2008 NISSAN Versa FM/AM Radio with 6 CD Changer audio system. This guide is designed to help vehicle owners get their audio systems set up as quickly as possible. You will learn how to navigate the system and get the most out of its features. As you progress through this manual, you will notice that it is set up so that you can read the sections that are relevant and skip the sections that you don’t need to read. First, you will be taken through the essentials of the audio system, including a rundown of the buttons and instructions to set the Clock. Then you will learn how to operate the Radio, the CD Player, the MP3 Disc feature and the Auxiliary Port (for use with your media player). This manual features simple step-by-step instructions to help you make the most of your audio system. NISSAN Customer Care Program We also recommend that you explore the NISSAN Customer Care Program if you have any concerns or comments. Both NISSAN and NISSAN dealers are dedicated to serving all your automotive needs. Your satisfaction with your vehicle and your dealer are our primary concerns. NISSAN dealers are always available to assist with all your automobile sales and service needs. However, if there is something that your NISSAN dealer cannot assist you with or you would like to provide NISSAN directly with comments or questions, please contact the NISSAN Consumer Affairs Department using our toll-free number: 1-800-387-0122
We appreciate your interest in NISSAN and thank you for buying a quality NISSAN vehicle.
You can also write to NISSAN at: Nissan Canada Inc. 5290 Orbitor Drive Mississauga, ON L4W 4Z5

NISSAN Versa FM/AM Radio with 6 CD Changer
iv
Explanation of Symbols ✎ The pencil is a NOTE symbol. A note indicates an important point or piece of information. �The hand is a TIP symbol. A tip indicates a hint, a shortcut or a useful feature of your audio system. ➹ The arrow is WARNING symbol. A warning is a caution to ensure you safely use your audio system. Please carefully read and follow all warnings.

Getting started
v
Getting started
User manual overview This guide contains five chapters. Each chapter covers a specific function of the audio system. Three appendices offer further information about your system. Chapter 1 is an introduction to your audio system. Chapter 2 explains how to set the Clock, change the Display, adjust the Audio Settings and set the Radio Station Presets. Chapter 3 explains how to use the Radio. Chapter 4 explains how to use the CD Player. Chapter 5 explains how to play an MP3 CD and use the Auxiliary Port for your media player. Appendix A features troubleshooting tips. Appendix B features information about NISSAN’s customer care program. Appendix C features safety tips for CDs.

NISSAN Versa FM/AM Radio with 6 CD Changer
vi
✎ This manual is a guide for the 2008 Versa audio system that is NOT equipped with SATELLITE RADIO. If your audio system is equipped with SATELLITE RADIO, please contact NISSAN for the relevant owner’s manual, 2008 Versa Audio System, FM/AM Satellite Radio with 6 CD Changer. � If you have already read through this manual or you are familiar with the Versa’s audio system and are looking for a specific feature or troubleshooting tip, consider skipping ahead to the following commonly searched for features:
To learn how to Go to
Set radio presets “To set radio station presents” on page 8
Repeat a song “To repeat or randomize tracks” on page 13
Navigate MP3 disc folders “To navigate folders” on page 17
Attach an MP3 Player “To use the AUX port…” on page 20
Randomize CD tracks “To repeat or randomize tracks” on page 13
Scan the tracks of a CD “To scan tracks of a CD” on page 14 Radio To turn on the radio, the ignition key must be in the ACC or ON position. Put the ignition in the ACC position to listen to the radio with the engine off. Press the <PWR> button to turn the radio on. Radio reception The Versa is equipped with a state of the art audio system featuring a radio with enhanced circuits that extend range and quality of reception. � Using a cellphone inside or near your Versa may interfere with radio quality or cause the speakers to emit a buzzing noise. If this occurs, try moving your cellular device to another part of the vehicle.

Getting started
vii
FM radio reception The FM range is 40-48 km. However, it is normal for a signal to fade or drift as your vehicle moves further away from the station’s transmitter. Tall buildings, hills or antennas can also influence signal quality. AM radio reception AM signals are able to bend around obstructions, hug the ground and bounce off the ionosphere back toward the ground. Due to these properties, AM signals can also lose quality due to interference. Possible sources affecting signal quality include highway underpasses, areas with multiple tall buildings and ionic turbulence. Thunderstorms and power lines can cause static. Compact disc (CD) player Your vehicle is equipped with a state of the art Compact Disc (CD) Player that features a 6 CD Changer. The CD Player plays CDs, CD-Rs and CD-RWs. It can read MP3 and WMA files (MP3 Discs). For information about safe handling of CDs, see Appendix C on page 26. MP3 Discs The CD Player can play MP3 Discs with a maximum of 512 files, 255 folders (including the root folder) and 8 levels. The CD Player can also play WMA files. WMA files are played in the same manner as MP3 files. The CD Player is only capable of reading pre-recorded discs and is not capable of burning CDs. The term MP3 is short for Moving Pictures Experts Group Audio Layer 3 and is the most common compressed digital audio format. The MP3 format is a compressed audio file at close to CD-quality sound but at a fraction of the size of an uncompressed audio file. The MP3 (or mp3) format allows for multiple bit rates up to 320 kilobytes per second (kbps). The CD Player is capable of playing all bit rates. To learn about WMA files (Windows Media Audio), see http://www.microsoft.com/windowsmedia. The audio system displays any ID3 tag information that is encoded in an MP3 file, such as artist, song title, album and track length. This information appears on the Album/Artist/Track title line on the display. See “To change the MP3 display” on page 18.
NISSAN Versa FM/AM Radio with 6 CD Changer
viii
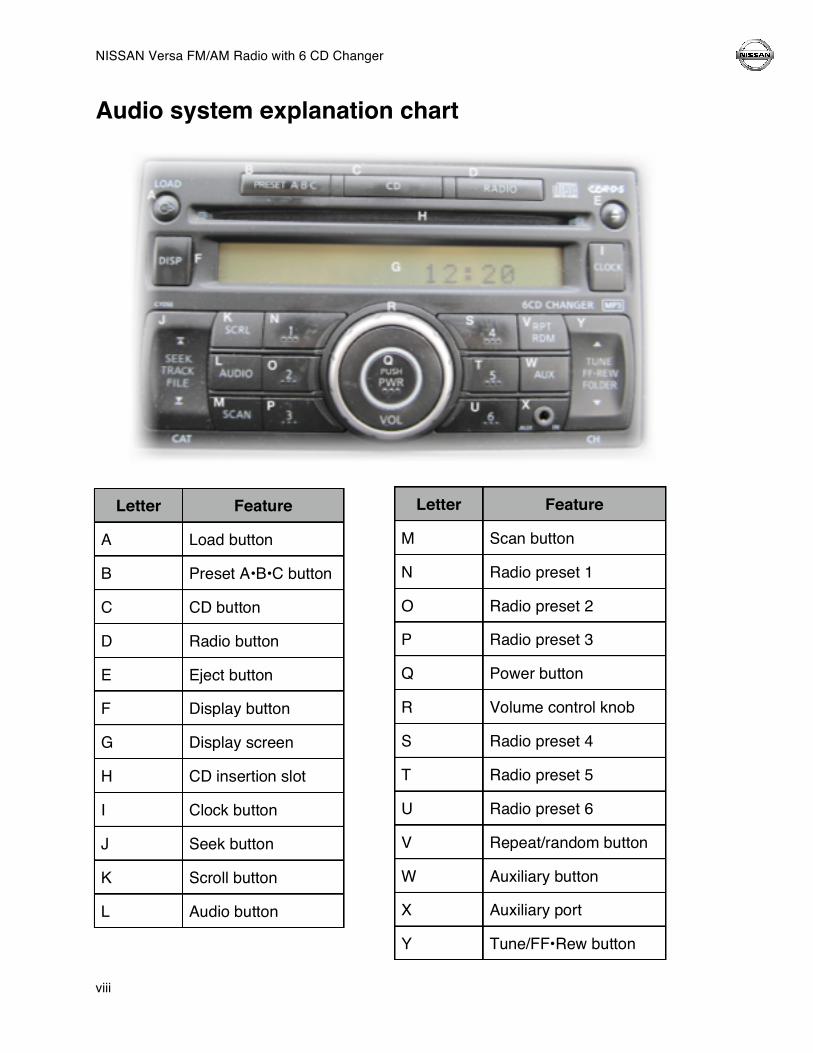
Audio system explanation chart
Letter Feature
A Load button
B Preset A•B•C button
C CD button
D Radio button
E Eject button
F Display button
G Display screen
H CD insertion slot
I Clock button
J Seek button
K Scroll button
L Audio button
Letter Feature
M Scan button
N Radio preset 1
O Radio preset 2
P Radio preset 3
Q Power button
R Volume control knob
S Radio preset 4
T Radio preset 5
U Radio preset 6
V Repeat/random button
W Auxiliary button
X Auxiliary port
Y Tune/FF•Rew button
Chapter 1: Using your FM/AM Radio with Compact Disc Changer
1
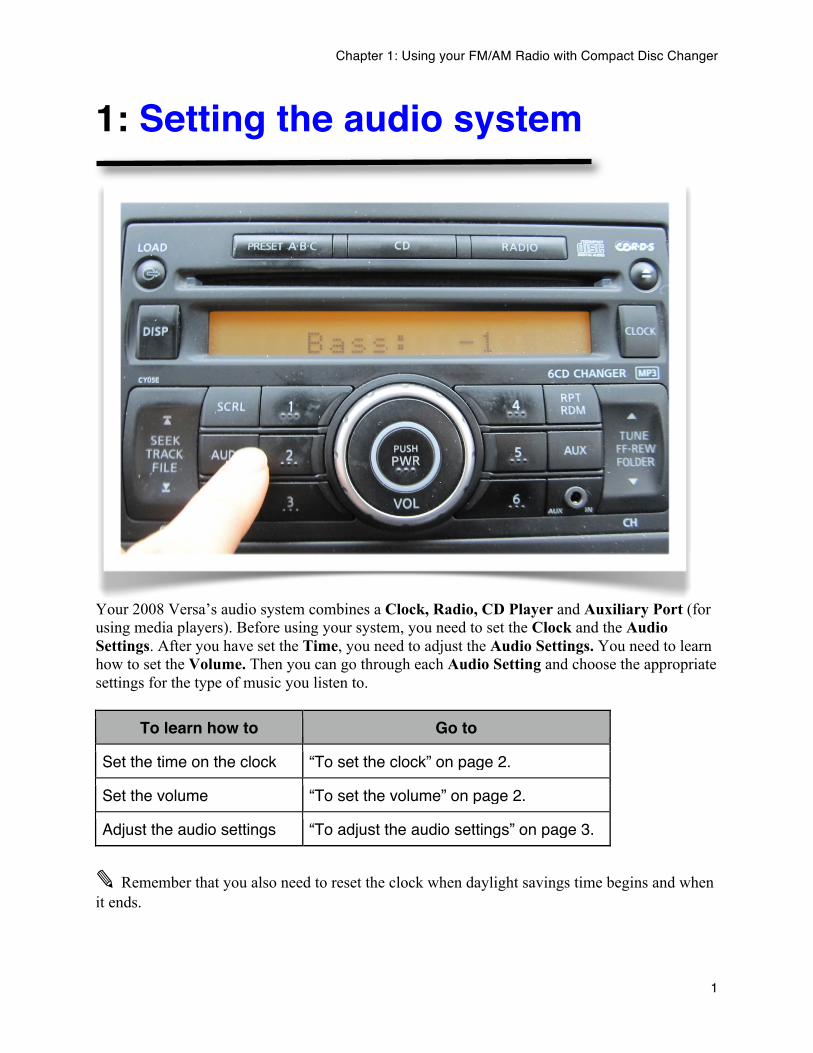
1: Setting the audio system
Your 2008 Versa’s audio system combines a Clock, Radio, CD Player and Auxiliary Port (for using media players). Before using your system, you need to set the Clock and the Audio Settings. After you have set the Time, you need to adjust the Audio Settings. You need to learn how to set the Volume. Then you can go through each Audio Setting and choose the appropriate settings for the type of music you listen to.
To learn how to Go to
Set the time on the clock “To set the clock” on page 2.
Set the volume “To set the volume” on page 2.
Adjust the audio settings “To adjust the audio settings” on page 3.
✎ Remember that you also need to reset the clock when daylight savings time begins and when it ends.

NISSAN Versa FM/AM Radio with 6 CD Changer
2
To set the clock The first time you use the radio, when changing to and from daylight savings time or when the vehicle’s battery has been changed, you need to set the clock. ✎ Remember to set the clock for either AM or PM. AM is indicated by a small capital A and PM is indicated by a small capital P in the top left corner above the time. Setting the clock 1. Hold down the <CLOCK> button until it flashes. 2. To increase the hour, press the <SEEK TRACK FILE> button UP. To decrease the hour, press the button DOWN. 3. To increase the minutes, press <TUNE FFREW FOLDER> button UP. To decrease the minutes, press the button DOWN. 4. To lock in the new time, press the <CLOCK> button.
To set the volume Setting the Volume of your audio system sets the overall volume for listening to the Radio, the CD Player or an MP3 Disc. You can also set the Volume so that it goes up and down depending on your speed. This is called Speed Volume. To learn how to set the Speed Volume, see “To adjust the audio settings” on page 3-4. ➹ Listening to your audio system with the Volume set at dangerously high levels can damage your hearing. � Wind noise can make it hard to hear the audio system. If you are having trouble hearing, instead of increasing the volume consider closing the windows some or all of the way. Setting the volume 1. To turn on the system, push the <PWR> button. •Your system is now turned on to either the Radio or the CD Player (depending on which one was operational when the system was last used). 2. To increase the volume, turn the <VOLUME> knob right. To decrease the volume, turn the <VOLUME> knob left.

Chapter 1: Using your FM/AM Radio with Compact Disc Changer
3
To adjust the audio settings Adjusting the Audio Settings allows you to customize the sound coming out of the audio system’s speakers for your personal musical tastes. Different genres of music require different levels of treble and bass (for instance, classic rock vs talk radio). You can also set the Volume for left and right and front and back. This feature is useful if a passenger is napping or the driver needs lower volume to concentrate on road. You can adjust the following audio settings:
Audio Setting Purpose Range Example Reason
Bass +/- bass level Between 1 and 5 Set bass at 2 Listening to classical music.
Treble +/- treble level Between 1 and 5 Set treble at 1 Listening to talk radio.
Balance +/- volume between left and right speakers
Between R5 (right 5) and L5 (left 5). 0 is the same level for each.
To turn volume completely off for the driver’s side, set to R5
Driver needs to concentrate and doesn’t want to hear the radio.
Fade +/- volume between the front and rear speakers
Between F5 (front 5) and R5 (rear 5). 0 is the same level for each.
To turn volume completely off for the front of the car, set to R5
Kids in the backseat want to listen to their music, parents in the front do not.
Speed volume To have volume automatically increase with speed
There are three settings: LOW, MD (medium) or HIGH.
To have the volume increase slightly when your vehicle’s speed increases, set on MD
The vehicle is changing speeds a lot in start and stop traffic. You are getting tired of adjusting the audio level.

NISSAN Versa FM/AM Radio with 6 CD Changer
4
Adjusting the audio settings •Press the <AUDIO> button to scroll through the following settings: Bass: Sets the bass level. Treble: Sets the treble level. Balance: Sets the balance between the left and right speakers. Fade: Sets the balance between the front and rear speakers. Speed Volume: Sets how much the volume increases as your vehicle speeds up. Beep: Sets whether the radio’s buttons beep when pressed.
Setting Display shows
To set the level
Bass Bass: 0 Press <TUNE +/-> up or down. Treble Treble : 0 Press <TUNE +/-> up or down. Balance Balance: 0 Press <TUNE +/-> up or down
(0=balanced between left and right speaker, R5=only the right speaker, L5=only the left speaker.)
Fade Fade: 0 Press <TUNE +/-> up or down. (0=balanced between the front and rear speakers, F5=only the front speakers, R5=only the rear speakers.)
Speed Volume Spd Vol: 0 Press <TUNE +/-> up or down. Beep BEEP:
ON/OFF Press <TUNE +/-> up or down. (You have three choices: Low, medium or high.)
Chapter 2: Using the FM/AM Radio
5
2: Listening to the FM/AM Radio
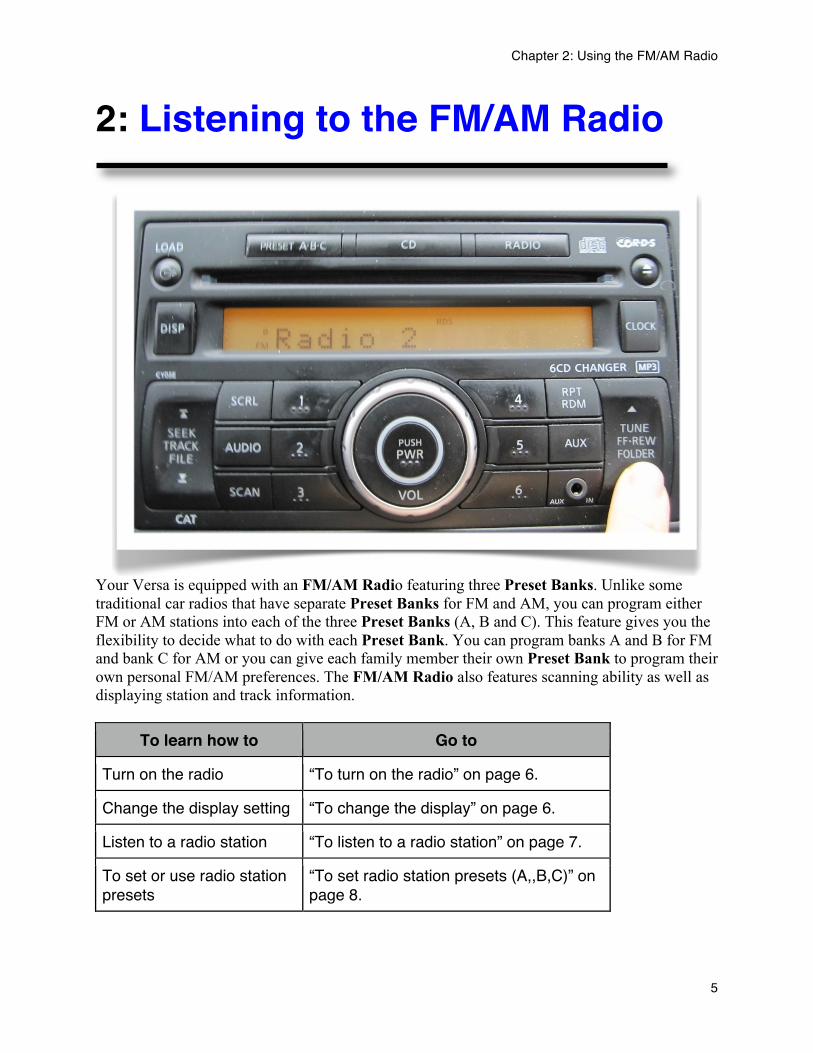
Your Versa is equipped with an FM/AM Radio featuring three Preset Banks. Unlike some traditional car radios that have separate Preset Banks for FM and AM, you can program either FM or AM stations into each of the three Preset Banks (A, B and C). This feature gives you the flexibility to decide what to do with each Preset Bank. You can program banks A and B for FM and bank C for AM or you can give each family member their own Preset Bank to program their own personal FM/AM preferences. The FM/AM Radio also features scanning ability as well as displaying station and track information.
To learn how to Go to
Turn on the radio “To turn on the radio” on page 6.
Change the display setting “To change the display” on page 6.
Listen to a radio station “To listen to a radio station” on page 7.
To set or use radio station presets
“To set radio station presets (A,,B,C)” on page 8.

NISSAN Versa FM/AM Radio with 6 CD Changer
6
To turn on the radio Turning on the Radio is a simple, one or two click process.
✎ When you turn on the audio system, the last used feature will turn on. If you were previously listening to the radio, it will be tuned to the station you were listening to. If you were previously playing a CD, the CD will commence from where you left off. Turning on the radio 1. Push the <PWR> button to turn on the audio system. •If the Radio was ON the last time you used the system, the Radio will be ON. •If you were previously playing a CD, the CD will PLAY. To turn ON the Radio, follow Step 2. 2. You have two options: A. To turn ON the Radio to the station last listened to, press the <RADIO> button. OR B. To turn ON the Radio while flipping through the three Preset Banks, press the <PRESET A•B•C> button.
To change the display The audio system’s display offers several options when you are listening to the radio. The default display setting shows the radio station you are currently listening to along with the time of day. You have the option to change this to display station/program/artist/track information.
✎ The default display setting when you are listening to the radio is the the radio station and the time of day. Changing the display 1. To display info about the current radio station, press the <DISPLAY> button. 2. To display artist/track info, press <DISPLAY> a second time. 3. To return to the station/time, press <DISPLAY> again. 4. To display the preset number and the station, press the <CLOCK> button. 5. Press <CLOCK> again to display the station and the time of day. � To scroll through display info that is too long to fit onto the display, press the <SCROLL> button.
Chapter 2: Using the FM/AM Radio
7
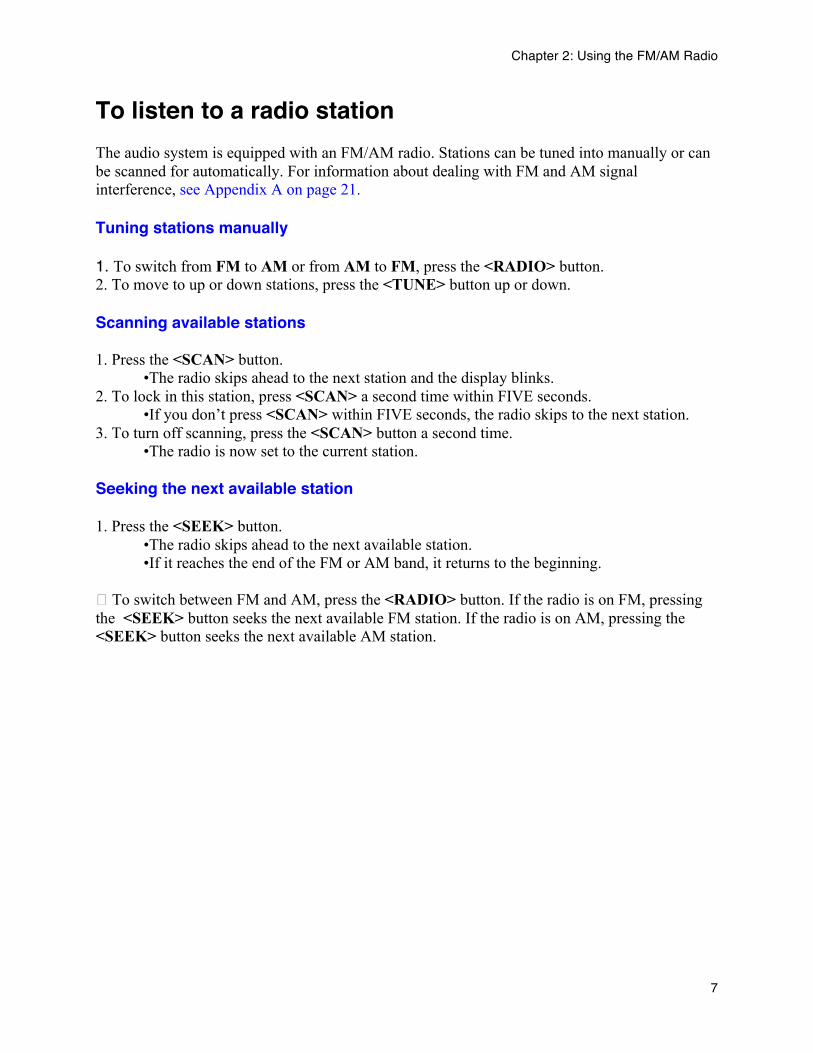
To listen to a radio station The audio system is equipped with an FM/AM radio. Stations can be tuned into manually or can be scanned for automatically. For information about dealing with FM and AM signal interference, see Appendix A on page 21. Tuning stations manually 1. To switch from FM to AM or from AM to FM, press the <RADIO> button. 2. To move to up or down stations, press the <TUNE> button up or down. Scanning available stations 1. Press the <SCAN> button. •The radio skips ahead to the next station and the display blinks. 2. To lock in this station, press <SCAN> a second time within FIVE seconds. •If you don’t press <SCAN> within FIVE seconds, the radio skips to the next station. 3. To turn off scanning, press the <SCAN> button a second time. •The radio is now set to the current station. Seeking the next available station 1. Press the <SEEK> button. •The radio skips ahead to the next available station. •If it reaches the end of the FM or AM band, it returns to the beginning. � To switch between FM and AM, press the <RADIO> button. If the radio is on FM, pressing the <SEEK> button seeks the next available FM station. If the radio is on AM, pressing the <SEEK> button seeks the next available AM station.
NISSAN Versa FM/AM Radio with 6 CD Changer
8
To set and/or access radio station presets (A, B, C) The radio has three radio station Preset Banks – A, B and C. Each bank can hold up to six station presets. Each preset can be either FM or AM. This allows you to program both FM and AM stations into each Preset Bank, giving you a wide variety of options for each bank. For instance, you can share the three banks between family members or program each one for your own personal needs. You access each preset with the corresponding Number Button. Setting radio station presets (A,B,C) 1. To access the preset bank you want (A, B or C), press the <PRESET A•B•C> button. •If you are on preset A, to access preset C you press <PRESET A•B•C> twice. 2. To scroll through stations until you come to the one you want, use the <TUNE> button. •When scrolling, to change from FM to AM or from AM to FM, press the <RADIO> button. 3. To lock in your new preset, press and hold the corresponding Number Button until you hear a
BEEP. •Example: If you want to lock a station into Preset 1 of Bank A then when you are in
Bank A, tune into the station you want to save, then press and hold the <1> button until it BEEPS.
Accessing radio station presets (A, B, C) 1. To access the preset bank you want, A, B or C, press the <PRESET A•B•C> button. •If you are on preset A, to access preset C press <PRESET A•B•C> twice. 2. Press the Number Button of the preset you want to listen to (for example: <2>). •You are now listening to the station that you have saved in the preset bank.

Chapter 3: Using the CD Player
9
3: Playing compact discs (CDs)
The Versa audio system features a CD Player with a 6 CD Changer. This changer allows you to listen to six consecutive CDs while driving without the distraction of having to eject and insert new discs. Skip control is built into the changer for high end audio sound even at high speeds or over rough terrain. The CD Player can be set on Repeat to repeat a CD or on Randomize to randomly select tracks. When the six CDs have finished, the player automatically goes back to playing the first CD. The CD Player can also play MP3 Discs. See Chapter 4: Playing MP3 Discs on page 15-20 to learn how to play an MP3 Disc. The CD Player supports the following media: CD, CD-R and CD-RW with most common file systems. For more information on supported file system, see Appendix C on page 26. ➹ Do not attempt to insert unsupported media discs into the changer. NISSAN is not responsible if discs do not work or become stuck in the player for this reason.

NISSAN Versa FM/AM Radio with 6 CD Changer
10
To learn how to Go to
Play a CD “To play a CD” on page 10.
Load more CDs into the changer
“To insert another CD” on page 11.
Eject a CD “To eject a CD” on page 11.
Change tracks or FF/REV “To change tracks or FF/REV” on page 12.
Change the display for a CD
“To change the CD display” on page 13.
Repeat or randomize tracks
“To repeat or randomize tracks” on page 13.
Scan 30 second song samples
“To scan tracks of a CD” on page 14.
To play a CD The CD Player has a tray that holds six CDs. You can load up to six CDs at a time. You can either play them in order or choose the CD you want to play. Turning on the audio system causes it to restart the CD at the point where it last shut off. This set of steps assumes you have not played a CD before and/or the CD tray is empty. If there are one or more CDs already in the tray, skip ahead to Step 3. Playing a CD 1. Press the <CD> button. •The display flashes “No Disc” and “#1.” 2. Press the <LOAD> button. •“Select Slot” flashes on the display. •Select one of the six slots by pressing the number buttons <1> through <6>. •If you do not select a slot within five seconds , the tray will automatically select Slot 1. 3. Press the Number Button of the slot you want to use. •“Insert Disc” and the number of the selected slot flash on the display. 4. Insert a CD into the CD Insertion Slot. •The CD loads into the slot you have selected. � If you have previously listened to a CD and left it in the tray, the CD will automatically begin where you left off when you press the <CD> button.

Chapter 3: Using the CD Player
11
To insert another CD The Tray holds up to Six CDs. When more than one CD is loaded you can select the CD you want to listen to. Once this CD is done playing, the changer automatically skips to the next CD in the tray. Inserting another CD 1.Press the <LOAD> button. •“Select Slot” flashes on the display. 2.Select a slot by pressing one of the six Number Buttons. •On the display, the slots that are flashing are the empty ones. If a Slot is not flashing, it means that there is already a CD in that Slot. You cannot insert a CD into that Slot unless you first Eject the CD currently there. 3. When the display reads “Insert Disc” insert a CD. •Example: The screen says “Loading 6” if you have inserted a CD into Slot 6. � To switch from one disc to another, press Number Buttons 1 through 6 to load other discs. The disc will automatically start to play after it loads.
To eject a CD You Eject a CD by pressing the Eject Button and then selecting the CD in the tray you want to Eject. The Eject Button looks like an upward arrow with a line underneath it. See “Audio System Explanation Chart” on page viii. � If the six CD tray is full, you need to Eject a CD to insert another CD. ➹ Do not Eject CDs while the vehicle is moving. This is a potential driving hazard and distraction. If you drop a CD onto the floor, ensure that it is not anywhere near the pedals. If it is, stop the car as soon as it is safe to do so. If possible, eject CDs while parked or have a passenger eject the disc. � If you change your mind after ejecting a CD you don’t have to pull it out of the CD Insertion Slot and re-insert it. After 10 seconds , the CD will automatically slide back inside the CD player and load.

NISSAN Versa FM/AM Radio with 6 CD Changer
12
Ejecting a CD To Eject a CD you press the Eject Button. The Eject Button is the button on the top right that looks like an upward arrow with a line underneath it. 1. Press the Eject Button. •The slots that currently have discs flash on the display. 2. Select a slot to eject by pressing one of the six Number Buttons. •Your disc Ejects. It hangs halfway out of the CD Insertion Slot. •You must remove the disc within 10 seconds or it will automatically slide back into the tray and reload. 3. Remove the CD.
✎ Repeat the above steps for each disc you wish to eject. � Remember to store discs safely away in a plastic jewel case or paper sleeve to avoid scratches or damage. To change tracks or FF/REV Changing tracks – skipping forward 1. To skip forward to the next track, press the <SEEK TRACK FILE> button UP. Repeat this step to skip more tracks until you reach the track you want. Changing tracks – skipping back 1. Press the <SEEK TRACK FILE> button DOWN twice to skip back a track. 2. Press the button DOWN again to skip back another track. 3. Repeat Step 2 until you find the track you want. Fast forwarding (FF) through a track 1. To fast forward (FF) through the track, press the <TUNE FF-REW FOLDER> button UP
and hold it until you are at the spot you want to listen to. 2. To stop fast forwarding through the track, let go of the button. Reversing (REV) through a track 1. To reverse (REV) through a track, press the <TUNE FF-REW FOLDER> button DOWN and hold it until you are at the spot you want to listen to.

Chapter 3: Using the CD Player
13
2. Let go of the button to stop reversing through the track. To change the CD display The audio system’s Display offers two options when you listen to a CD. You can either view the CD track you are listening to and the time of day or you can view the track you are listening to and the track time. You switch between Display Options with the <DISPLAY> button. Changing the CD display The Display defaults to Option #1, which is the CD track you are listening to and the time of day. 1. To switch to Option #2, press the <DISPLAY> button. •The display shows the track you are listening to and the track time. 2. To switch back to Option #1, press the <DISPLAY> button again. To repeat or randomize tracks You can set a CD to repeat or randomize tracks in several different ways. There are four options.
Option Select to
RPT DISC Repeat the CD currently playing
RPT TRACK Repeat the track currently playing
RDM ALL DISC Play random tracks from all CDs in the tray
RDM DISC Play random tracks from the CD that is playing Repeating or randomizing tracks 1. To scroll through the options, press <RPT RDM> until you arrive at the option you want. 2. To turn off repeat or randomize, press <RPT RDM> again. ✎ When multiple CDs are in the Tray, the discs will automatically repeat in numerical order. (For example: If you have discs in slots 1,2 and 4, once disc 1 finishes, the player will play disc 2 and then disc 4. Then it will return to disc 1.) To scan tracks of a CD You can scan the tracks of a CD in order to listen to the first 30 seconds of each song. If you find a song that you want to listen to, you can stop the scan at that point.

NISSAN Versa FM/AM Radio with 6 CD Changer
14
Scanning CD Tracks 1. To automatically scan through the first 30 seconds of each track on the CD, press the <SCAN> button. •The display shows the track currently playing as a flashing number. 2. To stay on the track that is playing, press the <SCAN> button. •The track number stops flashing.

Chapter 4: Playing an MP3 disc
15
4: Playings MP3 Discs
The CD Player can play MP3 Discs with a maximum of 512 files, 255 folders and 8 levels. An MP3 Disc is a data disc containing MP3 audio files. MP3 Discs allow you to have songs in folders (albums), or in multiple levels of folders. The files can be named/tagged and divided into levels of folders. The audio system has several different options for displaying information about the MP3 Disc. You can see the name of the track, the artist, the name of the album or the name of the folder. You can change tracks on MP3 Discs in the same manner as you would an audio CD, except that the <TUNE FF-REW FOLDER> button lets you change folders. You can have up to six MP3 Discs in the CD Player at a time. The audio system supports the following media for MP3 Discs: CD-R and CD-RW with most common file systems. The audio system also supports WMA files. These files play in the same manner as MP3 files.

NISSAN Versa FM/AM Radio with 6 CD Changer
16
To learn how to Go to
Play an MP3 disc “To play an MP3 disc” on page 16.
Skip through songs “To skip songs” on page 17.
Navigate through folders “To navigate folders” on page 17.
Change the MP3 display “To change MP3 display” on page 18.
Repeat an MP3 disc “To repeat an MP3 disc” on page 19.
Use a media player to play MP3s or other media files
“To use the AUX port for a media player” on page 20.
✎ Supported sampling frequency for MP3 files is between 8 kHz to 48 kHz. Supported bitrate is between 8 kbps to 320 kbps, including VBR (variable bitrate). � The fewer folders you create on an MP3 Disc, the easier it will be to navigate the disc when you play it in the audio system. To play an MP3 Disc Playing an MP3 Disc is very similar to playing a CD. There are some key differences which are explained in the following sections. Playing an MP3 Disc 1. Insert the MP3 Disc into the CD Insertion Slot. •Your disc automatically begins to play once it has loaded.
✎ You load multiple MP3 Discs in the tray the same way as multiple CDs. See “Playing Compact Discs (CDs)” on page 9 to learn about the operation of the six CD changer.
Chapter 4: Playing an MP3 disc
17
To skip songs Skipping through songs on an MP3 Disc is the same as skipping through songs on a CD. To learn how to skip songs, see “To change tracks or FF/REV” on page 12. The difference is that MP3 Discs can also include folders. See “To navigate folders” below for information on navigating through folders.
To navigate folders There can be a maximum of 255 folders and up to 8 folder levels on an MP3 Disc. Folders can contain as many MP3 files as the disc will hold. A CD-R can hold up to 700 mb. That is approximately between 370 and 700 minutes of music depending on the MP3’s bitrate. The larger the bitrate, the larger the file. ✎ 320 kbps is the largest possible MP3 bitrate. � Encode your MP3 files at 192 kpbs for near CD quality sound to maximize potential space on the MP3 disc. Navigating folders 1. Press the <TUNE FF•REW FOLDER> button. •Press the button UP to go up one folder. •Press the button DOWN to go down one folder. 2. Once inside the folder, to skip through tracks in the folder, press the <SEEK TRACK FILE/UP/DOWN> button.

NISSAN Versa FM/AM Radio with 6 CD Changer
18
To change the MP3 display You have several options for the Display when listening to an MP3 Disc.
Display example Meaning
CD – T1 12:00 Track number and time of day
T1 0:30 Track number and track time counter
Folder 1 FolderName Folder number rand name
Album AlbumName Album name
Artist ArtistName Artist name
Song SongName Track name
� To SCROLL through a display option that is too long to fit on the display (such as long album titles), press the <SCRL> button. Changing the MP3 display To switch through each option until you find the option that you want, press the <DISPLAY> button.
To repeat an MP3 disc

Chapter 4: Playing an MP3 disc
19
MP3 Discs can be repeated in the same manner as CDs.
✎ MP3 discs cannot be randomized. To repeat an MP3 Disc, press the <RPT RDM> button. You have four repeat options. Each time you press the <RPT RDM> button you will lock in an option. The option shows on the display.
Display Repeat Option
RPT DISC Repeat the MP3 Disc currently playing
RPT FOLDER Repeat the MP3 folder currently playing
RPT TRACK Repeat the track currently playing
RPT ALL DISC Repeat all discs in the tray (including CDs) Repeating an MP3 disc 1. Press the <RPT RDM> button. •The display reads: RPT DISC. •The MP3 disc currently playing is set to repeat. 2. Repeat Step 1 to switch to the other Repeat options. � To listen to an album several times in a row, use the RPT FOLDER option to repeat the album folder.
To use the AUX port for a media player
NISSAN Versa FM/AM Radio with 6 CD Changer
20
You can attach an EXTERNAL Media Player (an mp3 player, iPod or other audio device compatible with a 1/8” stereo plug cable) to the audio system. This is a convenient alternative method to play MP3 files or another audio format. A media player operates independently of the audio system. Attach a 1/8” Stereo Plug Cable from the media player’s AUDIO OUT PORT to the audio system’s AUX input port. ➹ Be cautious when increasing the volume of your Media Player. An overly loud volume setting from a media player can damage the Versa’s speakers. � Start with a low volume setting on your Media Player then slowly increase the volume using the audio system’s VOLUME KNOB. Using the AUX port for a media player 1. Attach a 1/8 Stereo Plug Cable to the AUDIO OUT PORT on your Media Player. 2. Attach the cable to the AUX input port on the audio system. 3. Press the <AUX> button on the audio system. 4. Turn on your Media Player. 5. Adjust the VOLUME on your Media Player so that it is not set very loud. 6. Press PLAY on your Media Player. 7. Adjust the overall volume using the audio system’s VOLUME KNOB.

Appendix A: Troubleshooting
21
Appendix A: Troubleshooting This troubleshooting guide is designed to answer questions and solve problems you are having with your audio system. If you do not find the answer you are looking for, see Appendix B, “Nissan Customer Service contact info,” to contact Nissan. The guide is divided into four tables:
For troubleshooting Go to
Clock Table 1, page 21
Radio Table 2, page 22
CD player Table 3, page 22
Audio settings Table 4, page 23 Clock
Problem Solution
Clock won’t turn on Make sure the ignition is in the ACC or ON position.
Cannot set the clock Hold down the <DISP> button and press the <TUNE FF•REW FOLDER> button. This resets the clock. Now, try setting the clock.
Clock has not switched to daylight savings time
The clock does not automatically change for daylight savings time. You need to reset the clock manually. See “To set the clock,” page 2.
Clock is losing time and/or resets every time you turn on the ignition
The “radio fuse” may need to be replaced. Do not attempt this yourself if you don’t know how to do it. Contact your NISSAN dealer.

NISSAN Versa FM/AM Radio with 6 CD Changer
22
Radio
Problem Solution
Radio won’t turn on Make sure the ignition is in the ACC or ON position.
FM/AM station is fading or subject to static
You may be experiencing radio interference. Try a different station or wait a few minutes for the car to pass the source of interference.
Radio presets no longer work/have disappeared
This can occur due to routine maintenance by your NISSAN dealer or an aging car battery. Try reprogramming the radio presets. See “To set radio station presets (A,B,C)” on page 8.
CD Player
Problem Solution
CD will not play •Make sure the CD is inserted correctly with the label side facing up. •Make sure the CD is not scratched, bent or warped. If it is, it may be unplayable. •Check for condensation near the player. If there is any, wait until it is gone (at least one hour) before use. •The CD may be copy controlled.
MP3 Disc will not play Make sure the files on the disc are either MP3 or WMA files. Other audio file formats will not work.
MP3 Disc will not load •There may be too many files, folders or levels of folders on the disc.There is a maximum of 512 files, 255 folders (including the root folders) and 8 levels. •Make sure the disc is not blank.
Poor sound quality or skips •Make sure the CD or MP3 Disc is not scratched or dirty. •Check to see if the bitrate of the MP3 files is low (below 192 kbps).
Songs do not play back in the correct order
Make sure that the randomize feature is turned off. See “To repeat or randomize tracks” on page 13.

Appendix A: Troubleshooting
23
Audio Settings
Problem Solution
Speakers only work in back
Make sure the Front Speakers are not turned off. Check the Audio Settings.
Speakers only work in front Make sure the Rear Speakers are not turned off. Check the Audio Settings.
Speakers only work on the driver’s side
Make sure the Passenger Speakers are not turned off. Check the Audio Settings.
Speakers only work on the passenger side
Make sure the Driver Side Speakers are not turned off. Check the Audio Settings.
No bass is coming out of the audio system
Make sure the Bass is not set to 0. Check the Audio Settings.
No treble is coming out of the audio system
Make sure the Treble is not set to 0. Check the Audio Settings.
The audio is hard to hear when the vehicle speeds up
•Make sure the Speed Volume is on Medium or High. Check the Audio Settings. •Try closing any car windows that are open.
✎ To learn how to adjust Audio Settings, see “To adjust the audio settings” on page 3.

NISSAN Versa FM/AM Radio with 6 CD Changer
24
Appendix B: NISSAN customer support information
NISSAN CARES... Warranty information A separate Warranty Information Booklet explains details about the warranties covering your vehicle. The “NISSAN Service and Maintenance Guide” explains details about maintaining and servicing your vehicle. Your NISSAN dealership knows your vehicle best. Whether you require service or have questions, the dealer will be glad to assist you with the extensive resources available to them. Before contacting your NISSAN dealership, please read this User Manual carefully. This will ensure familiarity with the audio system’s controls, assisting you in the safe operation of your vehicle.

Appendix B: NISSAN customer support information
25
NISSAN Customer Care Program Both NISSAN and your NISSAN dealership are dedicated to serving all your automotive needs. Your satisfaction with your vehicle and your NISSAN dealer are our primary concerns. Your NISSAN dealer is always available to assist with all your service needs. However, if there is something that your NISSAN dealer cannot assist you with, or if you would like to provide NISSAN directly with comments or questions, please contact the NISSAN Consumer Affairs Department using our toll-free number:
The Consumer Affairs Department will ask for the following information: •Your name, address and phone number •Vehicle identification number (attached to the top of the driver’s side instrument panel) •Date of purchase •Current odometer reading •Your NISSAN dealer’s name •Your comments or questions Alternately, you can write NISSAN with the information at:
We appreciate your interest in NISSAN. Thank you for buying a quality NISSAN vehicle.
For Canadian customers 1-800-387-0122
For U.S. customers 1-800-NISSAN (1-800-647-7261)
For Canadian Customers NISSAN Canada Inc. 5290 Orbitor Drive Mississauga, ON L4W 4Z5
For U.S. customers NISSAN North America, Inc. Consumer Affairs Department P.O. Box 685003 Franklin, TN 37068-5003
NISSAN Versa FM/AM Radio with 6 CD Changer
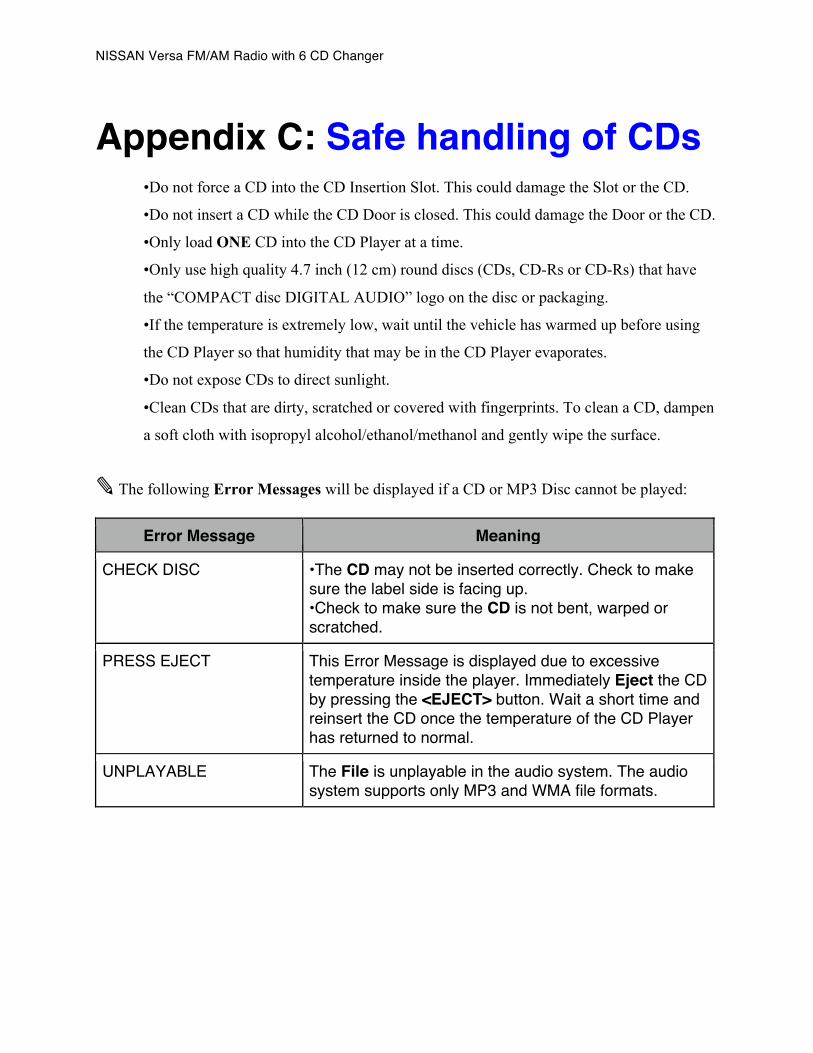
Appendix C: Safe handling of CDs •Do not force a CD into the CD Insertion Slot. This could damage the Slot or the CD.
•Do not insert a CD while the CD Door is closed. This could damage the Door or the CD.
•Only load ONE CD into the CD Player at a time.
•Only use high quality 4.7 inch (12 cm) round discs (CDs, CD-Rs or CD-Rs) that have
the “COMPACT disc DIGITAL AUDIO” logo on the disc or packaging.
•If the temperature is extremely low, wait until the vehicle has warmed up before using
the CD Player so that humidity that may be in the CD Player evaporates.
•Do not expose CDs to direct sunlight.
•Clean CDs that are dirty, scratched or covered with fingerprints. To clean a CD, dampen
a soft cloth with isopropyl alcohol/ethanol/methanol and gently wipe the surface.
✎ The following Error Messages will be displayed if a CD or MP3 Disc cannot be played:
Error Message Meaning
CHECK DISC •The CD may not be inserted correctly. Check to make sure the label side is facing up. •Check to make sure the CD is not bent, warped or scratched.
PRESS EJECT This Error Message is displayed due to excessive temperature inside the player. Immediately Eject the CD by pressing the <EJECT> button. Wait a short time and reinsert the CD once the temperature of the CD Player has returned to normal.
UNPLAYABLE The File is unplayable in the audio system. The audio system supports only MP3 and WMA file formats.

2008 Versa Audio System Owner’s Manual
27
Index
A ACC vi audio cable, See stereo plug cable audio input, See auxiliary port auxiliary port (<AUX>) 20
B balance 3 battery 2 bass 3 buttons viii buzzing noise vi
C CD player changer (six CD), See tray (six CD) display artist/track info 13 playing CDs 10 troubleshooting 26 repeating 13, 19 randomizing 13 tray (six CD) 10 cellphone, See buzzing noise cleaning CDs 26 clock battery 2, 22 daylight savings time 1, 2, 21 resetting 21 setting 2 troubleshooting 21 customer care program, See NISSAN contact information
D daylight savings time, See clock
F fade 3
H humidity 26
I iPod See MP3 player
M memory 8 MP3s 15-20 MP3 Discs bitrate vii, 15, 17 burning CDs vii file formats vii, 15 folders 17 ID3 tag vii troubleshooting 26 maximum number of files vii, 15, 17 repeating tracks 19 sampling frequency 16 song information 18 MP3 player 20
N NISSAN contact information 25
P power button 2

NISSAN Versa FM/AM Radio with 6 CD Changer
28
R radio, operation turning on 6 presets 8 FM/AM 8 display info 6 seeking stations 7 tuning 7 radio, reception AM vii buzzing noise vi cellphone vi FM vii on/off 6 static 22 troubleshooting 22
S satellite radio vi speed volume 3-4 stereo plug cable 20 symbols iv
T time 1 treble 3 turning on radio, See power button
W warranty 24 WMA, See MP3s wind noise 2
V volume 2 volume, troubleshooting 23