2018 hongyu zhao web development based on adobe …
TRANSCRIPT

Bachelor’s thesis
Information Technology
NINFOS14 2018
Hongyu Zhao
WEB DEVELOPMENT BASED ON ADOBE EXPERIENCE MANAGER(AEM) IN A WEB PROJECT

BACHELOR’S THESIS | ABSTRACT
TURKU UNIVERSITY OF APPLIED SCIENCES
Information Technology
2018 | 46 pages
Hongyu Zhao
WEB DEVELOPMENT BASE ADOBE EXPERIENCE MANAGER(AEM) IN A WEB PROJECT This thesis represents a documentation for web developers and content managers who work with web projects based on the Adobe Experience Manager (AEM).
The objective of this thesis was to guide beginner developers and content managers to improve their productivity and increase their knowledge about AEM.
Experience was gained by daily work with front-end development with AEM. Technical materials were collected from AEM official documentation.
KEYWORDS:
Adobe Experience Manager, JavaScript, CSS, web development, documentation

CONTENTS
LIST OF ABBREVIATIONS (OR) SYMBOLS 5
1 INTRODUCTION 1
2 GOALS & AUDIENCE 2
3 TECHNOLOGIES 3 3.1 HTML & HTML5 3
3.2 CSS & CSS 3 3
3.3 JS & ES6 3
3.4 XML 3 3.5 jQuery 4
3.6 Bootstrap 4 3.7 AEM 4
3.8 Handlebars 4
4 PROJECT STRUCTURE AND WORKING PROCESS 5
5 WEB DEVELOPMENT BASED ON AEM COMPONENTS 6 5.1 Why choose AEM for the company project’s CMS? 6 5.2 AEM development environment set up 6
5.3 AEM component 9 5.3.1 AEM dialog 9
5.3.2 Column control 10
5.3.3 Title Text Image V2 11 5.3.4 Multi Image V2 12
5.3.5 Raw HTML 13
5.4 Building event pages 14 5.4.1 Install Handlebars by NPM 14
5.4.2 Basic usage of handlebars 14
5.4.3 Using helpers in handlebars 15
6 FRONT-END DEVELOPMENT IN AEM 19 6.1 RawHTML 19
6.2 Web storage 19

6.2.1 local storage 20 6.2.2 Session storage 21
6.2.3 indexDB storage 22
6.3 HTML5 drag and drop 33
6.4 Canvas 37
7 CONCLUSION 40
REFERENCES 41
FIGURES
Figure 1. Project structure 5 Figure 2. VMware network connection. 7 Figure 3. Enable the share folder. 8 Figure 4. AEM login interface. 8 Figure 5. Page properties. 10 Figure 6. AEM component - column control. 11 Figure 7. Column control with 4 columns. 11 Figure 8. AEM component - Title Text Image V2. 12 Figure 9. AEM component - 5.3.3 Title Text Image V2 Demo. 12 Figure 10. AEM component - Multi Image V2. 13 Figure 11. Handlebars basic usage output. 15 Figure 12. Example result of lookup expression code example. 17 Figure 13. Before drag. 34 Figure 14. After drag to right side. 34 Figure 15. canvas traignle example result. 38 Figure 16. drawing normal text by canvas example result. 38

LIST OF ABBREVIATIONS (OR) SYMBOLS
HTML Hypertext Markup Language CSS Cascade Style Sheet XML eXtensuble Markup Language SVG Scalable Vector Grapgichs API Application programming interface AEM Adobe Experience Management Doctype Document type declaration

1
1 INTRODUCTION
The content of the thesis represents a documentation of technologies, work flow, and content management for front-end developers and content managers who work with a web project based on Adobe Experience Manager(AEM). One of the company’s project is used as an example, for describing the processing of managing AEM projects. The documentation covers the following topics: building web pages in AEM with multiple levels, basic modern front-end development and a web page template engine.

2
2 GOALS & AUDIENCE
The purpose of the thesis is to document a knowledge of AEM web management for front-end developer and content managers. The documentation will help to standardise work process related to projects development in AEM and help front-end developers and content managers to familiarise with AEM technologies.

3
3 TECHNOLOGIES
This chapter introduces the main technologies used in this thesis project. The main technologies are: HTML 5, CSS 3 JavaScript, XML, jQuery, Bootstrap, AEM and Handlebars.
3.1 HTML & HTML5
Hypertext Markup Language (HTML) [1] is used to define the content of web pages. HTML text is a descriptive text made up of HTML commands that describe text, graphics, animations, sounds, tables, links, and more. The structure of HTML includes the head and the body. The head describes the information required by the browser, and the body contains the specific content to be described. According to the MDN Web Docs [1], HTML5 is a latest version of the HTML, and it is supported in all modern browsers. The following sections focus on explaining the new issues in HTML5, the elements have been deleted or redefined in HTML5.
3.2 CSS & CSS 3
Cascading Styles Sheets(CSS) [2] is a particular web development style sheets which is used to specify the layout of web pages. In CSS, It can be defineed in the document by a number of the style statements, that is merged into a single rule in a definite way. Nowadays, There is the CSS3 already, which has more features than the previews versions, such as: animation, translating the elements, font stretching, and so on.
3.3 JS & ES6
JavaScript [3] is the programming language to program the behavior of web pages. The most important application in JavaScript is the ability to add dynamic functionality to web pages. It is most often used as part of a Web browser, which allows the implementation of client- side script to interact with the user's browser for limited management, asynchronous communication, editing, and document content for display to the user.
3.4 XML
Extensible Markup Language (XML) [4], meaning Extensible Markup Language. XML syntax is similar to HTML, but elements in HTML are fixed, and XML tags can be user-defined.

4
3.5 jQuery
jQuery [5] is a JavaScript library, which is fast, small and feature-rich. It does things like the travel and manipulation of HTML documents, event handling, animation and Ajax much simpler. It has an easy to use API that works in several browsers. Combining versatility and extensibility, jQuery has changed the way millions of people write JavaScript.
3.6 Bootstrap
Bootstrap [7], from Twitter, is a popular front-end framework. Bootstrap is based on HTML, CSS, JavaScript, it is simple and flexible, making Web development faster. Bootstrap provides a basic structure with grid system, link style, and background. The stylesheet part of Bootstrap, it has global CSS setting, defining basic HTML element styles, extensible classes, and an advanced grid system. Bootstrap contains a dozen reusable components for creating images, drop-down menus, navigation, warning boxes, pop-up boxes, and so on. It contains a dozen custom jQuery plug-ins. You can include all of the plug-ins directly, or you can include them individually. As well as, in the Bootstrap, you can customize Bootstrap components, LESS variables, and jQuery plug-ins to get your own version.
3.7 AEM
Adobe Experience Manager (AEM) [8] is a comprehensive content management solution for building websites, mobile applications, and forms. This makes it easy to manage marketing content and assets.
3.8 Handlebars
Handlebars [10] is a largely compatiable with Mustache templates. The Mustache is a sample web system with implementations aviable for many morden web development languages, like CoffeScript, JavaScript, PHP and so on. In most cases, Handlebars is used to replace Mustache and continue to use the current template. It provides the power nessecary to build a semantic templates with no frustration.
5
4 PROJECT STRUCTURE AND WORKING PROCESS
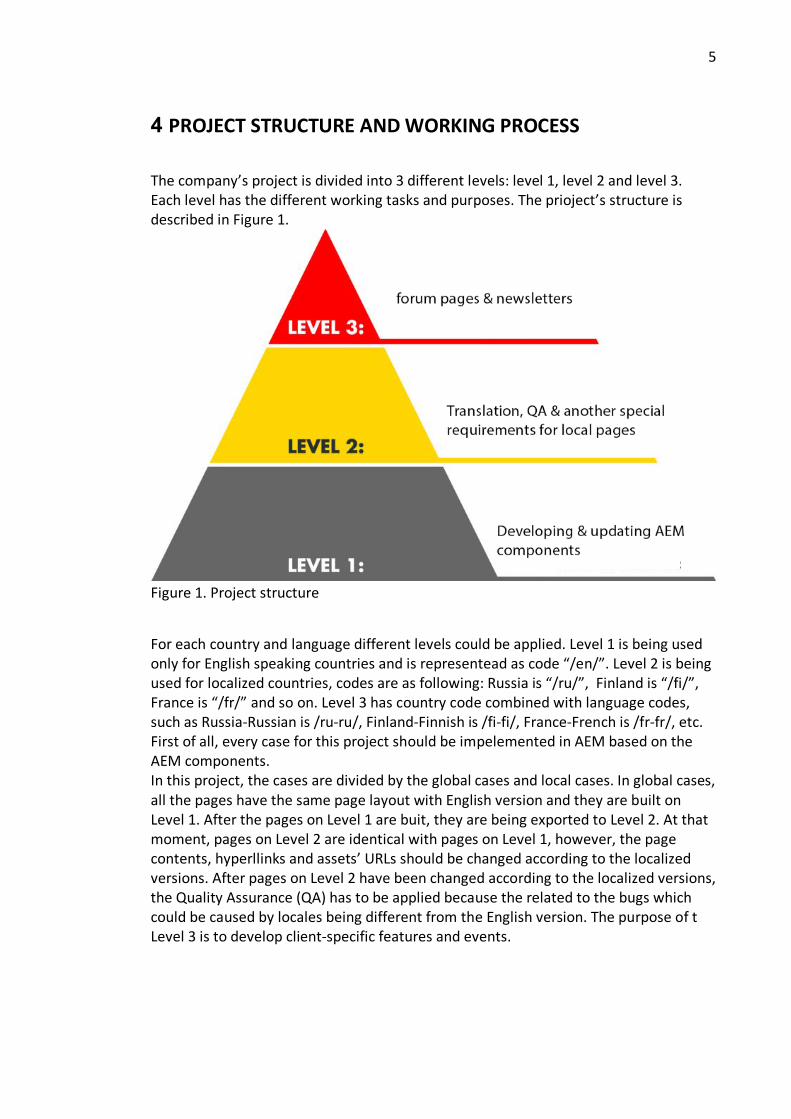
The company’s project is divided into 3 different levels: level 1, level 2 and level 3. Each level has the different working tasks and purposes. The prioject’s structure is described in Figure 1.
Figure 1. Project structure
For each country and language different levels could be applied. Level 1 is being used only for English speaking countries and is representead as code “/en/”. Level 2 is being used for localized countries, codes are as following: Russia is “/ru/”, Finland is “/fi/”, France is “/fr/” and so on. Level 3 has country code combined with language codes, such as Russia-Russian is /ru-ru/, Finland-Finnish is /fi-fi/, France-French is /fr-fr/, etc. First of all, every case for this project should be impelemented in AEM based on the AEM components. In this project, the cases are divided by the global cases and local cases. In global cases, all the pages have the same page layout with English version and they are built on Level 1. After the pages on Level 1 are buit, they are being exported to Level 2. At that moment, pages on Level 2 are identical with pages on Level 1, however, the page contents, hyperllinks and assets’ URLs should be changed according to the localized versions. After pages on Level 2 have been changed according to the localized versions, the Quality Assurance (QA) has to be applied because the related to the bugs which could be caused by locales being different from the English version. The purpose of t Level 3 is to develop client-specific features and events.

6
5 WEB DEVELOPMENT BASED ON AEM COMPONENTS
Adobe Experience Manager(AEM) is used as the main technology in this project. In the AEM, it has a lot of AEM components can be used to building the web pages. They are reuable, reliable and faster.
5.1 Why choose AEM for the company project’s CMS?
Content Management System(CMS) is a computer application that supports the creation and modification of digital content. It usually supports multiple users in a collaborative environment. This project objectives are to build the client’s business,attract new customers, retain existing customers of the main source of income, recruit staff, tell the media and investors, maintain relationships with partners and suppliers valuable tool. This needs to be in the form of digital content such as: images, video, documents, applications, and lists. AEM (Adobe Experience Manager) is an enterprise web content management system. It is one of the fastest growing web platforms in the world, mainly used by large companies. AEM sites provide the following functions:
• Can build and manage mobile sites and responsive design on the platform. • The site built by AEM has tools to optimize the shopping cart, synchronize
product information from other systems such as: ERP or product inventory management (PIM) systems, an e-commerce platform and generate pages from the catalog data.
• This is especially useful for organizations that need to manage many areas and languages. With websites, they can be controlled from a centralized location.
• The unified digital experience of different devices (such as desktops, tablets, smartphones and location screens) is sent to users.
• The ability to manage and launch marketing activities from a central location. Organizing and storing assets on the site, So the assets can be easily accessed and using for all of the activities.
5.2 AEM development environment set up
The working evenironment is in the VMware Fusion, with enables to the Windows applications abd PC-only devices. It allows users to run multiples operating system(OS) and applications at same time. Inside of the VMware, connect to the VPN by a security token with the project’s username.

7
Figure 2. VMware network connection.
After the network is connected, the next step is to enable a shared folder for the virtual machine. The shared folder is being used for uploading assets from local device to the virtual machine. At the same time, “Read & Write” permissions should be set to a shared folder (Figure 3).

8
Figure 3. Enable the share folder.
After all set up ready, login to the AEM.
Figure 4. AEM login interface.

9
5.3 AEM component
AEM components [9] are used to hold, format, and render the content made available on the webpages. The AEM component is a modular unit that implements specific functionality to present page content web site. It is reusable and has configurable editing behavior. Each AEM component can has the vaiours functionalities, in the following sections will introduce the frequently-used AEM components in this company project.
5.3.1 AEM dialog
AEM dialog is the the defaulted component in AEM. It has 5 sections which provide various features, and the 3 sections used often. The first one is the page section, it has one tab which called page properties, it is using for default settings for the morden web development in the page properties section, which save a lot of time for developers. It sets the default doctype for all pages as html, dir as ltr, data-local as the localized code for level 3, the data-lang as the language code of level 2, and the charset as UTF-8 (Code snippet 1). shows an example for Italy – Italian language.
As well as, the page properties tab provides the custom settings for the web pages, such as, page title, browser title, page keywords, pages launch or expire time, the redirect vanity URLs, ans so on. The Figure 5 shows more details below.
<!DOCTYPE html> <html dir="ltr" data-locale="it-it" data-lang="it"> <head> <meta charset="UTF-8">
Code snippet 1. Default page properties.

10
Figure 5. Page properties.
Inside of the page section, deleopers are supposed to activate/deactiveate page, lock page, and rollout the page form higher level to the lower level, for example rollout one page from Level 2 to Level 3. The second section is a list for all custom AEM components which is developed by HTML Template Language (HTL) and some important custom AEM components will be introduced more in sections 5.3.2 – 5.3.#. The third component is using for create the backup version for the web pages. In this section, the developers allowed to create the page’s version before update the page, and loading diffirence between versions.
5.3.2 Column control
This is the main container for all the child components on the we page.

11
Figure 6. AEM component - column control.
This component divide the column layout on each raw from 1 column to 4 cloumns, 100% width, 50% width, 30% width and 20% width, respectively. The different column layout versions have a different margin and padding space. The Figure 8 shows an example of how one raw is divided by 4 cloumns.
Figure 7. Column control with 4 columns.
5.3.3 Title Text Image V2
This is a component which can contain the image, texts and buttons inside of one block, as well as other various layout options. It also can be used for setting the URLs, such as open the assets on the tab or as an overlaybox on the current page, by setting the CTA target option.

12
Figure 8. AEM component - Title Text Image V2.
Figure 9 shows an example for a carousel which is built by AEM component Title Text Image V2.
Figure 9. AEM component - 5.3.3 Title Text Image V2 Demo.
5.3.4 Multi Image V2
This component can be using for the multi images displayed design. Such as image sliders.

13
Figure 10. AEM component - Multi Image V2.
As Figure 10 shows, this component can display many images with the the image title, texts and image hyperlinks. In addition clicking the green up/down arrow can changeg the image’s ordering sequence.
5.3.5 Raw HTML
Since the AEM components can not cover all the special requests from clients, so there has to be one AEM component which is called Raw HTML. This component has the 100% width as a default, and it allows to add the full HTML code to complete the special requests. When the custome JavaScript and CSS needed, the JavaScript codes should be contained inside of the <script type=”text/javascript”></script> HTML tag, and CSS code should be contained with <style type=”text/css”></style> HTML tag.

14
5.4 Building event pages
The client has the products release events every year from September to December, and each event page is built by the template engines. The template engine is like a parsing generator for HTML, which generates static HTML pages after the corresponding template is populated with the data. It can also be executed both server and client side. In this project, the Handlebars is used as a template engine for building event pages.
5.4.1 Install Handlebars by NPM
Node Package Manager (NPM) [13] is a package manager for JavaScript. Handlebar's NPM package contains two libraries that are both suitable for the CommonJS awareness system and build a browser library that can directly use the browser mechanism. The browser is built in node_modules/handlebars/dist/ directory. Getting a browser to access the broswer’s content depends on the build of the system, but it may be as simple as copying files to a usable place. This is the preferred installation method when using the precompiler, because it ensures the precompiled template is always running with the same version of the runtime. The following command installs Handlebars by using npm
5.4.2 Basic usage of handlebars
A file extension of the Handlebars is .hbs, the data contains objects.
Calling data by the HTML template inside of the HTML tag, as well as adding a className, idName and inline CSS stylesheet inside of the HTML tag Punctuate the Code snippet heading as I have the previous one
npm install --save handlebars
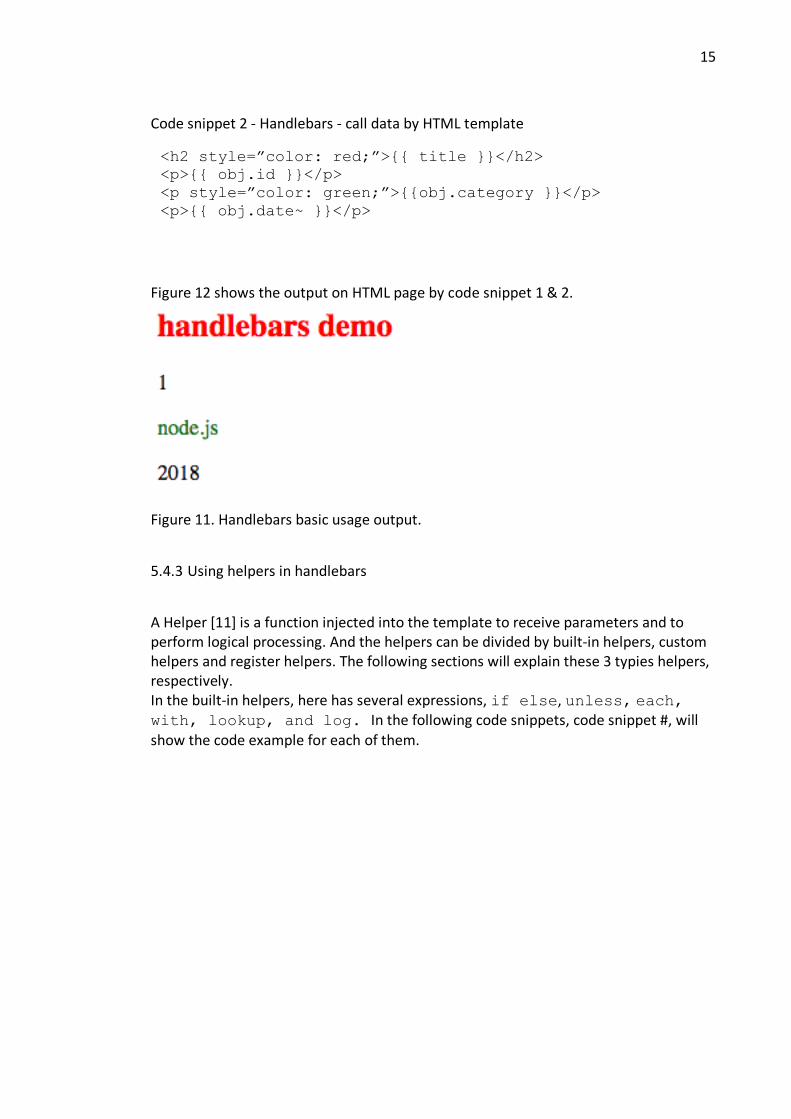
{ title: 'handlebars demo', obj: { id: '1', category: 'node.js', "date": '2018' } }
15
Figure 12 shows the output on HTML page by code snippet 1 & 2.
Figure 11. Handlebars basic usage output.
5.4.3 Using helpers in handlebars
A Helper [11] is a function injected into the template to receive parameters and to perform logical processing. And the helpers can be divided by built-in helpers, custom helpers and register helpers. The following sections will explain these 3 typies helpers, respectively. In the built-in helpers, here has several expressions, if else, unless, each, with, lookup, and log. In the following code snippets, code snippet #, will show the code example for each of them.
Code snippet 2 - Handlebars - call data by HTML template
<h2 style=”color: red;”>{{ title }}</h2> <p>{{ obj.id }}</p> <p style=”color: green;”>{{obj.category }}</p> <p>{{ obj.date~ }}</p>
16
Same with the general programming language, such as JavaScript, but since special chracters are used in handlebars, the if condition is not logical expression, only variables or values.
Same reason for the if-else expression, handlebars does not support logical non-("!" ), this is another helpers’ expression which is opposite of the if condition. This Helper is called unless. The expression each can be used as a relative path to get the context of the previous layer. The context concept is similar to the contet in JS, for example, in each passage code block, once every loop context is passage[0], passage[1], and so on. Some default variables of each expression, @first/@last, return a true value when the object is the first or the last element in the array. If the element of the array is a value rather than an object, the @index represents the current index value, which can be used to obtain the current value with @key or this. The expression with is used with paging and scoped.
{{ #if uesrs }} <h1>{{ firstName }} {{ lastName }}</h1> {{ else }} <h1>Unknown user</h1> {{ /if }}
Code snippet 3 - Handlebars - if-else expression code example
Code snippet 4 - Handlebars - unless expression code example
{{ #unless demoIndex }} <h1>This is the helpers- unless code example</h1> {{ /unless }}
Code snippet 5 - Handlebars, each expression ciode example
{{ #with users as |myUsers| }} <h2>{{ myUsers.firstName }} {{ myUsers.lastName }}</h2> {{ else }} <p class="none">No contents here</p> {{ /with }}

17
The loopup expression [10] allows dynamic parameter analysis using the handlebar variable. This is useful for decompressing the indexs’ value of array.
The Figure # show the output result of the code snippet 8.
Figure 12. Example result of lookup expression code example.
{{ #each passage }} {{ #each paragraphs }} {{ @../index }}:{{ @index }}:{{ this }}</p> {{ else }} <p class="none">None</p> {{ /each }} {{ /each }}
Code snippet 6 - Handlebars, with expression code example
//The code in .hbs (handlebars type document) { team: [ {id: 1, title: "team1"}, {id: 2, title: "team2"}, ], members: [ {id: 1, login: "member1", teamId: 1}, {id: 2, login: "member2", teamId: 2}, {id: 3, login: "member3", teamId: 1} ], infos: [ 'a', 'b', 'c' ] }; //In .html (HTML type document) <table> {{ #each memberss }} <tr data-id="{{ id }}"> <td>{{ login }}</td> <td data-id="{{ teamId }}">{{ lookup ../infos @index }}</td> </tr> {{ /each }} </table>
Code snippet 7 - Handlebars, loopup expression ciode example

18
Sometimes if default helpers is not enough forall the requests, so the custom helpers can finish the special requests written by JS. The data type, like Number, string, Boolean, can be directly introduced into, at the same time also can pass a JSON object (but only one), with key=value, finally can be visited by parameter hash attributes [12]. The pointer this can be used to refer to the object when passing the variable, and returned as an HTML code after a logical decision. But considering the maintainability of HTML code and js code is not reusable, and it is better to use pagination in the abstract layer. In this case, the template can be written as, for example, {{ agree_button person }}. And by using the register helper to build a custom block helper in JS.
hbs.registerHelper('agree_button', function (p) { console.log(p === this);//==> true var blog = hbs.handlebars.escapeExpression(this.person.blog), name = hbs.handlebars.escapeExpression(this.person.name); return new hbs.handlebars.SafeString( "<a href='" + blog + "'>" + name + "</button>" ); }); //data var context = { person: { name: "Zhao Hongyu", blog: "https://example.com"} } };
Code snippet 8 - Handlebars, register helper in custom block helper

19
6 FRONT-END DEVELOPMENT IN AEM
In some cases, design requires the custom layout which can't be impletemented by using an existing AEM component, pure code will be the last option.Therefore, there is one AEM component, RAWHTML, which is an empty HTML block, with some defaulte CSS style settings. For the localhost development, some front-end development knowledge and skills are nessecary. The following sections will introduce the comman project requests which can not be done by AEM components.
6.1 RawHTML
RawHTML is an AEM component which allows an insertion of a code snnipet into an empty HTML block. The empty HTML block contains default CSS style settings: wdith, height, display and className.
6.2 Web storage
The design and idea of HTML5 Web storage is a better mechanism for storing client network data. It is implemented as a client-side database through a web browser, which allows web pages to store data in the form of key-value pairs. It has the following properties:
• Each original site/domain can store up to 5MB of data. • You can use JavaScript to manipulate data in web storage by using attributes
and methods. • Like cookies, you can choose to keep the data (maintain), even if you've left the
site, close the browser TAB, exit the browser or shut down the computer. • Unlike cookies, which are created by server-side scripts, web storage is created
by client-side scripts such as JavaScript. • Unlike cookies, data in a web store does not automatically accompany each
HTTP request on the server side. • Web storage is native support in mainstream Web browsers, such as Chrome,
Opera, Firefox, Safari, and IE8 +. In other words, no third-party plug-ins are required
HTML5 Web storage provides 2 different storage objects, window.localStorage() and window.sesstionStorage().

20
First of all, before using the web storage, we have to check if browser support for localStorage and session Storage, which using following codes:
6.2.1 local storage
Local storage, the data is stored as a string and will continue (unless you explicitly delete it). Even if the browser window closes, the data will always be there, and if the next access to the same origin USES the same browser, then the data is available. Local storage is the data that is specifically designed to store over multiple browser Windows and persist over the current session. Unlike desktop systems, Web applications have always lacked the ability to work offline. Now, the emergence of HTML5 local storage has made offline work possible. Imagine you're filling out a multi-page Web form, or writing an article, and the deadline is looming, and there's a sudden outage. You will lose all the data you have carefully created. Because of the local storage, you can continue to work offline, while the Web application USES client-side scripts such as JavaScript to periodically store your work locally. A web site allows users to customize the theme and layout of a web page and save these Settings in a local store. In this way, users can see their own web pages in subsequent visits.
// Check browser support if (typeof(Storage) !== "undefined") { //doing something here } else { //not support message here }
Code snippet 9

21
6.2.2 Session storage
The data is stored as a string and will only persist in the current session. When the browser window closes, the data will be deleted. Session storage is a case where the same user USES the same web site for multiple transactions in different browsers. Transactions in each browser window get a backup of their own session storage, which is different from another transaction in another browser window. When the user closes the browser window, the session store data that belongs to this window will continue to exist. In this way, transaction data does not leak from one browser window to another.
<script type="text/javascript"> // Check browser support if (typeof(Storage) !== "undefined") { localStorage.lastname="Tony"; document.write(localStorage.lastname); } else { document.getElementById("result").innerHTML = "Sorry, your browser does not support web storage..."; } </script>
Code snippet 10

22
6.2.3 indexDB storage
In HTML5's local storage, there is a database called indexedDB [6], a NoSQL database stored locally on the client side that can store a large amount of data. A web site can have multiple indexedDB databases, but the name of each database is unique. We need to connect to a specific database through the database name.
<script type="text/javascript"> // Check browser support if (typeof(Storage) !== "undefined") { sessionStorage.lastname="Tony"; document.write(sessionStorage.lastname); } else { document.getElementById("result").innerHTML = "Sorry, your browser does not support Web Storage..."; } </script>
Code snippet 11
<script type="text/javascript"> // Open dbName database var request = indexedDB.open('dbName', 1); //do it when connecting the database failed request.onerror = function(e){ console.log('connecting the database failed'); } //do it when connecting the database success request.onsuccess = function(e){ console.log('connecting the database successed'); } </script>
Code snippet 12

23
We use the indexeddb.open method to connect to the database, which takes two parameters, the first is the database name, and the second is the database version number. This method returns an IDBOpenDBRequest object representing a request object that requests a connection to the database. We can define the methods for connection success or failure by listening to the onsuccess and onerror events of the request object. And each database version number should be different and must be an integer, for avoiding the duplicated database versions. After indexedDB.open() connected, we can return an IDBOpenDBRequest object and by calling the close() method to close the database. According to the delete database, by calling deleteDatabase() method:
<script type="text/javascript"> //updating the database version, and open it as the name: 2 var request = indexedDB.open('dbName', 2); request.onupgradeneeded = function(e){console.log('new database name is' + e.newVersion);} </script>
Code snippet 13
var request = indexedDB.open('dbName', 2); request.onsuccess = function(e){ console.log('connected'); var db = e.target.result; db.close(); console.log('database closed'); }
Code snippet 14
indexedDB.deleteDatabase('dbName'); console.log('database deleted');
Code snippet 15
24
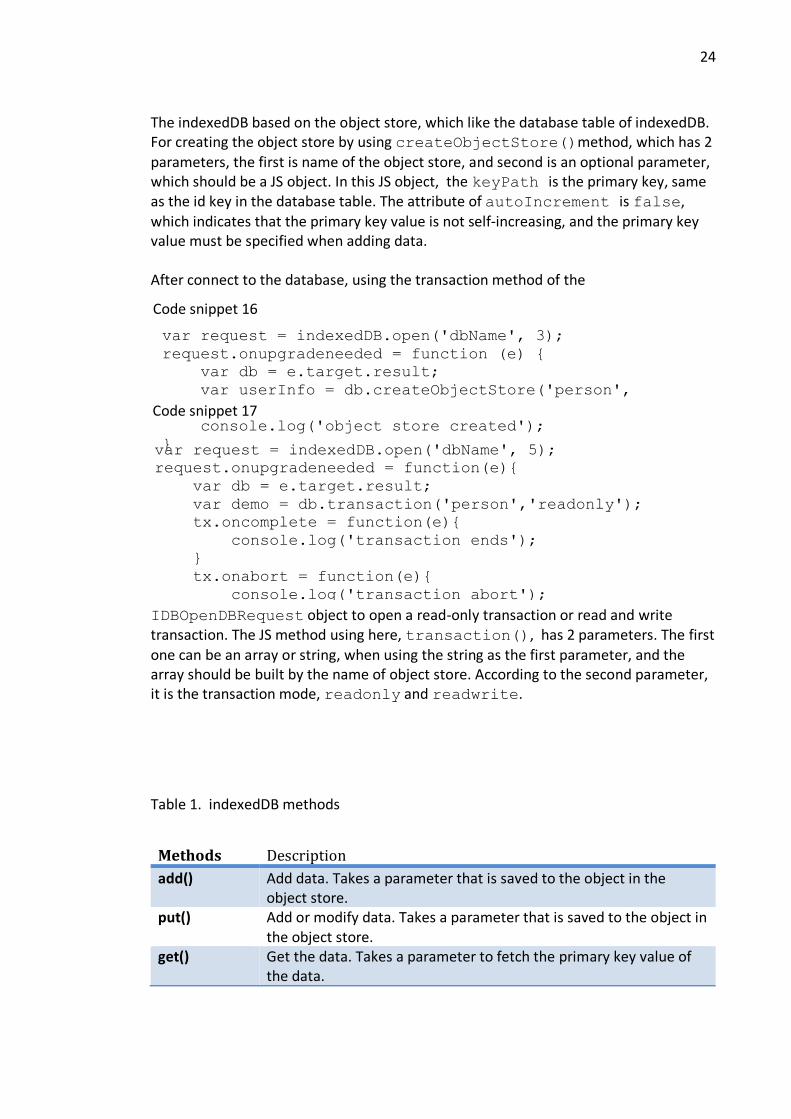
The indexedDB based on the object store, which like the database table of indexedDB. For creating the object store by using createObjectStore()method, which has 2 parameters, the first is name of the object store, and second is an optional parameter, which should be a JS object. In this JS object, the keyPath is the primary key, same as the id key in the database table. The attribute of autoIncrement is false, which indicates that the primary key value is not self-increasing, and the primary key value must be specified when adding data. After connect to the database, using the transaction method of the
IDBOpenDBRequest object to open a read-only transaction or read and write transaction. The JS method using here, transaction(), has 2 parameters. The first one can be an array or string, when using the string as the first parameter, and the array should be built by the name of object store. According to the second parameter, it is the transaction mode, readonly and readwrite.
Table 1. indexedDB methods
Methods Descriptionadd() Add data. Takes a parameter that is saved to the object in the
object store. put() Add or modify data. Takes a parameter that is saved to the object in
the object store. get() Get the data. Takes a parameter to fetch the primary key value of
the data.
var request = indexedDB.open('dbName', 3); request.onupgradeneeded = function (e) { var db = e.target.result; var userInfo = db.createObjectStore('person', {keyPath: 'perID', autoIncrement: false}); console.log('object store created'); }
Code snippet 16
var request = indexedDB.open('dbName', 5); request.onupgradeneeded = function(e){ var db = e.target.result; var demo = db.transaction('person','readonly'); tx.oncomplete = function(e){ console.log('transaction ends'); } tx.onabort = function(e){ console.log('transaction abort'); } }
Code snippet 17

25
delete() Delete data. Takes a parameter to fetch the primary key value of the data.
If we want to get a range of data, we can use cursors. The cursor is created and opened through the openCursor() method of the object store. The openCursor() method takes two parameters, the first is IDBKeyRange object, which is created by the following methods:
1. boundRange, represents a collection of primary key values from 1 to 10(including 1 and 10). If the third parameter is true, it indicates that the minimum key value of 1 is not included, and if the fourth parameter is true, it means that the maximum key value is not included, and the default value is false.
2. onlyRange, represents a collection of primary key values. The only() parameter is the primary key value, integer type.
3. Lowerrange, represents a set of primary key values greater than or equal to 1. The second parameter is optional, and true indicates that the minimum primary key 1, or false, is included, and the default value is false.
4. upperRange, represents a collection of primary key values less than or equal to 10. The second parameter is optional, and true indicates that it does not
contain the maximum primary key 10, or false, and the default value is false.
The second parameter of the openCursor method represents the reading direction of the cursor, which mainly includes the following:
1. next: the data in the cursor is in ascending order of primary key value, and the data with equal primary key value is read.
2. nextunique: the data in the cursor is in ascending order in the primary key value, and the primary key value reads only the first data.
3. prev: the data in the cursor is arranged in descending order of primary key values, and the data with the same primary key value is read.
var boundRange = IDBKeyRange.bound(1, 50, false, false);
var onlyRange = IDBKeyRange.only(1);
var lowerRange = IDBKeyRange.lowerBound(17, false);
var upperRange = IDBKeyRange.upperBound(90, false);

26
4. prevunique: the data in the cursor is arranged in descending order of the primary key value. The primary key value is equal to the first data.
From the connection database, create object warehouse, index, to operation, retrieve data, complete the complete process of indexedDB access data. A complete example is given below to better understand the indexedDB database. Figure 2 - empty indexedDB database
Figure 3 - insertb new data into indexedDB
var request = indexedDB.open('dbName', 10); request.onsuccess = function(e){ var db = e.target.result; var tx = db.transaction('person','readonly'); var dbstore = tx.objectStore('person'); var range = IDBKeyRange.bound(1,10); var re = dbstore.openCursor(range, 'up'); re.onsuccess = function(){ var cursors = this.result; if(cursors){ console.log(cursors.value.personName); cursors.continue(); }else{ console.log('ends'); } } }
Code snippet 18

27
Figure 4 - update the single database value
Figure 5 - the indexedDB after updated

28
The code of the example shown below.
(continue)
<!DOCTYPE html> <html lang="en"> <head> <meta charset="UTF-8"> <meta name="viewport" content="width=device-width, initial-scale=1.0, user-scalable=no"> <meta http-equiv="X-UA-Compatible" content="ie=edge"> <title>indexedDB example</title> <style type="text/css"> *{ margin: 0; padding: 0; } .main{ width: 1150px; margin: auto; } .main .v-form{ position: fixed; top: 0; width: 1150px; padding: 20px 0; background: #fff; } .main .v-form .v-input{ float: left; border: 1px solid #ddd; height: 40px; width: 335px; padding:0 10px;; border-radius: 3px; margin:0 20px 0 0; box-sizing: border-box; font-size: 16px; }
Code snippet 19 - compelete indexedDB example code

29
(continue)
.main .table button{ width: 40px; height: 24px; border: 1px solid #08aae5; border-radius: 3px; background: #08aae5; color: #fff; cursor: pointer; } .main .table button.del{ border: 1px solid #F44336; background: #F44336; } </style> </head> <body> <div id="app"> <div class="main"> <div class="v-form"> <input type="text" class="v-input" placeholder="Type name here" name="username" v-model="username"> <input type="text" class="v-input" placeholder="Type age here" name="age" v-model="age"> <input type="text" class="v-input" placeholder="Type email address here" name="email" v-model="email"> <button type="text" class="v-btn" @click="submit">submit</button> </div> <table class="table"> <thead> <th>#</th> <th>User Name</th> <th>Ago</th> <th>email</th> <th>Operation</th>
Code snippet 19 - compelete indexedDB example code (continue)

30
(continue)
</thead> <tr v-for="(item,i) in dbData" :key="item.id"> <td v-html="i+1"></td> <td v-html="item.username"></td> <td v-html="item.age"></td> <td v-html="item.email"></td> <td> <button class="edit" @click="edit(i)">Edit</button> <button class="del" @click="deleteOneData(item.id)">Delete</button> </td> </tr> </table> </div> </div> <script src="https://cdn.bootcss.com/vue/2.2.6/vue.min.js"></script> <script> var dbName = 'usersDB', daVer = 1, db = '', dbData = []; // connect database function openDB(){ var request = indexedDB.open(dbName, daVer); request.onsuccess = function(e){ db = e.target.result; console.log('database connected'); vm.getData(); } request.onerror = function(){ console.log('connect failed'); } request.onupgradeneeded = function(e){ db = e.target.result;
Code snippet 19 - compelete indexedDB example code (continue)

31
(continue)
if(!db.objectStoreNames.contains('Users')){ var store = db.createObjectStore('Users',{keyPath: 'id', autoIncrement: true}); var idx = store.createIndex('index','username',{unique: false}) } } } //save data function saveData(data){ var tx = db.transaction('Users','readwrite'); var store = tx.objectStore('Users'); var req = store.put(data); req.onsuccess = function(){ console.log('Saved ID name as'+this.result); } } //delete the single data function deleteOneData(id){ var tx = db.transaction('Users','readwrite'); var store = tx.objectStore('Users'); var req = store.delete(id); req.onsuccess = function(){ vm.getData(); } } //retrieve all data function searchData(callback){ var tx = db.transaction('Users','readonly'); var store = tx.objectStore('Users'); var range = IDBKeyRange.lowerBound(1); var req = store.openCursor(range,'next');
Code snippet 19 - compelete indexedDB example code (continue)

32
(continue)
if(cursor){ // push the retrieved value into the array. dbData.push(cursor.value); cursor.continue(); }else{ // callBack callback && callback(); } } } var vm = new Vue({ el: '#app', data: { edit_id: 0, username: '', age: '', email: '', dbData: [] }, mounted: function(){ openDB(); // indexedDB.deleteDatabase('usersDB'); }, methods: { submit: function(){ if(this.username && this.age && this.email){ var param = { username: this.username, age: this.age, email: this.email } if(this.edit_id > 0){ param.id = this.edit_id } saveData(param); this.getData(); this.username = this.age = this.email = ''; } },
Code snippet 19 - compelete indexedDB example code (continue)

33
6.3 HTML5 drag and drop
Drag and drop is a powerful and logical user interaction that any desktop application has. Use a pointer device like the mouse to implement a copy by dragging and dropping, inserting and deleting files and objects on any computer desktop. The HTML5 Drag and Drop API provides native support for browser drag-and-drop operations, making it easier to Drag and Drop code. First of all, setting an element as draggable, to set the draggable attribute to true: <img draggable="true" /> Then clarify what need to happen when the HTML element is dragged. So here we need to know one more attribute of HTML5, ondragstart, which can call a function what specifies what data to be dragged. And then using one JS method to set the dragged element’s data type and value,
After specified the dragged element, using another method specifies that where it to be dragged. By default setting, the data or element cannot to be dropped in other
function drag(ev) { ev.dataTransfer.setData("text", ev.target.id); }
this.getData(); this.username = this.age = this.email = ''; } }, getData: function(){ var self = this; searchData(function(){ self.dbData = dbData; }); }, edit: function(index){ this.username = dbData[index].username; this.age = dbData[index].age; this.email = dbData[index].email; this.edit_id = dbData[index].id; } } }) </script> </body> </html>
Code snippet 19 - compelete indexedDB example code (continue)
Code snippet 20

34
element. Therefore, we have to use one JS method, event.preventDefault(), to prevent the default setting. Generally, the following code snippet is a demo for explain how the HTML5 drag/drop works.
Figure 13. Before drag.
Figure 14. After drag to right side.
The code of the example shown above.
35
<!DOCTYPE HTML> <html> <head> <style> * { cursor: pointer; } #left, #right { float: left; width: 200px; height: 50px; margin: 20px; padding: 10px; border: 2px solid black; }
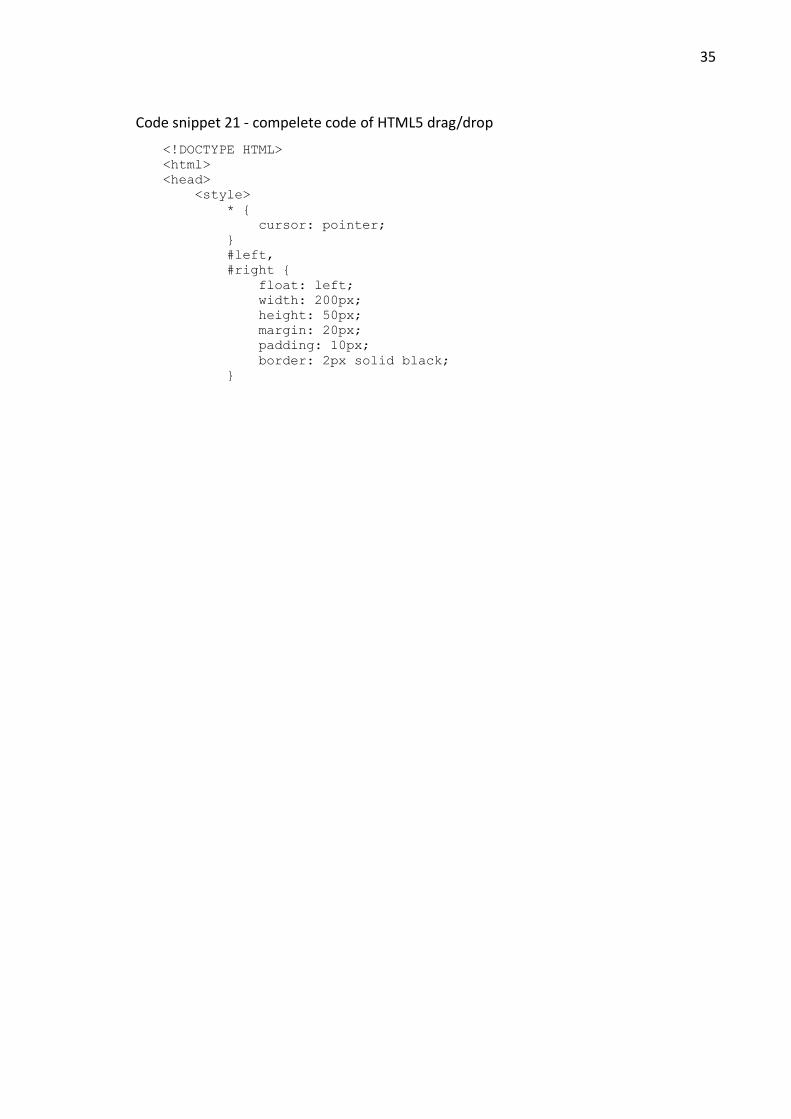
Code snippet 21 - compelete code of HTML5 drag/drop

36
.box { display: block; width: 200px; height: 50px; background: blue; } </style> </head> <body> <div id="left" ondrop="drop(event)" ondragover="drag_start(event)"> <div class="box box-blue" draggable="true" ondragstart="drag(event)" id="drag1"></div> </div> <div id="right" ondrop="drop(event)" ondragover="drag_start(event)"></div> <script> function drag_start(ev) { ev.preventDefault(); } function drag(ev) { ev.dataTransfer.setData("text", ev.target.id); } function drop(ev) { ev.preventDefault(); var data = ev.dataTransfer.getData("text"); ev.target.appendChild(document.getElementById(data)); } </script> </body>
Code snippet 21 - compelete code of HTML5 drag/drop (continue)

37
6.4 Canvas
In the HTML5, Canvas element can be drawing the pictures on the web page by using JS. Canvas is a rectangular area where you can control each pixel. Canvas has many ways to draw paths, rectangles, circles, characters, and add images. Create a Canvas element, by setting element’s id, width and height in the canvas tag, <canvas id="demo" width="300" height="200"></canvas>
Drawing by JavaScript
Table 2. JavaScript methods for drawing canvas Methodname
Description
moveTo() Using X and Y as parameters to set the starting point of the line specified on the Canvas.
lineTo() Using X and Y as parameters to create a path from the last point to the specified point on the Canvas.
Stroke() draws the path line of the specified point to the lineTo() specified by moveTo() on the Canvas. The stroke() method has no parameters.
beginPath() Used to start a new path or reset the current path without parameters.
closePath() used to create a path from the starting point to the endpoint, effectively closing and forming the shape of the path, without parameters.
fill() Filling the style for the current path 2 complete examples of canvas are goven below, which covering how to draw the traignle and text by canvas. Example 1: Drawing a triangle, and filled with solid color.
var c=document.getElementById("demo"); var cxt=c.getContext("2d"); cxt.fillStyle="#000"; cxt.fillRect(0,0,150,75);
Code snippet 22 - drawing canvas in JavaScript

38
Figure 15. canvas traignle example result.
Example 2: drawing normal text
Figure 16. drawing normal text by canvas example result.
<!DOCTYPE html> <html> <body> <canvas id="demo" width="400" height="200"></canvas> <script type="text/javascript"> var canvas = document.getElementById("demo"); var context = canvas.getContext("2d"); context.moveTo(50,150); context.lineTo(150,100); context.lineTo(250,150); context.closePath(); context.stroke(); context.fill(); </script> </body> </html>
Code snippet 23 - the compelete code of canvas traignle

39
<!DOCTYPE html> <html> <body> <canvas id="demo" width="400" height="200"></canvas> <script type="text/javascript"> var canvas = document.getElementById("demo"); var context = canvas.getContext("2d"); context.font = "30px Arial"; context.fillText("canvas", 20, 50); </script> </body> </html>
Code snippet 24 - the compelete code of drawing normal text by canvas

40
7 CONCLUSION
The goal of the thesis was achieved by completing the documentation. Software developers and content managers are now able to access the documentation within company's network and use it for working purposes. The project which is used as an example in the thesis will keep updating in the future and , this documentation will be shared with the team workers who are working in the project. The main challenges of the thesis were 0to understand the general thery of AEM, how it control the data flow between diferrent Levels.

41
REFERENCES
1. MichaelDono, chrisdavidmills and others. (2018). HTML5 – Developer guide | MDN [online] developer.mozilla.org. Available at: https://developer.mozilla.org/en-US/docs/Web/Guide/HTML/HTML5
2. Uemmra3, Kberov and others. (2017). CSS - Glossary | MDN [online] developer.mozilla.org. Available at: https://developer.mozilla.org/en-US/docs/Glossary/CSS
3. Zfjames, _serendipity and others. (2018). JavaScript - Glossary | MDN [online] developer.mozilla.org. Available at: https://developer.mozilla.org/en-US/docs/Glossary/javascript
4. Dria, pluwen and others. (2018). XML introduction | MDN [online] developer.mozilla.org. Available at: https://developer.mozilla.org/en-US/docs/XML_introduction
5. xfq, iigmir and others. (2017). jQuery - Glossary | MDN [online] developer.mozilla.org. Available at: https://developer.mozilla.org/en-US/docs/Glossary/jquery
6. daleharvey, leoo and others. (2018). IndexedDB API – Web APIs | MDN [online] developer.mozilla.org. Available at: https://developer.mozilla.org/en-US/docs/Web/API/IndexedDB_API
7. Bootsrap Core Team. (2018). Introduction · Bootstrap [online] getbootstrap.com. Available at: https://getbootstrap.com/docs/4.1/getting-started/introduction/
8. Adobe. (2018). The basics [online] helpx.adobe.com . Available at: https://helpx.adobe.com/experience-manager/6-2/sites/developing/using/the-basics.html
9. Adobe. (2018). AEM Components – the Basics [online] helpx.adobe.com . Available at: https://helpx.adobe.com/experience-manager/6-2/sites/developing/using/components-basics.html
10. Yehuda Katz. (2017). Handlebars.js : Minimal Templating on Steroids[online] handlebarsjs.com. Available at: http://handlebarsjs.com/expressions.htm l
11. Yehuda Katz. (2017). Handlebars.js : Minimal Templating on Steroids[online] handlebarsjs.com. Available at: http://handlebarsjs.com/#helpers
12. Yehuda Katz. (2017). Handlebars.js : Minimal Templating on Steroids[online] handlebarsjs.com. Available at: http://handlebarsjs.com/reference.html
13. npm. (1985). Scripts |npm Documentation [online] npmjs.com. Available at: https://docs.npmjs.com/misc/scripts