3 productivity programs
DESCRIPTION
qweTRANSCRIPT

Microsoft Digital Literacy
Productivity Programs
Introduction
to
Productivity
Programs
© 2014 Microsoft Corporation. All Rights Reserved

Table of Contents Welcome .......................................................................................................................................................... 6
Description .................................................................................................................................................. 6
Benefits ......................................................................................................................................................... 6
Introduction to productivity programs ................................................................................................. 7
Overview of productivity programs ........................................................................................................ 8
Matching game .............................................................................................................................................. 9
Congratulations ........................................................................................................................................... 10
Common features and commands ....................................................................................................... 11
Introduction to the User Interface ........................................................................................................ 12
User Interface video ............................................................................................................................... 13
User Interface review ............................................................................................................................. 22
Knowledge check .................................................................................................................................... 22
Using the pointer ........................................................................................................................................ 23
Mouse simulation activity .................................................................................................................... 24
Working with the Ribbon ......................................................................................................................... 25
Ribbon in Word, Excel, and PowerPoint video ............................................................................. 26
Ribbon in Word, Excel, and PowerPoint review ........................................................................... 39
Using the Mini Toolbar ............................................................................................................................. 40
Mini Toolbar simulation ....................................................................................................................... 41
Mini Toolbar review ............................................................................................................................... 42
Knowledge check .................................................................................................................................... 43
Keyboard techniques for entering text ............................................................................................... 44
Keyboard techniques for entering text simulation ..................................................................... 45
Keyboard Review .................................................................................................................................... 46
Knowledge check .................................................................................................................................... 47
Keyboard shortcuts .................................................................................................................................... 48
Keyboard shortcuts video .................................................................................................................... 48
Keyboard shortcuts review .................................................................................................................. 55

Knowledge check .................................................................................................................................... 56
Congratulations ........................................................................................................................................... 57
Introduction to word processors ........................................................................................................... 58
Basic tasks in Word 2013 .......................................................................................................................... 59
Basic tasks in Word 2013 simulation ............................................................................................... 60
Knowledge check .................................................................................................................................... 61
Creating a document by using a template ........................................................................................ 62
Creating a document by using a template simulation .............................................................. 63
Knowledge check .................................................................................................................................... 64
Edit and formatting text ........................................................................................................................... 65
Edit and formatting text video ........................................................................................................... 66
Knowledge check .................................................................................................................................... 83
Working with tables and pictures ......................................................................................................... 84
Working with tables and pictures simulations ............................................................................. 85
Knowledge check .................................................................................................................................... 87
Proofreading documents ......................................................................................................................... 88
Proofreading documents video ......................................................................................................... 89
Proofreading documents review ....................................................................................................... 95
Knowledge check .................................................................................................................................... 96
Benefits of desktop publishing .............................................................................................................. 97
Benefits of desktop publishing video .............................................................................................. 98
Benefits of desktop publishing review ..........................................................................................106
Knowledge check ..................................................................................................................................107
Congratulations .........................................................................................................................................108
Introduction to Spreadsheet Programs.............................................................................................109
Overview of spreadsheet programs ...................................................................................................110
Overview of spreadsheet Programs simulation .........................................................................111
Notes for Presentation........................................................................................................................111
Knowledge check ..................................................................................................................................112
Inserting data ..............................................................................................................................................113
How to insert data into a worksheet in Excel 2013 simulation ............................................114

Spreadsheet Programs Review ........................................................................................................114
Knowledge check ..................................................................................................................................115
Performing basic mathematical tasks in a spreadsheet ..............................................................116
Performing basic mathematical tasks in a spreadsheet video .............................................117
Performing basic mathematical tasks in a spreadsheet review ...........................................125
Knowledge check ..................................................................................................................................126
Inserting charts ..........................................................................................................................................127
Inserting charts video ..........................................................................................................................128
Knowledge check ..................................................................................................................................136
How to print spreadsheet data ............................................................................................................137
How to print spreadsheet data video ...........................................................................................138
Knowledge check ..................................................................................................................................143
Congratulations .........................................................................................................................................144
Introduction to presentation programs ............................................................................................145
Introduction to presentation programs ............................................................................................146
Introduction to presentation programs simulation .................................................................147
Knowledge check ..................................................................................................................................148
Creating a presentation ......................................................................................................................149
Creating a presentation video .........................................................................................................150
Knowledge check ..................................................................................................................................157
Adding graphics and multimedia ........................................................................................................158
Adding graphics and multimedia simulation .............................................................................159
Knowledge check ..................................................................................................................................160
How to print a presentation ..................................................................................................................161
How to print a presentation video .................................................................................................162
Knowledge check ..................................................................................................................................168
Congratulations .........................................................................................................................................169
Introduction to database programs ...................................................................................................170
Overview of databases ............................................................................................................................171
Overview of databases simulation .................................................................................................172
Knowledge check ..................................................................................................................................173

Creating a database .................................................................................................................................174
Creating a database video.................................................................................................................175
Knowledge check ..................................................................................................................................183
Working with records in a database ..................................................................................................184
Working with records in a database simulation ........................................................................185
Knowledge check ..................................................................................................................................186
Database queries .......................................................................................................................................188
Database queries video ......................................................................................................................189
Knowledge check ..................................................................................................................................197
Working with reports ...............................................................................................................................198
Working with reports video ..............................................................................................................199
Knowledge check ..................................................................................................................................206
Congratulations .........................................................................................................................................207

Microsoft Digital Literacy: Productivity Programs 6 | P a g e
Welcome
Description Productivity programs are tools that you can use to create documents, presentations,
tables, charts, and graphs. This course explores the most common productivity
software applications used in business, in education, and at home. In this course, you
will learn the features of various productivity programs such as word processing
software, spreadsheets, presentation software, and databases. You will also learn how
to select the right software to cater to your needs.
Benefits Productivity programs are used in business for schedules, résumés, business plans,
and more. These programs are widely known and used on a daily basis. In school,
students are using these applications to write essays, create presentations, and
organize their schedule. High Schools and Colleges have started demanding a typed
final essay for a grade; forming these applications into a vital part of education. Others
may use the applications at home for any other tasks, making these applications a
universal tool.
Introduction
to
Productivity
Programs

Microsoft Digital Literacy: Productivity Programs 7 | P a g e
Introduction to productivity programs
Productivity Programs are programs designed to help you perform specific tasks easily
and efficiently. Allowing anyone to do the following:
Text Documents
Presentations
Databases
Spreadsheets
And more
In this lesson, you will learn about the basic features of productivity programs. You will
also learn about the templates and Office Web applications that help you to create
and edit documents.

Microsoft Digital Literacy: Productivity Programs 8 | P a g e
Overview of productivity programs
Microsoft Office 2013
provides users with the latest
productivity applications. Each
application has a specific
purpose, though they share a
similar interface.
View what Office 2013
Application is the best fit on
the right.
Text Documents Spreadsheets
Word
Useful for reports,
essays, letters, and
documentation.
Excel
Useful for managing bills,
showing a budget, and
other number tracking
jobs.
Slideshows Databases
PowerPoint
Useful for school
lectures, business
proposals, and
conference talks.
Access
Useful for storing shipping
records, patient records,
and store products.

Microsoft Digital Literacy: Productivity Programs 9 | P a g e
Matching game

Microsoft Digital Literacy: Productivity Programs 10 | P a g e
Congratulations
Congratulations on
completing the lesson!
You should now be able to:
Describe the
functionality of various
productivity programs
Explain the benefits of
templates and Office
Online
Explain the use of Office
Web applications.

Microsoft Digital Literacy: Productivity Programs 11 | P a g e
Common
Features and
Commands
Common features and commands
You can use different types of productivity programs to create different types of
documents for storing and presenting information. Most productivity programs
provide features to perform some common tasks such as; open and close a file, print a
file, and insert, move, modify, and delete text and objects. To help you perform these
common tasks, most productivity programs include some common features and
commands. Microsoft’s Office Programs have several common features, such as:
Ribbon
Quick Access
Toolbar
And more
In this lesson, you will learn about the common features and commands of various
types of productivity programs. You will also learn about the main components of the
user interface, keyboard shortcuts, and various key combinations.

Microsoft Digital Literacy: Productivity Programs 12 | P a g e
Introduction to the User Interface
The user interface is the means by
which you interact with the productivity
programs in Office 2013. You will find
many common user interface features
and commands across all the Office
2013 applications.

Microsoft Digital Literacy: Productivity Programs 13 | P a g e
User Interface video
This video will introduce you to
the common user interface you
will see in office 2013
productivity programs.
Let’s start in the top left corner
with the Quick Access Toolbar.
By default the Quick Access
Toolbar includes Save, Undo,
and Redo.

Microsoft Digital Literacy: Productivity Programs 14 | P a g e
You can customize the Quick
Access Toolbar by clicking this
arrow to display a list of
common commands you can
display or remove.
Let’s add Spelling and
Grammar to Quick Access
Toolbar by clicking it.
Microsoft Digital Literacy: Productivity Programs 15 | P a g e
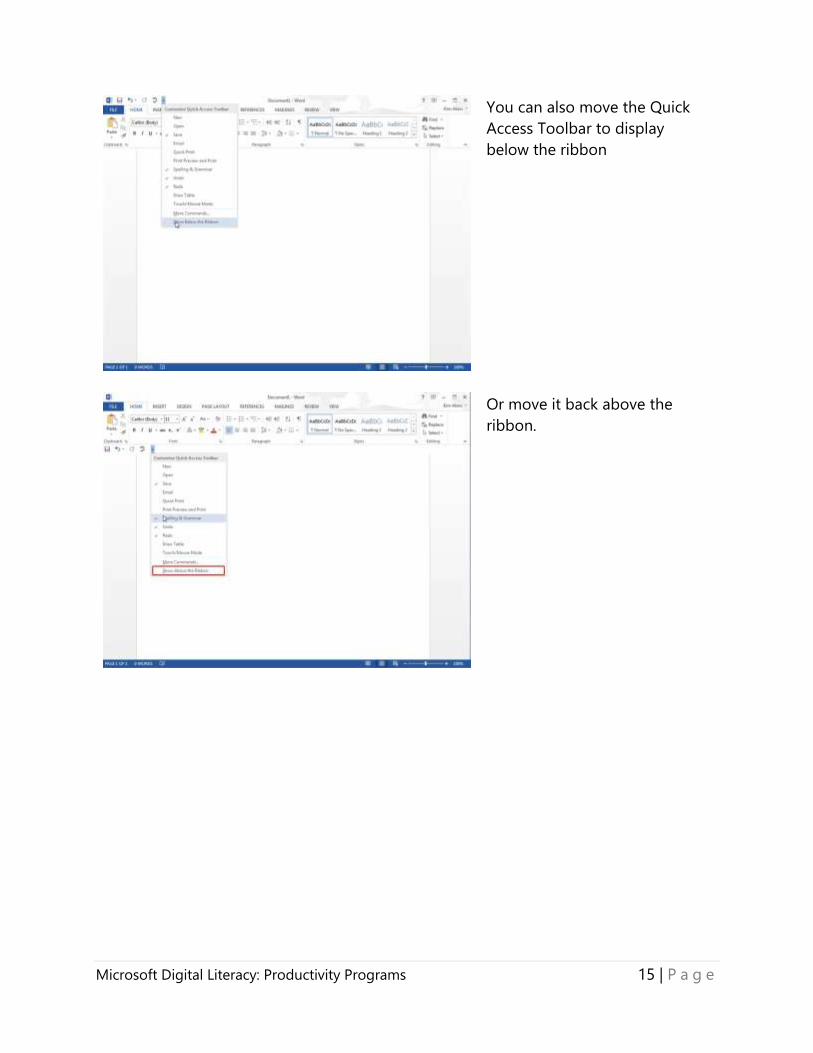
You can also move the Quick
Access Toolbar to display
below the ribbon
Or move it back above the
ribbon.

Microsoft Digital Literacy: Productivity Programs 16 | P a g e
You can remove any individual
command from the Quick
Access Toolbar by right clicking
on it and selecting Remove
From Quick Access Toolbar.
This is called the Title Bar and
displays the name of the file
you are working on.

Microsoft Digital Literacy: Productivity Programs 17 | P a g e
From the title bar you can
access Help, Ribbon display
options and Minimize,
Maximize or Close the
application.

Microsoft Digital Literacy: Productivity Programs 18 | P a g e
This is the ribbon.
It is organized by Tabs, Groups,
and Commands.
We will discuss the Ribbon in
more detail later in this lesson.
This is the work area where
depending on the program you
are using you will either type,
insert images and data, or
create presentations.

Microsoft Digital Literacy: Productivity Programs 19 | P a g e
This is the Status Bar.
The Status bar gives you
information about your
document, worksheet, or
presentation.
View Shortcuts

Microsoft Digital Literacy: Productivity Programs 20 | P a g e
Zoom Slider
You can customize the Status
Bar by Right Clicking over the
Status Bar and selecting what
option you would to hide or
display.

Microsoft Digital Literacy: Productivity Programs 21 | P a g e
You are now familiar with the
common user interface options
in Office 2013.

Microsoft Digital Literacy: Productivity Programs 22 | P a g e
User Interface review
User Interface Review
This demonstration introduced you to the
following areas of the user interface:
Quick Access Toolbar
Title Bar
Ribbon
Workspace
Status Bar
Knowledge check
How is the ribbon organized?
o Tabs
o Groups
o Commands
o Tabs, groups, and commands
Answer –
#1 – The ribbon is organized into tabs, groups and commands.

Microsoft Digital Literacy: Productivity Programs 23 | P a g e
Using the pointer
A pointer is the on-screen arrow or shape
that moves when you move your mouse
or other pointing device. Using the
pointer, you can quickly move around a
document and perform commands.
A cursor is a blinking vertical bar on the
screen that indicates the location where
you can insert text or graphics in a
document. For example, in Word 2013,
you can set the location of the cursor by
moving the pointer to some text and
then clicking the left mouse button.

Microsoft Digital Literacy: Productivity Programs 24 | P a g e
Mouse simulation activity
The Mouse Simulation Activity can be accessed online at http://www.microsoft.com/digitalliteracy.

Microsoft Digital Literacy: Productivity Programs 25 | P a g e
Working with the Ribbon
Working with the Ribbon In productivity applications, such as
Microsoft Word 2013, Excel 2013, and
PowerPoint 2013, the ribbon consists of
tabs. Each tab is divided into groups. A
group helps you perform a set of similar
tasks, such as adding picture shapes in a
document.
The ribbon also consists of contextual
tabs, which appear only when necessary.
For example, in a Word 2013 document,
the contextual tab for editing a table
appears when a table is inserted in the
document.

Microsoft Digital Literacy: Productivity Programs 26 | P a g e
Ribbon in Word, Excel, and PowerPoint video
When you open a
productivity application, such
as Word 2013, Excel 2013, or
PowerPoint 2013, you can see
the ribbon above the
workspace.
Here you see the ribbons for
Word 2013
Excel 2013

Microsoft Digital Literacy: Productivity Programs 27 | P a g e
PowerPoint 2013.
The ribbons use tabs and
groups to organize the
available functions in an
application.
The tabs are along the top of
the ribbon.
Note that some tabs are
common among all three
applications, whereas others
are available only to certain
applications, such as the Page
Layout tab in Word 2013, the
Formulas tab in Excel 2013,
and the Transitions tab in
PowerPoint 2013.
Each tab contains groups.
Groups are a collection of
buttons that perform similar
or related functions.

Microsoft Digital Literacy: Productivity Programs 28 | P a g e
When you open a file in a
productivity application, the
application opens with the
Home tab selected.
The Home tab contains the
most frequently used groups
of commands.
These are the common
groups among the Home
tabs:
Clipboard, which contains
commands for copying or
cutting content and pasting it
elsewhere.
Font, which contains the most
commonly used commands
for changing the font of text
in your documents

Microsoft Digital Literacy: Productivity Programs 29 | P a g e
Editing, which contains
commands that help you
make multiple changes to
your document quickly
Some groups appear in only a
particular application,
whereas other groups appear
in several applications.
An example of groups that
appear in only one
application are the Number
and Cells groups in Excel
2013.
Another example of a group
that is present in the Home
tab of only one application is
the Drawing group in
PowerPoint 2013.
This group contains functions
and drawing tools that can be
used to quickly draw custom
diagrams in your
presentations.

Microsoft Digital Literacy: Productivity Programs 30 | P a g e
The Insert tab contains
groups related to inserting
external, or new, content in
an existing document.
Some groups common to the
Insert tab are Tables,
Illustrations, Apps, and Text.
The Review tab contains
groups of commands that
address reviewing your
document, such
proofreading, tracking
changes, managing changes,
making comments, restricting
write access to the file, and
comparing versions of your
document.
The View tab contains groups
of commands for changing
the view of a file while you
edit it.
The View groups provide
predefined views based on
how the output of the file
might appear.

Microsoft Digital Literacy: Productivity Programs 31 | P a g e
The Show group contains
check boxes that you can
select or clear to indicate
which elements of the user
interface to hide or display
while you edit.
Use the Zoom group
commands to adjust the
zoom level of your
workspace.
The Window groups contain
commands for opening new
or existing files, rearranging
files in your workspace, and
creating split views of your
current workspace.
This function can be handy
when you are working in one
area of a file but need to look
at a different area of the file
for reference.

Microsoft Digital Literacy: Productivity Programs 32 | P a g e
You might have noticed that
some functions are dimmed
at times.
This means that they are
unavailable.
In the case of a document in
Word 2013, the Cut button in
the Clipboard group is
dimmed until text in the
document is selected.
Note that the Cut button has
changed and that the
background changes color
when you point to it,
indicating that the button is
available.

Microsoft Digital Literacy: Productivity Programs 33 | P a g e
In PowerPoint 2013, the Paste
button in the Clipboard
group is available because
you currently have text on the
Clipboard that was cut from
Word.
Note that also that the entire
Font group is unavailable.

Microsoft Digital Literacy: Productivity Programs 34 | P a g e
For the Font group to
become available, text needs
be added to the slide.
Note also that the functions
in the Font group have
become available.
Now you can manipulate the
font by using the commands
in the Font group.

Microsoft Digital Literacy: Productivity Programs 35 | P a g e
On the Review tab of Excel
2013, in the Comments
group, the Show/Hide
Comments button is currently
unavailable.
After you add a comment to
the document, the button is
made available.

Microsoft Digital Literacy: Productivity Programs 36 | P a g e
Clicking the button hides the
comment that you just added
to the spreadsheet; clicking
the button again makes it
visible.
Some groups have more
advanced options available.
You can display and change
these options by using the
Dialog Box Launcher.
When a group has advanced
options available, the Dialog
Box Launcher is available in
the lower-right corner of the
group.

Microsoft Digital Literacy: Productivity Programs 37 | P a g e
When a group has advanced
options available, the Dialog
Box Launcher is available in
the lower-right corner of the
group.
Some commands and menus
are available in Backstage
view.
You can display the
Backstage view by clicking
the File tab.

Microsoft Digital Literacy: Productivity Programs 38 | P a g e
You can display the
Backstage view by clicking
the File tab.
Examples of menus available
in Backstage view are the
Print and Save menus.
If you have questions about
what a button does, you can
click the Help button in the
title bar, which opens the
Help documentation for each
application and provides
reference information and
further explanation.

Microsoft Digital Literacy: Productivity Programs 39 | P a g e
Ribbon in Word, Excel, and PowerPoint review
Ribbon in Word, Excel and
PowerPoint Review
Ribbon in Word, Excel, and PowerPoint
You should now be familiar with how to
do the following:
Select tabs
Locate groups of similar functions
Open the dialog box for a group
Locate the Save and Print
commands
Customize the ribbon
Open the Help dialog box

Microsoft Digital Literacy: Productivity Programs 40 | P a g e
Using the Mini Toolbar
The Mini Toolbar appears when you
select text in a document. It gives you
easy access to commands that you can
use to change the size, color, or font of
text.

Microsoft Digital Literacy: Productivity Programs 41 | P a g e
Mini Toolbar simulation
The Mini Toolbar simulation can be accessed online at http://www.microsoft.com/digitalliteracy.

Microsoft Digital Literacy: Productivity Programs 42 | P a g e
Mini Toolbar review
Mini Toolbar and the Image
Editing Menu Review
You should now be familiar with the
following commands on the Mini Toolbar
and the Image Editing Menu:
Changing font
Font size
Bold, Italic, and Underline
Font Color
Image quick styles
Inserting Office.com clip art

Microsoft Digital Literacy: Productivity Programs 43 | P a g e
Knowledge check
How do you display the Mini Toolbar?
Answer –
#1 – You display the Mini Toolbar by selecting text and then either using the left mouse
button and double-clicking or using the right mouse button and clicking.

Microsoft Digital Literacy: Productivity Programs 44 | P a g e
Keyboard techniques for entering text
You use the keyboard to enter
information into a computer. Depending
on the application you are running,
keyboard input will behave differently.
For example, Word 2013 is a word
processor, so most of your keyboard
input adds and modifies text.

Microsoft Digital Literacy: Productivity Programs 45 | P a g e
Keyboard techniques for entering text simulation
The Keyboard Techniques for Entering Text simulation can be accessed online at
http://www.microsoft.com/digitalliteracy.

Microsoft Digital Literacy: Productivity Programs 46 | P a g e
Keyboard Review
Keyboard Review
You should now have a basic
understanding of how to use a keyboard.
Keep the following in mind:
Alphanumeric keys are A-Z and 0-
9.
Modifier keys are Alt, Shift, Ctrl,
and Cmd (Mac only).
Action keys are the Spacebar,
Enter, Delete, Backspace, the arrow
keys, Tab, and Caps Lock.

Microsoft Digital Literacy: Productivity Programs 47 | P a g e
Knowledge check
Keyboard input does not behave the same in all applications.
o True
o False
All keyboards have the same keys and layout?
o True
o False
Answers –
#1- True. Different applications can use keys to do different tasks.
#2 – False. You can purchase many different keyboard layouts.

Microsoft Digital Literacy: Productivity Programs 48 | P a g e
Keyboard shortcuts
In addition to entering information by
using single keystrokes and simple key
combinations, you can use advanced
keyboard shortcuts and key
combinations, which speed up your
productivity.
Keyboard shortcuts video
The function keys on your
keyboard are used to
perform special tasks in
programs.

Microsoft Digital Literacy: Productivity Programs 49 | P a g e
For example, the F1 key is
most commonly used to
display a Help page
associated with the program.
However, the tasks of some
function keys are specific to a
particular program.

Microsoft Digital Literacy: Productivity Programs 50 | P a g e
For example, the F5 key in
PowerPoint 2013 is used to
start a slide show, whereas in
Word 2013, the same key
displays the Find And Replace
dialog box.
You use the navigation keys
to move around in a
document.
These keys include Home,
End, Page Up, Page Down,
and the four arrow keys.
What the navigation keys do
is similar, but not exactly the
same, in different programs.
Microsoft Digital Literacy: Productivity Programs 51 | P a g e
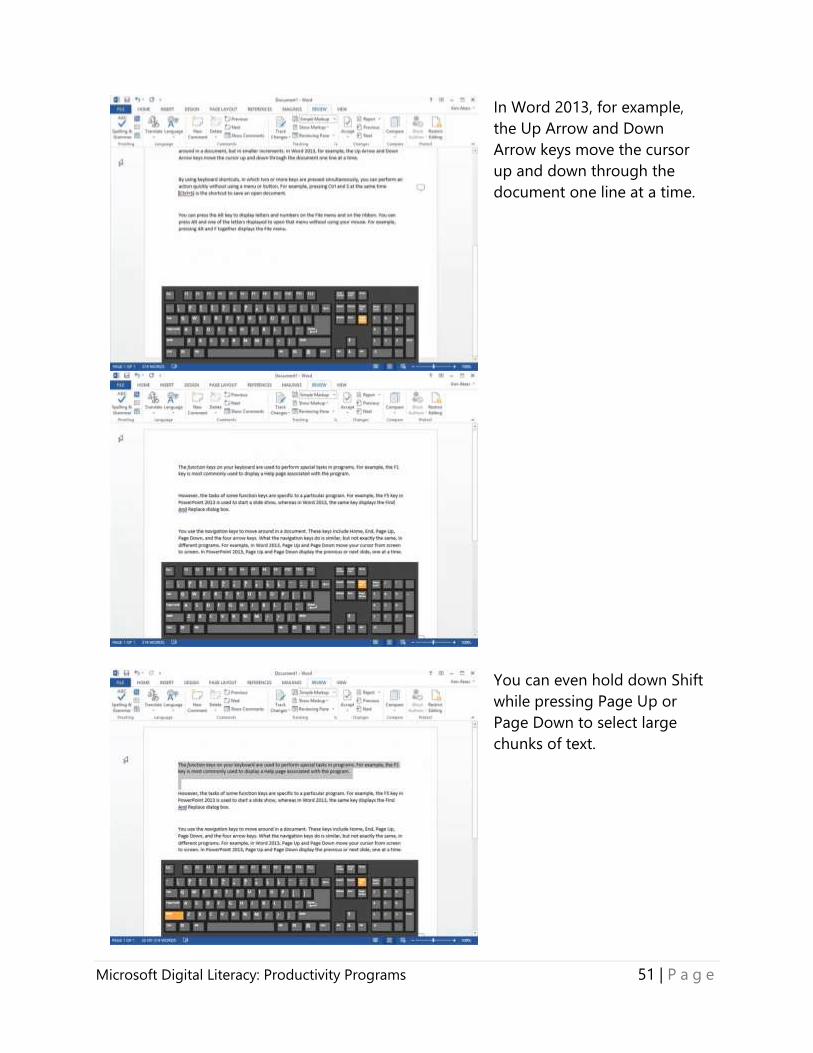
In Word 2013, for example,
the Up Arrow and Down
Arrow keys move the cursor
up and down through the
document one line at a time.
You can even hold down Shift
while pressing Page Up or
Page Down to select large
chunks of text.
Microsoft Digital Literacy: Productivity Programs 52 | P a g e
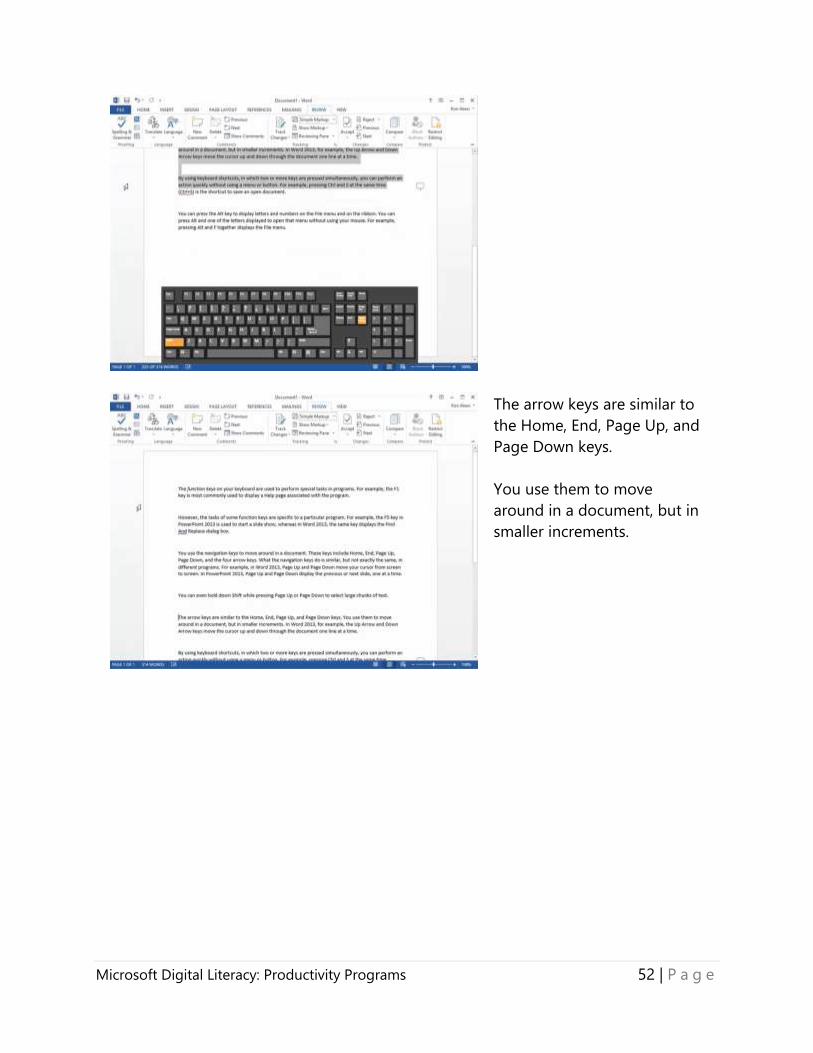
The arrow keys are similar to
the Home, End, Page Up, and
Page Down keys.
You use them to move
around in a document, but in
smaller increments.

Microsoft Digital Literacy: Productivity Programs 53 | P a g e
In Word 2013, for example,
the Up Arrow and Down
Arrow keys move the cursor
up and down through the
document one line at a time.
By using keyboard shortcuts,
in which two or more keys
are pressed simultaneously,
you can perform an action
quickly without using a menu
or button.

Microsoft Digital Literacy: Productivity Programs 54 | P a g e
For example, pressing Ctrl
and S at the same time.
Ctrl+S
is the shortcut to save an
open document.
You can press the Alt key to
display letters and numbers
on the File menu and on the
ribbon. You can press Alt and
one of the letters displayed
to open that menu without
using your mouse.

Microsoft Digital Literacy: Productivity Programs 55 | P a g e
For example, pressing Alt and
F together displays the File
menu.
Keyboard shortcuts review
Keyboard Shortcuts Review
You should now have a basic
understanding of how to use keyboard
shortcuts. Keep the following in mind:
Modifier keys are Alt, Shift, Ctrl,
and Cmd (Mac only).
A key combination consists of
pressing two or more keys.
Shortcut keys will perform an
action quickly.

Microsoft Digital Literacy: Productivity Programs 56 | P a g e
Knowledge check
What keys are shortcuts for opening dialog boxes?
o Function Keys
o Ctrl Key
o Alt Key
What keys perform quick commands?
o Functions Keys
o Ctrl Keys
o Alt Keys
Answers –
#1 – The Function keys commonly opens dialog boxes.
#2 – The Ctrl key commonly performs quick commands.

Microsoft Digital Literacy: Productivity Programs 57 | P a g e
Congratulations
Congratulations on
completing the lesson!
You should now be able to:
Identify the main
components of the
graphical user interface
(GUI) of a productivity
program
Use the pointer to
navigate in a program
Identify the tabs,
groups, and commands
on the Ribbon
Use the buttons on the
toolbars to perform
various tasks
Type text and
characters in a program
by using the keyboard
Explain the use of
keyboard shortcuts and
key combinations

Microsoft Digital Literacy: Productivity Programs 58 | P a g e
Introduction
to Word
Processors
Introduction to word processors
Microsoft Word 2013 is a word processor that can help you create certain items; which
are listed below:
Professional resumes
Agendas
Brochures
Certificates
Birthday cards
And more
In this lesson, you will learn about the basic tasks that you can perform by using a
word processor. You will learn to work with text, tables, and pictures. Learning what
exactly a word processor is and the specialties of such a program.
Microsoft Digital Literacy: Productivity Programs 59 | P a g e
Basic tasks in Word 2013
A word processor is a software program
that you use to create and work with text
on a computer. It performs the same
functions as paper, a pen, a typewriter or
keyboard, an eraser, and a dictionary.
Most computers come with basic word
processors such as Notepad and
WordPad. You can use advanced word
processors, such as Word 2013, to
perform more complex tasks that include
checking for spelling errors, finding
synonyms, inserting graphics, and
printing documents.

Microsoft Digital Literacy: Productivity Programs 60 | P a g e
Basic tasks in Word 2013 simulation
The Basic Tasks in Word 2013 simulation can be accessed online at http://www.microsoft.com/digitalliteracy.

Microsoft Digital Literacy: Productivity Programs 61 | P a g e
Knowledge check
What king of tasks can you perform in Word?
Answer –
#1 – Your answer should include the following: review documents, add images, print,
write letters, save documents, and format text.

Microsoft Digital Literacy: Productivity Programs 62 | P a g e
Creating a document by using a template
Office 2013 provides various types of
templates. These templates contain
predefined formats and layouts that you
can use to create a document quickly.
Standard templates are available locally
on your computer. However, advanced
templates are also available on the
Office.com web site.

Microsoft Digital Literacy: Productivity Programs 63 | P a g e
Creating a document by using a template simulation
The Creating a document by using a template Simulation can be accessed online at
http://www.microsoft.com/digitalliteracy.

Microsoft Digital Literacy: Productivity Programs 64 | P a g e
Knowledge check
There is only one type of template.
o True
o False
Templates are only available on your computer.
o True
o False
Answers –
#1 – False. There are hundreds of templates that help you write resumes, cover letters,
thank you notes, and event party invitations.
#2 – False. Your computer starts with some templates, but you can get many more from
the Microsoft Office website.

Microsoft Digital Literacy: Productivity Programs 65 | P a g e
Edit and formatting text
Word 2013 helps you to easily cut, copy,
and paste text, undo and redo actions,
justify text, change font parameters and
paragraph spacing, and perform various
other editing and formatting functions. In
this demonstration, you will see how to
perform basic tasks that are related to
editing and formatting of text in Word
2013.

Microsoft Digital Literacy: Productivity Programs 66 | P a g e
Edit and formatting text video
With Word 2013, you can
easily change the text of your
document and make it look
more interesting.
One way to move text in your
document is to copy and
paste it.
The copy option in Word
2013 helps you duplicate
information.
When you select and then
copy text no changes are
made to the original copied
text.
Start by selecting text to copy
with your mouse or the
keyboard and then click the
Copy button in the toolbar or
press control and C.

Microsoft Digital Literacy: Productivity Programs 67 | P a g e
The Paste option inserts text
that has been cut or copied
from a document into a
different location.
That can be within the same
document or even into a
different document.
The Paste option inserts text
that has been cut or copied
from a document into a
different location.
That can be within the same
document or even into a
different document.

Microsoft Digital Literacy: Productivity Programs 68 | P a g e
You can reverse specific and
repeat actions that you
performed.
Click the undo button or
press control z to reverse
your last action.
Pressing it again will reverse
the action that happened
before that and so on.
You can use the Cut option
to remove selected text from
its original location by
clicking the cut command or
pressing control X.
Microsoft Digital Literacy: Productivity Programs 69 | P a g e
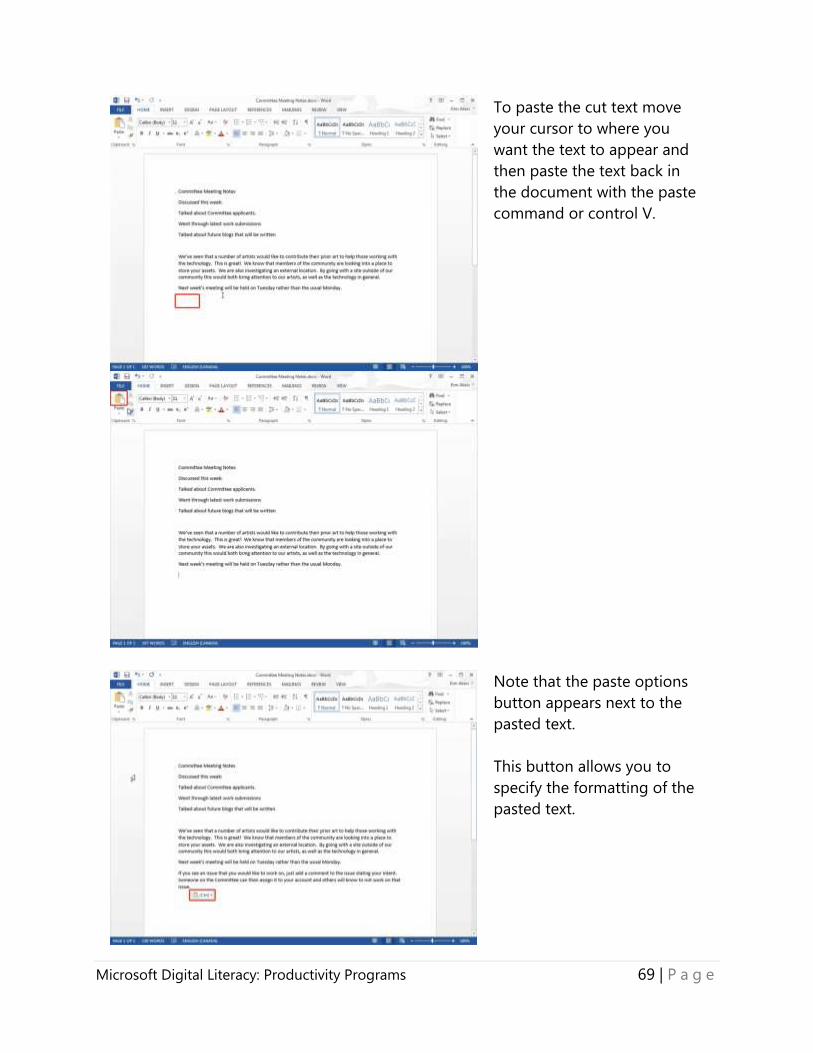
To paste the cut text move
your cursor to where you
want the text to appear and
then paste the text back in
the document with the paste
command or control V.
Note that the paste options
button appears next to the
pasted text.
This button allows you to
specify the formatting of the
pasted text.

Microsoft Digital Literacy: Productivity Programs 70 | P a g e
When you need to change
the font, size, or style of a
word or sentence use the
commands that are available
in the Home Tab.
You can change your selected
text by clicking the Font
selection box and picking an
entry from the list.

Microsoft Digital Literacy: Productivity Programs 71 | P a g e
Changing the font size is as
simple as typing a number in
the next box or clicking the
dropdown selection of preset
numbers.

Microsoft Digital Literacy: Productivity Programs 72 | P a g e
To emphasize important
parts of the text, you can
select from predetermined
styles.
You can change the size, font,
color, and alignment of text
in a single click.
After selecting a style, you
can refine the formatting.

Microsoft Digital Literacy: Productivity Programs 73 | P a g e
For example, you can make
the title for your document
centered and underlined.
If you want to have absolute
control over the appearance,
you can apply a style step by
step.

Microsoft Digital Literacy: Productivity Programs 74 | P a g e
Microsoft Digital Literacy: Productivity Programs 75 | P a g e
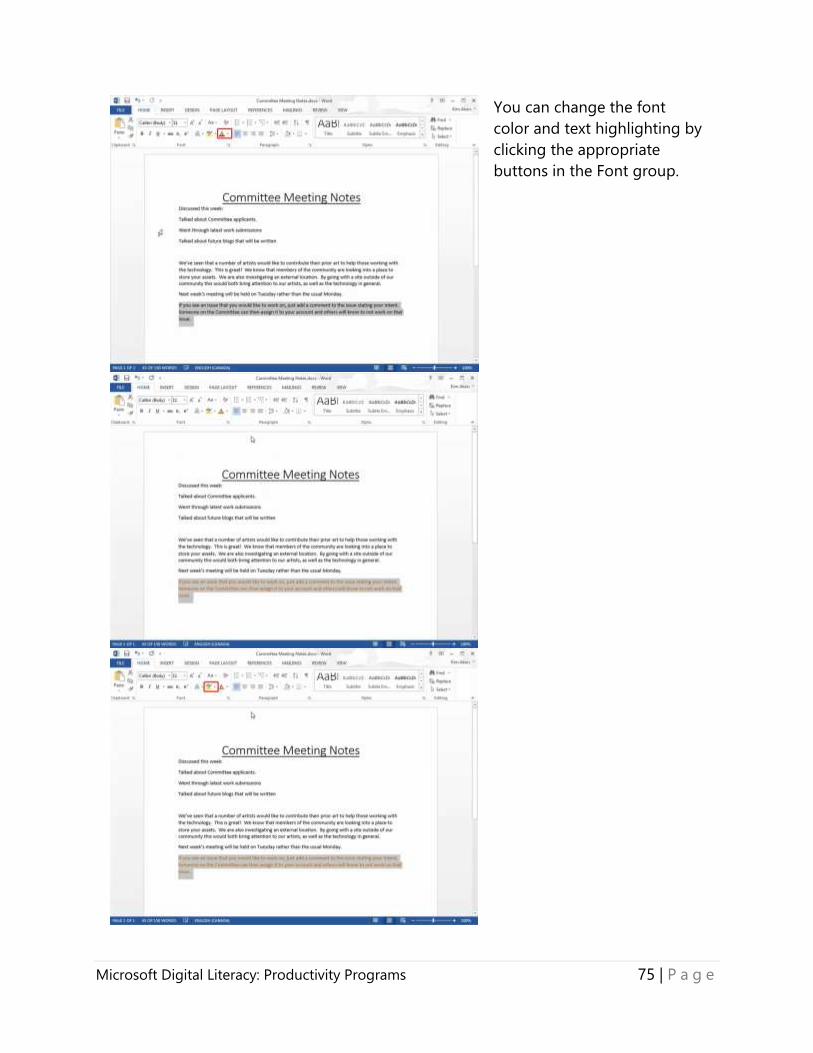
You can change the font
color and text highlighting by
clicking the appropriate
buttons in the Font group.

Microsoft Digital Literacy: Productivity Programs 76 | P a g e
Changing the text to be bold
and italicized will make it
stand out even more.

Microsoft Digital Literacy: Productivity Programs 77 | P a g e
You can specify the
arrangement of the text in a
document by using the
alignment settings.
This will affect the spacing
and positioning of the text.
Center will make all of the
text align down the middle of
the document.

Microsoft Digital Literacy: Productivity Programs 78 | P a g e
The Align Text Right and
Align Text Left buttons allow
you to align the text to the
edges of the page.

Microsoft Digital Literacy: Productivity Programs 79 | P a g e
Use the Justify button to
align the text of a paragraph
evenly between the left and
the right margins of a page.
Suppose there is a list of
items in your document and
you want to make them stand
out as a list and not separate
lines.
You can make an unordered
list by clicking the Bullets
button.

Microsoft Digital Literacy: Productivity Programs 80 | P a g e
If your list has a specific
order, you can click on the
Numbering button.

Microsoft Digital Literacy: Productivity Programs 81 | P a g e
To change the style of the
list, you can click on the
Numbering or Bullet
dropdowns and select style
that fits your document.

Microsoft Digital Literacy: Productivity Programs 82 | P a g e

Microsoft Digital Literacy: Productivity Programs 83 | P a g e
Knowledge check
What are five things that Word 2013 can easily let you do with text?
Answer –
#1 – Your answer should include at least five of the following: cut, copy, and paste text,
undo and redo actions, justify text, change font parameters, and paragraph spacing.

Microsoft Digital Literacy: Productivity Programs 84 | P a g e
Working with tables and pictures
Suppose you want to create a report that
contains information about the weekly
sale of museum tickets during a month.
Instead of presenting this information as
plain text, you can present the
information in an easy-to-understand
format using a table.
You can divide the information into
logical sections within a table to group
different types of data, making it easier
to read the entire document. You can
also include pictures in a document to
make it visually appealing.

Microsoft Digital Literacy: Productivity Programs 85 | P a g e
Working with tables and pictures simulations
The Working with Tables and Pictures simulation can be accessed online at
http://www.microsoft.com/digitalliteracy.

Microsoft Digital Literacy: Productivity Programs 86 | P a g e
The Working with Tables and Pictures simulation can be accessed online at
http://www.microsoft.com/digitalliteracy.

Microsoft Digital Literacy: Productivity Programs 87 | P a g e
Knowledge check
How can you present information in an easy-to-understand format?
o PowerPoint
o Chart
o Table
o Paragraph
You can divide information in a table into sections with different types of data.
o True
o False
Answers –
#1 – A table will allow you to put information into different cells and divide it up into
different categories.
#2 – True. You can use rows and columns to divide any number of sections.

Microsoft Digital Literacy: Productivity Programs 88 | P a g e
Proofreading documents
Advanced word processors, such as Word
2013, can automatically check the
spelling, grammar, and punctuation of a
document based on the language of the
typed text. You may also search for
synonyms using the built-in thesaurus.
Word 2013 also features an AutoCorrect
function that will automatically correct
misspellings and grammatical errors as
soon as you start typing the text. For
example, typing “teh” will automatically
be corrected to “the”.

Microsoft Digital Literacy: Productivity Programs 89 | P a g e
Proofreading documents video
Any time you are writing a
report or an essay you may
check your document for
spelling and grammar
mistakes.
This is done using the
proofreading tools that Word
2013 provides as found under
the Review tab on the Ribbon
bar.

Microsoft Digital Literacy: Productivity Programs 90 | P a g e
Within the work area of Word
2013 you may see words with
a wavy red underline.
This indicates that the word is
not found in Word 2013's
dictionary.

Microsoft Digital Literacy: Productivity Programs 91 | P a g e
Clicking on the Spelling &
Grammar command opens a
Spelling task pane that
provides suggestions on how
to correct the misspelled
word.
Clicking the Change All
button corrects all instances
of the misspelled word in the
document.
This saves you from having to
manually correct the whole
document.

Microsoft Digital Literacy: Productivity Programs 92 | P a g e
Word 2013 also helps you
check and correct
grammatical errors in your
document.
Words with a wavy blue
underline offer suggestions in
the Grammar task pane
where you may either correct
your document or choose to
ignore the suggestion.
When words from different
languages or the names of
people and companies show
up as misspelled, we may
click on the Ignore All button
to ignore the suggestions for
your document

Microsoft Digital Literacy: Productivity Programs 93 | P a g e
If this is a word that is
common across multiple
documents we may click on
the Add button to add it to
Word 2013's dictionary.
To find a synonym for a word,
you can use the Thesaurus
feature in Word 2013.

Microsoft Digital Literacy: Productivity Programs 94 | P a g e
Word 2013 searches for
synonyms and provides a list
to choose from.
You may then select the word
you want from the list.

Microsoft Digital Literacy: Productivity Programs 95 | P a g e
In this demonstration, you
saw how to proofread a
document in Word 2013.
Proofreading documents review
Proofreading Documents Review
You should now be familiar with the
following Proofreading Features:
Review Tab's Spelling & Grammar
Misspelled word highlights with
the red wavy underline
Click to choose a new spelling
Grammar Suggestions
Add to dictionary
Thesaurus

Microsoft Digital Literacy: Productivity Programs 96 | P a g e
Knowledge check
How do you correct a misspelled word?
Answer –
#1 – Your answer should have included clicking on the Spelling & Grammar command
and choosing the correct spelling from the provided list of one or more words.

Microsoft Digital Literacy: Productivity Programs 97 | P a g e
Benefits of desktop publishing
Up to this point you have learned all
about Word Processors, such as Word
2013. You will now be learning about the
benefits of publishing the work that has
been done on a word processor. There is
a specific program that will allow you to
do some final touches and move stuff
around much easier for a very long
document.
A word processor such as Word 2013
provides a lot of flexibility in creating
your document. But if you are looking to
create documents with a specialized text
and image layout a desktop publishing
(DTP) program such as Publisher 2013
can help out. DTP makes it easier to
arrange and modify information for
documents that are very long, or have
special formatting needs. And DTP
programs also offer built-in templates for
documents such as newsletters,
brochures, flyers, signs, resumes,
business forms, letter formats, and
catalogs.

Microsoft Digital Literacy: Productivity Programs 98 | P a g e
Benefits of desktop publishing video
A word processor such as
Word 2013 provides a lot of
flexibility when creating your
documents.
But if you are looking to
create documents with a
specialized layout such as a
brochure or a photo calendar,
a desktop publishing
application like Publisher
2013 gives you the power to
combine text and images in a
variety of ways.
Let’s step through creating a
brochure using Publisher
2013.
When we start up Publisher
2013 we are provided with a
list of templates to choose
from.
We will start by selecting
BUILT-IN.

Microsoft Digital Literacy: Productivity Programs 99 | P a g e
We are now provided with a
list of template categories.
We will select the Brochures
category.

Microsoft Digital Literacy: Productivity Programs 100 | P a g e
Publisher 2013 now provides
us a list of brochure
templates to choose from.
We will select the first
brochure template called
Arrows.

Microsoft Digital Literacy: Productivity Programs 101 | P a g e
And click on the Create
button to create a new
document based on this
template.
Once Publisher 2013 has
created our document, we
are provided with a list of the
pages on the left.
The work area of Publisher
2013 is where we may
change the provided example
text and images according to
our project’s needs.

Microsoft Digital Literacy: Productivity Programs 102 | P a g e
Let's start with the brochure’s
title.
Now right click on the front
page picture and select the
option to change it.

Microsoft Digital Literacy: Productivity Programs 103 | P a g e
This will open the Insert
Pictures dialog where we may
search for a royalty-free
photo or image

Microsoft Digital Literacy: Productivity Programs 104 | P a g e
Here is a list of photos, clip
art, and images to choose
from.
Let’s select an image from
the list for our brochure, and
then click on the Insert
button to place the image in
the brochure.
Microsoft Digital Literacy: Productivity Programs 105 | P a g e
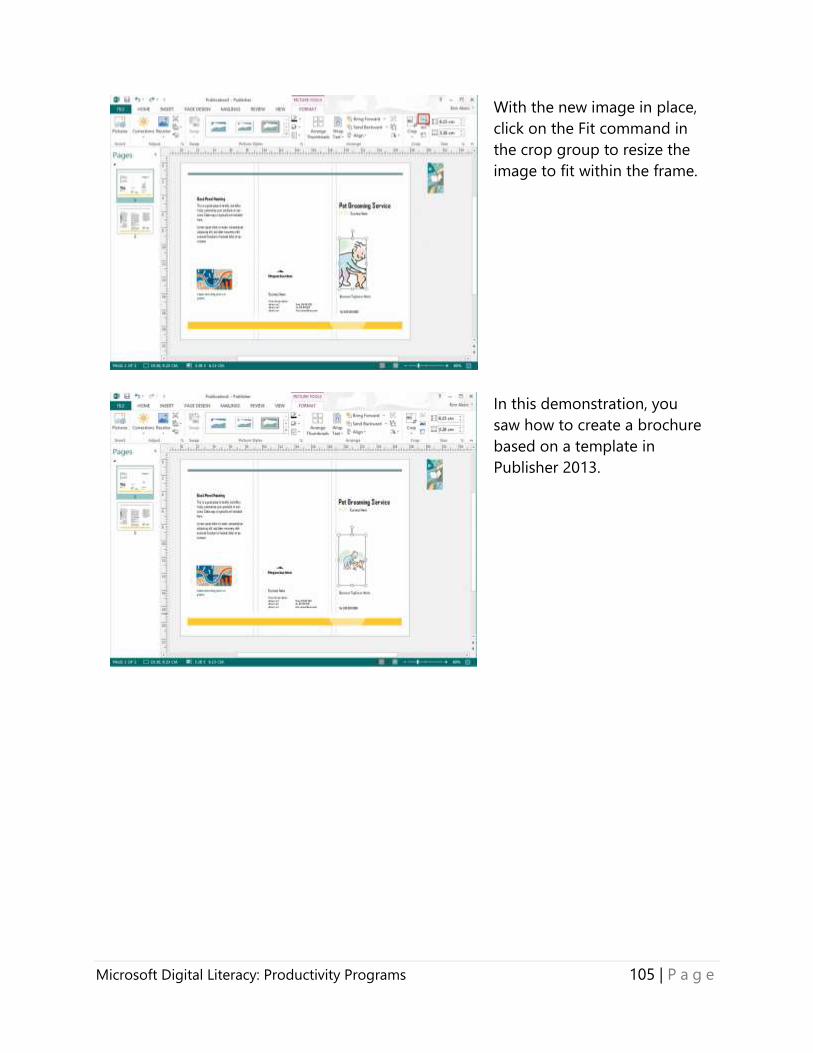
With the new image in place,
click on the Fit command in
the crop group to resize the
image to fit within the frame.
In this demonstration, you
saw how to create a brochure
based on a template in
Publisher 2013.

Microsoft Digital Literacy: Productivity Programs 106 | P a g e
Benefits of desktop publishing review
Benefits of Desktop Publishing
Review
This demonstration introduced you to
the following tasks you can perform with
Publisher 2013:
Create a DTP document based on
a template
Modify text to suit your particular
project
Change the provided default
images
Browse the Office 2013 royalty-
free image catalog

Microsoft Digital Literacy: Productivity Programs 107 | P a g e
Knowledge check
What types of documents can you create with a desktop publishing program?
How do you resize an image to fit the frame it is in?
Answers –
#1 – Your answer could have included any of the following: newsletters, brochures,
flyers, signs, resumes, business forms, letter formats, and catalogs.
#2 – Your answer should have included selecting the image’s frame and clicking on the
Fit command under the Format tab on the Ribbon bar.

Microsoft Digital Literacy: Productivity Programs 108 | P a g e
Congratulations
Congratulations on completing the
lesson!
You should now be able to:
Perform basic tasks in a word
processor.
Create a document by using a
template.
Edit and format text.
Work with tables and pictures.
Proofread a document.
Create a new online document.
Identify the benefits of DTP.

Microsoft Digital Literacy: Productivity Programs 109 | P a g e
Introduction
to
Spreadsheet
Programs
Introduction to Spreadsheet Programs
Excel 2013 is Microsoft's Spreadsheet Program. This specialized program allows you to
create spreadsheets, such as:
Schedules
Budgets
Calendars
Invoices
Plans
And more
In this lesson, you will learn about the components of a spreadsheet and how to store
data in it. You will also learn to perform basic mathematical tasks and create charts
and graphs in a spreadsheet. In addition, you will learn about the various options
available for printing a spreadsheet.

Microsoft Digital Literacy: Productivity Programs 110 | P a g e
Overview of spreadsheet programs
Microsoft Office 2013 includes Excel, the
leading spreadsheet program. A
spreadsheet is a table consisting of rows
and columns designed to organize your
data. Data usually consist of words or
numbers used to describe an item. A
number might represent the cost of
groceries, or even the date they were
purchase. A word might describe where
you purchased the groceries. Organizing
data into a table has two advantages.
First off it makes it easy to find a piece of
data, answering the question “How much
did I pay for the groceries last time?”
Secondly, it allows you to do calculations
on the data, “How much have I spent on
groceries this month?” In addition you
can take that data and use Excel to build
graphs and charts, but let’s not get ahead
of ourselves, time to learn the basics and
gain some terminology!

Microsoft Digital Literacy: Productivity Programs 111 | P a g e
Overview of spreadsheet Programs simulation
Notes for Presentation Clickable items are identified with a yellow border, provide an effect for the eye, pulsing
highlight, or flipping the tile like a windows phone
Slide 2 - After pressing Excel icon, all Icons move to these position Excel sheet comes up
from below
Slide 4 - When an Item is clicked, icon fades and 3 text values appear
Slide 5 - Then text fields move to their corresponding position in the sheet
Slide 6 - Fill in 1 column at a time, to show the column selection changing
Slide 7 - Repeat for each Icon, than enlarge the excel sheet
Slide 9 - Highlight cell - 3F- do type effect for string : =sum(C3:C5)
Slide 15 – Use radio buttons, grey out option if user selected wrong answer
Slide 17 - After pressing button, highlight worksheet tabs swap image show different
tabs 1 tab full, another empty, then return to original tab
Slide 18 - Excel sheet slides down, icon return to center position

Microsoft Digital Literacy: Productivity Programs 112 | P a g e
Knowledge check
What is a cell address?
o Cells don’t have addresses
o The street name and zip code
o A random letter and number
o An intersecting column header and row header
Which types of the following data can cells contain?
o Numbers
o Text
o Equations
o All of the above
Answers –
#1 – The intersecting column header (letter) and row header (number) make up a cell
address.
#2 – Cells can contain numbers, text, and equations.

Microsoft Digital Literacy: Productivity Programs 113 | P a g e
Inserting data
The time will come when you need to
make a budget and keep track of how
much your bills are each month. In order
to do this, you will need to know the
details about each bill such as bill name,
due date, bill amount, date paid, etc.
Then you will need to calculate the
overall amount of your bills for the
month so you can see how much of your
paycheck goes out each month. All of this
can be easily tracked, and tabulated, with
Excel. You do this by entering the
information into the cells of an Excel
spreadsheet. If the bill ever changes, you
can even edit the cell with the new value
and it will automatically replace the old
value with the new. In following
demonstration you will learn how to
insert data into a worksheet in Excel 2013.

Microsoft Digital Literacy: Productivity Programs 114 | P a g e
How to insert data into a worksheet in Excel 2013 simulation
Spreadsheet Programs Review
Spreadsheet Programs Review
What you should know now:
Inserting and editing text in a cell
Copy and cut text from cell
Paste or move to another cell
Insert additional rows and columns
Save a worksheet

Microsoft Digital Literacy: Productivity Programs 115 | P a g e
Knowledge check
The Save As function is found in the Review Tab of the Office Ribbon.
o True
o False
To move text from cell to another, you use?
o Copy
o Cut
o Move
o Transfer
Answers –
#1 – False. It is in the file tab.
#2 – Using cut will allow you to delete the information in one cell and paste it in
another.

Microsoft Digital Literacy: Productivity Programs 116 | P a g e
Performing basic mathematical tasks in a spreadsheet
In addition to storing and manipulating
data, a spreadsheet program such as
Excel 2013 allows us to perform various
mathematical tasks on our data quickly
and accurately. The spreadsheet program
provides functions that perform
calculations on the cells of the
spreadsheet. For example, you could add
together all of your household expenses
to reach a total, or use the Average
function to calculate the average of your
grades.

Microsoft Digital Literacy: Productivity Programs 117 | P a g e
Performing basic mathematical tasks in a spreadsheet video
A spreadsheet program such
as Excel 2013 allows us to
perform various
mathematical tasks on our
data quickly and accurately.
To perform these tasks, we
use functions provided by
Excel 2013.
We begin by clicking on the
Formulas tab in the Ribbon
Bar.

Microsoft Digital Literacy: Productivity Programs 118 | P a g e
The Function Library group
provides access to all of the
functions provided by Excel
2013.
Let’s begin by adding
together the students first
semester test scores in our
example.
Microsoft Digital Literacy: Productivity Programs 119 | P a g e
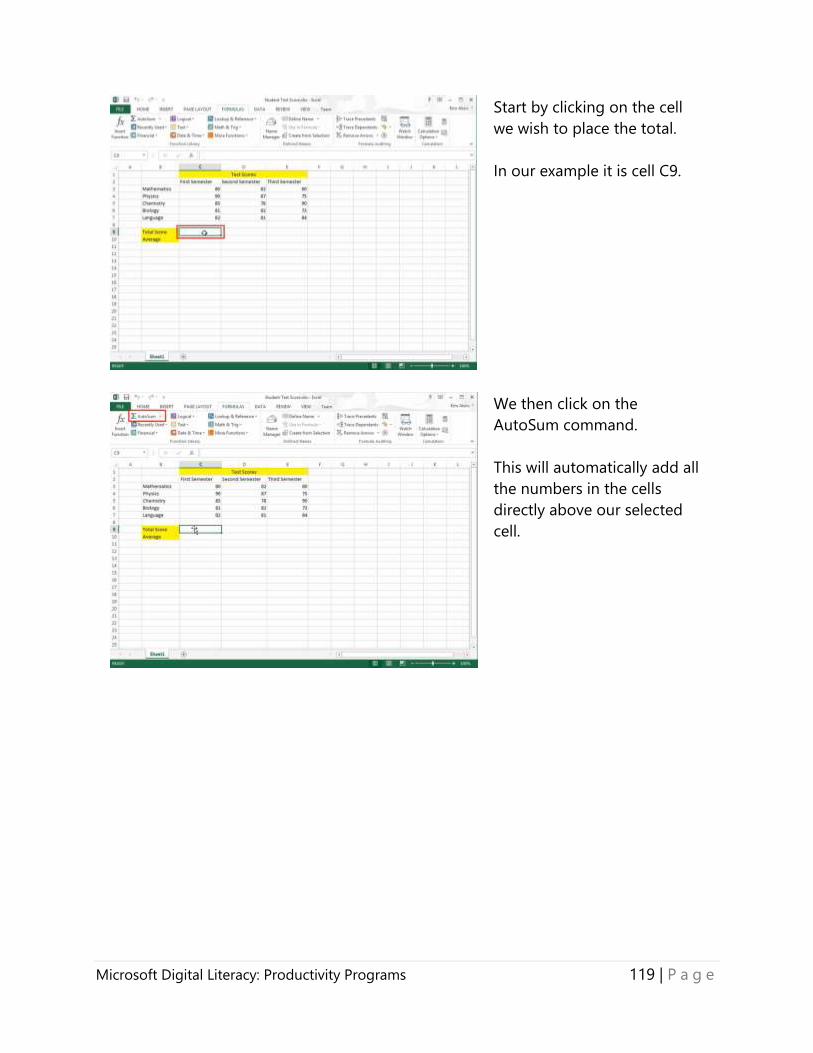
Start by clicking on the cell
we wish to place the total.
In our example it is cell C9.
We then click on the
AutoSum command.
This will automatically add all
the numbers in the cells
directly above our selected
cell.

Microsoft Digital Literacy: Productivity Programs 120 | P a g e
Notice that Excel 2013 shows
us which cells and the
numbers that will be added
together.
If we wanted to use a
different range of cells we
could click and drag on the
different cells.
For now let’s limit our range
to just add the numbers in
the cells C3 through C7.
To accept the cell range,
press the Enter key.

Microsoft Digital Literacy: Productivity Programs 121 | P a g e
Excel 2013 calculates the total
and displays it in a selected
cell.
We can see the Sum Function
used for the C9 cell by
clicking on it again and
looking in the formula bar.
Let’s now copy our function
to the other two semesters.

Microsoft Digital Literacy: Productivity Programs 122 | P a g e
Start by clicking on the Home
tab.
…and then click on the Copy
command.
Excel 2013 will highlights the
copied cell.

Microsoft Digital Literacy: Productivity Programs 123 | P a g e
Next we select the Total
Score cells of the remaining
two semesters.
Finally, we click on the Paste
command.

Microsoft Digital Literacy: Productivity Programs 124 | P a g e
Excel 2013 copies the
function from cell C9 and
paste it into cells D9 and E9.
Excel 2013 automatically
changes the cell range of a
copy and pasted function to
the appropriate column.
In this demonstration, you
saw how to perform a
mathematical calculation in
Excel 2013.

Microsoft Digital Literacy: Productivity Programs 125 | P a g e
Performing basic mathematical tasks in a spreadsheet review
Performing Basic Mathematical
Tasks in a Spreadsheet Review
You should now be familiar with
performing mathematical tasks in a
spreadsheet:
Select a range of cells
Calculate a cell’s value by using a
function
Copy a function from one cell to
another

Microsoft Digital Literacy: Productivity Programs 126 | P a g e
Knowledge check
Where do you find cell functions in Excel 2013?
Answer –
#1 – Your answer should have mentioned the Formulas tab and the Function Library
group.

Microsoft Digital Literacy: Productivity Programs 127 | P a g e
Inserting charts
You have learned how to insert data and
operate data now we will show you how
use display data with a chart. Excel
provides a wide variety of charts and built
in functions for the chart. Perhaps you
would like to find a linear relationship to
a chart. All you have to do is plot the data
on a scatter chart and insert a trend line.
Excel will give you the y = mx + b
relationship of the data! Let me show
you.
Microsoft Digital Literacy: Productivity Programs 128 | P a g e
Inserting charts video
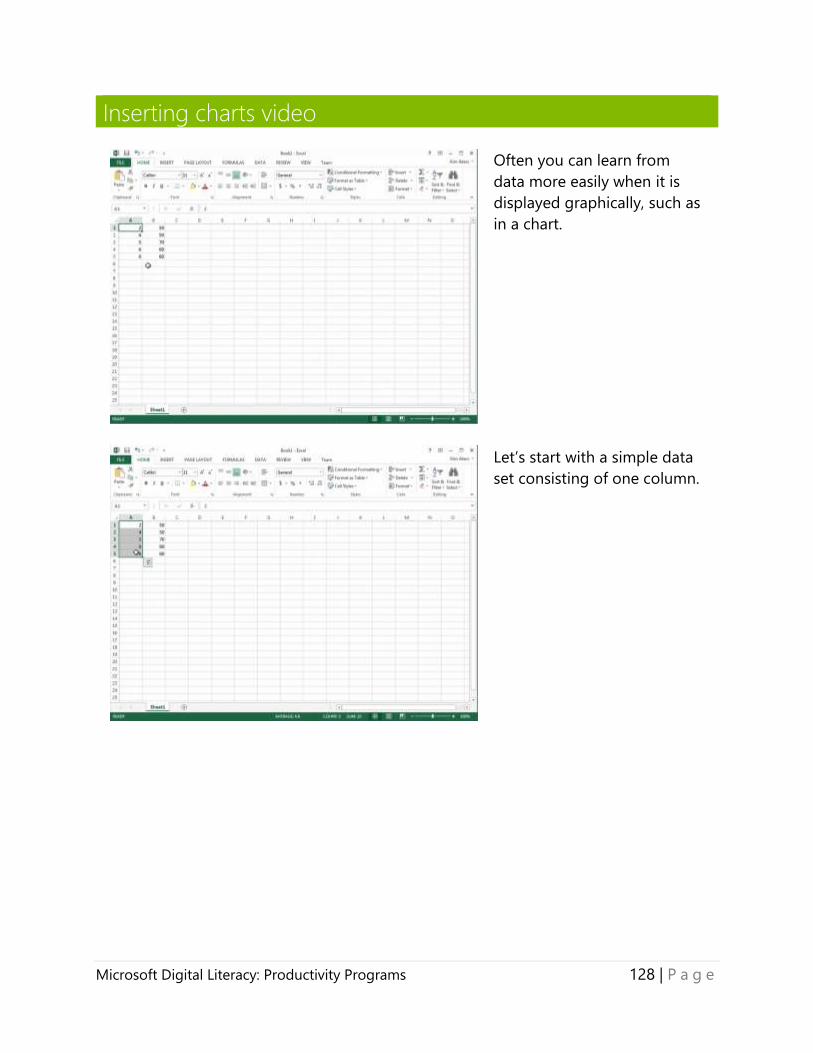
Often you can learn from
data more easily when it is
displayed graphically, such as
in a chart.
Let’s start with a simple data
set consisting of one column.

Microsoft Digital Literacy: Productivity Programs 129 | P a g e
Click on the insert tab and
then select Recommended
Charts in the Charts group
and click Ok to create the
chart excel recommends.

Microsoft Digital Literacy: Productivity Programs 130 | P a g e
When you select the chart,
additional tabs for Design
and Format appear.
You can customize a chart to
include a title and labels.

Microsoft Digital Literacy: Productivity Programs 131 | P a g e
To edit the title, first click to
select it and then click on it
again to edit the text.
You can remove the chart
title by going to the Chart
Layouts group on the Design
tab.
Select Add Chart Element and
Chart Title then select None
in the options.
Microsoft Digital Literacy: Productivity Programs 132 | P a g e
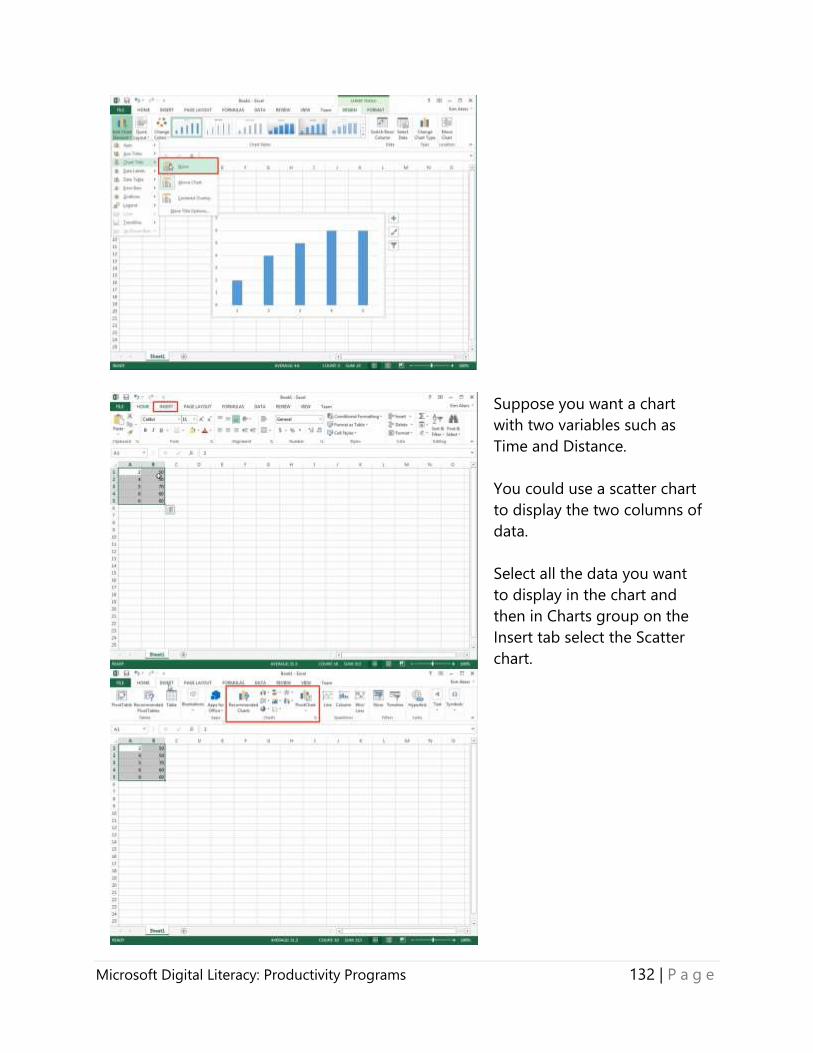
Suppose you want a chart
with two variables such as
Time and Distance.
You could use a scatter chart
to display the two columns of
data.
Select all the data you want
to display in the chart and
then in Charts group on the
Insert tab select the Scatter
chart.
Microsoft Digital Literacy: Productivity Programs 133 | P a g e
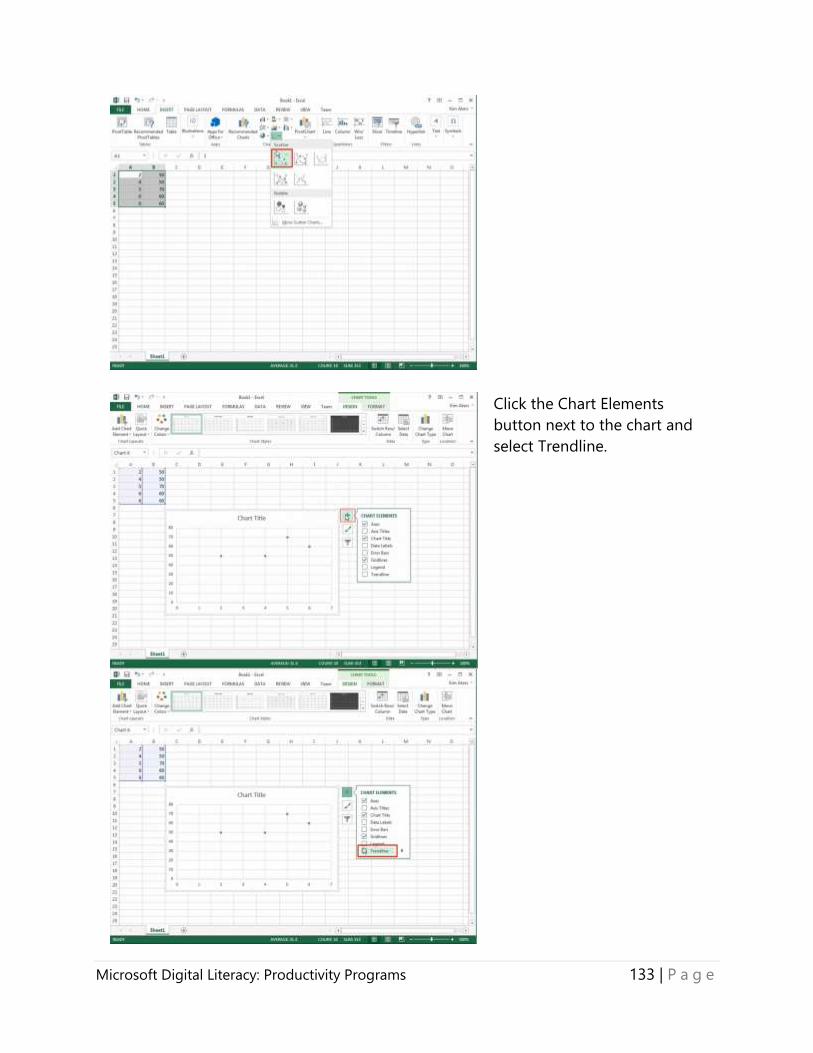
Click the Chart Elements
button next to the chart and
select Trendline.

Microsoft Digital Literacy: Productivity Programs 134 | P a g e
Expand the Trendline option
and click More Options to
display the Format Trendline
dialog box to change the
trendline options.

Microsoft Digital Literacy: Productivity Programs 135 | P a g e
Excel quickly creates a chart
that can enhance any
presentation.
You can also paste your
spreadsheets and charts
directly into other Office
2013 products.

Microsoft Digital Literacy: Productivity Programs 136 | P a g e
Knowledge check
When inserting charts, you should only select the data.
o True
o False
If I am not sure what chart to use, I should try…
o Scatter
o Pie
o Recommended Chart
o Bar
Answer –
#1 – True. When you insert a chart it will only display the selected data.
#2 – The Recommended Chart is based on the type of data you have selected and is the
best choice if you are unsure.

Microsoft Digital Literacy: Productivity Programs 137 | P a g e
How to print spreadsheet data
Excel 2013 provides many options for
printing spreadsheets. If you happen to
have more columns than rows you can
choose to print your spreadsheet as a
Landscape. Perhaps your data isn’t fitting
on your page, Excel provides the option
to scale the data to fit your paper. Let’s
look as some of the way you can print
spreadsheets in Excel 2013.

Microsoft Digital Literacy: Productivity Programs 138 | P a g e
How to print spreadsheet data video
Excel 2013 offers some extra
printing features best suited for
data.
You’ll find the printing menu on
the file tab.

Microsoft Digital Literacy: Productivity Programs 139 | P a g e
Under settings you can choose
whether to print just the active
sheets in the workbook or print
the entire workbook.
You can specify which page
numbers you would like to
And how many copies you
would like to print.

Microsoft Digital Literacy: Productivity Programs 140 | P a g e
You can adjust the orientation
of the Worksheet on the paper
by selecting the Portrait
Orientation Command or
Landscape Orientation
command.
Make sure you have the correct
paper size and margin settings
set before you send you
worksheet to the printer.

Microsoft Digital Literacy: Productivity Programs 141 | P a g e
Excel 2013 provides custom
scaling settings for finding the
best fit for your print out.
By default the actual size of the
data is printed.
You can print charts by
selecting the specific chart you
want to print in the worksheet
before you enter the Print
menu.

Microsoft Digital Literacy: Productivity Programs 142 | P a g e
Notice the chart appears in the
preview window of the print
settings.
Now you know the additional
features Excel 2013 provides for
printing data.

Microsoft Digital Literacy: Productivity Programs 143 | P a g e
Knowledge check
You have a spreadsheet with data in a number of columns that doesn’t fit on a single
printed page using the default settings. What can you do to present the data on a
single printed page?
o Use landscape orientation
o Use the printing settings to only print one page
You can print specific pages of an Excel spreadsheet.
o True
o False
Answers –
#1 – Landscape orientation allows you to print a spreadsheet with more width than the
default portrait orientation.
#2 – True. You can select a single page to print or a range of pages to print.

Microsoft Digital Literacy: Productivity Programs 144 | P a g e
Congratulations
Congratulations on completing the
lesson!
You should now be able to:
Identify the components of a
spreadsheet.
Enter data into a spreadsheet.
Perform basic mathematical tasks
in a spreadsheet.
Insert charts in a spreadsheet.
Print a spreadsheet.
Create an online spreadsheet.

Microsoft Digital Literacy: Productivity Programs 145 | P a g e
Introduction
to
Presentation
Programs
Introduction to presentation programs
PowerPoint 2013 is Microsoft’s Presentation Program. This specialized program allows
you to create a presentation for business, school, or for personal use. A presentation
can include the following:
Text
Graphics
Charts
Video
Audio
And more
In this lesson, you will learn about the basic elements of a presentation program, how
to create a presentation, and how to add graphics and multimedia to a presentation.
You will also learn to identify the various options available to print your presentation
in different formats and create a new online presentation.

Microsoft Digital Literacy: Productivity Programs 146 | P a g e
Introduction to presentation programs
Power Point 2013 allows you to develop
presentations. Presentations consist of
slides containing text and images.
Presentations can be displayed visually as
a slide show or printed for distribution.
Power point uses the Office 2013
interface to quickly add text and images
to slides.

Microsoft Digital Literacy: Productivity Programs 147 | P a g e
Introduction to presentation programs simulation
The Introduction to Presentation Programs simulation can be accessed online at
http://www.microsoft.com/digitalliteracy.

Microsoft Digital Literacy: Productivity Programs 148 | P a g e
Knowledge check
PowerPoint 2013 slides can display charts, spreadsheets, and documents from other
Office products.
o True
o False
What view allows you to edit the number of slides to put on each printed page?
o Notes
o From Beginning
o Handout Master
Answer –
#1 – True. You can insert charts, spreadsheets and documents from other Office
programs into PowerPoint slides.
#2 – The Handout Master view allows you to set the slides per page, the page
orientation and other print settings.

Microsoft Digital Literacy: Productivity Programs 149 | P a g e
Creating a presentation
Most presentations consist of several
slides of content. The appearance of the
slide can be themed to improve the look
of your presentations. Many times
transitions are added to the content to
add higher quality of professionalism.
After you create a presentation it is
important to review the presentation to
insure it behaves as intended.

Microsoft Digital Literacy: Productivity Programs 150 | P a g e
Creating a presentation video
Text is the most direct way to
add content to a slide.
The default slide has two text
areas, one for a title and
another for a subtitle.

Microsoft Digital Literacy: Productivity Programs 151 | P a g e
To add text simply click on the
text area and start typing.
To add a new slide select the
‘New Slide’ Command from the
Insert Ribbon.

Microsoft Digital Literacy: Productivity Programs 152 | P a g e
To add a new slide select the
‘New Slide’ Command from the
Insert Ribbon.
There are several layouts to
choose from, we will select the
blank slide layout and add our
own elements.
Here we will select the ‘Text
Box’ command from the Insert
Ribbon.

Microsoft Digital Literacy: Productivity Programs 153 | P a g e
Clicking on the slide will place
the text box on our slide.
To give all the slides in your
presentation a consistent look
PowerPoint offers a variety of
themes found on the Design
tab.

Microsoft Digital Literacy: Productivity Programs 154 | P a g e
We will use the Facet Style for
this presentation.
PowerPoint 2013 supports the
fonts and styles you’re familiar
with from working with other
Office 2013 programs.
Microsoft Digital Literacy: Productivity Programs 155 | P a g e
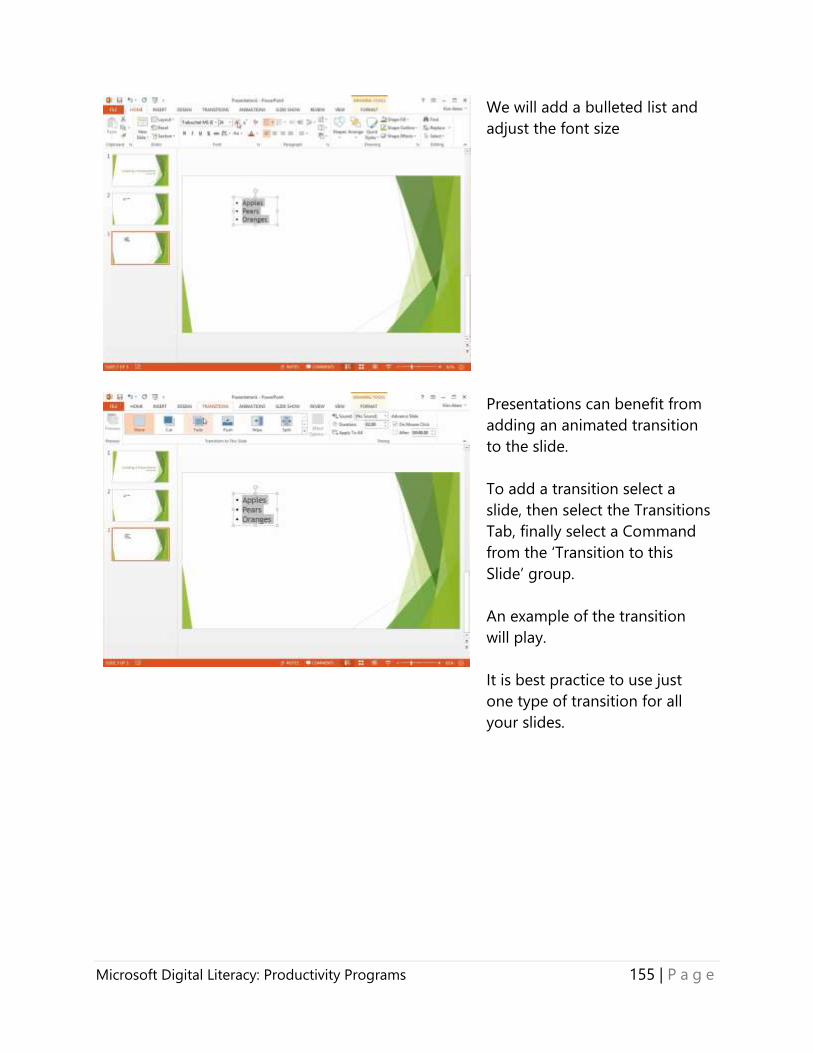
We will add a bulleted list and
adjust the font size
Presentations can benefit from
adding an animated transition
to the slide.
To add a transition select a
slide, then select the Transitions
Tab, finally select a Command
from the ‘Transition to this
Slide’ group.
An example of the transition
will play.
It is best practice to use just
one type of transition for all
your slides.

Microsoft Digital Literacy: Productivity Programs 156 | P a g e
Once you have created your
presentation it is important to
test the presentation from the
beginning.
To test your presentation select
the Slide Show Tab and select
‘From the Beginning’ Command
or press F5

Microsoft Digital Literacy: Productivity Programs 157 | P a g e
Knowledge check
When making a presentation, it is a best practice to use a wide variety of transitions.
o True
o False
Text areas can be repositions after they are placed on a slide.
o True
o False
Answer –
#1 – False. You want to be conservative in using transitions so they don’t become a
distraction.
#2 – True. You can edit the size and position of text areas after they are placed on a
slide.

Microsoft Digital Literacy: Productivity Programs 158 | P a g e
Adding graphics and multimedia
Most presentations are designed to show
the audience some content. Many times
the best way to express the content is
with images, tables and charts. Power
Point 2013 supports content from other
Office 2013 products. The content can be
pasted from other Office 2013 products
or built directly within Power Point 2013.
Let’s look at some of the ways we can
improve the content of a presentation.

Microsoft Digital Literacy: Productivity Programs 159 | P a g e
Adding graphics and multimedia simulation
The Adding Graphics and Multimedia simulation can be accessed online at
http://www.microsoft.com/digitalliteracy.

Microsoft Digital Literacy: Productivity Programs 160 | P a g e
Knowledge check
You cannot build charts in PowerPoint 2013.
o True
o False
Images can be dragged directly into PowerPoint 2013.
o True
o False
Answer –
#1 – False. PowerPoint allows you to build charts from scratch to display on a slide.
#2 – True. You can drag and drop images right onto a slide.

Microsoft Digital Literacy: Productivity Programs 161 | P a g e
How to print a presentation
Power Point 2013 provides many options
for printing spreadsheets, for instance
you can adjust how many slide appear on
a page. You may want to include your
notes when printing or show just the text.
Let’s look as some of the way you can
print spreadsheets in Power Point 2013.

Microsoft Digital Literacy: Productivity Programs 162 | P a g e
How to print a presentation video
Power point 2013 lets you
adjust the layout of the
handouts of your Presentation.
Select Handout Master from
the View Ribbon.

Microsoft Digital Literacy: Productivity Programs 163 | P a g e
The Master View offers many
options, here we change the
handout’s layout to be
Landscape.

Microsoft Digital Literacy: Productivity Programs 164 | P a g e
You can also have more than 1
slide to be printed out on each
page.
Here we will set PowerPoint to
put 4 slides on each printed
page.

Microsoft Digital Literacy: Productivity Programs 165 | P a g e
When you are ready to print,
select the Print button in the
backstage view.
In Settings choose the ‘Slide 4
Horizontal’ from the Handout
section.

Microsoft Digital Literacy: Productivity Programs 166 | P a g e
An example of the Layout is
displayed in the preview
window.
When printing multiple copies,
you can print one complete
presentation at a time or print
one slide at a time with the
Collated and Uncollated
Commands under Settings.

Microsoft Digital Literacy: Productivity Programs 167 | P a g e
Now you have the basics of
printing for Power Point 2013
presentations.

Microsoft Digital Literacy: Productivity Programs 168 | P a g e
Knowledge check
You can only print one slide per page.
o False
o True
You can include your presentation notes when printing.
o True
o False
Answers –
#1 – False. You can change the print settings to print as many as 9 slides on a page.
#2 – True. You can change the print settings to either include or hide slide notes when
printing your presentations.

Microsoft Digital Literacy: Productivity Programs 169 | P a g e
Congratulations
Congratulations on completing the
lesson!
You should now be able to:
Identify the elements of a
presentation program.
Create a presentation.
Add graphics and multimedia to a
presentation.
Use the print options that are
available in a presentation
program.
Create a new online presentation.

Microsoft Digital Literacy: Productivity Programs 170 | P a g e
Introduction
to Database
Programs
Introduction to database programs
Access 2013 is Microsoft's database program. This specialized program allows you to
create a database for:
Providing information
Keep certain items organized
Keep track of money
classify certain things
And more
In this lesson, you will learn about the basic tasks that you can perform by using a
database program. You will learn how to create and use a database. In addition, you
will learn how to generate various types of reports by using queries.

Microsoft Digital Literacy: Productivity Programs 171 | P a g e
Overview of databases
Businesses generate a lot of data,
consider how many times you have been
asked for your name and email just to
sign up for a new account on a website.
Your name and address are examples of
data. Databases are designed to store
and access data. This data is usually
stored in several different tables, when
someone wants to verify your account
they check the submitted data to that
stored in the database. Access 2013
allows you do build these tables, fill them
with data and then look at the data. Let’s
look at an overview of the process.

Microsoft Digital Literacy: Productivity Programs 172 | P a g e
Overview of databases simulation
The Overview of Databases simulation can be accessed online at http://www.microsoft.com/digitalliteracy.

Microsoft Digital Literacy: Productivity Programs 173 | P a g e
Knowledge check
Access 2013 uses a unique field to connect data between tables, what is it called?
o Data Type
o Field Name
o Primary Key
Databases can only contain one table.
o True
o False
Answers –
#1 – The primary key is the field where data can be looked up, making a search much
easier when the database is large.
#2 – False. A database can contain as many tables as the user needs.

Microsoft Digital Literacy: Productivity Programs 174 | P a g e
Creating a database
Databases contain several tables. A table
needs a description of the data before
data can be entered. For any column we
must specify if the data will be text, a
number, a date or something more
sophisticated. By specifying the data type
we can insure the data is valid when it is
add to the table. Let’s look at how we
added a table to a database.

Microsoft Digital Literacy: Productivity Programs 175 | P a g e
Creating a database video
As you can see there are
several types of Databases, we
will create a Blank Desktop
Database and name the file
TestDB.

Microsoft Digital Literacy: Productivity Programs 176 | P a g e
Click the Create button to open
the database file.
By default Access 2013 shows
you a table in DataSheet View.

Microsoft Digital Literacy: Productivity Programs 177 | P a g e
You can change views, with the
View button on the Home Tab.
Notice how Access 2013 will
ask you to provide a name for
your table.

Microsoft Digital Literacy: Productivity Programs 178 | P a g e
Let’s call our table "Student"
and click OK.
Each table starts with a piece of
data called ID whose data type
is Autonumber.

Microsoft Digital Literacy: Productivity Programs 179 | P a g e
Notice how the Primary Key
button is highlighted in the
Ribbon when the ID row is
selected.
You can toggle which row will
be the table’s Primary key.

Microsoft Digital Literacy: Productivity Programs 180 | P a g e
Lets add a couple more rows of
entries on our table
one for StudentName as a
Short Text Data Type and one
of Birthdate as a Date and Time
Data type.
In DataSheet View notice that
the field names we created are
now the column headers.

Microsoft Digital Literacy: Productivity Programs 181 | P a g e
In DataSheet View notice that
the field names we created are
now the column headers
You can type directly into the
cell or in certain cases, like a
date, we can choose a value
with the Calendar widget.

Microsoft Digital Literacy: Productivity Programs 182 | P a g e
Notice that with each new entry
in the table Access
automatically updates the
StudentID number.
Access 2013 allows database
designers an interface to create
their tables quickly.
Take some time to learn which
data type will best suit your
information and records.

Microsoft Digital Literacy: Productivity Programs 183 | P a g e
Knowledge check
The first row in a table must be the Primary Key of the table.
o True
o False
This data type insures that I have unique numbers.
o Number
o Short Text
o Autonumber
Answers –
#1 – False. The primary key can be anywhere and not necessarily the first row.
#2 – Autonumber will make sure you have unique numbers for each line of data.

Microsoft Digital Literacy: Productivity Programs 184 | P a g e
Working with records in a database
Access 2013 databases hold a collection
of tables and Excel 2013 creates tables. It
is natural to wonder ‘How does one
import an Excel table?’ Access 2013
supports a wide range of formats for
importing and exporting. In this lesson
let’s focus on the Excel Importer Wizard.

Microsoft Digital Literacy: Productivity Programs 185 | P a g e
Working with records in a database simulation
The Working with Records in a Database simulation can be accessed online at
http://www.microsoft.com/digirtalliteracy.

Microsoft Digital Literacy: Productivity Programs 186 | P a g e
Knowledge check
I cannot change the data type of a column once it is loaded into Access 2013.
o True
o False
I can use the first row in an Excel spreadsheet to be the name fields in my Access
table.
o True
o False
Answers –
#1 – False. The data type can be changed at any moment.

Microsoft Digital Literacy: Productivity Programs 187 | P a g e
#2 – True. Excel and Access are compatible with each other.

Microsoft Digital Literacy: Productivity Programs 188 | P a g e
Database queries
Queries allow database designers to
change or retrieve data from a database.
Access 2013 allows queries to be built
with a graphical interface. There is also
support for SQL queries. Let’s look at
how we can create a query.

Microsoft Digital Literacy: Productivity Programs 189 | P a g e
Database queries video
You use a query to retrieve
specific information from a
database.
It helps you view specific
data to modify or analyze it.

Microsoft Digital Literacy: Productivity Programs 190 | P a g e
You use a database program
to enter a query in the form
of a question.
The database program then
performs the required
operations to present the
answer in the form of a
report.

Microsoft Digital Literacy: Productivity Programs 191 | P a g e
Suppose you own a coffee
shop and you store detailed
information about your
customers in a Customer
table and data about the
sales of all the products in a
Product table.
These two tables form part of
a database.
You want to introduce a
special discount offer on the
less popular flavor of coffee
beans in the area with postal
code 97001.

Microsoft Digital Literacy: Productivity Programs 192 | P a g e
For this, you need to retrieve
the sales details to help you
make this decision.
You decide to use a query for
this.
Queries work on search
conditions called filters to
retrieve specific information
from a database.

Microsoft Digital Literacy: Productivity Programs 193 | P a g e
To define a filter, you need to
first select the tables from
which you want to retrieve
data.
The common fields in the
tables are shown as
connected.
You then specify the fields,
known as criteria fields, on
which you want to base your
query.

Microsoft Digital Literacy: Productivity Programs 194 | P a g e
In this case, you would use
the postal code field.
Next, you select the fields
you want to view.
You can specify these fields
by dragging them from the
tables.
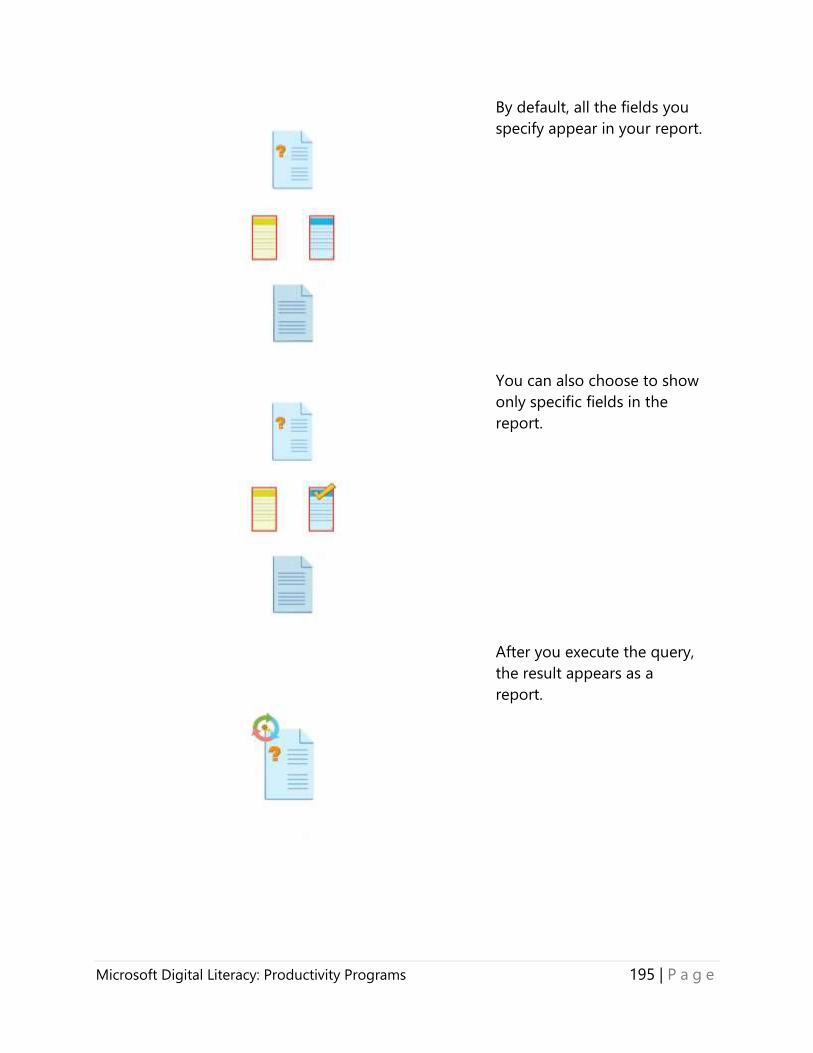
Microsoft Digital Literacy: Productivity Programs 195 | P a g e
By default, all the fields you
specify appear in your report.
You can also choose to show
only specific fields in the
report.
After you execute the query,
the result appears as a
report.

Microsoft Digital Literacy: Productivity Programs 196 | P a g e
This report contains the sales
details of all the coffee bean
sold in the area with the
postal code 97001.

Microsoft Digital Literacy: Productivity Programs 197 | P a g e
Knowledge check
SQL is not support by Access 2013.
o True
o False
A query is a fast way to look at data in your dataset.
o True
o False
Answers –
#1 – False. SQL is supported in Access 2013.
#2 – True. A query allows you to quickly compare and filter all the data in your database.

Microsoft Digital Literacy: Productivity Programs 198 | P a g e
Working with reports
Access 2013 allows you to developer
reports on the content of the database.
Reports are useful for meetings and
presentations when you want to
distribute part of your database. The
Report Wizard also offers options to
show statistical analysis on the data. Let’s
see how to use the Report Wizard.

Microsoft Digital Literacy: Productivity Programs 199 | P a g e
Working with reports video
On the Create Tab you will
find Access 2013’s Report
Wizard in the reports group.
The Report Wizard helps you
to customize and print
reports from your data.
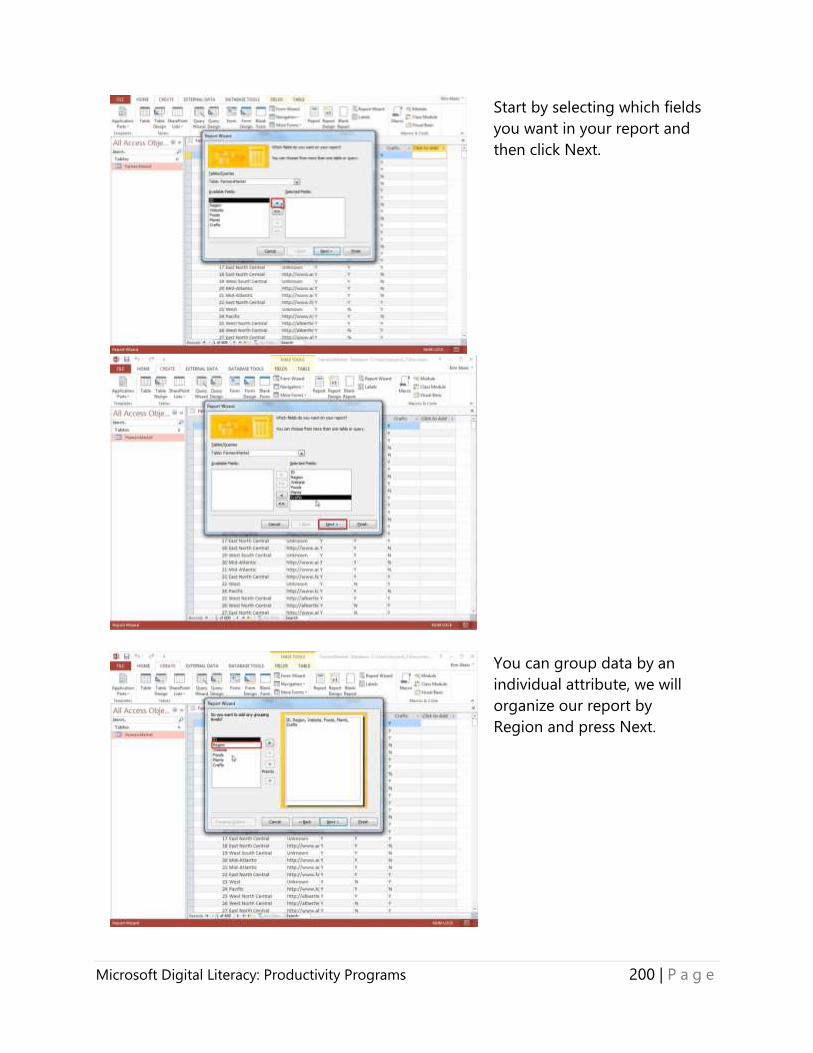
Microsoft Digital Literacy: Productivity Programs 200 | P a g e
Start by selecting which fields
you want in your report and
then click Next.
You can group data by an
individual attribute, we will
organize our report by
Region and press Next.

Microsoft Digital Literacy: Productivity Programs 201 | P a g e
Access 2013 can arrange the
values for each columns
to be in ascending or
descending order.
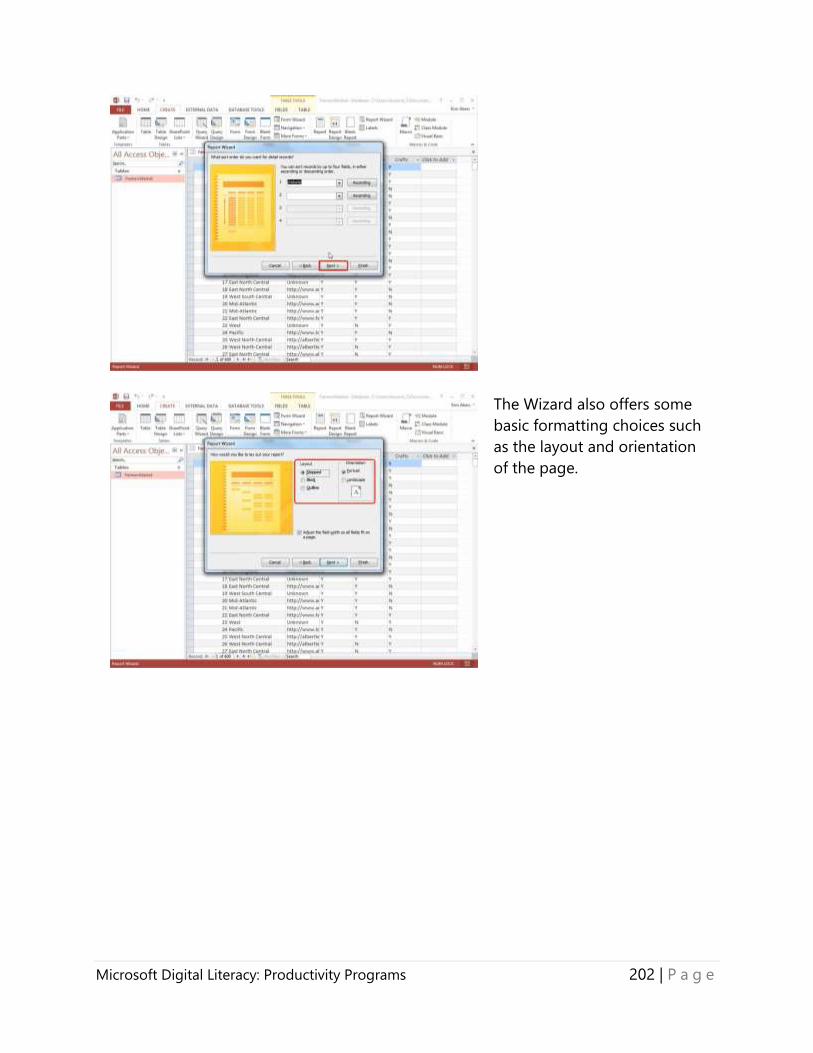
Microsoft Digital Literacy: Productivity Programs 202 | P a g e
The Wizard also offers some
basic formatting choices such
as the layout and orientation
of the page.

Microsoft Digital Literacy: Productivity Programs 203 | P a g e
On the last step you can
name your report and then
click Finish to preview it.
Here is a preview of the
report, you may notice that
the value for Region is cut
off.

Microsoft Digital Literacy: Productivity Programs 204 | P a g e
We can change the
formatting of the report in
Design view by closing the
print preview.
Lets select and rescale the
Region Header object on the
report.

Microsoft Digital Literacy: Productivity Programs 205 | P a g e
When you are done, change
to Report View to double
check your formatting.
Now you know the basics of
the Access 2013 Report
Wizard.
Try making a report and
changing the look to match
your presentation.

Microsoft Digital Literacy: Productivity Programs 206 | P a g e
Knowledge check
You cannot change the formatting of a report.
o True
o False
Reports can provide averages or summations to the data.
o True
o False
Answers –
#1 – False. Formatting can be changed at any time for any report.
#2 – True. Reports can summarize advanced queries and calculations.

Microsoft Digital Literacy: Productivity Programs 207 | P a g e
Congratulations
Congratulations on completing the
lesson!
You should now be able to:
Explain basic concepts of a
database.
Create a database.
Work with records in a
database.
Explain what database
queries are and how they
work.
Work with reports.

Microsoft Digital Literacy: Productivity Programs 208 | P a g e
Glossary
A B C D E F G H I J K L M N O P Q R S T U V W X Y Z
A
Active Cell
An active cell is the cell in which you are working currently. There can be only one active cell at a
time.
C
Cell
A cell is formed by the intersection of a row and a column. You can use a cell to store and
display different types of data such as text, numbers, or formulas.
Cell address
Each cell in a worksheet is identified by a cell address. A cell address is made of the column
letter and row number of the cell. For example, the cell formed by the first column and first row
has the cell address A1. The cell address indicates the exact location of a cell in a worksheet.
Cell pointer
A cell pointer is the highlighted rectangular border formed around an active cell.
Cell range
A cell range is a block of cells selected to implement a formula in a worksheet.

Microsoft Digital Literacy: Productivity Programs 209 | P a g e
Cell value
Cell value is the actual numeric value of the data in a cell. This value might not be the same as
the data displayed in the cell.
Columns
The vertical divisions in a worksheet are called columns. Each column is identified by a letter. For
example, the first column in a worksheet is A.
Contextual Tabs
Tabs which are displayed only when a particular object type is selected.
Cursor
The cursor is a blinking vertical bar on the screen that marks the location at which the inserted
text appears. You can also use the cursor to select text or graphics in a document.
D
Database
A database contains objects that help you to store, edit, and format information.
Database programs
You use database programs to store and manage data in an organized way. By using these
programs, you can also sort or search for the information stored in a database.
Desktop publishing (DTP) programs
DTP programs are used to combine text and graphics to create documents such as brochures,
greeting cards, annual reports, books, or magazines.

Microsoft Digital Literacy: Productivity Programs 210 | P a g e
F
Flat file database
A flat file database contains all the data in a single table.
Formula bar
The formula bar is used to enter or modify data in a worksheet. When you type data in a cell, the
data is displayed simultaneously in the active cell and in the formula bar. However, when you
enter a formula in a cell, the formula is displayed in the formula bar, whereas the numeric value
of the formula is displayed in the corresponding cell.
G
Group
A group is a labeled set of closely related commands.
L
Label
A label is a text entry that is used to identify the type of information in a row or a column of a
worksheet. Labels do not have any cell value associated with them.
M
Mouse
The mouse is the primary input device used to interact with objects in Microsoft Windows.

Microsoft Digital Literacy: Productivity Programs 211 | P a g e
P
Pointer
The on-screen arrow or shape that moves when you move your mouse or other pointing
device. It changes to a variety of shapes to indicate its current behavior.
Presentation software
You can use presentation software to combine graphics and text to create presentations.
Productivity software
These are specialized programs that help you create and work with various types of documents.
Common categories of productivity software are word processors, spreadsheets, presentation
software, and databases.
Programs
A sequence of instructions that can be executed by a computer. A program is also known as
software.
Q
Query
A query is a database object that enables you to locate the desired information in a database.
R
Relational database
A relational database stores data in multiple tables.

Microsoft Digital Literacy: Productivity Programs 212 | P a g e
Reports
You can create reports in a database program, such as Access 2007, to organize, summarize, and
perform calculations on data stored in a database.
Rows
The horizontal divisions in a worksheet are called rows. Each row is identified by a number. For
example, the first row in a worksheet is 1.
S
Scroll bars
Scroll bars are vertical and horizontal bars located at the side or at the bottom of a display area.
You can use scroll bars to move to a specific location in the work area.
Spreadsheets
You use spreadsheet programs to create budgets, manage accounts, perform mathematical
calculations, and convert numerical data into charts and graphs.
Status bar
The status bar is a horizontal bar that is at the bottom of some productivity programs. This bar
displays information about the current status of the program or document that you are viewing.
T
Title bar
The title bar is the horizontal bar that contains the name of the window. Most title bars also
contain buttons to close, minimize, and resize the window.

Microsoft Digital Literacy: Productivity Programs 213 | P a g e
Toolbar
The toolbar is a block of buttons or menus that you can use to quickly perform common tasks.
W
Word processors
Word processors are used to create and modify text-based documents.
Work area
The work area is the blank space within the program where you enter information.
Workbook
A workbook is a file created in Excel 2007. A workbook can contain one or more worksheets and
related items.
Worksheet
A spreadsheet is called a worksheet in Excel 2007.
X
X-axis
The x-axis is the horizontal line in a chart. Typically, you show time on the x-axis.

Microsoft Digital Literacy: Productivity Programs 214 | P a g e
Y
Y-axis
The y-axis is the vertical line in a chart.