8.1 implementation guide - pega... document: pega marketing for communications 8.1 implementation...
TRANSCRIPT

MARKETING
Pega Marketing for CommunicationsImplementation Guide
8.1

©2018 Pegasystems Inc., Cambridge, MA. All rights reserved.
Trademarks
For Pegasystems Inc. trademarks and registered trademarks, all rights reserved. All other trademarks orservice marks are property of their respective holders.
For information about the third-party software that is delivered with the product, refer to the third-partylicense file on your installation media that is specific to your release.
Notices
This publication describes and/or represents products and services of Pegasystems Inc. It may containtrade secrets and proprietary information that are protected by various federal, state, and internationallaws, and distributed under licenses restricting their use, copying, modification, distribution, or transmittalin any form without prior written authorization of Pegasystems Inc.
This publication is current as of the date of publication only. Changes to the publication may bemade from time to time at the discretion of Pegasystems Inc. This publication remains the propertyof Pegasystems Inc. and must be returned to it upon request. This publication does not imply anycommitment to offer or deliver the products or services described herein.
This publication may include references to Pegasystems Inc. product features that have not been licensedby you or your company. If you have questions about whether a particular capability is included in yourinstallation, please consult your Pegasystems Inc. services consultant.
Although Pegasystems Inc. strives for accuracy in its publications, any publication may containinaccuracies or typographical errors, as well as technical inaccuracies. Pegasystems Inc. shall not be liablefor technical or editorial errors or omissions contained herein. Pegasystems Inc. may make improvementsand/or changes to the publication at any time without notice.
Any references in this publication to non-Pegasystems websites are provided for convenience only anddo not serve as an endorsement of these websites. The materials at these websites are not part of thematerial for Pegasystems products, and use of those websites is at your own risk.
Information concerning non-Pegasystems products was obtained from the suppliers of those products,their publications, or other publicly available sources. Address questions about non-Pegasystemsproducts to the suppliers of those products.
This publication may contain examples used in daily business operations that include the names ofpeople, companies, products, and other third-party publications. Such examples are fictitious and anysimilarity to the names or other data used by an actual business enterprise or individual is coincidental.
This document is the property of:
Pegasystems Inc.One Rogers StreetCambridge, MA 02142-1209, USAPhone: 617-374-9600 Fax: 617-374-9620
www.pega.com
Document: Pega Marketing for Communications 8.1 Implementation Guide
Feedback
If you have comments for how we can improve our materials, send an email to [email protected].
Contents
Contents
Application overview.................................................................................................................................................................................6Prerequisites................................................................................................................................................................................................ 6Pega Marketing for Communications application stack........................................................................................................................7
Preparing for the implementation..........................................................................................................................................................8Creating your application.......................................................................................................................................................................... 8Verifying installed rulesets.........................................................................................................................................................................9Creating operator accounts.......................................................................................................................................................................9Updating the Manager field for your organization units....................................................................................................................10Configuring Microsite settings................................................................................................................................................................ 10Optional: Configuring your Pega applications to support shared features......................................................................................11Enabling Dynamic Class Referencing..................................................................................................................................................... 13Updating authentication profile credentials......................................................................................................................................... 13
Building the application......................................................................................................................................................................... 14Defining requirements............................................................................................................................................................................. 14
Mapping your application data................................................................................................................................................ 14Defining the customer class....................................................................................................................................... 15Defining the prospect class.........................................................................................................................................15
Accessing Integration Designer................................................................................................................................................ 15Defining push notifications....................................................................................................................................................... 16Defining business issues and groups...................................................................................................................................... 16Defining propositions.................................................................................................................................................................16Application data model..............................................................................................................................................................17
Adding properties to data types................................................................................................................................ 17Defining the security model and organization structure.....................................................................................................18
Authentication schemes.............................................................................................................................................. 18Defining your authentication scheme....................................................................................................................... 18Defining your authorization scheme......................................................................................................................... 19
Defining your access groups.........................................................................................................................19Defining access roles and privileges............................................................................................................19
Defining the work groups........................................................................................................................................... 19Defining the work queues...........................................................................................................................................19
Defining reporting requirements..............................................................................................................................................20Defining your campaigns...........................................................................................................................................................20Defining strategies......................................................................................................................................................................20Defining calculations.................................................................................................................................................................. 20
Defining commissions..................................................................................................................................................21Defining the investment budget................................................................................................................................ 21Defining the churn score calculation.........................................................................................................................22
Defining email accounts............................................................................................................................................................ 22Defining SMS accounts.............................................................................................................................................................. 24
Configuring features.................................................................................................................................................................................24Configuring access groups and roles.......................................................................................................................................25Configuring the Decisioning hierarchy.................................................................................................................................... 25
Optional: Configuring the top-level Strategy Result class.......................................................................................26
Pega Marketing for Communications Implementation Guide | October 05, 2018 | iii

Contents
Optional: Configuring Pega Marketing for Communications to support the Pega Customer RelationshipManagement features........................................................................................................................................... 26
Configuring the directed inheritance class pattern for Strategy Result classes...................................................27Adding business issues and groups.......................................................................................................................... 28
Configuring the customer class................................................................................................................................................28Creating your customer class..................................................................................................................................... 28Mapping a customer class to a database table....................................................................................................... 29Optional:Creating a custom customer class key property......................................................................................29Adding associated customer entities.........................................................................................................................30Setting the context for your customer class............................................................................................................ 30Extending and updating the SearchForCustomers report definition.................................................................... 31Extending and updating the CustomerSearchResultGrid section..........................................................................32Optimizing properties to speed up segment creation............................................................................................ 32
Configuring the prospect class................................................................................................................................................. 33Creating a prospect class............................................................................................................................................ 33Configuring the prospect template............................................................................................................................33
Importing offers from Product Catalog...................................................................................................................................34Static and dynamic bundles......................................................................................................................................................34Strategy builder templates........................................................................................................................................................ 35Configuring the profile preference logic................................................................................................................................. 35
Creating questions........................................................................................................................................................35Mapping offer weight...................................................................................................................................................36
Configuring channels..................................................................................................................................................................36Configuring email accounts.........................................................................................................................................37Configuring the outbound SMS account...................................................................................................................37Configuring the inbound SMS account..................................................................................................................... 38Specifying delivery time frames................................................................................................................................. 38Configuring push notifications....................................................................................................................................38
Configuring Passbook settings..................................................................................................................... 38Optional: Configuring repository storage for marketing images.........................................................................................38
Configuring custom repository storage.....................................................................................................................39Configuring default repository storage for Pega Cloud deployments...................................................................39
Reports......................................................................................................................................................................................... 40Configuring calculations.............................................................................................................................................................40
Configuring commissions............................................................................................................................................ 40Configuring the commission parameters................................................................................................... 41Configuring the commission calculations................................................................................................... 41
Configuring the investment budget...........................................................................................................................42Configuring the investment budget paramaters....................................................................................... 42Configuring the investment budget calculations....................................................................................... 42
Configuring the churn score....................................................................................................................................... 43Optional: Configuring Adaptive Decision Manager for sales offers.................................................................................... 43Marketing assets configuration................................................................................................................................................ 44Optional: Running a marketing campaign for batch evaluation..........................................................................................45Verifying the System Health page............................................................................................................................................46
Testing a new application........................................................................................................................................................................46Testing your application in the Build environment............................................................................................................... 46Testing in the Test or Production environments....................................................................................................................47Testing in the UAT environment...............................................................................................................................................48
Packaging a new application...................................................................................................................................................................48Merging application changes.................................................................................................................................................... 48Packaging an application for migration.................................................................................................................................. 48Importing the packaged application........................................................................................................................................49
Production maintenance and monitoring............................................................................................................................................50
Pega Marketing for Communications Implementation Guide | October 05, 2018 | iv

Contents
Application health monitoring................................................................................................................................................................ 50Identifying and reporting issues.............................................................................................................................................................50Revision management..............................................................................................................................................................................51
Pega Marketing for Communications Implementation Guide | October 05, 2018 | v

Application overview
Application overviewPega Marketing for Communications is a comprehensive marketing automation solution that deliversinbound offer management and outbound marketing campaigns on a single platform. Pega Marketing forCommunications uses a unique combination of predictive and adaptive analytics, real-time decisioning,and business process management to dynamically manage cross-channel conversations (from offerdesign to fulfillment), drive revenue, and expand customer lifetime value.
• Prerequisites
• Pega Marketing for Communications application stack
PrerequisitesBefore you start your Pega Marketing for Communications implementation, ensure that you understandthe following information.
• Supported browsers. Review the Platform Support Guide.
• Basic functionality of Pega Marketing for Communications. For more information, see the PegaMarketing for Communications product page.
• Basic functionality of Pega Platform.
Pega Marketing for Communications Implementation Guide | October 05, 2018 | 6

Application overview
Pega Marketing for Communications application stack
The Pega Marketing for Communications application is built on the Pega Marketing and Pega Foundationfor Communications applications.
Pega Marketing for Communications Implementation Guide | October 05, 2018 | 7
Preparing for the implementation
Preparing for the implementationThe implementation team builds out the environment for the application.
Preparing for an implementation includes the following tasks:
1. Creating your application
2. Verifying installed rulesets
3. Creating operator accounts
4. Updating the Manager field for your organization units
5. Configuring Microsite settings
6. Optional: Configuring your Pega applications to support shared features
7. Enabling Dynamic Class Referencing
8. Updating authentication profile credentials
Creating your applicationCreate your application and extend it to meet your organization needs by using the New Applicationwizard.
1. Create a new Application Setup operator ID by performing the following actions:
a) Log in by entering the administrator user name with the password that you specified for yourapplication.
b) Save a copy of the administrator operator, and give it a name that identifies it as an ApplicationSetup operator.
c) Add the PegaMKTComms:AppSetup access group to the new operator record.
d) Select the PegaMKTComms:AppSetup access group as the default access group for the operator.
e) On the Work tab, update the organizational unit to point to the organizational structure created aspart of prerequisites steps.
f) Save the new Application Setup operator.
2. Log in as the Application Setup operator.
3. In the Dev Studio header, click the name of your current application and click New Application.
4. Follow the instruction in the New Application wizard.For more information, see Creating an application.
5. Click Switch to new application.
6. Optional: To fully set up your application, in the top-right corner of the screen, click Resourcesmenu > Application Guides and follow the setup steps.
The New Application wizard creates the application class structure for you. You can reuse the classesand rulesets that the wizard creates in your applications. When you implement your applications, youcan apply class hierarchy and inheritance principles to help you improve the maintainability and overallefficiency of your application.
For more information, see Class layers and class hierarchy and inheritance.
Pega Marketing for Communications Implementation Guide | October 05, 2018 | 8

Preparing for the implementation
Verifying installed rulesetsThe following lists the highest level ruleset versions available after you run the New Application wizard.Verify that your system includes these ruleset versions.
Note: If your system does not contain the following rulesets, the application was not createdcorrectly.
1. In Dev Studio, click Configure > Application > Structure > RuleSet Stack.
Note: If you are in App Studio, switch to Dev Studio to see this option.
2. Verify that the following ruleset versions are listed:
• <your implementation application>:01.01.01
• <your implementation application>-Artifacts:01-01-01
• <your implementation application>-Rules:01-01-01
• <your implementation application>:01-01-01
• <your implementation application>Int:01-01-01
• <your organization>:01-01-01
• <your organization>Int:01-01-01
• Test:01-01-01
• TestInt:01-01-01
• <your implemenation application>-HealthCheck:01-01
• <your implemenation application>-Catalogue:01-01
• <your implemenation application>-UI:01-01
• PegaCRMC-Integration:08-01
Creating operator accountsThe New Application Wizard for Pega Marketing for Communications creates the following default accessgroups:
<your implementation application>:AdministratorsThis is an access group for administrators. The default portal for operators in this access group is AppStudio.
<your implementation application>:MarketManagersThis is an access group for managers. The default portal for operators in this access group is the CaseManager portal.
<your implementation application>:MarketAnalystsThis is an access group for Pega Marketing for Communications users. The default portal for operatorsin this access group is the Pega Marketing portal.
<your implementation application>:AppSetupThis is an access group that for creating new application. The default portal for operators in this accessgroup is the AppConfig portal.
Pega Marketing for Communications Implementation Guide | October 05, 2018 | 9

Preparing for the implementation
Create operator accounts for users of your implementation Pega Marketing for Communicationsapplication and assign them to the predefined user groups.
1. Log in as a Pega Platform administrator.
2. Create an operator account with one of the above access groups. For more information, see OperatorID data instances – Completing the Create or Save As form. Keep in mind the settings described below.
3. In the Access settings section on the Security tab, select Allow rule checkout.
4. Click Update password and enter the password for this operator, then click Submit.
5. Click Save.
6. Log off and log in as the operator you created.
7. Disable the Auto checkout on save as setting in the operator preferences. For more information, seeSetting your user preferences.
Tip: After creating the first operator record, open it in Dev Studio and click Save > Save as. Thiscreates a new operator record with all the settings and preferences you previously entered.
What to do next: After you create operator accounts for users of your implementation application,you can invite them to log in at any time. To invite users to your application, log in to the PegaMarketing for Communications portal as a user in the MarketAdmins user group. In the Pega Expressnavigation bar, click Users > People > Invite people to your application.
Updating the Manager field for your organization unitsThe New Application Wizard creates the organization structure for your application. For each organizationunit the wizard creates, specify the manager operator.
1. Log in as a Pega Platform administrator.
2. Click Records > Organization > Organization Unit. A list of all existing organization units is displayed.
3. Click on a unit to select the manager operator.
4. In the Manager field in the Staff section, enter or select one of the operators with the <yourimplementation application>:MarketManager access group.
5. Click Save.
6. Repeat the procedure for every unit in your organization.
Configuring Microsite settingsIf you have installed the MS.war file on a different machine than the one on which you have deployedPega Marketing for Communications, you need to modify the index.html file.
Note: Only operators who have the role PegaMKTComms:MicrositeAdmin can createMicrosites. By default, Marketing Analysts do not have this role. If an operator requires theability to create Microsites, associate the operator with an access group that contains thePegaMKTComms:MicrositeAdmin role (refer to the Pega Platform help or the PDN for instructionson configuring access groups).
Pega Marketing for Communications Implementation Guide | October 05, 2018 | 10
Preparing for the implementation
1. Navigate to the directory where the MS.war file has been deployed (for example, Tomcat\webapps\MS ).
2. Edit the file index.html and prepend the full URL to your system:
• http://<hostname>:<port>/prweb?pyActivity=pzIncludeMashupScripts
• http://<hostname>:<port>/prweb/PRRestService/PegaMKTMicrosite/Services/IncludeMicrositeScripts
3. In Dev Studio, open the application rule associated with the PegaNBAM:Agents access group.
4. In the application rule, go to the Integration & Security tab.
5. In the Mashup security section, add a new Trusted Origin and add the URL for the location of thedeployed MS.WAR file.
6. Create the following Dynamic System Settings to override the default configuration settings in theMicrosite gadget. The owning ruleset for all of the settings is PegaMKT-Engine.
• microsite/applicationname - This is the application name which the Microsite gadget uses whenconnecting to Pega Marketing for Communications. By default, it is the name of the applicationassociated with the access group on the PegaMKTMicrosite service package.
• microsite/URL - This is the URL which the Microsite gadget uses when connecting to Pega Marketingfor Communications. The URL should point to an IAC servlet on the public node. The URL format ishttp://<hostname>:<port>/prweb/IAC.
• microsite/systemid - This is the system ID which the Microsite gadget uses when connecting to PegaMarketing for Communications. By default, it is the system ID defined on the system which the URLspoint to.
• microsite/defaultclass - If the Site parameter of the Microsite URL is not defined, thissetting purpose is used instead. The default value of the setting is PegaMKT-Work-Microsite_NOSITENAMESPECIFIED_.
• microsite/parameters/useridentifier - This is the user which the Microsite gadget uses toauthenticate itself with Pega Marketing for Communications. By default, the user is microsite.
• microsite/parameters/skinname - This is the name of the skin used by the Microsite.
Note: If you are using your own skin to update the included styles tab of the skin rule, selectthe check box Include legacy CSS. Without the legacy CSS, your skin will not be displayed onmulti-node environments.
• microsite/parameters/additional - This is a comma-separated list of additional parameters that canbe passed to the gadget.
Optional: Configuring your Pega applications tosupport shared featuresThese procedures are required only if you will use the Pega Customer Relationship Managementfeatures to share data and service cases across the Pega Customer Service for Communications,Pega Sales Automation, and Pega Marketing for Communications applications. These proceduresinvolve configuration across multiple applications, and therefore include links to multiple applicationimplementation guides.
Before you begin:
Pega Marketing for Communications Implementation Guide | October 05, 2018 | 11

Preparing for the implementation
• Your Pega Customer Service for Communications, Pega Sales Automation, and Pega Marketing forCommunications applications must already be created as described in Creating your application.
To configure your Pega applications to support shared features, complete the following steps:
1. For environments that include both Pega Customer Service for Communications and Pega SalesAutomation, complete the following steps:
a) Add the Pega Sales Automation implementation rulesets to your Pega Customer Servicefor Communications application, and add the Pega Customer Service for Communicationsimplementation rulesets to your Pega Sales Automation application. See "Adding shared rulesets"in the Pega Customer Service for Communications or Pega Sales Automation Implementation Guideon the Pega Customer Service for Communications product page or the Pega Sales Automationproduct page.
b) Create an integration ruleset for your Pega Customer Service for Communications and PegaSales Automation applications, and then add the integration ruleset to the top of the rulesetstack for each application. See "Creating integration rulesets" in the Pega Customer Service forCommunications or Pega Sales Automation Implementation Guide on the Pega Customer Service forCommunications product page or the Pega Sales Automation product page .
c) Enable the Pega Customer Relationship Management features. See "Enabling or disablingshared features" in the Pega Customer Service for Communications or Pega Sales AutomationImplementation Guide on the Pega Customer Service for Communications
d) In your Pega Customer Service for Communications application, update the operator access groupsto include the CustomerService:CSRSalesAccess role that is required to access the sharedfeatures. See "Updating access groups to have shared access" in the Pega Customer Service forCommunications Implementation Guide on the Pega Customer Service for Communications productpage.
e) Pega Customer Service product page or the Pega Sales Automation product page.
2. For environments that also include Pega Marketing for Communications, complete these additionalsteps.
a) Configure your Pega Customer Service for Communications application to support Pega CustomerDecision Hub.
1. Enable Pega Customer Decision Hub. See "Configuring application settings" in the PegaCustomer Service for Communications Implementation Guide on the Pega Customer Service forCommunications product page.
2. Configure Customer Decision Hub settings. For each setting, copy the rule to the highestruleset shared by Pega Customer Service for Communications and Pega Sales Automation, andsave your changes in that ruleset. See "Configuring Pega Customer Decision Hub" in the PegaCustomer Service for Communications Implementation Guide on the Pega Customer Service forCommunications product page.
b) In Pega Marketing for Communications, configure the application to support the Pega CustomerRelationship Management features. See Configuring Pega Marketing for Communications tosupport the Pega Customer Relationship Management features.
c) In your Pega Sales Automation application, configure the integration between Pega SalesAutomation and Pega Marketing for Communications. See "Configuring the integration betweenPega Sales Automation and Pega Marketing for Communications" in the Pega Sales AutomationImplementation Guide on the Pega Sales Automation product page.
d) In your Pega Sales Automation application, test the integration with Pega Marketing forCommunications local campaigns. See "Testing the Pega Sales Automation integration with Pega
Pega Marketing for Communications Implementation Guide | October 05, 2018 | 12
Preparing for the implementation
Marketing for Communications local campaigns" in the Pega Sales Automation Implementation Guide on the Pega Sales Automation product page.
e) In Pega Marketing for Communications, run a Marketing campaign for batch evaluation. SeeRunning a marketing campaign for batch evaluation.
f) In your Pega Sales Automation application, test the integration with Pega Marketing forCommunications next best offers. See "Testing the Pega Sales Automation integration with PegaMarketing for Communications next best offers" in the Pega Sales Automation Implementation Guideon the Pega Sales Automation product page.
Enabling Dynamic Class ReferencingAvoid hard-coded classes in your rules by using Dynamic Class Referencing (DCR). As a result, you caneffectively extend your application and reduce maintenance issues that are caused by out-of-date hard-coded references.
1. In Dev Studio, search for and open the pyDefault data transform rule of the PegaMKT-Data-PMCExtension class.
2. Save the data transform rule to your implementation layer.
3. On the Definition tab, set the value of the SurveyClassName property to your implementation layer'swork class.
4. Click Save.
Updating authentication profile credentialsBefore you proceed with the implementation, make sure that you update the authentication profiles inyour application.
Change credentials for the following authentication profiles:
• CIF_AuthProfile
• PCFAuthProfile
1. In Dev Studio, open the profile rule that you want to update.
2. In the User name field, enter the operator ID.
3. Click Set password and then enter the password for the operator.
4. Click Save.
Pega Marketing for Communications Implementation Guide | October 05, 2018 | 13

Building the application
Building the applicationThe implementation team determines which features to enable or extend, and then configures and teststhe application.
Building an application includes the following tasks:
1. Defining requirements
2. Configuring features
3. Testing a new application
4. Packaging a new application
Defining requirementsThe implementation team determines which features to enable or extend to meet your businessrequirements.
Tip: Pega Marketing for Communications provides an interactive Initial Setup guide that can walkyou through the process of extending your application. To review the guide before you begin, clickResources menu > Application Guides > Initial Setup Guide.
To define requirements, review the topics in the following sections:
• Mapping your application data
• Accessing Integration Designer
• Defining push notifications
• Defining business issues and groups
• Defining propositions
• Application data model
• Defining the security model and organization structure
• Defining reporting requirements
• Defining your campaigns
• Defining strategies
• Defining calculations
• Defining email accounts
• Defining SMS accounts
Mapping your application dataThe application data types provide a default set of properties for your use. You can add or removeproperties from these data types depending on your requirements. You can also add new data types.
1. In the navigation panel of Dev Studio, click Data types.
2. Click the data type that you want to modify.
Pega Marketing for Communications Implementation Guide | October 05, 2018 | 14

Building the application
3. On the Data model tab, determine the properties to add, remove, or leave unchanged. For moreinformation about data types, see Viewing data type details. Repeat these steps for any other datatypes, as necessary.
• Defining the customer class
• Defining the prospect class
Defining the customer classPega Marketing for Communications requires a customer class to support the loading of customer data.
1. Define a name for the customer class.
2. Identify the customer class key. The default key property is CustomerID.
3. Identify the ruleset for the customer class.
4. Identify the associations (for example, PurchaseData) for this customer class.
Defining the prospect classA prospect is a potential customer that business users want to target. Pega Marketing forCommunications requires a prospect class to support the loading of prospect data.
The base prospect class is PegaMKT-Data-Prospect. If the base prospect class is not sufficient, then youmust extend the class by creating and configuring a custom prospect class. For example, if the defaultconfiguration does not capture all the potential customer data that you require, you can adjust the datatable that contains prospect information.
1. Define a name for the prospect class.
2. Identify the ruleset for the prospect class.
3. Identify the structure required for the list of prospects. Specify the properties on the prospect recordand their backing columns in the prospect table. Ensure that the structure meets the followingrequirements.
• The property name starts with a period
• The table does not contain empty rows
• The column name does not exceed 27 characters
Accessing Integration DesignerUse the Integration Designer to view the systems of record that are used by your data types.
The Integration Designer displays a comprehensive view of all business objects in your application andtheir associated data, such as references, data sources, and data views
• To access the Integration Designer, in App Studio, on the left pane, click Data.For more information, see Integration systems.
Pega Marketing for Communications Implementation Guide | October 05, 2018 | 15

Building the application
Defining push notificationsPega Marketing for Communications can send push notification messages to registered apps. Pushnotifications can be sent while running offers.
For more information, see the Push notifications chapter in the Pega Marketing User Guide on the PegaMarketing product page.
1. For every app, define the following information.
• Name of the app - how the app is referred to within the Pega Marketing for Communicationsapplication, for example, in Offer flows
• Description
• Platform of the app - select Android or iOS
• Unique ID - used for validating push notification service requests, for example, for registering andun-registering app users
2. Define additional information.
• For an Android app, define the Google key.
• For an iOS app, define the following additional information.
• App certificate - an Apple .p12 certificate
• Certificate name - used for storing the certificate in the system
• Certificate password - used to validate the certificate
• Certificate type
• Monitor Apple's notification feedback service?
Defining business issues and groupsBusiness issues represent major business objectives that users process and report on. Business groupsrepresent sub-categories of business issues.
Pega Marketing for Communications includes Pega-provided business issues and groups that you can usein your application, or copy and modify to meet your business objectives.
1. Log in as the administrator operator with the password that you specified for the Pega Marketing forCommunications application that you are implementing.
2. Click Configure > Decisioning > Decisions > Proposition Management > Hierarchy.
3. Identify the business issues that are required for your implementation.
4. Identify the business groups that are required for your implementation.
Defining propositionsA proposition contains offer data for telecommunications customers, such as a product purchase or aservice contract. Propositions are unique for each business based on a company's products.
For information about how to configure propositions, see Proposition Management landing page.
1. Identify the business issues and groups that require propositions.
2. Define each proposition.
Pega Marketing for Communications Implementation Guide | October 05, 2018 | 16

Building the application
Application data modelThe application provides a set of data types, data pages, and sample data, which you can use to beginimplementing your application. You will need to use the data from your system of record instead of usingthe sample data provided by the application.
Data modeling involves creating a conceptual model of how data items relate to each other in anapplication. In the Pega Platform, the data model refers to a set of rules that work together to populatethe data in your application. The system displays this data to help you process the information and canhelp you make decisions in your sales processes.
Data typesData type is another name for a class in your application. It holds data that the application uses. A datatype has one or more data pages and several property definitions associated with it.
PropertiesProperties define the format and visual presentation of data in your application.
When planning your data model, work with the data modeling resource at your site to understand theattributes of the data types that need to be supported by your application.
• Adding properties to data types
Adding properties to data typesData types categorize the data that your application uses. The data types that come with your applicationhave one or more data pages associated with them. Add properties to a data type to further customize it,for example, by adding contact information to a data type that represents a user of your application.
1. In the Dev Studio Explorer panel, click Data.
2. Click the data type that you want to modify.
3. On the Data model tab, scroll to the bottom.
4. To add a property, click Add field. Add as many properties as your application requires. Repeat thesesteps for any other data types, as necessary.
For more information about data types, see Data type management.
For information about data pages, see Data pages.
For information about adding data types, see Creating a new data type.
Pega Marketing for Communications Implementation Guide | October 05, 2018 | 17
Building the application
Defining the security model and organization structureSecurity planning involves defining authorization and authentication strategies for your application.
AuthenticationProves to the application that you are who you say you are.
AuthorizationDetermines the functions that you can perform in the application. This corresponds to access group androle configuration.
Security planning also involves setting up the organization structure and operator attributes. Theapplication provides security in the form of access settings and denial rules. Many integration rules alsoincorporate authentication.
For more information about the additional aspects of security, enroll in the Lead System Architect course onPega Academy and cover the Security lessons that correspond to the following topics:
1. Authentication schemes
2. Defining your authentication scheme
3. Defining your authorization scheme
4. Defining the work groups
5. Defining the work queues
Authentication schemesThe Pega Platform offers the following authentication types:
PRBasicBased on passwords in the Operator ID data instances and the login form. This is defined by the [email protected] rule, which your application can override.
PRSecuredBasicSimilar to PRBasic, but passes credentials by using Secure Sockets Layer (SSL) with Basic HTTPauthentication. The login form is defined by the HTML @baseclass.Web-Login-SecuredBasic rule,which your application can override.
PRCustomSupports access to an external LDAP directory or a custom authentication scheme.
PRExtAssignSupports external assignments (Directed Web Access).
J2EEContextSpecifies that the application server in which the Pega Platform is deployed uses JAAS to authenticateusers.
Defining your authentication schemeYour site can use a centralized, automated means of maintaining operator data instead of maintaining itmanually in your application.
1. Discuss Authentication schemes with your site's security and application server teams.
2. Determine the appropriate authentication type.
For more information on authentication scheme planning, see Authentication in Pega Platform.
Pega Marketing for Communications Implementation Guide | October 05, 2018 | 18

Building the application
Defining your authorization schemePega Marketing for Communications comes with a predefined set of access groups, roles, and privileges.You can use the application roles as a starting point, but you should create your own application-specificaccess groups and roles to avoid any future problems when upgrading.
Other rule types such as sections, flow actions, and activities use roles and privileges to allow access tothese rules at run time.
• Defining your access groups
• Defining access roles and privileges
Defining your access groupsDefine the access groups that you want to add to your application.
1. Identify additional access groups that are needed for your application.
2. Identify portals associated with these access groups.
For more information, see Viewing access groups and operators.
Defining access roles and privilegesYou can associate one or more roles with an access group. Roles are additive. The more roles that you addto an access group, the more authorization there is. Privileges can be associated with one or more roles.
1. Determine which roles are needed for your application. You can use the Pega Marketing forCommunications roles as a starting point.
2. Determine which privileges to associate with each role.
3. Associate each role with an access group.
For more configuration information, see Groups and roles.
Defining the work groupsA work group determines which work queues you can access.
1. In the header of Dev Studio, click Configure > Org & Security > Tools > Work Groups.
2. Review and modify the list if necessary.
For more information, see Teams.
Defining the work queuesA work queue is a queue of open assignments in the application.
1. In the header of Dev Studio, click Configure > Org & Security > Tools > Work Queues to display a listof work queues.
2. Review and modify the list if necessary.
For more information, see Initial Work queues.
Pega Marketing for Communications Implementation Guide | October 05, 2018 | 19

Building the application
Defining reporting requirementsBased on your login and portal, your application provides numerous pre-configured reports to monitorcase and work inventory as well as monitor workforce productivity and quality. These standard reportsare driven by the case and work object life-cycle infrastructure as well as the work and assignment-levelservice level rules for goals and deadlines used in managing the life cycle of a case.
Defining your campaignsA Pega marketing campaign uses predictive and adaptive analytics to deliver the right offering to the rightcustomer at the right time. Components of a campaign include goals, a marketing strategy, the targetaudience, an engagement schedule, and an offer volume constraint.
1. Identify the campaigns that you need to configure in Pega Marketing for Communications.
2. Define the components of each campaign.
For more information about the components of a campaign and how to configure campaigns, see thePega Marketing User Guide on the Pega Marketing landing page .
Defining strategiesA strategy matches offers to customers. Extend the application-provided strategies for your business, andcreate new strategies if required.
1. Review the application-provided strategies, and determine which strategies to extend.
a) Log in to the Pega Marketing portal.
b) Click Intelligence > Strategies.
c) Double-click a strategy row to review the details.
d) Identify the required modifications.
2. Identify new strategies that are required.
For more information about how to extend and add strategies, see the Pega Marketing User Guide onthe Pega Marketing landing page, and also see Decision Strategy Manager (DSM) Landing pages.
Defining calculationsPega Marketing for Communications calculates several customer values to determine the best strategiesand offers for customers. Implementers configure the formulas and parameters for commissions,the investment budget, and churn score in the Pega Marketing for Communications application.Implementers configure the customer lifetime value (CLV) calculation, which can be modified orupdated as per your business needs, in the Pega Foundation for Communications application. For moreinformation, see the Implementation Guide on the Pega Foundation for Communications product page.
The Pega Customer Service Advisor portal displays the commission amount and investment budgetamounts at the top of the open Cart. The Marketing portal displays the churn category in the portalheader.
To define the Pega Marketing for Communications customer calculations, complete the following tasks:
1. Defining commissions
2. Defining the investment budget
Pega Marketing for Communications Implementation Guide | October 05, 2018 | 20
Building the application
3. Defining the churn score calculation
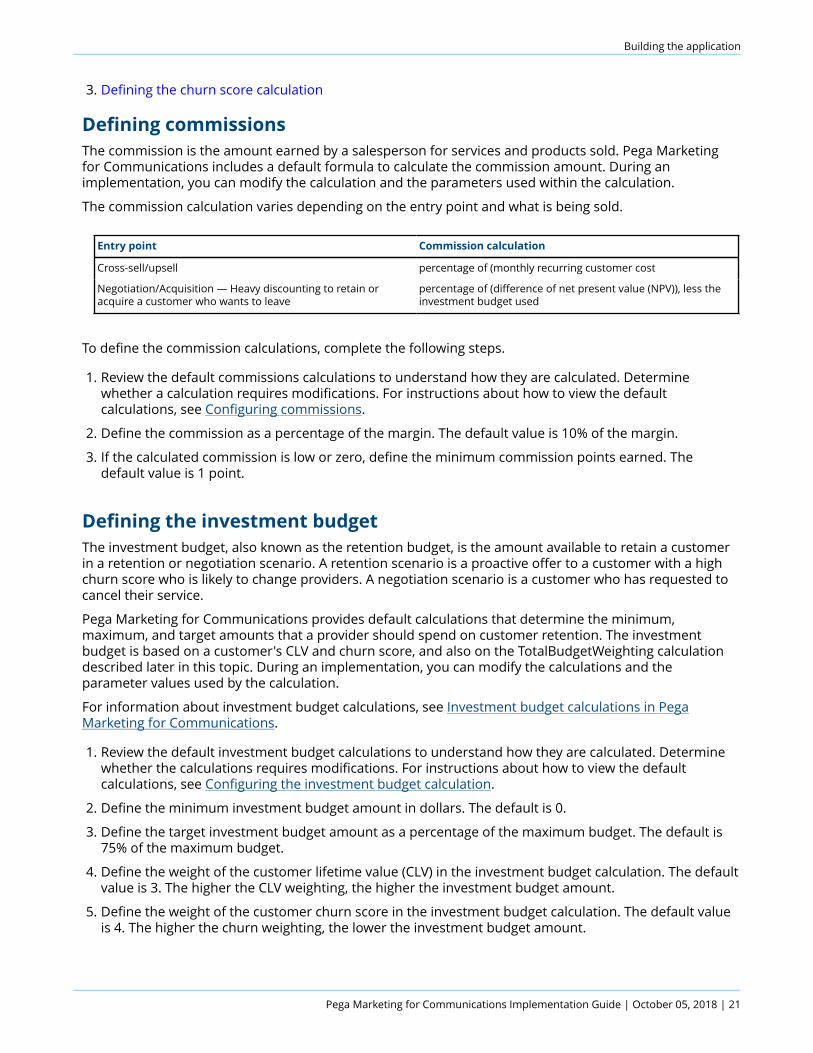
Defining commissionsThe commission is the amount earned by a salesperson for services and products sold. Pega Marketingfor Communications includes a default formula to calculate the commission amount. During animplementation, you can modify the calculation and the parameters used within the calculation.
The commission calculation varies depending on the entry point and what is being sold.
Entry point Commission calculation
Cross-sell/upsell percentage of (monthly recurring customer cost
Negotiation/Acquisition — Heavy discounting to retain oracquire a customer who wants to leave
percentage of (difference of net present value (NPV)), less theinvestment budget used
To define the commission calculations, complete the following steps.
1. Review the default commissions calculations to understand how they are calculated. Determinewhether a calculation requires modifications. For instructions about how to view the defaultcalculations, see Configuring commissions.
2. Define the commission as a percentage of the margin. The default value is 10% of the margin.
3. If the calculated commission is low or zero, define the minimum commission points earned. Thedefault value is 1 point.
Defining the investment budgetThe investment budget, also known as the retention budget, is the amount available to retain a customerin a retention or negotiation scenario. A retention scenario is a proactive offer to a customer with a highchurn score who is likely to change providers. A negotiation scenario is a customer who has requested tocancel their service.
Pega Marketing for Communications provides default calculations that determine the minimum,maximum, and target amounts that a provider should spend on customer retention. The investmentbudget is based on a customer's CLV and churn score, and also on the TotalBudgetWeighting calculationdescribed later in this topic. During an implementation, you can modify the calculations and theparameter values used by the calculation.
For information about investment budget calculations, see Investment budget calculations in PegaMarketing for Communications.
1. Review the default investment budget calculations to understand how they are calculated. Determinewhether the calculations requires modifications. For instructions about how to view the defaultcalculations, see Configuring the investment budget calculation.
2. Define the minimum investment budget amount in dollars. The default is 0.
3. Define the target investment budget amount as a percentage of the maximum budget. The default is75% of the maximum budget.
4. Define the weight of the customer lifetime value (CLV) in the investment budget calculation. The defaultvalue is 3. The higher the CLV weighting, the higher the investment budget amount.
5. Define the weight of the customer churn score in the investment budget calculation. The default valueis 4. The higher the churn weighting, the lower the investment budget amount.
Pega Marketing for Communications Implementation Guide | October 05, 2018 | 21
Building the application
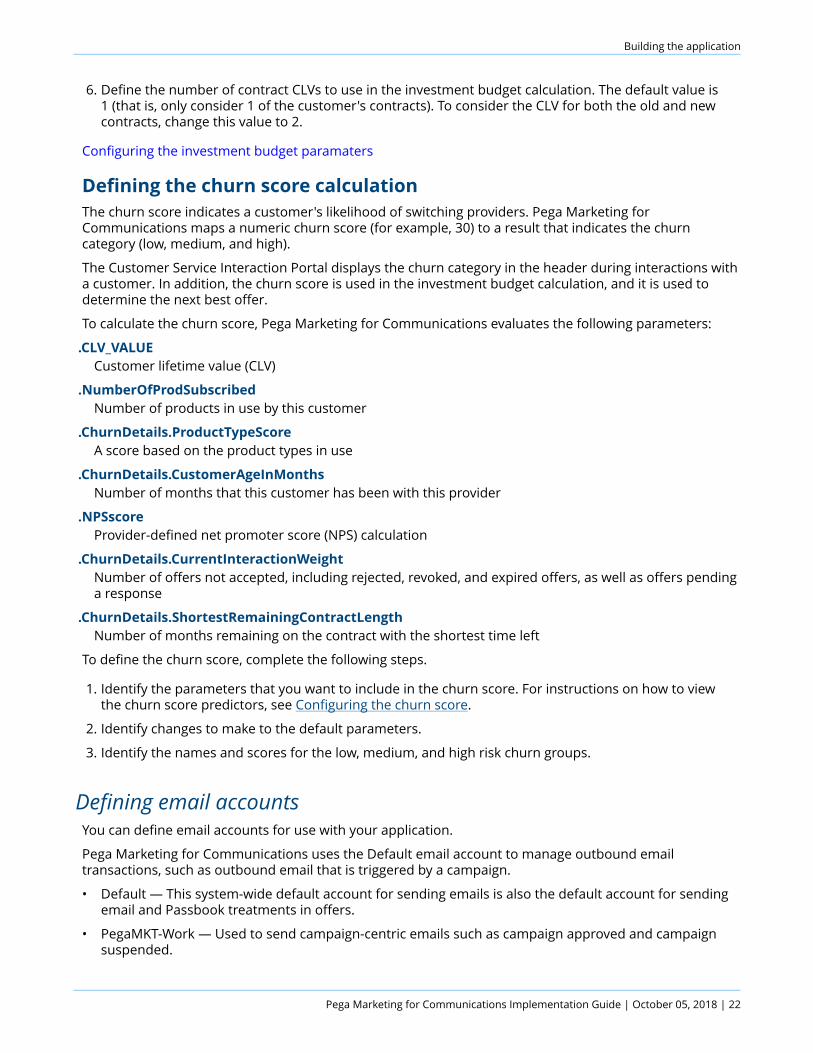
6. Define the number of contract CLVs to use in the investment budget calculation. The default value is1 (that is, only consider 1 of the customer's contracts). To consider the CLV for both the old and newcontracts, change this value to 2.
Configuring the investment budget paramaters
Defining the churn score calculationThe churn score indicates a customer's likelihood of switching providers. Pega Marketing forCommunications maps a numeric churn score (for example, 30) to a result that indicates the churncategory (low, medium, and high).
The Customer Service Interaction Portal displays the churn category in the header during interactions witha customer. In addition, the churn score is used in the investment budget calculation, and it is used todetermine the next best offer.
To calculate the churn score, Pega Marketing for Communications evaluates the following parameters:
.CLV_VALUECustomer lifetime value (CLV)
.NumberOfProdSubscribedNumber of products in use by this customer
.ChurnDetails.ProductTypeScoreA score based on the product types in use
.ChurnDetails.CustomerAgeInMonthsNumber of months that this customer has been with this provider
.NPSscoreProvider-defined net promoter score (NPS) calculation
.ChurnDetails.CurrentInteractionWeightNumber of offers not accepted, including rejected, revoked, and expired offers, as well as offers pendinga response
.ChurnDetails.ShortestRemainingContractLengthNumber of months remaining on the contract with the shortest time left
To define the churn score, complete the following steps.
1. Identify the parameters that you want to include in the churn score. For instructions on how to viewthe churn score predictors, see Configuring the churn score.
2. Identify changes to make to the default parameters.
3. Identify the names and scores for the low, medium, and high risk churn groups.
Defining email accountsYou can define email accounts for use with your application.
Pega Marketing for Communications uses the Default email account to manage outbound emailtransactions, such as outbound email that is triggered by a campaign.
• Default — This system-wide default account for sending emails is also the default account for sendingemail and Passbook treatments in offers.
• PegaMKT-Work — Used to send campaign-centric emails such as campaign approved and campaignsuspended.
Pega Marketing for Communications Implementation Guide | October 05, 2018 | 22

Building the application
1. Define the following information for the Default email account:
• Email provider
• Sender name
• From email address
• User ID
• Password
• Reply to email address
• SMTP host name
• SMTP port number
• Use SMTPS?
• Keystore instance (message signing)
• Certificate alias (message signing)
2. Define the following information for the Default email account.
• Email provider
• Sender name
• From email address
• User ID
• Password
• Reply to email address
• SMTP host name
• SMTP port number
• Use SMTPS?
• Keystore instance (message signing)
• Certificate alias (message signing)
3. Define the following information for the PegaMKT-Work email account.
• Email provider
• Sender name
• From email address
• User ID
• Password
• Reply to email address
• SMTP host name
• SMTP port number
• Use SMTPS?
• Keystore instance (message signing)
• Certificate alias (message signing)
Pega Marketing for Communications Implementation Guide | October 05, 2018 | 23

Building the application
Defining SMS accountsPega Marketing for Communications uses the Pega-provided Default account to manage outbound SMSmessages triggered by a campaign .
1. Define the following information for the outbound SMS account.
• Account name
• Host address
• Host port
• User ID
• Password
• Test number
• Sender's number
• Maximum connections
• Restrict sending of offer message to a specific time frame?
2. Define the following advanced settings for the outbound SMS account.
• Unit cost
• Source TON
• Source NPI
• Response timeout in seconds
• Max number of retries
• Character encoding type
• Reconnect on disconnect?
3. If required, define the name and value of any additional SMPP properties for this account.
Configuring featuresThe implementation team enables or extends features to meet your business requirements.
To configure application features, review the topics in the following sections:
1. Configuring access groups and roles
2. Configuring the Decisioning hierarchy
3. Configuring the customer class
4. Configuring the prospect class
5. Importing offers from Product Catalog
6. Static and dynamic bundles
7. Strategy builder templates
8. Configuring the profile preference logic
9. Configuring channels
10. Optional: Configuring repository storage for marketing images
Pega Marketing for Communications Implementation Guide | October 05, 2018 | 24

Building the application
11. Reports
12. Configuring calculations
13. Optional: Configuring Adaptive Decision Manager for sales offers
14. Marketing assets configuration
15. Optional: Running a marketing campaign for batch evaluation
16. Verifying the System Health page
Configuring access groups and rolesIt is a best practice to create new access groups and roles that are based on the default access groups androles that come with the product. This insulates your application from changes if the roles and groupschange permissions in a future release. Refer to the roles and groups that you identified during theprocedures.
To update an access group, complete the following steps:
1. Click Dev Studio > Org & Security > Groups & Roles > Access Groups.
2. Select the access group that you want to copy.
3. Click Save as to save the role to your application.It is recommended that you name the role with a different name. Update the roles to use the ones thatyou created for your application.
4. Click Create and open.
5. In the Definition tab, map the Name and Version field details with your application and click Save.
6. Optional: To update an access role, complete the following steps:
a) Click Dev Studio > Org & Security > Groups & Roles > Access Roles.
7. Select the access role that you want to copy.
8. Click Save as to save the role to your application.Pega recommends that you give the role a different name.
9. Click Create and open.
10. Click Save.
Configuring the Decisioning hierarchyPropositions are stored in a hierarchy that is comprised of business issues and groups. For moreinformation, see Proposition Management landing page.
Before you begin:
Make sure that you add your Pega Next-Best-Action-Advisor hierarchy. For more information, seethe Next-Best-Action Design and Configuration tech note on the Pega Marketing for Communicationsproduct page.
Before using Pega Marketing for Communications, perform the following tasks to configure thedecisioning hierarchy:
1. Optional: Configuring the top-level Strategy Result class
Pega Marketing for Communications Implementation Guide | October 05, 2018 | 25

Building the application
2. Optional: Configuring Pega Marketing for Communications to support the Pega Customer RelationshipManagement features
3. Configuring the directed inheritance class pattern for Strategy Result classes
4. Adding business issues and groups
Optional: Configuring the top-level Strategy Result classThe class that represents the top of the decisioning hierarchy is referred to as the top level Strategy Result(SR) class.
Note: Some implementations require selecting a top-level SR class different than the one createdby the wizard. For example, if the requirement is to create a new application and use an existingtop-level SR class that contains a configured decisioning hierarchy, you must reference the existingSR class.
1. Log in by using an administrator account. Dev Studio opens.
2. ClickConfigure > Decisioning > Decisions > Proposition Management > Hierarchy
3. In the Top Level section, click the class listed as the Top level class.
4. In the To field, enter the name of your preferred top-level SR class. The class must already exist andhave a correct inheritance path.
5. Click Save.
Optional: Configuring Pega Marketing for Communications to supportthe Pega Customer Relationship Management featuresIf you want to use Pega Marketing for Communications with the Pega Customer RelationshipManagement suite, review the configuration of decisioning services, verify the top level SR class, andconfigure Pega Marketing for Communications to use Pega Sales Automation cases.
1. Log in to the Pega Platform as an administrator.
2. In Dev Studio, click Configure > Decisioning > Infrastructure > Services and verify that all decisioningservices have the status Normal.
3. Click Configure > Decisioning > Decisions > Proposition Management > Hierarchy and verify thatthe top level SR class is set to CRM-SR.
4. Log in to the Pega Platform as any operator who has PegaSA:MarketAdmins as their secondaryaccess group for the Pega Marketing implementation application.
5. Click Application Name > Switch Application > PegaSA_Marketing to open the PegaSA_Marketingapplication.
6. In the Dev Studio header search text field, search for and select the ConfigureNBAA activity.
7. Review the descriptions provided for each of the activity parameters and update the default parametervalues to support your implementation environment.
8. Click Actions > Run.
9. When the activity is complete, open the Records explorer and click Sysadmin > Agent Schedule.
10. Open the following agents and verify their status:
• PegaCRM-Artifacts – Enabled
• PegaMKT-Engine – Enable all the agents under this agent schedule
• PegaMKT-FieldMarketing – Enabled
Pega Marketing for Communications Implementation Guide | October 05, 2018 | 26

Building the application
11. To make sure that the remote host is mapped correctly, click Records Explorer > SysAdmin > RemoteSystem.
• If the NBAA host is on the same server as the Pega Sales Automation application, in the GatewayURL field, enter http://<host>:<port>/prweb.
• If the NBAA host is on a different server than Pega Sales Automation, in the Gateway URL field,enter the PRGateway URL (http://<host>:<port>/prgateway/). For more information, seeConfiguring Web Mashup with the Gateway Configuration Console on Pega Community.
12. Add PegaSAHC:MarketReps as the secondary access group for your sales representatives' operatoraccounts.
13. Log off and restart the application server.
14. Verify the default destination ruleset for the PegaSAHC:MarketReps access group.
a) Click Configure > Org & Security > Groups and Roles > Access Groups.
b) Open the PegaSAHC:MarketReps access group.
c) In the Advanced tab, check that the Default destination ruleset is set to an open ruleset versionof SAHC-Artifacts.
15. Edit the SFAUserProfile authentication profile and enter the user credentials for an operator that canbe used to test the campaigns.
16. Edit the NBA service package and enter SPMHC_Sample:SalesRep in the Service access group field.
17. Edit the SFAEndPointSvcLocMktAct dynamic system setting and enter SAHC-Sample-Work-Task-CustAct in the Value field.
18. Click Test connectivity.
Configuring the directed inheritance class pattern for Strategy ResultclassesWhen you create a new implementation application, Pega Marketing for Communications automaticallycreates a top-level SR class for the new application. You must change the directed inheritance classpattern of that class to PegaComm-NBAMCFW-SR so that your application can take advantage of the Pega-provided properties in that class.
1. In Dev Studio, click Configure > Decisioning > Decisions > Proposition Management > Hierarchy.
2. In the Top Level section, click the class listed as the Top level class.
3. Select the value in the To field, and then copy it.
4. In the Explorer panel, click App to open the Application Explorer.
5. In the search field at the top of the Application Explorer, paste the SR class value and hit Enter.
6. In the Application Explorer, right-click the SR class node, and then click Definition.
7. In the Class inheritance section of the page, change the Parent class (Directed) value to PegaComm-NBAMCFW-SR .
8. Click Save.
Pega Marketing for Communications Implementation Guide | October 05, 2018 | 27

Building the application
Adding business issues and groupsIf you want to reuse existing business issues and groups, refer to the Strategy Result class that PegaMarketing for Communications uses. If the Pega-provided business issues and groups do not meet yourneeds for identifying business objectives and subcategories, then create new ones.
Strategy rules must match business issues and groups. For example, an acquisition strategy rule shouldbe associated with the Acquisition business issue.
1. Log in by using an administrator account. Dev Studio opens.
2. Click Configure > Decisioning > Decisions > Proposition Management > Hierarchy.
3. Follow the instructions to create new business issues and groups as described in Creating a businessissue and Creating a group.
Configuring the customer classTo successfully load customer data, a customer class must be configured.
The customer class represents the customer entity in Pega Marketing for Communications. Thebase customer class is PegaComm-Data-Customer-NBAMCCustomer, which is backed by thecrm_contact_view view in the marketing schema. Pega Marketing for Communications utilizes theexternal mappings defined on the customer class to load up customer data.
It is unlikely that your application can use the base customer class as is, except for some limiteddemonstration purposes. Typically, to support loading of customer data, you must configure a differentclass that extends the base customer class. To do this, complete the following steps:
• Creating your customer class
• Mapping a customer class to a database table
• Optional:Creating a custom customer class key property
• Adding associated customer entities
• Setting the context for your customer class
• Extending and updating the SearchForCustomers report definition
• Extending and updating the CustomerSearchResultGrid section
• Optimizing properties to speed up segment creation
Creating your customer classTo support loading customer data, create a customer class that extends the base customer class and hasthe CustomerID property as its only key.
1. In the Dev Studio header search text field, enter PegaComm-Data-Customer-NBAMCCustomer. Fromthe results, select the PegaComm-Data-Customer-NBAMCCustomer class.
2. Click Save as.
3. Enter the name for the new customer class (for example, MyCo-Data-Customer ), and then clickCreate and open.
4. In the Keys section, ensure that the only key listed is CustomerID.
5. In the Class inheritance section, select the Find by name first (Pattern) check box, and then as theparent class, enter PegaComm-Data-Customer-NBAMCCustomer.
6. On the External Mapping tab of the class rule, specify the properties available on the customer recordand their backing columns in the customer table.
Pega Marketing for Communications Implementation Guide | October 05, 2018 | 28
Building the application
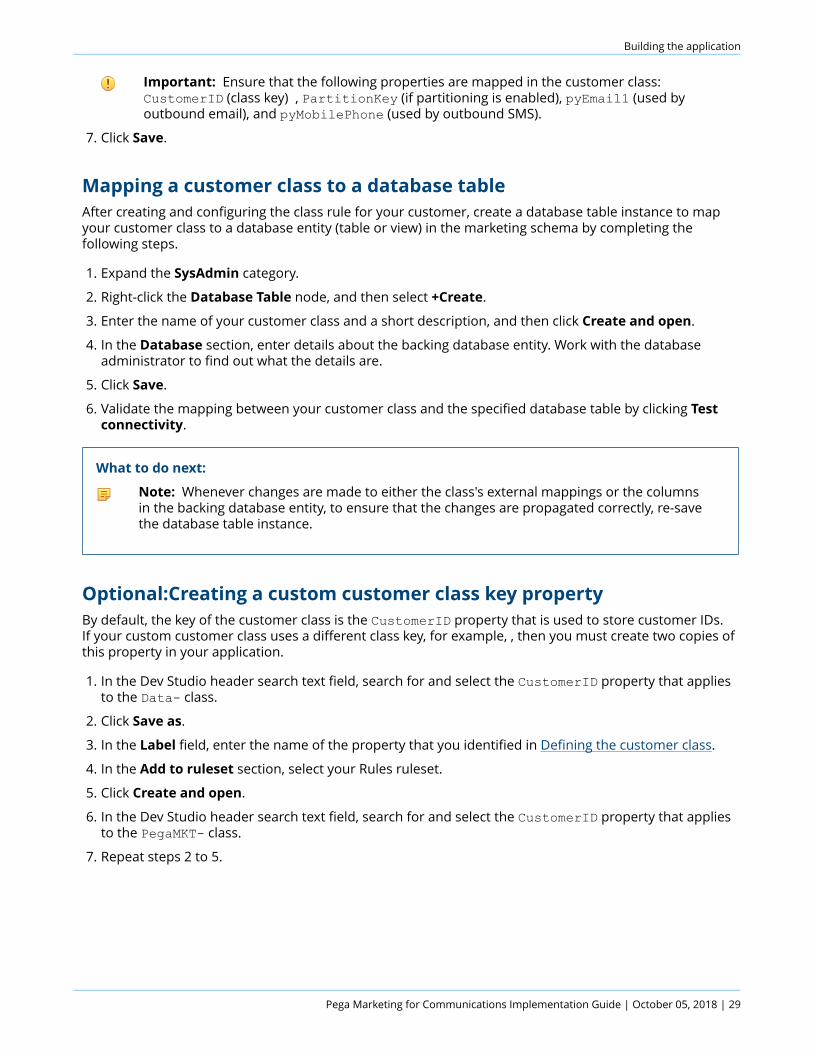
Important: Ensure that the following properties are mapped in the customer class: CustomerID (class key) , PartitionKey (if partitioning is enabled), pyEmail1 (used byoutbound email), and pyMobilePhone (used by outbound SMS).
7. Click Save.
Mapping a customer class to a database tableAfter creating and configuring the class rule for your customer, create a database table instance to mapyour customer class to a database entity (table or view) in the marketing schema by completing thefollowing steps.
1. Expand the SysAdmin category.
2. Right-click the Database Table node, and then select +Create.
3. Enter the name of your customer class and a short description, and then click Create and open.
4. In the Database section, enter details about the backing database entity. Work with the databaseadministrator to find out what the details are.
5. Click Save.
6. Validate the mapping between your customer class and the specified database table by clicking Testconnectivity.
What to do next:
Note: Whenever changes are made to either the class's external mappings or the columnsin the backing database entity, to ensure that the changes are propagated correctly, re-savethe database table instance.
Optional:Creating a custom customer class key propertyBy default, the key of the customer class is the CustomerID property that is used to store customer IDs.If your custom customer class uses a different class key, for example, , then you must create two copies ofthis property in your application.
1. In the Dev Studio header search text field, search for and select the CustomerID property that appliesto the Data- class.
2. Click Save as.
3. In the Label field, enter the name of the property that you identified in Defining the customer class.
4. In the Add to ruleset section, select your Rules ruleset.
5. Click Create and open.
6. In the Dev Studio header search text field, search for and select the CustomerID property that appliesto the PegaMKT- class.
7. Repeat steps 2 to 5.
Pega Marketing for Communications Implementation Guide | October 05, 2018 | 29

Building the application
Adding associated customer entitiesPega Marketing for Communications supports associating the customer class with other entities. Forexample, each customer record can have associated purchase data information. After creating thecustomer class, create and configure any associated entities.
To add a new association for an entity (for example, PurchaseData) to the customer class, complete thefollowing steps.
Note: The relationship with associated entities must be one-to-one or one-to-many.
1. Create a property rule for the associated entity directly under the customer class.
a) Ensure that the mode of the property is Page, Page List, or Page Group.
b) Ensure that the page class of the property is the class of the entity.
2. Create an association rule for the entity under the customer class.
a) In the Class association section, enter the class of the entity as the Class name.
b) In the Class join list, add an entry to specify the join between the entity and the customer class.The Type value is ignored (leave it as Include all rows…). Specify the join criteria by clicking Editconditions.
What to do next:
You can use the same procedure to associate nested entities, for example, Branch nested underPurchaseData. Create the property rule and the association rule for the new entity (for example,Branch) in the class of the target entity (for example, PurchaseData).
Note: When using an extended customer class, copy the History association rule andthe History property rule from the base customer class (PegaComm-Data-Customer-NBAMCCustomer) into the extended customer class.
Setting the context for your customer classUse the Context Dictionary to review or update the default contexts, configure a different primary context,or add an additional customer context. For example, you can configure Subscriber as additional customerentity.
The Context Dictionary identifies the customer entities, the relationships between these entities, and anyassociated data to be used by Pega Marketing for Communications. By default, the primary context isCustomer, mapped to the PegaComm-Data-Customer-NBAMCCustomer class, and the prospect contextis Prospect, mapped to the <your organization name>-Data-Customer-Prospect class.
1. In the App Studio navigation bar of the Pega Marketing portal, click Settings > Context Dictionary.
2. Review the primary context.
a) Click the Configure icon by the name of a context.
b) Review the available properties.
c) If you defined a new extended customer class, select it in the Class field.
d) Review the associated data. If you defined additional associated data for your base customer class,click + Add associated data to enable it.
Pega Marketing for Communications Implementation Guide | October 05, 2018 | 30

Building the application
3. Optional: To add a new customer context, click Add context and specify the name, customer class, andoptional exclusion list. If you defined additional associated data for your new customer class, click +Add associated data to enable it.You can use additional customer context to build segments and launch campaigns. Using multiple datacontexts allows you to better target your marketing efforts at multiple levels.
4. Optional: To set your new customer context as the primary Context, click Change primary and selectthe context in the Select Primary Context dialog box.
CAUTION: Changing the primary context affects Segments and Campaigns which use it. If youhave already defined any Segments or Campaigns, recreate them manually after changing theprimary context to ensure that they continue working.
5. Optional: Click the Configure icon by the name of the prospect context. If you defined a new extendedprospect class, select it in the Class field.For more information about the prospect class, see Configuring the prospect class.
6. Optional: Set the context storage in the Context storage section.By default, the data resides in the relational database that supports Pega Platform. You can also usethe Cassandra-backed decision data store to store context data. However, any data required to createcustomer segments must still reside in a relational database, and data must be synchronized betweenthe decision data store and relational tables if you plan to use segmentation.
7. Click Save.
Extending and updating the SearchForCustomers report definitionAfter creating a custom customer class, you must extend the rules that are related to list segments. This isnecessary so that your application can use customer data from your extended customer class.
SearchForCustomers is a report definition that can be used to search customer details by customer IDor name.
1. In the Dev Studio header search text field, enter searchforcustomers, and then select theSearchForCustomers report definition from the search results.
2. Click Save as.
3. In the Apply to field, enter the custom customer class that you configured in Creating your customerclass.
4. In the Add to ruleset section, select your Rules ruleset.
5. Click Create and open.
6. Optional: If the custom customer class has a class key different from the default, CustomerID, updatethe Query tab.
a) In the Edit columns section, in the Column source column, replace CustomerID with the name ofthe correct customer class key, for example, AccountID.
b) In the Edit filters section, in the Column source column, replace CustomerID with the name of thecorrect customer class key, for example, AccountID.
7. Click Save.For more information on list segments, see the Pega Marketing User Guide on the Pega Marketingproduct page.
Pega Marketing for Communications Implementation Guide | October 05, 2018 | 31

Building the application
Extending and updating the CustomerSearchResultGrid sectionAfter creating a custom customer class, you must extend the rules that are related to list segments. This isnecessary so that your application can use customer data from your extended customer class.
CustomerSearchResultGrid is the default section that can be used to display a segment in a grid basedon a segment identifier.
1. In the Dev Studio header search text field, enter customersearchresultgrid, and then select theCustomerSearchResultGrid section from the search results.
2. Click Save as.
3. In the Apply to field, enter the custom customer class that you configured in Creating your customerclass.
4. In the Add to ruleset section, select your Rules ruleset.
5. Click Create and open.
6. Click Check out.
7. On the Pages & Classes tab, in the Class column, replace the base customer class name with thecustomer class name that you configured in Creating your customer class.
8. On the Design tab, on the Grid Repeat Layout panel, click the Gear icon.
9. Click Submit.
10. Click Save.For more information on list segments, see the Pega Marketing User Guide on the Pega Marketingproduct page.
Optimizing properties to speed up segment creationTo improve value retrieval performance when selecting segment criteria from a list, you can add andremove optimizations for properties which you plan to use to create segments. When you select criteriavalues from a list in a segment rule, you use the Select items dialog box to select one or more values forthe criterion. If the property has many values, populating the Select items dialog box can result in poorperformance. By optimizing the property, the number of values that are queried is reduced, resulting inimproved retrieval performance.
1. In the Application Explorer, in the search text field, enter Data-Admin-DistinctValueIndex andpress Enter.
2. Click Data-Admin-DistinctValueIndex to open the Data-Admin-DistinctValueIndex class.
3. Click Create to create a distinct value index instance of the property that you want to optimize. Youmust define the property as a text, integer, or decimal type.
a) In the Short description field, enter a brief description of the instance.
b) In the Class name field, enter the name of the class that the property is associated with. The classcannot have security restrictions defined for it.
c) In the Property name field, enter the name of the property whose values you want to retrieve.
d) Click Save.An agent calls the populateDistinctValues activity, which searches the specified class and cachesthe distinct values of the property in a table.
4. Use the optimized property in a segment. For more information, see Chapter 6: Segments - SelectingCriteria Values from a List in the Pega Marketing for Communications User Guide on the Pega Marketing forCommunications product page.
Pega Marketing for Communications Implementation Guide | October 05, 2018 | 32

Building the application
Configuring the prospect classTo successfully load prospect data, a prospect class must be configured.
Perform the following tasks to configure a custom prospect class:
1. Creating a prospect class
2. Configuring the prospect template
Creating a prospect classTo support loading prospect data, create a prospect class that extends the base prospect class and has thecorrect class key.
1. In the Dev Studio header search text field, enter PegaMKT-Data-Prospect, and then select thePegaMKT-Data-Prospect class from the search results.
2. Click Save as.
3. Enter the name for the new prospect class, following the pattern <Customer-Class>-Prospect.
• If no customer class is configured, then substitute <Customer-Class> with the base customer classPegaComm-Data-Customer-NBAMCCustomer.
• If a custom customer class is created and configured, then substitute <Customer-Class> with thecustom customer class.
4. Click Create and open.
5. In the Keys section, ensure that only the correct key is listed.
6. In the Class inheritance section, select the Find by name first (Pattern) check box.
7. In the Parent class (Directed) field, enter the base prospect class PegaMKT-Data-Prospect.
8. On the External Mapping tab of the class rule, specify the properties available on the prospect recordand their backing columns in the prospect table. Ensure that these mappings meet the followingrequirements:
• The column name does not exceed 27 characters
• The property name starts with a period
• The table does not contain empty rows
9. Click Save.
10. Copy the following rules into the extended prospect class:
• ProspectDataSet
• ProspectListImportResultReportDefinition
Configuring the prospect templatePega Marketing for Communications contains a spreadsheet that business users can use to import datafrom an external database. The ProspectTemplate binary file contains such columns as name andage. You must configure the Pega-provided template to meet your business needs. Make the customizedbinary file available to the business users to allow them to import prospect data.
1. In the Dev Studio search box, type ProspectTemplate, and then select it from the search results.
2. Click Save as.
Pega Marketing for Communications Implementation Guide | October 05, 2018 | 33

Building the application
3. In the Label field, enter ProspectTemplate as label for the file.
4. In the Identifier field, enter ProspectTemplate as identifier for the file.
5. From the Add to ruleset drop-down list, select your Rules ruleset.
6. Click Create and open.
7. On the File tab of the binary file, click Download file.
8. Edit the file to ensure that the columns in the binary file match the properties on theExternal Mapping tab of your prospect class.
9. To upload the edited file, on the File tab of the binary file, click Upload file.
10. In the Upload file window, click Choose file, locate the edited file and click Upload file.
Importing offers from Product CatalogReuse existing product offers by importing them from Product Catalog. Mapping offer attributes toproperties in Pega Marketing for Communications is part of the import process. You can import simpleoffers as well as bundle offers.
1. In the Dev Studio header, click Launch web interface > Pega Marketing.
2. Click the Configuration icon and then Product catalog > Import offers.
3. In the Select catalog field, enter a catalog name and then click Continue.
4. Select products from the selected catalog and then click Continue.
5. In the row for the product offer whose attributes you want to map, click Map.
6. Click +Add offer.
7. Select the issue and the group to which you want to map the offer and then click Apply.
8. In the Imported properties column, locate the attributes that you want to map and, from the list inthe adjacent column, select the corresponding properties.If a property to which you want to map an offer attribute does not exist, in the Form tab of therespective decision data rule, add a new property.
9. Click Continue.The offer that you mapped has a check mark next to it.
10. After you map all the relevant offers, click Continue.
Note: If you import bundle offers, make sure that you map the child offers as well.
11. Click Finish.After you complete this process for a specific offer, the same mapping applies to all other offers in thespecified business objective and business group.
Static and dynamic bundlesPega Marketing for Communications supports two types of service bundles that customers can acquire:static and dynamic.
Static bundles are fixed and have the structure of master propositions that contain child propositions.These bundles can be dual play, triple play, or quad play, depending on the number of services that theyinclude. For example, if a bundle contains three offers, it is called triple play.
Pega Marketing for Communications Implementation Guide | October 05, 2018 | 34

Building the application
Dynamic bundles are created by the customers as they move through the interface and select from theavailable services.
Both types of bundles are managed by the AqcuisitionBundles strategy rule and theAqcuisitionBundles real-time container.
Note: Any custom strategies or properties that you you use in the process must reside in the top-level Strategy Result class.
For more information about strategies that are related to static and dynamic bundles, see Acquisitionstrategies in Pega Marketing for Communications
For information about product offers in Pega Marketing for Communications, see Product offer structuressupported by Pega Marketing for Communications
For information about the customer acquisition journey, see New customer acquisition in Pega Marketingfor Communications 8.1.
Strategy builder templatesStrategy builder templates help you save time by simplifying the configuration of strategies. The approachis generic and supports extension and reusability.
Strategies come with a pre-defined structure that needs to be updated or re-created for various use cases.This is reflected in the implementation layer because the strategies come with limited extensibility. Toreuse the strategies that you create in the base application, you must save them in the implementationlayer. Strategy builder templates help break this process into steps with minimal configuration. You canuse templates for strategies that, for example, calculate Customer Lifetime Value or Pricing.
For more information about strategy builder templates, see Creating strategy builder templates in PegaMarketing for Communications
Configuring the profile preference logicThe profile preference logic is a process that increases the weight of individual propositions. Customizethe preference logic by creating questions, mapping them to offers, and then assigning weight to eachquestion.
• Creating questions
• Mapping offer weight
Creating questionsCreate questions and define the answers that help the user to find offers that are most suited to theirpreferences. For example, you can create a question that determines how many devices the customeruses to have the application suggest a suitable offer based on the answer.
Note: You can edit existing questions by clicking their names.
1. In Dev Studio, click Launch web inteface > Pega Marketing.
2. On the Marketing portal, click the Configuration icon and then Profile preferences > Managequestions.
3. Click Create profile question.
4. Select the type of question from the following options:
Pega Marketing for Communications Implementation Guide | October 05, 2018 | 35

Building the application
Single selectAllows you to select only one answer.
Multi selectAllows you to select more than one answer.
5. Complete the Add preference question form.For example, associate the question with an issue and a group, type the question, and add answers.
6. Click Save.
Mapping offer weightCustomize the importance of the questions that the customers answer during offer selection. Forexample, raise the importance of the question that determines the number of devices that the customerhas by increasing the weight of the the individual answers.
Every question has specific weight that decides the impact of the answer on the final offer. The weight isbased on the answers that customers provide to questions that are displayed during offer selection.
Note: This task describes manual offer weight mapping. You can also import a CSV file with a pre-made mapping.
1. In Dev Studio, click Launch web inteface > Pega Marketing.
2. On the Marketing portal, click the Configuration icon and then Profile preferences > Offerweightage mapping.
3. Click Add offer weightage.
4. Name the mapping instance and complete the fields by selecting values from the lists, such as Issueand Group.
5. In the Offer Weightage field, define a weight between 0 and 0.99.Assign weight to individual answers to customize the way in which they influence the offer.
Configuring channelsChannels are a means of communication that customers can use to interact with a company. PegaMarketing for Communications includes integrated, multi-channel support capabilities for managingemail, SMS, push notifications and web-based service interactions. Additionally, in-person interactions canbe conducted using a mobile device, such as a tablet computer.
Pega Marketing for Communications allows you to build your process once and reuse it in any channel.
Configure channels by performing the following actions:
• Configuring email accounts
• Configuring the outbound SMS account
• Configuring the inbound SMS account
• Specifying delivery time frames
• Configuring push notifications
Pega Marketing for Communications Implementation Guide | October 05, 2018 | 36
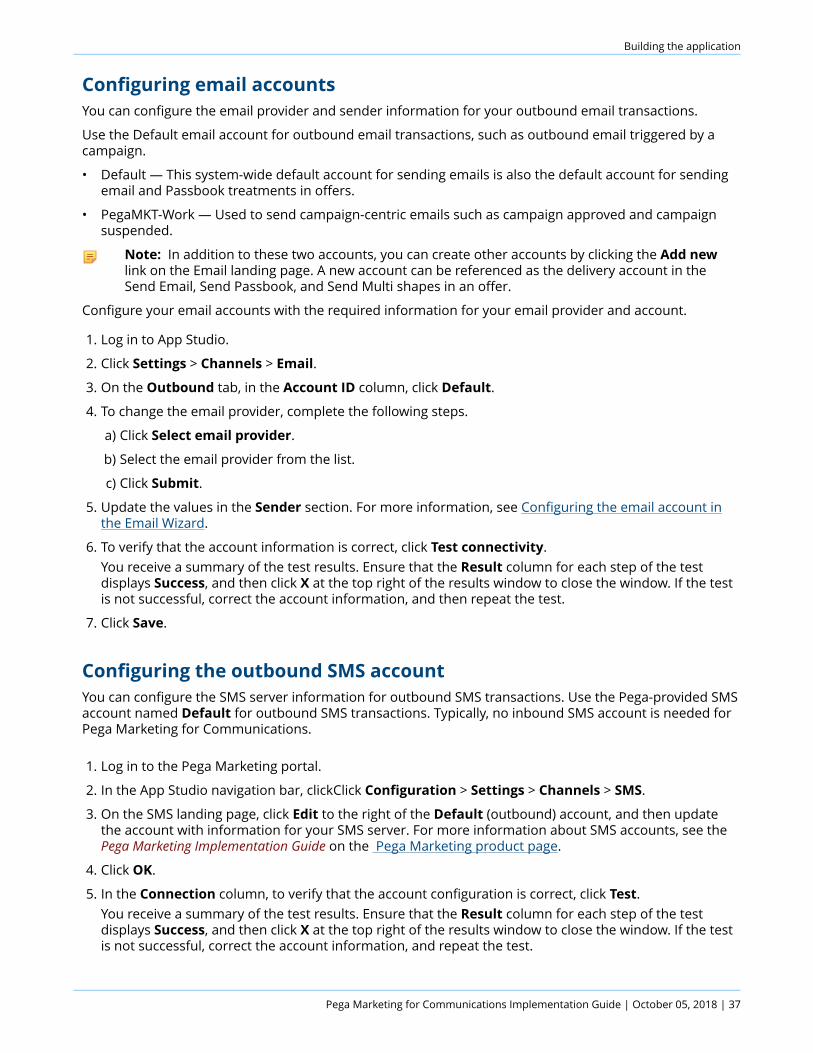
Building the application
Configuring email accountsYou can configure the email provider and sender information for your outbound email transactions.
Use the Default email account for outbound email transactions, such as outbound email triggered by acampaign.
• Default — This system-wide default account for sending emails is also the default account for sendingemail and Passbook treatments in offers.
• PegaMKT-Work — Used to send campaign-centric emails such as campaign approved and campaignsuspended.
Note: In addition to these two accounts, you can create other accounts by clicking the Add newlink on the Email landing page. A new account can be referenced as the delivery account in theSend Email, Send Passbook, and Send Multi shapes in an offer.
Configure your email accounts with the required information for your email provider and account.
1. Log in to App Studio.
2. Click Settings > Channels > Email.
3. On the Outbound tab, in the Account ID column, click Default.
4. To change the email provider, complete the following steps.
a) Click Select email provider.
b) Select the email provider from the list.
c) Click Submit.
5. Update the values in the Sender section. For more information, see Configuring the email account inthe Email Wizard.
6. To verify that the account information is correct, click Test connectivity.You receive a summary of the test results. Ensure that the Result column for each step of the testdisplays Success, and then click X at the top right of the results window to close the window. If the testis not successful, correct the account information, and then repeat the test.
7. Click Save.
Configuring the outbound SMS accountYou can configure the SMS server information for outbound SMS transactions. Use the Pega-provided SMSaccount named Default for outbound SMS transactions. Typically, no inbound SMS account is needed forPega Marketing for Communications.
1. Log in to the Pega Marketing portal.
2. In the App Studio navigation bar, clickClick Configuration > Settings > Channels > SMS.
3. On the SMS landing page, click Edit to the right of the Default (outbound) account, and then updatethe account with information for your SMS server. For more information about SMS accounts, see the Pega Marketing Implementation Guide on the Pega Marketing product page.
4. Click OK.
5. In the Connection column, to verify that the account configuration is correct, click Test.You receive a summary of the test results. Ensure that the Result column for each step of the testdisplays Success, and then click X at the top right of the results window to close the window. If the testis not successful, correct the account information, and repeat the test.
Pega Marketing for Communications Implementation Guide | October 05, 2018 | 37

Building the application
Configuring the inbound SMS accountYou can configure the SMS server information for inbound SMS transactions. An inbound SMS account isused to listen for customer responses to offers and to take appropriate next actions.
1. Log in to the Marketing portal
2. Complete the instructions in Configuring an inbound SMS account in the Pega Marketing User Guide onthe Pega Marketing product page.
Specifying delivery time framesYou can specify delivery time frames for outbound SMS and email accounts. The time frames onlyapply to the delivery of SMS and email treatments in offers. Other delivery, such as work object-relatedcorrespondence, is not affected by these time restrictions.
1. In the ACCOUNT AVAILABILITY section, click the Specify Range button.
2. Select the start value From and the end value To of the time range.
3. Ensure that the correct time zone is selected from the drop-down list.
4. Click OK.
Configuring push notificationsYou can register an app so it can receive push notification messages from the Pega Marketing forCommunications application. Push notifications allow a server to send (push) a message to the client. Forexample, mobile apps can send notification messages to their users.
1. Log in to the Marketing portal
2. Complete the instructions in Registering apps for push notification in the Pega Marketing User Guide onthe Pega Marketing product page.For more information, see the Push notifications chapter in the Pega Marketing User Guide on the PegaMarketing product page.
• Configuring Passbook settings
Configuring Passbook settingsYou can configure Passbook settings to enable the sending of Passbook updates with push notifications.After you upload a valid Apple certificate and a valid organizational certificate, Passbook is automaticallyenabled.
1. Log in to the Marketing portal
2. Complete the instructions in the Passbook settings appendix in the Pega Marketing User Guide on the Pega Marketing product page .
Optional: Configuring repository storage for marketing imagesYou can configure Pega Marketing for Communications to use repository storage for your Image Library.
The Image Library is used to store and maintain marketing digital assets. By default, the assets are storedin a traditional rule-based Image Library. You can instead configure repository storage for your images.Using repository storage for your Image Library gives you the integrated ability to manage and distributemarketing images, improves usability, and simplifies the launch of email campaigns at scale.
Pega Marketing for Communications Implementation Guide | October 05, 2018 | 38

Building the application
• Configuring custom repository storage
• Configuring default repository storage for Pega Cloud deployments
Configuring custom repository storageFor all cloud or on premise implementations you can enable repository storage with your existing S3repositories (S3, Azure, or local file storage).
Before you begin: Make sure that the IP of the Content Delivery Network you want to use forrepository storage is whitelisted for the Pega Web Service, so that the Content Delivery Network canaccess and serve images from the Web Service.
1. Configure the repository connection.For more information, see Creating a repository connection or Creating custom repository connections.
2. In Dev Studio, configure the following Dynamic System Settings:
• MarketingImageAssets/IsRepositoryStorageEnabled - Set to true.
• MarketingImageAssets/CustomRepositoryName - Enter the name of the repositoryrule which points to your S3 repository. This setting overwrites the value of the settingMarketingImageAssets/DefaultRepositoryName.
• Optional: MarketingImageAssets/Folder - Enter the name of the folder where Pega Marketingfor Communications will store the image assets. This folder will be located inside the root folderdefined in the repository rule. If you do not define a folder for the images, they will be storeddirectly in the repository root folder.
• Optional: MarketingImageAssets/CustomBaseURL - Enter the URL of the Content DeliveryNetwork which you configured, and update the MKTDefaultSecured content security policy ruleto include CustomBaseURL under the Image-Source category in the Allowed Websites column.If you leave this setting blank, the images will be rendered directly from the Pega Web Service. Thissetting overwrites the value of the setting MarketingImageAssets/BaseURL.
3. Optional: To modify the maximum file size allowed for images, edit the MarketingImageAssets/AllowedFileSize Dynamic System Setting.
4. Optional: To allow image types other than .png, .jpg, .jpeg, .tiff, and .heif, save the data transformAllowedImageTypes to your application ruleset and add new types as required.
5. Run the D_RepositorySettings data page with flush mode on, or clear the cache.Flushing the DSS settings is required to apply the changes made to the settings.
What to do next: If you replace an image in the repository with a new version, the cached image onthe Content Delivery Network must be invalidated and replaced with the new version of the image.Cache invalidation is automatic in the Pega Cloud repository, but when using your own S3 repository,you must configure the invalidation logic, which should be applied on a DELETE event to clear theimage cache. For more information, refer to the documentation of your S3 repository.
Configuring default repository storage for Pega Cloud deploymentsFor Pega Cloud deployments, you can enable and configure the default repository storage.
1. In Dev Studio, configure the following Dynamic System Settings:
• MarketingImageAssets/IsRepositoryStorageEnabled - Set to true.
Pega Marketing for Communications Implementation Guide | October 05, 2018 | 39
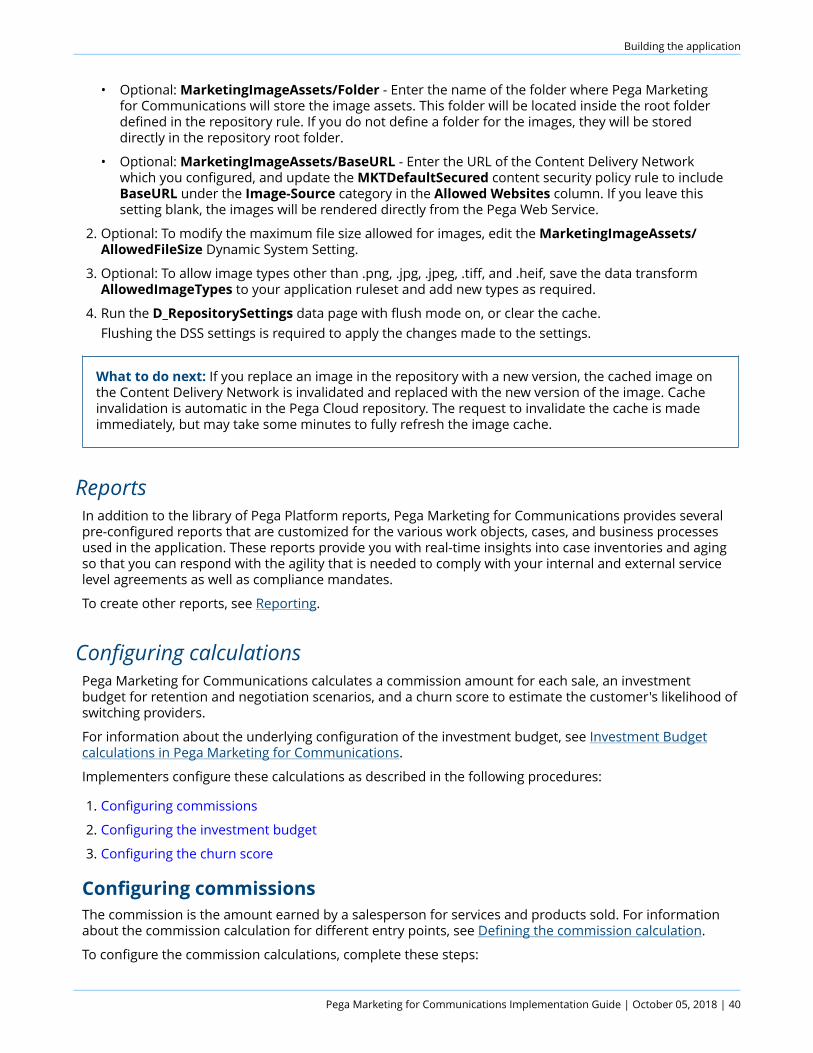
Building the application
• Optional: MarketingImageAssets/Folder - Enter the name of the folder where Pega Marketingfor Communications will store the image assets. This folder will be located inside the root folderdefined in the repository rule. If you do not define a folder for the images, they will be storeddirectly in the repository root folder.
• Optional: MarketingImageAssets/BaseURL - Enter the URL of the Content Delivery Networkwhich you configured, and update the MKTDefaultSecured content security policy rule to includeBaseURL under the Image-Source category in the Allowed Websites column. If you leave thissetting blank, the images will be rendered directly from the Pega Web Service.
2. Optional: To modify the maximum file size allowed for images, edit the MarketingImageAssets/AllowedFileSize Dynamic System Setting.
3. Optional: To allow image types other than .png, .jpg, .jpeg, .tiff, and .heif, save the data transformAllowedImageTypes to your application ruleset and add new types as required.
4. Run the D_RepositorySettings data page with flush mode on, or clear the cache.Flushing the DSS settings is required to apply the changes made to the settings.
What to do next: If you replace an image in the repository with a new version, the cached image onthe Content Delivery Network is invalidated and replaced with the new version of the image. Cacheinvalidation is automatic in the Pega Cloud repository. The request to invalidate the cache is madeimmediately, but may take some minutes to fully refresh the image cache.
ReportsIn addition to the library of Pega Platform reports, Pega Marketing for Communications provides severalpre-configured reports that are customized for the various work objects, cases, and business processesused in the application. These reports provide you with real-time insights into case inventories and agingso that you can respond with the agility that is needed to comply with your internal and external servicelevel agreements as well as compliance mandates.
To create other reports, see Reporting.
Configuring calculationsPega Marketing for Communications calculates a commission amount for each sale, an investmentbudget for retention and negotiation scenarios, and a churn score to estimate the customer's likelihood ofswitching providers.
For information about the underlying configuration of the investment budget, see Investment Budgetcalculations in Pega Marketing for Communications.
Implementers configure these calculations as described in the following procedures:
1. Configuring commissions
2. Configuring the investment budget
3. Configuring the churn score
Configuring commissionsThe commission is the amount earned by a salesperson for services and products sold. For informationabout the commission calculation for different entry points, see Defining the commission calculation.
To configure the commission calculations, complete these steps:
Pega Marketing for Communications Implementation Guide | October 05, 2018 | 40

Building the application
1. Configuring the commission parameters
2. Configuring the commission calculations
Configuring the commission parametersConfigure the commission parameters for your application.
1. Log in by using an administrator account. Dev Studio opens.
2. In the Explorer panel, click App to open Application explorer.
3. In the search box at the top of the Application explorer, enter PegaComm-Data-ControlParameters,then press Enter to open that class.
4. Click Data Model > Data Transform > pyDefault.
5. Update the values in the equal to field for the following parameters:
• .COMMISSION_PERCENT — The percent of the margins earned as a commission. The default value is.1 (10%).
• .COMMISSION_PERCENT_MINIMUM — The minimum commission points earned on any sale. Thedefault value is 1 point.
Configuring the commission calculationsReview and configure the following commission calculations.
• Cross-sell/upsell and retention commission calculation — This calculation is configured in theNextBestOffer strategy.
• Commission calculation — This calculation is configured in the BudgetCalculation strategy.
1. Enter PegaComm-Data-Customer-NBAMCCustomer in the search box at the top of the Applicationexplorer, and then press Enter to open that class.
2. To modify the commission calculation for the cross-sell/upsell and retention entry points, complete thefollowing steps.
a) In the Application explorer, click Decision > Strategy > NextBestOffer.
b) Double-click the Set Agent Compensation shape.
c) The Set .AgentCompensation action equal to field contains the calculation. To view the completecalculation, copy it, and then paste it in a text editor.
d) To modify the calculation, copy a new value to the equal to field, and then click Submit.
3. To modify the commission calculation, complete the following steps.
a) In the Application explorer, click Decision > Strategy > BudgetCalculation.
b) Double-click the Investment Budget shape.
c) The Set .TotalCommission action equal to field contains the calculation. To view the completecalculation, copy it, and then paste it in a text editor.
d) To modify the calculation, copy a new value to the equal to field, and then click Submit.
4. Click Save to save the changes to the strategy.
Pega Marketing for Communications Implementation Guide | October 05, 2018 | 41

Building the application
Configuring the investment budgetThe investment budget, also known as the retention budget, is the amount available to retain a customerin a retention or negotiation scenario.
To configure the investment budget, complete these steps:
1. Configuring the investment budget paramaters
2. Configuring the investment budget calculations
Configuring the investment budget paramatersCustomize the parameters that the application uses to calculate the investment budget. For example,increase the influence of the customer lifetime value on the overall budget.
The investment budget is the amount available to retain a customer in a retention or negotiation scenario.The budget defines the offers that the CSR can present to a customer.
1. In Dev Studio, click Launch web interface > Pega Marketing.
2. On the Marketing portal, click the Configuration icon and then Advisor settings > Configure budgetparameters.
3. In the Budget parameters section, enter the values you defined for the properties in Defining theinvestment budget.
4. Optional: To restrict the value of the items that the CSR can place in the basket, select the Enforcemax budget check box.If you do not select this check box, exceeding the budget results in a warning message but the CSR canstill proceed with the transaction.
Configuring the investment budget calculationsReview and configure the following investment budget calculations.
• .TotalBudgetWeighting — The overall calculation for the investment budget. Configure this calculationin the BudgetCalculation strategy's Total Budget Weighting shape.
• .WeightedBudget — The weighting of the contract CLV in the investment budget calculation. Configurethis calculation in the BudgetCalculation strategy's Investment Budget shape.
• .Maximum — The maximum investment budget calculation. Configure this calculation in theBudgetCalculation strategy's Investment Budget shape.
1. Enter PegaComm-Data-Customer-NBAMCCustomer in the search box at the top of the Applicationexplorer, and then press Enter to open that class.
2. In the Application explorer, click Decision > Strategy > BudgetCalculation.
3. To modify the .TotalBudgetWeighting calculation, complete the following steps:
a) Double-click the Total Budget Weighting shape.
b) The Set .TotalBudgetWeighting equal to field contains the calculation. To view the completecalculation, copy it, and then paste it in a text editor.
c) To modify a calculation, copy a new value to the equal to field, and then click Submit.
4. To modify the .WeightedBudget calculation, complete the following steps:
a) Double-click the Investment Budget shape.
b) The Set .WeightedBudget equal to field contains the calculation. To view the complete calculation,copy it, and then paste it in a text editor.
Pega Marketing for Communications Implementation Guide | October 05, 2018 | 42

Building the application
c) To modify a calculation, copy a new value to the equal to field, and then click Submit.
5. To modify the .Maximum calculation, complete the following steps:
a) Double-click the Investment Budget shape.
b) The Set .Maximum equal to field contains the calculation. To view the complete calculation, copy it,and then paste it in a text editor.
c) To modify a calculation, copy a new value to the equal to field, and then click Submit.
6. To save the changes to the strategy, click Save.
Configuring the churn scoreThe churn score indicates a customer's likelihood of switching providers. Pega Marketing forCommunications provides a default churn score calculation, but implementers can modify the calculation.
1. Log in by using an administrator account. Dev Studio opens.
2. In the Explorer panel, click App to open Application explorer.
3. Enter PegaComm-Data-Customer-NBAMCCustomer in the search box at the top of the Applicationexplorer, and then press Enter to open that class.
4. In the Application explorer, click Decision > Scorecard > DetermineChurnValue.
5. Click Save as, and create a name for the new rule.
6. For each predictor, change the following values to modify the resulting churn score:
• Condition field — Identifies possible values for this predictor. For example, the default CLVpredictor expression has two numeric ranges: <=500, and <=1000.
• Score field — The score to assign to a predictor condition. Different conditions can have differentscores.
• Weight field — The multiplier to apply to the score.
• Otherwise field — Number to use in the churn score calculation if the predictor value is outside therange of the Condition field.
•Delete icon — Removes the predictor from the churn score calculation.
7. Click the Results tab.
8. In the Result column, modify the names of the low risk, medium risk, and high risk churn groups, inthat sequence.
9. In the Cutoff field, enter the highest score to include in the low and medium risk groups.The high risk group automatically includes results that exceed the cutoff for the medium risk group.
10. Click Save.
Optional: Configuring Adaptive Decision Manager for sales offersAdaptive Decision Manager uses customer data to create models that predict the future behavior ofcustomers. If you want to use Pega Marketing for Communications in a CRM suite configuration with PegaSales Automation, you can use the UploadResponses activity to upload sample data or existing customerdata, and prepare Adaptive Decision Manager for sales offers.
1. Log in to the Pega Platform as the Pega Sales Automation administrator operator who hasPegaSA:MarketAdmins as their secondary access group.
Pega Marketing for Communications Implementation Guide | October 05, 2018 | 43

Building the application
2. In the Dev Studio header search box, enter D_NBAContainer, and then select the result. TheD_NBAContainer data page opens.
3. Click Actions > Run to generate the models that need to be trained.Running this data page extracts the following parameters:
• ActionID: TopOffers
• CustomerID: pzinskey of any contact in Pega Sales Automation.
4. Click Application Name > Switch Application and switch to the PegaSA_Marketing or the Marketingimplementation application.
5. In the Dev Studio header search text field, search for and select the UploadResponses activity.
6. Click Actions > Run and provide the proposition name in run time.
7. Click Choose File and browse to the location of the file you want to upload.Sample response data for propositions is located in the \ResourceKit\SAMarketingAdaptiveSampleResponses folder on the distribution media.
8. Click Submit.
9. Click Close.
10. Repeat steps 2 through 9 for the remaining proposition sample responses:
• ReturnOfPRemiumTermLifeInsurance
• FiveYearTermLifeInsurance
• MortgageTermLifeInsurance
Marketing assets configurationMost Pega Marketing for Communications rules are not executable. This is because they are metadatarules and have no generated run-time behavior. The metadata that these rules carry with them is used todo work on a user's behalf.
Implementation layer rules in Pega Marketing for Communications reside in one of the twoimplementation layer rulesets: Rules and Artifacts. To configure your marketing assets, you must createinstances of any of the rule types listed below within the relevant Business Issue/Group context. For moreinformation on configuring marketing assets, see the Pega Marketing User Guide on the Pega Marketingproduct page.
Rule types in the Artifacts ruleset
The first set of rule types reside in the Artifacts ruleset and can change based on the needs of themarketing team. These rules can be divided into two groups, depending on where they are automaticallypublished.
You can find these rules by going to the Application Explorer. For more information, see Using theApplication Explorer.
• Rule types that are automatically published to an internal Pega Marketing class PegaMKT-Work-Offer-<issue>-<group>:
• Offer - Rule-Obj-Flow-Offer
• Email - Rule-Obj-Treatment-Outbound
• SMS - Rule-Obj-Corr-SMS
• Passbook - Rule-PegaMKT-Passbook
• Volume Constraint - Rule-Obj-VolConstraintGrp
Pega Marketing for Communications Implementation Guide | October 05, 2018 | 44

Building the application
• Real-Time Event - Rule-PegaMKT-Event
• Real-Time Container - Rule-PegaMKT-Container
• Output Template - Rule-Obj-Template
• Geofence - Rule-PegaMKT-Geofence
• Rule types that are automatically published to your configured customer class:
• Segment - Rule-Obj-Report-Definition-Segment
• Strategy - Rule-Decision-Strategy
• Analysis Project - Rule-Obj-Analysis
• Sample Population - Rule-Obj-Report-Definition-Segment-Sample
• Contact Policy - Rule-PegaMKT-ContactPolicy
Revision management
Revision management enables marketing users to revision, package, and import marketing artifacts. Theycan make controlled changes in the business sandbox and test these in production within the boundariesdefined by IT. The users can see their assigned change requests in the My Work and Revision Managementwidgets.
For more information, see Revision management.
Rule types in the Rules ruleset
The second set of rules are saved to a Rules ruleset in your configured customer class and are typicallynot changed after the implementation is complete.
You can find these rules by following the hierarchy and rules under the newly-created customer class inthe Application Explorer.
• Customer - Rule-Obj-Property
• Segment - Rule-Obj-Association
Note: If you change the customer class midway through the implementation process, thepreviously-created segments or strategies no longer display in the Marketing portal. To accessthem in Dev Studio, you must navigate to the original customer class.
Optional: Running a marketing campaign for batch evaluationTo use Pega Marketing in a CRM suite configuration with Pega Sales Automation, you can test theintegration by configuring a campaign to run at a specified time every day to populate next best offers foreach contact. Use contacts from Pega Sales Automation as the campaign segment.
1. Log in to the Pega Platform as the Pega Sales Automation administrator operator who hasPegaSA:MarketAdmins as their secondary access group.
2. Click Application Name > Switch Application > PegaSA_Marketing to open the PegaSA_Marketingapplication.
3. In the Explorer panel, click App.
4. Click PegaCRM-Data-Customer > Marketing > Segment and open the AllSFACustomers segment.
5. Click Actions > Refresh.
6. Click Actions > Run.
7. In the Dev Studio header search text field, search for and select the RunProgram activity.
Pega Marketing for Communications Implementation Guide | October 05, 2018 | 45

Building the application
8. Enter a unique Program Name, and then enter the same program name as a parameter to the activity.
9. Click Actions > Run.
10. On the Marketing Campaign form, click Actions > Submit for Execution.
11. Click Confirm.When the campaign finishes running, the status changes to Pending-Wrapup.
12. Click Launch > Pega Marketing.
13. Click Configuration > Settings > Channels > Database.
14. Locate the row containing the SFAPrioritizedContacts template and ensure that the number ofrecords equals the total offers initiated on the Run Summary and that the status for the template is InProgress.
15. In the Actions column, select Finalized.
Verifying the System Health pageAfter building your implementation features, check the System Health page for any errors or warnings.
1. Log in to the Pega Marketing portal.
2. Click Configuration > Settings > System Health.
3. Review and address any errors or warnings.
Testing a new applicationTesting a new application includes the following procedures:
1. Testing your application in the Build environment
2. Testing in the Test or Production environments
3. Testing in the UAT environment
Testing your application in the Build environmentTest a new application in the Build environment before migrating the new application to a Test orProduction environment. Testing in the Build environment enables you to verify that basic functionalityand interfaces work correctly and also that performance is acceptable.
1. Run functional tests to test specific features from the end-user perspective.
2. Use the Performance tool to measure the performance of the application. For information about thePerformance tool, see About the Performance tool.
• Prior to extending your site-specific Pega implementation, establish a performance benchmark(baseline) by using the Performance tool. This allows subsequent, iterative performance testsagainst the established baseline to help identify any degradation in performance resulting fromdevelopment efforts.
• Use the Performance tool to check the performance of the following features:
• Search
• Account selection
Pega Marketing for Communications Implementation Guide | October 05, 2018 | 46

Building the application
• Loading of components
• Kickoff of all service intents. For this unit testing, automated scripts are recommended but notrequired.
• Save the test results so that you can compare them to future test results to determine whether anapplication update has a performance impact.
3. Verify that the Pega-provided reports and your custom reports run successfully, and that they showyour implementation layer data, rather than the default demonstration data. This can be an automatedtest.
4. Test all integrations, both independently and with associated integrations.
Test integrations for any optional Pega Marketing for Communications components and otherapplications that you plan to use. See the product documentation for the component or application todetermine which product components to test.
5. Test security. Test the most common roles to ensure that the required access groups are configuredand point to the correct software version.
Testing in the Test or Production environmentsAfter you import the application to a Test or Production environment, test the application in the newenvironment to verify that it works correctly in that environment.
Note: For a multitenancy configuration, run tests in each tenant region. The testing performed inthe Test environment should include usability testing to ensure that the application meets the UIstandard.
1. Verify that the source and the destination files are the same.
2. Run functional tests to test specific features from the end-user perspective.
3. In the Test or Production environment, run the Application Guardrails Compliance Score to ensure thatthe application meets guardrails.
4. Verify that the Pega-provided reports and your custom reports run successfully, and that they showyour implementation layer data, rather than the default demonstration data. This can be an automatedtest.
5. Test all integrations, both independently and with associated integrations.
Test integrations for any optional Pega Marketing for Communications components and otherapplications that you plan to use. See the product documentation for the component or application todetermine which product components to test.
6. Verify that the integrations point to the correct system of record, and not to the system of record forthe Build environment.
7. Test security. Test the most common roles to ensure that the required access groups are configuredand point to the correct software version. Use these common roles in your smoke tests (see next step).
8. Run a smoke test to compare the source and destination environments. Verify that all tests that passin the Build environment also pass in the Test or Production environment. If anything fails, comparethe environments to determine whether a difference in environment could cause the test to fail. Ifthe environment caused the failure, either fix the issue that caused the failure or adjust the test asappropriate for the new environment.
9. Run performance tests to verify that performance meets expectations. Pega recommends automatedperformance testing. Save the results so that you can compare them to future performance test resultsto determine whether an application update has a performance impact.
Pega Marketing for Communications Implementation Guide | October 05, 2018 | 47

Building the application
Testing in the UAT environmentAfter you complete testing in a Test environment, it is common to perform User Acceptance Testing (UAT)in a designated UAT environment, which could be a pre-production environment. UAT ensures that endusers will be able to successfully complete work and meet business objectives.
Note: Organizations that use Scrum for application development will complete less formal UAT aspart of each sprint cycle.
1. Verify the integrity of the UAT environment.
2. Have the end-users (or business analysts acting the role of end-users) run scripts to test all scenariosincluding boundary and exception testing. The end-users (that is, the trainers, managers, anddirectors), perform the following steps during UAT:
a) Verify that there are no major issues.
b) Review changes in order to better understand the features.
Packaging a new applicationTo migrate a new application to a different environment, you must first package the application so that itcan be imported to the new environment.
Packaging and importing a new application includes the following procedures:
1. Merging application changes
2. Packaging an application for migration
3. Importing the packaged application
Merging application changesIf you developed your application features in separate branches, use the Merge Branches wizard to mergethe branches before you package the application. The wizard shows any merge conflicts so that you cancorrect them before you merge the branches.
Additionally, the revision management capability allows business users to make controlled changes in thebusiness sandbox and test the changes in a production environment within the boundaries defined by IT.For more information, see Revision management.
Packaging an application for migrationBefore you can migrate a new application to a different environment, you must package the relevant datainstances and rulesets into a product rule. The product rule is an instance of Rule-Admin-Product, andit is referred to as the RAP file.
1. In the header of Dev Studio, click Configure > Application > Distribution > Package to start theApplication Packaging wizard. For information about using the wizard, see Application Packagingwizard.
2. Complete each page of the Application Packaging wizard.
3. On the last page of the wizard, click Preview.
4. Review the contents of the generated RAP file.
5. On the last page of the wizard, click Modify to make any changes.
Pega Marketing for Communications Implementation Guide | October 05, 2018 | 48
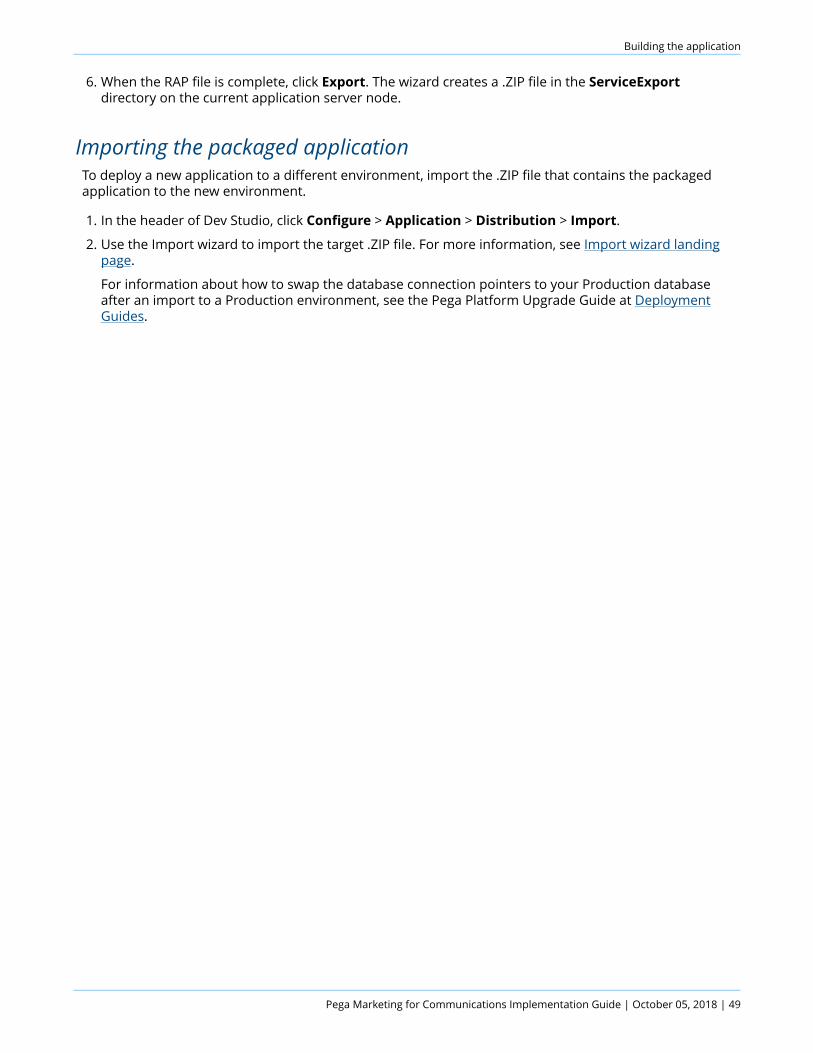
Building the application
6. When the RAP file is complete, click Export. The wizard creates a .ZIP file in the ServiceExportdirectory on the current application server node.
Importing the packaged applicationTo deploy a new application to a different environment, import the .ZIP file that contains the packagedapplication to the new environment.
1. In the header of Dev Studio, click Configure > Application > Distribution > Import.
2. Use the Import wizard to import the target .ZIP file. For more information, see Import wizard landingpage.
For information about how to swap the database connection pointers to your Production databaseafter an import to a Production environment, see the Pega Platform Upgrade Guide at DeploymentGuides.
Pega Marketing for Communications Implementation Guide | October 05, 2018 | 49
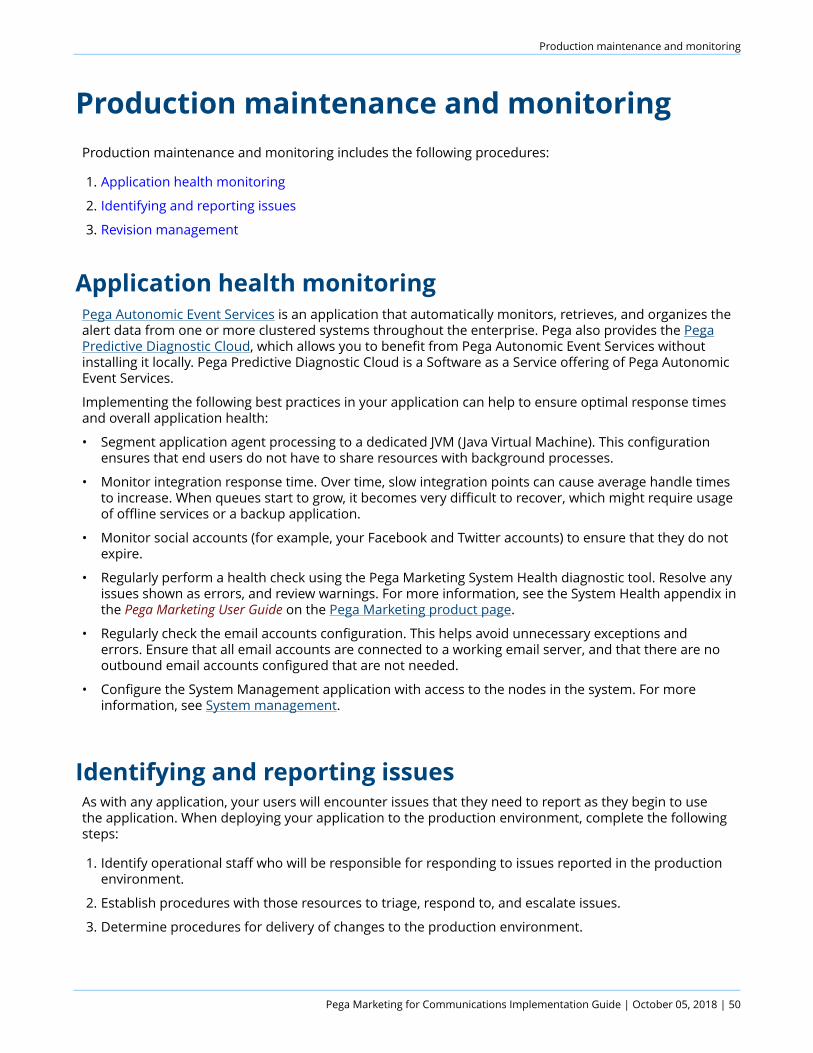
Production maintenance and monitoring
Production maintenance and monitoringProduction maintenance and monitoring includes the following procedures:
1. Application health monitoring
2. Identifying and reporting issues
3. Revision management
Application health monitoringPega Autonomic Event Services is an application that automatically monitors, retrieves, and organizes thealert data from one or more clustered systems throughout the enterprise. Pega also provides the PegaPredictive Diagnostic Cloud, which allows you to benefit from Pega Autonomic Event Services withoutinstalling it locally. Pega Predictive Diagnostic Cloud is a Software as a Service offering of Pega AutonomicEvent Services.
Implementing the following best practices in your application can help to ensure optimal response timesand overall application health:
• Segment application agent processing to a dedicated JVM (Java Virtual Machine). This configurationensures that end users do not have to share resources with background processes.
• Monitor integration response time. Over time, slow integration points can cause average handle timesto increase. When queues start to grow, it becomes very difficult to recover, which might require usageof offline services or a backup application.
• Monitor social accounts (for example, your Facebook and Twitter accounts) to ensure that they do notexpire.
• Regularly perform a health check using the Pega Marketing System Health diagnostic tool. Resolve anyissues shown as errors, and review warnings. For more information, see the System Health appendix inthe Pega Marketing User Guide on the Pega Marketing product page.
• Regularly check the email accounts configuration. This helps avoid unnecessary exceptions anderrors. Ensure that all email accounts are connected to a working email server, and that there are nooutbound email accounts configured that are not needed.
• Configure the System Management application with access to the nodes in the system. For moreinformation, see System management.
Identifying and reporting issuesAs with any application, your users will encounter issues that they need to report as they begin to usethe application. When deploying your application to the production environment, complete the followingsteps:
1. Identify operational staff who will be responsible for responding to issues reported in the productionenvironment.
2. Establish procedures with those resources to triage, respond to, and escalate issues.
3. Determine procedures for delivery of changes to the production environment.
Pega Marketing for Communications Implementation Guide | October 05, 2018 | 50

Production maintenance and monitoring
Revision managementRevision management is a Pega Platform feature that enables business users to take ownership of partsof the enterprise application. Users can make controlled changes in the business sandbox and test thechanges in a production environment within the boundaries defined by IT.
Most marketing artifacts can be included and updated in revisions. Revision managers can start a newrevision and create change requests within the revision. A change request can contain marketing rulesand be assigned to a marketer.
These two widgets can be used by marketers to view their assigned change requests:
• The My Work widget
• The Revision Management widget
• Added to a user's Home page in the Pega Marketing portal
• Displays change requests that are assigned to the user, and lists each rule within the request
• Enables a user to directly access the rules within an assigned change request
There are three roles involved in revision management:
• DecisionManager:RevisionManager - includes the ability to create a revision and change request.
• DecisionManager:StrategyDesigner - can be assigned a change request to work on.
• DecisionManager:PegaMarketing - includes both of the above roles to allow running campaignsfrom the application overlay context.
Note: Even when revision management is used, an artifacts ruleset with an unlocked rulesetversion is still required to store rules generated at runtime.
For more information, see the Revision Management chapter in the Pega Marketing User Guide, available onthe Pega Marketing product page .
In addition to revision management, you can give managers the ability to update other rule types in theProduction environment. For example, managers can update the Goals and Deadline for a certain casetype. These rules must be delegated in Dev Studio first. After the rule has been delegated, you can accessit by clicking your operator profile > My rules. For more information on rule delegation, see Delegating arule or data type.
Managers can also create reports in the Reports section of the portal. For more information, see ReportBrowser features.
Pega Marketing for Communications Implementation Guide | October 05, 2018 | 51