appendixⅠ i-dvr.net registration - globalmediapro
TRANSCRIPT

APPENDIXⅠ I-DVR.NET REGISTRATION
DDNS Registration on I-DVR.NET
In the package of each DVR, you will find a sticker shows account information including
username and password that allows users to login I-DVR.NET for registration.
To register DDNS on I-DVR.NET, please follow the steps as shown.
Step 1. Please open IE browser and then enter “ http://i-DVR.NET/logon.asp ” in IE browser bar.
Next, “Control Panel Logo” dialog will appear. Enter the username and password
provided by the sticker and then press, “Logon.”
Step 2. After login successfully, enter name at “host” in “Add New Record” dialog. For
example, “hostname” is the host name, and then the address will be
“hostname.i-dvr.net.” Select “Standard” type and enter an IP address of the DVR.
Input known IP address if any, or press the “insert” button if none.
Step 3. The “Host Manager” dialog will show “insert succeed” when user setup successfully.
The “host.domain” column will show up the setup just entered. Next, enter the DVR the same time setting the DDNS client machine information If DDNS set up at DVR side successfully, the website will update the IP information in one minute. The IP column will be renewed to the corresponding IP address by
System will automatically show the current computer IP. If the DVR IP is known, you can type it in the column. If not, you can press “insert” button.
Please enter any name by your choice at Column, “host.domain”
For example, “hostname” Therefore, IE address will be “hostname.i-dvr.net”

pressing “F5: refresh” button.
Step 4. Enter DVR →Main Menu → Configuration → Network Setup → DDNS. Activate
DDNS functions and input related information.
“host.domain” is named by your choice. “hostname.i-dvr.net” is what the main server generates
If DVR IP has any changes, there are updates Here at the same time. Press, “F5: Refresh” And then IP column will update automatically to it’s real IP Address.
This part of the information required and the same within the i-dvr.net
DDNS work properly when this option selected.

Step 5. Back to the i-dvr.net, on this page by pressing "F5: Refresh", IP will be automatically
updated into the DVR of the real IP location.

APPENDIXⅡ ez-dns REGISTRATION
DDNS Registration on ez-dns.com In addition to I-DVR.NET the Company, the other has a ez-dns.com server may be used.. To register DDNS on ez-dns.com, please follow the steps as shown. Step 1. Please open IE browser and then enter “ http://ez-dns.com ” in IE browser bar.
First time, please click on the top of the screen of "Sing up" (red box )
Step 2. To input a user name and password, after clicking “singup”. Later, log in to use ez-dns.com that this group account password
Step 3. The “host.domain” column will show up the setup just entered. Next, enter the DVR the same time setting the DDNS client machine information If DDNS set up at DVR side successfully, the website will update the IP information in 10 minute. The IP column will be renewed to the corresponding IP address by pressing “F5: refresh” button.

Step 4. Enter DVR →Main Menu → Configuration → Network Setup → DDNS. Activate
DDNS functions and input related information.
“host.domain” is named by your choice. “demodvr.ez-dns.com” is what the main server generates
The system will automatically display the current user's computer IP, If the DVR's IP location is known can be input field and click update, If DVR IP has any changes, there are updates Here at the same time. Press, “F5: Refresh” And then IP column will update automatically to it’s real IP Address.
This part of the information required and the same within the ez-dns.com
DDNS work properly when this option se
lected.
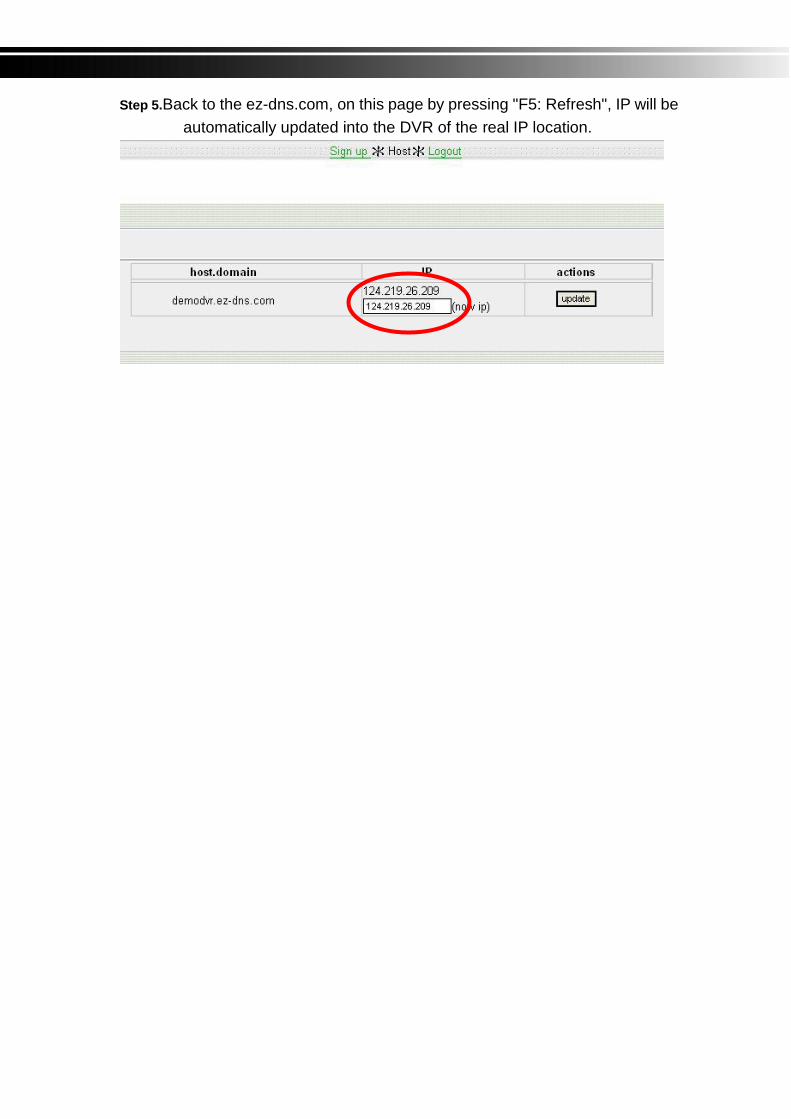
Step 5.Back to the ez-dns.com, on this page by pressing "F5: Refresh", IP will be
automatically updated into the DVR of the real IP location.
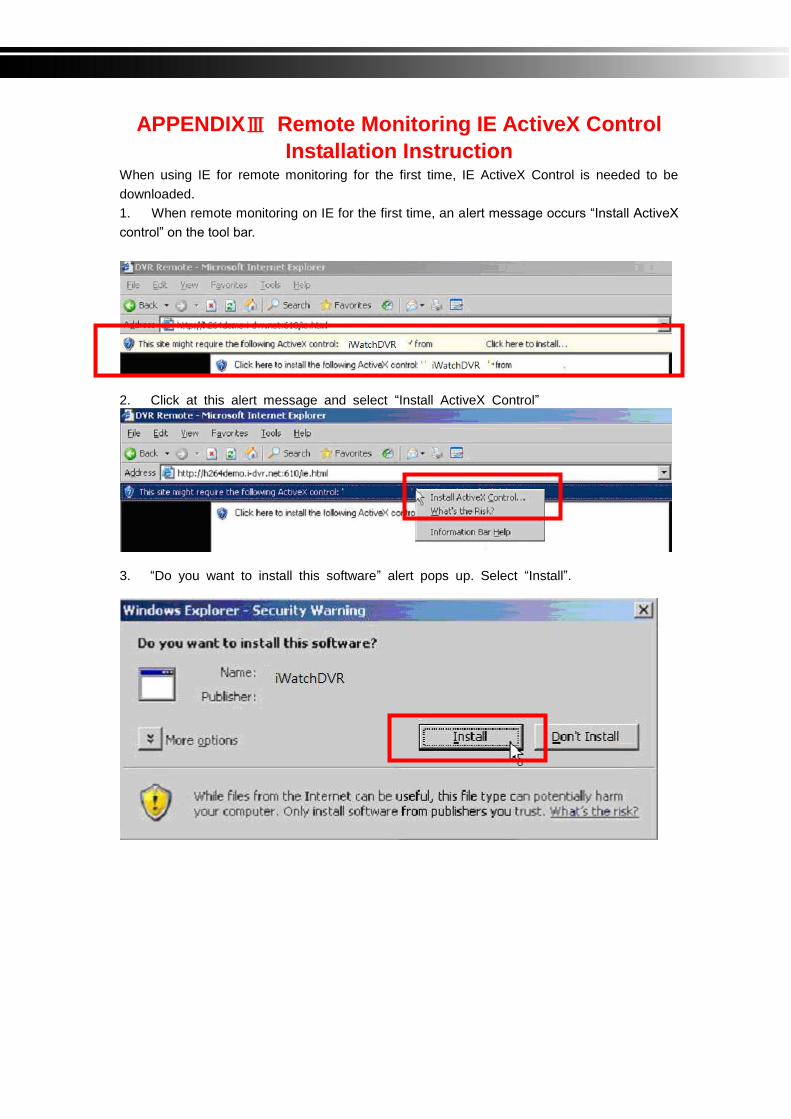
APPENDIXⅢ Remote Monitoring IE ActiveX Control
Installation Instruction When using IE for remote monitoring for the first time, IE ActiveX Control is needed to be
downloaded.
1. When remote monitoring on IE for the first time, an alert message occurs “Install ActiveX
control” on the tool bar.
2. Click at this alert message and select “Install ActiveX Control”
3. “Do you want to install this software” alert pops up. Select “Install”.
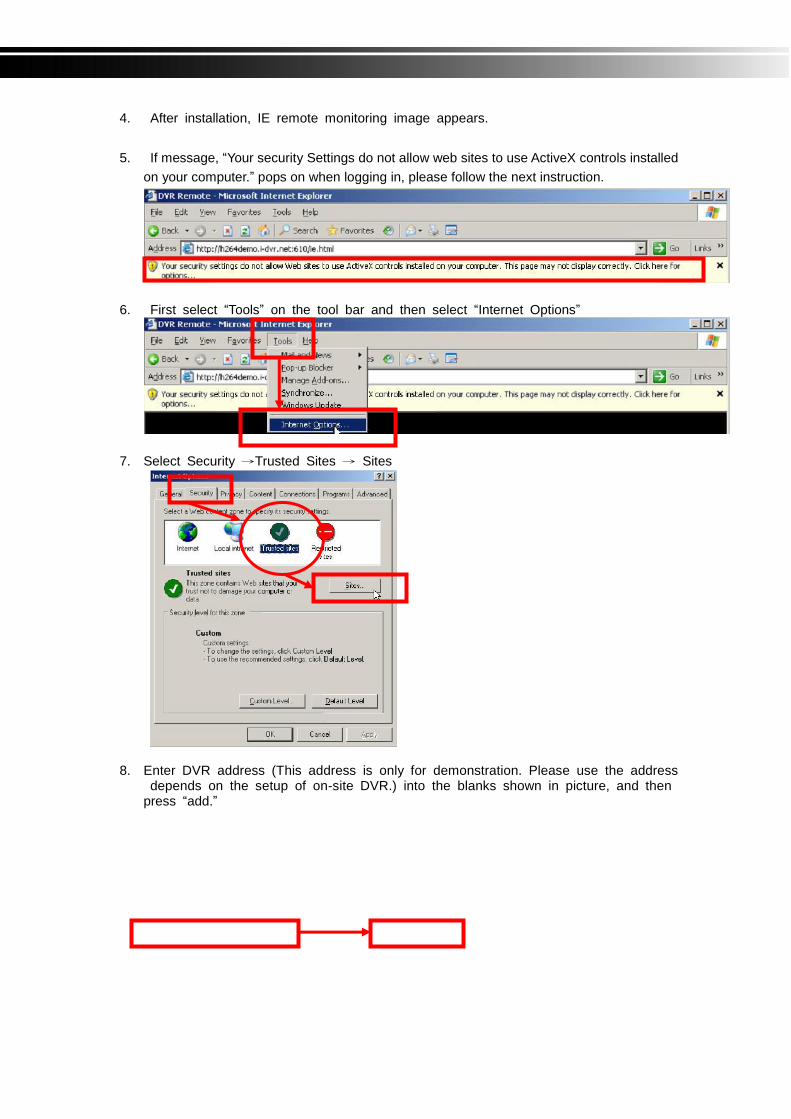
4. After installation, IE remote monitoring image appears.
5. If message, “Your security Settings do not allow web sites to use ActiveX controls installed
on your computer.” pops on when logging in, please follow the next instruction.
6. First select “Tools” on the tool bar and then select “Internet Options”
7. Select Security →Trusted Sites → Sites
8. Enter DVR address (This address is only for demonstration. Please use the address depends on the setup of on-site DVR.) into the blanks shown in picture, and then press “add.”

9. Newly added website will appear at the trusted web sites list. Press close.

10. Go back to IE window, press refresh button or F5.