at a glance overview - office of science education (ose)€¦ · · 2017-09-29at a glance...
TRANSCRIPT

Lesson 1 Engage/Explore
AT A GLANCE Overview Lesson 1 engages the students in oral health by introducing a visitor: Exee from planet Y. Exee does not have a mouth and asks students what purpose their mouth serves. After students list everything their mouth helps them do, they sort the functions according to those that help them eat, drink, and communicate. Next, students play the game, Mouth Mirrors, in which they mimic the mouth movements of a partner. Through this game, students identify some of the structures of their oral cavity. Next, they eat a cracker and pay attention to how their mouth helps them eat. They connect the structures with the functions of the oral cavity. At the end of the lesson, students begin a Mouth Journal in which they answer the question, What would you tell Exee about the mouth?
Purpose In this lesson, students will
• become engaged in learning about the mouth (oral cavity) and oral health and
• recognize that our mouth serves many purposes and has different parts.
Objectives After completing this lesson, students will
• realize that the human mouth performs many functions that help a person eat, drink, and communicate (including speech and facial expressions);
• name functions of the mouth that help a person eat, such as bite, chew, taste, and swallow;
• describe functions of the mouth that help a person drink, such as open, close, taste, and swallow;
27
What Do Mouths Do?
• identify functions of the mouth that help a person communicate, such as speak, shout, whisper, smile, pout, laugh, cry, sing, kiss, and whistle;
• indicate the structures in the mouth that help them perform these functions; and
• recognize that the tongue is the sensory organ of taste.
BACKGROUND INFORMATION Our new friend, Exee, the extraterrestrial who zooms in from planet Y, asks a provocative question: Why do people have that hole (the mouth or the oral cavity) in the center of their faces?
The mouth is but one of the many sensory organs found in the craniofacial area. This area of our bodies houses the eyes, the ears, the nose, and the tongue—most of our sensory organs other than the skin.
Besides helping us taste food, the mouth performs many functions in basic survival and in other aspects of our lives. Our mouth allows us to take in essential nutrients and
water and to communicate, both through speech and facial expressions. All of these functions are essential to life, as we know it.
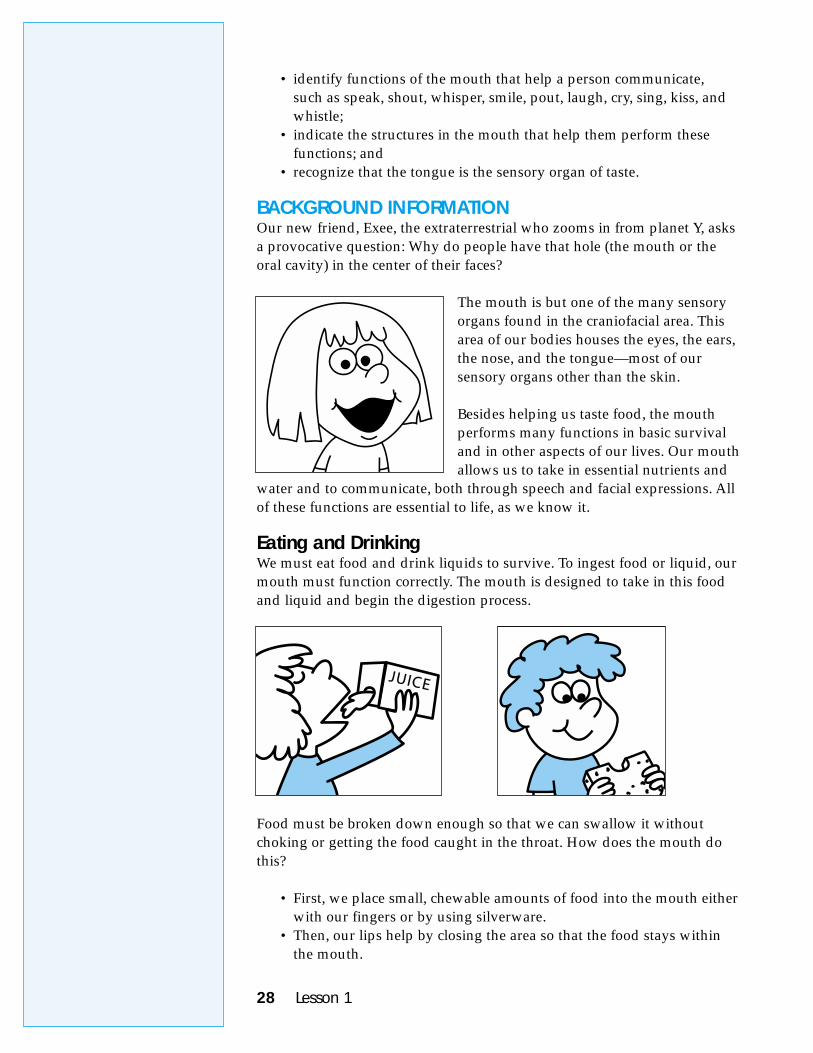
Eating and Drinking We must eat food and drink liquids to survive. To ingest food or liquid, our mouth must function correctly. The mouth is designed to take in this food and liquid and begin the digestion process.
JUICE
Food must be broken down enough so that we can swallow it without choking or getting the food caught in the throat. How does the mouth do this?
• First, we place small, chewable amounts of food into the mouth either with our fingers or by using silverware.
• Then, our lips help by closing the area so that the food stays within the mouth.
28 Lesson 1

• After food has entered the oral cavity, the first of two stages of digestion occurs. First, the tongue moves the food around to various teeth so that the teeth can break the food into small pieces. The next stage occurs as the tongue, with the help of our saliva, transports the ball or mass of food, called a bolus, to the back of the mouth. (Note that saliva begins the digestion process within the oral cavity as it mixes certain enzymes with the food to help break down the food into the materials our bodies can use.)
• Then, we swallow the bolus at the pharynx so that the food can reach our stomach via the esophagus to continue the digestive process.
During the ingestion of liquids, the jaw and tongue help pass the liquid to the back of the mouth where we can swallow it.1
Taste and Smell Another function of the mouth is to enable us to savor the food we eat. We enjoy food more when we can distinguish the flavor of the food as well as enjoy its texture. We can taste because we have taste buds that line the surface and sides of the tongue. We can smell thanks to specialized nervous tissue found at the top of the nasal cavities. We have “common chemical sense” because of the many nerve endings in the linings of the mouth and
nose. A number of pathways take the information from these sensory areas to the brain. To fully enjoy the flavor of a food, all three of these senses need to be engaged.
Facial Expressions Facial expressions can set the mood in many situations and usually tell us what people are thinking or feeling. For example, if we walk toward someone with a smile on our face, we
are much more inviting than if we wear an expression of a scowl and pursed lips. Without a mouth and its structures, we would not be able to display our emotions through our expressions.
Our lips, teeth, jaws, cheeks, and facial muscles all play an important role in creating facial expressions. We are able to make facial expressions because of the complex muscular structure of the face. We have 22 muscles on either side of the face; humans have more facial muscles than any other animal.
Did You Know? Approximately three-fourths of the flavor we experience from food actually comes from the aroma or smell of the food—from our olfactory system. The rest of the flavor we experience depends on taste (whether we sense the food as sweet, sour, bitter, or salty); the texture of the food; and whether we experience irritation, such as spiciness, from the food.2
Did You Know? Among human expressions, the smile is the most recognized. According to research in this area, only smiles and surprise are identifiable in faces exposed briefly at 150 feet from the observer, and only smiles are identifiable at 300 feet.3
Phot
o: C
orel
All of our facial muscles are controlled by the facial nerve
What Do Mouths Do? 29

(cranial nerve VII). This nerve originates in the brain and divides into three branches to control the facial muscles. The first branch of the facial nerve allows our eyes to tear and our mouths to salivate. The second branch sends taste sensations to the brain, and the third directs facial expressions such as smiling, frowning, and squinting.4 In addition, “Human facial skin is mobile and able to shape quickly according to pulses from the brain.”4
So, thanks to the nerves and muscles of our face, we can express ourselves very well without using any words at all.
Speech We can form words to speak to one another because of the structure and tis-sues in our mouth. Our vocal cords and our respiratory system help produce the sounds we call speech. Probably the most important organ in speech formation is a muscle we often take for granted: our tongue. As stated by a speech pathologist,
It could be the most unique muscle in the human body. Much of the time, it just sits still. But, at appropriate moments, the human tongue twists and turns and gyrates, and then, through subtle and exact movements, forms words and says what has to be said. A minute later and with entirely different motions, the muscular tongue can initiate a swallow that will permit its owner to eat and live.5
Human tongues, along with their associated nerves, the respiratory system, and the teeth and lips, are much more versatile than those of other animals, allowing humans the ability to speak unlike any other species on Earth.
IN ADVANCE
Activities that include the CD-ROM Activity Number CD-ROM
Activity 1 yes
Activity 2 no
Activity 3 no
30 Lesson 1

Photocopies Activity Number
Master Number Number of Copies
Activity 1 Master 1.1, A Visitor from Outer Space
1 copy for each student to color (optional) 1 transparency (optional)
Activity 2 none none
Activity 3 none none
Wrap-up Master 1.2 Mouth Journal Master 1.3 Mouth Journal Writing Pages
1 copy for each student 6 copies for each student
Materials Activity 1
For the class: • CD-ROM • computers • overhead projector (optional) • transparency of Master 1.1, A Visitor from Outer Space (optional) • 1 sheet of flip chart paper • markers
For each student: 1 copy of Master 1.1, A Visitor from Outer Space (optional)
Activity 2 For the class:
• list on flip chart paper, What My Mouth Can Do, from Activity 1 • 1 small mirror • 1 sheet of flip chart paper • markers
Activity 3 For the class:
• 1 sheet of flip chart paper • markers
For each student: • 2 crackers, such as saltines • 1 napkin
Wrap-up Activity For each student: 1 copy of Master 1.2, Mouth Journal 6 copies of Master 1.3, Mouth Journal Writing Pages
Preparation • Arrange for students to have access to computers. • Check students’ health records for food allergies and make sure that
all students can eat the crackers you bring to class. If students cannot eat saltines, provide an alternate snack, such as graham crackers or animal crackers that the entire class can eat.
• Gather the materials needed for the activities. • Make a transparency of Master 1.1, A Visitor from Outer Space (optional). • Duplicate Master 1.1, A Visitor from Outer Space, 1 for each student
(optional).
What Do Mouths Do? 31

Content Standard A: Abilities necessary to do scientific inquiry.
If you would like to use this activity as a pre-assessment of what students know about their mouths, ask them to first complete the task individually. Then, make the class chart from the individual responses.
NS ES
• Decide whether you or your students will assemble the Mouth Journals from Master 1.2 and Master 1.3. Prepare accordingly. Students will write in their Mouth Journal at the end of each of the six lessons.
PROCEDUREActivity 1: Helping Exee (the Extraterrestrial) Learn about Mouths The purpose of this activity is to engage students in learning about their mouths.
1. Ask students to view the opening story on the CD-ROM. Discuss the story of Exee as necessary. Ask students to tell you what question Exee wants to answer.
Load the CD-ROM on the computer (see instructions for using the CD-ROM on pages 17-18). The opening story plays automatically when the CD-ROM starts. You can play the animation again by clicking on Exee Movie.
Alternatively, you can gather the students ina whole group area and read the openingstory from the transparency of Master 1.1, AVisitor from Outer Space.
Tip from the field test: Make individualcopies of Master 1.1, A Visitor from OuterSpace, so that students can use them as coloring books. Showing over-head transparencies of the pictures from the master can help with thediscussion of the Exee story.
2. Invite students to make a list for Exee explaining why they have mouths. Exactly what do their mouths do? Ask them to demonstrate and then name the action. Record the students’ responses on a sheet of flip chart paper titled What My Mouth Can Do. (See sample chart on page 33).
Encourage the students to think of as many things as they can. They might include actions such as those listed on the sample chart, What My Mouth Can Do.
3. Review the functions of the mouth by asking students to group the actions according to those that help a person
• eat (for example, bite, chew, lick, taste, and swallow); • drink (for example, open, close, taste, and swallow); and • communicate (for example, talk, shout, whisper, smile, pout,
laugh, cry, sing, kiss, and whistle).
32 Lesson 1

You might help students make a Venn diagram that organizes the different functions, as illustrated in the sample Venn Diagram.
Optional grouping activities include the following:
• Use hula hoops or circles of rope to make a physical Venn diagram. Write each function (open, bite, chew, and so on) on a separate index card and have students place each card in the appropriate place within the Venn diagram.
• Write each function on a separate index card and attach string or yarn to the cards. Give each student a card to wear around his or her neck and ask the students to place themselves in the appropriate places within the Venn diagram.
Tip from the field test: Students might be interested in talking about how Exee eats, drinks, and communicates. They will notice that Exee “eats” the tennis racket through an opening on the top of his head (do not call it a mouth). They might guess that Exee would drink through the same opening. Exee communicates through the lights on his instrument panel and by talking. Without the sound of Exee’s voice, however, it might be difficult to know if Exee is happy or sad or glad or mad, because Exee does not have a mouth with which to make the facial expressions we use to communicate those feelings.
What Do Mouths Do? 33

4. Allow students to explore what the mouth does on the CD-ROM.
Load the CD-ROM on the computer. From the main menu, select What Do Mouths Do?
Activity 2: Mouth Mirrors The purpose of this activity is to help students act out different things that the mouth can do (its functions) and to observe what is inside the mouth (its parts).
1. Introduce this activity by holding up a mirror. Ask students to describe what a mirror does.
Help students understand that a mirror reflects (or shows back) an image.
2. Tell students that they will take turns with a partner pretending to be a “mouth mirror.” Let them know that they will be acting out the different things that the mouth can do (its functions) and observing what is inside the mouth (its parts).
First, demonstrate the activity by doing the following things with one student:
• Sit facing the student. • Tell the student that you will be the “mouth mover” and he or
she will be the mouth mirror. Invite the mouth mirror to mimic your movements.
• Slowly move your mouth in one of the following ways: open wide, close your lips, stick out your tongue, puff out your cheeks, bare your teeth, move your tongue over your front teeth, smile.
• Allow time for the student to copy your movement. • Again, slowly move your mouth in different ways. Allow time
for the student to mirror your mouth movements.
3. Assign partners or allow students to find a partner. Ask them to decide who will be the first mouth mover and who will be the first mouth mirror.
34 Lesson 1
Inform students that they will trade roles after 20 to 30 seconds. Be sensitive to students who might be embarrassed to open their mouths for others to see.
4. Invite students to begin the activity and to observe their partner carefully. Remind them to pay attention to what they can observe inside their partner’s mouth as it moves.
The mover slowly opens the mouth, closes the mouth, moves the tongue, bares the teeth, and so on. The mirror does whatever the mover is doing. Stress to students that movements need to be done slowly so that the mouth mirror can follow along exactly. After 20 to 30 seconds, tell the partners to change roles.
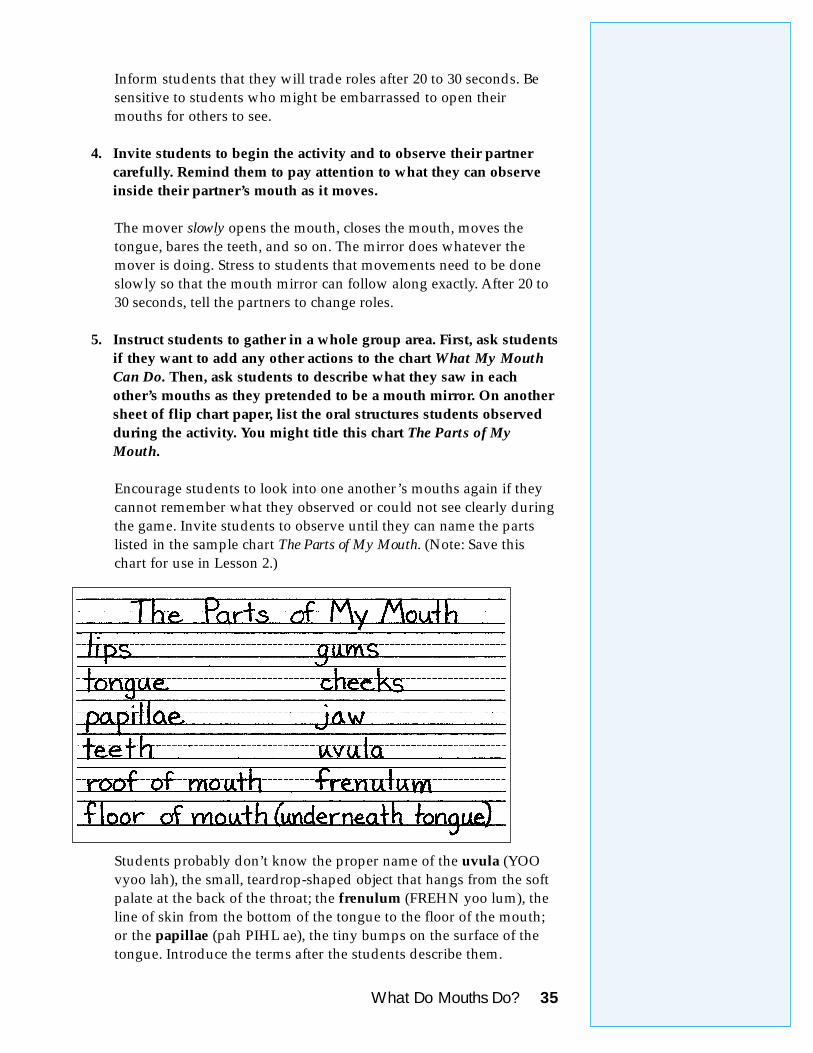
5. Instruct students to gather in a whole group area. First, ask students if they want to add any other actions to the chart What My Mouth Can Do. Then, ask students to describe what they saw in each other’s mouths as they pretended to be a mouth mirror. On another sheet of flip chart paper, list the oral structures students observed during the activity. You might title this chart The Parts of My Mouth.
Encourage students to look into one another’s mouths again if they cannot remember what they observed or could not see clearly during the game. Invite students to observe until they can name the parts listed in the sample chart The Parts of My Mouth. (Note: Save this chart for use in Lesson 2.)
Students probably don’t know the proper name of the uvula (YOO vyoo lah), the small, teardrop-shaped object that hangs from the soft palate at the back of the throat; the frenulum (FREHN yoo lum), the line of skin from the bottom of the tongue to the floor of the mouth; or the papillae (pah PIHL ae), the tiny bumps on the surface of the tongue. Introduce the terms after the students describe them.
What Do Mouths Do? 35

ES NS
Content Standard A: Abilities necessary to do scientific inquiry. Content Standard C: The characteristics of organisms.
Activity 3: Food for Thought The purpose of this activity is to connect the structures in the mouth with their functions.
1. Remind students that one of the things they listed that they can do with their mouths is to eat. Ask them to pantomime how they might eat something.
2. Be sure students have washed their hands. Distribute the crackers (or alternative snack food) and napkins and tell students that they will have a snack. Ask the students to take one bite of their cracker and to pay attention to how they eat their snack. (Remind them not to eat the entire cracker in one bite.)
What do they do with their mouths? What helps them eat the cracker? For example, what parts help them hold the food in their mouths so that it doesn’t fall out?
3. After the students are finished with the first bite, ask them to describe how they ate their snack. What did they do first, second, third? What parts of their mouths did they use to eat a bite of the cracker?
As students respond, record their ideas on flip chart paper. You might organize the ideas into two columns, one that identifies the step in the process and another that lists the part(s) of the mouth they used during that step (see the following sample chart, My Mouth Helps Me Eat Crackers). Note that the title of the example is specific to crackers because we do not eat all foods in the same way. For example, we don’t usually bite ice cream or pudding.
36 Lesson 1

As students suggest words for the chart, invite them to finish eating their snack. The students probably will focus mainly on their teeth as they bite and chew. Encourage them to pay attention to what their jaws, cheeks, tongue, and lips do as they bite, chew, and swallow the food.
4. To bring in the role of saliva, ask the students what happened to the cracker at each step.
• Did the cracker stay as hard as when they first bit into it? • When did the cracker become soft? • Why do they think the cracker became soft and mushy? • Could they have swallowed the cracker if it did not become
mushy?
If students use the term, add saliva to the chart. At this point, use whatever words the students use to describe what they think made the cracker soft and mushy. Lesson 2 formally introduces the term saliva.
5. Ask students if they know what helped them taste the cracker. Mention that the tongue is the organ of taste because it has taste buds. Students might look at one another’s tongues and notice the tiny bumps that are on the surface. Students should be instructed to look at, but not touch each other’s tongues.
The tiny bumps on the surface of the tongue are the papillae. The taste buds are located at the base of the papillae at the sides, front, and back of the tongue. Students will not be able to see the taste buds, but you can point out their general location.
What Do Mouths Do? 37

Assessment: At the end of each lesson, there will be a wrap-up during which students tell Exee what they have learned. You can collect students’ journals after each lesson to assess their progress or wait until the end of the supplement to do a final assessment.
Wrap-up 1. Hand out the Mouth Journals that
you have assembled or have your students assemble them from Masters 1.2 and 1.3.
2. Ask your students to write and/or draw in their journals their answer to the following question: What would you tell Exee about the mouth?
38 Lesson 1