back and lifting safety - california training kits ... · pdf fileback and lifting safety; 5....
TRANSCRIPT

Care and Compliance Group, Inc • 800.321.1727 • www.careandcompliance.com
Back and Lifting Safety
Instructor Guide
UPDATED JUNE 22, 2011

INSTRUCTOR GUIDE: BACK AND LIFTING SAFETY
Overview This module will address the causes of back injury, safe lifting techniques, and safely assisting residents.
Time/Duration
Video(s) “Back and Lifting Safety” (20 minutes)
Special Supplies None.
Learning Objectives
1. The importance of back safety; 2. Take care of your back: posture and conditioning; 3. Ergonomics; 4. Back and lifting safety; 5. Mechanical resident lifting, transferring, and repositioning
devices; 6. Slips, trips, and falls.

QUIZ: BACK AND LIFTING SAFETY
Name: Date: 1. Which of the following may cause back injuries? a. Poor lifting techniques b. Being out of shape c. Poor health condition d. Poor posture e. All of the above 2. When assisting residents with ambulation, always stand at the: a. Resident’s stronger side b. Resident’s weaker side 3. Your back should be straight when attempting to pick up an object. a. True b. False 4. While carrying a load, if you need to change direction you should: a. Twist your torso to turn and change direction b. Use your feet to change direction while keeping your back straight 5. If a resident begins to fall you should: a. Release your grasp and let them fall to the floor b. Gently guide them to the floor c. Do not let them fall…hold them up 6. Non-skid footwear can help avoid falls and injuries. a. True b. False

7. According to OSHA, back injuries rarely occur in the workplace. a. True b. False 8. Back injuries are preventable. a. True b. False 9. The spine is made of many small bones called: a. Discs b. Vertebrae 10. Which of the following helps to absorb pressure and shock to the spine? a. Vertebrae b. Muscle c. Discs d. Ligaments

QUIZ KEY: BACK AND LIFTING SAFETY 1. Which of the following may cause back injuries? a. Poor lifting techniques b. Being out of shape c. Poor health condition d. Poor posture e. All of the above 2. When assisting residents with ambulation, always stand at the: a. Resident’s stronger side b. Resident’s weaker side 3. Your back should be straight when attempting to pick up an object. a. True b. False 4. While carrying a load, if you need to change direction you should: a. Twist your torso to turn and change direction b. Use your feet to change direction while keeping your back straight 5. If a resident begins to fall you should: a. Release your grasp and let them fall to the floor b. Gently guide them to the floor c. Do not let them fall…hold them up 6. Non-skid footwear can help avoid falls and injuries. a. True b. False

7. According to OSHA, back injuries rarely occur in the workplace. a. True b. False 8. Back injuries are preventable. a. True b. False 9. The spine is made of many small bones called: a. Discs b. Vertebrae 10. Which of the following helps to absorb pressure and shock to the spine? a. Vertebrae b. Muscle c. Discs

Cer
tifi
cate
of
Com
plet
ion
TH
IS I
S T
O R
EC
OG
NIZ
E
__
____
____
____
____
____
____
____
____
____
____
FO
R D
ED
ICA
TIO
N T
O Q
UA
LIT
Y R
ESI
DE
NT
CA
RE
T
HR
OU
GH
ED
UC
AT
ION
AN
D P
RO
FE
SSIO
NA
L D
EV
EL
OP
ME
NT
.
BA
CK
AN
D L
IFT
ING
SA
FE
TY
__
____
____
____
____
____
____
____
____
____
____
____
__
__
____
____
____
Inst
ruct
or S
igna
ture
Dat
e


Care and Compliance Group, Inc • 800.321.1727 • www.careandcompliance.com
Back and Lifting Safety
Learner Workbook
UPDATED JUNE 22, 2011

- 2 -
BACK SAFETY Your back is like a complex machine made up of numerous muscles, bones, nerves, and supporting tissues. It is a machine you use every day, probably in ways you don't even notice. Back disorders are one of the leading workplace injuries. Just like the finest machinery, your back requires proper care to keep it working. If your back is not working right, you'll suffer. An injured back affects your ability to move your limbs, hips, neck, and head. Take Care of Your Back! Your job may involve lifting or being in awkward postures that puts stress on your back. You may be at risk for a back injury.
Posture Proper posture includes standing and sitting in an upright position without slouching or rounding your shoulders. Get in the habit of holding in your belly to keep it from protruding and putting excess force on your spine. When standing, bend your knees slightly. Proper sleeping posture is also important to prevent and relieve back pain. Sleep on a mattress that is firm, not sagging, but not too hard. Do not sleep on your stomach. Instead, sleep on your side with a pillow between your knees. Conditioning Proper conditioning involves aerobic exercise, as well as strengthening and stretching core muscles of the spine and stomach. Walking, swimming, and bicycling are excellent ways to condition the entire body and improve your heart. Aerobic activity along with a healthy diet helps prevent weight gain - a risk factor for back injury.

- 3 -
Ergonomics Ergonomics is the science of fitting the job to the worker. When there is a mismatch between the physical requirements of the job and the physical capacity of the worker, work-related musculoskeletal disorders (MSDs), including back injuries, can result. Ergonomics is the practice of designing equipment and work tasks to conform to the capability of the worker, it provides a means for adjusting the work environment and work practices to prevent injuries before they occur. Adapting the job to fit the worker whenever possible helps prevent or reduce the risk of musculoskeletal disorders (MSD) and injuries. Management leadership and employee participation is critical to assure a safe and health work environment. These controls are an important part of an effective ergonomic program:
1. Take regulator breaks
2. Exercising (e.g., deep breathing, shoulder rolls, leg lifts, etc.)
3. Drinking plenty of water
4. Alternate tasks
5. Evaluate your work station: • Utilize office chairs with five legs and casters • Adjust desks and chairs to an appropriate working height • Arrange desks/work areas with frequently used items within easy reach
6. Report any back injuries or pain to your supervisor
7. Use hand trucks and carts are available for moving or large, bulky, and/or heavy items
8. Change posture and eye focus for approximately 1-2 minutes an hour while working at a work stations and/or computers
9. Avoid twisting, flexing, and reaching
10. Relax shoulders while sitting
11. Position equipment properly
12. DO not cross your legs while sitting

- 4 -
Back and Lifting Safety We can prevent or reduce back injuries through staff training, administrative controls, engineering controls, and appropriate work practices. Manual lifting of residents should be minimized in all cases and eliminated when feasible. Utilize mechanical lifting, transferring, or reposition devices if available and if properly trained in their use. Request assistance from a co-worker when necessary. You are encouraged to use the following work practice controls when lifting an object:
1. Size up the load, and plan ahead.
2. Obtain help (human or mechanical) for heavy objects, or split into smaller loads if
possible.
3. Make sure you have enough room to lift safely and that the area is clear of tripping
hazards. If a close approach to the load is not possible, slide it toward you before trying
to lift.
4. Use a wide stance and bend your knees (but don’t over-flex the knees to a deep knee
bend position).
a. Keep the load centered, as close as possible with feet apart, straddling the load if
possible or a corner of the load.
b. Tighten your stomach muscles, keep your back straight and as vertical as you
can, look forward.
c. Lift slowly with leg power (mainly your thigh muscles, not your back). If you can’t
lift slowly, you can’t lift safely. Don’t hurry or use jerky movements. Never bend
over with your knees straight and lift with the upper torso.
5. Be sure you have a safe firm grip.
a. Check for nails and sharp edges.
b. If material is wet and slippery, wipe it off.
c. Grasp opposite corners of the object (or handles if provided). A hook grip is less
tiring than keeping the fingers straight.
d. If you need to change your grip during the lift, do it as smoothly as possible.

- 5 -
6. Shift weight to back leg before walking, in order to test and maintain balance.
7. Move slowly and avoid sudden movements.
8. Keep the weight as close to your body as possible.
9. Try to avoid lifting loads above the waist line.
10. If you need to turn, turn your whole body with your legs, rather than turning just your
upper body with your back.
11. Avoid bending over to lift or lower heavy objects while reaching out, as this places a lot
of strain on low back muscles.
12. Set the load down properly using similar techniques.
a. Bend knees and not your back.
b. If precise positioning of the load is necessary, put it down first, then slide it into
position.
Report any back pain or injuries to your supervisor.

- 6 -
MECHANICAL RESIDENT LIFTING, TRANSFERRING, AND REPOSITIONING DEVICES (The following images and descriptions are adapted from the OSHA publication Guidelines for Nursing Homes which is available at www.osha.gov.)
ONLY USE A MECHANICAL DEVICE AFTER RECEIVING PROPER TRAINING AND WHEN INDICATED IN THE RESIDENT'S SERVICE PLAN
Transferring from Sitting to Standing Position
Description: Powered sit-to-stand or standing assist devices. When to Use: Transferring residents who are partially dependent, have some weight-bearing capacity, are cooperative, can sit up on the edge of the bed with or without assistance, and are able to bend hips, knees, and ankles. Transfers from bed to chair (wheel chair, Geri or cardiac chair), or chair to bed, or for bathing and toileting. Can be used for repositioning where space or storage is limited. Points to Remember: Look for a device that has a variety of sling sizes, lift-height range, battery portability, hand-held control, emergency shut-off, and manual override. Ensure device is rated for the resident weight. Electric/battery powered lifts are preferred to crank or pump type devices to allow smoother movement for the resident, and less physical exertion by the caregiver.

- 7 -
Transferring from Sitting to Standing Position
Description: Lift cushions and lift chairs When to Use: Transferring residents who are weight-bearing and cooperative but need assistance when standing and ambulating. Can be used for independent residents who need an extra boost to stand. Points to Remember: Lift cushions use a lever that activates a spring action to assist residents to rise up. Lift cushions may not be appropriate for heavier residents. Lift chairs are operated via a hand-held control that tilts forward slowly, raising the resident. Residents need to have physical and cognitive capacity to be able to operate lever or controls. Always ensure device is in good working order before use and is rated for the resident weight to be lifted. Can aid resident independence.
Description: Gait belts/transfer belts with handles When to Use: Transferring residents who are partially dependent, have some weight-bearing capacity, and are cooperative. Transfers such as bed to chair, chair to chair, or chair to car; when repositioning residents in chairs; supporting residents during ambulation; and in some cases when guiding and controlling falls or assisting a resident after a fall. Points to Remember: More than one caregiver may be needed. Belts with padded handles are easier to grip and increase security and control. Always transfer to resident's strongest side. Use good body mechanics and a rocking and pulling motion rather than lifting when using a belt. Belts may not be suitable for ambulation of heavy residents or residents with recent abdominal or back surgery, abdominal aneurysm, etc. Should not be used for lifting residents. Ensure belt is securely fastened and cannot be easily undone by the resident during transfer. Ensure a layer of clothing is between residents' skin and the belt to avoid abrasion. Keep resident as close as possible to caregiver during transfer. Lower bedrails, remove arms and foot rests from chairs, and other items that may obstruct the transfer.

- 8 -
Resident Lifting
Description: Portable lift device (sling type); can be a universal/hammock sling or a band/leg sling When to Use: Lifting residents who are totally dependent, are partial- or non-weight bearing, are very heavy, or have other physical limitations. Transfers from bed to chair (wheel chair, Geri or cardiac chair), chair or floor to bed, for bathing and toileting, or after a resident fall. Points to Remember: More than one caregiver may be needed. Look for a device with a variety of slings, lift-height range, battery portability, hand-held control, emergency shut-off, manual override, boom pressure sensitive switch, that can easily move around equipment, and has a support base that goes under beds. Having multiple slings allows one of them to remain in place while resident is in bed or chair for only a short period, reducing the number of times the caregiver lifts and positions resident. Portable compact lifts may be useful where space or storage is limited. Ensure device is rated for the resident weight. Electric/battery powered lifts are preferred to crank or pump type devices to allow a smoother movement for the resident, and less physical exertion by the caregiver. Enhances resident safety and comfort.

- 9 -
Ambulation
Description: Ambulation assist device When to Use: For residents who are weight bearing and cooperative and who need extra security and assistance when ambulating. Points to Remember: Increases resident safety during ambulation and reduces risk of falls. The device supports residents as they walk and push it along during ambulation. Ensure height adjustment is correct for resident before ambulation. Ensure device is in good working order before use and rated for the resident weight to be lifted. Apply brakes before positioning resident in or releasing resident from device.
- 10 -
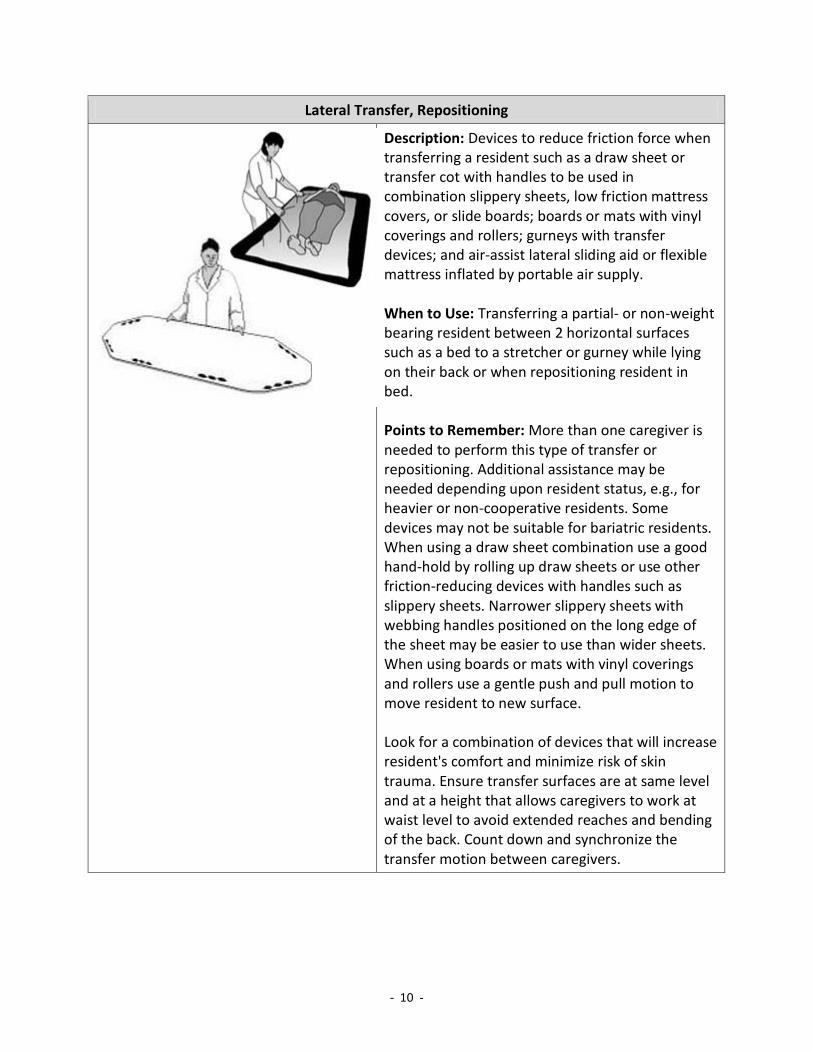
Lateral Transfer, Repositioning
Description: Devices to reduce friction force when transferring a resident such as a draw sheet or transfer cot with handles to be used in combination slippery sheets, low friction mattress covers, or slide boards; boards or mats with vinyl coverings and rollers; gurneys with transfer devices; and air-assist lateral sliding aid or flexible mattress inflated by portable air supply. When to Use: Transferring a partial- or non-weight bearing resident between 2 horizontal surfaces such as a bed to a stretcher or gurney while lying on their back or when repositioning resident in bed. Points to Remember: More than one caregiver is needed to perform this type of transfer or repositioning. Additional assistance may be needed depending upon resident status, e.g., for heavier or non-cooperative residents. Some devices may not be suitable for bariatric residents. When using a draw sheet combination use a good hand-hold by rolling up draw sheets or use other friction-reducing devices with handles such as slippery sheets. Narrower slippery sheets with webbing handles positioned on the long edge of the sheet may be easier to use than wider sheets. When using boards or mats with vinyl coverings and rollers use a gentle push and pull motion to move resident to new surface. Look for a combination of devices that will increase resident's comfort and minimize risk of skin trauma. Ensure transfer surfaces are at same level and at a height that allows caregivers to work at waist level to avoid extended reaches and bending of the back. Count down and synchronize the transfer motion between caregivers.

- 11 -
Description: Transfer boards - wood or plastic (some with movable seat) When to Use: Transferring (sliding) residents who have good sitting balance and are cooperative from one level surface to another, e.g., bed to wheelchair, wheelchair to car seat or toilet. Can also be used by residents who require limited assistance but need additional safety and support. Points to Remember: Movable seats increase resident comfort and reduce incidence of tissue damage during transfer. More than one caregiver is needed to perform lateral transfer. Ensure clothing is present between the resident's skin and the transfer device. The seat may be cushioned with a small towel for comfort. May be uncomfortable for larger residents. Usually used in conjunction with gait belts for safety depending on resident status. Ensure boards have tapered ends, rounded edges, and appropriate weight capacity. Ensure wheels on bed or chair are locked and transfer surfaces are at same level. Remove lower bedrails from bed and remove arms and footrests from chairs as appropriate.
Weighing
Description: Scales with ramp to accommodate wheelchairs; portablepowered lift devices with built-in scales; beds with built-in scales. When to Use: To reduce the need for additional transfer of partialor non-weight-bearing or totally dependent residents to weighing device. Points to Remember: Some wheelchair scales can accommodate larger wheelchairs. Built-in bed scales may increase weight of the bed and prevent it from lowering to appropriate work heights.

- 12 -
Repositioning
Description: Electric powered height adjustable bed When to Use: For all activities involving resident care, transfer, repositioning in bed, etc., to reduce caregiver bending when interacting with resident. Points to Remember: Device should have easy-to-use controls located within easy reach of the caregiver to promote use of the electric adjustment, sufficient foot clearance, and wide range of adjustment. Adjustments are best completed within about 20 seconds to ensure staff use. Beds with a very wide range of adjustments may take longer but may also have other advantages to the caregivers and the residents. For residents that may be at risk of falling from bed some beds that lower closer to the floor may be needed. Heavy duty beds are available for bariatric residents. Beds raised and lowered with an electric motor are preferred over crank-adjust beds to allow a smoother movement for the resident and less physical exertion to the caregiver.
Description: Trapeze bar; hand blocks and push up bars attached to the bed frame When to Use: Reposition residents that have the ability to assist the caregiver during the activity, i.e., residents with upper body strength and use of extremities, who are cooperative and can follow instructions. Points to Remember: Residents use trapeze bar by grasping bar suspended from an overhead frame to raise themselves up and reposition themselves in a bed. Heavy duty trapeze frames are available for bariatric residents. If a caregiver is assisting ensure that bed wheels are locked, bedrails are lowered and bed is adjusted to caregiver's waist height. Blocks also enable residents to raise themselves up and reposition themselves in bed. Bars attached to the bed frame serve the same purpose. May not be suitable for heavier residents. Can aid resident independence.

- 13 -
Bathtub, Shower, and Toileting Activities
Description: Bath boards and transfer benches When to Use: Bathing residents who are partially weight bearing, have good sitting balance, can use upper extremities (have upper body strength), are cooperative, and can follow instructions. Independent residents can also use these devices. Points to Remember: To reduce friction and possible skin tears, use clothing or material between the resident's skin and the board. Can be used with a gait or transfer belt and/or grab bars to aid transfer. Back support and vinyl padded seats add to bathing comfort. Look for devices that allow for water drainage and have height-adjustable legs. May not be suitable for heavy residents. If wheelchair is used ensure wheels are locked, the transfer surfaces are at the same level, and device is securely in place and rated for weight to be transferred. Remove arms and foot rests from chairs as appropriate and ensure that floor is dry.
Description: Toilet seat risers When to Use: For toileting partially weight-bearing residents who can sit up unaided, use upper extremities (have upper body strength), are able to bend hips, knees, and ankles, and are cooperative. Independent residents can also use these devices. Points to Remember: Risers decrease the distance and amount of effort required to lower and raise residents. Grab bars and height-adjustable legs add safety and versatility to the device. Ensure device is stable and can accommodate resident's weight and size.

- 14 -
Description: Grab bars and stand assists; can be fixed or mobile. Long-handled or extended shower heads, or brushes can be used for personal hygiene. When to Use: Bars and assists help when toileting, bathing, and/ or showering residents who need extra support and security. Residents must be partially weight bearing, able to use upper extremities (have upper body strength), and be cooperative. Long-handled devices reduce the amount of bending, reaching, and twisting required by the caregiver when washing feet, legs, and trunk of residents. Independent residents who have difficulty reaching lower extremities can also use these devices. Points to Remember: Movable grab bars on toilets minimize workplace congestion. Ensure bars are securely fastened to wall before use.

- 15 -
SLIPS, TRIPS, AND FALLS The following procedures can minimize the risk of slips, trips, and falls.
1. Keep floors clean and dry.
2. Provide warning signs for wet floor areas.
3. Where wet processes are used, maintain drainage and provide false floors, platforms,
mats, or other dry standing places where practicable, or provide appropriate waterproof
footgear.
4. Keep all areas in the workplace clean and orderly and in a sanitary condition.
5. Keep aisles and passageways clear and in good repair, with no obstruction across or in
aisles that could create a hazard.
6. Keep exits clear of obstructions at all times.
7. Ensure spills are reported and cleaned up immediately.
8. Use no-skid waxes and surfaces coated with grit to create non-slip surfaces in slippery
areas such as toilet and shower areas.
9. Use waterproof footgear to decrease slip/fall hazards.
10. Use only properly maintained ladders to reach items. Do not use stools, chairs, or boxes
as substitutes for ladders.
11. Re-lay or stretch carpets that bulge or have become bunched to prevent tripping
hazards.
12. Aisles and passageways should be sufficiently wide for easy movement and should be
kept clear at all times. Temporary electrical cords that cross aisles should be taped or
anchored to the floor.
13. Eliminate cluttered or obstructed work areas.
14. Medication room countertops or medication carts should be free of sharp, square
corners.
15. Use prudent housekeeping procedures such as cleaning only one side of a passageway
at a time, and provide good lighting for all halls and stairwells, to help reduce accidents.

- 16 -
16. Provide adequate lighting especially during night hours. You can use flashlights or low-
level lighting when entering patient rooms.
17. Use the handrail on stairs, to avoid undue speed, and to maintain an unobstructed view
of the stairs ahead of them even if that means requesting help to manage a bulky load.
18. Eliminate uneven floor surfaces.