back - office of rehabilitation research & development conditioning exercises : back exercise...
TRANSCRIPT

12
BACK
Strong and flexible back muscles are essentialfor maintaining good posture and an adequate rangeof motion, and can reduce the risk of injuries thatmay occur from everyday activities . Certain exer-cises are also beneficial in easing the backaches andpain that are often associated with a chronic "badback ." Many people with AK and BK amputationexperience back pain. Although no proven scientificdata can pinpoint the exact cause, it is believed thata discrepancy in leg length, poor gait habits, andimproper alignment are contributing factors.
In a 1985 study at the Bioengineering Centre atthe University College London, 80 percent of astudy group of people with AK amputation reportedthat they had back pain . The group recorded astatistically greater level of leg length difference andscoliosis compared with a nonamputation controlgroup . The results of the study suggest that theremay be some relationship between the leg lengthdifference recorded in the group with amputationsand the degree of incapacity due to lower backpain . '
An earlier study conducted by the VeteransAdministration included several categories affectingthe veteran with a lower limb amputation . Onecategory that was surveyed among a cross-section ofveterans with amputations, both traumatic anddysvascular, was back pain . Fifty-four percent ofthe 81 veterans with amputation surveyed in thiscategory complained of back pain . 2
Exercises for the back usually concentrate on
'A . Middleditch and P . Jarman, Assessment of the Spine in Above-Knee Amputees, Bioengineering Centre Report. London : UniversityCollege London, 1985, pp . 123-128 .
specific muscles in either the upper or lower back.Although the major muscles are located in the sameregion of the body, they are exercised with distinctlydifferent body movements to isolate either the upperor lower back.
The major muscle groups of the upper back areteres major and minor, trapezius, and latissimusdorsi . The muscles emphasized in the exercises thatfollow are the trapezius muscles (commonly referredto as "traps") and the latissimus dorsi muscles(commonly referred to as "lats") . The main lowerback muscle emphasized in the exercises is theerector spinae (sacrospinalis), a large and deepthree-part muscle.
The correct techniques for lifting weights, orfor lifting any heavy or bulky items encountered in anormal work day, are essential in protecting theback from injury . Some general rules are:
1. Whenever picking up a weight, the back shouldbe straight and the head up . Bend by flexingthe knees before beginning to lift . This permitsyou to lift the weight primarily with the legsand not the back.
2. Hold the weight or object close to your bodyfor added support and balance . In this way,there is less risk of injury through losing yourbalance or dropping the object.
3. Get help or use a dolly to lift or move heavyobjects.
2F .T . Hoaglund, et al., "Elevation of Problems and Needs of VeteranLower-Limb Amputees in the San Francisco Bay Area During thePeriod 1977-1980 ." Journal of Rehabilitation Research and Develop-ment, Vol . 20, No . 1, 1983, pp . 57-71.
165
166
RRDS Clinical Guide . Physical Fitness : A Guide for Individuals with Lower Limb Loss
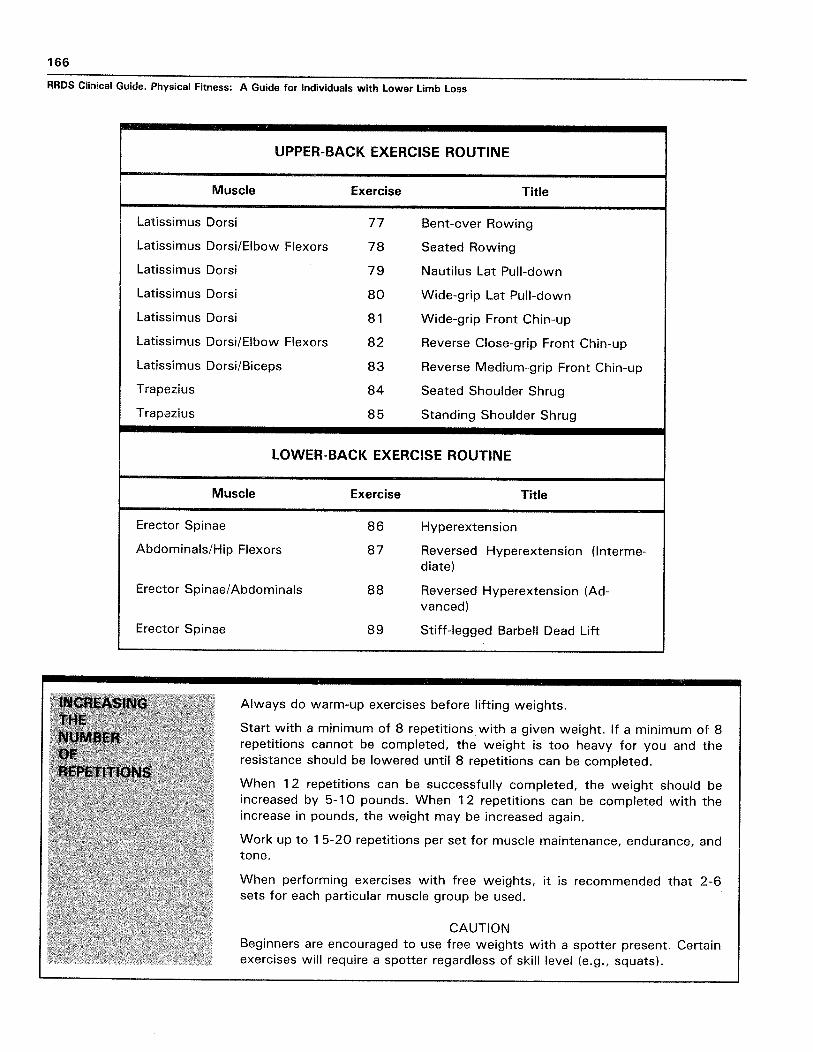
UPPER-BACK EXERCISE ROUTINE
Muscle Exercise Title
Latissimus Dorsi 77 Bent-over Rowing
Latissimus DorsilElbow Flexors 78 Seated Rowing
Latissimus Dorsi 81 Wide-grip Front Chin-up
Latissimus Dorsi/Elbow Flexors 82 Reverse Close-grip Front Chin-up
Latissimus Dorsi/Biceps 83 Reverse Medium-grip Front Chin-up
Trapezius 84 Seated Shoulder Shrug
Trapezius 85 Standing Shoulder Shrug
LOWER-BACK EXERCISE ROUTINE
Muscle Exercise Title
Erector Spinae 86 Hyperextension
Abdominals/Hip Flexors 87 Reversed Hyperextension (Interme-
Erector Spinae/Abdominals 88
diate)
Reversed Hyperextension (Ad-
Erector Spinae 89
vanced)
Stiff-legged Barbell Dead Lift
INCREASINGTHENUMBEROFREPETITIONS
Always do warm-up exercises before lifting weights.
Start with a minimum of 8 repetitions with a given weight . If a minimum of 8repetitions cannot be completed, the weight is too heavy for you and theresistance should be lowered until 8 repetitions can be completed.
When 12 repetitions can be successfully completed, the weight should beincreased by 5-10 pounds . When 12 repetitions can be completed with theincrease in pounds, the weight may be increased again.
Work up to 15-20 repetitions per set for muscle maintenance, endurance, andtone.
When performing exercises with free weights, it is recommended that 2-6sets for each particular muscle group be used.
CAUTIONBeginners are encouraged to use free weights with a spotter present . Certainexercises will require a spotter regardless of skill level (e .g., squats).
167
Conditioning Exercises : Back
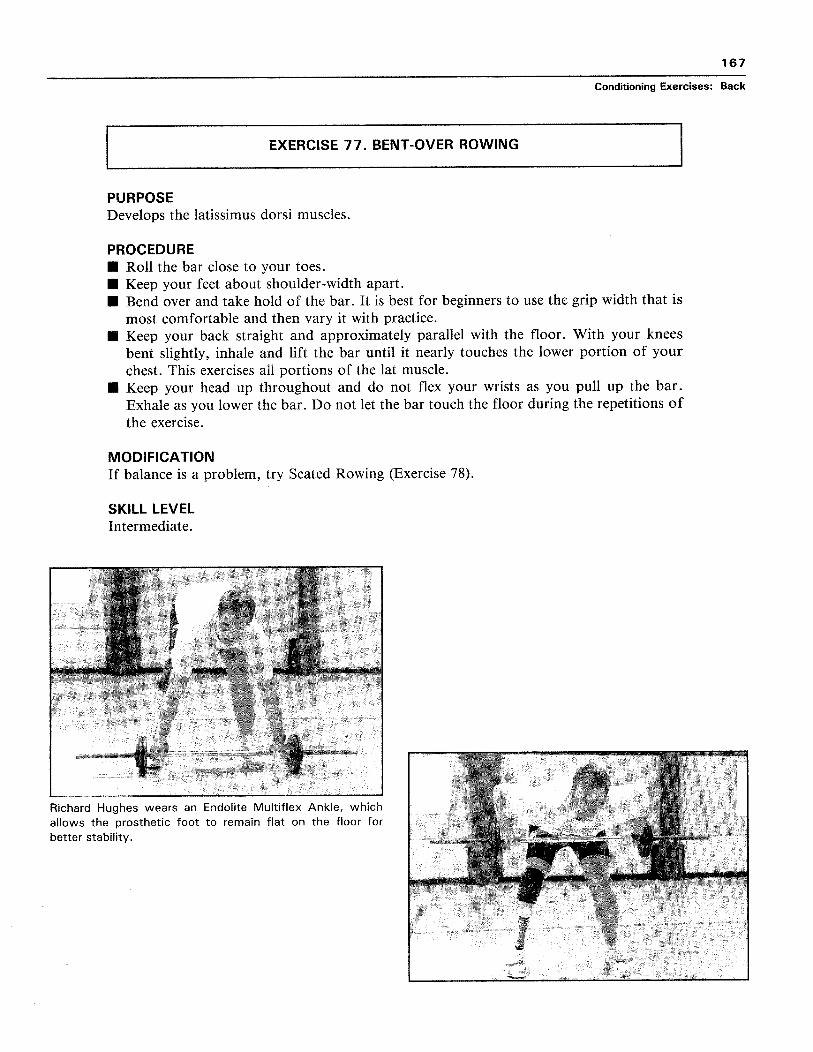
EXERCISE 77 . BENT-OVER ROWING
PURPOSEDevelops the latissimus dorsi muscles.
PROCEDUREn Roll the bar close to your toes.n Keep your feet about shoulder-width apart.n Bend over and take hold of the bar . It is best for beginners to use the grip width that is
most comfortable and then vary it with practice.n Keep your back straight and approximately parallel with the floor . With your knees
bent slightly, inhale and lift the bar until it nearly touches the lower portion of yourchest . This exercises all portions of the lat muscle.
n Keep your head up throughout and do not flex your wrists as you pull up the bar.Exhale as you lower the bar . Do not let the bar touch the floor during the repetitions ofthe exercise.
MODIFICATIONIf balance is a problem, try Seated Rowing (Exercise 78).
SKILL LEVELIntermediate.
Richard Hughes wears an Endolite Multiflex Ankle, whichallows the prosthetic foot to remain flat on the floor for
better stability .
168
RRDS Clinical Guide . Physical Fitness : A Guide for Individuals with Lower Limb Loss
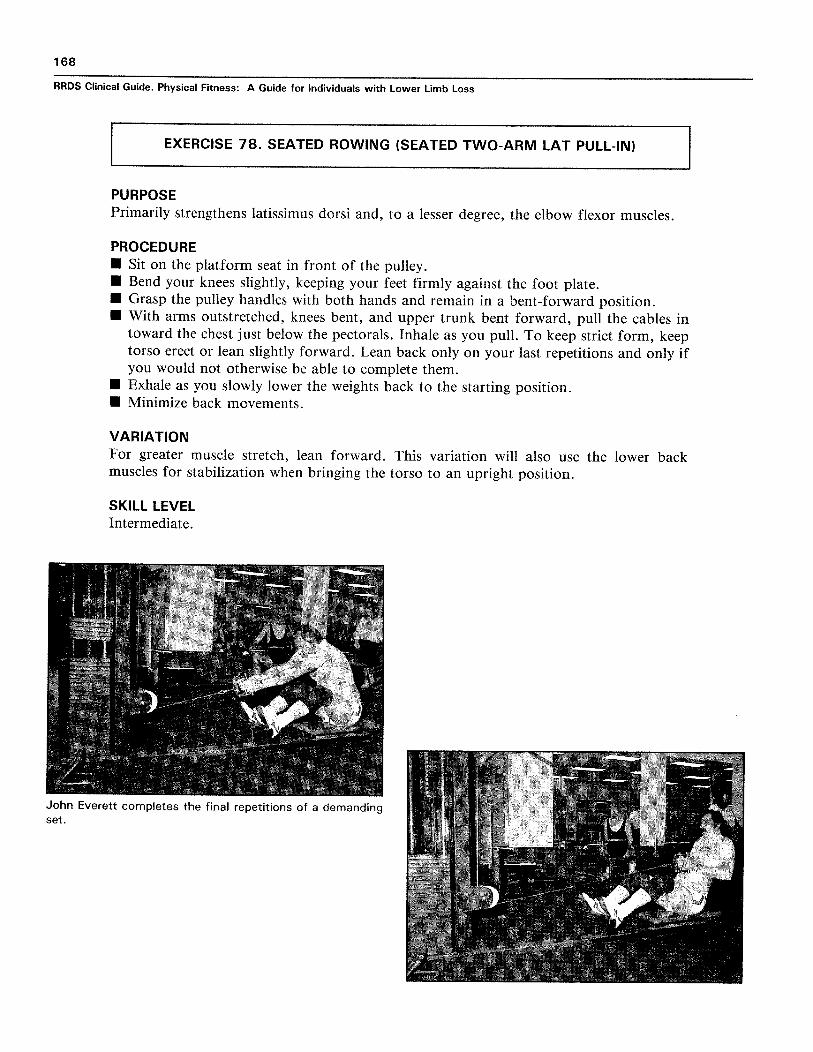
EXERCISE 78 . SEATED ROWING (SEATED TWO-ARM LAT PULL-IN)
PURPOSE
Primarily strengthens latissimus dorsi and, to a lesser degree, the elbow flexor muscles.
PROCEDUREn Sit on the platform seat in front of the pulley.n Bend your knees slightly, keeping your feet firmly against the foot plate.n Grasp the pulley handles with both hands and remain in a bent-forward position.n With arms outstretched, knees bent, and upper trunk bent forward, pull the cables in
toward the chest just below the pectorals . Inhale as you pull . To keep strict form, keeptorso erect or lean slightly forward . Lean back only on your last repetitions and only ifyou would not otherwise be able to complete them.
n Exhale as you slowly lower the weights back to the starting position.n Minimize back movements.
VARIATIONFor greater muscle stretch, lean forward . This variation will also use the lower backmuscles for stabilization when bringing the torso to an upright position.
SKILL LEVELIntermediate.
John Everett completes the final repetitions of a demandingset .
169
Conditioning Exercises : Back
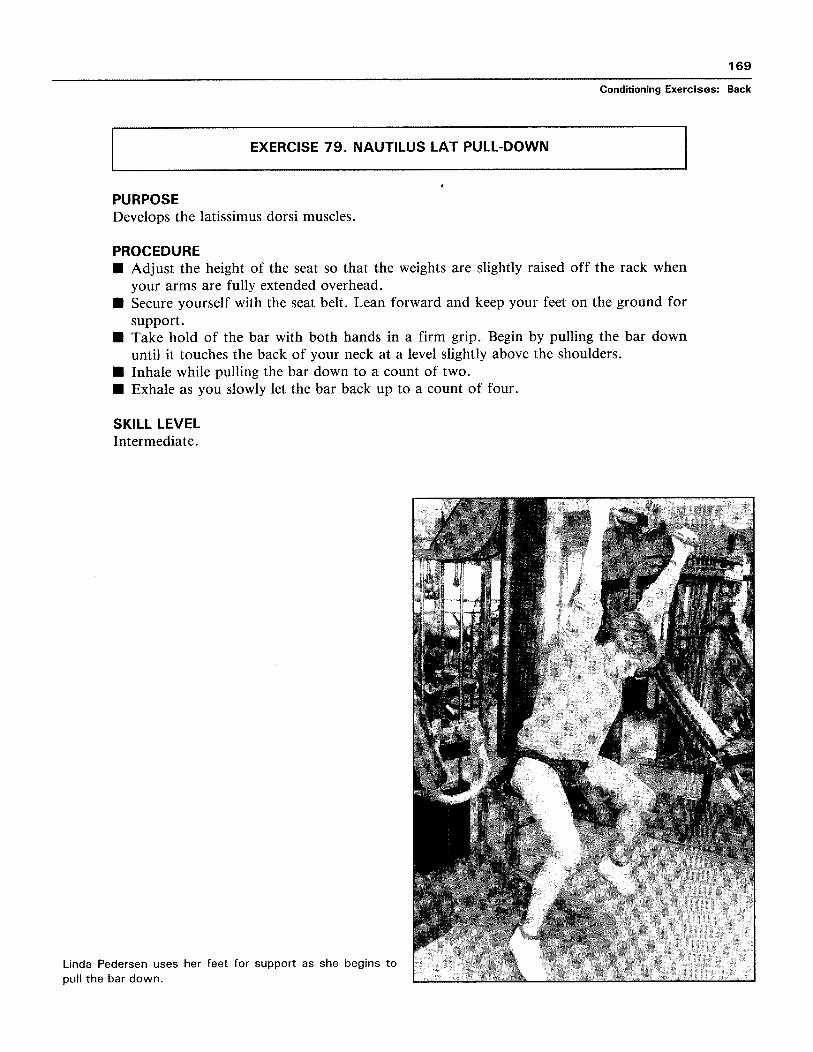
EXERCISE 79 . NAUTILUS LAT PULL-DOWN
PURPOSEDevelops the latissimus dorsi muscles.
PROCEDUREn Adjust the height of the seat so that the weights are slightly raised off the rack when
your arms are fully extended overhead.n Secure yourself with the seat belt . Lean forward and keep your feet on the ground for
support.n Take hold of the bar with both hands in a firm grip. Begin by pulling the bar down
until it touches the back of your neck at a level slightly above the shoulders.n Inhale while pulling the bar down to a count of two.n Exhale as you slowly let the bar back up to a count of four.
SKILL LEVELIntermediate.
Linda Pedersen uses her feet for support as she begins topull the bar down .
170
RRDS Clinical Guide . Physical Fitness : A Guide for Individuals with Lower Limb Loss
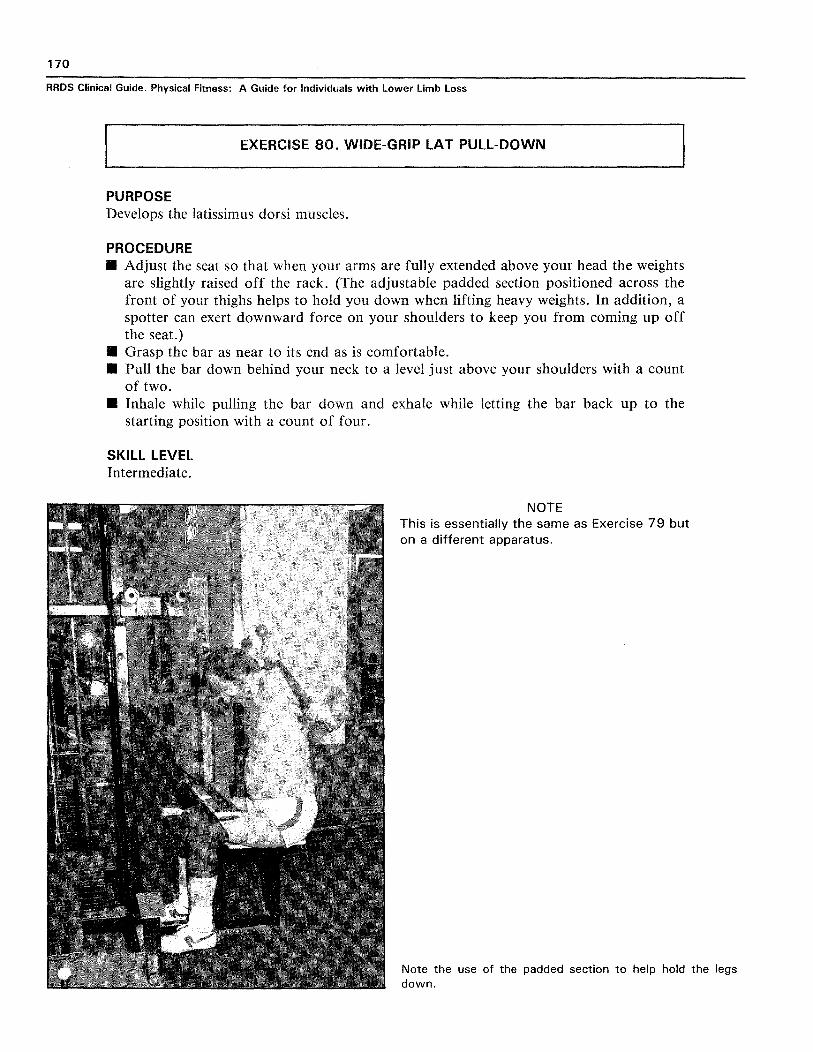
EXERCISE 80 . WIDE-GRIP LAT PULL-DOWN
PURPOSEDevelops the latissimus dorsi muscles.
PROCEDUREMI Adjust the seat so that when your arms are fully extended above your head the weights
are slightly raised off the rack. (The adjustable padded section positioned across thefront of your thighs helps to hold you down when lifting heavy weights . In addition, aspotter can exert downward force on your shoulders to keep you from coming up offthe seat .)
▪ Grasp the bar as near to its end as is comfortable.II Pull the bar down behind your neck to a level just above your shoulders with a count
of two.▪ Inhale while pulling the bar down and exhale while letting the bar back up to the
starting position with a count of four.
SKILL LEVELIntermediate .
NOTEThis is essentially the same as Exercise 79 buton a different apparatus.
Note the use of the padded section to help hold the legsdown .
171
Conditioning Exercises : Back
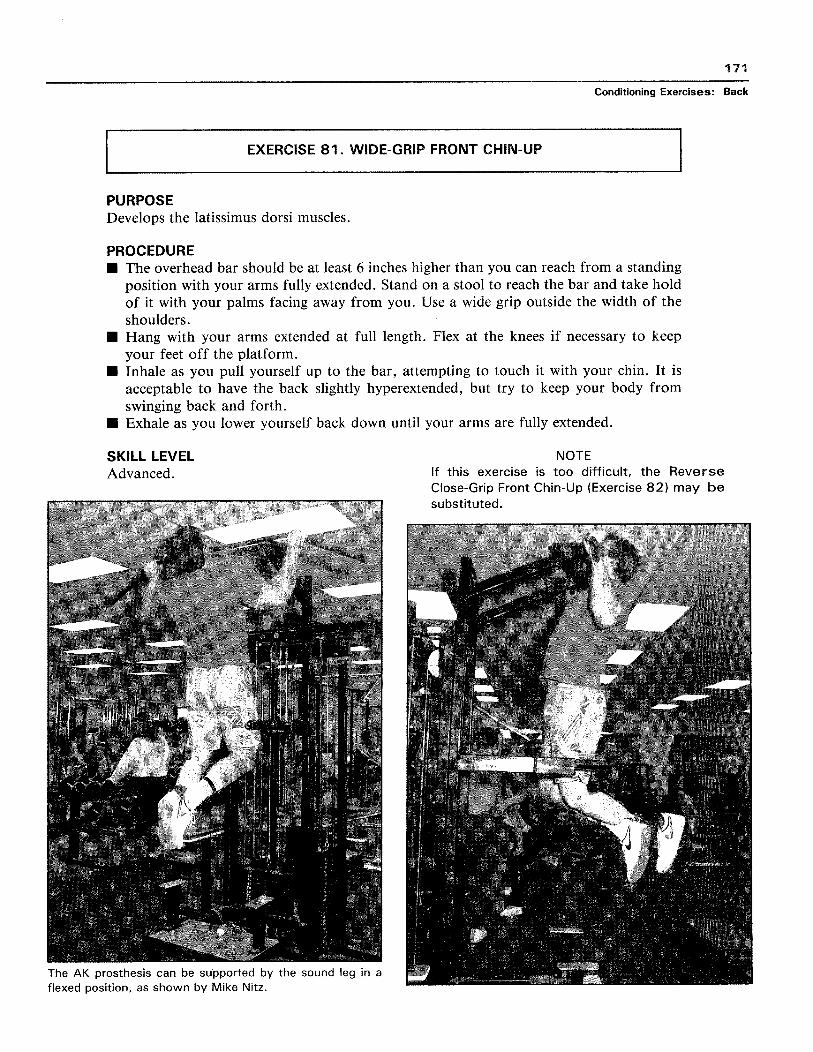
EXERCISE 81 . WIDE-GRIP FRONT CHIN-UP
PURPOSEDevelops the latissimus dorsi muscles.
PROCEDUREn The overhead bar should be at least 6 inches higher than you can reach from a standing
position with your arms fully extended . Stand on a stool to reach the bar and take holdof it with your palms facing away from you . Use a wide grip outside the width of theshoulders.
n Hang with your arms extended at full length . Flex at the knees if necessary to keepyour feet off the platform.
n Inhale as you pull yourself up to the bar, attempting to touch it with your chin . It isacceptable to have the back slightly hyperextended, but try to keep your body fromswinging back and forth.
n Exhale as you lower yourself back down until your arms are fully extended.
SKILL LEVELAdvanced .
NOTEIf this exercise is too difficult, the ReverseClose-Grip Front Chin-Up (Exercise 82) may besubstituted.
The AK prosthesis can be supported by the sound leg in aflexed position, as shown by Mike Nitz .
172
RnoBClinical Guide . Physical Fitness : A Guide for Individuals with Lower Limb Loss
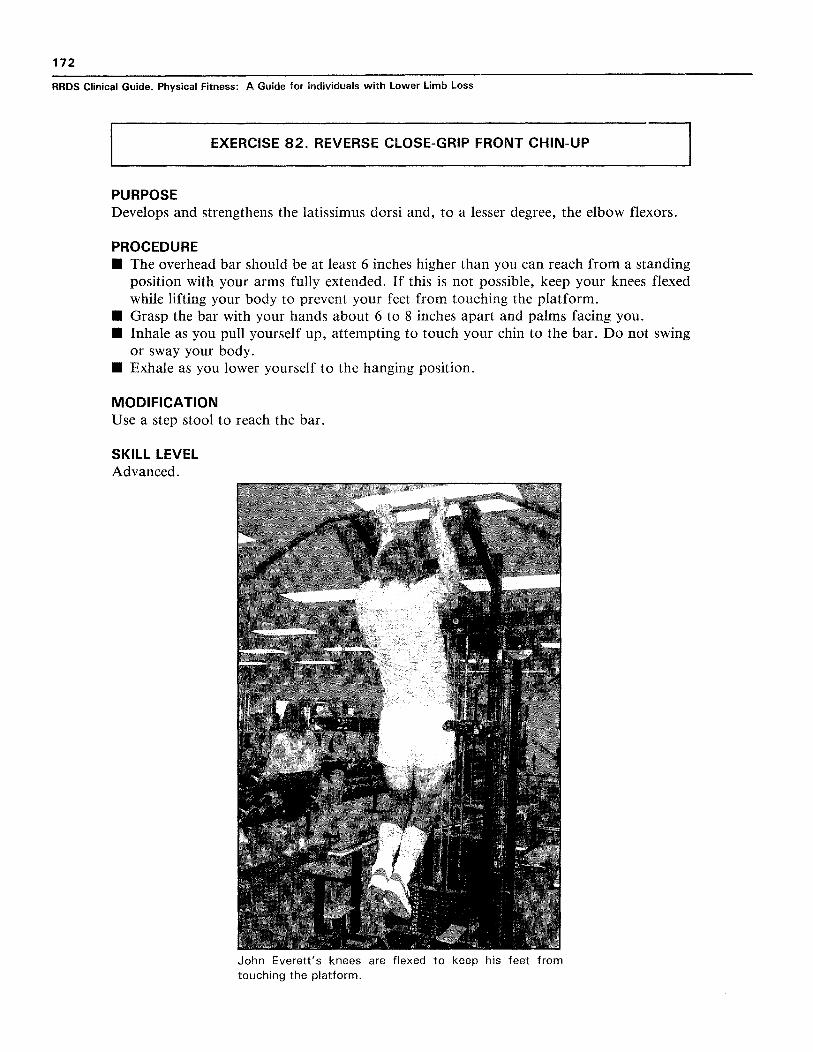
EXERCISE 82. REVERSE CLOSE-GRIP FRONT CHIN-UP
PURPOSEDevelops and strengthens the latissimus dorsi and, to a lesser degree, the elbow flexors.
PROCEDURE▪ The overhead bar should be at least 6 inches higher than you can reach from a standing
position with your arms fully extended . If this is not possible, keep your knees flexedwhile lifting your body to prevent your feet from touching the platform.
• Grasp the bar with your hands about 6 to 8 inches apart and palms facing you.▪ Inhale as you pull yourself up, attempting to touch your chin to the bar . Do not swing
or sway your body.II Exhale as you lower yourself to the hanging position.
MODIFICATIONUse a step stool to reach the bar.
SKILL LEVELAdvanced .
John Everett's knees are flexed to keep his feet fromtouching the platform .
173
Conditioning Exercises : Back
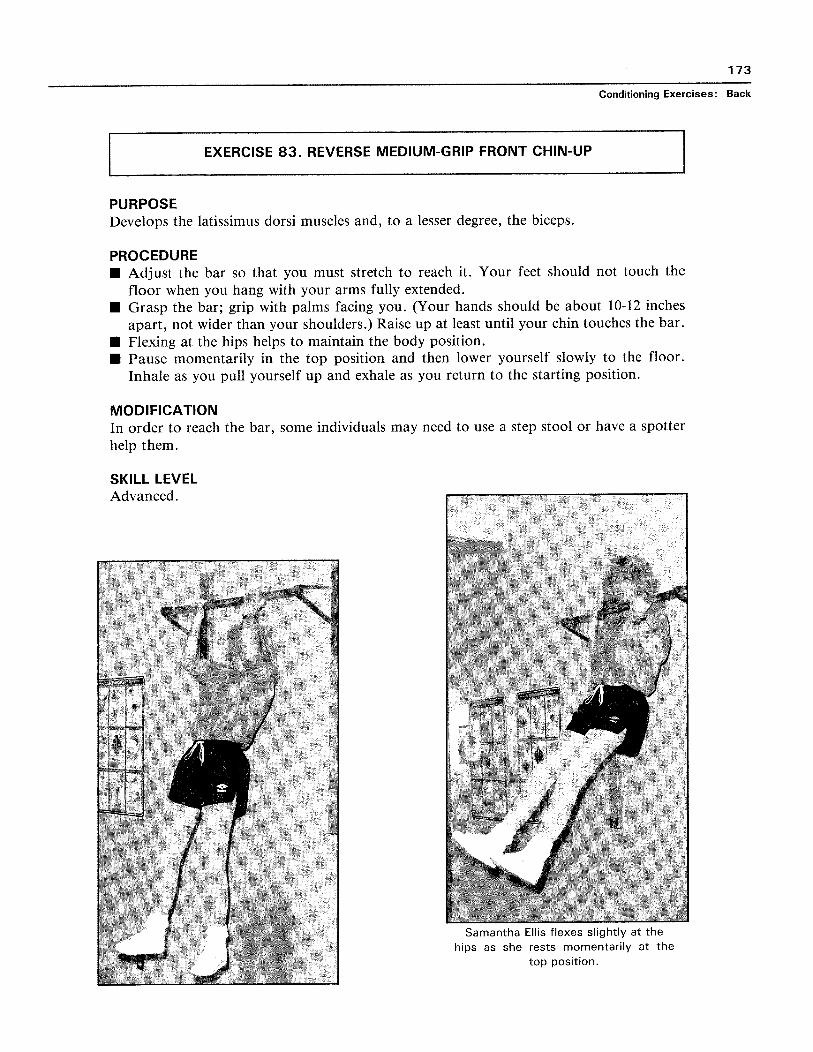
EXERCISE 83 . REVERSE MEDIUM-GRIP FRONT CHIN-UP
PURPOSEDevelops the latissimus dorsi muscles and, to a lesser degree, the biceps.
PROCEDUREn Adjust the bar so that you must stretch to reach it . Your feet should not touch the
floor when you hang with your arms fully extended.n Grasp the bar ; grip with palms facing you . (Your hands should be about 10-12 inches
apart, not wider than your shoulders .) Raise up at least until your chin touches the bar.n Flexing at the hips helps to maintain the body position.n Pause momentarily in the top position and then lower yourself slowly to the floor.
Inhale as you pull yourself up and exhale as you return to the starting position.
MODIFICATIONIn order to reach the bar, some individuals may need to use a step stool or have a spotterhelp them.
SKILL LEVELAdvanced .
Samantha Ellis flexes slightly at thehips as she rests momentarily at the
top position .
174
RnooClinical Guide . Physical Fitness : A Guide for Individuals with Lower Limb Loss
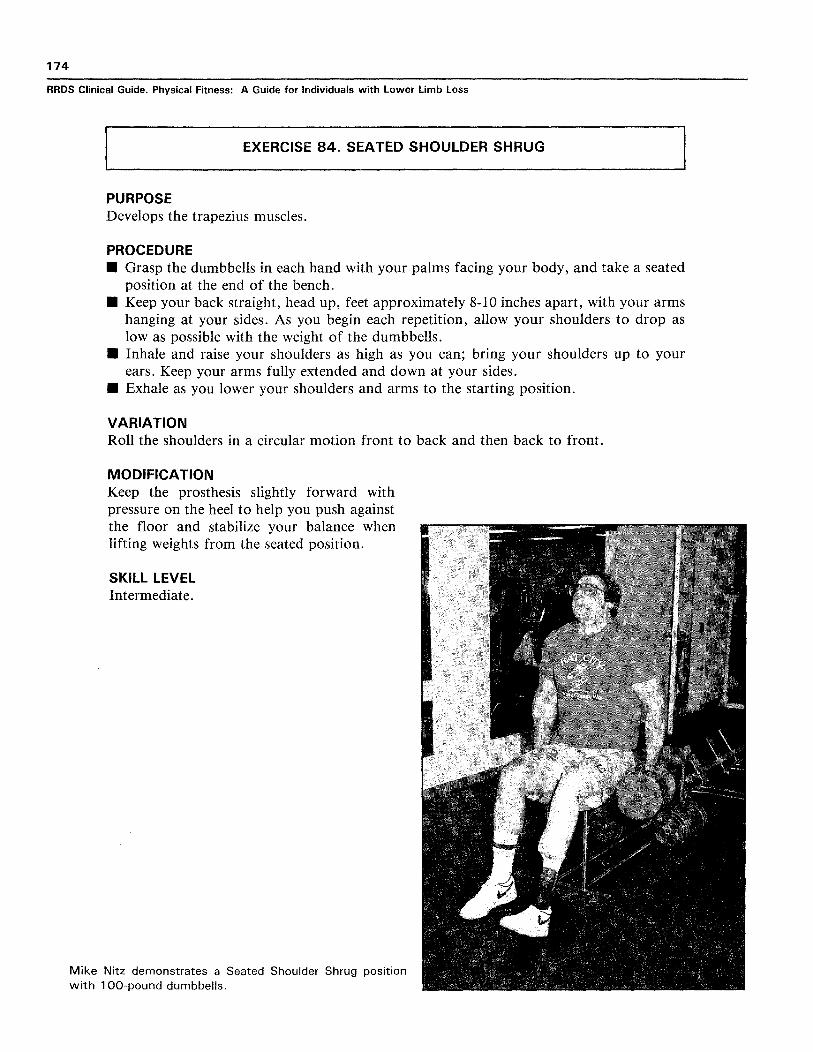
EXERCISE 84 . SEATED SHOULDER SHRUG
PURPOSEDevelops the trapezius muscles.
PROCEDUREEl Grasp the dumbbells in each hand with your palms facing your body, and take a seated
position at the end of the bench.N~ Keep your back straight, head up, feet approximately 8-10 inches apart, with your arms
hanging at your sides . As you begin each repetition, allow your shoulders to drop aslow as possible with the weight of the dumbbells.
• Inhale and raise your shoulders as high as you can ; bring your shoulders up to yourears . Keep your arms fully extended and down at your sides.
• Exhale as you lower your shoulders and arms to the starting position.
VARIATIONRoll the shoulders in a circular motion front to back and then back to front.
MODIFICATIONKeep the prosthesis slightly forward withpressure on the heel to help you push againstthe floor and stabilize your balance whenlifting weights from the seated position.
SKILL LEVELIntermediate.
Mike Nitz demonstrates a Seated Shoulder Shrug positionwith 100-pound dumbbells .
175
Conditioning Exercises : Back
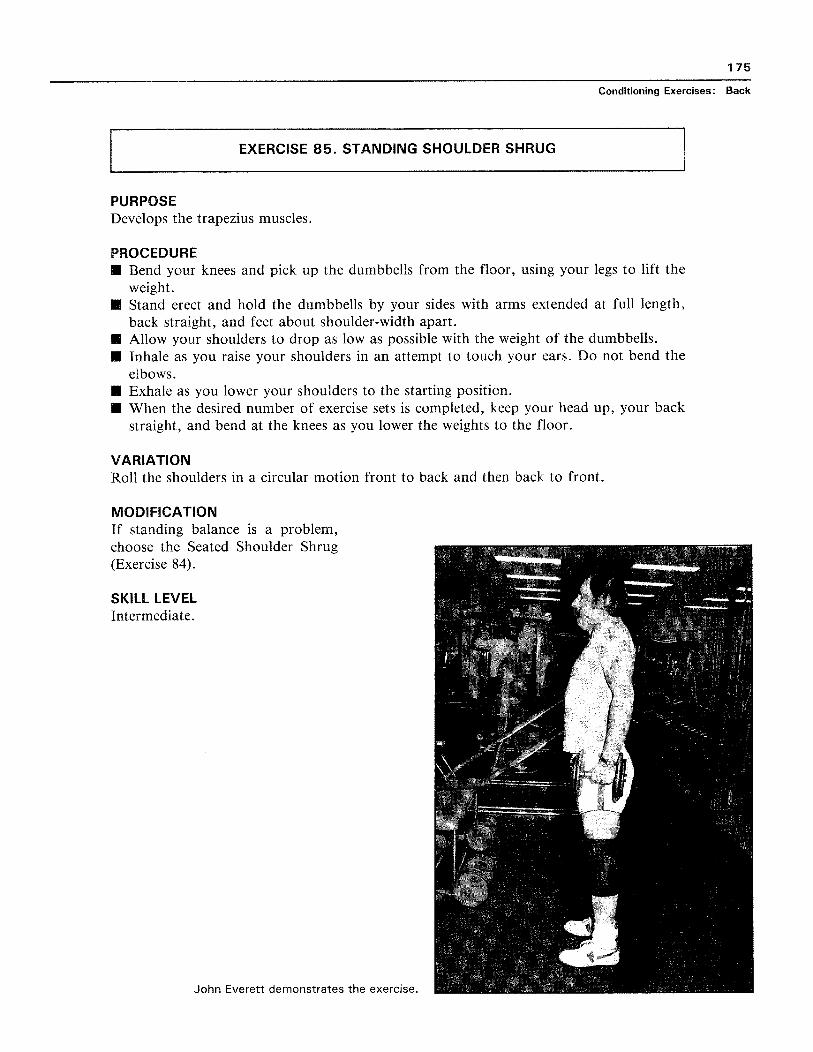
EXERCISE 85 . STANDING SHOULDER SHRUG
PURPOSEDevelops the trapezius muscles.
PROCEDUREn Bend your knees and pick up the dumbbells from the floor, using your legs to lift the
weight.n Stand erect and hold the dumbbells by your sides with arms extended at full length,
back straight, and feet about shoulder-width apart.n Allow your shoulders to drop as low as possible with the weight of the dumbbells.n Inhale as you raise your shoulders in an attempt to touch your ears . Do not bend the
elbows.n Exhale as you lower your shoulders to the starting position.n When the desired number of exercise sets is completed, keep your head up, your back
straight, and bend at the knees as you lower the weights to the floor.
VARIATIONRoll the shoulders in a circular motion front to back and then back to front.
MODIFICATIONIf standing balance is a problem,choose the Seated Shoulder Shrug(Exercise 84).
SKILL LEVELIntermediate .
John Everett demonstrates the exercise .
176
RRDS Clinical Guide . Physical Fitness : A Guide for Individuals with Lower Limb Loss
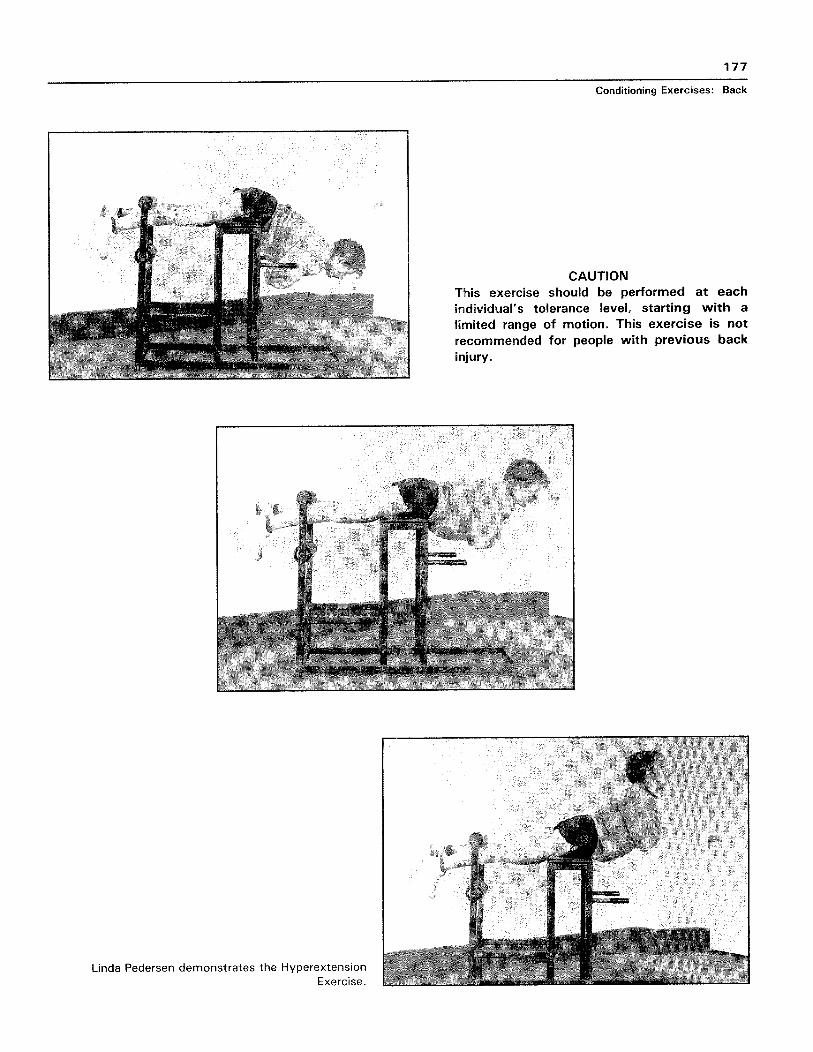
EXERCISE 86 . HYPEREXTENSION
PURPOSEDevelops lower back strength.
PROCEDUREn Climb onto the hyperextension bench in a face-down position, with your lower
abdomen and hips resting on the support above the hand bars . Grasp the hand bars forbalance while getting into position.
n Your legs should be outstretched between the two leg support bars . To help maintainbody position, the legs are held down by the upper padded bar.
n Lower your torso, let go of the hand bars, and fold your arms across your chest, asdemonstrated by Linda Pedersen in the photo.
n Raise your trunk up until your body is about parallel with the floor . The arms may befolded across the chest, outstretched toward the feet, or out to the side.
n Arch your back and raise your body beyond the parallel position ; then lower yourselfdown slowly as in the photo and repeat the sequence.
n As you advance in your physical conditioning, you may raise your back slightly beyondthe parallel position, as shown in the photo.
n Inhale while raising your body and exhale while lowering it.
VARIATIONSFor an enhanced workout, perform one or more of the following steps : 1) hold the bodyin the up position for a few seconds, then lower yourself down slowly ; 2) hold a weightbehind the head or against the chest (whichever is more comfortable) ; 3) twist to each side(left, center, then right), alternating on each repetition ; 4) hold the hands behind the headduring the entire exercise . The hands may be held against the chest when starting and outto the sides as the exercise is completed (this may be easier for the beginner) . Theimportant thing is not to let the arms swing back and forth during the exercise.
SKILL LEVELIntermediate .
NOTEBeginners should be instructed on how to get into the proper position on the hyperextensionbench without the danger of falling or straining . Start with the position demonstrated andwork up to the position shown as the back muscles are strengthened . Assistance may beneeded in positioning an AK or BK prosthesis between the support bars . To rest betweensets, turn over and sit up on the bench, support your weight with your arms, or stepcompletely out of the apparatus .
177
Conditioning Exercises: Back
CAUTION
This exercise should be performed at eachindividual's tolerance level, starting with alimited range of motion . This exercise is notrecommended for people with previous backinjury.
Linda Pedersen demonstrates the HyperextensionExercise .
178
RHOS Clinical Guide . Physical Fitness : A Guide for Individuals with Lower Limb Loss
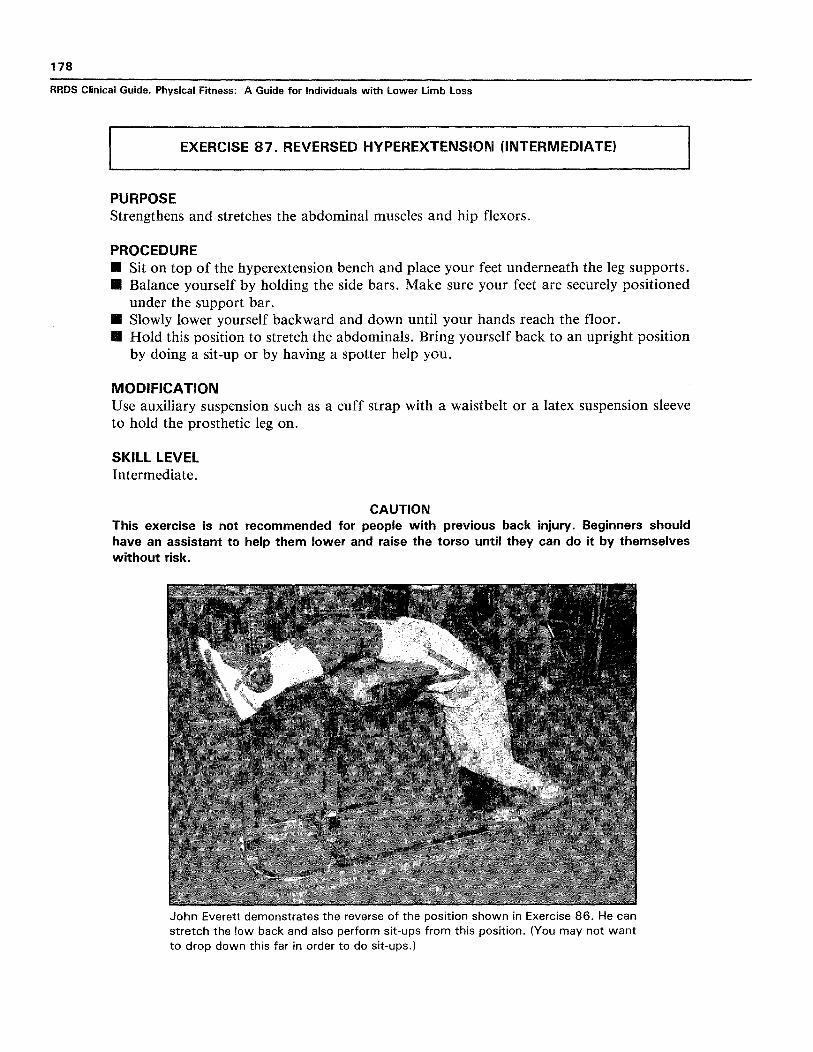
EXERCISE 87 . REVERSED HYPEREXTENSION (INTERMEDIATE)
PURPOSEStrengthens and stretches the abdominal muscles and hip flexors.
PROCEDURED~ Sit on top of the hyperextension bench and place your feet underneath the leg supports.01 Balance yourself by holding the side bars . Make sure your feet are securely positioned
under the support bar.U~ Slowly lower yourself backward and down until your hands reach the floor.Ol Hold this position to stretch the abdominals . Bring yourself back to an upright position
by doing a sit-up or by having a spotter help you.
MODIFICATIONUse auxiliary suspension such as a cuff strap with a waistbelt or a latex suspension sleeveto hold the prosthetic leg on.
SKILL LEVELIntermediate .
CAUTIONThis exercise is not recommended for people with previous back injury . Beginners shouldhave an assistant to help them lower and raise the torso mndl they can do it by themselveswithout risk.
John Everett demonstrates the reverse of the position shown in Exercise 86 . He canstretch the low back and also perform sit-ups from this position . (You may not wantto drop down this far in order to do sit-ups .)
179
Conditioning Exercises : Back
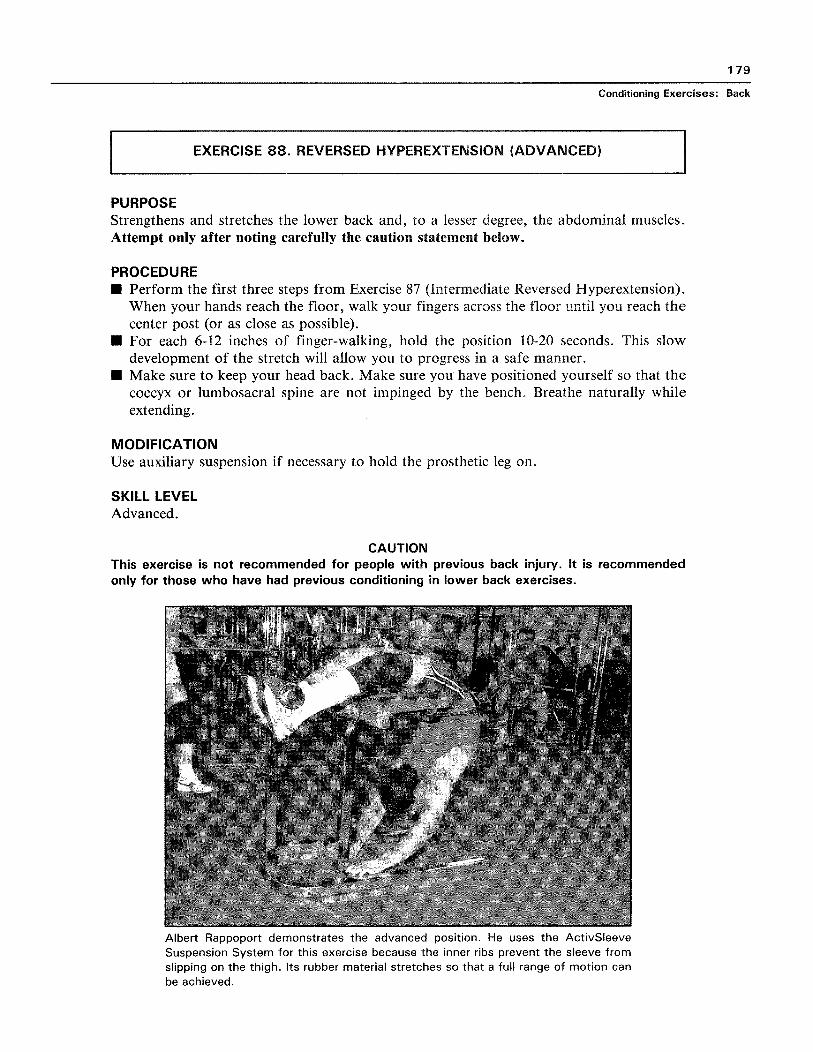
EXERCISE 88 . REVERSED HYPEREXTENSION (ADVANCED)
PURPOSEStrengthens and stretches the lower back and, to a lesser degree, the abdominal muscles.Attempt only after noting carefully the caution statement below.
PROCEDUREn Perform the first three steps from Exercise 87 (Intermediate Reversed Hyperextension).
When your hands reach the floor, walk your fingers across the floor until you reach thecenter post (or as close as possible).
n For each 6-12 inches of finger-walking, hold the position 10-20 seconds . This slowdevelopment of the stretch will allow you to progress in a safe manner.
n Make sure to keep your head back . Make sure you have positioned yourself so that thecoccyx or lumbosacral spine are not impinged by the bench . Breathe naturally whileextending.
MODIFICATIONUse auxiliary suspension if necessary to hold the prosthetic leg on.
SKILL LEVELAdvanced .
CAUTIONThis exercise is not recommended for people with previous back injury . It is recommendedonly for those who have had previous conditioning in lower back exercises.
Albert Rappoport demonstrates the advanced position . He uses the ActivSleeveSuspension System for this exercise because the inner ribs prevent the sleeve fromslipping on the thigh . Its rubber material stretches so that a full range of motion canbe achieved .
180
RRDS Clinical Guide . Physical Fitness : A Guide for Individuals with Lower Limb Loss
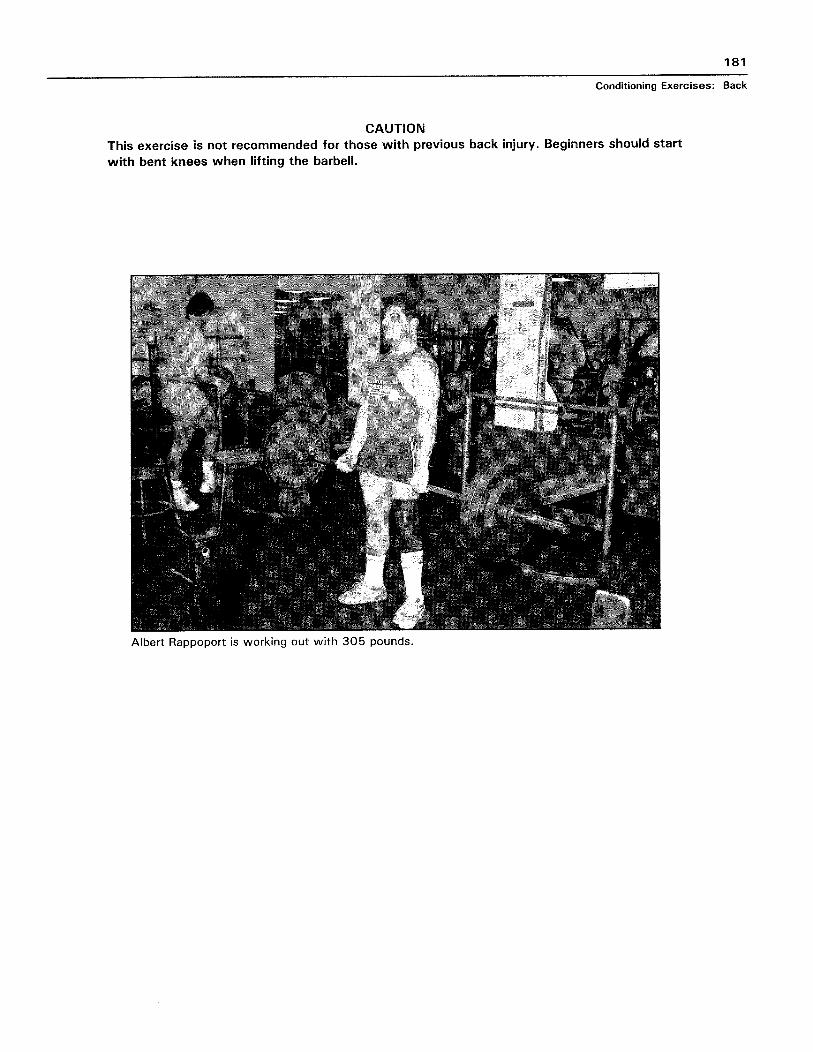
EXERCISE 89 . STIFF-LEGGED BARBELL DEAD LIFT
PURPOSEStrengthens the muscles of the lower back.
PROCEDUREn Roll the barbell to nearly touch your shins so that your feet are under the bar.n Position your feet about shoulder-width apart . Do not bend your knees while doing the
exercise.n Bend from the waist and grasp the bar with an alternated hand grip (i .e., one palm
facing toward you, the other away from you) . The alternated hand grip is safest,especially when using heavier weights, because the bar is balanced and it is moredifficult for the barbell to slip out of your hands . Hold the bar with your hands aboutshoulder-width apart, just outside the width of your feet.
n With legs and back straight, hands in position, and head up, inhale and lift the weightuntil you are standing erect.
n Pause momentarily, keeping your arms straight with no bend at your elbows. (Flexingthe elbows decreases the strengthening effect on the back muscles .)
n Exhale as you lower the weight back to the floor, maintaining the straight-leggedposition . It is acceptable for your arms to slightly touch the sides of your legs whilelifting and lowering the weight.
VARIATIONS— If lifting straight-legged is too difficult, use the bent-knee technique for dead lifts,keeping the back straight, the knees slightly bent, and lifting with the thighs and back.— For a more intense workout, do not rest the weight on the floor—only touch it downbefore lifting it back up.— Another form of the Straight-Legged Dead Lift requires the person to stand on top ofa weight bench or low platform in order to lower the weight to a level below the feet for agreater range of motion.
SKILL LEVELIntermediate to Advanced .
NOTEWhenever lifting heavy weights, it is advisable to use a weight belt to prevent injury and totake some of the stress off the lower back . However, in the photographed demonstration noweight belt is used because the lifter is trying to emphasize his back muscles to a greaterextent . Only experienced lifters should use this technique and do so with caution . Theweights should be increased gradually and only if one trains on a regular basis . Remember,even experienced lifters can injure themselves by not warming up, by not following strictform, by not using a spotter, and by increasing the weight beyond their known capabilities .
181
Conditioning Exercises : Back
CAUTIONThis exercise is not recommended for those with previous back injury . Beginners should start
with bent knees when lifting the barbell.
Albert Rappoport is working out with 305 pounds .
182
RRDS Clinical Guide . Physical Fitness : A Guide for Individuals with Lower Limb Loss
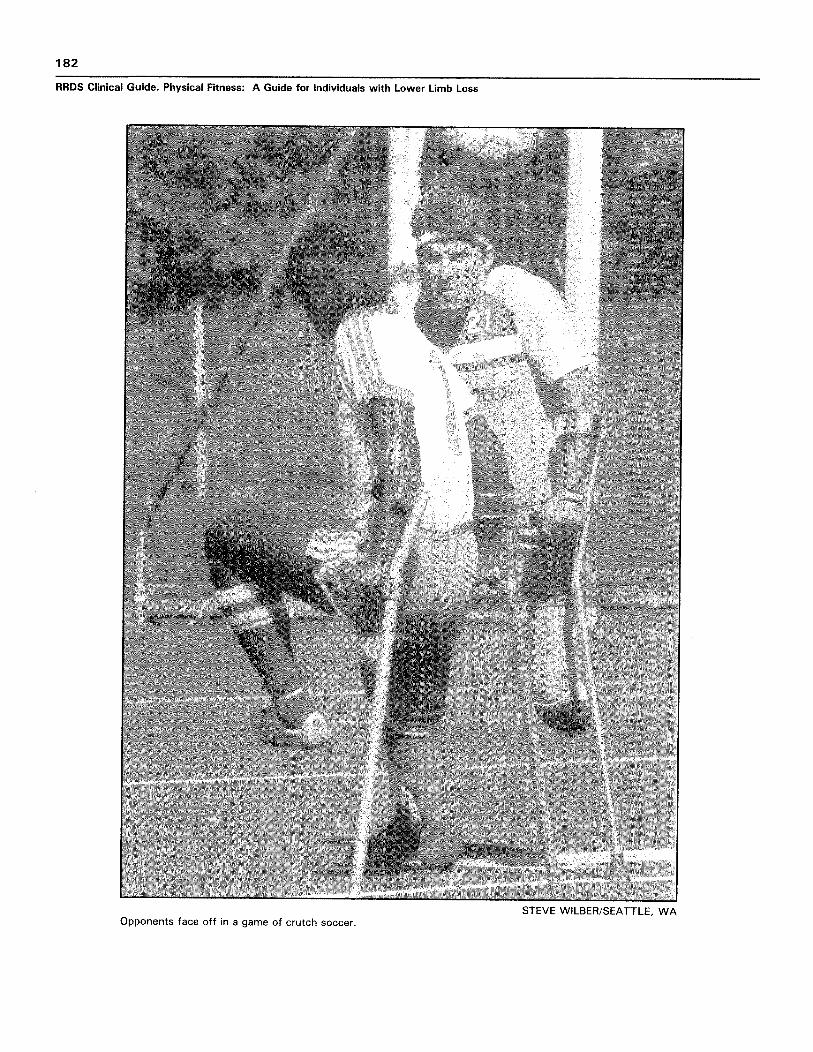
STEVE WILBER/SEATTLE, WAOpponents face off in a game of crutch soccer .