chainmaille - smyks.dk - perler og smykkedele, fantastiske ... · chainmaille tutorial ... buy them...
TRANSCRIPT

How to Make Chainmail
Chainmaille Tutorial
This is how to weave the European 4 in 1 pattern of chainmail. European 4 in 1 is the pattern most peoplethink of when they imagine chainmail. It's what you see in movies like Lord of the Rings. It is called European4 in 1 because it of the European family of maille, and if it were to be expanded into every direction infinitely,each one ring would go through four others.
You will need a few things to get started.
Supply list:Jump ringsTwo pairs of pliers
That's it! Your jump rings can vary. You can make your own by winding a coil and cutting them, or you canbuy them pre-made at jewelry supply stores. The rings I'm using in this tutorial are rather large. They aremade of 16 gauge wire, and they have an inner diameter of 5/16 inch. They are made of bright aluminum.This ring size overall is not optimal for European 4 in 1, as it is loose. In practice a smaller ring should beused, unless you are looking for the open, airy feel that you'll see in the completed project here.
I use one pair of wide flat nose pliers to grip the rings, and one pair of slim flat nose pliers to do mymaneuvering. You can also use chain nose, bent nose, or even needle nose pliers if it's what you've got.
What we're learning is simply how to weave the pattern together to make a patch. Here's what the finishedproduct will look like.
Alright. Now to get started! The most important thing to any mailler is how your closures are. Every ring youclose, you want it to be perfectly smooth and seamless. The place where the ring is cut should be almostinvisible when the rings are closed the right way (and of course given that your cuts and metal allow for this).This is important to ensure your piece is comfortable to wear whether you're making a bracelet, a shirt, oranything really. Here's a picture of a new, just cut, jump ring that hasn't been opened or closed yet.

To close a jump ring properly, you want to grab each side of it with a pair of pliers. I like to open mine a bitfirst. Do not try to pull the sides apart; it won't work out well. It will make the ring misshapen and you will havea hard time getting it round again. To open, move your right hand pliers toward your body and your left handaway from you. Then to close, slowly move the right side forward until it meets with the left side. Keep inmind that you're trying to make that seam as smooth as possible, and try to get the ends to line up flush. Youmay need to wiggle the ring sides around a smidge to get them to line up perfectly. Here is a good, closedjump ring.

Your ring should be smooth and unwarped. This will take practice if you are new. Before you start weaving,practice closing your jump rings well. It really is the most important thing. I advise getting some cheap ringsto practice with before you jump in with sterling silver or gold rings.
Now that we've got how to open and close a ring down, it's on to the actual making of the maille!
♦ Step 1: Close four jump rings using the correct technique outlined above.
♦ Step 2: Open a new ring, and thread the four closed rings from Step 1 onto it.

♦ Step 3: Close the ring that has the four previously closed rings on it.

♦ Step 4: Arrange the rings as shown. I weave all my maille in my hands, not laying down. I've shown bothviews.

♦ Step 5: Close two rings and open one ring.

♦ Step 6: Weave the open ring onto the pattern from Step 4. You will see that it leans the same way as thering that was the original open ring from Step 2. This open ring should go through two of the previouslyclosed rings. This step is probably the most difficult for beginners. Study the picture and make sure you haveit lined up correctly.

♦ Step 7: Add the two closed rings to the open ring and close the open ring.
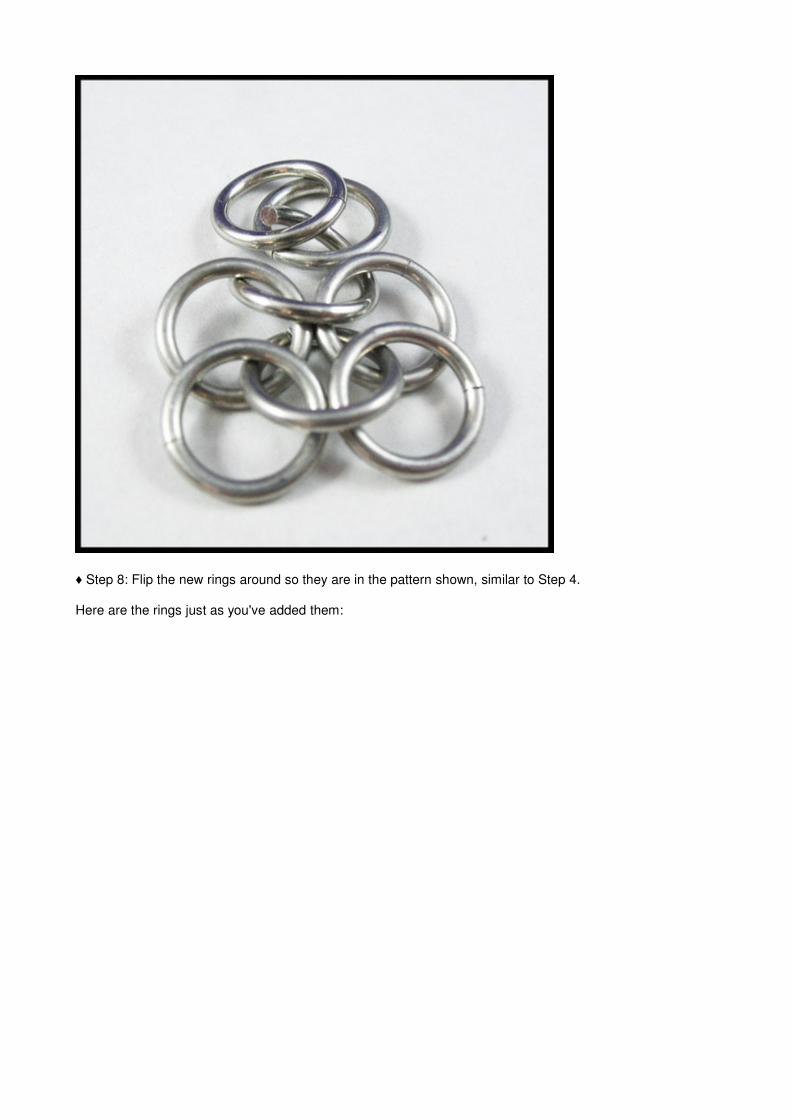
♦ Step 8: Flip the new rings around so they are in the pattern shown, similar to Step 4.
Here are the rings just as you've added them:

And flipped around so they're in the correct position:

♦ Step 9: Close two rings and open one ring. Weave them the same way you wove the last set of two closed/one open. This step is the same as Steps 5-7; just repeat those.
This picture shows the open ring woven with the two closed rings added on:
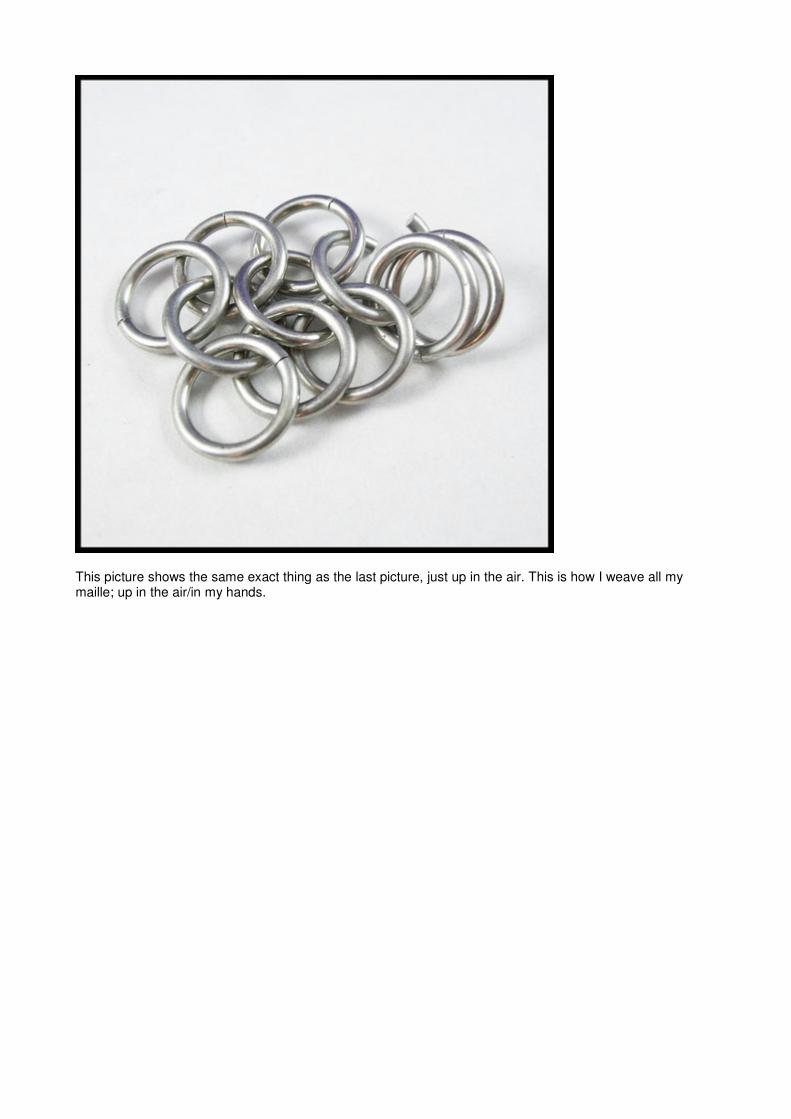
This picture shows the same exact thing as the last picture, just up in the air. This is how I weave all mymaille; up in the air/in my hands.

♦ Step 10: Now close that open ring and flip the closed rings around, same as Step 8.

♦ Step 11: Repeat steps 9 and 10 until you have a strip as long as you'd like your finished piece to be.
From here, you could be done! You've woven a strip of European 4 in 1 chainmail! However if you'd like tomake your strip wider, here's how to do it. This is how you'd keep weaving if you wanted to make your ownshirt.
♦ Step 12: Close two rings and open one ring.

♦ Step 13: Weave the open ring through the two rings on the side of the strip you originally made. It will beleaning the same way as all your previously "open" rings. Add your closed rings to the open ring and closethe open ring.
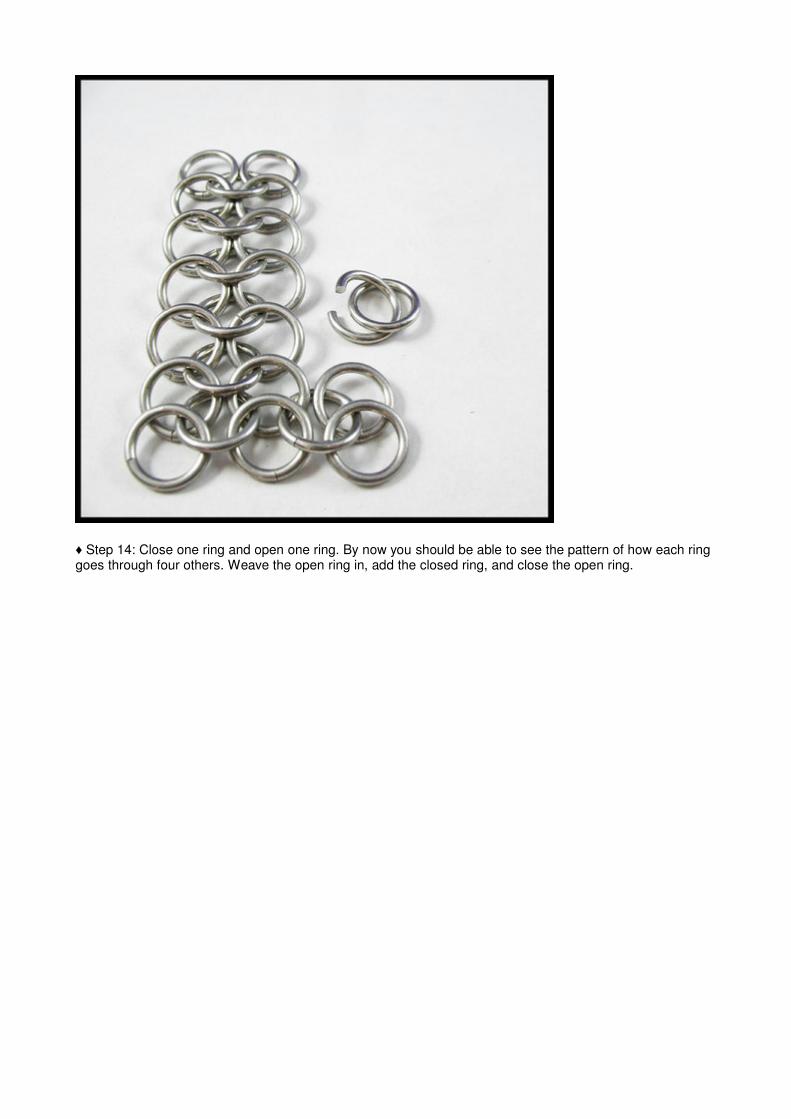
♦ Step 14: Close one ring and open one ring. By now you should be able to see the pattern of how each ringgoes through four others. Weave the open ring in, add the closed ring, and close the open ring.

♦ Step 15: Repeat Step 14 until this addition is as long as your previous strip. Now you're all done! If you'dlike it even wider, you can repeat steps 12-14 until your patch is as wide as you'd like.

The applications for this weave are limitless. You can make jewelry, clothing, or pretty much anything thatcan be made with fabric. Here are a few things I've made with this weave:


And that's how it's made! Of course this is just one of the literally hundreds of chainmaille weaves. Feel freeto browse around my site to see lots of other patterns. :)