chapter 5 autoshape magic
TRANSCRIPT

Chapter 5
AutoShape MagicIn This Chapter� Supernatural AutoShapes
� Make your AutoShapes behave
� The Format Painter
� PowerPoint’s fills and lines
� Connectors get smart
� AutoShapes let you do more
Presentation graphics can emphasize your essential message and keepyour audience’s attention. But great presentation graphics often take
time that you can better spend elsewhere in your business (especially if youaren’t already an expert designer — or maybe you just need more time tostudy astronomy).
PowerPoint AutoShapes can give your presentations the pop you need withjust a few simple steps. This chapter shows how you can quickly create andcustomize presentation graphics with AutoShapes.
AutoShapes use PowerPoint’s basic line, color, and font tools. If a tool in thischapter is unfamiliar, it’s covered elsewhere in this book. Colors, for example,are covered in Chapter 3; fonts and text are in Chapter 7.
Why AutoShapes?AutoShapes are preset, intelligent shapes like circles, arrows, stars, and call-outs that you can use to draw almost anything inside PowerPoint. Figure 5-1shows some of these AutoShapes. Combine these shapes to create amazingvisual content so fast that your colleagues will be left blinking and dazzled.
10_598171 ch05.qxp 10/25/05 7:05 PM Page 75
COPYRIG
HTED M
ATERIAL

With AutoShapes, you can
� Draw circles, rectangles, arcs, hexagons, cubes, and many other shapes.
� Place a thought bubble beside a picture of Aunt Eliza and make herthink (for a change).
� Combine several shapes to create diagrams, charts, and timelines.
� Draw an exotic thunderbolt shape fit for Harry Potter’s forehead.
� Draw stars with more points than you can count.
If you want to create better presentations, you’ll love AutoShapes.
You can create professional-looking drawings on your slides even if you haveled an uneventful, boring, or sinister life that required no artistic expression.If you have led a moral and eventful life full of artistic vision, you’ll still loveAutoShapes because Microsoft beta-tested this technology with all sorts ofguinea pigs (er, users).
Although AutoShapes are versatile, you can’t get too far in your presentationsby using them as they are. After all, how much impact can a set of green shapeson a white background make? Not to worry — in this chapter, you find out howto combine them with exotic fills. In fact, you discover the easiest route tocreate cutting-edge PowerPoint presentations that scream wow!
Figure 5-1:AutoShapes
may be atthe bottom
of thePowerPoint
interface,but they’rethe tops in
PowerPoint.
76 Part II: Achieving Visual Appeal
10_598171 ch05.qxp 10/25/05 7:05 PM Page 76
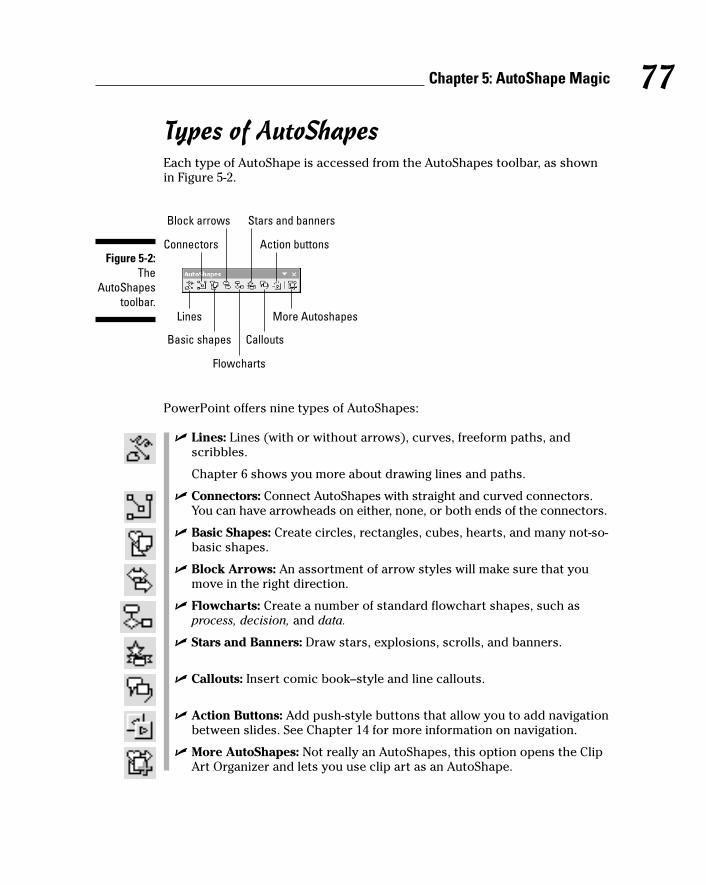
Types of AutoShapesEach type of AutoShape is accessed from the AutoShapes toolbar, as shownin Figure 5-2.
PowerPoint offers nine types of AutoShapes:
� Lines: Lines (with or without arrows), curves, freeform paths, and scribbles.
Chapter 6 shows you more about drawing lines and paths.
� Connectors: Connect AutoShapes with straight and curved connectors.You can have arrowheads on either, none, or both ends of the connectors.
� Basic Shapes: Create circles, rectangles, cubes, hearts, and many not-so-basic shapes.
� Block Arrows: An assortment of arrow styles will make sure that youmove in the right direction.
� Flowcharts: Create a number of standard flowchart shapes, such asprocess, decision, and data.
� Stars and Banners: Draw stars, explosions, scrolls, and banners.
� Callouts: Insert comic book–style and line callouts.
� Action Buttons: Add push-style buttons that allow you to add navigationbetween slides. See Chapter 14 for more information on navigation.
� More AutoShapes: Not really an AutoShapes, this option opens the ClipArt Organizer and lets you use clip art as an AutoShape.
Connectors
Block arrows Stars and banners
Action buttons
Lines
Basic shapes
Flowcharts
Callouts
More Autoshapes
Figure 5-2:The
AutoShapestoolbar.
77Chapter 5: AutoShape Magic
10_598171 ch05.qxp 10/25/05 7:05 PM Page 77

Drawing AutoShapesAutoShapes can be found in the Drawing toolbar. If you can’t see the Drawingtoolbar within PowerPoint, choose View➪Toolbars➪Drawing. By default, theDrawing toolbar lives at the bottom of the PowerPoint interface (refer toFigure 5-1), but you can move the toolbar anywhere you want.
Click the AutoShapes icon in your Drawing toolbar and then drag the handleto spawn a standalone AutoShapes toolbar (refer to Figure 5-2). You’ll findnine icons on the toolbar. All but the last one open their own flyout menusthat can be dragged off by their handles to create new toolbars.
Before you get enthusiastic about keeping these toolbars open all the time,remember that PowerPoint can spawn enough toolbars to make the com-bined population of China and India appear sparse. For proof, look at Figure5-3, which shows all the AutoShape toolbars on display. Fortunately,Microsoft placed icons to draw lines, rectangles, and ovals right on theDrawing toolbar, so you needn’t encounter all the menus and toolbars beforeyou get to these common shapes.
Figure 5-3:If you can
find a place to
work afteropening
all theAutoShape
toolbars,you’re either
an optimistor have a
very largemonitor.
78 Part II: Achieving Visual Appeal
10_598171 ch05.qxp 10/25/05 7:05 PM Page 78

You can draw an AutoShape in two ways:
� Choose any shape and click on the slide to place a default-sizedAutoShape.
� Choose any shape and then drag-and-draw on the slide to place anAutoShape of the size and proportion you require.
PowerPoint automatically applies a default fill and line to the AutoShape. Yes,those defaults can be changed. (See the sidebar, “Changing default fills andlines,” later in this chapter.)
Text within AutoShapesTo add text to an AutoShape, draw an AutoShape and start typing. Anythingyou type shows up within the AutoShape.
You can’t just create an AutoShape and start typing for some AutoShapetypes such as lines, connectors, and Action Buttons.
To type or edit text within an existing AutoShape, follow these steps:
1. Select the AutoShape.
2. Right-click and choose either Add Text or Edit Text.
3. Start typing your text.
In many ways, AutoShapes function in the same way as regular text placehold-ers. That isn’t surprising; any new text box you create on a slide is actually justa rectangle AutoShape with special characteristics.
You even use AutoShapes when you aren’t aware. Many elements, like tablesand charts, are special types of AutoShapes. In fact, if you ungroup a table orchart, you end up with a collection of AutoShapes, as I discuss in the section,“A tale of tables,” later in the chapter.
“Sticky” AutoShapes toolsSometimes, you want to pull your hair out because PowerPoint insists onmaking you work more. This is particularly true if you want to draw a hun-dred stars on your slide. PowerPoint will insist that you reselect the StarAutoShape after drawing each star. That means you’re clicking within theAutoShape menu a hundred times! Maybe it’s just easier to imagine a skywithout stars?
79Chapter 5: AutoShape Magic
10_598171 ch05.qxp 10/25/05 7:05 PM Page 79

Or maybe you should tame PowerPoint and get your work done fast — I showyou how in this section.
PowerPoint changes the AutoShape crosshair cursor to the default arrowcursor soon after you draw an AutoShape. If you want to draw a hundredstars, don’t go back to the Basic Shapes flyout menu a hundred times. Dothis instead:
1. Select the AutoShapes menu on your Drawing toolbar and open thecategory you need (such as Stars & Banners).
2. Drag the handle of the flyout menu to create a standalone toolbar.
3. Double-click the AutoShape you need and the icon remains “sticky.”
4. Draw your hundred or so AutoShapes.
5. Click the star icon once again (or any other icon) or just press the Esckey to get your hands off this “sticky” mess.
Supernatural AutoShape abilitiesAutoShapes have special attributes and supernatural powers. Some of themare such show-offs — they even sport yellow diamonds when selected. Youcan’t steal those diamonds, but you can certainly put them to good use. Forexample:
� Dragging the diamond above a rounded rectangle AutoShape from left toright (or top to bottom) increases the “rounded” value of the rectangle,as shown in Figure 5-4.
Figure 5-4:Increasing
the roundedvalue of arectangle.
80 Part II: Achieving Visual Appeal
10_598171 ch05.qxp 10/25/05 7:05 PM Page 80

� Dragging the diamond down or toward the right on a parallelogram,octagon, hexagon, or trapezoid alters the shape further. Drag toward theleft (or top) and you have almost a rectangle — look at Figure 5-5.
� Dragging the diamond down or toward the right on a cube, bevel, or can(otherwise known as a cylinder) alters the three-dimensional angle ofthe shape. Drag toward the left (or top) to make the shape more two-dimensional, as illustrated in Figure 5-6.
Figure 5-6:Controlling
the thirddimension.
Figure 5-5:Adjusting an
AutoShapeis easy.
81Chapter 5: AutoShape Magic
10_598171 ch05.qxp 10/25/05 7:05 PM Page 81
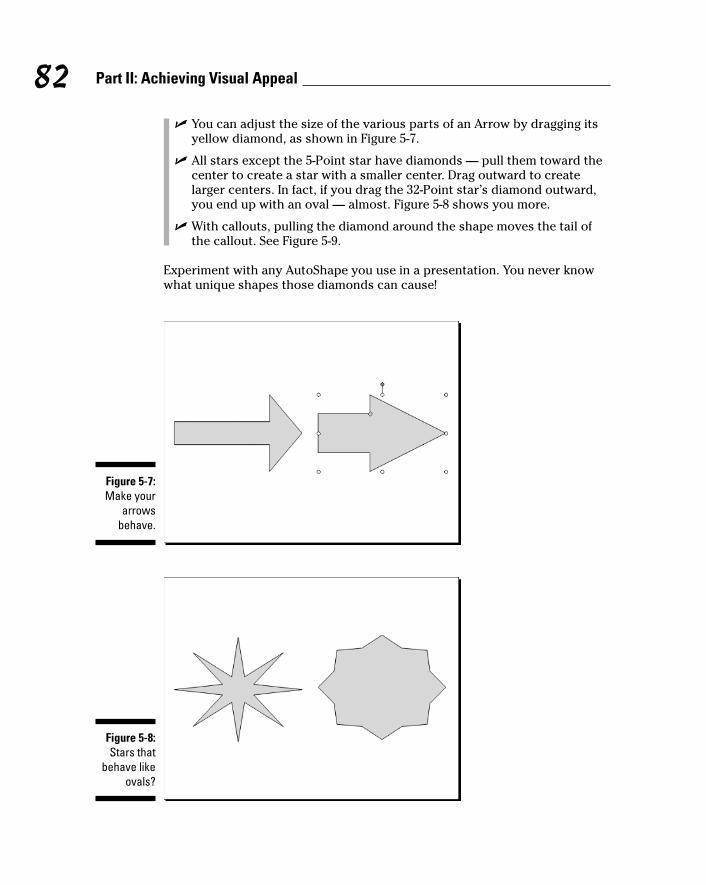
� You can adjust the size of the various parts of an Arrow by dragging itsyellow diamond, as shown in Figure 5-7.
� All stars except the 5-Point star have diamonds — pull them toward thecenter to create a star with a smaller center. Drag outward to createlarger centers. In fact, if you drag the 32-Point star’s diamond outward,you end up with an oval — almost. Figure 5-8 shows you more.
� With callouts, pulling the diamond around the shape moves the tail ofthe callout. See Figure 5-9.
Experiment with any AutoShape you use in a presentation. You never knowwhat unique shapes those diamonds can cause!
Figure 5-8:Stars that
behave likeovals?
Figure 5-7:Make your
arrowsbehave.
82 Part II: Achieving Visual Appeal
10_598171 ch05.qxp 10/25/05 7:05 PM Page 82

Changing AutoShapesSometimes you end up drawing the wrong AutoShape. By the time you realizethe mistake, you’ve already added a fill and applied some animation anddon’t want to delete and start again.
Here’s a solution: Select the AutoShape on the slide, choose Draw➪ChangeAutoShape in the Drawing toolbar, and choose the AutoShape you want tochange to.
Keeping Your AutoShapes TidyOn the CD, you’ll find a full version of AutoShape Magic, my PowerPoint add-in. I got so frustrated repeating certain tasks that I created this add-in tomake life simpler and happier for all PowerPoint users.
To install AutoShape Magic, read the documentation included in the samefolder as the setup file on the CD. When you have completed the installation,AutoShape Magic shows up as a toolbar inside PowerPoint, as shown inFigure 5-10.
Throughout the rest of this chapter, I refer often to the add-in and how to useparticular options.
Although I discuss the resize, rotate, flip, nudge, move, align, and distributeoptions using AutoShapes, bear in mind that most other slide elements, includ-ing photos, charts, and even videos, can be manipulated in the same way.
Figure 5-9:See who’s
thinkingwhat with
thosecallouts.
83Chapter 5: AutoShape Magic
10_598171 ch05.qxp 10/25/05 7:05 PM Page 83

Double-click any AutoShape and you’ll be face-to-face with the venerableFormat AutoShape dialog box with six tabs (see Figure 5-11). You can alsosummon this dialog box by selecting an AutoShape and choosingFormat➪AutoShape. In the Size tab, you’ll find options to resize and rotateAutoShapes. Unless you need to enter exact coordinates or resize percent-ages, there are faster and easier ways of keeping your AutoShapes in order.For now, click Cancel to get rid of the Format AutoShape dialog box.
OrientationMost AutoShapes have eight resize handles around them — four handles onthe corners and four more on the sides, as you can see in Figure 5-12. Anothergreen rotation handle can be found over the top-middle handle. All these han-dles help you change the orientation of your shapes, as I show you next.
Figure 5-11:The FormatAutoShapedialog box.
Twice size
Half size
Blue green gradient
Blue whitegradient Reverse gradient colors
Help
Blue blackgradient
ResetGradient directions
Decrease 10%
Increase 10%
Center object
Figure 5-10:AutoShape
Magicshows up as
a toolbarinside
PowerPoint.
84 Part II: Achieving Visual Appeal
10_598171 ch05.qxp 10/25/05 7:05 PM Page 84

ResizeIt’s easy to make AutoShapes teeny-tiny or humongous. Here are your options:
� Drag one of the eight handles to resize the shape.
� To resize while maintaining the shape’s proportions, hold the Shift keywhile you drag one of the four corner handles.
� To resize from the center of the AutoShape, hold the Ctrl key while youdrag one of the four corner handles.
� To resize from the center and still maintain proportions, hold both theShift and Control keys while you drag one of the four corner handles.
� To resize only one side, drag the corresponding side handle.
� To resize opposite sides, hold the Ctrl key while you drag a side handle.
� To resize your AutoShape in 10-percent increments, use the “+” and “–”buttons on the AutoShape Magic toolbar (the add-in found on the CD).The other set of “+” and “–” icons allows you to double or halve yourAutoShape size with just one click.
� To enter exact coordinates and resize percentages, double-click theAutoShape to summon the Format AutoShape dialog box, click the Sizetab, and enter specific coordinates or measurements in the varioustext boxes.
RotateTo rotate AutoShapes, select an AutoShape and do the following:
� Drag the green rotation handle toward the right or left to rotate aroundthe center of the AutoShape.
Rotate
Resize
Figure 5-12:Resize and
rotatehandles
keep yourAutoShapes
on a leash.
85Chapter 5: AutoShape Magic
10_598171 ch05.qxp 10/25/05 7:05 PM Page 85

� Hold the Shift key and drag the rotation handle to rotate in 15-degreeincrements.
� Hold the Ctrl key and drag the rotation handle to rotate around thebottom of the AutoShape.
� Hold both the Shift and Ctrl keys and drag the rotation handles if youwant to rotate around the bottom (rather than the center) of theAutoShape in 15-degree increments.
� If you want to rotate in 90-degree increments, head to the Drawing tool-bar and choose Draw➪Rotate or Flip and then choose either Rotate Left90° or Rotate Right 90°.
� The Draw➪Rotate or Flip menu also has the Free Rotate option thatessentially puts four rotation handles on the selected AutoShape ratherthan just one. If you hold the Ctrl key while you drag one of these rota-tion handles, the shape rotates around the corner opposite the oneyou’re dragging.
� You’ll find a selected AutoShape’s rotation value within the Size tab ofthe Format AutoShape dialog box. You can enter a new value here ortype in a zero rotation value to restore the original placement. Double-click the AutoShape to summon the Format AutoShape dialog box.
Flip or mirrorStart flipping your AutoShapes like pancakes:
� Select any of the side handles of a selected AutoShape and dragtoward the AutoShape. Keep dragging beyond the AutoShape on theother side to flip an object. Although this is quick and easy, I prefer thenext option because it more precisely maintains the AutoShape’s size.
� In the Drawing toolbar, choose Draw➪Rotate or Flip and then chooseeither Flip Vertical or Flip Horizontal.
PositioningThe position of an object on a slide in relation to itself and other objects canbe manipulated by using these options.
Group and ungroupMany PowerPoint tasks can be performed easier and faster with groupedobjects. Perhaps you want to animate a group of shapes all at once, or youwant to move every shape an inch to the left. PowerPoint provides functionalgrouping and ungrouping abilities:
86 Part II: Achieving Visual Appeal
10_598171 ch05.qxp 10/25/05 7:05 PM Page 86
� Grouping in PowerPoint places more than one object in a collection sothat you can change the characteristics of objects contained within thegroup at one go.
� Ungrouping in PowerPoint breaks a grouped collection back into individ-ual objects.
Follow these steps to group your shapes (or anything else):
1. Select all the shapes you want to group. You can
• Select one shape, then hold down the Shift or Ctrl keys while youselect other shapes.
• Drag a marquee around the shapes you want to be grouped.
2. Group the shapes by choosing Draw➪Group in the Drawing toolbar.
Now you can change the position, color, size, and various other attrib-utes of all the grouped items simultaneously.
Follow these steps to ungroup your grouped shapes:
1. Select the grouped shape you want to ungroup.
2. Choose Draw➪Ungroup in the Drawing toolbar.
Nudge or movePowerPoint provides more than one way to nudge or move your shapes:
� Select an AutoShape and press the arrow keys on the keyboard to nudgethe shape.
� To nudge in even smaller increments, hold down the Ctrl key while youpress the arrow keys.
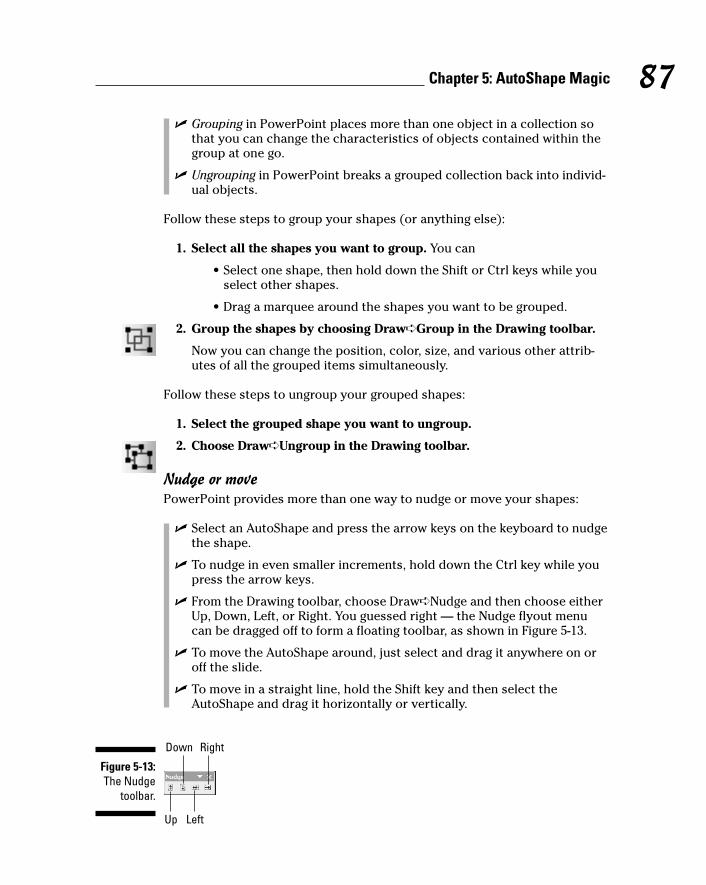
� From the Drawing toolbar, choose Draw➪Nudge and then choose eitherUp, Down, Left, or Right. You guessed right — the Nudge flyout menucan be dragged off to form a floating toolbar, as shown in Figure 5-13.
� To move the AutoShape around, just select and drag it anywhere on oroff the slide.
� To move in a straight line, hold the Shift key and then select theAutoShape and drag it horizontally or vertically.
Down Right
Up Left
Figure 5-13:The Nudge
toolbar.
87Chapter 5: AutoShape Magic
10_598171 ch05.qxp 10/25/05 7:05 PM Page 87

AlignBefore you align your AutoShapes, or any other element in a PowerPointslide, make sure that the Align or Distribute toolbar (shown in Figure 5-14)is visible by choosing Draw➪Align or Distribute and dragging the Align orDistribute menu’s handle onto your work area. In PowerPoint, everything ison a toolbar!
Let us assume you have three AutoShapes on a slide. Select all three shapes(by clicking the first one and then Shift-clicking the other two) and click anyof the six align icons on the Align or Distribute toolbar.
� Align Left: Aligns the left edge of all the AutoShapes.
The leftmost AutoShape determines the left anchor. See the secondcolumn of AutoShapes in Figure 5-15.
� Align Center: Aligns all AutoShapes vertically along their centers.
The anchor is determined by the median center of all the AutoShapes.See the first column of AutoShapes in Figure 5-15.
� Align Right: Aligns the right sides all the AutoShapes.
The rightmost AutoShape determines the right anchor. See the thirdcolumn of AutoShapes in Figure 5-15.
� Align Top: Aligns the tops of all AutoShapes.
The topmost AutoShape determines the top anchor.
� Align Middle: Aligns all AutoShapes horizontally along their midlines.
The anchor is determined by the median center of all the AutoShapes.
� Align Bottom: Aligns the bottoms of all the AutoShapes.
The bottommost AutoShape determines the bottom anchor.
Align center
Align top Align bottom
Distribute vertically
Align left
Align right
Align middle
Distribute horizontally
Align and distribute
Figure 5-14:The Align or
Distributetoolbar.
88 Part II: Achieving Visual Appeal
10_598171 ch05.qxp 10/25/05 7:05 PM Page 88

Center an AutoShapeFollow these steps to center an AutoShape on a PowerPoint slide:
1. Select the AutoShape.
2. Make sure that the Relative to Slide option is selected in the Align orDistribute toolbar.
3. Click the Align Center and the Align Middle icons.
If you have installed AutoShape Magic (the PowerPoint add-in available onthis book’s CD), just select the AutoShape and click the Center icon.
Follow these steps if you need to center several AutoShapes on a PowerPointslide without altering their distances from each other:
1. Select all the AutoShapes.
2. Group the AutoShapes.
Choose Draw➪Group in the Drawing toolbar.
3. Make sure that the Relative to Slide option is selected in the Align orDistribute toolbar.
4. Click the Align Center and the Align Middle buttons.
5. Ungroup the selected AutoShapes (if required) by choosingDraw➪Ungroup in the Drawing toolbar.
If you have AutoShape Magic installed, just select the grouped AutoShapesand click the Center icon.
DistributeDistributing AutoShapes is a great way to make sure that they’re perfectlylined up. For example, if you want a row of 12 evenly spaced stars, you usethe Distribute command. Figure 5-16 illustrates how distributed AutoShapeslook. Assume that you have three AutoShapes on a slide.
Figure 5-15:Alignment
samples.
89Chapter 5: AutoShape Magic
10_598171 ch05.qxp 10/25/05 7:05 PM Page 89
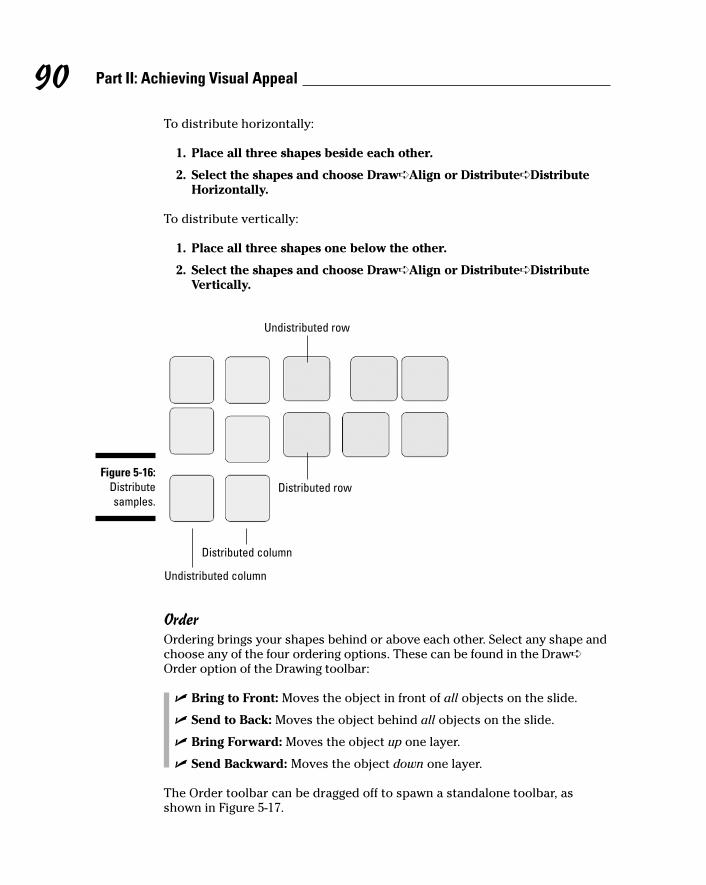
To distribute horizontally:
1. Place all three shapes beside each other.
2. Select the shapes and choose Draw➪Align or Distribute➪DistributeHorizontally.
To distribute vertically:
1. Place all three shapes one below the other.
2. Select the shapes and choose Draw➪Align or Distribute➪DistributeVertically.
OrderOrdering brings your shapes behind or above each other. Select any shape andchoose any of the four ordering options. These can be found in the Draw➪Order option of the Drawing toolbar:
� Bring to Front: Moves the object in front of all objects on the slide.
� Send to Back: Moves the object behind all objects on the slide.
� Bring Forward: Moves the object up one layer.
� Send Backward: Moves the object down one layer.
The Order toolbar can be dragged off to spawn a standalone toolbar, asshown in Figure 5-17.
Undistributed row
Undistributed column
Distributed column
Distributed rowFigure 5-16:
Distributesamples.
90 Part II: Achieving Visual Appeal
10_598171 ch05.qxp 10/25/05 7:05 PM Page 90

The Format PainterYou just formatted an AutoShape with the fill and line you want, and the textinside the AutoShape is formatted using a particular font style and color. Nowyou need to apply the same formatting to 25 more shapes within the presen-tation. What do you do?
You could format each AutoShape the same way and have no time for lunch. Oryou could use the Format Painter and also have time for dessert and coffee.
Follow these steps to use the Format Painter:
1. Select the AutoShape whose attributes you want to copy.
2. Copy the attributes:
• If you want to apply the attributes to one AutoShape, click theFormat Painter icon.
• If you want to apply the attributes to several AutoShapes, double-click the Format Painter icon so that it remains selected (“sticky”).
3. Click the AutoShape(s) where you want the attributes copied.
4. If you double-clicked the Format Painter to make it sticky, get rid ofthe stickiness. You can
• Click the Format Painter button again.
• Click any other icon.
• Press Esc to get rid of the stickiness.
Here are some guidelines for using the Format Painter:
� The Format Painter can be used to copy attributes to other AutoShapeson the same slide, the same presentation, or across other presentations.
� The Format Painter works beyond AutoShapes. You can use the FormatPainter to copy characteristics of placeholders, tables, and charts.
Sent to back
Send backward
Bring to front
Bring forward
Figure 5-17:You decide
whichshapes are
on top.
91Chapter 5: AutoShape Magic
10_598171 ch05.qxp 10/25/05 7:05 PM Page 91

Working with Fills and LinesPowerPoint’s ability to present richly colored and textured elements is basedon the OfficeArt fill and line technology. OfficeArt is a shared graphic compo-nent used across the Microsoft Office suite.
Apart from AutoShapes, PowerPoint’s fills and lines work the same wayacross other slide elements, such as WordArt, backgrounds, and charts. Infact, they even work the same way in other Microsoft Office programsbecause they’re all based on OfficeArt technology. So you can use all thetricks you learn here in Word and Excel!
Although fills and lines can be used for almost all PowerPoint elements in thesame way, there are subtle differences. For example, backgrounds can’t havea transparent fill, and pictures can only be formatted for lines.
PowerPoint’s fillsPowerPoint provides five types of fills:
� Solid Colors
� Gradients
� Patterns
� Textures
� Pictures
Color Plate 5-1 shows how versatile the fills can be.
By default, any AutoShape you draw has a solid fill. You can change the filleither through the icons on the Drawing toolbar or through the FormatAutoShape dialog box.
I suggest you use the Drawing toolbar because
� It’s quicker.
� The fill and line color icons on the Drawing toolbar remember the lastsettings you used for solid fills and lines.
If you want to repeat a fill or line color again, you just click the icon.
92 Part II: Achieving Visual Appeal
10_598171 ch05.qxp 10/25/05 7:05 PM Page 92

Default fills and Color SchemesWhenever you create a new shape, PowerPoint uses a default fill color. Thiscolor is determined by the default fill color specified in PowerPoint’s ColorSchemes option for the active open presentation. Color Schemes are coveredin Chapter 3 — however, you can follow the rest of this chapter even withoutreading that section now.
The advantage or disadvantage (whichever way you look at it) of using adefault color from a Color Scheme is that when you change the Color Scheme,all your fill colors change, too. If you don’t want your fill colors to change,don’t use a color from the Color Scheme swatches in the Fill Color toolbar.
The Fill Color toolbarTo access the Fill Color toolbar:
1. Click the downward-pointing arrow next to the Fill Color icon in theDrawing toolbar to open a flyout menu.
2. Drag this menu off the Drawing toolbar to create a floating Fill Colortoolbar within PowerPoint, as you can see in Figure 5-18.
Default fill color
Recently used colors
Color Scheme colors
Figure 5-18:The Fill
Colortoolbar.
93Chapter 5: AutoShape Magic
Changing default fills and linesYou can override Color Schemes and changethe default fill and line colors for AutoShapes inany presentation:
1. Draw any AutoShape or select an existingAutoShape.
2. Format the fills and lines as required.
3. Double-click the AutoShape to summon theFormat AutoShape dialog box.
4. In the Colors and Lines tab, check theoption that says “Default for new objects.”
10_598171 ch05.qxp 10/25/05 7:05 PM Page 93
Solid fillsFollow these steps to change or apply a solid fill:
1. Select the AutoShape.
2. On the Fill Color toolbar (see Figure 5-18), choose from
• Eight Color Scheme swatches
• Eight recently used color swatches
• An absolute color value by clicking More Fill Colors
Clicking the More Fill Colors option opens the standard Windows colorpicker dialog box, where you can choose or mix any RGB color — thatmeans you have almost 16 million color choices.
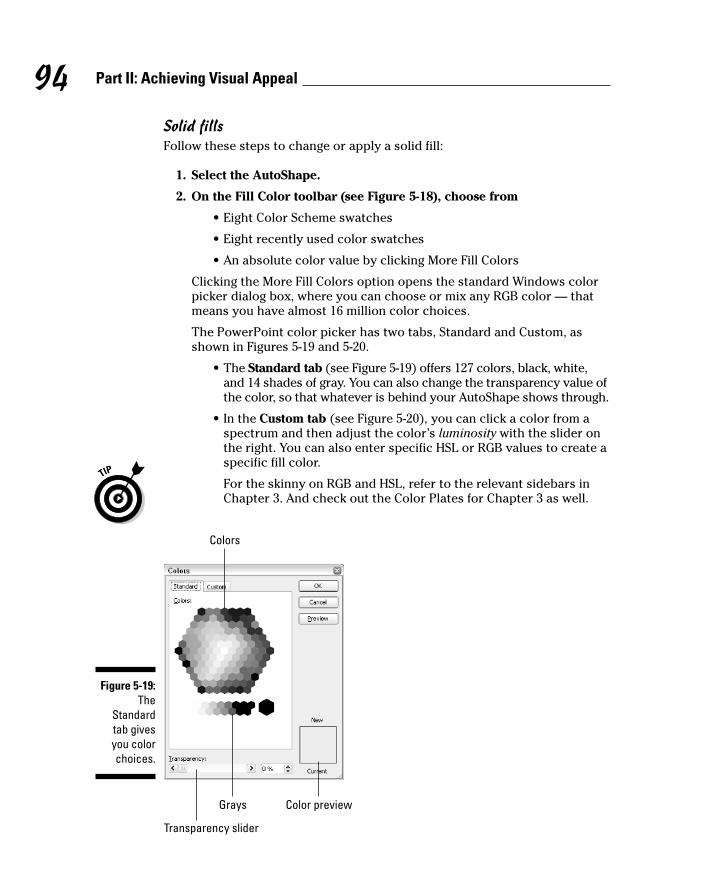
The PowerPoint color picker has two tabs, Standard and Custom, asshown in Figures 5-19 and 5-20.
• The Standard tab (see Figure 5-19) offers 127 colors, black, white,and 14 shades of gray. You can also change the transparency value ofthe color, so that whatever is behind your AutoShape shows through.
• In the Custom tab (see Figure 5-20), you can click a color from aspectrum and then adjust the color’s luminosity with the slider onthe right. You can also enter specific HSL or RGB values to create aspecific fill color.
For the skinny on RGB and HSL, refer to the relevant sidebars inChapter 3. And check out the Color Plates for Chapter 3 as well.
Colors
Transparency slider
Color previewGrays
Figure 5-19:The
Standardtab givesyou colorchoices.
94 Part II: Achieving Visual Appeal
10_598171 ch05.qxp 10/25/05 7:05 PM Page 94

Gradient fillsTo change or apply a gradient fill, select the AutoShape and choose FillEffects from the Fill Color toolbar (refer to Figure 5-18). Click the Gradient tabin the Fill Effects dialog box and you see the dialog box shown in Figure 5-21.
Figure 5-21:The
Gradient tabof the Fill
Effectsdialog box ischock-full of
options.
Color picker Luminosity
Color preview
Figure 5-20:The Customtab lets you
mix yourown RGBand HSL
colors.
95Chapter 5: AutoShape Magic
10_598171 ch05.qxp 10/25/05 7:05 PM Page 95
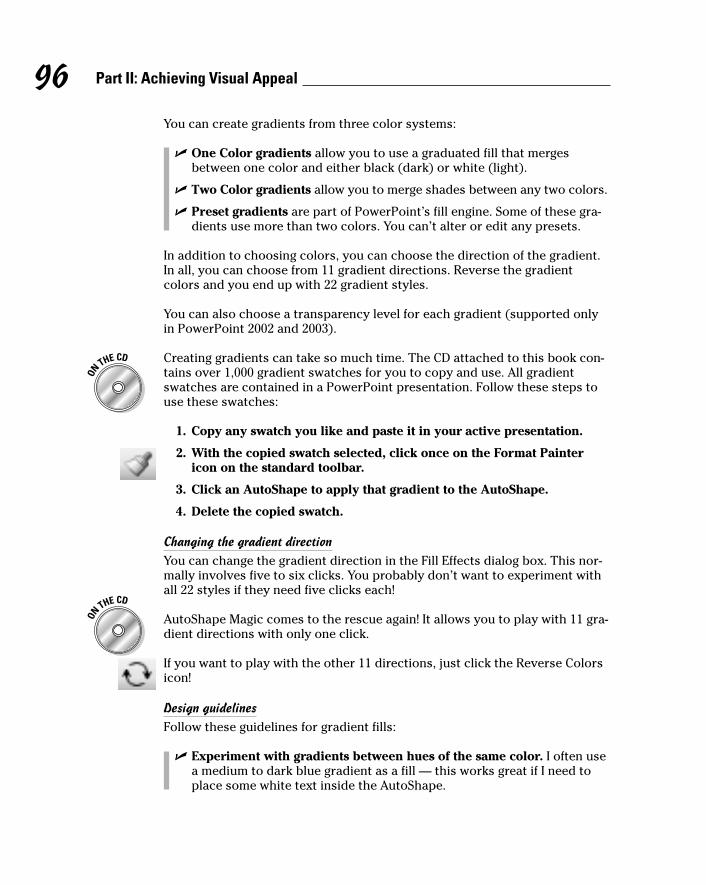
You can create gradients from three color systems:
� One Color gradients allow you to use a graduated fill that mergesbetween one color and either black (dark) or white (light).
� Two Color gradients allow you to merge shades between any two colors.
� Preset gradients are part of PowerPoint’s fill engine. Some of these gra-dients use more than two colors. You can’t alter or edit any presets.
In addition to choosing colors, you can choose the direction of the gradient.In all, you can choose from 11 gradient directions. Reverse the gradientcolors and you end up with 22 gradient styles.
You can also choose a transparency level for each gradient (supported onlyin PowerPoint 2002 and 2003).
Creating gradients can take so much time. The CD attached to this book con-tains over 1,000 gradient swatches for you to copy and use. All gradientswatches are contained in a PowerPoint presentation. Follow these steps touse these swatches:
1. Copy any swatch you like and paste it in your active presentation.
2. With the copied swatch selected, click once on the Format Paintericon on the standard toolbar.
3. Click an AutoShape to apply that gradient to the AutoShape.
4. Delete the copied swatch.
Changing the gradient directionYou can change the gradient direction in the Fill Effects dialog box. This nor-mally involves five to six clicks. You probably don’t want to experiment withall 22 styles if they need five clicks each!
AutoShape Magic comes to the rescue again! It allows you to play with 11 gra-dient directions with only one click.
If you want to play with the other 11 directions, just click the Reverse Colorsicon!
Design guidelinesFollow these guidelines for gradient fills:
� Experiment with gradients between hues of the same color. I often usea medium to dark blue gradient as a fill — this works great if I need toplace some white text inside the AutoShape.
96 Part II: Achieving Visual Appeal
10_598171 ch05.qxp 10/25/05 7:05 PM Page 96

Make sure that any gradient fill you use works well with either black orwhite text.
� If you don’t need to place any text in the AutoShape, you can use gra-dients composed of light and dark colors.
� If you need to focus attention on a single AutoShape in a slide thatcontains many elements, use a gradient fill with a contrasting color.For example, in a slide filled with blue gradient elements, I would use ared-to-black gradient to focus on a single AutoShape.
� Experiment with using white as one of the gradient colors. This worksespecially well if you’re creating a presentation with a white background.
Texture fillsIn PowerPoint parlance, textures tile across to form a fill. It goes withoutsaying that such textures need to be seamless. PowerPoint includes 24 tex-tures, and you can import more by using the Other Texture button.
Seamless textures wrap all over the slide to create an uninterrupted patternwhen tiled. If your texture isn’t seamless, or if you don’t want to tile it, youcan always use picture fills (discussed later in this chapter).
Here’s how you change or apply a texture fill:
1. Select the AutoShape.
2. On the Fill Color toolbar (see Figure 5-18), choose Fill Effects andopen the Texture tab in the Fill Effects dialog box (see Figure 5-22).
3. Choose from one of the existing textures or click the Other Texturebutton and choose a texture saved on your hard drive.
Figure 5-22:The Texture
tab of theFill Effects
dialog box.
97Chapter 5: AutoShape Magic
10_598171 ch05.qxp 10/25/05 7:05 PM Page 97
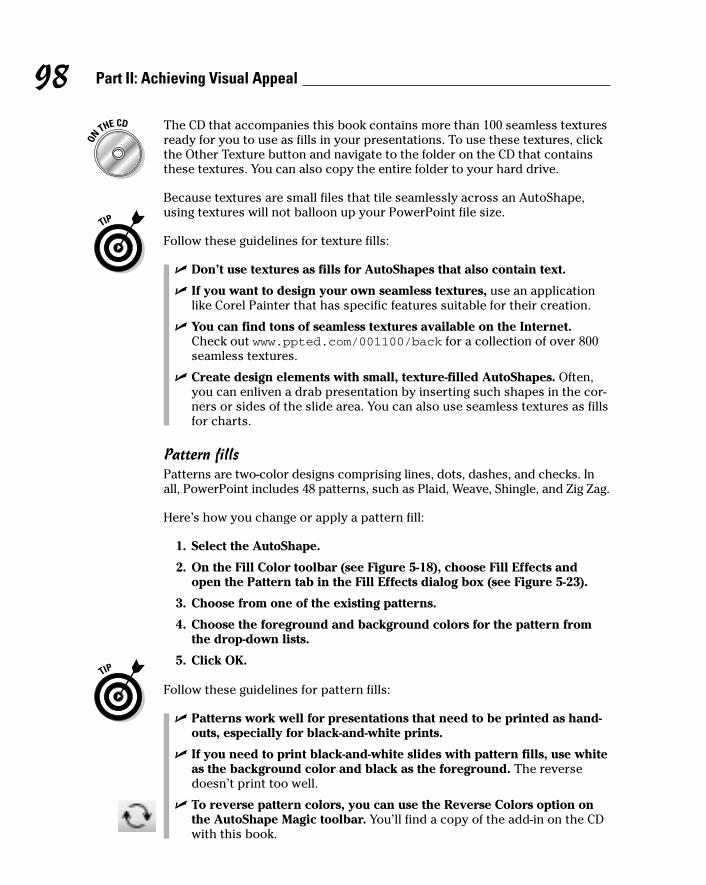
The CD that accompanies this book contains more than 100 seamless texturesready for you to use as fills in your presentations. To use these textures, clickthe Other Texture button and navigate to the folder on the CD that containsthese textures. You can also copy the entire folder to your hard drive.
Because textures are small files that tile seamlessly across an AutoShape,using textures will not balloon up your PowerPoint file size.
Follow these guidelines for texture fills:
� Don’t use textures as fills for AutoShapes that also contain text.
� If you want to design your own seamless textures, use an applicationlike Corel Painter that has specific features suitable for their creation.
� You can find tons of seamless textures available on the Internet.Check out www.ppted.com/001100/back for a collection of over 800seamless textures.
� Create design elements with small, texture-filled AutoShapes. Often,you can enliven a drab presentation by inserting such shapes in the cor-ners or sides of the slide area. You can also use seamless textures as fillsfor charts.
Pattern fillsPatterns are two-color designs comprising lines, dots, dashes, and checks. Inall, PowerPoint includes 48 patterns, such as Plaid, Weave, Shingle, and Zig Zag.
Here’s how you change or apply a pattern fill:
1. Select the AutoShape.
2. On the Fill Color toolbar (see Figure 5-18), choose Fill Effects andopen the Pattern tab in the Fill Effects dialog box (see Figure 5-23).
3. Choose from one of the existing patterns.
4. Choose the foreground and background colors for the pattern fromthe drop-down lists.
5. Click OK.
Follow these guidelines for pattern fills:
� Patterns work well for presentations that need to be printed as hand-outs, especially for black-and-white prints.
� If you need to print black-and-white slides with pattern fills, use whiteas the background color and black as the foreground. The reversedoesn’t print too well.
� To reverse pattern colors, you can use the Reverse Colors option onthe AutoShape Magic toolbar. You’ll find a copy of the add-in on the CDwith this book.
98 Part II: Achieving Visual Appeal
10_598171 ch05.qxp 10/25/05 7:05 PM Page 98

Picture fillsPictures make great fills — you can obtain pictures from digital cameras,scans, online photo galleries, or CD-ROM clip-art collections. Many picturesare included within Clip Organizer, a media cataloging program that’s part ofMicrosoft Office.
Here’s how you change or apply a picture fill:
1. Select the AutoShape.
2. On the Fill Color toolbar (see Figure 5-18), choose Fill Effects andopen the Picture tab in the Fill Effects dialog box (see Figure 5-24).
3. Click the Select Picture button and select a picture saved on yourhard drive.
The CD with this book contains several royalty-free pictures for you touse. You can access the pictures from the CD, or you can copy all thepicture folders to your hard drive and access them from there.
4. Select the Lock Picture Aspect Ratio check box if you don’t want yourpicture proportions to change.
This option is available only in PowerPoint 2002 and 2003.
5. Deselect the Rotate Fill Effect with Shape check box if you want tokeep your picture right-side-up when you rotate the AutoShape — bydefault this option is selected.
This option is available only in PowerPoint 2002 and 2003.
6. Click OK.
Figure 5-23:The Pattern
tab of theFill Effects
dialog box.
99Chapter 5: AutoShape Magic
10_598171 ch05.qxp 10/25/05 7:05 PM Page 99
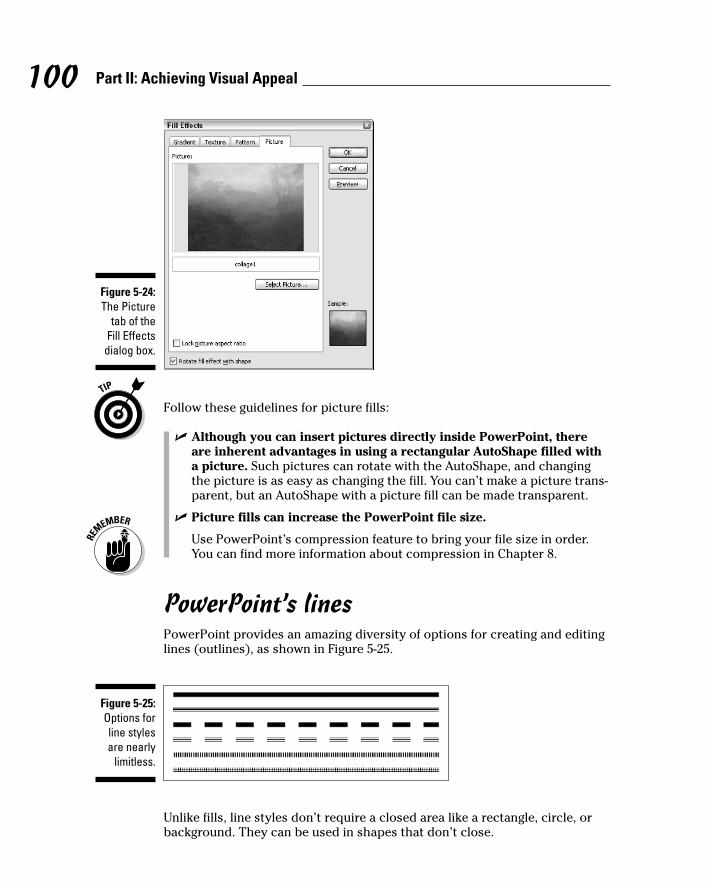
Follow these guidelines for picture fills:
� Although you can insert pictures directly inside PowerPoint, thereare inherent advantages in using a rectangular AutoShape filled witha picture. Such pictures can rotate with the AutoShape, and changingthe picture is as easy as changing the fill. You can’t make a picture trans-parent, but an AutoShape with a picture fill can be made transparent.
� Picture fills can increase the PowerPoint file size.
Use PowerPoint’s compression feature to bring your file size in order.You can find more information about compression in Chapter 8.
PowerPoint’s linesPowerPoint provides an amazing diversity of options for creating and editinglines (outlines), as shown in Figure 5-25.
Unlike fills, line styles don’t require a closed area like a rectangle, circle, orbackground. They can be used in shapes that don’t close.
Figure 5-25:Options forline stylesare nearly
limitless.
Figure 5-24:The Picture
tab of theFill Effects
dialog box.
100 Part II: Achieving Visual Appeal
10_598171 ch05.qxp 10/25/05 7:05 PM Page 100

Line attributesOn PowerPoint’s Draw toolbar, you’ll find four icons that can be used toformat lines:
� The Line Color icon opens a flyout menu similar to the Fill Color icon.This menu can be dragged off the Draw toolbar to spawn the Line Colorfloating toolbar (see Figure 5-26).
� The Line Style icon opens a flyout menu with different line styles. Theseinclude thin and thick lines and double-ruled lines (see Figure 5-27).
� The Dash Style icon opens a flyout menu with different dash styles (seeFigure 5-28).
� The Arrow Style icon opens a flyout menu with different arrow stylesfor lines (see Figure 5-29).
Figure 5-28:Dash Style
flyout.
Figure 5-27:Line Style
flyout.
Default line color
Color Scheme colors
Figure 5-26:Line Color
flyout.
101Chapter 5: AutoShape Magic
10_598171 ch05.qxp 10/25/05 7:05 PM Page 101

Applying a line styleFollow these steps to apply or edit a line style:
1. Select the element (shape, drawing, line).
2. Choose a color for the line from the Line Color flyout (see Figure 5-26)on the Draw toolbar.
3. Choose a line style from the Line Style flyout (see Figure 5-27) on theDraw toolbar. Choose More Lines if you want to tweak beyond thepresets available.
4. Choose a dash style (if required) from the Dash Style flyout (seeFigure 5-28) on the Draw toolbar.
5. Choose an arrow style (if required) from Arrow Style flyout (seeFigure 5-29) on the Draw toolbar. You can choose the More Arrowsoption if you want larger or smaller arrowheads.
Follow these guidelines for lines:
� Just because PowerPoint includes a line by default on every AutoShapeyou draw is no reason to live with it. Let’s face it — sometimes lines justget in the way. If that’s the case with some of your presentation visuals,set the line attribute on the Colors and Lines tab of the FormatAutoShape dialog box to No Line.
� Taking this further, you can achieve a great effect by adding a shadow toan AutoShape that has no line. To add a shadow, click the Shadow iconin the Drawing toolbar.
� Sometimes, you can achieve a nice effect by using the same color forboth line and fill. You might want to darken the line color just a little bit.
� Explore patterned lines. They make great frames for images — you candiscover them in the next section.
Patterned linesWhat’s a patterned line? Every element in PowerPoint has a fill and lineattribute — patterned lines are just another line attribute.
Figure 5-29:Arrow Style
flyout.
102 Part II: Achieving Visual Appeal
10_598171 ch05.qxp 10/25/05 7:05 PM Page 102
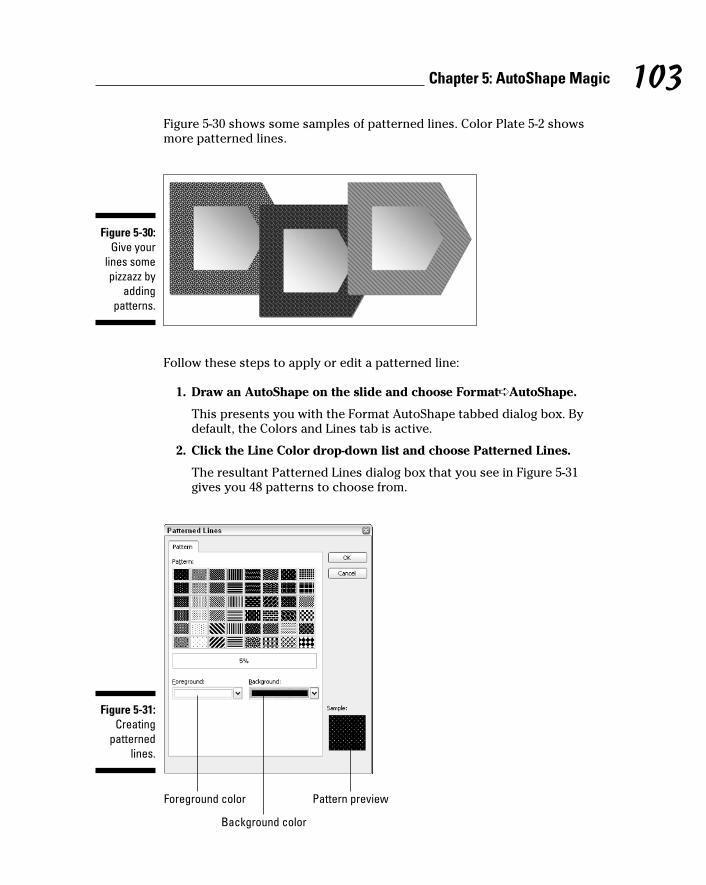
Figure 5-30 shows some samples of patterned lines. Color Plate 5-2 showsmore patterned lines.
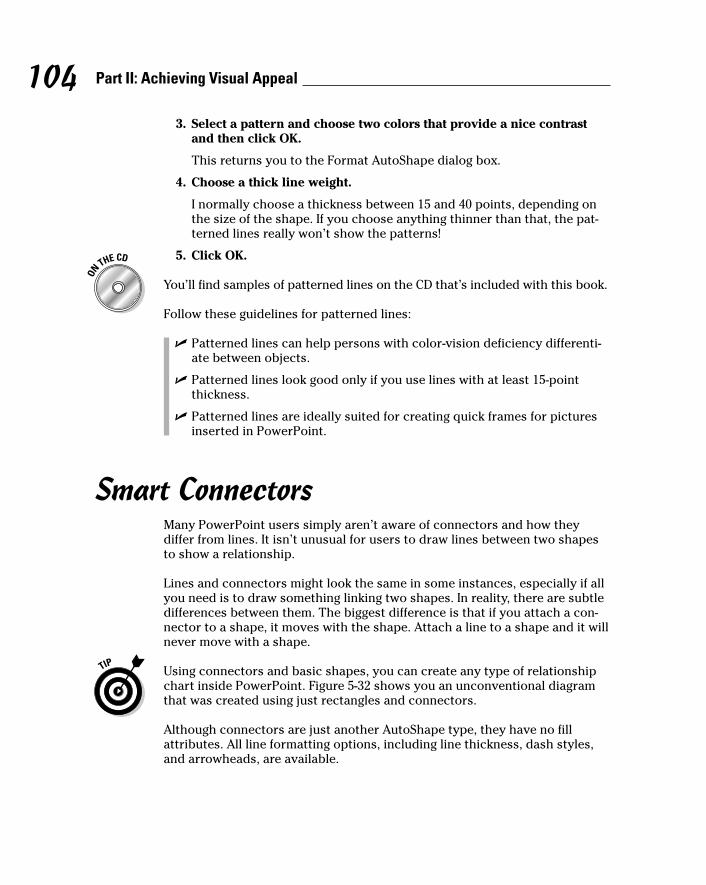
Follow these steps to apply or edit a patterned line:
1. Draw an AutoShape on the slide and choose Format➪AutoShape.
This presents you with the Format AutoShape tabbed dialog box. Bydefault, the Colors and Lines tab is active.
2. Click the Line Color drop-down list and choose Patterned Lines.
The resultant Patterned Lines dialog box that you see in Figure 5-31gives you 48 patterns to choose from.
Pattern previewForeground color
Background color
Figure 5-31:Creating
patternedlines.
Figure 5-30:Give your
lines somepizzazz by
addingpatterns.
103Chapter 5: AutoShape Magic
10_598171 ch05.qxp 10/25/05 7:05 PM Page 103
3. Select a pattern and choose two colors that provide a nice contrastand then click OK.
This returns you to the Format AutoShape dialog box.
4. Choose a thick line weight.
I normally choose a thickness between 15 and 40 points, depending onthe size of the shape. If you choose anything thinner than that, the pat-terned lines really won’t show the patterns!
5. Click OK.
You’ll find samples of patterned lines on the CD that’s included with this book.
Follow these guidelines for patterned lines:
� Patterned lines can help persons with color-vision deficiency differenti-ate between objects.
� Patterned lines look good only if you use lines with at least 15-pointthickness.
� Patterned lines are ideally suited for creating quick frames for picturesinserted in PowerPoint.
Smart ConnectorsMany PowerPoint users simply aren’t aware of connectors and how theydiffer from lines. It isn’t unusual for users to draw lines between two shapesto show a relationship.
Lines and connectors might look the same in some instances, especially if allyou need is to draw something linking two shapes. In reality, there are subtledifferences between them. The biggest difference is that if you attach a con-nector to a shape, it moves with the shape. Attach a line to a shape and it willnever move with a shape.
Using connectors and basic shapes, you can create any type of relationshipchart inside PowerPoint. Figure 5-32 shows you an unconventional diagramthat was created using just rectangles and connectors.
Although connectors are just another AutoShape type, they have no fillattributes. All line formatting options, including line thickness, dash styles,and arrowheads, are available.
104 Part II: Achieving Visual Appeal
10_598171 ch05.qxp 10/25/05 7:05 PM Page 104

Types of connectorsPowerPoint provides three types of connectors:
� Straight connectors
� Elbow connectors
� Curved connectors
Each connector style has three variants:
� No arrowheads on either side
� Arrowhead on one side
� Arrowheads on both sides
Drawing connectorsDraw the connectors only after your shapes are in place. To draw a connec-tor between shapes, follow these steps:
1. Select a connector style from the Connectors flyout menu on theAutoShapes menu in the Drawing toolbar.
The flyout can be dragged out by its handle to spawn a new toolbar.
The minute you move your cursor near a shape, you’ll find several blue,square handles highlighted on the shape, as you can see in Figure 5-33.
2. Click the cursor on one of the handles to determine the start point ofthe connector.
Figure 5-32:Connector
samples.
105Chapter 5: AutoShape Magic
10_598171 ch05.qxp 10/25/05 7:05 PM Page 105

Move toward the shape you want to connect, and the blue squares arehighlighted on that shape.
3. Click any of the blue handles to set the connector’s closing point.
Changing the connector typeTo change the connector type, right-click the connector and choose the newconnector type from the flyout menu, as shown in Figure 5-34.
Figure 5-34:Change
yourConnector
types.
Figure 5-33:You can’t
tell it fromthis black-and-whitebook, but
thosehandles
are blue.
106 Part II: Achieving Visual Appeal
10_598171 ch05.qxp 10/25/05 7:05 PM Page 106

Using the yellow diamondsCurved and elbow connectors, when selected, sport yellow diamonds thatallow you to change the elbow location in elbow connectors and the curva-ture in curve connectors. Straight connectors need no manipulation.
After manipulating the curve and elbow connectors, you might want tochange their shapes back to the original forms. Just right-click the connectorand choose Reroute Connectors from the resultant context menu.
Adding, changing, or reversing arrowheadsYou might want to add or remove the arrowheads from a connector. Youmight also want to reverse the arrowheads in a connector.
Follow these steps to add, change, or reverse arrowheads:
1. Select the connector that you want to edit and chooseFormat➪AutoShape (or just double-click the connector).
This summons the Format AutoShape dialog box.
2. In the Colors and Lines tab, the bottom third of the dialog box is con-cerned exclusively with arrowheads.
You can set the begin and end styles for the arrowheads and also makethe arrowheads smaller or larger.
3. When you’re done, click OK.
There are many ways to get to the Format AutoShape dialog box, but the easi-est route is to double-click any AutoShape (including connectors).
Moving connectors and shapesFollow these guidelines:
� When you move a shape with an attached connector, the connectormoves with the shape and automatically becomes longer or shorter toaccommodate the distance between shapes.
� Connector ends attached to a shape have a red circle handle. Connectorends unattached to a shape have a green circle handle.
� To move a connector, first select the connector and then drag one of theends to another shape or leave it unconnected.
Expanding your chart horizonsYou can combine shapes and connectors to create any sort of chart inPowerPoint. For most data-based charts, you can use PowerPoint’s owncharts. However, for other types of charts, the shape-and-connectorapproach works very well.
107Chapter 5: AutoShape Magic
10_598171 ch05.qxp 10/25/05 7:05 PM Page 107
Some examples of this approach include
� Relationship charts
� Mind maps
� Flowcharts
� Callouts
� Concept charts
Connectors: Design guidelinesFollow these guidelines to create better connectors:
� Experiment with connector formatting options — especially line thick-ness and color. Dark-color connectors work well over light backgroundcolors, and vice versa.
� Use a consistent line color and thickness for the shapes and connec-tors on the same slide to maintain a unified design look.
� Animate connectors in sequence with the shapes to create a sequen-tial chart build.
More AutoShape IdeasAlmost everything on a PowerPoint slide has something to do withAutoShapes. Even then, some ideas are better than others. Here are some ofmy favorite AutoShape ideas.
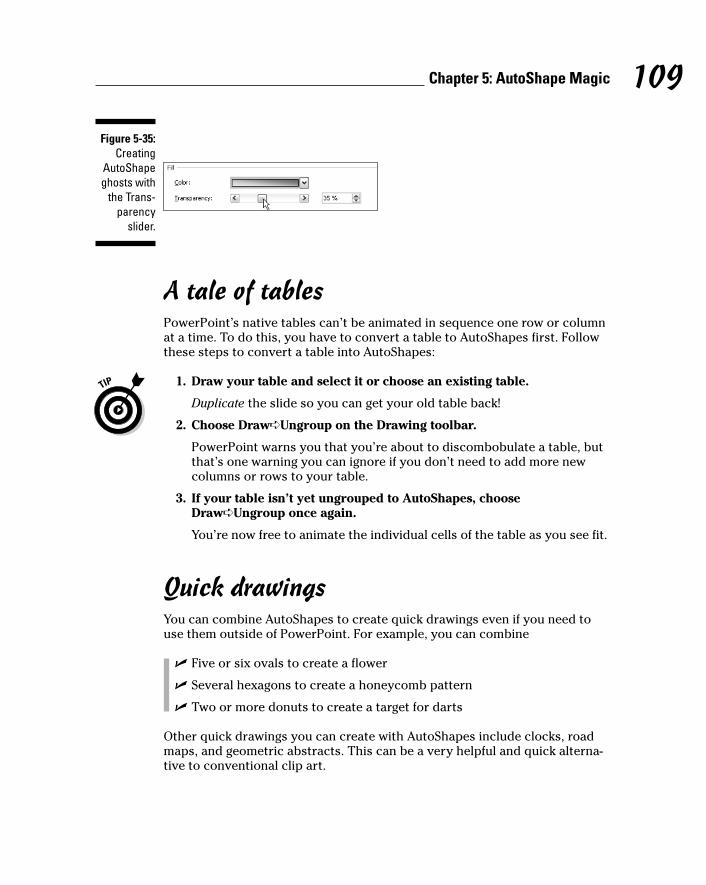
Transparent fillsThis only works with PowerPoint 2002 and 2003.
All fill styles can be made transparent to varying degrees. To change thetransparency value:
1. Double-click the AutoShape to open the Format AutoShape dialog box.
2. In the Colors and Lines tab, drag the Transparency slider to show anyvalue between 0 and 100 (see Figure 5-35).
108 Part II: Achieving Visual Appeal
10_598171 ch05.qxp 10/25/05 7:05 PM Page 108
A tale of tablesPowerPoint’s native tables can’t be animated in sequence one row or columnat a time. To do this, you have to convert a table to AutoShapes first. Followthese steps to convert a table into AutoShapes:
1. Draw your table and select it or choose an existing table.
Duplicate the slide so you can get your old table back!
2. Choose Draw➪Ungroup on the Drawing toolbar.
PowerPoint warns you that you’re about to discombobulate a table, butthat’s one warning you can ignore if you don’t need to add more newcolumns or rows to your table.
3. If your table isn’t yet ungrouped to AutoShapes, chooseDraw➪Ungroup once again.
You’re now free to animate the individual cells of the table as you see fit.
Quick drawingsYou can combine AutoShapes to create quick drawings even if you need touse them outside of PowerPoint. For example, you can combine
� Five or six ovals to create a flower
� Several hexagons to create a honeycomb pattern
� Two or more donuts to create a target for darts
Other quick drawings you can create with AutoShapes include clocks, roadmaps, and geometric abstracts. This can be a very helpful and quick alterna-tive to conventional clip art.
Figure 5-35:Creating
AutoShapeghosts with
the Trans-parency
slider.
109Chapter 5: AutoShape Magic
10_598171 ch05.qxp 10/25/05 7:05 PM Page 109
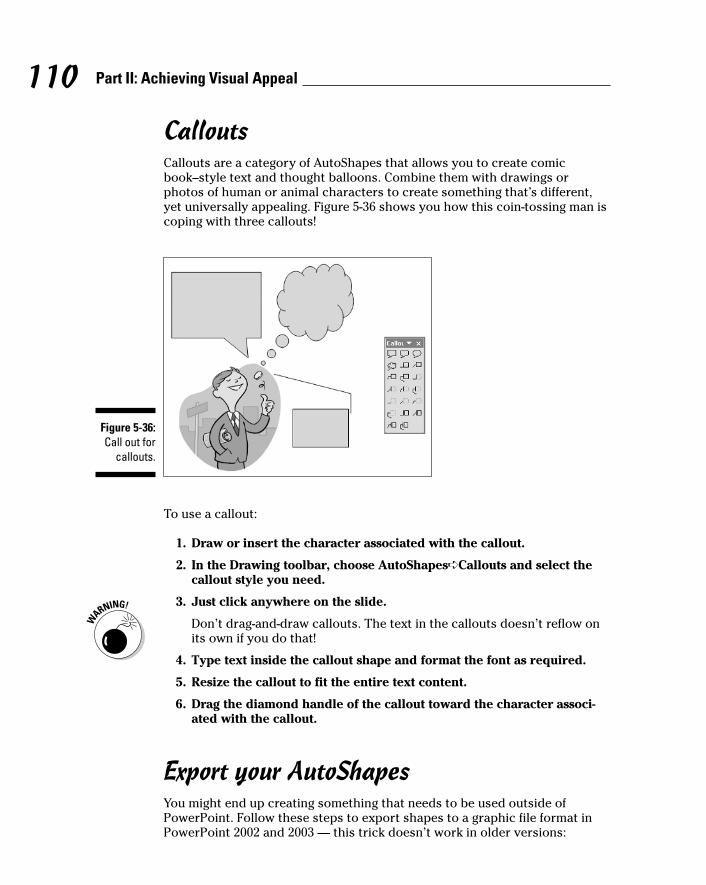
CalloutsCallouts are a category of AutoShapes that allows you to create comicbook–style text and thought balloons. Combine them with drawings orphotos of human or animal characters to create something that’s different,yet universally appealing. Figure 5-36 shows you how this coin-tossing man iscoping with three callouts!
To use a callout:
1. Draw or insert the character associated with the callout.
2. In the Drawing toolbar, choose AutoShapes➪Callouts and select thecallout style you need.
3. Just click anywhere on the slide.
Don’t drag-and-draw callouts. The text in the callouts doesn’t reflow onits own if you do that!
4. Type text inside the callout shape and format the font as required.
5. Resize the callout to fit the entire text content.
6. Drag the diamond handle of the callout toward the character associ-ated with the callout.
Export your AutoShapesYou might end up creating something that needs to be used outside ofPowerPoint. Follow these steps to export shapes to a graphic file format inPowerPoint 2002 and 2003 — this trick doesn’t work in older versions:
Figure 5-36:Call out for
callouts.
110 Part II: Achieving Visual Appeal
10_598171 ch05.qxp 10/25/05 7:05 PM Page 110

1. Select all the shapes and then group them by choosing Draw➪Groupon the Drawing toolbar.
2. Right-click the graphic and choose Save Picture As.
3. In the Save As dialog box, choose the graphic format you need fromthe Save as Type drop-down list.
4 Type a name for your graphic in the File Name text box and then clickSave.
If you’re using PowerPoint 2000, you can simply select your group of shapes,copy it (Ctrl+C), and then paste it (Ctrl+V) into another Microsoft Officeapplication.
While this regular copy-and-paste routine works well most of the time,designers often need to move their compositions to high-end drawing andpage-layout applications. To export your graphic to an industry standardformat, such as EPS, you need to have Adobe Acrobat (the full version, notjust the Reader) and Adobe Illustrator installed on your system. This trickworks in all versions of PowerPoint:
1. Select your shapes and choose Draw➪Group in the Drawing toolbar.
2. Print the slide(s) to PDF.
Print your slide containing the AutoShape to a PDF document by usingthe Acrobat printer driver.
Make sure that each slide that contains your composition is saved as aseparate PDF document. All versions of Adobe Illustrator can’t importmultipage PDFs.
3. Edit outside PowerPoint.
Open the single-page PDF inside Adobe Illustrator. Edit as requiredbefore you save to an EPS graphic. EPS graphics can be used in page-layout programs like Adobe InDesign and Quark XPress.
Beyond AutoShapesIf you love the AutoShape concept, you might want to explore Microsoft Visioand SmartDraw. Both applications use the shape metaphor to create dia-grams. Both Visio and SmartDraw work very well with PowerPoint.
You’ll find an evaluation version of SmartDraw on the CD attached to thisbook. I’ve often used SmartDraw to create quick charts, timelines, and treediagrams. These charts can then be used within PowerPoint.
111Chapter 5: AutoShape Magic
10_598171 ch05.qxp 10/25/05 7:05 PM Page 111

112 Part II: Achieving Visual Appeal
10_598171 ch05.qxp 10/25/05 7:05 PM Page 112