ci/cd pipeline for microsoft windows on the aws cloud · ci/cd pipeline for microsoft windows on...
TRANSCRIPT

CI/CD Pipeline for Microsoft Windows on the AWS Cloud
Using Jenkins, Microsoft .NET, MSBuild, AWS CodeDeploy, and AWS CodePipeline
Quick Start Reference Deployment
Tom Fuller and Santiago Cardenas
Solutions Architects, Amazon Web Services
November 2016
Last updated: August 2017 (revisions)

Amazon Web Services – Microsoft .NET CI/CD Pipeline on the AWS Cloud August 2017
Page 2 of 32
Contents
About This Guide ................................................................................................................... 3
Quick Links ............................................................................................................................ 3
About Quick Starts ................................................................................................................. 3
Overview .................................................................................................................................... 4
Microsoft .NET CI/CD Pipeline on AWS ............................................................................... 4
Cost and Licenses ................................................................................................................... 5
AWS Services.......................................................................................................................... 5
Third-Party Libraries and Services ........................................................................................ 6
Architecture ...............................................................................................................................8
Best Practices ......................................................................................................................... 9
Design Considerations ............................................................................................................. 11
Choosing a CI Tool ................................................................................................................ 11
Using Self-Signed Certificates ............................................................................................. 12
Deployment Scenarios............................................................................................................. 13
Scenario 1: Deploy Sample App ........................................................................................... 13
Scenario 2: Use Your Own Code Package ............................................................................ 16
Scenario 3: Use Multiple AWS CodeDeploy Servers ........................................................... 16
Deployment Steps ................................................................................................................... 17
Step 1. Prepare an AWS Account ......................................................................................... 18
Step 2. Launch the .NET CI/CD Pipeline Stack .................................................................. 21
Step 3. Validate the Pipeline Run ........................................................................................ 25
Step 4. Deploy a New Release ............................................................................................. 28
Step 5. Clean Up ................................................................................................................... 29
Troubleshooting ...................................................................................................................... 29
Additional Resources .............................................................................................................. 31
GitHub Repository .................................................................................................................. 32
Document Revisions................................................................................................................ 32

Amazon Web Services – Microsoft .NET CI/CD Pipeline on the AWS Cloud August 2017
Page 3 of 32
About This Guide This Quick Start reference deployment guide discusses architectural considerations and
configuration steps for deploying a Microsoft .NET development pipeline on the Amazon
Web Services (AWS) Cloud. It also provides links for viewing and launching AWS
CloudFormation templates that automate the deployment.
The guide is for IT infrastructure architects, administrators, .NET developers, and DevOps
professionals who are planning to implement or extend their Microsoft .NET workloads on
the AWS Cloud.
Quick Links The links in this section are for your convenience. Before you launch the Quick Start, please
review the architecture, configuration, network security, and other considerations discussed
in this guide.
If you have an AWS account, and you’re already familiar with AWS services and
Microsoft .NET with MSBuild, you can launch the Quick Start to build the architecture
shown in Figure 1 in a new virtual private cloud (VPC). The deployment takes
approximately 30 minutes. If you’re new to AWS or to Microsoft .NET with MSBuild,
please review the implementation details and follow the step-by-step instructions
provided later in this guide.
If you want to take a look under the hood, you can view the AWS CloudFormation
template that automates the deployment.
About Quick Starts Quick Starts are automated reference deployments for key workloads on the AWS Cloud.
Each Quick Start launches, configures, and runs the AWS compute, network, storage, and
other services required to deploy a specific workload on AWS, using AWS best practices for
security and availability.
View template
Launch Quick Start

Amazon Web Services – Microsoft .NET CI/CD Pipeline on the AWS Cloud August 2017
Page 4 of 32
Overview
Microsoft .NET CI/CD Pipeline on AWS The Microsoft .NET Framework is a popular platform for developing applications that run
on the Microsoft Windows platform. .NET supports programming languages such as Visual
Basic, C++, and C#. .NET developers typically write software on their personal computers
before shipping final software to server environments for testing or production use.
The AWS Cloud makes it easy for developers to code, build, and deploy .NET solutions.
AWS has a .NET SDK that simplifies the work for .NET developers who want to use AWS
services. AWS also has a continuous integration (CI) orchestration service called AWS
CodePipeline, and multiple deployment options to help developers quickly deploy and
manage their .NET solutions. AWS Elastic Beanstalk and AWS CodeDeploy provide an easy
model for deploying and versioning .NET applications.
All of these services are built on top of the core AWS networking, storage, and compute
services that allow developers to manage their .NET application lifecycle securely, reliably,
and efficiently. These services are all API-driven, which provides a significant advantage for
developers who are looking to automate their development pipeline on AWS. This Quick
Start enables you to use standard Windows technologies like MSBuild, Internet
Information Services (IIS), Windows PowerShell, and .NET in combination with an open
source CI tool (Jenkins) and AWS services such as Amazon Elastic Compute Cloud
(Amazon EC2), Amazon Simple Storage Service (Amazon S3), Elastic Load Balancing, AWS
CodePipeline, and AWS CodeDeploy to fully automate a continuous integration /
continuous delivery (CI/CD) pipeline.
You can use this Quick Start for two purposes:
To deploy a core set of services on the AWS Cloud to integrate your own code push,
build, and deploy pipeline. This might involve integrating your source control
environment to feed a code package into Amazon S3, and then using AWS Code Pipeline
to orchestrate your CI pipeline.
To automate an end-to-end example CI release, which would download, build, and push
a sample application code package to Amazon S3, and then deploy it to one or multiple
AWS CodeDeploy servers that are running IIS. This sample application uses a SQL
Server database in Amazon Relational Database Service (Amazon RDS), so it represents
a simple, two-tier ASP.NET web application written in C#. You can make changes to the
.NET source files and push a new package of the application to the S3 bucket to see how
you would run multiple releases through the pipeline.

Amazon Web Services – Microsoft .NET CI/CD Pipeline on the AWS Cloud August 2017
Page 5 of 32
Note The sample application is written in .NET, but the pipeline was designed to
support any code package that can be built by MSBuild and run on a Windows server.
Cost and Licenses You are responsible for the cost of the AWS services used while running this Quick Start
reference deployment. There is no additional cost for using the Quick Start. Prices are
subject to change. See the pricing pages for each AWS service you will be using in this Quick
Start for full details.
This Quick Start launches the Amazon Machine Image (AMI) for Windows Server 2012 R2
and includes the license for the Windows operating system. The rest of the software
deployed by the Quick Start is available as open source under the MIT license.
AWS Services The core AWS components used by this Quick Start include the following AWS services. (If
you are new to AWS, see Getting Started with AWS.)
Amazon VPC – The Amazon Virtual Private Cloud (Amazon VPC) service lets you
provision a private, isolated section of the AWS Cloud where you can launch AWS
services and other resources in a virtual network that you define. You have complete
control over your virtual networking environment, including selection of your own IP
address range, creation of subnets, and configuration of route tables and network
gateways.
Amazon EC2 – The Amazon Elastic Compute Cloud (Amazon EC2) service enables you
to launch virtual machine instances with a variety of operating systems. You can choose
from existing Amazon Machine Images (AMIs) or import your own virtual machine
images.
Amazon EBS – Amazon Elastic Block Store (Amazon EBS) provides persistent block-
level storage volumes for use with Amazon EC2 instances in the AWS Cloud. Each
Amazon EBS volume is automatically replicated within its Availability Zone to protect
you from component failure, offering high availability and durability. Amazon EBS
volumes provide the consistent and low-latency performance needed to run your
workloads.
ELB – Elastic Load Balancing automatically distributes incoming application traffic
across multiple Amazon EC2 instances. It enables you to achieve fault tolerance in your
applications, seamlessly providing the required amount of load balancing capacity
needed to route application traffic.

Amazon Web Services – Microsoft .NET CI/CD Pipeline on the AWS Cloud August 2017
Page 6 of 32
Amazon S3 – Amazon Simple Storage Service (Amazon S3) provides developers and IT
teams with secure, durable, highly-scalable cloud storage. Amazon S3 offers easy-to-use
object storage, and includes a simple web interface so you can store and retrieve any
amount of data from anywhere on the web. With Amazon S3, you pay only for the
storage you actually use. There is no minimum fee and no setup cost.
AWS CodePipeline – AWS CodePipeline is a continuous delivery service for fast and
reliable application updates. AWS CodePipeline builds, tests, and deploys your code
every time there is a code change, based on the release process models you define. You
can rapidly and reliably deliver features and updates. You can easily build an end-to-end
solution by using our pre-built plugins for popular third-party services like GitHub, or
by integrating your own custom plugins into any stage of your release process. With
AWS CodePipeline, you pay only for what you use. There are no upfront fees or long-
term commitments.
AWS CodeDeploy – AWS CodeDeploy automates code deployments to any instance,
including Amazon EC2 instances and instances running on premises. AWS CodeDeploy
makes it easier for you to rapidly release new features, helps you avoid downtime during
application deployment, and handles the complexity of updating your applications. You
can use AWS CodeDeploy to automate your software deployments, and to eliminate the
need for error-prone manual operations. The service scales with your infrastructure so
you can easily deploy to one instance or to thousands of instances.
Amazon RDS for SQL Server – Amazon Relational Database Service (Amazon RDS) for
Microsoft SQL Server makes it easy to set up, operate, and scale SQL Server
deployments in the cloud. With Amazon RDS, you can deploy multiple versions and
editions of SQL Server in minutes with cost-efficient and resizable compute capacity.
Amazon RDS supports SQL Server 2008 R2, 2012, and 2014 and the Express, Web,
Standard, and Enterprise editions. (2008 R2 and 2012 are available only for the
Enterprise edition.) Amazon RDS frees you up to focus on application development by
managing time-consuming database administration tasks, including provisioning,
backups, software patching, monitoring, and hardware scaling.
Third-Party Libraries and Services This Quick Start deploys the following third-party open source components to deliver a
CI/CD pipeline on the AWS Cloud.
MSBuild – The Microsoft Build Engine (MSBuild) is a system for building Windows-
based applications. It provides an XML project file that configures the components and

Amazon Web Services – Microsoft .NET CI/CD Pipeline on the AWS Cloud August 2017
Page 7 of 32
tasks required to orchestrate and build your applications. MSBuild is the build platform
for Visual Studio, and also supports other software development environments.
Jenkins – Jenkins is an open source automation server that provides hundreds of
plugins to support building, deploying, and automating any project. This Quick Start
uses the following Jenkins plugins:
– MSBuild Plugin – Enables you to use MSBuild to build .NET projects on a Jenkins
server.
– AWS CodePipeline Plugin – Provides a pre-built software configuration management
(SCM) step, and a post-build (publisher) step for your Jenkins project. It polls for
AWS CodePipeline jobs and downloads input artifacts. When a build succeeds, this
plugin compresses the build artifacts and uploads them to AWS CodePipeline.
– Groovy Plugin – Adds the ability to directly execute Groovy code.
Bouncy Castle Crypto APIs – These libraries are essentially C# wrappers for the Win32
Cryptography APIs. They provide an easy way to convert native Windows PFX
certificates to the PEM format required for server certificates used by Elastic Load
Balancing HTTPS endpoints.

Amazon Web Services – Microsoft .NET CI/CD Pipeline on the AWS Cloud August 2017
Page 8 of 32
Architecture Deploying this Quick Start with the default parameters builds the following Microsoft
.NET CI/CD pipeline in the AWS Cloud.
Figure 1: Microsoft .NET CI/CD pipeline architecture on AWS
The AWS CloudFormation template sets up the virtual network and creates the networking
resources needed for the Microsoft .NET CI/CD pipeline deployment. It also deploys all the
Windows Server instances necessary to automatically build and deploy a .NET web
application using AWS CodeDeploy.
The highly available AWS architecture spans two Availability Zones.
Each Availability Zone includes a VPC with two subnets, and supports remote
administration.

Amazon Web Services – Microsoft .NET CI/CD Pipeline on the AWS Cloud August 2017
Page 9 of 32
The subnets provide a public (DMZ) address space and a private address space.
The public subnets include NAT gateways and Remote Desktop (RD) gateways in an
Auto Scaling group for outbound internet access.
The private subnet in the first Availability Zone hosts an MSBuild server with Jenkins
installed, and a Windows Server instance with IIS and AWS CodeDeploy installed. The
servers are bootstrapped from scratch using the base Amazon Machine Image (AMI) for
Microsoft Windows Server 2012 R2.
Optionally, an Amazon RDS for SQL Server database instance is deployed in the private
subnet to support the sample application. This is deployed only if you keep the default
true setting for the Deploy the demo application (DemoAppInclude) parameter,
which controls the inclusion of the sample application.
Optionally, a second AWS CodeDeploy server is created in a different Availability Zone
from the first AWS CodeDeploy server, to allow you to test a load-balanced
configuration in your pipeline. This configuration also enables you to validate rolling
upgrade deployments through AWS CodeDeploy.
Best Practices The architecture built by this Quick Start supports AWS best practices for high availability
and security:
Only one build server is deployed in a single Availability Zone because the server can
be rebuilt from scratch at any point. For a more robust deployment of Jenkins, you
would use both Availability Zones and a distributed node configuration, as described
on the Jenkins website.
The Windows Server instances with AWS CodeDeploy can optionally be deployed in
both subnets with an ELB load balancer routing traffic to the instances. Keeping the
web servers on the private subnet reduces the scope of access to those servers
through the use of security group rules.
The Jenkins server has been customized to create a user name and password based
on AWS CloudFormation parameters. You can deploy the CI pipeline multiple times
and allow specific users to access their application's build jobs. You can extend the
deployment to associate Jenkins with an LDAP server and use specific groups of
users to apply. For additional details, visit the Jenkins website.
The Quick Start automatically generates self-signed certificates, which are uploaded
as IAM server certificates and then used by the ELB endpoints to ensure that user

Amazon Web Services – Microsoft .NET CI/CD Pipeline on the AWS Cloud August 2017
Page 10 of 32
names and passwords entered on forms only travel across the internet by using an
encrypted channel (HTTPS). This is fine for CI (test) deployments, but if you're using
the Quick Start in a production deployment, we strongly recommend that you install
a certificate that is signed by a trusted Certificate Authority.
The AWS CloudFormation template configures all the security group rules and IAM
policies to follow the principle of least access. Only the API calls and resources
needed are granted access to the instances.
The SQL Server instance running in Amazon RDS has not been configured for Multi-
AZ to control costs. The sample application deployed by the Quick Start is for
demonstration purposes only. If you want to deploy a production application, we
recommend that you configure the SQL Server database for Multi-AZ.
The MSBuild project automates the process of pre-compiling the ASP.NET web
application to avoid deploying any source code to the servers.
The MSBuild server with Jenkins doesn’t have Visual Studio installed to reduce the
possibility that external libraries or out-of-band changes could be made to the
projects on the build server.
Remote access is granted to all the servers through Remote Desktop Gateway as a
matter of convenience. It is not necessary to get on these servers for anything other
than troubleshooting during initial setup.
The sample application has been kept simple to illustrate the application flow end to
end. It is not intended to be a production application and would require additional
work to securely deploy connection strings instead of using simple web form input.
The S3 bucket policy restricts any operations on this bucket to a secure channel and
enforces encryption at rest using a key from the AWS Key Management Service
(KMS). If you are considering this pipeline for integration with your on-premises
source control system, the bucket policy and encryption help meet security best
practices.

Amazon Web Services – Microsoft .NET CI/CD Pipeline on the AWS Cloud August 2017
Page 11 of 32
Design Considerations
Choosing a CI Tool In this Quick Start we are using a Jenkins server to integrate AWS CodePipeline and
Microsoft MSBuild. Jenkins has a huge ecosystem of plug-ins and favorable open source
licensing, which help enable you to get up and running quickly with no upfront costs
beyond the AWS services. Jenkins also has a simple lightweight model for deploying a
standalone CI build server that has fault tolerance and can still be secured. This Quick Start
deploys a Jenkins server for every application instead of deploying a central build server
with multiple projects fighting for resource time. Possible scalability and robustness
enhancements that you could optionally implement include:
Jenkins supports a connection to an LDAP repository. However, for simplicity, the
Quick Start uses the local user repository to create a Jenkins user for remote access. We
encourage you to set up additional users and implement any access control groups
required by your organization.
Jenkins supports an external data store that can be made highly available. This Quick
Start uses the local data store on top of Amazon EBS. This data store is external to the
EC2 instance and provides durability at the disk level with mirroring.
If you’d like to have backups to restore the Jenkins data to a particular point in time or
to move the data from one environment to another, you should consider Amazon EBS
snapshots, which you can use for migration.
Jenkins includes a distributed build configuration option, but this Quick Start assumes
that the build server is ephemeral and can be restored from the raw AMI at any point,
with a data import to restore data if necessary.
Note The data import option is available only if you configure Amazon EBS
snapshots.
A Jenkins multi-server configuration would be expensive for a single application but
might make sense if you decide to scale and manage multiple applications from a single
Jenkins cluster.
You can version the Jenkins environment in place by running updates, or you can
redeploy the environment after updating the AWS CloudFormation template to the
latest versions of all the components.

Amazon Web Services – Microsoft .NET CI/CD Pipeline on the AWS Cloud August 2017
Page 12 of 32
Using Self-Signed Certificates In order to support an HTTPS endpoint via the ELB load balancer, this Quick Start
generates a server certificate on the build server and uploads it to the user’s account. Self-
signed certificates are very useful for development and testing but do have negative side
effects when browsers identify them as untrusted. For this reason, when you display the
Jenkins dashboard or run the sample application after deployment, the major browsers will
show different types of errors or require you to accept an exception record.
A number of techniques are available for generating self-signed certificates; however, on the
Windows platform, there is some friction converting to the PEM format supported by the
AWS CLI. The most common approach to convert to PEM on Windows is to use tools from
OpenSSL, but we decided not to include these tools in the Quick Start for licensing reasons.
The Bouncy Castle libraries provide easy-to-use C# APIs that can manage all certificate key
generation. The Quick Start includes a script that will use those libraries to generate a self-
signed certificate and upload a Server Certificate to your account.
The Quick Start uses HTTPS for the Jenkins dashboard and sample application websites
because they both require username/password input on the public internet. If you want to move this stack into a production-ready implementation and avoid browser warnings, you
must change the ELB HTTPS endpoints to reference a server certificate that has a trusted
root certificate authority. For details, see the Elastic Load Balancing documentation.
Amazon Web Services – Microsoft .NET CI/CD Pipeline on the AWS Cloud August 2017
Page 13 of 32
Deployment Scenarios
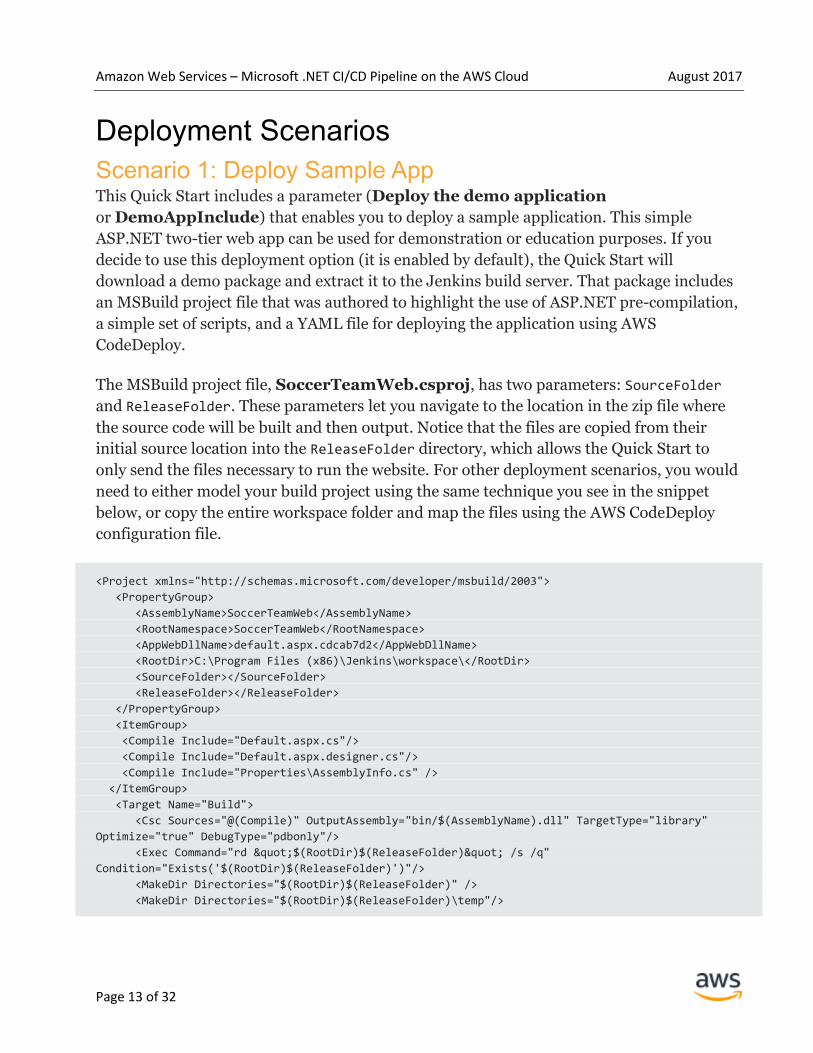
Scenario 1: Deploy Sample App This Quick Start includes a parameter (Deploy the demo application
or DemoAppInclude) that enables you to deploy a sample application. This simple
ASP.NET two-tier web app can be used for demonstration or education purposes. If you
decide to use this deployment option (it is enabled by default), the Quick Start will
download a demo package and extract it to the Jenkins build server. That package includes
an MSBuild project file that was authored to highlight the use of ASP.NET pre-compilation,
a simple set of scripts, and a YAML file for deploying the application using AWS
CodeDeploy.
The MSBuild project file, SoccerTeamWeb.csproj, has two parameters: SourceFolder
and ReleaseFolder. These parameters let you navigate to the location in the zip file where
the source code will be built and then output. Notice that the files are copied from their
initial source location into the ReleaseFolder directory, which allows the Quick Start to
only send the files necessary to run the website. For other deployment scenarios, you would
need to either model your build project using the same technique you see in the snippet
below, or copy the entire workspace folder and map the files using the AWS CodeDeploy
configuration file.
<Project xmlns="http://schemas.microsoft.com/developer/msbuild/2003">
<PropertyGroup>
<AssemblyName>SoccerTeamWeb</AssemblyName>
<RootNamespace>SoccerTeamWeb</RootNamespace>
<AppWebDllName>default.aspx.cdcab7d2</AppWebDllName>
<RootDir>C:\Program Files (x86)\Jenkins\workspace\</RootDir>
<SourceFolder></SourceFolder>
<ReleaseFolder></ReleaseFolder>
</PropertyGroup>
<ItemGroup>
<Compile Include="Default.aspx.cs"/>
<Compile Include="Default.aspx.designer.cs"/>
<Compile Include="Properties\AssemblyInfo.cs" />
</ItemGroup>
<Target Name="Build">
<Csc Sources="@(Compile)" OutputAssembly="bin/$(AssemblyName).dll" TargetType="library"
Optimize="true" DebugType="pdbonly"/>
<Exec Command="rd "$(RootDir)$(ReleaseFolder)" /s /q"
Condition="Exists('$(RootDir)$(ReleaseFolder)')"/>
<MakeDir Directories="$(RootDir)$(ReleaseFolder)" />
<MakeDir Directories="$(RootDir)$(ReleaseFolder)\temp"/>

Amazon Web Services – Microsoft .NET CI/CD Pipeline on the AWS Cloud August 2017
Page 14 of 32
<AspNetCompiler VirtualPath="/" PhysicalPath="$(RootDir)$(SourceFolder)"
TargetPath="$(RootDir)$(ReleaseFolder)\temp" Force="true" Debug="false" Clean="true"
FixedNames="true" Updateable="false" />
<Copy SourceFiles="$(RootDir)$(ReleaseFolder)\temp\bin\$(AssemblyName).dll"
DestinationFolder="$(RootDir)$(ReleaseFolder)"/>
<Copy SourceFiles="$(RootDir)$(ReleaseFolder)\temp\bin\$(AppWebDllName).compiled"
DestinationFolder="$(RootDir)$(ReleaseFolder)"/>
<Copy SourceFiles="$(RootDir)$(ReleaseFolder)\temp\bin\App_Web_$(AppWebDllName).dll"
DestinationFolder="$(RootDir)$(ReleaseFolder)"/>
<MakeDir Directories="$(RootDir)$(ReleaseFolder)\Scripts"/>
<Copy SourceFiles="$(RootDir)$(SourceFolder)\appspec.yml"
DestinationFolder="$(RootDir)$(ReleaseFolder)"/>
<Copy SourceFiles="$(RootDir)$(ReleaseFolder)\temp\PrecompiledApp.config"
DestinationFolder="$(RootDir)$(ReleaseFolder)"/>
<Copy SourceFiles="$(RootDir)$(ReleaseFolder)\temp\Default.aspx"
DestinationFolder="$(RootDir)$(ReleaseFolder)"/>
<Copy SourceFiles="$(RootDir)$(ReleaseFolder)\temp\star-icon.png"
DestinationFolder="$(RootDir)$(ReleaseFolder)"/>
<Copy SourceFiles="$(RootDir)$(ReleaseFolder)\temp\Web.config"
DestinationFolder="$(RootDir)$(ReleaseFolder)"/>
<Copy SourceFiles="$(RootDir)$(ReleaseFolder)\temp\installwebsite.bat"
DestinationFolder="$(RootDir)$(ReleaseFolder)\Scripts"/>
<Copy SourceFiles="$(RootDir)$(ReleaseFolder)\temp\installwebsite.ps1"
DestinationFolder="$(RootDir)$(ReleaseFolder)\Scripts"/>
<Copy SourceFiles="$(RootDir)$(ReleaseFolder)\temp\deletewebsite.bat"
DestinationFolder="$(RootDir)$(ReleaseFolder)\Scripts"/>
<Copy SourceFiles="$(RootDir)$(ReleaseFolder)\temp\deletewebsite.ps1"
DestinationFolder="$(RootDir)$(ReleaseFolder)\Scripts"/>
<Exec Command="rd "$(RootDir)$(ReleaseFolder)\temp" /s /q"/>
</Target>
</Project>
The appspec.yml file has all the hooks that AWS CodeDeploy needs to deploy the sample
application and recreate the IIS website on Windows Server.
version: 0.0 os: windows files: - source: \Default.aspx destination: c:\inetpub\wwwroot\SoccerTeamWeb - source: \star-icon.png destination: c:\inetpub\wwwroot\SoccerTeamWeb - source: \PrecompiledApp.config destination: c:\inetpub\wwwroot\SoccerTeamWeb - source: \Web.config destination: c:\inetpub\wwwroot\SoccerTeamWeb - source: \SoccerTeamWeb.dll destination: c:\inetpub\wwwroot\SoccerTeamWeb\bin - source: \App_Web_default.aspx.cdcab7d2.dll

Amazon Web Services – Microsoft .NET CI/CD Pipeline on the AWS Cloud August 2017
Page 15 of 32
destination: c:\inetpub\wwwroot\SoccerTeamWeb\bin - source: \default.aspx.cdcab7d2.compiled destination: c:\inetpub\wwwroot\SoccerTeamWeb\bin - source: \Scripts\deletewebsite.ps1 destination: c:\temp - source: \Scripts\installwebsite.ps1 destination: c:\temp hooks: BeforeInstall: - location: \Scripts\deletewebsite.bat timeout: 180 AfterInstall: - location: \Scripts\installwebsite.bat timeout: 180
The Default.aspx.cs file includes the server-side logic for creating and initializing the
database, seeding the SQL Server on RDS database with sample data, and building an initial
view of the data. After initial deployment you can update the source package to redeploy a
new version of the application. For example, you could modify the logic that determines
who gets added to the all-star team based on their number of goals.
private void WriteContent(SqlConnection Conn, string databaseName)
{
try
{
string strSQL = string.Format("SELECT Name,Age,Goals,Position from
{0}.dbo.Players",databaseName);
SqlCommand DBCmd = new SqlCommand(strSQL, Conn);
SqlDataReader myDataReader;
myDataReader = DBCmd.ExecuteReader();
Response.Write("<table cellpadding='5'><tr><td align='center'><u>All Star</u></td><td
align='center'><u>Name</u></td><td align='center'><u>Age</u></td><td
align='center'><u>Goals</u></td><td align='center'><u>Position</u></td></tr>");
while (myDataReader.Read())
{
Response.Write("<tr>");
Response.Write("<td align='center'>");
if ((int)myDataReader["Goals"] >= 10)
{
Response.Write("<img height='25' width='25' src='/star-icon.png' />");
}
Response.Write("</td>");
Response.Write("<td align='center'>" + myDataReader["Name"].ToString() + "</td>");
Response.Write("<td align='center'>" + myDataReader["Age"].ToString() + "</td>");
Response.Write("<td align='center'>" + myDataReader["Goals"].ToString() + "</td>");
Response.Write("<td align='center'>" + myDataReader["Position"].ToString() + "</td>");
Response.Write("</tr>");
}

Amazon Web Services – Microsoft .NET CI/CD Pipeline on the AWS Cloud August 2017
Page 16 of 32
Response.Write("</table><br/><br/>");
myDataReader.Close();
}
catch (Exception ex)
{
Response.Write(ex.Message);
}
}
Scenario 2: Use Your Own Code Package If you decide not to deploy the sample application included with this Quick Start by setting
the Deploy the demo application (DemoAppInclude) parameter to false, the Quick
Start doesn’t deploy the following resources:
Amazon RDS for SQL Server Web edition database instance
Amazon RDS DB subnet group
Amazon RDS VPC security group
The Quick Start also changes the type of AWS CodePipeline that is built. If you decide to
deploy without the sample application, the pipeline is configured to look for your own
source code in the generated S3 bucket, using the name of the code package you provided in
the AWS CloudFormation template. The source code you upload must meet the
requirements of MSBuild and include configuration to deploy using AWS CodeDeploy on
Windows Servers in Amazon EC2. A full explanation of the parameters and their
descriptions are provided in the deployment steps section of this guide.
Scenario 3: Use Multiple AWS CodeDeploy Servers AWS CodeDeploy can publish your application to any number of servers based on tags or
based on an Auto Scaling group. In this Quick Start, you have the option to deploy to either
a single server or to two servers (one server in each Availability Zone). This enables you to
do a test with a load-balanced environment or with rolling upgrades. If you want to scale
beyond two servers, you can modify the template to use Auto Scaling groups instead of
individual instances.

Amazon Web Services – Microsoft .NET CI/CD Pipeline on the AWS Cloud August 2017
Page 17 of 32
Deployment Steps The procedure for deploying the .NET CI/CD pipeline architecture on AWS consists of the
following steps. For detailed instructions, follow the links for each step.
Step 1. Prepare an AWS account
Sign up for an AWS account, if you don’t already have one.
Choose the region where you want to deploy the stack on AWS.
Create a key pair in the region.
Review account limits for Amazon EC2 instances, and request a limit increase, if
needed.
Step 2. Launch the stack
Launch the AWS CloudFormation template into your AWS account.
Enter values for required parameters.
Review the other template parameters, and customize their values if necessary.
Step 3. Validate that the pipeline ran end to end
Stop one of the two RD Gateway instances.
Review pipeline status.
Log in to Jenkins and review the Jenkins build status.
Validate the sample application deployment status.
Step 4. Deploy a new release
Copy the DemoApp.zip to your local computer.
Make modifications and re-zip.
Upload the modified code package to the S3 bucket created in step 2.
Step 5. Clean up
Use the AWS CLI to delete the server certificate.
Delete the S3 bucket manually.
Delete the master template stack.

Amazon Web Services – Microsoft .NET CI/CD Pipeline on the AWS Cloud August 2017
Page 18 of 32
Step 1. Prepare an AWS Account 1. If you don’t already have an AWS account, create one at https://aws.amazon.com by
following the on-screen instructions. Part of the sign-up process involves receiving a
phone call and entering a PIN using the phone keypad.
2. Use the region selector in the navigation bar to choose the AWS Region where you want
to deploy the .NET CI/CD pipeline on AWS.
Amazon EC2 locations are composed of AWS Regions and Availability Zones. Regions
are dispersed and located in separate geographic areas. Each region includes at least two
Availability Zones that are isolated from one another but connected through low-latency
links. Deploying your cloud applications across multiple Availability Zones helps you
achieve high availability, even in the face of natural disasters that might impact a single
Availability Zone.
This Quick Start uses the t2.medium instance type for the build server and AWS
CodeDeploy server portions of the deployment. t2.medium instances are currently
available in all AWS regions.
Figure 2: Choosing an AWS Region
Tip Consider choosing a region closest to your data center or corporate network to
reduce network latency between systems running on AWS and the systems and users
on your corporate network.

Amazon Web Services – Microsoft .NET CI/CD Pipeline on the AWS Cloud August 2017
Page 19 of 32
3. Create a key pair in your preferred region. To do this, in the navigation pane of the
Amazon EC2 console, choose Key Pairs, Create Key Pair, type a name, and then
choose Create.
Figure 3: Creating a key pair
Amazon EC2 uses public-key cryptography to encrypt and decrypt login information. To
be able to log in to your instances, you must create a key pair. With Windows instances,
we use the key pair to obtain the administrator password via the Amazon EC2 console
and then log in using Remote Desktop Protocol (RDP) as explained in the step-by-step
instructions in the Amazon Elastic Compute Cloud User Guide.
4. If necessary, request a service limit increase for the Amazon EC2 t2.medium instance
type. To do this, in the AWS Support Center, choose Create Case, Service Limit
Increase, EC2 instances, and then complete the fields in the limit increase form. The
current default limit is 20 instances.
You might need to request an increase if you already have an existing deployment that
uses this instance type, and you think you might exceed the default limit with this
reference deployment. It might take a few days for the new service limit to become
effective. For more information, see Amazon EC2 Service Limits in the AWS
documentation.

Amazon Web Services – Microsoft .NET CI/CD Pipeline on the AWS Cloud August 2017
Page 20 of 32
Figure 4: Requesting a service limit increase

Amazon Web Services – Microsoft .NET CI/CD Pipeline on the AWS Cloud August 2017
Page 21 of 32
Step 2. Launch the .NET CI/CD Pipeline Stack
1. Launch the AWS CloudFormation template into your AWS
account. The template is launched in the US East (Virginia)
Region by default but can be launched in any region that
supports AWS CodePipeline (see supported regions).
This stack takes approximately 30 minutes to create.
Note You are responsible for the cost of the AWS services used while running this
Quick Start reference deployment. There is no additional cost for using this Quick
Start. Prices are subject to change. See the pricing pages for each AWS service you
will be using in this Quick Start for full details.
2. On the Select Template page, keep the default setting for the template URL, and then
choose Next.
3. On the Specify Details page, review the parameters for the template. These are
described in the following table.
Provide values for the required parameters. For all other parameters, the template
provides default settings that you can customize.
Network Configuration:
Parameter (name) Default Description
Availability Zones
(AvailabilityZones)
Requires input Choose two Availability Zones that will be used to deploy
your Windows servers for this template. The Quick Start
preserves the logical order you specify.
VPC CIDR
(VPCCIDR)
10.0.0.0/16 CIDR block for the VPC.
Private Subnet 1 CIDR
(PrivateSubnet1CIDR)
10.0.0.0/19 CIDR block for the private subnet located in Availability
Zone 1.
Private Subnet 2 CIDR
(PrivateSubnet2CIDR)
10.0.32.0/19 CIDR block for the private subnet located in Availability
Zone 2.
Public Subnet 1 CIDR
(PublicSubnet1CIDR)
10.0.128.0/20 CIDR block for the public (DMZ) subnet located in
Availability Zone 1.
Public Subnet 2 CIDR
(PublicSubnet2CIDR)
10.0.144.0/20 CIDR block for the public (DMZ) subnet located in
Availability Zone 2.
Allowed Remote Desktop
Gateway External Access
CIDR
(RDGWCIDR)
Requires input CIDR block that’s allowed external access to the Remote
Desktop gateways. We recommend that you use a
constrained CIDR range to reduce the potential of
inbound attacks from unknown IP addresses.
Launch

Amazon Web Services – Microsoft .NET CI/CD Pipeline on the AWS Cloud August 2017
Page 22 of 32
Amazon EC2 Configuration:
Parameter Default Description
Key Pair Name
(KeyPairName)
Requires input Name of an existing Amazon EC2 public/private key pair
to enable remote access to instances.
Remote Desktop Gateway
Instance Type
(RDGWInstanceType)
t2.large Amazon EC2 instance type for the Remote Desktop
Gateway instances.
Microsoft Remote Desktop Gateway Configuration:
Parameter Default Description
Admin User Name
(AdminUser)
StackAdmin User name for the new local administrator account.
Admin Password
(AdminPassword)
Requires input Password for the administrative account. Must be at
least 8 characters containing letters, numbers, and
symbols.
Domain DNS Name
(DomainDNSName)
example.com Fully qualified domain name (FQDN). This is not a
required parameter and will not be used if the Remote
Gateway servers are not joined to a domain.
CodeDeploy and DemoApp Configuration:
Parameter Default Description
Application name
(CodeDeployAppName)
DemoApp Application name that will be used by AWS
CodeDeploy.
Deployment Group name
(CodeDeployDeployment
GroupName)
DemoApp-DG Deployment group name that will be used by AWS
CodeDeploy. This group name can be used to modify
how the application is deployed after the stack is
deployed.
Number of CodeDeploy
servers
(CodeDeployNumber
OfServers)
1 The number of test servers you want to deploy with
AWS CodeDeploy. An ELB load balancer is put in front
of these servers so you can deploy the application to
multiple servers to test a load-balanced configuration or
rolling upgrades. You can choose one or two servers.
Deploy the demo
application
(DemoAppInclude)
true Keep this setting to include a sample application that
will be built and deployed for testing. This will
download a simple two-tier ASP.NET web application
that includes a custom MSBuild project that works with
AWS CodeDeploy. If you set this parameter to false,
you should upload your own source code package to the
S3 bucket created by this template. Otherwise, the
CI/CD pipeline will be broken. For details, see
deployment scenario 2 previously in this guide.

Amazon Web Services – Microsoft .NET CI/CD Pipeline on the AWS Cloud August 2017
Page 23 of 32
Parameter Default Description
Username for the demo
app db
(DemoAppDBUserName)
awsuser The user name for the database administrator account
in the sample application. This parameter is necessary
only if you choose to deploy the sample application.
You’ll use the credentials in step 4 to validate the
deployment.
Password for the demo
app db
(DemoAppDBPassword)
Requires input The password for the database administrator account in
the sample application. This parameter is necessary
only if you choose to deploy the sample application.
You’ll use the credentials in step 4 to validate the
deployment.
Code Package Filename
(CodePackageFileName)
DemoApp-Source.zip Use this option if you are bringing your own code
package to deploy through the pipeline. The package
you specify must be found in the S3 bucket created by
this template. This must be a .zip file with .NET source
code inside. If you are deploying the sample application
provided with this Quick Start, this value is ignored.
Jenkins Build Configuration:
Parameter Default Description
Jenkins Custom Action
Version Number
(JenkinsCustomAction
VersionNumber)
Requires input The version number for the custom action that is created
for AWS CodePipeline. If you redeploy the stack, you must
increment the version number or change the application
name. The combination of the application name and
version number creates a provider for the custom action
that must be unique even after you delete the custom
action. For details, see the API documentation.
Certificate Name for
ELBs
(ELBServerCertificateName)
QuickStartCICDCert The name of the certificate that will be created and used
by the ELB for the web application deployed to the build
and test servers. Choose a unique name so the self-signed
certificate for *.<region>.elb.amazonaws.com can be
generated without any conflicts. If a certificate already
exists with the same name, the AWS CloudFormation
template will try and use the existing certificate, which
might create an error if the certificate doesn’t support ELB
CNAMEs. This resource is not controlled by the
CloudFormation template and will need to be cleaned up
manually.
Jenkins User
(JenkinsUserName)
JenkinsUser The user account that should be given access to Jenkins to
configure and run builds. You’ll use the credentials in step
4 to access the Jenkins dashboard.
Jenkins Password
(JenkinsPassword)
Requires input The password for the Jenkins user account you created.
You’ll use the credentials in step 4 to access the Jenkins
dashboard.

Amazon Web Services – Microsoft .NET CI/CD Pipeline on the AWS Cloud August 2017
Page 24 of 32
Parameter Default Description
Path to SourceCode
(SourceFolder)
DemoApp\
SoccerTeamWeb
The path to the source code to build after your sample
application package is unzipped.
Note You must include the root folder from the .zip file
in your path and use a backslash between folders. The
default setting specifies the sample application and can be
used as an example if you are trying to set the parameter
for your own source package.
Release Folder
(ReleaseFolder)
Release The release folder that can be used by the Jenkins job to
copy the binaries to the test server. All content copied into
this folder will be zipped and shipped via AWS
CodeDeploy. This is a unique option available in the AWS
CodePipeline for Jenkins and is not required. The default
setting is for the sample application and can be used as an
example for your own MSBuild jobs. The .csproj or .sln file
must include steps to copy the binaries from the source
folders into this release folder, and must include the same
parameters as the sample application if you want to use
the same technique.
.proj or .sln
(MSBuildProjectOr
SolutionFileName)
SoccerTeamWeb.
csproj
The name of the .proj or .sln file used to drive the MSBuild
step in Jenkins. This will be concatenated to the MSBuild
plugin for Jenkins to run the build task. If you make a
mistake when typing the name, you can modify the
configuration in your Jenkins project.
AWS Quick Start Configuration:
Parameter Default Description
Quick Start S3 Bucket
Name
(QSS3BucketName)
aws-quickstart The S3 bucket you have created for your copy of Quick
Start assets, if you decide to customize or extend the
Quick Start for your own use. The bucket name can
include numbers, lowercase letters, uppercase letters,
and hyphens, but should not start or end with a hyphen.
Quick Start S3 Key Prefix
(QSS3KeyPrefix)
quickstart-cicd-
windows/
The S3 key prefix for the Quick Start assets. This prefix
can include numbers, lowercase letters, uppercase
letters, hyphens (-), and forward slashes (/). This
parameter enables you to override the Quick Start
behavior for your specific implementation.
When you finish reviewing and customizing the parameters, choose Next.
Note You can also download the template and edit it to create your own
parameters based on your specific deployment scenario.

Amazon Web Services – Microsoft .NET CI/CD Pipeline on the AWS Cloud August 2017
Page 25 of 32
4. On the Options page, you can specify tags (key-value pairs) for resources in your stack
and set advanced options. When you’re done, choose Next.
5. On the Review page, review and confirm the template settings. Under Capabilities,
select the check box to acknowledge that the template will create IAM resources.
6. Choose Create to deploy the stack.
Note Part of this Quick Start deploys a custom action for AWS CodePipeline to
integrate with Jenkins. This has a unique versioning requirement, so if you want
to deploy this template multiple times in your account, you must increment the
custom action version parameter or change the application name. Essentially any
previous version is frozen, so you have to increment the version every time you
do a full release, even if you deleted the custom action.
7. Monitor the status of the stack. When the status is CREATE_COMPLETE, the .NET
CI/CD pipeline is ready.
Step 3. Validate the Pipeline Run After the stack is complete you will be able to validate that either (a) the sample application
has been built and deployed to the AWS CodeDeploy servers, or (b) upload your own code
package to the S3 bucket and release a new change from the pipeline. The following will
explain both approaches.
1. (Optional) To control costs, you can go to the running Amazon EC2 instances and stop
one or both of the RD Gateway servers that were deployed. Two servers are deployed to
help ensure high availability, but you will need only one server for remote access. If an
Availability Zone fails, you can start the other one to gain access in less than 10 minutes.
The BuildServer and CodeDeploy servers only need to be accessed if you need to
troubleshoot a deployment.
2. Validate that the pipeline ran from start to finish:
If you’ve included the sample application, sign in to the AWS Management
Console, choose AWS CodePipeline, and then choose the DemoApp-Pipeline that
was created by the template. If the pipeline was successful, you will see output
similar to Figure 5.

Amazon Web Services – Microsoft .NET CI/CD Pipeline on the AWS Cloud August 2017
Page 26 of 32
Figure 5: DemoApp-Pipeline successful run
If you excluded the sample application, AWS CodePipeline will fail on the
initial step because the source code will not be found in the S3 bucket that was
created by the template. You need to package up your code (similar to the
DemoApp.zip) and upload it to the S3 bucket that was created. The name of the
bucket can be found in the output parameters from the CloudFormation template.
After you have uploaded your source code package, choose Release change on the
AWS CodePipeline screen in Figure 5.
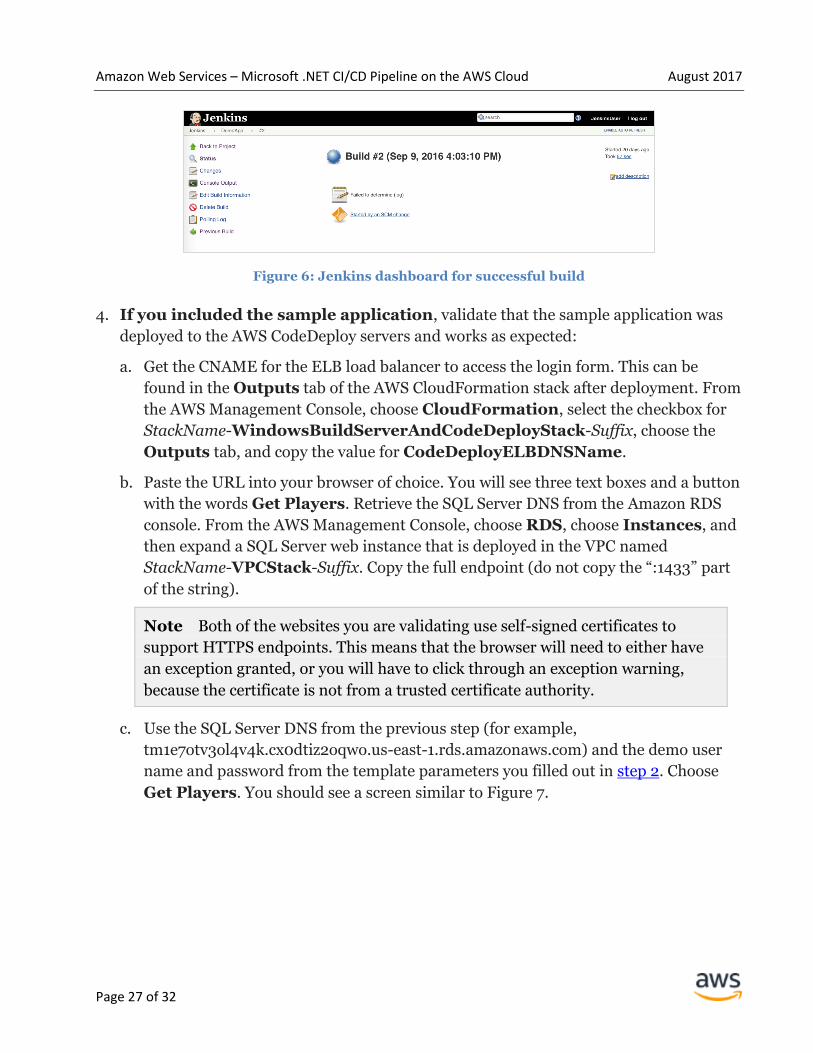
3. Log into the Jenkins dashboard and validate the successful build. To do this, choose
Details in the ApplicationBuild step of the pipeline shown in Figure 5. Use the
Jenkins user name and password you specified in the template parameters in step 2 to
log in. The Jenkins dashboard is illustrated in Figure 6.
Amazon Web Services – Microsoft .NET CI/CD Pipeline on the AWS Cloud August 2017
Page 27 of 32
Figure 6: Jenkins dashboard for successful build
4. If you included the sample application, validate that the sample application was
deployed to the AWS CodeDeploy servers and works as expected:
a. Get the CNAME for the ELB load balancer to access the login form. This can be
found in the Outputs tab of the AWS CloudFormation stack after deployment. From
the AWS Management Console, choose CloudFormation, select the checkbox for
StackName-WindowsBuildServerAndCodeDeployStack-Suffix, choose the
Outputs tab, and copy the value for CodeDeployELBDNSName.
b. Paste the URL into your browser of choice. You will see three text boxes and a button
with the words Get Players. Retrieve the SQL Server DNS from the Amazon RDS
console. From the AWS Management Console, choose RDS, choose Instances, and
then expand a SQL Server web instance that is deployed in the VPC named
StackName-VPCStack-Suffix. Copy the full endpoint (do not copy the “:1433” part
of the string).
Note Both of the websites you are validating use self-signed certificates to
support HTTPS endpoints. This means that the browser will need to either have
an exception granted, or you will have to click through an exception warning,
because the certificate is not from a trusted certificate authority.
c. Use the SQL Server DNS from the previous step (for example,
tm1e7otv3ol4v4k.cx0dtiz2oqwo.us-east-1.rds.amazonaws.com) and the demo user
name and password from the template parameters you filled out in step 2. Choose
Get Players. You should see a screen similar to Figure 7.

Amazon Web Services – Microsoft .NET CI/CD Pipeline on the AWS Cloud August 2017
Page 28 of 32
Figure 7: Demo application following successful Get Players test
Step 4. Deploy a New Release Now that the pipeline is set up and everything works end to end, you can modify the .NET
source code and deploy a new release. First, you will download the source code from your
S3 bucket and make changes locally. The following steps explain how you would deploy a
new release of the sample application included with the Quick Start. If you’re using your
own source code, the steps are the same, except that you use your own source files instead
of the sample files.
1. Download the DemoApp.zip source code package from the S3 bucket that was created
by the template. You can find the name of this bucket in the output parameters after the
template completes. This source code package is copied from a central demo-assets
folder during setup of the build server.
2. Extract the source code to your local machine and make a change to the Default.aspx.cs
file. You could make a simple cosmetic change or modify the logic that defines who
makes the all-star team (for more information, see deployment scenario 1).
3. Re-zip the full DemoApp folder where you made the code change and upload the
modified file to your S3 bucket.
Note To establish best practices for security, the Quick Start applies a policy to the
bucket you created. This policy requires you to set server-side encryption and to use an
HTTPS upload. If you are using the AWS Management Console to upload your source
code package, choose Set Details at the bottom of the web UI, and then choose Use
Server Side Encryption and Use an AWS Key Management Service master
key. Leave aws/s3 (default) selected. You can also set these parameters by using the
AWS CLI. For more information, see the put-object reference page in the AWS
documentation.

Amazon Web Services – Microsoft .NET CI/CD Pipeline on the AWS Cloud August 2017
Page 29 of 32
4. Navigate to AWS CodePipeline and release the new change. From the AWS Management
Console, choose CodePipeline, choose AppName-Pipeline, and then choose Release
change. Validate the code update by refreshing the URL you used to validate the
sample application above. It should take less than 10 minutes to deploy a revision.
Step 5. Clean Up When you are done working with the .NET CI/CD pipeline, we recommend that you clean
up all the resources deployed by this template to avoid incurring AWS charges for the stack.
1. Delete the self-signed server certificate by following the instructions for Working with
server certificates in the AWS documentation.
2. If you don’t want to keep the source code you were using for this pipeline, delete the S3
bucket manually to remove it from your account.
3. Delete the AWS CloudFormation stack created by the Quick Start. From the AWS
Management Console, choose CloudFormation, and select the Master template
checkbox for the Quick Start stack. Choose Actions, and then Delete Stack. It
typically takes less than 10 minutes to delete the stack.
Troubleshooting If you run into a problem running this Quick Start, review the following section for
troubleshooting tips and guidance.
When you deploy the Quick Start, if you encounter a CREATE_FAILED error instead of the
CREATE_COMPLETE status code, we recommend that you relaunch the template with
Rollback on failure set to No. (This setting is under Advanced in the AWS
CloudFormation console, on the Options page.) With this setting, the state of the stack will
be retained, and the instance will be left running, so you can troubleshoot the issue. You can
review the log files in the %ProgramFiles%\Amazon\EC2ConfigService and in the
C:\cfn\log folder.
Important When you set Rollback on failure to No, you’ll continue to
incur AWS charges for this stack. Please make sure to delete the stack when
you’ve finished troubleshooting.
The following table lists specific CREATE_FAILED error messages you might encounter.

Amazon Web Services – Microsoft .NET CI/CD Pipeline on the AWS Cloud August 2017
Page 30 of 32
Error message Possible cause What to do
API: ec2: RunInstances Not
authorized for images:
ami-ID
The template is
referencing an AMI that
has expired
We refresh AMIs on a regular basis, but our schedule
isn’t always synchronized with AWS AMI updates. If
you get this error message, notify us, and we’ll update
the template with the new AMI ID.
If you’d like to fix the template yourself, you can
download it and update the Mappings section with
the latest AMI ID for your region.
We currently do not have
sufficient m1.small
capacity in the AZ you
requested
The NAT instance
requires a larger
instance type
Switch to an instance type that supports higher
capacity, or complete the request form in the AWS
Support Center to increase the Amazon EC2 limit for
the instance type or region. Limit increases are tied to
the region they were requested for.
Instance ID did not
stabilize
You have exceeded your
IOPS for the region
Request a limit increase by completing the request
form in the AWS Support Center.
System Administrator
password must contain at
least 8 characters
The master password
contains $ or other
special characters
Check your password parameter settings, and then
relaunch the Quick Start.
Passwords must be at least 8 characters, consisting of
uppercase and lowercase letters and numbers. Avoid
using special characters such as @ or $.
Custom Action Type
(details) has been deleted.
Create a new version of the
action type
You’ve redeployed the
Quick Start with the
same version number or
application name for the
custom action for AWS
CodePipeline
If you redeploy the stack, you must increment the
version number or change the application name in the
template parameters. The combination of the
application name and version number creates a
provider for the custom action that must be unique
even after you delete the custom action. For details, see
the API documentation.
For additional information, see Troubleshooting AWS CloudFormation on the AWS
website. If the problem you encounter isn’t covered on that page or in the table, please visit
the AWS Support Center. If you’re filing a support ticket, please attach the install.log file
from the master instance (this is the log file that is located in the /root/install folder) to
the ticket.

Amazon Web Services – Microsoft .NET CI/CD Pipeline on the AWS Cloud August 2017
Page 31 of 32
Additional Resources
AWS services
AWS CloudFormation
https://aws.amazon.com/documentation/cloudformation/
Amazon EBS
– User guide:
https://docs.aws.amazon.com/AWSEC2/latest/UserGuide/AmazonEBS.html
– Volume types:
https://docs.aws.amazon.com/AWSEC2/latest/UserGuide/EBSVolumeTypes.html
– Optimized instances:
https://docs.aws.amazon.com/AWSEC2/latest/UserGuide/EBSOptimized.html
Amazon EC2 user guide for Windows
https://docs.aws.amazon.com/AWSEC2/latest/WindowsGuide/
Amazon VPC
https://aws.amazon.com/documentation/vpc/
AWS CodeDeploy
https://aws.amazon.com/codedeploy/
AWS CodePipeline
https://aws.amazon.com/codepipeline/
Deploying Microsoft software on AWS
Microsoft on AWS
https://aws.amazon.com/microsoft/
Secure Microsoft applications on AWS
https://media.amazonwebservices.com/AWS_Microsoft_Platform_Security.pdf
Microsoft Licensing Mobility
https://aws.amazon.com/windows/mslicensemobility/
MSDN on AWS
https://aws.amazon.com/windows/msdn/
AWS Windows and .NET Developer Center
https://aws.amazon.com/net/

Amazon Web Services – Microsoft .NET CI/CD Pipeline on the AWS Cloud August 2017
Page 32 of 32
Quick Start reference deployments
AWS Quick Start home page
https://aws.amazon.com/quickstart/
GitHub Repository You can visit our GitHub repository to download the templates and scripts for this Quick
Start, to post your comments, and to share your customizations with others.
Document Revisions Date Change In sections
August 2017 Updated templates in accordance with latest
standards
Parameter tables in step 2
November 2016 Initial version —
© 2017, Amazon Web Services, Inc. or its affiliates. All rights reserved.
Notices
This document is provided for informational purposes only. It represents AWS’s current product offerings
and practices as of the date of issue of this document, which are subject to change without notice. Customers
are responsible for making their own independent assessment of the information in this document and any
use of AWS’s products or services, each of which is provided “as is” without warranty of any kind, whether
express or implied. This document does not create any warranties, representations, contractual
commitments, conditions or assurances from AWS, its affiliates, suppliers or licensors. The responsibilities
and liabilities of AWS to its customers are controlled by AWS agreements, and this document is not part of,
nor does it modify, any agreement between AWS and its customers.
The software included with this paper is licensed under the Apache License, Version 2.0 (the "License"). You
may not use this file except in compliance with the License. A copy of the License is located at
http://aws.amazon.com/apache2.0/ or in the "license" file accompanying this file. This code is distributed on
an "AS IS" BASIS, WITHOUT WARRANTIES OR CONDITIONS OF ANY KIND, either express or implied.
See the License for the specific language governing permissions and limitations under the License.