citrix scom management pack for xenapp 6.x user guidebefore installing xenapp management pack, make...
TRANSCRIPT

Page 1
Citrix SCOM Management Pack for XenApp 6.x User Guide
Software version: 1.43
Release date: March 2016
This document provides installation, configuration, and usage instructions for Citrix SCOM
Management Pack for XenApp 6.x.
Legal notices
Copyright © 2016 Citrix Systems, Inc. All rights reserved.
Citrix, Inc.
851 West Cypress Creek Road
Fort Lauderdale, FL 33309
United States of America
Disclaimers
This document is furnished "AS IS." Citrix, Inc. disclaims all warranties regarding the contents of this
document, including, but not limited to, implied warranties of merchantability and fitness for any
particular purpose. This document may contain technical or other inaccuracies or typographical errors.
Citrix, Inc. reserves the right to revise the information in this document at any time without notice. This
document and the software described in this document constitute confidential information of Citrix, Inc.
and its licensors, and are furnished under a license from Citrix, Inc.
Citrix Systems, Inc., the Citrix logo, and Citrix XenApp are trademarks of Citrix Systems, Inc. and/or
one or more of its subsidiaries, and may be registered in the United States Patent and Trademark office
and in other countries. All other trademarks and registered trademarks are property of their respective
owners.
Microsoft and Windows are either registered trademarks or trademarks of Microsoft Corporation in the
United States and/or other countries.

Page 2
Trademarks
Citrix®
Citrix XenApp®
Microsoft®
Windows®
Contents Chapter 1: Quick introduction .................................................................................................... 3
About XenApp Management Pack ......................................................................................... 3
Product architecture ............................................................................................................... 3
Chapter 2: Installation and configuration ................................................................................... 4
Preparing for the installation .................................................................................................. 5
Installing XenApp Management Pack on the SCOM management server computer ............. 5
Verifying the installation on the management server computer ............................................ 10
Configuring access to the shared folder for agent installation .............................................. 12
Configuring agent nodes to act as SCOM proxies ............................................................... 18
Setting up a XenApp farm administrator account ................................................................. 20
Installing XenApp Management Pack on the agent-managed computers ............................ 22
Verifying the installation and configuration on the agent-managed computers .................... 23
Chapter 3: Uninstallation ......................................................................................................... 24
Uninstalling XenApp Management Pack from the agent-managed computers .................... 24
Removing dependent management packs (customizations) ................................................ 25
Removing included management packs .............................................................................. 25
Uninstalling XenApp Management Pack from the SCOM management server computer ... 26
Chapter 4: Usage .................................................................................................................... 27
Optional configuration .......................................................................................................... 27
Manually importing included management packs into SCOM .............................................. 37
Customizing sealed management packs .............................................................................. 38
Chapter 5: Support .................................................................................................................. 38
General support resources ................................................................................................... 38
Contacting Citrix Customer Service ..................................................................................... 38

Page 3
Chapter 1: Quick introduction
About XenApp Management Pack
Citrix SCOM Management Pack for XenApp 6.x (XenApp Management Pack) is an availability and
performance management solution that extends end-to-end service monitoring capabilities of Microsoft
System Center Operations Manager (SCOM) to include the Citrix XenApp 6.x (XenApp) infrastructure.
It fully integrates topology, health, and performance data into SCOM, providing an end‐to‐end
operations overview across the entire XenApp estate and enabling delivery of effective business
service management.
XenApp Management Pack allows you to:
Monitor health and availability
If any important part of the XenApp is not available, the XenApp users will not be able to work.
GUI freezes or the users are unable to log on to the XenApp application.
Monitor performance
Performance degradation detection before the degradation affects end users is of great
importance.
Monitor XenApp components and tasks
Almost any job a XenApp user requires is done by the chain of XenApp tasks. If any task or
component in this chain encounters a problem, the job for the end user cannot be done or
cannot be finished as expected.
Product architecture
The following diagram shows how XenApp Management Pack connects the SCOM management
platform and the XenApp infrastructure.

Page 4
Figure 1.1 A high-level view of the XenApp Management Pack architecture
Chapter 2: Installation and configuration
This chapter contains instructions that you must follow to install and configure XenApp Management
Pack. Perform all procedures in the documented order of precedence.

Page 5
Preparing for the installation
Before installing XenApp Management Pack, make sure the following prerequisites are fulfilled:
You environment meets the hardware and software requirements.
For software requirements, see the Citrix SCOM Management Pack for XenApp 6.x
Compatibility Matrix. For hardware and/or other requirements, see the Citrix SCOM
Management Pack for XenApp 6.x Release Notes.
A SCOM management group is chosen for XenApp monitoring. The computer that hosts the
SCOM management server of this management group is referred to as management server
computer.
SCOM agent is installed on all the computers that host XenApp, and these computers are
configured as agent nodes in the management group.
The SCOM agent Action Account has administrative privileges on all the computers that host
XenApp.
Complete XenApp configuration data is available.
The default management packs that the included management packs depend on are imported
in SCOM:
○ Data Warehouse Library
○ Health Library
○ Image Library (System Center)
○ Image Library (System)
○ Image Library (Windows)
○ Microsoft Generic Report Library
○ Performance Library
○ System Application Log Library
○ System Center Core Library
○ System Library
○ Windows Core Library
○ Windows Service Library
Note If you accidentally delete any of the listed default management packs, you can import
them back from the files in the SCOM installation directory.
Installing XenApp Management Pack on the SCOM management server computer
The server-side part of XenApp Management Pack must be installed on the computer that hosts SCOM
management server.
To install XenApp Management Pack on the SCOM management server computer, do the following:

Page 6
1. Log on to the management server computer. Use a user account from the local
Administrators user group that has administrative privileges in SCOM.
2. In Windows Explorer, locate the
Citrix_SCOM_Management_Pack_for_XenApp6_<Version>.exe file (where <Version>
is the current software version), and double-click it to invoke the installation process. Wait for
the Setup Wizard to appear.
3. In the Welcome page of the Setup Wizard, click Next.
Figure 2.1 Initial Setup Wizard page of XenApp Management Pack
4. In the Product Configuration page, click Next.
5. In the Customer Information page, type valid information into the User Name and Company
Name text boxes. Click Next.

Page 7
Figure 2.2 The Customer Information page
6. In the Registration Confirmation dialog box, verify that the provided information is correct and
click Yes.
7. In the License Agreement page of the Setup Wizard, carefully read the end user license
agreement. If you accept the terms of the agreement, click Yes.

Page 8
Figure 2.3 The License Agreement page
8. In the Choose Destination Location page, define the XenApp Management Pack installation
folder. Citrix recommends that you install XenApp Management Pack to the default folder.
Proceed as follows:
○ To install the product to the default folder listed in the Setup Wizard, no special actions
are required.
○ To install the product to a different folder, follow the substeps:
a. Click Browse.
b. In the Choose Folder dialog box, browse to a desired installation folder, select it, and
click OK.
Click Next.
9. In the Software License and Support Terms dialog box, read the message and click OK.

Page 9
Figure 2.4 The Software Licenses and Support Terms dialog box
10. In the Start Copying Files page of the Setup Wizard, click Next. The Setup Wizard starts
copying the installation files.
11. After the installation completes, the installation completion page is displayed.
Figure 2.5 Final Setup Wizard page
To let the Setup Wizard automatically import the included management packs into SCOM, leave
the Automatically import the Management Pack option selected. Citrix recommends this
choice.

Page 10
To import the management packs into SCOM manually at a later time, clear the Automatically
import the Management Pack option. For instructions about how to import or reimport the
management packs, see “Manually importing included management packs into SCOM”
12. Click Finish to close the Setup Wizard.
13. If you let the Setup Wizard to automatically import the management packs, a Command Prompt
window appears and reports the import progress. After the process completes, a dialog box
informs you about successful completion. Click OK to close the dialog box.
Verifying the installation on the management server computer
To verify that the XenApp Management Pack installation on the management server computer is
correct, do the following:
1. Log on to the management server computer.
2. Go to Start > Control Panel, click Programs, and then click Programs and Features.
3. Check for the presence of the following entry in the Name column:
Citrix SCOM Management Pack for XenApp 6.x
4. Check if there is the CitrixMPShare shared folder on the computer and whether it points to
the %ProgramData%\Citrix\CitrixMPShare location.
The shared folder is vital for communication between the management server and the agent
node during installation of the agent.
5. Launch the SCOM Operations console.
6. In the Monitoring view, expand the items in the left pane until they match the following figure.

Page 11
Figure 2.6 Elements of XenApp Management Pack, as seen in the SCOM Operations console

Page 12
Configuring access to the shared folder for agent installation
Note: Steps of this procedure must be followed only once on a SCOM management server computer.
In case you previously installed any of the following Citrix Management Pack products on the same
computer, you do not need to repeat the steps:
Provisioning Services Management Pack
StoreFront Management Pack
Web Interface Management Pack
XenApp and XenDesktop Management Pack
To configure access to the shared folder for agent installation, do the following:
1. Log on to the SCOM management server computer. Use a user account from the local
Administrators user group.
2. Choose a local user account (local to the computer with the shared folder) or a domain user
account that will have access to the shared folder.
Important: Citrix recommends creating a new, dedicated user account that you will use only for
deployment of the Management Pack agent to managed computers.
3. Using an operating system administrative tool, add the user account to the local
CitrixMPShareUsers user group.
4. Launch the SCOM Operations console.
5. In the Administration view, in the left pane, expand Run As Configuration, and then click
Accounts.
6. In the Tasks pane, expand Actions, and then click Create Run As Account.
7. In the Create Run As Account Wizard window, click Next.
8. In the Run As account type drop-down menu, leave the default selection (Windows).

Page 13
Figure 2.7 The General Properties page
9. In the Display name text box, type a name that the SCOM Operations console will use to refer
to the newly created SCOM user account. Click Next.
10. In the User name text box, type the user name of the operating system user account that you
chose in step 2.

Page 14
Figure 2.8 The Credentials page
11. In the Password and Confirm password text boxes, type the valid password of the operating
system user account.
12. In the Domain text box, update the value if needed. Click Next.
13. Depending the effective security policy in your SCOM environment, select either the Less
secure or More secure option.
Note: Selecting More secure requires manual steps to be performed in SCOM for each newly
added managed computer.
14. Click Create.
15. After the message about successful account creation appears, click Close.

Page 15
Figure 2.9 The Completion page
16. In the left pane, under Run As Configuration, click Profiles.
17. In the Profiles list, right-click Citrix Management Pack Network Share Account, and then
select Properties.
Page 16
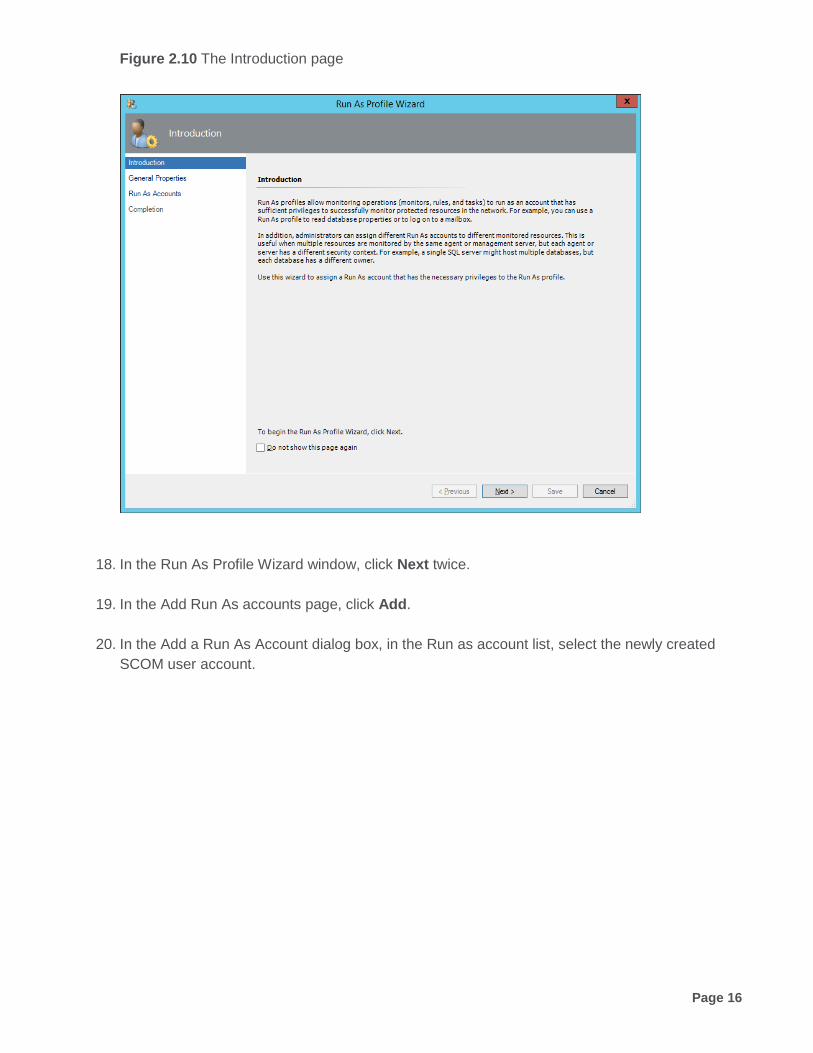
Figure 2.10 The Introduction page
18. In the Run As Profile Wizard window, click Next twice.
19. In the Add Run As accounts page, click Add.
20. In the Add a Run As Account dialog box, in the Run as account list, select the newly created
SCOM user account.

Page 17
Figure 2.11 The Add a Run As Account dialog box
21. Select the A selected class, group, or object option.
22. Click Select and then select Class.
23. In the Class Search dialog box, in the Filter by (optional) text box, type Windows
Computers.
24. Click Search.
25. In the Available items list, select All Windows Computers.

Page 18
Figure 2.12 The Class Search dialog box
26. Click OK to close the Class Search dialog box.
27. Click OK to close the Add a Run As Account dialog box.
28. Click Save to update the profile. This may take a while.
29. Click Close to close the Run As Profile Wizard window.
Configuring agent nodes to act as SCOM proxies
Each agent node where XenApp is installed must be configured to act as a SCOM proxy computer.
This configuration enables the agent to relay or forward information from or about other computes or
network devices to the management server. You can either configure the nodes one by one or you can
configure all discovered nodes at the same time. The latter scenario is particularly useful in large
XenApp environments.
To configure the agent nodes one by one, do the following:

Page 19
1. Choose the computers that will act as proxies in your XenApp environment.
2. Log on to the management server computer.
3. Launch the SCOM Operations console.
4. In the Administration view, in the left pane, expand Device Management, and then click
Agent Managed.
5. For each XenApp (agent-managed) computer, follow the steps:
a. Right-click the host name, and select Properties.
b. Click the Security tab.
c. Select the Allow this agent to act as proxy and discover managed objects on other
computers option.
d. Click OK.
To configure all discovered agent nodes at the same time, do the following:
1. Log on to the management server computer. Use a user account from the local
Administrators user group.
2. Go to Start > All Programs > Citrix > XenApp Management Pack.
3. Click XenApp MP Configuration.
4. In the Citrix Management Pack Configuration window, click the Proxy tab.
5. Click Discover to invoke the discovery process. It will discover all computers that are listed in
the XenApp 6.x Computers list in the Monitoring view of the SCOM Operations console.
Note: Newly added agent nodes may not be immediately visible in the XenApp 6.x Computers
list in SCOM. Allow some time for the list to get updated.
This discovery process may take a while.

Page 20
Figure 2.13 The Proxy tab of the Citrix Management Pack Configuration tool
6. Select the computers that you want to configure as proxies or click Check All to select all of
them. Click Uncheck All to clear the selection.
7. Click Apply to update the configuration in SCOM. This may take a while.
8. Optionally, to cease an agent node to act as a proxy, clear its entry in the Act as Proxy list, and
click Apply to update the configuration in SCOM.
9. Click OK to close the window.
Setting up a XenApp farm administrator account
A farm administrator account needs to be set in XenApp Management Pack for each XenApp farm that
you want to manage. The farm administrator account must be the local administrator of each XenApp
server and must have full access granted to the farm.
To set up farm administrator accounts, do the following:
1. Log on to the management server computer. Use a user account from the local
Administrators user group.

Page 21
2. Go to Start > All Programs > Citrix > XenApp Management Pack.
3. Click XenApp MP Configuration.
4. In the Citrix Management Pack Configuration window, in the XenApp tab, click Add.
5. In the Add XenApp farm admin account dialog box, type the following data in the respective text
boxes:
○ Farm name
○ Properties of the farm administrator account:
– Domain name
– User name
– Password
Figure 2.14 The Add XenApp farm admin account dialog box
6. Click OK.
7. Repeat steps 4 and 5 for each additional farm administrator account you want to set.

Page 22
8. Optionally, to modify the domain name, user name, or password of a farm administrator
configuration, click Modify. In the Modify XenApp farm admin account dialog box, modify the
data as required, and then click OK.
9. Optionally, to remove a farm administrator configuration, click Remove and then click Yes.
10. Click OK to apply the configuration changes and close the window.
Installing XenApp Management Pack on the agent-managed computers
On the computers that are agent-managed by SCOM, only XenApp Management Pack Agent must be
installed.
To install XenApp Management Pack on an agent-managed computer, do the following:
1. Log on to the management server computer.
2. Launch the SCOM Operations console.
3. In the Monitoring view, in the left pane, expand Citrix Library, and then click XenApp 6.x
Computers.
4. In the middle pane, select the agent-managed computer from the XenApp 6.x Computers list.
5. In the Tasks pane, expand XenApp Computer Role Tasks, and then click Install Citrix MPXA
Agent.
6. In the Run Task – Install Citrix MPXA Agent, adjust the task parameters as follows:
○ UpgradeAgent: This option, when set to true, causes uninstallation of the existing
XenApp Management Pack Agent from the agent-managed computer before the current
version is installed. Before such uninstallation, the SCOM agent must be put into
maintenance mode.
Default value: false
○ IgnorePrereqCheck: You may not alter this option.
Default value: false
○ AgentInstallationSource: This option defines the location of the Management Pack
agent installation package and its configuration files. If no value is specified, the
installation process attempts to identify the location based on the data received from the
management server.
The value for this option must be specified according on the agent-managed computer –
SCOM management server relationship:
Page 23
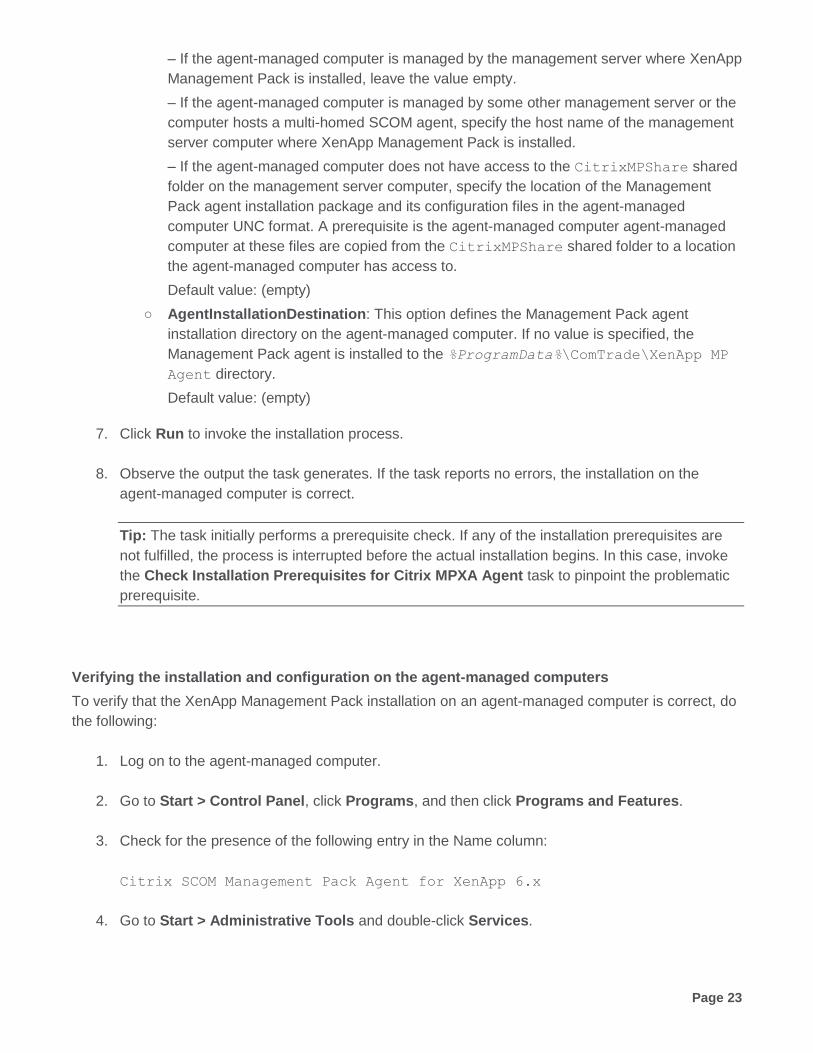
– If the agent-managed computer is managed by the management server where XenApp
Management Pack is installed, leave the value empty.
– If the agent-managed computer is managed by some other management server or the
computer hosts a multi-homed SCOM agent, specify the host name of the management
server computer where XenApp Management Pack is installed.
– If the agent-managed computer does not have access to the CitrixMPShare shared
folder on the management server computer, specify the location of the Management
Pack agent installation package and its configuration files in the agent-managed
computer UNC format. A prerequisite is the agent-managed computer agent-managed
computer at these files are copied from the CitrixMPShare shared folder to a location
the agent-managed computer has access to.
Default value: (empty)
○ AgentInstallationDestination: This option defines the Management Pack agent
installation directory on the agent-managed computer. If no value is specified, the
Management Pack agent is installed to the %ProgramData%\ComTrade\XenApp MP
Agent directory.
Default value: (empty)
7. Click Run to invoke the installation process.
8. Observe the output the task generates. If the task reports no errors, the installation on the
agent-managed computer is correct.
Tip: The task initially performs a prerequisite check. If any of the installation prerequisites are
not fulfilled, the process is interrupted before the actual installation begins. In this case, invoke
the Check Installation Prerequisites for Citrix MPXA Agent task to pinpoint the problematic
prerequisite.
Verifying the installation and configuration on the agent-managed computers
To verify that the XenApp Management Pack installation on an agent-managed computer is correct, do
the following:
1. Log on to the agent-managed computer.
2. Go to Start > Control Panel, click Programs, and then click Programs and Features.
3. Check for the presence of the following entry in the Name column:
Citrix SCOM Management Pack Agent for XenApp 6.x
4. Go to Start > Administrative Tools and double-click Services.
Page 24
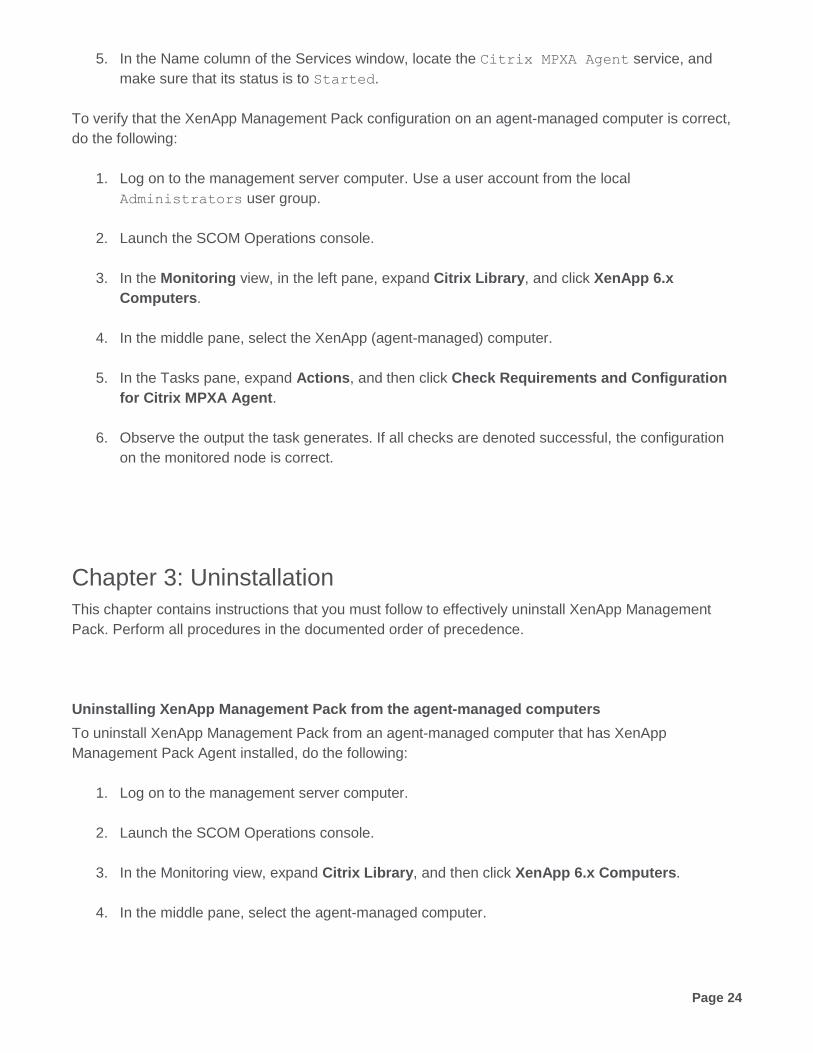
5. In the Name column of the Services window, locate the Citrix MPXA Agent service, and
make sure that its status is to Started.
To verify that the XenApp Management Pack configuration on an agent-managed computer is correct,
do the following:
1. Log on to the management server computer. Use a user account from the local
Administrators user group.
2. Launch the SCOM Operations console.
3. In the Monitoring view, in the left pane, expand Citrix Library, and click XenApp 6.x
Computers.
4. In the middle pane, select the XenApp (agent-managed) computer.
5. In the Tasks pane, expand Actions, and then click Check Requirements and Configuration
for Citrix MPXA Agent.
6. Observe the output the task generates. If all checks are denoted successful, the configuration
on the monitored node is correct.
Chapter 3: Uninstallation
This chapter contains instructions that you must follow to effectively uninstall XenApp Management
Pack. Perform all procedures in the documented order of precedence.
Uninstalling XenApp Management Pack from the agent-managed computers
To uninstall XenApp Management Pack from an agent-managed computer that has XenApp
Management Pack Agent installed, do the following:
1. Log on to the management server computer.
2. Launch the SCOM Operations console.
3. In the Monitoring view, expand Citrix Library, and then click XenApp 6.x Computers.
4. In the middle pane, select the agent-managed computer.

Page 25
5. In the Tasks pane, expand Actions, and then click Uninstall Citrix MPXA Agent.
6. Repeat steps 4 and 5 for each additional agent-managed computer.
Removing dependent management packs (customizations)
To remove the customizations that you made to the management packs included in XenApp
Management Pack, do the following:
1. Log on to the management server computer.
2. Launch the SCOM Operations console.
3. In the Administration view, click Management Packs.
4. In the middle pane, locate the management packs that depend on the management packs
included in XenApp Management Pack.
5. For each such dependent management pack, follow the steps:
a. Right-click it and then click Delete.
b. On the message stating that deleting the management pack might affect the scoping of
some user roles, click Yes.
Removing included management packs
To remove the management packs included in XenApp Management Pack, do the following:
1. Log on to the management server computer.
2. Launch the SCOM Operations console.
3. In the Administration view, click Management Packs.
4. Remove references to the included management packs from the
Microsoft.SystemCenter.SecureReferenceOverride management pack. To do this
perform the following steps:
a. Identify which included management packs are referenced. In the Administration >
Management Packs context of the SCOM Operations console, right-click
Microsoft.SystemCenter.SecureReferenceOverride and select Properties. In the
dialog box, click the Dependencies tab.

Page 26
b. For each such referenced management pack, find out its ID. Right-click the referenced
management pack. In the dialog box, take note of the value in the ID text box on the
General tab.
c. Export the Microsoft.SystemCenter.SecureReferenceOverride management
pack.
d. Make a copy of the file you exported the management pack to.
e. Edit the originally exported file: use the IDs to find and remove all dependencies to the
management packs from the Manifest > References context (the <Reference>
elements) and the Monitoring > Overrides context (the
<SecureReferenceOverride> elements).
f. Import back the altered Microsoft.SystemCenter.SecureReferenceOverride
management pack from the modified file.
5. In the middle pane, right-click Citrix Management Pack for XenApp 6.x Reports, and then
select Delete.
6. On the message stating that deleting the management pack might affect the scoping of some
user roles, click Yes.
7. Repeat steps 4 and 5 with Citrix Management Pack for XenApp 6.x.
8. Check if other Citrix SCOM Management Pack products are installed on the management
server computer. If none of them is installed, repeat steps 4 and 5 with Citrix Management
Pack Library.
Uninstalling XenApp Management Pack from the SCOM management server computer
To uninstall XenApp Management Pack from the SCOM management server computer, do the
following:
1. Log on to the management server computer. Use a user account from the local
Administrators user group that has administrative privileges in SCOM.
2. Make sure no other users are logged on to the computer.
3. Go to Start > Control Panel, click Programs, and then click Programs and Features.
4. Right-click Citrix SCOM Management Pack for XenApp 6.x and select Uninstall. Wait for the
Setup Wizard to appear.

Page 27
Important: If a warning informs you about other logged on users, the program might not
uninstall completely.
5. In the Welcome page of the Setup Wizard, click Next.
6. In the Product Configuration page, click Next.
7. In the Confirm Uninstall dialog box, click OK.
8. In the Completion page of the Setup Wizard, click Finish.
9. Check if other Citrix SCOM Management Pack products are installed on the management
server computer. If none of them is installed, follow the steps:
a. Stop sharing the CitrixMPShare shared folder.
b. Delete the %ProgramData%\Citrix\CitrixMPShare folder.
c. Using an operating system administrative tool, delete the local CitrixMPShareUsers
user group.
Chapter 4: Usage
Optional configuration
Tuning thresholds for performance monitors and rules
Some monitors and rules have default thresholds that might need additional tuning to suit your
environment. You should evaluate monitors and rules to determine whether the default thresholds are
appropriate for your environment. If a default threshold is not appropriate for your environment, you
should baseline the relevant performance counters, and then adjust the threshold by overriding them.
For a complete list of monitors and rules, see the Citrix SCOM Management Pack for XenApp
Reference Guide, which you can find in the Citrix_MPXA_ReferenceGuide.html file.
Discovering objects
For general information about discovering objects in SCOM, see the Object Discoveries in Operations
Manager 2007 webpage on the Microsoft TechNet website.

Page 28
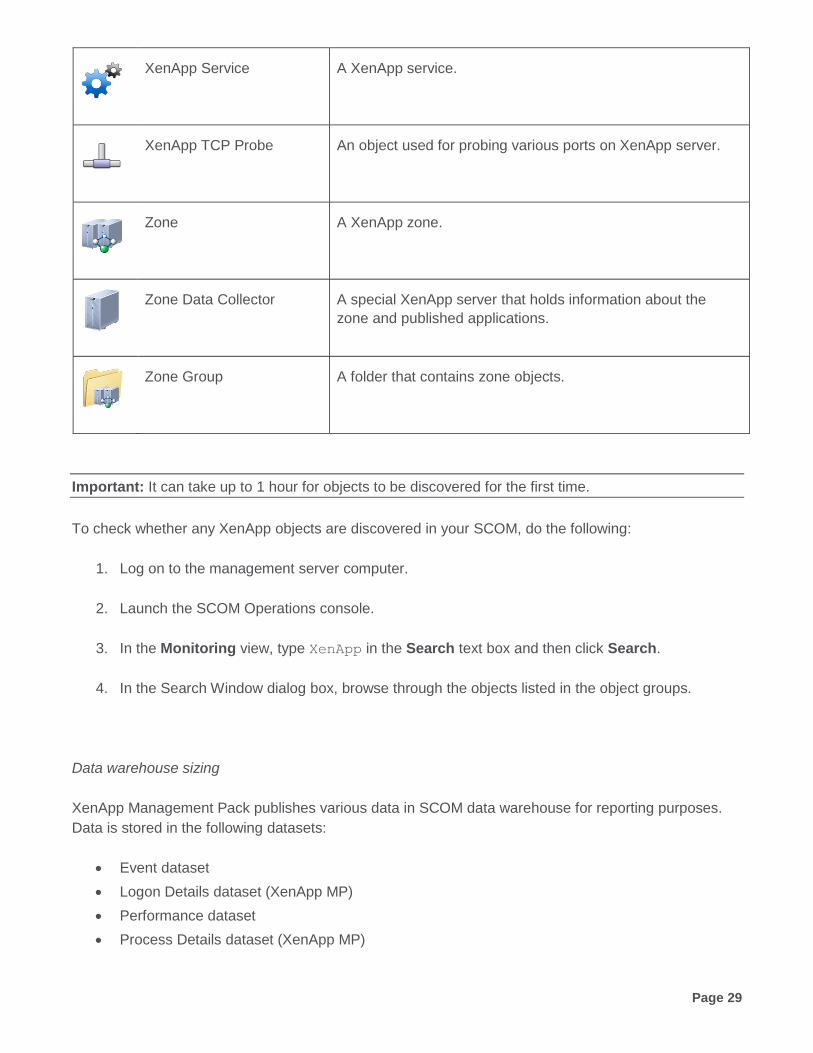
The following table lists the object types that XenApp Management Pack discovers in the managed
environment.
Table 4.1 Discovered XenApp object types
Object type Description
Application A published application.
Application Folder A folder that contains published applications.
Farm A XenApp farm.
Services Group A folder that contains Terminal Server and XenApp services.
Terminal Server Service A Terminal Server service.
XenApp A XenApp server.
XenApp Availability An object used for monitoring availability of XenApp servers.
XenApp Farms The root object for the XenApp Management Pack topology.
XenApp Folder A folder that contains XenApp servers.
Page 29
XenApp Service A XenApp service.
XenApp TCP Probe An object used for probing various ports on XenApp server.
Zone A XenApp zone.
Zone Data Collector A special XenApp server that holds information about the
zone and published applications.
Zone Group A folder that contains zone objects.
Important: It can take up to 1 hour for objects to be discovered for the first time.
To check whether any XenApp objects are discovered in your SCOM, do the following:
1. Log on to the management server computer.
2. Launch the SCOM Operations console.
3. In the Monitoring view, type XenApp in the Search text box and then click Search.
4. In the Search Window dialog box, browse through the objects listed in the object groups.
Data warehouse sizing
XenApp Management Pack publishes various data in SCOM data warehouse for reporting purposes.
Data is stored in the following datasets:
Event dataset
Logon Details dataset (XenApp MP)
Performance dataset
Process Details dataset (XenApp MP)

Page 30
Session Details dataset (XenApp MP)
State dataset
There are many factors that affect the space consumption on SCOM data warehouse. The amount of
data depends on the size of monitored XenApp environment and on the number of enabled data
collecting rules.
About XenApp Management Pack datasets
Datasets store data in raw and aggregated form. XenApp Management Pack introduces three custom
datasets for detailed user session information, for the user logons and for the detailed process
information. All other data is stored in default SCOM datasets. Data retention settings are different for
each dataset. For information about default SCOM dataset configuration, see How to Configure
Grooming Settings for the Reporting Data Warehouse Database.
Logon Details dataset
Logon Details dataset stores information about user logons (logon time, logon duration, individual logon
phase duration etc.). The default data retention is 400 days.
The following reports use user logon details information:
XenApp logons and published application usage per user
Server logons
User logons
User logon information is collected by the Publish XenApp User Logon Details DW rule.
Session Details dataset
Session Details dataset stores detailed information about user sessions (usernames, client info,
session names, application names, session CPU, memory and other metrics). The default data
retention is 400 days.
The following reports use user session details information:
XenApp logons and published application usage per user
XenApp user activity (on published application)
XenApp user activity (on server)
User session details information is collected by the Publish XenApp User Session Details DW
rule. The rule is disabled by default with a parameter override. To enable it, create an override and set

Page 31
the Enabled parameter to true. The rule is targeted on XenApp server and collects detailed session
information for each user session every 300 seconds.
Process Details dataset
Process Details dataset stores detailed information about system processes (process name, PID, user
name, session ID, CPU usage, page file bytes, working set size, IO operations and page faults). The
default data retention is 15 days.
The following reports use process details information:
XenApp server process performance
Process details information is collected by the Publish XenApp Process Details DW rule. The
rule is disabled by default with a parameter override. To enable it, create an override and set the
Enabled parameter to true. The rule is targeted on XenApp server and collects detailed process
information for a set of processes every 300 seconds. The set of processes is defined by the
CollectionType rule parameter. For more information, see the rule’s product knowledge.
Grooming settings for the Logon Details, Session Details and Process Details datasets
To change grooming settings, do the following:
1. Open SQL Server Management Studio and connect to the reporting data warehouse.
2. In the Object Explorer pane, expand Databases, expand OperationsManagerDW database,
and then expand Tables.
3. Right-click dbo.Dataset and then select Open Table.
4. Make a note of DatasetID GUID values for rows with DatasetDefaultName equal to each of the
following values:
○ XenApp Logon Details DataSet
○ XenApp Process Details DataSet
○ XenApp Session Details DataSet
5. In the Object Explorer pane, right-click dbo.StandardDatasetAggregation and then select
Open Table.
6. In the DatasetID column, locate the dataset GUID noted in step 4.
7. Locate the MaxDataAgeDays column and edit the value to set the grooming interval.

Page 32
8. Repeat steps 6 and 7 for the other two GUID values.
Calculating data warehouse space consumption
Size of published data in the SCOM data warehouse is different for each dataset.
Performance Dataset
Most data collection rules in XenApp Management Pack publish data to the performance dataset.
Performance dataset keeps hourly and daily aggregated data. SCOM default retention times are as
follows:
Raw data 10 days
Hourly aggregations 400 days
Daily aggregations 400 days
Estimated size (data and index size) of each record in Performance dataset is:
Raw data 68 bytes / record
Hourly aggregations 162 bytes / record
Daily aggregations 162 bytes / record
Logon Details Dataset
Logon Details dataset does not aggregate data. Retention time is 400 days.
Estimated size (data and index size) of each record in Logon Details dataset is:
Raw data 131 bytes / record
Session Details Dataset
Session Details dataset keeps raw session data and aggregated billing daily data. Retention time is 400
days.
Estimated size (data and index size) of each record in Session Details dataset is:
Page 33
Raw data 212 bytes / record
Billing daily aggregations 106 bytes / record
Bear in mind that collecting detailed user session information can significantly impact your SCOM data
warehouse size if there are many users using your XenApp environment.
Process Details Dataset
Process Details dataset does not aggregate data. Retention time is 15 days.
Estimated size (data and index size) of each record in Process Details dataset is:
Raw data 166 bytes / record
Calculating data warehouse growth with default XenApp Management Pack configuration
Default XenApp Management Pack configuration includes 15 enabled performance collecting rules,
which are targeted on XenApp server. Rules execute every 5 minutes. Most rules collect data for 1
instance per rule. Some rules collect data for multiple instances.
Performance data size per day for one XenApp server is calculated with the following formulas:
+ <RAW_Perf_record_size> * <#_raw_samples_per_day> * <#_of_1instance_rules>
+ <HOURLY_Perf_record_size> * <#_hourly_samples_per_day> * <#_of_1instance_rules>
+ <DAILY_Perf_record_size> * <#_daily_samples_per_day> * <#_of_1instance_rules>
+ <RAW_Perf_record_size> * <#_raw_samples_per_day> * <#_of_multiple_instance_rules> * <#_of_instances>
+ <HOURLY_Perf_record_size> * <#_hourly_samples_per_day> * <#_of_multiple_instance_rules> * <#_of_instances>
+ <DAILY_Perf_record_size> * <#_daily_samples_per_day> * <#_of_multiple_instance_rules> * <#_of_instances>
To get the size for the entire environment, multiply this result with the number of XenApp servers.
Sample calculation for a XenApp environment with 10 XenApp servers and 50 published applications is
as follows (we used 11 rules that collect XenApp server related metrics and 4 rules that collect data for
all local Applications (instances) on XenApp server):

Page 34
( 68bytes * 288 samples * 11 rules
+ 162 bytes * 24 samples * 11 rules
+ 162 bytes * 1 sample * 11 rules
+ 68 bytes * 288 samples * 4 rules * 50 applications (instances)
+ 162 bytes * 24 samples * 4 rules * 50 applications (instances)
+ 162 bytes * 1 sample * 4 rules * 50 applications (instances)
)
* 10 servers
= 47.56 MB per day
Because raw data remains in the data warehouse only for 10 days, calculation for long term data
consumption should not include size of the RAW data:
( 162 bytes * 24 samples * 11 rules
+ 162 bytes * 1 sample * 11 rules
+ 162 bytes * 24 samples * 4 rules * 50 applications (instances)
+ 162 bytes * 1 sample * 4 rules * 50 applications (instances)
)
* 10 servers
= 8.15MB per day
Figure 4.1 Data warehouse performance data growth monthly chart (based on a XenApp environment
with 10 XenApp servers and 50 applications)
User logon detailed data consumption per day is not very space consuming. This rule intercepts and
collects all user logons that occur on a XenApp server.
Formula for DW data size calculation is as follows:
<RAW_Logon_record_size> * <#_of_users> * <# _avg_logons_per_user>
0
500
1,000
1,500
2,000
2,500
3,000
3,500
4,000
0 1 2 3 4 5 6 7 8 9 10 11 12
Size
(M
B)
Month

Page 35
Sample calculation for a XenApp environment with 10 XenApp servers and 50 published applications is
as follows (we assume that on average each user performs 2 logons per day):
131 bytes * 2 logons * 500 users
= 0.12 MB per day
Figure 4.2 Data warehouse logon data growth monthly chart (based on a XenApp environment with
500 users)
User session detailed data consumption per day is calculated with a different formula. Because
collecting session detailed information can be space consuming, the rule for collecting user session
details (Publish XenApp User Session Details DW) is disabled by default with an override.
The rule executes every 300 seconds and collects all active user sessions on the server. It also tracks
all published applications that the user has been using in that session.
Formula for data size calculation is as follows:
<RAW_Session_record_size> * <#_raw_samples_per_day> * <# _user_sessions> * <#_avg_application_per_user>
+ <DAILY_Billing_Aggregation_record_size> * <# _avg_daily_users> * <#_avg_application_per_user>
Sample calculation for XenApp environment with 10 XenApp servers, 50 Applications and 500 users is
as follows (we assume that each user is using on average 2 applications for 8 hours per day, 5 days
per week):
212 bytes * 96 samples * 2 applications * 500 user sessions
+ 106 bytes * 2 applications * 500 users
= 19.56 MB per day = 97.80 MB per week
0
5
10
15
20
25
30
35
40
45
50
0 1 2 3 4 5 6 7 8 9 10 11 12
Size
(M
B)
Month
Page 36
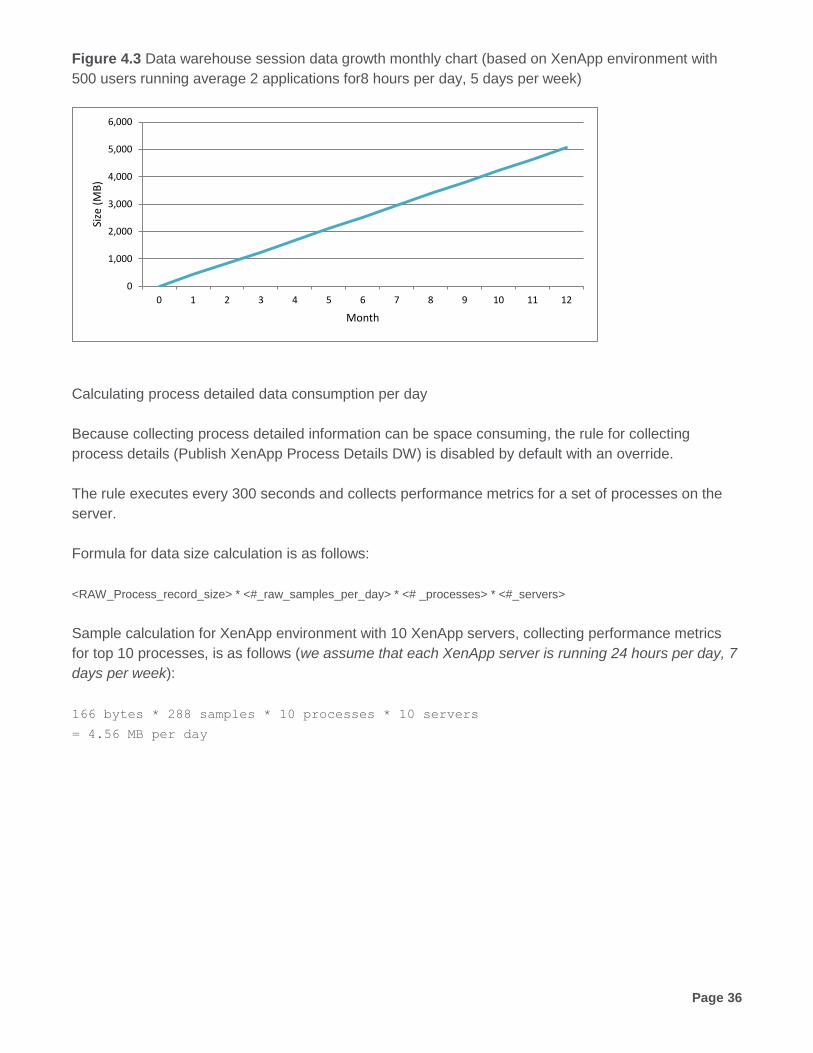
Figure 4.3 Data warehouse session data growth monthly chart (based on XenApp environment with
500 users running average 2 applications for8 hours per day, 5 days per week)
Calculating process detailed data consumption per day
Because collecting process detailed information can be space consuming, the rule for collecting
process details (Publish XenApp Process Details DW) is disabled by default with an override.
The rule executes every 300 seconds and collects performance metrics for a set of processes on the
server.
Formula for data size calculation is as follows:
<RAW_Process_record_size> * <#_raw_samples_per_day> * <# _processes> * <#_servers>
Sample calculation for XenApp environment with 10 XenApp servers, collecting performance metrics
for top 10 processes, is as follows (we assume that each XenApp server is running 24 hours per day, 7
days per week):
166 bytes * 288 samples * 10 processes * 10 servers
= 4.56 MB per day
0
1,000
2,000
3,000
4,000
5,000
6,000
0 1 2 3 4 5 6 7 8 9 10 11 12
Size
(M
B)
Month

Page 37
Figure 4.4 Data warehouse process data growth daily chart (based on XenApp environment with 10
servers, collecting top 10 processes per server)
Manually importing included management packs into SCOM
For general instructions about how to import management packs into SCOM, see the How to Import an
Operations Manager Management Pack webpage on the Microsoft TechNet website.
To import the sealed management packs for XenApp manually, do the following:
1. Log on to the management server computer.
2. Launch the SCOM Operations console.
3. In the Administration view, click Management Packs.
4. Make sure all required default management packs are present in the list in the middle pane. For
a list of requirements, see “Preparing for the installation”.
5. In the Tasks pane, expand Actions, and then click Import Management Packs.
6. In the Import Management Packs dialog box, click Add, and then select Add from disk.
7. In the Online Catalog Connection, click No.
8. In the Select Management Packs to import dialog box, browse to the folder that contains the
following management pack files, select those files, and then click Open.
○ Comtrade.Citrix.Library.mp
○ Comtrade.Citrix.XenApp.mp
0
10
20
30
40
50
60
70
80
0 1 2 3 4 5 6 7 8 9 10 11 12 13 14 15
Size
(M
B)
Day

Page 38
○ Comtrade.Citrix.XenApp.Reports.mp
9. Click Install.
Customizing sealed management packs
Similarly to customizing the default SCOM management pack, you can customize the sealed
management packs that XenApp Management pack provides. For details, see the Microsoft TechNet
website:
For general information about customization of management packs, see the Customizing
Management Packs webpage.
For instructions on how to customize a management pack, see the Create a New Management
Pack for Customizations webpage.
Chapter 5: Support
General support resources
Citrix® offers a variety of resources for support with your Citrix environment, including the following:
The Knowledge Center is a self-service, Web-based technical support database that contains
thousands of technical solutions, including access to the latest hotfixes, service packs, and
security bulletins.
Technical Support Programs for both software support and appliance maintenance are available
at a variety of support levels.
The Subscription Advantage program is a one-year membership that gives you an easy way to
stay current with the latest product version upgrades and enhancements.
Citrix Education provides official training and certification programs on virtually all Citrix products
and technologies.
For more information about Citrix services and support, see the Citrix Support Services and Resources
website.
You can also participate in and follow technical discussions offered by the experts on various Citrix
products at the Welcome to the Citrix Community, Citrix Discussions, and Citrix Services websites.
Contacting Citrix Customer Service
To contact Citrix Customer Service, see the Contact Support website.