contractor administrator training guide - facility · pdf filecontractor administrator...
TRANSCRIPT

VERISAE
MOBILE
Contractor Administrator Training Guide

Verisae Mobile – Contractor Administrator
Page 1 of 28
TABLE OF CONTENTS TABLE OF CONTENTS .................................................................................................................................. 1
VERSION CONTROL .................................................................................................................................... 2
NAVIGATIONAL TIPS .................................................................................................................................. 2
NOTES ....................................................................................................................................................... 2
VERISAE MOBILE DASHBOARD ................................................................................................................... 3
QUICK ACCESS PROCESS MAPS ................................................................................................................... 4
Contractor Engineer Access Verisae Mobile ....................................................................................................... 4 Contractor Engineer Start Work ......................................................................................................................... 4 Contractor Engineer Pause Work ....................................................................................................................... 5 Contractor Engineer Complete Work ................................................................................................................. 5
LOGIN PAGE ............................................................................................................................................... 6
ACCESS THROUGH EAM .......................................................................................................................... 6
ACCESS THROUGH MOBILE URL .............................................................................................................. 7
MOBILE SCREEN LAYOUT ........................................................................................................................ 8
NAVIGATION BUTTON .............................................................................................................................. 10
STORE INFORMATION .......................................................................................................................... 10
Store List .......................................................................................................................................................... 11
SERVICE SECTION ................................................................................................................................. 12
Outstanding Work Orders ................................................................................................................................ 12 Log Note........................................................................................................................................................... 13 All Work Orders ............................................................................................................................................... 14
ACTIONS BUTTON .................................................................................................................................... 15
Change Location ............................................................................................................................................... 15 Choose Filter .................................................................................................................................................... 15 Define Filter ..................................................................................................................................................... 16 User Preferences .............................................................................................................................................. 17 Search .............................................................................................................................................................. 18 Logout .............................................................................................................................................................. 18
SORTING DROPDOWN.............................................................................................................................. 19
ADDING TILES .......................................................................................................................................... 20
QUOTES TILE ........................................................................................................................................ 20
Steps ................................................................................................................................................................ 21
TECHNICIANS AT STORE TILE ................................................................................................................. 23
Steps ................................................................................................................................................................ 23
WORK ORDER TILE ............................................................................................................................... 24
Steps ................................................................................................................................................................ 25
EDITING TILES .......................................................................................................................................... 27
EDIT ..................................................................................................................................................... 27
DELETE ................................................................................................................................................. 27
SUPPORT ................................................................................................................................................. 28
Verisae Mobile – Contractor Administrator
Page 2 of 28
VERSION CONTROL
VERSION ISSUE DATE DESCRIPTION ISSUED BY
1.01 August 2015 Guide Creation for review purposes Andrew Masson
1.02 November 2015 Guide updates due to role amendments Andrew Masson
1.03 January 2016 WO Allocation update Andrew Masson
NAVIGATIONAL TIPS
This Guide is set out in a logical manner but should you get lost then return to the “Table of Contents” to find
what you are looking for.
The screenshots given are examples only and may not always align with the Live Application.
The following is used as a basis within this Guide:
BOLD CAPITAL WORDS: This references a button that you need to click on
“Bold Words in Speech Marks”: This references the Page / Table name
Important Information: This is referenced by bold writing within a green coloured box
The screenshots given are examples only and may not always align with the Live Application
Fields that are mandatory are coloured in a darker orange outline with a light orange background. See
the image below.
NOTES
This Guide sets out all the functionality that Verisae Mobile has to offer. Therefore, whilst utilising this Guide,
you may see functionality and aspects of the System that your role does not allow you access to.
Please always ensure that your tiles are correct and that they show the right data. You are responsible for
your own tiles. A constant check to the EAM system is always advisable to ensure that the values shown are
correct.
Verisae Mobile – Contractor Administrator
Page 3 of 28
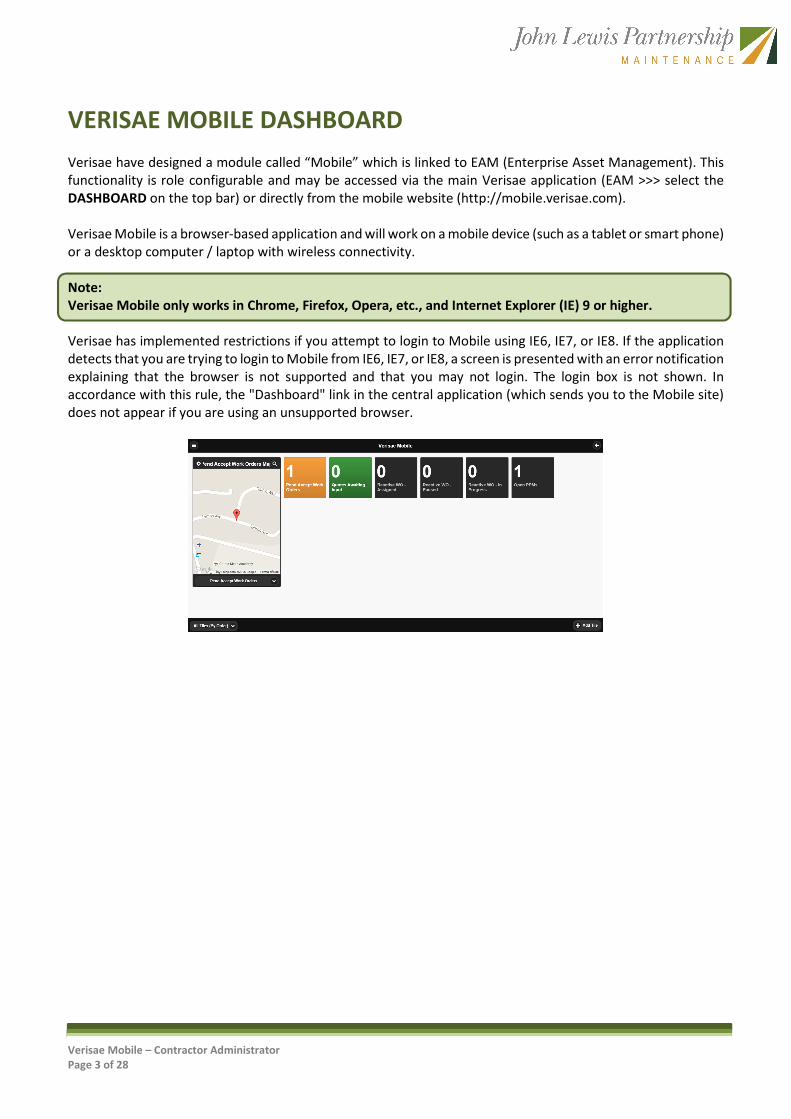
VERISAE MOBILE DASHBOARD
Verisae have designed a module called “Mobile” which is linked to EAM (Enterprise Asset Management). This
functionality is role configurable and may be accessed via the main Verisae application (EAM >>> select the
DASHBOARD on the top bar) or directly from the mobile website (http://mobile.verisae.com).
Verisae Mobile is a browser-based application and will work on a mobile device (such as a tablet or smart phone)
or a desktop computer / laptop with wireless connectivity.
Note:
Verisae Mobile only works in Chrome, Firefox, Opera, etc., and Internet Explorer (IE) 9 or higher.
Verisae has implemented restrictions if you attempt to login to Mobile using IE6, IE7, or IE8. If the application
detects that you are trying to login to Mobile from IE6, IE7, or IE8, a screen is presented with an error notification
explaining that the browser is not supported and that you may not login. The login box is not shown. In
accordance with this rule, the "Dashboard" link in the central application (which sends you to the Mobile site)
does not appear if you are using an unsupported browser.

Verisae Mobile – Contractor Administrator
Page 4 of 28
QUICK ACCESS PROCESS MAPS
The following process maps have been added to enable you to have a quick, high level overview of
functionality. To then view further information, please review the relevant detailed section within this Guide.
CONTRACTOR ENGINEER ACCESS VERISAE MOBILE
CONTRACTOR ENGINEER START WORK

Verisae Mobile – Contractor Administrator
Page 5 of 28
CONTRACTOR ENGINEER PAUSE WORK
CONTRACTOR ENGINEER COMPLETE WORK
Verisae Mobile – Contractor Administrator
Page 6 of 28
LOGIN PAGE
There are two ways to access Mobile:
Through the Verisae Enterprise Asset Management Site (EAM), or
Directly to the Mobile site using the correct URL
ACCESS THROUGH EAM
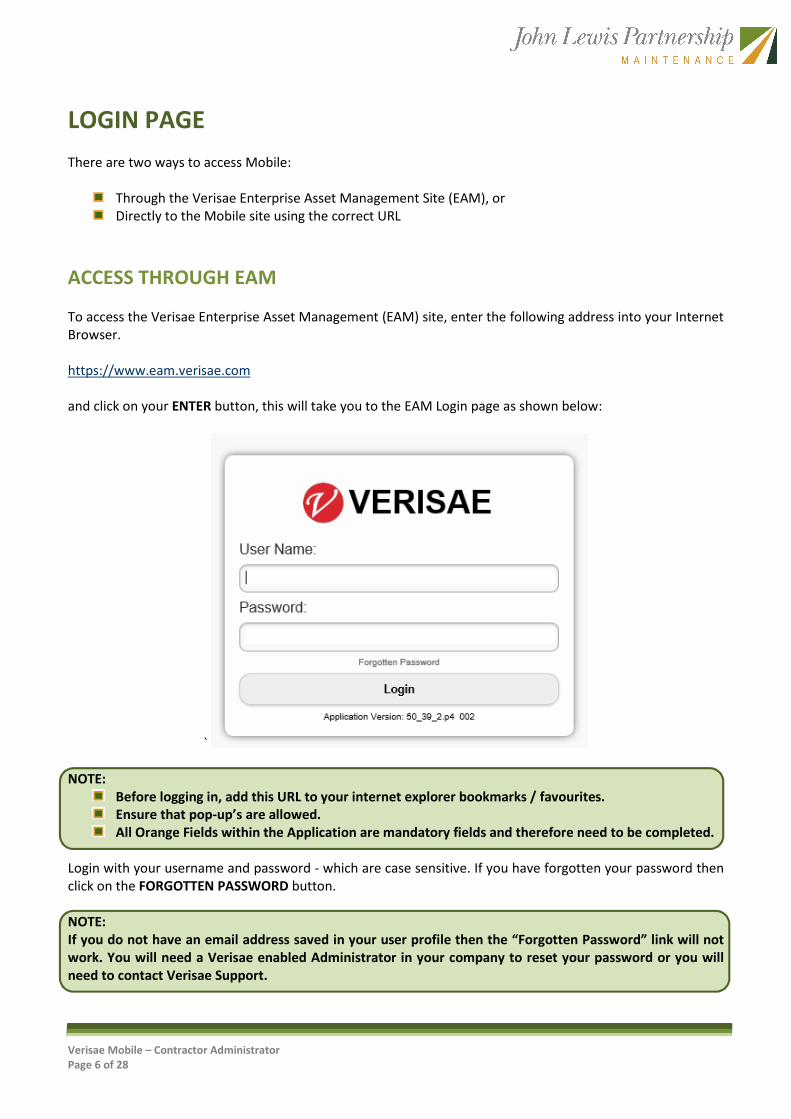
To access the Verisae Enterprise Asset Management (EAM) site, enter the following address into your Internet
Browser.
https://www.eam.verisae.com
and click on your ENTER button, this will take you to the EAM Login page as shown below:
`
NOTE:
Before logging in, add this URL to your internet explorer bookmarks / favourites.
Ensure that pop-up’s are allowed.
All Orange Fields within the Application are mandatory fields and therefore need to be completed.
Login with your username and password - which are case sensitive. If you have forgotten your password then
click on the FORGOTTEN PASSWORD button.
NOTE:
If you do not have an email address saved in your user profile then the “Forgotten Password” link will not
work. You will need a Verisae enabled Administrator in your company to reset your password or you will
need to contact Verisae Support.
Verisae Mobile – Contractor Administrator
Page 7 of 28
You will then see the following page (example). Click on the DASHBOARD link. If this link is not present, ensure
that you are using a supported browser or contact your Verisae Representative to see if you have access to this
functionality.
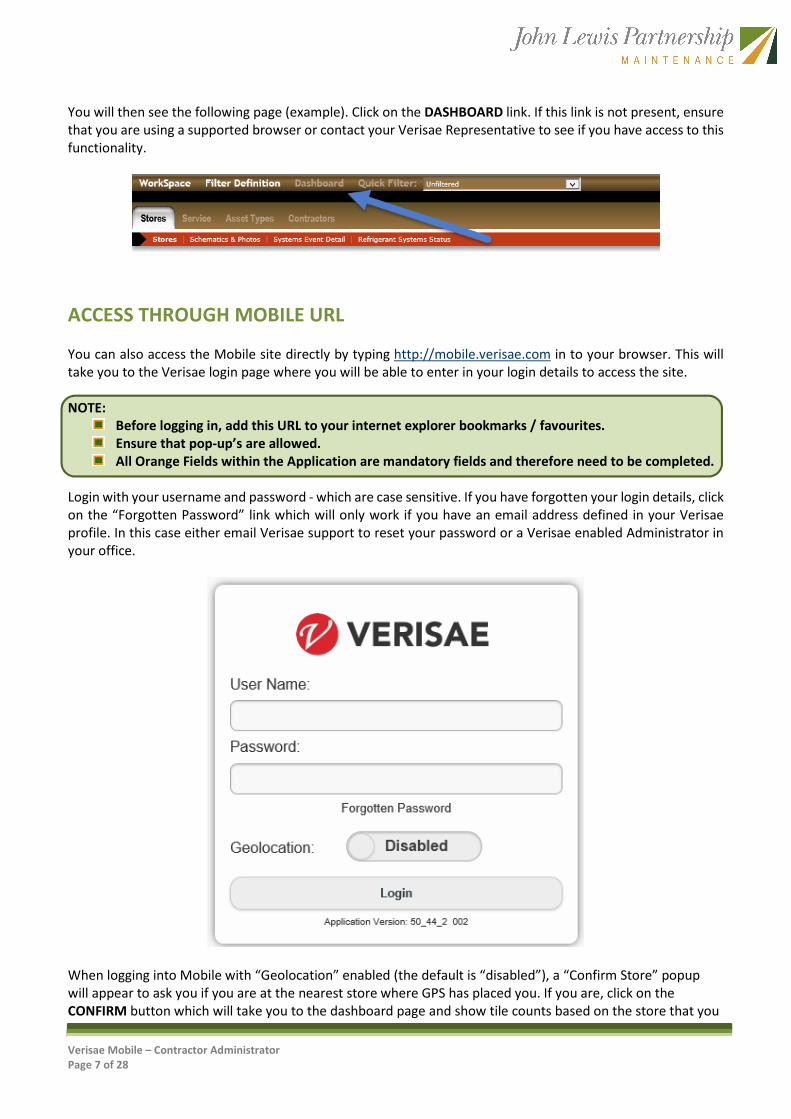
ACCESS THROUGH MOBILE URL
You can also access the Mobile site directly by typing http://mobile.verisae.com in to your browser. This will
take you to the Verisae login page where you will be able to enter in your login details to access the site.
NOTE:
Before logging in, add this URL to your internet explorer bookmarks / favourites.
Ensure that pop-up’s are allowed.
All Orange Fields within the Application are mandatory fields and therefore need to be completed.
Login with your username and password - which are case sensitive. If you have forgotten your login details, click
on the “Forgotten Password” link which will only work if you have an email address defined in your Verisae
profile. In this case either email Verisae support to reset your password or a Verisae enabled Administrator in
your office.
When logging into Mobile with “Geolocation” enabled (the default is “disabled”), a “Confirm Store” popup
will appear to ask you if you are at the nearest store where GPS has placed you. If you are, click on the
CONFIRM button which will take you to the dashboard page and show tile counts based on the store that you

Verisae Mobile – Contractor Administrator
Page 8 of 28
are at. If not, click on the CHANGE STORE button to select an alternate store, or you can click on the
UNFILTERED button to show all counts on the tiles.
MOBILE SCREEN LAYOUT
The main homepage, or dashboard, of the Mobile application may contain a number of tiles that displays a
range of defined information. These tiles can be of various uses and types and are configurable by you
(depending on your login role). When you first login you will have access to a number of generic tiles which can
then be edited by you, if required.
You are able to set up tiles that can show you a wealth of information – examples such as:
Show Open PPM Work Orders for your area / branches
Show a map of open Refrigeration Work Orders for your area
Show “In Progress” Work Orders – perhaps you want to drop by and see how work is progressing
Show Quotes that need review
The options are many and varied
Each corner of the screen has a different button and these buttons do various things. Once clicked you will be
presented with further options. We will go in to these buttons in more detail as this guide progresses.
Each tile is its own individual square image. A value is displayed in large, white text on each tile for easy reading
and scanning. A black background is the default for all tiles. If RAG (Red, Amber, Green) is enabled, the tile may
have a coloured background or top banner. Specialty tiles, like the map function, are of different sizes and
shapes and have unique features.
For efficient loading of the dashboard, the tiles load sequentially (in the order determined for the dashboard)
and display individually once the loading per tile is complete, rather than loading all of the tiles and only
displaying them once all are loaded.

Verisae Mobile – Contractor Administrator
Page 9 of 28
A failed tile does not affect the loading and displaying of all tiles. The loading status of a tile is indicated by a
white box and spinning wheel. A tile that has failed to load is indicated by a light red box labelled "Error" and
the title of the tile. You have the ability to delete this failed tile by selecting and holding down (long-clicking) on
that tile, generating a pop-up with the option to "Delete."

Verisae Mobile – Contractor Administrator
Page 10 of 28
NAVIGATION BUTTON
The “Navigation” button is the top left button. Selecting this button generates a fly-in menu from the left side
of the screen. Options in this menu help you to navigate within and from the mobile application.
The following is a high level description of the different button selections:
BUTTON DESCRIPTION
Close Menu To exit the menu and remove the fly-in, select the CLOSE MENU button or click on your
browser outside of this menu.
Dashboard Closes the menu and takes you back to the main page
Workspace Sends you to EAM. This button is only included if you have the appropriate access to EAM
Store Information Opens a further option underneath - “Store List”. Selecting this will take you to the
respective page
Service Opens further options underneath, namely, “Outstanding Work Orders” and “All Work
Orders”.
NOTE:
Your role may not give you access to all of these functions.
STORE INFORMATION If you click on this button, a further option will appear and this is:
Store List

Verisae Mobile – Contractor Administrator
Page 11 of 28
STORE LIST
Navigation: Store Information >>> Store List
When you click on the STORE LIST button, a table will show that will list out the stores that you are able to see
within your role and that you, as a Contractor, are associated to.
NOTE:
If your filter is on – then you will only see stores within the filter.
You are able to click on the STORE MAP button to see a map of where all the associated stores are located.
Your browser will ask you for your position as it will want to know where you are in relation to the stores.
Your location will be shown as a green pointer and the stores will be in red. Of course the location will only
work if you enable geolocation and also share your location within the application.
Click on the back arrow button in the Application to go back to the store list and you are then able to select a
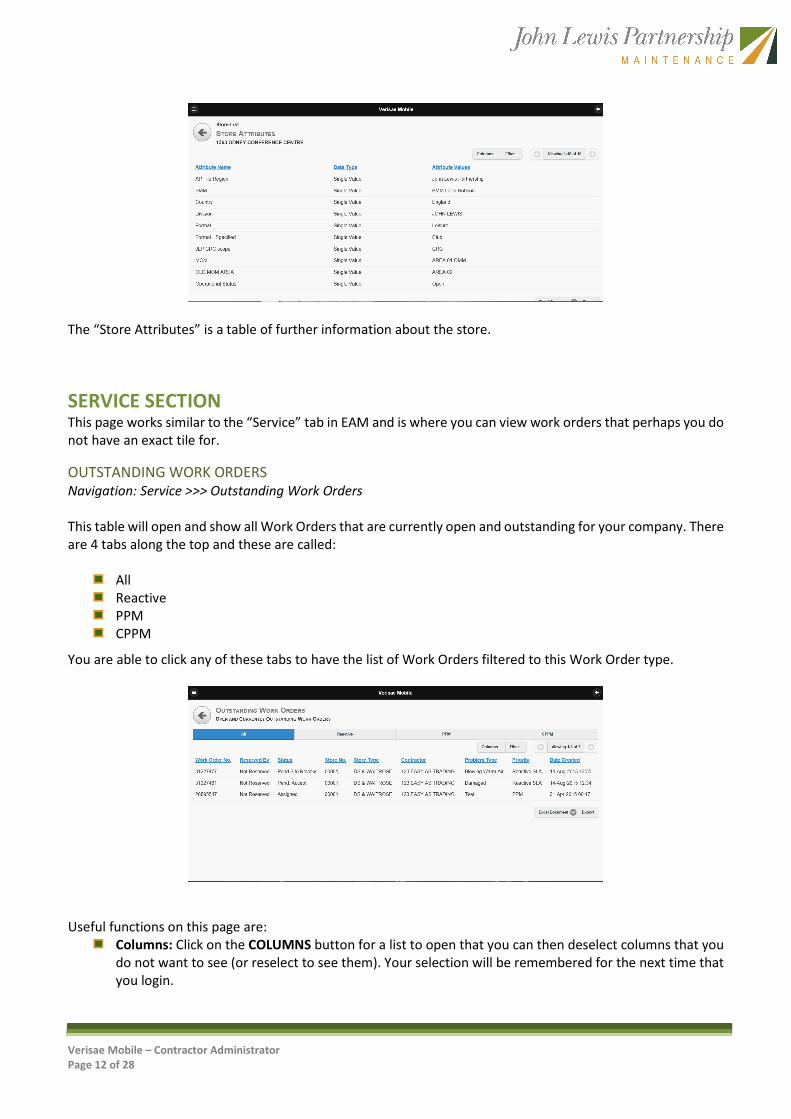
store which will open up the “Store Attributes”.
Verisae Mobile – Contractor Administrator
Page 12 of 28
The “Store Attributes” is a table of further information about the store.
SERVICE SECTION This page works similar to the “Service” tab in EAM and is where you can view work orders that perhaps you do
not have an exact tile for.
OUTSTANDING WORK ORDERS
Navigation: Service >>> Outstanding Work Orders
This table will open and show all Work Orders that are currently open and outstanding for your company. There
are 4 tabs along the top and these are called:
All
Reactive
PPM
CPPM
You are able to click any of these tabs to have the list of Work Orders filtered to this Work Order type.
Useful functions on this page are:
Columns: Click on the COLUMNS button for a list to open that you can then deselect columns that you
do not want to see (or reselect to see them). Your selection will be remembered for the next time that
you login.

Verisae Mobile – Contractor Administrator
Page 13 of 28
Filter: You can further define the results on this table by clicking on this button and seeing a search type
window.
Export: On the bottom of the table is an EXPORT button that will allow you to export the results of the
table. Formats are: Excel Document; Tab Delimited and Comma Delimited.
You are able to select a Work Order from the table which will then take you to the “Work Order Summary” page
where, depending on the status and your role configuration, you will be able to carry out a number of actions.
These actions are described at a high level in the table below.
Select An Action…
OPTION DESCRIPTION
Accept / Decline Work
Clicking this option will open a popup where you will select a button to either:
Accept: Select “Accept” and then fill in the “Comments” box. If you are a
contractor, you will also need to then select the “Update ETA” option and
populate the required fields.
Decline: Select “Decline” >>> fill in the “Comments” box
Allocate Technician
A table list of names will appear whereby you will need to click on the required person
and the page will refresh back to the “Work Order Summary” page. If you need an email
to be sent then please ensure that there is an email address for the Engineer in their
“Staff List” profile.
Log Note Add in the “Reason” and the “Comments” field and then click on the OK button. See
the below section for further information.
Re-allocate Technician
When you select this option a list of names will appear. Click on the name that you want
to re-allocate the Work Order to and the page will refresh back to the “Work Order
Summary” page.
Update ETA Populate the “New ETA” field (click in the field and a date and time chooser will popup)
and add in mandatory comments before clicking on the SAVE button.
LOG NOTE
The “Log Note” functionality is a powerful tool and can be used for a multitude of reasons. The main one will
be to update someone on the status of a Work Order. Any notes added can be seen by anyone who has access
to the history of the Work Order. However, logging a note generally does not notify anyone that a note has
been added. If you do need to update someone that a note has been added, then once you have populated the
“Reason” and “Comments” fields, click on the “E-mail Details” section. The recommended process for notifying
someone is below.
STEPS:
Populate the “Reason” field
Verisae Mobile – Contractor Administrator
Page 14 of 28
Add in free text comments
Click on the “E-mail Details” section
Add a tick in to the “Specify Recipient’s E-mail” box
Add free text email addresses. If there are multiple then separate this by a comma
Click on the SUBMIT button
An email will be sent to the recipients
NOTE:
You can add email addresses by clicking on the ADD RECIPIENT button. However, if a user has not added an
email address to their profile in Verisae then their name will not be selectable.
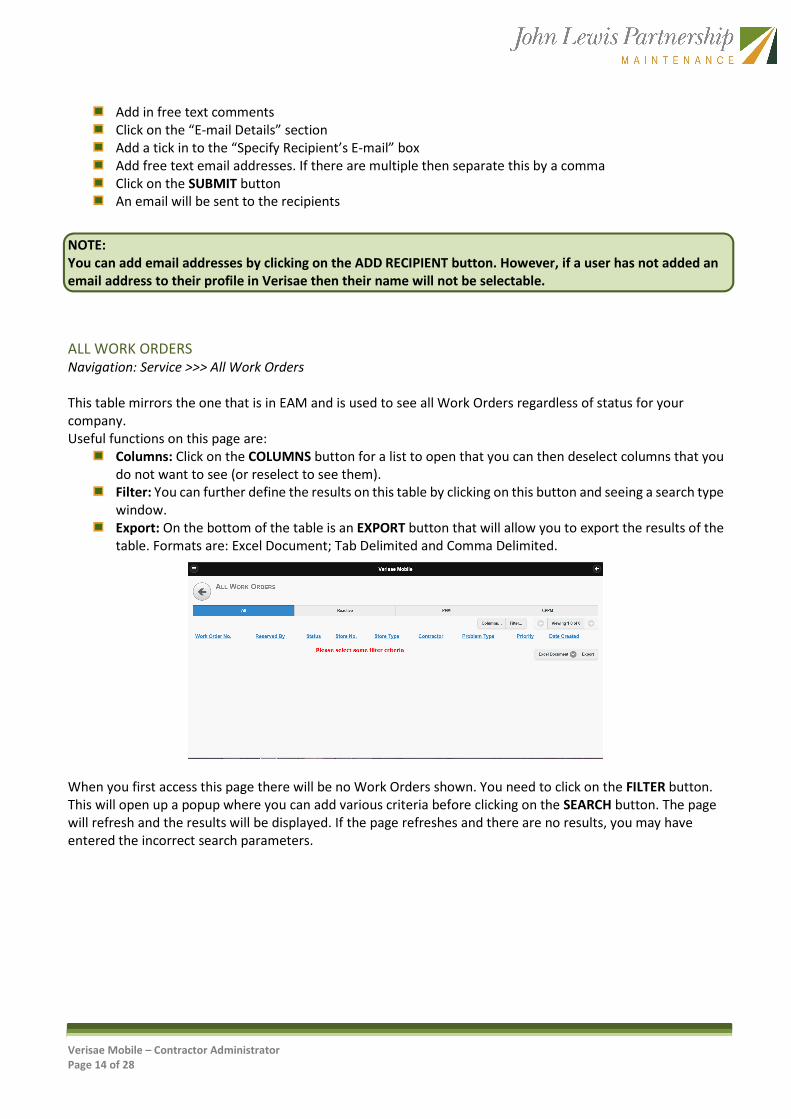
ALL WORK ORDERS
Navigation: Service >>> All Work Orders
This table mirrors the one that is in EAM and is used to see all Work Orders regardless of status for your
company.
Useful functions on this page are:
Columns: Click on the COLUMNS button for a list to open that you can then deselect columns that you
do not want to see (or reselect to see them).
Filter: You can further define the results on this table by clicking on this button and seeing a search type
window.
Export: On the bottom of the table is an EXPORT button that will allow you to export the results of the
table. Formats are: Excel Document; Tab Delimited and Comma Delimited.
When you first access this page there will be no Work Orders shown. You need to click on the FILTER button.
This will open up a popup where you can add various criteria before clicking on the SEARCH button. The page
will refresh and the results will be displayed. If the page refreshes and there are no results, you may have
entered the incorrect search parameters.

Verisae Mobile – Contractor Administrator
Page 15 of 28
ACTIONS BUTTON
The “Actions” button is the top right button. Selecting this button generates a fly-in menu from the right side
of the screen. Options in this menu help you to perform various tasks, such as filtering the dashboard to certain
categories or locations, create a work order, or set the user preferences. To exit the menu and remove the fly-
in, click anywhere on the dashboard screen off of the menu.
BUTTON DESCRIPTION
Change Location Allows you to select a specific site so that displayed tiles show information relevant to
that site
Choose Filter
Shows the Current Filter that is presently implemented on the dashboard and offers a
second field for “Select Filter”, which is a dropdown of other available filters that you may
switch to. You can also click on the UNFILTERED button to clear any applied filters.
Define Filter Where you will come in order to define new filters to choose from in the above section.
User Preferences Set your user preferences
Search The ability to search for information throughout the application
Logout Logout of Verisae Mobile
CHANGE LOCATION
If you would like to see the dashboard tiles display numbers for a different Store, then select the CHANGE
LOCATION button. A window then displays a list of locations and allows you to select a Store to apply to the
dashboard. The tiles will then display their information for that specific Store.
NOTE:
Store Users: displays a list of stores
Client Users: displays all of the different levels of the organization of which you have visibility.
CHOOSE FILTER
On the CHOOSE FILTER button is a smaller font section which informs you what filter is currently defined. If you
would like to change this, then select the CHOOSE FILTER button. This pop-up shows the Current Filter that is
presently implemented on the dashboard and presents a second field called “Select Filter”, which is a dropdown
of other available filters that you may switch to. If there is no option for what you would like to filter to, then
you will need to define a filter. If available, close the “Define Filter” popup box and then open the menu again
to then be able to select the DEFINE FILTER option.

Verisae Mobile – Contractor Administrator
Page 16 of 28
The UNFILTERED button on the bottom of the pop-up clears any filters that were chosen and sends the
dashboard back to the default, unfiltered mode without any restrictions.
DEFINE FILTER
This button allows you to create or edit a filter. Select the DEFINE FILTER button. This will open a pop-up box as
shown in the below example:
The fields are as follows:
Filter Name: Free text field for defining the name of the Filter
Existing Criteria: Only shows if a filter has been preselected and lists out your previously selected
criteria.
Client: You will need to use the droplist and select “John Lewis Parthership”.
Organizations: This allows you to set the filter to display certain areas / stores. If you select the
“Select All” option under one of the headings then you will not be able to select any other areas.
Contractor: Will be blank for this role.
Categories: Selecting this will allow you to select one or more Categories to assign your filter to – it is
actually more a filter for Subcategory but use the “Select All” option under a Category should you
want everything within that Category.
You may see a number of buttons along the bottom bar:
SAVE: Make amendments to the existing filter and save it along with the amendments. To edit a filter
you first need to ensure that it is selected in the CHOOSE FILTER button.
SAVE AS: If you select SAVE AS then you will be prompted to change the name of the filter. A good
path if you are creating multiple filters with small tweaks to what is being shown.
CANCEL: Closes the popup box with no amendments.
NOTE: If you want to edit an existing filter, then first choose the filter using the “Choose Filter” option and
then open the “Define Filter” option.

Verisae Mobile – Contractor Administrator
Page 17 of 28
USER PREFERENCES
If you want to set or amend your system preferences then select the USER PREFERENCES button. This will open
up a page similar to the below.
Depending on your settings, this will determine what you can and cannot edit on this page. However, most
fields are editable on this page. It is highly recommended that you add an email address to your profile so that
the “Forgotten Password” option will work correctly on the login page.
Dashboard Order Setting
One setting that defaults to blank is the “Dashboard Order Setting”. This defines the sort order of the tiles on
the main Dashboard screen. Once you have finished your editing, click on the SAVE button to be taken back to
the main page. It is recommended that you use the “All Tiles (By Order)” option as the default.
Work Order History Order
The default setting for Work Order history is to show the oldest events at the top of the page and the newest
events at the bottom. This is now configurable and if you would prefer to show the newest event at the top of
the page, then select the “Newest to Oldest” option and click on the SAVE button.
Change Password
You are able to amend your own password and this can be done by clicking on the CHANGE PASSWORD button.
This will open up a new page where you will need to enter the password in twice before clicking on the SAVE
button.
The password criteria for all Mobile roles is as follows:
Must contain at least one number and one letter
Password cannot contain the username
The user will be required to change the password on the initial login as well as if the password is reset
After 3 attempts the account will be locked out
No passwords used in the previous 365 days will be allowed
If the user has not logged in for 90 days then the account will be made inactive

Verisae Mobile – Contractor Administrator
Page 18 of 28
SEARCH
If you need to search for information within the whole application, then click on the SEARCH button. This will
open up a page similar to the below where you have multiple criteria that you can select to search.
In order to search for your chosen criteria, populate the required field/s and then click on the SEARCH button
at the bottom of the page.
If you would like to start your search over again, then click on the CLEAR FORM button to start afresh.
LOGOUT
In order to log out of the application, click on the LOGOUT button. You will then be logged out and taken to the
Login page.
Verisae Mobile – Contractor Administrator
Page 19 of 28
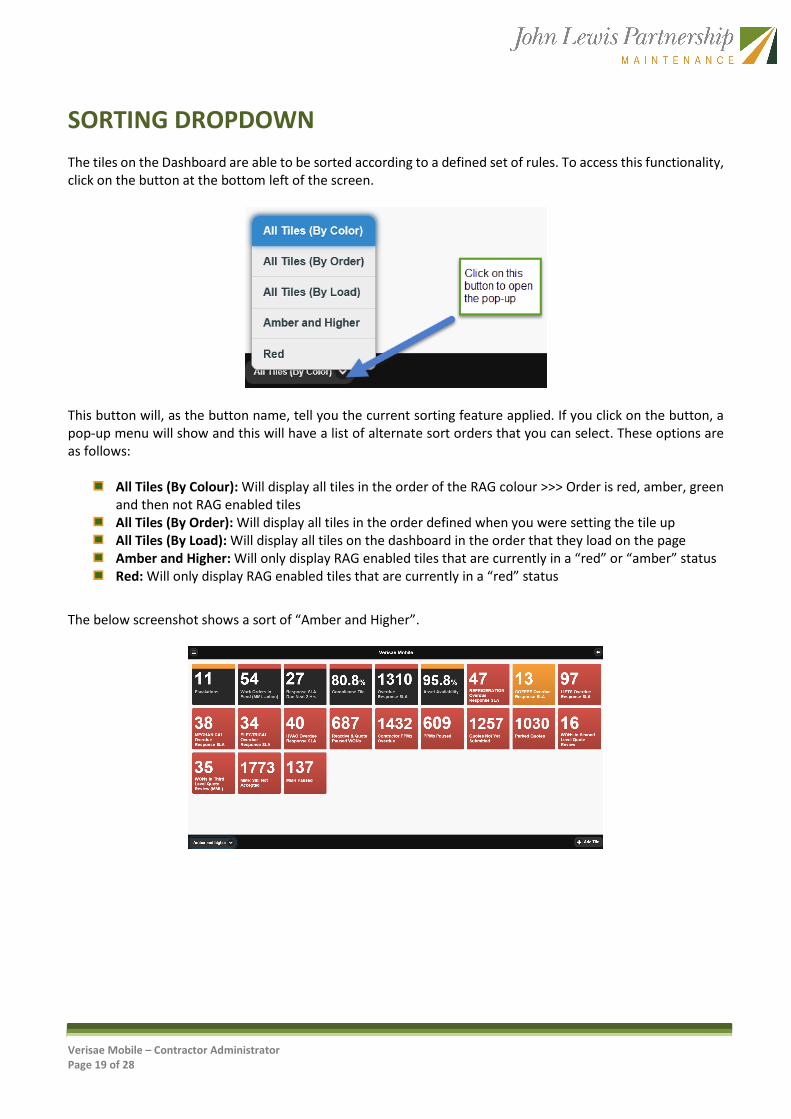
SORTING DROPDOWN
The tiles on the Dashboard are able to be sorted according to a defined set of rules. To access this functionality,
click on the button at the bottom left of the screen.
This button will, as the button name, tell you the current sorting feature applied. If you click on the button, a
pop-up menu will show and this will have a list of alternate sort orders that you can select. These options are
as follows:
All Tiles (By Colour): Will display all tiles in the order of the RAG colour >>> Order is red, amber, green
and then not RAG enabled tiles
All Tiles (By Order): Will display all tiles in the order defined when you were setting the tile up
All Tiles (By Load): Will display all tiles on the dashboard in the order that they load on the page
Amber and Higher: Will only display RAG enabled tiles that are currently in a “red” or “amber” status
Red: Will only display RAG enabled tiles that are currently in a “red” status
The below screenshot shows a sort of “Amber and Higher”.
Verisae Mobile – Contractor Administrator
Page 20 of 28
ADDING TILES
NOTE:
Please always ensure that your tiles are correct and that they show the right data. You are responsible for
your own tiles. A constant check to the EAM system is always advisable to ensure that the values shown are
correct.
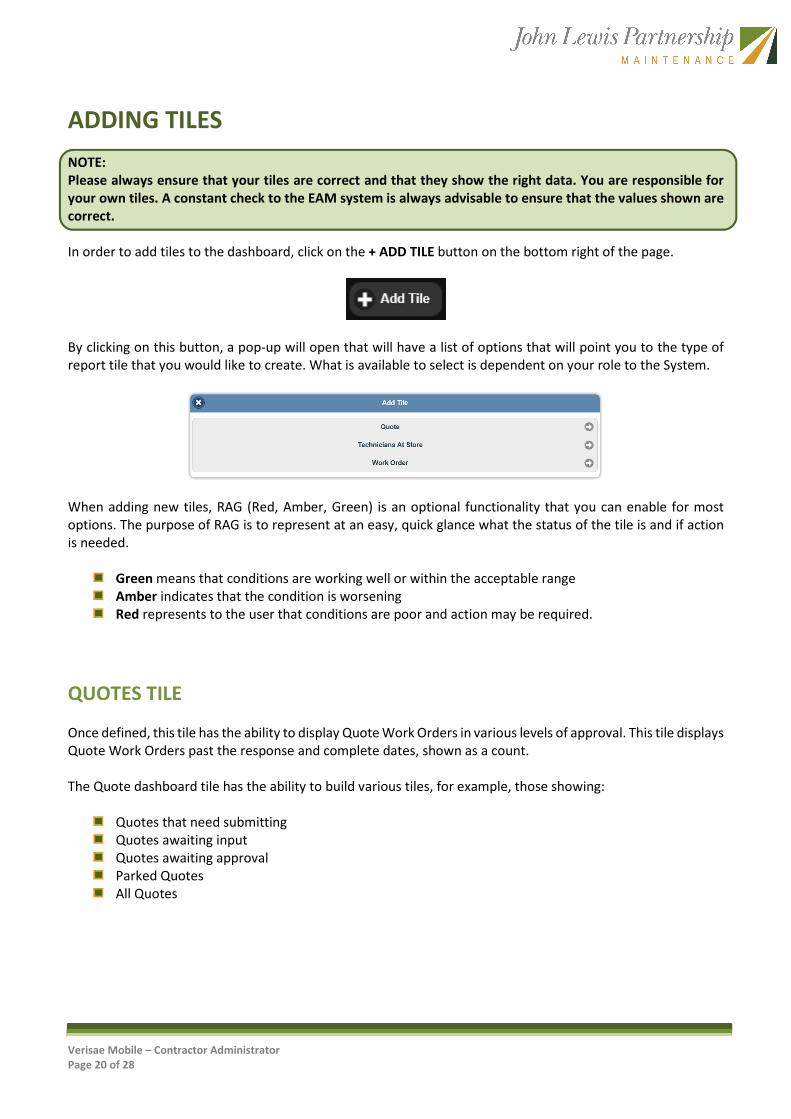
In order to add tiles to the dashboard, click on the + ADD TILE button on the bottom right of the page.
By clicking on this button, a pop-up will open that will have a list of options that will point you to the type of
report tile that you would like to create. What is available to select is dependent on your role to the System.
When adding new tiles, RAG (Red, Amber, Green) is an optional functionality that you can enable for most
options. The purpose of RAG is to represent at an easy, quick glance what the status of the tile is and if action
is needed.
Green means that conditions are working well or within the acceptable range
Amber indicates that the condition is worsening
Red represents to the user that conditions are poor and action may be required.
QUOTES TILE
Once defined, this tile has the ability to display Quote Work Orders in various levels of approval. This tile displays
Quote Work Orders past the response and complete dates, shown as a count.
The Quote dashboard tile has the ability to build various tiles, for example, those showing:
Quotes that need submitting
Quotes awaiting input
Quotes awaiting approval
Parked Quotes
All Quotes

Verisae Mobile – Contractor Administrator
Page 21 of 28
STEPS
Select a “Name” for the tile – this will display on the tile within the dashboard
Decide on the “Sort Order” – the number will default to the next tile number along
Set the “Refresh Rate” from the droplist section. This will refresh the tiles on the time lapse
requested.
Decide whether or not to enable the RAG status – by default this is disabled. If you are enabling this,
then click on the DISABLED button
o Style: Options are “Banner” (a thin coloured strip on the top of the tile) or “Background” (the
whole tile gets coloured
o Amber: use the slider to set the percentage level
o Red: use the slider to set the percentage level
If you select “Overdue Details” then an additional setting option appears called “Overdue Measure”.
There are the following options:
o Not Applicable
o Response Date
o Start Date
o Completion Date
o For the final 3 points above, a new field called “No. of Hours Till Overdue” will appear and you
will need to add a numerical value to represent the required hours.
Select “John Lewis Partnership” as the “Client”.
Select which “Categories” (and Subcategories should you want to go to that level) this tile will cover. If
you do not select a Category then all Categories will be included
Select what “Status” of the Quote that you want shown. Options for:
o Quote – New Request
o Quote – Awaiting Input
o Quote – Awaiting Review
o 2nd Level Quote / Estimate Review
o 3rd Level Quote / Estimate Review
o Parked Quote / Estimate
Choose a “Priority” to apply to the filter. Options for:
o Reactive SLA
o Specific Date
o Always select both of the above options

Verisae Mobile – Contractor Administrator
Page 22 of 28
For the “Creation Date” section, the default is to “Show All”. Use the droplist chooser to select
alternative predefined options
You then need to select the Store/s that will be displayed in the “Store” tab
In the “Store Type” tab – select the type of Store to be displayed. Leave this blank for all store types to
be shown
Once you have finished selecting your requirements, click on the SUBMIT button. The page will refresh
and your tile will display on the Dashboard page
Once defined, when you select the tile it will take you to a page called “Whatever you called it” where you will
be able to review the returned information. You are able to select the COLUMNS button to select which columns
you want shown in your report. You are also able to select the FILTER button to further filter the results.
Depending on your role configuration, you will be able to perform various actions on the click through of a
Quote Work Order; example: Approve, Reject, Park, etc.
Example: If you want to show all “Quotes Awaiting Input”
NAME: Quotes Awaiting Input
SORT ORDER: 5
REFRESH RATE: 5 Minutes
RAG DETAILS: Enabled with a “Background” style and setting of 2 for “Amber” and 3 for “Red”
CLIENT: John Lewis Partnership
STATUS: Tick in “Quote – Awaiting Input”
PRIORITY: Tick in both “Reactive SLA” and “Specific Date”
Click on the SUBMIT button
NOTE:
Your role will not allow you to click on the row but you will then know to go to the EAM Application and
populate the required details.
NOTE:
Please always ensure that your tiles are correct and that they show the right data. You are responsible for
your own tiles. A constant check to the EAM system is always advisable to ensure that the values shown are
correct.

Verisae Mobile – Contractor Administrator
Page 23 of 28
TECHNICIANS AT STORE TILE
Once defined, this tile will display a number of Engineers that are currently in a store and will be based on your
selection criteria.
STEPS
Select a “Name” for the tile – this will display on the tile within the dashboard
Decide on the “Sort Order” – the number will default to the next tile number along
Set the “Refresh Rate” from the droplist section. This will refresh the tiles on the time lapse
requested.
Decide whether or not to enable the RAG status – by default this is disabled. If you are enabling this,
then click on the DISABLED button
o Style: Options are “Banner” (a thin coloured strip on the top of the tile) or “Background” (the
whole tile gets coloured
o Amber: use the slider to set the percentage level
o Red: use the slider to set the percentage level
Select “John Lewis Partnership” as the “Client”.
Select a “Store”. You can either select an individual Store or an Area. If you leave this blank, then the
tile will display all stores / areas relevant to your user role.
Finally, you are able to select a “Store Type”. If you leave this blank then all store types will be
displayed.
Once you have finished selecting your requirements, click on the SUBMIT button. The page will refresh
and your tile will display on the Dashboard page
When you select the tile it will take you to a page called whatever you created the name of the tile to be. This
dashboard will display the Engineer details, the Contractor, what time they started work and where they are
amongst other types of columns.
You are able to select the COLUMNS button to select which columns you want shown in your report. You are
also able to select the FILTER button to further filter the results.
Example: If you want to show all “Engineers Onsite”
NAME: Engineers Onsite
SORT ORDER: 5
REFRESH RATE: 5 Minutes
RAG DETAILS: Disabled

Verisae Mobile – Contractor Administrator
Page 24 of 28
CLIENT: John Lewis Partnership
Click on the SUBMIT button
NOTE:
Please always ensure that your tiles are correct and that they show the right data. You are responsible for
your own tiles. A constant check to the EAM system is always advisable to ensure that the values shown are
correct.
WORK ORDER TILE
Once defined, this tile has the ability to display a number of Work Orders as per a comprehensive selection
choice. This tile will probably bring the most value if used correctly.
Verisae Mobile – Contractor Administrator
Page 25 of 28
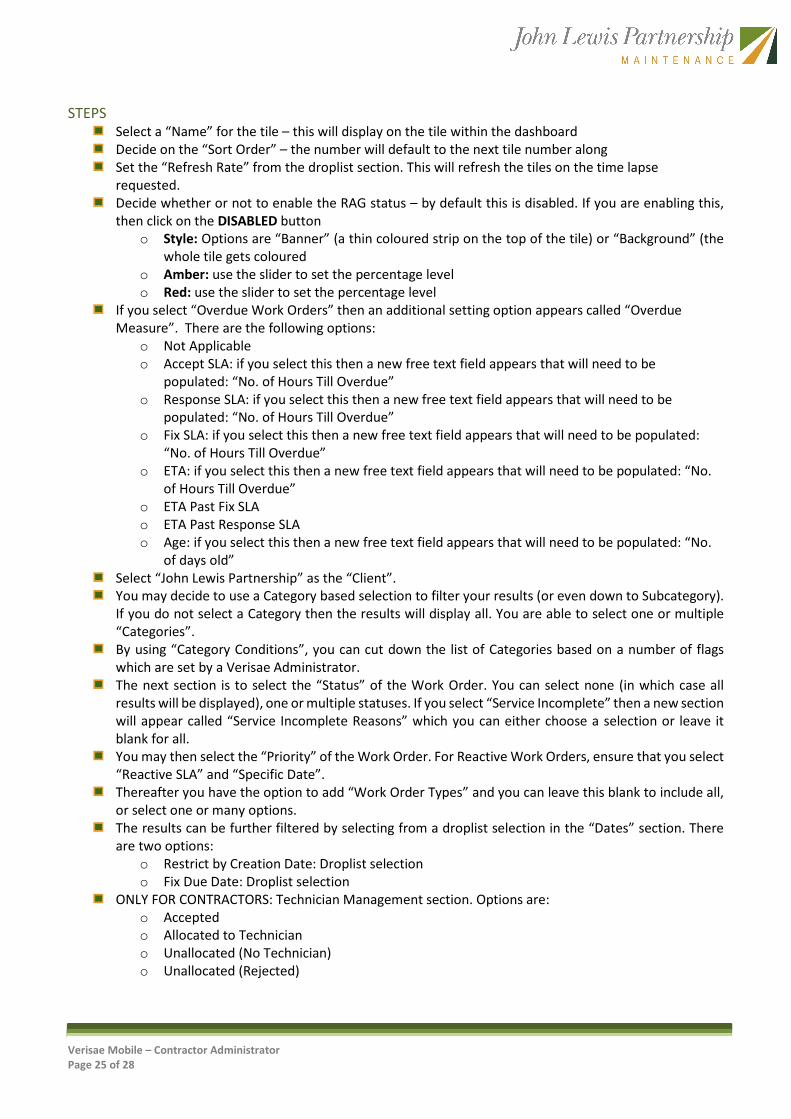
STEPS
Select a “Name” for the tile – this will display on the tile within the dashboard
Decide on the “Sort Order” – the number will default to the next tile number along
Set the “Refresh Rate” from the droplist section. This will refresh the tiles on the time lapse
requested.
Decide whether or not to enable the RAG status – by default this is disabled. If you are enabling this,
then click on the DISABLED button
o Style: Options are “Banner” (a thin coloured strip on the top of the tile) or “Background” (the
whole tile gets coloured
o Amber: use the slider to set the percentage level
o Red: use the slider to set the percentage level
If you select “Overdue Work Orders” then an additional setting option appears called “Overdue
Measure”. There are the following options:
o Not Applicable
o Accept SLA: if you select this then a new free text field appears that will need to be
populated: “No. of Hours Till Overdue”
o Response SLA: if you select this then a new free text field appears that will need to be
populated: “No. of Hours Till Overdue”
o Fix SLA: if you select this then a new free text field appears that will need to be populated:
“No. of Hours Till Overdue”
o ETA: if you select this then a new free text field appears that will need to be populated: “No.
of Hours Till Overdue”
o ETA Past Fix SLA
o ETA Past Response SLA
o Age: if you select this then a new free text field appears that will need to be populated: “No.
of days old”
Select “John Lewis Partnership” as the “Client”.
You may decide to use a Category based selection to filter your results (or even down to Subcategory).
If you do not select a Category then the results will display all. You are able to select one or multiple
“Categories”.
By using “Category Conditions”, you can cut down the list of Categories based on a number of flags
which are set by a Verisae Administrator.
The next section is to select the “Status” of the Work Order. You can select none (in which case all
results will be displayed), one or multiple statuses. If you select “Service Incomplete” then a new section
will appear called “Service Incomplete Reasons” which you can either choose a selection or leave it
blank for all.
You may then select the “Priority” of the Work Order. For Reactive Work Orders, ensure that you select
“Reactive SLA” and “Specific Date”.
Thereafter you have the option to add “Work Order Types” and you can leave this blank to include all,
or select one or many options.
The results can be further filtered by selecting from a droplist selection in the “Dates” section. There
are two options:
o Restrict by Creation Date: Droplist selection
o Fix Due Date: Droplist selection
ONLY FOR CONTRACTORS: Technician Management section. Options are:
o Accepted
o Allocated to Technician
o Unallocated (No Technician)
o Unallocated (Rejected)
Verisae Mobile – Contractor Administrator
Page 26 of 28
ONLY FOR CONTRACTORS: “Engineer” section allows Contractors to limit the results to a particular
Engineer. This allows Contractors to build tiles specific to themselves or for admin users to focus on
unassigned issues or tiles for groups of Engineers.
Select a “Store”. You can either select an individual Store or an Area. If you leave this blank, then the
tile will display all stores / areas relevant to your user role
Finally, you are able to select a “Store Type”. If you leave this blank then all store types will be
displayed.
Once you have finished selecting your requirements, click on the SUBMIT button. The page will refresh
and your tile will display on the Dashboard page
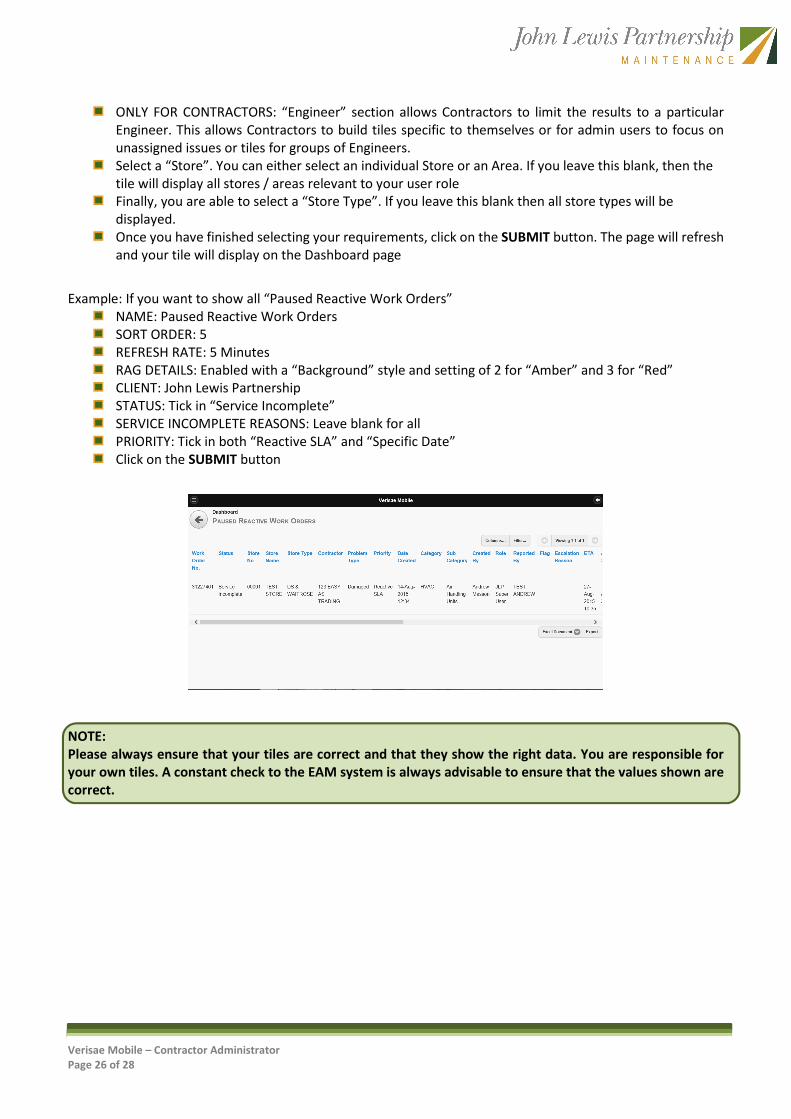
Example: If you want to show all “Paused Reactive Work Orders”
NAME: Paused Reactive Work Orders
SORT ORDER: 5
REFRESH RATE: 5 Minutes
RAG DETAILS: Enabled with a “Background” style and setting of 2 for “Amber” and 3 for “Red”
CLIENT: John Lewis Partnership
STATUS: Tick in “Service Incomplete”
SERVICE INCOMPLETE REASONS: Leave blank for all
PRIORITY: Tick in both “Reactive SLA” and “Specific Date”
Click on the SUBMIT button
NOTE:
Please always ensure that your tiles are correct and that they show the right data. You are responsible for
your own tiles. A constant check to the EAM system is always advisable to ensure that the values shown are
correct.
Verisae Mobile – Contractor Administrator
Page 27 of 28
EDITING TILES
NOTE:
Please always ensure that your tiles are correct and that they show the right data. You are responsible for
your own tiles. A constant check to the EAM system is always advisable to ensure that the values shown are
correct.
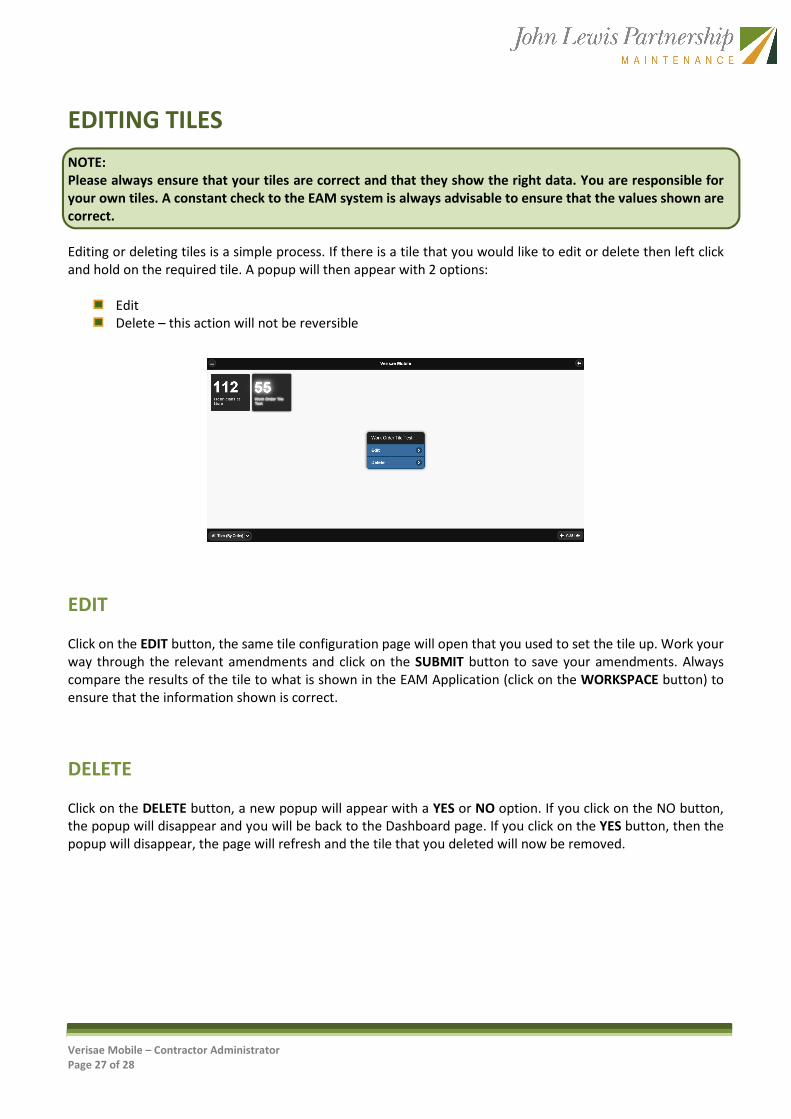
Editing or deleting tiles is a simple process. If there is a tile that you would like to edit or delete then left click
and hold on the required tile. A popup will then appear with 2 options:
Edit
Delete – this action will not be reversible
EDIT
Click on the EDIT button, the same tile configuration page will open that you used to set the tile up. Work your
way through the relevant amendments and click on the SUBMIT button to save your amendments. Always
compare the results of the tile to what is shown in the EAM Application (click on the WORKSPACE button) to
ensure that the information shown is correct.
DELETE
Click on the DELETE button, a new popup will appear with a YES or NO option. If you click on the NO button,
the popup will disappear and you will be back to the Dashboard page. If you click on the YES button, then the
popup will disappear, the page will refresh and the tile that you deleted will now be removed.

Verisae Mobile – Contractor Administrator
Page 28 of 28
SUPPORT
Should you experience any issues with the Application which are not caused by network issues or operational
issues in store – then Verisae operate a Support Help Desk that can be utilised. There are three ways of
contacting the Help Desk:
1. Telephone
2. Email
3. Online
Telephone
To raise a ticket utilising this method – then please call the below:
Using your email application – send an email to [email protected]
You will need to add as much information as possible to assist the agent with creating a ticket. The Helpdesk
Application will email you a ticket number that can then be utilised for all future correspondence on this
particular ticket.
Online
By typing the following link in to your browser – you will come to the Verisae Help Desk Online Application. Click
on the “Submit A Request” tab and fill in the required fields.
Link: http://helpdesk.verisae.com/