coverstitch chainstitch combo stitch
TRANSCRIPT

©2021 BERNINA of America. Permission granted to copy and distribute in original form only. Content may not be altered or used in any other form or under any other branding.
01122021
For BERNINA Overlocker L 890
WORKBOOK #2 – COVERSTITCH, CHAINSTITCH, COMBO STITCH
COVERSTITCH
CHAINSTITCH
COMBO STITCH
M A S T E R Y B O O K
S E R I E S
MYBERNINA
2
My BERNINA B E R N I N A O V E R L O C K E R W O R K B O O K
TABLE OF CONTENTS
INTRODUCTION ������������������������������������������������������ 3
LESSON 1: COMBO STITCHES ��������������������������������� 4
LESSON 2: COVER- CHAINSTITCH SETUP ��������������� 5
LESSON 2: 4-THREAD COVERSTITCH ��������������������� 6
LESSON 3: 3-THREAD WIDE COVERSTITCH ����������� 7
LESSON 4: 4-THREAD NARROW COVERSTITCH ���� 8
LESSON 5: 2-THREAD CHAINSTITCH ���������������������� 9
REFERENCE - OVERLOCKER NEEDLES ������������������ 10
REFERENCE - OVERLOCKER THREADS ����������������� 11
SUPPLIES ���������������������������������������������������������������� 12
L 890
3
My BERNINA B E R N I N A O V E R L O C K E R W O R K B O O K
INTRODUCTION
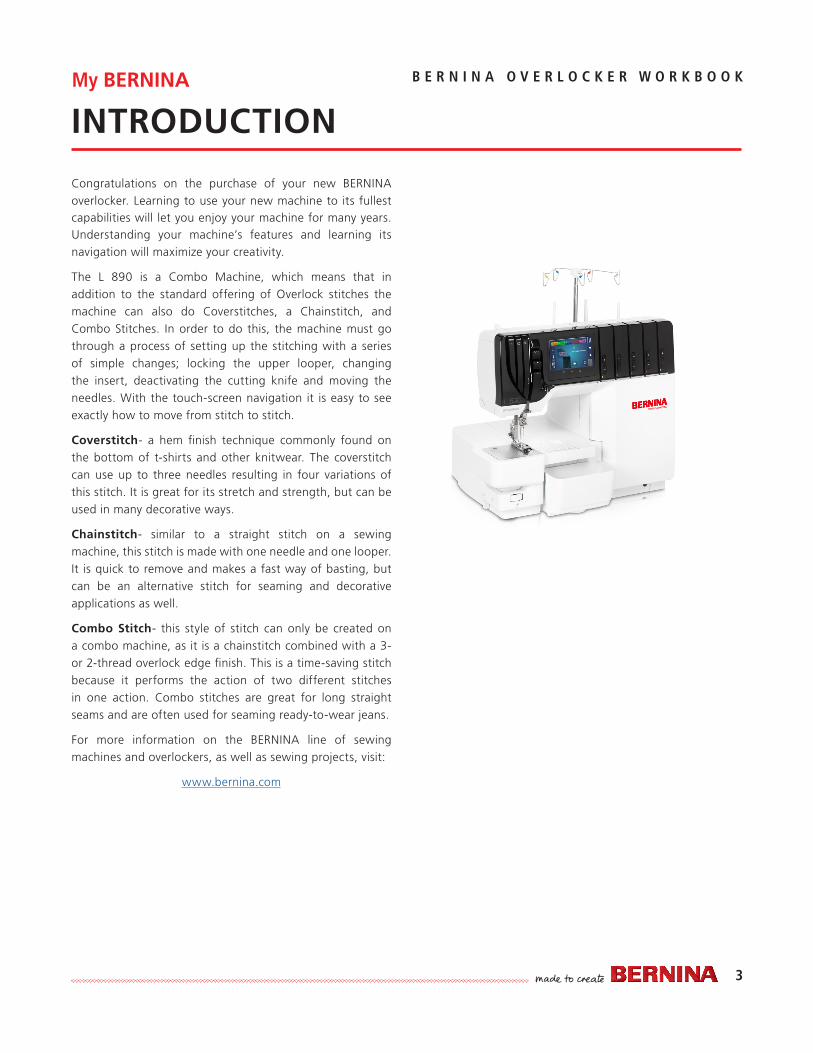
Congratulations on the purchase of your new BERNINA overlocker. Learning to use your new machine to its fullest capabilities will let you enjoy your machine for many years. Understanding your machine’s features and learning its navigation will maximize your creativity.
The L 890 is a Combo Machine, which means that in addition to the standard offering of Overlock stitches the machine can also do Coverstitches, a Chainstitch, and Combo Stitches. In order to do this, the machine must go through a process of setting up the stitching with a series of simple changes; locking the upper looper, changing the insert, deactivating the cutting knife and moving the needles. With the touch-screen navigation it is easy to see exactly how to move from stitch to stitch.
Coverstitch- a hem finish technique commonly found on the bottom of t-shirts and other knitwear. The coverstitch can use up to three needles resulting in four variations of this stitch. It is great for its stretch and strength, but can be used in many decorative ways.
Chainstitch- similar to a straight stitch on a sewing machine, this stitch is made with one needle and one looper. It is quick to remove and makes a fast way of basting, but can be an alternative stitch for seaming and decorative applications as well.
Combo Stitch- this style of stitch can only be created on a combo machine, as it is a chainstitch combined with a 3- or 2-thread overlock edge finish. This is a time-saving stitch because it performs the action of two different stitches in one action. Combo stitches are great for long straight seams and are often used for seaming ready-to-wear jeans.
For more information on the BERNINA line of sewing machines and overlockers, as well as sewing projects, visit:
www.bernina.com
4
My BERNINA B E R N I N A O V E R L O C K E R W O R K B O O K
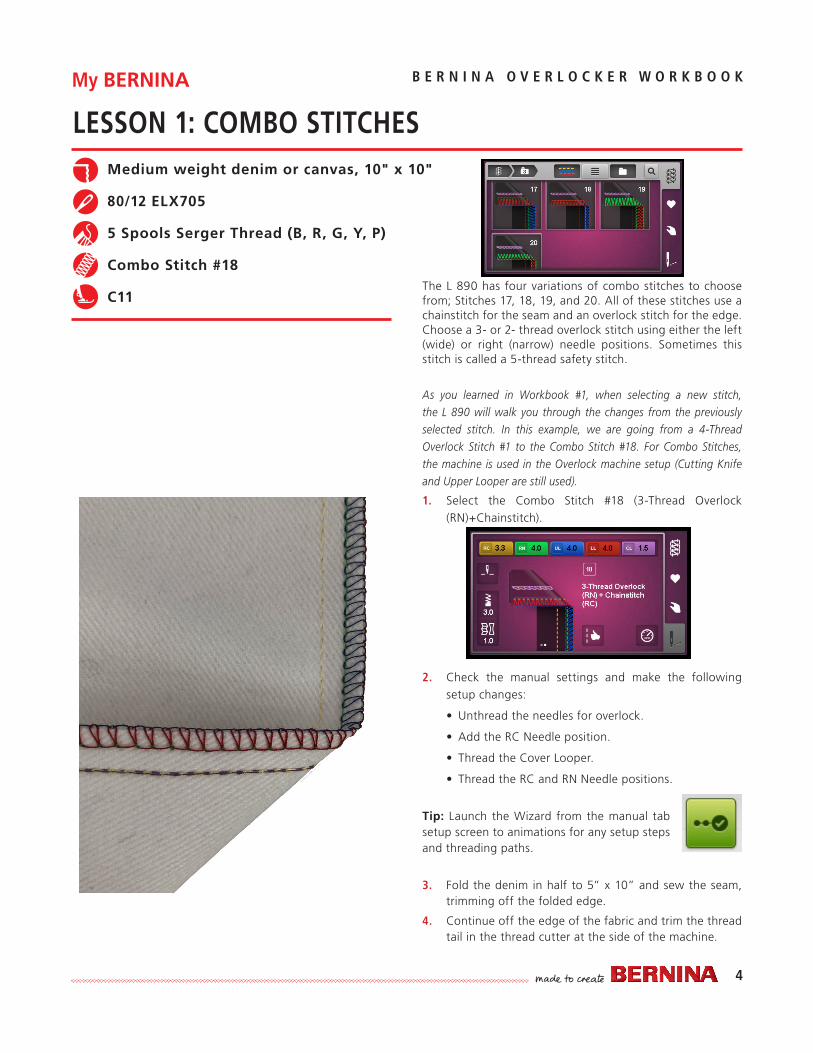
The L 890 has four variations of combo stitches to choose from; Stitches 17, 18, 19, and 20. All of these stitches use a chainstitch for the seam and an overlock stitch for the edge. Choose a 3- or 2- thread overlock stitch using either the left (wide) or right (narrow) needle positions. Sometimes this stitch is called a 5-thread safety stitch.
As you learned in Workbook #1, when selecting a new stitch, the L 890 will walk you through the changes from the previously selected stitch. In this example, we are going from a 4-Thread Overlock Stitch #1 to the Combo Stitch #18. For Combo Stitches, the machine is used in the Overlock machine setup (Cutting Knife and Upper Looper are still used).
1. Select the Combo Stitch #18 (3-Thread Overlock (RN)+Chainstitch).
2. Check the manual settings and make the following setup changes:
• Unthread the needles for overlock.
• Add the RC Needle position.
• Thread the Cover Looper.
• Thread the RC and RN Needle positions.
Tip: Launch the Wizard from the manual tab setup screen to animations for any setup steps and threading paths.
3. Fold the denim in half to 5” x 10” and sew the seam, trimming off the folded edge.
4. Continue off the edge of the fabric and trim the thread tail in the thread cutter at the side of the machine.
LESSON 1: COMBO STITCHESMedium weight denim or canvas, 10" x 10"
80/12 ELX705
5 Spools Serger Thread (B, R, G, Y, P)
Combo Stitch #18
C11
5
My BERNINA B E R N I N A O V E R L O C K E R W O R K B O O K
Touch the home button and switch the machine to guided mode. It will be helpful to see how the L 890 operates from the last stitch sewn to prompt you through each change for setting up the next stitch. It is particularly helpful when moving from overlock to coverstitch and back.
1. Touch the Home icon.
2. Select Guided Mode.
3. From the Stitch Selection tab, choose the Cover folder.
4. Select Stitch #21.
5. The Wizard is launched automatically and the screen will appear to look like a page-by-page tablet. Follow the directions and watch the animations along the way.
4-thread coverstitch
1. Lift the presser foot.
2. Unthread the thread paths: RC, RN, UL, LL (CL can remain threaded).
3. Change the presser foot to C13.
4. Check Presser Foot Pressure.
5. Remove needle from RN Position and insert needles in LC and CC needle positions.
6. Deactivate the Cutting Knife (located on the left side of the machine).
7. Set the Cutting Width to 5.
8. Change the insert to the Coverstitch Insert (flat).
9. Deactivate the Upper Looper (small knob inside- press the foot control and Pulse Drive will position the Upper Looper in the lower locked position—do not move knob).
10. Check that the Rolled Hem Selection Lever is set to <O>.
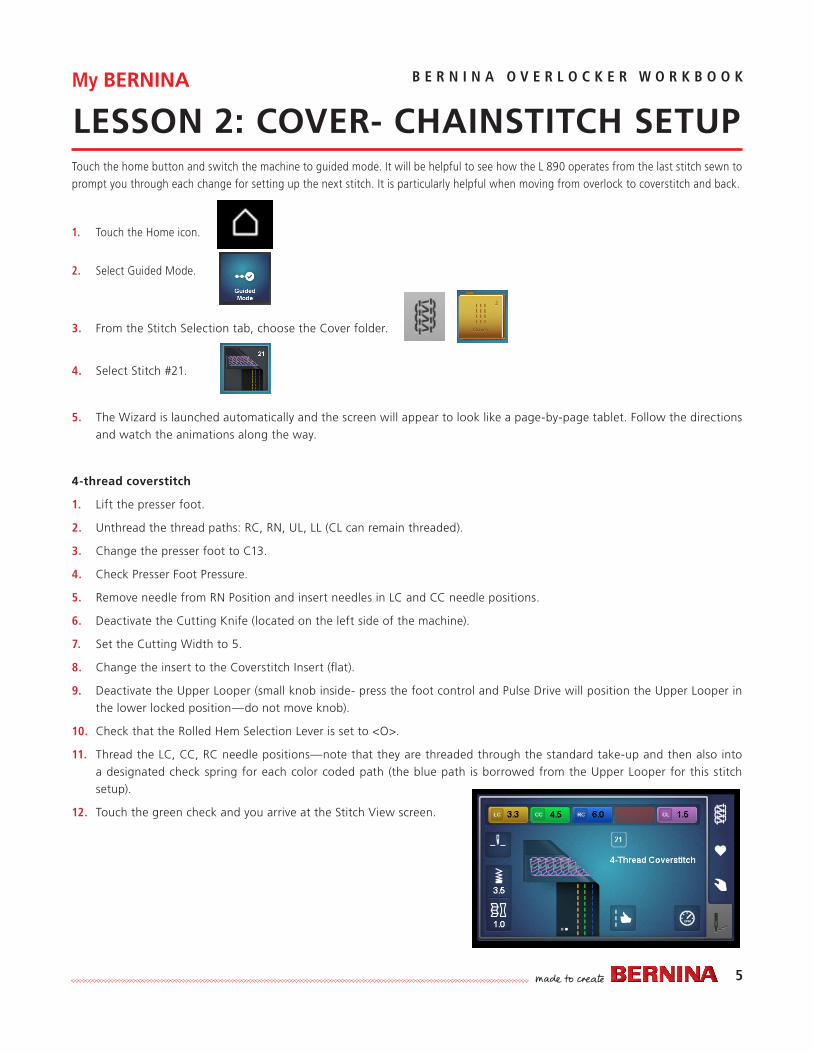
11. Thread the LC, CC, RC needle positions—note that they are threaded through the standard take-up and then also into a designated check spring for each color coded path (the blue path is borrowed from the Upper Looper for this stitch setup).
12. Touch the green check and you arrive at the Stitch View screen.
LESSON 2: COVER- CHAINSTITCH SETUP

6
My BERNINA B E R N I N A O V E R L O C K E R W O R K B O O K
LESSON 2: 4-THREAD COVERSTITCHSweatshirt knit, 10” x 10”
80/12 ELX705
4 Spools Serger Thread (Y, G, B, P)
4-thread Coverstitch #18
Chainstitch Foot #C13
1. Select Stitch #21 and follow the steps in Guided
Mode (as described on page 5).
2. Fold the fabric under 1” with wrong sides together
to create a hem, and align the fabric under the
presser foot, using the guidelines on the stitch
plate (hem side faces feed dog).
3. Place fabric completely under the foot up to
needles, so that the needles begin in the fabric
edge.
4. Stitch to the end of the fabric, but not off the
fabric edge.
5. Use the CS Lock tool to lock the stitches.
• Raise the presser foot.
• Use the CS Lock tool to grab the needle threads
from under the presser foot, just above the
fabric—pulling them to the front of the machine.
• Cut the needle threads.
• Pull the fabric to the back left of the machine
and release the looper thread—as this happens
the needle threads will move to the back of the
fabric and lock the stitch.

7
My BERNINA B E R N I N A O V E R L O C K E R W O R K B O O K
Move back to Expert Mode for quicker transitions between stitches.
1. Select the Home Icon, then Select Expert Mode. Select Stitch #22 and follow the manual mode prompts.
2. Unthread and remove the CC Needle Position.
3. Set the overlocker for a wide 2-needle coverstitch using the left and the right needles (remove the center coverstitch needle and thread). Adjust settings as directed below.
4. Fold up a 2” hem along the edge of the fabric. Glue stick or pin in place.
5. Using the markings on the stitch plate as a guide, place the fabric under the needles with the fold to the right of the presser foot, and with the right side of the fabric up and the hem/wrong side down.
6. Coverstitch the hem in place.
7. Use the CS Lock tool to lock the stitches.
• Raise the presser foot.
• Use the CS Lock tool to grab the needle threads from under the presser foot, just above the fabric—pulling them to the front of the machine.
• Cut the needle threads.
• Pull the fabric to the back left of the machine and release the looper thread—as this happens the needle threads will move to the back of the fabric and lock the stitch.
LESSON 3: 3-THREAD WIDE COVERSTITCHMedium weight cotton, 10” x 10”
80/12 ELX705
3 Spools Serger Thread (Y, B, P)
3-thread Wide Coverstitch #22
C13

8
My BERNINA B E R N I N A O V E R L O C K E R W O R K B O O K
1. Select Stitch #24 and make the manual settings changes recommended.
2. Unthread and remove LC Needle Position
3. Add and thread CC Needle Position
4. Set the overlocker for a narrow 2-needle coverstitch using the center and the right needles (remove the left needle and thread, then insert the center needle and thread). Adjust settings as directed below.
5. Fold the fabric under 1” to create a hem and align the fabric under the presser foot, use the guidelines on the stitch plate. Place the fabric completely under the foot.
6. Stitch to the end of the fabric.
7. Use the CS Lock tool to lock the stitches.
• Raise the presser foot.
• Use the CS Lock tool to grab the needle threads from under the presser foot, just above the fabric—pulling them to the front of the machine.
• Cut the needle threads.
• Pull the fabric to the back left of the machine and release the looper thread—as this happens the needle threads will move to the back of the fabric and lock the stitch.
LESSON 4: 4-THREAD NARROW COVERSTITCHJersey knit, 10” x 10”
80/12 ELX705
3 Cones Serger Thread (G, P, B)
4-thread Narrow Coverstitch #24
C13
9
My BERNINA B E R N I N A O V E R L O C K E R W O R K B O O K
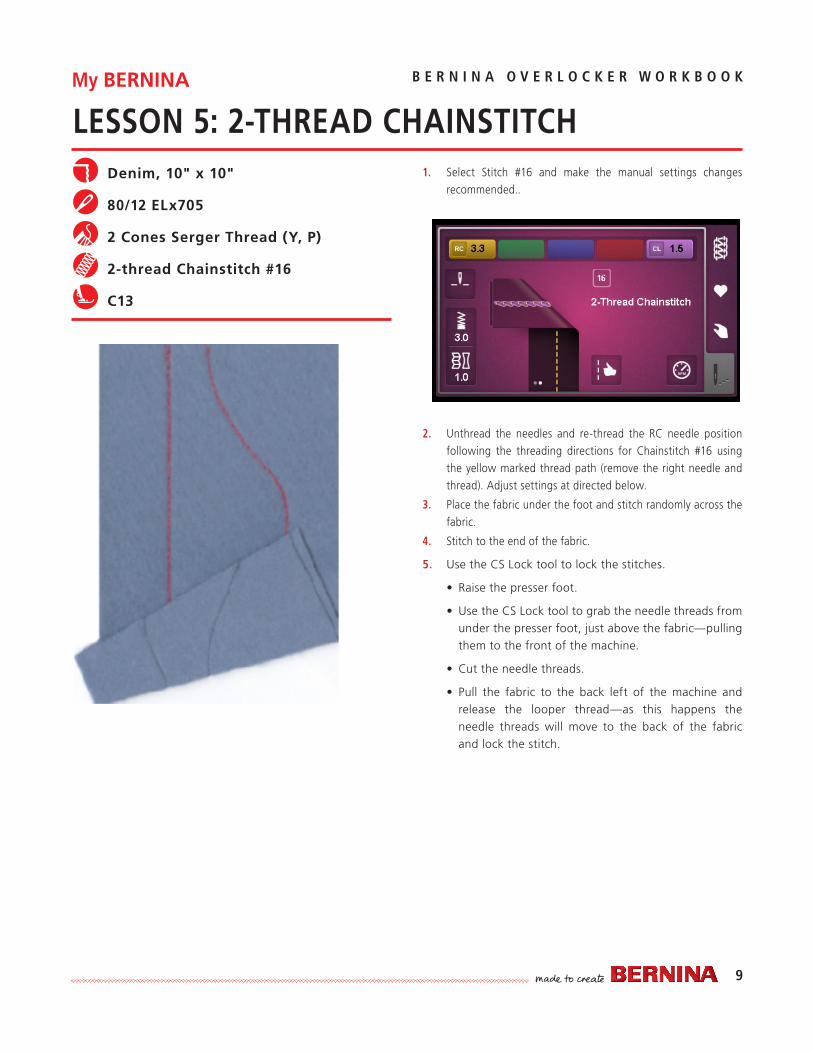
1. Select Stitch #16 and make the manual settings changes recommended..
2. Unthread the needles and re-thread the RC needle position following the threading directions for Chainstitch #16 using the yellow marked thread path (remove the right needle and thread). Adjust settings at directed below.
3. Place the fabric under the foot and stitch randomly across the fabric.
4. Stitch to the end of the fabric.
5. Use the CS Lock tool to lock the stitches.
• Raise the presser foot.
• Use the CS Lock tool to grab the needle threads from under the presser foot, just above the fabric—pulling them to the front of the machine.
• Cut the needle threads.
• Pull the fabric to the back left of the machine and release the looper thread—as this happens the needle threads will move to the back of the fabric and lock the stitch.
LESSON 5: 2-THREAD CHAINSTITCHDenim, 10" x 10"
80/12 ELx705
2 Cones Serger Thread (Y, P)
2-thread Chainstitch #16
C13

10
My BERNINA B E R N I N A O V E R L O C K E R W O R K B O O K
REFERENCE - OVERLOCKER NEEDLESbernette Overlocker Needles
Along with thread, needles are very important to stitch formation. Many mechanical problems and damage to fabrics can be traced to a bent, damaged, or incorrect size or type needle.
When selecting the correct needle, consider the following:• Recommended needle system – ELx705. These needle are a flat shank industrial needle. A pack of these needles is included
with the overlocker.• Recommended sizes for your overlocker are 70/11, 80/12 and 90/14. Larger needles can interfere with looper movement
and cause damage; smaller needles may not form the stitches correctly.• Needle point – assures proper stitch formation; avoids fabric damage
Need to Know
• Always make sure needles are fully inserted as high as possible, with the flat side to the back. The left needle will appear to be slightly higher than the right needle.
• Do not pull or push fabric while sewing. This can result in needle breakage or damage.
• Do not use bent or damaged needles.
• The needle is the most inexpensive part in your sewing machine, but it is crucial for getting good results and keeping your machine running well.
• The selected thread should fit in the groove on the front of the needle. If it isn’t protected by the groove, a needle with a larger groove should be used.
Tip: If one needle breaks, it is a good habit to change both needles. Keeping the needle size and type the same results in a better formed stitch.
Needle Size for Fabrics70 – shirt-weight80 – medium-weight90 – denim and twill

11
My BERNINA B E R N I N A O V E R L O C K E R W O R K B O O K
REFERENCE - OVERLOCKER THREADSOverlocker Threads
Overlocker threads are usually polyester and are finer (lighter weight) than many sewing machine threads to avoid thread build-up and excessive bulk in seams. It is important that the thread is smooth and without variations in diameter as it needs to feed smoothly through many thread guides for good stitch formation.
You also want a good-quality thread – such as Mettler Seracor – that is not “fuzzy” and does not leave excessive lint in the lower part of your overlocker. Overlocker threads are sold on larger spools for economy and convenience; regular spools of thread may be used but will not last very long when forming overlock stitches. Along with overlocker thread, there are applications that call for specialty and decorative threads.
Listed below are some of these threads commonly used in the overlocker:
• Texturized Nylon Thread – such as YLI Woolly Nylon or Maxi-Lock Stretch—A very elastic thread with excellent coverage; perfect for rolled edges and knit seams. Available in solid and variegated colors, and metallics.
• Polyester Topstitching Thread – such as YLI Jeans Stitch & Mettler Cordonnet – this heavy thread is used for decorative stitching (flatlocked seams and overcast edges). Also nice for cover and chain stitching. Available in solid and variegated colors.
• Rayon Decorative Threads – such as YLI Pearl Crown Rayon & YLI Designer 6 – shiny threads for decorative applications. Pearl Crown Rayon is twisted, while Designer 6 is untwisted. Available in solid and variegated colors.
• Metallic Decorative Threads – such as YLI Candlelight – adds a bit of glitz to seams and edgings.
• Decorative Sewing Threads – sewing machine threads can also be used in the overlocker, and are particularly effective when several are used together as one thread.

12
My BERNINA B E R N I N A O V E R L O C K E R W O R K B O O K
SUPPLIES
NEEDLES AND THREADS
80/12 ELX705 Serger Needles
5 Spools Serger Thread (yellow, green, blue, red, purple)
FABRICS FOR EXERCISES
QUANTITY SIZE FABRIC
2 10" x 10" Denim or Canvas
1 10" x 10" Sweatshirt knit
1 10" x 10" Jersey knit
1 10" x 10" Medium Weight Cotton