cspro training manual -...
TRANSCRIPT
CSPro Training Manual
May, 2018

Table of Content
Introduction .............................................................................................................. 1
What is CSPro? ........................................................................................................... 1
CSPro Features ........................................................................................................... 1
Installation ................................................................................................................. 2
Installing CSPro .......................................................................................................... 2
Installing a Newer Version ........................................................................................... 3
Uninstalling CSPro ...................................................................................................... 3
CSPro Tutorial ..................................................................................................................................... 3
About the Tutorial .................................................................................................................................. 3
Exercise 1: Create a Data Entry Application ....................................................................... 4
Step 1: Examine the Tutorial Questionnaire ....................................................................................... 4
Step 2: Start CSPro ................................................................................................................................ 4
Step 3: Naming Application Files ........................................................................................................ 5
Exercise 2: Create the Data Dictionary ................................................................................... 5
Step 1: The ID Item.................................................................................................................................... 5
Step 2: The Records .................................................................................................................................. 6
Step 3: Creating the Items ........................................................................................................................ 7
Step 4: Creating Values for the Items ....................................................................................................... 8
Exercise 3: Create the Data Entry Forms ............................................................................ 10
Step 1: Place ID and Housing Items on Form .................................................................................. 10
Step 2: Add Text and Boxes ............................................................................................................... 11
Step 3: Generate Forms Automatically ............................................................................................. 12
Exercise 4: Enter Data ................................................................................................................... 13
Step 1: Run the Data Entry Application ............................................................................................ 13
Step 2: Add a Case ............................................................................................................................... 14
Step 3: Finish Adding a Case .............................................................................................................. 15
Exercise 5: Add Edits to the Data Entry Application .................................................... 16
Step 1: Write Logic for the Edit ......................................................................................................... 16

Step 2: Compile the Logic ................................................................................................................... 17
Step 3: Test the Edit ............................................................................................................................. 18
Step 4: Complete the Case ................................................................................................................... 19
Exercise 6: CAPI questions and texts..................................................................................... 20
Step1: Adding CAPI questions and texts .......................................................................................... 20
Step2: Data entry options window ..................................................................................................... 22
Step3: More about the Data entry options window ......................................................................... 22
Reference ............................................................................................................................................... 23

1
1. Introduction
What is CSPro?
The Census and Survey Processing System (CSPro) is a software package for entry, editing,
tabulation, and dissemination of census and survey data.
CSPro lets you create, modify, and run data entry, batch editing, and tabulation applications from
a single, integrated development environment. It processes data on a case basis (one or more
questionnaires), where a case can consist of one or many data records.
The most common kinds of surveys in which CSPro is used are censuses (population and housing;
agriculture; and economic), Demographic and labour force surveys, Household income and expenditure
surveys, etc.
CSPro was developed jointly by the U.S. Census Bureau. CSPro is in the public domain. It is
available at no cost and may be freely distributed. It is available for download at
www.census.gov/ipc/www/cspro.
This guide contains information about installing CSPro, followed by a tutorial that will guide
you through a series of exercises to help you get started using CSPro. This includes
• Defining the metadata for the survey as a CSPro dictionary (containing information about
the questions, what kind of data will the answer be, name of the variable holding the data
etc.)
• Defining the code lists (possible replies) to the given questions (for instance, a question
about the respondent’s sex can have replies “1 = male” and “2 = female”)
• Designing the forms for the questionnaire.
• Programming the skips and controls and other logic of the questionnaire.
• Deploying the application on a laptop and tablet.
CSPro Features
This is an overview of some of CSPro's main capabilities.
Data Dictionary
Define simple or complex hierarchical file organization. Define hierarchical levels,
identification items, records, items (fields or variables), value sets (categories of values),
and values. Create descriptive notes for documentation. Define multiply occurring items
and define relationships between multiply-occurring records and items. Produce reports
of file organization.

2
Data Entry
Add, modify, verify and view cases (questionnaires). Create an unlimited number of
forms (screens). Create forms bigger than the computer screen that scroll as necessary.
Create forms with fields from different physical records. Enter data from rosters. Create
consistency checks and skip patterns of unlimited complexity. Execute procedures before and/or after field is entered. Display user-defined messages. Access multiple
lookup files. Read from and write to secondary files. Index cases to avoid duplication.
Produce operator statistics. Create a stand-alone data entry environment.
Concatenate Data
Concatenate (join end-to-end) two or more data (or other text) files.
Export Data
Export selected data variables to delimited (tab, comma, semicolon), SAS, SPSS, Stata,
R, or CSPro formatted data files.
Installation
Hardware and Software Requirements • The minimal configuration for CSPro is:
• 512MB of RAM
• Mouse
• 100MB of free hard drive space
• Microsoft Windows Vista, 7, 8, or 10
Installing CSPro
The CSPro installer has the file name cspro70.exe. To install CSPro:
1. Double-click on the file.
2. Read and accept the U.S. Census Bureau's license agreement
3. Select the components that you want to install. You will generally want to install all of the
components.
4. Select the folder where you want to install CSPro. You will generally want to install CSPro in
the suggested directory.
After CSPro has been installed on your computer, you will have the option to run the program
and/or view the release notes. You will find a CSPro 7.0 icon on your desktop that you can
double-click on when you want to run CSPro in the future.
3
Installing a Newer Version
Upgrading to CSPro 7.0 From CSPro 6.3 or Earlier
If you have an old version of CSPro installed on your computer, you can install CSPro 7.1
without affecting the previous version. When you have finished your conversion of applications
to CSPro 7.0, you can then uninstall the previous version.
Due to internal changes within CSPro 7.1, once files have been loaded in CSPro 7.1, you may no
longer be able to load them in previous versions of CSPro.
Updating a Previous Version of CSPro 7.0 If you are updating a previous version of CSPro 7.0, the installer will remove the previous
version and replace it with the new version. It will not change any applications or other files that
you have created.
Uninstalling CSPro
The uninstaller will remove all registry entries and CSPro system files. It will not remove any
applications or other files that you have created.
You can uninstall the program using the Windows Control Panel:
1. Using the Windows search functionality (Windows Key+S), type Add or remove programs.
2. Select CSPro from the list of programs.
3. Follow the prompts to uninstall the program.
2. CSPro Tutorial
About the Tutorial
The tutorial will guide you through a series of exercises to help you get started using CSPro. The
exercises in the tutorial require no special knowledge other than basic familiarity with Windows.
The exercises are divided into very short steps. Each step normally takes only a few hrours.
There are five exercises. You create files in each exercise that are used in later exercises.
Exercises 1 through 3 and 6 show you simple data entry and design applicatiob. Exercises 4
shows you the CSPro language for editing.
Exercise 1: Create a Data Entry Application
Exercise 2: Create the Data Dictionary
Exercise 3: Create the Data Entry Forms
Exercise 4: Enter Data
4
Exercise 5: Add Edits to the Data Entry Application
Exercise 6: CAPI questions and texts
Exercise 1: Create a Data Entry Application
Step 1: Examine the Tutorial Questionnaire
The tutorial exercises are based on a sample questionnaire on your hand.
Note the following about the sample questionnaire:
• Each questionnaire corresponds to a household.
• Each questionnaire (household) has a unique four-digit number at the top.
• We collect age, sex, and marital status for up to three people in the household.
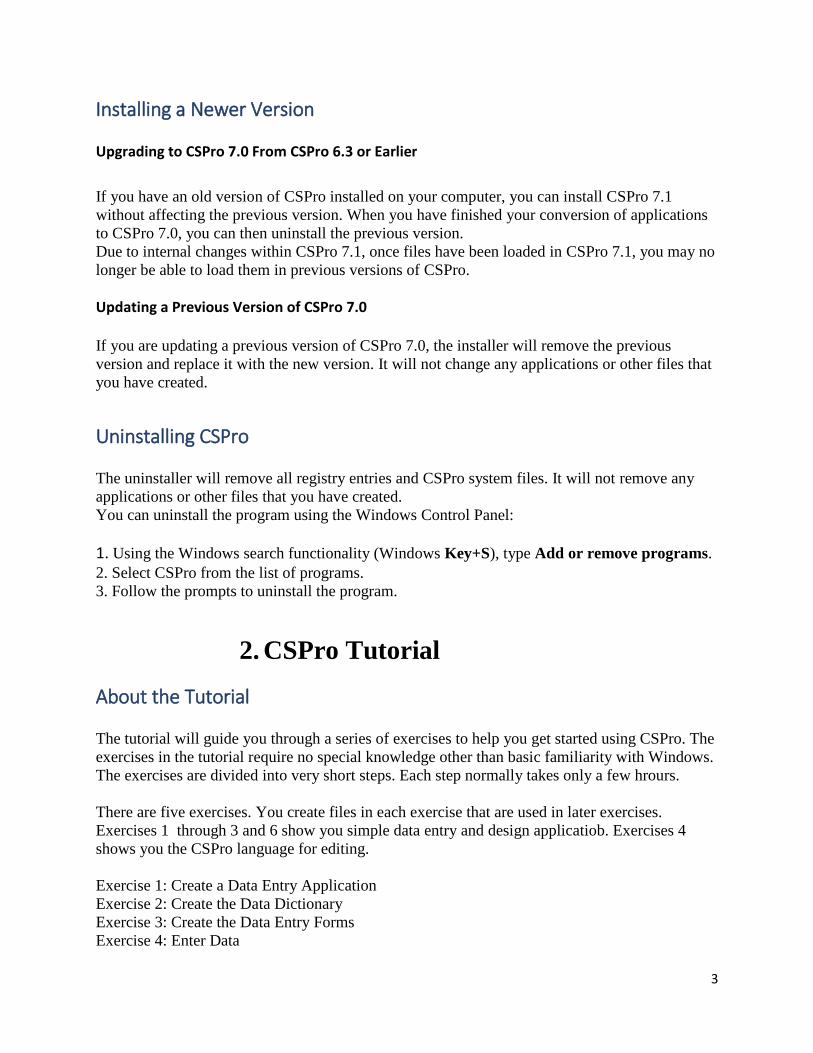
Step 2: Start CSPro
First, create a new folder for all files you will use in this tutorial. Open Windows Explorer and
create a folder named C:\CSProTutorial may_14.
Now you are ready to start CSPro, which you can by double-clicking on the CSPro 7.0 icon on
your desktop, or by finding the proper link off the Start menu.
The CSPro main screen will appear:

5
Step 3: Naming Application Files
We will create a data entry application. This contains:
We will use the Wizard to create the files that the data entry application requires. Click on the
radio button that says Create a new application. You should see the following dialog box:
1. Select Data Entry Application and press OK.
2. In the file open dialog box, enter MyEntry as the file name for the application.
3. Located in the folder you created for these exercises (C:\ CSProTutorial_may14). 4. Press Save.
5. The next screen will ask you to select the Input Dictionary.
6. Give the name : C:\CSProTutorial\ HH_Survey_2018.dcf.
7. Press OK.
8. CSPro will ask if you want to create a new dictionary. Press Yes.
You have created a new data entry application
Exercise 2: Create the Data Dictionary
Step 1: The ID Item
We will make our dictionary first, then our forms. CSPro automatically generates a skeleton data
dictionary. We will change it and add our own information.
Every data dictionary requires at least one Id item—you will often have more than one. An ID
(identification) item is a unique number (or series of numbers) that allows CSPro to distinguish
between individual questionnaires. CSPro requires at least one ID item.

6
• Click on (Id Items), then on the ‘+’ next to it to open the tree on the left side of the screen.
You will see that CSPro has created one id item. On the right side of the screen you will
see in the Len column that this item has the length of one character. We will make this four
or more character.
• Right-click on ‘HH_Survey_2018 identification", below (Id Items) on the tree, then select
Modify Item.
• Press the Enter key three times until the length is highlighted in blue.
• Type "4", then Enter, then click on the white space below this line to finish making this
change.
Continue to the next step: Step 2: The Records.
Step 2: The Records
By default, CSPro creates one record. Our tutorial application will have two records, a ‘Person
Record’ and a ‘Housing Record’. We will change the one record that CSPro generated to ‘Person
Record’, then add the ‘Housing Record’.
First, we will change the one record that CSPro generated to ‘Person Record’:
• Right-click on ‘HH_Survey_2018 identification’ on the tree on the left, then select Modify
Record.
• Type "Person record" as the Record Label, then press Enter.
• Type "PERSON_RECORD" as the Record Name, then press Enter.
• Press Enter to leave the Type value as is.
• Our application can have up to 10 people in a household, so type "10", then Enter, to change
Max and complete the changes to this record.
Next we will add the ‘Housing Record’:
• Right-click on Person Record on the tree on the left, then select Add Record.

7
• Type "Housing Record" as the Record Label, the press Enter.
• Press Enter to accept ‘HOUSING_RECORD’ as the Record Name.
• Press Enter to leave the Type value as is.
• Press Enter to leave Required Yes.
• Press Enter to leave Max 1 and start a new record.
• Press Esc on the blank record to finish making these changes.
When you have completed this step the screen should look something like:
Continue to the next step: Step 3: Creating the Items.
Step 3: Creating the Items
First, we will create the items ‘Age’, ‘Sex’, and ‘Marital Status’ in the Person record.
• Right-click on ‘Person Record’ on the tree, then select Add Item.
• Enter "Age" as the Item Label, then press Enter.
• Press Enter to accept AGE as the Item Name.
• Press Enter to accept the Start position.
• Type "2" then Enter to indicate that Age takes up two characters. This is because in our
application we have chosen to enter ages only up to 99.
• Press Enter six times to accept the rest of the default attributes for Age.

8
• Enter the attributes for the Sex item. After you type in the label and name, you can keep
pressing Enter to accept all the other default attributes.
• Enter the attributes for the Marital status item. After you type in the label and name, you
can keep pressing Enter to accept all the other default attributes.
• Press Esc to finish creating the items.
Next, we will create the ‘Type household’ and ‘Type roof’ items in the Housing record.
• Right-click on ‘Housing Record’, then select Add Item.
• Enter the attributes for the ‘Type Household’ item. After you type in the label and name,
you can keep pressing Enter to accept all the other default attributes.
• Enter the attributes for the ‘Type Roof’ item. After you type in the label and name, you can
keep pressing Enter to accept all the other default attributes.
• Press Esc to finish creating the items.
When you have completed this step the screen should look something like:
Step 4: Creating Values for the Items
Value sets define what data values we expect for a data item. Value sets are used to define
ranges of valid values during data entry and to define categories for cross tabulation.
First, we will create a value set for ‘Age’. We will use ten year age groups.
• Click on the ‘+’ next to ‘Person record’ to make sure its items are showing on the tree.
• Right-click on ‘Age’, then select Add Value Set.
• Press Enter Twice to accept the default Value Set Label and Value Set Name. The cursor
will drop to the line below into the Value Label column.

9
• Type "0 to 9" for the Value Label, then Enter.
• Type "0" as the From value, then Enter.
• Type "9" as the To value, then Enter twice, skipping over the Special column.
• Type "10 to 19" for the next Value Label, then Enter.
• Type "10 to 19" for the next Value Label, then Enter.
• Type "10" as the From value, then Enter.
• Type "19" as the To value, then Enter twice, skipping over the Special column.
• Continue in this fashion until you have reached 90-99.
Next, we will create a value set for ‘Sex’.
• Right-click on ‘Sex’, then select Add Value Set.
• Press Enter twice to accept the default Value Set Label and Value Set Name.
The cursor will drop to the line below into the Value Label column.
• Type "Male" as the first Value Label.
• Type "1" as the From value.
• Press Enter twice to skip over the To and Special columns
• Type "Female" as the second Value Label.
• Type ‘"2" as the From value.
• Press Enter twice to skip over the To and Special columns
• Press Esc to finish creating the value set.
To finish up:
• Add a value set for ‘Marital Status’. Use ‘1’ for Married and ‘2’ for Not married.
• Add values for the ‘Housing Record’ items from the housing information in the
questionnaire.
• VERY IMPORTANT: Now save the work you have done so far. Select File/Save from
the main menu, or click on the toolbar.
When you completed this step, the screen might look something like:

10
Exercise 3: Create the Data Entry Forms
Step 1: Place ID and Housing Items on Form
IMPORTANT NOTE: Generally it is a good idea to make the data entry forms look just like the
questionnaire itself. We can easily do this in CSPro. However, in order to show you more features
and save time, we will not do so.
We will place the dictionary items on the data entry form.
• Click on the Form button shown at the top on the toolbar. A blank gray form will appear
on the right hand side of the screen.
• Make sure the items on the tree are expanded so you can see them all. If any item has a ‘+’
sign next to it, click on the ‘+’ sign.
• Drag and drop ‘HH_Survey_2018" from the tree to the top of the form. (Click on
‘HH_Survey_2018 identification’ and hold the mouse button down while you move the
mouse to the top of the form, then release the mouse button.)
• Drag and drop ‘Housing Record" from the tree to the form, underneath ID_ITEM. Click
OK to accept the Drag Options settings.
When you have completed this step the screen should look something like:
11
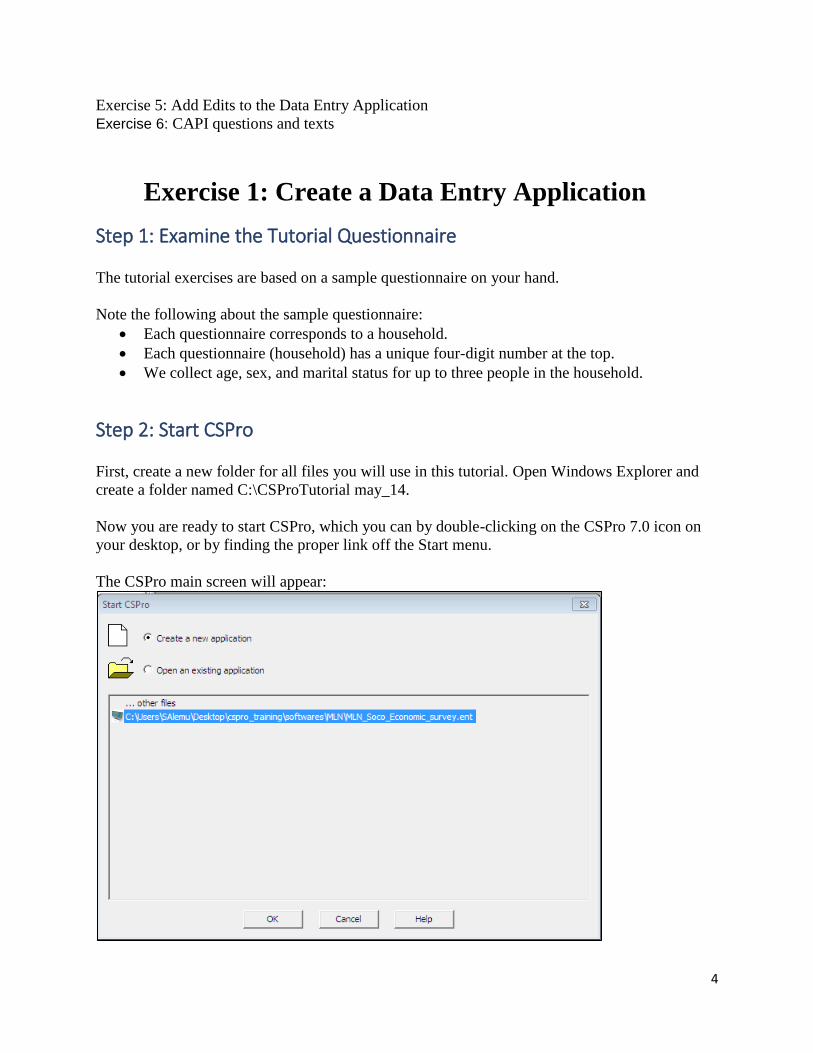
Step 2: Add Text and Boxes
First, we will add our own line of text at the top of the screen.
• Right-click on the form, somewhere above ‘Id Item’.
• Select Add Text from the menu.
• Type "My First Application", then Enter (or click on OK).
• Adjust the position of the text until it is just where you want it. To do this, select the text
(click on it) and use the arrow keys, or drag and drop the text to the new location.
Next we will draw a box around the data entry fields.
Click on the toolbar. A small toolbar will appear floating over the screen.
• Click on the box second to the right of the floating toolbar.
• Position the mouse pointer above and to the left of ‘Id item’.
• Left-click and hold the button down.
• Drag the mouse toward the right and down.
• When the box looks the way you want it, release the mouse button.
• Click again on the main toolbar to close the floating toolbar.
When you have completed this step the screen should look something like:

12
Step 3: Generate Forms Automatically
CSPro allows you to generate a complete set of forms, which include all the items in the data
dictionary, in one operation. We will use this feature now in order to save time.
• Select Edit/Generate Forms from the main menu, or press Ctrl-G.
• CSPro will warn you that the forms you made in steps 1 and 2 will be replaced. Click on
Yes to continue.
• The Drag Options dialog box will appear. Make sure the Roster Options has Horizontal
selected. Click on OK to close the Drag Options dialog box.
• Note that the tree on the left shows that you now have three forms. Open up the entire tree
by clicking the ‘+’ next to any part of the tree.
• Click on PERSON_RECORD_FORM on the tree. You will see the roster that CSPro
created for you.
• Click around on the tree on the left as you like to explore the forms that CSPro created.
• VERY IMPORTANT: Now save the work you have done so far. Select File/Save from the
main menu, or click on the toolbar.
When you have completed this step the screen should look something like:
13
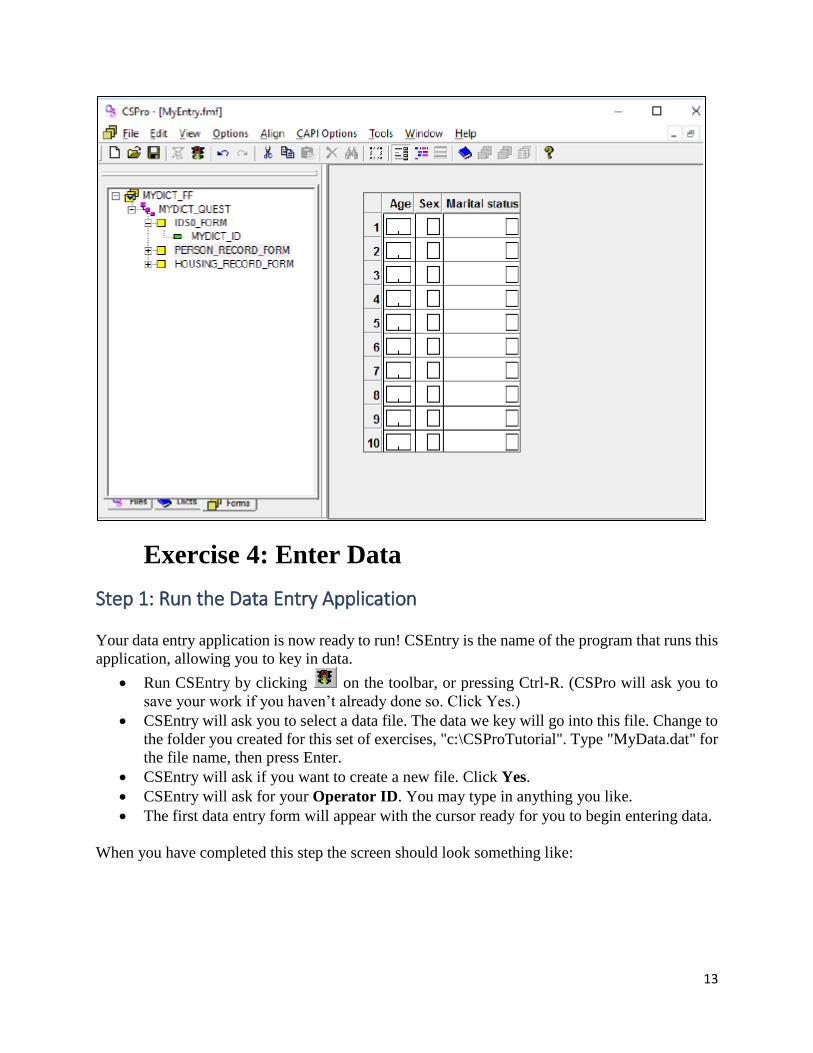
Exercise 4: Enter Data
Step 1: Run the Data Entry Application
Your data entry application is now ready to run! CSEntry is the name of the program that runs this
application, allowing you to key in data.
• Run CSEntry by clicking on the toolbar, or pressing Ctrl-R. (CSPro will ask you to
save your work if you haven’t already done so. Click Yes.)
• CSEntry will ask you to select a data file. The data we key will go into this file. Change to
the folder you created for this set of exercises, "c:\CSProTutorial". Type "MyData.dat" for
the file name, then press Enter.
• CSEntry will ask if you want to create a new file. Click Yes.
• CSEntry will ask for your Operator ID. You may type in anything you like.
• The first data entry form will appear with the cursor ready for you to begin entering data.
When you have completed this step the screen should look something like:

14
Step 2: Add a Case
We will now type in the data for our first case (questionnaire). We will use a fictitious family of
four.
• Type "1" then Enter to fill in the id item. The next form will appear, showing the person
roster.
• Type "48" in the ‘Age’ field. The cursor will move to the ‘Sex’ field.
• Type "3" in the ‘Sex’ field. CSEntry will tell you this value is out of range, because it is
not in the value set for ‘Sex’ you created in your data dictionary.
• With the OUT OF RANGE message still showing, type "1". The message will go away
and the cursor will move to the ‘Marital Status’ field.
• Continue typing in data for the family as shown below.
Tips: • You can move backward to the previous field using Shift-Tab, left arrow or up arrow.
• You can move forward to the next field using Enter, Tab, right arrow or down arrow.
• You can change a field by simply typing a new number into it.
• You can erase a field using the space bar.

15
Step 3: Finish Adding a Case
We will now tell the roster that we have finished entering people.
• Hold down the Ctrl key.
• Press the slash key (‘/’’) on the numeric keypad. The next form will appear on the screen.
If you have trouble finding this key combination, which could be the case on some laptops,
you can select Functions/End Group from the main menu.
CSEntry will ask us to accept the case. At this point you can select No and go back and make
changes to the data in the case if you like. If you are satisfied that the data are correct, press
Enter or select Yes.
CSEntry will now show the first form again, with the cursor ready for you to type in another
case. We will now stop adding cases. Click on the toolbar, or press Esc or Ctrl+S, or select Mode
Stop from the main menu.
When you have completed this step the screen should look something like:

16
Exercise 5: Add Edits to the Data Entry Application
Step 1: Write Logic for the Edit
We will now return to the data entry application. We will introduce a check to make sure that
married people are at least 12 years old. In our data entry application, we will perform this
check immediately after the keyer enters the marital status.
• Open the data entry application we created earlier. Click on on the toolbar, or select
File/Open from the main menu. Click on the application name, CSProTutorial may_14, and
click on open.
• Get ready to write logic by clicking “the logic button” on the toolbar, or pressing Ctrl-L or
selecting View/View Logic from the main menu.
• Click on the + next to PERSON_RECORD_FORM then click on the + next to
PERSON_RECORD000 then click on
• MARITAL_STATUS. The frame on the right hand side of the screen should show PROC
MARITAL_STATUS at the top.
• Note that PROC is short for procedure. We put our logic in the procedure for
MARITAL_STATUS because we want it to execute immediately after the operator keys
this field.

17
• Type in the logic code exactly as you see below.
PROC MARITAL_STATUS
if MARITAL_STATUS = 1 and AGE < 12 then
errmsg("Too young to be married");
endif;
Step 2: Compile the Logic
You have typed logic in the CSPro language. Like all procedural languages, the system must
check to make sure there are no syntax errors. This is called compiling.
• Click on MYDICT_FF in the forms tree to show all the CSPro logic.
• Compile the logic by clicking on the toolbar, or pressing Ctrl+K or selecting
File/Compile from the main menu.
• If you typed the logic correctly, you will see Compile Successful in the Compiler
Output under the logic.
• If you see a dialog box that says Compile Failed, you have typed something
incorrectly. A red circle will appear in the margin indicating the approximate location
of the error. The Compiler Output tab at the bottom of the screen will show you an
error message to help you determine the error. Check very carefully to make sure you
typed in exactly what was shown in the previous step.
When you have completed this step the screen should look something like:

18
Step 3: Test the Edit
We are now ready to run the data application and make sure our logic is working properly.
• Run CSEntry by clicking “the traffic light” on the toolbar, or pressing Ctrl-R.
• CSPro will ask you to save the changes. Click Yes.
• CSEntry will ask you to select a data file. Type "MyData.dat" for the file name, if it is not
already there, then press Enter.
• Type in any Operator ID.
• Click on on the toolbar, or press Ctrl-A to enter Add mode. The first form will appear
with the cursor on ‘Id Item’.
• Type "2" then Enter to fill in the id item. The next form will appear, showing the person
roster.
• Type "10" in the ‘Age’ field.
• Type "1" in the ‘Sex’ field.
• Type "1" in the ‘Marital Status’ field.
Your error message should appear on the screen, as shown below.

19
Step 4: Complete the Case
We will finish entering data for the second case, including the error condition, so that we
will be able to test that condition in the following exercise.
• Press F8 to clear the message.
• Hold down the Ctrl key and press the slash key (‘/’’) on the numeric keypad. The next
form will appear on the screen.
• Type "1" in the ‘Type Household’ field.
• Type "1" in the ‘Type Roof’ field.
• CSEntry will ask us to accept the case. Select Yes.
• Click the “Stop button” on the toolbar, or press Esc or Ctrl-S, or select Mode/Stop from
the main menu.
• Close CSEntry by clicking on the X in the top right corner, or selecting File/Close from
the main menu.

20
Exercise 6: CAPI questions and texts
Step1: Adding CAPI questions and texts
To add CAPI questions, we first need to tell CSPro that this is a CAPI application. Choose
Options – Data Entry… from the menu, and tick “CAPI mode” in the resulting data entry options
window:
When pressing OK, the Form has changed slightly: On top there is a yellow, empty field. This is
where the questions for the interviewer to read, as well as additional instructions to him – if
needed.
To add CAPI question to an item: Make sure the Form tree is shown in the left pane (click the
Forms tab on the bottom of the window), and highlight the item you want to make the question
for. Then click the CAPI questions button on the toolbar (shown below):

21
The CAPI question editor has two default fonts. The first one is to use for the questions, and the
other one to use for additional comments or information to the interviewer like this:
22
Step2: Data entry options window
Selecting “Options” – “Data entry...” pops up a window giving options on how the application
should behave. We saw that we can define the application to be a CAPI application. Here we shall
explore some of the other options available.
Step3: More about the Data entry options window
Turning off the question about Operator ID
The question about Operator ID can be turned off. This is handy during the development of the
application, as much testing is needed, and it is annoying to have to answer this question every
time. To turn it off, select Options – Data Entry Options… from the toolbar, and un-tick “Ask for
operator ID” (but do remember to turn in back on when the application is finished).
Partial save
There is an option “Allow partial save”. Whether we want to allow this when the survey is done,
or not is not a topic of this tutorial, but this option comes very handy when debugging the
application:
If we are working on a form towards the end of a multiple-form questionnaire and want to test it,
we have to enter data for all the previous forms first. By allowing partial save, data can be entered
up to the place we want to test, and then partial saved. Next time we want to test, we just continue
to enter data for this saved record.
System controlled vs. operator controlled applications
There are two modes the applications can run in: System controlled and operator controlled.
There are pros and cons for both modes.
Operator controlled mode
The default is operator controlled, and this allows more flexibility for the interviewer: He can use
the mouse to move around in the questionnaire, bypassing fields or whole sections of the
application. The mouse can also be used to skip to fields after having keyed an invalid response
for a value.
Data entry in operator controlled mode is sometimes quicker than system controlled mode, but
the data is less accurate.
System controlled mode
In system controlled mode, CSPro decides how the interviewer is allowed to move around in the
application. It also ensures that the data comes in the format the programmer specified, with skip
patterns obeyed and consistency checks passed. The interviewer has to resolve all errors before
moving in the questionnaire, which can slow down the process.

23
More practical exercise on the following Item lists
➢ Merging or Concatenating Cspro data
➢ Exporting cspro data
➢ Prepare one model questionnaire for exercise
Reference
CSPro Getting Started Guide 7.1.0.. International Programs Population Division U.S. Census
Bureau.Version 7.1.0. https://www2.census.gov/software/cspro/documentation/start71.pdf
CSPro Getting Started Guide 5.0.. International Programs Population Division U.S. Census
Bureau.Version 5.0. https://www2.census.gov/software/cspro/documentation/start71.pdf
Tutorial: Development of data entryand CAPI applications in CSPro. https://www.ssb.no/a/english/publikasjoner/pdf/doc_201219_en/doc_201219_en.pdf