current blender version. you can download blender from...
TRANSCRIPT

What do you need?
– Current blender version. You can download blender from http://www.blender3d.org ! This tutorial was created with blender 2.48a but it should also work with older versions, because it uses only elementary things of blender features. The only thing is that it might be another way of using these features.
– You should have knowlege about handling blenders 3d window. If you dont know it you can learn it from „Blender 3D: Noob to Pro“ on wikipedia: http://en.wikibooks.org/wiki/Blender_3D:_Noob_to_Pro
– Other knowlege is not necessary but could be helpful

Ok lets go:
Start blender (It could be possible that you see some other buttons under the 3d window, but it doesn't matter here)
Your cursor should be pointing into the 3d window if you want to interact in there. So the next thing is to erase the default cube (shortcut is „x“ on keyboard and choose the right entry on the upcoming menu → „Erase selected Object(s)“).
Now add a simple plane to your scene by pressing [space]Add → Mesh → Plane(It will center a new plane object to the origin)

Go back to top view [NumPad 7] and also the orthographic view is here very helpful [NumPad 5] ! You could check if orthographic view is really active by selecting „View“ in the menu:
While the plane is still selected (pink border) switch into edit mode [TAB] and turn on wireframe view (if your plane isnt pink, select it by click on it with your right mouse button):

Ok the next thing will be subdividing our plane. Because the whole street will be created out of our plane, but at the moment it only excists of one segment. So move your cursor again into the 3d window and press [W], a menu will popup with alot of special operations. What we need here is subdividing. If you are done blender subdivided the plane into four new planes. But this isnt enough, so subdivide two more times.Now the problem is that we only need a subdivision into x (horizontal) direction and not into y (vertical) direction, because in most cases our street will be flat so unnecessary polygons into y direction would damage our frame rates!If you want also a subdivision into y direction you can curve your street also in y direction, because in reality roads are in most cases curved also against the driving direction. But here in this tutorial we let it flat.
This street segment is flat This one is curved also against dd

Back to our plane, we only need the upper segments, to get them we select the lower segments by pressing [A] to deselect all vertices, than you press [B] once and you are able to select only the lower segments with your mouse pointer. Now it should look like this:

Now you can erase them by pressing [X] and choose → VerticesTo make the excisting vertices a little bit bigger select all vertices with [A] and size them with [S] and your mouse. Again size the vertices only in y direction by pressing [S] and then [Y] Key plus mouse moving. Now it should look like this:
Ok and now you can repeat the last steps to get more segments in x direction by subdividing about four or five times, erasing the lower segments, and sizing the excisting vertices only in y direction:

We are finished with creating our street. At this point we can easily putting the street texture on it. Search the internet for a tileable alsphalt texture like this one:
Switch to scripting window set:
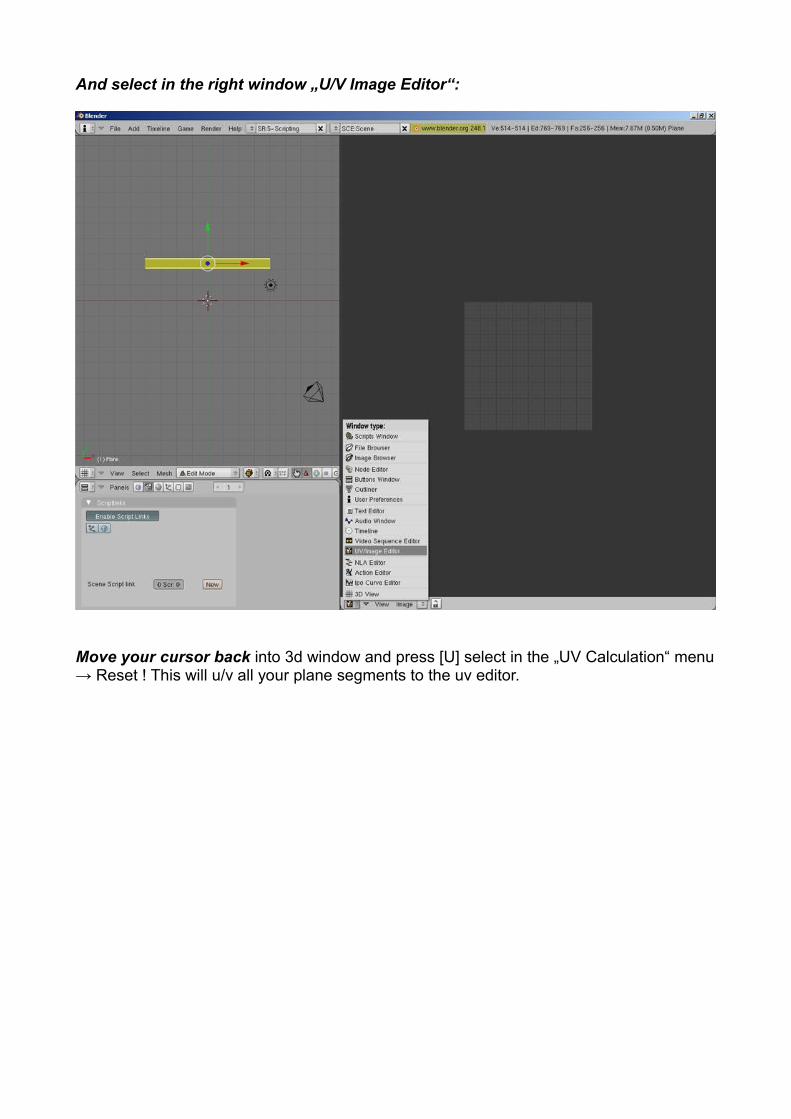
And select in the right window „U/V Image Editor“:
Move your cursor back into 3d window and press [U] select in the „UV Calculation“ menu → Reset ! This will u/v all your plane segments to the uv editor.

Load the asphalt texture over Image → Open:
Your square in the uv editor should fit now to the dimension of your loaded texture. Note that you also can zoom in the uv editor by using the mouse wheel!Switch back to model view:
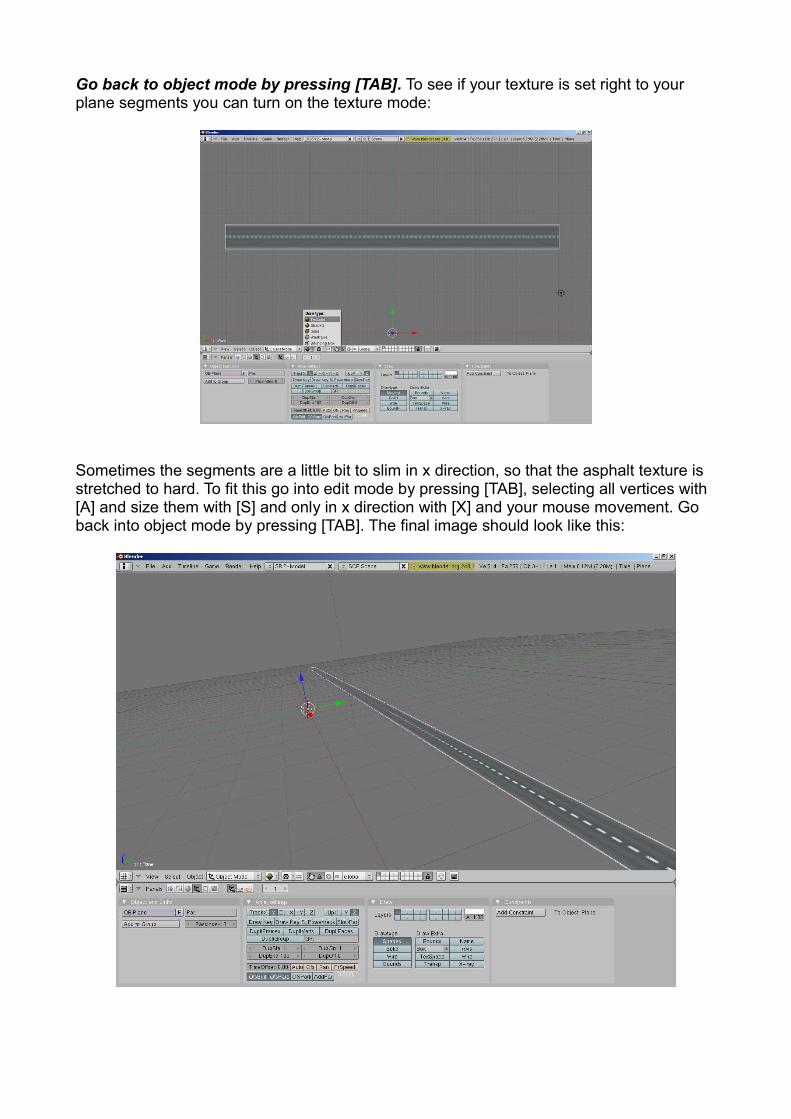
Go back to object mode by pressing [TAB]. To see if your texture is set right to your plane segments you can turn on the texture mode:
Sometimes the segments are a little bit to slim in x direction, so that the asphalt texture is stretched to hard. To fit this go into edit mode by pressing [TAB], selecting all vertices with [A] and size them with [S] and only in x direction with [X] and your mouse movement. Go back into object mode by pressing [TAB]. The final image should look like this:

To make further changes and get best results you have to put the center of your street to the right position. There is a little button which will do it for you, open the edit buttons and press the → Center New:

Now its time to create a curve, which will let us form our road. Simple create a „Bezier Curve“ by pressing space → Add → Curve → Bezier Curve ! And you will get a Curve in the origin of your 3d window:
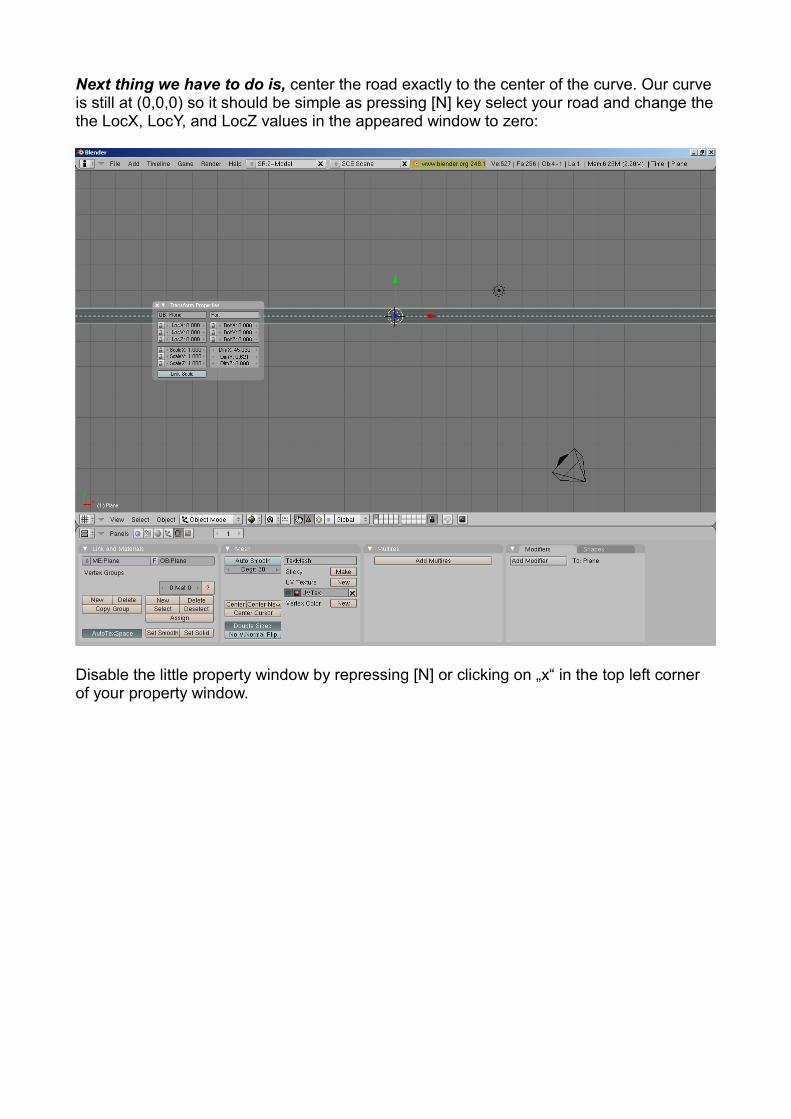
Next thing we have to do is, center the road exactly to the center of the curve. Our curve is still at (0,0,0) so it should be simple as pressing [N] key select your road and change the the LocX, LocY, and LocZ values in the appeared window to zero:
Disable the little property window by repressing [N] or clicking on „x“ in the top left corner of your property window.

Now we get to the most interesting part, we link our curve to the road plane object over an modifier. It is really simple, you only have to add a new modifier by pressing the button „Add Modifier“ and choose → Curve ! Then you have to put the object name of your curve into the column called „Ob:“ ! In most cases your curve should have the name „Curve“, to make sure this is right you can select your curve and you will see the name in the lower left corner of your 3d window, but reselect your road again if you add the modifier, otherwise you add an modifier to the curve:
Your street should be manipulated by the curve. The only thing you have to do is to extrude and manipulate your curve to your needs. But before this we have to switch the curve into 3d mode, because at the moment it is only a 2d curve, but we also want to create some hills.

To do so zoom a little bit into the screen with your mouse wheel, switch into wireframe view and select the „3D“ button under „Curve and Surface“:
With your Curve still selected switch into edit mode by pressing [TAB] you will see two pink lines. In the middle of each line there is a point, its the center of this line, over this point you can move the line to another location. Select one of the lines by pressing the right mouse button near to one of the center of one line, so that only this line gets pink. Now you can move it by pressing [G] and moving your mouse. You will see how the arrows every time following so that both lines are connected. And even your road will be manipulated in realtime. If you press [R] you can rotate each line around its center. So the whole thing is just a spline tool. But we want a more complex road. So you have to extrude one of the lines, with your line still selected press [E] and you will get another one, move it somewhere and click the left mouse button to locate it where it is. Extrude more lines and play around so you get familar with the spline system.

Here is my result:
Now we have to connect both ends by pressing [C] key! Most time it happens that the length of your curve doesnt fit to the length of your street plane. But you can match it by selecting all spline lines with key [A] and size the whole curve with [S] and your mouse.But I would recommend to let a little gap to each end of the street object. You can fit both ends when you are done with all work:

By the way how about using our 3d curve also to get some hills as I mentioned, you can also move a curve line up like this:
And if you want to turn your road around the curve axis, you have to use [T] key and your mouse:

If you are done with your work, recheck if you have a little gap between both street ends. Go back into object mode by pressing [TAB], switch into texture mode select your street and apply the modifier to your street, otherwise you dont get the results exported (but be careful you are not able to modify your street after applying the modifier):
The last thing is that you have to fill the gap, by connecting both ends of your street, putting the asphalt texture on it and sizing the uv polygon so it fits into the street!
Export your street to any 3d format or add some more things like landscapes!
FINISH!!