customizing a video in moviemaker
TRANSCRIPT
1
Customizing a Finished Video with Your Organization’s Information
Using MovieMaker
A How-To Guide
By Kristin Verrill and Gab Rich Atlanta Legal Aid Society, Inc.
Funded by a Technology Initiative Grant from
the Legal Services Corporation
Table of Contents
1. Customizing PowerPoint Slides with Your Organization’s Info 2. Creating a Project in Movie Maker and Adding Slides 3. Detaching the Audio from the Video 4. Trim the Video 5. Syncing Up the Slides and Audio 6. Finalizing the Project
2
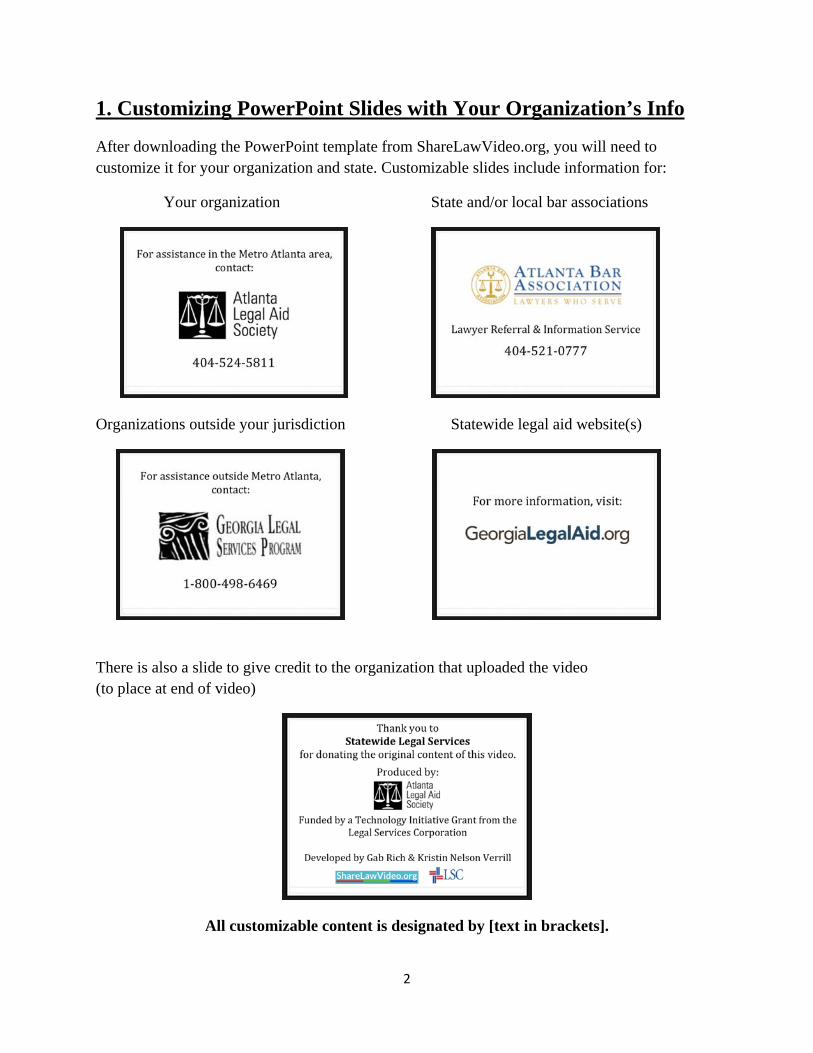
1. Customizing PowerPoint Slides with Your Organization’s Info
After downloading the PowerPoint template from ShareLawVideo.org, you will need to customize it for your organization and state. Customizable slides include information for:
Your organization State and/or local bar associations
Organizations outside your jurisdiction Statewide legal aid website(s)
There is also a slide to give credit to the organization that uploaded the video (to place at end of video)
All customizable content is designated by [text in brackets].

3
Once you have edited all of the customizable slides to suit organization and state-specific information, change the font color to match the rest of the presentation. Now, you are ready to set up the slides so they can be added to Movie Maker.
In order to add your slides to Movie Maker, you will first need to save the PowerPoint template as pictures. To do this, click File, and select Save as.
Select Save as type and navigate to “jpg” and select Save:
At the popup window that follows, select Every Slide:

4
2. Creating a Project in Movie Maker and Adding Slides
After saving the PowerPoint template as pictures and downloading the video file from ShareLawVideo, open Windows Movie Maker. Start a New Project from the Movie Maker menu:
Select Add videos and photos, then navigate to your video file and then select open.
Select Add videos and photos again, then navigate to the folder of PowerPoint slides converted to jpg files. Select all the slides and then open:
5
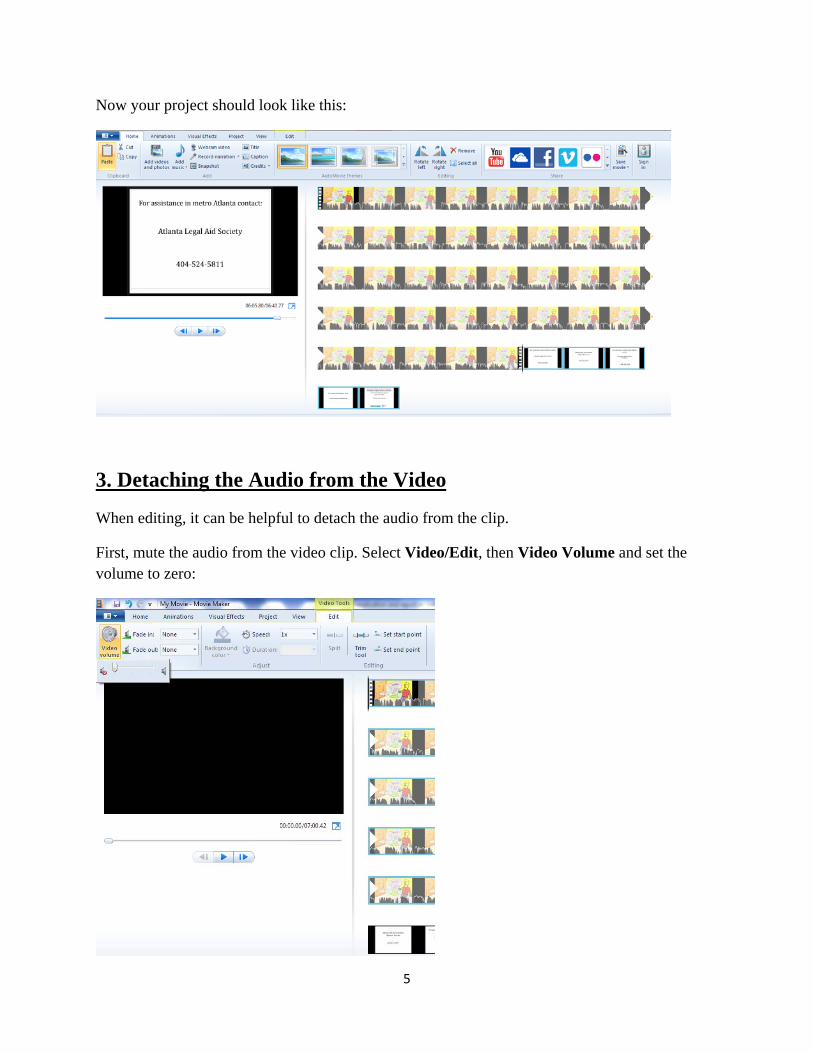
Now your project should look like this:
3. Detaching the Audio from the Video
When editing, it can be helpful to detach the audio from the clip.
First, mute the audio from the video clip. Select Video/Edit, then Video Volume and set the volume to zero:
6
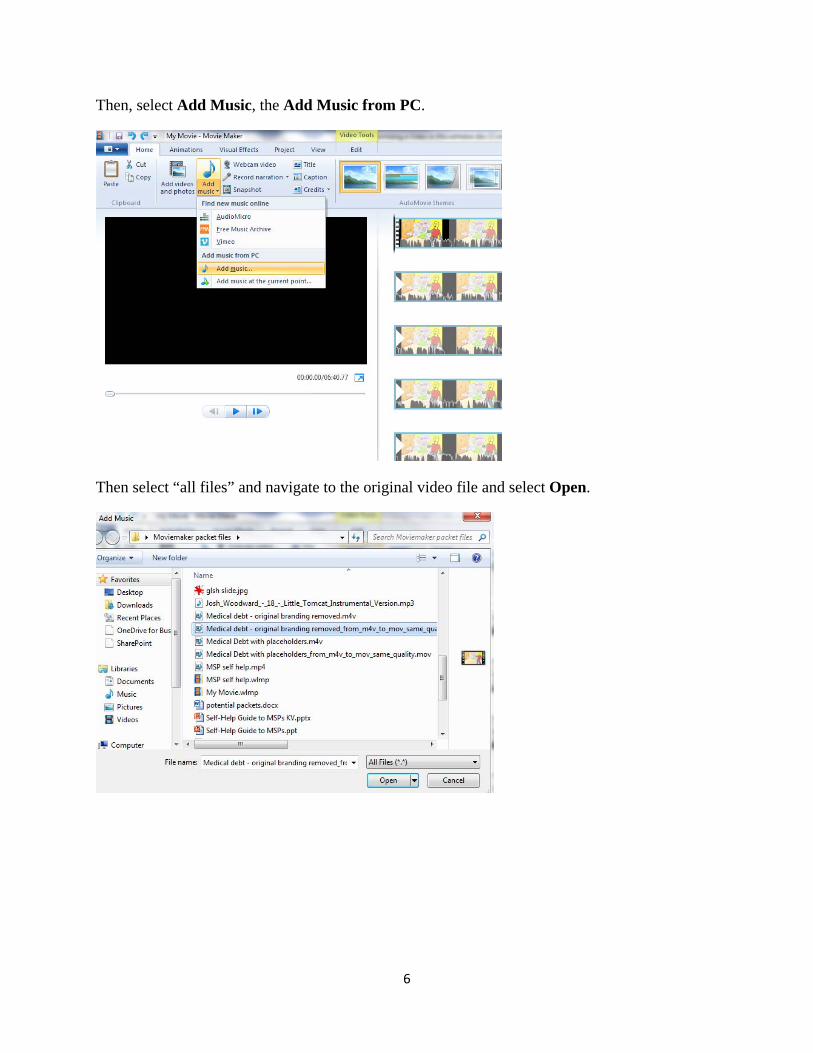
Then, select Add Music, the Add Music from PC.
Then select “all files” and navigate to the original video file and select Open.
7
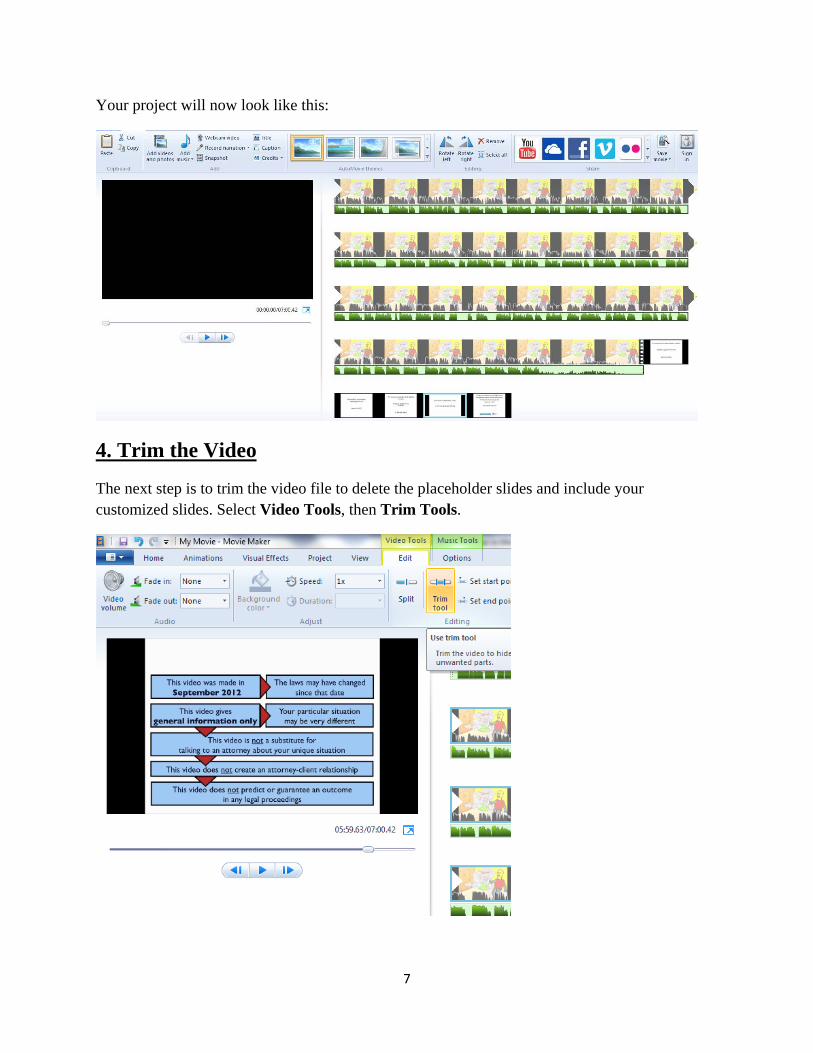
Your project will now look like this:
4. Trim the Video
The next step is to trim the video file to delete the placeholder slides and include your customized slides. Select Video Tools, then Trim Tools.
8
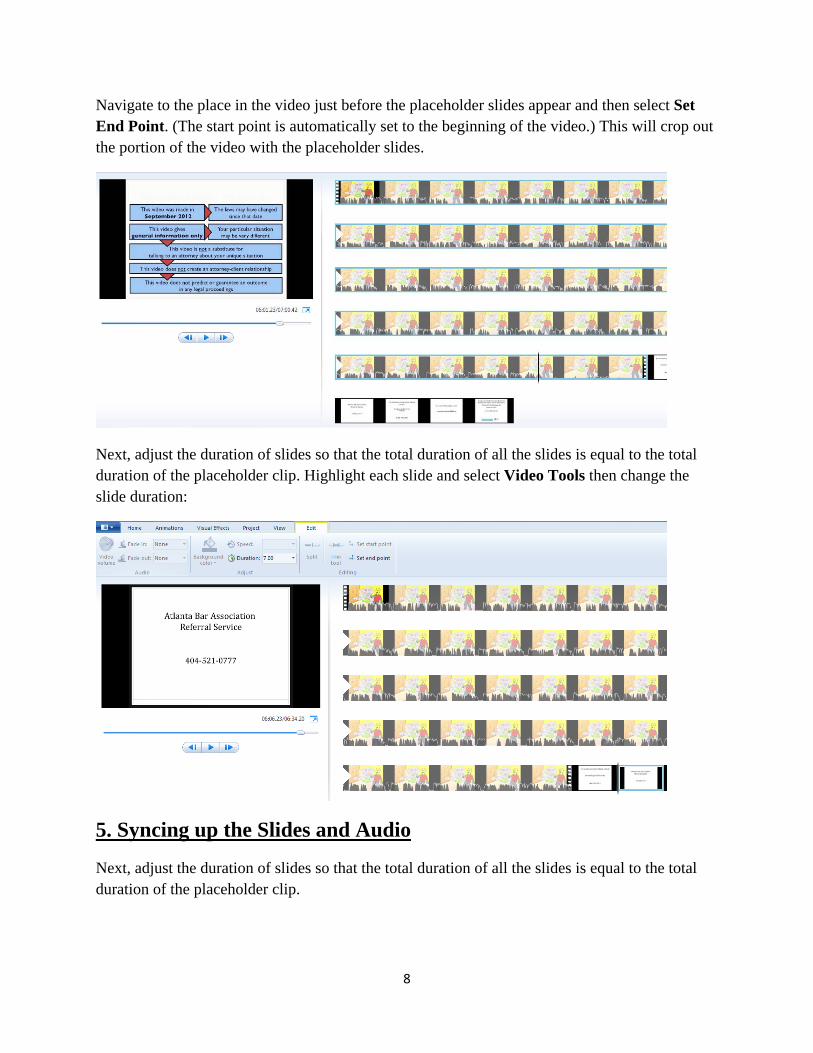
Navigate to the place in the video just before the placeholder slides appear and then select Set End Point. (The start point is automatically set to the beginning of the video.) This will crop out the portion of the video with the placeholder slides.
Next, adjust the duration of slides so that the total duration of all the slides is equal to the total duration of the placeholder clip. Highlight each slide and select Video Tools then change the slide duration:
5. Syncing up the Slides and Audio
Next, adjust the duration of slides so that the total duration of all the slides is equal to the total duration of the placeholder clip.
9
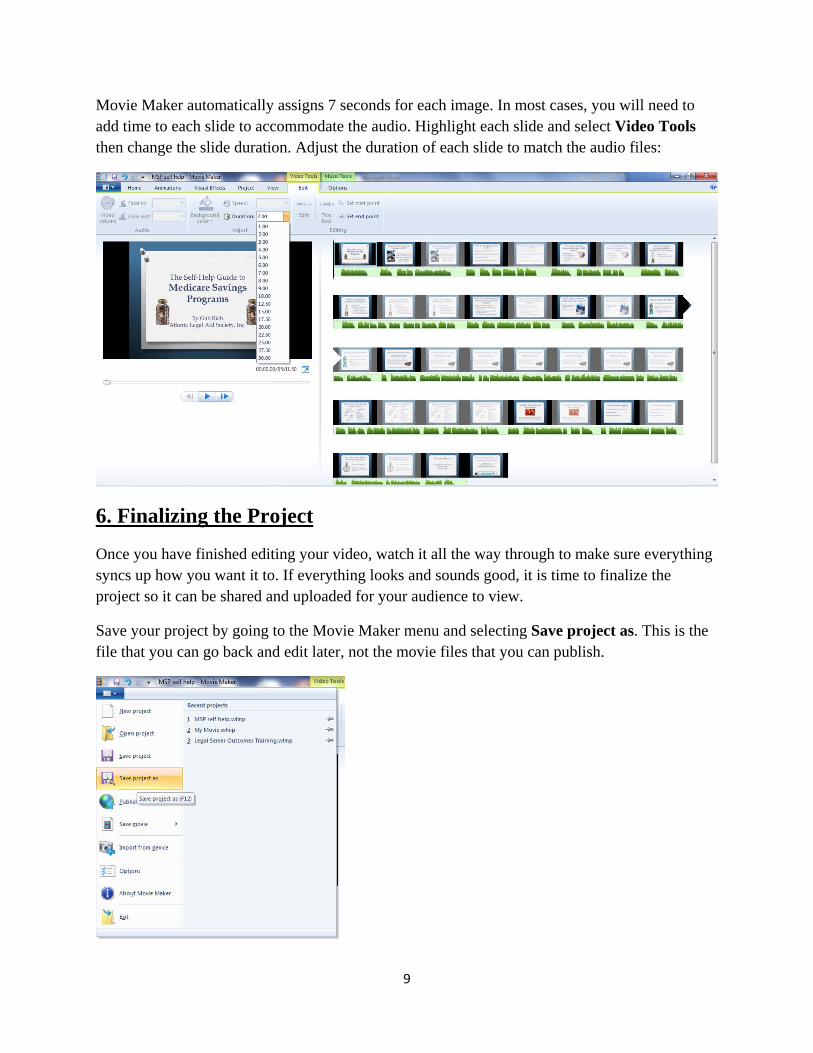
Movie Maker automatically assigns 7 seconds for each image. In most cases, you will need to add time to each slide to accommodate the audio. Highlight each slide and select Video Tools then change the slide duration. Adjust the duration of each slide to match the audio files:
6. Finalizing the Project
Once you have finished editing your video, watch it all the way through to make sure everything syncs up how you want it to. If everything looks and sounds good, it is time to finalize the project so it can be shared and uploaded for your audience to view.
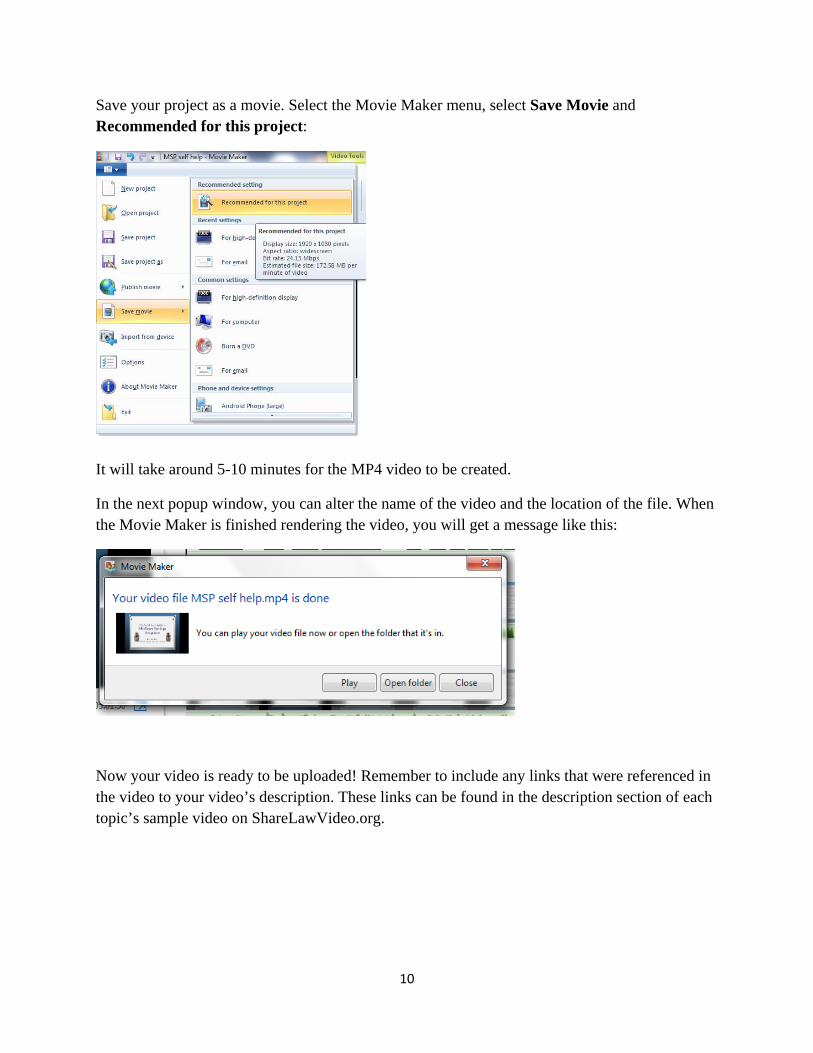
Save your project by going to the Movie Maker menu and selecting Save project as. This is the file that you can go back and edit later, not the movie files that you can publish.
10
Save your project as a movie. Select the Movie Maker menu, select Save Movie and Recommended for this project:
It will take around 5-10 minutes for the MP4 video to be created.
In the next popup window, you can alter the name of the video and the location of the file. When the Movie Maker is finished rendering the video, you will get a message like this:
Now your video is ready to be uploaded! Remember to include any links that were referenced in the video to your video’s description. These links can be found in the description section of each topic’s sample video on ShareLawVideo.org.