dbman: doing the basic stuff better!
TRANSCRIPT

Welcome To DBMan
DBMan © 2000,2001,2002,2003,2004,2005, 2006 SQLExec LLC. All rights reserved.
DBMan: Doing the Basic Stuff Better! Links for further assistanceDBMan Home Page Sales InformationTechnical SupportCheck for latest version of DBMan!
DBMan Questions, Suggestions, Remarks This product is only available by Internet Download. It is not provided by disc, tape or othertangible medium. DBMan is a user-friendly, database tool usually used for viewing and updating tablestructures or data. It works with most database vendors. You can connect to any databasevia ODBC, or the Powerbuilder native database drivers that come with this program forcertain database vendors like Oracle, Sybase, and Microsoft SQL Server.
Page 1

Getting StartedWhen DBMan is first installed, it takes the user to the DB Profiles Window (1st tab on theDBMan Options window), where it automatically searches for installed DB2, Sybase, andOracle connection profiles, as well as user and system data sources (DSNs defined withinMicrosoft ODBC Administrator). If found, these DB profiles are populated in the DB Profileswindow and saved in DBMan for subsequent use when connecting to databases. The useris then directed to the main window in DBMan, SQLExec, where the user can use theTreeView on the left to drill down on those vendors to connect to the profiles found. A robustset of popup options are available at each object level in the treeview. Double-click on atable to retrieve the table data. Data is returned in a grid form, called datawindows. Thereis a robust set of popup menu options (right mouse click popups) associated withdatawindows. There are also many other options available via the action menu on the mainmenu. General Settings can be set for options that globablly affect all DBMan featurewindows. DBMan has the following features:SQLEXEC is the main window in DBMan. It is here that you query and update tables, viewtable attributes, export and import rows, filter and sort the results, update grid cells with new
Page 2

values and save those changes back to the database without using SQL. You can use SQL,PL/SQL, or Transact SQL in the SQL Input Area. PIPEIT is DDL/DML window where you can "pipe" or propagate table structures and datafrom one database to another, from file to database, or database to file. Reverseengineer/forward engineer table capacity. DBVISUAL shows table attributes and their relationships (Referential Integrity) to othertables by clicking on the parent or child keys of a table. DBSCHEMA shows DDL differences between databases and allows you to generate DDLstatements on the fly to reconcile the source to the target database. DBDATA compares data between tables within or across databases. Also generates DMLstatements to apply which reconciles changes between two tables. GENDATA is a robust database bulking utility. DB2 UDB UTILS: Dynamic REORG/RUNSTATS/EXPLAIN for DB2 UDB databases. TRACEFILE: Parses PowerBuilder, Versata, DB2UDB, ODBC data sources. PARSEFILE: Metadata interface to extracting relevant information from huge log files. EDITFILE: DBMan's own File Editor for complex find and replace actions. SENDIT: Windows Network communications GUI interface. Although DBMan can work with any ODBC-compliant, DBMS Vendor, it is significantlyenhanced to work with the major vendors like Oracle, DB2, SQL Server, and Sybase. Seethe Limitations section for more details.DBMan, version 1.0, was released on April 26, 2000. It was written using Powerbuilderversion 6.5. DBman had a major rewrite on July 1, 2003, when it was upgraded usingPowerbuilder version 9.0. Currently, it is using Powerbuilder version 9.0.2 (Build 7554). You can view the DBMan history of Release/Version updates from an external file,DBManHistory.chm DBMan comes with a default trial period that can be extended.
Page 3

Database Connections DBMan stores database connection information so that the user can simply select aconnection profile, called a DB Profile, and connect without having to manually type inuserids, passwords, and other connection parameters each time a user connects to thedatabase. Passwords are encrypted within DBMan for security reasons and are alsoencrypted when connecting to a database. See DB Profiles for more details on howDBMan manages connection information. The Database Parameters section documentsdetails regarding the DBPARM connection property. You can connect via an ODBC driver or a DBMan-provided native driver (if available) for thespecific database vendor. The following two pictures show connections to an Oracledatabase using first, an ODBC driver, and then a native driver for Oracle.
Page 4

Page 5
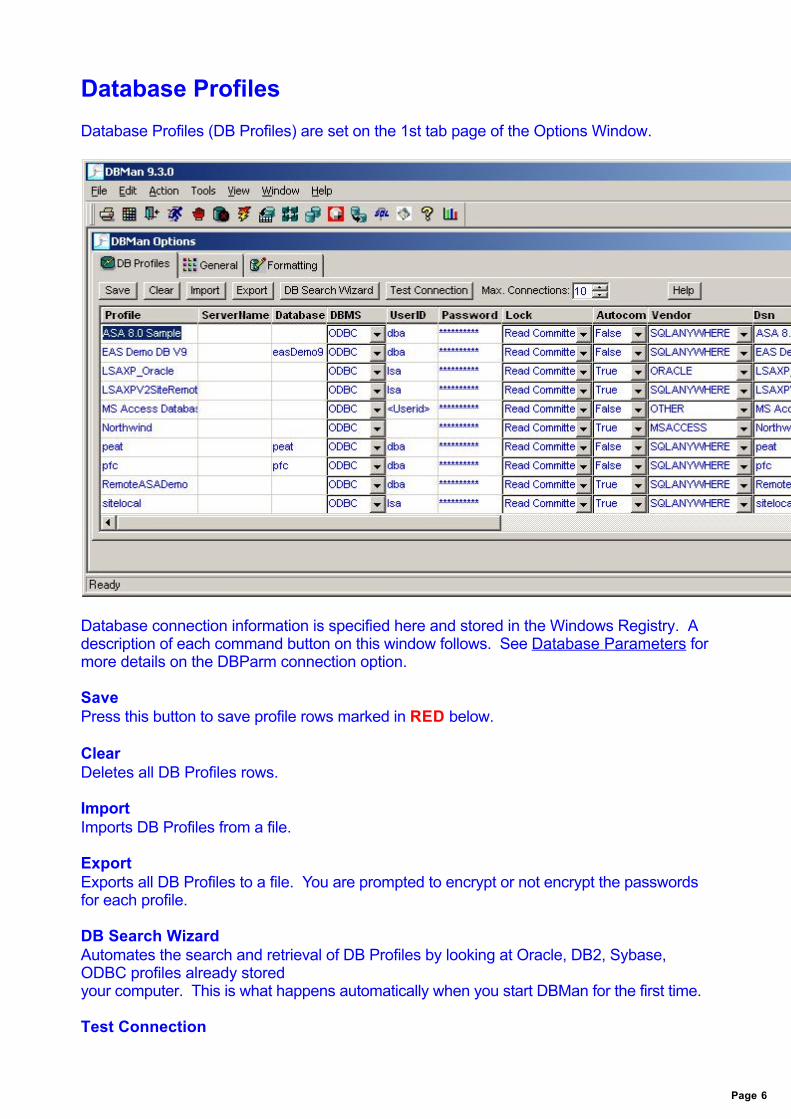
Database Profiles Database Profiles (DB Profiles) are set on the 1st tab page of the Options Window.
Database connection information is specified here and stored in the Windows Registry. Adescription of each command button on this window follows. See Database Parameters formore details on the DBParm connection option. SavePress this button to save profile rows marked in RED below. Clear Deletes all DB Profiles rows. ImportImports DB Profiles from a file. ExportExports all DB Profiles to a file. You are prompted to encrypt or not encrypt the passwordsfor each profile. DB Search WizardAutomates the search and retrieval of DB Profiles by looking at Oracle, DB2, Sybase,ODBC profiles already stored your computer. This is what happens automatically when you start DBMan for the first time. Test Connection
Page 6
Test your profile connectivity with this button. You can specify Max. Connections to restrict the number of active database connectionsthat can exist within DBMan at any one time. You can also automate the dynamic creation of an ODBC System DSN by right-mouseclicking on a profile and selecting Generate DSN. For Oracle, DBMan selects the driverbased on the following priority order:Oracle 9 driver, Oracle 8 Driver, Microsoft ODBC Driver for Oracle Hint: For Sybase connections, you can define one profile here, then check the SybaseAutogen checkbox on the connection window to retrieve all database instances running onthat particular Sybase Server. Notice in the above settings, one profile named, masterSPSPD2, which points to the Sybase master database. File FormatFile format is PowerBuilder-specific, based on the Powerbuilder initialization file format(PB.INI) where there is one section on top that specifies the names of the profiles that follow,followed by the definition for each profile. [DBMS_PROFILES]PROFILES='<Profile Name1>','<Profile Name2>'… [Profile <Profile Name1>]DBMS=Database=UserId=DatabasePassword=LogId=LogPassword=ServerName=DbParm=Lock= Prompt=DSN=Autocommit=Vendor=Comments=
Page 7

Native Drivers/ODBC DBMan allows DB Profiles to be created using database native drivers or ODBCinterfaces. Native Drivers are usually used when the desired database action is not incorporated withinthe standard ODBC APIs. Native drivers are supposed to be faster and more efficient, butthat is not always the case. ODBC provides a standard database interface templateregardless of what database vendor is being used. If you have a problem with database actions, you might try changing the database interfacefrom one to the other (Native Driver to ODBC or ODBC to Native Driver).
Native Driver SetupSelect the desired native driver from the DBMS dropdown (any value other than ODBC). Add the appropriate value(s) in the ServerName field and optionally, the Database field. ODBC SetupSelect ODBC as the DBMS dropdown value, which enables the DSN field. Then changethe DSN field from <No DSN> to another value in the selection list. This selection list ispopulated with the current list of ODBC Data Sources as shown in the Microsoft ODBCData Source Administrator window. It is here here you define your data sources that canthen be used by DBMan.
Page 8

DBMan provides Database Driver Interfaces for the following database interfaces:
Direct Connect Interface (DIR)
Informix v9.x Interface (IN9)
Microsoft SQL Server Interface (MSS)
Oracle 7 Interface (O73)
Oracle 8/8i (O84)
Oracle 9/9i (O90)
Sybase Adaptive Server Enterprise (SYC)
ODBC Database Driver (ODB)
OLE DB Database Driver (OLE)
JDBC Interface (JDB)
Page 9
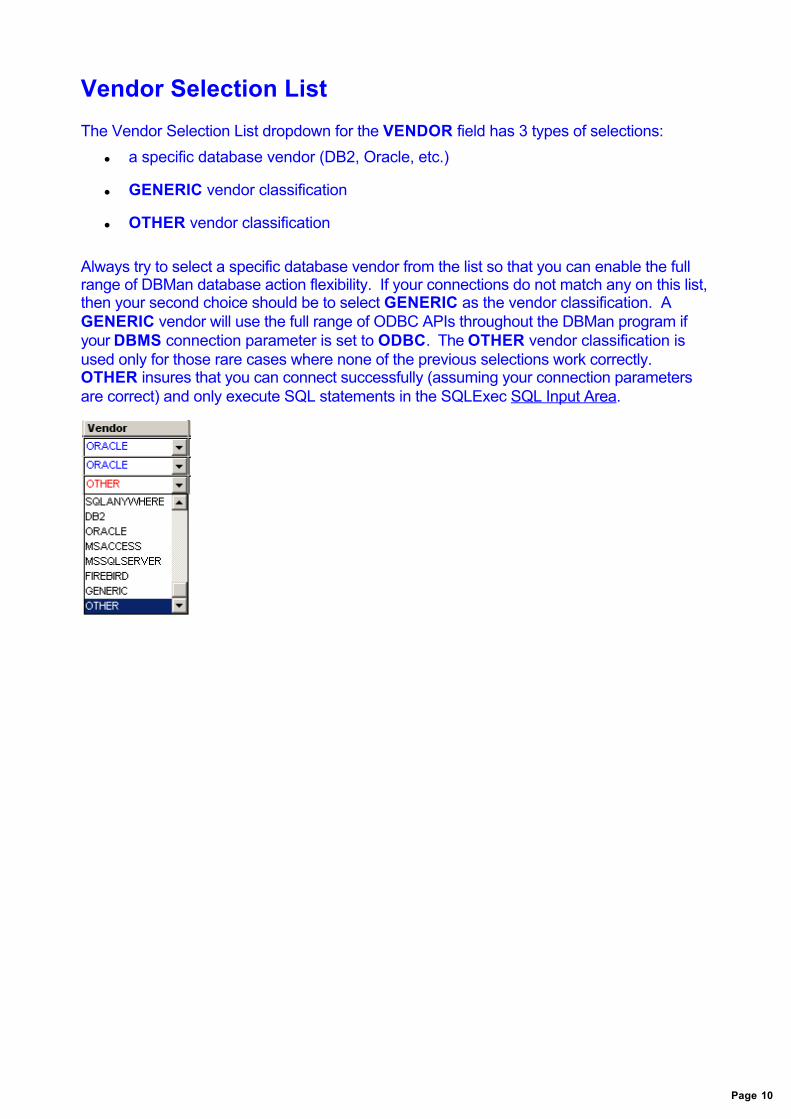
Vendor Selection List The Vendor Selection List dropdown for the VENDOR field has 3 types of selections:
a specific database vendor (DB2, Oracle, etc.)
GENERIC vendor classification
OTHER vendor classification Always try to select a specific database vendor from the list so that you can enable the fullrange of DBMan database action flexibility. If your connections do not match any on this list,then your second choice should be to select GENERIC as the vendor classification. AGENERIC vendor will use the full range of ODBC APIs throughout the DBMan program ifyour DBMS connection parameter is set to ODBC. The OTHER vendor classification isused only for those rare cases where none of the previous selections work correctly. OTHER insures that you can connect successfully (assuming your connection parametersare correct) and only execute SQL statements in the SQLExec SQL Input Area.
Page 10
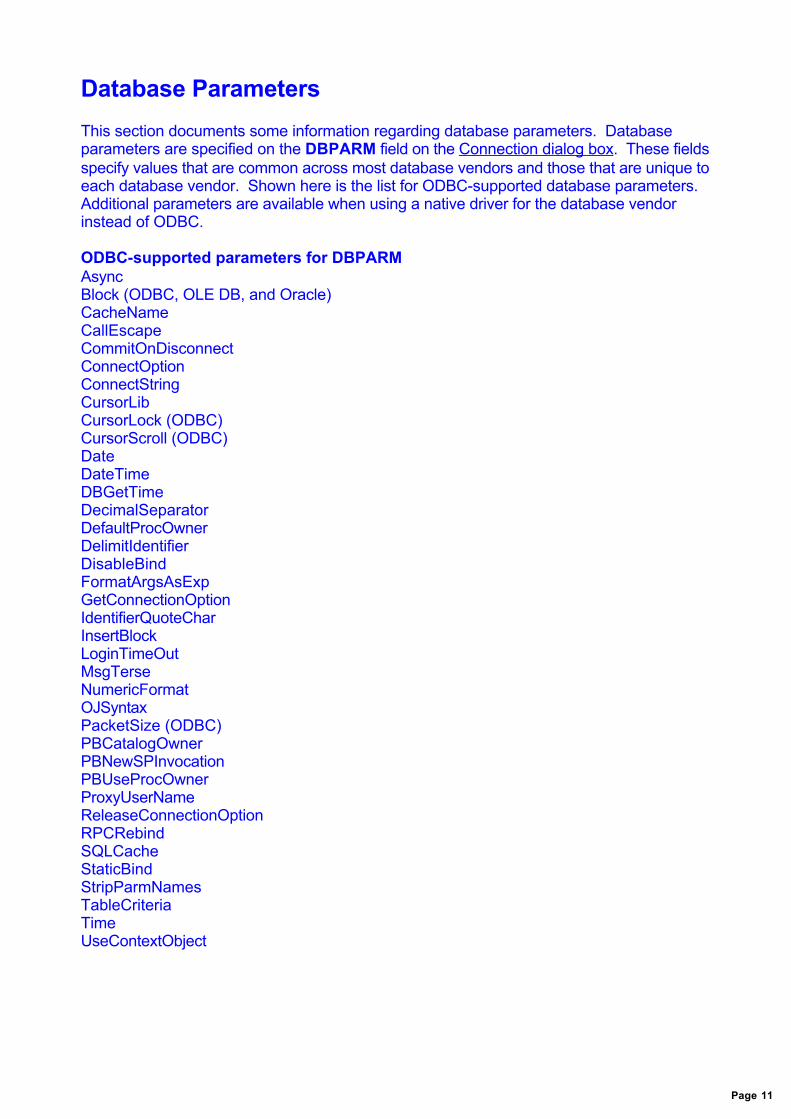
Database Parameters This section documents some information regarding database parameters. Databaseparameters are specified on the DBPARM field on the Connection dialog box. These fieldsspecify values that are common across most database vendors and those that are unique toeach database vendor. Shown here is the list for ODBC-supported database parameters. Additional parameters are available when using a native driver for the database vendorinstead of ODBC. ODBC-supported parameters for DBPARMAsyncBlock (ODBC, OLE DB, and Oracle)CacheNameCallEscapeCommitOnDisconnectConnectOptionConnectStringCursorLibCursorLock (ODBC)CursorScroll (ODBC)DateDateTimeDBGetTimeDecimalSeparatorDefaultProcOwnerDelimitIdentifierDisableBindFormatArgsAsExpGetConnectionOptionIdentifierQuoteCharInsertBlockLoginTimeOutMsgTerseNumericFormatOJSyntaxPacketSize (ODBC)PBCatalogOwnerPBNewSPInvocationPBUseProcOwnerProxyUserNameReleaseConnectionOptionRPCRebindSQLCacheStaticBindStripParmNamesTableCriteriaTimeUseContextObject
Page 11

JDBC Setup This section documents information related to configuring and connecting to DBMan throughJDBC. DBMan is a PowerBuilder application and as such it uses the PowerBuilder JDBCinterface (pbjdb90.dll) to access a database through the JDBC driver. The steps involve:1. Install the Java Virtual Machine (JVM).2. instal the Java Runtime Environment (JRE) must be installed on the computer: JREDownload
3. Set the PATH environment to point to the Sun Java VM library, JVM.DLL. For example, C:\Program Files\Java\j2re1.4.2_09\bin\client.4. Set the CLASSPATH environment variable.5. Install the JDBC driver for the particular database vendor.6. Define the JDBC profile in DBMan. Other information can be found at:Connecting to a database via the JDBC interface from PowerBuilder
Adaptive Server Anywhere (ASA or SQLANYWHERE)Driver: com.sybase.jdbc.SybDriver URL: jdbc:sybase:Tds:localhost:2638 Install the Jconnect JDBC Driver (jconn2.jar is installed on your computer).Run the SQL_ASA.SQL script to install stored procedures on your target database to use the JConnectJDBC driver.Update the CLASSPATH to point to the jconn2.jar file, e.g., C:\ProgramFiles\Sybase\Shared\jConnect-5_5\classes.Set the SQLCA fields as follows: SQLCA.DBMS = "JDBC" SQLCA.LogPass = <***> SQLCA.LogId = "dba" SQLCA.AutoCommit = False SQLCA.DBParm = "Driver='com.sybase.jdbc.SybDriver',URL='jdbc:sybase:Tds:localhost:2638',Properties='SQLINITSTRING=setTextSize 32000;'"
Adaptive Server Enterprise (ASE or Sybase SQL Server)Driver: com.sybase.jdbc.SybDriver URL: jdbc:sybase:Tds:199.93.178.151:5007/tsdata ORACLE 8Driver: oracle.jdbc.driver.OracleDriver URL: jdbc:oracle:thin:@ora80nt:1521:orcl
Page 12

Datawindows The datawindow is where most of the action happens in DBMan. A datawindow is 2dimensional grid of rows and columns, where data values are stored. They are usuallyassociated with the results of SQL query statements.
When you change any column value in the datawindow, the entire row will turn RED to signifya change to the row. Once the row is updated successfully back to the database, the rowwill return to its normal color, BLUE or BLACK. Each text cell in a datawindow can be expanded in two viewing modes: normal andformatted expanded views.See Grid Cell Expanded Viewing for more details. Many hot keys or short keys are defined in the context of datawindows. What makes these datawindows so important in DBMan is the popup menus associatedwith these datawindows. Right-click within the datawindow area and you get a robust list ofchoices from which to choose. For more complete information on each popup menu optionavailable, please check out the Popup Menus section. Here is just a sampling of thechoices... Sort and FilterYou can manage the results window instead of altering the WHERE conditions in your SQLstatements and re-executing the statements over and over again with the sort and filtermenu options. BulkingYou can add rows and modify columns using the Bulking menu choices. Some of thesefeatures are quite sophisticated for creating table relating keys while bulking up tables. Export and ImportYou can export your data to numerous file formats that are compatible with other programs. You can also import data and then press the update button to create insert statementsbehind the covers to add your new rows back to the database. Find and ReplaceYou can search for results and change them in the datawindow. Copy and PasteYou can copy a row, multiple rows, or all rows to the clipboard and then insert them directlyinto Excel for instance.
Page 13
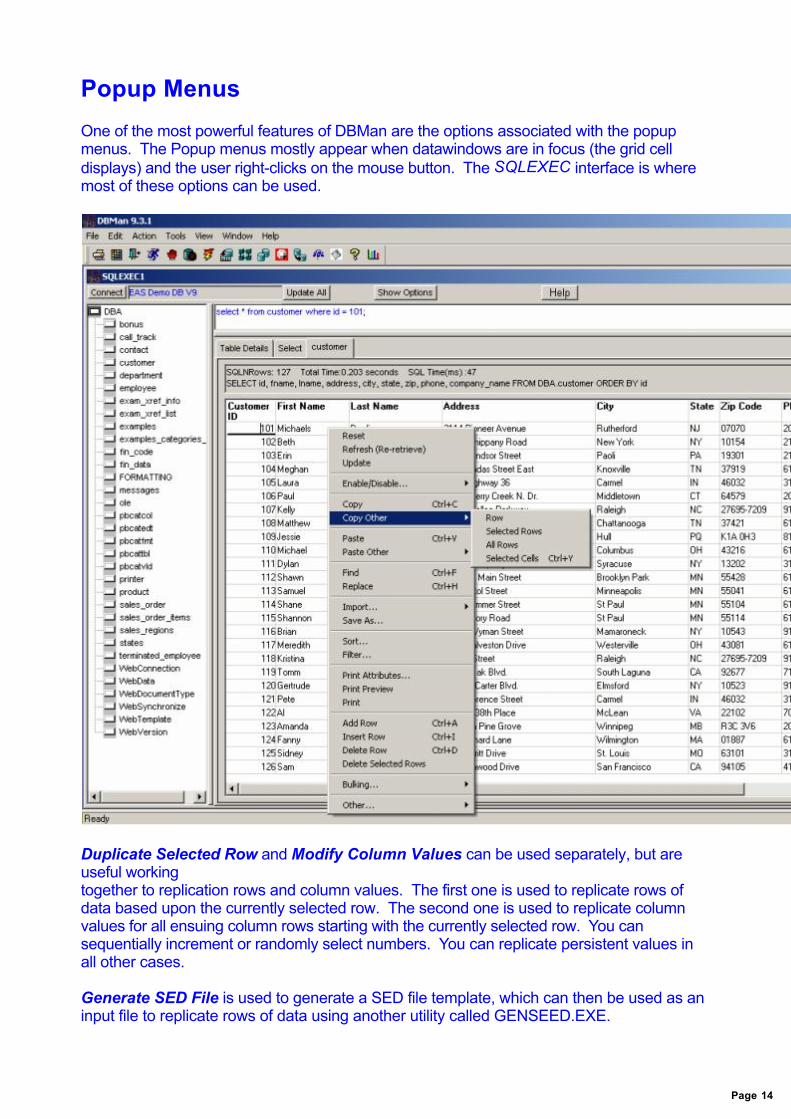
Popup Menus One of the most powerful features of DBMan are the options associated with the popupmenus. The Popup menus mostly appear when datawindows are in focus (the grid celldisplays) and the user right-clicks on the mouse button. The SQLEXEC interface is wheremost of these options can be used.
Duplicate Selected Row and Modify Column Values can be used separately, but areuseful workingtogether to replication rows and column values. The first one is used to replicate rows ofdata based upon the currently selected row. The second one is used to replicate columnvalues for all ensuing column rows starting with the currently selected row. You cansequentially increment or randomly select numbers. You can replicate persistent values inall other cases. Generate SED File is used to generate a SED file template, which can then be used as aninput file to replicate rows of data using another utility called GENSEED.EXE.
Page 14

You can summarize data in the resulting grid by the Expression option, under Other. For complex copy/paste features, see HotKeys section. An important concept to understand when working with datawindows is the following:Changes made to datawindows are not changes made to the database. Changesto datawindows are just that, changes made to the results buffers. To effect thosechanges back to the database, you must use the datawindow popup action,Update. The following list is the current popup menu options that are available on most datawindows. Reset will remove all rows from the datawindow.Refresh (Re-retrieve) will retrieve the data again using the same SQL statement. This isuseful when you made changes but do not want them permanently changed back in thedatabase. Refreshing the datawindow (results buffer) will get the data again from thedatabase changing all row colors from RED (changed) back to BLUE (non-changed rows).Update will update the database with changes on all rows marked in RED. Enable/Disable... shows you the enabled or disabled state of the following sub-items
Tabs When enabled, copy and paste actions are effective from within a single cellthat has the focus. Otherwise, you may select multiple cells for subsequent pasteactions.
Row Selection When enabled, the user can select multiple rows by holding downthe CTRL or SHIFT keys while left-clicking a row with the mouse. CTRL is used toselect one row at a time. SHIFT is used to select all rows between two selected rows.
Word Wrap When enabled, the text data in the expanded cell view is word-wrappedwithin the viewable area. Otherwise, text lines continue until a carriage return isdetected.
Copy executes the normal system copy to the windows clipboard.Copy Other... Row executes a copy for the current row. Selected Rows executes a copy for the currently selected rows. All executes a copy for the all rows in the current datawindow. Selected Cells executes a DBMan copy for the selected cells (Details: Multi-CellCopy/Paste). Paste executes a normal system paste for whatever is on the windows clipboard.Paste Other... Selected Cells executes a DBMan paste for the selected cells (Details: Multi-CellCopy/Paste). Find brings up the Find dialog box and prompts the user for a find key with which to search.Replace brings up the Find/Replace dialog box and prompts the user for a find key withwhich to find an replace with a replace value. Import allows the user to import a file contents into the current datawindow. TXT and CSVfile formats are supported for import.
Page 15

SaveAs prompts the user with many file format types with which to save all the contents ofthe current datawindow. Sort brings up a dialog box to select the datawindow columns for sorting in ascending ordescending order and with special functions on those sorting columns if desired. Sort onlyaffects the datawindow, and does not result in any SQL being executed against a database.Filter brings up a dialog box to specify the datawindow columns and/or functions to use asthe filter method. Filter only affects the datawindow, and does not result in any SQL beingexecuted against a database. Print Attributes shows the print attributes, i.e., portrait/landscape, margins, etc.Print Preview shows you the how the datawindow will appear when printed. This is usefultfor adjusting column widths so as to get the desired columns on the same page.Print prints the contents of the datawindow to the default printer. Note: For the following row actions, only the datawindow is modified. The database is notchanged unless the user selects the Update popup menu. Add Row adds an empty row after the last row. Insert Row adds a row before the current row.Delete Row removes the current row.Delete Selected Rows removes the currently selected rows. Bulking...
Generate SED File (GenSeed) Generates a file used as the primary input for theGENDATA feature.
Fill Factor inserts a number of rows specified by the fill factor in between gaps in theordered number key.
Insert Row With Values inserts a row with default data type values.
Duplicate Selected Row prompts the user to select how many rows to duplicateusing the current row.
Modify Column Values prompts the user with a variety of ways to update the rowsfor the current column value.
Other...
Show All Columns shows all column including previously hidden ones.
Hide Selected Column hides the current column from datawindow view, but doesnot remove it from the table.
Drop Selected Column removes the current column from datawindow view, butdoes not remove it from the table.
Create Computed Field creates a column with a computed value.
Create Expression shows functional results of specified expressions.
Filter Out...adds or removes old (BLUE) or changed (RED) rows.
Page 16

Datawindow Attributes shows the datawindow attributes for the currentdatawindow.
Log Update Scripts. When checked, any updates to the database result in SQLupdate scripts being logged to the DBMan log file. To see the actual values used onthe update scripts use these connection parameters: disablebind=1,staticbind=0
Page 17

HotKeys CTRL-C Normal Windows CopyCTRL-Y Executes DBMan copy for the currently selected cells CTRL-V Normal Windows PasteCTRL-G Executes a multi-line or multi-tab paste within a cellCTRL-P Pastes clipboard across multiple cellsCTRL-A Add Row at the endCTRL-I Insert Row before the current rowCTRL-D Delete the current RowCTRL-T Toggle TabsCTRL-R Toggle Row SelectionCTRL-X Copies all selected cells into clipboardCTRL-G Pastes clipboard into current cellCTRL-F Find PromptCTRL-H Find/Replaced PromptCTRL-HOMEMoves cursor to first rowCTRL-END Moves cursor to the last rowCTRL-INS Inserts a row before the current rowCTRL-DEL Deletes the current row F2 Saves and closes expanded view mode window for grid cellsF5 Searches for next occurrence of previously-specified string within the currently selectedcolumnF6 Copy to separate array holdersF7 Paste from separate array holdersF8 Goto Row PromptESC The Escape Key executes the CANCEL button on any window Copy/Paste Hot Key FeaturesCTRL-C and CTRL-V are the normal ways to copy and paste, respectively. For DBManthere are special hot keys relating to grid cells. See Multi-Cell Copy/Paste for details.
Page 18

Grid Cell Expanded Viewing Grid text cells can be expanded by double-clicking within the cell. It brings the text into aseparate window for easier viewing. There are two types of expanded mode: Normal andFormatted. Normal Expanded ModeData is shown as it is stored in the database. You can resize the window to fit the data,search for text, change font, size, and many other options. Formatted Expanded ModeData is shown as individual fields as they were defined on the Column Formatting Tab (3rdtab) of the Options Window. This is useful for large unformatted text fields that comprisemultiple data elements. Each field within the text can be defined as delimited or fixedlength. See the Column Formatting section for more details on how to define columnformatting.
Page 19
Grid Cell Format Setup The 3rd tab on the Options window is used to specify files that describe rules for columnformatting. It is here that one defines structure to unformatted column results in thedatawindow grid. Once defined, you can view the data for such defined columns in afield-oriented way. You specify formatting by either delimiter or field fixed widthspecifications. Given the sample column value below, the input formatting file shows bothmethod specifications. The next page shows where you input the input formatting file(Formatting tab of the options window), and what the results look like when displayed on theformatting results window. Delimiter method: Mr. DBMan*1234 Whatever Street*703-222-3333*[email protected] Width method: Mr. DBMan1234 Whatever [email protected] Input text formatting file contents#COLUMN=Formatting.unformatted_delimited#CONDITION=#DELIMITER=*Name=Address=Phone=Email=#END#COLUMN=Formatting.unformatted_fixedw idth#CONDITION=#DELIMITER=Name=9Address=20Phone=12Email=17#END
The following picture shows where you define your formatting rules (3rd tab on the Optionswindow).
Page 20

The following picture shows the field-delimited view of those columns defined with theformatting rules.
Page 21

Page 22

Multi-Cell Copy/Paste You can copy multiple cells and then paste them into other cells using the hotkeycombination: CTRL-Y / CTRL-P. Follow these steps to do this special case of copy/pasteacross multiple cells:1. Turn tabs off (CTRL-T) so you can select multiple cells.2. Select the cells to copy.3. Press CTRL-Y.4. Turn tabs on again (CTRL-T).5. Put cursor where you want to start the multi-cell paste.6. Press CTRL-P. Note: If you are copying data into one cell, but with tabs or carriage returns, press CTRL-Finstead of CTRL-P. There are other special hot keys for copying and pasting:CTRL-X Copies all selected cells into clipboardCTRL-G Executes a multi-line or multi-tab paste within a cellCTRL-G Pastes clipboard into current cell
Page 23

General Settings These settings are found on the Options Window (File-->Options), or by clicking the OptionsToolbar item.Settings involve the 2nd and 3rd tab on the Options Window. The 1st tab is used tomanage DB Profiles. Database-specific options can be set on their respective tabs on thiswindow. See the Database Settings section below for more details. General SettingsThe 2nd tab of the Options Window contains the DBMan program settings. Press <F1> tobring up the Help window that explains each option.
Show TipsProgram Tips window is automatically displayed when the program starts if this option ischecked. Show Row StatusShows microhelp row retrieve status. Show WarningsProvides warnings before actions are taken throughout the application. Show Inform PromptsTurns on informatory messages before certain actions.
Page 24

XP ThemesWhen checked, vertical/horizontal sizings are reduced to compensate for Windows XPthemes. Trigger SupportTrigger DDL information is provided in the PipeIt interface. Load In System TrayWhen checked, DBMan appears in the system tray and is loaded there at boot-up time. Optimize PrepareSQL statements are optimized when this box is checked. When checked, it may also causeunintended side-effects of SQL syntax errors. If you get unexpected SQL errors duringexecution, try turning this option off.By default, PowerBuilder tries to optimize all sql, which has the unintended side-effect ofrejecting the syntax of certain complex SQL statements. Uncheck this option if you arehaving SQL problems. You must re-connect after changing this option for it to take effect. Example code that works with option turned off, but not on:select dsk_obj.obj_id, dsk_obj.obj_usr_num,(select count(*) from proc_object where current_fl = 0)as "current_flag" from dsk_obj; RTE ModeIndicates whether expanded, formatted text is viewed and saved as Rich Text. Rows To DiskLeave this field unchecked unless you are experiencing memory errors when retrieving largeresult sets.When checked, retrieved results are sent to disk instead of memory, but performance isdegraded significantly. Report Errors (Net)Program Errors are automatically sent via a network message to program author when thisoption is checked. Report Errors (Email)Program Errors are automatically sent via the default Email program to DBMan when thisoption is checked. This is useful if you want DBMan to reply with email help. Auto RedrawWhen checked, Visual datawindows are redrawn after each row retrieved. This can slowdown performance and cause unwanted eye flicker. Avoid Connection TimeoutsWhen checked, intermittent messages are sent to the active database servers to avoidconnection time-outs. The frequency of these message is determined by the Idle Timervalue, also specified here on the General Settings tab. Memory ThresholdDetermines the memory available minimum where a messagebox appears notifying theuser that the memory on the computer has decreased below the specified minimum.
Page 25

Grid Cell BorderSet the datawindow or grid cell border style with a selection from the drop dow list. ByDefault, NONE is selected. In some XP Windows Themes, it is difficult to see the grid linessurrounding the grid cells. In these cases, you may want to change the border style fromNONE to BOX. Max. Column WidthSets the default maximum width of string type grid cells upon retrieval from the database. SQL DelimiterDesignates the SQL terminator character. UpdateWhereDictates the update condition when updating result windows back to the database.Key only - Fastest: Check is made to ensure the key has not been changed since it wasretrieved. Key & Updatable - Slowest: Check is made to ensure the key and any updatable columnhave not been changed since they were retrieved.Key & Modified - Check is made to ensure the key and any modified column have not beenchanged since they were retrieved.Use "Key only if you are not concerned about someone else updating this data since youretrieved it.Warning! Combining Key Only or Key & Modified with the UpdateMethod of Update can cause theprogram to produce errors if the table involved does not have a primary key. DBMan recommendsthe normal settings of Key and Updatable for the UPDATEWHERE field and UPDATE for theUpdateMethod field. UpdateMethod Effects how a datawindow results window is updated back to the database for changes,whether the key column can be updated in place or whether the row has to be deleted andreinserted. This value determines the syntax that will be generated when a user modifies akey field:Update - Use the UPDATE statement when the key is changed so that the key is updated inplace.Delete/Insert - Use a DELETE and an INSERT statement when the key is changed.Caution! When there are multiple rows in a DataWindow object and the user switcheskeys or rows, updating in place may fail due to DBMS duplicate restrictions.Warning! Combining Key Only or Key & Modified with the UpdateMethod of Update can cause theprogram to produce errors if the table involved does not have a primary key. DBMan recommendsthe normal settings of Key and Updatable for the UPDATEWHERE field and UPDATE for theUpdateMethod field. Security LevelDetermines the security level in effect for this program.MINIMUM - Users cannot update information and cannot execute stored procedures.MEDIUM - Users can update information, but are prompted before making changes.MAXIMUM - Users have no program restrictions. Idle TimerThe idle event is invoked when this threshold is reached. Certain actions are performed
Page 26
during idle refresh intervals like sending messages to the Database Server to avoidconnection time-outs (see Avoid Connection Timeouts checkbox). Sounds SectionThis section is where you can define sounds for specific actions in DBMan. You can alsoturn sounds off or on completely by checking/unchecking the Enable Sounds checkbox. Database SettingsThis section documents general settings for specific database vendors which are specifiedon other tabs on the Options Window. ORACLEShow RecycleBin Objects - When checked, recycle bin objects are retrieved from thedatabase. LineSize (PL/SQL Formatting) - Specifies the number of columns per line when formatting theoutput of PL/SQL scripts generated in SQLEXEC.
Page 27
Limitations All relational DBMS vendors are supported for SQL query activity in the SQLExec interfaceof DBMan, but only the following vendors/versions are supported for extendedDBMan-specific features:
Sybase Server Version 11, Sybase Adaptive Server Enterprise (ASE) Version 12,12.5, 15
SQL Anywhere Version 5, 5.5, Adaptive Server Anywhere (ASA) Version 6, 7, 8, 9
Oracle (Version 7, 8, 9i, 10g)
DB2 (UDB Version 6, 7, 8)
DB2 (Zos Version 5, 6, 7, 8 with some restrictions)
Microsoft SQL Server 2000, 2003
Microsoft Access (all versions)
Firebird (Version 1.5.0.4027) Using IBPhoenix Inc Open Source Firebird InterBase(r)driver 1.01.00.89 or higher
SQL input restrictionsWhile this program is intended to make it easier to execute, retrieve, and modify SQLstatements and their results, it may not replace all functionality of proprietary software thatalso executes SQL from a client software package. DBMan does not support ASE/SQLServer DBcc commands that return internal sybase output buffers. Stored procedures thatreturn multiple result sets are also not supported. For instance, sp_estspace <tablename> would normally return 3 separate window results, but DBMan only returns the firstset. You can still execute proprietary actions via the external interface to DBMan, notably, theexternal Transact SQL or PL/SQL interface in the SQL Input Area popup menu option of theSQLEXEC window.
Page 28

Trouble-Shooting This section documents some common problems. General SQL ErrrorProgram crashes or aborts with the error message indicating that part of the where clause was missing whenattempting to update a datawindow with update or delete changes like the following: SQLSyntax = DELETE FROM dbo.table_temp WHERE SQLCode = -1 SQLDBCode = 102 SQLErrText = Incorrect syntax near 'WHERE'.This problem may be caused by a combination of DBMan settings with tables that do not have primary keysdefined on them. Either create a primary key on the table or make sure that the UpdateWhere value on thegeneral tab of the Options window is set to "1 - Key & updatable". If the problem still persists, try setting theUpdateMethod value to "Delete/Insert" on the general tab of the Options window. SQLEXEC Window SQL ErrorsErrors occur when attempting to execute SQL statements from the SQL Input Area of the SQLEXECwindow. Make sure you have the correct settings for allowing comments and non-printable characters in theSQL statements. These are controlled by the options, Comments and Non-Printables. When checked,they permit comments and non-printables to be a part of the SQL statement. This is necessary for certainSQL statements like creating stored procedures where you have embedded comments and line formatting. As a default, you should keep these parameters checked, unless you really have comment lines in the SQLInput area that you want to ignore, and formatting that you want to remove before execution of the SQLstatements.
Page 29

Security Database SecurityA user's privileges are determined by the database privileges bestowed upon the user'suserid when connecting to a database. Database security is established by the DatabaseAdministrator (DBA) for a database. DBMan will permit the user to execute any databasecommand with which their connection userid has privileges. Password Encryption SecurityDBman encrypts passwords in the Windows Registry and encrypts them again whensending them as part of connection requests to a database. DBMan Program SecurityDBMan has 3 built-in security levels for program execution. At this time, the security levelsare actually set by the user! In a future release of DBMan, DBMan will be installed with apredetermined DBMan Program Security level to allow corporate control over DBManfunctionality. The rest of this section describes the current security levels. MINIMUMUser has least privileges.
User cannot update result windows.
User cannot use AutoCommit checkbox option. This may prevent user fromexecuting stored procedures.
User cannot update SQL in the SQL input area either.
User cannot use the PIPEIT interface for managing and migrating DDL and DML. MEDIUM
User is prompted every time they attempt to execute "COMMIT;" from the SQL inputarea.
User cannot use the PIPEIT interface for managing and migrating DDL and DML. MAXIMUMUser has no restrictions. User restrictions are only limited by the privileges set byDataBase Administrators (DBAs).
Page 30

DBMan Features This section documents the major features in DBMan, starting with the flagship feature,SQLExec.
Page 31
SQLEXEC SQLEXEC is the flagship interface in DBMan. It is here that you query and update tables,view table attributes, export and import rows, filter and sort query results, and much muchmore. You can have multiple connection objects open at the same time on one instance ofthe SQLEXEC window or you can open multiple instances of the SQLExec window. Thereare 3 main areas on the SQLExec screen:
Tree View Area - Shows database objects with the root object being the databasevendor Oracle, Sybase, etc.). Database Profiles (connection objects) are right underthis layer, followed by schemas, and regular objects like tables, views, storedprocedures (Oracle shows packages as well), and functions. Use the popup menu(right click) on each level to see what options are available.
SQL Input Area - This is the place where you manually insert SQL statements forexecution.
SQL Output Area - This is where the SQL statement execution results are shown asa separate tab usually for each SQL statement executed.
Page 32

To connect to a database instance, drill down one level from the database vendor level (toplevel) and click on one of the database profiles for that vendor. The connection dialogwindow appears. Once you are connected, you are then presented with the schemaselection window, where you can retrieve everything for all schemas or specific schemas. From there, you can drill down further to the schema and schema objects level, where manypopup menu choices are available, like double-clicking on a table to retrieve its contents,view object definitions, export data, etc. Most of the Main Menu/Action items apply to the SQLEXEC interface. Press F1 over any field to context-sensitive help The Show Options button will show you a list of options that can be changed. The context area at the top shows what database profile (connection object) has the currentfocus. This is especially important to what SQL statements are entered and executed fromthe SQL Input Area.
Page 33

Explain SQLYou can get SQL plan costs for an SQL statement by highlighting the SQL statement in theSQL Input Area, and then selecting menu: ActionàExplain SQL.
Page 34

Options The SQLExec options are shown by pressing the Show Options / Hide Options button.
AutocommitWhen checked, all updates to the database are automatically committed individuallybecause an implicit commit is executed after each statement. When unchecked, the usermust explicitly enter a COMMIT or ROLLBACK command to save or discard changes. Theonly exception is when an update is is done from the datawindow popup menu on the resultstab. A COMMIT is automatically done after the update changes are complete as a logicalunit of work (LUW) even when autocommit is turned off. If autocommit is turned on,COMMITS are also done between updates, even on the results tabs.Caution: When you set AutoCommit to True, you cannot roll back database changes.Therefore, use care when changing the setting of AutoCommit. ScratchPadWhen checked, all SQL statements executed from the SQL Input area send their results toone common tab, the Scratch Pad tab, thereby overwriting any previous output. Otherwise,each SQL statement executed results in a separate results tab. Criteria PromptWhen checked, a table criteria prompt is shown for all table data requests generated fromdouble-clicking a table under the Tree View Area on the left. Otherwise, whendouble-clicked, the table contents are automatically retrieved without any prompt to qualifythe result set.
SQL DirectWhen checked, all SQL Statements are executed through a direct ODBC call, instead ofusing the default DBMan database calls. Performance is greatly improved sometimes by
Page 35

using SQL Direct, and Database Vendor specific calls may need to use SQL Direct insteadof the default method. Retrieve As NeededWhen checked, only 1 screen of data is initially returned. The user must scroll down to forceother rows to be retrieved. This is useful in cases where you do not want to wait to retrieveall the data in a table with a lot of rows. Otherwise, all the rows of the table are retrieved. Using Aggregate functions in the sql statement will cause retrieve as needed to beoveridden. Aggregate functions include SORT, etc. Refresh TabsWhen checked, all tab results are deleted before the SQL requests are issued. Otherwise,each SQL request results in another tab result set. AutoFillWhen checked, the user is prompted with a list of tables and columns for selection whentyping a period after either the schema or table name in the SQL Input area. Auto Searchis enabled on the table and column list, so just type away to get to the value you want. Tostart a new search, just press the backspace key. Double-click or press Enter to copyyour selected value into the current cursor position in the SQL Input area. Exit the list withoutselecting anything by pressing the Escape key. Autofill is disabled when GENERIC orOTHER is selected as the DB Vendor.
TruncateWhen checked, tables deleted from the Tree View Area will use the Oracle Truncate methodof deleting rows, rather than the default, delete rows method. If the DB Vendor is not Oracle,the default delete rows method is used. Highlight SyntaxWhen checked, certain SQL keywords are highlighted in bold and contrasting colors.
Enclose In Quotes
Page 36

When checked, each column for each table under the Tree View Area will be enclosed inquotes when the table is double-clicked. This is sometimes helpful to avoid column namekeyword usage errors. CommentsWhen checked, comments are allowed as part of the SQL statements to be executed in theSQL Input Area. Otherwise, comments found are removed from the SQL statements beforeexecution. Comments are designated as lines starting with two forward-slashes ("//) orstarting with "/*" and ending with "*/". This is useful when creating views or storedprocedures in the SQL Input area and retaining those comments in the source code of thecreated objects. As a general rule though, you should leave this checkbox unchecked soSQL statements can be parsed more effectively. Only check it for the case wherestatements contain comments that you want to propagate as part of the SQL statement. Non-PrintablesWhen checked, non-printable characters like tabs are permitted as part of the sql statementto be executed. Otherwise, they are removed before sql execution. Note on Comments and Non-printablesErrors may occur when attempting to execute SQL statements from the SQL Input Area of the SQLEXECwindow. Make sure you have the correct settings for allowing comments and non-printable characters in theSQL statements. These are controlled by the options, Comments and Non-Printables. When checked,they permit comments and non-printables to be a part of the SQL statement. This is necessary for certainSQL statements like creating stored procedures where you have embedded comments and line formatting. As a default, you should keep these parameters checked, unless you really have comment lines in the SQLInput area that you want to ignore, and formatting that you want to remove before execution of the SQLstatements.
Page 37

TREE VIEW AREA The Tree View Area is useful for drilling down on the database to the underlying databaseobjects, and then performing popup menu actions on those objects: view, compile, change,export, etc. The Tree View Area, which is located on the left side of the SQLEXECwindow, is populated with the major database interfaces that DBMan supports with a richset of features. This vendor list includes:
DB2, Firebird, Microsoft Access, Microsoft SQL Server, Oracle, Adaptive ServerAnywhere (SQLANYWHERE), Adaptive Server Enterprise (Sybase enterpriseserver)
The tree view area includes 2 other objects to include any other vendors, but with lessfeatures: GENERIC and OTHER.
GENERIC is used to include an ODBC API set of extended features, but not the fullrange of features
available to the main DB Vendors.
OTHER has the most limited access to databases, with most of the action occurringonly within the SQL Input Area.
You can find out what options are available to you at each Tree View Level by right-clickingon an object and viewing the popup menu choices. You can double click on a table toautomatically retrieve its contents in a new tab in the SQL Output Area. Checkboxes areassociated with Tables for multiple selection options at the Tables Tree level or theindividual table level immediately below them. Thus, you can check 3 tables marked for theTruncate option. This action is similar to how the PipeIt interface works with checkedtables.
Page 38
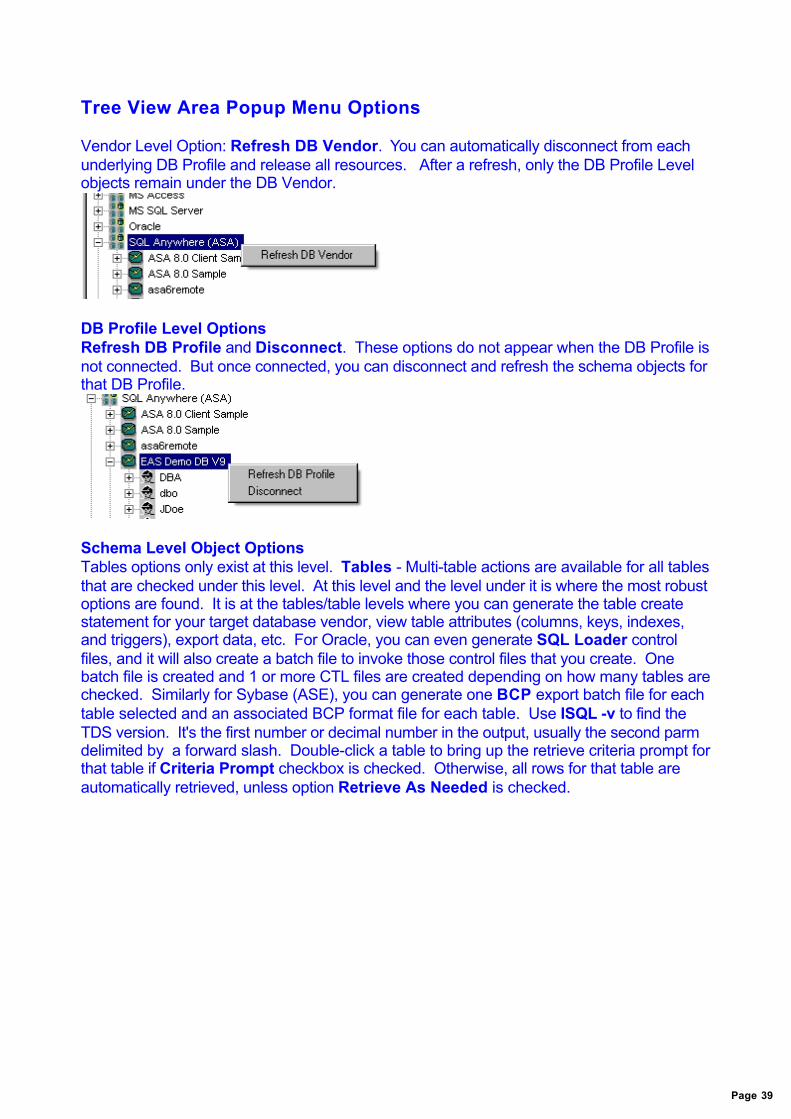
Tree View Area Popup Menu Options Vendor Level Option: Refresh DB Vendor. You can automatically disconnect from eachunderlying DB Profile and release all resources. After a refresh, only the DB Profile Levelobjects remain under the DB Vendor.
DB Profile Level OptionsRefresh DB Profile and Disconnect. These options do not appear when the DB Profile isnot connected. But once connected, you can disconnect and refresh the schema objects forthat DB Profile.
Schema Level Object OptionsTables options only exist at this level. Tables - Multi-table actions are available for all tablesthat are checked under this level. At this level and the level under it is where the most robustoptions are found. It is at the tables/table levels where you can generate the table createstatement for your target database vendor, view table attributes (columns, keys, indexes,and triggers), export data, etc. For Oracle, you can even generate SQL Loader controlfiles, and it will also create a batch file to invoke those control files that you create. Onebatch file is created and 1 or more CTL files are created depending on how many tables arechecked. Similarly for Sybase (ASE), you can generate one BCP export batch file for eachtable selected and an associated BCP format file for each table. Use ISQL -v to find theTDS version. It's the first number or decimal number in the output, usually the second parmdelimited by a forward slash. Double-click a table to bring up the retrieve criteria prompt forthat table if Criteria Prompt checkbox is checked. Otherwise, all rows for that table areautomatically retrieved, unless option Retrieve As Needed is checked.
Page 39

Object Level Options for Individual TablesEach table has similar options to those under its parent, Tables, at the individual table level. Note the second picture where you see the table attributes in the SQL Output area.
For more details on import and export options, please read the Import And Export Detailssection. Object Level Options for Views, Stored Procedures, Functions, and OraclePackagesYou can view object definitions for Views, Functions, Stored Procedures, and Packages byinvoking the item's popup menu (right mouse click). For all of the above, except views, youcan also double-click on them to view the object definition. If connected to Oracle, you havethe additional option of compiling these objects using the popup menu.
Page 40

SQLEXEC: Import And Export Details You can import data directly into a datawindow by using the popup menu options. You canexport data in 2 ways: using the datawindow menu options for a specific tab in the SQLOutput Area or the popup menu option (Export Table) for the table under the Tree View Area. With the table list menu option, you can export data and optionally the DDL statements tocreate the table. Triggers are not supported in the import or export functionality. You must extract them usingsome other database management tool. Import files must be Text (tab delimited) or CSV (Comma delimited). Export files can beone of many output file format options. The datawindow options for import and export as shown below.
The table menu option under the Tree View Area for exporting is shown below.
The export options window appears when Export Table is selected.
Page 41
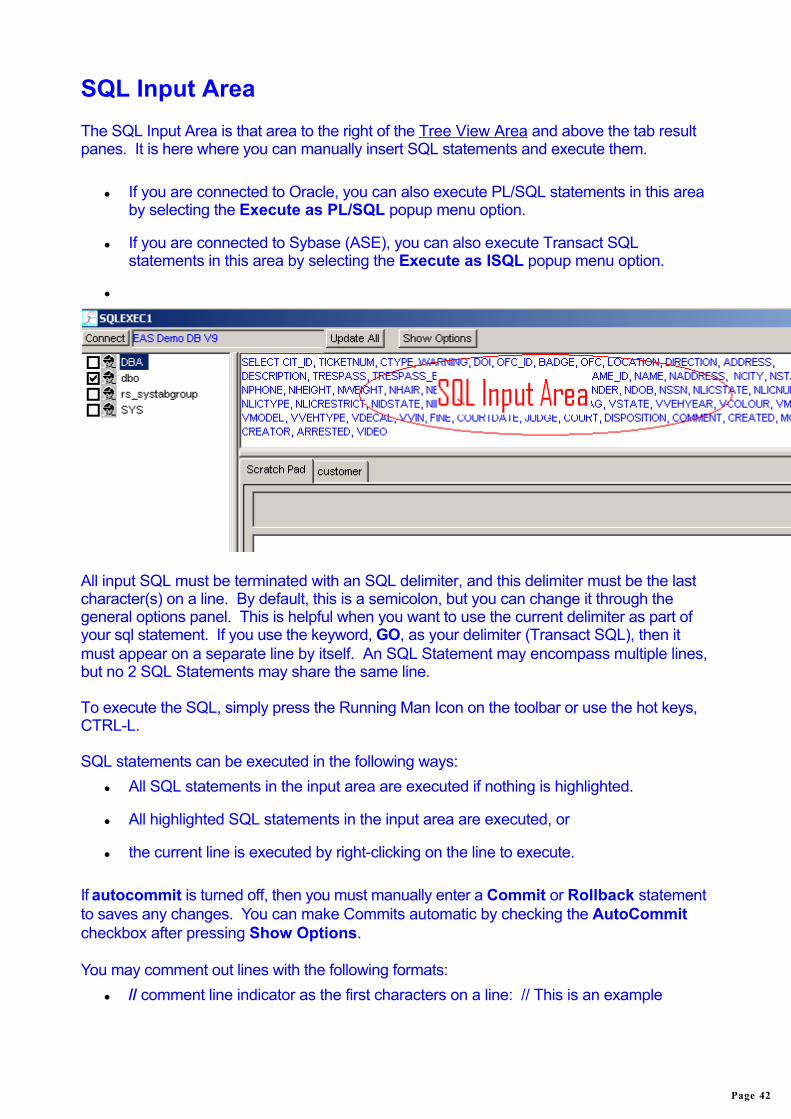
SQL Input Area The SQL Input Area is that area to the right of the Tree View Area and above the tab resultpanes. It is here where you can manually insert SQL statements and execute them.
If you are connected to Oracle, you can also execute PL/SQL statements in this areaby selecting the Execute as PL/SQL popup menu option.
If you are connected to Sybase (ASE), you can also execute Transact SQLstatements in this area by selecting the Execute as ISQL popup menu option.
All input SQL must be terminated with an SQL delimiter, and this delimiter must be the lastcharacter(s) on a line. By default, this is a semicolon, but you can change it through thegeneral options panel. This is helpful when you want to use the current delimiter as part ofyour sql statement. If you use the keyword, GO, as your delimiter (Transact SQL), then itmust appear on a separate line by itself. An SQL Statement may encompass multiple lines,but no 2 SQL Statements may share the same line. To execute the SQL, simply press the Running Man Icon on the toolbar or use the hot keys,CTRL-L. SQL statements can be executed in the following ways:
All SQL statements in the input area are executed if nothing is highlighted.
All highlighted SQL statements in the input area are executed, or
the current line is executed by right-clicking on the line to execute. If autocommit is turned off, then you must manually enter a Commit or Rollback statementto saves any changes. You can make Commits automatic by checking the AutoCommitcheckbox after pressing Show Options. You may comment out lines with the following formats:
// comment line indicator as the first characters on a line: // This is an example
Page 42

-- comment line indicator as the first characters on a line: -- This is an example too
/* ... */ the standard C comment delimiters which can span multiple lines: /* mycommented stuff */
Use the keyword "EXEC" or "EXECUTE" before any stored procedure call. Also, use thiskeyword for any commands that do not return an SQL buffer area. You can repeatedly execute the last paste or undo command by pressing the <F5> keywhen the SQL Input Area is in focus. A popup menu is associated with the SQL input area. Right-mouse click in this area to seethe following choices.
Stored Procedure InvocationYou can execute stored procedures from the SQL Input area as the following exampleillustrates: exec sp_customer_products(101);DBMan does not support stored procedure result sets of more than 1.
Page 43

SQL Output Area The SQL Output area consists of the tab pages area below the SQL Input Area and to theright of the Tree View Area pane. A tab page consists of the tab, tab summary area(shows sql statement that was executed, duration, errors), and the datawindow whereresults are returned. Each SQL statement executed results in a new tab page, where youhave a robust set of actions that can be executed against this result set using the popupmenu (right-clicking on the datawindow of a tab page). The first tab is reserved for theScratch Pad. It is functional only when the Scratch Pad option is checked.
If the results are updatable, you may change values in the results window and save thosechanges back to the database without using direct SQL. Just right-click in the datawindow(results window area), and select the Update popup menu action. You can keep adding result tabs if the Refresh Tabs option is not checked. Otherwise, thetabs are removed each time an SQL statement is executed. Right-click a tab to get aprompt to delete the tab. Double-click a tab or right-double-click on the tab left or rightarrows to get a prompt to delete all the tabs. If the Scratch Pad option is checked, theneach SQL statement executed reuses the same scratch pad tab. Double-click a text column in the results window to see its values in expanded view mode. This feature only works when the "Tabs Enabled" option is checked. For certain columns,the values appear in expanded, formatted view. For all other text column values, the data isdisplayed with rich text edit features. When "RTE Mode" is in effect (general tab on optionswindow), data is also saved to "TEXT.RTF" in the program directory. Test Expression description. DBMan can do PB datawindow validation stuff, or businessrule validations. Execute any sql that populates the tab datawindows. Then right-mouseclick to bring up the popup menu and select "Test Expression". You get a response windowwhere you can input an expression, hit the OK button, and see the results populated in the
Page 44

results field. You can manipulate it to do what you really want it to do by manipulating theSQL that generates the results. For example, using this sql--> select 'Virginia' as state,lname from customer;We use constants to create testing scenarios where we can manipulate the test valuesusing valid test column names as in the case where we hard-code "Virginia" as the returnedstate. So you can test different scenarios by hard-coding test values with the test columnname, i.e., "Virginia" is the test value for the test column, "state".
Page 45
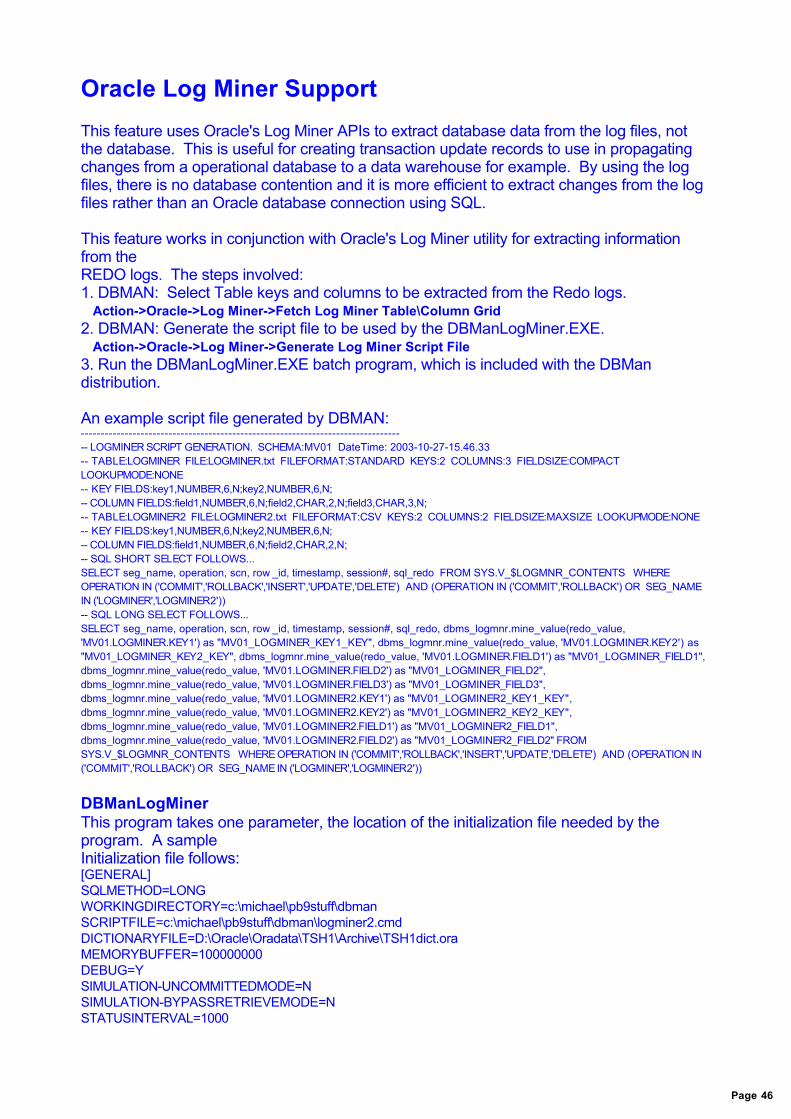
Oracle Log Miner Support This feature uses Oracle's Log Miner APIs to extract database data from the log files, notthe database. This is useful for creating transaction update records to use in propagatingchanges from a operational database to a data warehouse for example. By using the logfiles, there is no database contention and it is more efficient to extract changes from the logfiles rather than an Oracle database connection using SQL. This feature works in conjunction with Oracle's Log Miner utility for extracting informationfrom theREDO logs. The steps involved:1. DBMAN: Select Table keys and columns to be extracted from the Redo logs. Action->Oracle->Log Miner->Fetch Log Miner Table\Column Grid2. DBMAN: Generate the script file to be used by the DBManLogMiner.EXE. Action->Oracle->Log Miner->Generate Log Miner Script File3. Run the DBManLogMiner.EXE batch program, which is included with the DBMandistribution. An example script file generated by DBMAN:---------------------------------------------------------------------------------- LOGMINER SCRIPT GENERATION. SCHEMA:MV01 DateTime: 2003-10-27-15.46.33-- TABLE:LOGMINER FILE:LOGMINER.txt FILEFORMAT:STANDARD KEYS:2 COLUMNS:3 FIELDSIZE:COMPACT LOOKUPMODE:NONE-- KEY FIELDS:key1,NUMBER,6,N;key2,NUMBER,6,N;-- COLUMN FIELDS:field1,NUMBER,6,N;field2,CHAR,2,N;field3,CHAR,3,N;-- TABLE:LOGMINER2 FILE:LOGMINER2.txt FILEFORMAT:CSV KEYS:2 COLUMNS:2 FIELDSIZE:MAXSIZE LOOKUPMODE:NONE-- KEY FIELDS:key1,NUMBER,6,N;key2,NUMBER,6,N;-- COLUMN FIELDS:field1,NUMBER,6,N;field2,CHAR,2,N;-- SQL SHORT SELECT FOLLOWS...SELECT seg_name, operation, scn, row _id, timestamp, session#, sql_redo FROM SYS.V_$LOGMNR_CONTENTS WHEREOPERATION IN ('COMMIT','ROLLBACK','INSERT','UPDATE','DELETE') AND (OPERATION IN ('COMMIT','ROLLBACK') OR SEG_NAMEIN ('LOGMINER','LOGMINER2')) -- SQL LONG SELECT FOLLOWS...SELECT seg_name, operation, scn, row _id, timestamp, session#, sql_redo, dbms_logmnr.mine_value(redo_value,'MV01.LOGMINER.KEY1') as "MV01_LOGMINER_KEY1_KEY", dbms_logmnr.mine_value(redo_value, 'MV01.LOGMINER.KEY2') as"MV01_LOGMINER_KEY2_KEY", dbms_logmnr.mine_value(redo_value, 'MV01.LOGMINER.FIELD1') as "MV01_LOGMINER_FIELD1",dbms_logmnr.mine_value(redo_value, 'MV01.LOGMINER.FIELD2') as "MV01_LOGMINER_FIELD2",dbms_logmnr.mine_value(redo_value, 'MV01.LOGMINER.FIELD3') as "MV01_LOGMINER_FIELD3",dbms_logmnr.mine_value(redo_value, 'MV01.LOGMINER2.KEY1') as "MV01_LOGMINER2_KEY1_KEY",dbms_logmnr.mine_value(redo_value, 'MV01.LOGMINER2.KEY2') as "MV01_LOGMINER2_KEY2_KEY",dbms_logmnr.mine_value(redo_value, 'MV01.LOGMINER2.FIELD1') as "MV01_LOGMINER2_FIELD1",dbms_logmnr.mine_value(redo_value, 'MV01.LOGMINER2.FIELD2') as "MV01_LOGMINER2_FIELD2" FROMSYS.V_$LOGMNR_CONTENTS WHERE OPERATION IN ('COMMIT','ROLLBACK','INSERT','UPDATE','DELETE') AND (OPERATION IN('COMMIT','ROLLBACK') OR SEG_NAME IN ('LOGMINER','LOGMINER2'))
DBManLogMinerThis program takes one parameter, the location of the initialization file needed by theprogram. A sample Initialization file follows:[GENERAL]SQLMETHOD=LONGWORKINGDIRECTORY=c:\michael\pb9stuff\dbmanSCRIPTFILE=c:\michael\pb9stuff\dbman\logminer2.cmdDICTIONARYFILE=D:\Oracle\Oradata\TSH1\Archive\TSH1dict.oraMEMORYBUFFER=100000000DEBUG=YSIMULATION-UNCOMMITTEDMODE=NSIMULATION-BYPASSRETRIEVEMODE=NSTATUSINTERVAL=1000
Page 46

[LOG FILES]D:\Oracle\Oradata\TSH1\Archive\REDO1.LOGD:\Oracle\Oradata\TSH1\Archive\REDO2.LOG The 2 main Log Miner APIs are MINE_VALUE and COLUMN_PRESENT as illustratedbelow.Log Miner records were generated using the Supplemental logging facility in Oracle, so wecould get records on a table\column basis, and not the whole database. The followingexample documents the entire setup for the Log Miner test environment. A Setup Example for Log Miner1. Create the sample tables using the following DDL:Create Table MV01.LOGMINER ( KEY1 NUMERIC(5,0) NOT NULL, KEY2 NUMERIC(5,0) NOT NULL, FIELD1 NUMERIC(5,0) NOT NULL, FIELD2 CHAR(1) NOT NULL, FIELD3 CHAR(2) NOT NULL);CREATE UNIQUE INDEX LOGMINERK1 ON MV01.LOGMINER (KEY1, KEY2);ALTER TABLE MV01.LOGMINER ADD CONSTRAINT LOGMINERPK1 PRIMARY KEY (KEY1, KEY2);Create Table MV01.LOGMINER2 ( KEY1 NUMERIC(5,0) NOT NULL, KEY2 NUMERIC(5,0) NOT NULL, FIELD1 NUMERIC(5,0) NOT NULL, FIELD2 CHAR(1) NOT NULL, FIELD3 CHAR(2) NOT NULL);CREATE UNIQUE INDEX LOGMINER2K1 ON MV01.LOGMINER2 (KEY1, KEY2);ALTER TABLE MV01.LOGMINER2 ADD CONSTRAINT LOGMINER2PK1 PRIMARY KEY (KEY1, KEY2);
2. SYS userid is required to work with Log Miner. If you are using DBMan, make sure youare using the PB native oracle driver, DBMS= O90 Oracle9i (9.0.1), and that you have thefollowing DBParm: ConnectAs='SYSDBA'. 3. To install the logminer packages you need the run the scripts as SYS userid: $ORACLE_HOME/rdbms/admin/dbmslm.sql and $ORACLE_HOME/rdbms/admin/dbmslmd.sql. 4. Change ora init file parameter LOG_ARCHIVE_START=TRUE so logs automaticallygenerated,requiring no manual intervention. 5. Make sure Oracle is running in archive log mode before recording transactions to capturein the log files. Execute the following query to determine archive log mode:select log_mode from v$database;IF value=NOARCHIVELOG then need to do an alter database archivelog command. 6. This example uses supplemental logging to generate the target data in the REDO logfiles.ALTER TABLE MV01.LOGMINER ADD SUPPLEMENTAL LOG GROUP LOGMINERGROUP ( key1, key2, field1, field2, field3)ALWAYS;ALTER TABLE MV01.LOGMINER2 ADD SUPPLEMENTAL LOG GROUP LOGMINER2GROUP ( key1, key2, field1, field2, field3)ALWAYS;--DROP SUPPLEMENTAL LOG GROUP LOGMINERGROUP
7. Create 2 Redo log groups for collecting test data, and remove all other log files afterissuing FORCE CHECKPOINTS on them.ALTER DATABASE ADD LOGFILE GROUP 1 ('D:\ORACLE\ORADATA\MVITALE\REDO1.LOG') SIZE 1024K;ALTER DATABASE ADD LOGFILE GROUP 2 ('D:\ORACLE\ORADATA\MVITALE\REDO2.LOG') SIZE 1024K;
Page 47

8. Using 2 separate database profiles (to ensure concurrent connection sessions) and 2instances of SQLExec interfaces within DBMan, execute the following SQL making sure youare connecting with AUTOCOMMIT=FALSE.SQLEXEC1:insert into MV01.LOGMINER (KEY1,KEY2,FIELD1, FIELD2, FIELD3) VALUES (1,1,1,'a','aa');insert into MV01.LOGMINER (KEY1,KEY2,FIELD1, FIELD2, FIELD3) VALUES (2,2,1,'a','aa');insert into MV01.LOGMINER2 (KEY1,KEY2,FIELD1, FIELD2, FIELD3) VALUES (1,1,1,'a','aa');insert into MV01.LOGMINER2 (KEY1,KEY2,FIELD1, FIELD2, FIELD3) VALUES (2,2,1,'a','aa');commit;update MV01.LOGMINER SET FIELD3 = 'bb' w here KEY1 = 1 and KEY2 = 1;update MV01.LOGMINER2 SET FIELD3 = 'bb' w here KEY1 = 2 and KEY2 = 2;update MV01.LOGMINER SET FIELD3 = 'cc' w here KEY1 = 1 and KEY2 = 1;update MV01.LOGMINER2 SET FIELD3 = 'cc' w here KEY1 = 2 and KEY2 = 2;rollback; SQLEXEC1:update MV01.LOGMINER SET FIELD3 = 'bb' w here KEY1 = 1 and KEY2 = 1;update MV01.LOGMINER2 SET FIELD3 = 'bb' w here KEY1 = 1 and KEY2 = 1;update MV01.LOGMINER SET FIELD3 = 'cc' w here KEY1 = 1 and KEY2 = 1;update MV01.LOGMINER2 SET FIELD3 = 'cc' w here KEY1 = 1 and KEY2 = 1; SQLEXEC2:update MV01.LOGMINER SET FIELD3 = 'bb' w here KEY1 = 2 and KEY2 = 2;update MV01.LOGMINER2 SET FIELD3 = 'bb' w here KEY1 = 2 and KEY2 = 2;update MV01.LOGMINER SET FIELD3 = 'cc' w here KEY1 = 2 and KEY2 = 2;update MV01.LOGMINER2 SET FIELD3 = 'cc' w here KEY1 = 2 and KEY2 = 2; SQLEXEC1:commit; SQLEXEC2:commit; SQLEXEC1:update MV01.LOGMINER SET FIELD3 = 'dd' w here KEY1 = 1 and KEY2 = 1;update MV01.LOGMINER2 SET FIELD3 = 'dd' w here KEY1 = 1 and KEY2 = 1;
9. Begin preparation for moving the REDO logs to the target Log Miner directory. IssueFORCE CHECKPOINTS on REDO1 and REDO2. Create 2 dummy Redo logs and switchthem so that REDO1 and REDO2 are inactive. 10. Manually create the directory structure in explorer: <oraclehome>\Oradata\TSH1\Archive 11. Issue a checkpoint on the specific REDO log files that you want to use as input toLogminer and then switch them from active or current to inactive. Copy them from theORACLE redo log directory to target dictionary directory (<oraclehome>\ORADATA\TSHI\Archive). 12. Set the INIT.ORA parameter: UTL_FILE_DIR=D:\Oracle\Oradata\TSH1\Archive. Thenrestart the database for the change to take effect. 13. Build the Logminer dictionary. EXECUTE Dbms_Logmnr_D.Build(dictionary_filename =>'TSH1dict.ora', dictionary_location => 'D:\Oracle\Oradata\TSH1\Archive'); DBMAN: EXXEC Dbms_Logmnr_D.Build(dictionary_filename =>'TSH1dict.ora', dictionary_location =>'D:\Oracle\Oradata\TSH1\Archive');
14. At this point, you are ready to execute DBManLogMiner.EXE. Check the initializationfile for this program, DBManLogMiner.ini and make sure you have all the parameters set. 15. Instructions for manually viewing and extracting Log Miner data using DBMan follow.
Page 48

16. Connect to Oracle with user SYS as SYSDBA. (See step one). 17. For this example, we have 2 log files, REDO1.LOG and REDO2.LOG (attached withDBMan distribution). Issue the following commands to add these log files, start the LogMiner session, view mined data from a Log Miner view, and terminate the session.EXXEC sys.Dbms_Logmnr.Add_Logfile(options=> sys.Dbms_Logmnr.New , logfilename =>'d:\oracle>\Oradata\TSH1\Archive\REDO1.LOG');EXXEC sys.Dbms_Logmnr.Add_Logfile(options => sys.Dbms_Logmnr.AddFile, logfilename =>'d:\oracle\Oradata\TSH1\Archive\REDO2.LOG');EXXEC sys.Dbms_Logmnr.Start_Logmnr(dictfilename =>'d:\oracle\Oradata\TSH1\Archive\TSH1dict.ora');SELECT dbms_logmnr.mine_value(redo_value,'MV01.LOGMINER.FIELD3') ,sql_redo, SCN, TIMESTAMP, SEG_NAME, ROW_ID, SESSION#, SERIAL#, USERNAME, OPERATION, SQL_UNDO, STATUS,RAWTOHEX(REDO_VALUE) as "REDO_VALUE", RAWTOHEX(UNDO_VALUE) as "UNDO_VALUE", REDO_LENGTH,REDO_OFFSET, UNDO_LENGTH, UNDO_OFFSET FROM v_$logmnr_contents WHERE dbms_logmnr.mine_value(redo_value,'MV01.LOGMINER.FIELD3') IS NOT NULL OR (dbms_logmnr.mine_value(redo_value,'MV01.LOGMINER.FIELD3') IS NULL AND dbms_logmnr.column_present(redo_value,'MV01.LOGMINER.FIELD3') = 1);EXXEC dbms_logmnr.end_logmnr();
Here is a sample output from the example execution of DBManLogMiner.EXE.d:\oracle\ora92\precomp\demo\proc\sample10>dbmanlogminer logminer.iniDBMANLOGMINER Version 1.0 October 29, 2003Unable to open Uncommitted log file: d:\oracle\ora92\precomp\demo\proc\sample10\LOGMINER.LOGAssuming no uncommitted records to apply to the current session.username: syspassword: change_on_install Connected to ORACLE as user sys.LogMiner session started.Processing LogMiner records...LogMiner session ended.Start Time: Fri Oct 31 08:06:33 AM End Time: Fri Oct 31 08:06:34 AMTotal Rows Processed: 529 Total Records Written: 122 Record(s) uncommitted --> d:\oracle\ora92\precomp\demo\proc\sample10\LOGMINER.LOGTable: LOGMINER Records Written: 4Table: LOGMINER2 Records Written: 8Program Completed.
Page 49

PIPEIT PipeIt is a useful tool for migrating, moving, or copying table structures and data from onedatabase to another, one schema to another within the same database, file to database, ordatabase to file. Reverse engineer a database and forward engineer it to another databasevendor.
The drop down list box on the top right is where the user specifies the action to beperformed for the selected tables on the left side. The results pane, which is located on thebottom right, is used to display status information, while the PipeIt action is in progress. Ifyou are moving large amounts of data across databases, you may need to check the Rowsto Disk checkbox on the General Settings tab of the Options window. Memory retrieval isassumed when this checkbox is not checked. Memory retrieval is much more efficient than
Page 50

Disk retrieval. The DDL Specification section is where you specify if DDL information iswritten to file, what file it is written to, and what is the DDL separator to be used in that file.The rest of this section documents other details related to the PIPEIT interface. LimitationsDBMan does not support the copying of stored procedures, triggers, or privileges. It is alsolimited in scope with respect to index spaces and table spaces. Currently, the databasevendor support is limited:
No support for generic database connections
No support for Firebird or MS Access at this time.
No Forward Engineering support for proprietary objects like triggers and storedprocedures.
Limited Cross-database object support, i.e, cross-database foreign keys, etc. Create DDL Statements is useful for creating the table, indices, and keys. This is usefulwhen you want to generate the DDL, but not necessarily execute it. This option is alwaysused when creating or replacing tables. The File checkbox is used to:Pipe data from source files to target database.Pipe data from source database to files.When File checkbox for source is checked, the user is prompted for the directory location offiles with a TXT extension, and displays them in the table list on the left pane. It first looks forfiles with _SQL.TXT patterns for determining the SQL syntax to use. If not found, it isassumed that the SQL syntax is:SELECT * FROM <table name>where <table name> is the file name without the TXT extension The Parent/Child Order checkbox is used to determine the table retrieve order for thesource tables as they relate to referential integrity (RI) rules. If RI is in place it isrecommended that you not use REPLACE actions since operations may subsequently failwith RI constraint errors.Checked Parent to Child order (recommended for copy action)Unchecked Child to Parent order (recommended for delete action) For blob transfers, it is recommended that you specify the Pipe Copy choice. Blob supportis new, so please contact DBMan if any blob transfer errors are encountered. Filter FeatureWhen filter is checked, only copy action is supported. The source data retrieved is qualifiedby a where clause generated from an input configuration file. The input configuration fileformat:<table_name> : <where clause> <carriage return>The where clause can contain a placeholder area where real values can be substituted atrun time.placeholder format: %%ID_<XX>%%<XX> is a 2-digit number that can range from 01 to 99Each value supplied is mapped to the next constant string in the where clause. Hence, ifyou had 2 values, "aaa" and "bbb", they would be mapped to %%ID_01%% and
Page 51

%%ID_02%%, respectively.You are prompted for the placeholder value and the location of the configuration file after thesource database is connected. If you do not enter any values, then the where clause will beused "as is" with the values already provided within it. Sample Filter configuration file: TI_ADDR_ASSOC:WHERE INTERNAL_ID = '%%ID_01%%'TA_LEDGER:WHERE INTERNAL_ID = '%%ID_01%%' OR INTERNAL_ID2 ='%%ID_02%%' CHECKBOX SettingsThis section documents information about the checkbox settings that determine what objecttypes are generated. Stored Procedures checkbox is the common across all DB Vendors,while the following ones are specific to Sybase ASE:
Users
Groups
User-defined datatypes
Defaults
Rules
Permissions LISTBOX SettingsThis section documents information about the checkbox settings in the list box. TableSpaceCheck this box if you want to add TABLE SPACE DDL information for creating tablespaces and specifyingthose tablespaces in the TABLE Creation DDL. Currently, DBMan assumes the tablespaces already exist inthe target database, and will not attempt to create them. DBMan will however associate the table name withthe table space name in the table DDL definition. IndexSpaceCheck this box if you want to add INDEX SPACE DDL information for creating tablespaces for indexes andspecifying those index spaces in the TABLE Creation DDL. Currently, DBMan assumes the tablespacesalready exist in the target database, and will not attempt to create them. Format DDLCheck this box if you want to format DDL output with column definitions on indented, separate lines. ODBC BindCheck this box if you want to retrieve ODBC data in Bind variables instead of dynamic fetches usingSQLGetData. Foreign KeysCheck this box if you want to generate DDL for creating foreign keys, but not actually create them at thistime. If checked, the DDL for foreign keys will appear in the default DDL file. You can view this informationby selecting "View\Generated DDL" from the main menu. Prefetch Column Info
Page 52
Check this box if you want to retrieve DDL information for all tables and all columns before selecting anyaction. This speeds up the "before action" processing, but may slow down the ensuing action if most tablesin the selection box are actually selected. Pad Nulls with SpaceWhen checked, NULL values will be replaced with a space if the target table defines that column as NOTNULL. Normally you would not check this, but certain DBMS drivers remove space-filled values whenretrieved. You should only check this column if you get a warning or prompt to do so, since performance maybe degraded significantly. Enclose in quotesWhen checked, the columns in the SQL statement used to retrieve data will be enclosed in quotes to avoidkeyword usage errors. Convert To RawThis choice is for DB2/OS390 TO ORACLE DDL and data conversion. It converts certain CHAR columns inDB2 to RAW columns in ORACLE, because DB2 may have column values with invalid HEX type characters(x"07") OR low values (x"00"). In the former case, an "error in row" SQL error will be returned when the row isretrieved. In the second case, low values will be converted to an empty string when retrieved andsubsequently cause an "insert null into not null column" error when the insert attempt is made to the targetdatabase. To overcome this problem, DBMan provides a solution by which you can convert columns withthese characteristics into Oracle RAW columns. This will preserve any COBOL application mapping fromDB2 to ORACLE and allow the data to be copied without errors.When checked, the user has 2 choices:
The user will be prompted to allow DBMan to dynamically detect the CHAR-RAW candidates, or
The user will be prompted for a file location from which a list of table\columns will be convertedautomatically from CHAR(n) to RAW(n).
File Format: <TABLE NAME>:<column 1>,<column 2>, ... View Raw ListWhen checked, the user will be view the imported CHAR-RAW conversion list. See previous help on "Prompt: Char-Raw" for more details. OTHER SettingsThis section documents the other fields in the Pipeit window interface. SaveAsThis dropdown list box specified the default file type with which to save data when target is file, not database. Copy Without Blobs When this radio button is checked, copy action will be attempted on tables that have blob-defined columns,but blob column data will not be copied. This is only attempted on blobs defined as nullable. ODBC CopyWhen this radio button is checked, the copy method will be the external ODBC driver, instead ofPowerBuilder. Pipe CopyWhen this radio button is checked, the PowerBuilder PIPE copy method will used for copying data. Normal - DatastoreWhen this radio button is checked, normal copy processing involving PowerBuilder datastores will used forcopying data.
Page 53

Show TargetWhen enabled, you can click it and modify the contents of the datawindow that was in error and try theupdate again. DDL DelimiterSpecifies the statement delimiter to use in the output file. CR?When checked, the sql file delimiter starts on the next line. This is useful for scripts like Transact SQLwhere a GO statement usually follows sql statements on the ensuing line.
Page 54

DBVISUAL DB GUI is useful for visually viewing table DDL attributes. It is also helpful in following thechain of dependent or parent tables (primary/foreign key relationships) in a ReferentialIntegrity environment by double-clicking on a child or parent table row, which opens up a therelated table's DDL definition window.
Page 55

DBSCHEMA DB Schema Compare is used to compare DDL attributes from one database to anotherand across heterogeneous database vendors. It is also used to generate DDL statementson the fly to reconcile the source database to the target. This DDL-automation feature onlyworks for column attributes at the present time via table alter statements.
Some peculiarities appear when comparing datatypes between Sybase andSQLAnywhere.1. Creating a FLOAT column with precision 15, FLOAT(15), results in a datatype of REALwith precision 7!2. Creating a timestamp/datetime that should have a length of 8 instead shows up as length4!3. INDENTITY columns show up as not null using Sybase system stored procedure,sp_syscolumns, but show up as NULL using Sybase Central! All IDENTITY column have tobe NOT NULL. DBSchema is useful for comparing one database with another. It compares the followingthings:A) tablesB) columnsC) indices
Page 56
D) keysD) stored procedures/triggers (Sybase only) You can also save the schema of either source or target for later comparison with anotherdatabase. Hence, a file or database can be input as source and target. When designateda save file, 4 fileswill be saved: tables, columns, index, and procs/triggers files. Each file is appended withextensions as follows:tables --> <file name>"_tbl.txt"columns --> <file name>"_col.txt"indexes --> <file name>"_ind.txt"indexes --> <file name>"_key.txt"proc/trig--> <file name>"_obj.txt"When importing a file to use, you must specify one of these file names. Under the View Menu options, you can see data from the system tables that were used todetermine the schema differences. These views are only available when the DBSCHEMAinterface window is open. CheckBox Options
Compare Positions - When checked, column ordering positions is one of the criteria to check forcolumn attribute differences. By default, this option is always checked. If not checked, then youmay not see column ordering positions if those were the only types of changes for a particular table'scolumns.
Verbose Table DDL - When checked, CREATE INDEX and ALTER TABLE statements appear inthe DDL output when generating table DDL for source to target tables in the table list differenceswindow on the top left hand side of the window. Otherwise, only the Table DDL, which may or maynot include key information is output.
Automatic DDL Generation FeatureYou can generate table create or alter table statements, which can can be applied against the target toreconcile source changes into the target schema. Currently, this feature only applies to the table differencesand column differences data windows. TABLE DDL GenerationRight-click on the tables differences data window and select the Generate Table DDL option. Table DDL forthe source tables are generated in an output file with the target schema as the table qualifier, so just makesure other attributes like tablespace names are changed, if necessary. It also is only currently enabled whenboth the source and target are ORACLE. Column DDL GenerationYou can generate Alter table DDL statements when column differences data window is in the forefront. TheDDL generated, if applied, will make the target like the source via table ALTER statements (add, drop,modify). Just right-click on any table row in the columns differences view and select the Generate DDLoption. You can either generate Alter Table statements for the current table selected (Current Table) or AllTables.
Page 57

Page 58
DBDATA This interface is useful for comparing data between tables in the same database or againstdifferent databases. It also can generate DML statements to reflect differences between thesource (template) and target (changed template). The procedures are prettystraightforward:
Connect to both source and target databases (they can be the same).
Enter SQL statement(s) in the SQL Input Area.
Execute the SQL statement(s) to retrieve data into the source and targetdatawindows.
Press the Compare button. Presto!
Page 59

You can compare results row-by-row or you can specify a unique key with which to comparethe rows. By default, DBDATA provides a primary key if found or alternately a unique indexas the default compare key. If you leave the compare key field empty (you are prompted forthis value after pressing the Compare button) a row-by-row comparison is done. You cancompare using different SQL statements against different databases by using thekeywords, "DBDATA1" and "DBDATA2". For example, DBDATA1=select * from fin_data order by year, quarter, code; DBDATA2=select * from fin_data2 order by year, quarter, code;If the same SQL statement is used, then you do not need the DBDATA1 or DBDATA2keywords.
Page 60
SQL Input AreaThe SQL Input Area is the area above the source and target datawindows. It is here whereSQL statements are written and submitted to the database to populate the result windowsbelow (source and target datawindow panes). Result WindowsThe Result Windows are the source and target datawindow panes located below the SQLInput Area.Pressing either CTRL-L (Run hot key) or Run (File menu item: Action - Run) executes theSQL statement(s) in the SQL Input Area and generates rows in the Result Windows. CHECKBOX Descriptions
Autocommit is here for Sybase specifically, since certain system stored proceduresrequire autocommit=true to avoid "DDL in Transaction" errors.
Synchronize Results controls scrolling both source and target datawindow resultsat the same time. The Sort and filter popup menu options affect the source andtarget data similarly. You cannot control them separately in this regard when Synchronize Results is checked.
Generate DML checkbox determines whether DML statements will be generated ifdifferences are found. DML statements generated are the difference between thesource (template) and the target (changed template). It brings the source template inline with the changed template if the DML statements are applied to the sourcetemplate. This is useful in development life-cycle processes for data: You can trackdata changes via DML statements that can be used in a version control system. Youmust use a tables with either a primary key or unique index as the compare key togenerate DML statements. Note: You cannot use SELECT * type SQLs with somevendors, like Oracle, when this field is checked.
Row Select Mode determines if row selection is enabled or disabled.
Highlight Changed Rows If checked, then the following colors are used to identifychanged rows after the comparison is completed (Pressing the Compare button).
GREEN:Deleted Rows BLUE: Inserted Rows YELLOW: Updated Rows
Show Changes Only is used to show only those changed rows for insert, update,and delete differences between source and target.
DML: Insert Carriage Return is used to replace hard-coded carriage returns withcarriage returns embedded within the string. This is useful when you are usinganother tool, like Oracle's SQL*Plus to update the database with the Insert DMLstatements generated here. Otherwise, you may get errors when attempting toupdate a database.
DML: Key Only Update is used to modify the type of where clause that is createdfor UPDATE or DELETE DML statements. When checked, the where clauseconsists of only the key if available. When unchecked, the where clause consists ofevery column in the select list. The main advantage with the Key Only Update
Page 61
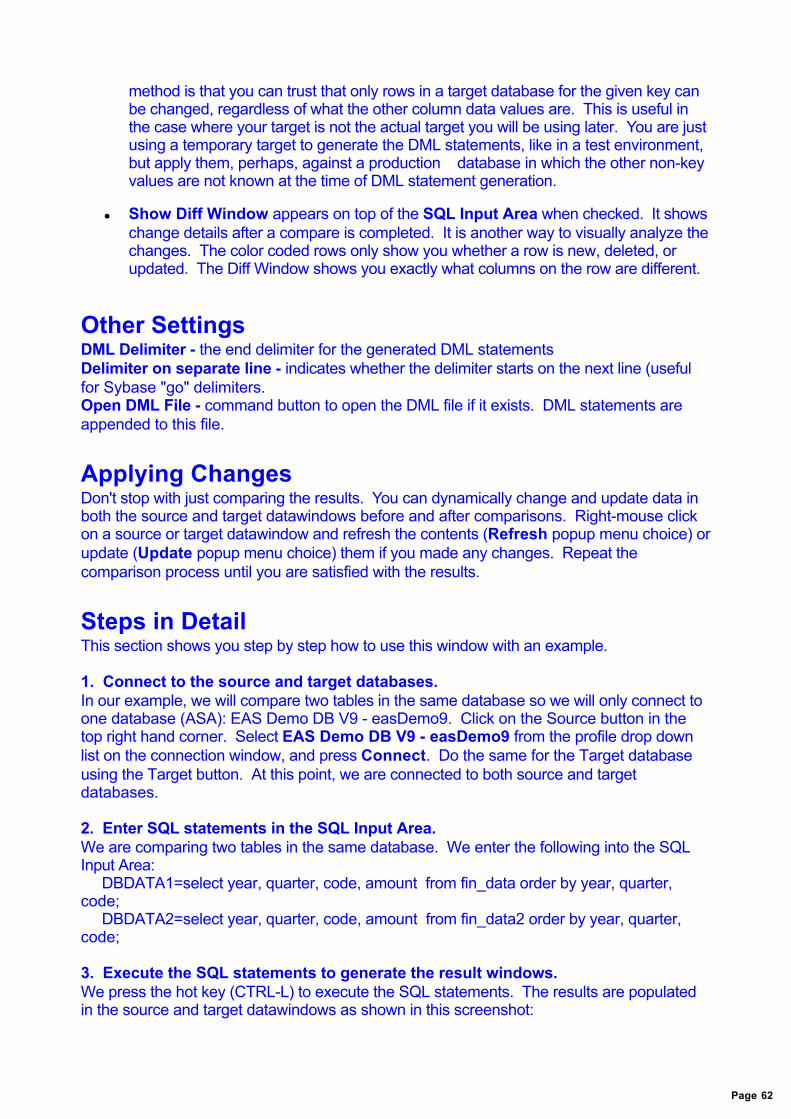
method is that you can trust that only rows in a target database for the given key canbe changed, regardless of what the other column data values are. This is useful inthe case where your target is not the actual target you will be using later. You are justusing a temporary target to generate the DML statements, like in a test environment,but apply them, perhaps, against a production database in which the other non-keyvalues are not known at the time of DML statement generation.
Show Diff Window appears on top of the SQL Input Area when checked. It showschange details after a compare is completed. It is another way to visually analyze thechanges. The color coded rows only show you whether a row is new, deleted, orupdated. The Diff Window shows you exactly what columns on the row are different.
Other SettingsDML Delimiter - the end delimiter for the generated DML statementsDelimiter on separate line - indicates whether the delimiter starts on the next line (usefulfor Sybase "go" delimiters.Open DML File - command button to open the DML file if it exists. DML statements areappended to this file. Applying ChangesDon't stop with just comparing the results. You can dynamically change and update data inboth the source and target datawindows before and after comparisons. Right-mouse clickon a source or target datawindow and refresh the contents (Refresh popup menu choice) orupdate (Update popup menu choice) them if you made any changes. Repeat thecomparison process until you are satisfied with the results. Steps in DetailThis section shows you step by step how to use this window with an example. 1. Connect to the source and target databases.In our example, we will compare two tables in the same database so we will only connect toone database (ASA): EAS Demo DB V9 - easDemo9. Click on the Source button in thetop right hand corner. Select EAS Demo DB V9 - easDemo9 from the profile drop downlist on the connection window, and press Connect. Do the same for the Target databaseusing the Target button. At this point, we are connected to both source and targetdatabases. 2. Enter SQL statements in the SQL Input Area.We are comparing two tables in the same database. We enter the following into the SQLInput Area: DBDATA1=select year, quarter, code, amount from fin_data order by year, quarter,code; DBDATA2=select year, quarter, code, amount from fin_data2 order by year, quarter,code; 3. Execute the SQL statements to generate the result windows.We press the hot key (CTRL-L) to execute the SQL statements. The results are populatedin the source and target datawindows as shown in this screenshot:
Page 62

4. Do the comparison.We press the Compare button to initiate the comparison process. We are first prompted toenter a comparison key. It may already be populated with either the primary key or a uniqueindex defined on the tables. Press Proceed to continue.
Page 63

5. View the changes.A message box appears when the comparison is complete. It summarizes row statistics forchanges. If differences were found and the Generate DML checkbox is checked, you areprompted to open the DML script file to view the DML statements that were generated. These statements can subsequently be applied against the source template table to make itidentical with the target changed template table.
6. View DML statements.Press YES to view the DML file:
7. Review source and target datawindowsIf Highlight Changed Rows was checked before you pressed the Compare button, youcan see your changes visually as background row color changes to reflect insert, update,and delete rows (insert and update in the source datawindow; delete in the targetdatawindow).
Page 64

This completes the step by step walkthrough for DBDATA.
Page 65

GENDATA GENDATA is used to create flat files for bulking up relational databases. It generates largedata files for subsequent import or loading into databases. It has referential integrityfeatures that allow you to control primary/foreign key table generation data values.
GENDATA has a SED file as input for data generation. You can generate a SED file forany row selected in the SQLEXEC interface by using the popup menu choice, GenerateSED File (GenSeed). You can get more information on this utility by reading the following
Page 66

file found in the DBMan installation directory: Here is an example SED file that can be used as input to the GenData interface. INPUT_RULES=EXTENSION:CSV;LNKSTRINGWIDTH:7;PRELINK:1111,2222;LINKSTRINGS:RANDOM;TAPGEN:10;LNKREVERSE;LINK50;LINKNUMBERS=11,22,23:45,67LINKSTRINGS=Marky,Mikey,Tim001 FORM_NUMBER FIX Y 760NPY1999 002 COLUMN_NAME FIX Y historic_resources_fund003 SOURCE_LOCATION FIX Y IT03-HISTORIC-RESOURCES004 SOURCE_TYPE FIX Y PIC S9(5)V99COMP-3.005 PROCESSING_NOTES FIX Y
Page 67

DB2 UDB UTILS This is the DB2 UDB Utilities interface. It allows you to do the following DB2 utilities:REORGRUNSTATSEXPLAIN Results are analyzed to see if there are any table space scans. It can generate SQL on thefly using the indexes for each table to see the optimizer path for each table. Tables can bedirectly specified in the input script file or can be automatically selected. SQL can bespecified in the input file for explain processing as well. It is recommended that thedatabase has an application control heap size (APP_CTL_HEAP_SZ) of at least 500 oryou start to get database memory errors if you are processing a lot of tables.
This interface is script-initiated. View/Edit the script file by pressing Edit Script File. Atypical script file follows:NSCHECKREORGRUNSTATSPREEXPLAIN [or POSTEXPLAIN]Database=MVDB0910[TABLES]BS_JOB_ERRORS [ or ALL TABLES][SQL]select * from BS_JOB_ERRORS
Page 68

select * from BS_JOB_REPORT File Line Definitions
NSCHECK is for determining if "Next Key Share Lock" is enabled or not. (Should only be issued ifthis program resides on the database server machine). This check determines if DB2_RR_TO_RS isturned on or off by calling DB2SET. If not there, then it is turned off by default or set to something. Then use DB2SET B2_RR_TO_RS=ON to change it if the user requests it. This setting candecrease the likelihood of deadlocks for multiple UDB batch processes.
REORG indicates to do REORGs.
RUNSTATS indicates to do RUNSTATS.
PREEXPLAIN specifies that DBMan will generate dynamic EXPLAIN statements for every index onevery table specified below, and summarize the results.
POSTEXPLAIN specifies that DBMan will only summarize EXPLAIN data that already exists in theDB2 PLAN table.
ALL TABLES designates that all user tables will be used for the given connection. You cannotspecify other tables when <ALL TABLES> is present.
Explain tables are dynamically created if they do not exist.'All information is deleted from theEXPLAIN tables before each run. Internally-generated EXPLAIN statements start withQUERYNO value 2001. External ones, derived from file, start with QUERYNO value 5001. DBMAN is used as the value for QUERYTAG in the EXPLAIN tables.
Page 69

TRACEFILE This SQL log trace file parser parses PowerBuilder, Versata, DB2UDB, and ODBC datasources.
For PowerBuilder Applications, specify TRACE before the DBMS value in the connectionprofile of the application to generate the PBTRACE.LOG file, which is usually located in thewindows system directory.A windows prompt will appear whenever a connection is made and PB trace is turned on.
You can enter comments in a Powerbuilder trace file that will be picked up as comment linesin the output if the line starts with 3 asterisks.
Page 70

PARSEFILE This file parsing interface is useful for parsing large event or log files by defining metadatato extract what you want to see from these large files.
This parsing utility dynamically parses files on the fly with a few simple metadata rulesspecified for each field that needs to be captured. You can save this metadata informationto file as tab-delimited or comma-delimited. Then you can import these rules back into themetadata datawindow before each ensuing run. Hence, you only need to define the rulesonce for each type of parsing file. You can parse the contents of a file or the clipboard. If a file is not specified, then it isassumed you want to parse the contents of the clipboard. In Clipboard Mode, you can only populate 1 row of data and the order of the fields is notimportant. In File Mode, you must specify each field in the order in the file in which it occurs. You canpopulate multiple rows of data in this mode. You can re-arrange the column order after theresults are captured. Be careful how you select the expected lines value. This columndictates how many ensuing lines to search for the specific field. Typically, you specify thebefore delimiter and the end delimiter and set column start and column end to 0. You add metadata rules by adding lines to the metadata area. Put the cursor in that area
Page 71

and press CTRL-A to add another metadata rule row. If you want to add a constant value to fill up a column position, select CONSTANT as thetype value, and put the value in the DELIM BEFORE field. Two special values you can specify for DELIM BEFORE and DELIM AFTER are: <CR> Carriage Return <TAB> Tab The File Parser interface remembers the last metadata file that was used and automaticallyimports it into the metadata area when the window opens. It also remembers the last filethat was used for parsing.
Page 72

EDITFILE DBMan's own File Editor for complex find and replace actions. It is useful for modifying values in specific columns or adding or removing specific lines.You can manipulate regular text files or rich text edit files, RTF files. There is a robust popupmenu available on the rich text area when you right-mouse click in that area.
Page 73

SENDIT Windows Network communications GUI interface.
This interface uses the Microsoft NET.EXE command in a graphical user interface to showusers in a domain and to send messages to one or more selected users.
Page 74

Database Considerations This section documents peculiarities related to specific database vendors. It documentsspecial error conditions, connection setup tips, etc. GENERIC is a special type of database vendor designation in that many action arerestricted to the Microsoft ODBC API set.
Page 75
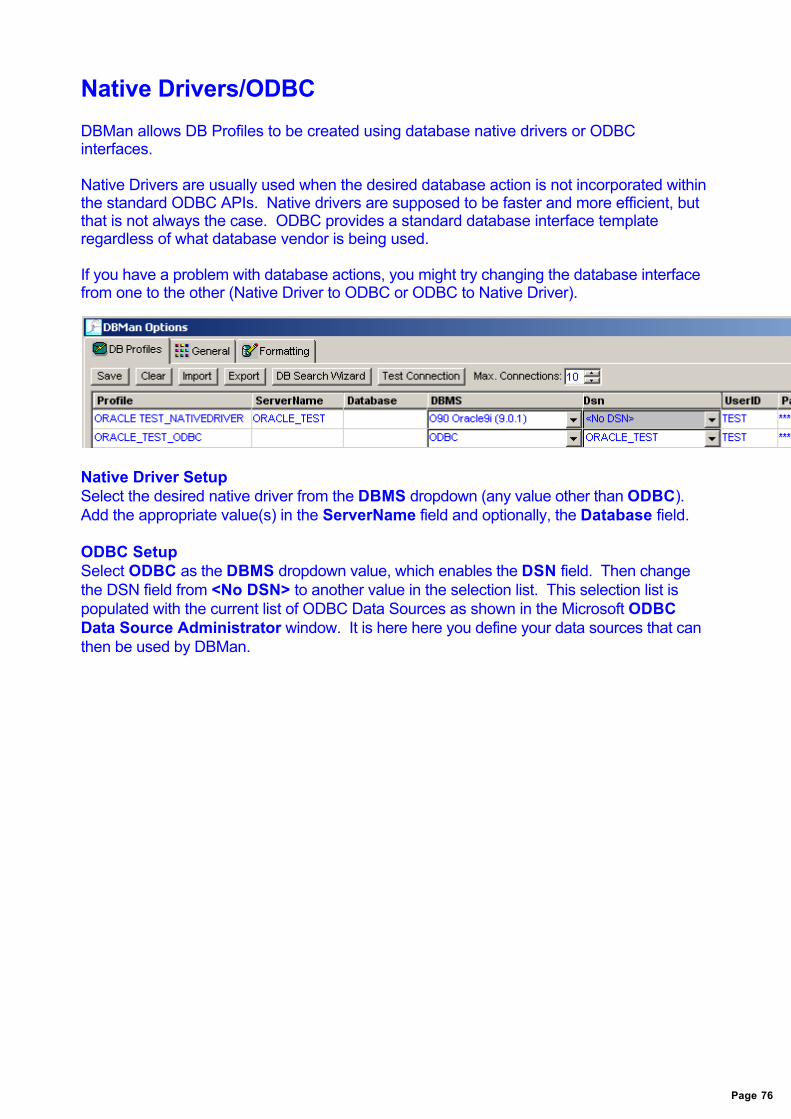
Native Drivers/ODBC DBMan allows DB Profiles to be created using database native drivers or ODBCinterfaces. Native Drivers are usually used when the desired database action is not incorporated withinthe standard ODBC APIs. Native drivers are supposed to be faster and more efficient, butthat is not always the case. ODBC provides a standard database interface templateregardless of what database vendor is being used. If you have a problem with database actions, you might try changing the database interfacefrom one to the other (Native Driver to ODBC or ODBC to Native Driver).
Native Driver SetupSelect the desired native driver from the DBMS dropdown (any value other than ODBC). Add the appropriate value(s) in the ServerName field and optionally, the Database field. ODBC SetupSelect ODBC as the DBMS dropdown value, which enables the DSN field. Then changethe DSN field from <No DSN> to another value in the selection list. This selection list ispopulated with the current list of ODBC Data Sources as shown in the Microsoft ODBCData Source Administrator window. It is here here you define your data sources that canthen be used by DBMan.
Page 76

DBMan provides Database Driver Interfaces for the following database interfaces:
Direct Connect Interface (DIR)
Informix v9.x Interface (IN9)
Microsoft SQL Server Interface (MSS)
Oracle 7 Interface (O73)
Oracle 8/8i (O84)
Oracle 9/9i (O90)
Sybase Adaptive Server Enterprise (SYC)
ODBC Database Driver (ODB)
OLE DB Database Driver (OLE)
JDBC Interface (JDB)
Page 77

GENERIC GENERIC refers to database sources in which the specific database vendor is not in theexplicit list of vendors supported by DBMan. While you can still use most of the features inDBMan using the GENERIC database vendor type, you are restricted in the following areasdue to the inherent limitations of being restricted to using the Microsoft ODBC APIs:
No trigger support
No reverse or forward engineering (which rules out using the PIPEIT interface andsome features in SQLEXEC).
No compilation support.
Only data export, not Structure Export, from SQLEXEC Tree View Area Table popup
options for table export.
Page 78

Oracle DBMan supports Oracle (Version 7, 8, 9i, 10g). DBMan has special built-in features for Oracle:
PL/SQL Support - Enter your PL/SQL scripts in the SQL Input Area of the SQLExecwindow.
Object Compile Support - DBMan can compile your views, functions, procedures,
or packages using the popup options of the Tree View Area on the SQLExecwindow.
SQL Loader Support - You can generate SQL Loader Control files on the fly with a
central SQL Loader batch file that is used to subsequently invoke the generated CTLfiles. Wow!
Explain Plan - You can see the performance cost for sql statements using the
Explain feature.
Logminer Support - DBMan has a friendly interface to specify how you want toextract log records using the Oracle Logminer APIs. It then starts a C program toextract those records to a record format you specify.
During DDL output for Oracle, DBMan specifies NUMBER as NUMERIC(22,0), the impliedprecision. Oracle Driver Client Software must be installed. TNSNAMES.ORA and SQLNET.ORA areOracle files where connection information is stored. A good first test is to see whether onecan connect with SQL-Plus, an SQL query tool that comes with the Oracle Driver ClientSoftware. If that test is successful, then the Oracle Driver Client Software was installedcorrectly, and the configuration files mentioned above were configured correctly. See thesection below for further details on these 2 Oracle, client-side, connection files. The best way to define Oracle database connections to DBMan is by pressing the QueryOracle TNSNames button on the DB Profiles tab on the Options window. This will populatethe grid below with all Oracle profiles found in the TNSNAMES.ORA file. You then need toenter LOGID and LOGPASS values for each of those profiles, since userid/passwordinformation is not stored in that file. If you still have problems connecting with DBMan, then the DB Profile information in DBManneeds to be corrected. You do not need to specify a System DSN for an Oracle DB Profileon the Profiles tab of the Options window in DBMan. You can use one of the native driversthat comes with DBMan (O90 Oracle9i (9.0.1), O84 Oracle8/8i (8.x.4+), etc.) as defined inthe DBMS dropdown column of the DB profile. For non-native driver connections, youspecify ODBC as the DBMS value, which does require a System DSN defined withinWindows ODBC Administrator, which is then populated as the DSN column value for a DBprofile in DBMan. Then you specify a ServerName value that corresponds to the Service
Page 79
Name or SID as defined in the TNSNAMES.ORA file. SYSDBA/SYSOPER ConnectionsTo connect as an Oracle DBA or Operator, add one of the following string to your DBPARMparameter:ConnectAs='SYSDBA'ConnectAs='SYSOPER' CONNECTING TO ORACLEConnecting to an Oracle Server is related to how the connection is defined in theSQLNET.ORA and TNSNAMES.ORA files (see those sections below for details). Thus, ifyou have a SQLNET.ORA NAMES.DEFAULT_DOMAIN value of COMPANY.COM and aTNSNAMES.ORA profile name of DBASPT.COMPANY.COM, then you could connect as:scott/[email protected] SQLNET.ORA and TNSNAMES.ORA file settingsThis section documents some basic stuff dealing with the configuration of these two files. SQLNET.ORAYou may need to comment out the NAMES.DEFAULT_DOMAIN section in theSQLNET.ORA file if you are not connected to a DOMAIN, i.e., a WORKGROUP. Basically,if you are connected to a network and your Oracle server resides on a network, use thedomain name for that network. Otherwise, comment this field out. This is normal when youare connected to a WORKGROUP instead of a DOMAIN. SQLNET.AUTHENTICATION_SERVICES= (NTS)NAMES.DIRECTORY_PATH= (TNSNAMES, ONAMES, HOSTNAME) #### The follow ing line may need to be commented out depending upon your netw ork configuration#### Example: NAMES.DEFAULT_DOMAIN = <domain>.com / gd-ns.comNAMES.DEFAULT_DOMAIN = COMPANY.COM
TNSNAMES.ORAThis file works in conjunction with your SQLNET.ORA file, so if you do not specify aNAMES.DEFAULT_DOMAIN in your SQLNET.ORA file, you must not use that as part of thename of your profile in the TNSNAMES.ORA file. DBASPT by itself is correct in that case,not DBASPT.COMPANY.COM. The "SERVICE_NAME" entry could be changed to "SID" because the use of "SID =your_database_name" is still supported, but the Net8 and beyond Oracle-recommendedstandard is "SERVICE_NAME = your_database_name." DBASPT.COMPANY.COM = (DESCRIPTION = (ADDRESS_LIST = (ADDRESS = (PROTOCOL = TCP)(HOST = yourpc)(PORT = 1521)) ) (CONNECT_DATA = (SERVER = DEDICATED) (SERVICE_NAME = dbaspt) ) )
ORACLE PRE-DEFINED USERIDSOracle has 3 main, pre-defined users: SYS, SYSTEM, and PUBLIC.
Page 80

SYS is the owner of the database and the owner of the data dictionary. Never ever createobjects under SYS. The objects belonging to SYS cannot be exported. SYSTEM is a privileged administration user, and typically owns Oracle provided tablesother than the dictionary. Don't create your own objects under SYSTEM. PUBLIC is a regular user profile. Any privilege granted to public automatically becomes aprivilege for other users as well. Both, SYS and SYSTEM are default users, created with the creation of the database.Although they have much power - as they are granted the DBA role - they're still ordinaryusers. Because SYS owns the data dictionary, (s)he is considered a bit more special thanSYSTEM. But SYS has the SYSDBA privilege which SYSTEM doesn't. This makes itpossible for SYS to become a very very powerful user. This is the case when (s)he connectsas sys/password as SYSDBA or / as sysdba . The as sysdba phrase is a request toaqcuire the privileges associated with the single SYSDBA system privileges. Thedifference becomes clear if you try to shutdown the database as ordinary SYS: you getinsufficient privileges as result. However, if connected as SYSDBA, it's possible. Note,SYSDBA is not a role, it is a privilege. You'll find it in system_privilege_map, not indba_roles. Anytime, someone connects as SYSDBA, it turns out it's being SYS. That is, ifSYSDBA is granted to JOHN and John connects as SYSDBA and select user from dual, itreveals he's actually SYS. ORACLE Data Dictionary BasicsThe Oracle Data Dictionary is divided into three categories distinguished by the prefix of theview name: Prefix Scope------ ---------------------------------ALL_ Objects the user can accessUSER_ Objects owned by the current userDBA_ Objects in all users' schemas METADATA APIsThis section documents some useful SQL to get DLL information using the metadata APIs. Get object DLL information: dbms_metadata.get_ddl(<object type>, <object name>, <schema>)Through DBMan:select cast(dbms_metadata.get_ddl('TABLE','BONUS','SCOTT')as varchar2(4000)) from dual;PL/SQL:SQL>set long 100000SQL>set pages 0SQL>select dbms_metadata.get_ddl('TABLE','BONUS','SCOTT') from dual; Dependent information such as referential constraints can be retrieved using theGET_DEPENDENT_DDL function: dbms_metadata.get_dependent_ddl(<object type>, <object name>, <schema>)dbms_metadata.get_dependent_ddl('REF_CONSTRAINT', 'EMP', 'SCOTT')dbms_metadata.get_dependent_ddl('TRIGGER', 'EMP', 'SCOTT') Grants and Permissions can be retrieved using the GET_GRANTED_DDL function:
Page 81

dbms_metadata.get_dependent_ddl('REF_CONSTRAINT', 'EMP', 'SCOTT')dbms_metadata.get_granted_ddl(<object type>, <Grantee>)dbms_metadata.get_granted_ddl('OBJECT_GRANT', 'REVRUN_USER')SQL> set long 99999SQL> column aa format a132SQL> select DBMS_METADATA.GET_GRANTED_DDL('OBJECT_GRANT','REVRUN_USER') aa from dual; There are transformation APIs that can be invoked that can tailor the outcome of themetadata APIs:DBMS_METADATA.SET_TRANSFORM_PARAM(DBMS_METADATA.SESSION_TRANSFORM,'STORAGE',false); DBMS_METADATA.SET_TRANSFORM_PARAM(DBMS_METADATA.SESSION_TRANSFORM,'PRETTY',true); DBMS_METADATA.SET_TRANSFORM_PARAM(DBMS_METADATA.SESSION_TRANSFORM,'SQLTERMINATOR',true); Table 8 (Classifying common database objects as Named, Dependent, Granted and Schemaobjects)CONSTRAINT (Constraints) SND
DB_LINK (Database links) SN
DEFAULT_ROLE (Default roles) G
FUNCTION (Stored functions) SN
INDEX (Indexes) SND
MATERIALIZED_VIEW (Materialized views) SN
MATERIALIZED_VIEW_LOG (Materialized view logs) D
OBJECT_GRANT (Object grants) DG
PACKAGE (Stored packages) SN
PACKAGE_SPEC (Package specifications) SN
PACKAGE_BODY (Package bodies) SN
PROCEDURE (Stored procedures) SN
ROLE (Roles) N
ROLE_GRANT (Role grants) G
SEQUENCE (Sequences) SN
SYNONYM (Synonyms) S
SYSTEM_GRANT (System privilege grants) G
TABLE (Tables) SN
TABLESPACE (Tablespaces) N
TRIGGER (Triggers) SND
TYPE (User-defined types) SN
TYPE_SPEC (Type specifications) SN
TYPE_BODY (Type bodies) SN
USER (Users) N
VIEW (Views) SN
More Metadata Info
SQLPLUS ConsiderationsCertain DML statements can cause problems in SQLPLUS if they have embedded
carriage returns in them. The work-around is to use carriage return ASCII
values instead of the actual carriage return. Example:
INSERT INTO MYTABLE (field1, field2)
VALUES('11
22'
'44');
This INSERT statement will probably cause errors like the following:
-- SP2-0042: unknown command "aaaa'" - rest of line ignored.
Page 82

Here is the way to work-around it:
INSERT INTO MYTABLE (field1, field2)
VALUES('11' || Chr(13) || Chr(10) || '22' || Chr(13) || Chr(10) || Chr(13) || Chr(10) ||
'44');
Page 83

DB2 DBMan fully supports DB2 UDB Version 6,7, and 8. It also supports DB2 Zos/MainframeVersion 5, 6, 7, and 8, but with some limitations. DB2 Connect, UDB, or some other DB2 UDB driver must be installed on the computerwhere DBMan is installed. For connections to Zos/DB2, certain packages must be presentand bound. You will need BINDADD authority with respect to the <database>.NULLID.*packages before executing the following bind commands from a DB2 command window inthe SQLLIB\BND directory: DB2 bind @db2ubind.lst blocking all grant public for DB2 utilitiesDB2 bind @db2cli.lst blocking all grant public for CLI Trouble-ShootingUDB DB2Make sure a DB2START command was issued on the target database server or you mayget errors like the following:SQLCode = -1SQLDBCode = -30081SQLSTATE = 08001[IBM][CLI Driver] SQL30081N A communication error has been detected. Communication protocol being used: "TCP/IP". Communication API being used: "SOCKETS". Location w here the error w as detected: "192.168.15.101". Communication funct
Page 84
MS SQL Server DBMan supports Microsoft SQL Server 2000/2003. MS SQL Server connections may require certain DBParm settings to eliminate SQL errors.[Microsoft][ODBC SQL Server Driver]Invalid character value for cast specification SQLSTATE = 22005Add the following specification to the DBParm parameter on the connection profile to eliminate these types oferrors: MsgTerse='Yes',CallEscape='No',FormatArgsAsExp='N''" Default login for MS SQL Server after an install is sa with no password.
Page 85

Adaptive Server Enterprise (ASE) DBMan supports Sybase Server Version 11, Sybase Adaptive Server Enterprise (ASE)Version 12,12.5, 15.
Transact SQL Support - Enter your Transact SQL scripts in the SQL Input Area ofthe SQLExec window.
BCP Support - You can generate a BCP control file and multiple BCP Format files
for each table using the SQLEXEC interface popup menu at the table level in the Tree View Area! Use ISQL -v to find the TDS version. It's the first number ordecimal number in the output, usually the second parm delimited by a forward slash.
Explain Plan - You can see the performance cost for sql statements using the
Explain feature. The default administrative password is sa with no password. dbo is assumed to be thetable owner. To connect to ASE over a network, use this format for the servername:<server name>, <port number>The default port number is 5000. You must set autocommit to TRUE on the connection or "DDL in Transaction" to true as anASE Server configuration option to execute certain types of SQL statements likeSP_PKEYS(). Using the Truncate command to delete rows from tables, SQLCA returns -1 in all caseswhere rows are deleted from the database. A question mark will appear whenever thenumber of rows returned is -1. If a column is updated in the grid in the SQL Output Area on the SQLEXEC window, and thenumber of characters exceeds the column limit, no error is returned when an attempt ismade to commit the change to the database and the column's value is not changed either. To overcome this limitation, DBMan will issue a warning whenever the user attempts toexceed a column's character value limit in the expanded view window, which occurs beforethe user attempts to update a column's value back to the database. ASE is not like most other database vendors in that its object names are case-sensitive. SQLEXEC ConsiderationsYou can use Sybase Transact SQL syntax in the SQL Input Area by setting the SQLdelimiter to "go" and checking the "SQLInputArea Comments" checkbox. Sybase Version Override for DBManYou can override the way DBMan works for a particular version of ASE, but specifying anASE version in the DBMan Registry main level (Sybase Force Version). Create a stringlike the following example shows forcing DBMan to work with Sybase version 11:
Page 86
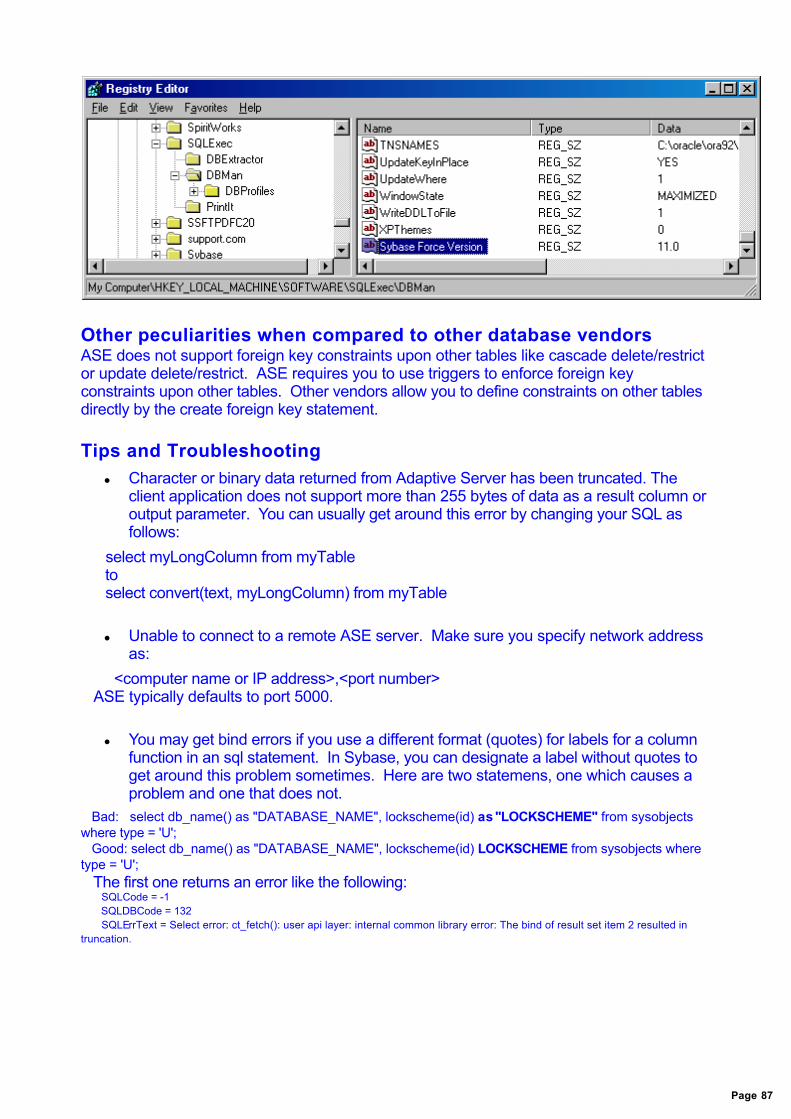
Other peculiarities when compared to other database vendorsASE does not support foreign key constraints upon other tables like cascade delete/restrictor update delete/restrict. ASE requires you to use triggers to enforce foreign keyconstraints upon other tables. Other vendors allow you to define constraints on other tablesdirectly by the create foreign key statement. Tips and Troubleshooting
Character or binary data returned from Adaptive Server has been truncated. Theclient application does not support more than 255 bytes of data as a result column oroutput parameter. You can usually get around this error by changing your SQL asfollows:
select myLongColumn from myTable to select convert(text, myLongColumn) from myTable
Unable to connect to a remote ASE server. Make sure you specify network addressas:
<computer name or IP address>,<port number> ASE typically defaults to port 5000.
You may get bind errors if you use a different format (quotes) for labels for a columnfunction in an sql statement. In Sybase, you can designate a label without quotes toget around this problem sometimes. Here are two statemens, one which causes aproblem and one that does not.
Bad: select db_name() as "DATABASE_NAME", lockscheme(id) as "LOCKSCHEME" from sysobjectswhere type = 'U'; Good: select db_name() as "DATABASE_NAME", lockscheme(id) LOCKSCHEME from sysobjects wheretype = 'U'; The first one returns an error like the following: SQLCode = -1 SQLDBCode = 132 SQLErrText = Select error: ct_fetch(): user api layer: internal common library error: The bind of result set item 2 resulted intruncation.
Page 87

Adaptive Server Anywhere (ASA) DBMan supports SQL Anywhere Version 5, 5.5, Adaptive Server Anywhere (ASA) Version6, 7, 8, 9. You can get access path information by using the following SQL syntax:SELECT EXPLANATION('<sql statement>'); You can turn SQL logging on and off by the following statements:CALL sa_server_option( 'requestlogfile', 'c:\whatever.log');CALL sa_server_option( 'requestlogging', 'SQL'); CALL sa_server_option( 'requestlogging', 'NONE'); DBMan cannot return remote select information via the ASA "FORWARD TO" syntax due toan inherit limitation in PowerBuilder and SyntaxFromSQL.FORWARD TO SQLServerRemote {SELECT * from sysobjects where id = 1}; Default login is dba/sql. Remote Connection InformationIn the ODBC configuration for the remote ASA machine, you need only specify the userid/password on thelogin tab and the tcp information on the network tab. On the network tab, check TCPIP and enter the following in the edit box for it:TCPIP{host=<server name/computer name>:<port number>;dobroadcast=no}Example: TCPIP{host=MyComputer:2638;dobroadcast=no} The Desktop Runtime Edition of Adaptive Server AnywhereMany ASA features are disabled in this low-cost deployed version. As such, you may encounter errors inDBMan, since DBMan assumes certain database queries like executing system stored procedures, whichare missing in the runtime version. The engine name for this version is rteng<version number>.exe (forexample, rteng9.exe) ASA Peculiarities
ASA does not store Primary Key Names even if you specify the name in the DDL definition.
Page 88

Interbase/Interbase/Firebird DBMan supports Interbase and Firebird databases. Interbase and Firebird have been tested with the IBPhoenix open source ODBC driver. You may select either GENERIC or FIREBIRD as the vendor type when connecting to eitherof these databases. Default login is SYSDBA/masterkey.
Page 89

MS Excel Although Excel is not normally thought of as a database, it can be an ODBC data sources,which allows it to be viewed as a database that consists of tables and a set of columnswithin each table. To view an Excel file in DBMan, first define an Excel data source for the DataDirect andMicrosoft Excel Driver. Use ODBC Administrator to create a DSN for the Excel driver. Ifyou are using Excel (other than versions 5.0/95 or 97 & 5.0/95), use the Microsoft Exceldriver. Otherwise, use the DataDirect Excel driver. Add the ODBC DSN to your DBManDB Profiles and you should be able to connect to the specified Excel workbook. Connection ErrorsIf you get the following error, you must save the Excel spreadsheet in a different Excelformat. [DataDirect][ODBC Excel Driver]Cannot open stream Book. Ole error (2).Make sure the excel file is saved to the format of 5.0/95 or 97 & 5.0/95. For moreinformation, see DataDirect KnowledgeBase Article 19823. If you get the following error, you are probably using the Microsoft Excel driver, which iscurrently not working with DBMan, so try to create the ODBC DSN with the DataDirect Exceldriver [Microsoft][ODBC Excel Driver]Optional feature not implemented Workbook Format considerationsIn order for DBMan to access an Excel data source, the Excel file must be a database. An Excel database is an Excel XLS workbook file that contains one or more named lists. AnExcel list is a labeled series of worksheet rows that contain similar information (table). When you use an Excel workbook as a database, each list is analogous to a databasetable, the list rows correspond to database records, and the list columns correspond todatabase fields. When you connect to an Excel database in DBMan, the list names displayin the under the Tree View Area on the left side in the SQLEXEC window.
Page 90

Clarion This section specifically deals with the Softvelocity Topspeed ODBC driver (Version 4.0)when connecting to Clarion databases (TPS files). Set the lockmode connection parameter to default to avoid driver not capable errors. You must add the following value to the dbparm connection parameter or you can only retrieve 1 row from any table: CursorLib='ODBC_Cur_Lib'
Page 91

MS ACCESS Microsoft Access is supported by DBMan through ODBC only. You must select GENERICor MS ACCESS as the vendor type when connecting to Access. 2 default table schemas are used with Access databases: SYSTEM and USER.
Page 92
FoxPro There are 2 ODBC drivers for FoxPro: FoxPro and Visual FoxPro. FoxPro is beingreplaced by Visual FoxPro.(see link: http://support.microsoft.com/kb/235357/EN-US/). Configuration Steps:
Define a System DSN for the Visual FoxPro Driver using ODBC Administrator,selecting Microsoft Visual FoxPro Driver as the driver type.
Define a DB Profile in DBMan that points to the DSN you created in the first step. Currently, DBMan requires that the Vendor type for FoxPro be Generic (Vendor =GENERIC) to gain the most features when connecting to Visual FoxPro databases. Youdefine the vendor for a connection on the DB Profiles Tab of the Options window. AnODBC DSN be created for a FoxPro database before defining that connection in theDBMan DB Profiles section. Once you have created the DSN, associate that DSN with theDBMan Profile by selecting that DSN for the DB Profile you create afterwards in DBMan(DSN column). To install the latest ODBC driver for FoxPro, go to the following link and download the file, VFPODBC.msi.http://msdn.microsoft.com/vfoxpro/downloads/updates/odbc/default.aspx FoxPro is really a collection of files that are treated together like a database. Visual FoxProuses tables to store data that defines different file types. The following list includes the filetypes that are saved as tables: Table (.dbf) Database (.dbc) Form (.scx) Label (.lbx) Menu (.mnx) Project (.pjx) Report (.frx) Visual Class Library (.vcx) You can use and browse these files in the same way that you browse any table file becausethese files are actually tables. See File Contents Details for more information.
Page 93

GENERIC GENERIC refers to database sources in which the specific database vendor is not in theexplicit list of vendors supported by DBMan. While you can still use most of the features inDBMan using the GENERIC database vendor type, you are restricted in the following areasdue to the inherent limitations of being restricted to using the Microsoft ODBC APIs:
No trigger support
No reverse or forward engineering (which rules out using the PIPEIT interface andsome features in SQLEXEC).
No compilation support.
Only data export, not Structure Export, from SQLEXEC Tree View Area Table popup
options for table export.
Page 94

MYSQLMySQL is supported by DBMan through ODBC only. You must select GENERIC as thevendor type when connecting to MYSQL. A future version of DBMan will fully incorporateMYSQL so that you may select MYSQL as the database vendor type and have morefeatures available to the user within DBMan. MYSQL was tested with Version 5.0.22 database and MYSQL Connector ODBC driver,3.51.12. By default, MYSQL comes with a master user account, root, with no password. MYSQL Catalog TablesThe following SQL statements retrieve catalog information: SELECT * FROM INFORMATION_SCHEMA.SCHEMATA;SELECT * FROM INFORMATION_SCHEMA.TABLES;SELECT * FROM INFORMATION_SCHEMA.COLUMNS;SELECT * FROM INFORMATION_SCHEMA.STATISTICS;SELECT * FROM INFORMATION_SCHEMA.USER_PRIVILEGES;SELECT * FROM INFORMATION_SCHEMA.SCHEMA_PRIVILEGES;SELECT * FROM INFORMATION_SCHEMA.TABLE_PRIVILEGES;SELECT * FROM INFORMATION_SCHEMA.COLUMN_PRIVILEGES;SELECT * FROM INFORMATION_SCHEMA.CHARACTER_SETS;SELECT * FROM INFORMATION_SCHEMA.COLLATIONS;SELECT * FROM INFORMATION_SCHEMA.COLLATION_CHARACTER_SET_APPLICABILITY;SELECT * FROM INFORMATION_SCHEMA.TABLE_CONSTRAINTS;SELECT * FROM INFORMATION_SCHEMA.KEY_COLUMN_USAGE;SELECT * FROM INFORMATION_SCHEMA.ROUTINES;SELECT * FROM INFORMATION_SCHEMA.VIEWS;SELECT * FROM INFORMATION_SCHEMA.TRIGGERS; Connection ValidationMake sure you can connect to MYSQL using the MYSQL command line client beforeproceeding to the next steps. Next, create an ODBC system data source (DSN) for MYSQLusing Windows ODBC Administrator. Test the DSN connection and make sure you canconnect successfully before trying to configure DBMan to use it. Trouble-ShootingThis section documents common MYSQL problems. LOCAL Connections: Use localhost instead of the actual computer name as the server. REMOTE Connections: Logon to local machine and try granting access to the user you are connecting as:grant all privileges on dbname.* to 'user'@'<IP ADDRESS>' identified by '<your password>';grant all privileges on *.* to 'ODBC'@'<IP ADDRESS>' identified by '<your password>';flush privileges;
ERROR 1045 (28000): Access denied for user 'ODBC'@'localhost' (using password: YES)
This error normally occurs if the user does not provide a password when attempting to connect to MYSQL
Page 95

and the MYSQL ODBC driver is installed.
#HY000Host 'XXX' is not allowed to connect to this MySQL server (1130)
[MySQL][ODBC 3.51 Driver]Access denied for user 'root'@'<IP ADDRESS>' (using password:YES)
Try using ODBC as the userid and see if this works. If so, there is some other area that is causing theproblem.
Page 96